

Page 1
Page 2

SAFETY WARNING
Disregarding any of the safety precautions and instructions
contained in this Operator’s Guide, Safety Videocassette or on-
product warnings may result in injury, including the possibility of
death.
This Operator’s Guide and Safety Videocassette should remain
with the unit at time of resale.
In USA, products are distributed by BRP US Inc.
In Canada, productsare distributed by Bombardier Recreational Products Inc.
The following are trademarks of Bombardier Recreational Products
Inc. or its subsidiaries.
SKI-DOO ROTAX
TM
DESS
MACH Z
®
®
TM
RER
SUMMIT
®
Printed in Canada. (mmo2005-008 DR)
©2004 B ombardier Rec reational Produ cts Inc an d BRP US I nc. Al l rights res erved.
®™Trademarksof Bombardier Recreational ProductsInc. or its affiliates.
* Trademark of Bombardier Inc., used under license.
Page 3

FOREWORD
Congratulations on your purchase of a new SKI-DOO snowmobile.
Whatever model you have chosen, it is backed by the Bombardier
Recreational Products Inc. (BRP) warranty and a network of authorized SKI-DOO snowmobile dealers ready to provide the parts, service or accessories you may require.
The Operator's Guide has been prepared to acquaint the owner/
operator and passenger with this new snowmobile and its various
controls, maintenance and safe riding instructions. This guide is
indispensable for the proper use of the product and should be kept
with this snowmobile at all times.
Make sure you read and understand the content of this Operator's
Guide.
For any questions pertaining to the warranty and its application, consult the WARRANTY section in this guide, and/or an authorized SKIDOO dealer.
This guide uses the followingsafety alert symbol in conjunction with
signal words to indicate a potential personal injury hazard.
WARNING
Indicates a potentially hazardous situation which, if not avoided, could result in death or serious injury.
CAUTION
Indicates a potentially hazardous situation which, if not avoided, may result in minor or moderate injury. When used withoutthesafetyalertsymbol
erty damage only.
, potential hazard exists for prop-
CAUTION: Denotes an instruction which, if not followed, could
severely damage vehicle components.
NOTE:
plete an instruction.
Although the mere reading of such information does not eliminate
the hazard, the understanding and application of the information will
promote the correct use of the vehicle.
Indicates supplementary information needed to fully com-
__________________________
1
Page 4

Your dealer is committed to your satisfaction. He has taken training to perform the initial set-up and inspection of your snowmobile
as well as completed the final adjustment required to suit your specific weight and riding environment before you took possession. At
delivery, your dealer would have explained the snowmobile controls
and provided you with a brief explanation of the various suspension
adjustments. We trust you have taken full advantage of this!
At delivery, you were also informed of the warranty coverage and
completed the Warranty Registration Form which is to be sent to us
for processing.
The information and components/system descriptions contained in
this guide are correct at time of publication. BRP, however maintains
a policy of continuous improvement of its products without imposing upon itself any obligation to install them on products previously
manufactured.
Because of its ongoing commitment to product quality and innovation, BRP reserves the right at any time to discontinue or change
specifications, designs, features, models or equipment without incurring obligation.
The illustrations in this document show the typical construction of
the different assemblies and, in all cases, may not reproduce the full
detail or exact shape of the parts shown, however, they represent
parts which have the same or a similar function.
It is understood that this guide may be translated into another language. In the event of any discrepancy, the English version shall
prevail.
Specifications are given in the SI metric system with the SAE U.S.
equivalent in parentheses. Where precise accuracy is not required,
some conversions are rounded off for easier use.
Most components of this snowmobile are built with parts dimensioned in the metric system. Most fasteners are metric and must
not be replaced by customary fasteners or vice versa.
We recommend genuine BRP products for replacement parts and
accessories. They've been specially designed for your vehicle and
manufactured to meet BRP's demanding standards.
A Shop Manual can be obtained for complete service, maintenance
and more repair information.
__________________________
2
Page 5

TABLE OF CONTENTS
SAFETY INFORMATION
INTRODUCTION ................................................... 8
SAFETY MEASURES .............................................. 9
SAFETY LABELING............................................... 12
A WORD TO ALL SNOWMOBILERS ............................ 14
LAWS AND REGULATIONS...................................... 21
SUMMARY OF ACCIDENT PREVENTION PRACTICES .. ... . . . 22
PASSENGER SAFETY BASICS................................... 26
ENVIRONMENT................................................... 27
RIDING THE VEHICLE ............................................ 29
HOW TO RIDE..................................................... 30
TERRAIN/RIDING VARIATIONS ................................. 34
ON-VEHICLE IMPORTANT INSTRUCTIONS.................... 42
VEHICLE INFORMATION
HOW TO IDENTIFY YOUR SNOWMOBILE ..................... 54
Vehicle Description Decal...................................... 54
SerialNumbers................................................. 55
CONTROLS/INSTRUMENTS/EQUIPMENT .................... 57
1) Throttle Lever................................................ 59
2) BrakeLever.................................................. 59
3) ParkingBrake Lever......................................... 59
4) Brake/ParkingBrakePilot Lamp (Red)...................... 60
5) START/RER Button .......................................... 61
6) ReversePilot Lamp.......................................... 62
7) Handlebar.................................................... 62
8) Holding Strap................................................ 63
9) Tether Cut-Out Switch ...................................... 64
10)DESSPilot Lamp........................................... 67
11)Engine Cut-Out Switch .................................... 67
12)Headlamp DimmerSwitch................................. 68
13)HighBeam PilotLamp(Blue).............................. 69
14)OilPilot Lamp .............................................. 69
15)Low BatteryVoltagePilot Lamp........................... 69
16) Engine Management System (EMS) Pilot Lamp. . .. .. . .. . 69
17)Rewind Starter Handle..................................... 69
__________________________
3
Page 6

18)Speedometer............................................... 70
19)Mode Button ............................................... 71
20)Odometer .................................................. 71
21)Trip Meter .................................................. 71
22)Resetable Hourmeter...................................... 72
23)Tachometer................................................. 72
24)Fuel TankCap .............................................. 72
25)MechanicalFuelLevelGauge ............................. 73
26)Electric FuelLevel Gauge.................................. 74
27)Temperature Gauge........................................ 75
28)Engine Overheat Warning Lamp (Red).................... 76
29)Heating GripSwitch........................................ 76
30)Heating Throttle LeverSwitch............................. 77
31)Windshield ................................................. 77
32)AdjustableToeholds........................................ 77
33)Hoodand SidePanelLatches ............................. 78
34)Fuses....................................................... 80
35)Front GrabHandle/FrontBumper.......................... 82
36)Storage Compartment..................................... 82
37)RearRack .................................................. 84
38)ToolKit...................................................... 84
39)SparkPlugHolder.......................................... 84
40)Spare Drive Belt Holder.................................... 85
41)Shields and Guards ........................................ 86
42)ConvertibleSki Stance..................................... 86
43)AdjustableSuspensions ................................... 87
Guidelines toAdjustSuspension.............................. 87
Track.......................................................... 103
FUEL AND OIL .................................................. 104
Recommended Fuel ......................................... 104
Recommended Oil ........................................... 105
BREAK-IN PERIOD.............................................. 106
Engine ........................................................ 106
Belt ........................................................... 106
10-Hour Inspection........................................... 106
PRE-OPERATION CHECK....................................... 107
PRE-OPERATION CHECK LIST................................. 109
OPERATING INSTRUCTIONS.................................. 110
PrincipleofOperation........................................ 110
Starting the Engine........................................... 111
Emergency Starting.......................................... 112
__________________________
4
Page 7

Shutting Off the Engine...................................... 114
VEHICLE WARM-UP............................................ 115
POST-OPERATION CARE ...................................... 116
SPECIAL OPERATIONS......................................... 117
Riding atHigh Altitudes...................................... 117
Engine Overheating.......................................... 117
Fuel FloodedEngine ......................................... 117
Rear Suspension Slider ShoeSticking....................... 117
MAINTENANC E INFORMATION
PERIODIC MAINTENANCE CHART............................ 120
FLUID LEVELS .................................................. 123
BrakeSystem ................................................ 123
Chaincase/Gearbox OilLevel ................................ 124
Oil Injection System.......................................... 125
CoolingSystem .............................................. 125
Battery Electrolyte ........................................... 126
MAINTENANCEFOR EPA CERTIFIED ENGINES............. 128
Engine Emissions Information............................... 128
MAINTENANCE................................................. 130
Vehicle Cleaningand Protection............................. 130
BeltGuard Removal and Installation ........................ 131
Drive Belt Removal/Installation.............................. 133
Drive Pulley Adjustment..................................... 136
Drive Belt Condition.......................................... 140
BrakeCondition .............................................. 140
BrakeAdjustment............................................ 140
Rear Suspension Condition.................................. 140
SuspensionStopper StrapCondition........................ 140
TrackCondition............................................... 140
TrackTension and Alignment................................ 141
Steering and Front Suspension.............................. 147
Wearand Condition ofSkisand Runners ................... 147
Exhaust System.............................................. 147
Air FilterCleaning ............................................ 148
Headlamp Beam Aiming..................................... 149
Bulb Replacement............................................ 149
__________________________
5
Page 8

TOWING ANACCESSORY..................................... 152
TOWING ANOTHER SNOWMOBILE.......................... 153
TRANSPORTING THE VEHICLE ............................... 154
STORAGEAND PRESEASON PREPARATION................ 155
Storage ....................................................... 155
Preseason Preparation....................................... 155
TROUBLESHOOTING........................................... 156
Monitoring BeeperCodedSignals........................... 156
SPECIFICATIONS ............................................... 161
WARRA NTY
BRP LIMITED WARRANTY NORTH AMERICA: 2005 SKI-DOO
SNOWMOBILES ................................................ 166
BRP INTERNATIONAL LIMITED WARRANTY: 2005 SKI-DOO
SNOWMOBILES ................................................ 171
PRIVACY OBLIGATIONS/DISCLAIMER....................... 175
CHANGE OF ADDRESS OR OWNERSHIP .................... 176
®
®
__________________________
6
Page 9

SAFETY
INFORMATION
______
SAFETY INFORMATION
_____
7
Page 10

INTRODUCTION
This safety information section includes safety WARNINGS which if
not followed may result in serious personal injury including the possibility of death.
After reading, please keep this Operator's Guide with the snowmo-
bile. If the snowmobile is resold, please give the guide to the new
owner for his awareness. An extra copy of the Operator's Guide is
available from your SKI-DOO snowmobile dealer at no charge.
This safety information section is dedicated to safer snowmobiling.
If you have any question regarding any topic whether or not it is cov-
ered in this Operator's Guide, please call BRP at the number below
and we will be happy to assist you:
In USA:
(715) 848-4957
In Canada:
(819) 566-3366
_____
8
SAFETY INFORMATION
_____
Page 11

SAFETY MEASURES
Observe the Following Warnings:
The performance of some snowmobiles may significantly exceed
that of other snowmobiles you have operated. Therefore, use by
novice or inexperienced operators is not recommended.
Basic training is required for the safe operation of any snowmo-
bile. Study your Operator's Guide paying particular attention to
cautions and warnings. Join your local snowmobile club: its social activities and trail systems are planned for both fun and safety.
Obtain basic instructions from your snowmobile dealer, friend, fellow club member or enroll inyour state or provincial safety training
program.
Know thelocallaws regardingsnowmobiles and be aware of the li-
ability,property damage and insurance laws relating to your equipment.
Always keep right hand side of the trail.
Always keep a safe distance from other snowmobiles and by-
standers.
Jumping a snowmobile is an unsafe and dangerous practice.
Know your snowmobile and treat it with the respect and care due
of any power driven machine. Common sense, proper handling
and routine maintenance will result in safer and enjoyable use.
Check your machine before each ride.
Always make a pre-start inspection BEFORE you turn on the igni-
tion.
If you are a parent, you must be the judge of your child's capabil-
ity to understand, to operate and to control a snowmobile. Warn
against speeding, over confidence and carelessness. Never let
children snowmobile unsupervised.
Snowmobiles are used in many areas and in many snow condi-
tions. Not all models perform the same in similar conditions. Always consult your snowmobile dealer when selecting the snowmobile model for your particular needs and uses.
Injury or death may result to the snowmobile operator, passenger
or bystander if the snowmobile is used in risky conditions which
are beyond the driver's, passenger's or snowmobile's capabilities
or intended use.
Remember, promotional material may show risky maneuvers per-
formed by professional riders under ideal and/or controlled conditions. You should never attempt any such risky maneuvers if they
are beyond your level of riding ability.
______
SAFETY INFORMATION
_____
9
Page 12

Never ride after consuming drugs or alcohol or if you feel tired or
ill. Operate your snowmobile prudently.
Speeding can be fatal. In many cases, youcannot react or respond
quickly enough to the unexpected. Always ride at a speed which
is suitable to the trail, weather conditions and your own ability.
Know your local rules. Speed limit may be in effect and meant to
be observed.
Snowmobilecan carry a passengeronlyif itis equippedwith a 2-up
or 3-up seat including a single hand grip (seat strap) or a double
hand grip (rear passenger grab handles).
The passenger (s) must be able to completely lean is feet on the
footrests and keep his hands on the grab handles or seat strap at
all times when he is seated on the snowmobile.
In an emergency, the snowmobile engine can be stopped by ac-
tivating the engine cut-out switch, pulling the tether cord cap or
turning off the key.
Your snowmobile is not designed to be operated on public streets,
roads or highways. In most States and Provinces, it is considered
an illegal operation.
Throttle mechanism should be checked for free movement and
return to idle position before starting engine.
Always engage parking brake when vehicle is not in use.
Always stop the engine before refueling. Fuel is flammable
and explosive under certain conditions. Always work in a wellventilated area. Do not smoke or allow open flames or sparks in
the vicinity. Open cap slowly. If a differential pressure condition
is noticed (whistling sound heard when loosening fuel tank cap)
have vehicle inspected and/or repaired before further operation.
Do notoverfill or top off the fuel tank before placing the vehicle in
a warm area. As temperature increases, fuel expands and might
overflow. Always wipe off any fuel spillage from the vehicle.
Periodically verify fuel system.
Never run the engine in a non-ventilated area and/or if vehicle is
left unattended.
Never operate the engine without belt guard securely installed or,
with hood or access/side panels open or removed. Never run the
engine without drive belt installed. Running an unloaded engine
such as without drive belt or with track raised, can be dangerous.
Unless otherwise specified, never run the engine when the track
is raised off the ground or with the hood opened or removed.
Maintain your snowmobile in top mechanical condition at all times.
_____
10
SAFETY INFORMATION
_____
Page 13

Do not lubricate throttle cable and housing.
Only perform procedures as detailed in this guide. Unless other-
wise specified, engine should be turned OFF and cold for all lubrication, adjustment and maintenance procedures.
Electric start models only: Never charge or boost a battery while
installed on snowmobile.
The engine and components used in a particular model should not
be used on other models. Use of Rotax
other than SKI-DOO snowmobiles is not recommended or authorized by BRP or its subsidiaries.
Electronic reverse (RER™) models only: The shifting to reverse
mode on these snowmobiles is done by the push of the RER
button when the engine is running. Wait until the reverse alarm
sounds and the Rotax Electronic Reverse (RER) pilot lamp comes
on in the dashboard before operating throttle to proceed in reverse. The reverse speed of these snowmobiles is not limited.
Always proceed with caution as fast reverse could result in loss
of vehicle stability and control. Come to complete stop before depressing RER button. Always remain seated and apply the brake
before shifting. Ensure the path behind is clear of obstacles or
bystanders before proceeding.
Models with mechanical reve rse: The reverse speed of these
snowmobiles is not limited. Always proceed with caution as fast
reverse could result in loss of vehicle stability and control. Come
to complete stop before selecting reverse gear. Wait until the
reverse alarm sounds before operating throttle to proceed in reverse. Always remain seated and apply the brake before shifting.
Ensure the path behind is clear of obstacles or bystanders before
proceeding.
®
snowmobile engines in
_____
SAFETY INFORMATION
_____
11
Page 14
SAFETY LABELING
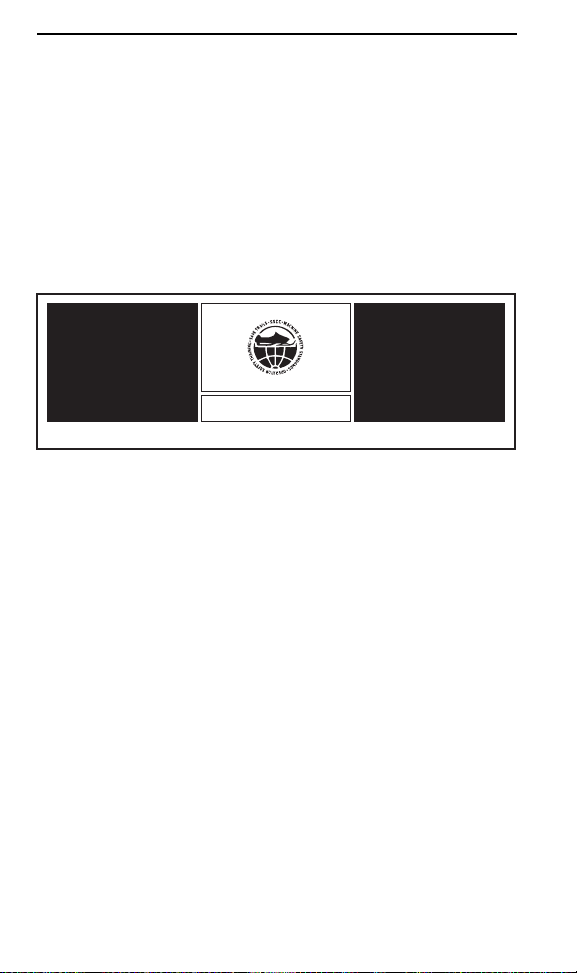
Safety standards for snowmobiles have been adopted by the Snowmobile Safety and Certification Committee (SSCC) of which BRP
is a proud participating member. Assurance that your snowmobile
meets these standards is easily checked by locating the Certification
Label on a right vertical portion of the vehicle.
Thislabelsignifies that an independent testing laboratory has verified
compliance with the SSCC safety standards. Other important labels
on the vehicle are WARNING or CAUTION labels relating to safety,
maintenance and/or snowmobile operation. Ensure all such labeling
is retained on the vehicle and its content is followed by vehicle operator and passenger.
PRINTED IN U.S.A.
CERTIFIED
CERTIFIÉ
THIS MODEL HAS BEEN
EVALUATED BY AN INDEPENDENT TESTING LABORATORY AND IT MEETS ALL
SSCC SAFETY STANDARDS
IN EFFECT ON THE DATE OF
ITS MANUFACTURE.
SPONSORED BY THE SNOWMOBILE SAFETY AND CERTIFICATION COMMITTEE, INC.
CE MODÈLE A ÉTÉ ÉVALUÉ
PAR UN LABORATOIRE
D'ESSAIS INDÉPENDANT
ET SATISFAIT TOUTES LES
NORMES DE SÉCURITÉ DU
SSCC EN VIGUEUR À LA
DATE DE FABRICATION.
PARRAINÉ PAR LE COMITÉ DE
SÉCURITÉ DE CERTIFICATION
DE LA MOTONEIGE, INC.
A00A1MA
OTHER SAFETY FEATURES
Read this Operator's Guide for other features that may be on your
particular snowmobile model. Do not operate your snowmobile unless all its safety features are in place and in good working order.
Lights — Head lamp, taillight and brake light arestandardequipment.
Besurelightsareclearofdirt,slushorsnowandareingoodworking
order or condition.
HOW TO DRESS
Proper snowmobile clothing should be worn. It should be comfortable and not too tight. Always check the weather forecast before
you go on a ride. Dress for the coldest weather expected. Thermal
underwear next to the skin also provides an important layer of insulation.
DOT approved helmets are recommended at all times. They provide
both warmth and reduce injury. A stocking type cap, balaclava and
facemask should always be carried orworn. Goggles or aface shield
which attach to the helmet are indispensable.
_____
12
SAFETY INFORMATION
_____
Page 15

Hands should be protected by a pair of snowmobile gloves or mitts
which have sufficient insulation and permit use of thumbs and fingers for operation of controls.
Rubber bottom boots with either a nylon or a leather top, with removable felt liners are best suited for snowmobiling.
You should keep yourself as dry as possible when snowmobiling.
When you come indoors, take your snowmobile suit and boots off
and make certain they dry properly.
Do not wear long scarfs and loose apparels that could get caught in
moving parts.
WHAT TO BRING
Every snowmobiler should carry at least the following basic parts and
tools that can help him and others in an emergency:
• this Operator's Guide
• spare spark plugs and wrench
• friction tape
• spare drive belt
• spare starter rope
• spare Light bulbs
• tool kit (including at least pliers, screwdriver, adjustable wrench)
• knife
• flashlight.
Include other items depending on the length and time of your ride.
_____
SAFETY INFORMATION
_____
13
Page 16
AWORDTOALLSNOWMOBILERS
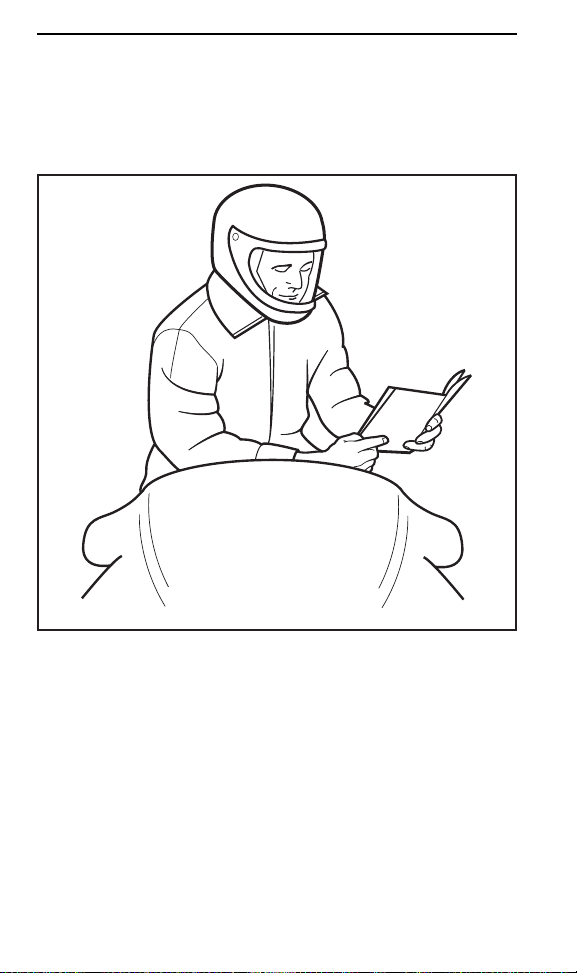
Everyone is a beginner the first time he sits behind the controls of a
snowmobile regardless of previous experience in driving an automobile,a motorcycle or a motorboat. The safe use of your snowmobile
is dependent on many conditions such as visibility, speed, weather,
environment,traffic, vehicle conditionand the condition of the driver.
A00A1NA
Each operator has a responsibility to ensure the safety of his/her passenger, if any, and of other recreationists or bystanders.
You are responsible for proper operation of your vehicle as well as
training those whom you allow to ride ordrive. There may be noticeable handling and performance differences from one snowmobile to
another one.
_____
14
SAFETY INFORMATION
_____
Page 17

A snowmobileis relatively simpleto operate but likeanyothervehicle
or mechanical equipment, it can be hazardous if you or a passenger
are the least bit reckless, thoughtless or inattentive. We encourage
you to havean Annual Safety Inspection of yoursnowmobile. Please
contact an authorized SKI-DOO dealer for further details. Finally, we
urge you to visit an authorized SKI-DOO dealer periodically for regular and safety maintenance, as well as snowmobile accessories you
may require.
TRANSPORTING AND TOWING
Follow transporting and towing instructions explained further in this
guide.
TRACTION ENHANCING PRODUCTS
Using more positive carbide ski runners and traction enhancing
products on your snowmobile will change its behavior, particularly
in terms of manoeuvrability, acceleration, and braking.
Studding the track gives a better grip on packed snow and ice, but
has no noticeable effect on soft snow. For this reason, driving a
snowmobile equipped with traction enhancing products (studs, carbide ski runners) requires a certain adaptation period. If your snowmobile is equipped with traction products, be sure to take plenty of
time to get used to the way it handles when turning, accelerating,
and braking.
Also, always check local regulations concerning the use of studs on
snowmobiles. Always drive your snowmobile in a responsible manner, respecting the environment and other people’s property.
Manoeuvrability:
Studding the track makes the snowmobile grip the ground better at
the rear. The use of carbide runners is therefore required to give
the skis a better grip, so that the front and rear of the snowmobile
are in balance. While off-the-shelf carbide ski runners are adequate,
they don’t necessarily give you optimal control, since that depends
on your personal preferences, your riding style, and how your suspension is set.
WARNING
If the front and rear of the snowmobile are out of balance due
to an incorrect combination of studs and runners, the snowmobile may tend to oversteer or understeer, which could lead
to a loss of control.
_____
SAFETY INFORMATION
_____
15
Page 18
1- Oversteering
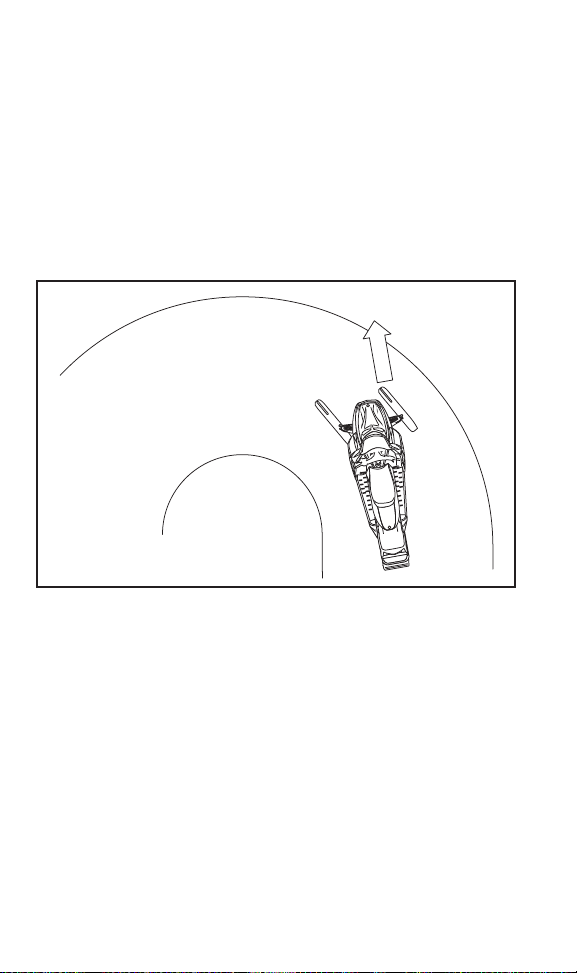
In certain conditions, usingmore positivecarbide ski runners without
studding the track could make the snowmobile prone to oversteering, see illustration.
OVERSTEERING
2- Understeering
In certain conditions, the use of studs could make the snowmobile
prone to understeering if the skis are not equipped with more positive carbide runners, see illustration.
A33A33A
UNDERSTEERING
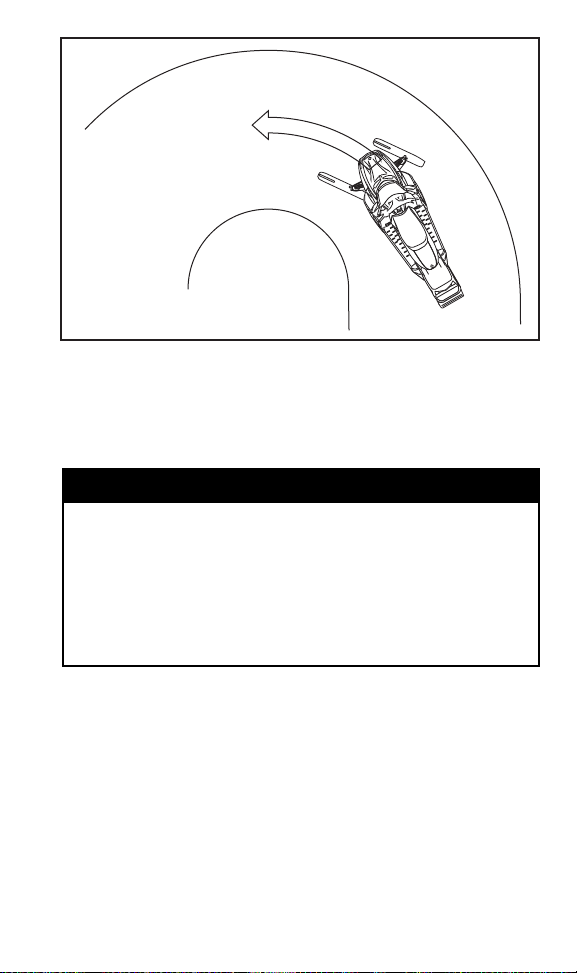
3- Controlled Driving
A balanced combination of carbide ski runners and studs ensures
adequate control and better handling, see illustration.
_____
16
SAFETY INFORMATION
_____
Page 19
A33A34A
CONTROLLED DRIVING
Acceleration:
Studding thetrack willallowyour sled to accelerate better on packed
snow and ice but will have no noticeable effect on soft snow. This
can cause sudden variations in traction under certain conditions.
WARNING
To prevent surprises that could lead to a loss of control of the
snowmobile, possibly resulting in serious injury or death:
– Always go easy on the throttle.
– NEVER try to spin the track to make the rear of the snow-
mobile skid.
This could cause debris or ice to be thrown violently backwards, possibly injuring others nearby or on snowmobiles behind you.
Braking:
As is the case for acceleration, studding the track will give you better
brakingcapacityonpackedsnoworicebutwillhavenonoticeable
effect on soft snow. Braking may thus vary suddenly under certain
conditions. Be sure to use restraint in braking to keep from blocking
the track in order toavoid surprises that could leadto a loss of control.
_____
SAFETY INFORMATION
_____
17
Page 20

Important Safety Rules:
WARNING
To prevent serious injury to individuals near the snowmobile:
– NEVER stand behind or near a moving track.
– Always use a wide-base snowmobile stand with a rear de-
flector panel.
– When the track is raised off the ground, only run it at the
lowest possible speed.
Centrifugal force could cause debris, damaged or loose studs,
pieces of torn track, or an entire severed track to be violently
thrown backwards out of the tunnel with tremendous force,
possibly resulting in the loss of a leg or other serious injury.
Effects of Studding on the Life of the Snowm obile:
The use oftractionenhancing products canincrease the load and the
stress on certain snowmobile components, as well as the vibration
level. This can cause premature wear on parts such as belts, brake
linings, bearings, chain, and chaincase sprocket, and shorten track
life. For this reason, it is even more important to follow the detailed
maintenance program given in the periodic inspection table.
Studs can also cause serious damage to your snowmobile if it is
not equipped with the tunnel protectors designed for your particular
model. Damage to the electrical wiring or perforation of the heat exchangers are potential hazards, that could cause the engine to overheat and be severely damaged.
WARNING
If tunnel protectors are excessively worn or not installed, the
gas tank could be punctured, causing a fire.
CAUTION: Ask your dealer for the appropriate tunnel protectors
model and kit number required for your snowmobile.
Consult the BRP limited warranty to find out what warranty
NOTE:
limitations are related to the use of studs.
Installation of Studs:
To ensure safe and proper installation, BRP recommends to have the
studs installed by your dealer.
– Use only studs, mounting plates, and nuts sold by BRP.
_____
18
SAFETY INFORMATION
_____
Page 21
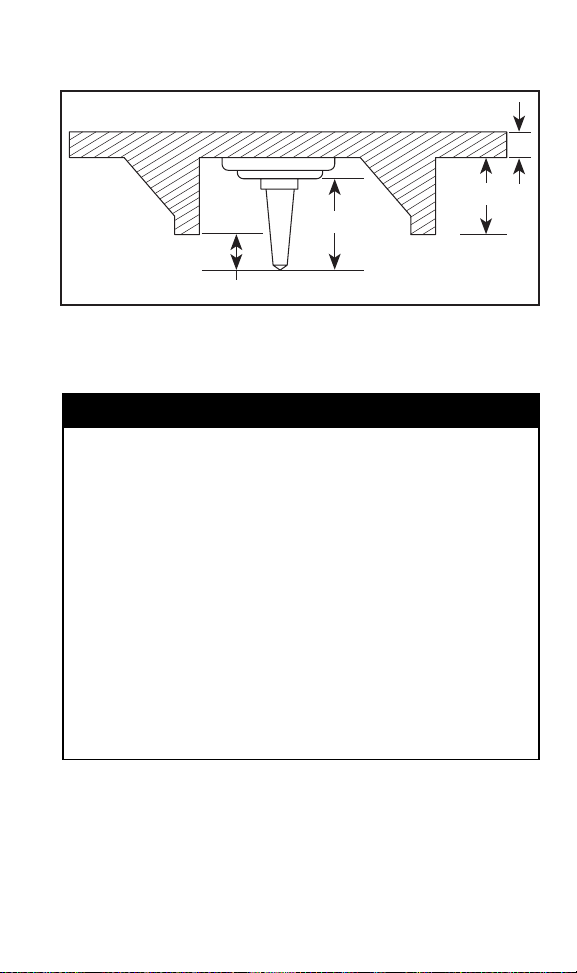
– Never use studs that exceed the height of your snowmobile’s
track profile by more than 9.5 mm (3/8 in).
3
4
1
A33A32A
INSTALLATION OF STUDS
1. Stud size
2. Penetration range 6.4 to 9.5 mm (1/4 to 3/8 in)
3. Track lug height
4. Track belt thickness
– Never stud a track that has not been approved for studs.
Approved tracks can be identified by a stud symbol (see
illustration) molded into the track surface.
– Studs should only be installed in the locations indicated
by molded bulges in the track surface.
– Never stud a track with a profile of 35 mm (1.375 in) or
more.
– The number of studs installed must always perfectly
match the pattern of molded bulges in the track.
– Always consult the traction product manufacturer’sinstal-
lation instructions and recomm endations before having
your dealer install studs and runners. It is very important
to follow the torque specifications for the stud bolts.
INSTALLING AN INCORRECT NUMBER OF STUDS OR AN IMPROPER INSTALLATION CAN INCREASE THE RISK OF THE
TRACK TEARING OR SEVERING, POSSIBLY RESULTING IN SERIOUS INJURY OR DEATH.
2
WARNING
_____
SAFETY INFORMATION
_____
19
Page 22

A33A35A
APPROVED TRACKS CAN BE IDENTIFIED BY THIS SYM BOL
Maintenance/R eplacement:
PROCEED WITH A VISUAL INSPECTION OF YOUR TRACK BEFORE
EACH USE.
Look for any defects, such as:
– perforations in the track
– tears in the track (particularly around traction holes)
– lugs that are broken or torn off, exposing portions of rods
– delamination of the rubber
– broken rods
– broken studs
– bent studs
– studs that are torn off the track
– missing track guide(s).
Replace broken or damaged studs immediately. If your track shows
signs of deterioration, it must be replaced immediately. When in
doubt, ask your dealer. Always follow the inspections schedule given in the periodic maintenance table.
WARNING
Riding with a damaged track or studs could lead to loss of
control, resulting in a risk of serious injury or death.
_____
20
SAFETY INFORMATION
_____
Page 23

LAWS AND REGULATIONS
Federal, state, provincial and local government agencies have enacted laws and regulations pertaining to the safe use and operation of
snowmobiles. It is your responsibilityas a snowmobiler to learn and
obey these laws and regulations. Respect and observance will result in safer snowmobiling for all.
_____
SAFETY INFORMATION
_____
21
Page 24

SUMMARY OF ACCIDENT PREVENTION
PRACTICES
Snowmobiling at nightcan bea delightful experience but because
of reduced visibility, be extra cautious. Avoid unfamiliar terrain and
be sureyour lightsare working. Always carry aflashlight and spare
light bulbs.
Do not leave your keys in the ignition switch, itpresents an invita-
tion to thieves and a danger to young children.
Nature is wonderful but don't let it distract your attention from
driving. If you want to truly appreciate winter's scenery,stop your
snowmobile on the side of the trail so that
hazard to others.
Fences represent a very serious threat for both you and your
snowmobile. Give a wide berth to telephone poles or posts.
Hidden wiresunseen from adistancecan causeserious accidents.
Obtain reflective tape or markings to identify hazardous wires near
your trail.
Overhead branches can cause driver distraction, cut faces and
even cause eye damage. Always wear an approved safety helmet, eye protection and a face shield. This also applies to your
passenger.
Smoking while refueling or while checking the fuel level can be
dangerous. All fuel gives off fumes. If you do smoke, do so away
from the snowmobile.
Although the snow on the ground measures several inches and
even feet in depth, dry grasses — in certain areas — may extend
above snow level. Remove any such accumulation from track,
engine and gas tank areas.
Be aware of inherent risks associated with riding off trails, such
as avalanche and other natural or man made hazards or obstacles.
Avoid road traveling. If you must do so and it is permitted, re-
duce speed. The snowmobile is not designed to operate or turn
on paving. When crossing a road, make a full stop, then look carefullyinbothdirectionsbeforecrossingata90° angle. Be wary of
parked vehicles.
you don't become a
_____
22
SAFETY INFORMATION
_____
Page 25
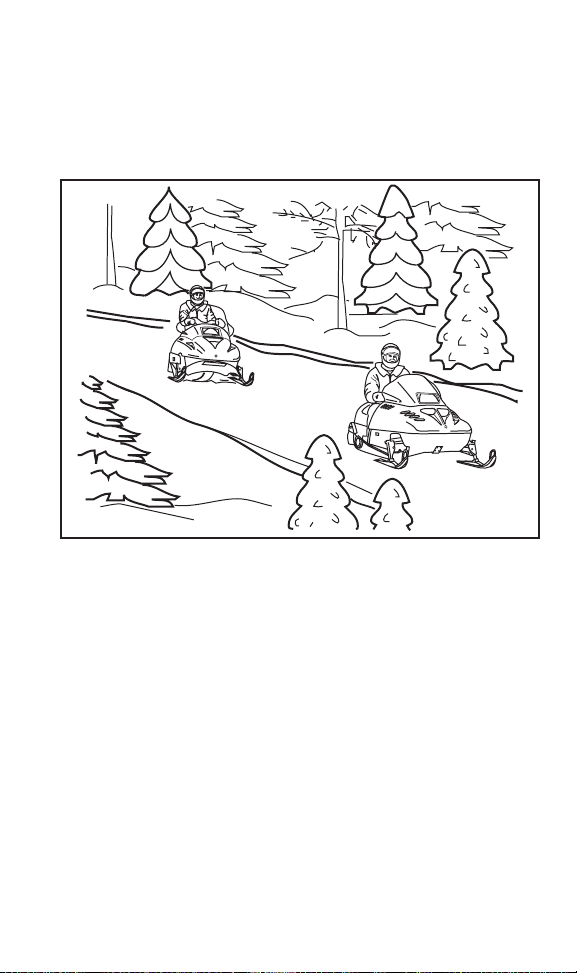
Tailgating another snowmobile should be avoided. If the snowmo-
bile in front of you slows for any reason, its driver and passenger
could be harmed through your neglect. Maintain a safe stopping
distance between you and the snowmobile in front of you. Depending on the terrain condition,stopping may requirea little more
space than youthink. Play it safe. Be prepared to use evasive driving.
A00A3WA
Make certain you check the throttle movement prior to starting the
snowmobile to ascertain that the throttle cable is properly operational. If not, turn off the machine by pushing the engine cut-out
switch, pulling the tether cord cap or by turning off the ignition.
Correct the problem before the snowmobile is operated. Be prepared to immediately respond should a throttle malfunction occur.
Always show a new operator how to start and stop the vehicle.
Indicate the correct riding positions and, above all else, only allow
him to operate the snowmobile in a restricted flat area — at least
until he is completely familiar with its operation. If there is a local
snowmobile operator's training course existing, have him enroll.
Make sure he is dressed properly for the weather with no long
scarves or loose fitting apparel that could get caught in moving
parts. Make sure his feet are on the running boards and that he
maintains a firm grab of the passenger strap or grips.
_____
SAFETY INFORMATION
_____
23
Page 26

Never have the engine running while the hood is open. Even at
idle, a snowmobile engine is turning around 1,800 revolutions per
minute. Always turn off the ignition before opening the hood for
any reason.
Never remove any original equipment from your snowmobile.
Each vehicle has many safety features built in. Such features
include various guards and consoles, plus reflective materials and
warning labels.
Venturing out alone with your snowmobile could also be haz-
ardous. You could run out of fuel, have an accident, or damage
your snowmobile. Remember, your snowmobile is capable of
traveling further in half an hour than you may be able to walk
in a day. Use the “buddy system”. Always ride with a friend
or member of your snowmobile club. Even then, tell someone
whereyouaregoingandtheapproximatetimeyouplantoreturn.
Meadows sometimes have low areas where waters accumulate
and freeze over in winter. This ice is usually glare ice. Attempting
to turn or brake on this surface could cause your vehicle to spin
out of control. Never brake or attempt speeding or turning on glare
ice. If you do happento travel over sucha condition,reduce speed
by carefully releasing the throttle.
Never “jump” your snowmobile. This should be left to profession-
al stunt men. Don't show off. Be responsible.
Stay sober. Safe riders don't ride under the influence of alcohol
or drugs. Drinking and driving demonstrates a most irresponsible
attitude not only to others but to yourself. Legislators and the
population in general don't tolerate it for good reason and BRP
doesn't either!
Wildlife compliments your snowmobiling day. Snowmobile tracks
provide firm ground over which animals can travel from area to
area. Do not violate this privilege by chasing or harassing wildlife.
Fatigue and exhaustion can lead to death. Avoid areas posted for
the protection or feeding of wildlife.
If you happen to be fortunate enough to see an animal, stop your
snowmobile and observe quietly.
Excessive speeding can be fatal. In many cases, you cannot react
or respond quickly enough to the unexpected. Ride at a speed
which is suitable to the trail and weather conditions. If a maximum
speed is posted, observe it.
_____
24
SAFETY INFORMATION
_____
Page 27

A poorly maintained snowmobile itself can be a potential hazard.
Excessively worn components could render the vehicle completely inoperative. Keep the snowmobile in good working condition
at all times. Follow your pre-operation check, weekly, monthly
and annually routine maintenance and lubrication procedures as
detailed in this guide. Consult a snowmobile dealer or acquire a
Shop Manual and proper tools and equipment if other repairs or
service is required.
Raising the rear of your snowmobile while the engine is running
could cause snow, ice or debris to be thrown back at an observer.
Never raise the rear of the vehicle while the engine is running. To
clear or inspect the track, stop the engine, tilt the vehicle on its
side and remove blockage with a piece of wood or branch. Never
allow anyone near a rotating snowmobile track.
Whileonsafari,donot“gun” the throttle. Snow and ice can be
thrown back into the path of a following snowmobile. In addition,
when “gunning” the throttle, the vehicle digs into and leaves an
irregular snow surface for others.
Safaris are both fun and enjoyable but don't show off or overtake
others in the group. A less experienced operator might try to do
the same as you and fail. When riding with others, limit your abilities to the experience of others.
Always cover yoursnowmobile when leavingit overnightor during
extended periods of inactivity. This will protect it from freezing as
well as retain its appearance.
The guidelines that we support are not designed to limit your
snowmobiling fun, but to preserve the beautiful freedom that you
can experience only ona snowmobile! These guidelines will keep
snowmobilers healthy, happy and able to introduce others to what
they know and enjoy about their favorite winter pastime. So, the
next timeyou hit the trails on a cool, crisp and clear winter day, we
ask you to remember that you are paving the way for the future
of our sport. Help us lead it down the right path! From all of us at
BRP, thank you for doing your share.
_____
SAFETY INFORMATION
_____
25
Page 28

PASSENGER SAFETY BASICS
Never ride as apassenger unlessthe snowmobileis equippedwith
a passenger seat, and sit only on the designated passenger seat.
Always wear an DOT approved helmet, and follow the same
dressing guidelines as those recommended for the driver as
described above.
Make sure that you are able to achieve a stable stance, both feet
resting positively on the footboards of footrests with good grip,
andthatyouareabletoholdonfirmlytothehandholds.
Once underway, if you feel uncomfortable or unsecure for any
reason, don't wait, tell the driver to slow-down or stop.
_____
26
SAFETY INFORMATION
_____
Page 29

ENVIRONMENT
There is nothing more exhilarating than snowmobiling. Venturing onto snowmobile trails that criss-cross the wild areas of the U.S. and
Canada is an exciting and healthy winter sport. However, as the
number of people using these recreational parks increases, so does
the potential for damage to the environment. Abuse of land, facilities and resources inevitably leads to restrictions and closures of
both private and public land.
In essence, the greatest threat to our sport, is all around us. Which
leaves us with one logical choice. When we snowmobile, we must
always ride responsibly.
The vast majority respect the law and the environment. Each of us
must set anexample for those who are new to the sport, young and
old alike.
It is in every one's best interest to tread lightly into our recreational
areas. Because, in the long run, to protect the sport we must preserve the environment.
Recognizing the importance of this issue and the need for snowmobilers to do their share in preserving areas that make it possible to
enjoy our sport, BRP has developed the “Light Treading Is Smart
Sledding” campaign for snowmobilers.
Light Treading refers to more than the thread of our tracks. It's a
statement of concern, respect and willingness to take the lead and
take action. It applies to the environment in general, its proper care
and maintenance, its natural inhabitants and all enthusiasts and the
public atlarge who enjoy the greatoutdoors. With this theme, we invite all snowmobilers to remember that respecting the environment
is not only critical to the future of our industry but to future generations.
Light Treading in no way suggests you should curb your appetite for
snowmobiling fun! It simply means tread with respect!
JUST WHAT IS LIGHT TREADING?
The fundamental objective of Light Treading is one of respect for
where and how you ride a snowmobile. You're a light treader when
you follow the principles below.
Become informed. Obtain maps, regulations and other information
from the Forest Service or from other public land agencies. Learn
the rules and follow them and that goes for speed limits, too!
_____
SAFETY INFORMATION
_____
27
Page 30

Avoid running over young trees, shrubs, and grasses and don't cut
wood. On flatlands or areas where trail riding is popular, it's important to ride only where authorized. Remember, there is a link between protecting your environment and your own safety.
Respect wildlife and be particularly sensitive of animals that are rearing young or suffering from food shortage. Stress can sap scarce
energy reserves. Refrain from riding in areas where only animals
are intended to tread!
Obey gate closures and regulatory signs and remember, light treaders don't litter!
Stay out of wilderness areas. They're closed to all vehicles. Know
where the boundaries are.
Obtain permission to travel across private land. Respect the rights
of landowners and other people's privacy. Remember, snowmobile
technology has lowered the noise factor considerably, but you still
shouldn't rev your engines where quiet “is the order of the day”.
WHY IS LIGHT TREADING SMART
Snowmobilers know all too well the efforts that have been made
throughout the sport's history to enjoy access to areas where people
can snowmobile safely and responsibly. This effort continues today,
as strong as ever.
Respecting the areas where we ride... wherever they may be... is
the only way to insure their future enjoyment. That's one majorreason why we know you'll agree that Light Treading Is Smart Sledding!
Andtherearemore.
Enjoying the opportunity to see winter and all its natural majestic
wonders, is an experience cherishedby snowmobilers. Light Treading will preserve this opportunity and will make it possible for us to
expose others to the beauty of winter and the unique thrill of our
sport! Light Treading will help our sport to grow!
Finally, Light Treading is the sign of a smart snowmobiler. You don't
have to leave big tracks or careen through a virgin forest to show you
can ride. So whether you're driving a high performance Ski-Doo, a
sporty MX-Z snowmobile or any other make or model, show you
know what you're doing. Show you know how to send snow flying
and make tracks with a light touch!
_____
28
SAFETY INFORMATION
_____
Page 31

RIDING THE VEHICLE
Before starting out on your first ride with this vehicle, read the following SAFETY INFORMATION as you will be informed about the
safe operating practices.
Although the mere reading of such information does not eliminate
the hazard, its understanding and heeding of all of the warnings and
cautions will promote the safe use of the vehicle.
Before venturing on the trails, operate the snowmobile ina restricted
flat area until you are completely familiar with its operation and feel
comfortable thatyou can safelytackle a more demanding task. Have
an enjoyable and safe ride.
_____
SAFETY INFORMATION
_____
29
Page 32
HOW TO RIDE
Your riding position and balance are the two basic principles of makingyoursnowmobilegowhereyouwantitto. Whenturningonthe
side of a hill, you and your passenger must be ready to shift body
weight to help it turn in the desired direction. Driver and passenger
must never assist by place their feet outside of the vehicle. Experience will teach you how much lean to put into turns at different
speeds and how much you will have to lean into a slope to maintain
proper balance.
Generally, the riding position for best balance and control is sitting.
However, the posting, kneeling or standing positions are also used
under certain conditions.
The novice driver should become familiar with the snowmobile
through practice on a level area at slow speeds before venturing
afield.
WARNING
Do not attempt any maneuvers if they are beyond your level
ability.
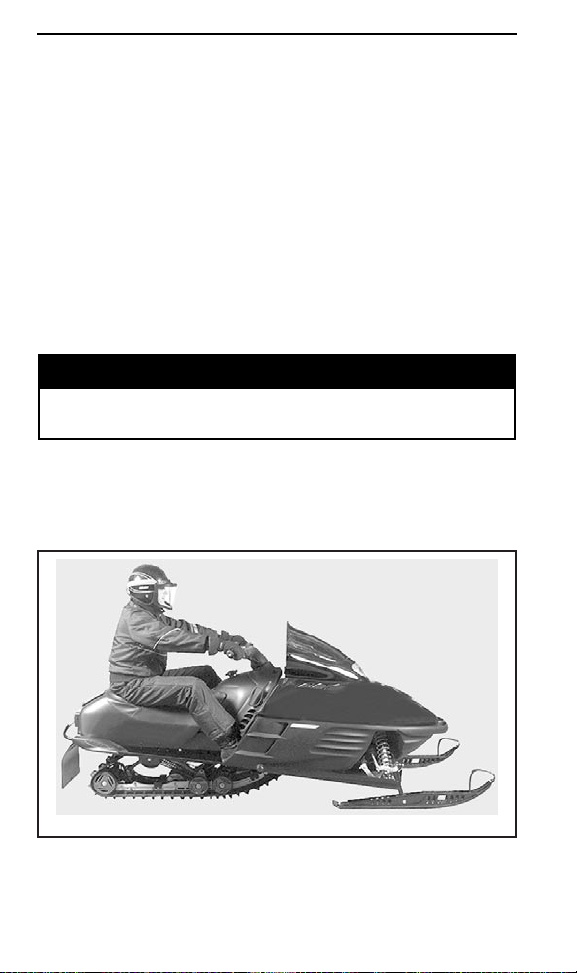
Sitting
Feet on the running boards, body midway back on seat is an ideal position when operating the snowmobile over familiar, smooth terrain.
Knees and hips should remain flexible to absorb shocks.
A30H02A
_____
30
SAFETY INFORMATION
_____
Page 33
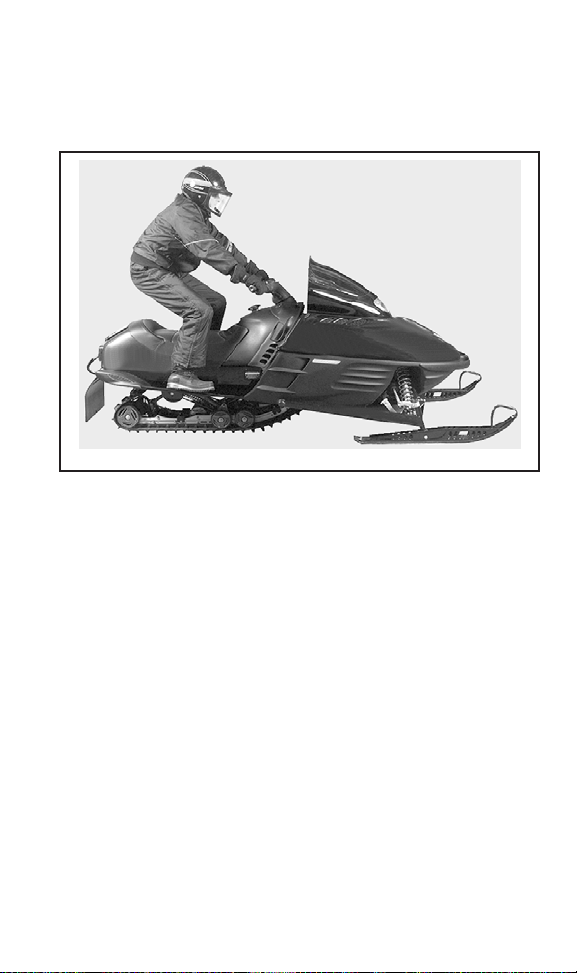
Posting
A semi-sitting position with the body off the seat and the feet under
the body in a sort of squatting posture, thus allowing the legs to
absorb the shocks when traveling over uneven terrain. Avoid abrupt
stops.
A30H03A
_____
SAFETY INFORMATION
_____
31
Page 34
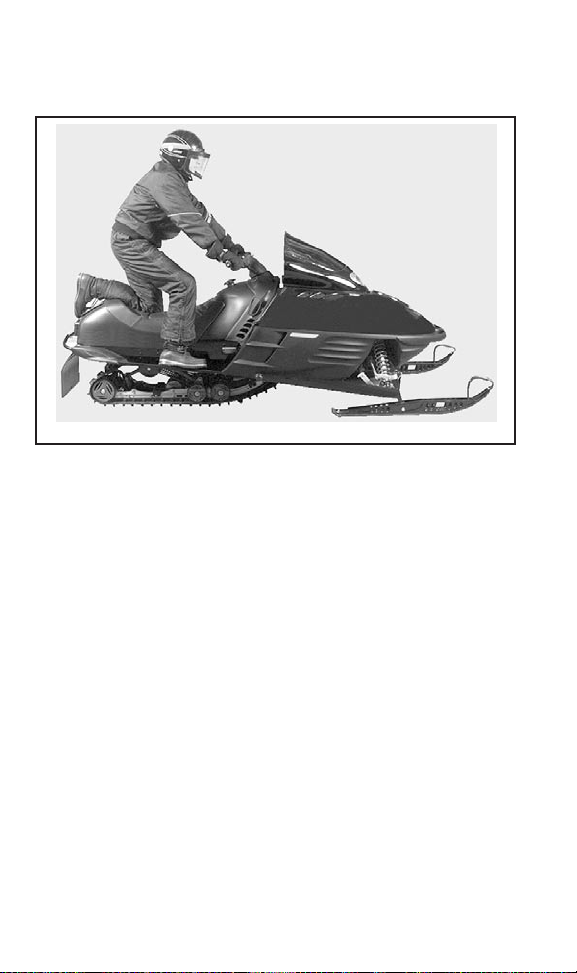
Kneeling
This position is achieved by placing one foot firmly on the running
board and the opposite knee on the seat. Avoid abrupt stops.
A30H04A
_____
32
SAFETY INFORMATION
_____
Page 35
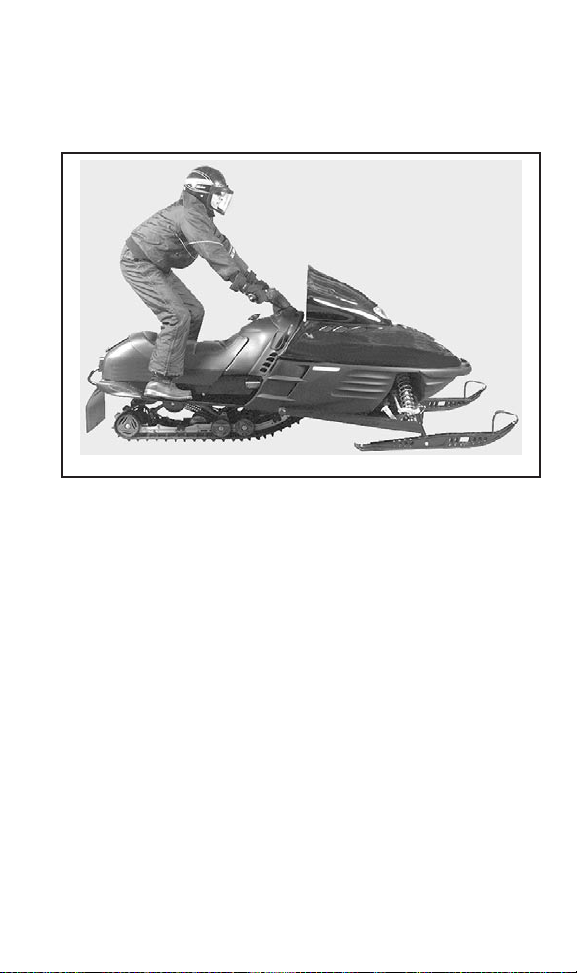
Standing
Place both feet on the running boards. Knees should be flexed to
absorb the shock from surface bumps. This is an effective position
to see better and to shift weight as conditions dictate. Avoid abrupt
stop.
A30H05A
_____
SAFETY INFORMATION
_____
33
Page 36

TERRAIN/RIDING VARIATIONS
Groomed Trail
On a maintained trail, sitting is the most preferred riding position. Do
not race and, above all, keep to the right hand side of the trail. Be
prepared for the unexpected. Observe all trail signs. Do not zigzag
from one side of the trail to the other.
Ungroomed Trail
Unless there has been a freshsnowfall you can expect “washboard”
and snowdrift conditions. Taken at excessive speeds, such conditions can be physically harmful. Slow down. Hold on the handlebar
and assume a posting position. Feet should be under the body assumingacrouchedpositiontoabsorbanyjarringeffect. Onlonger
stretches of “washboard” trails, the kneeling position of one knee on
the seat can be adopted. This provides a certain amount of comfort,
while at the same time keeps the body loose and capable of vehicle
control. Beware of hidden rocks or tree stumps partially hidden by
a recent snowfall.
Deep Snow
In deep “powder” snow, your vehicle could begin to “bog” down.
If this occurs, turn in as wide an arc as possible and look for a firmer
base. If you do get “bogged”, and it happens to everyone, do not
spin your track as this makes the vehicle sink deeper. Instead, turn
the engine off, get off and move the vehicle rear onto new snow.
Then tramp a clear path ahead of the vehicle. A few feet will generally suffice. Restart the engine. Assume the standing position and
rock the vehicle gently as you steadily and slowly apply the throttle.
Depending on whether the front or rear end of the vehicle is sinking, your feet should be placed on the opposing end of the running
boards. Never place foreign material beneath the track for support.
Do not allow anyone to stand in front of, or to the rear of, the snowmobile with the engine running. Stay awayfrom the track. Personal
injury will result if contact is made with the revolving track.
_____
34
SAFETY INFORMATION
_____
Page 37

Frozen Water
Traveling frozen lakes and rivers can be fatal. Avoid waterways. If
you are in a unfamiliar area, ask the local authorities or residents
about the ice condition, inlets, outlets, springs, fast moving currents
or other hazards. Never attempt to operate your snowmobile on ice
that may be too weak to support you and the vehicle. Operating a
snowmobile on ice or icy surfaces can be very dangerous if you do
not observe certain precautions. The very nature of ice is foreign
to good control of a snowmobile or any vehicle. Traction for starting, turning or stopping is much less than that on snow. Thus, these
distances can be multiplied manyfold. Steering is minimal, and uncontrolled spins are an ever present danger. When operating on ice,
drive slowly with caution. Allow yourself plenty of room for stopping
and turning. This is especially true at night.
Hard Packed Snow
Don't underestimate hard packed snow. It can be difficult to negotiate as both skis and track do not have as much traction. Best advice
is to slow down and avoid rapid acceleration, turning or braking.
Uphill
There are two types of hills you can encounter — theopenhillon
whichthere are fewtrees, cliffsor other obstacles,and a hillthat can
only be climbed directly. On an open hill, the approach is to climb it
by side hilling or slaloming. Approach at an angle. Adopt a kneeling
position. Keep your weight on the uphill side at all times. Maintain
a steady, safe speed. Continue as far as you can in this direction,
then switch to an opposite hill angle and riding position.
A direct climb could present problems. Choose the standing position, accelerate before you start the climb and then reduce throttle
pressure to prevent track slippage.
In either case, vehicle speed should be as fast as the incline demands. Always slow down as you reach the crest. If you cannot
proceed further, don't spin your track. Turn the engine off, free the
skis by pulling them out and downhill, place the rear of the snowmobile uphill restart the engine and ease it out with slow even throttle
pressure. Position yourself to avoid tipping over, then descend.
_____
SAFETY INFORMATION
_____
35
Page 38

Downhill
Downhill driving requires that you have full control of your vehicle
at all times. On steeper hills, keep your center of gravity low and
both hands on the handlebar. Maintain slight throttle pressure and
allow the machine to run downhill with the engine operating. If a
higher than safe speed is reached, slow down by braking but apply
the brake with frequent light pressure. Never jam the brake and lock
the track.
Side Hill
When crossing a side hill or traversing up or downhill, certain procedures must be followed. All riders should lean towards the slope
as required for stability. The preferred operating positions are the
kneeling position, with the knee of the down hill leg on the seat and
the foot of the uphill leg on the running board, or the posting position. Be prepared to shift your weight quickly as needed. Side hills
and steep slopes are not recommended for a beginner or a novice
snowmobiler.
Slush
Slush should be avoided at all times. Always check for slush before
starting across any lake or river. If dark spots appear in your tracks,
get off the ice immediately. Ice and water can be thrown rearward
into the path of a following snowmobile. Getting a vehicle out of a
slush area is strenuous and in some cases, impossible.
Fog or Whiteouts
On land or water, fog or visibility-limiting snow can form. If you have
to proceed into the fog or heavy snow, do so slowly with your lights
on and watch intently for hazards. If you are not sure of your way,
do not proceed. Keep a safe distance behind other snowmobilers to
improve visibility and reaction time.
Unfamiliar Territory
Whenever you enter an area that is new to you, drive with extreme
caution. Go slow enough to recognize potential hazards such as
fences or fence posts, brooks crossing your path, rocks, sudden
dips, guy wires and countless other obstacles which could result in a
termination of your snowmobile ride. Even when following existing
tracks, be cautious. Travel at a speed so you can see what is around
thenextbendoroverthetopofthehill.
_____
36
SAFETY INFORMATION
_____
Page 39

Bright Sunshine
Bright sunny days can considerably reduce your vision. The glare
from sun andsnow may blind you tothe extent that you cannoteasily
distinguishravines, ditches or other obstacles. Goggleswith colored
lenses should always be worn under these conditions.
Unseen Obstruction
There may be obstructions hidden beneath the snow. Driving off
established trails and in the woods requires reduced speed and increased vigilance. Driving too fast in an area can make even minor
obstacles very hazardous. Even hitting a small rock or stump could
throw your snowmobile out of control and cause injury to its riders.
Stay on established trails to reduce your exposure to hazards. Be
safe, slow down and enjoy the scenery.
Hidden Wires
Always be on the lookout for hidden wires, especially in areas that
may have been farmed at one time or another. Too many accidents
have been caused by running into wires in the fields, guy wires next
to poles and roads, and into chains and wires used as road closures.
Slow speeds are a must.
Obstacles and Jumping
Unplanned jumps of snowdrifts, snowplow ridges, culverts or indistinguishable objects can be dangerous. You can avoidthem by wearingthe propercolorlensesor face shieldsand byoperating at alower
speed.
Jumping a snowmobile is an unsafe and dangerous practice. However, if the trail does suddenly drop away from you, crouch (stand) towardsthe rearof thevehicleand keepthe skis up and straightahead.
Apply partial throttle and brace yourself for the impact. Knees must
be flexed to act as shock absorbers.
Tu rn in g
Depending on terrain conditions, there are two preferred ways
to turn or corner a snowmobile. For most snow surfaces, “body
english” is the key to turning. Leaning towards the inside of the
turn and positioning body weight on the inside foot will create a
“banking” condition beneath the track. By adopting this position
and positioning yourself as far forward as possible, weight will be
transferred to the inside ski.
_____
SAFETY INFORMATION
_____
37
Page 40
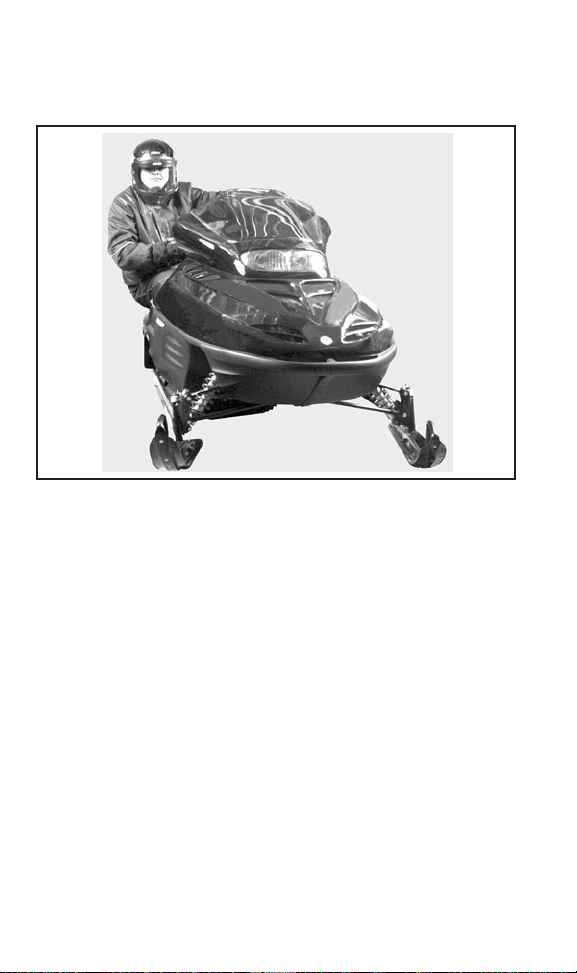
On occasion, you will find that the only way to turn the vehicle about
in deep snow is to pull the snowmobile around. Do not overexert
yourself. Get assistance. Remember to always lift using your legs
as opposed to your back.
A30H06A
Road Crossing
In some cases, you will be approaching the road from a ditch or
snowbank. Choose a place where you know you can climb without difficulty. Use the standing position and proceed with only as
much speed needed to crest the bank. Stop completely at the top
of the bank and wait for all traffic to clear. Judge the drop to the
roadway. Cross the road at a 90° angle. If you encounter another
snowbank on the opposite side, position your feet near the rear of
the vehicle. Remember, your snowmobile is not designed to operate on bare pavement and steering on this type of surface is more
difficult.
Railroad Crossing
Never ride on railroad tracks. It is illegal. Railroad tracks and railroad
rights-of-way are private property. A snowmobile is no match for a
train. When crossing a railroad track, stop, look and listen.
_____
38
SAFETY INFORMATION
_____
Page 41

Night Rides
The amount of natural and artificial light at a given time can effect
your ability to see or to be seen. Nighttime snowmobiling is delightful. It can be a unique experience if you acknowledge your reduced
visibility. Before you start, make certain your lights are clean and
work properly. Drive at speeds that will allow you to stop in time
when you see an unknown or dangerous object ahead. Stay on established trails and never operate in unfamiliar territory. Avoid rivers
and lakes. Guy wires, barbedwire fences, cabledroad entrances and
other objects such as tree limbs are difficult to see at night. Never
drive alone. Always carry a flashlight. Keep away from residential
areas and respect the right of others to sleep.
Safari Riding
Before starting out, designate a “trail boss” to lead the party and
another person to follow-up at the end of the party. Ensure that all
members of the party are aware of the proposed route and destination. Make certain that you are carrying all necessary tools and
equipment and that you have sufficient fuel to complete the trip.
Never overtake the trail boss or, for that matter, any other snowmobile. Use down-the-line hand signals to indicate hazards or intent of
direction change. Assist others whenever necessary.
It is always IMPORTANT to keep a safe distance between each
snowmobile. Always maintain a safe interval and allow sufficient
stopping distance. Don't be a tailgater. Know the position of the
machine ahead.
Signals
If you intend to stop, raise either hand straight above your head. A
left turn is indicated by extending your left hand straight out in the
proper direction. For right turns, extend the left arm and raise the
hand to a vertical position so it forms a right angle at the elbow. Every
snowmobiler should relay any signal to the ones behind.
Carrying a Passenger
Certain snowmobiles are designed for an operator only, others can
allow one passenger only, and others can allow up to two passengers. Refer to the indications on the vehicles to know if any particular snowmobile can accommodate passengersor not, and if so, how
many. Always respect those indications. Overloading is dangerous
because snowmobiles are not designed for it.
Even when passengers are allowed, you must make sure that the
personswhowouldliketobecomepassengersarephysicallyfitfor
snowmobiling.
_____
SAFETY INFORMATION
_____
39
Page 42

WARNING
Any passenge r must be able to firmly lay his feet on the
footrests and keep his hands on the grab handles or seat strap
at all times when seated. Respecting those physical criteria is
important to ensure that the passenger is stable and to reduce
the risks of ejection.
On snowmobiles allowing two passengers, if you have an adult and
a child for passenger, BRP recommends that the child sits in the
center location. This allows an adult sitting in the rear seat to keep
a visual contactwith the childand hold him if necessary. In addition,
the child is best protected against the wind and cold temperature if
seated in the center location.
Each operator has a responsibilityto ensure the safety of his passengers and should inform them of snowmobiling basics.
WARNING
– Passengers must only sit on designated passen ger seats.
Never allow anyone to sit between the handlebar and the
operator.
– Each passenger seat must have a strap or grab handles
and meet SSCC stand ards.
– Passengers and operators must always wear DOT ap-
proved helmets and warm clothing appropriate for
snow mobiling. Make sure that no skin is exposed.
– Once underway, if a passenger feels uncomfortable or un-
secure for any reason, he must not wait, and tell the driver
to slow-down or stop.
Riding with passengers on board is different than riding alone. The
operator has the benefit of knowing what will be the next maneuver
and is able to prepare himself accordingly. The operator also benefits from the support of his grip on the handlebar. In contrast, the
passengers have to rely on the operator’s careful and safe operation
of the vehicle. In addition, “body english” is limited with passengers, and the operator can sometimes see more of the trail ahead
than the passengers. Therefore, smooth starting and stopping are
required with passengers, and the operator must slow down. The
operator must also warn passengers of side hills, bumps, branches,
etc. An unforeseen bump can leave you passenger-less. Remind
your passengers to lean into the turn with you, without causing the
vehicle to topple. Be extremely careful, go more slowly and check
the passengers frequently.
_____
40
SAFETY INFORMATION
_____
Page 43

WARNING
When riding with a passenger:
– Braking ability and steering control are reduced. De-
crease speed and allow extra space to maneuver.
– Adjust suspension according to weight.
For complete information on how to adjust the suspension, please
refer to the section of this Operator’s Guide entitled ADJUSTABLE
SUSPENSIONS and to the relevant label on the belt guard.
Use extra caution and go even more slowly with young passengers.
Check frequently to make certain the child has a firm grip and is properly positioned with his feet on the running boards.
Tra il St op s
Wheneverpossible, pull off the trail when you stop. This will reduce
the hazard to other snowmobilers using the trail.
Trails and Signs
Trail signs are used to control, direct or regulate the use of snowmobileson trails. Become familiar with all signs used in the area where
you are snowmobiling.
_____
SAFETY INFORMATION
_____
41
Page 44
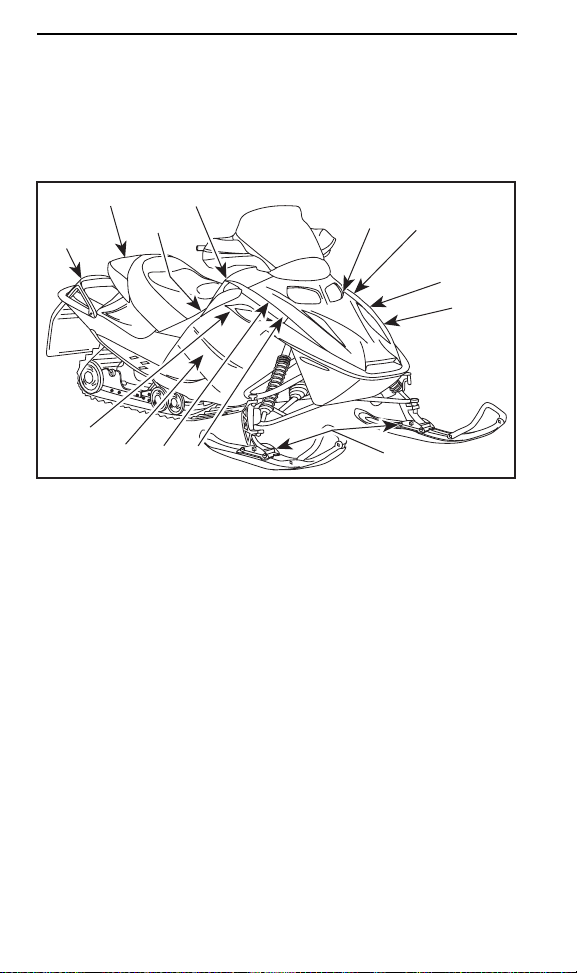
ON-VEHICLE IMPORTANT INSTRUCTIONS
The following instructions are on your snowmobile. If missing or
damaged, the decals can be replaced free of charge. See an authorized SKI-DOO dealer.
Please read the following instructions carefully before operating this
snowmobile.
11
13-14
1-15
16
6-10
9
8
A33A1ZF
TYPICAL — LOCATION OF IMPORTANT I NSTRUCTIONS
2
7
5
3
4
12
_____
42
SAFETY INFORMATION
_____
Page 45
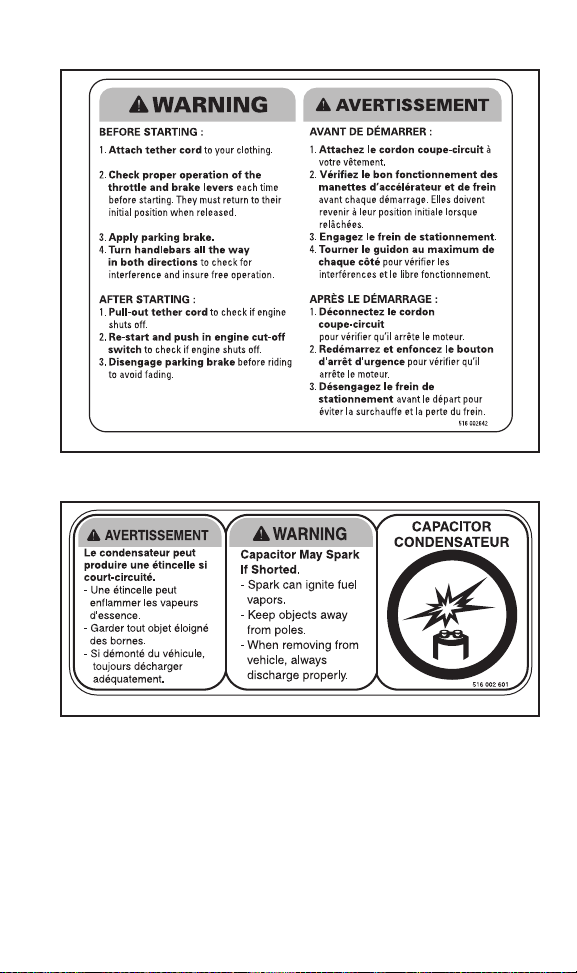
A33A2CA
Instruction 1
Instruction 2
A33A20A
MANUA L START MODELS
_____
SAFETY INFORMATION
_____
43
Page 46
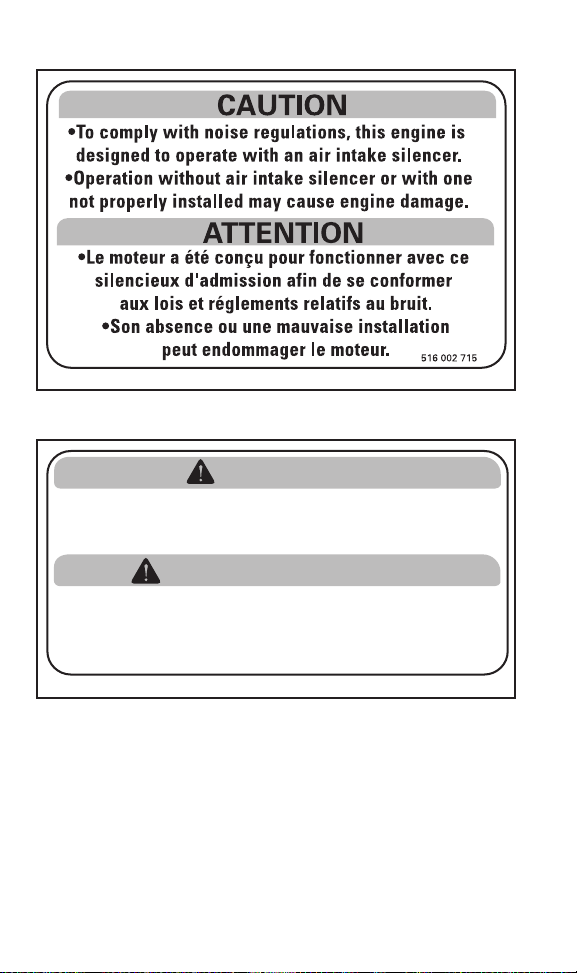
Instruction 3
A35A05A
Instruction 4
WARNING
This guard must ALWAYS be in place when engine is running.
Beware of rotating parts _ they could cause injuries or
catch your clothing.
AVERTISSEMENT
Ce garde-courroie doit TOUJOURS être en place lorsque le
moteur fonctionne. Attention aux pièces en rotation _ elles
peuvent vous blesser ou capter vos vêtements.
516 002 670
A33A2FA
_____
44
SAFETY INFORMATION
_____
Page 47
A33A2PA
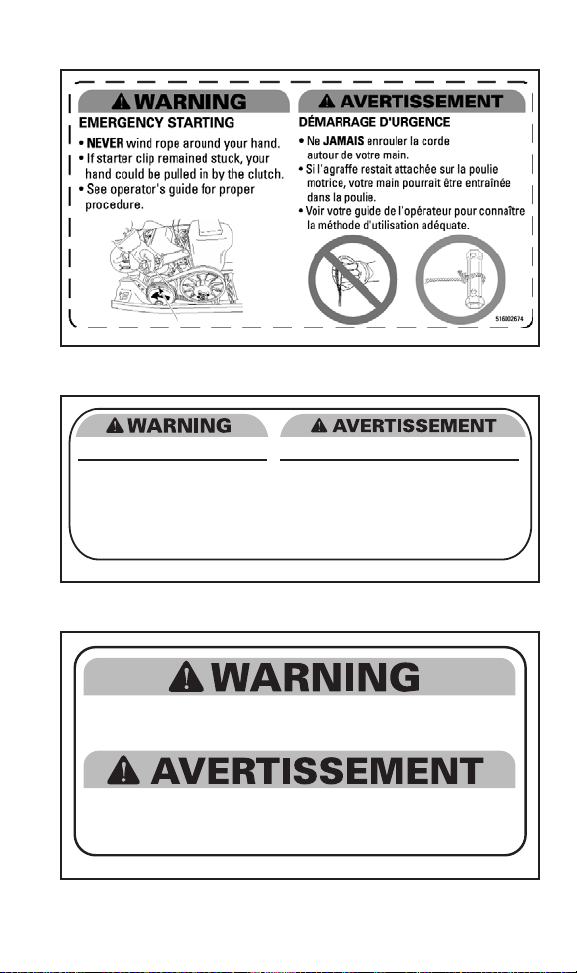
Instruction 5
Instruction 6
NEVER SIT IN CARGO AREA.
Exceeding maximum cargo load
may affect steering
control and braking ability.
MAXIMUM cargo load :
15,8 Kg /35 Lbs.
A33A2OA
NE JAMAIS S'ASSEOIR À LA PLACE DU CARGO.
Excéder le poids maximal du cargo peut
affecter le contrôle de la
direction et la capacité de freinage.
Charge MAXIMALE cargo :
15,8 Kg / 35 Lbs.
Instruction 7
Beware of HOT parts!
Attention aux pièces CHAUDES!
A33A2GA
_____
SAFETY INFORMATION
516 002 666
516002664
_____
45
Page 48
A32A1HA
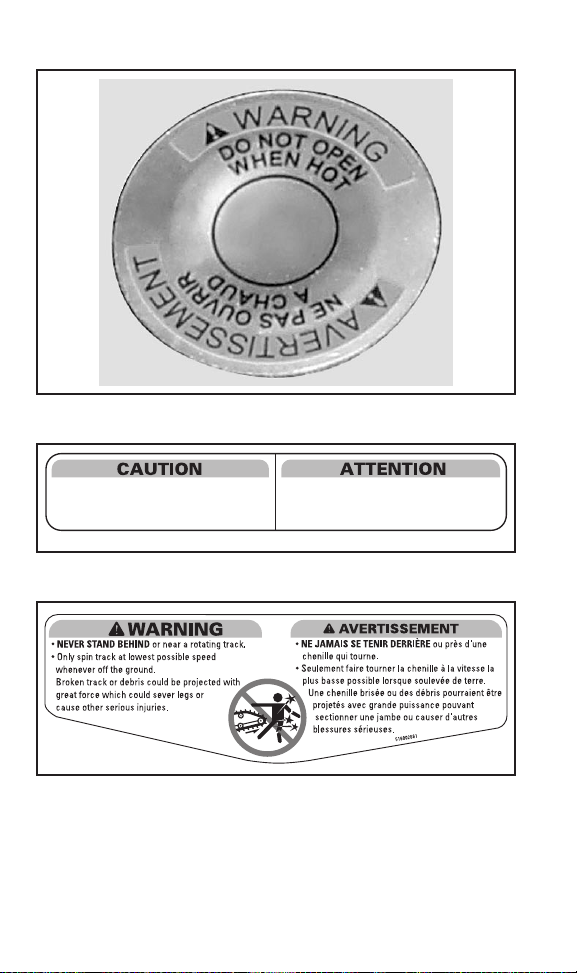
Instruction 8
Instruction 9
Use XP-S 2-Stroke Synthetic blend
XP-S
A33A2HA
A33A2NA
_____
46
or
Synthetic 2-Stroke oil.
SAFETY INFORMATION
semi-synthétique 2-temps XP-S
ou synthétique 2-temps XP-SMD.
Instruction 10
Utilisez de l'huile
_____
MD
516 002 325A
Page 49
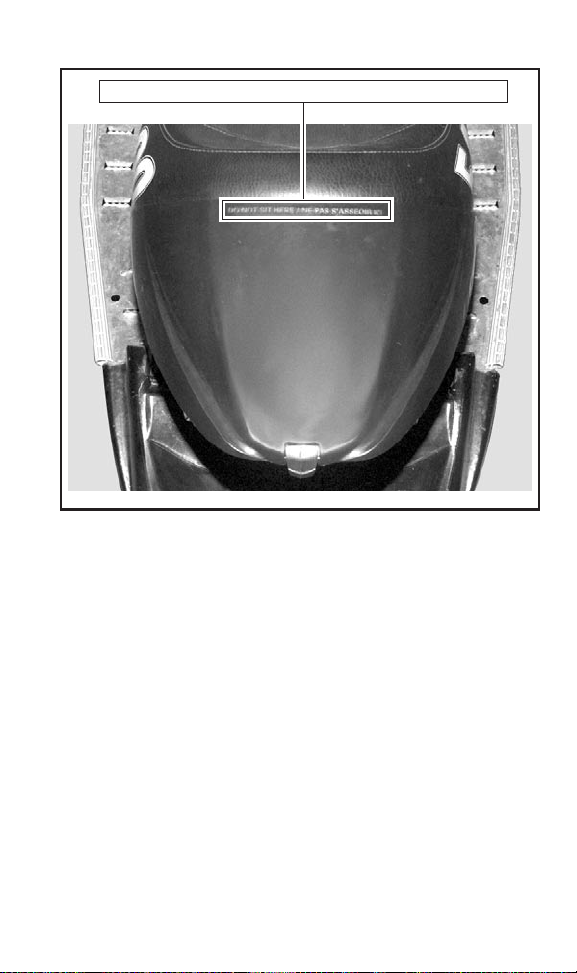
Instruction 11
DO NOT SIT HERE / NE PAS SASSEOIR ICI
A33H02A
MACH Z M ODELS
_____
SAFETY INFORMATION
_____
47
Page 50
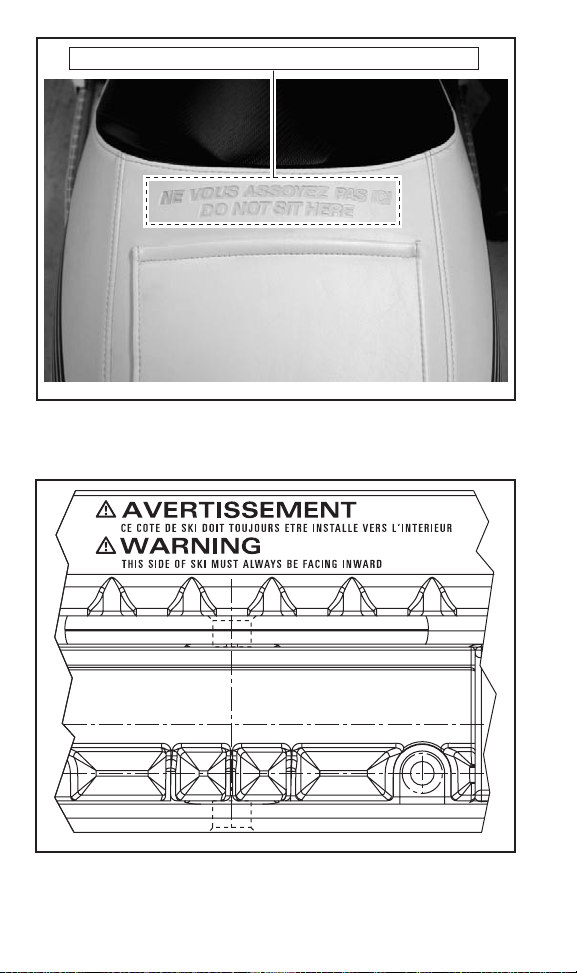
DO NOT SIT HERE / NE PAS SASSEOIR ICI
A33A2IA
SUMMIT MODELS
Instruction 12
A32F21A
SUMMIT MODELS
_____
48
SAFETY INFORMATION
_____
Page 51
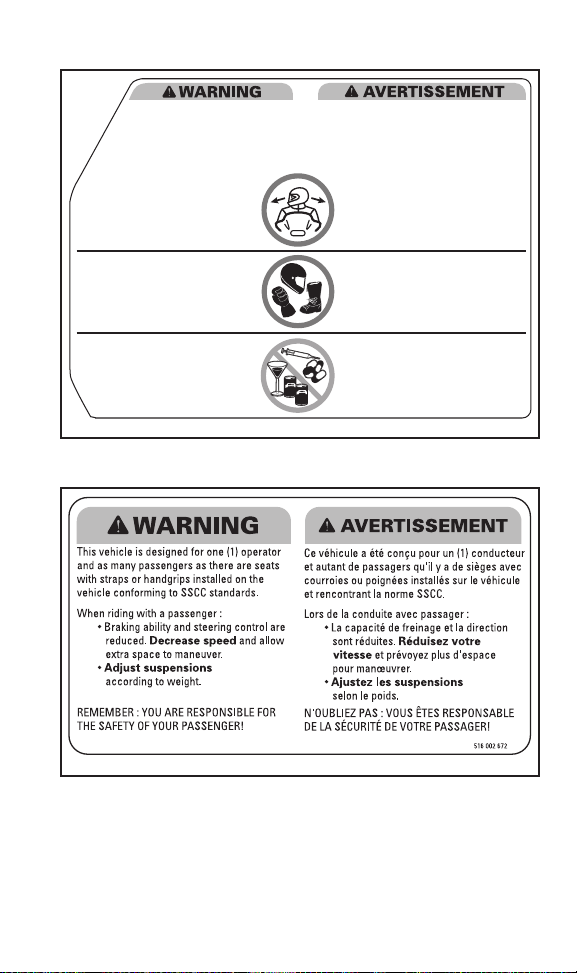
Instruction 13
ALL DRIVERS AND PASSENGERS
MUST READ THE FOLLOWING:
Avoid surprises! BE ON THE LOOK-OUT
for the unexpected. Operate defensively.
Scan constantly for people, objects,
conditions and upcoming vehicles.
Avoid thin ice / open water.
Use extra caution whenever off-trail.
ALWAYS wear a DOT approved
HELMET and clothing appropriate
for snowmobiling.
NEVER ride after
consuming alcohol or drugs
even as a passenger.
A33A2JA
TOUS LES CONDUCTEURS ET PASSAGERS
DOIVENT LIRE CE QUI SUIT:
Évitez les surprises! SOYEZ AUX AGUETS
pour les imprévus. Conduisez défensivement.
Scrutez constamment pour repérer
personnes, objets, conditions et
autres véhicules.
Évitez la glace mince / étendue deau
non gelée.
Redoublez de vigilance hors sentier.
TOUJOURS porter un CASQUE
approuvé DOT et des vêtements
appropriés à la motoneige.
Ne JAMAIS utiliser une motoneige
sous l'influence de drogues ou
alcool même en tant que passager.
Instruction 14
516002641
A33A2KA
_____
SAFETY INFORMATION
_____
49
Page 52
Instruction 15
Read and understand all warning
labels and operators guide before
operation.
If guide is missing, ask your dealer
for a new one.
Get familiar with your snowmobile.
Inexperienced riders may overlook risks and
be surprised by snowmobiles specific
behavior and terrain conditions.
Ride slowly.
Excessive speed and
reckless driving can kill !
ALWAYS adjust your speed according to
snow conditions and circumstances.
Steering control and braking ability
may be reduced on hard-pack snow, ice
or roads. Reduce speed & allow more
space to stop or turn.
Respect laws
on minimum operator age.
Manufacturer recommends
a minimum operating age
of 16 years old.
A33A2MA
Lire et comprendre toutes les
étiquettes davertissements et le
guide du conducteur avant utilisation.
Si le guide est introuvable, demandez-en
un nouveau à votre concessionnaire.
Familiarisez-vous avec votre
motoneige.
Les motoneigistes inexpérimentés peuvent
sous-estimer les risques et être surpris par le
comportement spécifique de la motoneige et
des conditions du terrain. Conduisez
lentement.
La vitesse excessive et la conduite
irresponsable peuvent causer la mort !
TOUJOURS adapter votre vitesse selon les
conditions de neige et les circonstances
environnantes.
Le contrôle de la direction et le
freinage peuvent être réduits sur la
neige compactée, la glace ou les routes.
Réduisez votre vitesse et allouez plus
d'espace pour tourner ou freiner.
Respectez les lois sur lâge minimal du
conducteur.
Le manufacturier recommande que le
conducteur soit âgé dau moins 16 ans.
516 002 671
_____
50
SAFETY INFORMATION
_____
Page 53

Instruction 16
THIS ENGINE IS CERTIFIED TO OPERATE ON
EMISSION CONTROL INFORMATION
UNLEADED GASOLINE AND CONFORMS TO XXXX
U.S. EPA REGULATIONS FOR SNOWMOBILE SI ENGINES.
ENGINE FAMILY:
FEL:
ENGINE DISPLACEMENT:
EXHAUST EMISSION CONTROL SYSTEM:
TUNE-UP SPECIFICATIONS
IDLE SPEED: .
SPARK PLUG TYPE:
SPARK PLUG GAP: .
A00A8RA
TYPIC AL
....................................................
..........................................................
.........................................
..........................................................
.................................................
.....................................
XXg/kW-hr HC
...................
...............
XXXXXXXXXXX
+NOx XXXg/kW-hr CO
XXXX cc
XXX
XXXX RPM ± XXX
XXXXXXXXXXX
XXXX in/XXXX mm
_____
SAFETY INFORMATION
_____
51
Page 54

_____
52
SAFETY INFORMATION
_____
Page 55

VEHICLE
INFORMATION
__________________________
53
Page 56
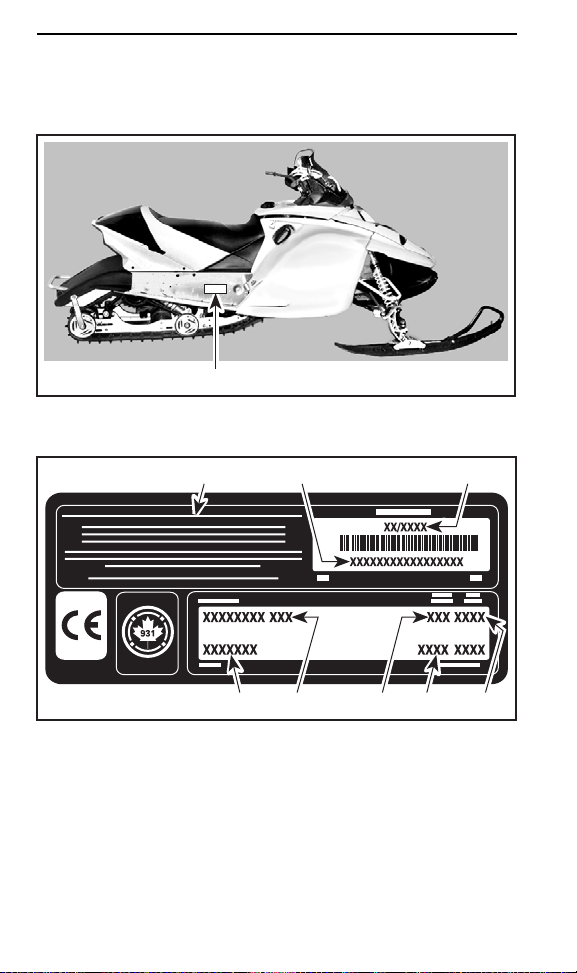
HOW TO IDENTIFY YOUR SNOWMOBILE
Vehicle Description Decal
Vehicle description decal is located on right hand side of tunnel.
A33H01A
TYPIC AL
1. Vehicle description dec al
A00A6MA
VEHICLE DESCRIPTION DECAL
1. Manufacturer name
2. Manufacturing date
3. Vehicle identification number (VIN)
4. Model name
5. Option package
6. Engine type
7. Model year
8. Color codes
_________________________
54
1
1
5
3
4687
2
Page 57
Serial Numbers
The main components of your snowmobile (engine and frame) are
identified by different serial numbers. It may sometimes become
necessary to locate thesenumbers for warranty purposesor totrace
your snowmobile in the event of loss. These numbers are required
by the authorized SKI-DOO dealer to complete warranty claims properly. No warranty will be allowed by BRP if the engine serial number
or vehicle identification number (VIN) is removed or mutilated in any
way. We strongly recommend that you take note of all the serial
numbers on your snowmobile and supply them to your insurance
company.
Vehicle Identification Number (VIN) Location
VIN is scribed on vehicle description decal. See above. It is also
engraved on tunnel near vehicle description decal.
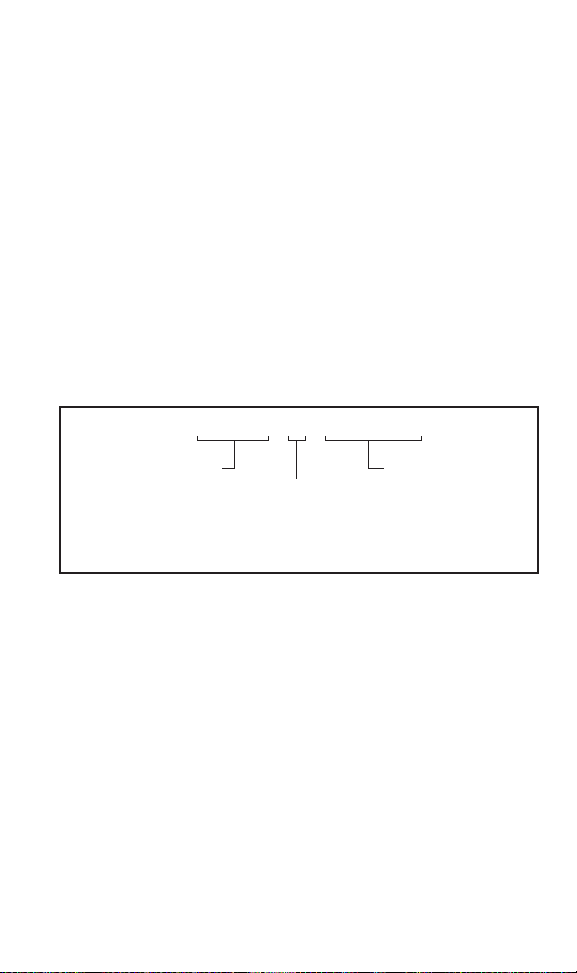
Model Number Location
Model number is part of vehicle identification number (VIN).
2 B P S B X 5 A 9 Y 1 0 0 0 0 0 1
Model number
Serial number
Model year: y = 2000
1 = 2001
2 = 2002
A00A8HA
VIN DESCRIPTION
etc.
__________________________
55
Page 58
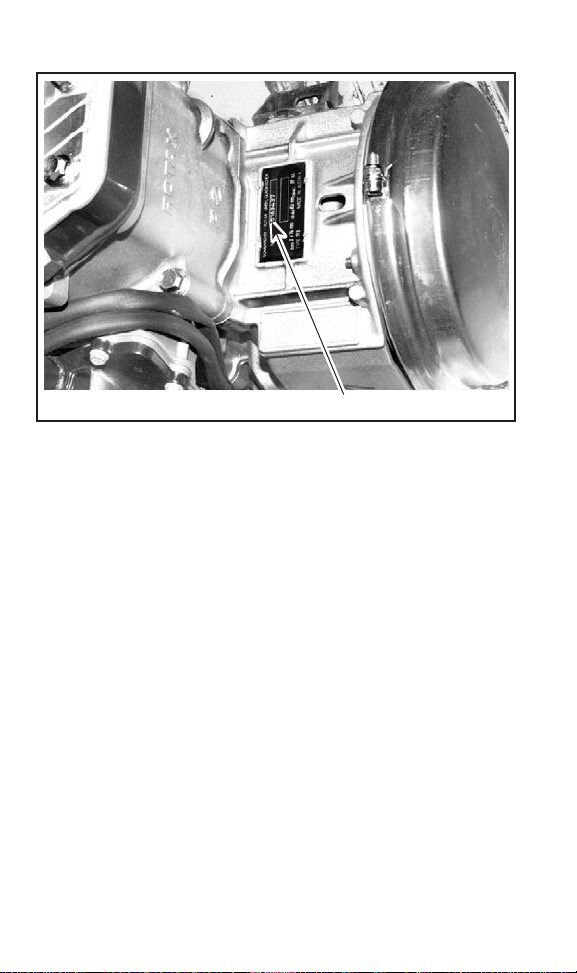
Engine Serial Number Location
A32C01B
TYPIC AL
1. Engine serial number
_________________________
56
1
Page 59
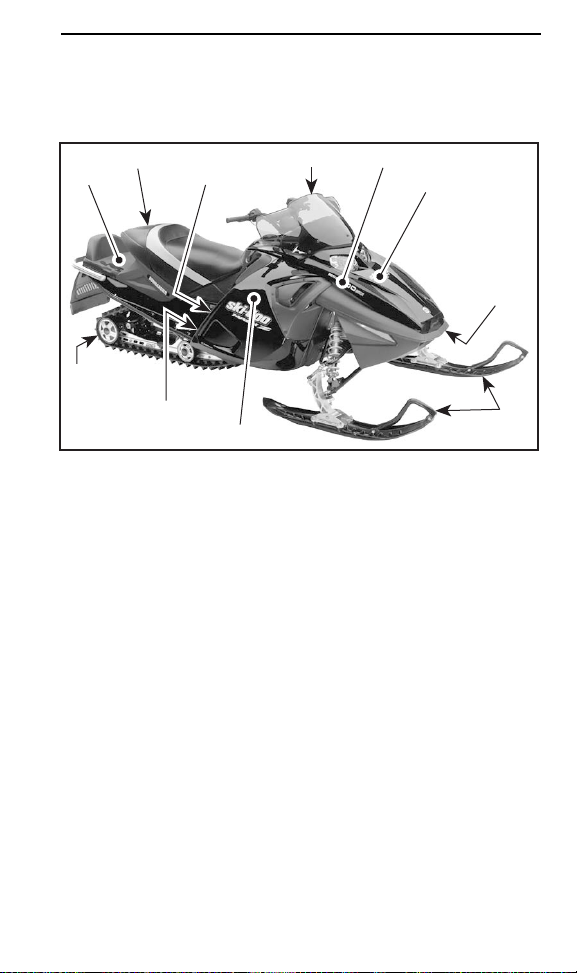
CONTROLS/INSTRUMENTS/EQUIPMENT
NOTE: Some controls/instruments/equipment do not apply or are op-
tional on some models. In these cases their reference numbers are
deliberately missing in the illustrations.
37
43
A35A01A
TYPIC AL
36
32
33
39
31
40
34
35
42
__________________________
57
Page 60
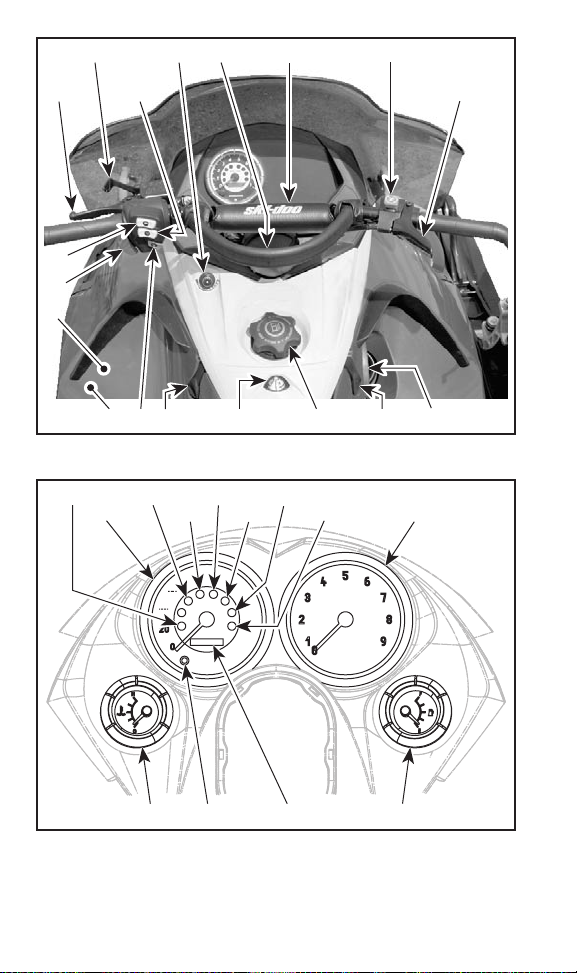
3
89
7
11
2
29
12
41
A35A02A
TYPIC AL
16
18
38
30
5
14
33
28
13
25
15
24 33 17
6-10
4
1
23
A35A03A
TYPIC AL — MACH Z MODELS
_________________________
58
27
19
20-21-22 26
Page 61
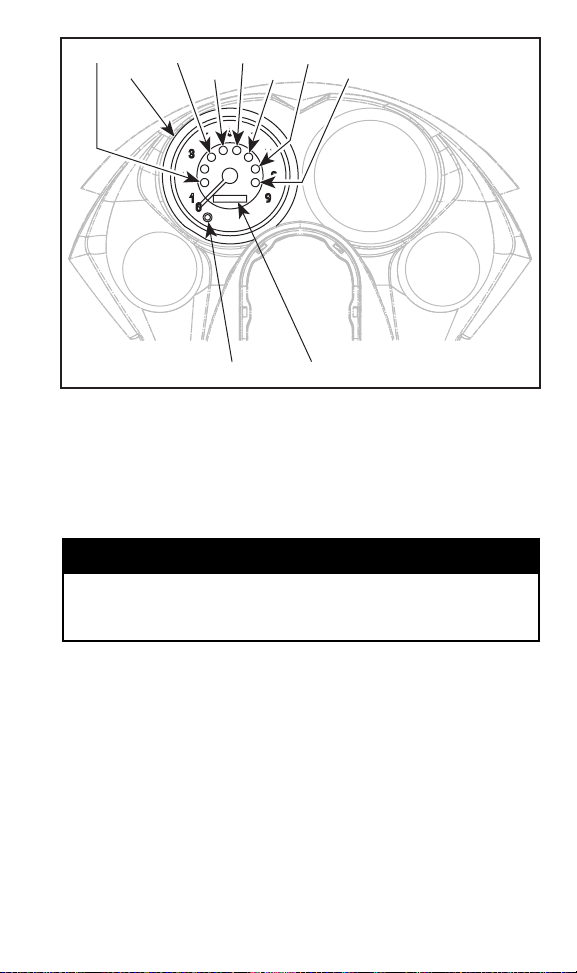
16
23
14
28
13
15
6-10
4
A35A04A
TYPIC AL — SUMMIT M ODELS
19
20-21-22
1) Throttle Lever
Located on the right hand side of handlebar and designed to be
thumb activated. When squeezed, it increases the engine speed
and engages the transmission. When released, engine speed
returns automatically to idle.
WARNING
Test the throttle lever operation each time b efore starting the
engine. The lever must return to its original position once released. Otherwise, do not start engine.
2) Brake Lever
Located on the left hand side of handlebar. When squeezed, the
brake is applied. When released, it automatically returns to its original position. Braking effect is proportional to the pressure applied
on the lever and to the type of terrain and its snow coverage.
3) Parking Brake Lever
Locatedon left hand side of handlebar. Parking brake shouldbe used
whenever snowmobile is parked.
__________________________
59
Page 62
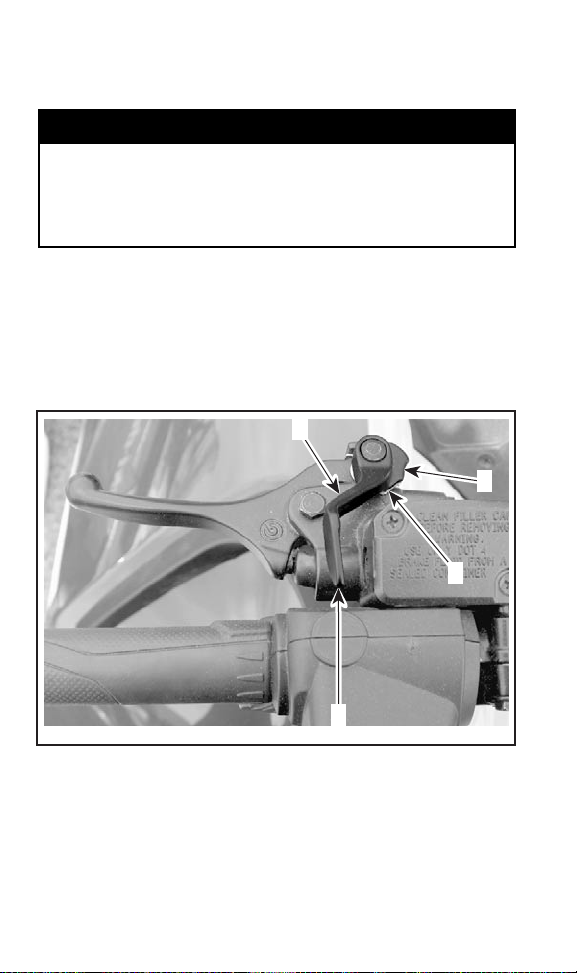
Whenever parking brake is applied and engine is running, injection
oil level/parking brake pilot lamp lights up to remind you that it is
engaged.
WARNING
Make sure p arking brake is fully disengaged before operating
the snowmobile. When you ride the vehicle, brake pads that
are caused to drag by a continuous pressure on the lever may
cause damage to the brake system and cause loss of braking
capacity and/or fire.
To engage mechanism, squeeze brake lever and maintain while
pulling locking lever with a finger in the desired locking position.
When brake lever is held at halfway the parking brake should be
fully applied.
To release mechanism, squeeze brake lever. Locking lever will automatically return to its original position. Always release parking brake
before riding.
1
4
3
A35D01A
TYPIC AL
1. Locking lever
2. OFF
3. ON — Position 1
4. ON — Position 2
2
4) Brake/Parking Brake Pilot Lamp (Red)
Lights when brake or parking brake is applied (with engine running).
_________________________
60
Page 63

This pilot lamp also lights up when injection oil level is low (with
engine running). Check oil level and replenish as soon as possible.
5) START/RER Button
General
The START/RER button has two functions.
When the engine is not running, depressing the START/RER button
will engage the electric starter on vehicle so equipped and start the
engine.
When the engine is running, depressing the START/RER button will
command the engine to reverse crankshaft rotation as driving the
snowmobile in reverse is achieved by changing the direction of rotation of the engine, not by shifting the chaincase in reverse gear.
When depressing the START/RER button, the electronic module will
practically slow down the engine RPM to a stop and advance the
ignition timing to cause crankshaft rotation reversing.
Engine will automatically shift into forward when starting after stopping or stalling.
Shifting procedure will take place only when the engine is running.
If engine is runningat a speed above 4300 RPM, the reverse function
of the START/RER button is cancelled.
It is recommended to warm up the engine to its normal operating
temperature before shifting.
Start Mode
To start engine, push START/RER button and hold until engine has
started.
CAUTION: Do not hold START/RER button more than 10 sec-
onds. A rest period should be observed between the cranking
cycles to let starter cool down. Holding START/RER button when
engine has started could damage starter mechanism.
Release START/RER button immediately when engine has started.
If engine does not start on first try, wait a few seconds then repeat
procedure. To stop engine, turn off engine cut-out switch or pull off
tether cord cap.
NOTE: If necessary engine may be manually started with rewind
starter (if so equipped).
__________________________
61
Page 64

Shifting in Reverse
WARNING
Shifting to reverse mode on these snowmobiles is done by
depressing the START/RER button when the engine is running. Wait until the reverse alarm sounds and the DESS/RER
pilot lamp comes on in the dash before operating throttle to
proceed in reverse. The reverse speed of these snowm obiles
is not limited. Always proceed with caution as fast reverse
could result in loss of vehicle stability. Come to complete
stop before depressing START/RER button. Always remain
seated and apply the brake before shifting. Ensure the path
behind is clear of obstacles or bystanders before proceeding.
With the snowmobile completely stopped and engine running at idle,
press and release the START/RER button.
TM
The DESS
sound once every second with a half a second duration when the
snowmobile is engaged in reverse.
Apply throttle slowly and evenly. Allow drive pulley to engage then
accelerate carefully.
Shifting in Forward
With the snowmobile completely stopped and engine running at idle,
press and release the START/RER button.
DESS/RER pilot lamp and warning buzzer will stop.
Apply throttle slowly and evenly. Allow drive pulley to engage then
accelerate carefully.
/RERTMpilot lamp will blink and a warning buzzer will
6) Reverse Pilot Lamp
This pilot lamp will light up when reverse is selected.
7) Handlebar
The handlebar controls the steering of the snowmobile. As the handlebar is rotated to right or left, the skis are turned right or left to
steer the snowmobile.
WARNING
Fast reverse while turning, could result in loss of stability an d
control.
_________________________
62
Page 65
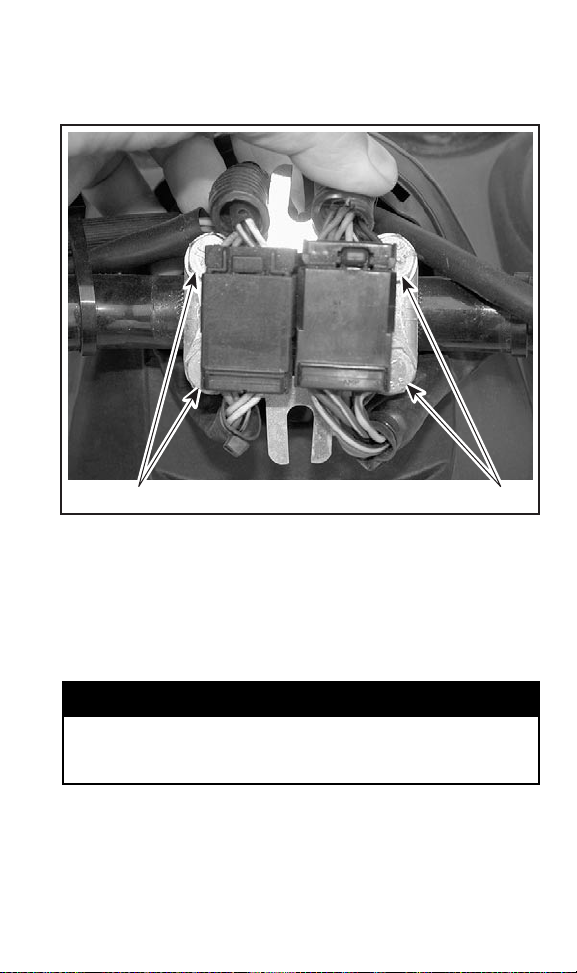
Handlebar Position Adjustment
The handlebar position can be adjusted to suit driver's preferences.
Loosen all 4 bolts retaining handlebar to steering column.
A33H16A
TYPIC AL
1. Four bolts
Move handlebarto the desired position. Torque all4 bolts to 24N•m
(18 lbf•ft).
1
1
8) Holding Strap
Holding strap provides a grip for driver when side-hilling.
WARNING
This strap is not for towing, lifting or other purpose than temporary use as a grab bar during side-hilling. Always keep at
least one hand on handlebar.
__________________________
63
Page 66
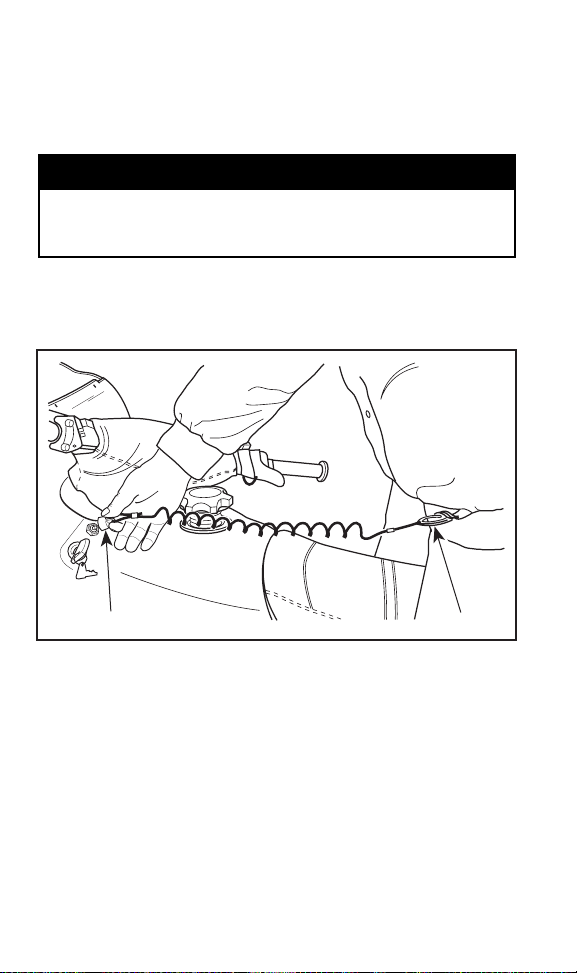
9) Tether Cut-Out Switch
General
It shuts off engine preventing snowmobile to runaway ifthe operator
falls off the vehicle accidently.
WARNING
Always remove tether cord cap and key when vehicle is not in
operation in order to prevent accidental engine starting or to
avoid unauthorized use by children or others or theft.
Operation
Attach to clothing eyelet then snap tether cord cap over post before
starting engine.
A06H1YA
1
TYPIC AL
1. Snap over post
2. Attach to eyelet
If emergency engine shut offis required,completely pull tether cord
cap from post.
_________________________
64
2
Page 67
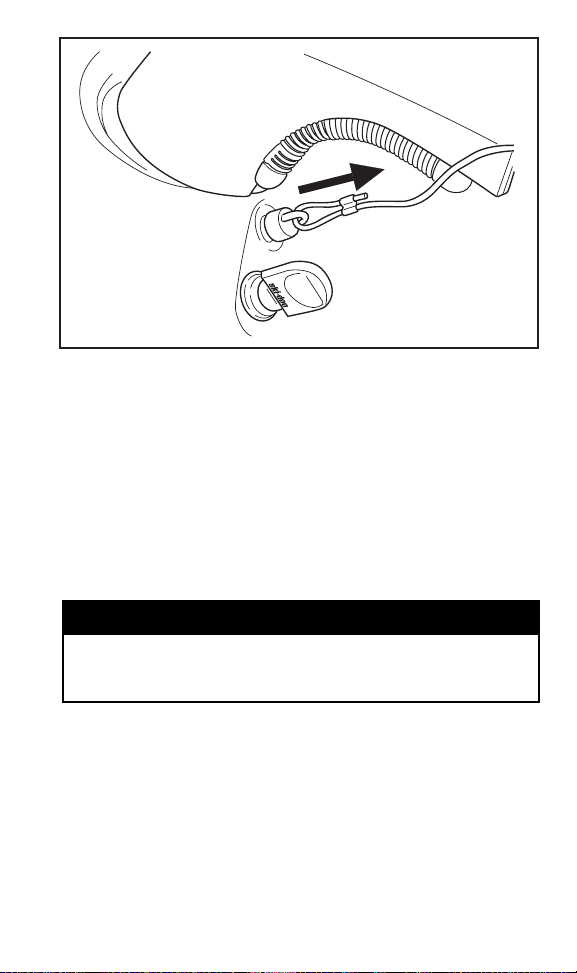
®
A06H1XA
TYPIC AL
Tether cut-out switch is part of tether cut-out system. This system
serves 3 functions.
It shuts off engine preventing snowmobile to runaway ifthe operator
falls off the vehicle accidently.
Through the DESS™ (Digitally Encoded Security System), it acts as
a lock by preventing unauthorized use of your snowmobile thus deterring theft
Finally, it prevents unintentional electric starter operation on vehicles
soequippedby disablingthe electricstarter and ignitioncircuits in the
MPEM or ECU.
WARNING
Always remove tether cord cap and key when vehicle is not in
operation in order to prevent accidental engine starting or to
avoid unauthorized use by children or others or theft.
DESS (Digitally Encoded Security System) Description
This system isdigitallyencoded to provide you and your snowmobile
with the equivalent security as a conventional lock key.
__________________________
65
Page 68

The tether cord cap provided with yoursnowmobile contains an electronic chip in which a unique digital code is permanently memorized. Your authorized SKI-DOO dealer programs this key code in the
MPEM (Multi-Purpose Electronic Module)or ECU (Electronic Control
Unit) of your snowmobile to allow engine operation above 3000 RPM
if and only if this unique code has been read after engine starting.
If a tether cord cap with different code is installed, the engine will
start butcannot reach drive pulley engagement speed to move vehicle.
Operation
See above for details.
Additional Tether Cord Caps
The MPEM of your snowmobile can be programmed by your authorized SKI-DOO dealer to accept 8 different key codes (tether cord
caps).
We recommend the purchase of additional caps from your authorized
SKI-DOO dealer as additional keys. If you have morethan one DESSequipped SKI-DOO snowmobile, each can be programmed by your
authorized SKI-DOO dealer to accept the other vehicles' keys.
DESS Pilot Lamp Codes
DESS pilot lamp blinking slowly (one time per 1.5 seconds) means
that a bad connection has been detected. Vehicle can not be driven.
To check for bad connection, remove tether cord cap. Make sure
the tether cord cap is free of dirt or snow. Reinstall cap and restart
engine. If a blink per 1.5 seconds still occurs contact an authorized
dealer.
_________________________
66
Page 69
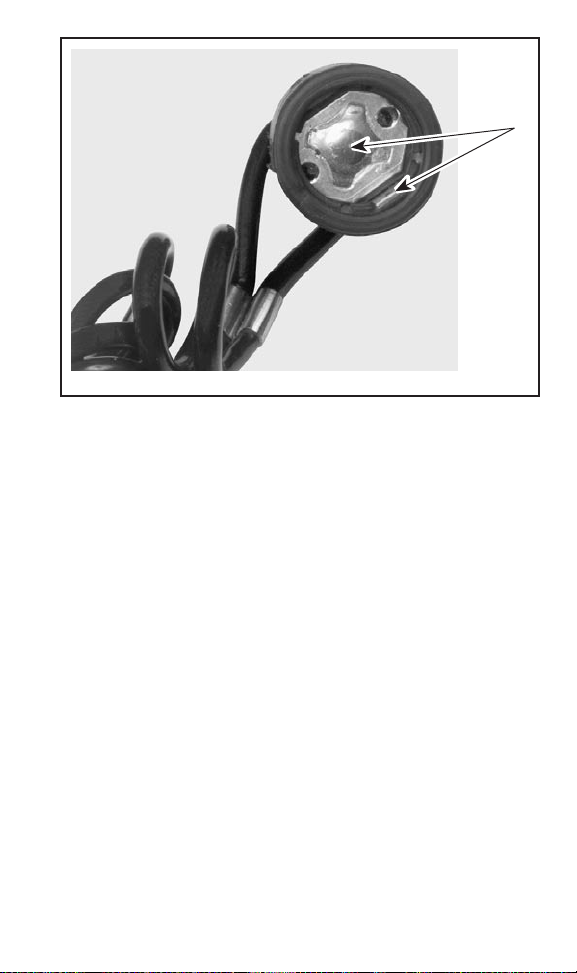
1
A30H08A
1. Free of dirt or snow
A DESS pilot lamp blinking 3 times per second means that you have
installed a cap with a code that MPEM of this snowmobile was not
programmed to recognize (wrong key). Vehicle can not be driven.
10) DESS Pilot Lamp
This lamp will light up to confirm DESS status. Refer to previous
paragraphs for description.
11) Engine Cut-Out Switch
This push-pull type or toggle type switch (depending on models) is
located on the right hand side of the handlebar. To stop the engine
in an emergency, select OFF position and simultaneously apply the
brake. To restart, button must be at the ON position.
__________________________
67
Page 70
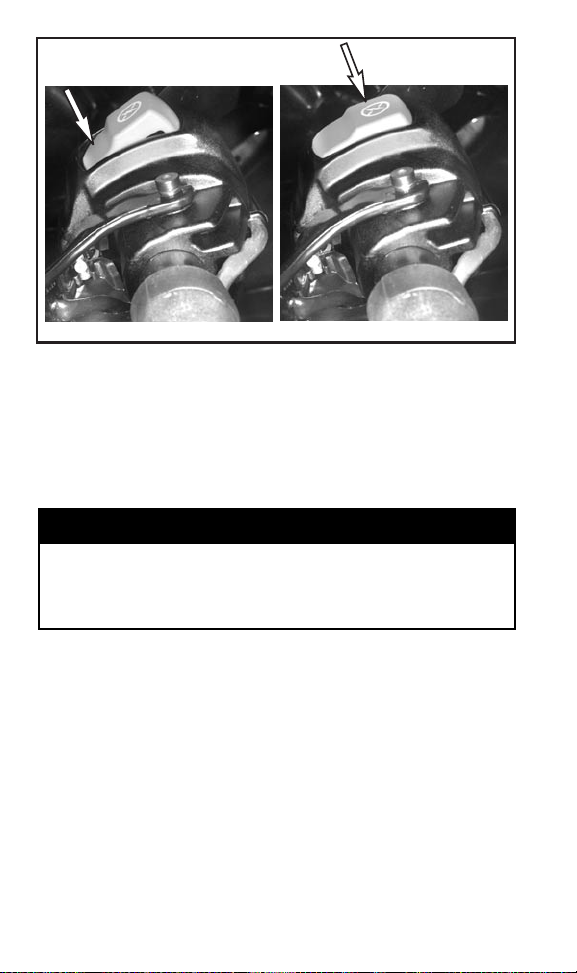
1
2
A33E03A
TYPIC AL
1. ON
2. OFF
All operators of the snowmobile should familiarize themselves with
the function of this device by using it several times on first outing
and whenever stopping the engine thereafter. This engine cut-out
procedure will become a reflex and will prepare operators for emergency situations requiring its use.
WARNING
If the switch has been used in an emergency caused by a suspected m alfunction, the source of the malfunction should be
determined and corrected before restarting engine. See an
authorized SKI-DOO dealer for servicing.
12) Headlamp Dimmer Switch
Located on left hand side of handlebar, allows selection of headlamp
beam. Note that lights are automatically ON whenever the engine
is running.
_________________________
68
Page 71
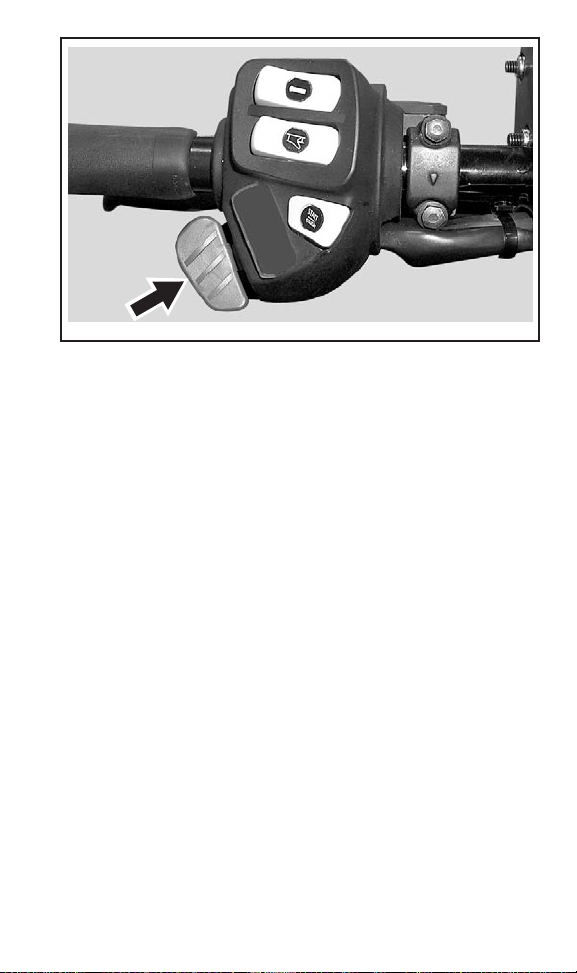
A33E04A
TYPIC AL
13) High Beam Pilot Lamp (Blue)
Lights when headlamp is on HIGH beam.
14) Oil Pilot Lamp
This pilot lamp will glow up when injection oil level is low. Stop vehicle in a safe place then, replenish injection oil reservoir.
15) Low Battery Voltage Pilot Lamp
This lamp will light up to indicate a low battery voltage condition.
See an authorized SKI-DOO dealer as soon as possible.
16) Engine Management System (EMS) Pilot Lamp
This lamp will light up to indicate a trouble. Refer to TROUBLESHOOTING for trouble code meaning and remedy.
17) Rewind Starter Handle
Auto-rewind type located on right hand side of snowmobile. To engagemechanism,pull handle slowly until a resistance is felt thenpull
vigorously. Slowly release handle.
__________________________
69
Page 72
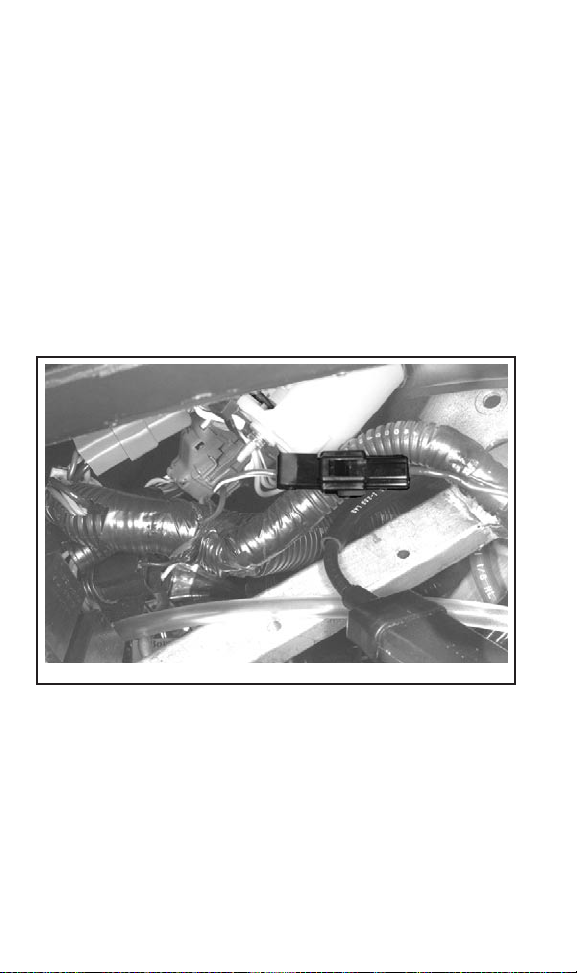
18) Speedometer
All Models excep t Summit
These models are equipped with an electronic speedometer. It may
showspeedinkm/horMPH.
NOTE: At vehicle speed of 90 km/h (55 MPH) and more the mode
LCD screen will show speed only instead of the selected mode.
Change from One Unit to the Other
Speedometer, odometer and trip meter will have their units
NOTE:
(kilometer or miles) changed all together.
Stop engine and open engine compartment. Cut locking ties. Plug
connectors together to change units from miles to kilometers.
Unplug to return to miles reading. Fasten connector to harness with
locking ties.
A33E06A
CONNECTORS LOCATION
Summit Models Only
These models are equipped with a tachometer that includes a LCD
screen on which speed is shown in km/h or MPH.
NOTE: As soon as the vehicle is moving, the LCD screen will show
speed only instead of the selected mode.
_________________________
70
Page 73

Change from One Unit to the Other
Speedometer, odometer and trip meter will have their units
NOTE:
(kilometer or miles) changed all together. Refer to above procedure
described for all other models to change unit.
19) Mode Button
Depress modebuttonto change display. Eachtimeengine is started,
display shows odometer. From that point depressing mode button
will change display for the trip meter.
Depressing mode button again will change display for the resetable
hourmeter. Push mode button again to return to odometer.
Push and hold mode button for 2 seconds to reset the tripmeter or
the resetable hourmeter depending on the one displayed.
20) Odometer
Odometer records the total distance travelled and displays it either
in miles or kilometers. Refer to SPEEDOMETER for changing units.
All Models excep t Summit
NOTE: At vehicle speed of 90 km/h (55 MPH) and more the mode
LCD screen will show speed only instead of the selected mode.
Summit Models Only
NOTE: As soon as the vehicle is moving, the LCD screen will show
speed only instead of the selected mode.
21) Trip Meter
Records distance travelled since it has been reset. Distance travelled is displayed either in miles or kilometers. Refer toSPEEDOMETER for changing units.
All Models excep t Summit
NOTE: At vehicle speed of 90 km/h (55 MPH) and more the mode
LCD screen will show speed only instead of the selected mode.
Summit Models Only
NOTE: As soon as the vehicle is moving, the LCD screen will show
speed only instead of the selected mode.
__________________________
71
Page 74
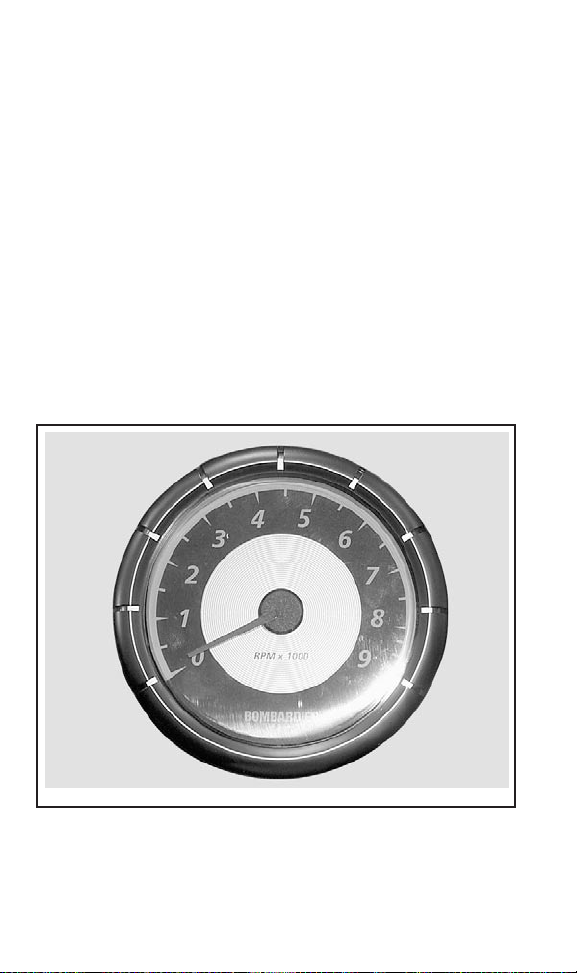
22) Resetable Hourmeter
Records engine running time in hours and minutes since it has been
reset.
All Models excep t Summit
NOTE: At vehicle speed of 90 km/h (55 MPH) and more the mode
LCD screen will show speed only instead of the selected mode.
Summit Models Only
NOTE: As soon as the vehicle is moving, the LCD screen will show
speed only instead of the selected mode.
All Models
Pushandholdmodebuttonfor2secondstoresettheresetablehourmeter.
23) Tachometer
Direct-reading dial indicates the number of thousand of revolutions
per minute (RPM) of the engine.
A33E0AA
MULTIPLY THE READING BY 1000
24) Fuel Tank Cap
Unscrew to fill up tank then fully tighten.
_________________________
72
Page 75
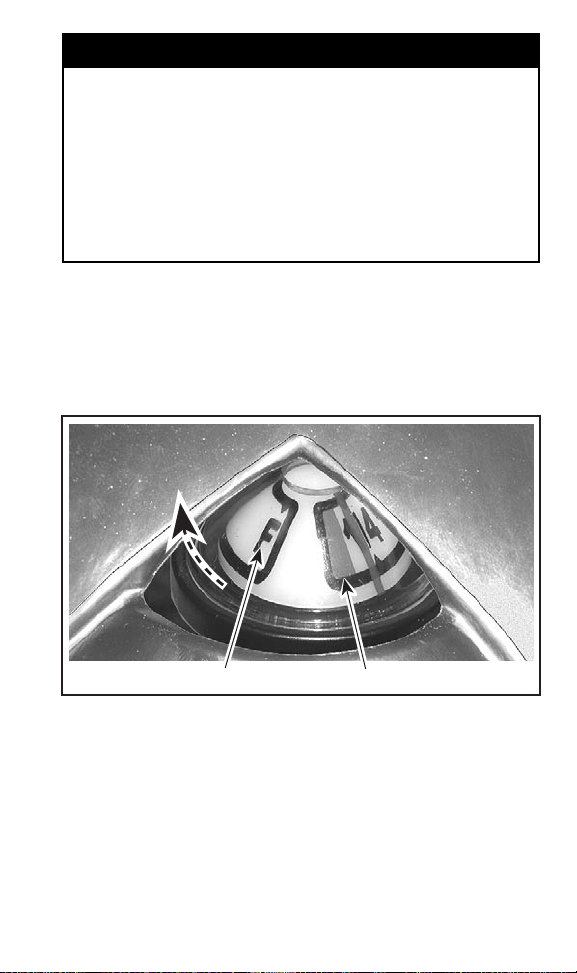
WARNING
Always stop the eng ine before refueling. Fuel is flammable
and explosive under certain conditio ns. Always work in a w ell
ventilated area. Do not smoke or allow open flames or sparks
in the vicinity. Open cap slowly. If a differential pressure condition is noticed (whistling sound heard when loosening fuel
tank cap) have vehicle inspected and/or repaired before further operation. Do not overfill or top off the fuel tank before
placing the vehicle in a warm area. As temperature increases,
fuel expands and m ight overflow. Always wipe off any fuel
spillage from the vehicle. Periodically verify fuel system.
NOTE: Do not sit or lean on seat when fuel tank cap is not properly
installed.
25) Mechanical Fuel Level Gauge
Located at rear of fuel tank cap the gauge facilitates fuel level reading.
A32A25B
TYPIC AL
1. Full
2. Empty
1 2
__________________________
73
Page 76
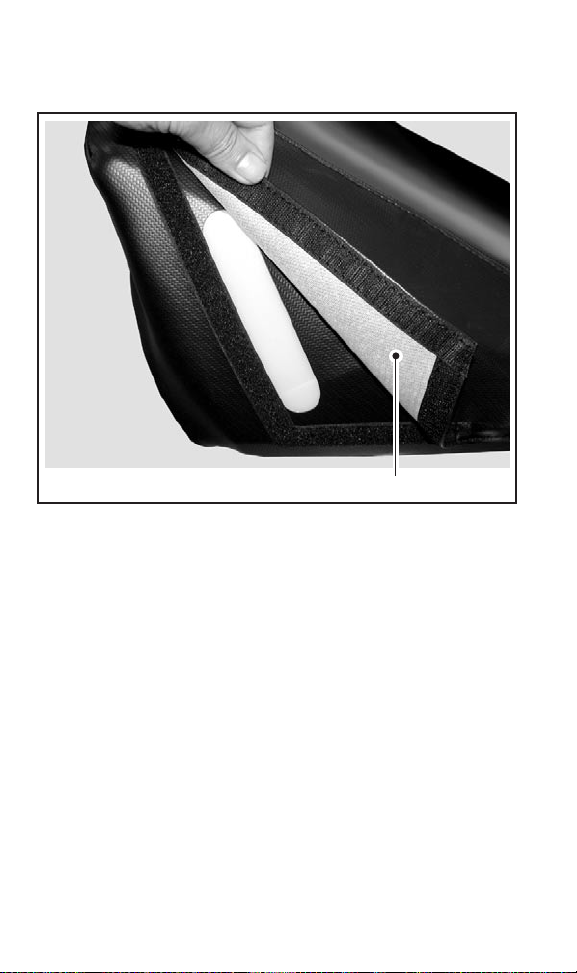
Some Summit Models
Open fabric door to see the fuel level through the transparent fuel
tank.
A33H1OA
1. Fabric door
1
26) Electric Fuel Level Gauge
Dash-mountedgaugeto facilitate fuellevelreading. Thisgauge functions when engine is running.
_________________________
74
Page 77
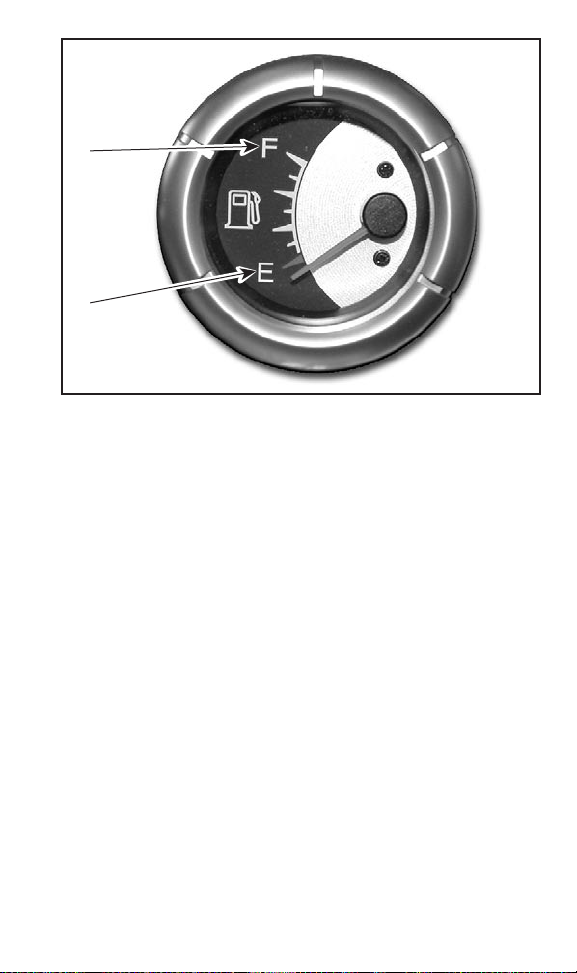
1
2
A32A26A
TYPIC AL
1. Full
2. Empty
27) Temperature Gauge
The gauge indicates engine coolant temperature. The needle moves
to the normal range as engine warms. Under all riding conditions,
the needle should stay within this range. If needle moves into the
overheat range, reduce snowmobile speed and run snowmobile in
loose snow or stop engine immediately.
__________________________
75
Page 78
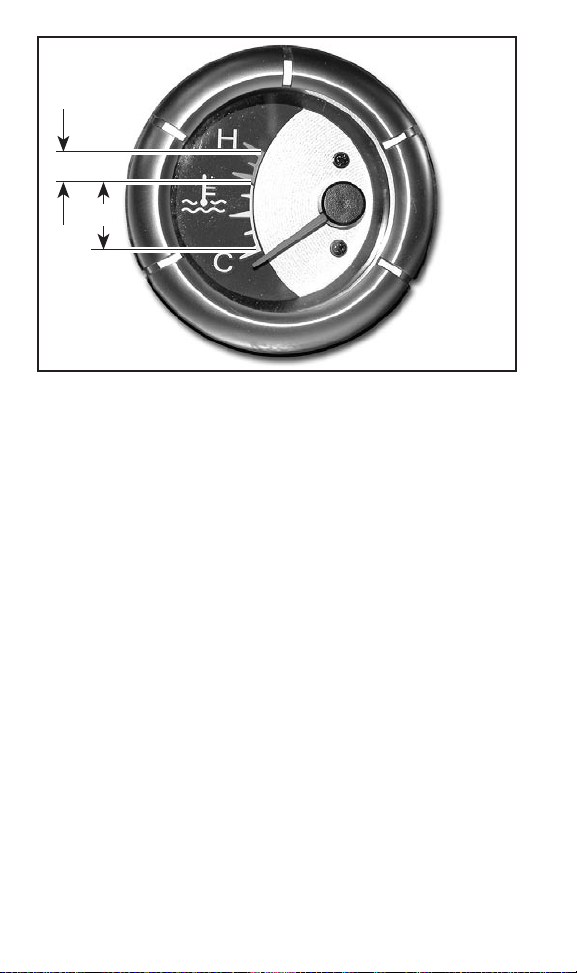
2
1
A32A27A
TYPIC AL
1. Normal
2. Overheat
28) Engine Overheat Warning Lamp (Red)
If this lamp glows, reduce snowmobile speed and run snowmobile
in loose snow or stop engine immediately.
29) Heating Grip Switch
It is a three-position switch. Select the desired position to keep your
hands at a comfortable temperature.
_________________________
76
Page 79
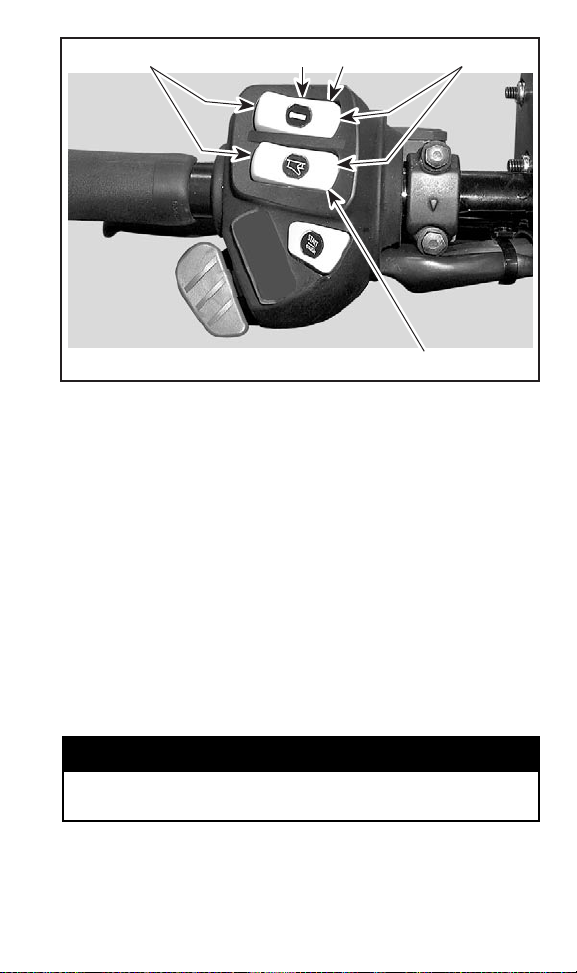
4
5
1
3
A33E04B
TYPIC AL
1.Heatinggripswitch
2. Heating throttle lever switch
3. Hot
4. Warm
5. Off
2
30) Heating Throttle Lever Switch
Three-position switch. Select the desired position to keep your right
thumb at a comfortable temperature. See illustrations above.
31) Windshield
Windshield provides operator comfort, as well as protection by deflecting wind and snow away from the operator.
32) Adjustable Toeholds
Each toehold can be adjusted to suit driver's preference. Loosen
bolts, adjust then, retighten bolts to 10 N•m(89lbf•
WARNING
Adjust with vehicle at rest in a safe place. Do not adjust too
snugly to trap booted foot. Securely tighten all adjustments.
__________________________
in).
77
Page 80
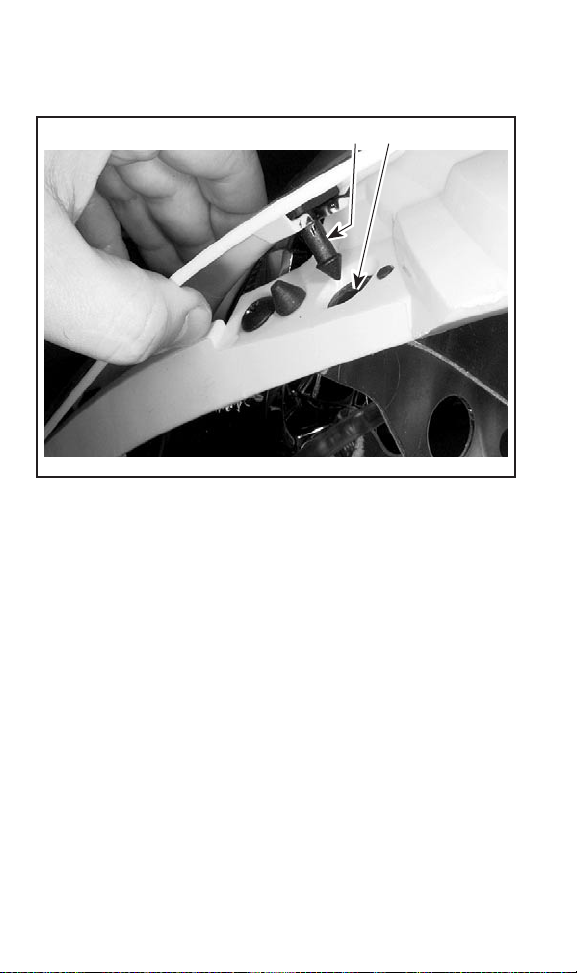
33) Hood and Side Panel Latches
To open hood, slightly widen (pull-out) its both sides top portion in
order to unhook its anchors from their grommets.
1
2
A33H0MA
1. Anchors
2. Grommets
To open a side panel, stretch and unhook the latches.
_________________________
78
Page 81
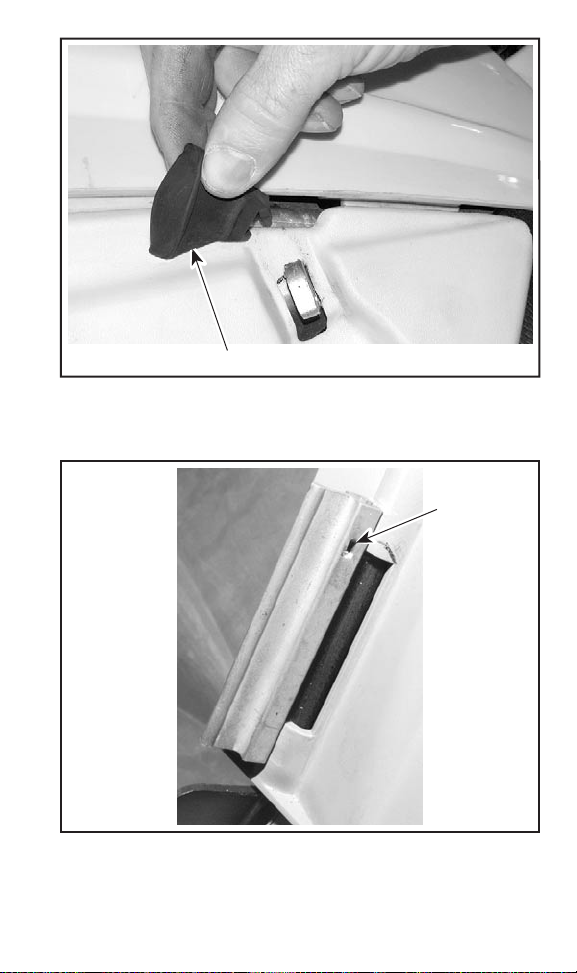
A33H13A
1. Latch
To remove a side panel remove by pulling up both locking devices
from hinge.
1
1
A33H0EA
1. Locking device
__________________________
79
Page 82
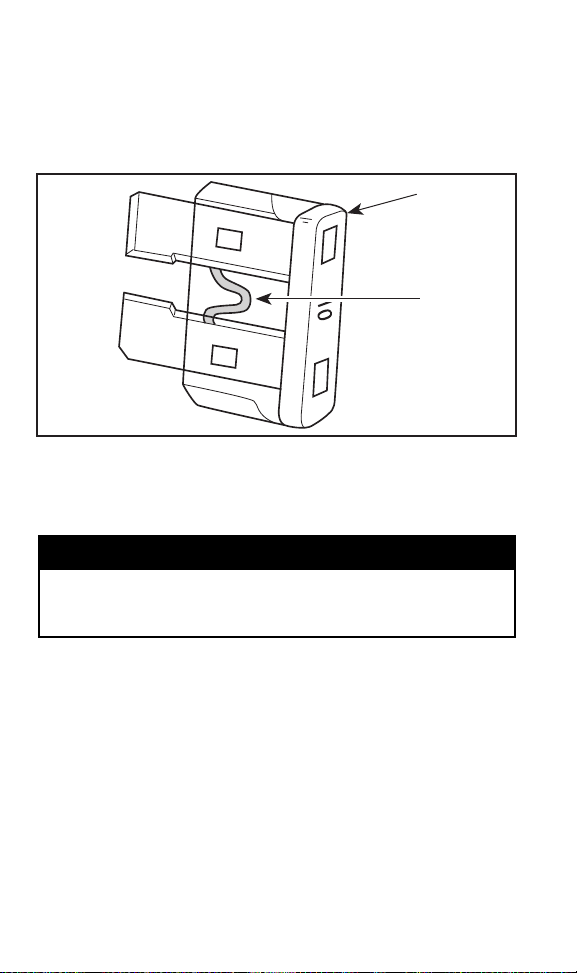
Reverseopening procedure to close hood and side panels. Properly
hook up latches.
34) Fuses
To remove fuse from holder, pull fuse out. Check if filament is melted.
1
2
A15E0KA
1. Fuse
2. Check if melted
CAUTION: Do not use a higher rated fuse as this can cause se-
vere damage to electric components and/or fire.
WARNING
If fuse has burnt out, source of malfunction should be determined and corrected before restarting. See an authorized
SKI-DOO dealer for servicing.
To open fuse box push on cover tab and tilt cover.
_________________________
80
Page 83
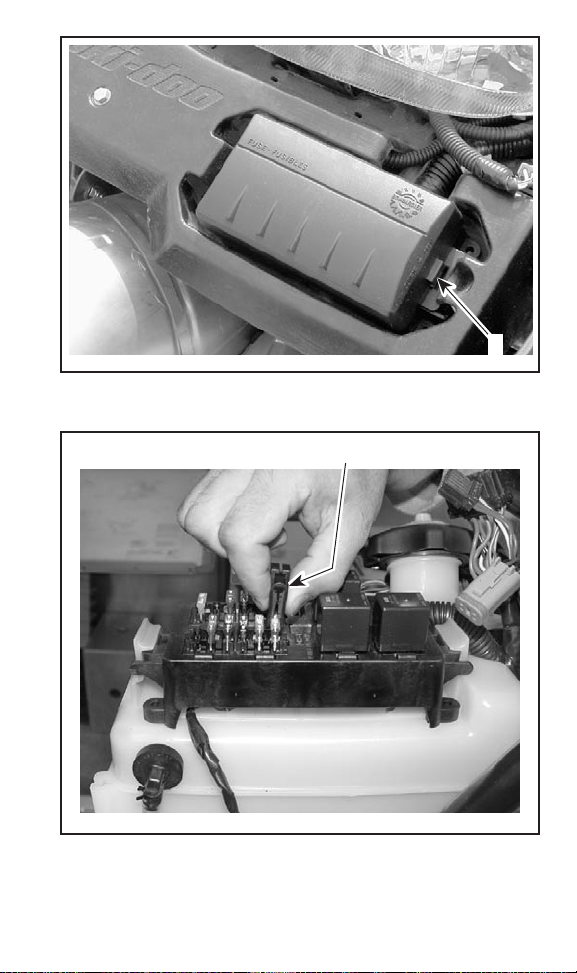
A35E01A
TYPIC AL
1. Push tab
A32I0JA
TYPIC AL
1. Fuse remover/installer
1
1
__________________________
81
Page 84
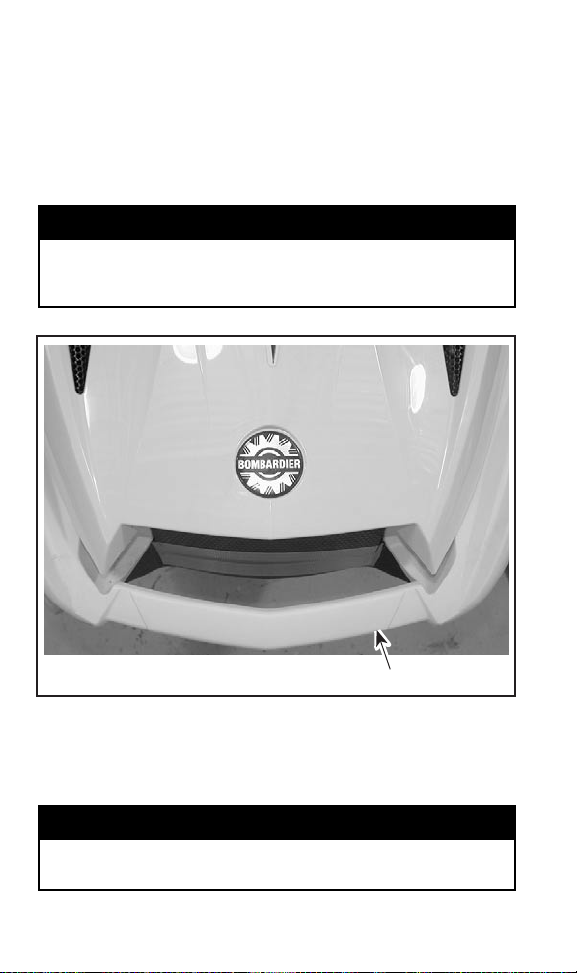
Some Models
Electric Fuel Level Gauge Fuse
See an authorized SKI-DOO dealer for fuse replacement.
35) Front Grab Handle/Front Bumper
To be used whenever front of snowmobile requires manual lifting.
WARNING
Do not attempt to lift the vehicle by hand alone. Use appropriate lifting device or have assistance to share lifting stress in
order to avoid risk of strain injuries.
A33H15A
1. Front grab handle
CAUTION: Do not use skis to pull or lift snowmobile.
1
36) Storage Compartment
WARNING
All storage compartments must be properly latched and they
must not contain any heavy or breakable objects.
_________________________
82
Page 85
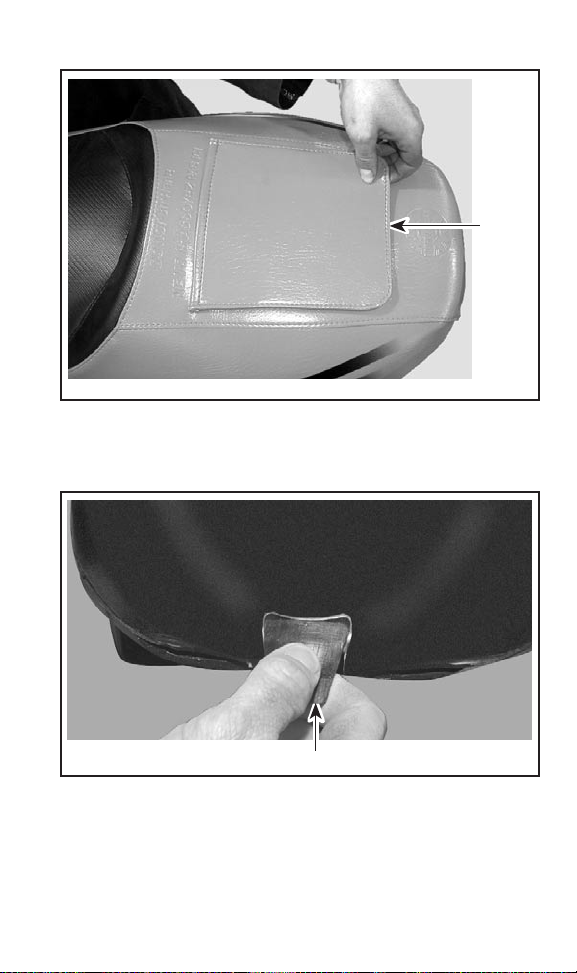
Summit Models
A33H1ZA
1. Storage compartment cover
MachZModels
Pull latch slightly upward then, backward to unlock cover.
1
A33H0LA
1. Latch
1
__________________________
83
Page 86
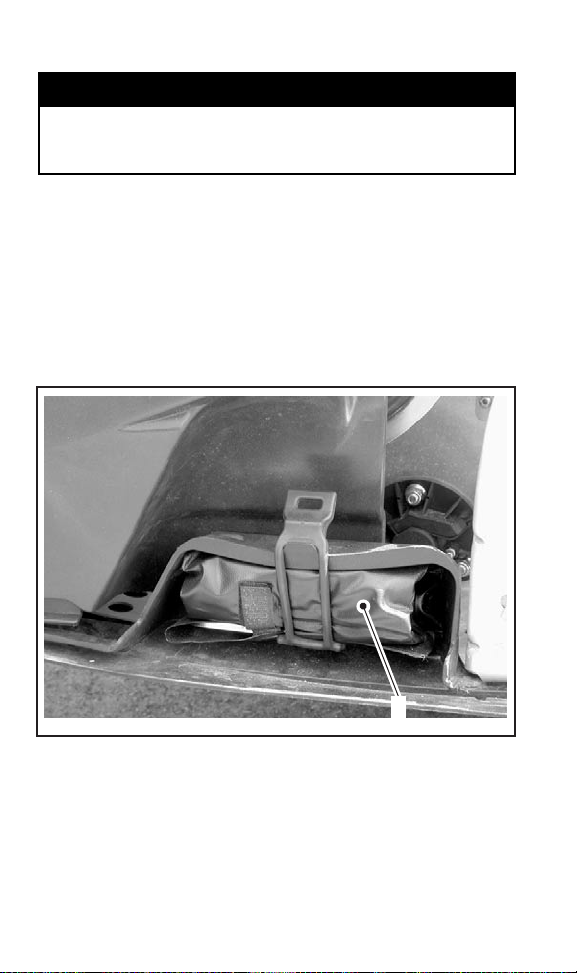
37) Rear Rack
WARNING
All objects in rear rack must be properly latched. Do not carry
any breakable objects. Excessive weight in rack may reduce
steering ability.
CAUTION: Always readjust suspension according to the load.
The capacity of this rack is limited. Ride at very low speed when
loaded. Avoid speed over bumps.
38) Tool Kit
A tool kit containing tools for basic maintenance is supplied with the
vehicle.
Tool bag is located in engine compartment above left hand side toehold.
A35B01A
LH SIDE OF VEHICLE
1. Tool kit
1
39) Spark Plug Holder
To keep spare spark plugs dry and prevent shocks that might affect
the adjustment or break them, a holder is provided in engine compartment.
_________________________
84
Page 87
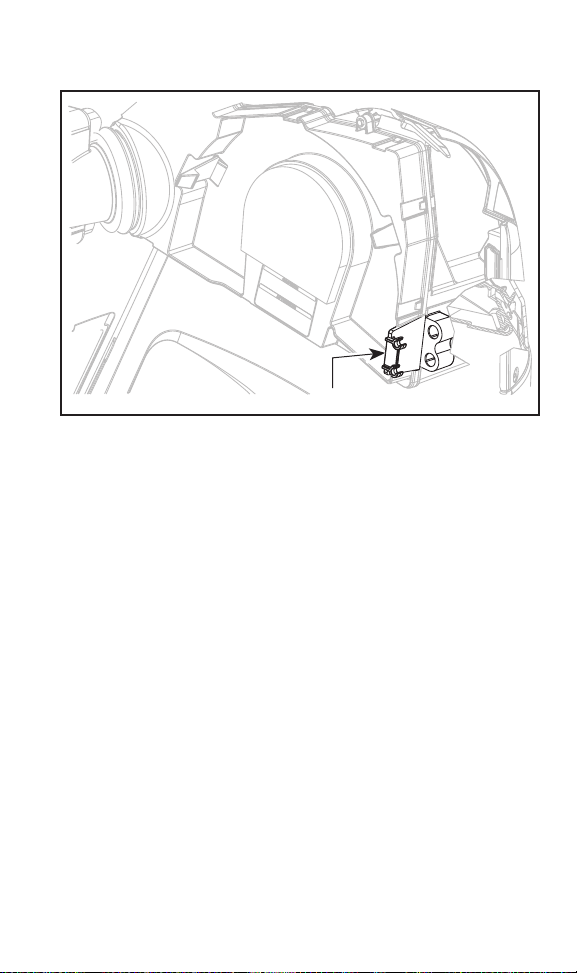
The spark plug holder is located on the air intake silencer inside the
LH side panel.
A35C01A
SPARK PLUG H OLDER ON LEFT HAND S IDE PANEL
1. Spare spark plugs holder
NOTE: Spare spark plugs are not supplied with snowmobile.
NOTE: Check spare spark plug gap according to SPECIFICATIONS
before installation.
CAUTION: Do not attempt to adjust gap on spark plug BR9ECS.
1
40) Spare Drive Belt Holder
A spare drive belt can be stored in holder.
NOTE: Spare drive belt is not supplied with the snowmobile.
__________________________
85
Page 88
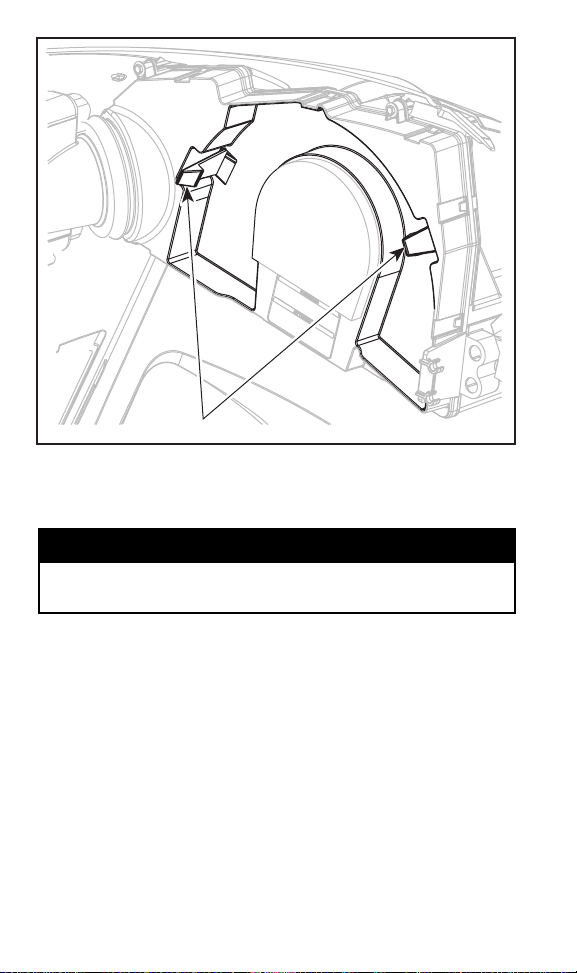
A35H01A
SPARE DRIVE BELT HOLDER ON LEFT HAN D SIDE PANEL
1. Spare drive belt holder
1
41) Shields and Guards
WARNING
Never operate engine without belt guard securely installed or,
with hood or access/side panels open or removed.
Your snowmobile is provided with a number of shields and guards.
Leave these in place on your vehicle as they are designed to keep
clothing and hands out of moving parts and away from hot components. Never attempt to make adjustments to any moving part while
the engine is running.
42) Convertible Ski Stance
Summit Models Only
Ski stance (distance between each skis) is adjustable. See an authorized SKI-DOO dealer.
_________________________
86
Page 89
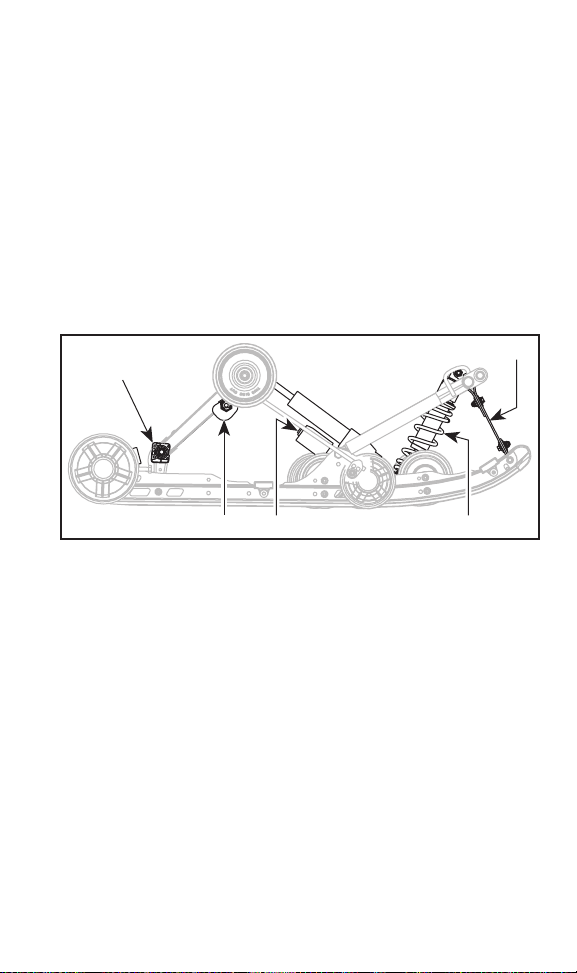
43) Adjustable Suspensions
General
All Models
Snowmobile handling and comfort depend upon suspension adjustments.
For factory recommended adjustments refer to decal on belt guard.
It describes settings for optimum comfort according to load for your
SKI-DOO model.
Choice of suspension adjustments vary with carrying load, driver's
weight, personal preference, riding speed and field condition.
NOTE: Some adjustments may not apply to your snowmobile. Use
special keys in tool kit.
3
4
A35F01A
TYPIC AL
1. Rear springs for comfort and ride height
2. Center spring for steering behavior
3. Stopper strap for snowmobile weight transfer
4. Coupling blocks — Handling
5. Rear shock motion ratio — Damping strength
6. Front suspension springs for handling (not shown)
1
52
Guidelines to Adjust Suspension
Following are guidelines to fine-tune suspension.
The best way to set up the suspension, is to start from factory set-
tings, then customize each adjustment one at a time. Adjustments
2 through 6 are interrelated. It may be necessary to readjust center
spring after adjusting front springs for instance. Test run the snowmobile under the same conditions; trail, speed, snow, driver riding
position, etc. Change one adjustment and retest. Proceed methodically until you are satisfied.
__________________________
87
Page 90

WARNING
Always remove DESS tether cord cap before performing any
maintenance or adjustment, unless otherwise specified. Vehicle must be parked in a safe place, away from the trail. Always
lift the front of vehicle off the ground with a suitable lifting device before adjusting ski suspension. Lift the rear of vehicle
off the ground with a wide-base snowmobile stand with a rear
deflector panel before rear suspension adjustment.
WARNING
Do not attempt to lift the vehicle by hand alone. Use appropriate lifting device to avoid risk of strain injuries. Always make
sure the lifting device is stable and secure before proceeding
to adjust the suspension components.
CAUTION: Wheneveradjusting rear suspension, check track ten-
sion and adjust as necessary.
Slight suspension bottoming occurring under the worst riding conditions indicates a good choice of spring preload.
NOTE: Some models may come from factory equipped with
Take/Apart (T/A) shocks. These can be rebuilt or recalibrated. See
an authorized SKI-DOO dealer.
1. Rear Springs — Comfort
IMPORTANT: Make sure that all objects to be transported are in
place in storage compartment and rear rack.
Grab rear bumper and lift until suspension is fully extended. From
this point, rear of snowmobile should collapse by 50 to 75 mm (2 to
3 in) when driver and passenger (if so applicable) take place. Measure at rear bumper as shown in next photo.
WARNING
Do not attempt to lift the vehicle by hand alone. Use appropriate lifting device or have assistance to share lifting stress in
order to avoid risk of strain injuries.
_________________________
88
Page 91
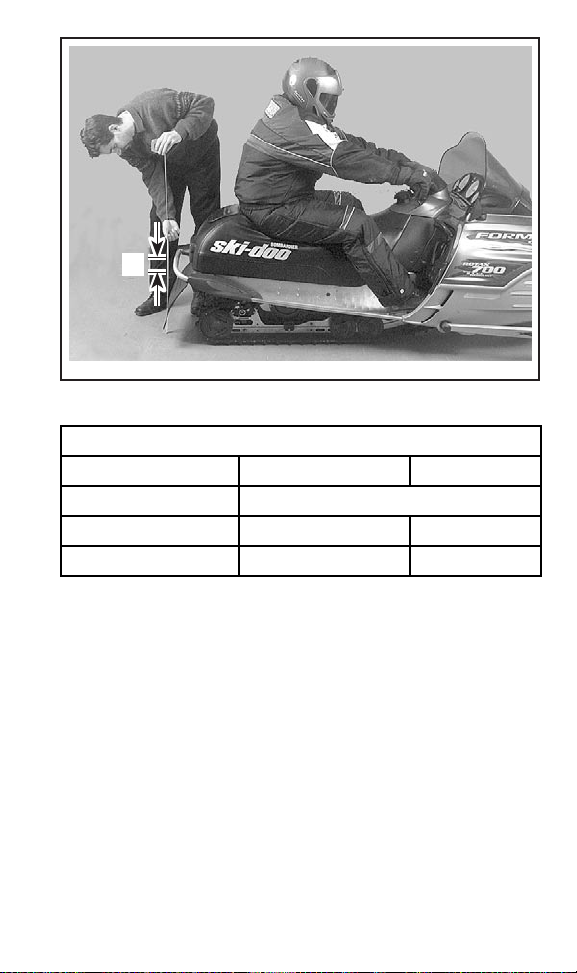
A
A32F0BA
TYPIC AL — MEASURE AT REAR BUMPER
A. Refer to table
REAR SPRINGS ADJUSTMENT
”A” CAUSE SOLUTION
50 to 75 mm (2 to 3 in) No adjustment required
More than 75 mm (3 in) Too soft of adjustment Increase preload
Lessthan50mm(2in) Too hard of adjustment Decrease preload
Increase Spring Preload
CAUTION: To increase preload, always turn the left side adjust-
ment cam in a clockwise direction, and the right side cam in a
counterclockwise direction. Left and right adjustment cams may
be at different settings.
__________________________
89
Page 92
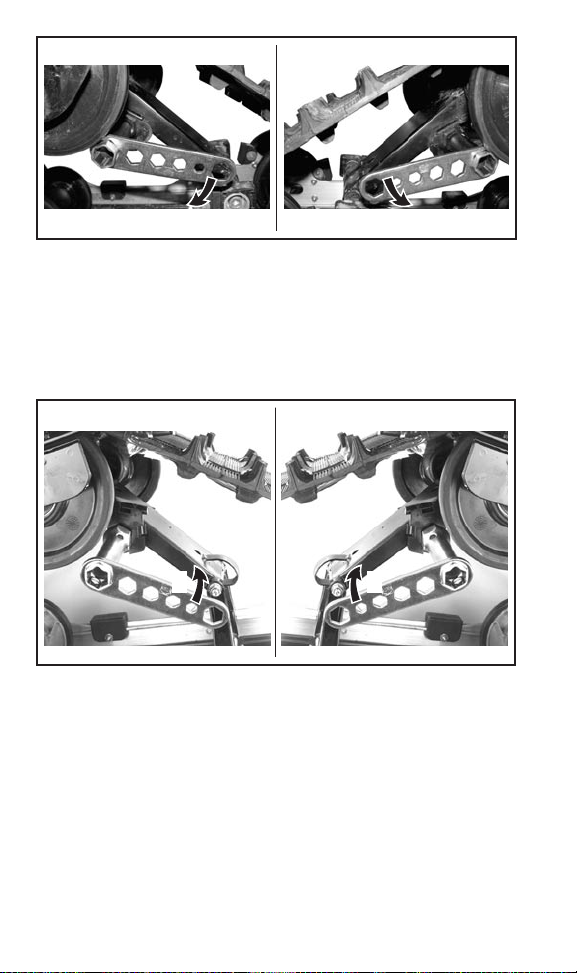
RHLH
A32F41A
TYPIC AL
1. Increase spring preload
Decrease Spring Preload
CAUTION: To decrease preload, always turn the left side adjust-
ment cam in a counterclockwise direction, the right side cam in
a clockwise direction. Left and right adjustment cams may be at
different settings.
1 1
RHLH
1 1
A30F04B
TYPIC AL
1. Decrease spring preload
2. Center Spring — Steering Behavior
Ride at moderate speed on a trail.
If handlebar is felt too easy or too hard to turn, adjust center spring
accordingly.
_________________________
90
Page 93
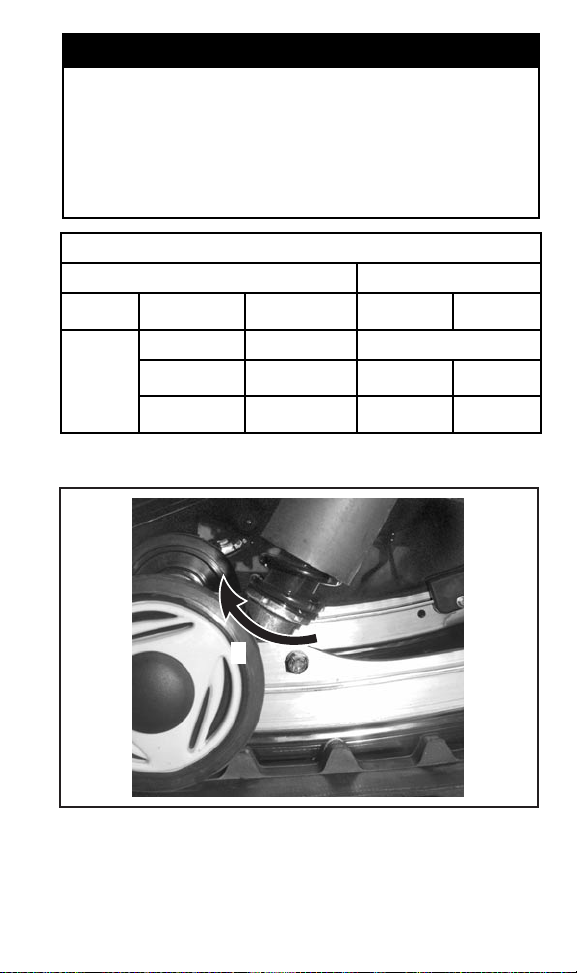
WARNING
Before proceeding with any suspension adjustment, remember:
– parkinasafeplace
– remove DESS tether cord cap
– lift rear of vehicle off the ground with a wide-base snow-
mobile stand with a rear deflector panel
– make sure lifting device is stable and secure.
CENTER SPRING ADJUSTMENT
STEERING BEHAVIOR ADJUSTMENT
VEHICLE
SPEED
Moderate
Increase Preload
HANDLEBAR
Easy to turn Neutral No adjustment required
Harder to turn
Very easy to
turn
STEERING
ATTIT UD E
Oversteering
Understeering
PROBLEM SOLUTION
To o s of t of
adjustment
Toohardof
adjustment
Increase
preload
Decrease
preload
1
A32F01A
TYPIC AL
1. Use adjuster wrench provided in tool kit to increase preload
__________________________
91
Page 94
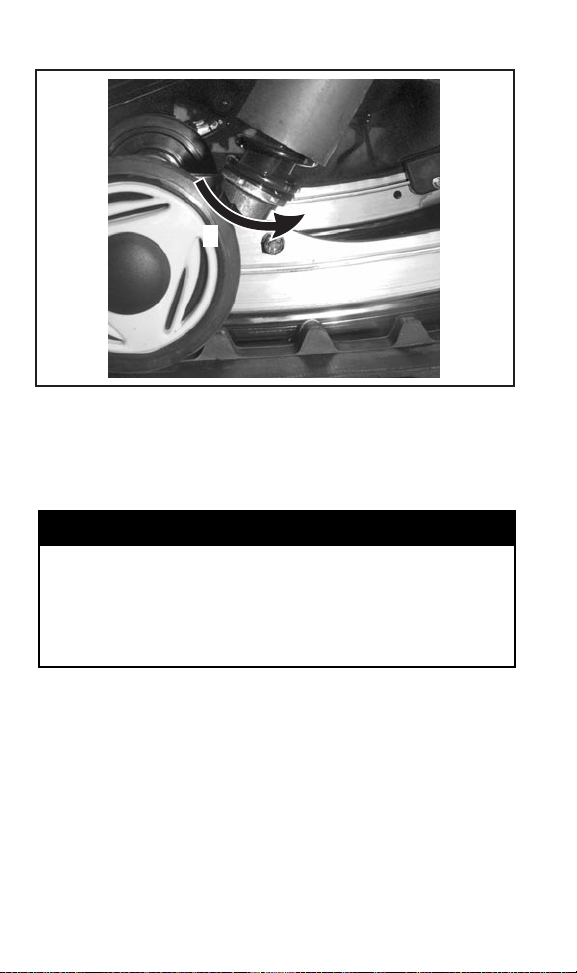
Decrease Preload
1
A32F01B
TYPIC AL
1. Use adjuster wrench provided in tool kit to decrease preload
3. Stopper Strap — Weight Transfer
Ride at low speed then fully accelerate. Note steering behavior. Adjust stopper strap length accordingly.
WARNING
Before proceeding with any suspension adjustment, remember:
– parkinasafeplace
– remove DESS tether cord cap
– lift rear of vehicle off the ground with suitable lifting device
– make sure lifting device is stable and secure.
CAUTION: Whenever stopper strap length is changed, track ten-
sion must be readjusted.
_________________________
92
Page 95
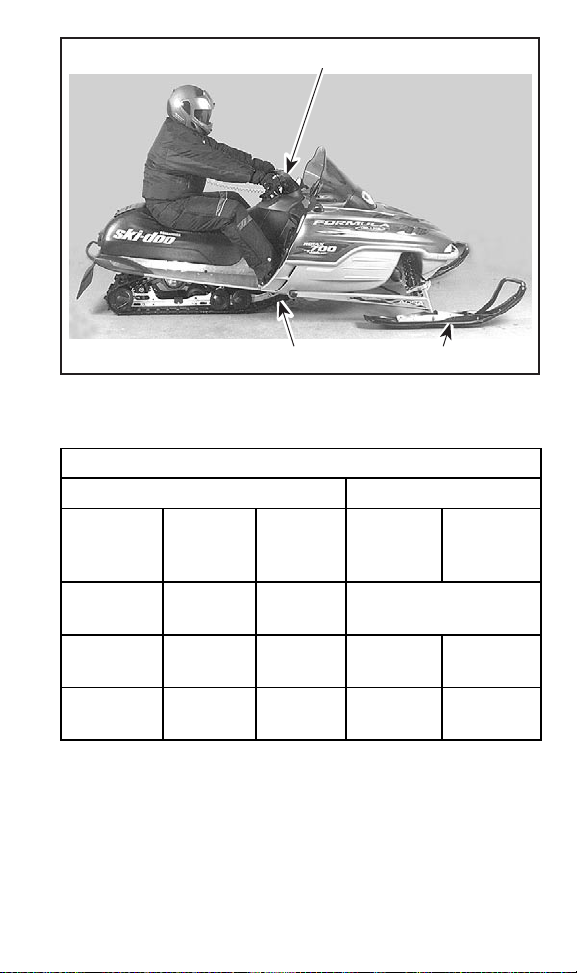
1
A32F0EB
TYPIC AL
1. Steering behavior
2. Track
3. Skis
STOPPER ST RAP — WEIGHT TRANSFER
WEIGHT TRANSFER ADJUSTMENTS
STEERING
BEHAVIOR
Comfortable
Light
Heavy
TRACK SKIS PROBLEM SOLUTION
Good
weight
transfer
To o m uc h
weight
transfer
Not enough
weight
transfer
23
Light
pressure
Lift off the
ground
Heavy
pressure
No adjustment required
To o l on g
strap
To o sh o rt
strap
Reduce
strap length
Increase
strap length
__________________________
93
Page 96
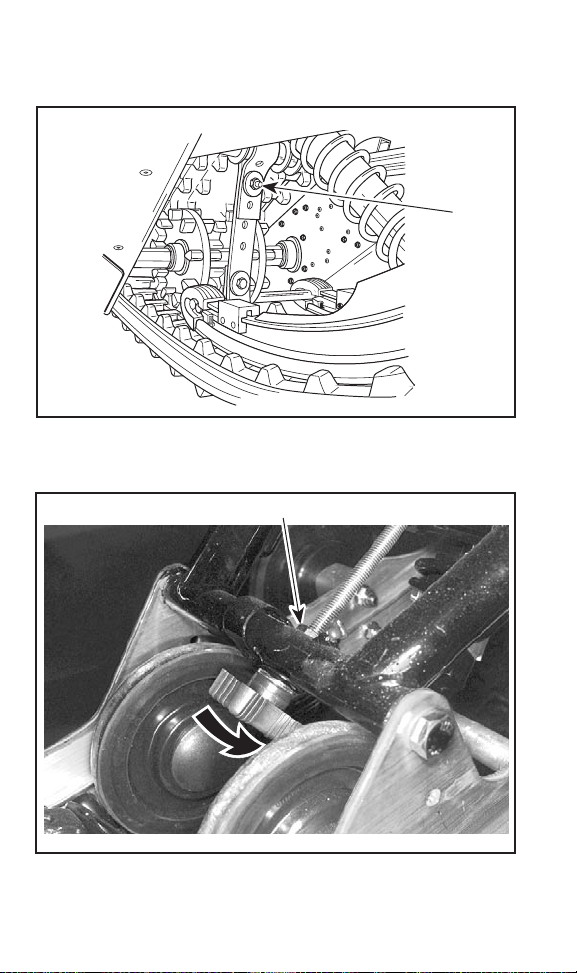
All Models excep t Summit
Reduce Strap Length
A03F0QB
TYPIC AL
1. Reduce strap length by bolting to a different hole
Summit Models
1
1
A32E19A
1. Loosen lock nut, turn knob accordingly then retighten lock nut
_________________________
94
Page 97
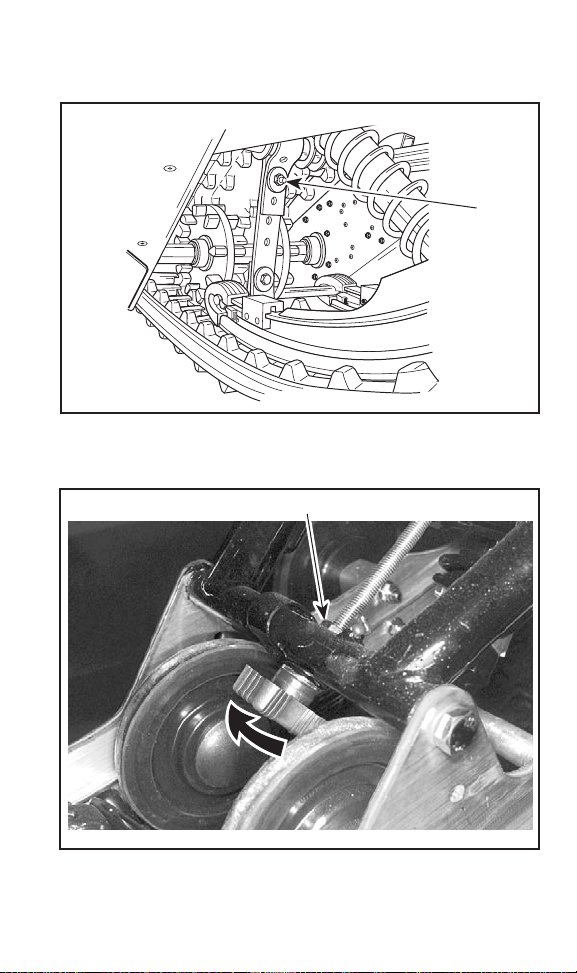
Increase Strap Length
All Models excep t Summit
A03F0QB
TYPIC AL
1. Increase strap length by bolting to a different hole
Summit Models
1
1
A32E19B
1. Loosen lock nut, turn knob accordingly then retighten lock nut
__________________________
95
Page 98
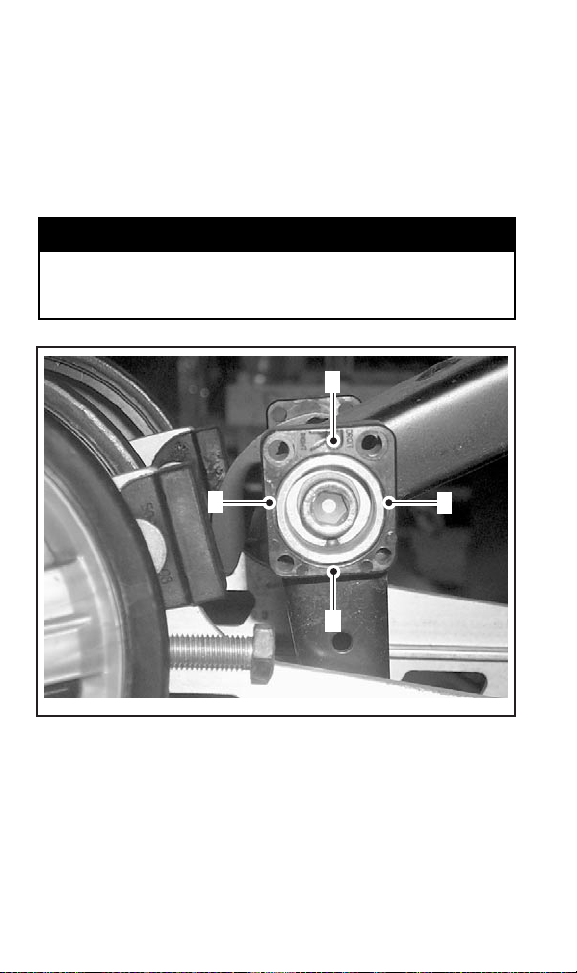
4. Coupling Blocks — Handling
MachZOnly
Ride at moderate speed and check for desired handling.
If handling requires adjustment, turn both left and right blocks by 90
to the desired position.
There are four possible adjustment positions. Side of block with the
desired adjustment number must be facing the rubber stopper.
WARNING
Both blocks must be set at the same position. Otherwise vehicle behavior may be unpredictable and suspension may become wa rped.
4
1
3
2
A33F4IA
COUPLING BLOCK — RIGHT SIDE VIEW (“R”—RIGHT EMBOSSED ON BLOCK)
1. Side of block marked “1” facing rearward (partly coupled suspension)
— more track grip and less skis steering
2. Side of block marked “2” facing rearward (partly coupled suspension)
— reduce track grip and increase skis steering
3. Side of block marked “3” facing rearward (partly coupled suspension)
— reduce track grip and increase skis steering
4. Side of block marked “4” facing rearward (fully coupled suspension)
— less track grip and more skis steering
_________________________
96
Page 99
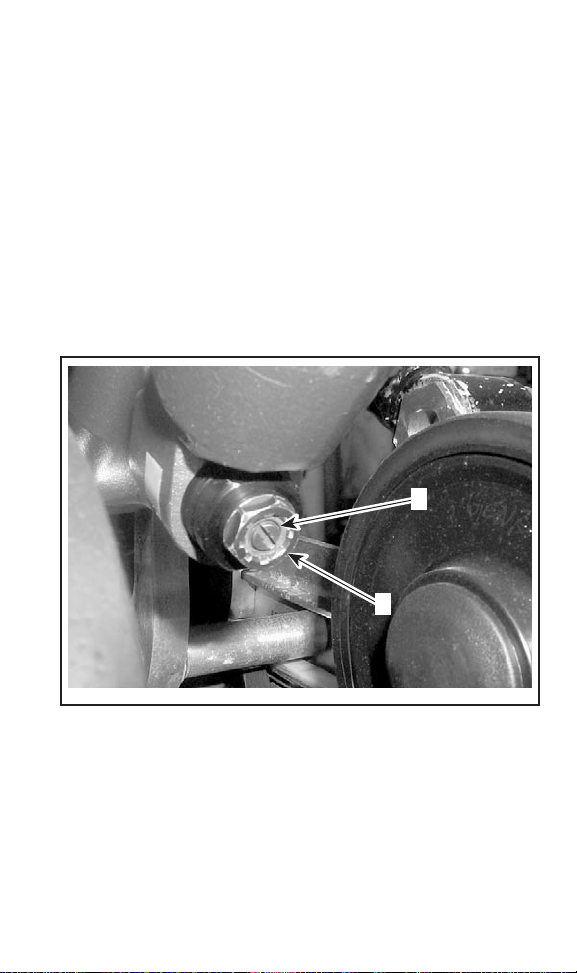
5. Rear Shock Motion Ratio — Damping Strength
MachZOnly
Rear shock on the above mentioned models feature 2 adjustments.
Low Speed Compression Adjuster
The low speed adjuster modifies the damping force for small suspension velocities. This adjuster has 5 turns of adjustment. Use a flat
screwdriver to adjust it. Turning it clockwise increases shock damping action (stiffer) for these low compression speeds.
High Speed Compression Adjuster
The High speedadjuster modifiesthe damping force for highsuspension velocities. Use a 17 mm wrench to adjust it. Turning it clockwise increases shock damping action (stiffer) for these high compression speeds.
1
2
A33F4HA
1. Low speed compression adjuster (flat screwdriver)
2. High speed compression adjuster (17 mm wrench)
__________________________
97
Page 100

6. Front Suspension Springs — Handling
Ride at moderate speed and check for proper handling.
Adjust front springs accordingly.
WARNING
Before proceeding with any suspension adjustment, remember:
– parkinasafeplace
– remove DESS tether cord cap
– lift rear of vehicle off the ground with a wide-base snow-
mobile stand with a rear deflector panel
– make sure lifting device is stable and secure.
WARNING
Always adjust both front springs to same position.
FRONT SPRINGS ADJUSTMENT
HANDLING STEERING PROBLEM SOLUTION
Good Comfortable
Bad
Bad Hard to turn
To o e as y t o
turn
No adjustment required
Too soft of
adjustment
Toohardof
adjustment
Decrease spring
Increase spring
preload
preload
_________________________
98
 Loading...