

Skeg Product Development CC IHB User Manual
IntelliHead User Guide
Installing, configuring and maintaining your IntelliHead
The IntelliHead is a self-contained, automatic, internet connected beverage pouring unit that
is designed as a drop in replacement for traditional bar-top taps or as a mobile unit when
combined with the IntelliKeg.
This User Guide will take you from mechanical installation of the unit on to connecting it to
the internet and finally configuring it on the IntelliHub, IntelliCup’s online management portal.
1

Installing the IntelliHead 4
Mechanical Installation 4
Counter Top Mounting 5
Piping and wiring 6
Beverage In 7
Fresh Water In 7
Waste Out 8
12V DC In 8
Remote Control 8
External Temperature Sensor (Optional) 8
Ethernet (Optional) 9
Sim Card (Optional) 9
Priming and Pouring 10
Using the Remote Control 11
Purge 11
Manual Pour 11
Wash 11
Stop 11
Reset 11
Connecting the IntelliHead to the Internet 12
Choosing Your Connection Method 12
Mobile IntelliHeads 12
Connecting Your Device to the IntelliHead 13
Windows 10 13
Mac OS (formerly OSX) 14
Android (Samsung, LG, Sony, etc) 15
iOS (iPhone) 16
Accessing the IntelliHead Config Page 17
Ethernet 18
Ethernet - Advanced 18
Wi-Fi 19
Wi-Fi - Advanced 19
Cellular 20
Updating the Firmware 21
IntelliHub: Managing your IntelliHead online 22
Troubleshooting 23
Pour Troubleshooting 23
There is excessive foaming while pouring 23
The injector injects into the cup but does not pour 23
2

Network Troubleshooting 23
The IntelliHead Configuration Page is inaccessible 23
The Wi-Fi “Current Settings” block shows “Not Connected” 23
The IntelliHead screen displays “no connectivity” 24
The IntelliHead screen displays “no connectivity” when using GSM interface 24
The Wi-Fi scan returns no results and the IntelliHead shows “no connectivity” 24
The WiFi password is correct/there is no WiFi password but the IntelliHead won’t
connect to the WiFi 24
FCC part 15 Statements for User’s Manual 25
ISED Required User Manual Statements for Certification 26
3
Installing the IntelliHead
The IntelliHead is designed for easy installation into a bar counter with seamless integration
into an existing cold chain. Should you not have an existing cold chain, the IntelliHead is
compatible with industry standard chillers and fittings which can be installed with no further
training by beverage industry service personnel.
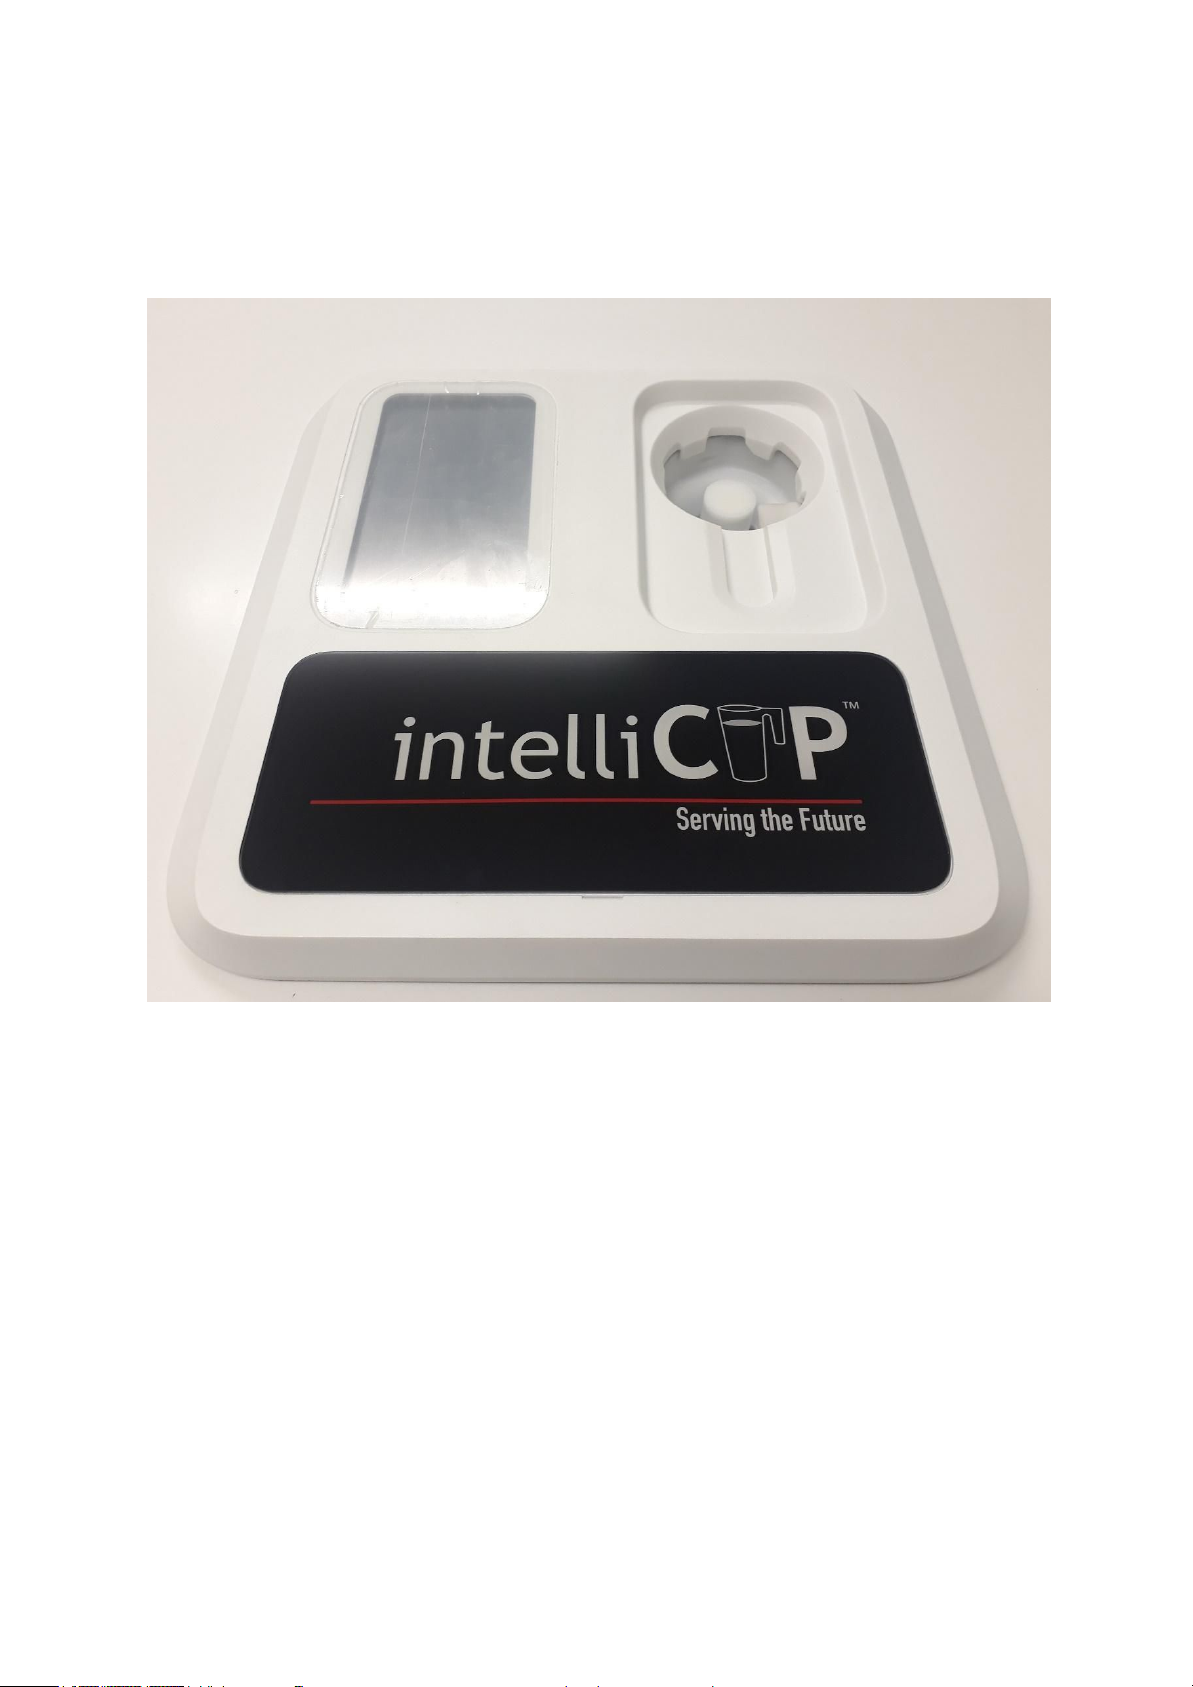
Mechanical Installation
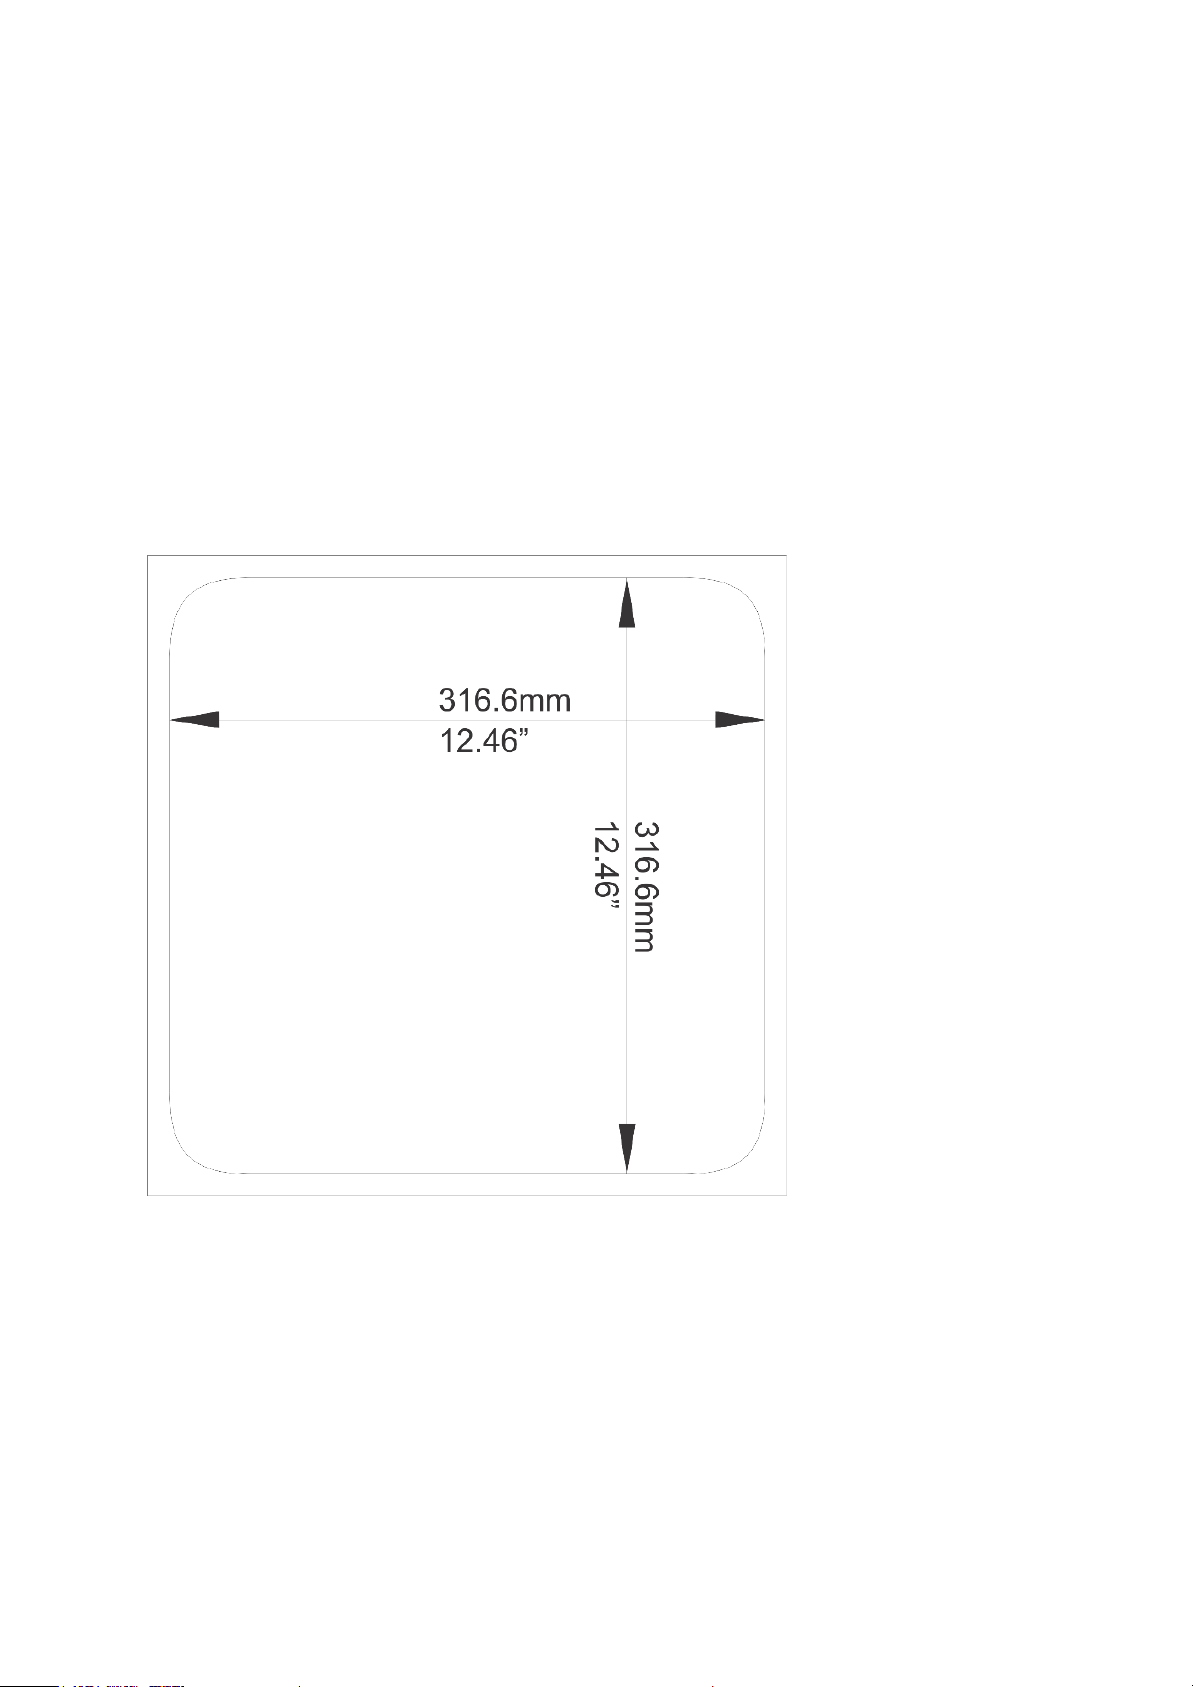
The IntelliHead is designed to drop into a countertop with a suitably sized cut-out and
sufficient space below the unit for fittings. The dimensions are shown below:
Countertop cutout size in mm
IntelliCup recommends 150mm clearance below the bottom of the unit for easy installation of
piping and cabling.
4

Counter Top Mounting
Place the complete assembly into the cut countertop. Fit the retaining brackets and screw in
6 off M6x45 screws to secure assembly to counter. See images below.
Assembly before dropping into countertop cut-out
Screws tightened to secure unit below countertop
5
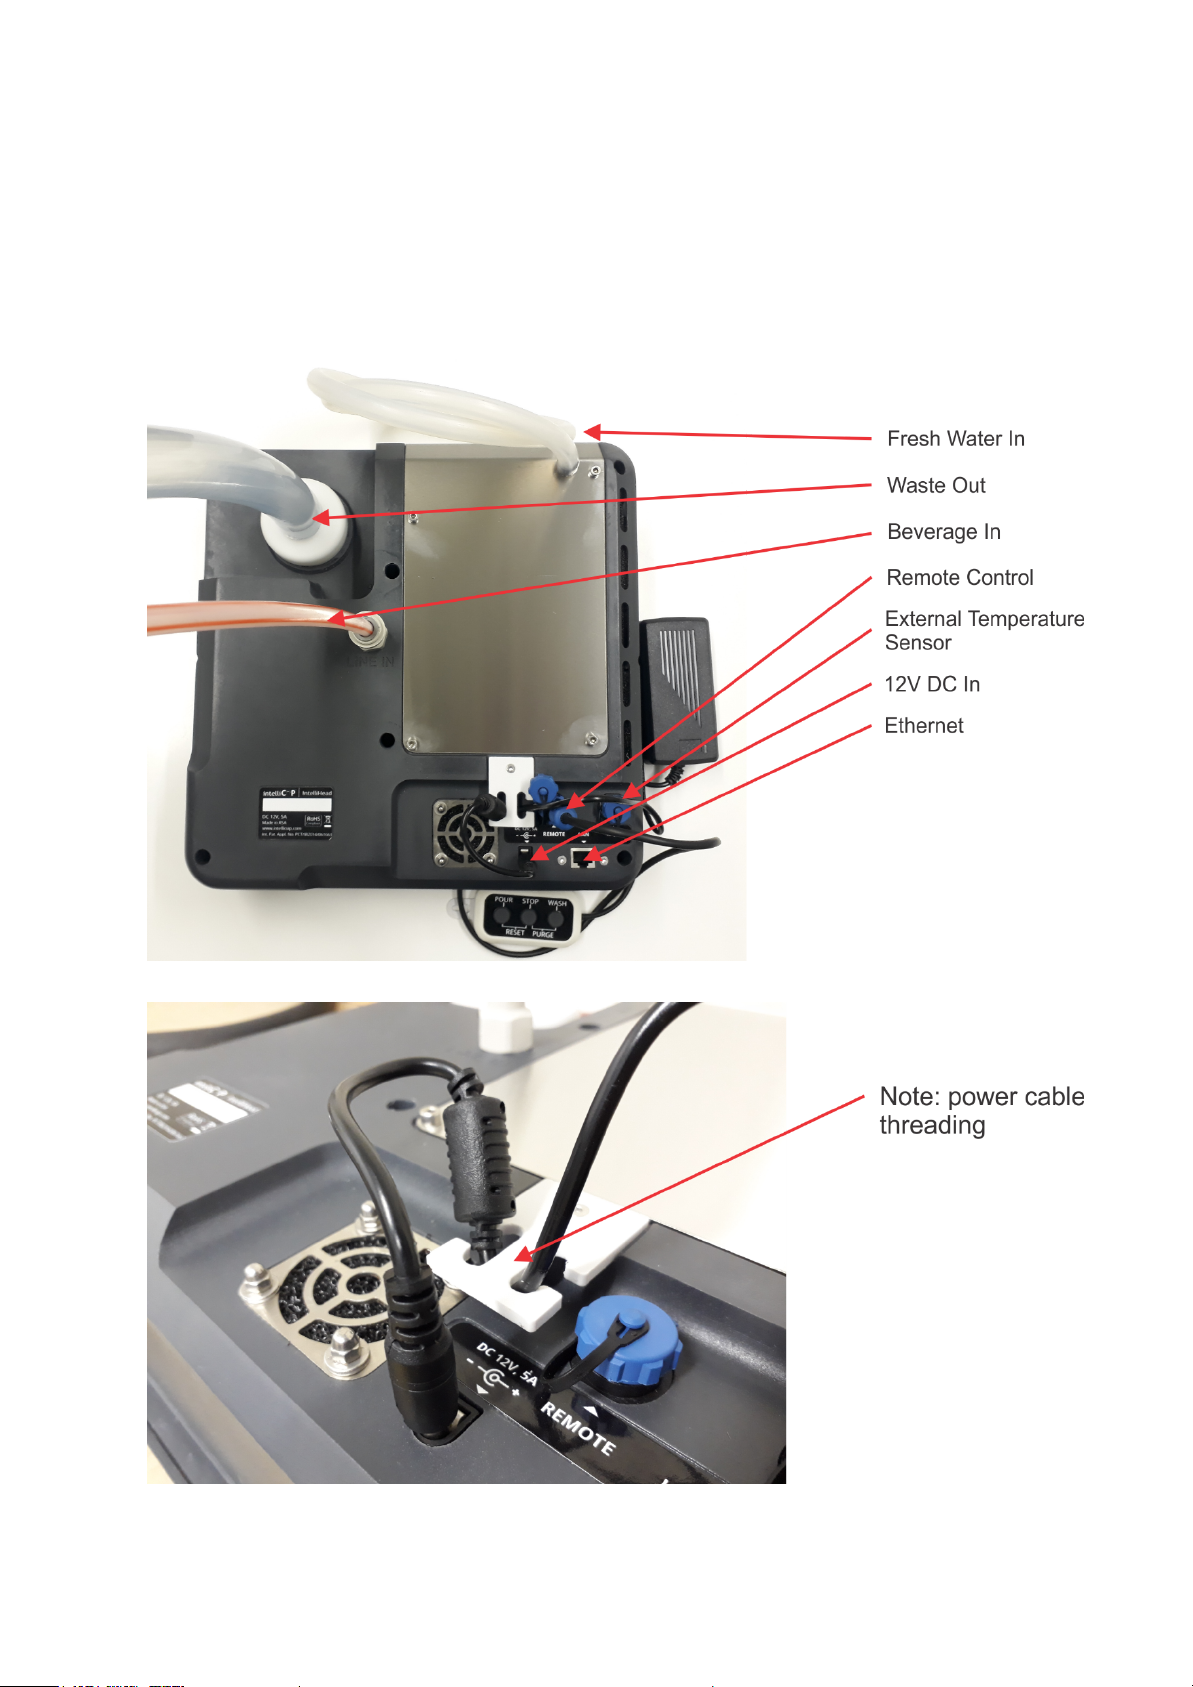
Piping and wiring
The IntelliHead has three compulsory piping connections (beverage in, fresh water in and
waste out), two compulsory wiring connections (12V DC in and remote control) and two
optional wiring connections (ethernet and external temperature probe).
6
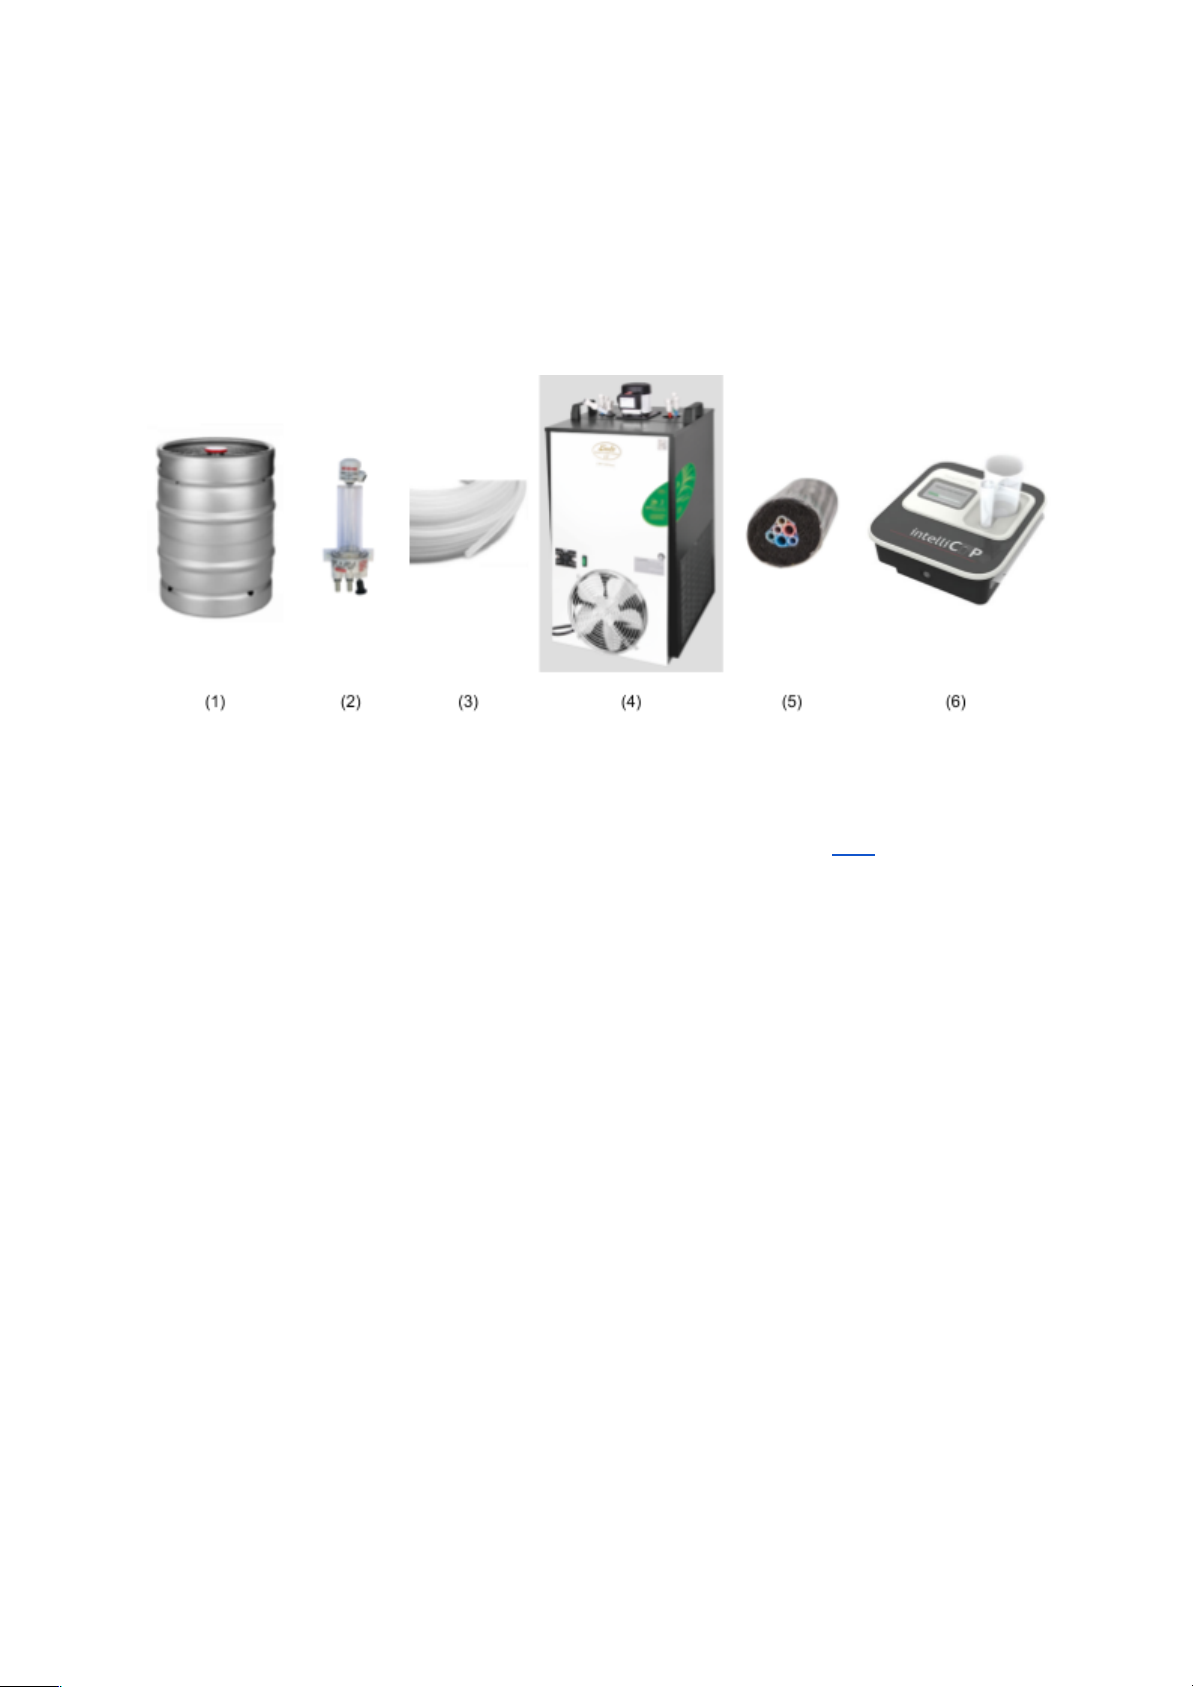
Beverage In
The IntelliHead has a ⅜” John Guest input for the beverage in line on the bottom of the unit.
For beer dispensing, the beer is supplied by a keg which is connected to a
refrigeration/chiller unit and then to the IntelliHead. The recommended cold chain setup is
illustrated below:
(1) Beer Keg (2) Foam Stopper (FOB) (3) ⅜” Beer Tubing (4) Refrigeration Unit (5) Insulated ⅜” Beer Piping with Active Cooling
(Python) (6) IntelliHead
To eliminate any excessive foaming, IntelliCup requires a refrigeration unit with at least a
40m long internal beer coil. An example of such a cooler can be found here or in the
Addendum.
IntelliCup also requires that the piping between the refrigeration unit and the IntelliHead be
insulated and actively cooled. This is standard in the beverage industry and is called a
‘Python’. Pythons can be bought cut to length from beverage suppliers. A Python consists of
at least one beverage line coming out of the refrigeration unit, one cold water line in and one
cold water return line. The water lines form a constantly running cooling loop that is fed from
the chiller’s own water and keeps the beer in the line at the same temperature as the beer in
the chiller. These are then wrapped in thick insulation as pictured in (5) above.
Finally, IntelliCup requires a foam control unit also known as a Foam on Beer (FOB) stopper.
This stops foam from an empty keg from entering the line by sealing the output when the
FOB stopper fills with foam. Once a new keg is connected, the foam is vented through a vent
pipe, the FOB stopper fills with beer again and the output is re-opened. These can be
purchased from beverage supply stores.
Fresh Water In
The IntelliHead has an internal cleaning mechanism which washes the cup dock and injector
area with clean water at regular intervals. This clears any debris from the cup dock area and
minimizes bacterial transfer from cup to cup via the injector.
7

The cleaning mechanism has its own pump and simply requires a 1-5 litre container filled
with fresh water. Connect the included silicone pipe to the side of the unit and drop the other
end so it is immersed in water at the bottom of the container.
Waste Out
The IntelliHead cup dock area has a drain hole to drain away water from the washing
process, to quickly drain away any overflow from an unsuccessful pour and to drain away
the waste in the purging and priming process.
Connect the included drain pipe to the drain hole on the bottom of the unit and route the pipe
into a 5 litre or larger container. Make sure that the pipe is angled down the entire way from
the IntelliHead to the container otherwise waste will pool in the pipe and may cause bad
odours.
12V DC In
The IntelliHead is powered by the included 12V DC power supply. Plug the power supply
into a 110V-240V AC wall socket and plug the other end into the bottom of the IntellIhead.
Keep the power supply away from areas where it may come into contact with liquids.
Remote Control
The IntelliHead can be manually controlled using the included external remote control. The
remote control allows staff to manually pour, purge, wash and reset the unit.
To connect the remote control, plug its four pin plug into the appropriate socket on the
bottom of the unit and tighten the plug to the socket by screwing the housing with your
fingers.
Note: The IntelliHead has two similar sockets on the bottom of the unit. The plug should not
require any force to insert. Attempting to plug into the incorrect socket may damage your
IntelliHead and void your warranty.
External Temperature Sensor (Optional)
The IntelliHead can be paired with an external temperature sensor that is fitted between the
keg and the chiller to monitor the input temperature of the keg.
To connect the external temperature sensor to the beverage line, cut the ⅜” beverage pipe
in between the chiller and the keg and fit the external temperature sensor in between using
the John Guest fittings on each end of the sensor.
To connect the external temperature sensor to the IntelliHead, plug its five pin plug into the
appropriate socket on the bottom of the unit and tighten the plug to the socket by screwing
the housing with your fingers.
8
 Loading...