

Page 1

DE
GB
Dachzelt / Roof tent
Skandika Modell:Wildland
Art.Nr. 80030
Page 2

Inhalt
03 Sicherheitshinweise
04 Lieferumfang
05 Aufbauanleitung
08 Abbauanleitung
08 Fehlerbehebung
10 Produktspezikationen
11 Garantiebedingungen
Die Videos zum Auf- und
Abbau sowie FAQ und die
Anleitungen zum Downloaden findest Du auf
unserer Skandika Service
Seite. Für weitere Informationen kannst Du einfach
unsere Website besuchen
www.skandika.com
Page 3

WICHTIGE INFORMATIONEN
Der Hersteller haftet nicht für Schäden oder Unfälle, die durch Nichtbeachtung dieser Gebrauchsanweisung, durch Veränderungen an Teilen oder durch die Verwendung von anderen als den Originalteilen des
Herstellers entstehen können. Die Warnungen, Vorsichtshinweise und Anweisungen in diesem Dokument können nicht alle möglichen Situationen abdecken - daher versteht der Betreiber, dass gesunder Menschenverstand und Vorsicht angewendet werden müssen. Es liegt in Ihrer Verantwortung, diese Anweisungen an jeden
Dritten weiterzugeben, der dieses Dachzelt verwendet.
SICHERHEITSHINWEISE
Prüfen Sie vor Benutzung des Dachzeltes unbedingt die
Dachlast Ihres Fahrzeugs. Auch die Auswahl der Dachträger
ist sehr wichtig; selbige müssen die Last (die beim Fahren
wesentlich höher ist als im Stand) problemlos aushalten
können.
Wir empfehlen Ihnen, während der Benutzung Ihres Dach-
zeltes nicht schneller als 110 km/h (70 mph) zu fahren und
sich stets an die geltenden Geschwindigkeitsbegrenzungen
zu halten.
3
– Die Höhe Ihres Fahrzeugs kann sich um bis zu 90 cm erhöhen
– Achten Sie auf niedrige Einstiege, tief hängende Äste usw.
– Bei Fahrten mit einem Dachzelt können ungewöhnliche Wind-
– Entfernen Sie in jedem Fall das Dachzelt, bevor Sie eine auto-
SICHERHEITSHINWEISE
(abhängig von Ihrem Dachträger).
geräusche entstehen.
matische Waschanlage benutzen!
Prüfen Sie zu Beginn jeder Fahrt und in regelmäßigen
Abständen während der Fahrt sorgfältig, ob Ihr Dachzelt fest
auf den Dachträgern sitzt und ob alle Fixierungsbänder sicher
befestigt sind.
Benutzen Sie Ihr Dachzelt nicht, wenn es an irgendeinem Teil
oder an seinen Komponenten sichtbare Schäden aufweist.
Wenden Sie sich an den Kundendienst, um angemessene
Hilfe zu erhalten. Dies gilt insbesondere für die Fixierungsbänder und die Schnallen.
Stellen Sie sicher, dass sich Ladungen und montierte Dach-
träger während der Fahrt nicht lösen und so ggf. schwere
Unfälle verursachen können.
Beachten Sie, dass durch das Dachzelt eine Veränderung
der Fahrzeughöhe und des Fahrverhaltens auftreten (veränderte Seitenwindempndlichkeit, ungewohntes Kurven- und
Bremsverhalten etc.).
Führen Sie immer die Bedienungsanleitungen von Fahrzeug
und Dachzelt bei jeder Fahrt mit und befolgen Sie alle gegebenen Instruktionen und Hinweise.
Verwenden Sie keine Reinigungsüssigkeiten auf Bleich-
mittel-, Alkohol- oder Ammoniakbasis für Ihr Dachzelt, da
sonst die Oberäche Ihres Dachzeltes beschädigt werden
kann.
Bitte beachten Sie bei der Verwendung Ihres Dachzeltes
folgende Punkte:
– Um Kraftsto zu sparen und die Sicherheit anderer Verkehrs-
teilnehmer zu gewährleisten, sollten Sie Ihr Dachzelt und die
Dachträger bei Nichtgebrauch abnehmen.
– Zu Ihrer Sicherheit sollten Sie nur geprüfte (z. B. GS-geprüfte)
Dachträger verwenden, die für die Verwendung in Verbindung
mit Ihrem Fahrzeug zugelassen sind.
– Um keine zu großen Auftriebskräfte zu erzeugen, sollte
Ihr Dachzelt parallel zum Straßenverlauf und nicht schräg
montiert werden.
Benutzen Sie die Leiter beim Ein- und Aussteigen aus Ihrem
Dachzelt immer mit der gebotenen Vorsicht und lassen Sie
Kinder diese nie alleine benutzen. Stellen Sie sicher, dass
die Leiterhaken in gutem Zustand sind. Kontaktieren Sie den
Kundenservice, wenn Sie Ersatz benötigen.
Kein oenes Feuer in der Nähe des Dachzeltes!
Das Zelt muss beim Aufbau und Zusammenfalten völlig
trocken sein. Ansonsten besteht Verschimmelungs- und
Verrottungsgefahr.
Gefahr durch elektrische Spannung an elektrischen Bauteilen!
Greifen Sie niemals bei eingeschaltetem Betriebsschalter
an elektrische Bauteile und Kontakte! Es besteht die Gefahr
eines Stromschlages mit Gesundheitsgefährdung oder Todesfolge. An Anschlussklemmen liegt auch bei ausgeschaltetem
Betriebsschalter Spannung an.
Page 4

LIEFERUMFANG
4
Koer mit Elektrozubehör
1 Stück
Kreuzschlitz-Schrauben-
Powerbank
Anschlusskabel für das
Solarmodul
1 Stück
dreher 6 x L100
1 Stück
Notfall-
1 Stück
Ladeadapter
1 Stück
Stromkabel
für Dachzelt
1 Stück
KFZ-Batterie-
Ladekabel
1 Stück
USB-Ladekabel
1 Stück
Werkzeugbeutel
1 Stück
Innensechskant 6mm
1 Stück
Innensechskant 5mm
1 Stück
Maulschlüssel 8 / 10
1 Stück
M6×30 mm
1 Stück
Stahlring
1 Stück
T-Einsteller
1 Stück
Federscheibe
6mm
1 Stück
Montagematerial
U-Schelle
Stange
Sterngrischraube
Federscheibe
Unterlegscheibe 8mm
Schraube M8
Fernbedienung
inkl. 2 Knopfzellen-
Batterien CR 2016
2 Stück
4 Stück
4 Stück
8 Stück
8 Stück
8 Stück
8 Stück
Page 5

AUFBAU
ANLEITUNG
Page 6

1
AUFBAUANLEITUNG
6
Installation des Dachzelts
Bevor Sie das Dachzelt montieren,
müssen Sie Dachträger korrekt an Ihrem
Fahrzeug montiert haben.
Sie sollten Dachträger auswählen, die
optimal auf Ihr Fahrzeug passen und das
Dachzelt tragen können. Die Trägerfüße
sind besonders wichtig für eine stabile
Verbindung zwischen Dachzelt, Dachträgersystem und Auto.
Das Dachzelt sollte relativ in der Fahrzeugmitte montiert werden, damit z. B.
die Kofferraumtür problemlos benutzt
werden kann und sich die Last möglichst
gleichmäßig verteilt.
Aufstellen Ihres Dachzeltes
2
1. WICHTIG!
Kabelanschluss wie folgt herstellen:
Möglichkeit 1
Stecken Sie das Kabel in den Zigarettenanzünder und starten Sie
das Fahrzeug.
Das Dachzelt kann elektronisch auf- und abgebaut werden.
Leistung und Eigenschaften der elektronischen Steuerung:
- Nennspannung: 12V Nennleistung: 35W
Drahtlose Empfangsfrequenz: 433 Mhz
Thermische Auslösung des Motors (Stromstärke 6A für 15 Sekunden)
- Zeit zum Auf- und Abbau des Zeltes: Ca. 60 Sekunden
- Manueller Stopp des Motors: Drücken und halten Sie STOP für ca. 1 Sekunde
- Die Gesamtleistung des Solarmoduls beträgt 27 W (2 × 13,5 W). Die Ladezeit
beträgt ca. 4 Stunden (hängt von der tatsächlichen Situation ab).
- Powerbank: 12V/8A Ausgang für Zelt, Batteriekapazität: 4.000 mAh. 5V/1AAusgang für Mobiltelefone, Notebooks, Outdoor-Beleuchtung und andere Geräte;
Batteriekapazität: 12.000 mAh. 5V/1A-Anschluss kann in 4 Stunden vollständig
aufgeladen werden.
Möglichkeit 2
Verbinden Sie die beiden Stromkabel vom Motor und der Powerbank, dann können Sie das Zelt mit der Powerbank betreiben.
Page 7
7
AUFBAUANLEITUNG
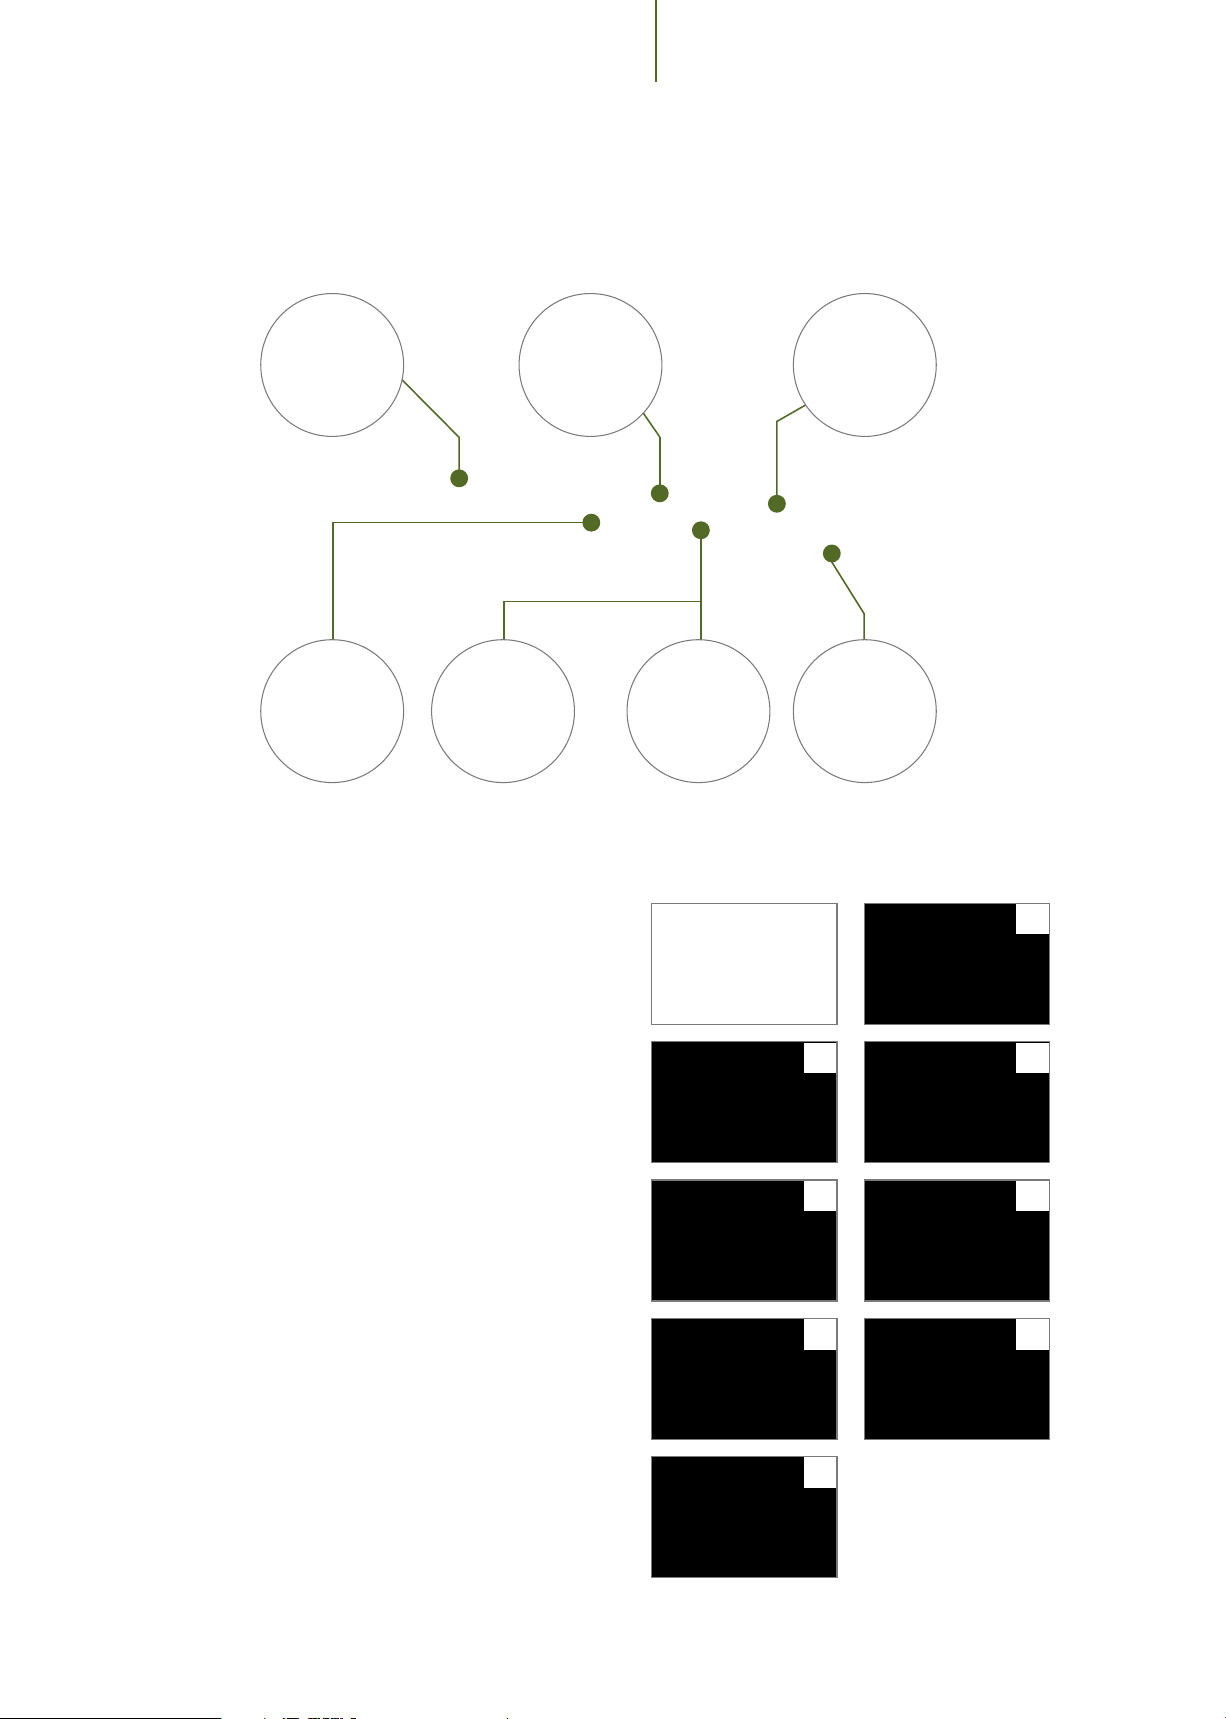
12V-
Ausgang
Lichtfunktion
Lade-
anschluss
USB 5V-
Ausgang
Solarpanel-
Anschluss
Ein/
Aus
Anschluss für
KFZ-Batterie
2. WICHTIG!
Lösen Sie alle Schnallen um den Rahmen.
3. Lösen Sie die Schnalle an der Leiter.
4. Drücken Sie UP auf Ihrer Fernbedienung, um das
Zelt aufzurichten (Hinweis: Die DOWN-Taste funktioniert erst, wenn das Zelt vollständig aufgerichtet
ist. Drücken Sie die STOP-Taste für 1 Sekunde, um
den Aufbau während des Aufrichtens zu stoppen).
5. Warten Sie eine Minute, bis sich das Zelt voll-
ständig aufgebaut hat.
6. Ergreifen Sie die Leiter und ziehen Sie diese
vorsichtig herunter.
7. Die Leiter klappt während des Herunterlassens
auseinander.
8. Richten Sie die Leiter gerade nach unten aus.
9. Schieben Sie das Hardtop vorsichtig nach oben.
1. 6.
2. 7.
3. 8.
4. 9.
5.
10. Wenn das Hardtop geöffnet ist, wird es automa-
tisch richtig fixiert.
Page 8

ABBAUANLEITUNG /
FEHLERBEHEBUNG
8
Abbauen Ihres Dachzeltes
1. Drücken Sie das Hardtop herunter.
2. Schieben Sie die Leiterhaken nach oben.
3. Klappen Sie die Leiter ein.
4. Schieben Sie die Leiter langsam nach oben.
5. Platzieren Sie die Leiter auf dem Hardtop.
6. Drücken Sie DOWN auf Ihrer Fernbedienung, um
das Zelt einzufahren (Hinweis: Die UP-Taste funktioniert erst, wenn das Zelt vollständig abgebaut
ist. Drücken Sie die STOP-Taste für 1 Sekunde, um
den Abbau während des Einfahrens zu stoppen).
7. Das Zelt wird automatisch heruntergefahren.
8. Schließen Sie die Schnalle, um die Leiter zu sichern.
9. Fixieren Sie den Rahmen.
2.
3.
4.
5.
1.
6.
7.
8.
9.
HINWEISE
• Halten Sie alle Teile stets sauber und trocken, um eine volle Funktionalität zu gewährleisten.
• Ist das Zelt oder der Alu-Rahmen feucht, warten Sie mit dem Abbau, bis die Teile getrocknet sind.
• Prüfen Sie, dass sich keine Gegenstände im Zelt benden während der Auf- und Abbauphase und dass sich
nichts an der Motorstange verfangen hat bzw. diese blockiert.
FEHLERBEHEBUNG
PROBLEM: Zelt önet sich nicht / lässt sich nicht aufbauen.
LÖSUNG: Prüfen Sie, ob das Netzkabel korrekt in die 12-V-Steckdose eingesteckt wurde resp. eine
korrekte Stromverbindung hergestellt wurde. Vermeiden Sie, die Taste DOWN während des Aufbauens
bzw. die Taste UP während des Abbauens zu betätigen. Der Motor ist mit einem Schutz ausgestattet, der
eine solche Bedienung verhindert. Drücken Sie immer zuerst STOP, um die gerade anliegende Bewegung
zu beenden und dann UP oder DOWN. Lässt sich das Zelt trotzdem nicht aufbauen, könnte ein Defekt
der motorisierten Aufrichtevorrichtung vorliegen. Es ist möglich, den Zeltmotor entsprechend auszutauschen - befolgen Sie hierzu folgende Schritte:
Page 9
9
FEHLERBEHEBUNG
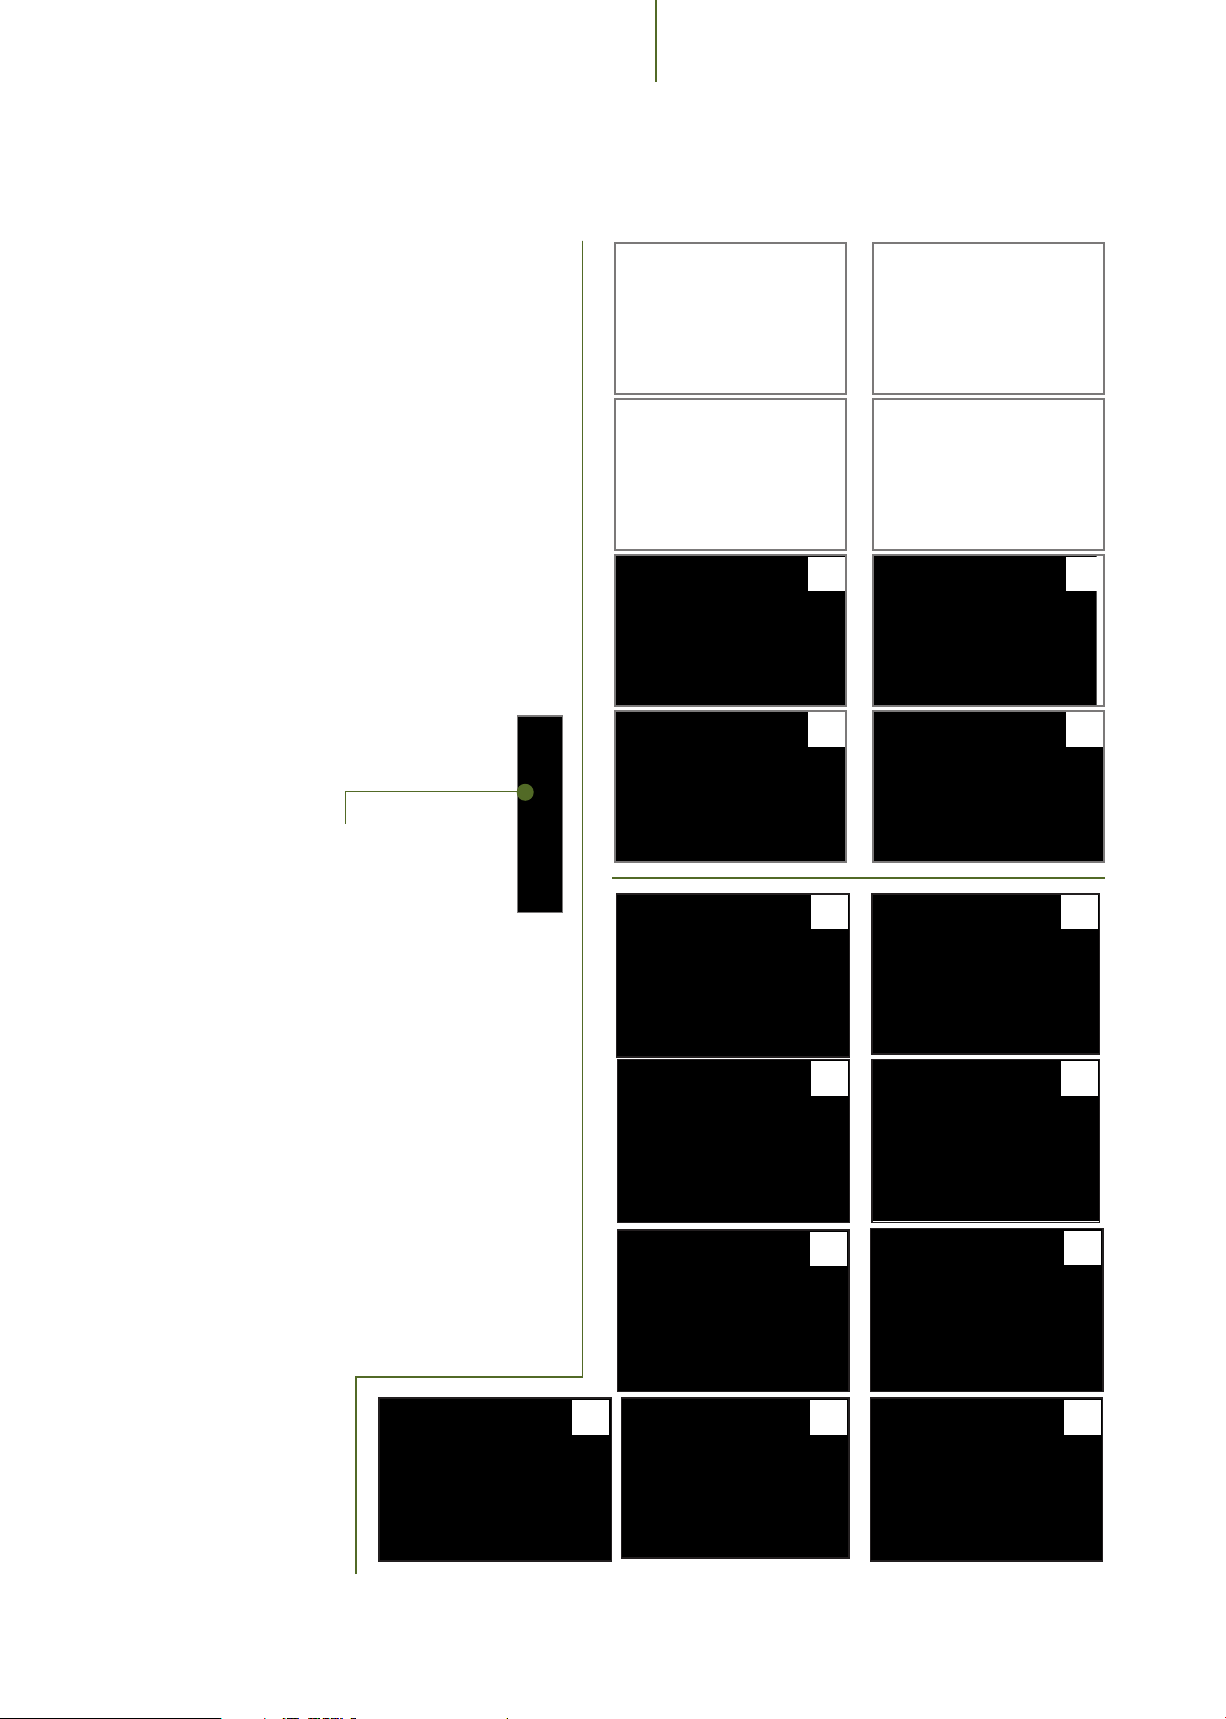
AUSTAUSCH DES ZELTMOTORS
1. Önen Sie die Kunststoabdeckung an der
Rahmenseite.
2. Ziehen Sie das weiße Kabel vorsichtig heraus.
3. Lösen Sie die wasserdichte Verbindung.
4. Ziehen Sie die Kabelteile auseinander.
5. Ziehen Sie das verbleibende Kabel aus dem
Rahmenloch.
6. Ziehen Sie auch die wasserdichte Verbindung
aus dem Rahmen.
7. Lösen Sie die Schraube am Rahmen mit einem
passenden Innensechskantschlüssel.
8. Lösen Sie die Verschraubung an der Zelt-
stange mit einem kleineren Innensechs kantschlüssel.
9. Tauschen Sie den Zeltmotor aus und
befestigen Sie alle Teile wieder.
1.
3.
5.
7.
2.
4.
6.
8.
HINWEIS:
Haben Sie kein Werkzeug bzw. einen Ersatzmotor dabei, können Sie das Zelt auch manuell
aufbauen.
Folgen Sie hierzu diesen Schritten:
1. Entfernen Sie den Arm an beiden Seiten.
2. Entfernen Sie die beiden 92cm-Stangen aus
den Zelttaschen.
3. Stützen Sie das Zelt an beiden Seiten mit den
Stangen ab.
4. Das Zelt muss von einer Seite zur anderen
hochgehalten werden. Achten Sie darauf,
dass evtl. herunterfallende Stangen
niemanden verletzen können.
1a 1b
1c 1d
2
4a 4b 4c
3
Page 10

PRODUKTSPEZIFIKATIONEN
10
Produktspezifikationen
Außenzelt 210D rip-stop Polyoxford PU 3000mm mit Silberbeschichtung UPF50+
Innenzelt 90g Polycotton PU 2000 mm
Boden 210D Polyoxford PU 2000 mm
Rahmen Alu-Legierung
Motor 12V , 28W/einzeln; 56W/Set
Abdeckung Polymer-Verbundwerkstoe ABS
Struktur
Personenzahl 2
Innenzeltabmessungen ca. 200 (L) 120 (B) 110/85 (H) cm
Packmaß ca. 233 × 36 × 140 cm
Nettogewicht ca. 62 kg (inklusive Leiter)
Bruttogewicht ca. 77 kg
Page 11
GARANTIEBEDINGUNGEN
Für unsere Artikel leisten wir Garantie gemäß nachstehenden Bedingungen:
1. Wir beheben kostenlos nach Maßgabe der folgenden
Bedingungen (Nummern 2-5) Schäden oder Mängel am
Artikel, die nachweislich auf einen Fabrikationsfehler
beruhen, wenn Sie uns unverzüglich nach Feststellung und innerhalb von 24 Monaten nach Lieferung
an den Endabnehmer gemeldet werden. Die Garantie
erstreckt sich nicht auf leicht zerbrechliche Teile, wie
z.B. Glas oder Kunststo. Eine Garantiepicht wird
nicht ausgelöst: durch geringfügige Abweichungen der
Soll-Beschaenheit, die für Wert und Gebrauchstauglichkeit des Artikels unerheblich sind; durch Schäden
aus chemischen und elektrochemischen Einwirkungen;
durch Eindringen von Wasser sowie allgemein durch
Schäden höherer Gewalt.
2. Die Garantieleistung erfolgt in der Weise, dass mangelhafte Teile nach unserer Wahl unentgeltlich instand
gesetzt oder durch einwandfreie Teile ersetzt werden.
Die Kosten für Material und Arbeitszeit werden von uns
getragen. Instandsetzungen am Aufstellungsort können
nicht verlangt werden. Der Kaufbeleg mit Kauf- und/
oder Lieferdatum ist vorzulegen. Ersetzte Teile gehen in
unser Eigentum über.
3. Der Garantieanspruch erlischt, wenn Reparaturen oder
Eingrie von Personen vorgenommen werden, die
hierzu von uns nicht ermächtigt sind oder wenn unsere
Geräte mit Ergänzungs- oder Zubehörteilen versehen
werden, die nicht auf unsere Artikel abgestimmt sind.
Ferner wenn der Artikeldurch den Einuss höherer
11
4. Garantieleistungen bewirken weder eine Verlängerung
5. Weitergehende oder andere Ansprüche, insbeson-
6. Unsere Garantiebedingungen, welche die Vorausset-
7. Verschleißteile unterliegen nicht den Garantiebedin-
8. Der Garantieanspruch erlischt bei nicht bestimmungs-
GARANTIEBEDINGUNGEN
Gewalt oder durch Umwelteinüsse beschädigt oder
zerstört ist, bei Schäden, die durch unsachgemäße
Behandlung insbesondere Nichtbeachtung der
Betriebsanleitung oder Wartung aufgetreten sind
oder falls der Artikel mechanische Beschädigungen
irgendwelcher Art aufweist. Der Kundendienst kann
Sie nach telefonischer Rücksprache zur Reparatur
bzw. zum Tausch von Teilen, welche Sie zugesandt
bekommen, ermächtigen. In diesem Fall erlischt der
Garantieanspruch selbstverständlich nicht.
der Garantiefrist noch setzen sie eine neue Garantiefrist
in Gang.
dere auf Ersatz außerhalb des Artikels entstandener
Schäden, sind soweit eine Haftung nicht zwingend
gesetzlich angeordnet ist ausgeschlossen.
zungen und den Umfang unserer Geschäftsbedingungen beinhalten, lassen die vertraglichen Gewährleistungsverpichtungen des Verkäufers unberührt.
gungen.
gemäßem Gebrauch.
HINWEISE ZUM UMWELTSCHUTZ
Das Symbol des durchgestrichenen Mülleimers auf Batterien oder Akkumulatoren besagt, dass diese am Ende
ihrer Lebensdauer nicht im Hausmüll entsorgt werden dürfen. Sofern Batterien oder Akkumulatoren Quecksilber (Hg), Cadmium (Cd) oder Blei (Pb) enthalten, nden Sie das jeweilige chemische Zeichen unterhalb des
Symbols des durchgestrichenen Mülleimers. Sie sind gesetzlich verpichtet, alte Batterien und Akkumulatoren
nach Gebrauch zurückzugeben. Sie können dies kostenfrei im Handelsgeschäft oder bei einer anderen Sammel-
stelle in Ihrer Nähe tun. Adressen geeigneter Sammelstellen können Sie von Ihrer Stadt- oder Kommunalverwaltung erhalten. Batterien können Stoe enthalten, die schädlich für die Umwelt und die menschliche Gesundheit sind. Besondere Vorsicht ist aufgrund der besonderen Risiken beim Umgang mit lithiumhaltigen Batterien geboten. Durch die getrennte
Sammlung und Verwertung von alten Batterien und Akkumulatoren sollen negative Auswirkungen auf die Umwelt und die
menschliche Gesundheit vermieden werden. Bitte vermeiden Sie die Entstehung von Abfällen aus alten Batterien soweit wie
möglich, z. B. indem Sie Batterien mit längerer Lebensdauer oder auadbare Batterien bevorzugen. Bitte vermeiden Sie die
Vermüllung des öentlichen Raums, indem Sie Batterien oder batteriehaltige Elektro- und Elektronikgeräte nicht achtlos
liegenlassen. Bitte prüfen Sie Möglichkeiten, eine Batterie anstatt der Entsorgung einer Wiederverwendung zuzuführen,
beispielsweise durch die Rekonditionierung oder die Instandsetzung der Batterie.
Im Zuge ständiger
Produktverbesserungen behalten
wir uns technische
und gestalterische
Änderungen vor.
Für Ersatzteile kontaktieren Sie bitte folgende E-Mail-Adresse: [email protected]
Der Service erfolgt durch: MAX Trader GmbH, Wilhelm-Beckmann-Straße 19, 45307 Essen,
Deutschland
Page 12

12
Contents
13 Safety information
14 Scope of supply
15 Assembly instructions
18 Dismantling instructions
18 Troubleshooting
20 Product specications
21 Guarantee conditions
Please visit the Skandika
Service portal on our
website for setup & help
videos, FAQs and downloadable instructions.
For more information
about Skandika, simply
visit our main page
www.skandika.com
Page 13

IMPORTANT INFORMATION
The manufacturer is not liable for any damage or accident that may occur as a result of non-compliance with
these instructions for use, modications made to parts or the usage of any parts other than the manufacturer’s
original parts. The warnings, cautions and instructions in this document cannot cover every possible situation,
so it is understood by the operator that common sense and caution must be applied. lt is your responsibility to
pass these instructions on to any third party who uses this roof tent.
SAFETY INFORMATION
Before using the roof tent, make sure to check the roof load of
your vehicle. The choice of roof racks is also very important;
they must be able to withstand the load (which is much higher
when driving than when stationary) without any problems.
13
– When driving with a roof tent, unusual wind noises may occur.
– In any case, remove the roof tent before using an automatic
SAFETY INFORMATION
car wash!
We recommend that you do not drive over 70 mph ( 110 km/h)
whilst using your roof tent and that you always adhere to the
valid speed limits.
At the start of each journey and at regular intervals during
every journey, carefully check that your roof tent is rmly
xed to the roof bars and that all of the locking straps are
securely fastened.
Do not use your roof tent if there is any visible damage to any
part of it or its components. Contact the customer service
for adequate help. This is especially applicable regarding the
locking straps and buckles.
Make sure that loads and mounted roof racks do not come
loose during the journey and thus possibly cause serious accidents.
Please note that the roof tent will cause a change in vehicle
height and handling (altered sensitivity to crosswinds, unfamiliar cornering and braking behaviour, etc.).
Always carry the owner‘s manuals of the vehicle and roof
tent with you on every journey and follow all instructions and
notes given.
Do not use bleach, alcohol or ammonia-based cleaning uids
on your roof tent as this may damage the surface of your roof
tent.
– To save fuel and ensure the safety of other road users, remove
your roof tent and roof racks when not in use.
– For your safety, you should only use tested (e.g. GS-tested)
roof bars that are authorised for usage in conjunction with
your vehicle.
– In order not to generate too much uplift, your roof tent should
be mounted parallel to the course of the road and not at an
angle.
Always use the ladder with due care when getting in and out
of your roof tent and never let children use it alone. Make sure
the ladder hooks are in good condition. Contact customer
service if you need a replacement.
No open re near the roof tent!
When packing the tent make sure that it is completely dry,
otherwise there is a danger of mildew and rotting.
Danger due to electrical voltage on electrical components!
Never touch electrical components and contacts when the
operating switch is switched on! There is a risk of electric
shock with health hazards or fatal consequences. Voltage
is present at terminals even when the operating switch is
switched o.
Please note the following when using your roof tent:
– The height of your vehicle can increase by up to 90 cm
(depending on your roof bars).
– Beware of low entrances, low hanging branches, etc.
Page 14

SCOPE OF SUPPLY
14
Case with electrical accessories
1 Pc
power bank
Connection cable for
the solar panel
1 Pc
Cross screwdriver
6 x L100
1 Pc
Emergency
1 Pc
Charger
1 Pc
Roof tent
power cord
1 Pc
Vehicle Battery
Charging Connection
Line
1 Pc
USB Output
Power Wire
1 Pc
Tool bag
1 Pc
Allen key 6mm
1 Pc
Allen key 5mm
1 Pc
Open-end spanner 8 / 10
1 Pc
M6×30 mm
1 Pc
Steel ring
1 Pc
T Slider
1 Pc
Spring washer
6mm
1 Pc
Assembly material
U-clamp
Tube
Star knob screw
Spring washer
Flat washer 8mm
Screw M8
4 Pcs
4 Pcs
8 Pcs
8 Pcs
8 Pcs
8 Pcs
Remote control
incl. 2 button cell
batteries CR 2016
2 Pcs
Page 15

AUFBAUANLEITUNG
ASSEMBLY
INSTRUCTIONS
Page 16

1
ASSEMBLY INSTRUCTIONS
Installing the roof tent
Before you mount the roof tent, you
must have roof racks correctly mounted
on your vehicle.
You should choose roof racks that
fit optimally on your vehicle and can
support the roof tent. The carrier feet
are particularly important for a stable
connection between the roof tent, roof
rack system and car.
The roof tent should be mounted relatively in the middle of the vehicle so
that, for example, the boot door can be
used without problems and the load is
distributed as evenly as possible.
16
Setting up your roof tent
2
1. IMPORTANT!
Connect the cables as follows:
Method 1
Plug the cable into the cigarette lighter and start the vehicle.
The roof tent can be erected and dismantled electronically.
Performance and features of the electronic control:
- Rated voltage: 12V Rated power: 35W
Wireless reception frequency: 433 Mhz
Thermal tripping of the motor (current 6A for 15 seconds)
- Time to erect and dismantle the tent: Approx. 60 seconds.
- Manual stop of the motor: Press and hold STOP for approx. 1 second
- The total power of the solar module is 27 W (2 × 13.5 W). The charging time is
approx. 4 hours (depends on the actual situation).
- Powerbank: 12V/8A output for tent, battery capacity: 4,000 mAh. 5V/1A output for
mobile phones, notebooks, outdoor lighting and other devices; battery capacity:
12,000 mAh. 5V/1A connection can be fully charged in 4 hours.
Method 2
Connect the two power cables from the motor and the powerbank, then you can operate the tent with the powerbank.
Page 17
17
ASSEMBLY INSTRUCTIONS
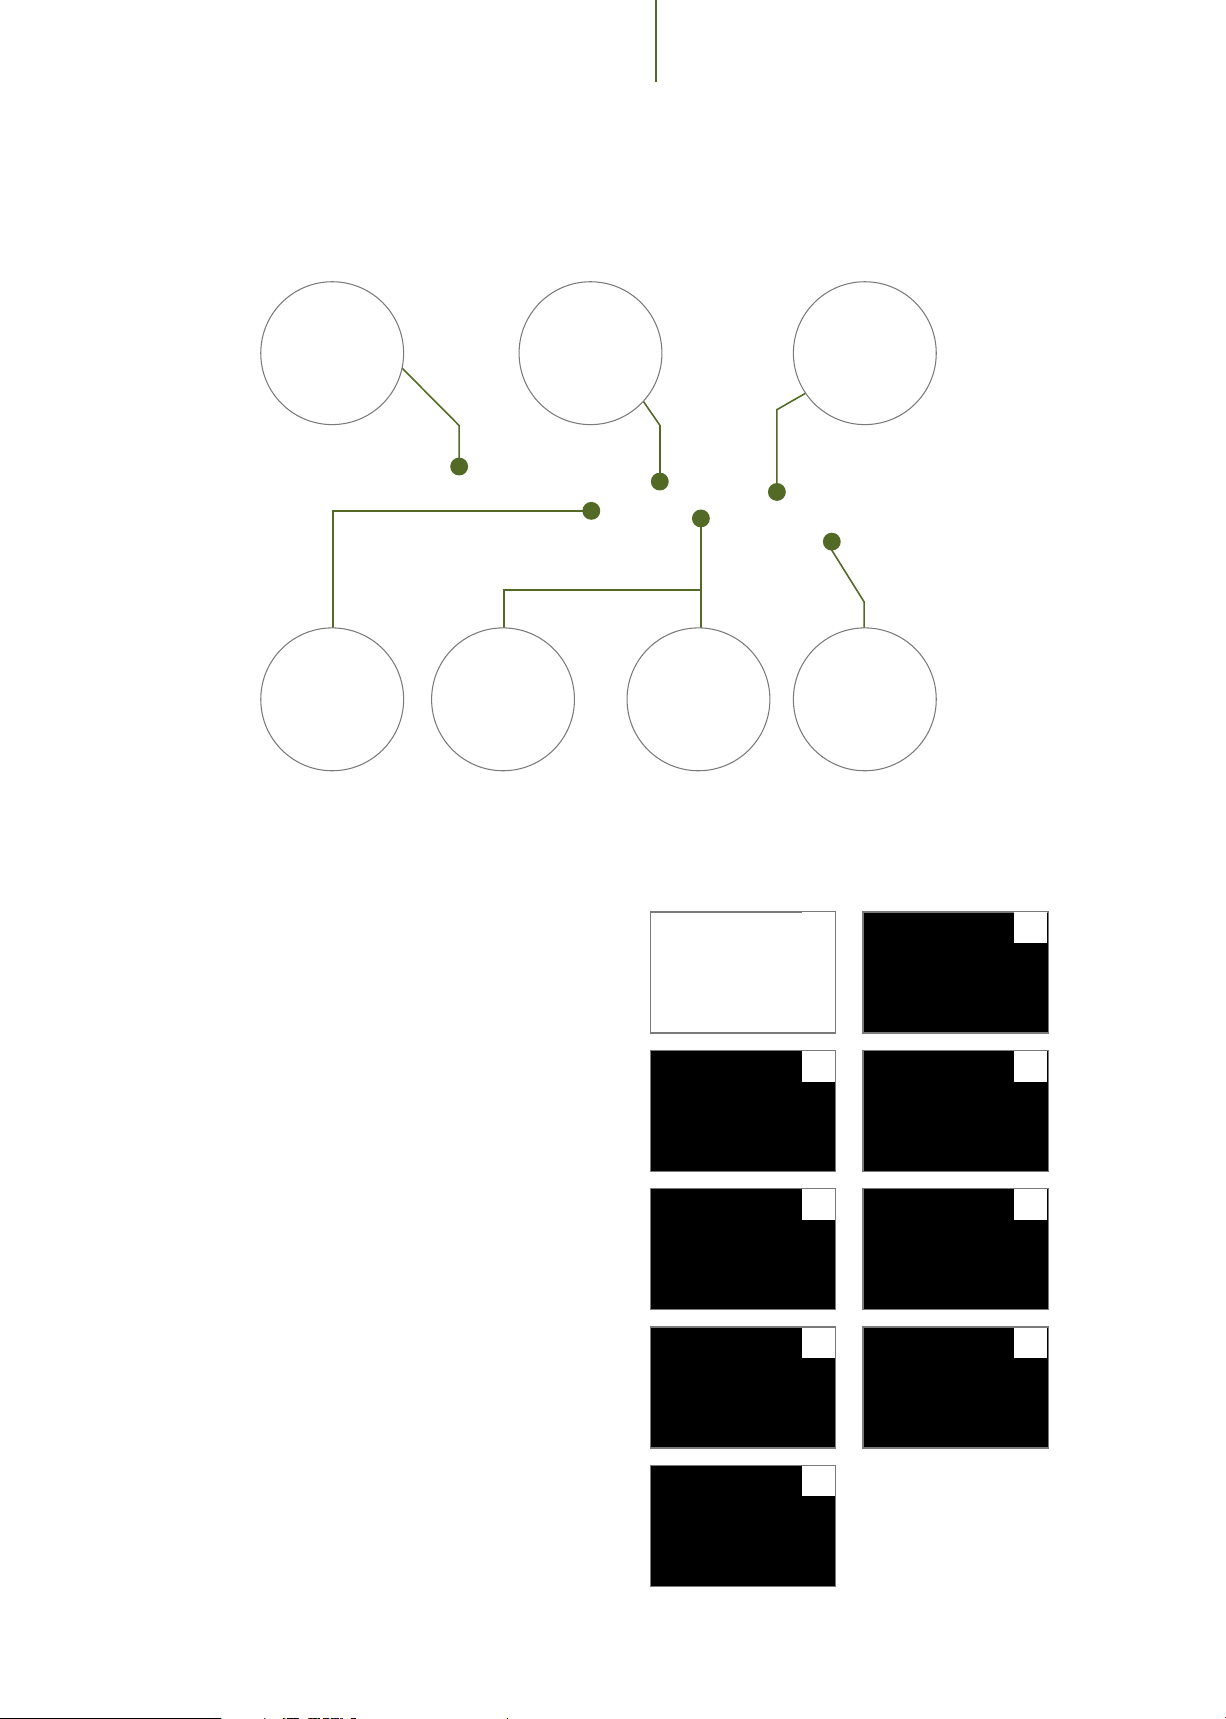
12V
Output
Light function
Charging
port
USB 5V
Output
Connection
for solar panel
On/
O
Connection for
car battery
2. IMPORTANT!
Loosen all the buckles around the frame.
3. Loosen the buckle on the ladder.
4. Press UP on your remote control to erect the tent
(Note: The DOWN button will not work until the
tent is fully erected. Press the STOP button for 1
second to stop the pitching during the erection).
5. Wait one minute for the tent to fully erect.
6. Grasp the ladder and carefully pull it down.
7. The ladder folds apart as it is lowered.
8. Point the ladder straight down.
9. Carefully push the hardtop upwards.
10. When the hardtop is open, it is automatically fixed
correctly.
1. 6.
2. 7.
3. 8.
4. 9.
5.
Page 18

DISMANTLING INSTRUCTIONS /
TROUBLESHOOTING
18
Dismantling your roof tent
1. Press down the hardtop.
2. Push the ladder hooks upwards.
3. Fold in the ladder.
4. Slowly push the ladder upwards.
5. Place the ladder on the hardtop.
6. Press DOWN on your remote control to retract
the tent (Note: The UP button will not work until
the tent is completely dismantled. Press the STOP
button for 1 second to stop dismantling during
retraction).
7. The tent is automatically lowered.
8. Close the buckle to secure the ladder..
9. Fix the frame.
2.
3.
4.
5.
1.
6.
7.
8.
9.
NOTES
• Always keep all parts clean and dry to ensure full functionality.
• If the tent or the aluminium frame is damp, wait until the parts have dried before dismantling.
• Check that there are no objects in the tent during the assembly and disassembly phases and that nothing is
caught on or blocking the motor pole.
TROUBLESHOOTING
PROBLEM: Tent does not open / cannot be erected.
SOLUTION: Check that the mains cable has been correctly plugged into the 12 V socket or that a correct
power connection has been made. Avoid pressing the DOWN key during assembly or the UP key during
disassembly. The motor is equipped with a protection that prevents such operation. Always press STOP
rst to stop the movement currently in progress and then UP or DOWN. If the tent still cannot be erected,
there may be a defect in the motorised erection device. It is possible to replace the tent motor accordingly
- to do this, follow these steps:
Page 19
19
TROUBLESHOOTING
REPLACING THE TENT MOTOR
1. Open the plastic cover on the frame side.
2. Carefully pull out the white cable.
3. Loosen the waterproof connection.
4. Separte the cable parts.
5. Pull the remaining cable out of the frame hole.
6. Also pull the waterproof connection out of the
frame.
7. Loosen the screw on the frame with a suitable
Allen key.
8. Loosen the screw connection on the tent pole
with a smaller Allen key.
9. Replace the tent motor and reattach all
parts.
NOTE:
If you do not have any tools or a spare motor
with you, you can also pitch the tent
manually.
Follow these steps:
1.
3.
5.
7.
1a 1b
2.
4.
6.
8.
1. Remove the arm on both sides.
2. Remove the two 92cm poles from the tent
pockets.
3. Support the tent on both sides with the poles.
4. The tent must be held up from one side to the
other. Make sure that any poles that fall down
cannot injure anyone.
1c 1d
2
4a 4b 4c
3
Page 20

PRODUCT SPECIFICATIONS
20
Product specifications
Flysheet 210D rip-stop Polyoxford PU 3000mm with silver coating UPF50+
Inner tent 90g Polycotton PU 2000 mm
Floor 210D Polyoxford PU 2000 mm
Frame Aluminium alloy
Motor 12V , 28W/single; 56W/set
Cover Polymer Composites ABS
Structure
Number of persons 2
Inner tent dimensions approx. 200 (L) 120 (B) 110/85 (H) cm
Pack size approx. 233 × 36 × 140 cm
Net weight approx. 62 kg (Ladder included)
Gross weight approx. 77 kg
Page 21
GUARANTEE CONDITIONS
For our devices we provide a warranty as dened below.
1. In accordance with the following conditions (numbers
2-5) we repair defect or damage to the device free of
charge, if the cause is a manufacturing defect. Therefore, these defects / damages need to be reported to us
without delay after appearance and within the warranty
period of 24 months after delivery to the end user. The
warranty does not cover parts, which easily break (e.
g. glass or plastic). The warranty does not cover slight
deviations of the product, which are insignicant for
usability and value of the device and damage caused
by chemical or electrochemical eects and damages
caused by penetration of water or generally force
majeure damage.
2. The warranty achievement is the replacement or repair
of defective parts, depending on our decision. The
cost of material and labor will be borne by us. Repairs
at customer site cannot be demanded. The proof of
purchase along with the date of purchase and / or
delivery is required. Replaced parts become our property.
3. The warranty is void if repairs or adjustments are made,
which are not authorized by us or if our devices are
21
4. Warranty services do not extend the warranty period
5. Further demands, especially claims for damages which
6. Our warranty terms - which cover the requirements and
7. Parts of wear and tear are not included in the warranty.
8. The warranty is void if not used properly.
GUARANTEE CONDITIONS
equipped with additional parts or accessories that are
not adapted to our devices. Furthermore, the warranty
is void if the device is damaged or destroyed by force
majeure or due to environmental inuences and in
case of improper handling / maintenance (e.g. due to
non-observance of the instruction manual) or mechanical damages. The customer service may authorize you
to replace or repair defective parts after telephone
consultation. In this case, the warranty is not void.
nor do they initiate a new warranty period.
occured outside the device, are excluded as long as a
liability is not obligatory legal.
scope of our warranty conditions - do not aect the
contractual warranty obligations of the seller.
ENVIRONMENTAL PROTECTION
The symbol of the crossed-out dustbin on batteries or accumulators indicates that they must not be disposed
of in household waste at the end of their life. If batteries or accumulators contain mercury (Hg), cadmium (Cd)
or lead (Pb), you will nd the respective chemical symbol below the symbol of the crossed-out dustbin. You
are legally obliged to return old batteries and accumulators after use. You can do this free of charge at a retail
outlet or at another collection point near you. You can obtain addresses of suitable collection points from your
city or local government. Batteries may contain substances that are harmful to the environment and human health. Particular
care should be taken when handling batteries containing lithium because of the special risks involved. The separate collection and recycling of old batteries and accumulators is intended to avoid negative impacts on the environment and human
health. Please avoid the generation of waste from old batteries as far as possible, e.g. by giving preference to batteries with a
longer life or rechargeable batteries. Please avoid littering public spaces by not carelessly leaving batteries or electrical and
electronic equipment containing batteries. Please consider ways to reuse a battery instead of disposing of it, for example by
reconditioning or repairing the battery.
In accordance with our policy
of continual product improvement, we reserve the right
to make technical and visual
changes without notice.
For spare parts please contact: [email protected]
Service centre: MAX Trader GmbH, Wilhelm-Beckmann-Straße 19, 45307 Essen,
Germany
Page 22

22
NOTIZEN / NOTES
_____________________________________________________
_____________________________________________________
_____________________________________________________
_____________________________________________________
_____________________________________________________
_____________________________________________________
_____________________________________________________
_____________________________________________________
_____________________________________________________
_____________________________________________________
_____________________________________________________
_____________________________________________________
_____________________________________________________
_____________________________________________________
Page 23

23
NOTIZEN / NOTES
_____________________________________________________
_____________________________________________________
_____________________________________________________
_____________________________________________________
_____________________________________________________
_____________________________________________________
_____________________________________________________
_____________________________________________________
_____________________________________________________
_____________________________________________________
_____________________________________________________
_____________________________________________________
_____________________________________________________
_____________________________________________________
Page 24

Vertrieb & Service durch /
Sales & Service by
MAX Trader GmbH
Wilhelm-Beckmann-Straße 19
45307 Essen
Deutschland / Germany
Art. 80030 Wildland DE_GB Ver. 1.1
 Loading...