

Page 1
3728
Kotona Air
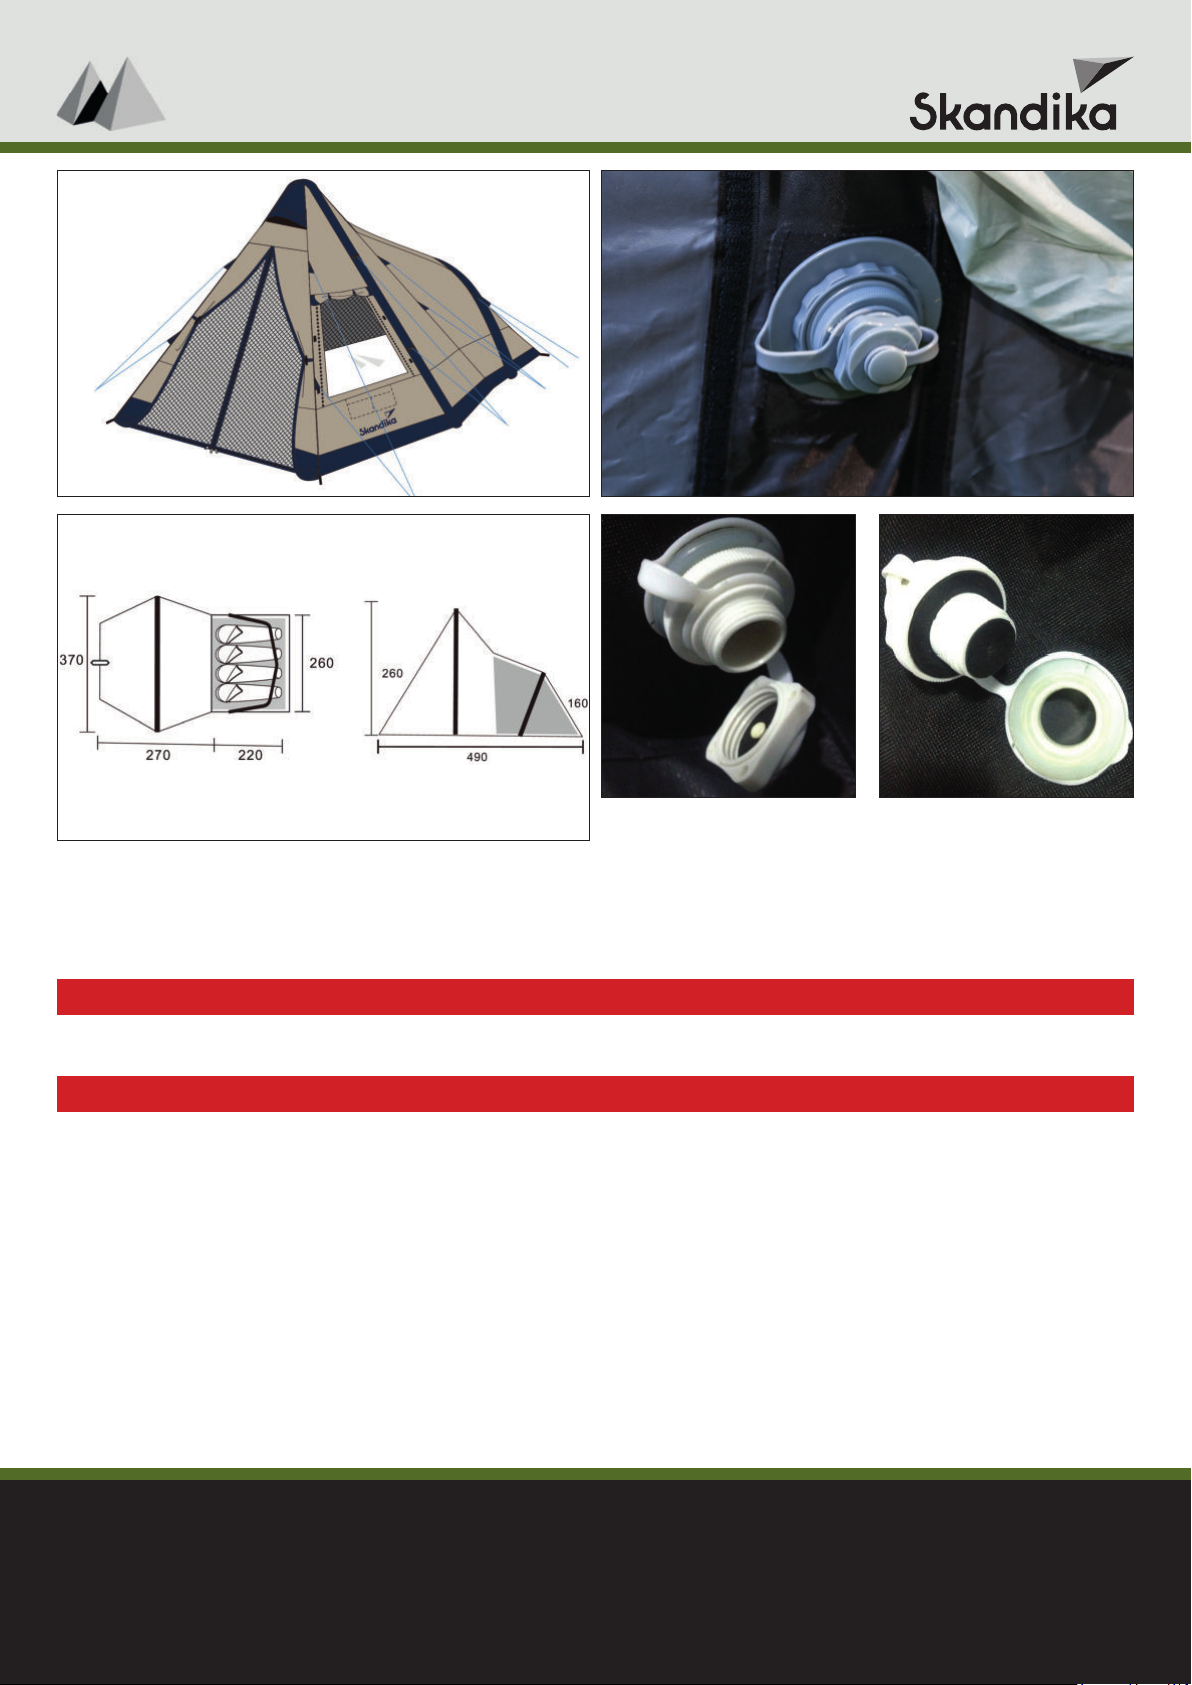
Infl ation Defl ation
ACHTUNG: SCHLÄUCHE NUR BIS 0,35 BAR AUFPUMPEN!
IMPORTANT: ONLY INFLATE TUBES TO A MAX. OF 0.35 BAR!
BRAUCHEN SIE HILFE?
Sehen Sie sich unsere Aufbau-Videos mit einer
visuellen Schritt-für-Schritt-Präsentation an,
die sie beim Aufbau begleiten.
www.skandika.com/zeltaufbau
Wenn Sie weitere Fragen haben, kontaktieren
Sie uns bitte unter [email protected]
NEED HELP?
See our set-up videos with a step by step
visual presentation to guide you along.
www.skandika.com/tentsetup
If you have any further questions, please
contact us at [email protected]
BESOIN D‘AIDE ?
Visionnez nos vidéos d‘installation avec une
présentation visuelle étape par étape pour vous
guider.
www.skandika.com/montagetente
Si vous avez d‘autres questions, n‘hésitez pas à
nous contacter à [email protected]
Page 2

3728
Kotona Air
AUFBAU & PFLEGE SET UP & MAINTENANCE
Wir freuen uns, dass Sie sich für ein Skandika-Zelt entschieden haben. Es bietet Ihnen viel Platz und Komfort in
bekannt hoher Skandika-Qualität.
Bauen Sie das Zelt sicherheitshalber vor dem Urlaub einmal zu Hause auf.
AUFBAUANLEITUNG
Bitte gehen Sie Punkt für Punkt vor, die Reihenfolge ist
wichtig.
• Entfernen Sie den kompletten Inhalt aus der Zelttasche.
• Breiten Sie das Zelt auf einem möglichst glatten und
sauberen Untergrund in der gewünschten Position
aus.
AUSSENZELT
• Stecken Sie die vier Ecken des Zeltbodens mit den
mitgelieferten Heringen ab.
• Öff nen Sie das Ventil am ersten Luftkanal (siehe Bild
„Infl ation“) und verbinden Sie den Adapter der Luftpumpe.
• Pumpen Sie den Luftkanal vollständig auf, entfernen
Sie die Pumpe und schließen Sie das Ventil.
• Wiederholen Sie diesen Vorgang mit den weiteren
Luftkanälen.
• Befestigen Sie die Abspannseilen an allen Abspannpunkten und spannen Sie sie in passender Entfernung
zum Zelt mit den mitgelieferten Heringen ab.
• Beim Abbau des Zeltes, öff nen Sie die Ventile an den
Luftkanälen (siehe Bild „Defl ation“), um die Luft entweichen zu lassen.
INNENZELTE
• Bringen Sie das Innenzelt innerhalb des aufgestellten
Außenzeltes an die passende Stelle.
• Beginnend von der Rückseite des Innenzeltes befestigen Sie die Ecken entlang der unteren Kante des
Außenzeltes.
• Haken Sie das Innenzelt an der Unterseite des Außenzeltes ein, beginnend von der unteren Rückseite und
arbeiten Sie sich nach vorne vor unter Benutzung der
Ringe und Knebel.
WICHTIG
Wenn Sie Schwierigkeiten bei einem der Schritte haben,
besuchen Sie bitte unsere Zeltaufbau-Video Seite, die Bilder und Tipps für jeden Schritt bereit hält.
Sollte noch etwas unklar sein, kontaktieren Sie uns bitte
unter [email protected].
PFLEGE
• Das Zelt muss beim Aufbau und Zusammenfalten
völlig trocken sein. Ansonsten besteht Verschimmelungs- und Verrottungsgefahr.
• Heringe und Nägel sollten immer getrennt von Außen- und Innenzelt verpackt werden.
• Die Bodenwanne des Innenzeltes sollte vor dem Zusammenfalten gereinigt werden.
• Schmutz an der Zeltwand entfernen Sie bitte ausschließlich mit einem weichen Schwamm und klarem
Wasser. Verwenden Sie keine Reinigungsmitte, da
diese der Imprägnierung schaden können.
• Ziehen Sie Heringe und Nägel nicht an den Ringen
bzw. Abspannleinen aus dem Boden.
Thank you for choosing your new tent from the Skandika
range. It provides you with a lot of room and high level of
comfort in the well-known superior quality of Skandika.
Before you go on holiday with the new tent, please do a
test set-up.
ASSEMBLY INSTRUCTIONS
Please follow these instructions point by point in the given
order.
• Remove all the contents from the tent bag.
• Unfold the tent and spread out on the ground in the
desired position, on a level and smooth area.
RAIN FLY
• Peg down the four corners of the groundsheet in the
desired position.
• Open the valve on the fi rst air channel (see picture
“Infl ation”) and connect the pump adapter.
• Pump up the air channel as fi rmly as possible, remove
the pump and close the valve.
• Repeat this with the other air channels.
• Make sure all the guy ropes are attached to the fl ysheet in the appropriate places and peg them out at a
suitable distance from the tent and adjust the tension
accordingly.
• When dismantling the tent, open the valves on the
air channels (see picture “Defl ation”) to let the air
escape.
INNER TENTS
• Take the inner tent inside the assembled fl ysheet to
its appropriate location.
• Starting from the rear of the inner tent, connect the
corners along the bottom edge of the fl ysheet.
• Hook the inner tent to the underside of the fl ysheet
starting at the bottom back and work your way forward to the top using the rings and toggles.
IMPORTANT
If you have diffi culty with any step, please visit our tent
set-up video page below which gives imagery and tips for
each step.
If anything is still not clear then please feel free to contact
us at [email protected].
CARE
• When packing the tent make sure that it is completely
dry, otherwise there is a danger of mildew and rotting.
• Always pack poles and tent pegs separately from inner and outer tent.
• Prior to folding, clean the basement of the inner tent.
• Use a soft sponge and clear water only to clean the
outer tent canvas. Don‘t use any cleaning agent, for
they may be harmful to the impregnation.
• Never pull tent pegs out by means of rings or tensioning ropes.
MONTAGE & ENTRETIEN
Nous nous réjouissons que vous ayez choisi une tente
SKANDIKA. Ces tentes off rent beaucoup d’espace et de
confort et ceci en qualité supérieure marque Skandika.
Pour ne pas courir de risques nous vous conseillons de
faire un essai de montage de la tente avant de partir en
vacances.
MONTAGE
Veuillez procéder point par point, l’ordre des diff érentes
étapes est important.
• Sortez le contenu complet du sac de tente.
• Étalez la tente dans la position voulue sur une surface
de préférence plane et propre.
TENTE EXTÉRIEURE
• Tendez convenablement le tapis de sol et fi xez une
sardine à chaque coin.
• Ouvrez la valve sur le premier conduit d’air (cf. Image
„Infl ation“) et reliez la valve avec l’adaptateur de la
pompe à air.
• Gonfl ez le conduit complètement, et retirez la pompe
et refermez la valve.
• Répétez cette étape avec les autres conduits d’air.
• Fixez les cordes sur les points d’ancrage et tendez-les
à distance convenable de la tente.
• Lors du démontage de la tente, ouvrez les valves (cf.
Image „Defl ation“), pour que l’air s’échappe.
TENTES INTÉRIEURES / CABINES
• Installez convenablement la cabine à l’endroit prévu
pour celle-ci à l’intérieur de la tente.
• En commençant par l’arrière de la cabine accrochez
les coins le long du bord inférieur de la tente extérieure.
• Accrochez la cabine au dessous de la tente extérieure, en commençant par le fond, travaillez de l’arrière
vers l’avant en utilisant les clips sur la paroi extérieure de la cabine et les anneaux correspondants sur
l’intérieur de la toile extérieure.
IMPORTANT
Si vous avez des diffi cultés à n‘importe quelle étape, veuillez consulter notre page vidéo de montage
de tente ci-dessous qui donne des images et des conseils pour chaque étape. Si toutefois quelque chose
n‘est toujours pas clair, n‘hésitez pas à nous contacter à
[email protected].
ENTRETIEN
• Lors du démontage et pliage, prendre le temps de sécher chaque élément afi n d’éviter toute moisissure et
décomposition.
• Toujours ranger les pointes et sardines séparément
des toiles intérieures et extérieures.
• Nettoyer le fond de la tente intérieure avant de la
plier.
• Nettoyer d’éventuelles salissures sur la tente à l’aide
d’un linge doux et de l’eau claire. Ne pas utiliser de
détergent car ceci pourrait détériorer l’enduction
protectrice.
• Ne pas tirer sur les cordes d’ancrage pour extraire les
sardines et pointes du sol.
BRAUCHEN SIE HILFE?
Sehen Sie sich unsere Aufbau-Videos mit einer
visuellen Schritt-für-Schritt-Präsentation an,
die sie beim Aufbau begleiten.
www.skandika.com/zeltaufbau
Wenn Sie weitere Fragen haben, kontaktieren
Sie uns bitte unter [email protected]
NEED HELP?
See our set-up videos with a step by step
visual presentation to guide you along.
www.skandika.com/tentsetup
If you have any further questions, please
contact us at [email protected]
BESOIN D‘AIDE ?
Visionnez nos vidéos d‘installation avec une
présentation visuelle étape par étape pour vous
guider.
www.skandika.com/montagetente
Si vous avez d‘autres questions, n‘hésitez pas à
nous contacter à [email protected]
 Loading...