

1 / 8
Instruction Manual
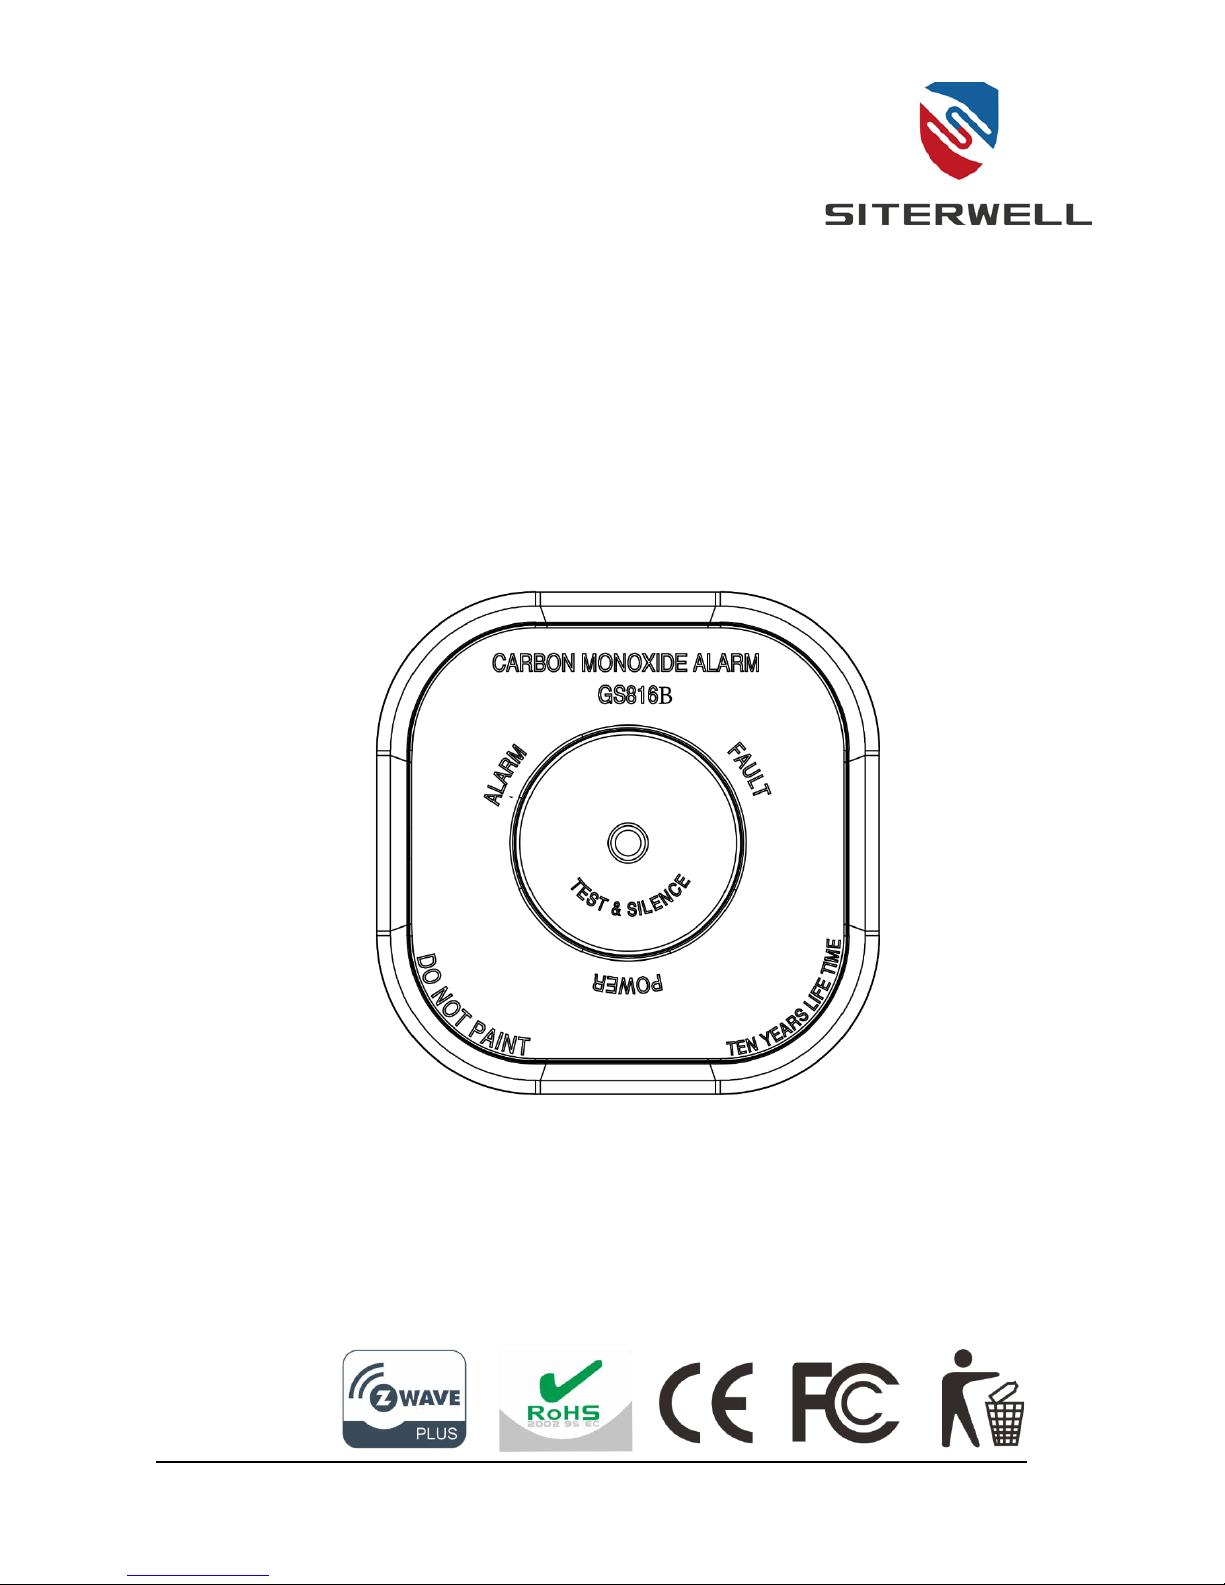
CARBON MONOXIDE ALARM
Thank you for your support
Please read the instruction manual carefully before operating
Please keep the instruction manual for future reference
SITERWELL ELECTRONICS CO.,LIMITED

2 / 8
Product Introduction
Thank you for purchasing the GS816B wi reless carbon monoxide (CO) alarm. This device is a product that has been built using state-of-
the-art technology. This detector is a Z-Wave enabled device and is fully compatible with any Z-Wave enabled network and it’s security
framework.
This user guide contains important information on starting operation and using the devise. Store this user guide in a safe place for future
reference. These instructions are a part of this product – bear this in mind if you pass on this product to others.
CAUTION:
This CO alarm is designed for indoor use only. DO not expose to rain or moisture. DO not knock or drop the detector. DO not
open or tamper with the alarm as this could cause malfunction.
The alarm will not protect against the risk of carbon monoxide poisoning when the battery has drained.
Technical Parameters
Model:GS816B
Type of apparatus: Type A
Power Supply: DC 3V(2pcs alkaline battery)
Recommend battery type: GP GN15A / Raymax LR6
Sensor Type: Electrochemical
Product life: 10 years after initial power up
Sensitivity Setting: Conforms to EN 50291-1:2010+A1:2012 standard.
30PPM Without alarm before 120 mi nutes
50PPM Between 60 to 90 minutes
100PPM Between 10 to 40 minutes
300PPM Less than 3 minutes
Standby Current:<50µA (average)
Alarm Current: <30mA (average)
Operation Ambient Con diti on: -10~+40℃, 30~95% non-condensing
Storage/Tra nsport Ambient Condition: -20~+50℃, 10~95% non-condensing
Alarm sound : ≥85DB at 100cm @3.2±0.5KHz pulsing alarm
CO alarm silence: about 5 minutes
Wireless transmission distance : >30 meters (in open distance )
Radio Protocol: Z-Wave
Security: S2_UNAUTHENTICATED
Radio Frequency: 868.4MHz EU; 908.4MHz US; 921.4MHz ANZ; 869.2MHz RU
NOTE: This CO alarm is designed to detect carbon monoxide gas from any source of combustion. It is not designed to detect any
other gas.
Technical Information
ALARM indicator
Red LED
FAULT indicator
Yellow LED
TEST/SILENCE
button
Sounder
POWER indicator
Green LED

3 / 8
1: POWER indicator
The POWER indicator (green LED) is used to indicate power status of the CO alarm or remote alarm status of the CO alarm. The POWER
indicator will flash every 30 seconds.
2: FAULT indicator
The FAULT indicator (yellow LED) is used to indicate fault warning status of the CO alarm.
3: ALARM indicator
The ALARM indicator (red LED) is used to indicate local alarm status of the CO alarm.
4: TEST&SILENCE button
The TEST&SILENCE button is used to test the unit’s electronics and to silence the unit during alarm.
5: Alarm sounder
The alarm sounder is used to send out CO alarm warning and CO test alarm status and fault warning information.
Product Configuration
This product can be included and operated in any Z-Wave network with other Z-Wave certified devices from other manufacturers and/or other
applications. All non-battery operated nodes within the network will act as repeaters regardless of vendor to increase reliability of the network.
1: Z-Wave Command Classes
COMMAND_CLASS_ZWAVEPLUS_INFO(V2) COMMAND_CLASS_ASSOCIATION(V2)
COMMAND_CLASS_MULTI_CHANNEL_ASSOCIATION(V3) COMMAND_CLASS_ASSOCIATION_GRP_INFO(V3)
COMMAND_CLASS_TRANSPORT_SERVICE(V2) COMMAND_CLASS_VERSION(V2)
COMMAND_CLASS_MANUFACTURER_SPECIFIC(V2) COMMAND_CLASS_DEVICE_RESET_LOCALLY(V1)
COMMAND_CLASS_POWERLEVEL(V1) COMMAND_CLASS_BATTERY(V1)
COMMAND_CLASS_NOTIFICATION (V8) COMMAND_CLASS_WAKE_UP(V2)
COMMAND_CLASS_SECURITY_2(V1) COMMAND_CLASS_SUPERVISION(V1)
S2 supported Command Classes:
COMMAND_CLASS_VERSION COMMAND_CLASS_ASSOCIATION
COMMAND_CLASS_MULTI_CHANNEL_ASSOCIATION COMMAND_CLASS_ASSOCIATION_GRP_INFO
COMMAND_CLASS_MANUFACTURER_SPECIFIC COMMAND_CLASS_DEVICE_RESET_LOCALLY
COMMAND_CLASS_POWERLEVEL COMMAND_CLASS_BATTERY
COMMAND_CLASS_NOTIFICATION COMMAND_CLASS_WAKE_UP
COMMAND_CLASS_SUPERVISION
Supported Notification Type: CO Alarm(0x02)
CO Alarm Supported Event:
a: Carbon monoxide detected, Unknown Location(0x02) b: Carbon monoxide Test (0x03)
c: Replacement Required, Unspecified reason (0x04) d: Replacement Required, End-of-life (0x05)
e: Alarm Silenced (0x06)
Note: After the device is powered again all previously triggered notifications will be cleared/set to inactive.
2: Include this device into any Z-Wave network
For “Inclusion” in (adding to) a network:
a: Put the Z-Wave interface controller int o “include” mode, and following its instruction to add the GS816B to your controller. To get in the
“inclusion” mode, the position of the detector and controller should be kept in the usual working position.
b: Power on the detector, in 2 seconds, press the button three times in the warm-up state or the normal standby st ate, this detector will be
automatically with the controller network with the red light flash every two seconds . I f the network is successful, the red led always on about
5 seconds, else the yellow led always on 5 seconds.
Note: Inclusion network status, you can click on the button to exit.
3: Exclude this device from any Z-Wave network
For “Exclusion” from (removing from) a network:
a: Put the Z-Wave Interface Controller into “exclusion” mode.
b: Power on the detector, in 2 seconds, press the button three times in the warm-up state or the normal standby st ate, this detector will be
automatically remove from the controller network with the red light flash every two seconds. If the network is exclusion successful, the red led

4 / 8
always on about 5 seconds, else the yellow led always on 5 seconds.
Note: Exclusion network status, you can click on the button to exit.
Note: If the alarm is remove(excluded), then the sensor will be itself restored to factory default settings.
4: Factory Default Reset
It happens automatically when the device is excluded or you can use the following steps to reset factory settings.
a: Remove the battery.
b: Press the button and don't let go. And then connecting the battery, the red led will on 3 seconds,3 seconds later, when the red light is off,
then release the button.
c. When the button is released, the red light is lit for 3 seconds. In these 3 seconds, press the button, then the red led will flash quickly about
10 seconds (NOTE: Do not turn off the power when the red led flashes). After successful recovery factory settings, the product into
preheating state.
Note: If this sensor is reset, the information of Z-Wave network in the sensor will be deleted. The sensor
will be itself restored to factory default settings. Please use this procedure only when the network
primary controller is missing or otherwise inoperable.
NOTE: Damage to the Z-Wave module will not affect the main function of the alarm, only affect the
module related functions.
Associations
When networking with the product host,this feature is used to associate other products. This has the effect that when the sensor detects
the CO leak, all devices associated with the sensor will receive the relevant reports and can be controlled by the sensor, e.g. the CO value,
alarm device etc.
This device supports three linkage groups: The group 1 is the lifeline group.
Linkage group 2 is assigned to the devices status - sending BASIC SET control frame to the associated devices having detected the CO
leak.
Linkage group 3 reports the detection's status to the associated device.
The maximum number of devices that can be added to the linkage group 1 is 5 number,linkagegroup2 or linkage group3 is 5 numbers.
This product will send a “BASIC SET(0xFF)” message to associated group, when press and release the test button(<2s) t o check the
function; and this CO al arm will also send a “BASIC SET(0x00)” message to associated group, after end of test alarm(<10s). This CO alarm
will send a “BASIC SET(0xFF)” message to associated group, when this product is CO alarm (Co nforms to EN 50291-1:2010+A1:2012
standard); and this product will also send a “BASIC SET(0x00)” message to associated group, when CO alarm is cleared.
Installation instructions
WARNING: This alarm should be installed by a competent person.
WARNING: Installation of the alarm should not be used as a substitute for proper installation, use and maintenance of fuel burning
appliances including appropriate ventilation and exhaust systems.
1: Installation location
When choosing your installation locations, make sure you can hear the alarm from all sleeping areas. If you install only one CO alarm in
your home, install the alarm near bedrooms. Not in the basement or furnace room. The recommended position for the unit should be at least
1.8 meters (about 6 feet) above the floor level. Far away metal installation.
2: Mounting step
a: Drilling two ф5.0mm holes in the wall, the distance between two holes center is 30mm(1.18 inch),then insert ing two plastic stopper
provided into the holes.
b: Insert the two screws provided until the screw heads are approximately 5mm from wall.
c: Test the unit by using the TEST&SILENCE button. Ensure the unit sound is alarm pattern.
d: Hook the unit over the screws onto keyholes in back of unit.

5 / 8
As you install the battery on the unit, maybe it will sound for several minutes, then stop and enter in normal operation mode. If it
always sounds, please call our agent.
3: Recommended installation locations:
The following suggestions are intended to help you with the placement and installation of your CO alarm.
Place out of the reach of children. Under no circumstance should children be allowed to handle the CO alarm.
Install in a bedroom or hallway located close to the sleeping area. Take special care to verify the alarm can be heard in sleeping areas.
It is recommended that a CO alarm be installed on each level of a multilevel home.
Locate 1~3 meter (3.3~10feet) away from all fuel burning appliances.
Placing at eye level allows for optimum monitoring of the red and green indicator lights.
Insure that all vents of the unit are unobstructed.
Do not install in dead air spaces such as peaks of vaulted ceilings, or gabled roofs.
Do not install in turbulent air from ceiling fans.
Do not place near fresh air vents or close to doors and windows that open to the outside.
Keep the CO alarm away from excessively dusty, dirty , or greasy areas such as kitchens, garages and furnace rooms. Dust, grease and
household chemicals can affect the sensor.
Keep out of damp and humid areas such as the bath room. Avoid spraying aerosols near the CO alarm.
Do not install in areas where the temperature is below-10℃ or hotter than 40℃.
Do not place behind curtains or furniture. CO must be able to reach the sensor for the unit to accurately detect CO.
Do not place near metal objects, otherwise it will affect the distance of wireless signal transmission.
Tips
1: Start up
After connecting the battery, all thr ee LEDs light up briefly and the CO alarm confirms start-up with a beep. After power on, 30 seconds before
the green LED flash every 3 seconds, this is preheated state. 30 seconds later the green LED flashing every 30 seconds indicates the unit is
functioning properly.
Power on time, if the yellow LED on 5 seconds, the Z-Wave module will be fault, but it is not affect the main function of
the alarm.
2: Normal operation
The POWER indicator (green LED) flashing every 30 seconds.
3: Fault warning
If the unit chirps once every 30 seconds, with FAUL T indicator (yellow LED and beep) will be flash. It indicates the CO alarm is in malfunction
condition. That means your CO alarm has no detecting function and no respond CO.
Replace battery, if condition continues, the CO alarm has malfunctioned. Replace immediately. Please contact us to more service.
4: Low battery voltage warning
If the unit chirps twice every 30 seconds, with FAULT indicator (yellow LED and beep) will be flash. It indicates the battery is low. You need to
replace the battery.

6 / 8
NOTE: The unit will not protect against the risk of carbon monoxide poisoning when the battery has drained.
5: End of life warning
If the unit chirps 3 times every 30 seconds with FAULT indicator (yellow LED and beep) flash. It indicates end of life of CO alarm. You need
to immediately replace the CO alarm.
6: CO alarm warning
When the unit detects a dangerous level of CO, the unit will emit a loud alarm pattern. The alarm signal pattern is 4 quick beeps followed by
5 seconds of silence. This cycle repeats as long as a dangerous CO condition exists. The red alarm LED will flash the same pattern.
This signal will repeated until the alarm resets after dissipation of CO or the alarm signal is manually silenced.
7: CO alarm warning silence
If the unit is under the CO alarm warning, enable the TEST&SILENCE button, it will come into silence status for 5 minutes, and ALARM
indicator (red LED) still keep flashing.
Note: The alarm signal will re-energized within 5 minutes from the time the TEST&SILENCE button is operated if the concentration
of CO surrounding the alarm remains at 45ppm or greater.
8: Human alarm sounds
If the unit come into the status of CO alarm warning, the unit will start in a lower volume (<80dB) for around 10 seconds, then issuing a normal
volume (>85dB). It will avoid people to be scared suddenly by a very loud alarm sound.
9: Tes t the unit
To test the unit, press and hold TEST&SILENCE button about 2 seconds, you should hear alarm sound patterns and with a corresponding
ALARM indicator (red LED) flash.
The test alarm sound pattern includes:4 short beeps (normal volume), 5 seconds pause.
NOTE: After the TEST&SILENCE button is enabled, the alarm sounds and the red alarm light flashes. This does not indicate that
CO is present.
NOTE: Test the unit monthly! If at any time your unit does not perform as described, replace it immediately.
Battery Usage T ip s
Twice chirps with corresponding FAULT indicator (yellow LED) flashing twice every 30 seconds indicates that the battery is low battery, you
must to replace the battery with battery specified.
To install or replace the battery in unit, please perform the following steps:
1: Take down the unit from screw heads of the wall.
2: Open battery compartment.
3: Remove the old battery, and replaced by new battery.
4: Close battery compartment.
5: Hook the alarm body over the screw heads onto keyholes in back of the unit.
6: Test alarm using the TEST&SILENCE button, if the testing alarm is ok, means the product can work normally.
WARNING:Use only the battery specified. Use of different battery may have a detrimental effect on the CO alarm. A good safety
measure is to replace the battery at least once a year.
NOTE: Re install immediately after cleaning and then test unit using the TEST&SILENCE button!
What to do if the alarm sounds
WARNING! –Action of this device indicates the presence of dangerous levels of CO! CO can be fatal! If the alarm sounds:
If a carbon monoxide apparatus initiates an alarm signal it is recommended that the following actions are taken in the order given:
1: Keep calm and open all doors and windows to increase the rate of ventilation, but see also item a) below. Stop using all fuel-burning
appliances and ensure, if possible, that they are turned off, e.g. for gas appliances, isolate the emergency control valve;
2: If the alarm continues to be activated, then evacuate the premises. Leave the doors and windows open, and only re-enter the building
when the alarm has stopped. In multi-occupancy and multi-storey premi ses, ensure that all the occupants are alerted to the risk;
3: Get medical help for anyone suffering the effects of carbon monoxide poisoning, see point Health effects of carbon monoxide (CO)
(T able A), and advise that carbon monoxide inhalation is suspected;
4: Telephone the appropriate appliance servicing and/or maintenance agency or, when necessary, the relevant fuel supplier on their
emergency number or the national Gas Emergency Service Provider, if appropriate, so that the source of carbon monoxide emissions can

7 / 8
be identified and corrected. Unless the reason for the alarm is obviously spurious, do not use the fuel-burning appliances again, until they
have been checked and cleared for use by a competent person according to national regulations.
General maintenance
To keep your CO alarm in good working order, please follow these simple steps:
1: Verify the unit's alarm sound and indicators operation by enable the TEST&SILENCE button once a week.
2: Remove the unit from the wall and clean the alarm cover and vents with a soft brush attachment once a month to remove dust and dirt.
3: Never use detergents or other solvents to clean the unit.
4: Avoid spraying air fresheners, hair spray or other aerosols near the CO alarm.
5: Do not paint the unit. Paint will seal the vents and interfere with the sensor's ability to detect CO. Never attempt to disassemble the unit or
clean inside. This action will void your warranty.
6: As soon as possible, place the CO alarm back in its proper location to assure continuous protection from carbon monoxide poisoning.
7: When household cleaning supplies or similar contaminants are used, the area should be ventilated.
WARNING: If the apparatus is tampered with, this have the risk of malfunction electric shock or malfunction.
WARNING: The following substances can affect the sensor and may cause false actions: methane, propane, isobutene,
isopropanol, ethylene, benzene, toluene, eth yl acetate, hydrogen sulfide, sulfur dioxides, alcohol based products,
paints, thinner, solvents, adhesives, hair sprays, after shaves ,perfumes and some cleaning agents.
WARNING:Your CO alarm will not be operational and will not monitor for CO levels without battery.
WARNING: This apparatus is designed to protect individuals from the acute effects of carbon monoxide exposure. It will not fully
safeguard individuals with specific medical conditions. If in doubt consult a medical practitioner.
Health effects of carbon monoxide (CO)
1: Toxic effects
Carbon monoxide (CO) is a colourless, odourless, non-irritating gas classified as a chemical asphyxiant and whose toxic action is a direct
result of the hypoxia produced by a given exposure.
CO is rapidly absorbed through the lungs, diffuses across the alveolar capillary membrane and is reversibly bound with haemoglobin as
carboxyhaemoglobin (COHb), however, a minute amount is present in the plasma.The affinity of haemoglobin for CO is over 200 times its
affinity for oxygen. This reduces the oxygen carrying capacity of the blood, and has an effect on the dissociation of oxyhaemoglobin, which
further reduces the oxygen supply t o t he tiss ues. CO is chemically unchanged in the body, and is eliminated in expired air. The elimination is
determined by the same factors that applied during absorption. The half-life while breathing room air is 2 h - 6,5 h depending on the initial
COHb level.
If the CO level in the inhaled air is constant, the level of COHb in the blood will approach an equilibrium (saturation) state after several hours.
However, the rate at which the equilibrium is reached depends on many factors, e.g. lung ventilation rate (physical activity) and alveolar
capillary transfer, cardiac parameters, blood haemoglobi n concentration, barometric pressure, oxygen and carbon dioxide concentration in
the inhaled air, but the two most important factors in determining the COHb level are the CO concentration and the duration of exposure.
Table A – Health effects of COHb blood levels on healthy adu lts
% COHb
Effects
0,3 – 0,7
Normal range in non-smokers due to endogenous CO production
0,7 – 2,9
No proven physiological changes
2,9 – 4,5
Cardio-vascular changes in cardiac patients
4 – 6
Usual values observed in smokers, impairment in psychomotor tests
7 – 10 Cardio-vascular changes in non-cardiac patients (increased cardiac output and coronary blood flow)
10 – 20
Slight headache, weakness, potential burden on foetus
20 – 30
Severe headache, nausea, impairment in limb movements
30 – 40 Severe headache, irritability, confusion, impairment in visual acuity, nausea, muscular weakness, dizziness
40 – 50
Convulsions and unconsciousness
60 – 70
Coma, collapse, death
Source: U.S. Environmental Protection Agency 1984

8 / 8
2: Chronic effects on high risk groups
Individuals with coronary artery disease exposed to low levels of CO show reduced ability to exercise and the time of onset of exerciseinduced angina pectoris in such patients exposed to low levels of CO is reduced. Carbon monoxide readily crosses the placental barrier and
may endanger the normal development of the foetus.
A number of high-risk groups are particularly sensitive to the effects of CO because of various organ impairments or specific changes ,
mainly:
a: Those whose oxygen carrying capacity is decreased due to anaemia or other haemoglobin disorders;
b: Those with increased oxygen needs such as those encountered in fever, hyperthyroidism or pregnancy;
c: Those with systemic hypoxia due to respiratory insufficiency;
d: Those with heart disease and any vascular insufficiency.
3: Normal COHb levels:
Under normal conditions, humans typically have low levels of COHb of between 0,3 % and 0,7 % present within the body. These levels are
considered neither beneficial nor harmful.
4: Tobacco smoking
Tobacco smokers are exposed to significant concentrations of CO. In cigarette sm okers, the COHb concent ration varies between 5 % - 9 %,
while heavy cigar smokers may exceed 10 %.
WARNING!-Exposure to high levels of carbon monoxide can be fatal or cause permanent damage and disabilities.
WARNING : The apparatus may not prevent the chronic effects of carbon monoxide exposure, and that the apparatus will not fully
safeguard individuals at special risk.
Manufacturer and Service information
SITERWELL ELECTRONICS CO.,LIMITED
ADDRESS: NO.76 HAICHUAN ROAD, CHUANGYE ZONE B, JIANGBEI, NINGBO, CHINA
TEL: 0086-0574-87729581
FAX: 0086-0574-87729581
E-MAIL:
Sales@china-siter.com
Guarantee
THREE YEARS LIMITED WARRANTY
Dear customer,
Our products are subject to strict quality controls. Howev er , if this device sh ould unexpectedly not function perfe ctly , please
contact the customer services address given on warranty service information. This is the only way for you to be able to return
your device of have it picked up free.
The warranty period is 36 months and begins on the day of purchase.
Please always keep your till receipt as proof of purchase. Warranty claims can only be made for possible defects caused
by material and production faults.
During the warranty period, defective devices can be sent to the service address given overleaf for you (post paid). You
will then receive a new or repaired device back free. After the warranty period has expired you still have the possibility of
sending the defective device for repair to the address given overleaf. Repairs carried out after the warranty period must be
paid for.
In the event of misuse or improper treatment, use of force or intervention not carried out by our authorized service
branches, the warranty is no longer valid. This warranty does not restrict your legal rights.
NOTE: In the event of a warranty claim, please return the till receipt an d completed warranty card with fault description tog ether
with the defective device.
NOTE: The warranty does cover the batteries supplied.
 Loading...