

Sitecom DC-227 User Manual

ADSL2+ Modem
DC-227
Full manual

Sitecom ADSL2+ Modem DC-227
Contents
1. INTRODUCTION........................................................................................... 4
I
NTENDED AUDIENCE
G
ENERAL DESCRIPTION
S
PECIFICATIONS
ADSL Standard ..................................................................................................4
Software Features ..............................................................................................5
Management .....................................................................................................5
2. HARDWARE INSTALLATION ......................................................................... 6
2.1 P
ANEL LAYOUT
2.1.1 Top & frontpanel ........................................................................................6
2.1.2 Rear Panel ................................................................................................7
2.2 P
ROCEDURE FOR HARDWARE INSTALLATION
2.2.1 Hardware Requirements...........................................................................8
2.2.2 Decide where to place your ADSL2+ Modem...............................................8
.................................................................................................4
..............................................................................................4
.......................................................................................................4
....................................................................................................6
..................................................................8
2.2.3 Setup LAN connection..............................................................................8
2.2.4 Hardware Setup Procedures .....................................................................8
2.2.5 Power on ...............................................................................................8
3 NETWORK SETTINGS AND SOFTWARE INSTALLATION ................................... 9
3.1 ....................................................................................................................... 9
4 CONFIGURING THE ADSL2+ MODEM ............................................................. 10
4.1 S
TART-UP AND LOG IN
4.1.1 LAN Settings ...........................................................................................12
4.1.2 ARP Settings ...........................................................................................13
4.1.3 DHCP .....................................................................................................14
4.1.4 Route .....................................................................................................15
4.1.5 Interface.................................................................................................16
4.1.6 Statistics ................................................................................................17
5 RUN SETUP WIZARD ..................................................................................... 18
6 BASIC SETTINGS ........................................................................................... 20
.........................................................................................10
6.1 DNS S
6.2 DHCP S
6.2.1 DHCP Server ...........................................................................................22
6.2.2 DHCP Relay Configuration .........................................................................23
ETTINGS
ETTINGS
................................................................................................20
..............................................................................................21
2

Please check www.sitecom.com for up to date drivers & utilities, manuals and support
6.3 DDNS S
6.4 IGMP............................................................................................................26
6.5 UPNP ............................................................................................................28
6.6 RIP ..............................................................................................................29
7 FIREWALL SETTINGS ...................................................................................... 31
7.1 P
ORT FORWARDING
7.2 URL B
7.3 DMZ.............................................................................................................34
7.4 IP F
7.5 MAC F
7.6 R
EMOTE MANAGEMENT
8 ADVANCED SETTINGS ..................................................................................... 40
8.1 B
RIDGING
8.2 R
OUTING
8.3 SNMP ...........................................................................................................43
ETTINGS
LOCKING
ILTERING
ILTERING
.......................................................................................................40
........................................................................................................41
..............................................................................................24
............................................................................................31
................................................................................................33
...................................................................................................35
................................................................................................37
........................................................................................39
8.4 QOS.............................................................................................................45
8.5 M
ISC
.............................................................................................................47
8.6 ADSL SET......................................................................................................48
8.7 ADSL ATM.....................................................................................................50
9 TOOLBOX ........................................................................................................ 52
9.1 T
IMEZONE
9.2 ACL..............................................................................................................54
9.3 F
IRMWARE UPGRADE
9.4 B
ACKUP SETTINGS
9.5 C
OMMIT AND REBOOT
9.6 P
ING
9.7 S
YSLOG
APPENDICES ...................................................................................................... 60
A
PPENDIX A: HOW TO MANUALLY FIND YOUR
A
PPENDIX B: MAPPING
.......................................................................................................53
..........................................................................................55
.............................................................................................56
.........................................................................................57
.............................................................................................................58
.........................................................................................................59
PVC
PC’S IP
S TO
VLANS.......................................................................61
AND
MAC
ADDRESS
.................................60
3

Sitecom ADSL2+ Modem DC-227
1. Introduction
The ADSL2+ Modem user manual contains the guidance to install and configure the
DC-227 ADSL2+ Modem using the Web GUI.
Intended Audience
This manual is intended for end users to access ADSL broadband service.
General Description
The DC-227 modem is a high-speed ADSL2+ modem that is specifically designed to
connect to the Internet and to directly connect to your local area network (LAN) via
high-speed 10/100 Mbps Ethernet. The ADSL2+ modem is compatible with the latest
ADSL standards, including ADSL2 and ADSL2+, and supports up to 24 Mbps
downstream and 1.5 Mbps upstream to deliver true broadband speed and throughput.
To ensure fully compatibility, the DSL device was tested with all major DSLAMs, and
support standard 10/100 Mbps Base-T Ethernet interface Auto MDI/MDIx 10/100 Switch
function allowing user easily to link to PC or other Switches/Hubs. The DSL device is an
idea solution for multi-users utilizing build-in channel mode (PPPoE/A, IPoA, IPoE), IP
routing, NAT functionalities sharing the ADSL link. The DSL device is also a perfect
solution for the residential users, it supports the users with bridge mode in host based
PPPoE Client.
Specifications
ADSL Standard
ITU-T G.992.1(G.dmt)
ANSI T1.413 Issue 2
G.992.2 (G.lite)
G.994.1 (G.hs)
Auto-negotiating rate adaptation
ADSL2 G.dmt.bis (G.992.3)
ADSL2 G.lite.bis (G.992.4)
ADSL2+ (G.992.5)
4

Please check www.sitecom.com for up to date drivers & utilities, manuals and support
Software Features
RFC-1483/2684 LLC/VC-Mux bridged/routed mode
RFC-1577 Classical IP over ATM
RFC-2516 PPPoE
RFC-2364 PPPoA
ITU-T 1.610 F4/F5 OAM send and receive loop-back
802.1d Spanning-Tree Protocol
DHCP Client/Server/Relay
NAT
RIP v1/v2
DNS Relay Agent
DMZ support
IGMP Proxy/Snooping
Stateful Packet Inspection
Protection against Denial of Service attacks
IP Packet Filtering
QoS
Dynamic DNS
UPnP support
Management
Web-based Configuration
Menu-driven Command-line Interpreter
Telnet Remote Management
SNMP v1/v2/Trap
Firmware upgrade through FTP, TFTP and HTTP
Configuration backup/restore
5
Sitecom ADSL2+ Modem DC-227
2. Hardware Installation
2.1 Panel Layout
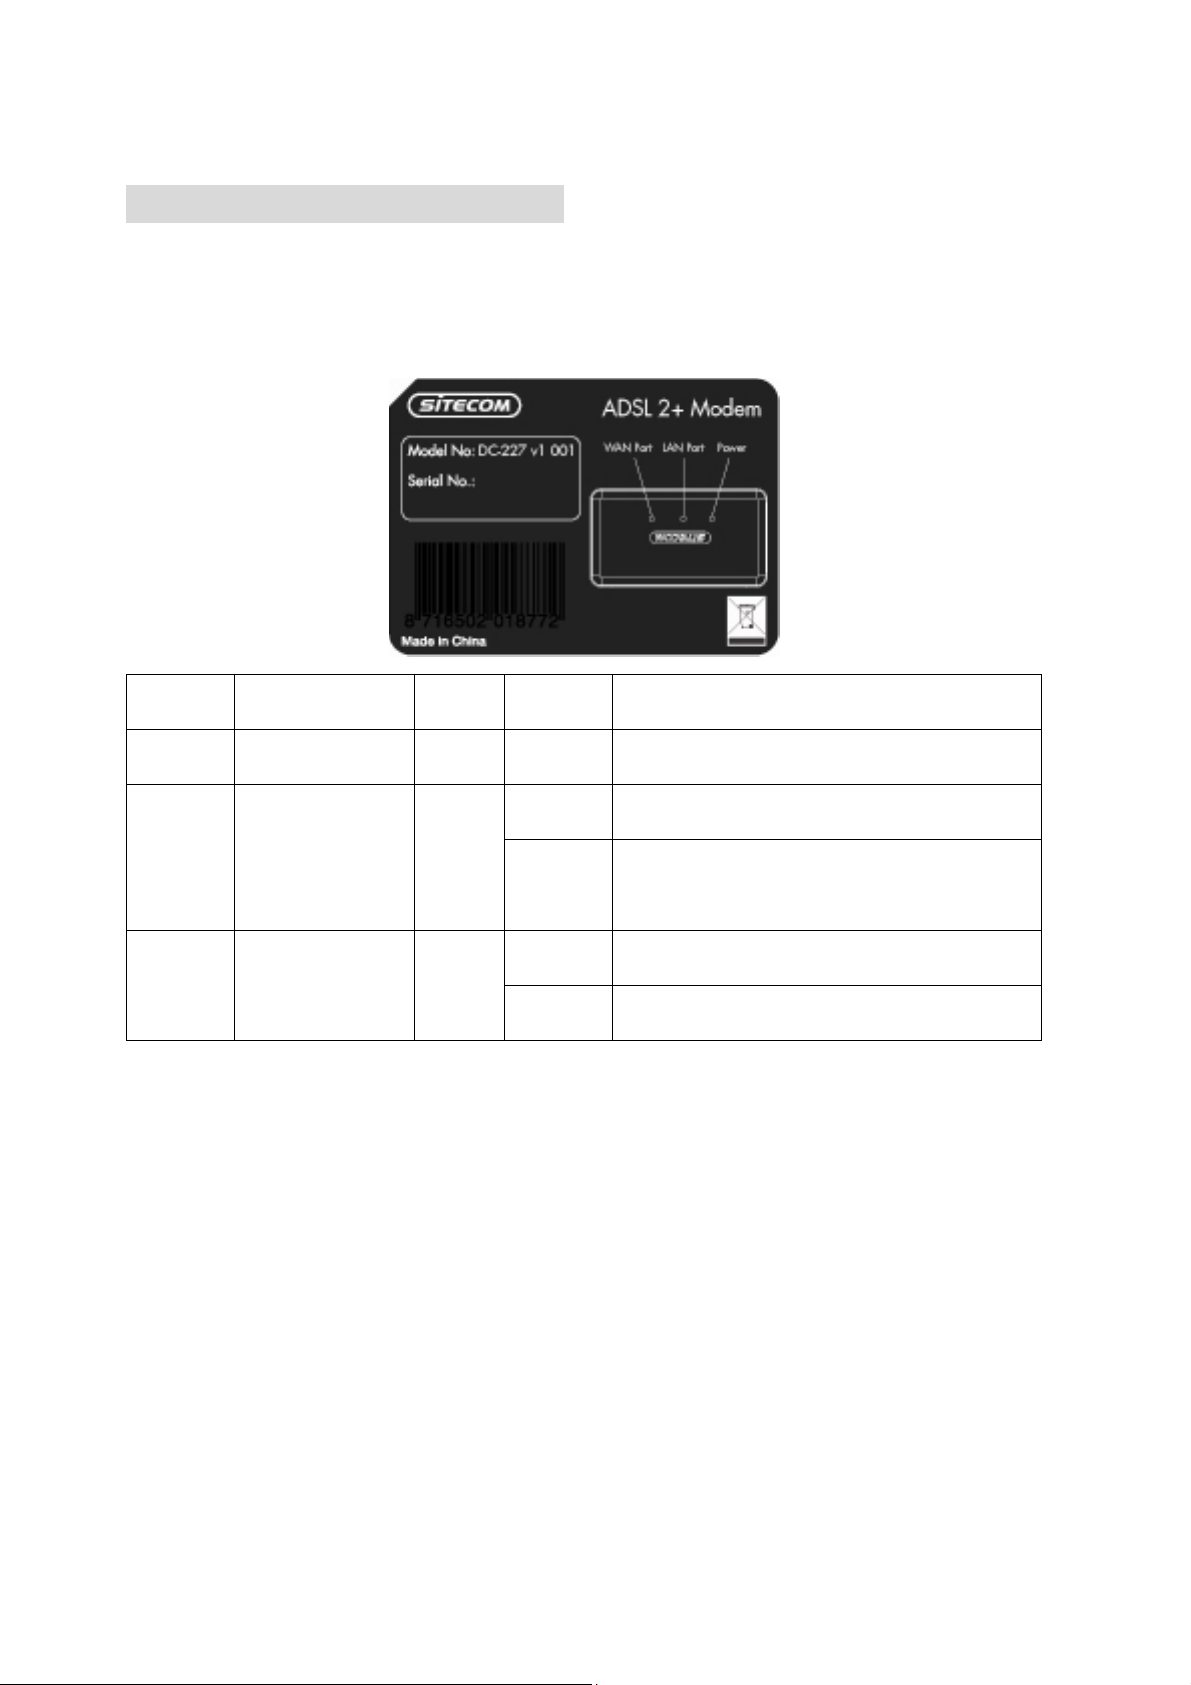
2.1.1 Backlabel
LED Function Color Status Description
POWER Power indication Green On Power is connected.
On ADSL line was detected.
WAN Link Status Green
Blinking
Blinking The LAN port is sending or receiving data.
LAN Data Rate Green
On The LAN port is connected.
The modem couldn’t detect the ADSL
signal, or is attempting to get line sync.
6

Please check www.sitecom.com for up to date drivers & utilities, manuals and support
To reset the system settings to factory defaults, press the reset button for at
2.1.2 Rear Panel
Port Description
WAN The port to connect with your ADSL line.
Ethernet The ports where you can connect your computer or other device.
Reset
least 10 seconds.
POWER The power inlet.
7

Sitecom ADSL2+ Modem DC-227
2.2 Procedure for Hardware Installation
2.2.1 Hardware Requirements
• ADSL/ADSL2/ADSL2+ Internet subscription
• 9V AC power adapter
• RJ-45 Ethernet cable
• RJ-11 ADSL line
2.2.2 Decide where to place your ADSL2+ Modem
You can place your ADSL2+ Modem on a desk or other flat surface, or you can mount it
on a wall. This location must be close to a power connection and your ADSL/Telephone
connection.
2.2.3 Setup LAN connection
Connect an Ethernet cable to one of your computers.
2.2.4 Hardware Setup Procedures
1. Connect the RJ-11 cable from the DC-227 to your ADSL line.
2. Connect the RJ-45 line from your PC to an Ethernet port on the DC-227.
3. Plug the power supply into a wall outlet.
2.2.5 Power on
Connect the power-adapter to the power inlet port and connect it to a wall outlet, this
product will automatically enter the self-test phase. When it is in the self-test phase, the
Power LED will not be lighted for about 15 seconds, and then Power will flash 9 times to
indicate that the self-test operation has finished. Finally, power will be lit continuously to
indicate that this product is in normal operation.
8
Please check www.sitecom.com for up to date drivers & utilities, manuals and support
3 Network Settings and Software Installation
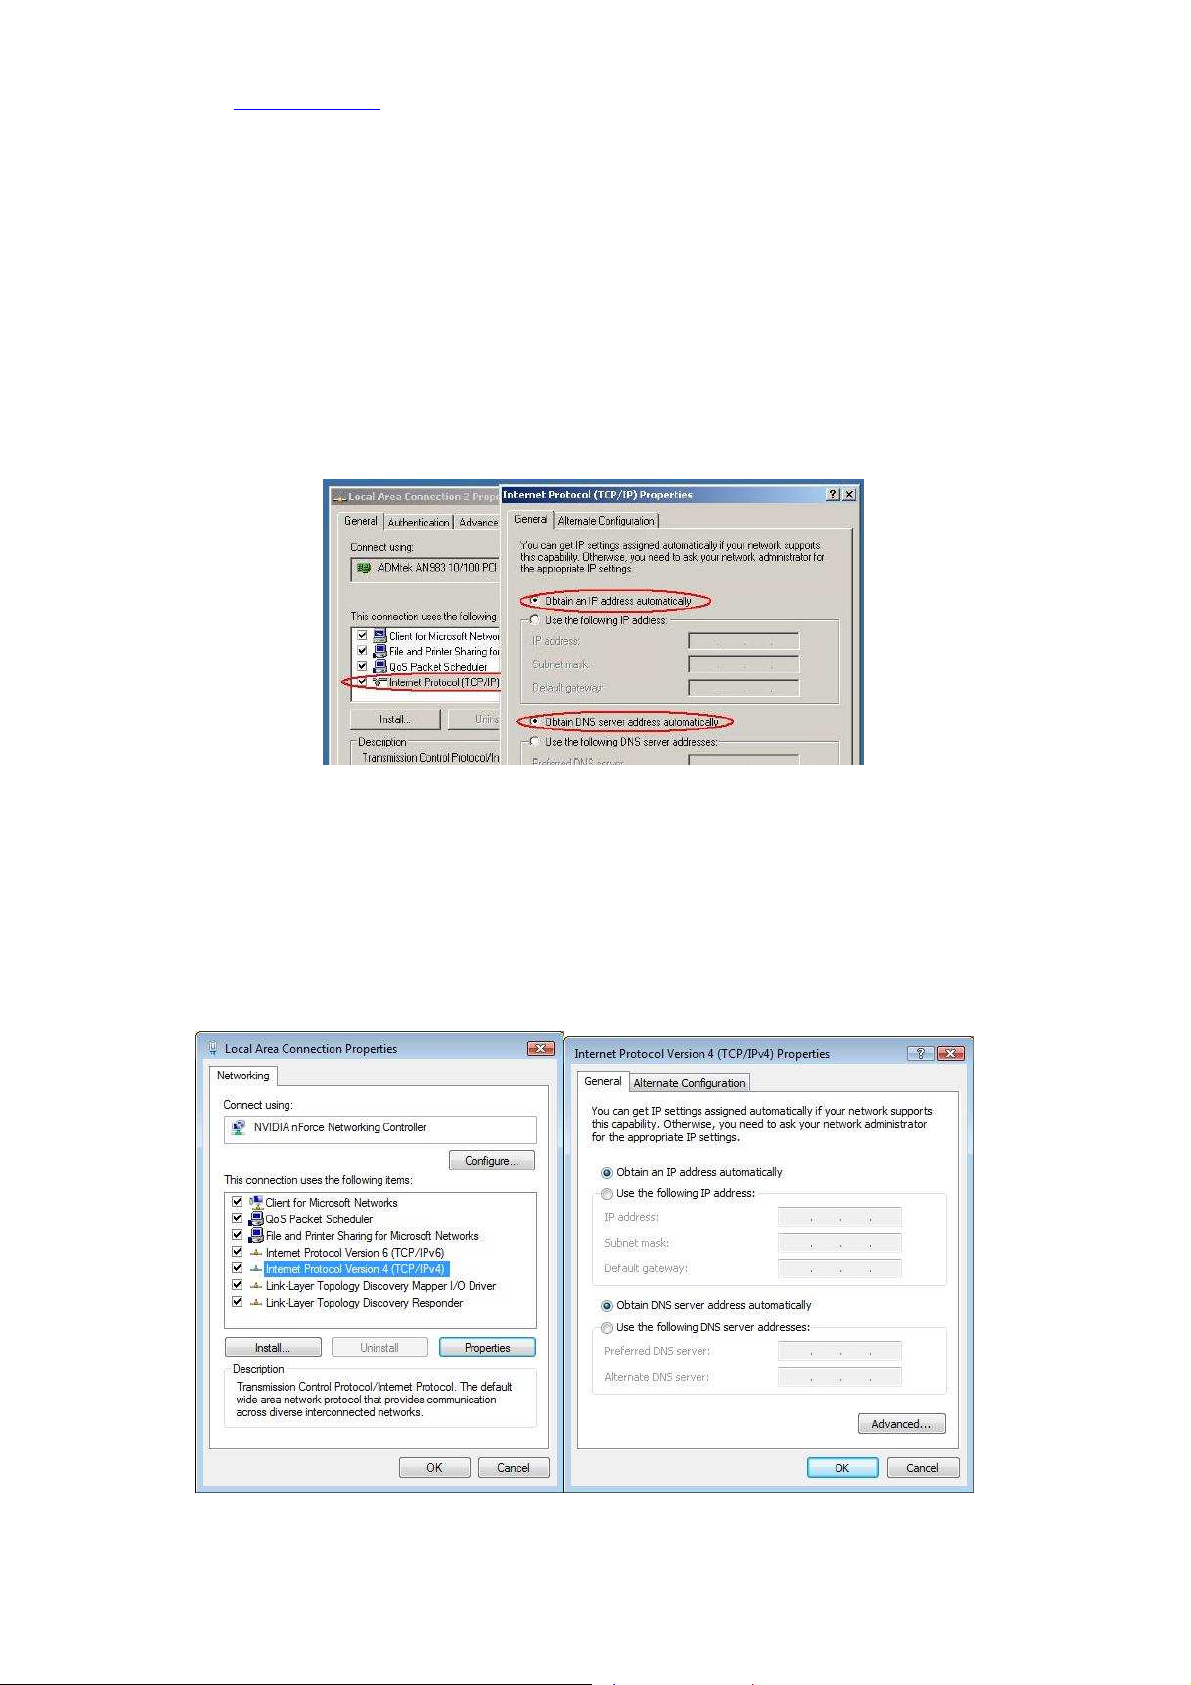
3.1 Windows 2000/XP
1. Go to START > Configuration screen > (Network and Internet connections >) Network
connections.
2. Click on your network connection with the right hand mouse button and select
‘Properties’.
3. Click on ‘Internetprotocol (TCP/IP)’, and click on the button ‘Properties’.
4. Select ‘Obtain an IP address automatically’.
5. Click on OK, then on Close, and restart your PC.
3.2 Windows Vista
1. Click the Windows (Start) button.
2. Right-click with the mouse on ‘Network’, and select ‘Properties’.
3. Click ‘status’ of your network connection, and select ‘Properties’ in the new window.
4. In User Account Control click ‘continue’.
5. Click ‘Internet Protocol Version 4 (TCP/IPv4)’, then click ‘Properties’.
6. Select ‘Obtain an IP address automatically’.
7. Click OK, then close all windows and restart your PC.
9
Sitecom ADSL2+ Modem DC-227
4 Configuring the ADSL2+ Modem
This ADSL2+ Modem uses a easy-setup web-interface which can be opened through your
webbrowser, such as Netscape Communicator or Internet Explorer. This approach can be
adopted in any MS Windows, Macintosh or UNIX based platforms.
The default configurations for the system are listed below.
• LAN IP address: 10.0.0.1 Subnet Mask: 255.255.255.0
• VPI/VCI: 8/35, Encapsulation: 1483 Bridged IP LLC
[Administrator Login]
• Username: admin, Password: admin
[User Login]
• Username: user, Password: user
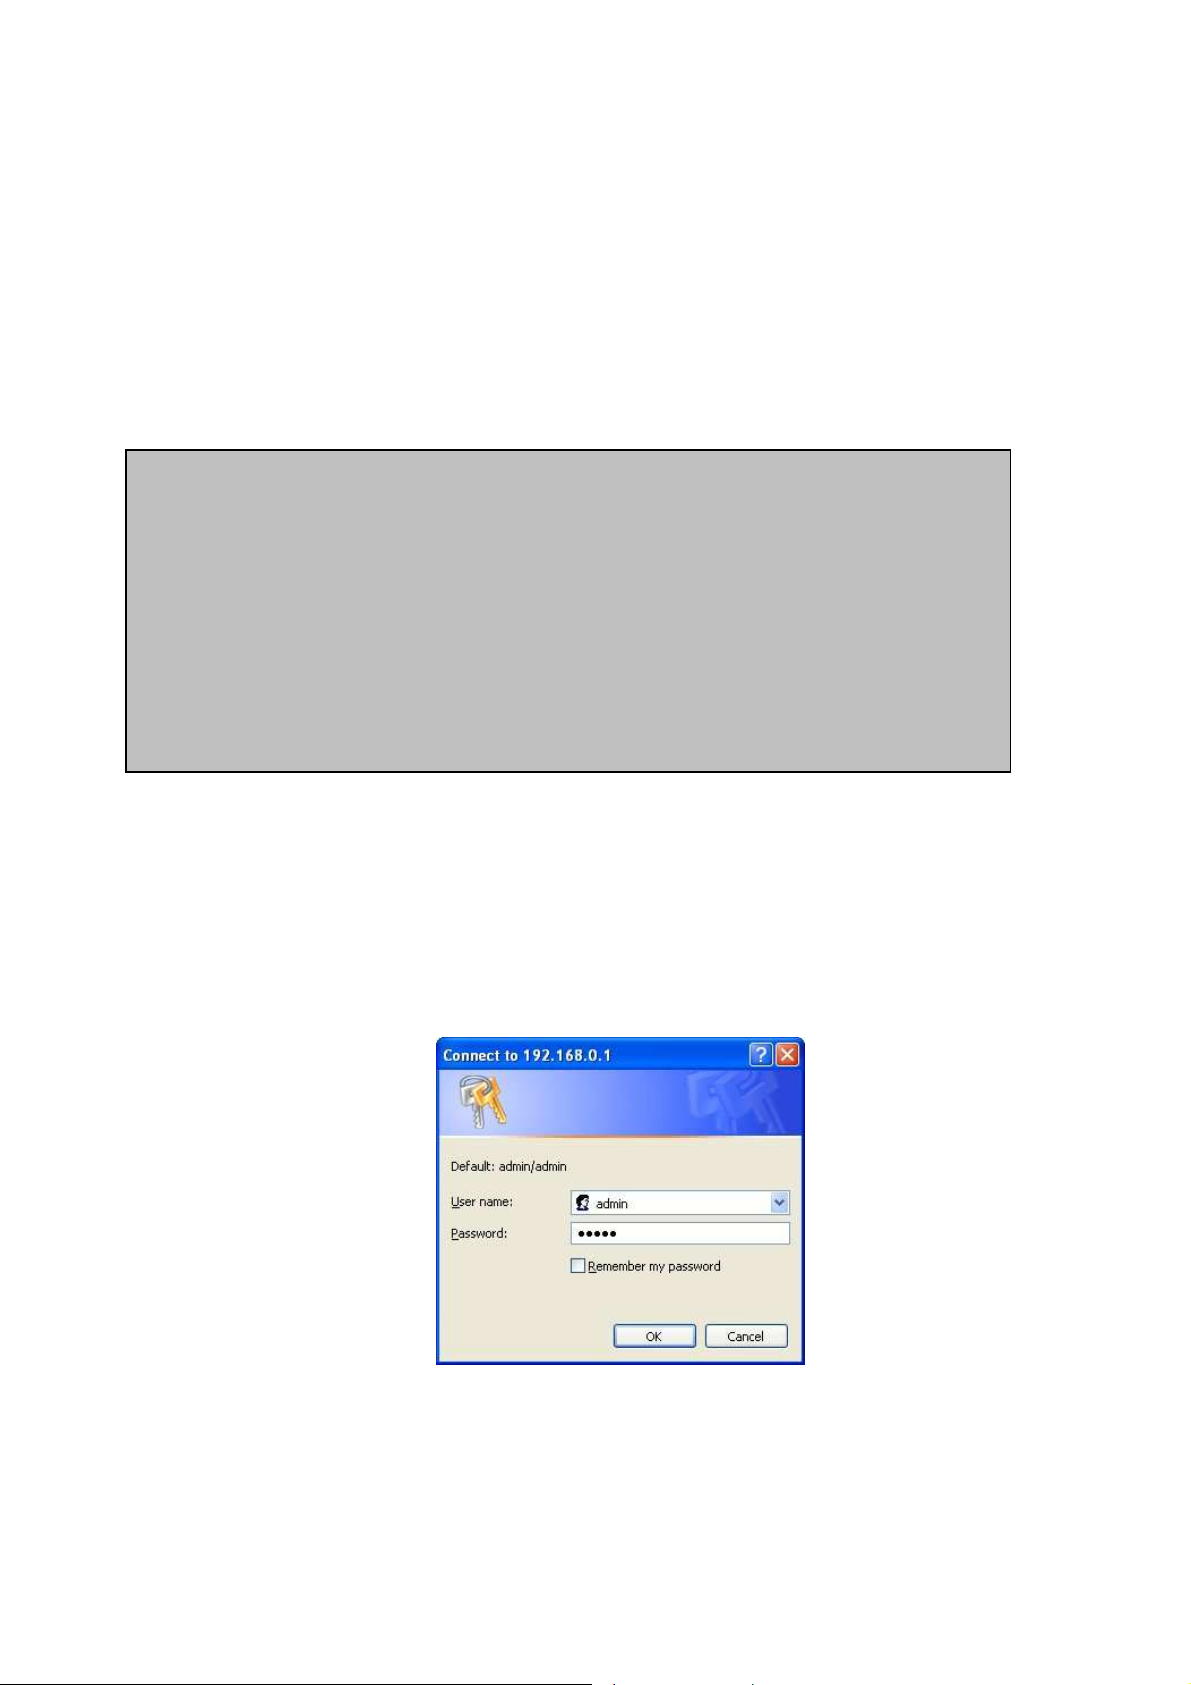
4.1 Start-up and Log in
1. Start your web browser (e.g. Internet Explorer).
2. Type in de address bar: http://10.0.0.1, and press [Enter].
3. Enter your username as: admin, and for your password: admin, and click OK.
4. You will now see the start page for your modem.
10
Please check www.sitecom.com for up to date drivers & utilities, manuals and support
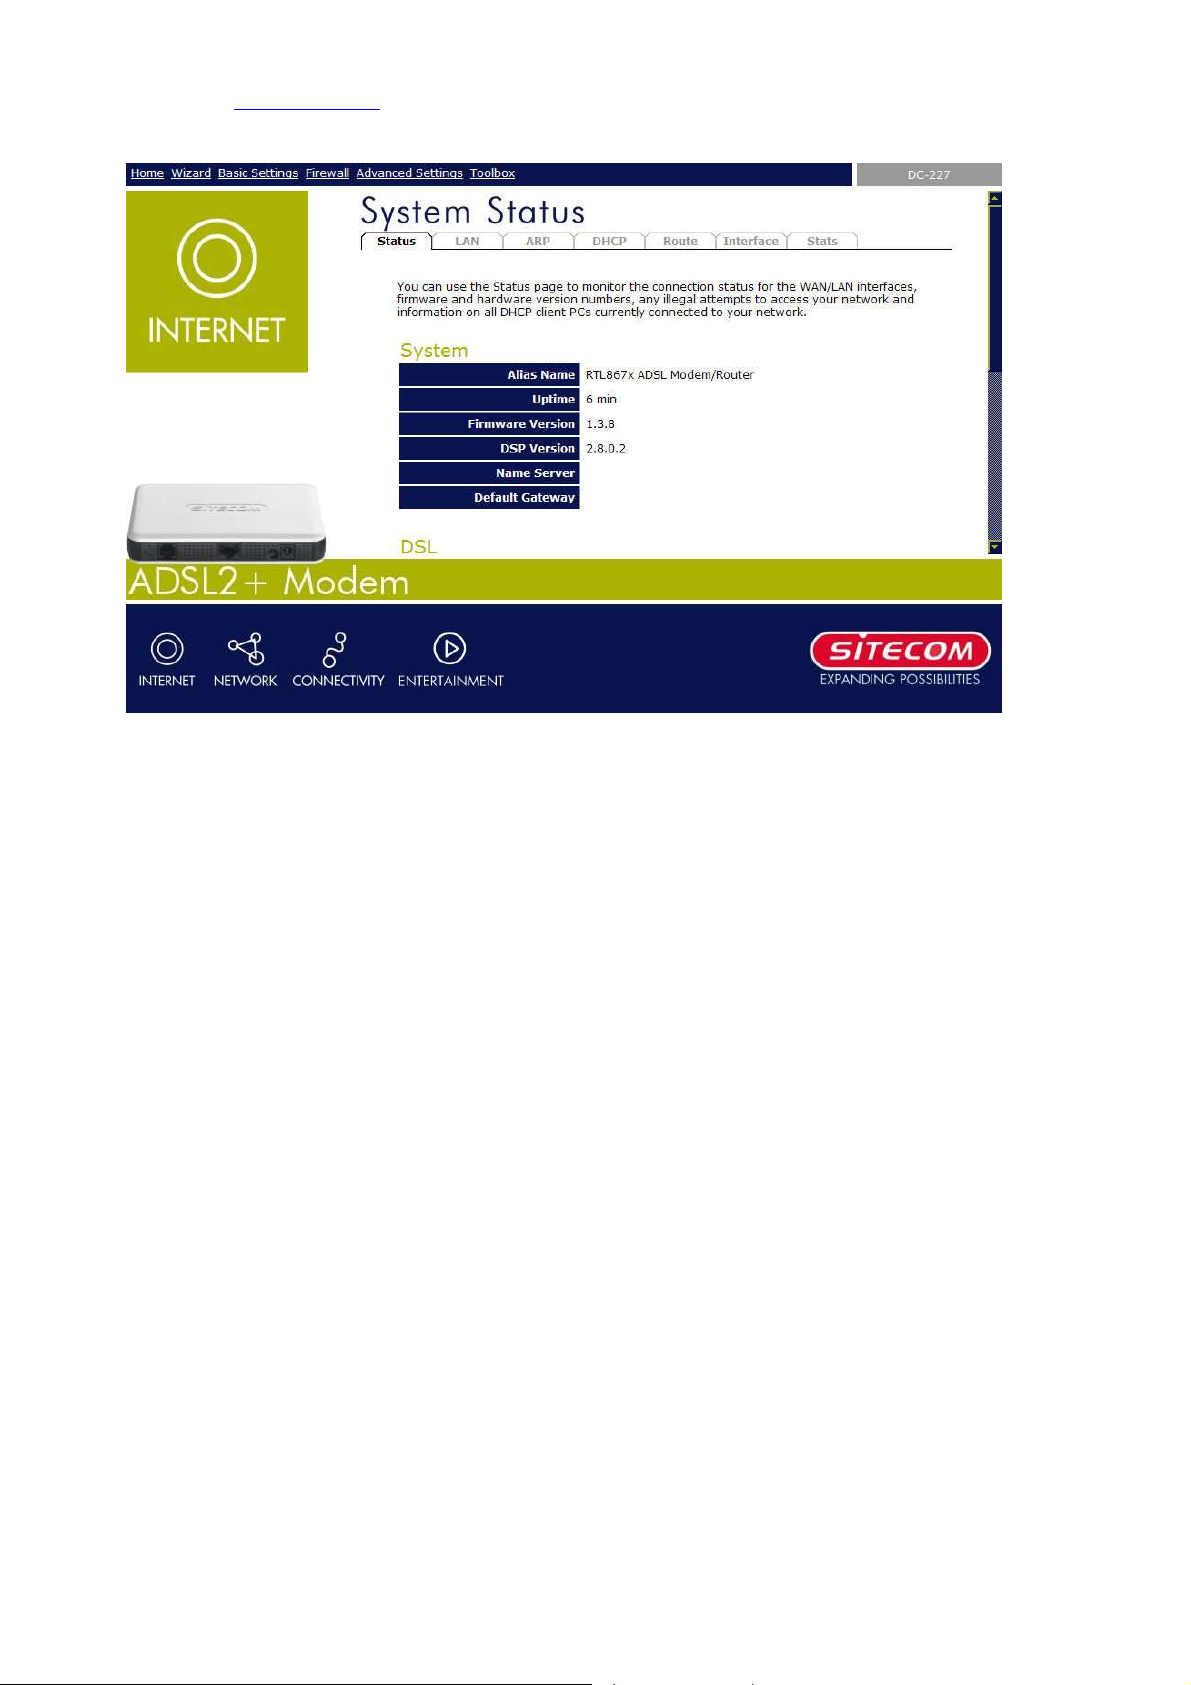
The Status section allows you to monitor the current status of your modem. You can use the
Status page to monitor; the connection status of the ADSL modem's WAN/LAN interfaces,
the current firmware and hardware version numbers, and information on all DHCP client PCs
currently connected to your network.
Connect / Disconnect
The two buttons take effect only when PVC is configured as PPPoE/PPPoA mode.
Click Connect/Disconnect button to connect/disconnect the PPP dial up link.
11
Sitecom ADSL2+ Modem DC-227
ing function for the multiple bridged LAN
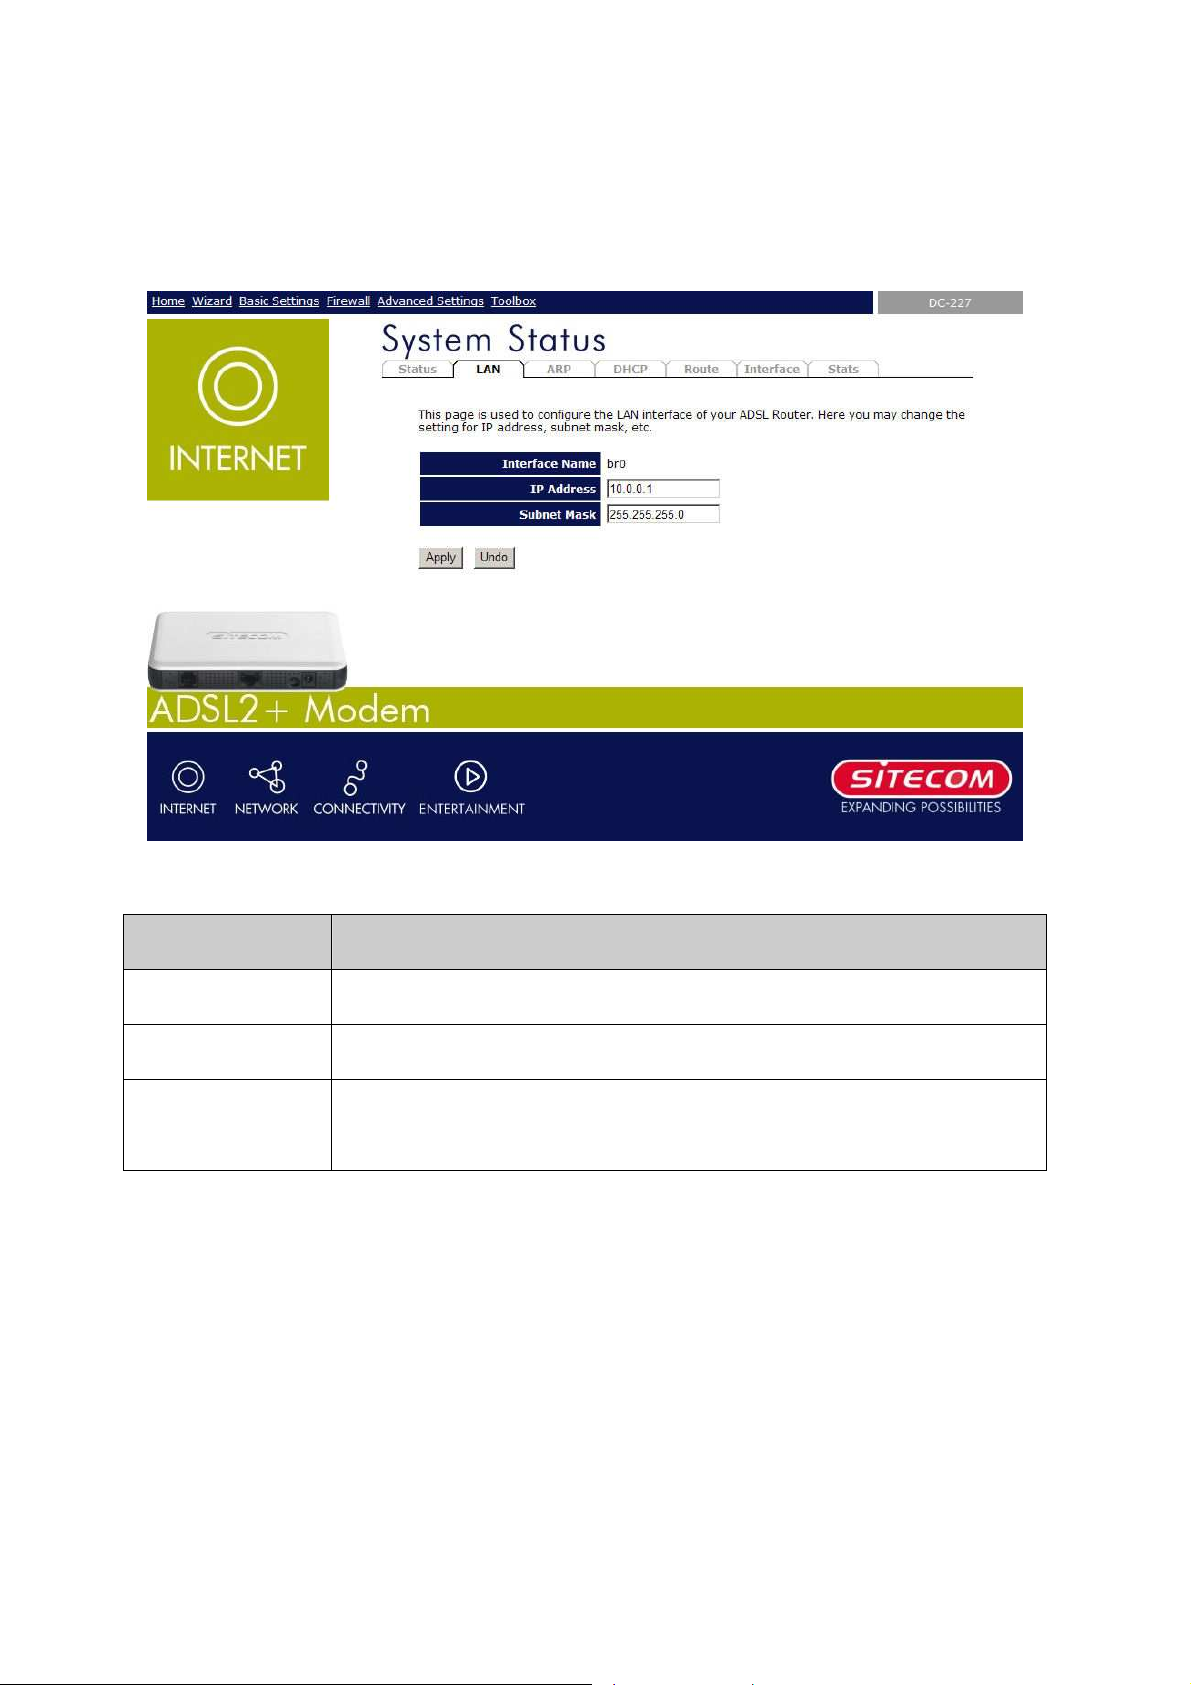
4.1.1 LAN Settings
This page shows the current setting of LAN interface. You can set IP address, subnet mask,
and IGMP Snooping for LAN interface in this page.
Fields on this page:
Field Description
IP Address The IP address your LAN hosts uses to identify the device’s LAN port.
Subnet Mask LAN subnet mask.
IGMP Snooping Enable/disable the IGMP snoop
ports.
Apply Changes
Click to save the setting to the configuration. New parameters will take effect after save
into flash memory and reboot the system.
Undo
Discard your changes.
12

Please check www.sitecom.com for up to date drivers & utilities, manuals and support
4.1.2 ARP Settings
This page shows a list of MAC addresses and IP addresses for devices that are/were
connected to the ADSL modem.
Click “Refresh” to update the list.
13
Sitecom ADSL2+ Modem DC-227
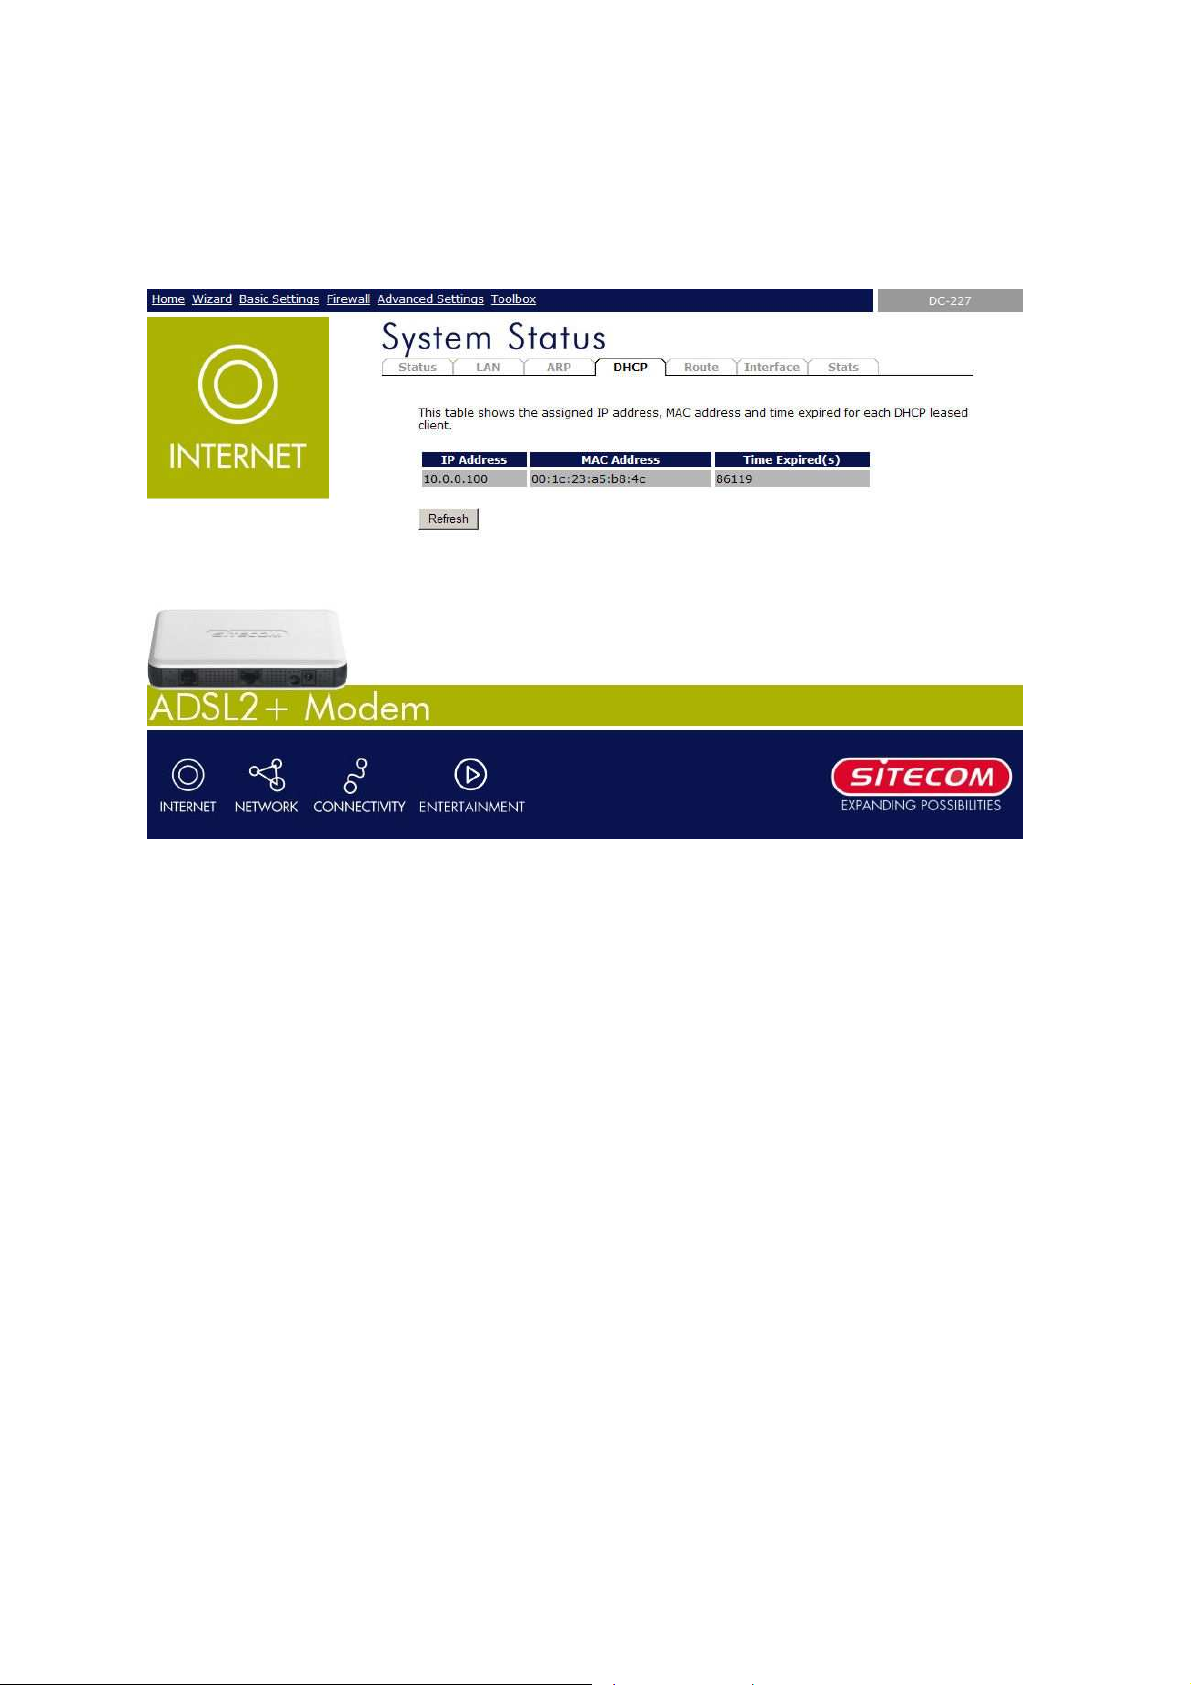
4.1.3 DHCP
This page shows a list of assigned IP addresses and MAC addresses for each DHCP leased
client.
Click “Refresh” to update the list.
14
Please check www.sitecom.com for up to date drivers & utilities, manuals and support
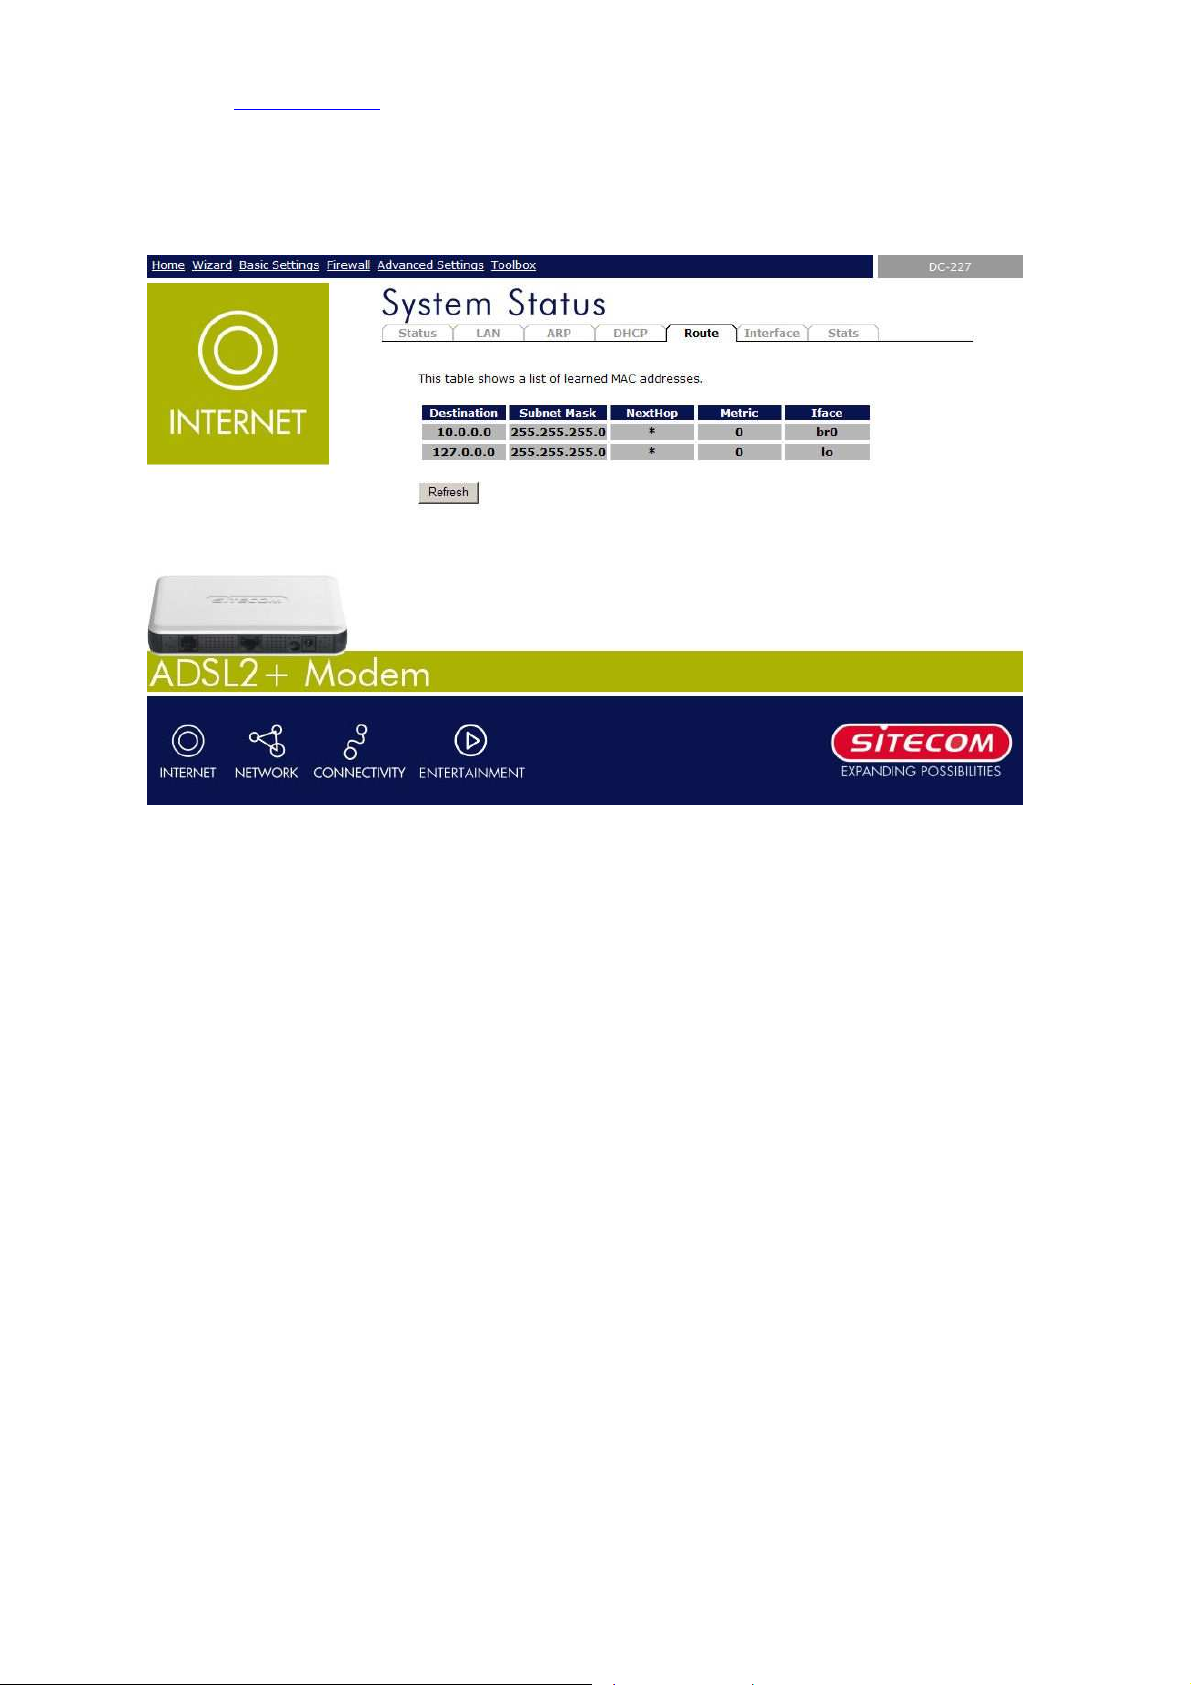
4.1.4 Route
This page shows a list of learned routes.
Click “Refresh” to update the list.
15
Sitecom ADSL2+ Modem DC-227
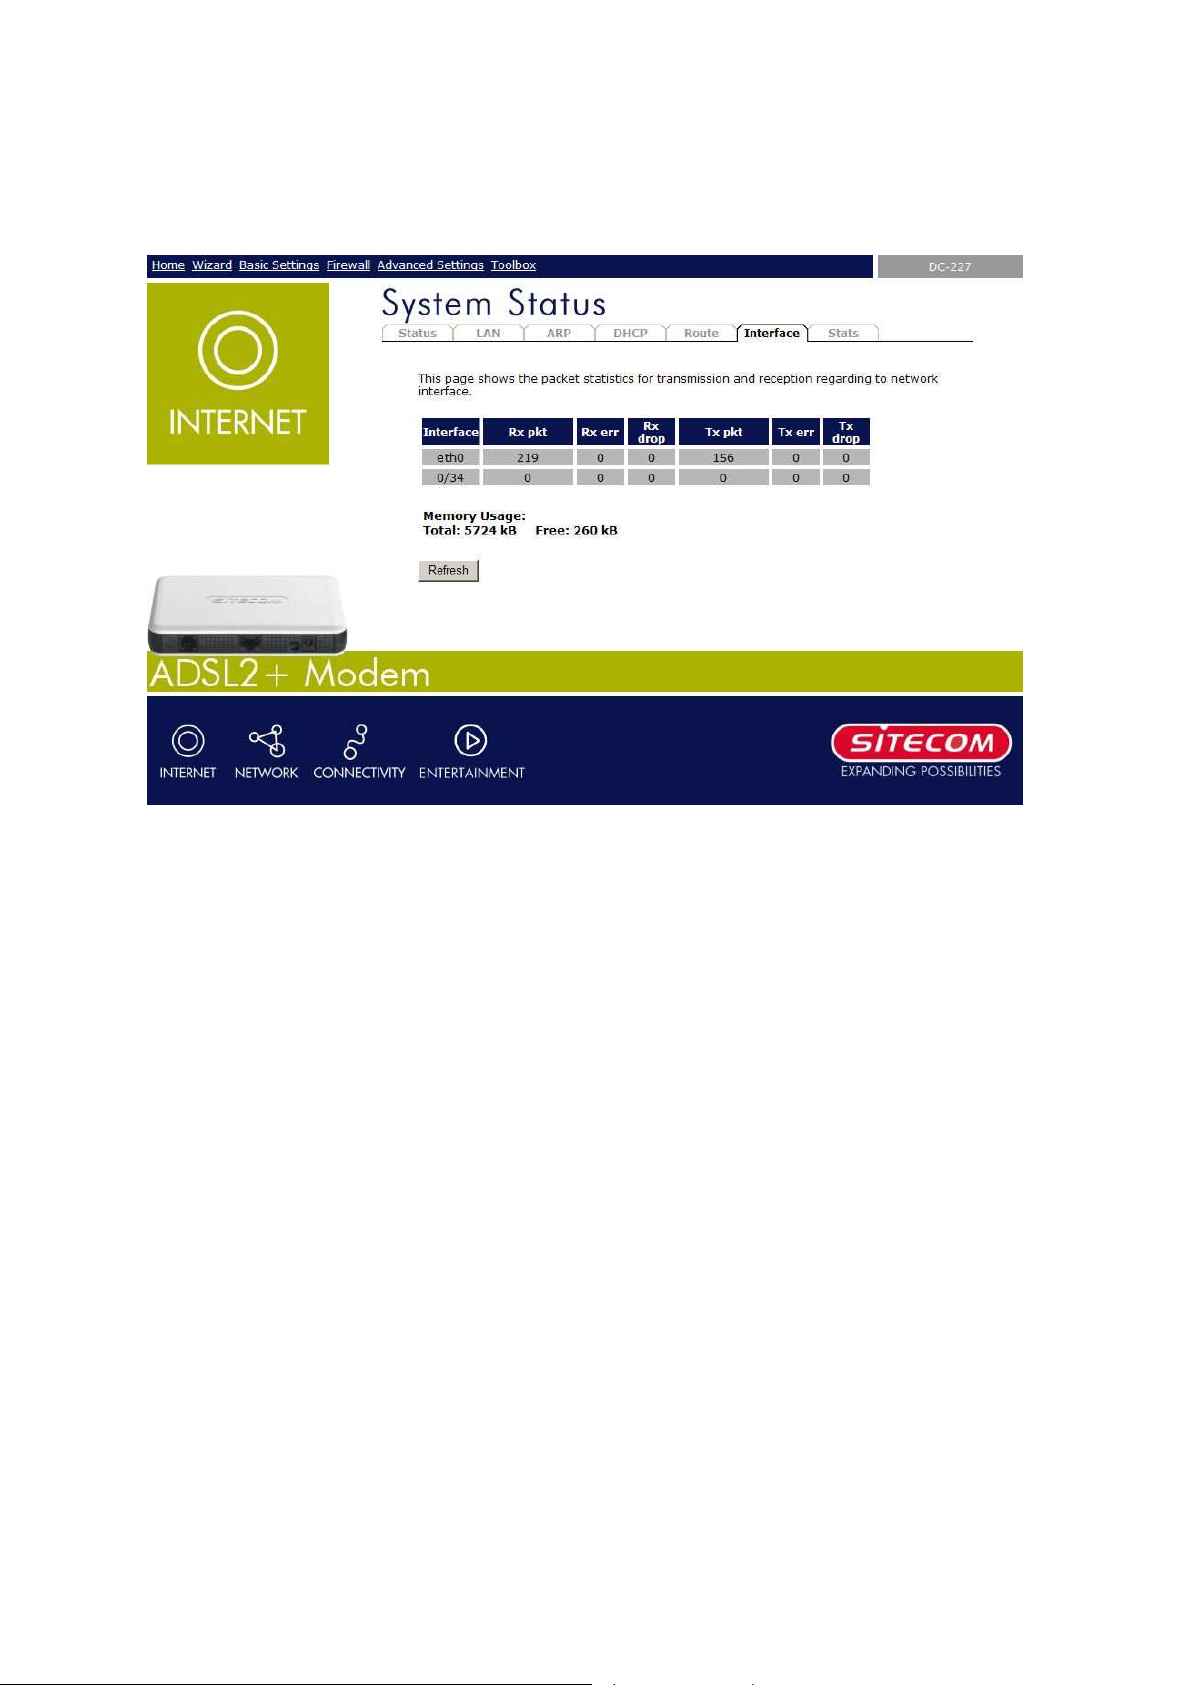
4.1.5 Interface
This page shows the packet and memory statistics for the different interfaces.
Click “Refresh” to update the list.
16
Please check www.sitecom.com for up to date drivers & utilities, manuals and support
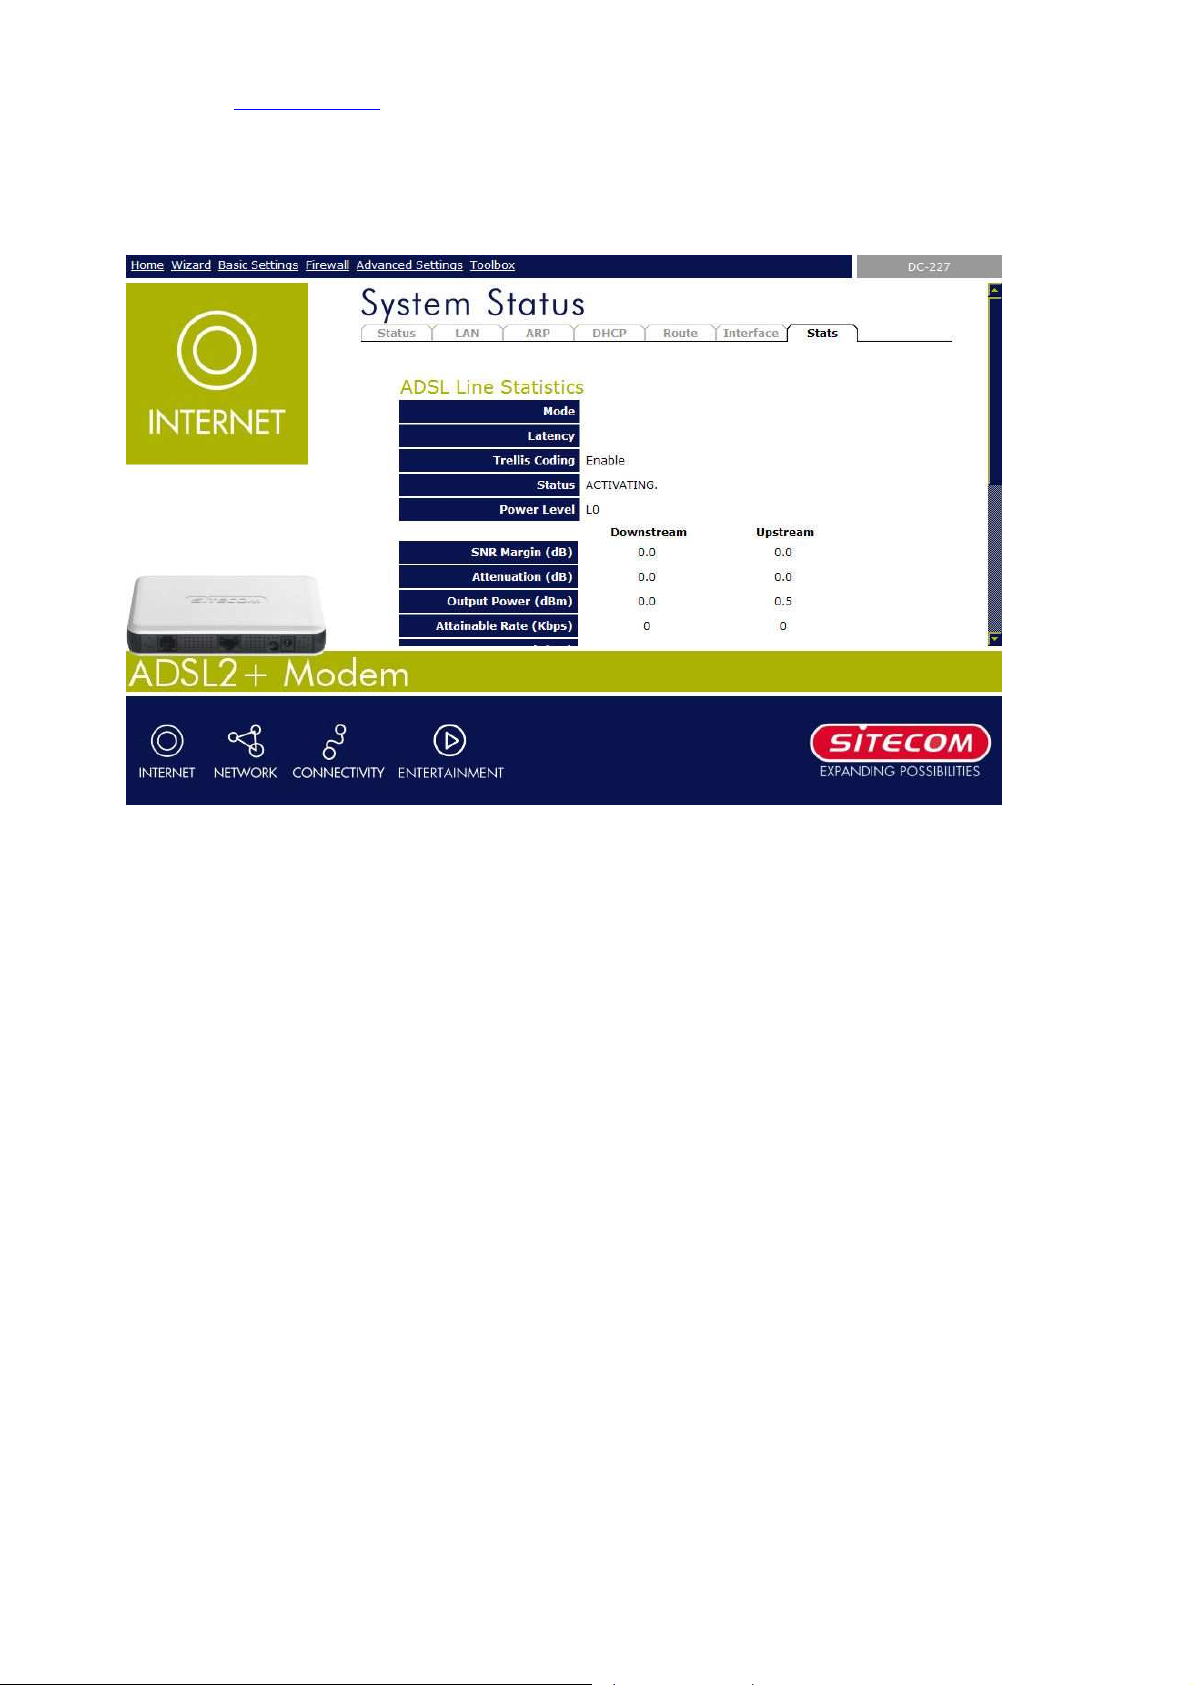
4.1.6 Statistics
This page shows the statistics for the ADSL line and connection.
Click “Refresh” to update the list.
17
Sitecom ADSL2+ Modem DC-227
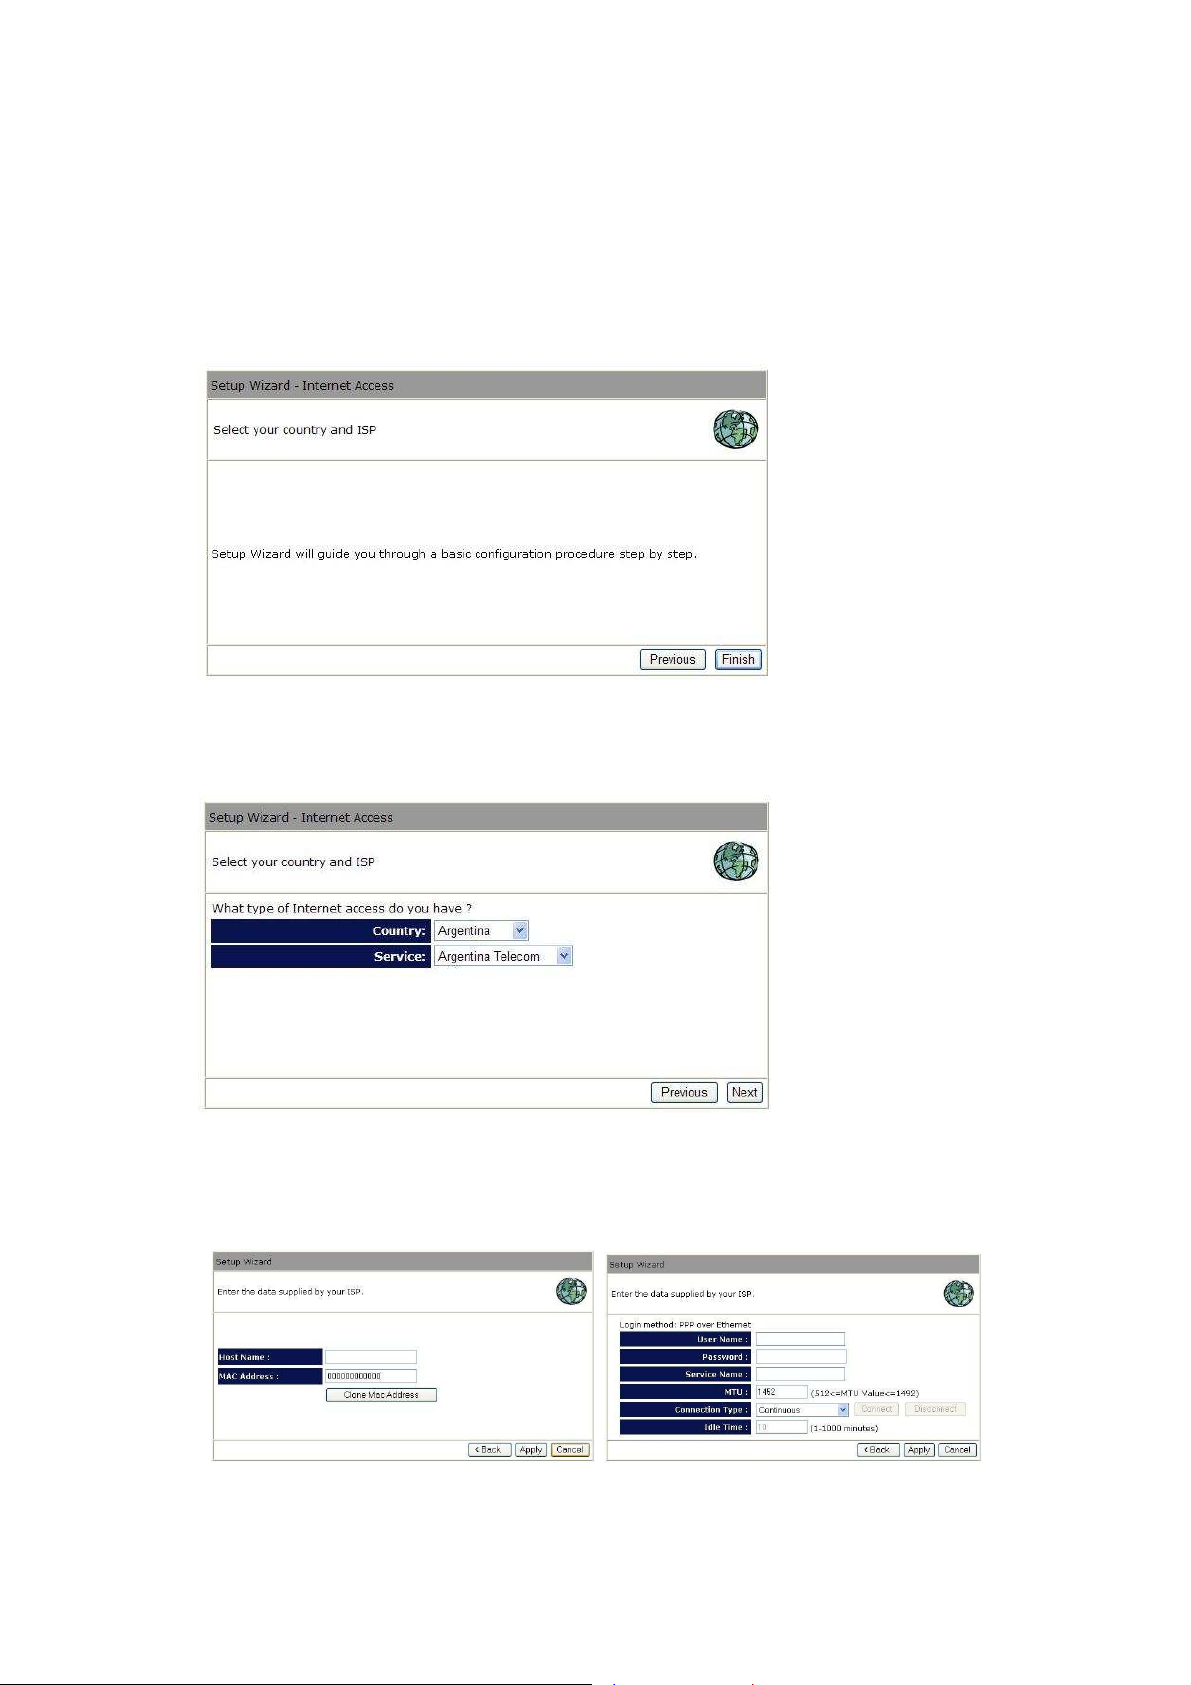
5 Run Setup Wizard
• Click Wizard to configure the modem.
• The Setup wizard will now be displayed; check that the modem is connected and
click Next.
• Select your country from the Country list.
• From Service, select your internet provider. Click Next.
• Depending on the chosen provider, you may need to enter your user name and
password, or MAC address in the following window. After you have entered the correct
information, click Next.
• Click APPLY to complete the configuration.
18

Please check www.sitecom.com for up to date drivers & utilities, manuals and support
• The modem will now save the settings and restart, please wait 120 seconds and you
will be transferred back to the status window. The configuration is complete.
• Wait for about 10 seconds to allow the modem to (re)connect to the Internet.
19
 Loading...