

Dock & Play Radio + Home Kit
User Guide

If you experience problems with the operation
or performance of your SiriusXM product,
DO NOT RETURN THIS PRODUCT TO YOUR RETAILER.
Call SiriusXM Listener Care at 1-866-746-7961
and speak to one of our service representatives.

Table of Contents
Introduction. . . . . . . . . . . . . . . . . . . .5
Features . . . . . . . . . . . . . . . . . . . . . . . . . . . .6
Safety and Care Information . . . . . . . . . . .7
What’s in the Box? . . . . . . . . . . . . . . . . . . .9
OnyX Functions . . . . . . . . . . . . . . . . . . . . . 10
Home Dock. . . . . . . . . . . . . . . . . . . . . . . . . 11
Remote Control Functions. . . . . . . . . . . . 12
Home Installation . . . . . . . . . . . . . . 13
Step 1: Connect the Home Dock and
Dock the OnyX Radio. . . . . . . . . . . . . . . 14
Step 2: Place and Aim the
Indoor/Outdoor Home Antenna . . . . . . 16
Step 3: Connect the Home Dock to a
Stereo System or Powered Speakers . 21
Step 4: Subscribe . . . . . . . . . . . . . . . . . . 23
Using Your OnyX . . . . . . . . . . . . . 25
The Main Display . . . . . . . . . . . . . . . . . . . 26
Navigation Basics . . . . . . . . . . . . . . . . . . .27
Listening to Satellite Radio . . . . . . . . . . 29
Special Features . . . . . . . . . . . . . . 33
Color Themes. . . . . . . . . . . . . . . . . . . . . . 34
Trim Rings . . . . . . . . . . . . . . . . . . . . . . . . 35
Parental Controls . . . . . . . . . . . . . . . . . . 38
Where Else Can You Use Your
OnyX? . . . . . . . . . . . . . . . . . . . . . 43
Configuring Your OnyX . . . . . . . . 45
Radio ID . . . . . . . . . . . . . . . . . . . . . . . . . . 46
Jump Settings . . . . . . . . . . . . . . . . . . . . . 47
Set Brightness. . . . . . . . . . . . . . . . . . . . . 48
Set Audio Level . . . . . . . . . . . . . . . . . . . . 49
Signal Indicator . . . . . . . . . . . . . . . . . . . . 50
Factory Settings . . . . . . . . . . . . . . . . . . . . 51
Demo Mode . . . . . . . . . . . . . . . . . . . . . . . 52
Using OnyX with a Vehicle Dock . 55
Find Available FM Channels in Your
Area . . . . . . . . . . . . . . . . . . . . . . . . . . . . 56
Set and Select an FM Channel. . . . . . . . 59
FM Presets . . . . . . . . . . . . . . . . . . . . . . . . . 61
Auto Shut Off. . . . . . . . . . . . . . . . . . . . . . 62
Using the Vehicle Dock From the
Universal Xpress Car Kit . . . . . . . . . . . 62
Turn FM Transmitter On/Off. . . . . . . . . . 63
To turn the FM Transmitter Off: . . . . . . 64
AUX Detect. . . . . . . . . . . . . . . . . . . . . . . . 65
Troubleshooting. . . . . . . . . . . . . . . .67
Product Specifications . . . . . . . . . . 71
Patent Information . . . . . . . . . . . . . . . . . .73
Environmental Information . . . . . . . . . . .73
Indoor/Outdoor Home Antenna
Template . . . . . . . . . . . . . . . . . . . . . . . . .77
SiriusXM 90-Day Limited
Warranty . . . . . . . . . . . . . . . . . . . 79
3

4

Introduction
5

Introduction
Features
Thank you for purchasing the XM OnyX with Home Kit!
XM OnyX has these exciting features to enhance your overall experience:
• Hear SiriusXM with a home stereo system or set of powered speakers with
easy, do-it-yourself set-up.
• Use the Remote Control to conveniently operate your Radio from across the
room.
• Choose the display color that suits your environment, and personalize with
the trim rings.
• Browse other channels while listening to the current one.
• View artist name, song title, and channel information on the large color
display.
• Store your favorite channels for one touch access.
• Easily lock and unlock channels with mature content.
• One-Touch Jump™ to the previous channel to which you were listening, or to
traffic and weather for the city of your choice from a list of 22 of the most
congested cities.
• Listen at home, in the office or outdoors, in multiple vehicles — all with just
one subscription.
• Home Kit included — add accessories for your vehicles, other homes, or office.
Please read the entire User Guide before using your OnyX!
6

Safety and Care Information
IMPORTANT! Always read and understand all the instructions to avoid injury to
yourself and/or damage to your device. Sirius XM Radio Inc. disclaims all
responsibility for damage from data loss due to breakdown, repair, or other
causes.
• Do not expose to extreme temperatures (above 140ûF or below -4ûF, or
above 60ûC or below -20ûC).
• Do not expose to moisture. Do not use device near or in water. Do not touch
the device with wet hands.
• Do not let any foreign matter spill into device.
• Do not store in dusty areas.
• Do not expose to chemicals such as benzene and thinners. Do not use liquid
or aerosol cleaners. Clean with a soft damp cloth only.
• Do not expose to direct sunlight for a prolonged period of time, and do not
expose to fire, flame, or other heat sources.
• Do not try to disassemble and/or repair device yourself.
• Do not drop your device or subject it to severe impact.
• Do not place heavy objects on device.
• Do not subject device to excessive pressure.
• If the LCD screen is damaged, do not touch the liquid crystal fluid.
7

Introduction
Warning!
• Opening the case may result in electric shock.
• Make sure that you insert the Home Power Adapter’s plug all the way into
the outlet.
• If the liquid crystal fluid comes in contact with your skin, wipe the skin area
with a cloth and then wash the skin thoroughly with soap and running water.
If the liquid crystal fluid comes into contact with your eyes, flush the eyes
with clean water for at least 15 minutes and seek medical care. If the liquid
crystal fluid is ingested, flush your mouth thoroughly with water. Drink large
quantities of water, and induce vomiting. Seek medical care.
• This product contains chemicals known to the State of California to cause
cancer and birth defects or other reproductive harm.
8

What’s in the Box?
2
1
3 4 5 6 7 8 9 0
OnyX Radio
menu
FM
jump
direct
Home Dock
Trim Rings
Indoor/Outdoor
Home Antenna
Trim Ring Removal Tool
Home Power
Adapter
Stereo Audio
Cable
info
display
menu
fm
direct
+
mute
2
1
3
5
4
6
8
7
9
jump fav
0
Remote Control
9

Introduction
OnyX Functions
Up and Down Buttons
Press to preview and tune
to channels through the
channel lineup; also press
to scroll through lists and
highlight menu items.
2
1
Number Buttons
Press to tune to
a stored favorite
channel, press and
hold to store a
favorite channel;
also enter a channel
number.
3 4 5 6 7 8 9 0
10
Trim Ring
Changeable
decorative
Trim Ring.
Left and Right Buttons
Press to search for
channels by category.
menu
FM
jump
direct
Direct Button
Press first before
entering the channel
number, to directly
tune to a channel.
Power Button
Press to turn Radio on
and off.
Select Button
Press to confirm
selection of highlighted
items in a menu or list.
Menu Button
Press to access advanced
features and configuration
options; in configuration
options, press and hold
to return to main display
screen.
FM Button
Press to access and
cycle through FM presets
(Vehicle Dock only).
Jump Button
Press to go back to
the previous channel
to which you were
listening; or press it to
directly access traffic
and weather for the city
of your choice.

Home Dock
Color-Coded Connections
The color-coded Home Dock makes it simple to connect. Just match the colors
on the cable ends to the colors on the dock to see what goes where.
Rear View
ANTAUDIO POWER
AUDIO (Green)
Connection for
stereo system or
powered speakers.
ANT (Silver)
Connection for
the Indoor/
Outdoor Home
Antenna.
POWER (Red)
Connection for
Home Power
Adapter.
11

Introduction
Remote Control Functions
Power Button
Press to turn Radio on
and off.
Not Used
Select Button
Press to confirm selection of
highlighted items in a menu
or list.
Not Used
— / FM Button
FM: Press to access and
cycle through FM presets
(Vehicle Dock only).
— : Not used.
Number Buttons
Press to tune to a stored
favorite channel, press
and hold to store a
favorite channel; also
enter a channel number.
Jump Button
Press to go back to the
previous channel to which
you were listening; or press
it to directly access traffic
and weather for the city of
your choice.
12
jump
Arrow Buttons Up/Down
Press to preview and tune to
channels through the channel
lineup; also press to scroll
through lists and highlight
menu items.
Arrow Buttons Left/Right
Press to search for channels by
category.
Not Used
Menu Button
Press to access advanced
features and configuration
info
display
menu
fm
1
4
7
mute
direct
+
2
3
5
6
8
9
fav
0
options; in configuration
options, press and hold to
return to main display screen.
+ / Direct Button
Direct: Press first before
entering the channel
number, to directly tune to
a channel.
+ : Not used.
Mute Button
Press to silence XM audio.
Not Used

Home Installation
13
Home Installation
There are several parts to setting up your Home Kit. Follow these 4 steps for an
easy installation.
Step 1: Connect the Home Dock and Dock the OnyX Radio
When installing the Home Dock in your home, choose a location in close proximity
to your stereo system or powered speakers, and also where the cable from the
Indoor/Outdoor Home Antenna can reach the Home Dock. The location should
be easily accessible and provide good visibility of the display, but should not be
located where it will be in direct sunlight, which will affect the visibility of the
display screen.
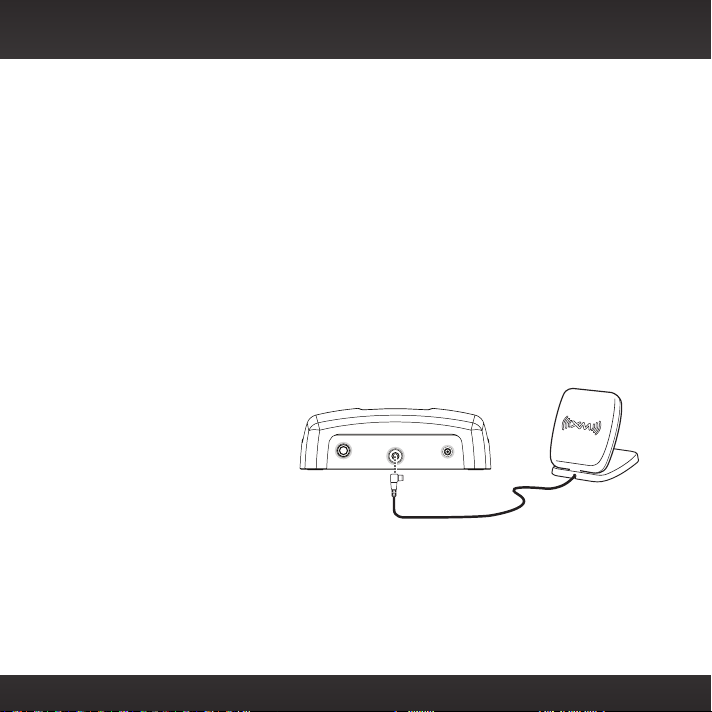
A. Connect the Indoor/Outdoor Home Antenna
Once you have selected a location, connect the antenna to the silver ANT
connector at the rear of the Home Dock.
We will work on the location and
aiming of the antenna in the next
step.
ANTAUDIO POWER
14

B. Connect the Home Power Adapter
Connect the Home Power Adapter to the red Power connector at the rear of the
Home Dock, and plug it into a wall outlet.
ANTAUDIO POWER
C. Dock the OnyX Radio
Place your OnyX Radio into the Home Dock and press
the Power button to turn it on.
menu
FM
1
2
3
4
5
6
jump
7
8
9
0
direct
15

S
E
L
Home Installation
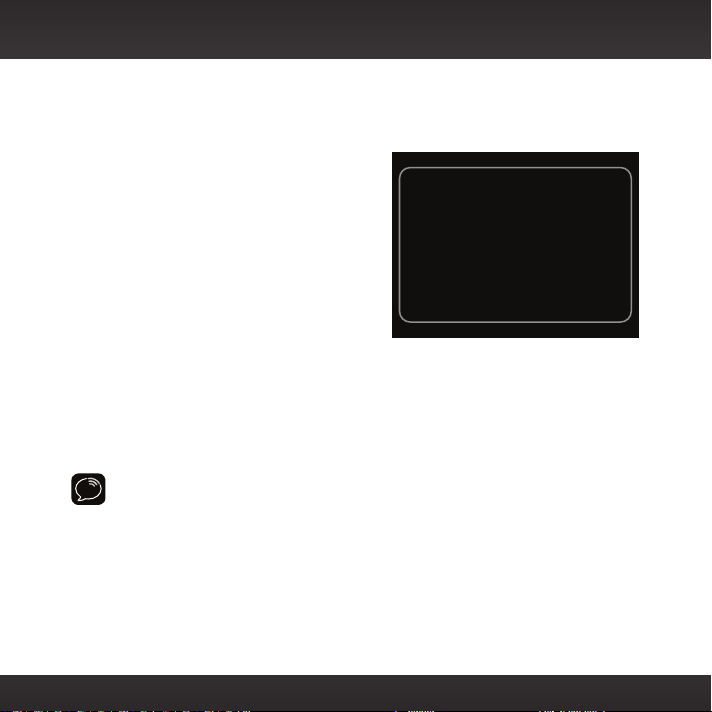
Step 2: Place and Aim the Indoor/Outdoor Home Antenna
To begin, try experimenting with the Indoor/Outdoor Home Antenna to get a feel
for the reception in your location. In major metropolitan areas, you might find that
you get great reception in several locations without worrying too much about aim
and placement. If two to three bars of signal strength are being displayed at the
lower left corner of the screen, continue with
step 3 on page 21.
If there is not at least two bars of signal
strength displayed, refer to “Signal Indicator”
on page 50 and access the Signal Indicator
screen to see a visual indication of signal
strength. Move the antenna around the room
or from room to room. Aim it from different
windows. If you find a location where you are
receiving good Satellite or Terrestrial signal
strength (or both), press and hold menu to exit
the Signal Indicator screen. The radio should
be tuned to channel 1, the XM Preview channel.
Continue with the step 3 on page 21.
If you are unable to find a location where you
are receiving good Satellite or Terrestrial
signal strength, try some of the suggestions
which follow.
1 XM Preview
800-643-2112
siriusxm.com
Signal Indicator
ATELLIT
TERRESTRIA
16

Other Indoor/Outdoor Home Antenna Installation Suggestions
NOTE! If the signal reception is low, intermittent, or Acquiring Signal is
displayed, after a period of time the Radio may enter demo mode. Demo mode is
a feature for retail display purposes, and the Radio will automatically exit demo
mode once it begins to receive a good signal. To exit demo mode immediately,
press and hold the Select button for 10 seconds. Demo mode can be disabled, if
desired, by following the instructions in “Demo Mode” on page 52.
Try moving the Indoor/Outdoor Home Antenna closer to a window, ideally one
that is facing due south.
Not sure which way is south?
Think about where the sun
rises (in the east) and sets (in
the west). Then stand so that
east is to your left and you’ll be
facing south. Is there a window
in the direction you’re facing?
Move the antenna closer to the
window.
TIP! Still not sure which
way is south or where to place your Indoor/Outdoor Home Antenna? Look up
your location on an online mapping website that offers satellite views of street
addresses where you can easily see which way is south, and what window may
offer an unobstructed view of the sky.
S
Another easy method is to start at any window, then work from window to
window in a simple pattern to find the window gives the best signal strength.
Note that the antenna must also have an unobstructed view, with no trees or
buildings blocking its aim. If the antenna is aimed through a window, be aware
that blinds, screens, or any other non-glass elements such as thermal insulation
17

Home Installation
can sometimes cause reception issues. If this is the case, you may want to use
another window or place the antenna outside of the window.
If you find a window that gives you good signal
strength, you can place the antenna on the
windowsill. The antenna may need to be placed
on something to raise it above the level of the
window frame.
If you don’t have a window where you receive
a consistent signal, or placing the antenna in
a window is not a practical solution for you,
BETTER reception can be achieved by placing
the antenna outside on a window ledge, porch,
table, or patio. The location you choose should
provide the antenna with a clear view of the
southern sky.
If none of the previous solutions work
for you, then the BEST reception can
be achieved by mounting the antenna
outdoors, with a clear view of the
southern sky.
Note that you will want to consider any
potential hazards when you choose
the mounting location, and possibly
consider professional installation.
Sirius XM Radio Inc. is not liable for
any damages.
To mount the antenna, you will need
SOUTH
SOUTH
SOFFIT
18

four screws (not included) with a 1/4”
head (e.g., an M3 screw), and that are
OUTDOORS
suitable for the material onto which
you are affixing the antenna, (e.g.,
wood, metal, etc.). The screws should
be spaced 1-3/8” apart horizontally
and 1-1/8” vertically. Refer to the
template on “Indoor/Outdoor Home
Antenna Template” on page 77.
Once you have found a suitable
SOUTH
location for the antenna, route the
antenna cable to the Home Dock. Be sure you
avoid any obstructions that could crimp, kink,
or twist the cable. Use protective grommets
wherever rough openings are encountered.
If the antenna is installed outdoors, route
the cable from the antenna location to the
1-3/8 in
interior of the home, working the cable through
the basement, under a window sill, etc., and
make adjustments to take up cable slack as
1-1/8 in
necessary. Reconnect the antenna to the silver
ANT connector at the rear of the Home Dock.
TIP! If your Indoor/Outdoor Home
Antenna’s cable isn’t long enough, visit www.siriusxm.com/accessories, or your
favorite retailer, and consider a 50 ft. Home Antenna Extension Cable or a
Wireless Home Signal Repeater.
Verify that the antenna is pointed south, and that the antenna’s view of the sky is
not blocked by a tree, a building, a bridge, or anything else. Try various locations
19

Home Installation
until you find one where are receiving a good signal.
The Indoor/Outdoor Home Antenna’s reception can also be tweaked by opening
or closing the antenna clamshell, and turning the antenna. While observing the
signal strength, make small adjustments to the angle of tilt of the clamshell until
the highest possible signal strength is achieved. If you have not wall-mounted
the antenna, turn the antenna slightly to the right or left and observe if the
signal strength increases. For each tweak, allow a few seconds in each position
to determine if the signal strength increases.
SOUTH
If the signal strength is good for either
Satellite or Terrestrial (or both), exit the
Signal Indicator screen by pressing and
holding menu. If the Radio is displaying
channel 1, the XM Preview channel, with two
to three bars of signal strength displayed at
the lower left of the screen, continue with the
next step, otherwise, continue trying other
locations for the antenna.
1 XM Preview
800-643-2112
siriusxm.com
20

Step 3: Connect the Home Dock to a Stereo System or
Powered Speakers
The Home Dock can be connected to your stereo system, or to a set of powered
speakers. If you are connecting to a stereo system, see the following section. If
you are connecting to a set of powered speakers, see “To Connect the Home Dock
to Your Powered Speakers” on page 22.
To Connect the Home Dock to Your Stereo System
The Home Dock can be connected to your stereo system through the AUX In or
LINE In connection of your stereo system, using the provided Stereo Audio Cable.
1 Take the provided Stereo Audio Cable and connect the single 1/8” (3.5 mm)
connector to the green AUDIO connector at the rear of the Home Dock.
2 Connect the white left and red right Stereo Audio Cable connectors (“L”
and “R” are also on each respective tip) to any available input other than
PHONO on your stereo system. (If your stereo’s inputs are marked red and
black, simply connect the white plug to the black input.)
3 Turn the stereo system On, and make sure you select the correct input on
your stereo system for the AUX In or LINE In connection.
ANTAUDIO POWER
R
L
21

Home Installation
4 If you have connected everything correctly, and you are receiving the XM
signal, you should hear the XM audio from channel 1.
5 The audio level of your Radio can also be adjusted, if necessary. Refer to
“Set Audio Level” on page 49 to adjust the audio level.
To Connect the Home Dock to Your Powered Speakers
The Home Dock can be connected directly to a set of powered speakers.
1 Connect the 1/8” (3.5 mm) connector from the powered speakers to the
green AUDIO connector at the rear of the Home Dock.
2 Plug the powered speakers into a wall outlet.
3 Turn On the powered speakers.
4 If you have connected everything correctly, and you are receiving the XM
signal, you should hear the XM audio from channel 1.
5 The audio level of your Radio can also be adjusted, if necessary. Refer to
“Set Audio Level” on page 49 to adjust the audio level.
ANTAUDIO POWER
22

Step 4: Subscribe
Subscribe to the XM service by following these steps:
1 Make sure your OnyX is turned on, and receiving the XM signal so that you
can hear the XM audio.
2 Make a note of your XM Radio ID. You can find it by selecting Radio ID in
menu items, by tuning to channel 0, on a label on the bottom of the gift box,
and on the label on the back of your OnyX.
NOTE! The XM Radio ID does not use the letters I, O, S, or F.
3 To subscribe:
•Online: Go to www.siriusxm.com and click on “How Do I Activate a
Radio?” and then click on the “Activate my radio” button to subscribe.
OR
•By phone: Call 1-800-XM-RADIO (1-800-967-2346)
Activation usually takes 10 to 15 minutes after you have completed the
subscription process, but may take up to an hour. We recommend that your Radio
remain on until subscribed. Once subscribed, the Radio will receive and you can
tune to channels in your subscription plan.
Press or to tune to other channels, and or to browse the different
categories of channels. Learn what all the buttons do by turning to “Navigation
Basics” on page 27.
23

24

Using Your OnyX
25

or Sports Teams/Score
Using Your OnyX
The Main Display
When listening to a channel, information about the channel and what is currently
playing is displayed.
Channel Number
26
28 The Spectrum
Tom Petty
I Should Have Known It
Antenna Signal
Strength
Song/Program Title
or Talk Show Schedule
or Game Time/Game Details
Channel Name
Artist Name
or Talk Show Host

Navigation Basics
Power Button
Pressing the Power button turns OnyX On or Off.
Navigation Buttons
Pressing Left, Right, Up, and Down navigates through various features
and functions of OnyX.
• Left or Right button: Displays the channel categories such as Rock, Pop,
Sports, Talk/News, etc. Repeated presses cycle through the categories one at
a time. Also, decreases or increases the settings of various menu options
such as Brightness, Audio Level, etc.
• Up or Down button (press and release): Immediately tunes to the
next or previous channel in the channel lineup. Also, scrolls through lists
and highlights an item in the list.
• Up or Down button (press and hold): Continuously scrolls through
any list. While on the main display screen, continuously scrolls through the
channel lineup and briefly displays the information of each channel. When
the button is released, Radio tunes to the last channel it had scrolled to in
the channel lineup.
Select Button
Pressing the Select button selects a highlighted item in a list and
confirms settings.
27

...
Using Your OnyX
Menu Button
Pressing menu displays various options to make setup and feature changes.
Pressing menu when in menu options returns to the previous menu option screen
until menu options is exited. Pressing and holding menu returns to the main display
screen in most instances.
FM Button (Applies to Vehicle Dock)
Pressing FM provides easy tuning of FM presets for optimized PowerConnect
performance. Repeatedly pressing FM displays and cycles through the list of
preset FM channels one at a time. The Radio automatically tunes to the displayed
FM channel. Pressing and holding FM accesses the FM Settings menu. It is not
available when Aux In Cable or Cassette Adapter is used for audio connection.
Jump Button
Depending on how it is configured, pressing jump either tunes to the previous
channel that was being played, or tunes to the channel broadcasting traffic and
weather conditions of a city of your choice, selected from a list of the 22 most
congested cities. Pressing it again returns it to the original channel.
Direct Button
Pressing direct prompts for the entry of a channel number using the number
buttons. Once the channel number is entered, the Radio directly tunes to the new
channel.
Number Buttons
Each number button stores a favorite channel in its button location and provides
one touch access to it afterward. Number buttons also directly tune to a channel
when the channel number is entered after pressing direct.
1 0
menu
FM
jump
direct
28

Listening to Satellite Radio
Tune to a channel:
1 Press and release and to immediately tune to the next or previous
channel.
2 Press and hold and to quickly scroll through the channels. Release
to tune to the channel that is displayed.
TIP! You can also use the Remote Control to control the Radio.
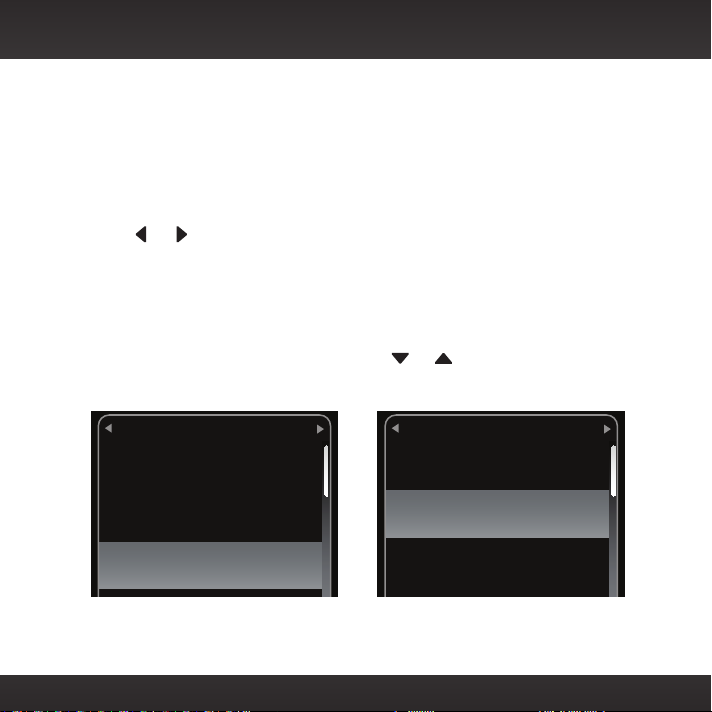
View a category:
Channels are organized into categories to make it easier for you to find the ones
that suit your taste.
To view a category press or .
1 Scroll through the category using
and , and find the channel you want.
2 Press the Select button to select the
channel, or press or for the
previous or next category.
TIP! To briefly listen to each channel in
the category, scroll to and highlight Scan
at the end of the category list and press the Select button. Refer to “Scanning
Channels in a Category” on page 32 to learn more about Scan.
Pearl Jam Radio
22
Pearl Jam/Better Man
Grateful Dead23
Grateful Dead/Truckin’
Margaritaville24
Jimmy Buffett/Fins
Rock
29
Using Your OnyX
Direct Tune
A channel can be tuned directly by entering the channel number using the
number buttons.
1 To directly tune to a channel press
direct.
2 Use the number buttons 0-9 to enter
the channel number and wait a moment
until the channel is tuned, or press the
Select button to immediately tune to
the channel.
Direct Tune
Enter channel #
5 1 _
Jump
Depending upon how you configure the mode, pressing jump will either go to the
last channel to which you were listening, or go to the traffic and weather channel
for the city of your choice which you select from a list of the 22 most congested
cities.
TIP! By default jump is configured to tune to a traffic/weather channel. To select
a city for traffic and weather, or to configure jump to tune to the last channel to
which you were listening, refer to “Jump Settings” on page 47.
Return to Main Display Screen
Pressing and holding menu in most instances will return you to the main display
screen. In some cases, you may need to follow the instructions on the display
screen.
30

Favorite Channels
You can set up to 10 of your favorite channels so you can easily access them.
Each favorite channel can be assigned to a number button.
To assign a favorite channel to a number button:
1 Tune to the desired channel.
2 Press and hold a number button between
0-9 that you want to assign to that
favorite channel. An advisory with the
channel number and name will be
displayed on the screen confirming
that the channel has been assigned.
To listen to a favorite channel:
1 Press the number button between 0-9
that was assigned to the desired favorite channel. OnyX will tune to that
channel.
TIP! When you are at the main display screen, press to see your list of favorite
channels. Scroll to highlight a favorite and press the Select button to listen to
that channel.
Favorite Saved
10 The Pulse
saved as
Favorite 1
31
Using Your OnyX
Scanning Channels in a Category
You can scan a category and listen to each channel for 10 seconds before OnyX
automatically tunes to the next channel. If you want to stay tuned to the channel
being played and stop the scan, just press the Select button.
To scan a category:
1 Press or until the desired category is displayed.
2 Scroll down to highlight the last item in the category which will be Scan
and the category name.
3 Press the Select button. The scan will begin.
4 Press the Select button to stop the scan, and to continue to listen to the
channel currently being played, or press or to return to the channel
you were listening to before you began the scan.
32
Pop
The Blend
16
Phil Collins/Take Me Hom
Love 17
Dionne Warwick/Heartbr
Scan Pop>
Scanning
70s on 7
7
Neil Diamond/Sweet Caro
80s on 8 8
The Hooters/And We Dan
90s on 9 9
Ace of Base/The Sign

Special Features
33

e
Special Features
Color Themes
You can change the color of the display screen to one of 6 color themes: Blue,
Red, Amber, Yellow, Silver, or Teal. You can choose the display color that matches
your dash lights, and personalize with the trim rings. The default color theme is
blue.
To change the color theme:
1 Press menu.
2 Press to scroll to and highlight
Color Theme. Press the Select button.
3 Press or to highlight the desired
color theme. OnyX will immediately
change to the selected color theme.
4 Press the Select button to confirm the
selected color theme.
5 Press and hold menu to return to the
main display screen.
Press arrow keys to choose
Select Theme
Blu
and Select to confirm
34

Trim Rings
Your OnyX has a changeable Trim Ring to style the Radio to your liking. The Trim
Ring surrounds the Select button on the Radio. A total of three trim rings are
included with your OnyX, including the one that is already installed in the Radio.
1
2
3
4
5
6
7
8
9
0
To remove and replace the Trim Ring:
The Trim Ring can be removed by using the Trim Ring Removal Tool. Placing this
tool against the Trim Ring, and mildly applying pressure while turning it, will
loosen or tighten the Trim Ring depending upon which direction you turn the tool.
m
e
n
u
F
M
j
u
m
p
d
i
r
e
c
t
35

Special Features
1 Place the Trim Ring Removal Tool on the Trim Ring on the Radio. Use care
to align the tool so it’s centered on the Trim Ring.
m
e
n
u
F
M
u
j
m
p
i
1
2
4
3
5
8
7
6
2 Using mild pressure to keep the tool against the Trim Ring, rotate the tool
counter-clockwise until it will not rotate any further.
2
1
3 4 5 6 7 8 9 0
e
r
d
0
9
menu
direct
c
t
FM
jump
3 The Trim Ring is now loose. Turn OnyX over and the Trim Ring should fall
out. If it does not, gently tap the back of the Radio until it does.
36

4 Turn the Radio face up again and insert the new Trim Ring into the Radio.
5 Align the Trim Ring Removal Tool on the Trim Ring on the Radio. Use care
to align the tool so it’s centered on the Trim Ring.
6 Using mild pressure to keep the tool against the Trim Ring, rotate the tool
clockwise until it will not rotate any further. The new Trim Ring is now
installed.
menu
FM
jump
2
1
3 4 5 6 7 8 9 0
direct
37
Special Features
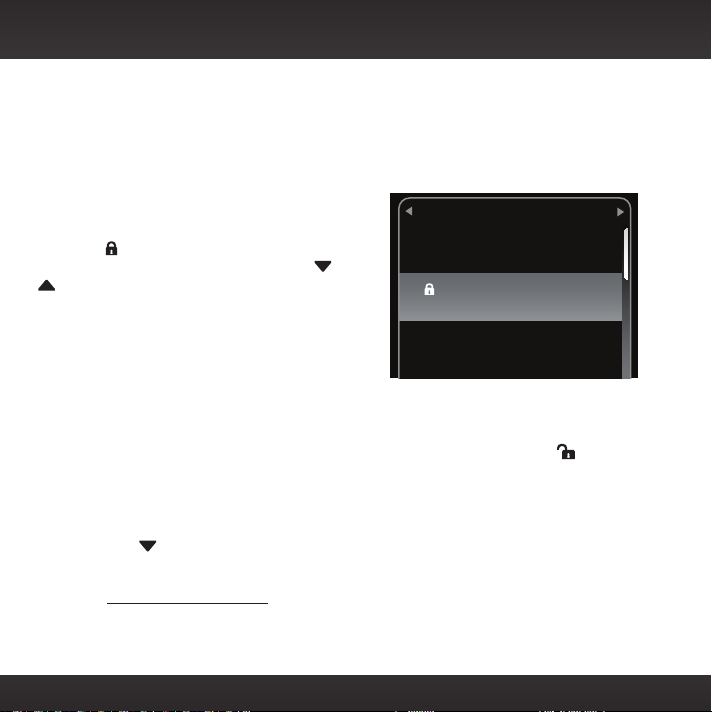
Parental Controls
OnyX has a parental control feature which allows you to lock access to channels,
or lock access to an entire category. A 4-digit code controls access to the locked
channel or locked category.
When you browse a category, the number of
the locked channel will be shown but not the
artist and song/program information. Instead, a
lock icon and the word “Locked“ is shown. If
you scroll through the channels using and
, the locked channels are skipped and are
neither displayed, nor tuned.
If you attempt to tune to a locked channel,
either by using direct tune or through the
category list, you’ll be prompted to enter your
4-digit code. When the correct code is entered,
you’ll be able to tune to and listen to the channel. All locked channels become
unlocked and remain unlocked until you turn OnyX Off, and back On. In the
category list, the previously locked channels will show an unlocked icon .
To turn Parental Controls On (or Off):
1 Press menu.
2 Press to scroll to and highlight Parental Controls. Press the Select
button.
•If this is the first time you want to turn on Parental Controls, Parental
Controls will be highlighted. Press the Select button. You will be
prompted to select a 4-digit code:
38
Pearl Jam Radio
22
Pearl Jam/Better Man
Locked23
Margaritaville24
Jimmy Buffett/Fins
Rock

i. For each digit, press one of the
0-9 keys and then press to
advance to the next digit. (Press
if you need to go back and
edit a previous digit.)
ii. When you have selected all 4
digits of your code press the
Select button.
iii. The Code Confirmation screen
will be displayed. For your
records, write down the code you
have selected. Press the Select
button. Continue with step 3.
•If you had previously selected a
4-digit code you will be prompted to
enter your code:
i. For each digit, press one of the
0-9 keys and then press to
advance to the next digit.
(Press if you need to go back
and edit a previous digit.)
ii. When you have selected all 4
digits of the code press the
Select button.
3 At the “Parental Controls” screen, Parental Controls will be highlighted.
Press the Select button to turn parental control On (or press the Select
button to turn parental control Off).
4 Press and hold menu to return to the main display screen.
Enter Parental Code
Press OK to confirm
Code Confirmation
Your Parental Code is:
3287
You will need this code to change
or turn off Parental Controls
Press Select to continue
39

Special Features
Locked Channels Locked Categories
To lock (or unlock) channels or categories:
1 Press menu.
2 Press to scroll to and highlight Parental Controls. Press the Select
button.
3 You will be prompted to enter the 4-digit code. For each digit, press one
of the 0-9 keys and then press to advance to the next digit. (Press if
you need to go back and edit a previous digit.)
4 When you have entered all 4 digits of the code press the Select button.
5 If Parental Controls is shown as Off, press the Select button to turn it
On, otherwise continue with the next step.
6 At the “Parental Controls” screen, Press to scroll to and highlight
Locked Channels. Press the Select button.
7 A list of all the categories and the channels in each category will be
displayed. Press and to scroll to and highlight a channel or
category you want to lock. Press the Select button. A lock icon will be
displayed to the left of the channel or category you locked. (To unlock a
locked channel or category, simply highlight the locked channel or
Locked Channels
Rock
Elvis Radio
E Street Radio
Undergrnd Gara
Pearl Jam Radio
40
Locked Channels
Rock
Elvis Radio
E Street Radio
Undergrnd Gara
Pearl Jam Radio

category and press the Select button. The lock icon will disappear
indicating the channel or category is unlocked.)
8 You can continue to lock and unlock as many channels or categories as
you wish. When you are finished, press and hold menu to return to the
main display screen.
To change your code:
1 Press menu.
2 Press to scroll to and highlight Parental Controls. Press the Select
button.
3 You will be prompted to enter your existing 4-digit code. For each digit,
press one of the 0-9 keys and then press to advance to the next digit.
(Press if you need to go back and edit a previous digit.)
4 When you have entered all 4 digits of the code press the Select button.
5 If Parental Controls are shown as Off, press the Select button to turn it
On, otherwise continue with the next step.
6 At the “Parental Controls” screen, Press to scroll to and highlight
Change My Code. Press the Select
button.
7 You will be prompted to enter a new
4-digit code. For each digit, press one
of the 0-9 keys and then press to
advance to the next digit. (Press if
you need to go back and edit a previous
digit.)
8 The Code Confirmation screen will be
Code Confirmation
Your Parental Code is:
3287
You will need this code to change
or turn off Parental Controls
Press Select to continue
41

Special Features
displayed. For your records, write down the code you have selected. Press
the Select button.
9 Press and hold menu to return to the main display screen.
To listen to a locked channel:
There are two ways to tune to a channel which has been locked. The first is
to directly tune to the locked channel, and the second is to select the locked
channel from a category list.
1 Directly tune to or select the locked channel:
To directly tune to a locked channel:
i. Press direct and enter the channel number using the 0-9 keys.
To select a locked channel from the category list:
i. Press or to view the category list of the locked channel to
which you wish to tune.
ii. Press to scroll to and highlight the locked channel. Press the
Select button.
2 You will be prompted to enter your existing 4-digit code. For each digit,
press one of the 0-9 keys and then press to advance to the next digit.
(Press if you need to go back and edit a previous digit.)
3 When you have entered all 4 digits of the code, press the Select button.
If your code is correct the channel will be tuned. All locked channels
become unlocked and remain unlocked until you turn OnyX Off, and back
On. In the category list, the previously locked channels will show an
unlocked icon .
42

Where Else Can You Use Your OnyX?
43

Where Else Can You Use Your OnyX?
SiriusXM offers a variety of accessories that allow you to adapt your OnyX to
your lifestyle and enhance your listening experience. With these accessories, you
can effortlessly take your Satellite Radio listening experience from your home or
office to your vehicle or on the go — all with a single subscription.
• In Your Vehicle – With Vehicle Kits, you can enjoy your OnyX in each of your
vehicles.
• In Your Office, Other Homes, etc. – With additional Home Kits, you can play
your OnyX through an existing stereo system or powered speakers where
you work, or in other homes.
• In Almost Any Location You Like – With a portable Sound System you have
the freedom to listen to your OnyX where and when you want, from your
kitchen or den, to the office, to outside on the deck, or at a picnic.
For more information on XM accessories or to purchase an accessory, please
visit your local retailer or www.siriusxm.com/accessories.
44

Configuring Your OnyX
45

Configuring Your OnyX
Radio ID
Your OnyX has an 8 character alphanumeric ID which uniquely identifies your
Radio. This ID is used during the subscription process.
To display the Radio ID:
1 Press menu.
2 Radio ID will be highlighted. If it is not
highlighted, press to scroll to and
highlight Radio ID. Press the Select
button. The Radio ID will be displayed.
3 Press and hold menu to return to the
main display screen.
46
Radio ID
Your Radio ID is:
A234B456

Jump Settings
The jump button can be configured to either jump back to the last channel to
which you were listening, or to jump to the traffic and weather for the city of
your choice from a list of 22 of the most congested cities. When configuring for
traffic/weather, you’ll be prompted to select your city.
To configure jump:
1 Press menu.
2 Press to scroll to and highlight
JUMP Settings and press the Select
button.
3 Mode will be highlighted with either
Traffic/Weather or Last Channel. If
you want to change the mode, press
the Select button. Otherwise, just
leave it as is. (Repeatedly pressing the
Select button toggles between the
choices.)
4 If you have selected Last Channel,
press and hold menu to return to
the main display screen. If you have
selected Traffic/Weather continue with
step 5.
5 Press to scroll to and highlight Set
Location and press the Select button.
6 A list of cities will be displayed. Press
Mode Last Channel
Mode
Set Location
JUMP Settings
JUMP Settings
Traffic/Weather
ATL
47

Configuring Your OnyX
to scroll to and highlight your
desired location and press the Select
button.
7 The JUMP Settings screen will display
the location you selected. Press and
hold menu to return to the main display
screen.
Set Location
Atlanta
Baltimore
Boston
Chicago
Dallas
Set Brightness
To change the display’s brightness:
1 Press menu.
2 Press to scroll to and highlight Brightness and press the Select
button.
3 Press to decrease or to increase
the brightness of the display.
4 Press the Select button to confirm the
brightness setting.
5 Press and hold menu to return to the
main display screen.
Set Brightness
Press arrow keys to adjust
and Select to confirm
48

Set Audio Level
The audio level of OnyX can be adjusted when an audio connection is made
between the dock and the stereo system or powered speakers. Audio level is used
to adjust OnyX’s volume level to match the volume of other audio sources you
may use, such as a CD player, or an MP3 player, etc.
Do not use the audio level as a volume control. Use the volume control on your
stereo system or powered speakers instead.
To adjust the audio level:
1 Press menu.
2 Press to scroll to and highlight
Audio Level and press the Select
button.
3 Press to decrease or to increase
the audio level.
4 Press the Select button to confirm the
new audio level.
5 Press and hold menu to return to the
main display screen.
Set Audio Level
Press arrow keys to adjust
and Select to confirm
49

E
L
Configuring Your OnyX
Signal Indicator
For best reception, your antenna should have an unobstructed view of the XM
satellites. In large cities, there are terrestrial transmitters (ground repeaters) to
help increase the signal coverage.
Your OnyX can display the strength of the satellite and terrestrial signals being
received.
To display the signal strength:
1 Press menu.
2 Press to scroll to and highlight
Signal Indicator and press the Select
button.
3 The Satellite and Terrestrial bars
show the strength of the signal being
received.
4 Reposition the antenna if you are
having trouble receiving the signal.
5 Press and hold menu to return to the
main display screen.
Signal Indicator
ATELLIT
TERRESTRIA
50

Factory Settings
The factory settings menu has two choices, AUX Detect and Restore Defaults.
AUX Detect applies to the Vehicle Dock only (refer to page 61).
Restore Defaults
You can clear all of your personal settings,
such as favorite channels, color theme, etc.,
and return the Radio to its original out-of-thebox settings
To reset OnyX to factory defaults:
NOTE! Restoring defaults permanently
removes all personal settings.
1 Press menu.
2 Press to scroll to and highlight
Factory Settings and press the Select
button.
3 Press to scroll to and highlight
Restore Defaults and press the Select
button.
4 A warning screen will be displayed. If
you are certain that you want to reset
your OnyX to the default settings,
press the Select button to confirm.
5 If you want to cancel, press menu to
return to Factory Settings.
Factory Settings
AUX Detect
Restore Defaults
Are You Sure?
All settings will be erased.
Press Select to confirm
or menu to cancel
enabled
51

Configuring Your OnyX
Demo Mode
Your OnyX has a demo mode that starts playing when, for a prolonged period of
time (more than 5 minutes), the Radio either detects it’s not connected to the
antenna, or the antenna stops receiving a signal. It disappears when the antenna is
connected properly or when the Radio starts receiving a signal. You can also exit
demo mode at any time, by pressing and holding the Select button for 10 seconds.
If desired, you can also manually put OnyX in demo mode.
The ability for OnyX to enter demo mode is enabled by default. If you don’t want
OnyX to ever enter the demo mode, you can disable the demo feature. You can
enable it again at another time if desired.
To enable or disable the demo mode:
1 Press menu.
2 Press to scroll to and highlight
Demo Mode and press the Select
button.
3 Status will be highlighted. Press
the Select button to toggle the
setting between enabled or disabled.
(Repeatedly pressing the Select button
toggles between the choices.)
4 If you have selected disabled, press
and hold menu to return to the main display screen. If you have selected
enabled continue with step 5.
5 Press to scroll to and highlight Enter Demo Mode and press the Select
button. The demo mode will start in 10 seconds.
Status
Enter Demo Mode
Demo Mode
enabled
52

6 To exit demo mode at any time, press and hold the Select button for 10
seconds.
Demo Mode
Entering Demo Mode.
Press & Hold Select
for 10 seconds to exit
53

54

Using OnyX with a Vehicle Dock
55

Using OnyX With a Vehicle Dock
This section contains information applicable only when using your OnyX with a
Vehicle Dock.
• If you purchase an XM Dock and Play PowerConnect Additional Vehicle Kit to
use your OnyX in your vehicle, follow the instructions included with the kit
for installation. When those instructions refer you to the User Guide for your
Radio for additional instructions, you will find the information in this User
Guide, in these sections:
“Find Available FM Channels in Your Area” on page 56
“Set and Select an FM Channel” on page 59
“FM Presets” on page 61
“Turn FM Transmitter On/Off” on page 63
• If you decide to use a Vehicle Dock from a Universal Xpress Car Kit, you’ll
need to do some additional configuration found in this User Guide in the
section:
“Using the Vehicle Dock From the Universal Xpress Car Kit” on page 62.
For troubleshooting information when using a Vehicle Dock, refer to the User
Guide for the Vehicle Dock.
Find Available FM Channels in Your Area
Before attempting any of the procedures below, you should park your vehicle in
a safe location. Do not attempt to set up your FM channels or any OnyX function
while driving.
PowerConnect allows you to listen to SiriusXM through your existing vehicle
radio. You will first need to find an available FM channel, which is a channel that is
not being used by an FM radio station in your area. When you tune your vehicle’s
FM radio to an available channel, you should only hear static or silence – not talk
or music.
56

Once you have found an available FM channel, you’ll need to tune OnyX and your
vehicle’s radio to the same FM channel to receive XM audio through your vehicle’s
radio.
We recommend one of the following methods to find an available FM channel:
1 Use the SiriusXM FM Channel Finder
Use the SiriusXM FM Channel Finder at www.siriusxm.com/frequency. Go
to the website and enter your zip code. The Channel Finder will suggest a
list of available FM channels in your area. For convenience, write down or
print out the list.
Tune OnyX to a favorite XM channel (or to channel 1, if it’s not activated).
Turn on your vehicle’s FM radio. Pick the first FM channel on your Channel
Finder list and tune the FM radio to that channel. If you do not hear a local
FM station broadcast, then tune OnyX to the same FM channel. (Refer to
“Set and Select an FM Channel” on page 59.) You should hear the XM channel
through your vehicle’s radio. If you are satisfied with the sound quality,
you’re done! If this FM channel doesn’t work well for you, work down the list
until you find an FM channel that allows you to hear XM clearly.
OR
2 Manually tune through your local FM channels
Manually tune through your local FM channels on your vehicle’s FM radio.
Turn on your vehicle’s FM radio. Start at 88.1 and use the ‘Manual’ tune
function on your vehicle’s FM radio to tune through each FM channel oneby-one (88.1 followed by 88.3 etc.) to locate channels that aren’t being used
by a local FM radio station. Write down each FM channel that has only static
or silence on it, until you reach 107.9. Once you have created your list of
available FM channels, you will need to find the one that provides the best
match for OnyX.
57

Using OnyX With a Vehicle Dock
Tune OnyX to a favorite XM channel (or to channel 1, if it’s not activated).
Pick the first FM channel on your list and tune the FM radio to that channel.
Then tune OnyX to the same FM channel. (Refer to “Set and Select an FM
Channel” on page 59.) You should hear the XM channel through your vehicle’s
radio. If you are satisfied with the sound quality, you’re done! If this FM
channel doesn’t work well for you, work down the list until you find an FM
channel that allows you to hear XM clearly.
NOTE! You may find an FM channel with static or silence that does not work with
OnyX. It is possible that some type of inaudible interference is present that
prevents reception of the XM broadcast. Your only options are to use another FM
channel or a different audio connection method.
TIP! If you regularly drive from one location to another, such as your daily
commute, you may need to use different FM channels along your route for best
performance. If this is the case, we recommend saving the best FM channels as
presets on your FM radio and OnyX. Then you simply select and match the best
channel for the area you are in.
TIP! It will be much more difficult to find available FM channels in large cities
than in most suburban or rural locations. A direct audio connection using the
Aux In Cable, Cassette Adapter, or professional installation is your best solution
if you drive in or near large metropolitan areas.
NOTE! The SiriusXM FM Channel Finder relies on data from the Federal
Communications Commission. The data may not reflect the latest stations in
your area. In addition, local geography and weather conditions can impact
reception, so your results may be different from the list.
NOTE! The performance of FM radios are different, based on manufacturer and
vehicle style. Some may not work well with the type of FM transmitter used by
OnyX. This is why we recommend a direct audio connection using the Aux In
Cable or Cassette Adapter if they can be used in your vehicle. Professional
installation can also resolve almost any performance issue.
58

Set and Select an FM Channel
OnyX allows you to easily store (i.e., preset) up to 5 different FM channels.
At any time, you can select any one of these 5 FM presets to hear SiriusXM
through your existing vehicle radio. Having a choice of 5 FM presets also makes
it easy to switch to the appropriate FM channel as you travel from one area to
another. Each FM preset is stored in its own storage location. You can easily add
or edit the FM preset in any one of the 5 storage locations.
IMPORTANT! OnyX and the vehicle’s FM radio need to be tuned to the same FM
channel in order to hear the audio.
TIP! The FM 1 storage location is preset with FM channel 97.9.
To set and select an FM preset:
1 Press menu.
2 Press to scroll to and highlight FM Settings and press the Select button.
3 FM Channels will be highlighted. If it is
not highlighted, press to scroll to
and highlight FM Channels. Press the
Select button.
4 Press to scroll to and highlight the
storage location (FM 1 to
FM 5) you want to set and press the
Select button. You can choose among
the following options:
i. If the chosen storage location is empty (denoted by “---“), or if the
storage location contains the FM preset currently being used
FM 1
FM 2
FM 3
FM 4
FM 5
FM Channels
97.9
99.3
103.7
_ _ _
_ _ _
current
59

Using OnyX With a Vehicle Dock
(denoted by “current”), then the FM channel tuning screen is
displayed.
ii. If the chosen storage location has an FM preset that is not
currently being used, and you want to edit it, Edit Channel is
highlighted. Press the Select button. The FM channel tuning
screen is displayed.
iii. If the chosen storage location has an FM preset that is not currently
being used, and you want to start using it, press to highlight
Start Using and press the Select button. Skip to step 7.
4 Press and to tune to the desired
FM channel in steps of .2, i.e., 99.3 to
99.5. Press and to tune to the
desired channel in steps of 1, i.e., 99.3
to 100.3. Press the Select button to
select the FM channel.
5 If you are editing the storage location
that has the “current” FM preset, skip
to step 7. Otherwise, Start Using will be
highlighted. Press the Select button.
NOTE! You can also set an FM preset
without having to start using it right
away. Just press menu and exit the
screen.
6 The chosen FM channel will be
confirmed on the display screen and
OnyX will tune to that FM channel.
7 Set your vehicle’s FM radio to same FM
channel.
Edit FM Channel 2
99.3 FM
Press arrow keys to tune
and Select to confirm
99.3 FM
Set your vehicle radio to the
above channel to enable audio.
60

IMPORTANT! You’ll first need to find a suitable FM channel that is unused or
available in your area.
FM Presets
FM presets make it easy to quickly access stored FM channels and choose a new FM
channel from them.
Use FM presets when you use PowerConnect or the FMDA to listen to your OnyX
through your vehicle’s FM radio.
To use a different FM preset:
1 Press FM to display the current FM
preset.
2 To display and select the next FM
preset, press FM. The Radio will tune to
the displayed FM channel. If the preset
is the one you want, press menu or wait
for the screen to timeout.
3 Repeatedly pressing FM will cycle
through the FM presets.
4 Set your vehicle’s FM radio to the same
FM channel.
IMPORTANT! You need to ensure that
your vehicle’s FM radio is tuned to the
same FM channel.
TIP! To configure the list of preset FM
channels, you need to find available FM
99.3 FM
Set your vehicle radio to the
above channel to enable audio.
103.7 FM
Set your vehicle radio to the
above channel to enable audio.
61

Using OnyX With a Vehicle Dock
channels in your area. Refer to”Find Available FM Channels in Your Area” on
page 56. Next, refer to “Set and Select an FM Channel” on page 59.
Auto Shut Off
Auto Shut Off is applicable only when OnyX is in a Vehicle Dock.
OnyX will automatically shut off after 8 hours
of inactivity, i.e., when no buttons have been
pressed. This feature prevents the vehicle
battery from being discharged if you forget to
turn your OnyX off.
When OnyX is about to shut off, the message
Auto Shut Off, Started auto shut off due
to inactivity is displayed, followed by Press
any button to cancel. If you wish to continue
listening, press any button.
Using the Vehicle Dock From the Universal Xpress Car Kit
If you have chosen to use the Vehicle Dock from the Universal Xpress Car Kit with
your OnyX Radio, you will need to complete some additional installation steps. When
you have completed these additional steps, you can continue with the installation of
your OnyX.
When you are using the Universal Xpress Vehicle Dock, the screen will initially
display “AUX Connected” when you power on your OnyX. Ignore this message.
Once you have completed the steps below, it will not be displayed again.
Auto Shut Off
Started auto shut off
due to inactivity.
Press any button to cancel
62

If you are connecting the audio through your vehicle’s FM radio (SureConnect
or FMDA):
1 Disable the AUX Detect feature. Refer to “AUX Detect” on page 65, and
disable AUX Detect.
2 Turn the FM Transmitter in OnyX On. Refer to “Turn FM Transmitter On/
Off” on page 63, and turn the FM Transmitter On.
3 Continue with the installation.
If you are connecting the audio using the Aux In Cable or Cassette Adapter:
1 Disable the AUX Detect feature. Refer to “AUX Detect” on page 65, and
disable AUX Detect.
TIP! The FM Transmitter must be Off. To verify that the FM Transmitter is Off,
refer to “Turn FM Transmitter On/Off” on page 63.
2 Continue with the installation.
Turn FM Transmitter On/Off
Turning the FM Transmitter On applies only if you are
using the older model Vehicle Dock from the Universal
Xpress Car Kit, and plan to use SureConnect or FMDA as
the audio connection option.
You’ll have to turn On the FM Transmitter under the FM
Settings menu. However, before you can access the FM
Settings menu, you first need to disable AUX Detect.
Refer to “AUX Detect” on page 65. Once you have disabled
AUX Detect, the FM Settings menu will be accessible.
AUX Connected
Audio enabled through
auxiliary line. FM turned OFF.
63

Using OnyX With a Vehicle Dock
To turn the FM Transmitter On:
1 Press menu.
2 Press to scroll to and highlight FM
Settings and press the Select button.
3 FM Transmitter will be highlighted.
Press the Select button to toggle the
setting from Off to On.
4 The FM Channels menu item will now
be accessible, allowing you to tune
OnyX and the FM radio in your vehicle to the same FM channel.
TIP! OnyX is programmed with FM channel 97.9 as the default setting.
To turn the FM Transmitter Off:
If you are using the older model Vehicle Dock from the Universal Xpress Car Kit,
and plan to use the Aux In Cable or a Cassette Adapter as the audio connection
option, you’ll have to turn the FM Transmitter under the FM Settings menu in
OnyX Off, if it was previously turned On.
1 Press menu.
2 Press to scroll to and highlight FM
Settings and press the Select button.
3 FM Transmitter will be highlighted.
Press the Select button to toggle the
setting from On to Off.
4 A warning message will be displayed
advising you to connect the Aux In
FM Transmitter
FM Channels
FM Transmitter
FM Channels
FM Settings
on
FM Settings
off
64

Cable. Press the Select button to
confirm that you want to turn off the
FM Transmitter.
5 Press and hold menu to exit.
Turn OFF FM?
Please connect an AUX cable
or no audio will be available.
Press Select to confirm
AUX Detect
AUX Detect allows OnyX to automatically detect a connection made to the
AUDIO connector of the PowerConnect Vehicle Dock by an Aux In Cable or
Cassette Adapter. AUX Detect is enabled by default.
IMPORTANT! If you are using the PowerConnect Vehicle Dock which came with
your OnyX, AUX Detect should remain enabled.
If you are using the older model Vehicle Dock from the Universal Xpress Car
Kit, and plan to use PowerConnect or FMDA as the audio connection option,
you will need to disable AUX Detect. Please read the additional instructions,
“Using the Vehicle Dock From the Universal Xpress Car Kit” on page 62. Once AUX
Detect is disabled, you’ll have to turn the FM Transmitter On. Refer to “Turn FM
Transmitter On/Off” on page 63.
To disable AUX Detect:
(Do this only when using the older model Vehicle Dock.)
1 Press menu.
65

Using OnyX With a Vehicle Dock
2 Press to scroll to and highlight Factory Settings and press the Select
button.
3 AUX Detect should be highlighted and show as enabled. Press the Select
button to toggle the setting.
4 A warning screen will be displayed.
Press the Select button to confirm that
you want to disable AUX Detect.
5 If you want to cancel press menu to
return to Factory Settings. AUX Detect
will remain enabled.
6 AUX Detect will show as disabled.
Press and hold menu to return to the
main display screen.
To enable AUX Detect
(Do this when the Radio is transferred to the PowerConnect Vehicle Dock from an
older model Vehicle Dock.)
1 Press menu.
2 Press to scroll to and highlight Factory Settings and press the Select
button.
3 AUX Detect will be highlighted and show as disabled. Press the Select
button again to toggle the setting to enabled.
4 Press and hold menu to return to the main display screen.
Disable AUX Detect?
Disable only if using vehicle dock
from Universal Xpress Car Kit.
Otherwise, leave it enabled.
Press Select to confirm
or menu to cancel
66

Troubleshooting
67

Troubleshooting
OnyX has been designed and built to be trouble-free but if you experience a
problem, try this:
• Check that all connections are firm and secure.
• Make sure you have connected the Home Dock as described in this User
Guide. Verify that the AC power outlet is working.
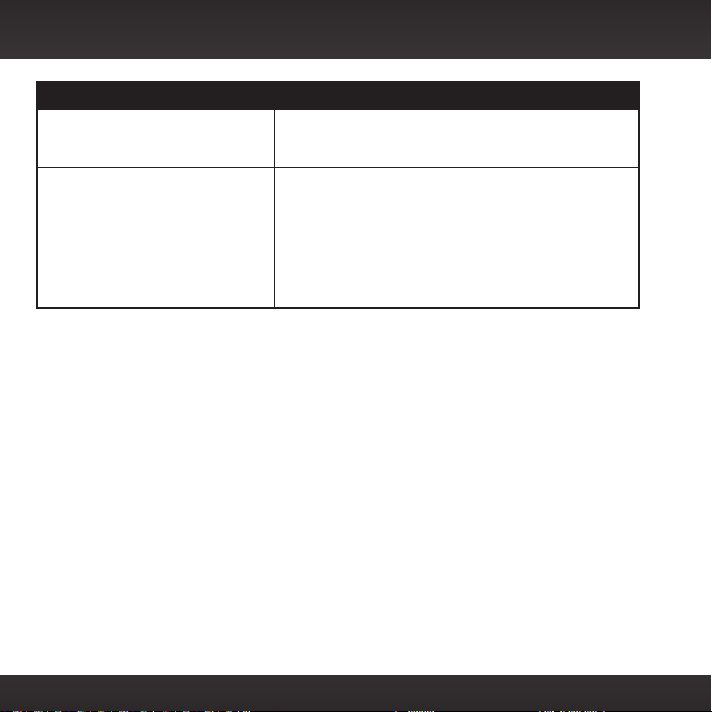
If you see this on the screen: Try this:
Acquiring Signal •Move the antenna to a south-facing window. Not sure
Check Antenna Connection •Make sure that the antenna cable is firmly and
Channel Off Air •The channel you’ve selected is not currently
Loading • Your OnyX is acquiring audio or program
which way is south? Think about where the sun rises
(in the east) and sets (in the west). Then stand so
that east is to your left and you’ll be facing south. Is
there a window in the direction you’re facing?
•You may need to find a better location for the
antenna. Refer to “Step 2: Place and Aim the
Indoor/Outdoor Home Antenna” on page 16.
securely plugged into the Home Dock. Make sure
the cable is not bent or broken.
•Turn OnyX Off, then On, to reset this message.
•If the message persists, most likely the Indoor/
Outdoor Home Antenna cable has been damaged.
Replace the antenna.
broadcasting. Tune to another channel.
information This message usually goes away in a
few seconds.
68

If you see this on the screen: Try this:
Updating •Your OnyX is updating with the latest encryption
— •No program information, such as artist name, song
code. Wait until the update is done.
•You may be trying to tune to a channel that is
blocked or unavailable. Tune to another channel.
title, or channel exists.
If this happens: Try this:
You do not receive all the
channels to which you subscribed
Audio sounds too soft •Raise the volume of your stereo system or powered
Audio fades •Check all cables for a firm and secure connection.
No audio •Check all cables between your OnyX and your
No song title or artist name is
displayed
•Ensure that you have subscribed to the service by
following the steps in “Step 4: Subscribe” on page 23.
•Go to https://care.siriusxm.com/retailrefresh_view.
action and follow the directions to refresh your
Radio.
•Call 1-800-967-2346 for further assistance.
speakers, or increase the audio level of your OnyX
until the sound quality improves. Refer to “Set
Audio Level” on page 49.
stereo system or powered speakers for a firm and
secure connection.
•Ensure you have selected the proper input source
on your stereo system, or try another source.
•Increase the audio level of your OnyX. Refer to “Set
Audio Level” on page 49.
•The information may not be available or updates
may be in progress.
69
Troubleshooting
If this happens: Try this:
Traffic and Weather channels
sound different from other
channels
The demo is playing •Your Indoor/Outdoor Home Antenna is not
•These channels use a different audio technology
than other channels so they often sound different
from other channels.
connected or you are not receiving the XM signal.
Check that the antenna is connected properly and is
not obstructed.
•Press and hold the Select button for 10 seconds to
exit Demo Mode.
•You can disable Demo Mode. Refer to “Demo Mode”
on page 52.
70

Product Specifications
71

Product Specifications
System
Power Requirements: 110 V AC, 400 mA (max)
Operating Temperature: -4°F to +140°F (-20°C to +60°C)
Audio Output: 1.5 V
OnyX Radio
Dimensions: 4.5 in (width) x 2.4 in (height) x 0.7 in (depth)
115 mm (width) x 61 mm (height) x 17 mm (depth)
Weight: 3.4 oz (95 g)
Home Dock
Dimensions: 3.6 in (width) x 1.1 in (height) x 1.5 in (depth)
93 mm (width) x 29 mm (height) x 38 mm (depth)
Weight: 3.8 oz (109 g)
Audio Connector: 1/8 in (3.5 mm) female
Antenna Connector: SMB male
Home Power Adapter
Input: 100-240 V AC, 50-60 Hz, 0.4 A
Output: 5.2 V DC, 1.6 A
Indoor/Outdoor Home Antenna
Type: XM Indoor/Outdoor
Connector: SMB female, right angle
Cable Length: 20 ft (6.1 m)
Stereo Audio Cable
Connectors: 1/8 in (3.5 mm) stereo male to RCA left & right
Cable Length: 3 ft (91 cm)
rms
(max)
72

Patent and Environmental Information
Patent Information
It is prohibited to, and you agree that you will not, copy, decompile, disassemble,
reverse engineer, hack, manipulate, or otherwise access and/or make available
any technology incorporated in this product. Furthermore, the AMBE™ voice
compression software included in this product is protected by intellectual
property rights including patent rights, copyrights, and trade secrets of Digital
Voice Systems, Inc. The software is licensed solely for use within this product.
The music, talk, news, entertainment, data, and other content on the Services
are protected by copyright and other intellectual property laws and all ownership
rights remain with the respective content and data service providers. You are
prohibited from any export of the content and/or data (or derivative thereof )
except in compliance with applicable export laws, rules and regulations. The user
of this or any other software contained in a SiriusXM Radio is explicitly prohibited
from attempting to copy, decompile, reverse engineer, hack, manipulate or
disassemble the object code, or in any other way convert the object code into
human-readable form.
Environmental Information
Follow local guidelines for waste disposal when discarding packaging and
electronic appliances.
73

FCC Statement
The user is cautioned that changes or modifications not expressly approved by Sirius XM
Radio Inc. can void the user’s authority to operate this device.
This device complies with Part 15 of the FCC Rules. Operation is subject to the following two
conditions:
1. This device may not cause harmful interference.
2. This device must accept any interference received, including interference that may
cause undesired operation.
This equipment has been tested and found to comply with the limits for a Class B digital
device, pursuant to Part 15 of the FCC Rules. These limits are designed to provide
reasonable protection against harmful interference in a residential installation.
This equipment generates, uses, and can radiate radio frequency energy and, if not installed
and used in accordance with the installation instructions, may cause harmful interference
to radio communications. However, there is no guarantee that interference will not occur
in a particular installation. If this equipment does cause harmful interference to radio or
television reception, which can be determined by turning the equipment off and on, the user
is encouraged to try to correct the interference by one or more of the following measures:
• Reorient or relocate the receiving antenna of the affected receiver.
• Increase the separation between the SiriusXM equipment and the affected receiver.
• Connect the SiriusXM equipment into an outlet on a circuit different from that to which
the affected receiver is connected.
• Consult the dealer or an experienced radio/TV technician for help.
WARNING! The FCC and FAA have not certified this Satellite Radio Receiver for use in any
aircraft (neither portable nor permanent installation). Therefore, Sirius XM Radio Inc. cannot
support this type of application or installation.
74

Copyrights and Trademarks
©2011 Sirius XM Radio Inc. “SIRIUS”, “XM” and all related marks and logos are trademarks
of Sirius XM Radio Inc. and its subsidiaries. “BBC” and “Radio One” are trademarks of the
British Broadcasting Corporation and are used under license. BBC logo © BBC 1996. Radio
1 logo © BBC 2001. Cosmopolitan™ is a registered trademark of Hearst Communications,
Inc. Elvis Radio logo © EPE Reg. U.S. Pat & TM off. IndyCar (and Design) are registered
trademarks of Brickyard Trademarks, Inc., used with permission. Major League Baseball
trademarks and copyrights are used with permission of Major League Baseball Properties,
Inc. Visit the official website at MLB.com. Games subject to availability and change and
may not include all spring training games. All rights reserved. NASCAR™ is a registered
trademark of the National Association for Stock Car Auto Racing, Inc. The NBA
identifications are the intellectual property of NBA Properties, Inc. and the respective NBA
member teams. © 2011 NBA Properties, Inc. © 2011 NFL Properties LLC. All NFL-related
trademarks are trademarks of the National Football League. NHL and the NHL Shield are
registered trademarks of the National Hockey League. © NHL 2011. All NHL logos and
marks and NHL team logos and marks depicted herein are the property of the NHL and the
respective teams and may not be reproduced without the prior written consent of
NHL Enterprises, L.P. The Home Ice© channel is a registered trademark of XM Satellite
Radio Inc. The Swinger Golfer logo is a registered trademark of PGA TOUR, Inc. Visit
www.siriusxm.com/channellineup for updates. All programming/channel lineup/XM service
subject to change or preemption. All other marks and logos are the property of their
respective owners. All rights reserved.
IMPORTANT NOTICE: REQUIRED SUBSCRIPTION
Hardware and subscription sold separately, and activation fee required. Other fees and taxes may
apply. Subscriptions governed by SiriusXM Customer Agreement; see www.siriusxm.com. Prices
and programming are subject to change. Service automatically renews into the subscription
Package you choose (which may differ from the Package which arrived with the Radio), for
additional periods of the same length as the Plan you choose, and automatically bills at the
then current renewal rate, after any complimentary trial or promotional period ends, until you
call SiriusXM at 1-866-635-2349 to cancel. XM U.S. Satellite service available only to those at
least 18 years of age in the 48 contiguous USA and DC, while SiriusXM Internet Radio is available
throughout our satellite area and also AK, HI and PR.
75

Owners Record
The Radio model number is located below and the XM Radio ID is located on the
label on the back of OnyX.
Record the XM Radio ID in the space provided below. Refer to these numbers
whenever you call your dealer regarding this product.
Radio Model Number: XDNX1
XM Radio ID:___________________________
76

Indoor/Outdoor Home Antenna Template
1-3/8”
1-1/8”
77

78

SiriusXM 90-Day Limited Warranty
What This Warranty Covers
This warranty covers defects in material and workmanship for 90 days from the date of purchase by the
original retail purchaser only. Sirius XM Radio Inc., at its sole option, will repair or replace the product
with a new or reconditioned product without charge for parts and labor. Products replaced under this
warranty become the property of SiriusXM. Replacement products are warranted to be free from defects
for 30 days or the remainder of the original warranty, whichever is longer.
What This Warranty Does Not Cover
This warranty does not cover: products sold as used, as is, reconditioned or refurbished; software stored
on internal or removable memory; non-rechargeable batteries, surface preparation cleaners, adhesive
pads, fasteners, and ear-buds; costs incurred for installation, removal or reinstallation of the product;
correction of installation problems, such as elimination of externally generated static or noise and
antenna placement and aiming; defects or damage caused by alteration, improper installation or removal,
use of third party accessories, mishandling, misuse, neglect, accident, power surges or acts of nature.
How to Obtain Warranty Service
To obtain warranty service, please call SiriusXM Listener Care at 1-866-746-7961. You will be required
to provide proof of purchase and a description of the defect. You must prepay the cost of shipping the
product to an approved service center.
LIMITATIONS OF LIABILITY
THE LIABILITY OF SIRIUSXM UNDER THIS WARRANTY IS LIMITED TO REPAIR OR REPLACEMENT
AS PROVIDED ABOVE AND, IN NO EVENT, SHALL THE LIABILITY EXCEED THE PURCHASE PRICE
PAID FOR THE PRODUCT. ANY IMPLIED WARRANTIES, INCLUDING ANY IMPLIED WARRANTY OF
MERCHANTABILITY OR FITNESS FOR A PARTICULAR PURPOSE, SHALL BE LIMITED TO THE DURATION
OF THIS WRITTEN WARRANTY. ANY ACTION FOR BREACH OF WARRANTY, INCLUDING BREACH OF
ANY IMPLIED WARRANTY OF MERCHANTABILITY, MUST BE BROUGHT WITHIN 48 MONTHS FROM THE
DATE OF ORIGINAL PURCHASE. IN NO CASE SHALL SIRIUSXM BE LIABLE FOR ANY CONSEQUENTIAL
OR INCIDENTAL DAMAGES FOR BREACH OF THIS OR ANY OTHER WARRANTY, EXPRESS OR IMPLIED.
SOME STATES DO NOT ALLOW LIMITATIONS ON HOW LONG AN IMPLIED WARRANTY LASTS OR
THE EXCLUSION OR LIMITATION OF INCIDENTAL OR CONSEQUENTIAL DAMAGES, SO THE ABOVE
LIMITATIONS OR EXCLUSIONS MAY NOT APPLY TO YOU. This warranty gives you specific legal rights
and you may also have other rights, which vary from state to state.

siriusxm.com
Sirius XM Radio Inc.
1221 Avenue of the Americas
New York, NY 10020
1.800.967.2346
© 2011 Sirius XM Radio Inc.
XDNX1HKUG 040711a
 Loading...