

Page 1
Siretta Routers
Quick Start Guide
Rev 1.0
Page 2
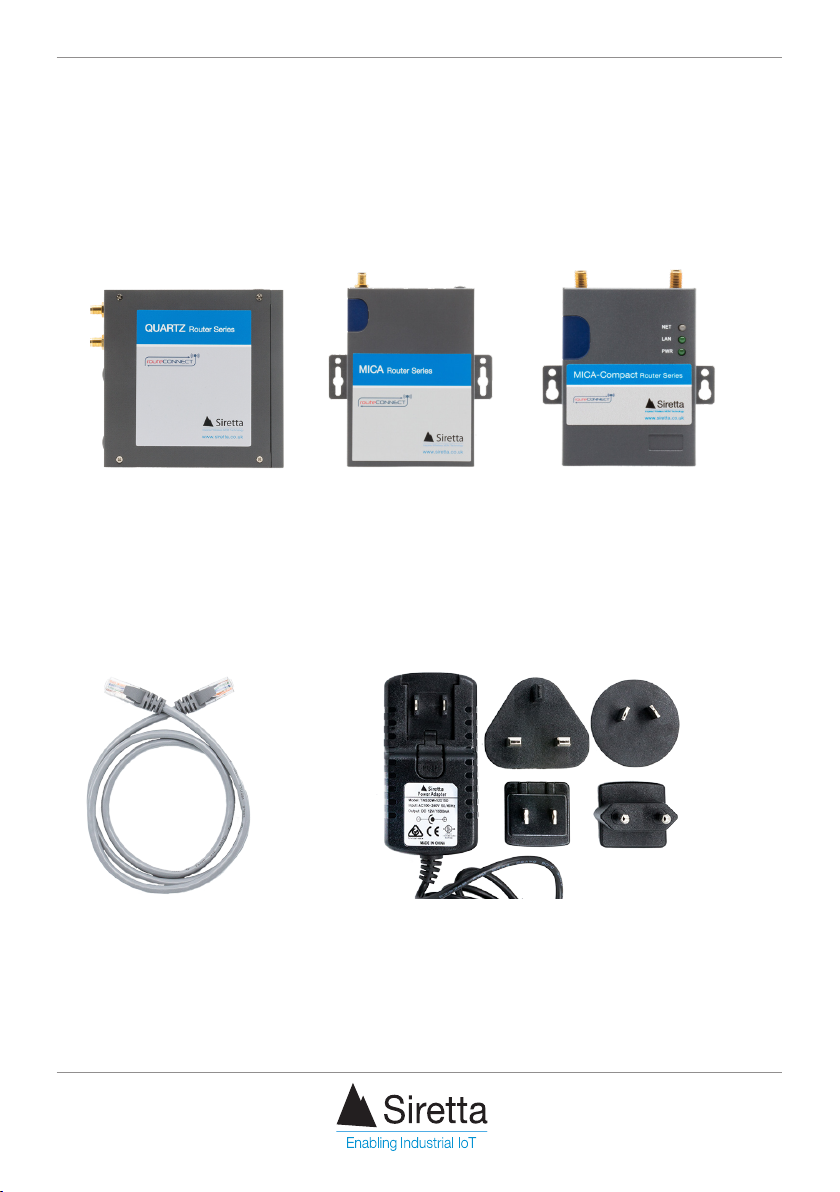
Whats in the Box?
This quick start guide is intended for all Siretta routers.
For reference, we have used a QUARTZ-GW22-UMTS (EU) 3G QUARTZ router.
As standard, you will receive one of the following routers:
QUARTZ
MICA MICA-Compact
Common Accessories
If you ordered a router with accessories, you will also receive the following items:
Ethernet Cable Power Adaptor
Page 3
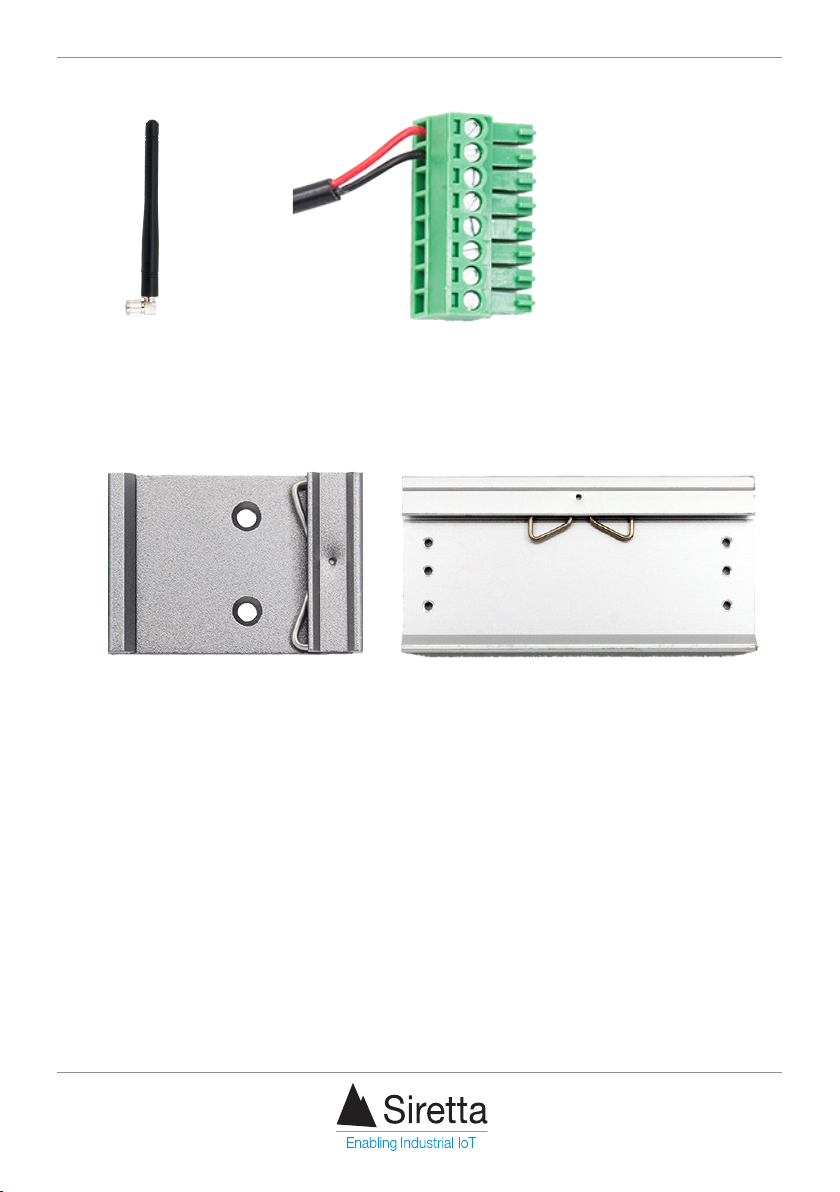
Cellular
Antenna
Power Cable and Connector
(QUARTZ Series only)
DIN Rail Adaptor
(QUARTZ and MICA-Compact
DIN Rail Adaptor
(MICA Series only)
Series only)
NOTE - For LTE routers, the kit may be supplied with an additional cellular antenna. This means
the router is capable of MIMO (Multiple Inputs, Multiple Outputs) cellular communication.
Page 4
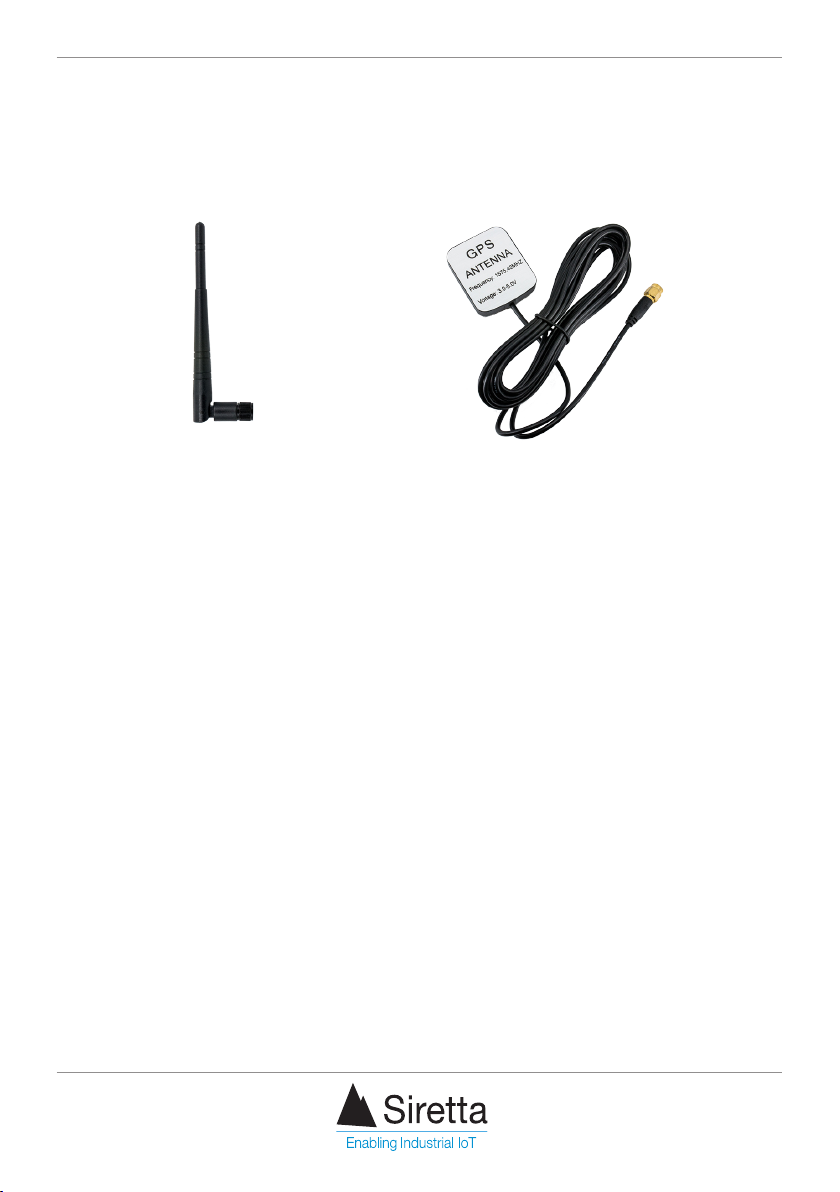
Optional Accessories
If you ordered a router with accessories and have opted for either WiFi and/or GPS
variants, then you will also receive one or both of the following items:
WiFi Antenna
(For routers with WiFI option)
(For routers with GPS option)
GPS Antenna
Additional Items
You will require the following items for conguring your router:
» 3G or 4G SIM card with APN details
» Screwdriver to open the SIM cover
» PC to congure the router
NOTE - Please ensure your antenna and SIM card are appropriate for the router you are using.
Page 5
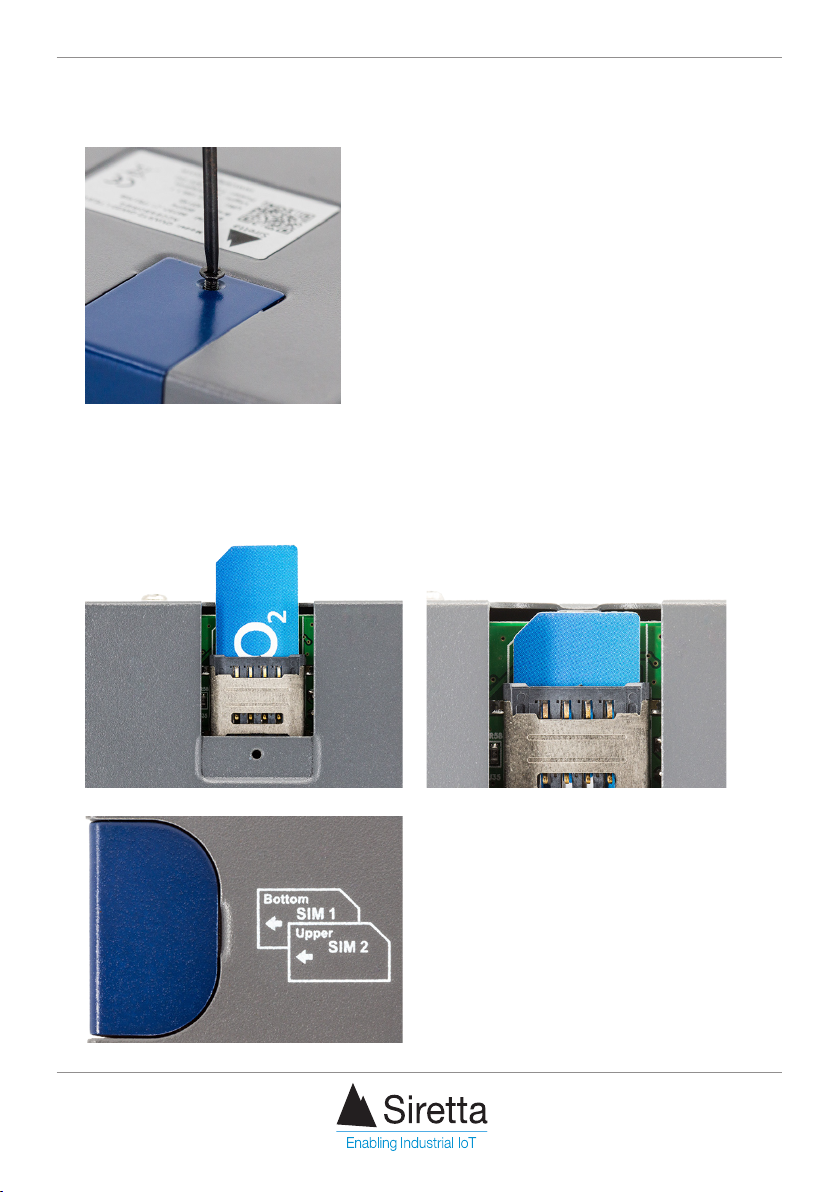
Step 1. Use a screwdriver to open the SIM cover on your router.
Step 2. Insert a SIM card fully into the SIM slot. Close the SIM cover, ensuring it is
screwed back into place.
Page 6
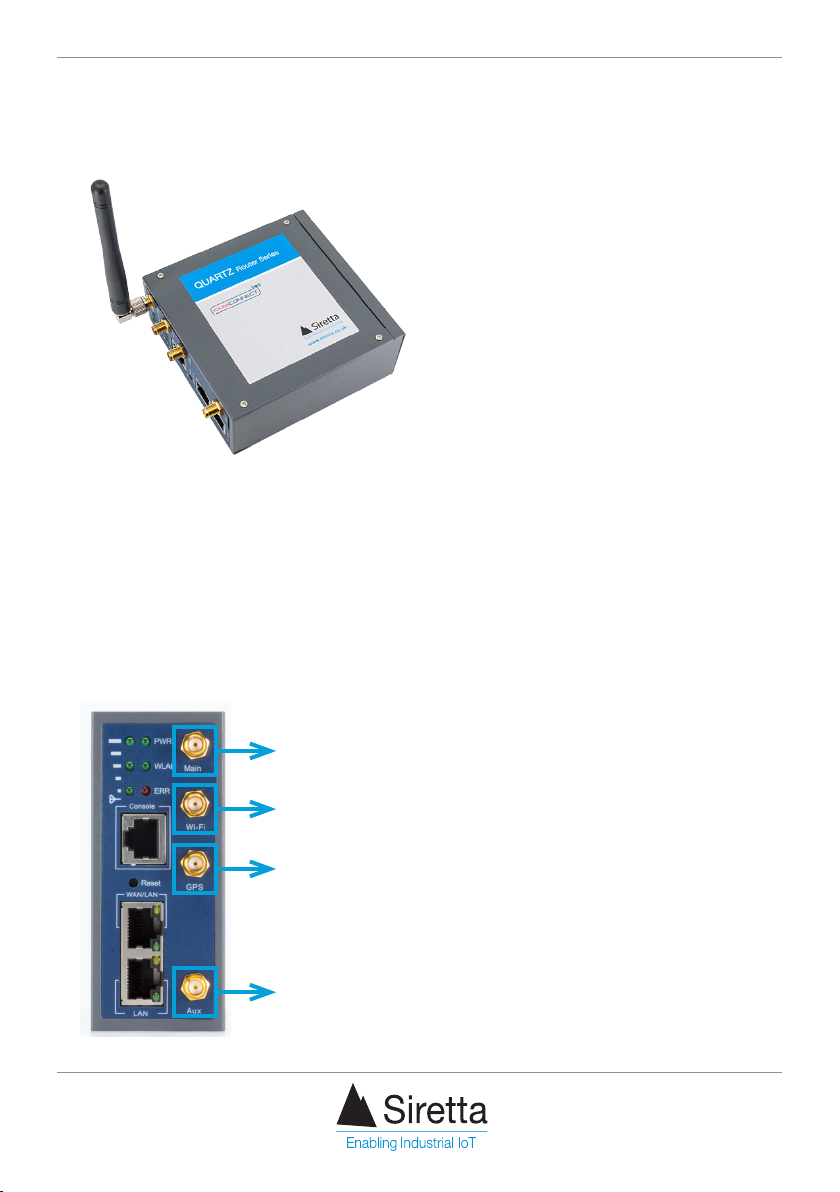
Step 3. Screw the cellular antenna to the main antenna connector on the router. Twist
the antenna connector clock-wise until the antenna is rmly connected.
If you have a WiFi router, connect the WiFi antenna to the WiFi antenna connector
on the router.
If you have a GPS router, connect the GPS antenna to the GPS antenna connector
on the router.
If you have an LTE router that has been supplied with a 2nd cellular antenna for
MIMO, then attach this to the AUX connector on the router.
Main
WiFi
GPS
AUX
Page 7
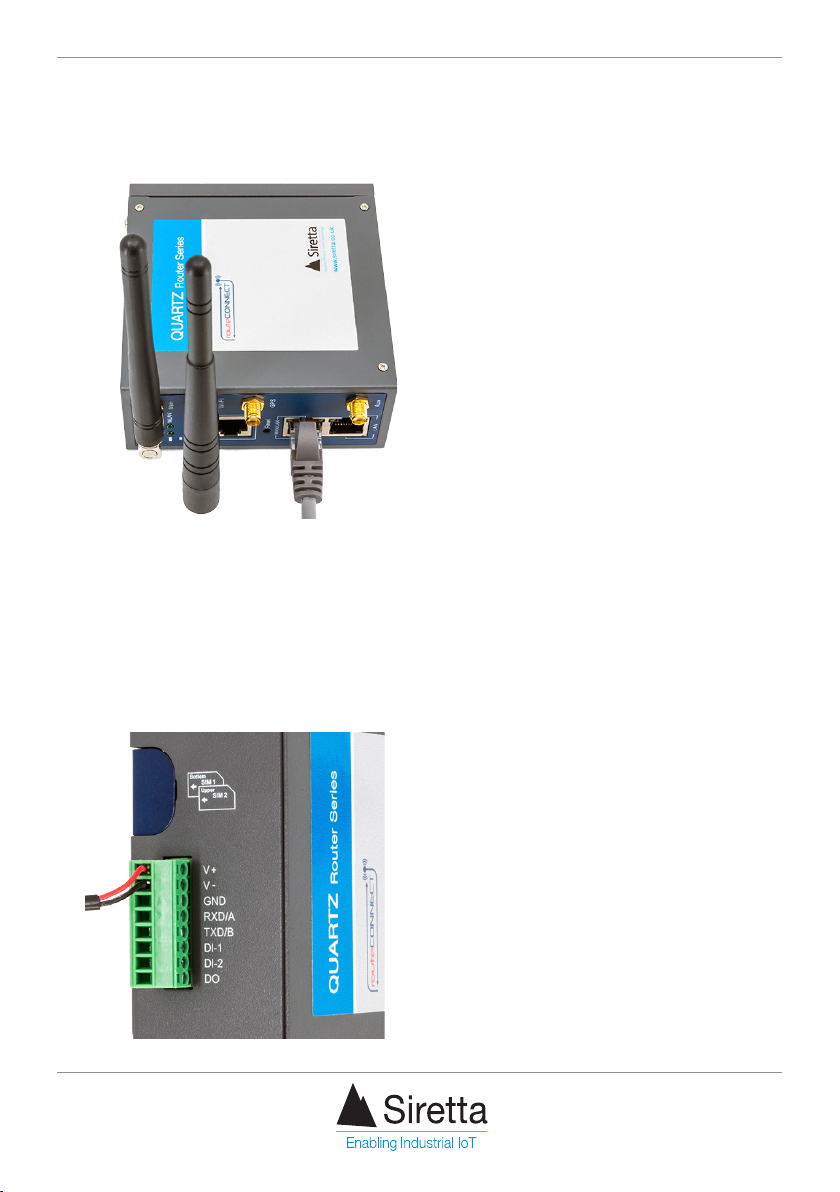
Step 4. Connect one end of the Ethernet cable into the router LAN port, connect the
other end of the cable into an Ethernet port on your PC.
Step 5. For MICA & MICA-COMPACT: Plug the plug-top power supply into your router
using the 2.1mm centre pin connector.
For QUARTZ: Plug the green power connector on the QUARTZ power adapter cable
into the router as shown below. Plug the 2.1mm centre pin connector from the plugtop power supply in to the other end of the QUARTZ power adapter cable.
Page 8
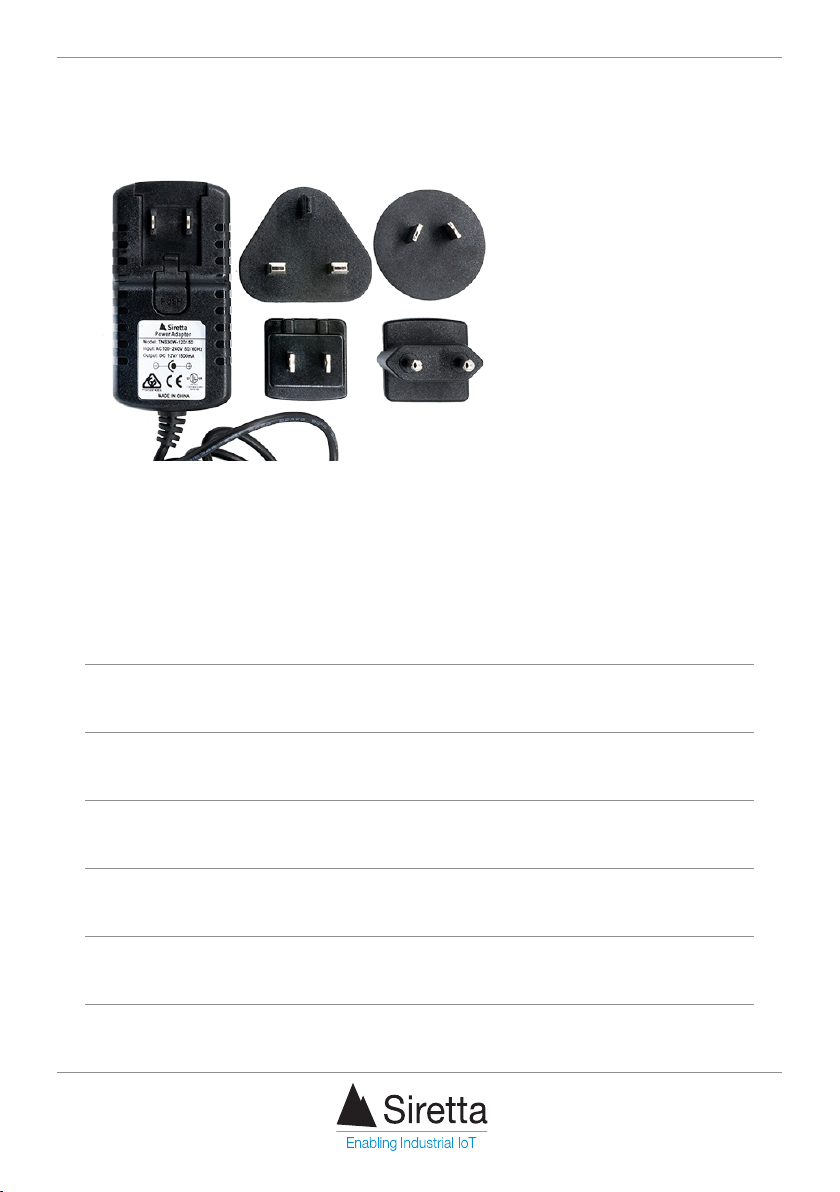
Step 6. Select connector type for your power adaptor depending on your
geographical location (UK/EU/USA/AU). Plug the power adaptor to the mains.
Step 7. Switch on the power. See table below for LED indications when router is
powered on.
Table 1. Router LED indication
LED colour State
PWR Green
when ON
WLAN Green
when ON
ERR Red
when ON
Signal Strength
Green when ON
Green LAN
when ON
If this LED is OFF, ensure power adaptor is connected correctly
and mains power is switched on.
Router WiFi is enabled. If this LED is OFF, WiFi is not enabled or
supported.
Router is not registered to the network. Check the SIM card is
inserted correctly.
If only one LED is on, check the antenna position or try a
different location.
LAN cable is connected. If this LED is OFF, check both ends of
the LAN cable are connected properly.
Page 9
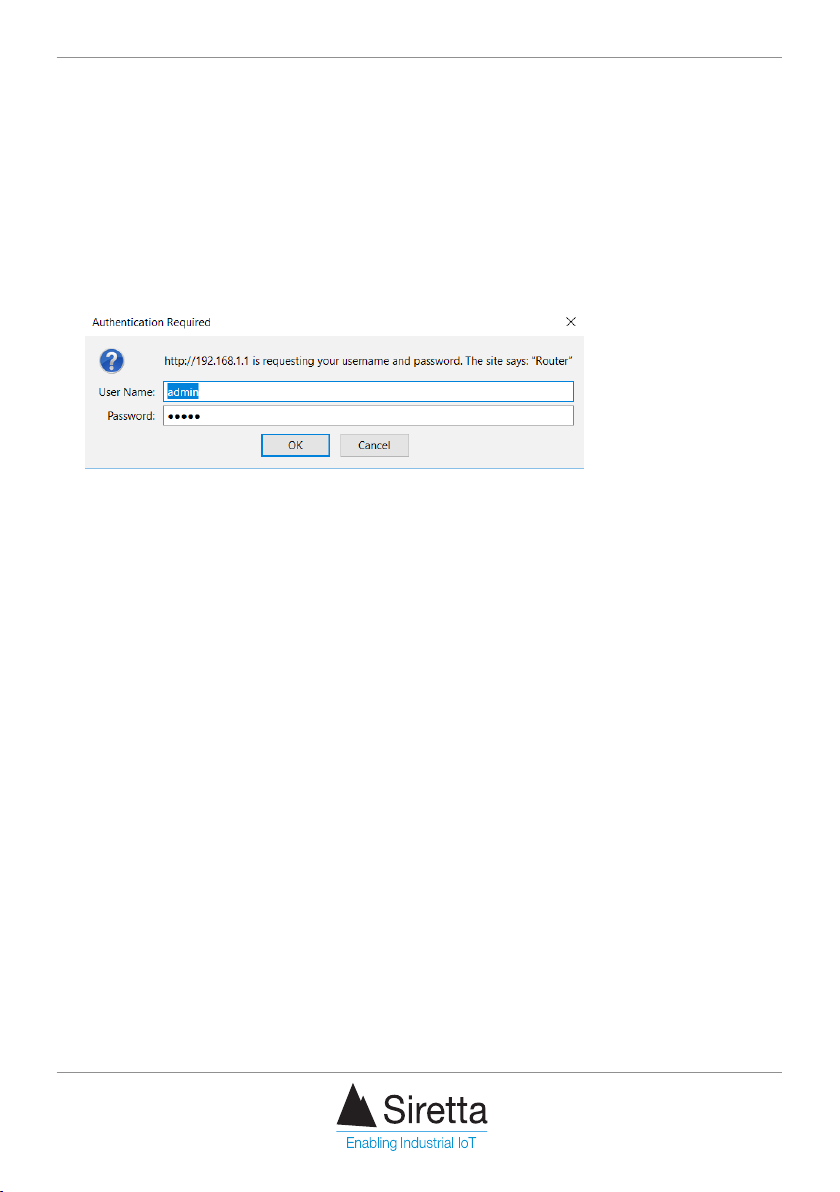
Step 8. Obtain the IP address of your router. You can nd this on the silver label on the
back of your router. Type the IP address of your router into your PC browser. When
prompted for your user name and password use the following:
User name: admin
Password: admin
These credentials are factory defaults. You can set your own user name and password
in the router settings.
Page 10
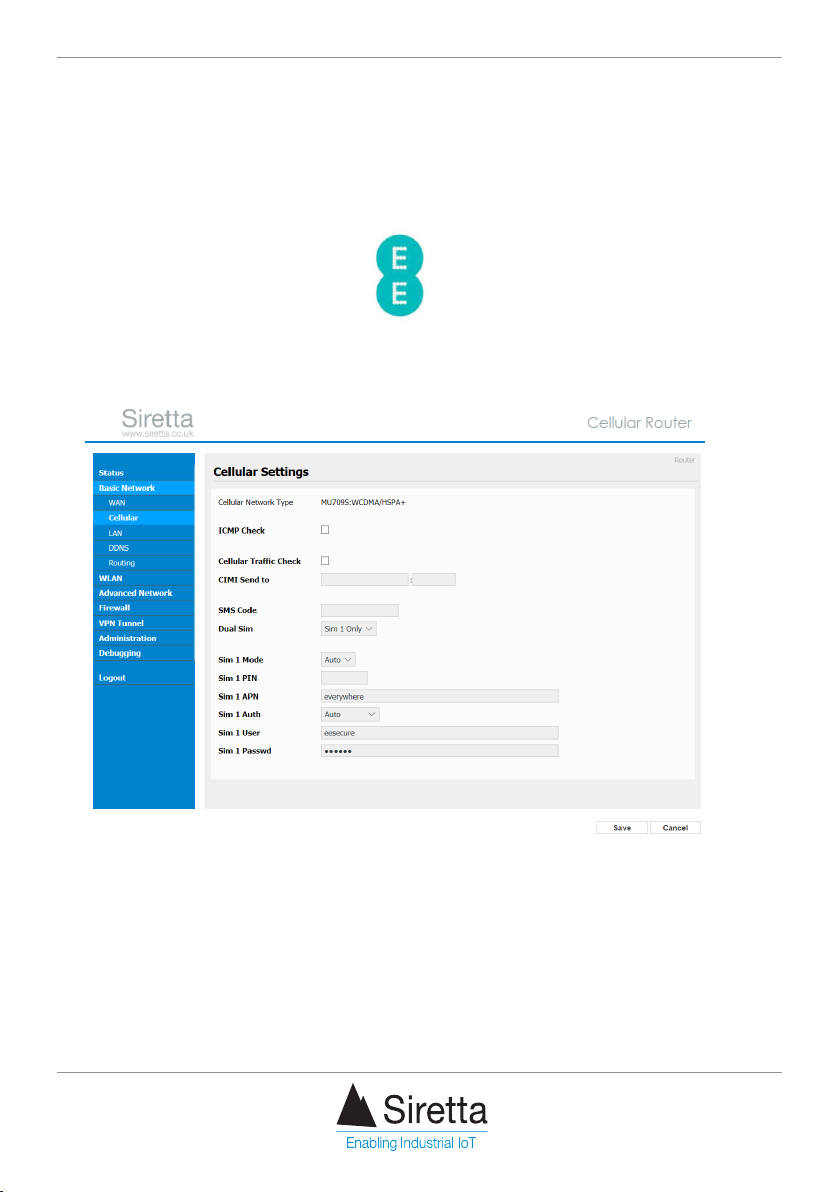
Step 9. On successful login, navigate to the Basic Network > Cellular tab.
When you arrive at the ‘Cellular Settings’ page, you will need to enter the APN details
for the network provider of your SIM card.
In the image below, we have used the APN details relevant for “EE”. These being:
• APN: everywhere
• Username: eesecure
• Password: secure
You are not required to enter any ‘Proxy’ or ‘Port’ details.
Page 11
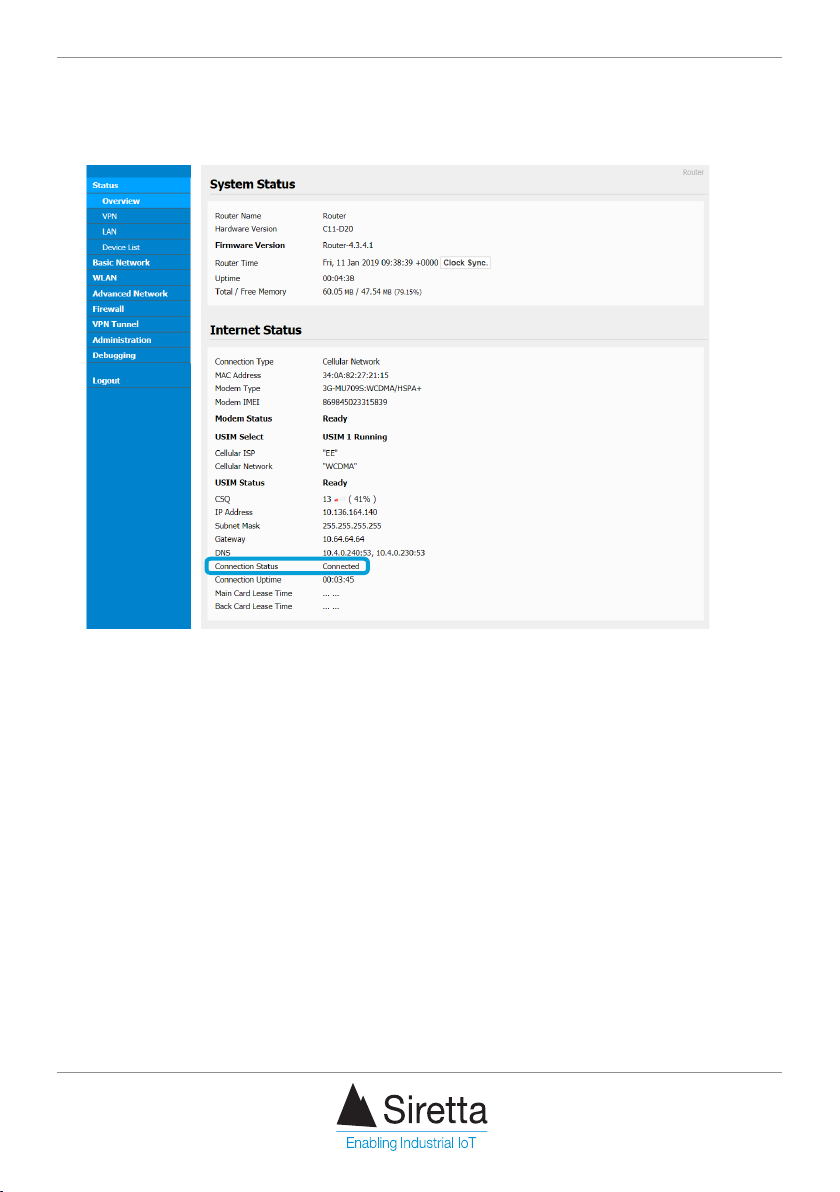
Step 11. Click “Save”. Your router will reboot itself. The router will then connect to the
network and is ready for use with your application.
NOTE - If you cannot access the router GUI, please check your local area network settings.
Further Information
For more information when using your router, a range of application notes, hardware
and software user manuals are available to download. You can request these from
your Siretta representative, alternatively these can be download from www.siretta.com
Page 12

sales
+44 (0)118 976 9000
fax
+44 (0)118 976 9020
email
www.siretta.com
Siretta Ltd
Basingstoke Road
Spencers Wood
Reading
Berkshire
RG7 1PW
United Kingdom
Company No. 08405712
VAT Registration No. GB163 04 0349
 Loading...