

Siqura HD10A, HD11A PRH, HD12A, HD10A PRH, HD16A WDR User Manual
Siq u r a H D 1 x A S e r i es
High-Speed IP PTZ Dome Cameras
User M an ual

Note: To ensure proper operation, please read this manual thoroughly before using the product and retain the
information for future reference.
Copyright © 2011 Siqura B.V.
All rights reserved.
Siqura HD1xA
User Manual v2 (102104-2)
AIT54MW07SP2
Nothing from this publication may be copied, translated, reproduced, and/or published by means of printing,
photocopying, or by any other means without the prior written permission of Siqura.
Siqura reserves the right to modify specifications stated in this manual.
Brand names
Any brand names mentioned in this manual are registered trademarks of their respective owners.
Liability
Siqura accepts no liability for claims from third parties arising from improper use other than that stated in this
manual.
Although considerable care has been taken to ensure a correct and suitably comprehensive description of all
relevant components, the manual may nonetheless contain errors and inaccuracies.
Should you detect any errors or inaccuracies in the manual, we would be grateful if you would inform us. This helps
us to further improve our documentation.
More information
If you have any comments or queries concerning any aspect related to the product, please do not hesitate to
contact:
The Netherlands
Corporate Headquarters
Siqura B.V.
Zuidelijk Halfrond 4
2801 DD Gouda, The Netherlands
General : +31 182 592 333
Fax : +31 182 592 123
E-mail : sales.nl@siqura.com
WWW : www.siqura.com
USA
US Corporate Offices
TKH Security Solutions USA, Inc.
12920 Cloverleaf Center Drive
Germantown, Maryland 20874, USA
General : +1 301 444 2200
Fax : +1 301 444 2299
E-mail : sales.us@tkhsecurity-usa.com
WWW : www.tkhsecurity-usa.com

Page i
Contents
1 INTRODUCTION ....................................................................................................................................... 3
2 SAFETY INFORMATION ............................................................................................................................ 5
2.1 CAUTIONS ................................................................................................................................................. 5
2.2 REGULATIONS ............................................................................................................................................ 6
3 PRODUCT DESCRIPTION ........................................................................................................................... 7
3.1 MODELS ................................................................................................................................................... 7
3.2 PRODUCT OVERVIEW .................................................................................................................................. 8
3.3 PRODUCT FEATURES .................................................................................................................................... 9
4 USING THE ON-SCREEN DISPLAY ............................................................................................................ 11
4.1 USING A CONTROL KEYBOARD TO ACCESS THE ON-SCREEN MENUS ...................................................................... 11
5 CAMERA CONFIGURATION VIA THE ON-SCREEN MENU ......................................................................... 13
5.1 DISPLAYING CAMERA PARAMETERS ON SCREEN. ............................................................................................. 14
5.2 OSD MENU TREE ..................................................................................................................................... 15
5.2.1 Siqura HD10A / HD10A PRH / HD12A.............................................................................................. 15
5.2.2 Siqura HD11A PRH / HD16A ............................................................................................................ 19
5.3 CONFIGURATION MENU............................................................................................................................. 23
5.3.1 Main Page 1 .................................................................................................................................... 23
5.3.1.1 Language ................................................................................................................................................ 23
5.3.1.2 Default camera ....................................................................................................................................... 23
5.3.1.3 Backlight compensation ......................................................................................................................... 23
5.3.1.4 Focus ...................................................................................................................................................... 24
5.3.1.5 Auto exposure ........................................................................................................................................ 25
5.3.1.6 White balance control (WBC) ................................................................................................................. 26
5.3.2 Setup Menu 1 .................................................................................................................................. 28
5.3.2.1 Zoom Speed ............................................................................................................................................ 28
5.3.2.2 Digital Zoom ........................................................................................................................................... 28
5.3.2.3 Slow Shutter ........................................................................................................................................... 29
5.3.2.4 Image Inverse ......................................................................................................................................... 29
5.3.2.5 Freeze (HD11A PRH / HD16A WDR) ........................................................................................................ 29
5.3.2.6 Aperture ................................................................................................................................................. 29
5.3.2.7 Stabiliser (HD11A PRH / HD16A WDR) ................................................................................................... 29
5.3.2.8 Exit .......................................................................................................................................................... 30
5.3.3 Setup Menu 2 .................................................................................................................................. 30
5.3.3.1 Flip .......................................................................................................................................................... 30
5.3.3.2 Angle Adjuster ........................................................................................................................................ 31
5.3.3.3 Speed by Zoom ....................................................................................................................................... 31
5.3.3.4 Auto Cali. ................................................................................................................................................ 31
5.3.3.5 OSD Auto Close ....................................................................................................................................... 31
5.3.3.6 System Reset .......................................................................................................................................... 31
5.3.3.7 Exit .......................................................................................................................................................... 31
5.3.4 Main Page 2 .................................................................................................................................... 32
5.3.4.1 ID Display ................................................................................................................................................ 32
5.3.4.2 Title Display ............................................................................................................................................ 32
5.3.4.3 Title Setting ............................................................................................................................................ 33
5.3.4.4 Preset ..................................................................................................................................................... 34
5.3.4.5 Sequence ................................................................................................................................................ 35
5.3.4.6 Auto Pan ................................................................................................................................................. 36
5.3.4.7 Cruise ...................................................................................................................................................... 37
5.3.4.8 Home Setting .......................................................................................................................................... 38
5.3.5 Main Page 3 .................................................................................................................................... 39

Contents
Page ii
5.3.5.1 IR function (removable IR cut) ................................................................................................................ 39
5.3.5.2 Alarm Detect .......................................................................................................................................... 40
5.3.5.3 WDR function ......................................................................................................................................... 41
5.3.5.4 Privacy Mask ........................................................................................................................................... 41
5.3.5.5 Time Setting............................................................................................................................................ 45
5.3.5.6 Schedule ................................................................................................................................................. 45
5.3.5.7 Exit OSD .................................................................................................................................................. 46
6 APPENDIX: OSD MENU NOTES ............................................................................................................... 47
6.1 SIQURA HD10A / HD10A PRH / HD12A ................................................................................................... 47
6.2 SIQURA HD11A PRH / HD16A WDR ........................................................................................................ 52

Page 3
C h a p t e r 1
1 Introduction
Document scope
This manual applies to the Siqura HD1xA series, Siqura's high-speed PTZ dome cameras. It
describes how to configure and operate the cameras. Instructions for installing a camera can be
found in the separate installation manual accompanying the specific model.
Intended audience
This manual is aimed at technicians and operators involved in the configuration and operation of
Siqura HD1xA cameras.
Assumed skills and know-how
To work with the Siqura HD1xA camera, an operator must have adequate knowledge and skills
in the fields of:
CCTV systems and components
Using a control keyboard to navigate an on-screen menu
Video, data, and contact closure transmissions
Specifications
The information given in this manual was current when published. Siqura reserves the right to
revise and improve its products. All specifications are subject to change without notice.
Important information
Before proceeding, please read and observe all instructions and warnings in this manual. Retain
this manual with the original bill of sale for future reference and, if necessary, warranty service.
When unpacking your product, check for missing or damaged items. If any item is missing, or if
damage is evident, do not install or operate this product. Contact your supplier for assistance.

Siqura HD1xA Series
Page 4
Typographical conventions
Before you start using this guide, it is important to understand the typographical conventions
used in the documentation. The following kinds of formatting in the text identify special
information.
Formatting convention
Type of Information
Numbered list
Step-by-step procedures. You can follow these instructions to
complete a specific task.
Special Bold
Items you must select, such as menu options, command buttons, or
items in a list.
Emphasis
Used to emphasize the importance of a point or for variable
expressions such as parameters.
CAPITALS
Names of keys on the keyboard. for example, SHIFT, CTRL, or
ALT.
KEY+KEY
Key combinations for which the user must press and hold down one
key and then press another, for example, CTRL+P, or ALT+F4.
Page 5
C h a p t e r 2
2 Safety Information
This chapter provides cautions on what to do and what not to do when working with or handling
your Siqura HD1xA unit. It also offers information on product compliance with environmental
regulations and explains how to dispose of the product at the end of its service life.
In This Chapter
Cautions ........................................................................... 5
Regulations ....................................................................... 6
2.1 Cautions
Handle the camera carefully.
Do not abuse the camera. Avoid striking, shaking, etc. as the camera can be damaged by
improper handling or storage.
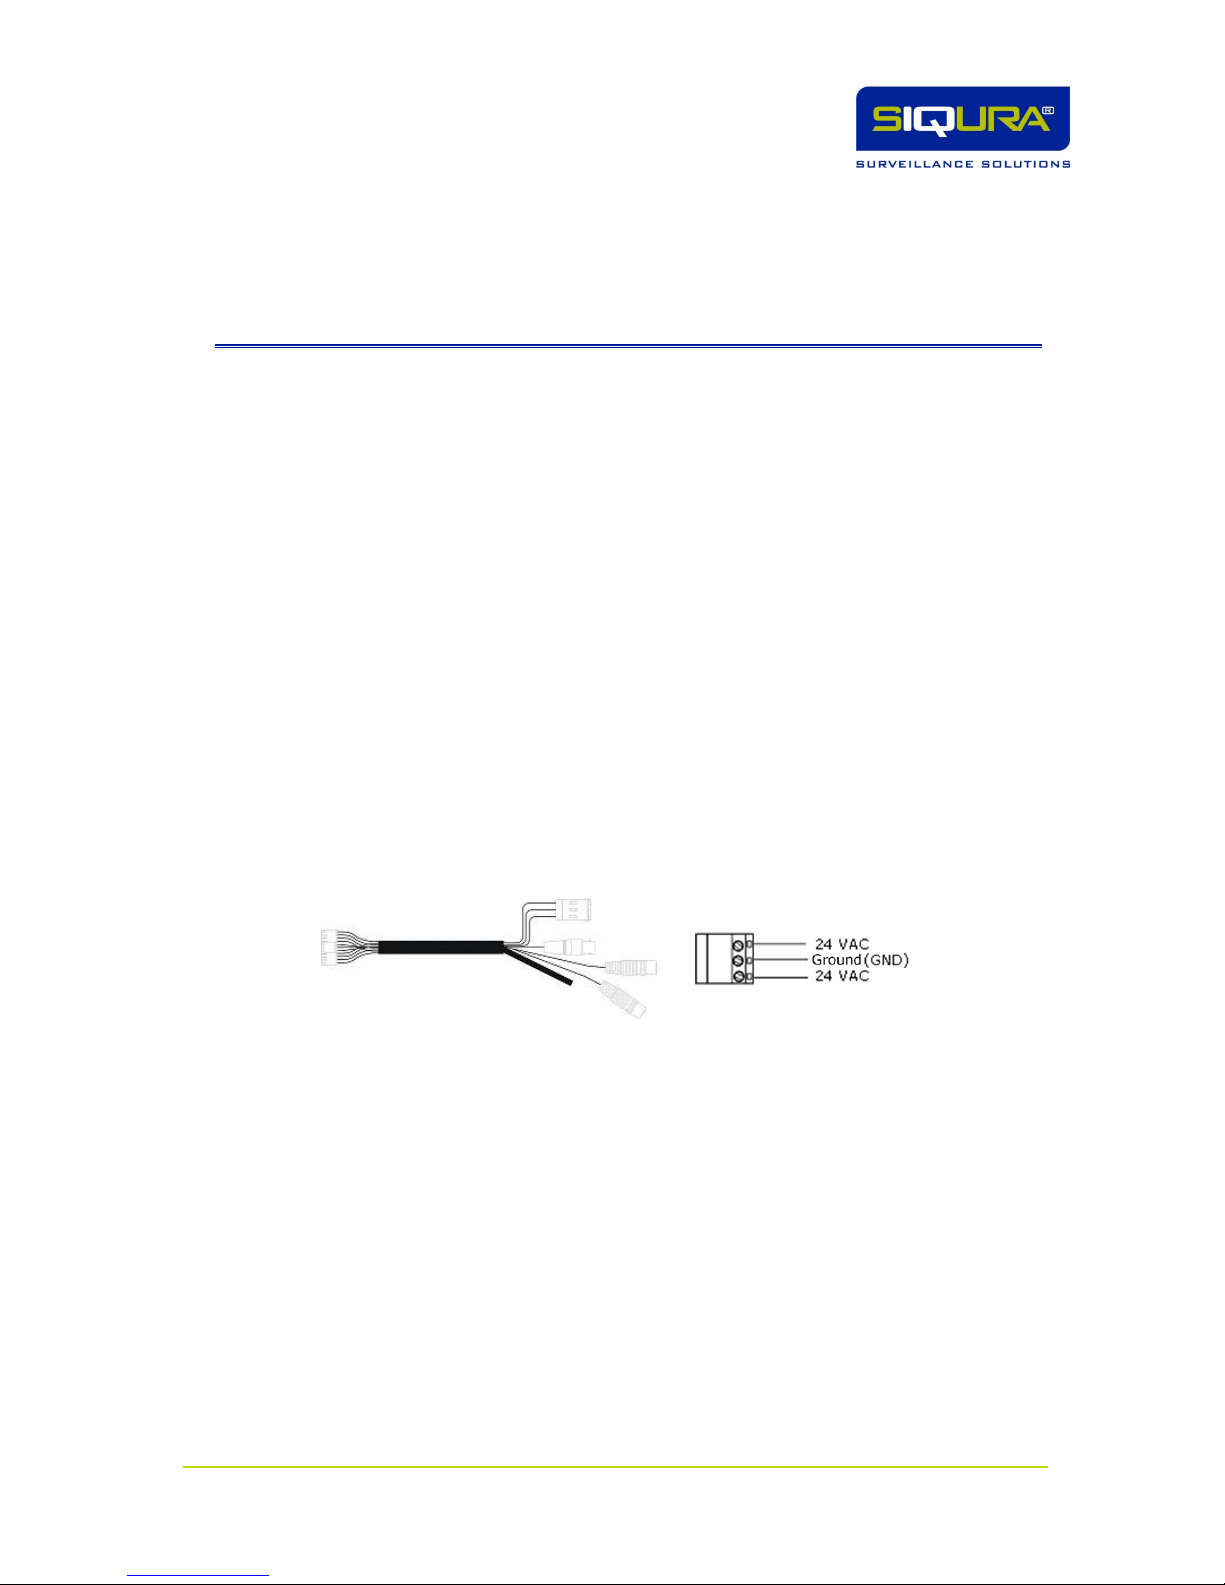
Install electrical wiring carefully.
Ask a qualified electrician to perform the wiring for the installation. Please note that input
electricity to the unit is at a tolerance of 24VAC 50/60 Hz ± 20%. Ground the camera
appropriately to prevent electric shock or damage.
Cable harness
Power input: 3-pin terminal block
Do not disassemble the camera.
To prevent electric shock, do not remove screws or covers. There are no user serviceable parts
inside. Please consult technical support if a camera is suspected of malfunctioning.
Do not block the cooling vent on indoor cameras.
This camera has a cooling fan inside. Blocking the cooling holes may lead to overheating and
cause malfunction. Overheating is not covered by warranty.
Do not operate the camera beyond the specified temperature,
humidity, and power source ratings.
The indoor dome camera is specified for temperatures between 0°C ~ 40°C (32°F ~ 104°F) and
humidity below 90%. The outdoor dome camera is specified for temperatures between -45°C ~
50°C (-49°F ~ 122°F), and relative humidity below 90%.
Siqura HD1xA Series
Page 6
Do not expose the indoor dome camera to moisture or operate it
in wet areas.
The indoor dome camera is designed for indoor use or use in locations where it is protected from
rain and moisture. If the indoor camera gets wet, turn the power off immediately and ask a
qualified technician for servicing. Moisture can damage the indoor camera and also create the
danger of electric shock.
Do not use strong or abrasive detergents when cleaning the
camera.
Use a dry cloth to clean the camera when it is dirty. If the dirt is hard to remove, use a mild
detergent and wipe gently. To clean the lens, use lens tissue or a cotton tipped applicator and
ethanol. DO NOT clean the lens with strong detergents.
Never face the camera towards the sun.
Do not aim the camera at bright objects. Whether the camera is in use or not, never aim it at the
sun or other extremely bright objects, as this can damage the camera.
2.2 Regulations
This device complies with Part 15 of the FCC Rules.
Operation is subject to the following conditions.
This device may not cause harmful interference.
This device must accept any interference received, including interference
that may cause undesired operation.
This symbol on the product or on its packaging indicates that this product shall not
be treated as household waste in accordance with Directive 2002/96/EC. Instead
it shall be handed over to the applicable collection point for the recycling of
electrical and electronic equipment. By proper waste handling of this product you
ensure that it has no negative consequences for the environment and human
health, which could otherwise be caused if this product is thrown into the garbage
bin. The recycling of materials will help to conserve natural resources.
For more information on how to recycle this product, please contact your local city
office, your household waste disposal service or the seller of the product.
Compliance is evidenced by written declaration from our suppliers, assuring that
any potential trace contamination levels of restricted substances are below the
maximum level set by EU Directive 2002/95/EC, or are exempted due to their
application.
Page 7
C h a p t e r 3
3 Product Description
The Siqura HD1xA series cameras are high-speed PTZ dome cameras designed to deliver superb
performance and durability in any security and surveillance installation. This chapter introduces
the individual camera models and their features.
In This Chapter
Models .............................................................................. 7
Product Overview ............................................................... 8
Product Features ................................................................ 9
3.1 Models
The Siqura HD1xA series provides five models of new generation advanced DSP colour camera.
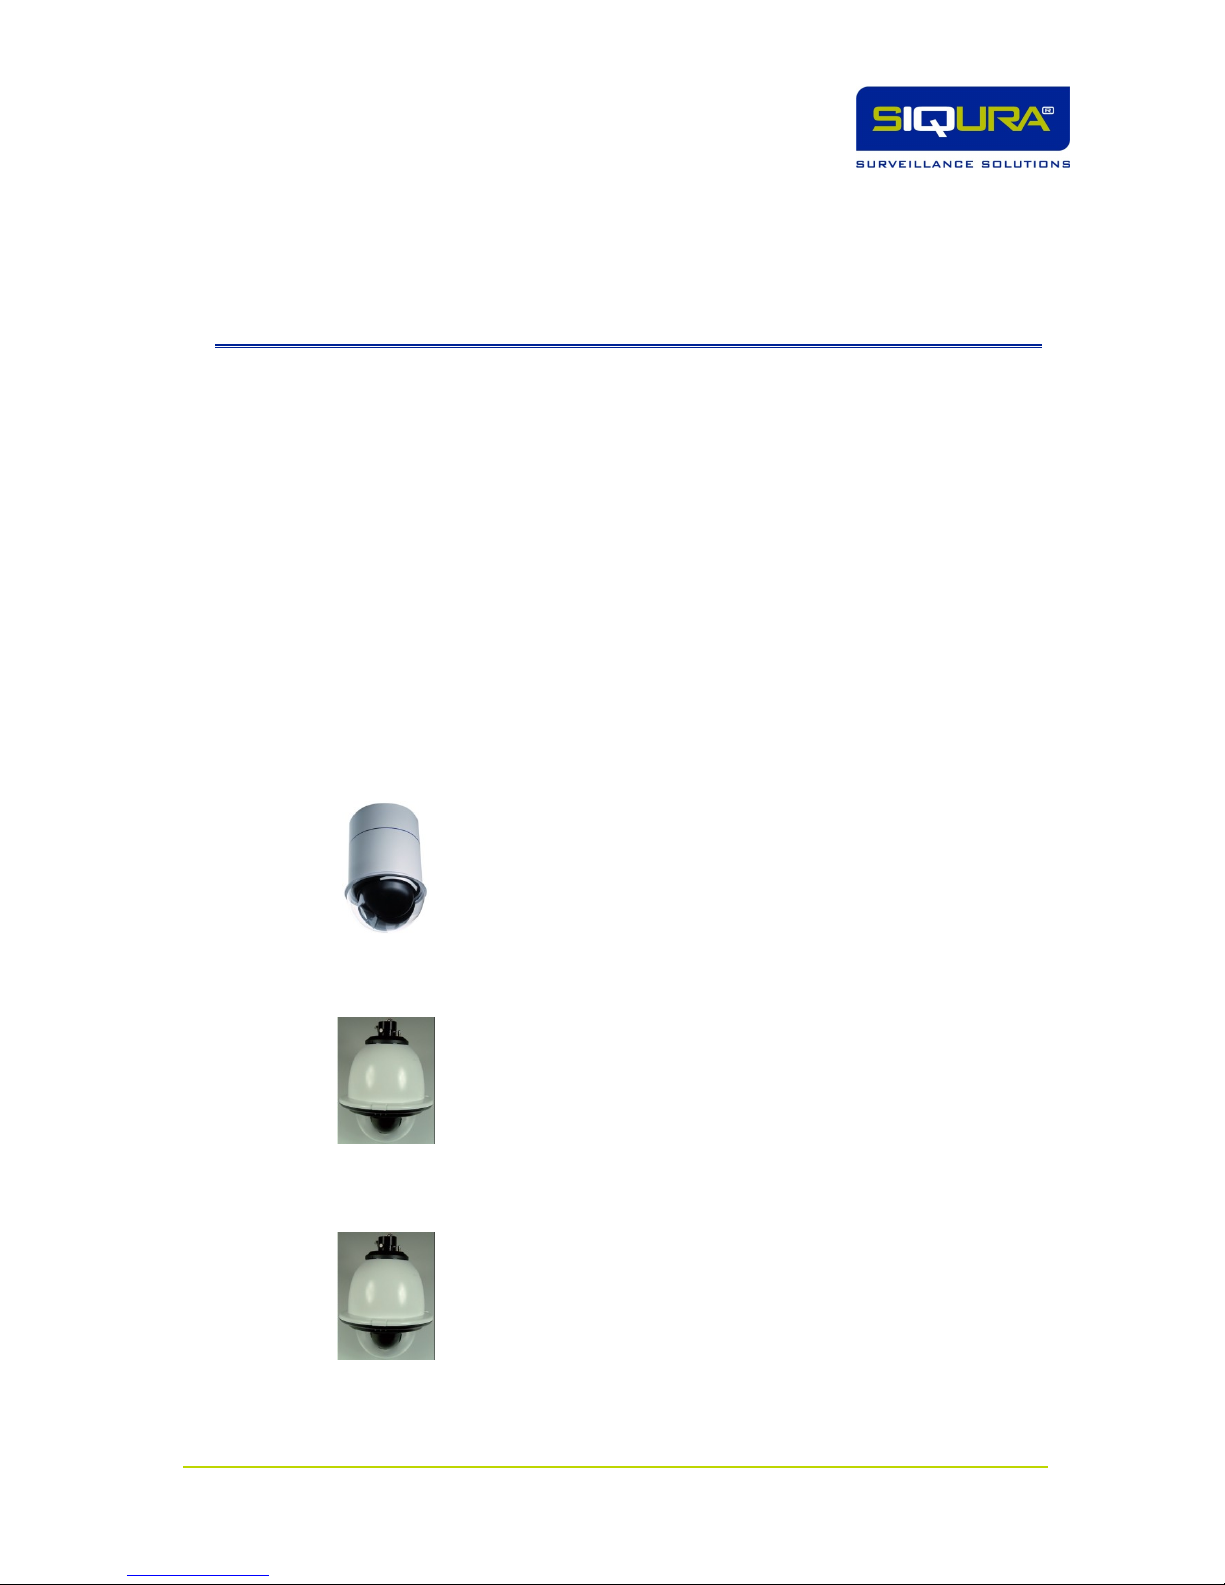
Siqura HD10A PTZ Dome
Indoor high-speed PTZ dome
26x optical zoom/12x digital zoom
24 privacy masks
Wide dynamic range
Siqura HD10A PRH PTZ Dome
Outdoor high-speed PTZ dome
26x optical zoom/12x digital zoom
24 privacy masks
Wide dynamic range
Pressurised housing
Siqura HD11A PRH PTZ Dome
Outdoor high-speed PTZ dome
35x optical zoom/12x digital zoom
8 privacy masks
Wide dynamic range
Electronic image stabilisation
Pressurised housing

Siqura HD1xA Series
Page 8
Siqura HD12A PTZ Dome
Outdoor high-speed PTZ dome
26x optical zoom/12x digital zoom
24 privacy masks
Wide dynamic range
(bracket sold separately)
Siqura HD16A WDR PTZ Dome
Outdoor high-speed PTZ dome
35x optical zoom/12x digital zoom
8 privacy masks
Wide dynamic range
Electronic image stabilisation
(bracket sold separately)
3.2 Product Overview
Functions
The Siqura HD1xA camera delivers up to 420x zoom ratio (HD16A WDR) to capture clear images
in the distance. Continuous auto focus, backlight compensation, auto exposure and digital slow
shutter functions are provided for clear and high quality images. The removable IR cut filter
ensures 24-hour operation, while Privacy Masks are specially designed to avoid intrusive
monitoring of specified regions. All of the salient functions can be incorporated to meet your
needs. The Home function allows users to specify a preset position as the 'home position' or
home functions (Sequence/Auto-Pan/Cruise). Under this mode, dome cameras return to the
preset home position or functions when the camera has been idle for a user-defined period of
time. Additionally, the unique Schedule function enables users to program a preset point or
function (Sequence/Auto-Pan/Cruise) so that these actions can be automatically performed at
specified times. The camera possesses the additional functions of image inverse, and OSD
operation in up to 12 languages.
PTZ
The dome provides variable pan/tilt speeds ranging from a fast patrol of 400° per second to a
slow ramble of 0.5° per second with +/- 0.1° pan accuracy for fast and accurate tracking. 360°
endless rotation and -10°~190° tilt travel allow for the tracking of objects passing directly
underneath the dome. Up to 256 preset points can be programmed for precise location of target
areas; users can also define eight sequence routes, four auto-pan routes, and one cruise route
for the camera to operate automatically.
Simplicity
The Siqura HD1xA series cameras require only a single cable for ease of installation, and can be
integrated with CCTV products such as DVRs, control keyboards, and CCTV accessories for a
total surveillance solution.
Reliability
Dependability and high reliability are key factors in the mini dome's design cycle. Siqura HD1xA
cameras are assembled with meticulous care and thorough testing at our ISO 9001-compliant
factory.

Product Description
Page 9
3.3 Product Features
Precise and Accurate Dome Performance
Auto Calibration
Preset accuracy of +/- 0.1°
Preset speed up to 400°/sec
Proportional Pan & Tilt Speed
Preset Position/Sequence/Auto Pan/Cruise
Dynamic Dome Applications
Multi-language OSD
Support for 2-way audio
Remote PTZ control using the Pelco D protocol
Up to 24 masking zones (Optional)
8 alarm inputs, 1 alarm output; support for remote streaming of alarm signals
Video motion detection
Flexible indoor/outdoor mountings
Weather-resistant
Pressurised housing (HD10A PRH / HD11A PRH)
Superior Camera Image Quality
Minimum illumination 0.01 Lux (B/W)
Digital Slow Shutter
Electronic Shutter
Wide dynamic range (Optional)
Auto white balance
Backlight Compensation
Auto exposure
Image inverse
Electronic image stabiliser (Optional)
Removable IR-Cut Filter


Page 11
C h a p t e r 4
4 Using the On-Screen Display
Refer to the following sections to operate and set the dome camera using its on-screen display
(OSD). You can control the dome camera via the OSD or with a control keyboard or other control
device.
In This Chapter
Using a control keyboard to access the on-screen menus ........ 11
4.1 Using a control keyboard to access the
on-screen menus
To enter the on-screen menu with a control keyboard
Using the Pelco D protocol, enter 95 and then Preset.
To navigate the on-screen menu with joystick or direction keys
Use the UP/DOWN buttons (or direction keys) to move the cursor up and down the on-screen
menu.
For menu items with an arrow pointing to the right , pan LEFT/RIGHT or use the direction
keys to select a menu option or show a submenu.
For menu items with an arrow pointing down , use the Preset 95 command to enter the
submenu.
For menu items with both an arrow pointing to the right and an arrow pointing downwards
, pan LEFT/RIGHT or use the direction keys) to select a menu option or use the Preset 95
command to open submenus.
If the keyboard has an open/close iris control, you may use:
Open iris to enter a submenu.
Close iris to exit a submenu or to exit the on-screen menu.
Additional commands from a keyboard
The single contact closure output can be controlled with the following Pelco-D commands:
Alarm Output On - Set Preset 9 6
Alarm Output Off - Go Preset 9 6


Page 13
C h a p t e r 5
5 Camera Configuration via the
On-Screen Menu
The Siqura HD1xA's On-Screen Menu (OSM) can be used to configure detailed camera functions
and parameter settings. This chapter provides a detailed description of OSM structures, settings,
and values for the various models of the Siqura HD1xA series.
In This Chapter
Displaying Camera Parameters on Screen. ............................ 14
OSD Menu Tree ................................................................. 15
Configuration Menu ............................................................ 23

Siqura HD1xA Series
Page 14
5.1 Displaying Camera Parameters on Screen.
Certain camera parameters can be selectively displayed on screen as described below.
Position
Function
OSD Display
Description
1 Focus modes
A
Auto focus mode
M
Manual focus mode
2 Backlight
X
Backlight compensation OFF
B
Backlight compensation ON
3
Alarm
ALARM
Alarm message
4
Zoom ratio
x1
Present zoom ratio
(Optical zoom/Digital zoom)
5
Title
Maximum 20 characters for each title.
16 sets of title are available.
6
Camera ID
Show the camera ID (not recommended as this value is fixed at
001).
OSD summary, for positions see below
On-screen display positions

Camera Configuration via the On-Screen Menu
Page 15
5.2 OSD Menu Tree
The OSD setup menu structure is listed in the following tables. Print the OSD menu table (see
"Appendix: OSD Menu Notes" on page 47) to record your own settings.
5.2.1 Siqura HD10A / HD10A PRH / HD12A
Item
Layer 1
Layer 2
Layer 3
Default
LANGUAGE
ENGLISH, FRENCH, GERMAN, ITALIAN, PORTUGUESE,
SPANISH, RUSSIAN, POLISH, SIMPLIFIED CHINESE,
TRADITIONAL CHINESE, JAPANESE, TURKISH
ENGLISH
DEFAULT
CAMERA
<ON>, <OFF>
ON
BACKLIGHT
<ON>, <OFF>
OFF
FOCUS
AUTO
AF MODE <NORMAL>, <PT TRIG>,
<ZOOM TRIG>
AUTO
EXIT + SAVE: YES
MANUAL
AE MODE
EXPOSURE
COMP.
<OFF>, EXPOSURE VALUE: <-10.5dB> ~
<10.5dB>
OFF
AE MODE
AUTO
BRIGHT VALUE;
SHUTTER SPEED;
IRIS VALUE; GAIN
VALUE: AUTO
EXIT + SAVE: YES
SHUTTER
BRIGHT VALUE:
AUTO
SHUTTER SPEED
<1/50> ~ <1/10000>
SEC.
-or-
SHUTTER SPEED
<1/60> ~ 1/10000
SEC.
IRIS VALUE: AUTO
GAIN VALUE: AUTO
EXIT + SAVE: YES
IRIS
BRIGHT VALUE:
AUTO
SHUTTER SPEED:
AUTO
IRIS VALUE: <F1.6>
GAIN VALUE: AUTO
EXIT + SAVE: YES
MANUAL
BRIGHT VALUE:
AUTO

Siqura HD1xA Series
Page 16
Item
Layer 1
Layer 2
Layer 3
Default
SHUTTER SPEED:
<1/50> ~ <1/10000>
SEC.
IRIS VALUE:
<F1.6>
GAIN VALUE
<-3>dB ~ <28>dB
EXIT + SAVE: YES
EXIT
YES
WBC MODE
AUTO (Auto White Balance)
INDOOR
OUTDOOR
ATW (Auto-tracing WBC)
MANUAL
R GAIN <000> ~ <127>
B GAIN <000> ~ <127>
EXIT + SAVE: YES
SETUP MENU 1
ENTER
ZOOM SPEED
<1> ~ <8>
8
DIGITAL ZOOM
<ON>, <OFF>
OFF
SLOW SHUTTER
<ON>, <OFF>
OFF
D.N.R.
2 D.N.R.: <ON>,
<OFF>
ON
3 D.N.R.: <ON>,
<OFF>
ON
EXIT + SAVE: YES
IMAGE INVERSE
<ON>, <OFF>
OFF
FREEZE
<ON>, <OFF>
OFF
APERTURE
<01> ~ <16>
07
EXIT
<YES>
SETUP MENU 2
ENTER
FLIP
<OFF>, <M.E.>,
<IMAGE>
OFF
EXIT + SAVE: YES
ANGLE ADJUSTER
MIN ANGLE <0 ~
+10 DEG>
00
MAX ANGLE <080 ~
100 DEG>
90
EXIT + SET
YES
SPEED BY ZOOM
<ON>, <OFF>
OFF
AUTO CALI.
<ON>, <OFF>
OFF
PASSWORD
<ON>, <OFF>
OFF
OSD AUTO CLOSE
<OFF>, <10> ~
<30> SEC.
20
 Loading...