

Page 1
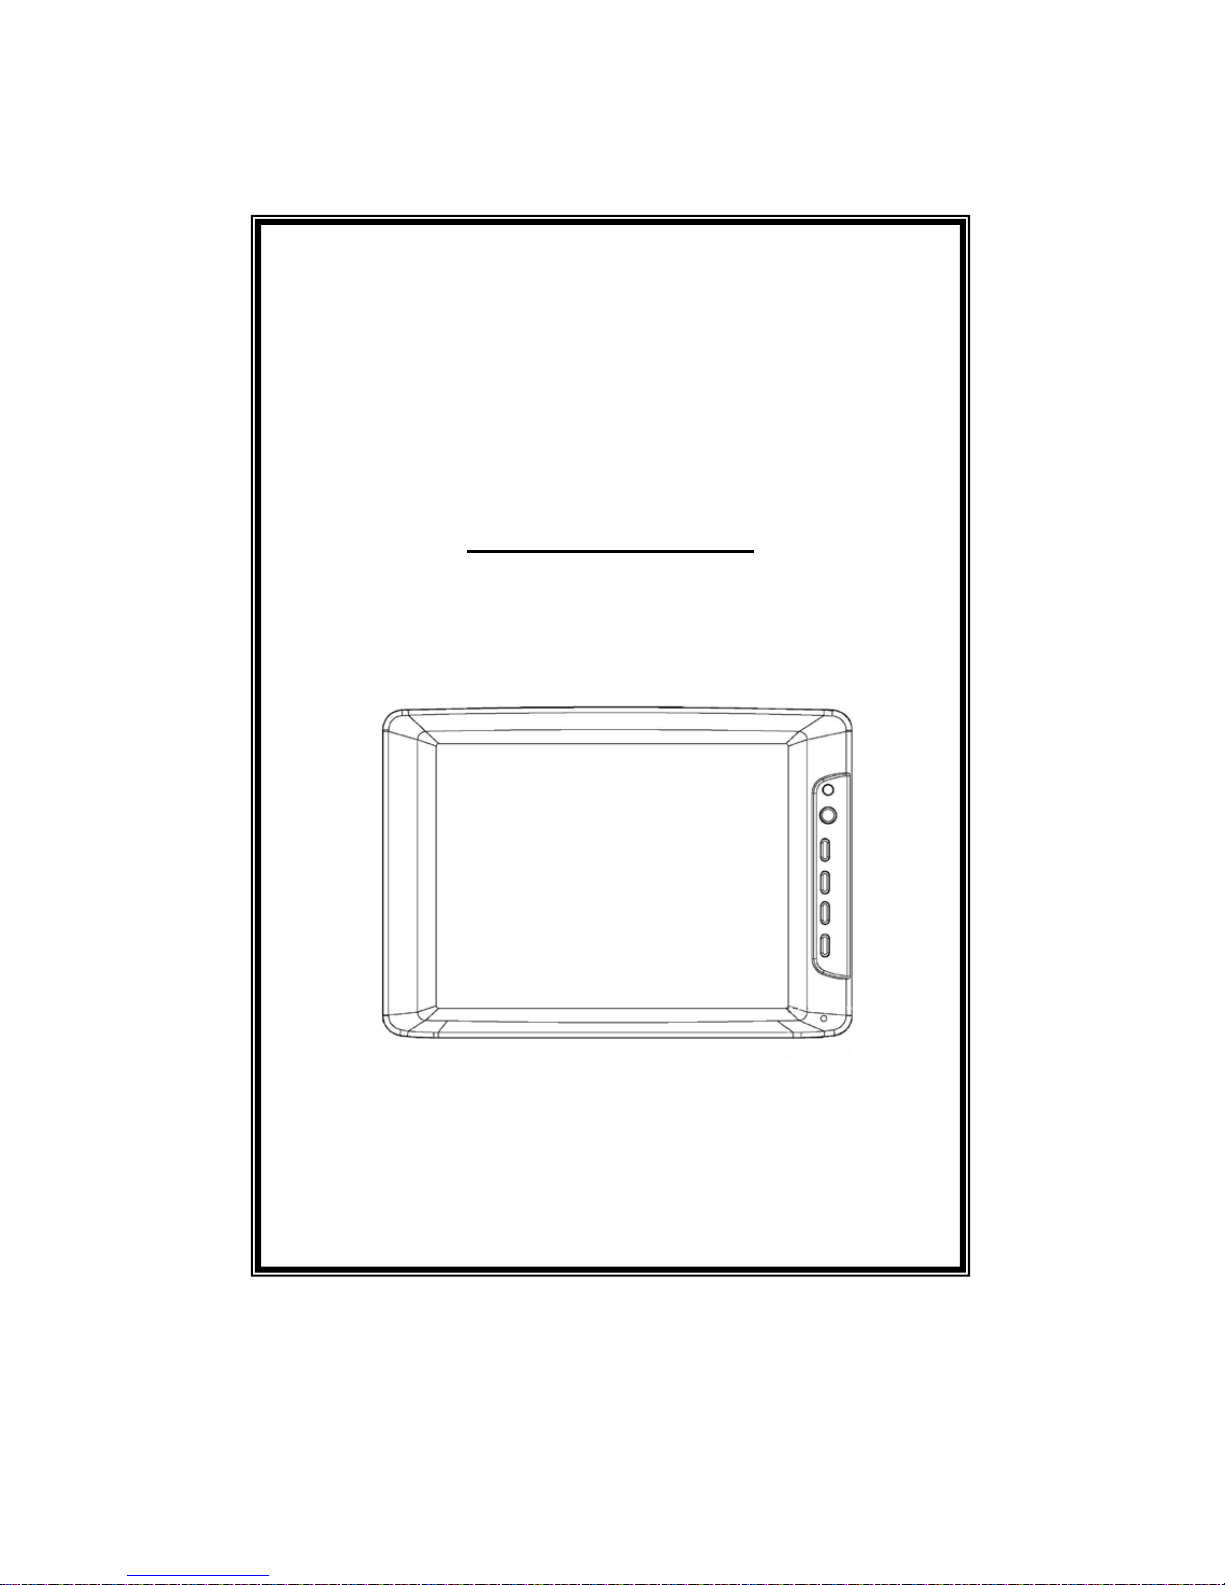
USER’S MANUAL
VL1
8.4-INCHES TFT TOUCHSCREEN
USER’S MANUAL
V.LH01
1
Page 2
INDEX
NO CONTENT PAGE
1 Features 3
2
Specification 4
3
Installation 5~9
4
Notice 10
5
Video Control Keys 11
6
Video Remote Controller Function 12
7
Content of OSD Function 13~15
8
Content of VGA Function 16~18
9 Language Table of OSD Menu 19
10 VGA Mode Support List 20
11 Replacing Batteries Of Remote Controller 21
12
Standard Package 22
2
Page 3

1. Features:
. Touch Screen, No need mouse for use
. Multi Language OSD in English, Spanish, French, German,
Italian.
. High Contrast 600:1
. Three Video Inputs
. One VGA Input
. Two Audio Inputs(Stereo)
. USB Interface
. LED backlight with low power consumption
. NTSC/PAL/SECAM Auto Switching
. Auto Power On/Off Function
. Auto Reversing Function for Video # 3
. Auto Dimmer Function
. Built-In Speaker
. Wide DC Input DC9-32V
3
Page 4
2.Specification:
8.4-INCH TFT LCD COLOR VIDEO MONITOR
Resolution 800 (V) x R.G.B. x 600 (H)
Display Size 8.4-Inch TFT
Active Area(mm) 170.4(H) x 127.8(V)
Brightness (cd/m2) 450
Contrast R a tio 600:1
Drive System Active Matrix
Back Light LED
Video Input Composite Video Signal 1 Vpp 75Ω
Video Inpu t S y stem NTSC/PAL/SECAM Auto Switc h ing
Dot Pitch 0.213(H) x 0.213(V)
Viewing Angle L/R/U: 80 D:60 deg.
Power Source DC9-32V
Power Consumption 750mA(max)
Operation
Temperature
-30
℃
to +85℃
Storage Temperature
-30
℃
to +85℃
Monitor Dimensions 229.6(L) x162.79 (H) x 33.9(W) mm
4
Page 5

3. Installation
Step 1: Wire Connection
1. Yellow RCA Jack: Video 1
2. Black RCA Jack: Video 2
3. Blue RCA Jack: Video 3(For Reversing Camera, when you
shift the reverse gear, the camera image will be shown on the
screen automatically)
4. White RCA Jack: Audio L1
5. Red RCA Jack: Audio R1
6. USB: Wire to PC for install touchkit driver
7. 15 Pin D-SUB: Wire to P C
8. DC Jack: Power DC9-32V
5
Page 6
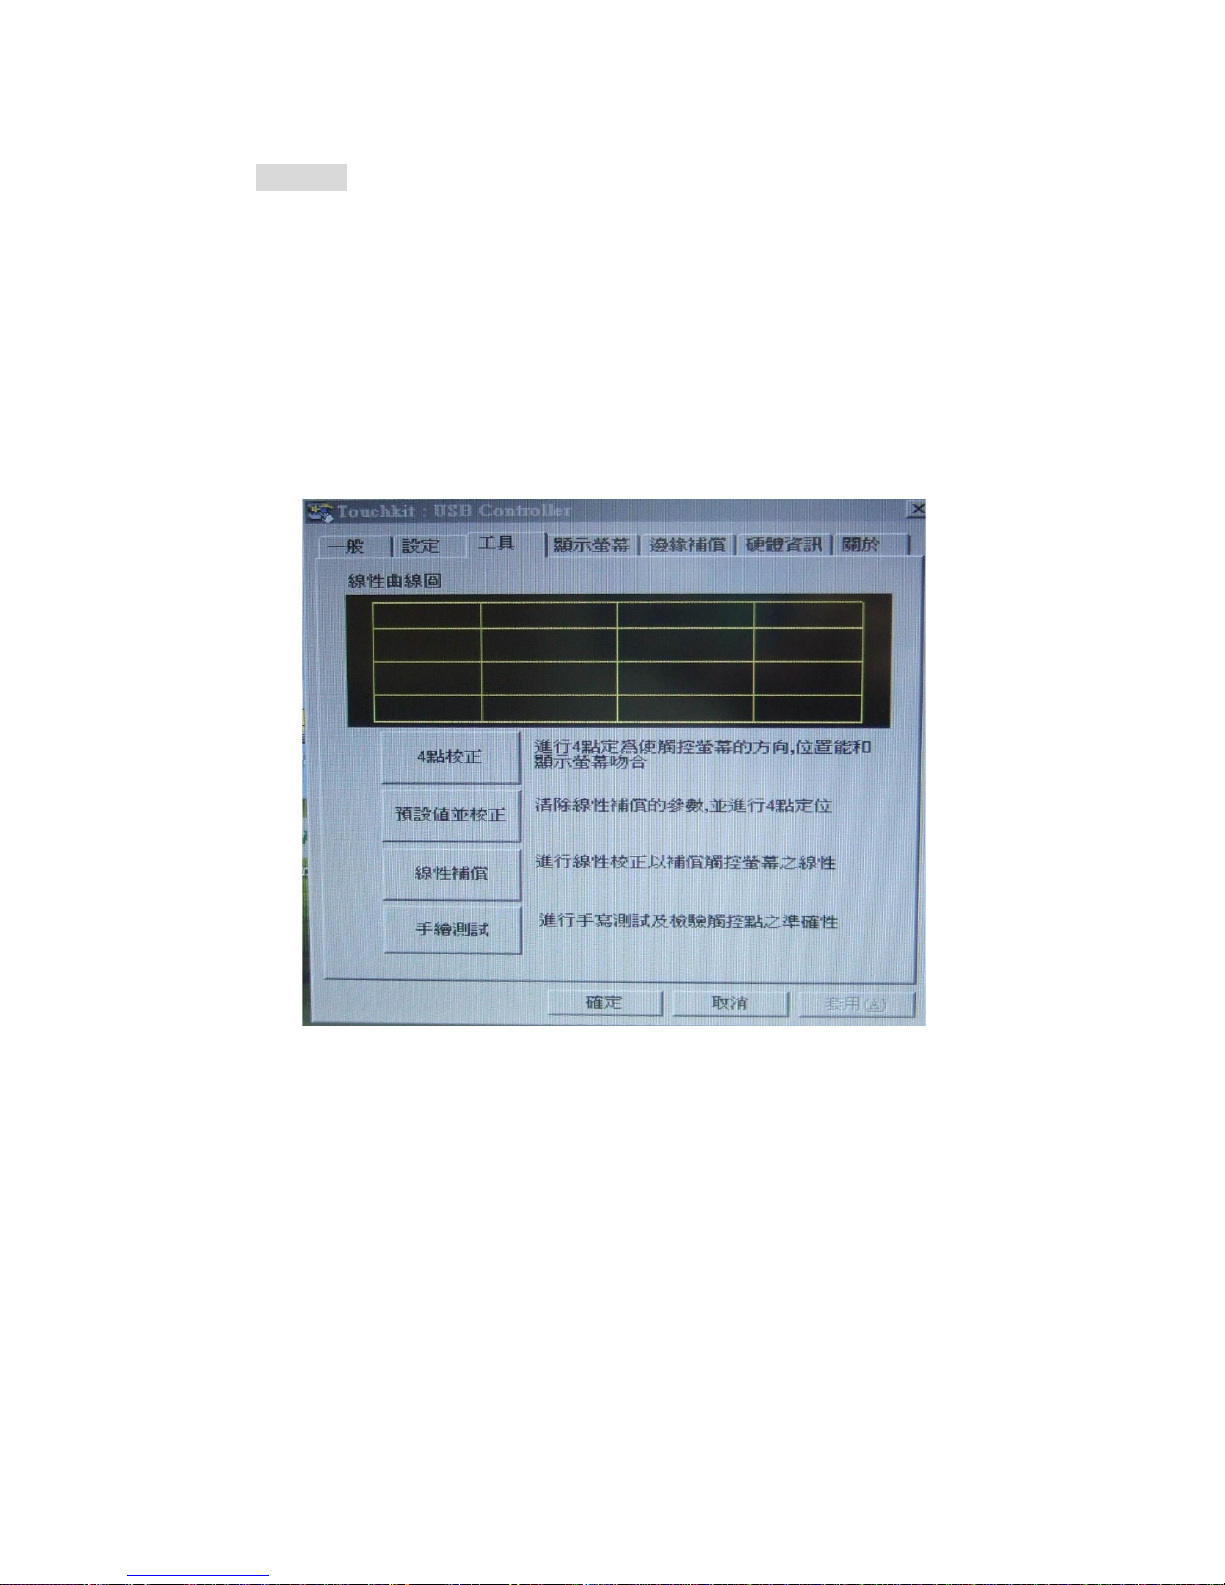
Step 2:
a) Install the CD Disk of the software into your PC first
b) Select the “TouchKit” function from your PC
c) Select the Interface to be USB mode
d) Select the Language what you want: English, Traditional
Chinese, Simplified Chinese, Japanese, Spanish, French,
German, Korean
e) Select the “4 PTS CAL” to correct the sens iti v ity touch panel
f) 4 Touch points are shown on the screen, please touch the
left point on the bottom
right point on the bottomright
point on the top
left point on the top to correct touch
function.
6
Page 7

g) Draw test: when you finish the 4 Pts Cal correction, you can
select the draw test and drawing on the screen for testing
that if your screen can feel you touch.
h) Advance: if you feel the 4 Pts Cal is not good enough for you,
you can select the advance function for 25 Pts Cal correction.
The step is the same as above.
7
Page 8
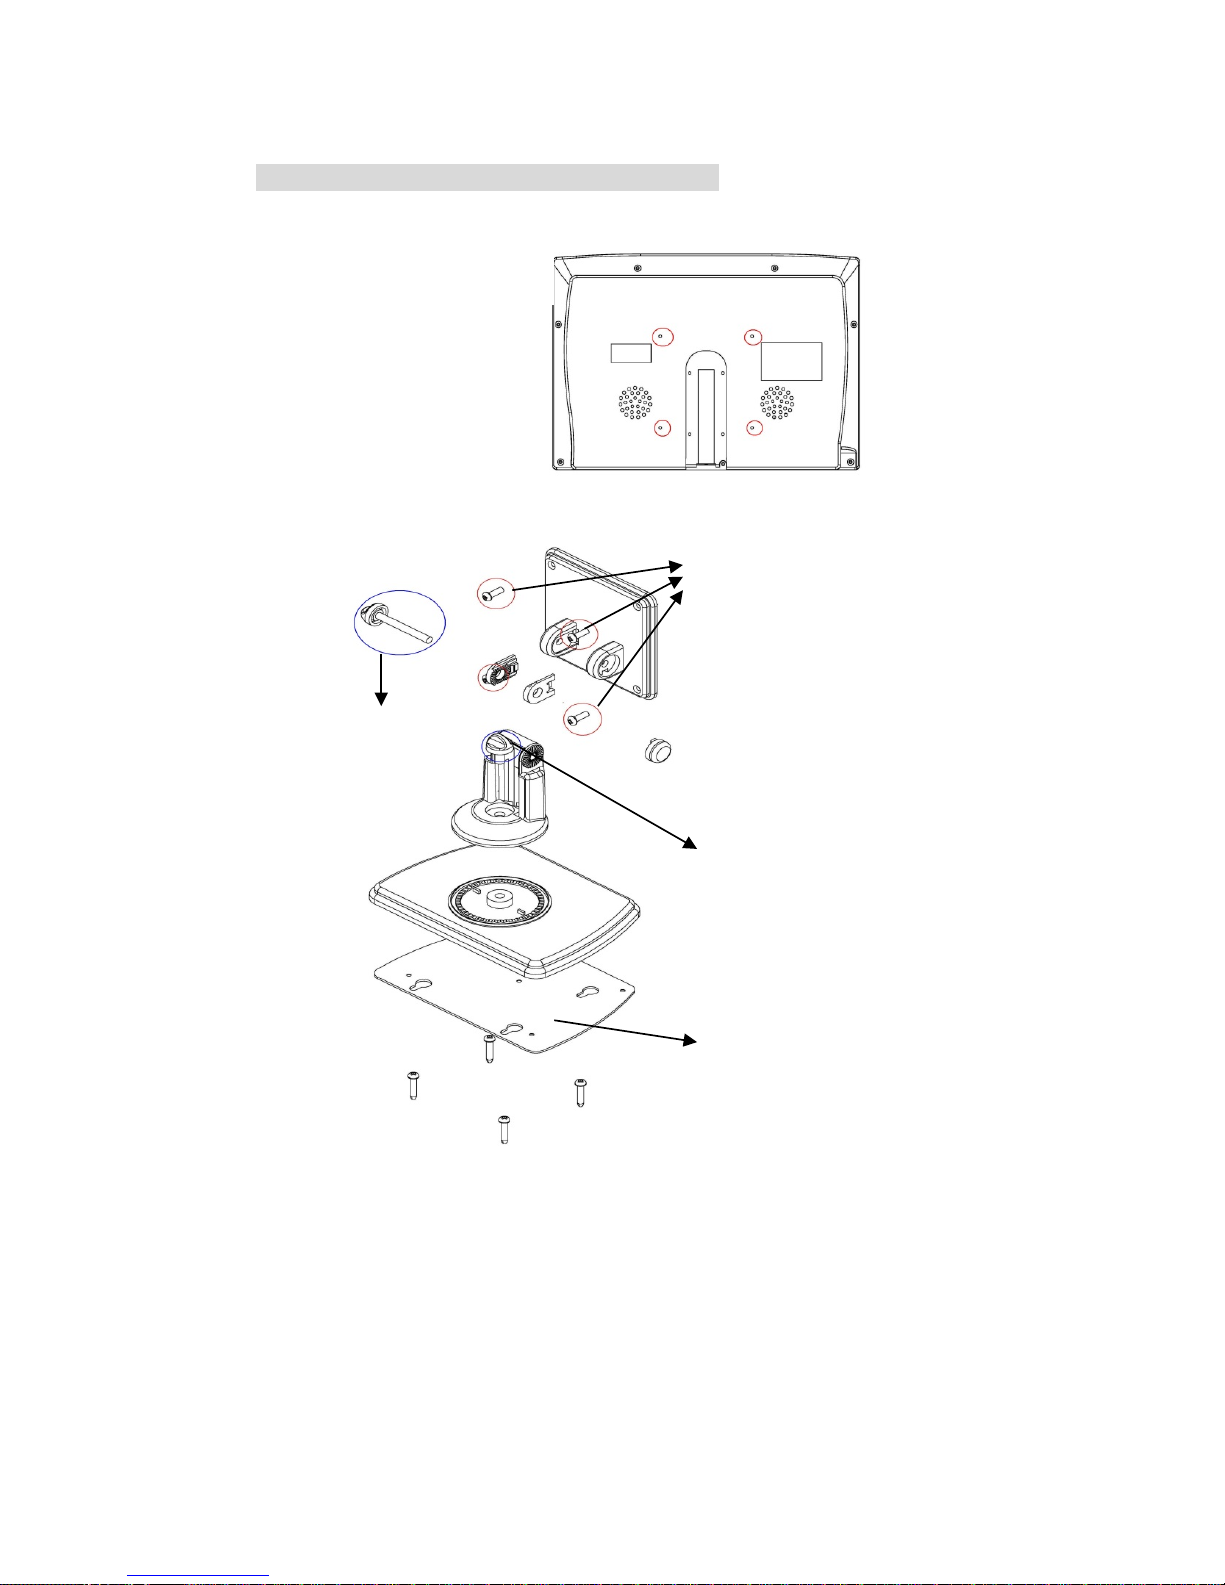
Step 3: VESA Stand Assembly Instruction
Rear Enclosure
Steps:
1) Screw 4 screws with the
VESA hole of rear
enclosure together.
2) Screw this part into the
plate.(for adjust the
screen angle)
3) 3M adhesive sticker for
fix on the dashboard or
suitable place.
Adjust the
screen angle
8
Page 9
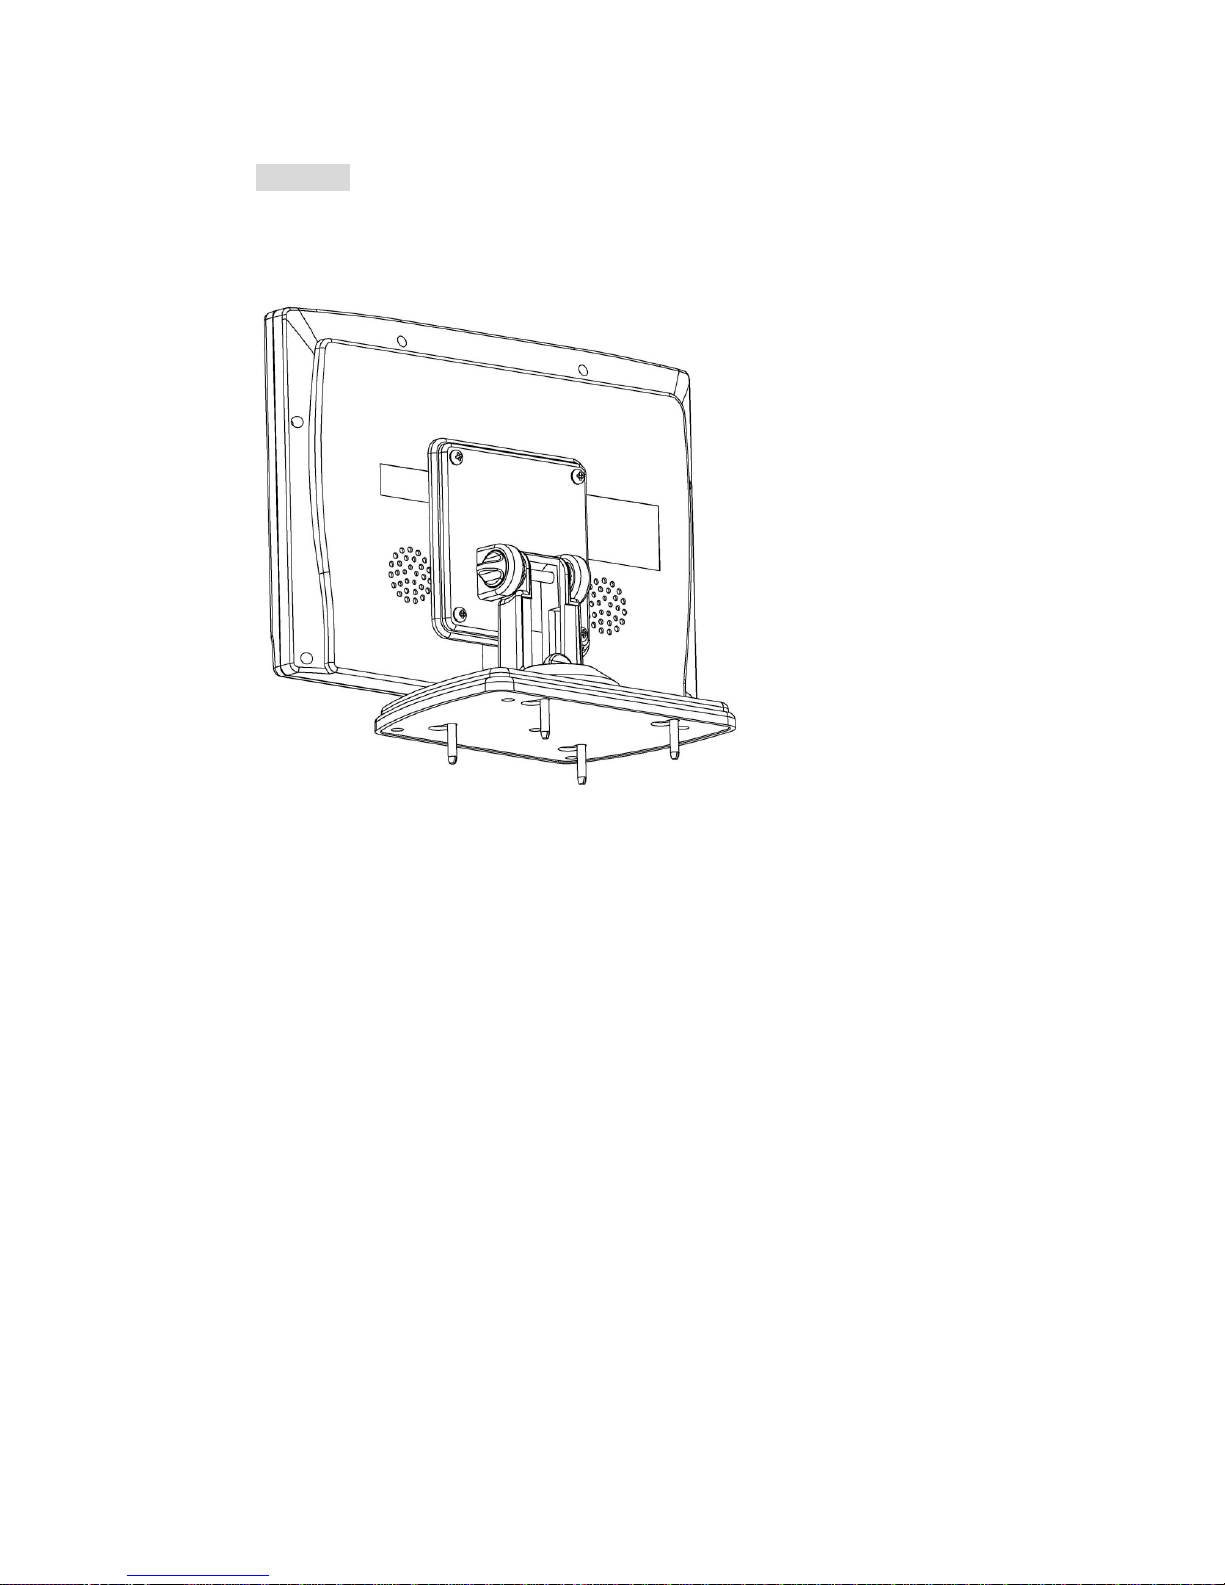
Finished
9
Page 10

***** NOTICE *****
1) Please calibrate the Touchscreen with the Touchkit-utility
after the Touchscreen drivers have been installed.
If you do not calibrate the Touchscreen, it might not work
properly and can be inaccurate. (Please Refer To The Step 2
Of the User Manual)
***** Hinweis *****
1) Bitte kalibrieren Sie den Touchscreen im
Touchkit-Program m n ac hdem die Touchscre en Treiber
installiert sind.
Wenn Sie den Touchscreen nicht kalibrieren, dann wird er
möglicherweise nicht richtig funktionieren und sehr
ungenau sein. (siehe auch Handbuch, Schritt 2)
10
Page 11
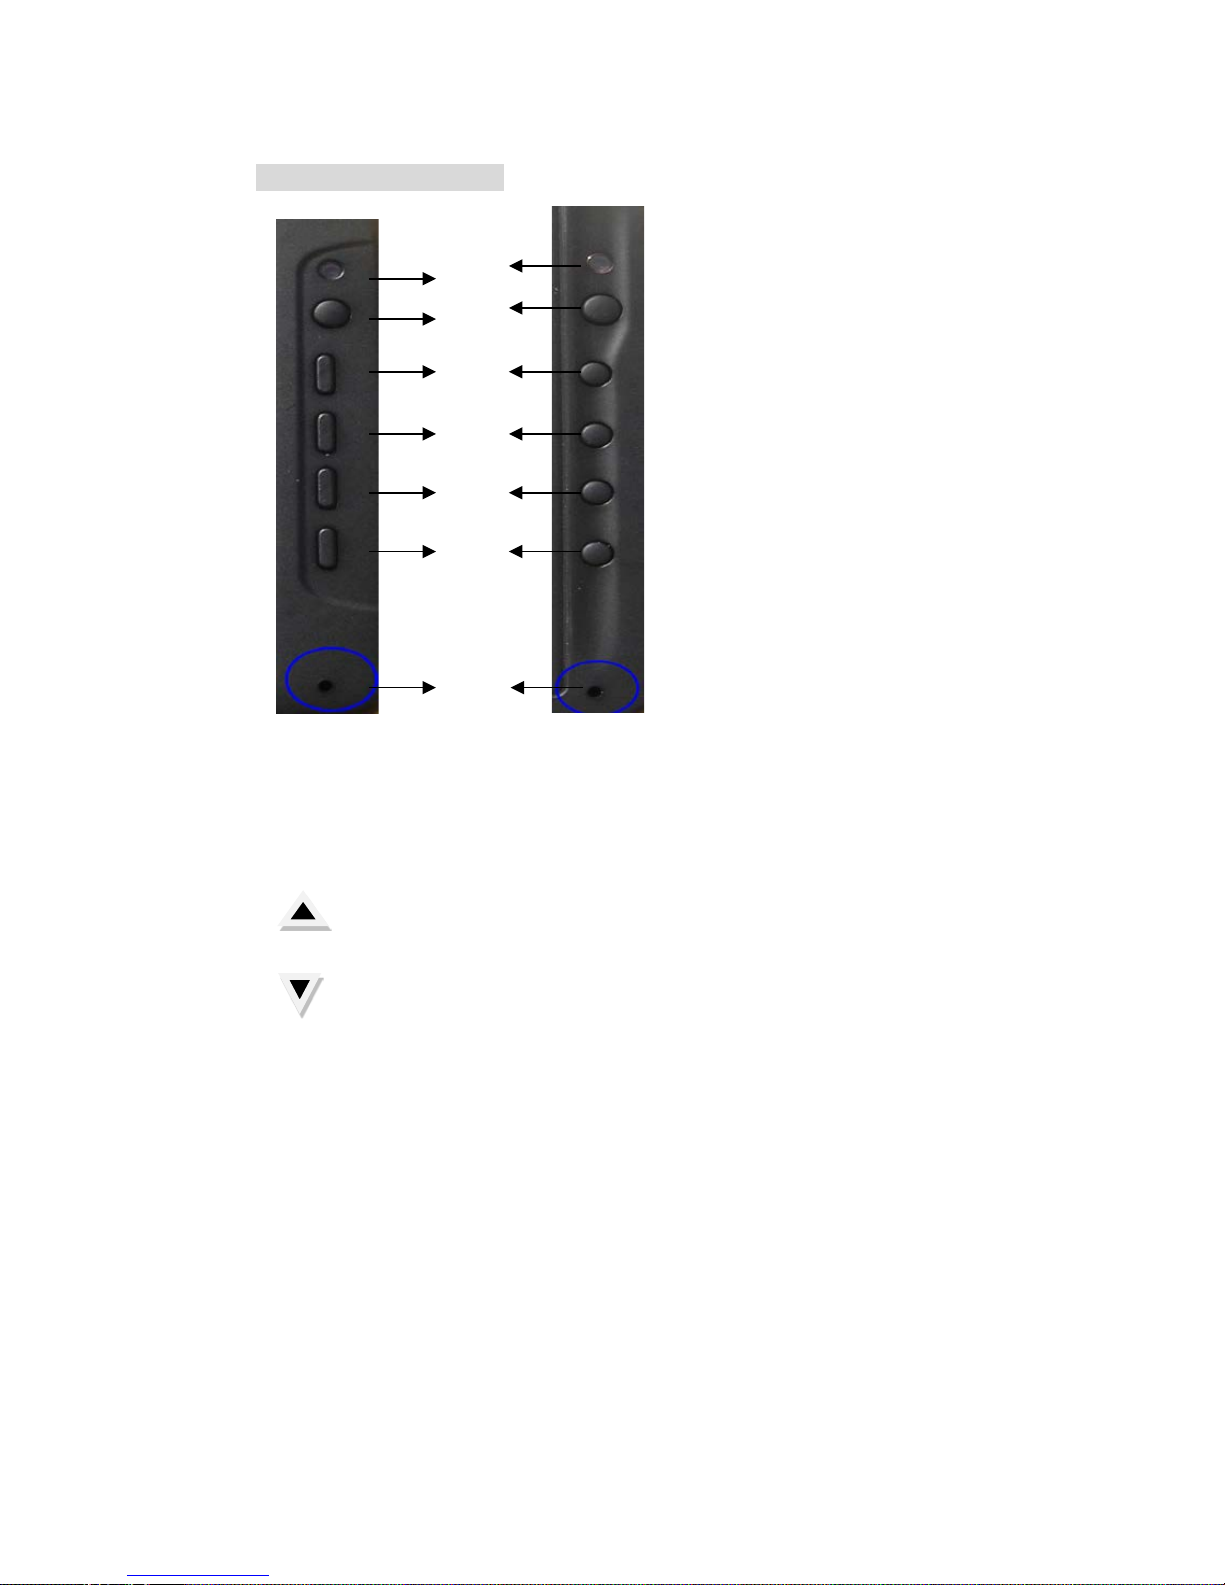
4. Video Control Keys:
1. IR receiver
2. POWER: power ON/OFF & Video 1,2, VGA Mode selection.
3. Dimmer: Adjust the Dimmer range(3 levels, by manual)
4. MENU: Show menu list of function and make selection.
5. : Increase +) the rating of the function that you selected.
6. : Decrease -) the rating of the function that you selected.
7. Auto Dimmer Sensitive Sensor
1
2
3
4
5
6
7
11
Page 12
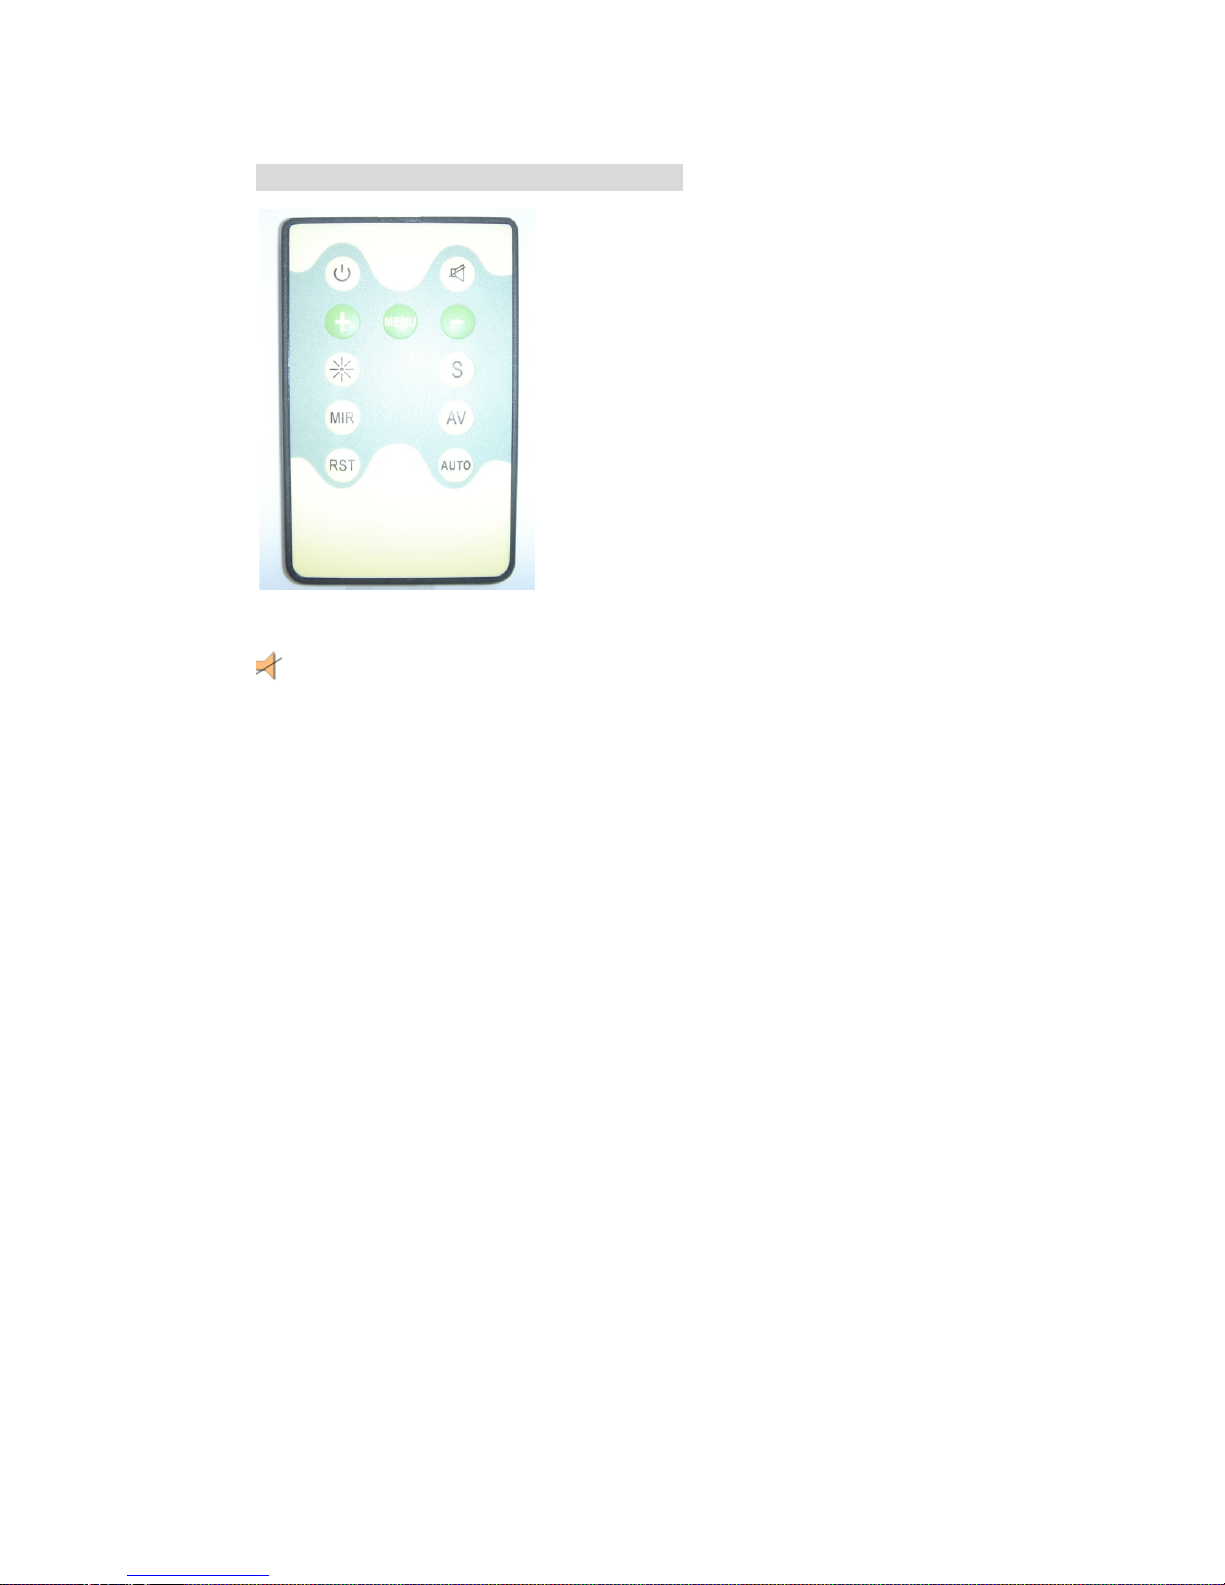
5. VIDEO Remote Controller Function:
POWER: Power On/ Of f Function.
MENU: Show Function Menu List and make Selection.
- : Decrease the rating of the function you selected.
+ : Increase the rating of the function you selected.
S: Adjust the screen aspect ratio at 16:9 or 4:3 mode
AV: Video Selection. Select Video 1 or Video 2 & VGA Mode.
RST: Restore to the ori gin default value se tti ng.
AUTO: Auto adjustment.
DIMMER: Auto, Dark, Normal, Bright
MIR: Set Mirror function of screen.
: MUTE
12
Page 13

6. Content of OSD Function
OSD MENU LIST
BRIGHTNESS:
Adjust the brightness of screen.
Adjust area: 0~100
CONTRAST:
Adjust the contrast of screen.
Adjust area: 0~100
COLOR:
Adjust the color of screen.
Adjust area: 0~100
13
Page 14

HUE:
Adjust HUE function.
Adjustment area: 0~100
H-POSITION
Adjust Horizontal Position
Adjust area:0~100
V-POSITION:
Adjust Vertical Position
Adjust area: 1~100
ZOOM:
Adjust Ratio Position
Adjust Type: 16:9 /4:3
RESET:
Return to origin default value
EXIT:
Save the value you set & Exit Function
OPTION: For setting more functions (Please see next page)
14
Page 15
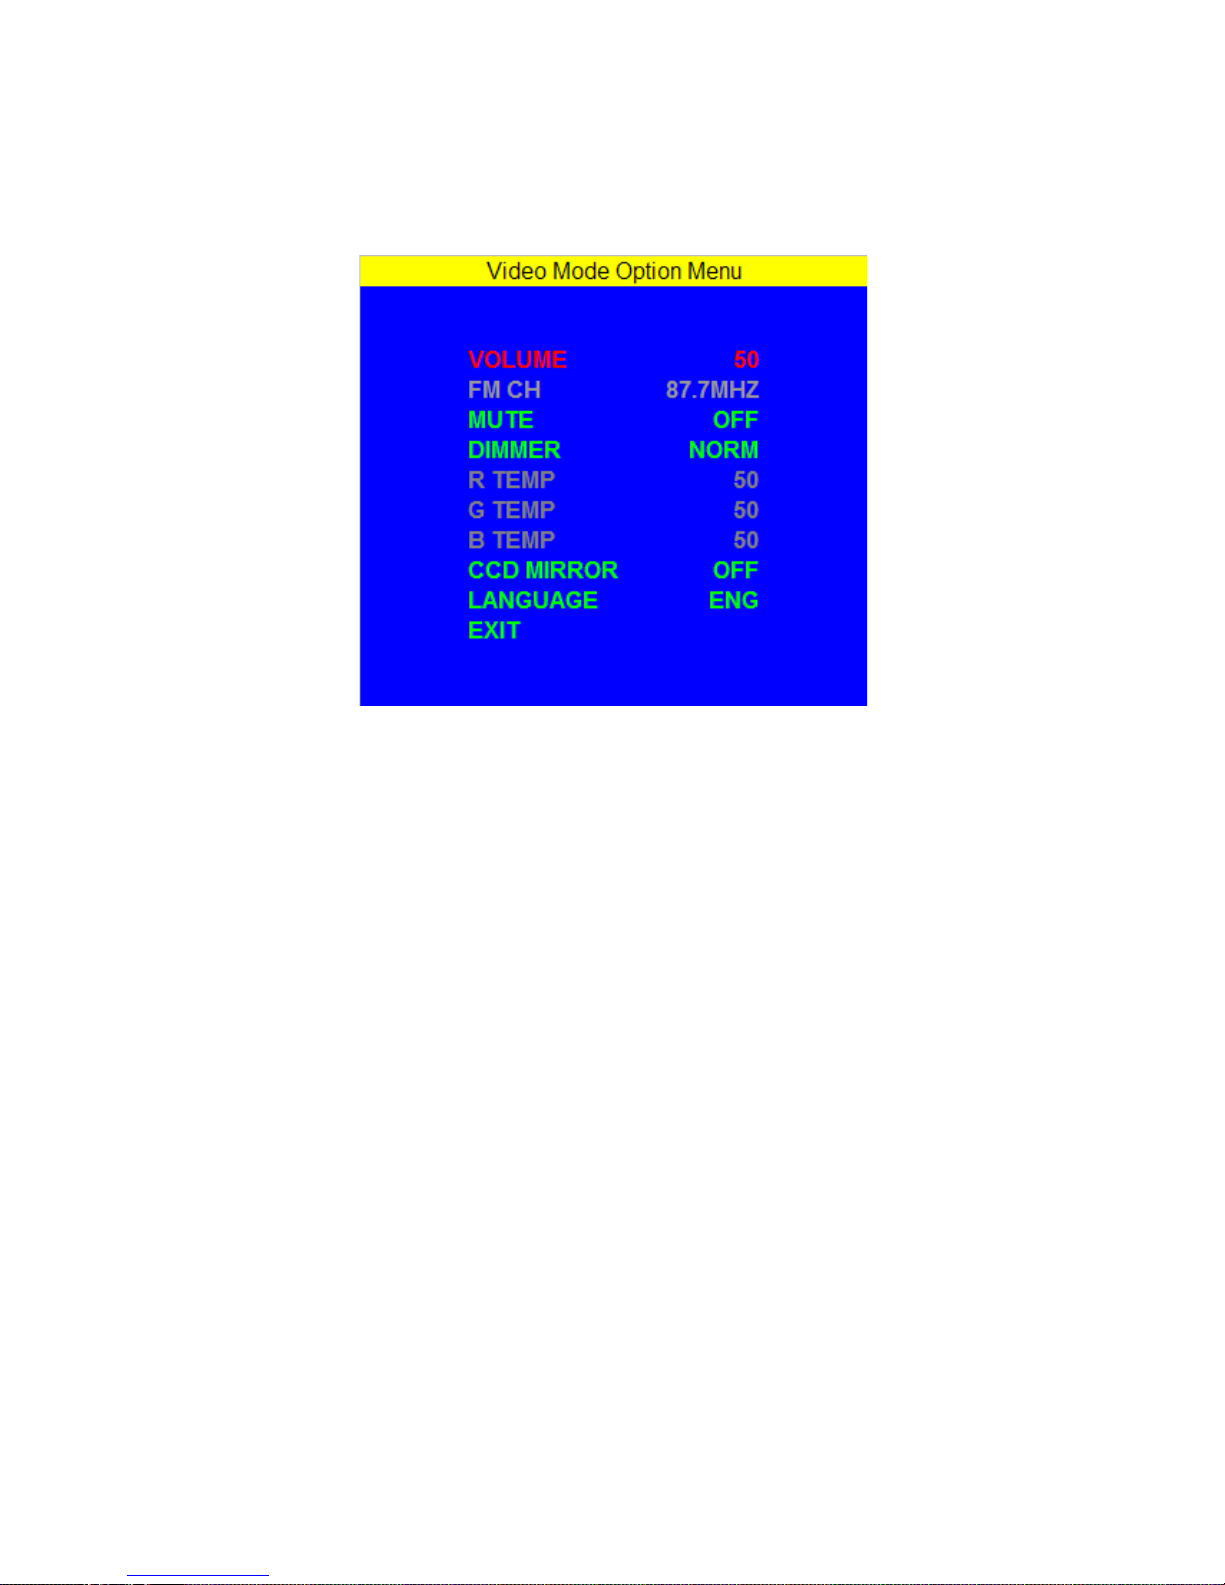
VIDEO OPTION Functions:
Volume: Adjust volume from 0-100
Mute: Select Audio On/Off
Dimmer: Select Auto Dimmer/Bright/Dark/Normal
CCD Mirror: Select CCD Mirror On/Off
Language: 5 languages of OSD in English, Spanish, French,
German, Italian.
Exit: Save the value you set and Exit to last menu mode.
15
Page 16
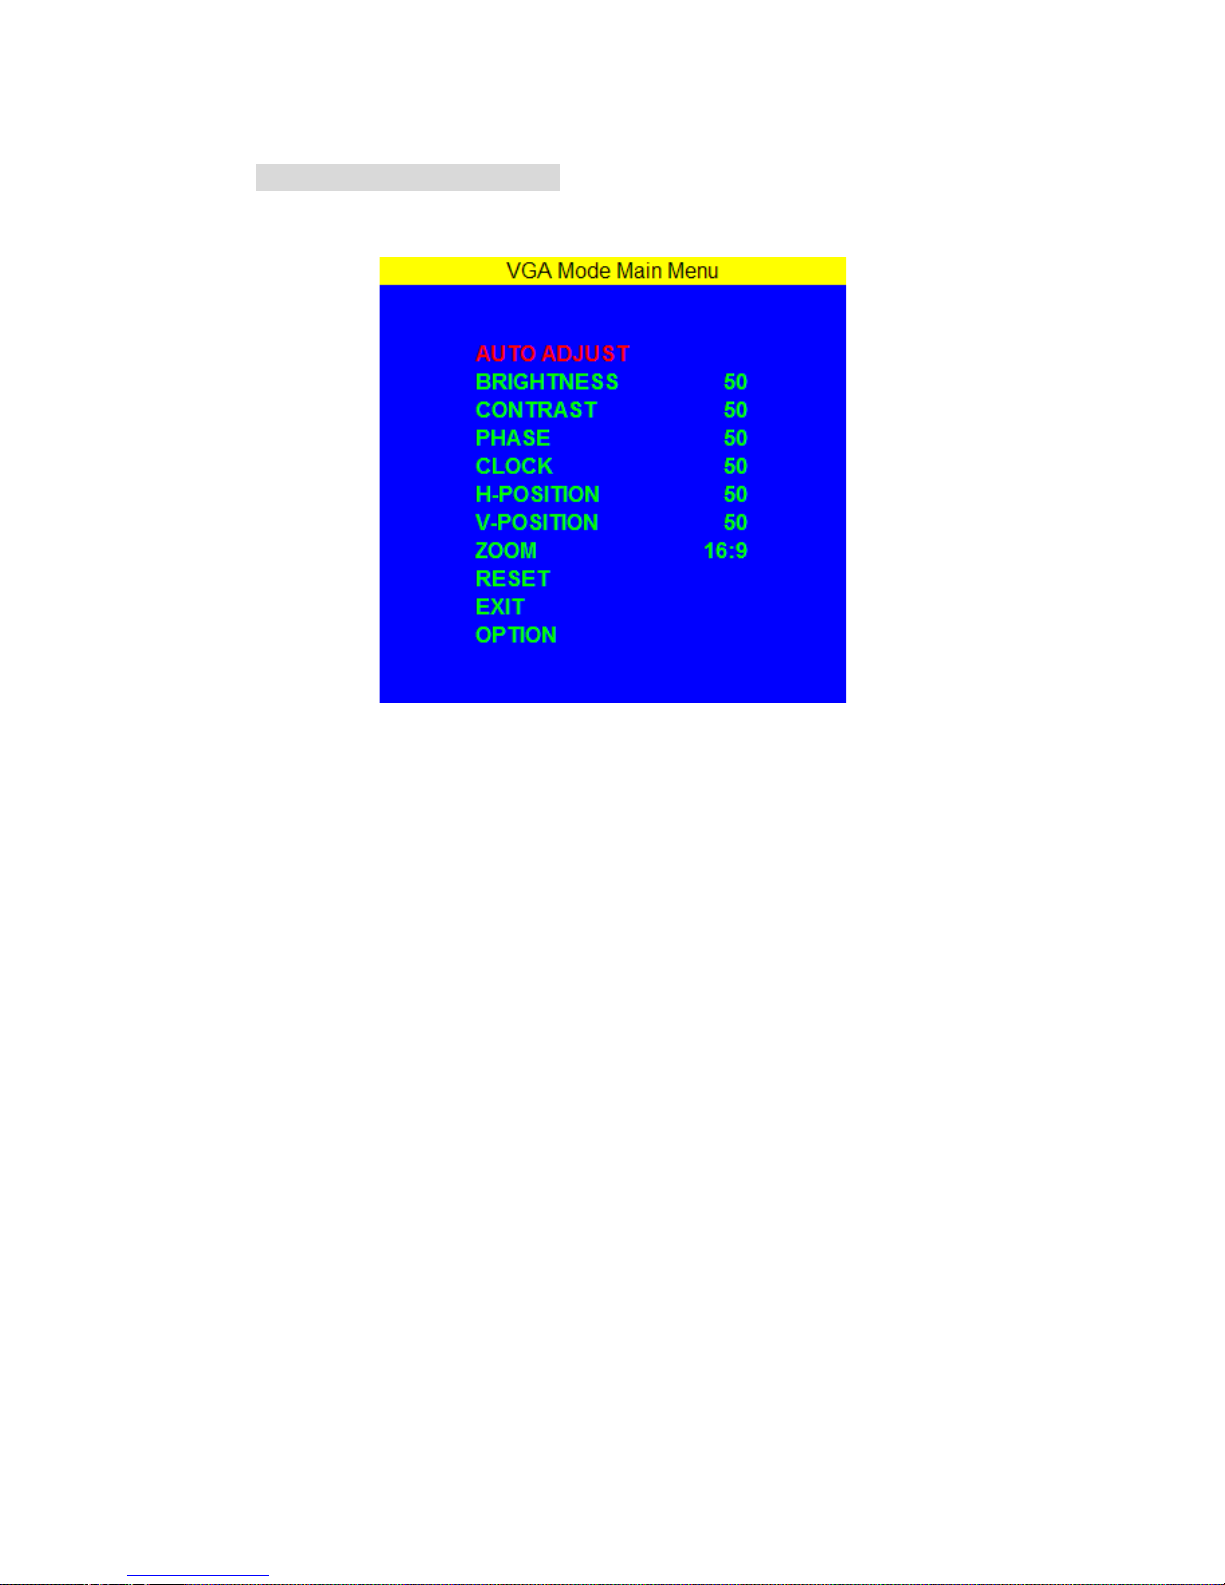
7. Content of VGA Function
VGA MENU LIST
AUTO ADJUST
Adjust the screen vertical & horizontal position
BRIGHTNESS:
Adjust the brightness of screen.
Adjust area: 0~100
CONTRAST:
Adjust the contrast of screen.
Adjust area: 0~100
16
Page 17

PHASE:
Adjust the Phase control. Phase adjustment may be required
to optimize the display quality.
CLOCK:
Adjust the full screen by manual (H & V screen size)
H-POSITION:
Adjust Horizontal Position
Adjust area:0~100
V-POSITION:
Adjust Vertical Position
Adjust area: 1~100
ZOOM:
Adjust Ratio Position
Adjust Type: 16:9 /4:3
RESET:
Yes: Reset the Value
No: Don’t reset the Value
EXIT: Save the setting value & Exit
17
Page 18
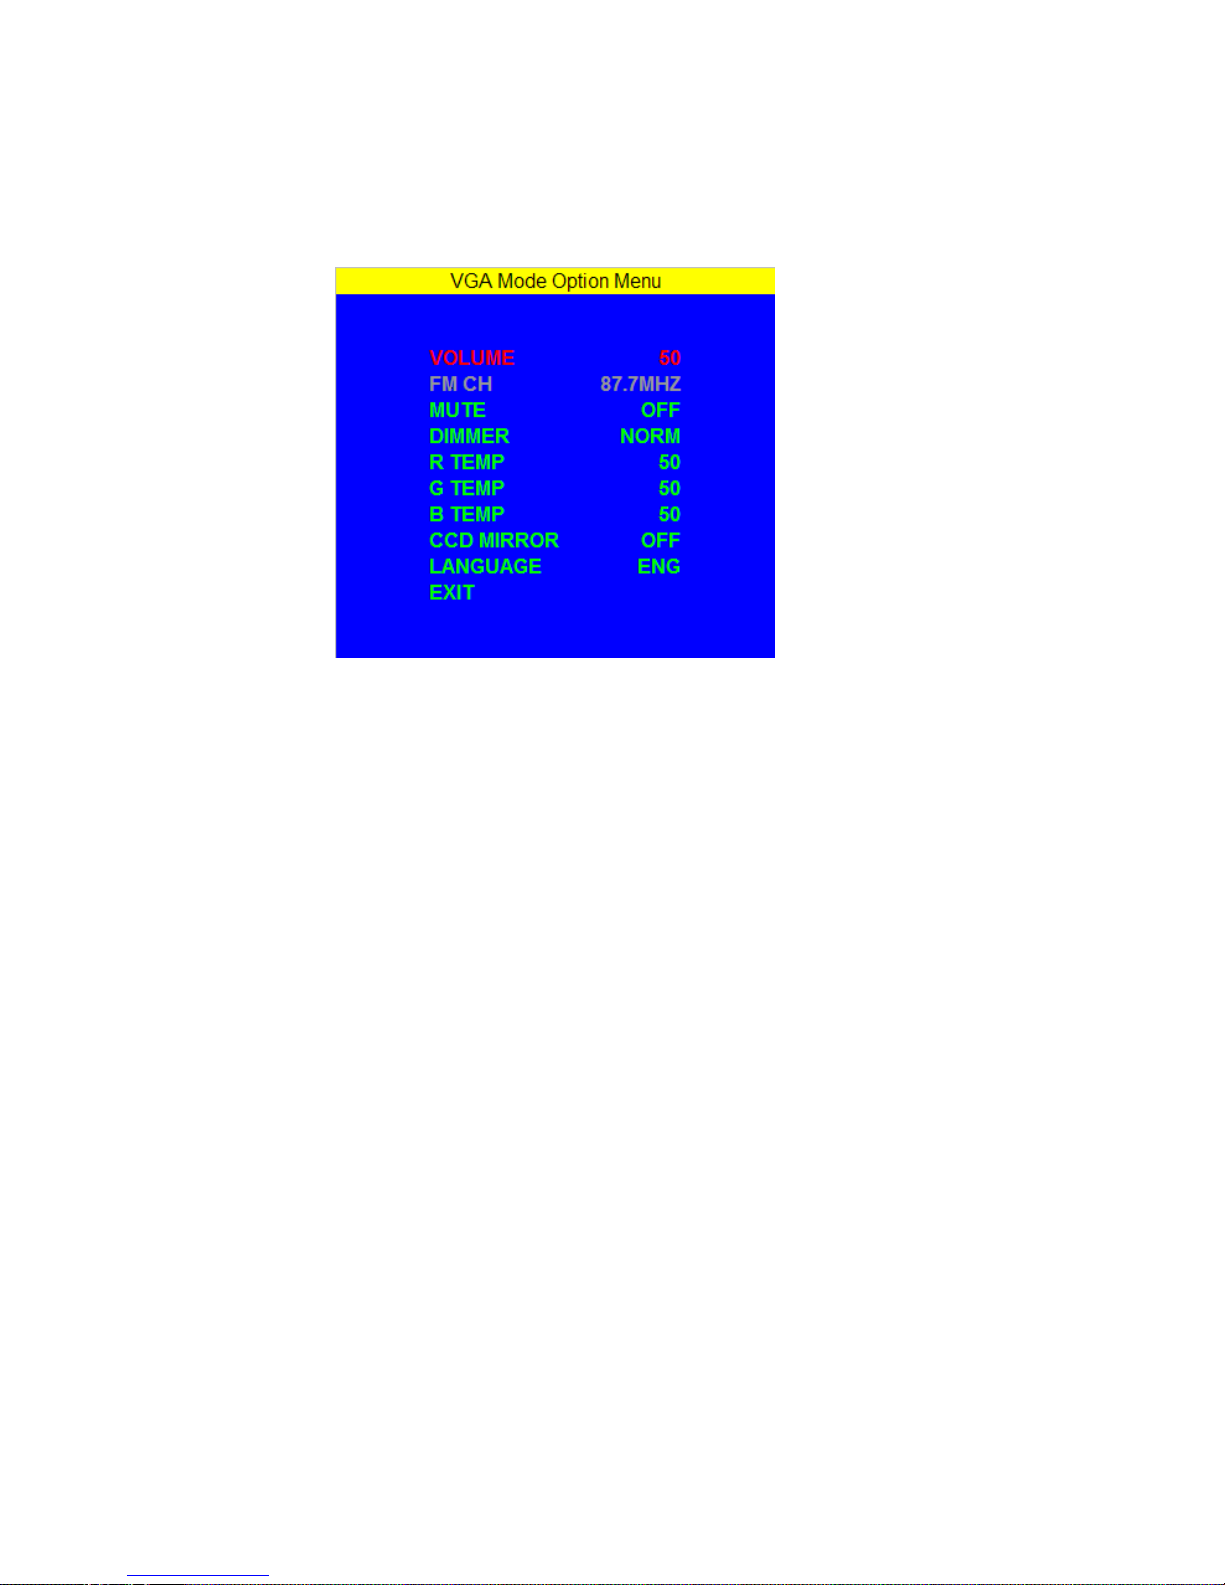
OPTION: Setting more functions in VGA mode
Option Menu List of VGA mode
Volume: Adjust volume from 0-100
Mute: Select Audio On/Off
Dimmer: Select Auto Dimmer/Bright/Dark/Normal
R_TEMP: Adjust RED Color Range from 0-100
G_TEMP: Adjust Green Color Range from 0-100
B_TEMP: Adjust Blue Color Range from 0-100
CCD Mirror: Select CCD Mirror On/Off
LANGUAGE: English, Spanish, French, German, Italian.
Exit: Save the value you set and Exit Function
18
Page 19

Language Table of OSD Menu
19
Page 20
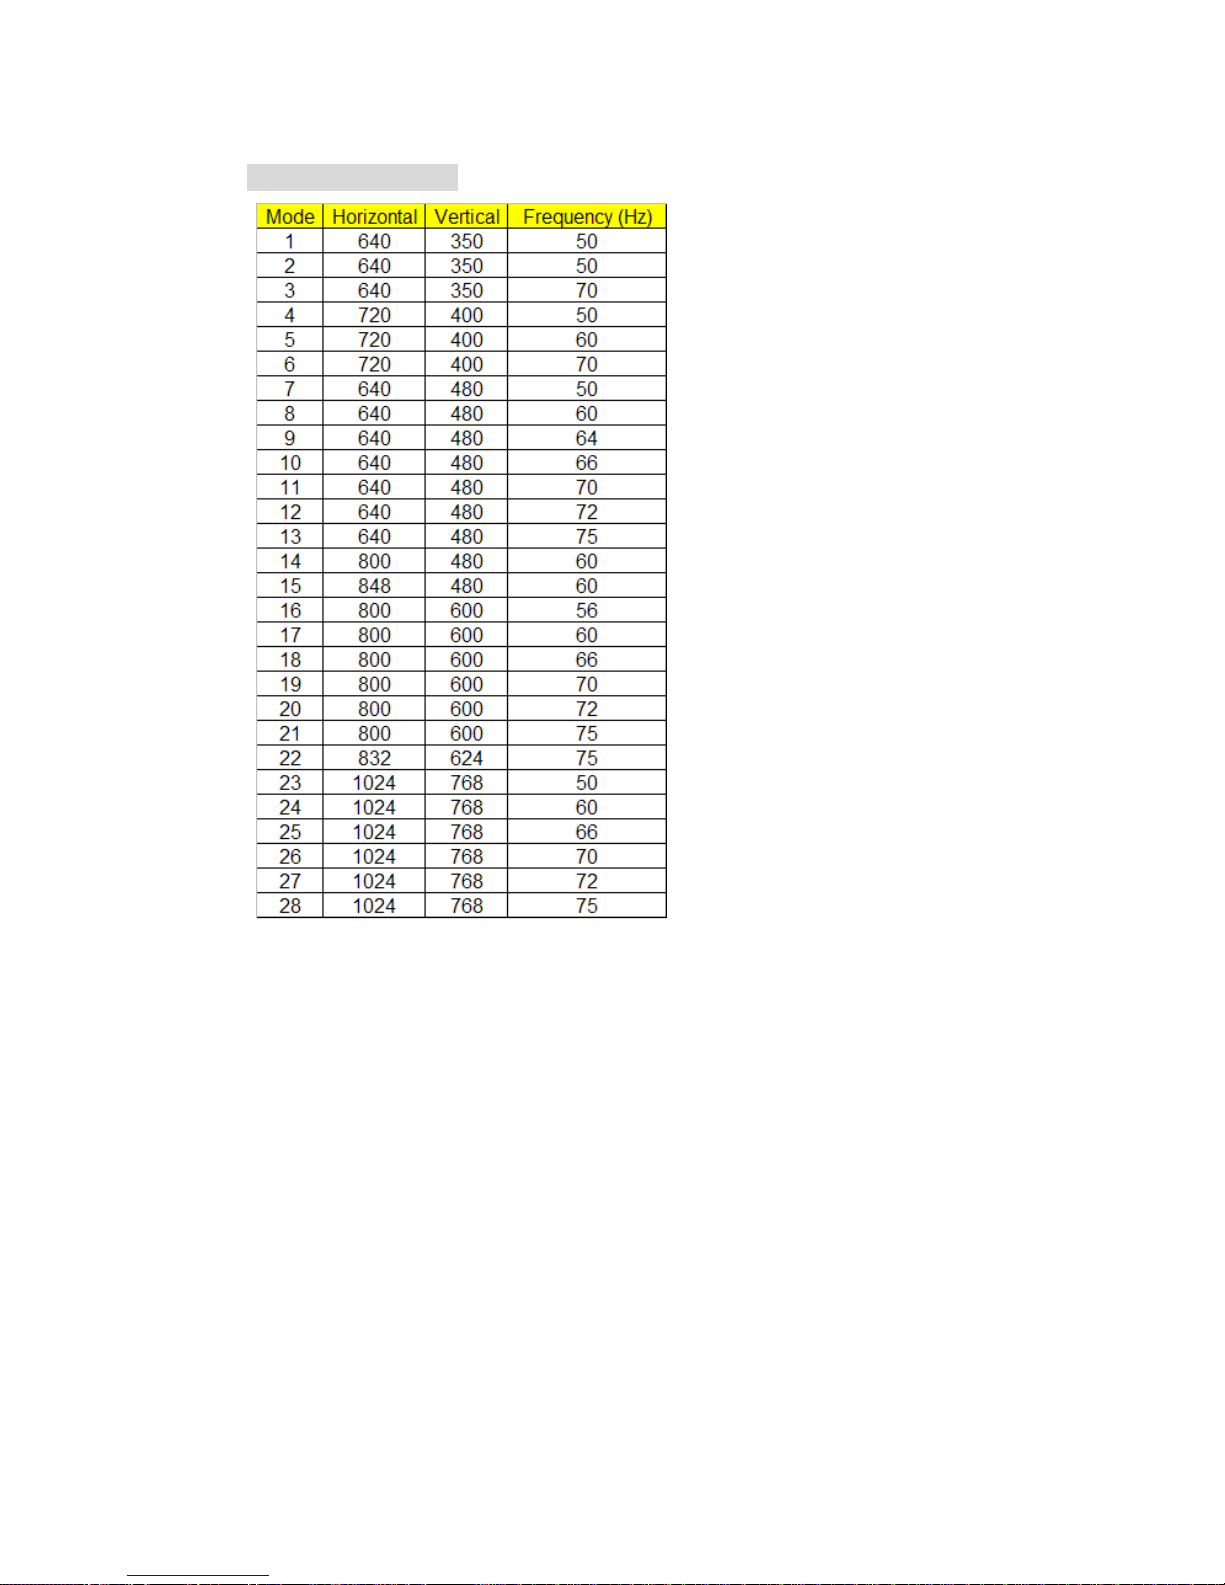
VGA Mode Support
20
Page 21

8. Replacing Batteries of Remote Controller
(1) Always use new batteries when replacing the old set.
(2) Do not attempt to charge, short-circuit, disassemble, hurt
or burn used batteri es .
(3) Battery replacement is necessary when remote controller
acts sporadically or stops on the remote controller
(4) Do not drop, apply shock or stop on the remote controller
(5) Do not spill water on the remote controller
(6) Do not place objects between the remote controller and
remote control receiver
(7) Do not use remote controller for other equipment at the
same time.
(8) If the monitor does not operate even when operating the
remote controller from a close range, it is time to replace
the batteries (pro duc ts number: RC202 5) , Refer to the
label on back of the Basic Controller.
21
Page 22

9. STANDARD PACKAGE:
. Metal or VESA Stand x 1
. All-In-One Cable (Power x 1, Video x 3, Audio x 2, 15Pin D-Sub
USB Cable) x 1
. TouchKit Driver x 1
. Remote Controller With Battery x 1
. Touch Stylus x 1
. User’s Manual x 1
. AC Switching Power Supply x 1 (optional)
. Car Cigarette Lighter Adapter x 1 (optional)
22
 Loading...