

Page 1
ENG
Manual ● Mode d’emploi ● Handleiding ● Handbuch ● Manuale
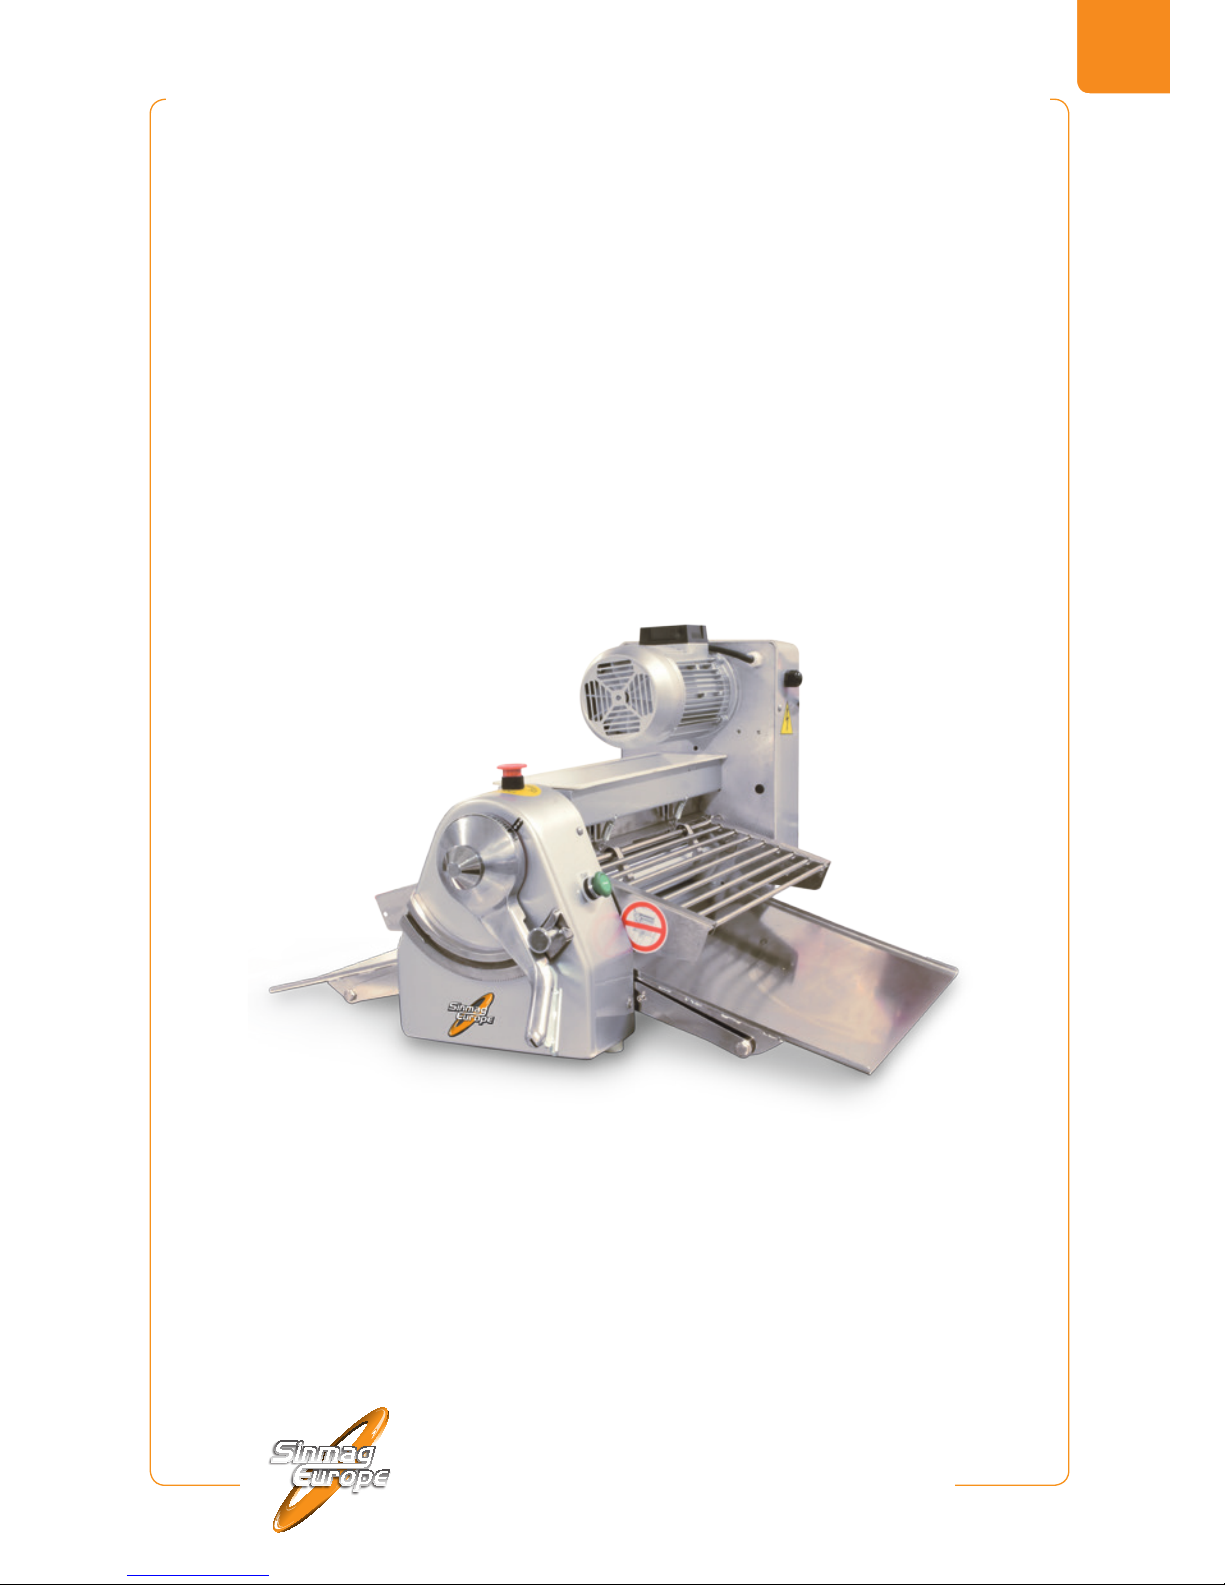
Dough sheeter . Laminoir . Uitroltafel
Ausrollmaschine . Laminadora . Sfogliatrice
SM-520A
Page 2

Congratulations with the purchase of this dough sheeter.
This machine has been tested thoroughly in our warehouse
in Belgium before delivery.
This way, Sinmag Europe is able to guarantee delivery of a
machine ready for installation.
For correct use and long service life of your machine, we
recommend that you read this manual attentively before
starting to use the machine.
Sinmag Europe thank you for your trust and wish you much
job satisfaction with this machine.
Sinmag Europe Team.
2
SINMAG EUROPE BVBA
ENG
Page 3
NOTICE
The use of this or any industrial equipment may involve hazards such as hot
surface, sharp objects, or danger from exposure to the electrical power. This
manual is provided to assist you in the safe and efcient use of our equipment.
All equipment, whether considered hazardous or not, should be used in accordance
with principles of good manufacturing practice.
The operator of this equipment must be of a legal age. Before operation, please read
and follow the instructions carefully for maximum safety, and to obtain the best use of
our equipment.
1. INTRODUCTION
1.1 Brief introduction
This handbook aims at introducing you on how to install, operate and maintain the
dough sheeter SM-520A.
Thanks for choosing as your supplier. Any question,
please contact our local ofce or dealer that will provide you with instant and ideal
service.
1.2. Specication
MODEL SM-520A
MODEL WITH SUPPORT
✘
MOTOR POWER
0,37 kW
NET WEIGHT MACHINE
80 kg
WORKING WIDTH
PLATE LENGTH
SPACE BETWEEN ROLLERS
520 mm
2 x 420 mm
1 - 30 mm
VOLTAGE
220/380V 3Ph 50Hz
SINMAG EUROPE BVBA
3
ENG
Page 4

2. SAFETY INFORMATIONS
2.1 Safety symbols
For your safety, please pay attention to the following symbol as marked on the machine:
This label warns that only qualied service personnel can access this
position and the operator must disconnect the power before carrying out any
cleaning or servicing.
2.2 Working safety information
The machine must only be used by personnel suitably trained for the purpose and who
have been trained in the contents of this publication.
To ensure safe work, comply with the following instructions:
1. Install the machine in compliance with workplace safe work requirements.
2. Don’t place the machine near a source of heat and this machine must not be used in
a place where the surrounding environment may have a potential risk of explosion.
3. Use the machine with great care and never be distracted.
4. Do not wear loose tting clothing or clothing with wide or open sleeves.
5. Do not remove, cover or modify the identication plates placed on the machine body.
6. Do not use the machine as a working surface or area and do not place any objects
on it that are not required for normal working operations.
7. Do not use the machine with temporary electrical connections or non-insulated
cables.
8. Periodically check the state of the power cable and the cable clamp on the machine
body, have it replaced as soon as is necessary by qualied personnel.
9. Stop the machine immediately as soon as there is any defective or abnormal
operation, a breakage, any incorrect movements, or unusual noises.
10. Before cleaning or carrying out maintenance, disconnect the machine from the
electricity mains.
11. Use protective working gloves for cleaning and maintenance.
12. For all extraordinary maintenance, consult the manufacturer or qualied and
authorised personnel.
13. Do not use water jets or spray to clean the machine.
14. When sharp accessories are manipulated, use cut-resistant gloves.
3. INSTALLATION
3.1 General installation requirements
NOTE:
It is most important that this machine is installed correctly and that the operation
is correct before use. Installation shall comply with local electrical, re, health
and safety requirements.
This machine is designed to provide years of satisfactory service. Correct installation is
essential to achieve the best performance, efciency and trouble-free operation.
3.2 Installation
This appliance shall be installed with sufcient ventilation to prevent the occurrence of
unacceptable concentrations of health harmful substances in the room.
4
SINMAG EUROPE BVBA
ENG
Page 5

Installations must be carried out by qualied service persons only. Failure to install
equipment to relevant codes and manufacturer’s specications in this section will void
the warranty.
Components having adjustments protected (e.g. paint sealed) by the manufacturer are
only to be adjusted by an authorised service agent. They are not to be adjusted by the
installation person.
It is the responsibility of the owner to supply and arrange for the connection of all
services to the machine.
3.3 Unpacking
On receipt of the machine, carry out the following: Remove all packaging and transit
protection including all protective plastic coverings from outer panels.
Check equipment and parts for damage. Report any damage immediately to the carrier
and dealer. Never attempt to operate the machine with damaged parts.
Report any deciencies to the dealer that supplied the machine.
3.4 Location
1. Select a location for the machine with a minimum of 0.6m space around the machine
for operating, cleaning and servicing.
2. Position the machine in its proper working position. The machine must be installed
on a at, solid and dry base.
3. It is recommended that the machine is level from front to back and from side to side.
This will ensure the greatest stability.
3.5 Electrical connection
1. An electrical supply should be available within the reach of the included power cord.
Do not use extensions to connect the machine’s power cord to the electrical supply.
2. Before making the electrical connections, read the specications on the rating plate
to ensure that they comply with those of the electrical supply. Electrical connection
should be made by a qualied service technician who will observe all applicable
safety codes and the national electrical codes.
3. Check the correct connection (rotation) of the machine. If connected wrong,
the motor will run, but the machine will not move. If necessary, you will have to
exchange the position of 2 phase wires.
When connecting this machine to the mains supply, ensure that the following is carried out
:
1. An isolating switch is tted within 2m of the machine.
2. A grommet/gland is tted around the power supply cord entry hole into the machine.
3. All wiring connections must be checked and tight.
Once the electrical connection has been made, the machine is ready for use.
ELECTRICAL SUPPLY REQUIREMENTS 220/330V 3Ph 50Hz + E.
SINMAG EUROPE BVBA
5
ENG
Page 6
4. BRIEF INTRODUCTION
Light Duty Dough Sheeter SM-520A is produced to extend and mould the dough into
sheet for Danish Pastry, Croissant and Puff pastry etc.
There are two stainless steel plates on both side of this machine.
To make the operation easily, we suggest sprinkling some our on the plate before
moulding the dough.
5. SET-UP
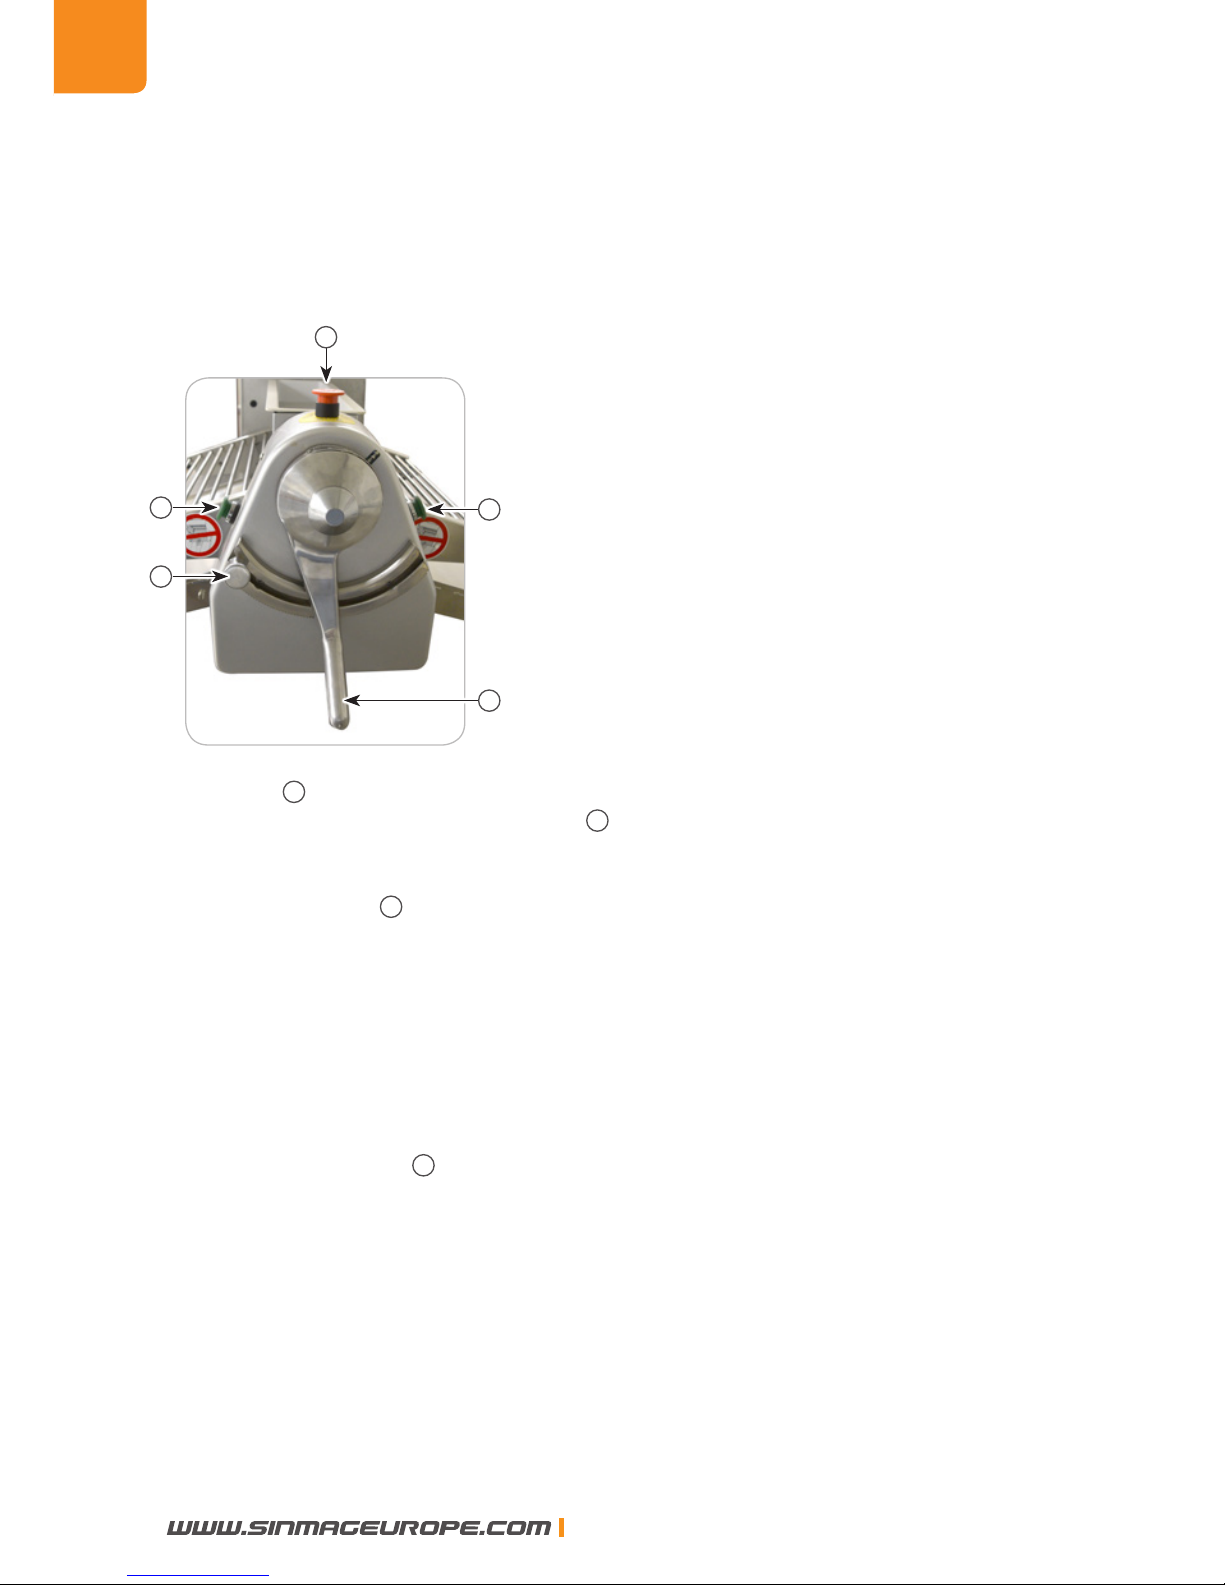
1
3
2
1
5
Power switch
The buttons 1 on both sides of the machine side cover can change the roller rotating
direction. When you press the top button 2 the machine should stop immediately.
Handgrip subassembly
The adjustment lever 3 is used for adjusting the clearance between the rollers.
Setting roller clearances
Press locking lever on adjustment lever.
Rotate adjustment lever to desired position.
The scale dial indicates the value of the roller clearance setting.
Dough thickness stop control
• Set the adjustment lever to the desired thickness.
• Undo the knurled knob 5 and move the sliding block until it comes up against the
adjustment lever.
• Tighten up the knurled knob.
6. MACHINE CHECKOUT
Each day, before beginning production with your dough sheeter, check the following:
• Is the machine clean?
• Are all guards securely in place and operative?
• Check to ensure that top and bottom scrapers are installed properly.
6
SINMAG EUROPE BVBA
ENG
Page 7

7. OPERATION STEPS
1
Pull down both plates of the machine.
2
Attach the our tray under the pressure rollers.
3
Pull down the safety grid.
4
Lay the dough at the right side of the plate, put the free end of the dough into the
pressure roller.
5
Adjust the roller clearances as your desire.
6
Sprinkle the our on the dough.
7
Press the right switch to let the dough on the plate move from right to left.
8
Press the top button to stop the machine. Adjust the handle to next scale and
sprinkle our on the dough again.
9
Press the left switch to let the dough on plate move from left to right.
10
Repeat step 5 to 9 until the dough is with a desired thickness, then fold the dough
again and again to the tiers which you need.
Ensure that the machine should stop when the safety grid is lifted.
This machine must never be cleaned with running water.
To protect the scraper and our tray from distortion, don’t use hot water to clean
them.
The side machine cover must be closed.
If you want to lift the plate when the machine is not in operation, you should lift
the safety grid rst.
SINMAG EUROPE BVBA
7
ENG
Page 8
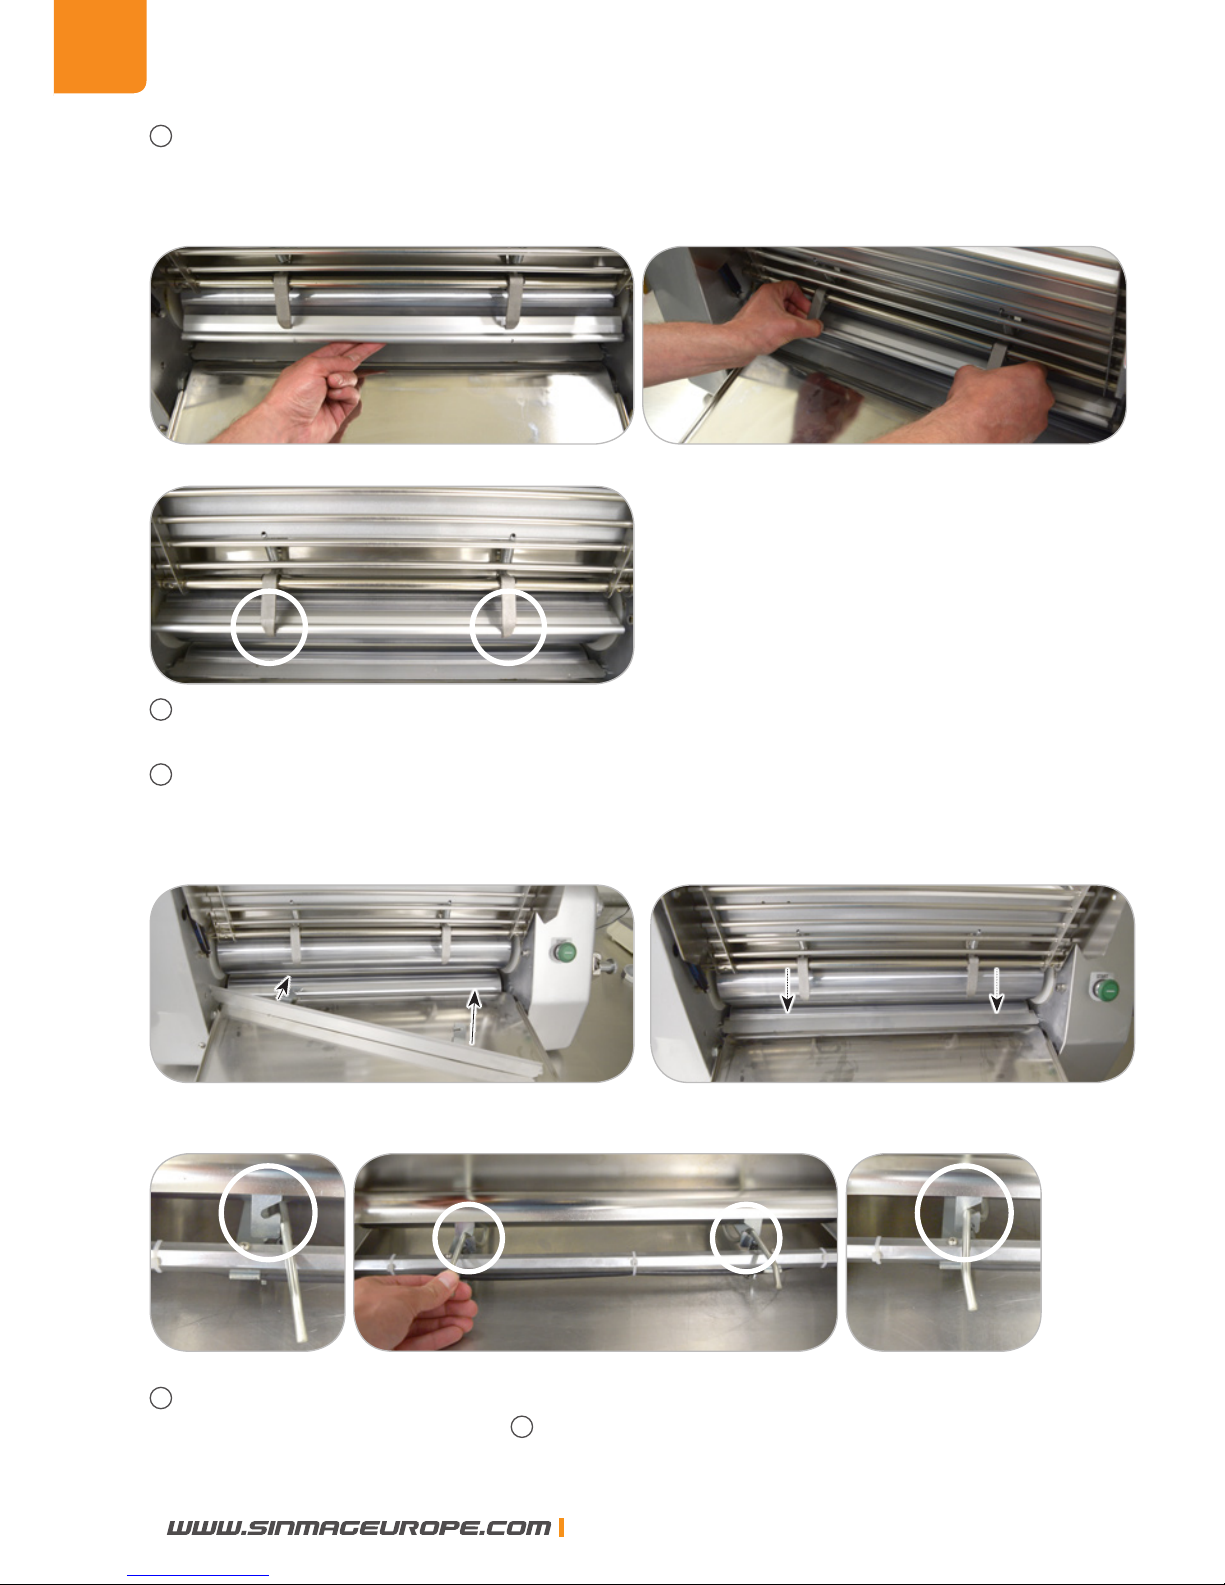
8. DETACHING AND ATTACHING THE SCRAPERS
1
Attaching top scrapers
• Place scraper on top pressing roller.
• Pull out the spring - mounted retaining levers far enough to allow angle to slide
underneath.
• Position retaining levers to engage the scraper.
2
Detaching top scraper
• Lift up retaining levers to allow scraper to come away.
3
Attaching bottom scraper
• Place the t-scraper with the hooks pointed downwards in the space between the
pressure and conveyor rollers.
• Pushdown t-irons as far as they will go into the lateral guides.
• Fix spring-mounted rods under rolling table into the hooks.
4
Detaching bottom scraper
• Reverse procedure described in 3.
8
SINMAG EUROPE BVBA
ENG
Page 9

8. CLEANING
Scrapers
Remove top and bottom scrapers for cleaning.
Rub the scrapers over with a damp cloth.
Do not use any sharp or pointed instrument to scrape off bits of dough that have
hardened to the scraper.
Dough plate
Take down the plate, rub all bits of dough with water and dry it after daily use.
Flour tray
The tray can be pulled out, please clean all the bits of dough in the tray with water and
dry it after daily use.
Roller
Clean the roller with a damp cloth.
Working area
Please keep the working area clean and ventilated.
SINMAG EUROPE BVBA
9
ENG
Page 10

SINMAG EUROPE ❙ BLANKENBERGSESTEENWEG 44A ❙ 8377 ZUIENKERKE - BELGIUM
 Loading...