

SINGER W311 User Manual

li'
■S, s.». «
, ,.V'--:.j-í,¿; ./'i/-:-
ф\ ,
S i a - 1 I E "ШО!«
Ш
1МПШШ
ì:j
Ж И “ ! @

You are now the owner of a precision engineered Sewing
Machine. Give your machine proper care and it will provide
many years of trouble free service.

CONTENTS
Description of machine.................................................................... 2
Operating balance wheel and stop, motion
Winding the bobbin ......................................................................... 4
Adjusting to wind on the bobbin ........................................
Setting the needle ............................................................................ 5
Opening or closing the hinge plate
Removing the bobbin case .............................................................. g
Setting the bobbin case
Threading the bobbin case .............................................................. 7
Threading the needle........................................................................ 8
Preparing for sewing................................................................ 9
Removing the material
Adjusting the upper thread tension
Adjusting under thread tension
Thread tension.................................................................................11
Adjusting the drop feed...................................................................12
Regulating pressure on material
Regulating the length of stitch ...................................................... 13
Sewing in reverse ...........................................................................13
Regulating width of zigzag stitch ..................................................14
Regulating length of zigzag stitch .................................................14
Straight stitching.............................................................................15
....................................................................
......................................................
....................................................
....................................
............
.................................................
.......................................
...............................................
10
10
11-
12
Creative embroidery ........................................................................
3
5
6
7
Samples of creative embroidery
Sewlight.......................................................................................... |g
Embroidering with a hoop ...............................................................
Darn or monogram without hoop
Accessories ......................................................................................
Making buttonholes..........................................................................
Blind stitch ......................................................................................20
Stretch stitch sewing
Bution sewing .................................................................................22
Narrow hemming............................................................................£3
Hemming and inserting lace in one operation ...........................£4
Cloth guide ......................................................................................24
Quilting guide.................................................................................25
Zipper foot
Cleaning the shuttle mechanism .....................................................26
Oiling the machine...........................................................................
Hints on smooth sewing ..................................................................28
Needle and thread sizes
For portable installation
Installing sewing head in cabinet .............................................'•■•33
Adjust the motor belt .......................................................................34
.......
........................................................................
...............................................................................
.....................................................
...................................................
..................................................................
.............................................................
..
ig
..
17
..
..
2I
..
..
..
.
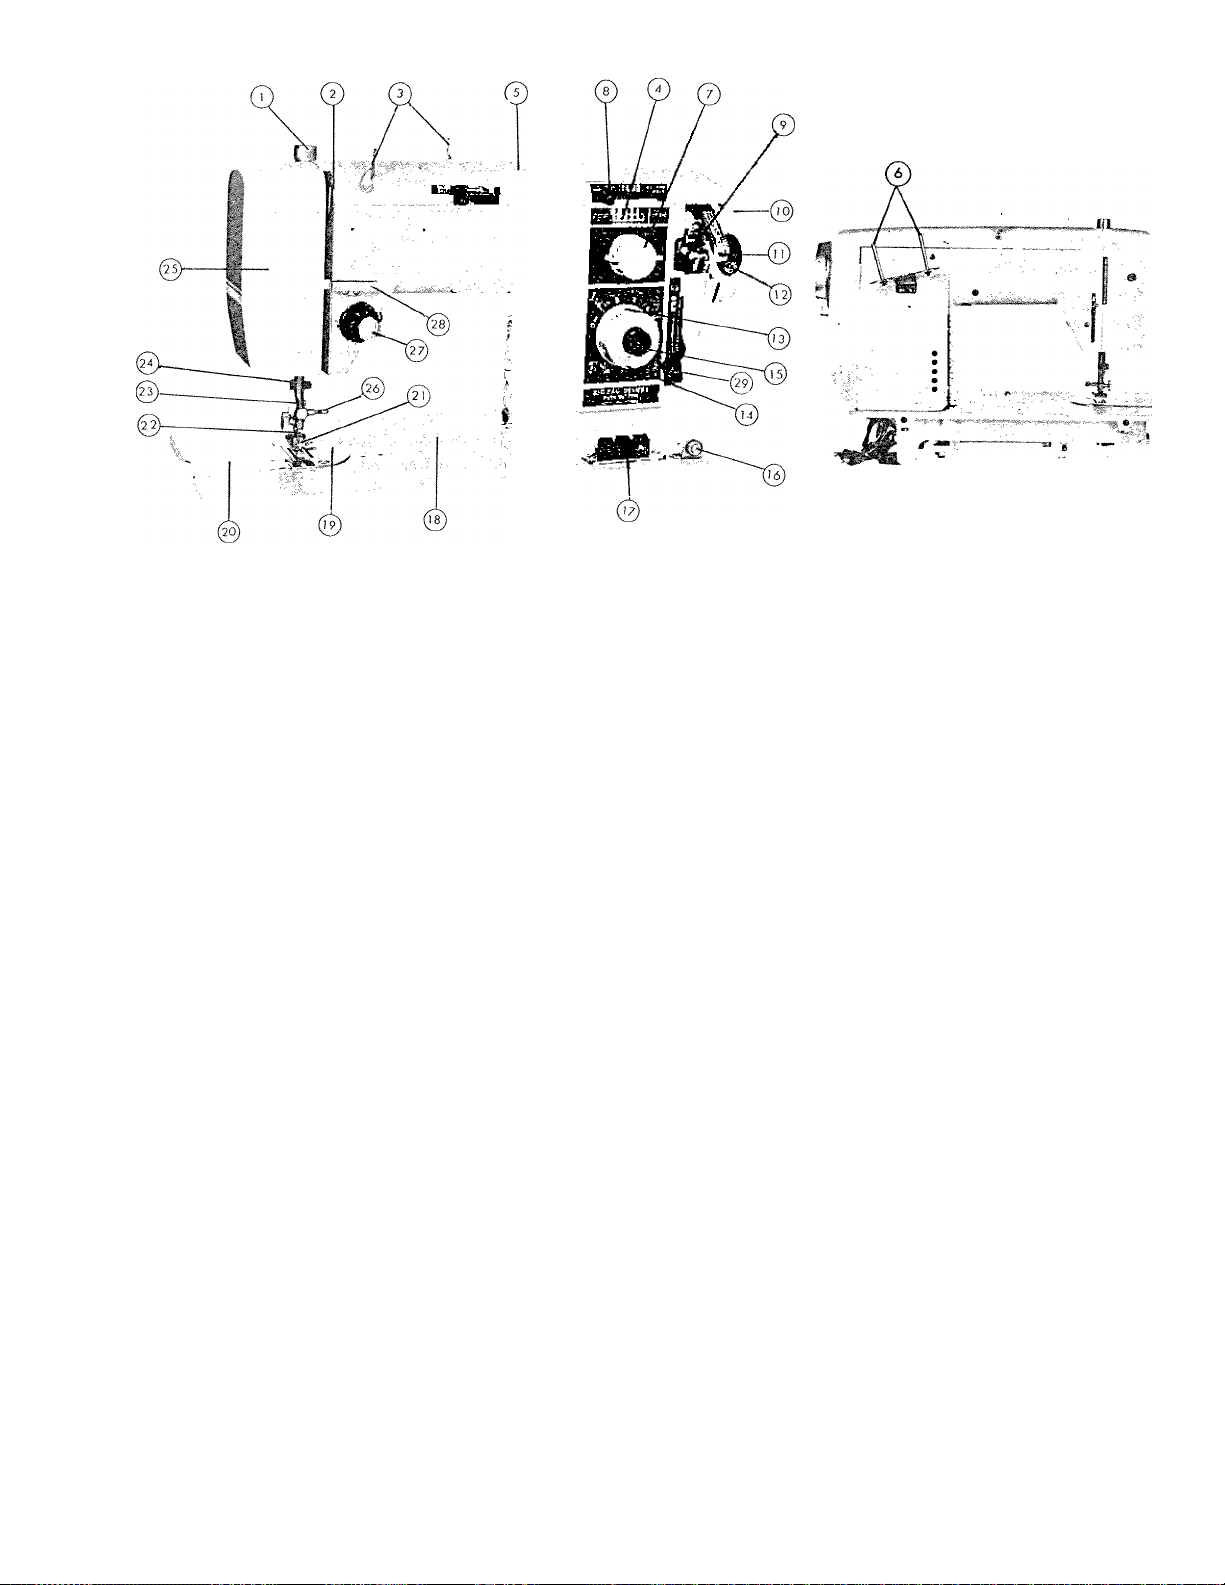
1 Pressure regulator
2 Thread take up lever
3 Upper thread guide
4 Zigzag window
5 Top cover
6 Spool pin
7 Zigzag lock
8 Zigzag lever
9 Bobbin winder release
10 Balance wheel
11 Bobbin winder lever
12 Rubber ring
13 Stitch length regulator
14 Stitch length dial
15 Reverse feed push button
16 Bobbin winder
17 Drop feed regulator
18 Bed-plate
tension bracket
(push button type)
19 Needle plate
20 Hinged plate
21 Presser foot
22 Needle
23 Needle bar thread guide
24 Thread cutter
25 Face plate
26 Needle clamp screw
27 Upper thread tension regulator
28 Arm thread guide
29 Stretch lever

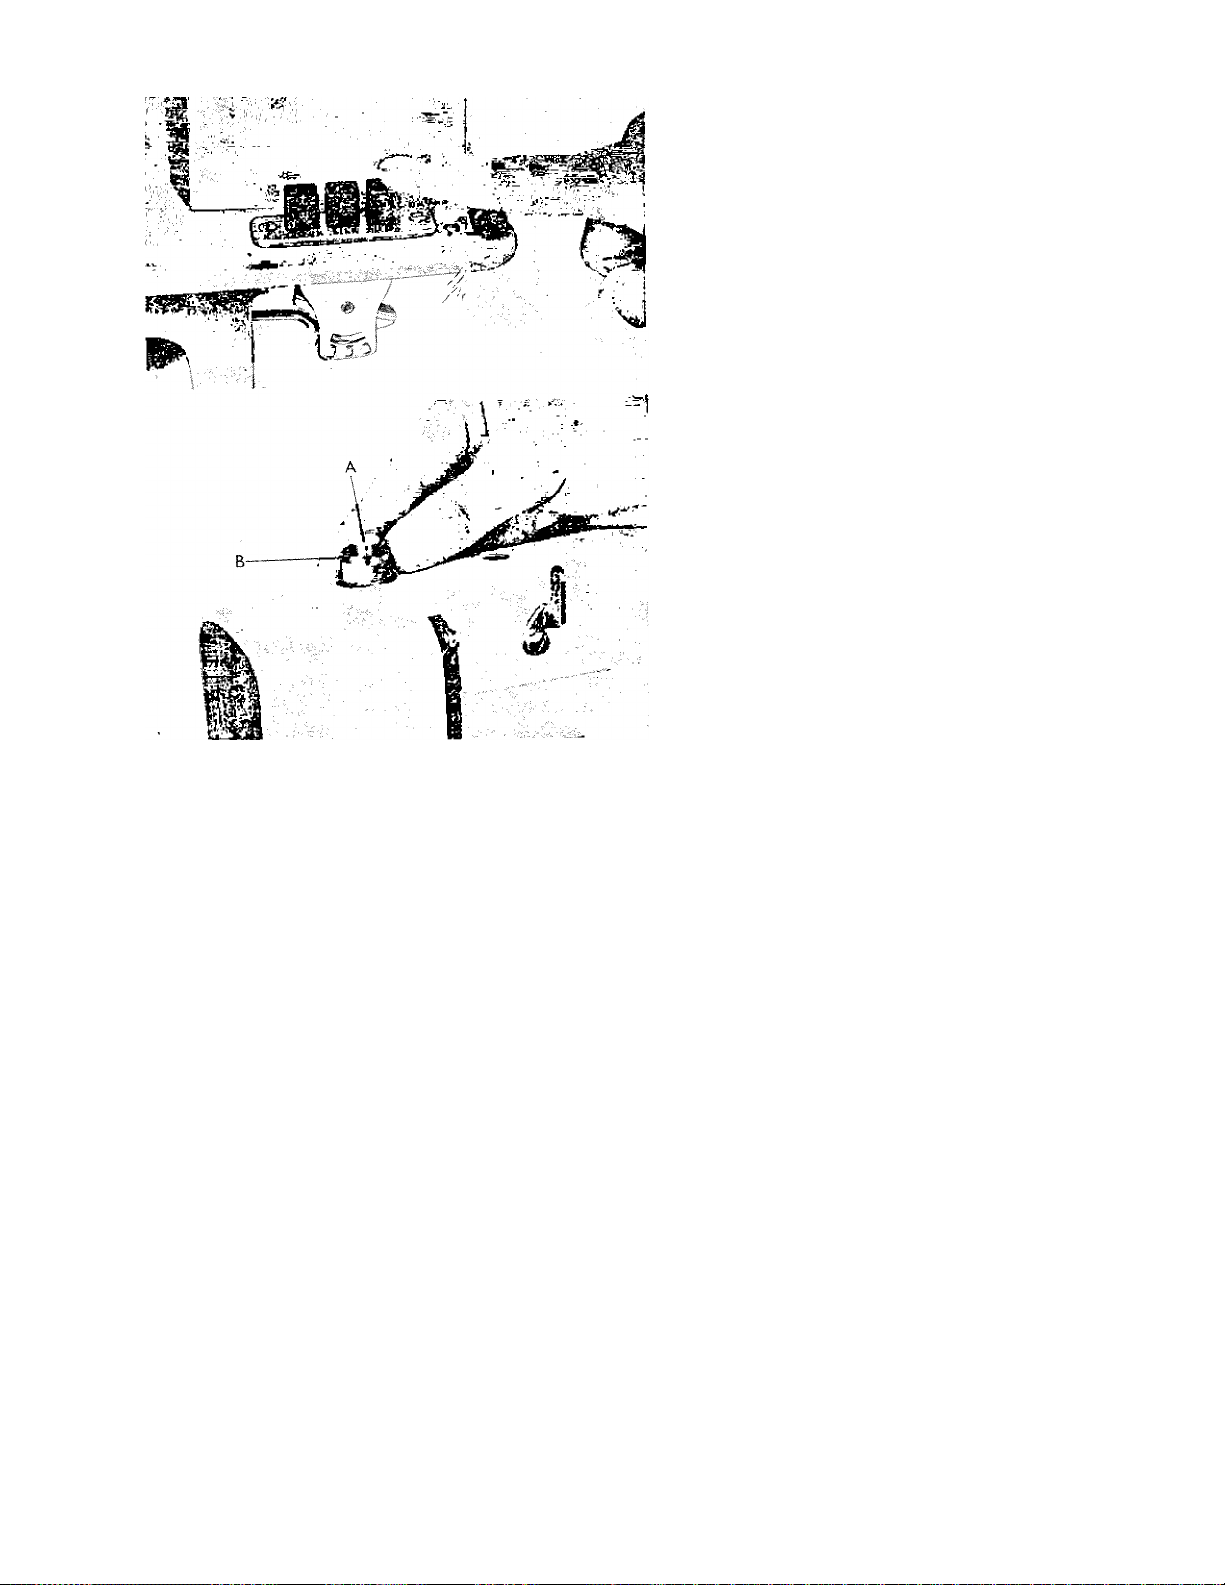
OPERATING BALANCE WHEEL AND STOP MOTION
Hold the balance wheel (A) firmly with your left hand and
turn the stop motion knob (B) toward you, thus permitting the
balance wheel to run freely, so that the bobbin can be wound
without operating the stitching mechanism.
To lock balance wheel, turn the stop motion knob away from
you.
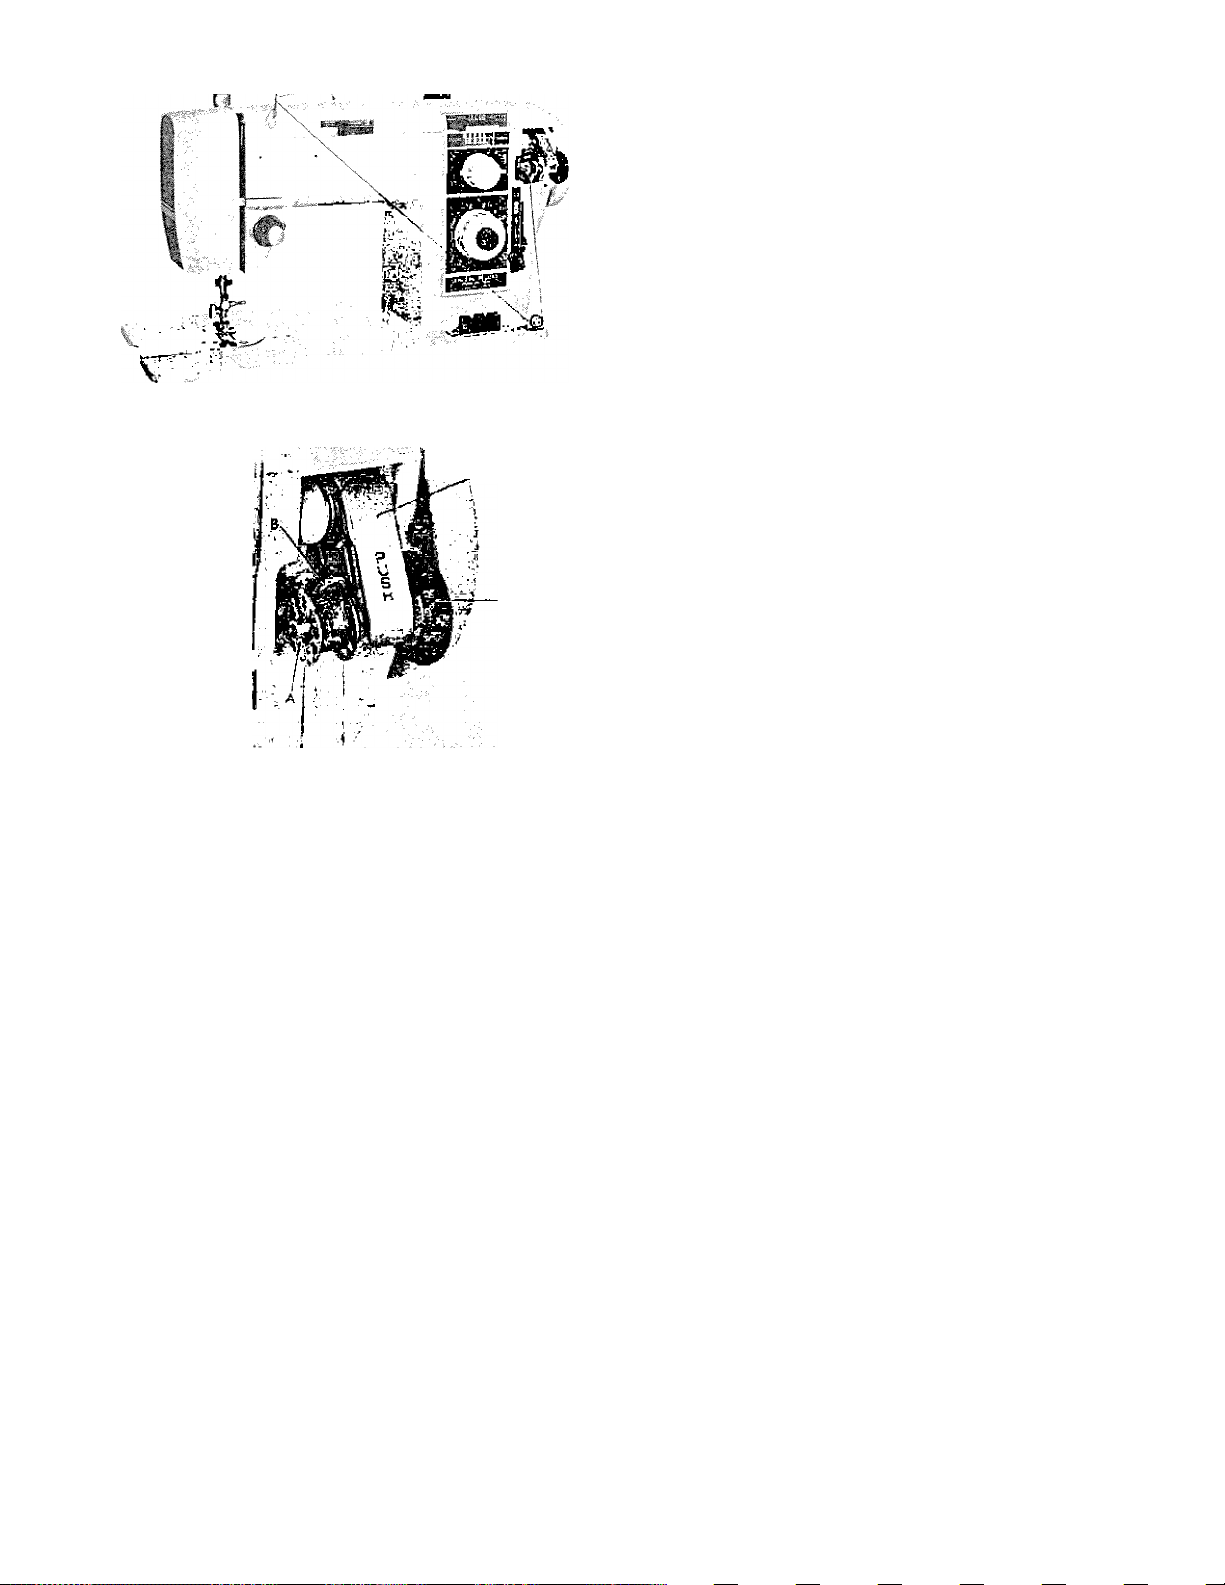
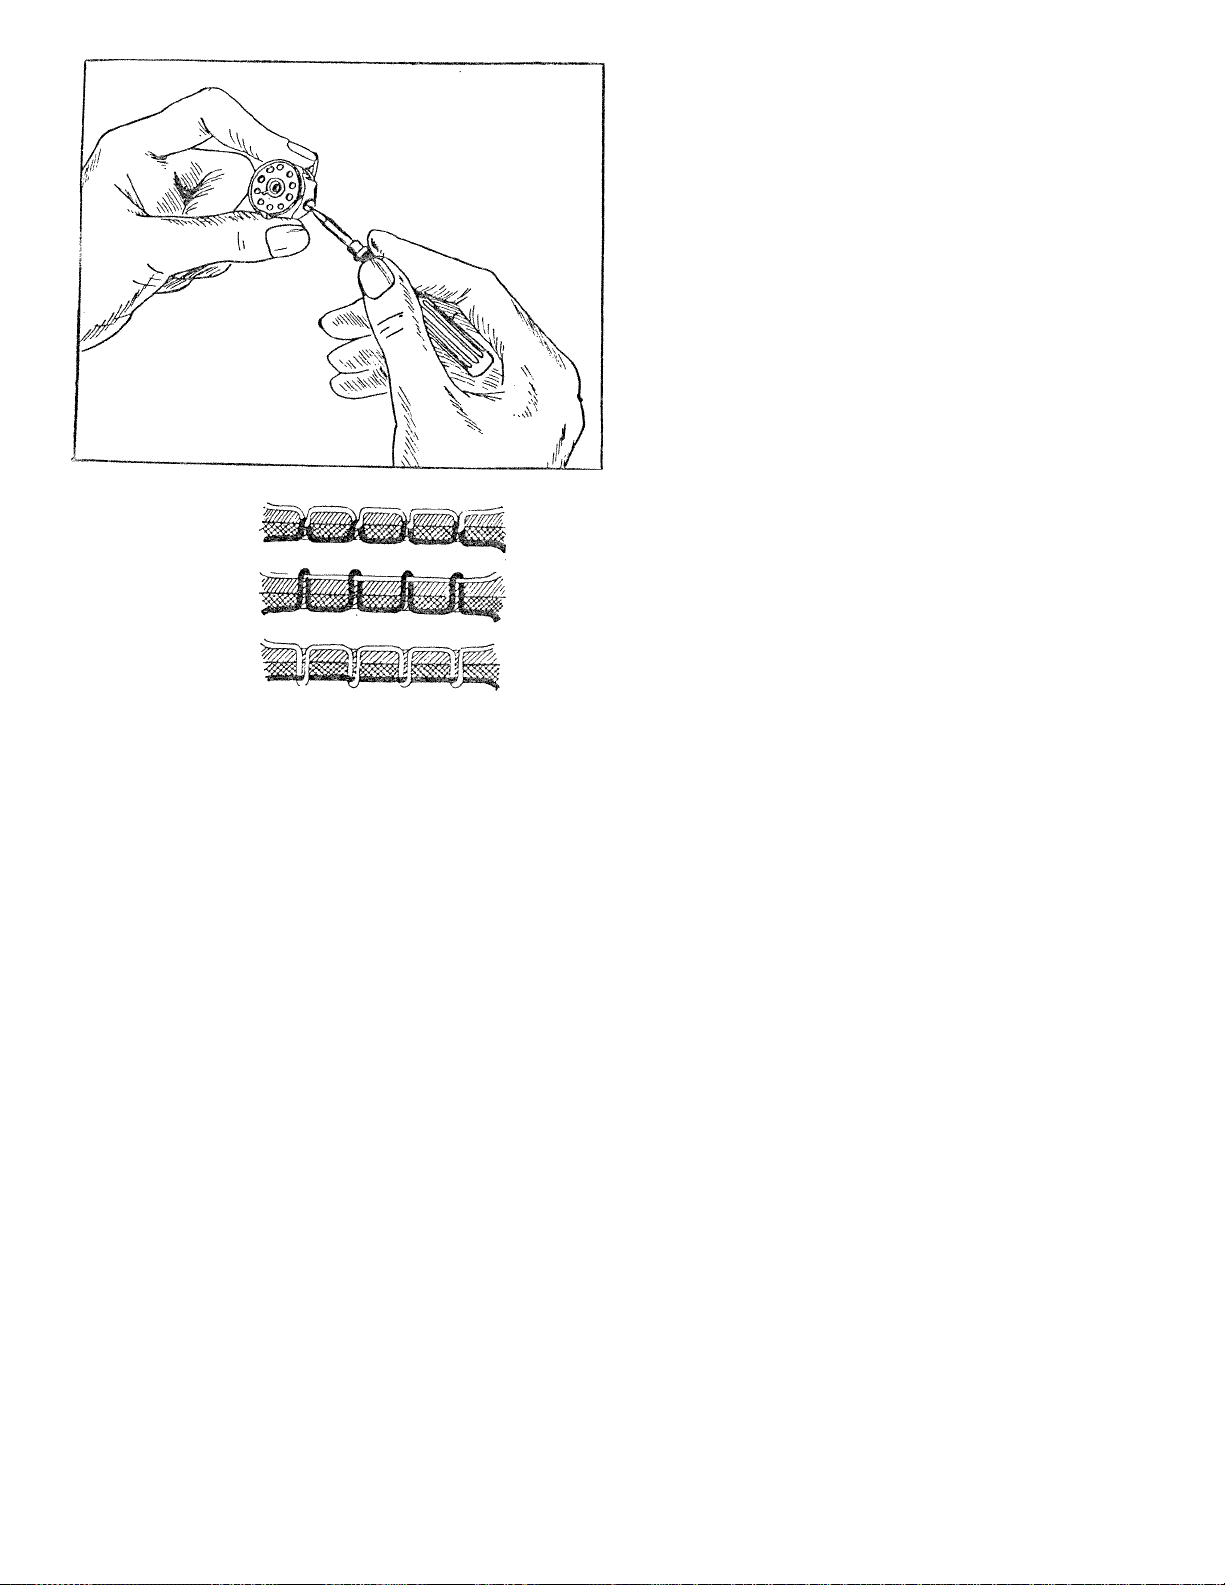
WINDING THE BOBBIN
Place the spool of thread on the spool pin (6) and dra
out about 12" of thread through tension bracket. Wii
thread on to the bobbin seven or eight times toward you. Thi
set the bobbin on the spindle (A) of the bobbin winder. Shou
the bobbin wind unevenly, slide tension bracket to left or rig
as required.
To set the bobbin, put the bobbin on the spindle (A)
shown, pushing up the stop latch (B).
After setting the bobbin, push the lever (C) down and t
rubber ring will touch the balance wheel. Then turn the balan
wheel toward you and run the machine slowly to wind the be
bin evenly.
When the bobbin is full, it will automatically come to a stf
Cut the thread and remove the bobbin and retighten balar
wheel for sewing.
. _ir-'
:j,/. •
Ti.
In order to sew and wind bobbin simultaneously, do i
loosen the balance wheel.
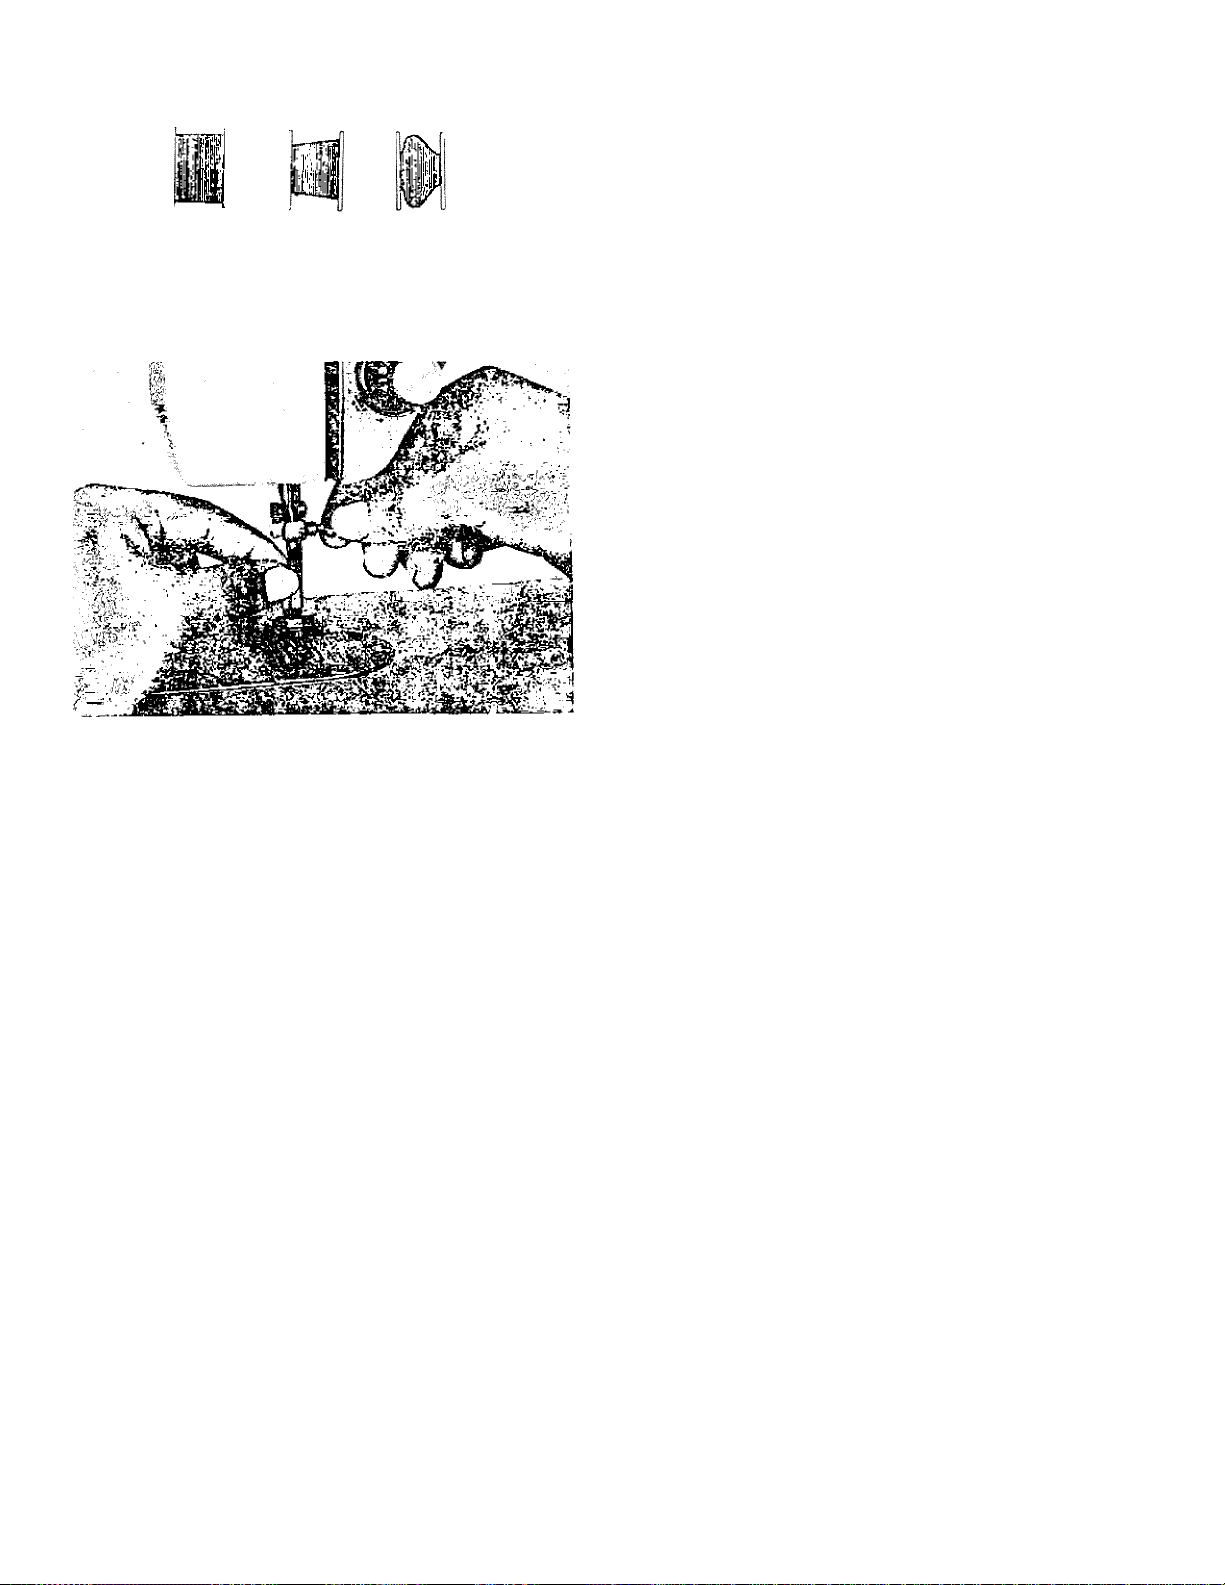
Correct winding Incorrect winding
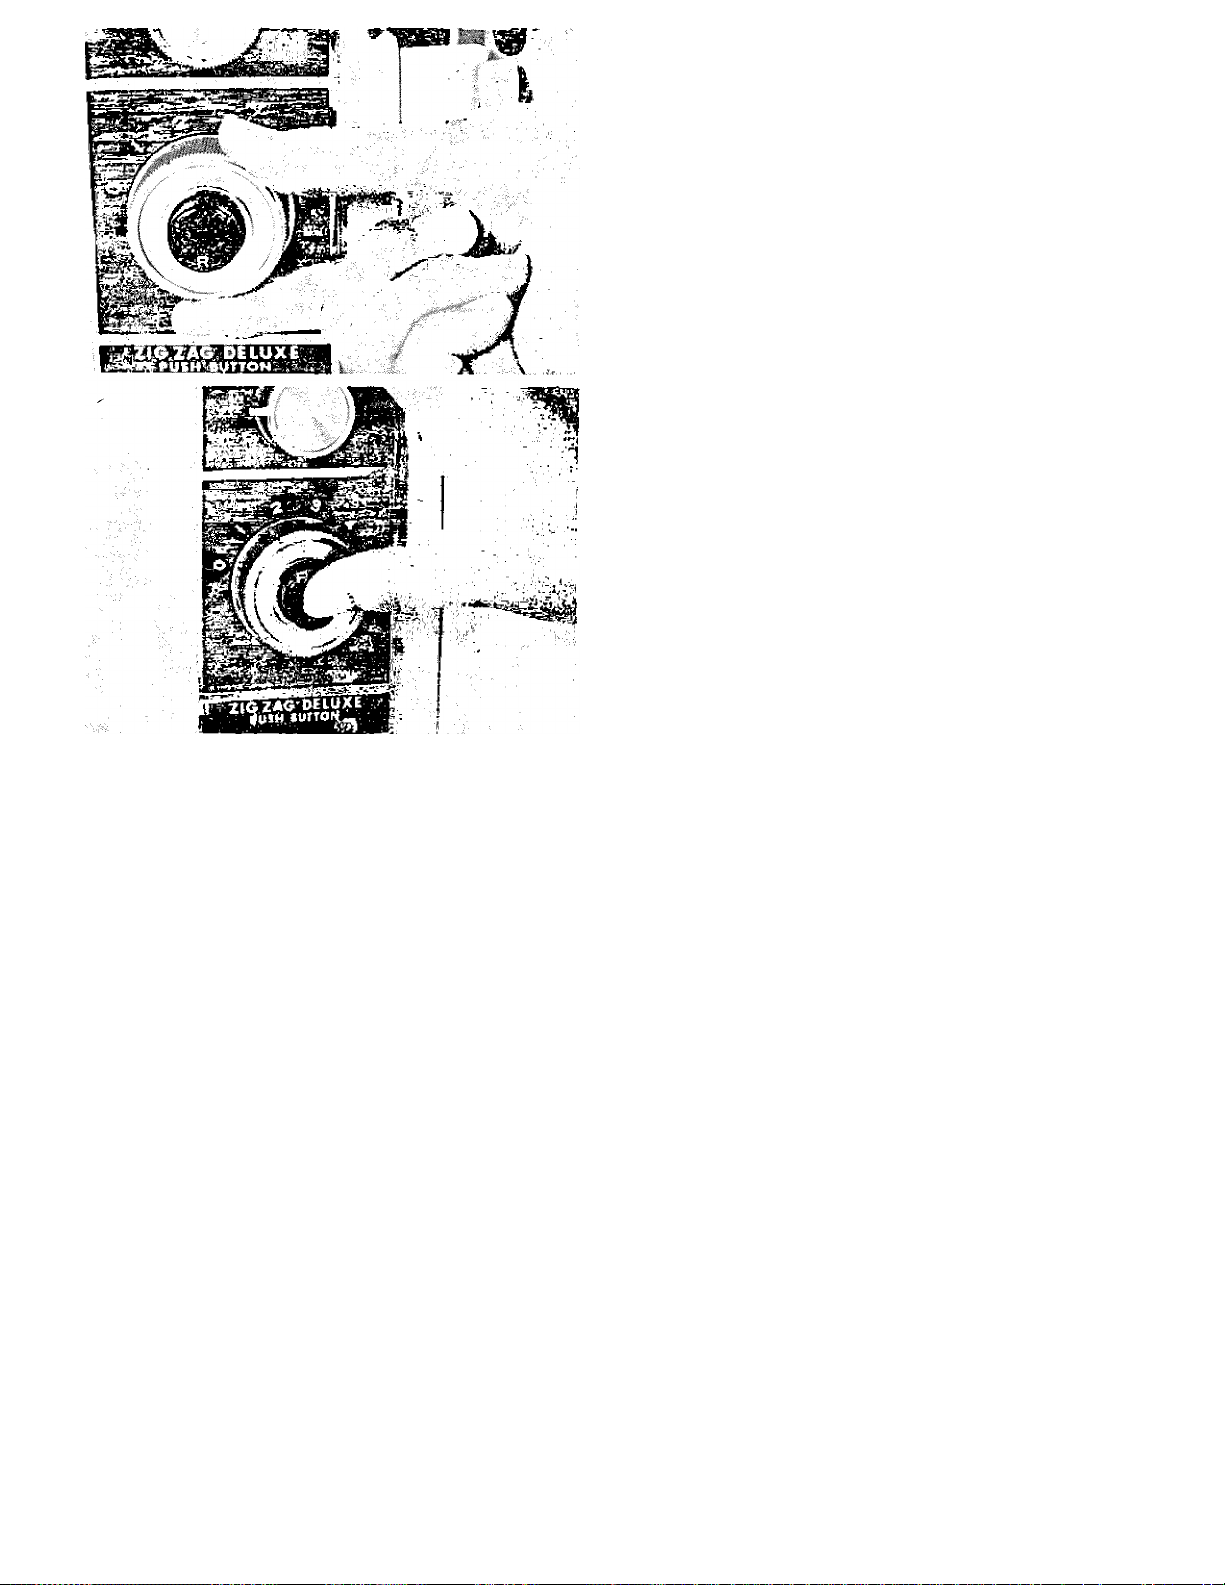
ADJUSTING TO WIND ON THE BOBBIN
In order to ensure smooth rotation of the bobbin within its
case, make sure that the thread is wound evenly on the bobbin,
otherwise it may cause thread to break, irregular tension, or
fail to produce neat stitches.
SETTING THE NEEDLE
Turn the balance wheel toward you until the needle bar rea
ches its highest position.
Loosen the needle clamp screw.
Insert the needle with the flat side toward the balance wheel
and push the needle 'up into the needle clamp until it hits the
stop.
Tighten the needle clamp securely.
OPENING OR CLOSING THE HINGE PLATE
•^,v;.'
V■■■„■,.-i'-rv. ■■
Our new type hinge plate supersedes the slide plate.
To open, place finger in recess and lift.
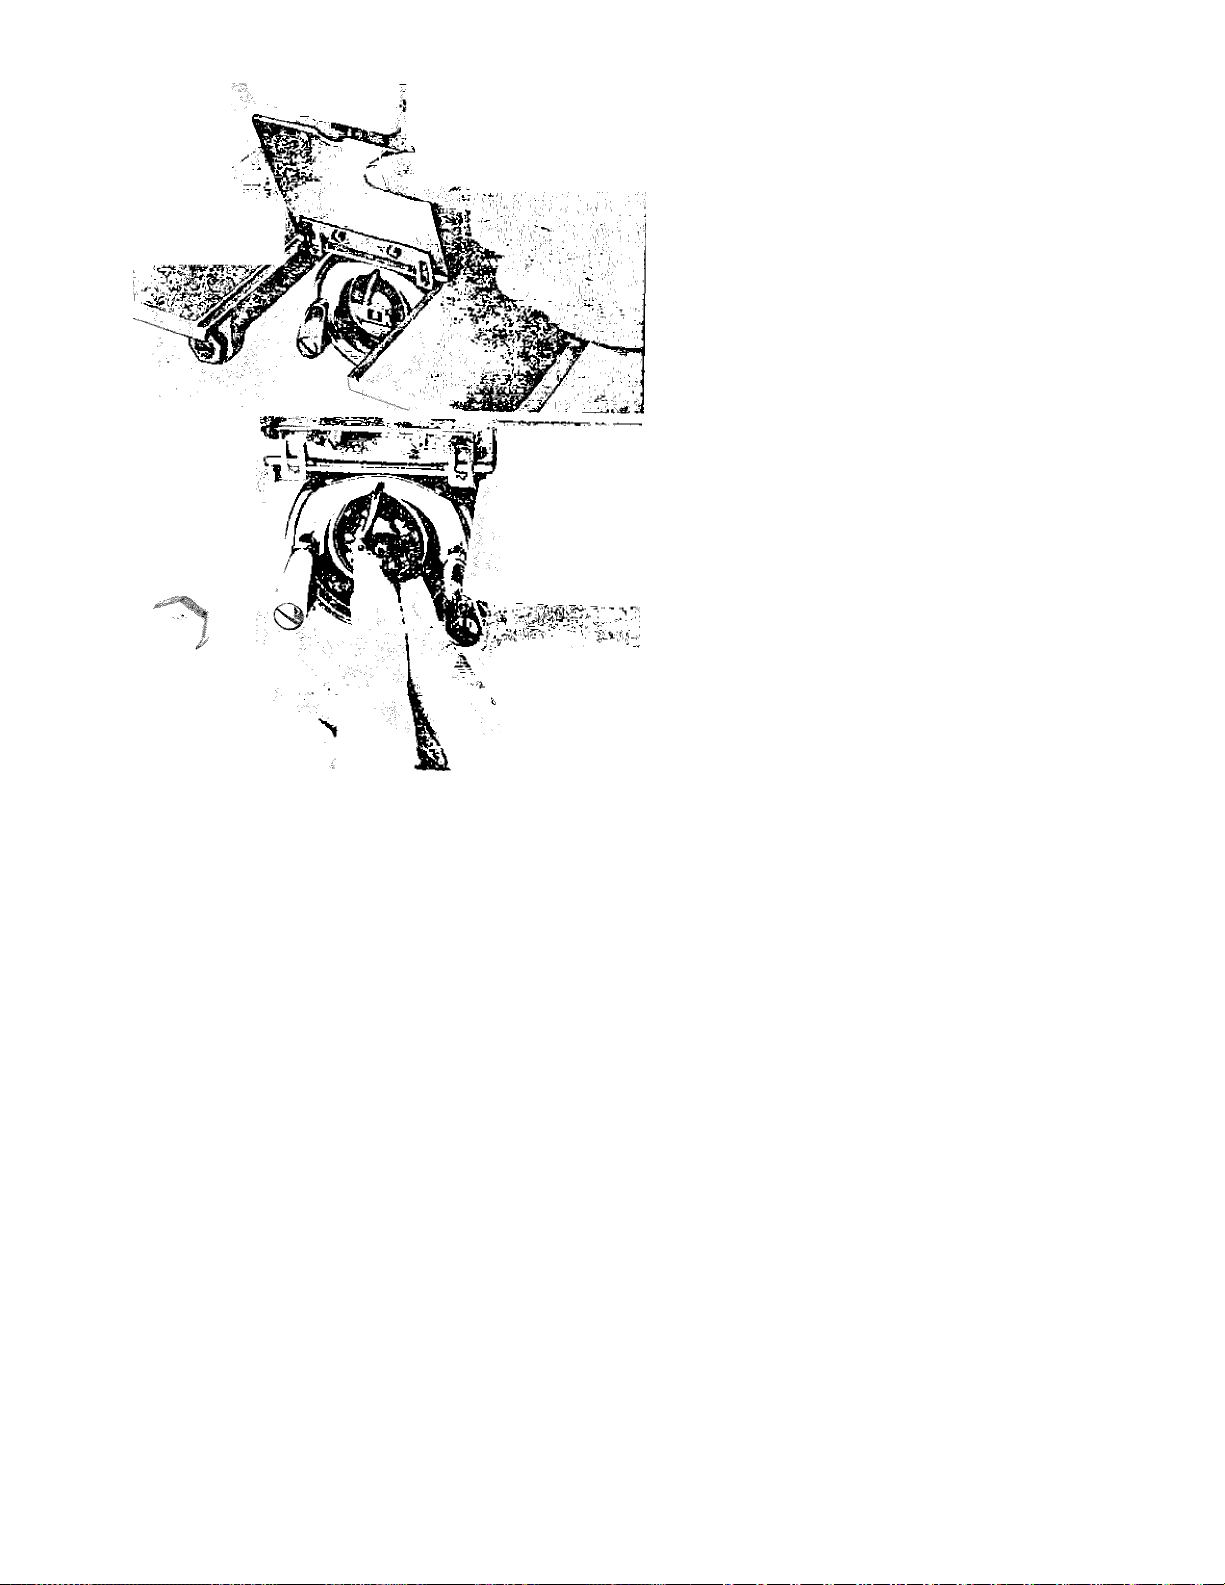
REMOVING THE BOBBIN CASE
Turn the balance wheel toward you until the needle bar
at its highest position.
.
-■I'-v. I;".'..'ll
■ ■ ■ '■ -1."'
Lift the hinged plate and insert thumb and forefinger of le
hand.
Open the latch of the bobbin case as shown and take out th
bobbin case by holding the latch.
Inportant—The shuttle hook and bobbin case can be knocke
out of position if you use a bent needle, or try to take oi
the bobbin case when the needle bar is lowered.
^ slot
delivery
eye
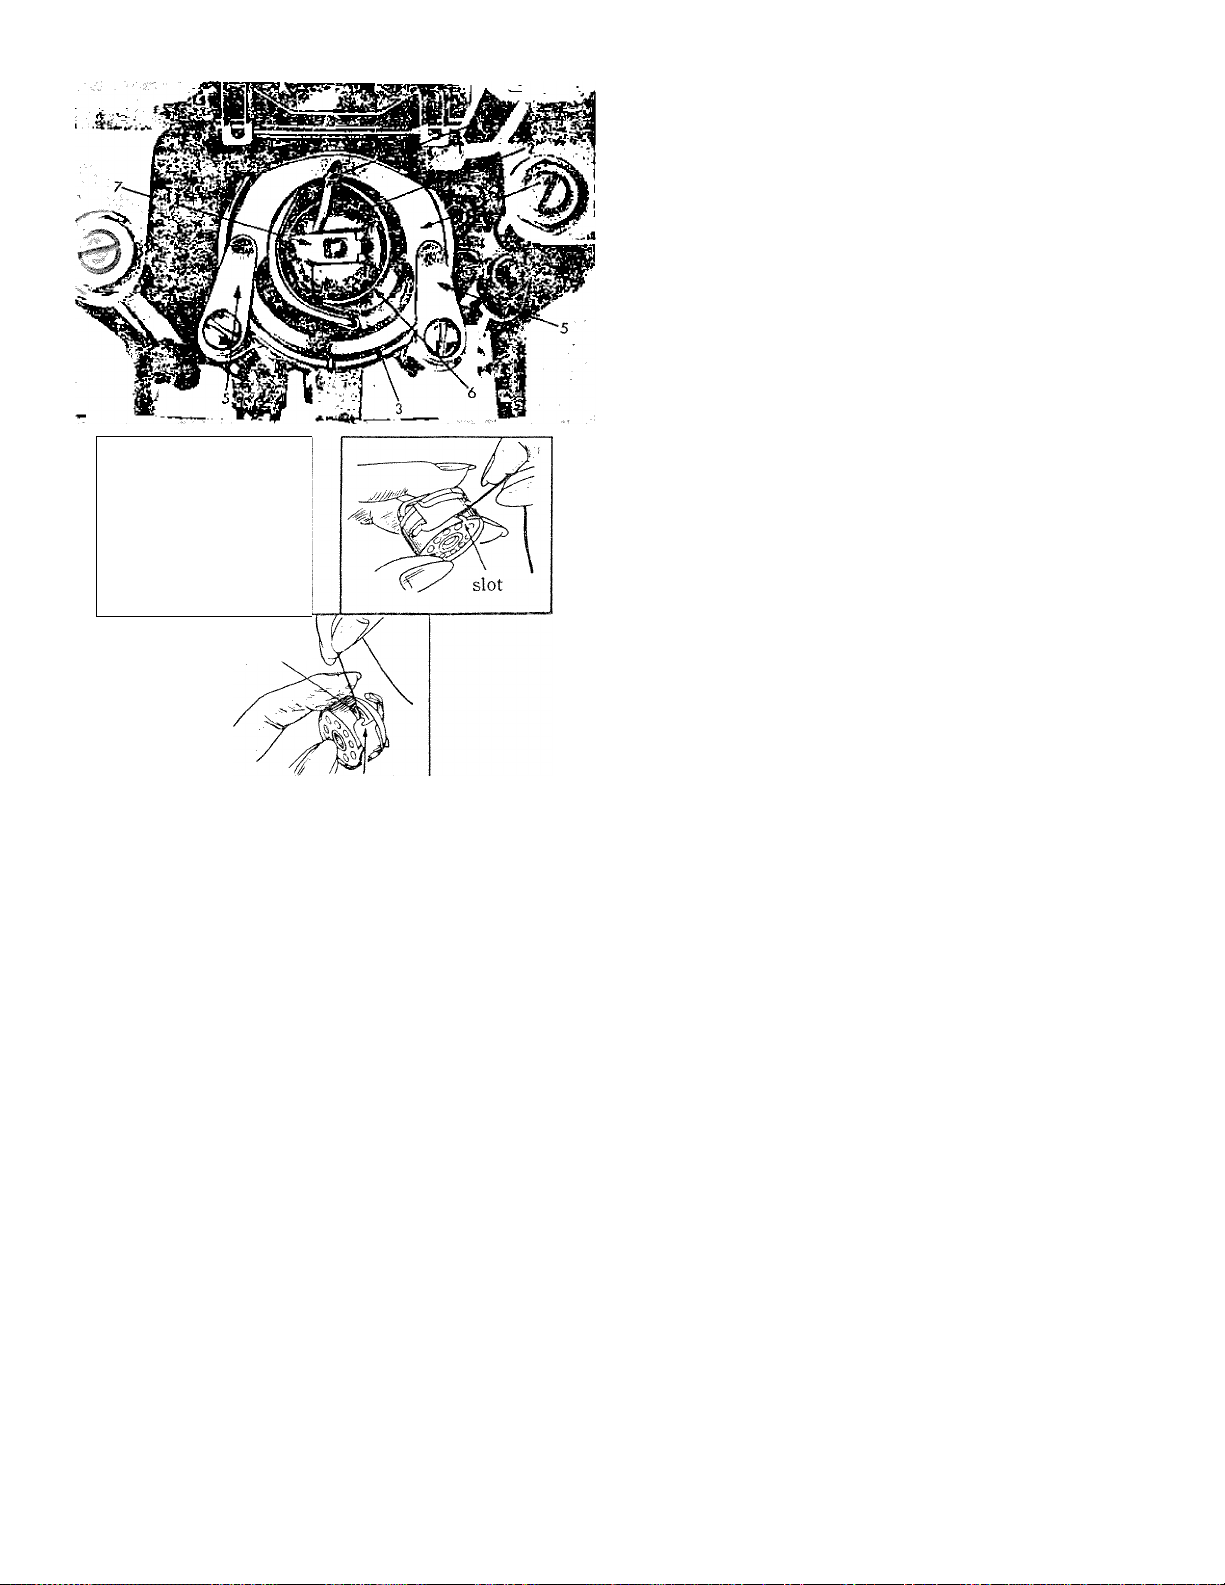
SETTING THE BOBBIN CASE
Turn the balance wheel toward you until the needle bar is at
its highest position.
Hold the latch of the threaded bobbin case between the thumb
and forefinger of the left hand, replace the bobbin case. Make
sure that the bobbin case position finger is fixed in the notch
at the top of the shuttle race. Then release the bobbin case
latch to make sure the bobbin case is locked in position.
Cl) Position Finger. (2) Bobbin Case. (3) Shuttle Race.
(4) Race Ring. (5) Clips. (6) Shuttle Hook. (7) Latch.
THREADING THE BOBBIN CASE
Hold the bobbin case between the thumb and forefinger of
your left hand with the slot in the edge facing up.
Hold the wound bobbin between the thumb and two fingers
of your right hand with the thread on top leading away from
you.
- tension spring
Insert the bobbin into the case, pull the thread into the slot,
then down under the spring until it enters the delivery eye.
7
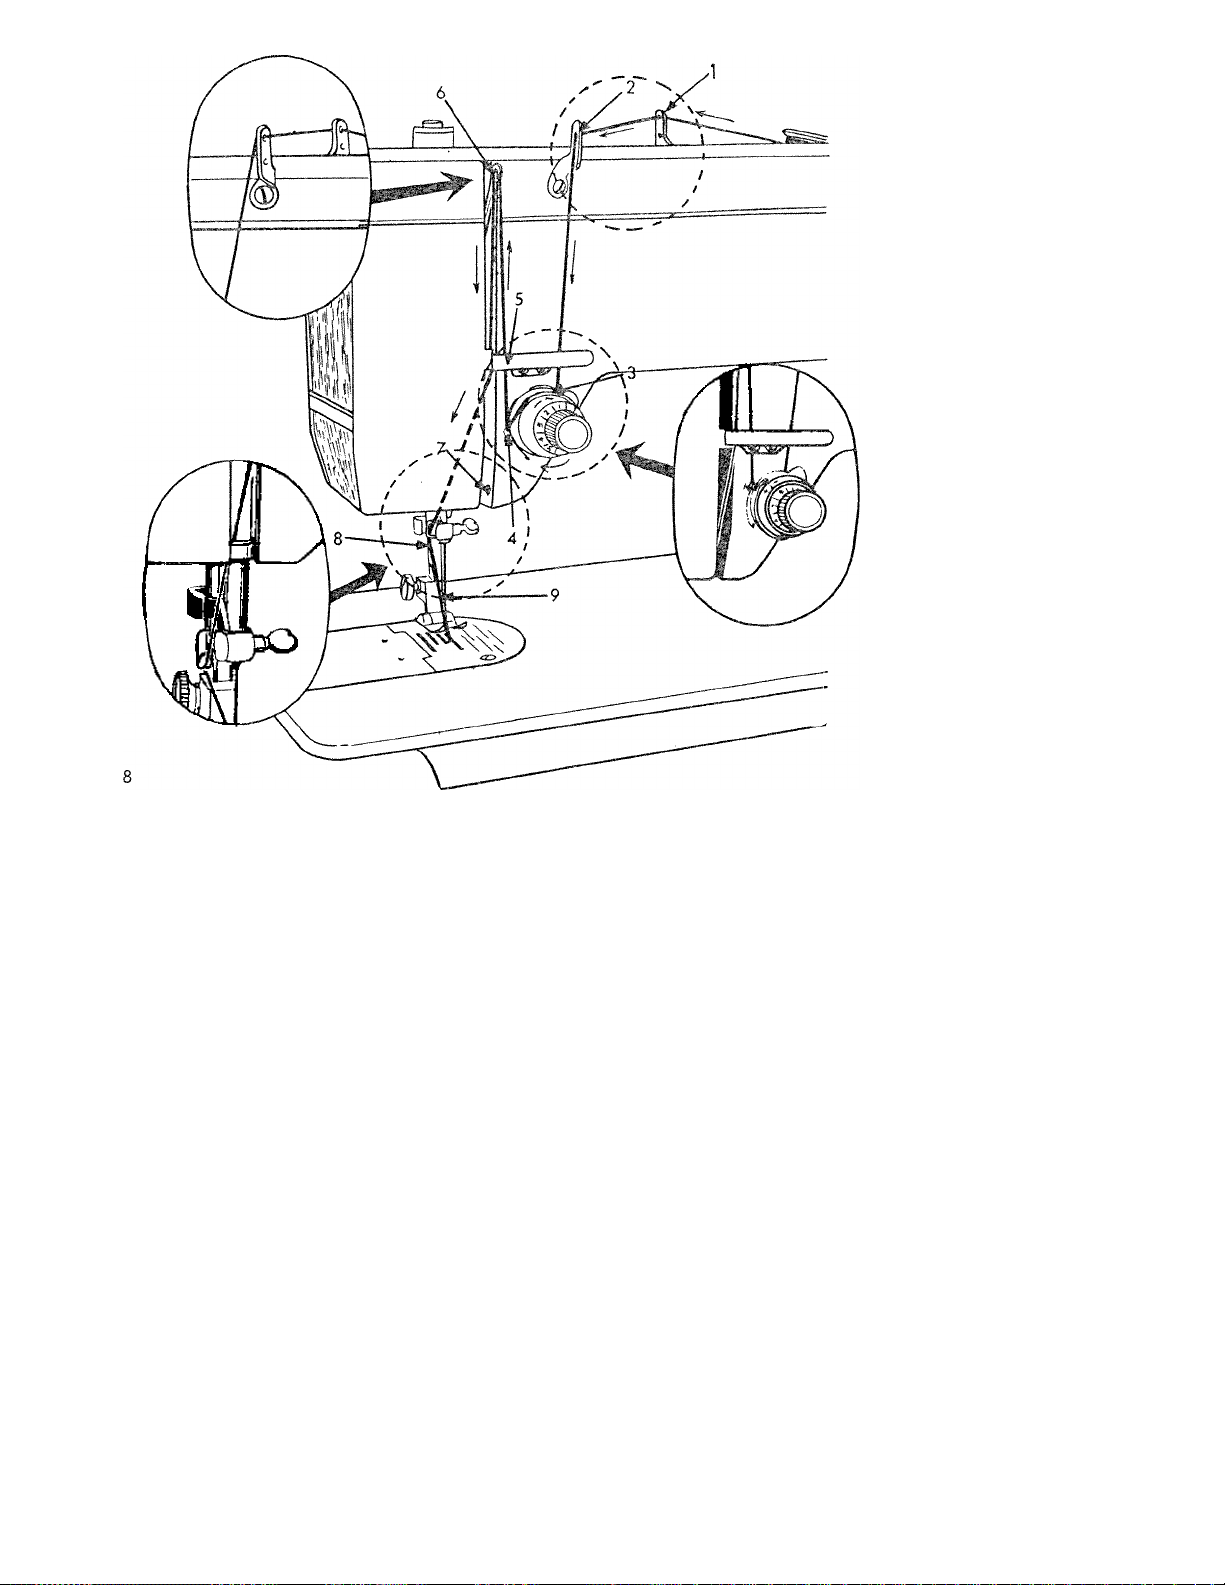
THREADING THE NEEDLE
(Upper Thread)
Place a spool of thread on spool
and raise the take-up lever to its high
])oint.
Pul! thread through the slot of up
thread guides (1),(2)
down through the tension discs (3)
up into the thread check spring (4)
under the arm thread guide (5)
and on up into the eye of the take
lever (6) from right to left.
Return thread through the arm thrv
guide (5)
down through the lower guide (7) ins
the face plate
and into the needle bar thread guide (
Thread needle from left to right, pull:
about four inches of thread through
needle.
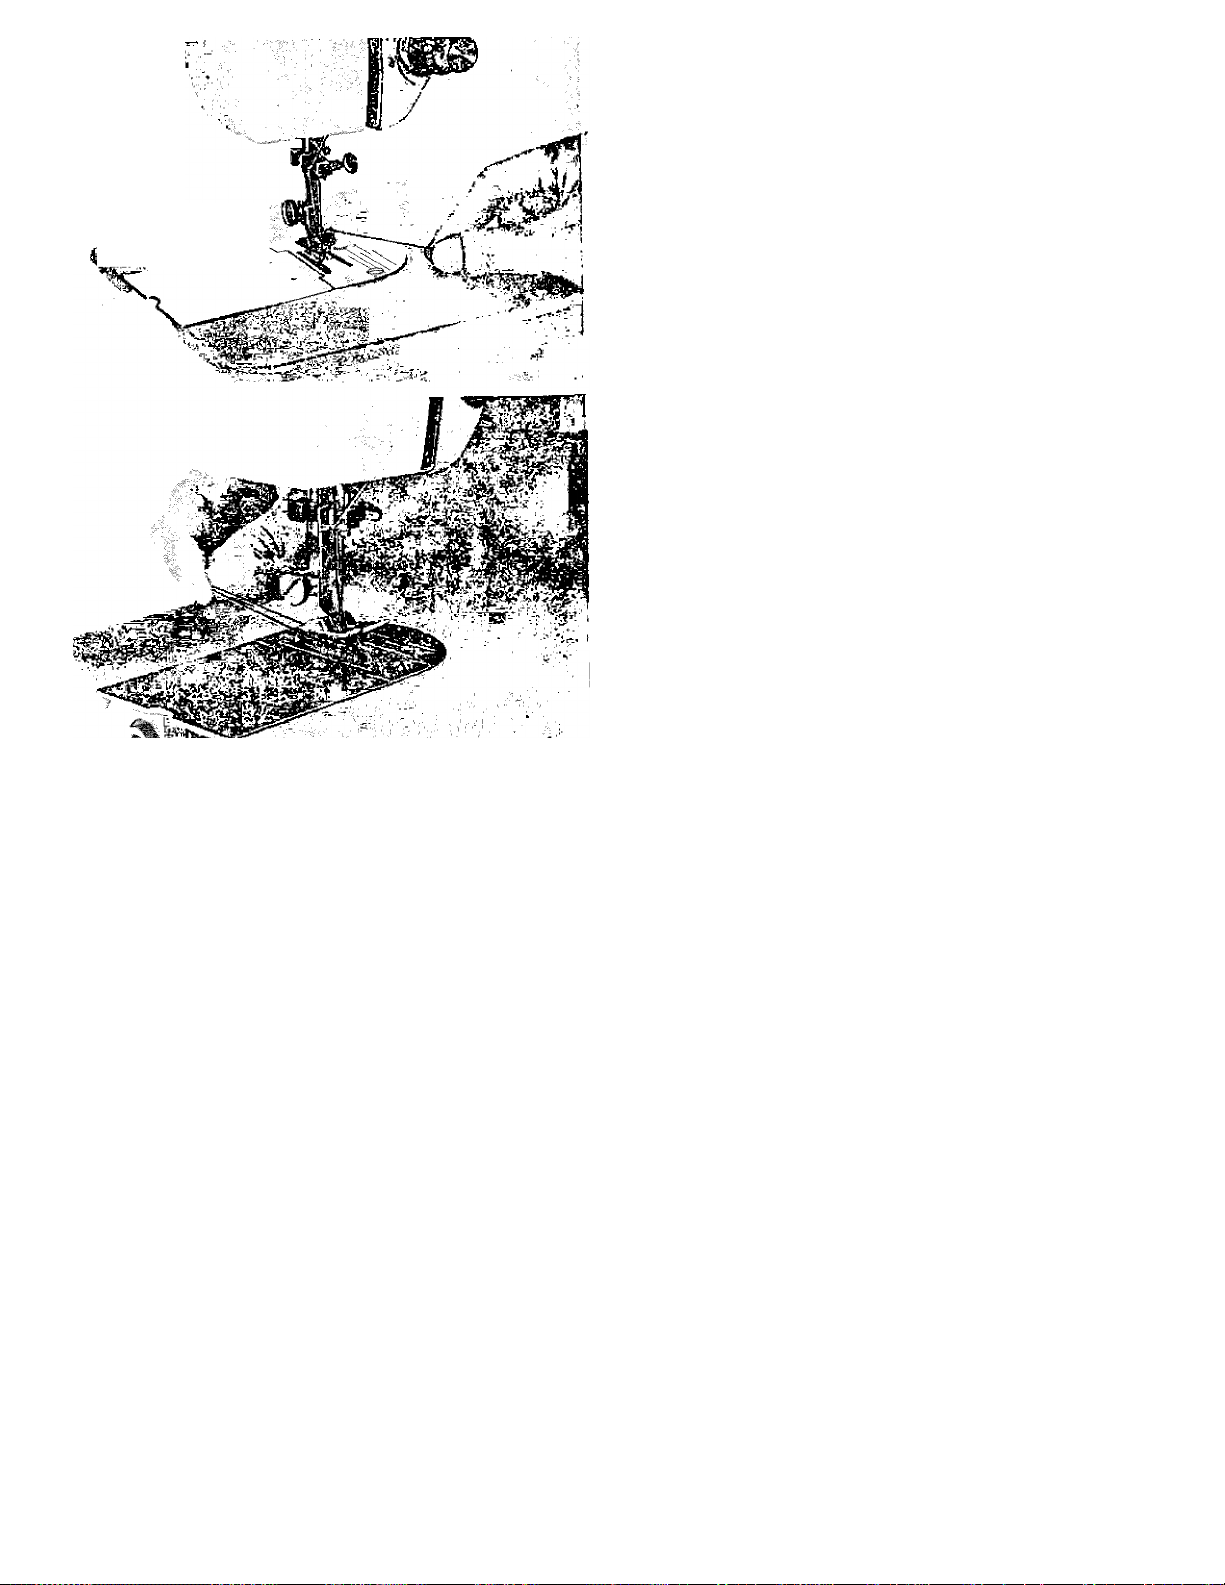
PREPARING FOR SEWING
(a) Pull sufficient thread through the needle and with the
left hand hold the end, leaving it slack from the hand to
the needle.
(b) Turn the balance wheel toward you until the needle
moves down Snd up again, thus catching the under thread.
(c) When the take-up lever is at its highest point, pull the
end of the needle thread you are holding and the under
thread will be brought up with it through the needle hole
in the needle plate.
(d) Lay both ends of thread under and to the back of the
presser foot, and having inserted the material to be stitch,
ed, lower the presser bar lifter and commence to sew by
turning the balance wheel toward you.
Do not try to help the feeding of the work by pulling the
material, as this may deflect the needle and cause it to break.
The machine feeds without any assistance.
Never operate the machine without material under the presser
foot.
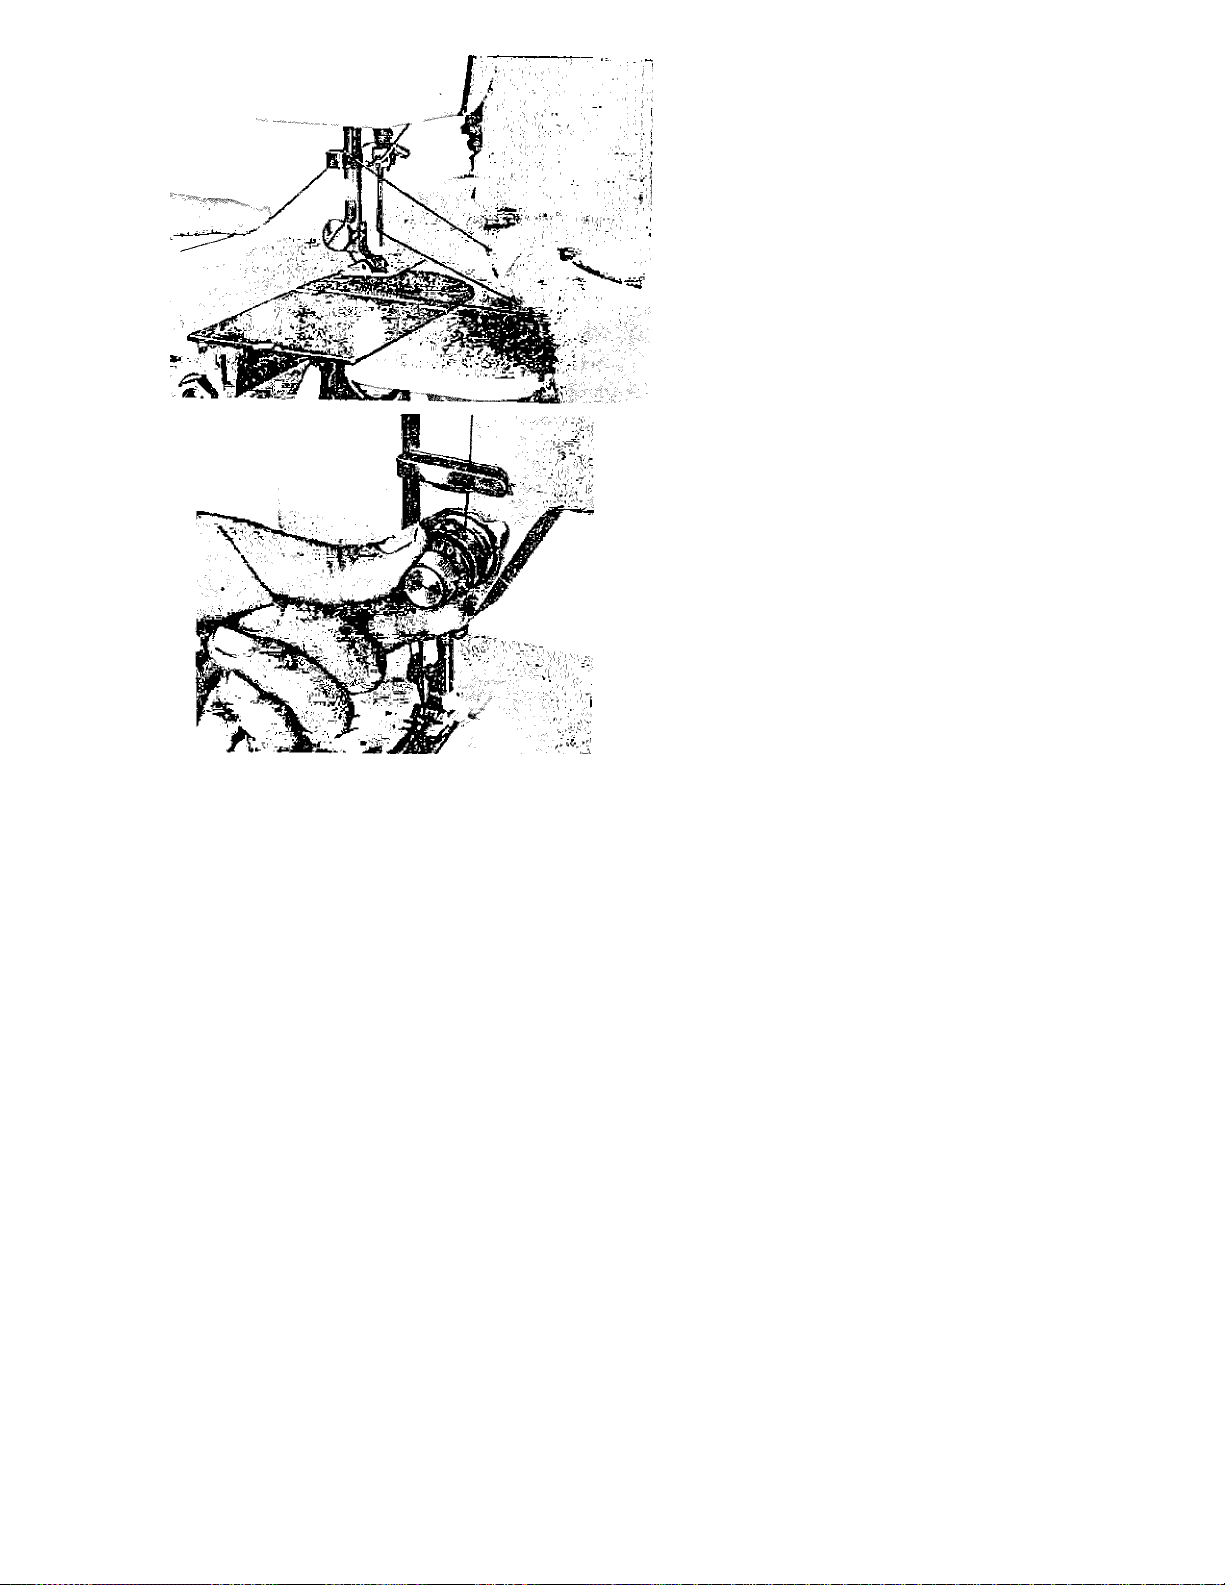
REMOVING THE MATERIAL
(a) Stop the machine when the needle is at its highest poii
(b) Lift the presser bar lever and draw the material to the b
hand side and to the rear of the machine.
(c) Passing the threads over the thread cutter as shown, p
down lightly and cut the threads.
(d) Always leave three to four inches of thread for furth
sewing.
ADJUSTING THE UPPER THREAD TENSION
(a) In most cases the perfect stitch can be obtained by regu
ting the upper thread tension. To increase the upper thre
tension, turn the tension dial clockwise, and to decrea;
turn it anti-clockwise.
(b) The tension dial should not be turned abruptly but lit
by little until the desired tension is obtained, and alwa
make sure that the presser foot is down when maki
tension adjustments.
10
ADJUSTING UNDER THREAD TENSION
All machines are correctly adjusted before leaving the factory,
therefore it is seldom necessary to alter the UNDER tension.
Should it become necessary to do so, tighten the tension
spring screw to increase the tension and loosen the screw
slightly to lessen the tension, using the small screw driver.
THREAD TENSION
(a) For ordinary stitching, the needle and the bobbin threads
should be locked in the center of the thickness of the
material, as illustrated (A).
A
(b) If the tensipn on the needle thread is too tight, or if that
on the bobbin is too loose, the needle thread will lie
straight along the upper surface of the material, as shown
in illustration (B).
C
A. Perfect Stitch.
B. Tight Upper Thread Tension.
C. Tight Under Thread Tension.
wmmm
(c) If the tension on the bobbin thread is too tight, or if that
on the needle is too loose, the bobbin thread will lie
straight along under side of the material, as shown in
illustration (C).
wfm
ADJUSTING THE DROP FEED
This mechanism drops the feed dog under the needle pi
when the material is required to be moved freely by hand .
embroidering and darning.
When the left button is pushed completely down (mark
DOWN.), it enables the material to be moved freely under :
presser foot, which is convenient for embroidery, darning, e
For sewing very light material, push the center button cc
pletely down (marked SILK).
For ordinary sewing, push the right button completely do'
(marked UP), when the three buttons are always up and evc
REGULATING PRESSURE ON MATERIAL
To increase pressure for heavy materials, press (A) downwa
and to release pressure for light materials, darning, etc., press)
down when (A) will automatically release the pressure.
When darning, lower the presser bar lever and yon are rea
to darn or embroider.
“Note:—When reverting to normal sewing, do not forget
press “A” into position to give the required pressure on :
presser foot, otherwise the machine will not feed properly.
12
REGULATING THE LENGTH OF STITCH
Turn the dial to the right to lengthen and to the left to
shorten the stitch. Near 0 is the shortest stitch and 5 is the
longest.
SEWING IN REVERSE
To sew backward for tying the threads at the beginning or
end of a seam, press in the button R, as far as it will go. The
machine will sew backward as long as the button is pressed.
 Loading...