

Page 1

™™
™
™™
STITCH FUNCTION MANUAL
Page 2

Page 3

TABLE OF CONTENTS
I. Clothing Construction Functions
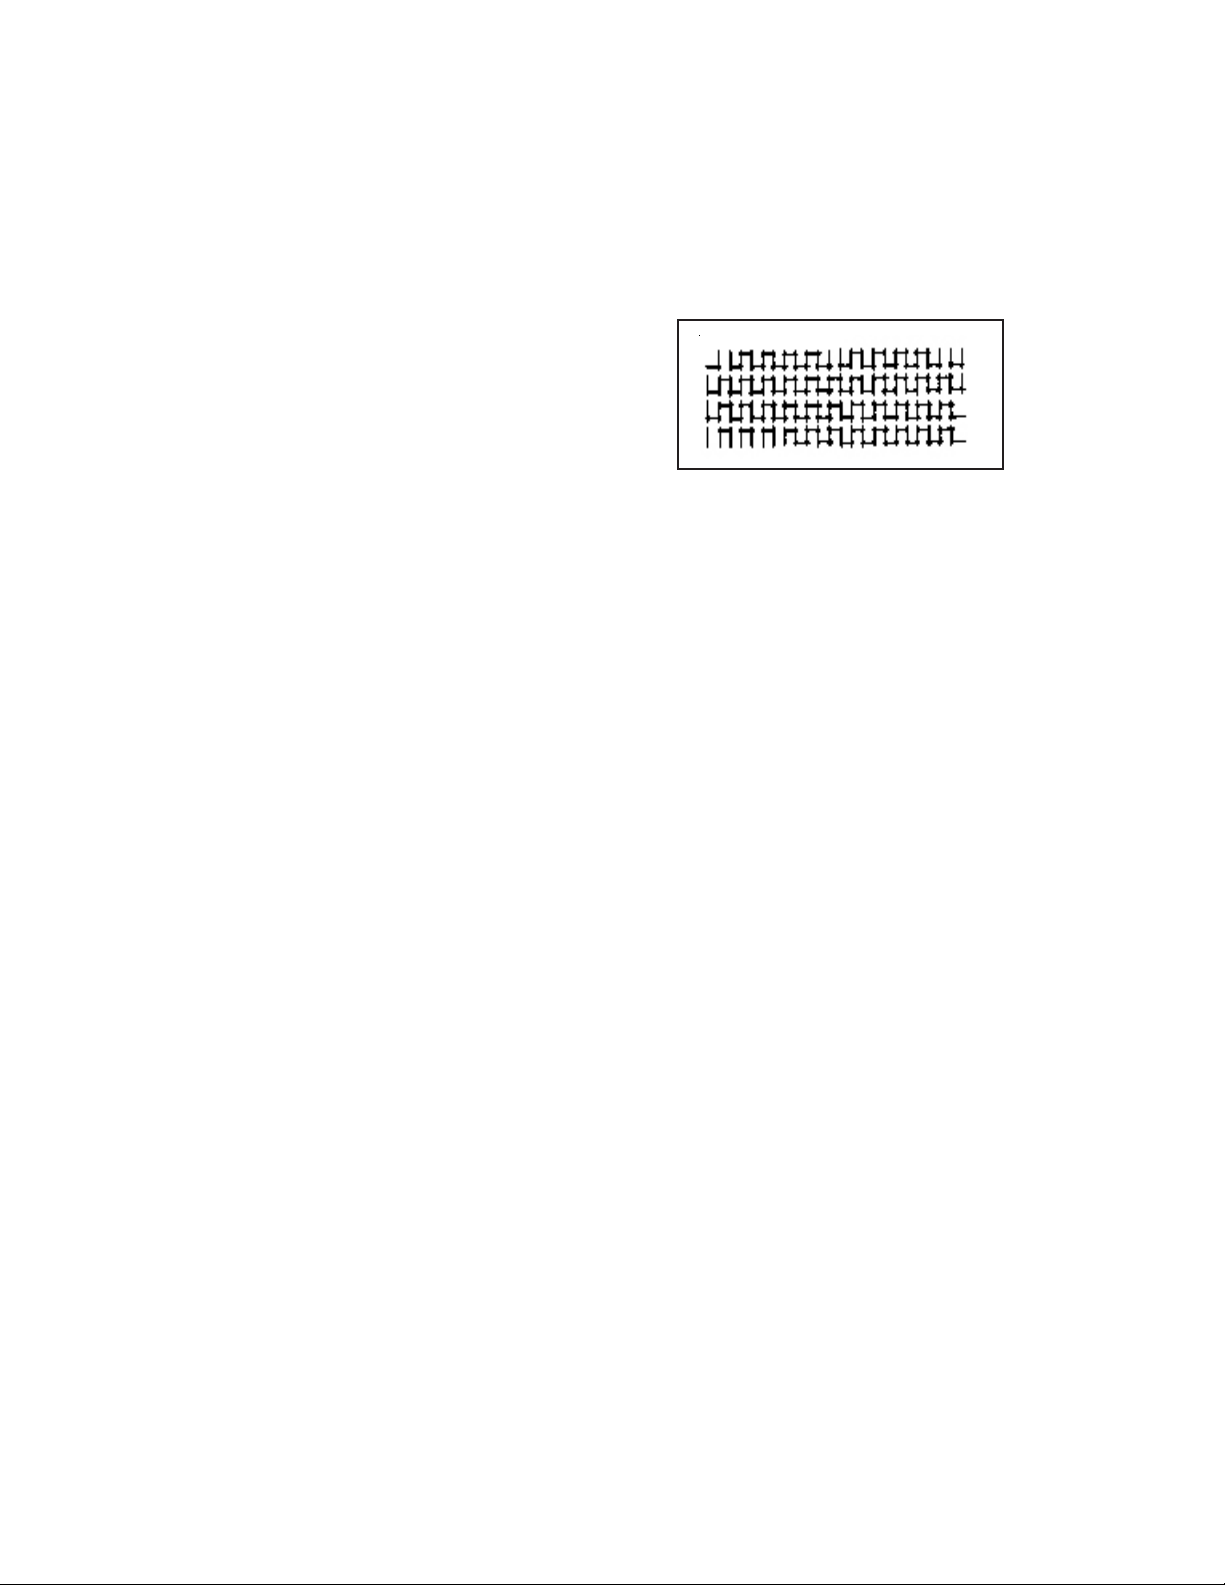
Button Sewing ............................................................ 6
Darning ....................................................................... 7
Staystitching ............................................................... 8
French Seam .............................................................. 8
Topstitching ................................................................ 9
Zipper Insertion ........................................................ 10
Piped (Corded) Edge/Welting ................................... 11
Flat Fell Seam .......................................................... 11
II. Decorative Functions
Satin Stitch Appliqué & Blindstitch Appliqué ............ 12
Shadow and Cutwork Appliqué ................................ 13
Thread Painting and Sketching ................................ 14
III. Heirloom Functions
Hemstitched Lace Insertion ...................................... 15
Traditional PinTucks ................................................. 16
IV. Home Décor Functions
Gathering ................................................................. 17
Free Hand Embroidery and Monogram .................... 18
Couching and Corded Satin Stitching ...................... 19
Interlocking Fell Seam .............................................. 20
V. Quilting Functions
Template, Motif and Stipple Quilting ........................ 21
Channel Quilting ....................................................... 22
Page 4

CloClo
Clo
CloClo
thing Construction Fthing Construction F
thing Construction F
thing Construction Fthing Construction F
unctionsunctions
unctions
unctionsunctions
ButtButt
Butt
ButtButt
MacMac
Mac
MacMac
on Seon Se
on Se
on Seon Se
hine Preparation:hine Preparation:
hine Preparation:
hine Preparation:hine Preparation:
• Lower Feed Dogs
• To begin, set machine to Straight Stitch
wingwing
wing
wingwing
• Presser Foot: Standard Zigzag
optional optional
or
optional Button foot (part #179911-P)
optional optional
SeSe
wing Instructions:wing Instructions:
Se
wing Instructions:
SeSe
wing Instructions:wing Instructions:
Insert fabric under presser foot. Insert button under foot making sure to
align button opening with foot opening. Align needle with the opening (hole)
on left side of button. Sew 3 or 4 stitches to secure thread end. Select
Zigzag stitch. Set stitch width so that needle clears both button openings
(holes) when moving from left to right (always test the width by turning your
handwheel manually before sewing). Sew 4 to 5 Zigzag stitches. Select
Straight stitch. Make sure the needle is aligned with the left button opening
(hole). Sew 3 to 4 stitches to secure thread end.
66
66
Page 5
DarningDarning
Darning
DarningDarning
MacMac
hine Preparationhine Preparation
Mac
hine Preparation:
MacMac
hine Preparationhine Preparation
• Pattern: Straight Stitch
• Stitch Width: Straight
• Stitch Length: Pre-Programmed
• Foot: Embroidery foot supplied with embroidery unit.
(DO NO(DO NO
(DO NO
(DO NO(DO NO
• Drop Feed: Lower feed dogs
SeSe
wing Instructions:wing Instructions:
Se
wing Instructions:
SeSe
wing Instructions:wing Instructions:
T AT A
T A
T AT A
TTTT
AA
CH EMBRCH EMBR
TT
A
CH EMBR
TTTT
AA
CH EMBRCH EMBR
OIDEROIDER
OIDER
OIDEROIDER
Y UNIT)Y UNIT)
Y UNIT)
Y UNIT)Y UNIT)
Hoop the section of clothing requiring darning in the hoop supplied with the
embroidery unit.
or tear by basting a matching or similar piece of fabric to the underside of the
tear. Slip the embroidery hoop under the presser foot (do not forget t o lower
presser foot) and begin manually feeding the hoop forward and backwards until
the hole or tear is completely covered in stitches. Turn the hoop so that the
stitching now appears horizontal and repeat the forward and backward
movement over the first rows of stitching.
(DO NO(DO NO
(DO NO
(DO NO(DO NO
T AT A
T A
T AT A
TTTT
AA
CH THE EMBRCH THE EMBR
TT
A
CH THE EMBR
TTTT
AA
CH THE EMBRCH THE EMBR
OIDEROIDER
OIDER
OIDEROIDER
Y UNIT)Y UNIT)
Y UNIT) Reinforce the hole
Y UNIT)Y UNIT)
77
7
77
Page 6
SS
tata
ystitcystitc
S
ta
ystitc
SS
tata
ystitcystitc
MacMac
hine Preparation:hine Preparation:
Mac
hine Preparation:
MacMac
hine Preparation:hine Preparation:
• Pattern: Straight Stitch
• Stitch Width: Straight
• Stitch length: 1.5mm (fine)
• Foot: Standard Zigzag foot
SeSe
wing Instructions:wing Instructions:
Se
wing Instructions:
SeSe
wing Instructions:wing Instructions:
Staystitching is used to reinforce curves such as
armholes, seams in stretch fabrics and other areas
to prevent stretching. Stay stitch along the edge of
the area 1/4 inch from the edge of the seam.
FF
rencrenc
F
renc
FF
rencrenc
hinghing
hing
hinghing
h Seam:h Seam:
h Seam:
h Seam:h Seam:
88
8
88
MacMac
hine Preparation:hine Preparation:
Mac
hine Preparation:
MacMac
hine Preparation:hine Preparation:
• Pattern: Straight Stitch
• Stitch Width: Straight
• Stitch Length: 2 – 3
• Foot: Standard Zigzag or
Zipper foot (part #006905008)
SeSe
wing Instructions:wing Instructions:
Se
wing Instructions:
SeSe
wing Instructions:wing Instructions:
Align top and bottom fabric, undersides
together. Stitch at 1/4 of an inch from the
edge. Press seam open and then fold in
topsides together, with stitching line exactly
on fold. Press flat. Stitch 3/8 of an inch
from the fold.
optionaloptional
optional
optionaloptional
Page 7

TT
opstitcopstitc
T
opstitc
TT
opstitcopstitc
MacMac
hine Preparation:hine Preparation:
Mac
hine Preparation:
MacMac
hine Preparation:hine Preparation:
• Pattern: Straight Stitch
• Needle Position: Center
• Stitch Width: Straight
• Stitch Length: Variable
• Foot: Standard Zigzag or
hinghing
hing
hinghing
Zipper foot (part #006905008)
optionaloptional
optional
optionaloptional
SeSe
wing Instructions:wing Instructions:
Se
wing Instructions:
SeSe
wing Instructions:wing Instructions:
This function is used to embellish a variety of
projects. Sew 1/4 of an inch from the edge of
your garment or seam to topstitch.
99
9
99
Page 8

Zipper InserZipper Inser
Zipper Inser
Zipper InserZipper Inser
MacMac
hine Preparation:hine Preparation:
Mac
hine Preparation:
MacMac
hine Preparation:hine Preparation:
• Pattern: Straight Stitch
• Stitch Width: Straight
• Stitch length: Pre-Programmed
• Foot:
tiontion
tion
tiontion
OptionalOptional
Optional Zipper foot (part #006905008)
OptionalOptional
SeSe
wing Instructions:wing Instructions:
Se
wing Instructions:
SeSe
wing Instructions:wing Instructions:
Machine baste (longest stitch length) seam at
5/8 of an inch. Press seam open and spread
garment flat wrong side up. Place zipper face
down on seam with coils directly on the seamline.
Hand baste zipper into place. Using zipper foot,
topstitch zipper from the right side beginning at
the bottom of zipper and working your way to the top.
Stitch up left side and then right side. For perfect
stitching, use 3/4 inch wide tape and tape it down the
center of the seam. You can use the tape as a
sewing guide.
1010
10
1010
Page 9

Piped (Corded) Edge / WPiped (Corded) Edge / W
Piped (Corded) Edge / W
Piped (Corded) Edge / WPiped (Corded) Edge / W
MacMac
hine Preparation:hine Preparation:
Mac
hine Preparation:
MacMac
hine Preparation:hine Preparation:
• Pattern: Straight Stitching
• Stitch Width: For straight stitching
• Stitch Length: 2 – 3
• Foot:
SeSe
wing Instructions:wing Instructions:
Se
wing Instructions:
SeSe
wing Instructions:wing Instructions:
Use store bought piping or cording or cover cord with a
bias strip of fabric to make your own. Hand or machine
baste piped edge between 2 layers of fabric so that all
raw edges are aligned. Attach zipper foot to shank so
that needle passes through the opening on left side of
foot. Sew guiding the Zipper foot along the edge of the
piping.
Optional Optional
Optional Zipper foot (part #006905008)
Optional Optional
eltingelting
elting
eltingelting
Flat FFlat F
Flat F
Flat FFlat F
MacMac
Mac
MacMac
SeSe
Se
SeSe
Baste fabric wrong sides together at
seamline. Stitch at 5/8 of an inch from the
edge. Press the seam allowances to one side
of the seam, and trim away the low er seam
allowance to 1/8 of an inch. Turn in top
seam allowance 1/4 of an inch (to edge of
stitching) and press. Baste seam allowance to
garment, concealing the trimmed lower
seam. Stitch along the edge of the fold.
ell Seamell Seam
ell Seam
ell Seamell Seam
hine Preparation:hine Preparation:
hine Preparation:
hine Preparation:hine Preparation:
• Pattern: Straight Stitch
• Stitch Width: Straight
• Stitch length: Pre-Programmed
• Foot: Standard Zigzag or
Zipper foot (part #006905008)
wing Instructions:wing Instructions:
wing Instructions:
wing Instructions:wing Instructions:
optionaloptional
optional
optionaloptional
1111
11
1111
Page 10

DecorativDecorativ
Decorativ
DecorativDecorativ
e Fe F
e F
e Fe F
unctionsunctions
unctions
unctionsunctions
Satin SSatin S
Satin S
Satin SSatin S
BlindstitcBlindstitc
Blindstitc
BlindstitcBlindstitc
• Pattern: Zigzag or Blindhem
• Stitch Width: 1.5 (1/16 of an inch)
• Stitch Length: 0.5 – 1.5 for Zigzag,
• Foot: Standard Zigzag or
SeSe
wing Instructions:wing Instructions:
Se
wing Instructions:
SeSe
wing Instructions:wing Instructions:
Position appliqué piece on background fabric and
secure it in place using fabric glue. Align needle
so that it pierces background fabric along the
outside edge of the appliqué. Lower presser foot.
Satin SSatin S
For
Satin S
Satin SSatin S
proceed to sew following the edge of the
appliqué.
BlindstitcBlindstitc
For
Blindstitc
BlindstitcBlindstitc
proceed to sew following the edge of your
appliqué.
If using a Blindhem foot, align the lip of the blind
hem foot guide so that it sits directly under the
edge of the appliqué. You may need to adjust the
position of the guide to bring it closer or further
from the edge of the appliqué, by using the
thumbscrew located at the right of the foot.
To pivot for curves or corners, leave needle down
in fabric on outside edge of appliqué, lift foot and
pivot.
titctitc
h Appliqué &h Appliqué &
titc
h Appliqué &
titctitc
h Appliqué &h Appliqué &
h Appliquéh Appliqué
h Appliqué
h Appliquéh Appliqué
2 – 3 for Blindhem
optional optional
optional Blindhem foot (part #010400)
optional optional
titctitc
h Appliquéh Appliqué
titc
h Appliqué, use Zigzag stitch and
titctitc
h Appliquéh Appliqué
h Appliqué h Appliqué
h Appliqué use Blindhem stitch and
h Appliqué h Appliqué
Satin SSatin S
Satin S
Satin SSatin S
Blindstitc Blindstitc
Blindstitc
Blindstitc Blindstitc
titctitc
titc
titctitc
hh
h
hh
hh
h
hh
1212
12
1212
Page 11

ShadoShado
Shado
ShadoShado
MacMac
Mac
MacMac
• Pattern: Blanket Stitch # 13 reversed for Shadow and
• Stitch Width: 2.0 or desired width
• Stitch Length: Preprogrammed for blanket, 0.5 to 1.5 for Zigzag
• Foot: Standard Zigzag or
w and Cutww and Cutw
w and Cutw
w and Cutww and Cutw
hine Preparation:hine Preparation:
hine Preparation:
hine Preparation:hine Preparation:
Zigzag for Cutwork
oror
k Appliquék Appliqué
or
k Appliqué
oror
k Appliquék Appliqué
optional optional
optional Blindhem foot (part #010400)
optional optional
Shado Shado
Shado
Shado Shado
SeSe
wing Instructions:wing Instructions:
Se
wing Instructions:
SeSe
wing Instructions:wing Instructions:
ShadoShado
Shado
ShadoShado
fabric. Position colored fabric larger than the design area on the underside of the transparent
fabric and secure it in place using a basting stitch or fabric glue. Using a marking pencil trace
placement of the appliqué on the right side of the transparent fabric. Stitch along design lines
using the blanket stitch so that when the needle swings to the right it sews on the design line
and when it swings to the left it sews within the design area. When design is complete, trim
excess colored appliqué fabric on the underside close to the stitching.
For
is trimmed away from the right side to create a sheer opening. Position sheer fabric larger
than the design area on the underside of the transparent fabric and secure it in place using a
basting stitch or fabric glue. Using a marking pencil trace placement of the appliqué on the
right side of the top layer of sheer fabric. Stitch along design lines using a straight stitch.
When straight stitching is completed, trim the top layer of fabric close to the stitching within
the design area.
Once trimming is completed, set machine to Zigzag stitch and sew along design lines so that
when the needle swings to the right it sews on the design line and when it swings to the left it
sews within the design area. When design is complete, trim excess appliqué fabric on the
underside close to the stitching. To pivot for curves or corners, leave needle down in fabric on
outside edge of appliqué, lift foot and pivot.
w appliquéw appliqué
w appliqué is where a lightweight colored fabric is layered under a sheer or transparent
w appliquéw appliqué
CutwCutw
oror
Cutw
CutwCutw
k appliquék appliqué
or
k appliqué, 2 layers of sheer fabric are stitched together, and the top layer of fabric
oror
k appliquék appliqué
ww
w
ww
Cutw Cutw
Cutw
Cutw Cutw
oror
or
oror
kk
k
kk
1313
13
1313
Page 12

Thread PThread P
Thread P
Thread PThread P
MacMac
hine Preparation:hine Preparation:
Mac
hine Preparation:
MacMac
hine Preparation:hine Preparation:
• Pattern: Straight Stitch and Zigzag
Stitch
• Stitch Width: Straight and desired
width for zigzag
• Stitch Length: Pre-Programmed
• Foot: Embroidery foot supplied with
embroidery unit.
(DO NO(DO NO
(DO NO
(DO NO(DO NO
• Drop Feed: Lower feed dogs
SeSe
wing Instructions:wing Instructions:
Se
wing Instructions:
SeSe
wing Instructions:wing Instructions:
Stencil or draw your pattern onto the right
side of your fabric. Hoop your fabric into the
hoop supplied with the embroidery unit, and
slip it under the embroidery foot.
(Do no(Do no
(Do no
(Do no(Do no
macmac
mac
macmac
t attact attac
t attac
t attact attac
hine)hine)
hine)
hine)hine)
ainting and Skainting and Sk
ainting and Sk
ainting and Skainting and Sk
T AT A
TTTT
AA
T A
T AT A
h the embrh the embr
h the embr
h the embrh the embr
CH EMBRCH EMBR
TT
A
CH EMBR
TTTT
AA
CH EMBRCH EMBR
oideroider
oider
oideroider
OIDEROIDER
OIDER
OIDEROIDER
y unit ty unit t
y unit t
y unit ty unit t
ee
tctc
e
tc
ee
tctc
Y UNIT)Y UNIT)
Y UNIT)
Y UNIT)Y UNIT)
o theo the
o the
o theo the
hinghing
hing
hinghing
PP
aintingainting
P
ainting
PP
aintingainting
Sk Sk
Sk
Sk Sk
ee
tctc
hinghing
e
tc
hing
ee
tctc
hinghing
1414
14
1414
Thread SkThread Sk
For
Thread Sk
Thread SkThread Sk
Straight stitch, and stitch as if your needle is
your pencil. Follow the design that you have
traced onto your fabric, by moving the hoop
manually.
Thread PThread P
For
Thread P
Thread PThread P
machine to Zigzag stitch at the width desired
and begin to fill in the design area by moving
the hoop manually. To create shading in y our
design, change the thread color frequently,
leaving a jagged edge for blending in the next
color. To secure thread ends when changing
colors, set stitch width to 0 and stitch in place
a few times.
ee
tctc
hinghing
e
tc
hing, set your machine for
ee
tctc
hinghing
aintingainting
ainting (fill-in stitches), set your
aintingainting
Page 13

Heirloom FHeirloom F
Heirloom F
Heirloom FHeirloom F
unctionsunctions
unctions
unctionsunctions
HemstitcHemstitc
Hemstitc
HemstitcHemstitc
MacMac
hine Preparation:hine Preparation:
Mac
hine Preparation:
MacMac
hine Preparation:hine Preparation:
• Pattern: Straight Stitch and Hemstitching Pattern #14
• Stitch Width: Preprogrammed
• Stitch Length: Preprogrammed
• Foot: Standard Zigzag or
Satin foot (part #006172008-P)
hed Lace Inserhed Lace Inser
hed Lace Inser
hed Lace Inserhed Lace Inser
optionaloptional
optional
optionaloptional
tiontion
tion
tiontion
SeSe
wing Instructions:wing Instructions:
Se
wing Instructions:
SeSe
wing Instructions:wing Instructions:
Using a marking pencil, draw a placement line for the lace along the edge of your
garment. Baste or pin the lace along this placement line on the right side of the
fabric. Straight stitch along each edge of the lace, as close to the edge as
possible. Cut down the centre of the fabric under the lace, taking care not to cut
the lace. Press fabric edge on each side away from the lace. Set machine to
hemstitching and stitch along the fabric edge on each side of the lace on the right
side of the fabric. Trim excess fabric close to stitching on wrong side of fabric.
1515
15
1515
Page 14

TT
raditional PinTraditional PinT
T
raditional PinT
TT
raditional PinTraditional PinT
MacMac
hine Preparation:hine Preparation:
Mac
hine Preparation:
MacMac
hine Preparation:hine Preparation:
• Pattern: Straight
• Stitch Width: Straight
• Stitch Length: 2 – 3
• Foot: Standard Zigzag or
ucuc
uc
ucuc
ksks
ks
ksks
optional optional
optional Zipper foot (part #006905008)
optional optional
SeSe
wing Instructions:wing Instructions:
Se
wing Instructions:
SeSe
wing Instructions:wing Instructions:
To mark pintucks in your fabric, either pull a thread to mark the fold or
mark with chalk or marking pencil. Fold and press wrong sides together
on pulled thread line or marked lines. Stitch 1/8 of an inch from fold
line. Repeat, sewing in the same direction for each tuck. Press flat.
1616
16
1616
Page 15

Home Decor FHome Decor F
Home Decor F
Home Decor FHome Decor F
GatheringGathering
Gathering
GatheringGathering
MacMac
hine Preparation:hine Preparation:
Mac
hine Preparation:
MacMac
hine Preparation:hine Preparation:
• Pattern: Straight Stitch
• Stitch Width: Straight
• Stitch Length: Longest
• Foot: Standard Zigzag
unctionsunctions
unctions
unctionsunctions
SeSe
wing Instructions:wing Instructions:
Se
wing Instructions:
SeSe
wing Instructions:wing Instructions:
Use this technique for gathering waistbands, sleeve caps etc. At 1/4 of an inch
from the edge of the seam, begin by backstitching and then continue to sew the
length required. When seam is complete, raise the needle to it’s highest, raise
the presser foot and pull the upper and lower threads to the back of the foot. Cut
your thread ends leaving a minimum 6 inches of thread. Repeat this procedure
once again at 1/4 of an inch from your first row of stitching. Once the two rows
are completed, draw in your fabric the required amount by pulling on the bobbin
thread. Secure thread ends.
1717
17
1717
Page 16

FF
ree Hand Embrree Hand Embr
F
ree Hand Embr
FF
ree Hand Embrree Hand Embr
MacMac
hine Preparation:hine Preparation:
Mac
hine Preparation:
MacMac
hine Preparation:hine Preparation:
• Pattern: Zigzag Stitch
• Stitch Width: Desired width for zigzag
• Stitch Length: Pre-Programmed
• Foot: Embroidery foot supplied with embroidery unit
(DO NO(DO NO
(DO NO
(DO NO(DO NO
• Drop Feed: Lower Feed dogs
T AT A
T A
T AT A
TTTT
TT
TTTT
oideroider
oider
oideroider
AA
CH EMBRCH EMBR
A
CH EMBR
AA
CH EMBRCH EMBR
y and Monogramy and Monogram
y and Monogram
y and Monogramy and Monogram
OIDEROIDER
OIDER
OIDEROIDER
Y UNIT)Y UNIT)
Y UNIT)
Y UNIT)Y UNIT)
SeSe
wing Instructionswing Instructions
Se
wing Instructions:
SeSe
wing Instructionswing Instructions
Stencil or draw your pattern or monogram onto the right side of your fabric.
Hoop your fabric into the hoop supplied with the embroidery unit, and slip it
under the Embroidery foot.
Set your machine to Zigzag stitch at the width desired and begin to fill in the design
area by moving the hoop manually. T o secure thread ends, set stitch width to “0”
and stitch in place a few times. Hand movement will control the quality and the
look of your stitching.
(Do no (Do no
(Do no
(Do no (Do no
t attact attac
t attac
t attact attac
h the embrh the embr
h the embr
h the embrh the embr
oideroider
oider
oideroider
y unit ty unit t
y unit t
y unit ty unit t
o the maco the mac
o the mac
o the maco the mac
hine)hine)
hine)
hine)hine)
1818
18
1818
Page 17

CoucCouc
Couc
CoucCouc
SS
S
SS
MacMac
Mac
MacMac
SeSe
Se
SeSe
hing and Corded Satinhing and Corded Satin
hing and Corded Satin
hing and Corded Satinhing and Corded Satin
titctitc
hinghing
titc
hing
titctitc
hinghing
hine Preparation:hine Preparation:
hine Preparation:
hine Preparation:hine Preparation:
• Pattern: Zigzag
• Stitch width: Variable (Set
according to width of cord)
• Stitch length: Variable
• Foot: Zigzag or
Satin foot (part #006172008-P)
wing Instructions:wing Instructions:
wing Instructions:
wing Instructions:wing Instructions:
optionaloptional
optional
optionaloptional
Couching and Corded Satin Stitching is
simply the technique of zigzagging over
a fine cord. Use as a decorative touch
on jackets and other sewing projects.
With a marking pencil, draw a design
on your fabric. Lay the cord under the
center opening of your foot and zigzag
over the cord so that the needle falls
just to the right and left of the
decorative cord. As you sew, follow the
lines of your design. For couching, set
the stitch length at the pre-programmed
length and for corded satin set the
stitch length shorter for a satin effect.
1919
19
1919
Page 18

IntInt
erlocerloc
Int
erloc
IntInt
erlocerloc
MacMac
hine Preparation:hine Preparation:
Mac
hine Preparation:
MacMac
hine Preparation:hine Preparation:
• Pattern: Straight Stitch
• Stitch Width: Straight
• Stitch length: Pre-Programmed
• Foot: Standard Zigzag or
optionaloptional
optional Zipper foot
optionaloptional
king Fking F
king F
king Fking F
ell Seamell Seam
ell Seam
ell Seamell Seam
(part #006905008)
SeSe
wing Instructions:wing Instructions:
Se
wing Instructions:
SeSe
wing Instructions:wing Instructions:
Baste fabric right sides together with edge of top layer 1/2 inch from the edge of the
bottom layer. Stitch at 3/4 of an inch from the edge of the bottom layer. Fold the
bottom layer of seam allowance, so that it meets top layer (approx 1/4 of an inch).
Press. Fold and press bottom la yer again so that it now meets the stitching line.
Edgestitch close to the fold. Press seam to one side.
2020
20
2020
Page 19

Quilting FQuilting F
Quilting F
Quilting FQuilting F
TT
emplatemplat
T
emplat
TT
emplatemplat
QuiltingQuilting
Quilting
QuiltingQuilting
MacMac
hine Preparation:hine Preparation:
Mac
hine Preparation:
MacMac
hine Preparation:hine Preparation:
• Pattern: Straight Stitch
• Needle Position: Center
• Stitch Width: Straight
• Stitch Length: 2 - 3
• Foot: Use embroidery foot supplied
• Drop Feed: Drop feed dogs.
e, Moe, Mo
e, Mo
e, Moe, Mo
with the embroidery unit.
(DO NO(DO NO
(DO NO
(DO NO(DO NO
T AT A
T A
T AT A
tif and Stif and S
tif and S
tif and Stif and S
TTTT
AA
CH EMBRCH EMBR
TT
A
CH EMBR
TTTT
AA
CH EMBRCH EMBR
OIDEROIDER
OIDER
OIDEROIDER
tippletipple
tipple
tippletipple
Y UNIT)Y UNIT)
Y UNIT)
Y UNIT)Y UNIT)
unctionsunctions
unctions
unctionsunctions
TT
emplatemplat
T
emplat
TT
emplatemplat
MoMo
Mo
MoMo
tiftif
tif
tiftif
ee
e
ee
Before you begin to sew, you must hoop the
fabric (all layers) in one of the hoops that
was supplied with the embroidery unit. The
hoop will not be attached to the embroidery
unit, rather you will feed it manually under
the embroidery foot.
SeSe
wing Instructions:wing Instructions:
Se
wing Instructions:
SeSe
wing Instructions:wing Instructions:
For template quilting transf er a design from
a template (plastic stencil) to your fabric
and then stitch following the outline. Motif
quilting is used to emphasize the printed
design of a fabric and is accomplished by
outlining the desired motif. Stippling is free
motion quilting where you hoop the fabric
and guide it by hand, allowing you to stitch
in any direction. All of the above techniques
are used to hold the layers of the quilt
together.
SS
tipplingtippling
S
tippling
SS
tipplingtippling
2121
21
2121
Page 20

Channel QuiltingChannel Quilting
Channel Quilting
Channel QuiltingChannel Quilting
MacMac
hine Preparation:hine Preparation:
Mac
hine Preparation:
MacMac
hine Preparation:hine Preparation:
• Pattern: Straight Stitch
• Needle Position: Center
• Stitch Width: Straight
• Stitch Length: 2 - 3
• Foot: Use Zigzag or General Purpose Foot
You may also use the
Even Feed foot (part #423242451-P)
optional optional
optional
optional optional
2222
22
2222
SeSe
wing Instructions:wing Instructions:
Se
wing Instructions:
SeSe
wing Instructions:wing Instructions:
For channel quilting, simply sew several long parallel lines
of straight stitching through all layers of the quilt. These
lines can be sewn diagonally, horizontally or v ertically.
 Loading...