

Page 1
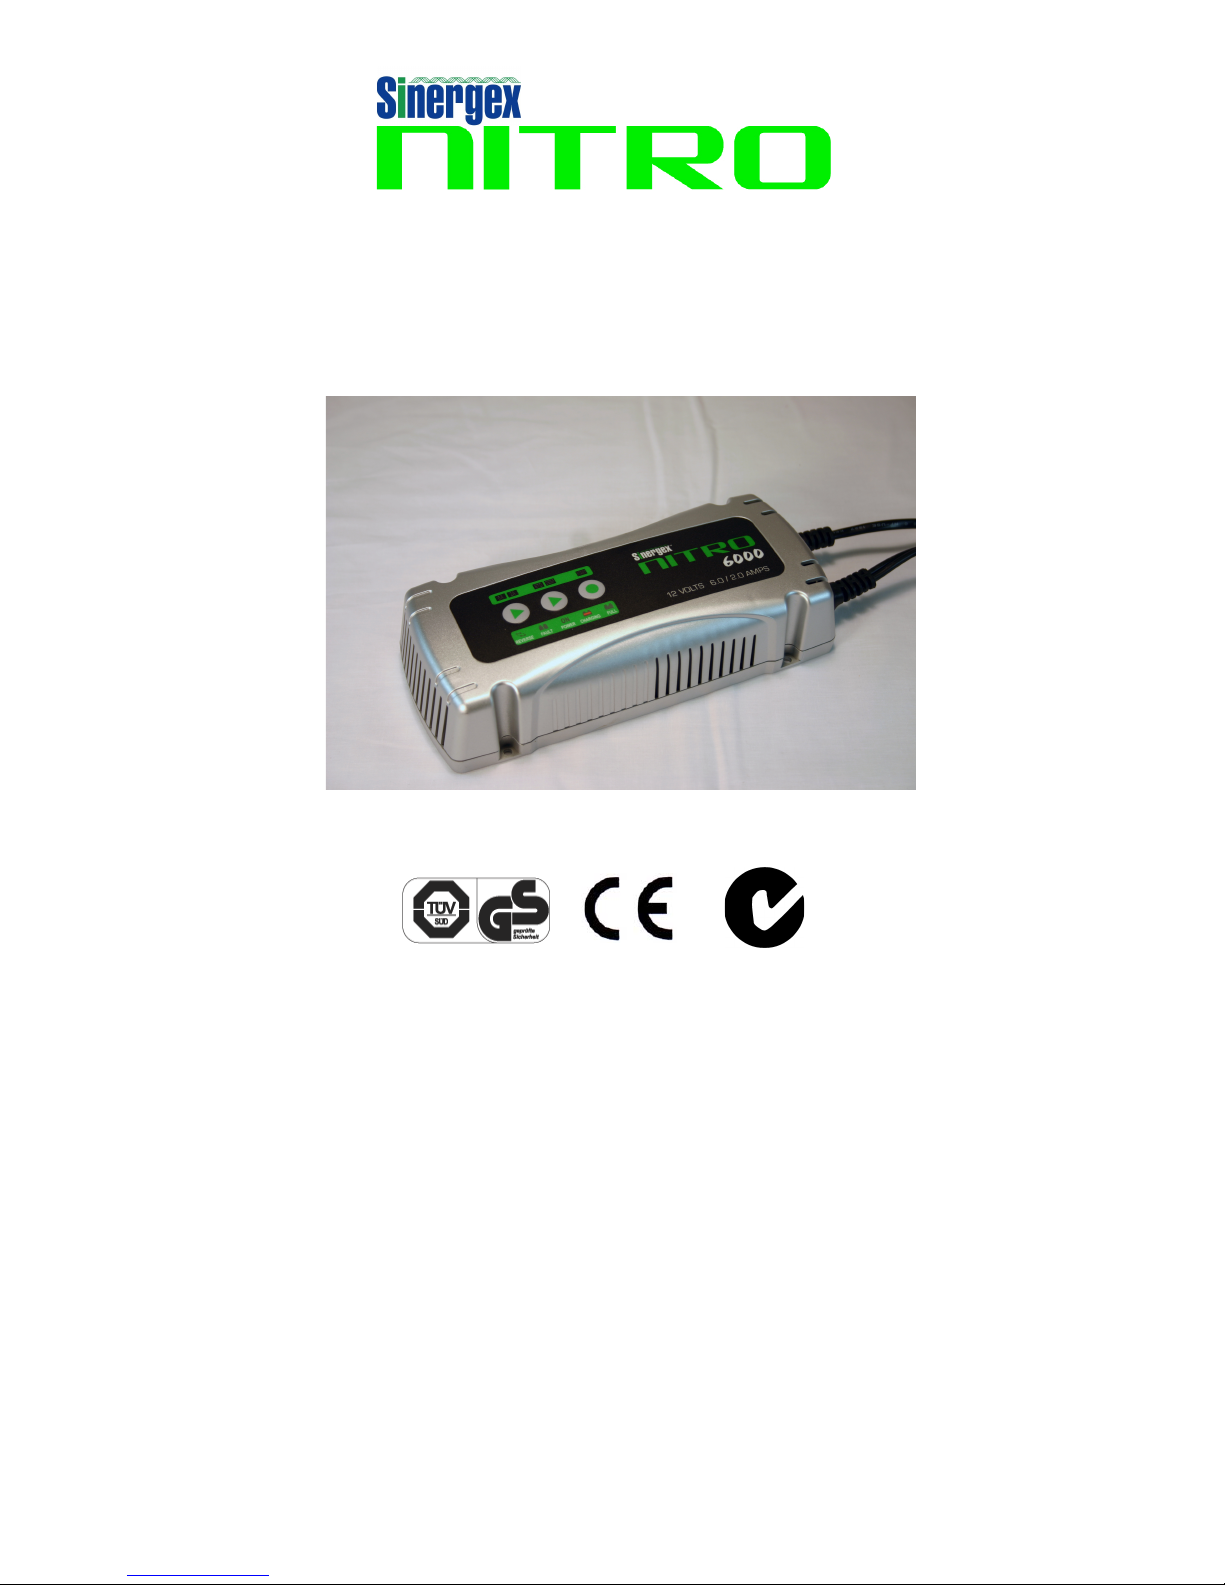
6000
Digital Intelligent Battery Charger
OPERATOR’S MANUAL
1
TM
Page 2

Thanks for purchasing a Nitro Digital Battery charger and
trusting your battery’s care to Sinergex. The Nitro chargers
are some of the most advanced chargers available. Before
operation please read the following instructions and warnings
carefully to ensure safe charging.
IMPORTANT SAFETY INFORMATION
GASES
When the battery is being charged you may notice bubbling in the
fluid caused by the release of gas. As the gas is flammable no
naked lights should be used around the battery, and the area
should be kept well ventilated. Because of this risk of explosive
gas only connect and disconnect the battery leads when the mains
supply is disconnected.
BATTERY TYPES
This charger is only suitable for normal lead acid, AGM, Gel
batteries and should not be used to recharge NICAD or any other
type of battery.
PLEASE NOTE
• When not in use, store the charger in a dry area to avoid
damage.
• Your Battery Charger is suitable for INDOOR USE ONLY.
Keep away from liquids, rain or snow at all times.
• This battery charger is not designed as power supply.
REPAIR
• The Battery Charger should not be opened. Any attempt at
modification or repair by the user will void warranty.
2
Page 3

• The mains supply cord of this appliance can not be replaced; if
the cord is damaged, the appliance should be discarded.
WARNING!
• Avoid getting battery fluid (electrolyte) on your skin or clothes.
It is acidic and can cause burns. If this occurs you should rinse
the affected area with water immediately.
• If electrolyte gets into your eyes - wash thoroughly and seek
medical attention immediately.
• Never charge a frozen battery. If battery fluid (electrolyte)
becomes frozen, bring battery into a warm area to allow
battery to thaw before you begin charging.
• Do not touch the DC battery clamps together when the charger
is on.
• Never operate charger if it has received a hard blow, been
dropped, or otherwise damaged. Take it to a qualified
professional for inspection and repair.
• Be sure to position the charger power cord to prevent it from
being stepped on, tripped over, or damaged.
• Never pull out the plug by the cord when unplugging the
charger. Pulling on the cord may cause damage to the cord or
the plug.
3
Page 4

Precautions When Working with Batteries
• If battery acid contacts skin or clothing, wash immediately with
soap and water. If acid enters eye, immediately flood eye with
running cold water for at least 20 minutes and get medical
attention.
• Never smoke or allow a spark or flame in vicinity of the battery
or engine.
• Do not drop a metal tool on the battery. The resulting spark or
short-circuit may cause an explosion.
• Remove personal metal items such as rings, bracelets,
necklaces, and watches when working with a lead-acid
battery.
• A lead-acid battery can produces a short-circuit current high
enough to weld a ring or the like to metal, causing severe
burns.
INTRODUCTION
The Sinergex Nitro 6000 is member of the family of advanced
battery chargers manufactured by Sinergex Technologies.
Nitro chargers will increase your battery’s performance and
prolong its life. Please carefully read and follow the following
safety and operating instructions.
The Nitro is controlled by a 12-bit AD microprocessor with
4-stage charging characteristic for charging batteries
automobiles, motorcycles, snow mobiles, tractors, personal
watercraft, boats etc.
Suitable for charging for common Lead Acid, AGM, Gel,
Sealed and Maintenance Free batteries
4
Page 5
NITRO 6000 Intelligent Battery Charger with 9.0 AMPS RMS
– Charges 12 VDC Batteries. 6.0 AMPS DC
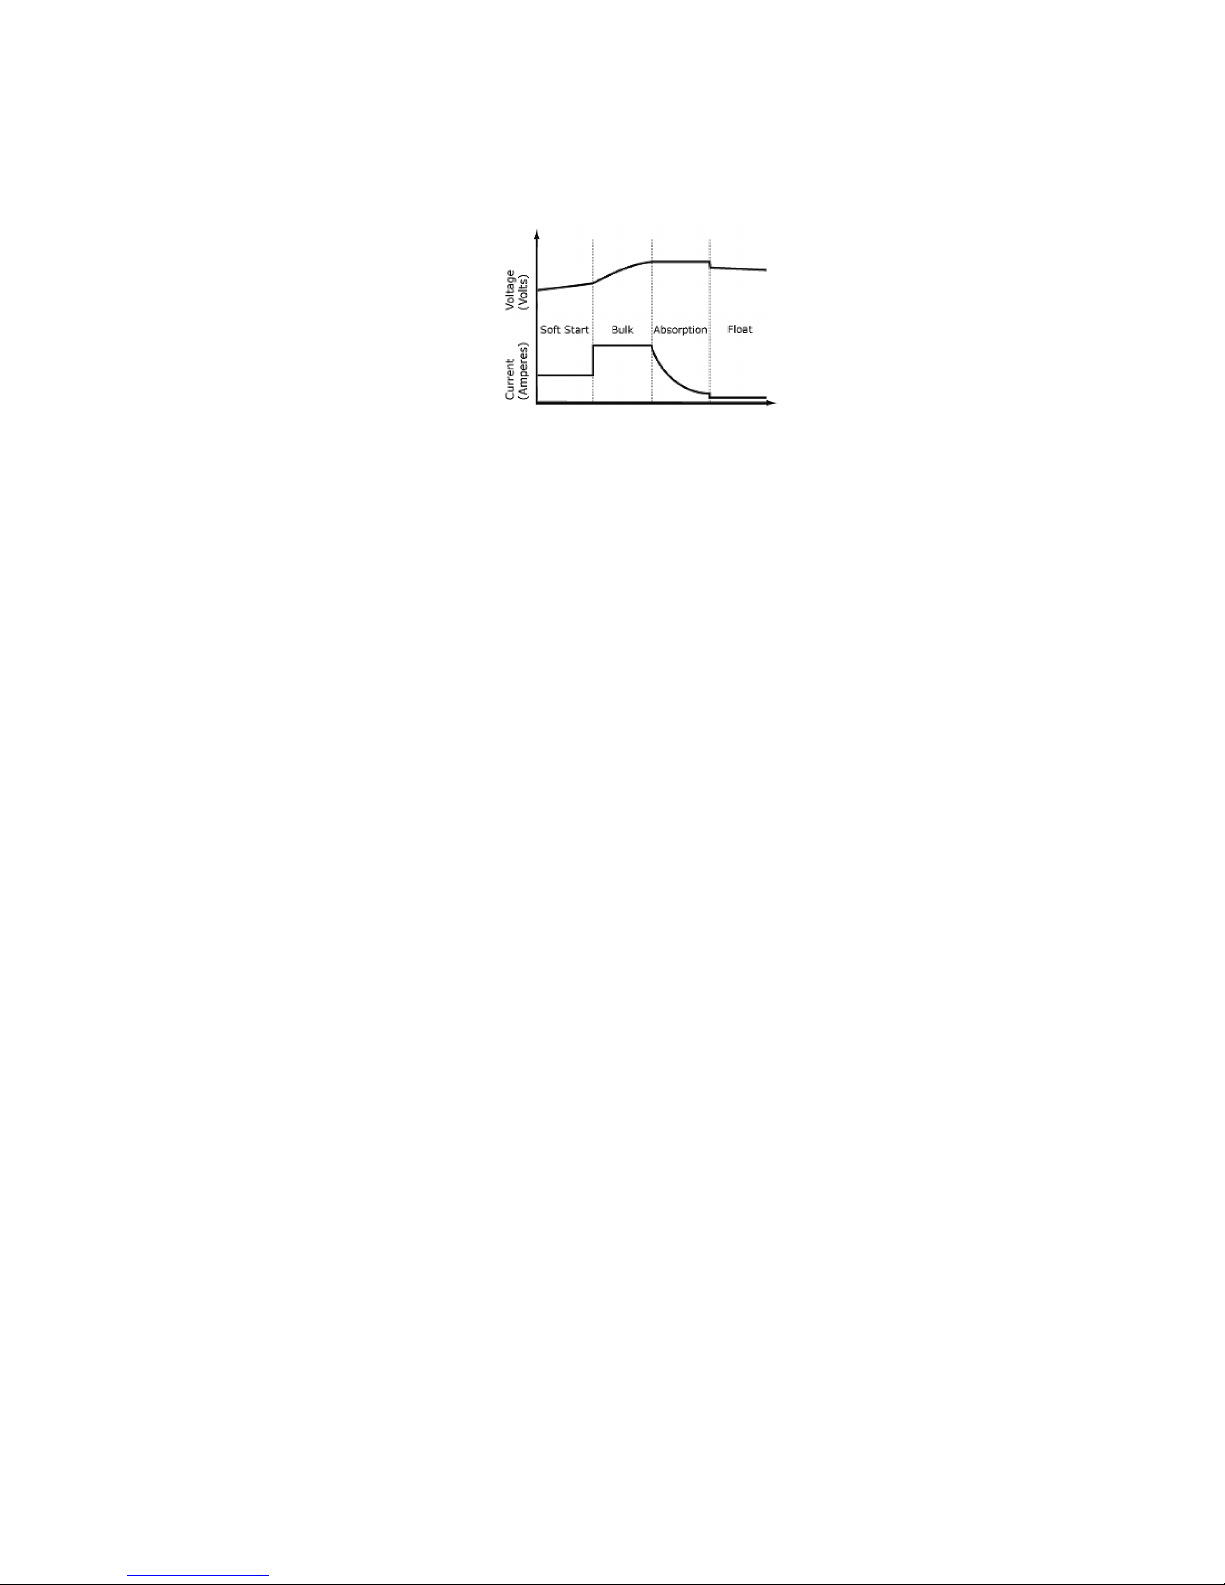
– Automatic and Intelligent 4-Stage Charging Curve
Soft Start: Initial battery test to determine battery condition. If the
battery is severely discharged charger will begin the Soft Start
stage. Charging starts with reduced current until battery voltage
reaches 10 Volts.
Bulk: Major charging stage where the battery receives the
majority of its charge. During this stage the battery brought to
75% - 80% of its charger. The NITRO charger delivers maximum
current until the terminal voltage has risen to the set level of 14.4
V for Normal battery selection and 14.2 V for Gel battery
selection.
Absorption: Completes the charge up to virtually 100% at a
constant voltage of 14.4 V at +25°C. The current tapers off after
the current reached the minimum level.
Float: Maintenance charging at constant voltage, keeping the
batteries at 100% charge. Normal charging mode is time-limited
(max 10 days) while Float mode chargers indefinitely without
damaging the battery.
5
Page 6

FEATURES
Temperature Compensation
Ambient temperature directly effects your battery and its charging
requirements. The Nitro 6000 uses a sensor and automatically
adjusts the charge voltage for an optimum charge. For best results
we recommend keeping the inline sensor as close to the battery as
possible.
VOLTAGE COMPENSATION
Charging voltage can be lost while travelling through the cables
from the charger to the battery resulting in low voltage at the
battery terminals. The Nitro 6000 compensates for this drop and
automatically adjusts to maximize the charge being delivered to
your battery.
REVERSE POLARITY PROTECTION
The Nitro 6000 has built in Reverse Polarity Protection. (Reverse
Polarity occurs when connecting the Positive or Red DC cable to
the Negative or Black battery terminal.) The “REVERSE” LED on
the front Touch Panel will illuminate and charging will not start. If
this happens, unplug the charger from the AC source, and
reconnect the charger to the battery correctly. Connect the RED
cable to the POSITIVE (+) battery terminal, and the BLACK cable
to the NEGATIVE (-) terminal, then reconnect the charger to the
AC source and begin charging.
6
Page 7
CHARGER MEMORY
In the event of a black-out or loss of AC power, the Nitro 6000
automatically memorizes the selected charging mode. When AC
power is restored, the charger will continue in the selected mode.
ATTENTION: When AC power is connected and the connection to
the battery is disconnected, this memory is erased and the
charging mode will need to be reselected.
OTHER FEATURES
– Anti Spark Protection
– Short Circuit Protection
– Battery and Charger Overheating Protection
– Waterproof ABS Housing. Ingress Protection Rating IP20
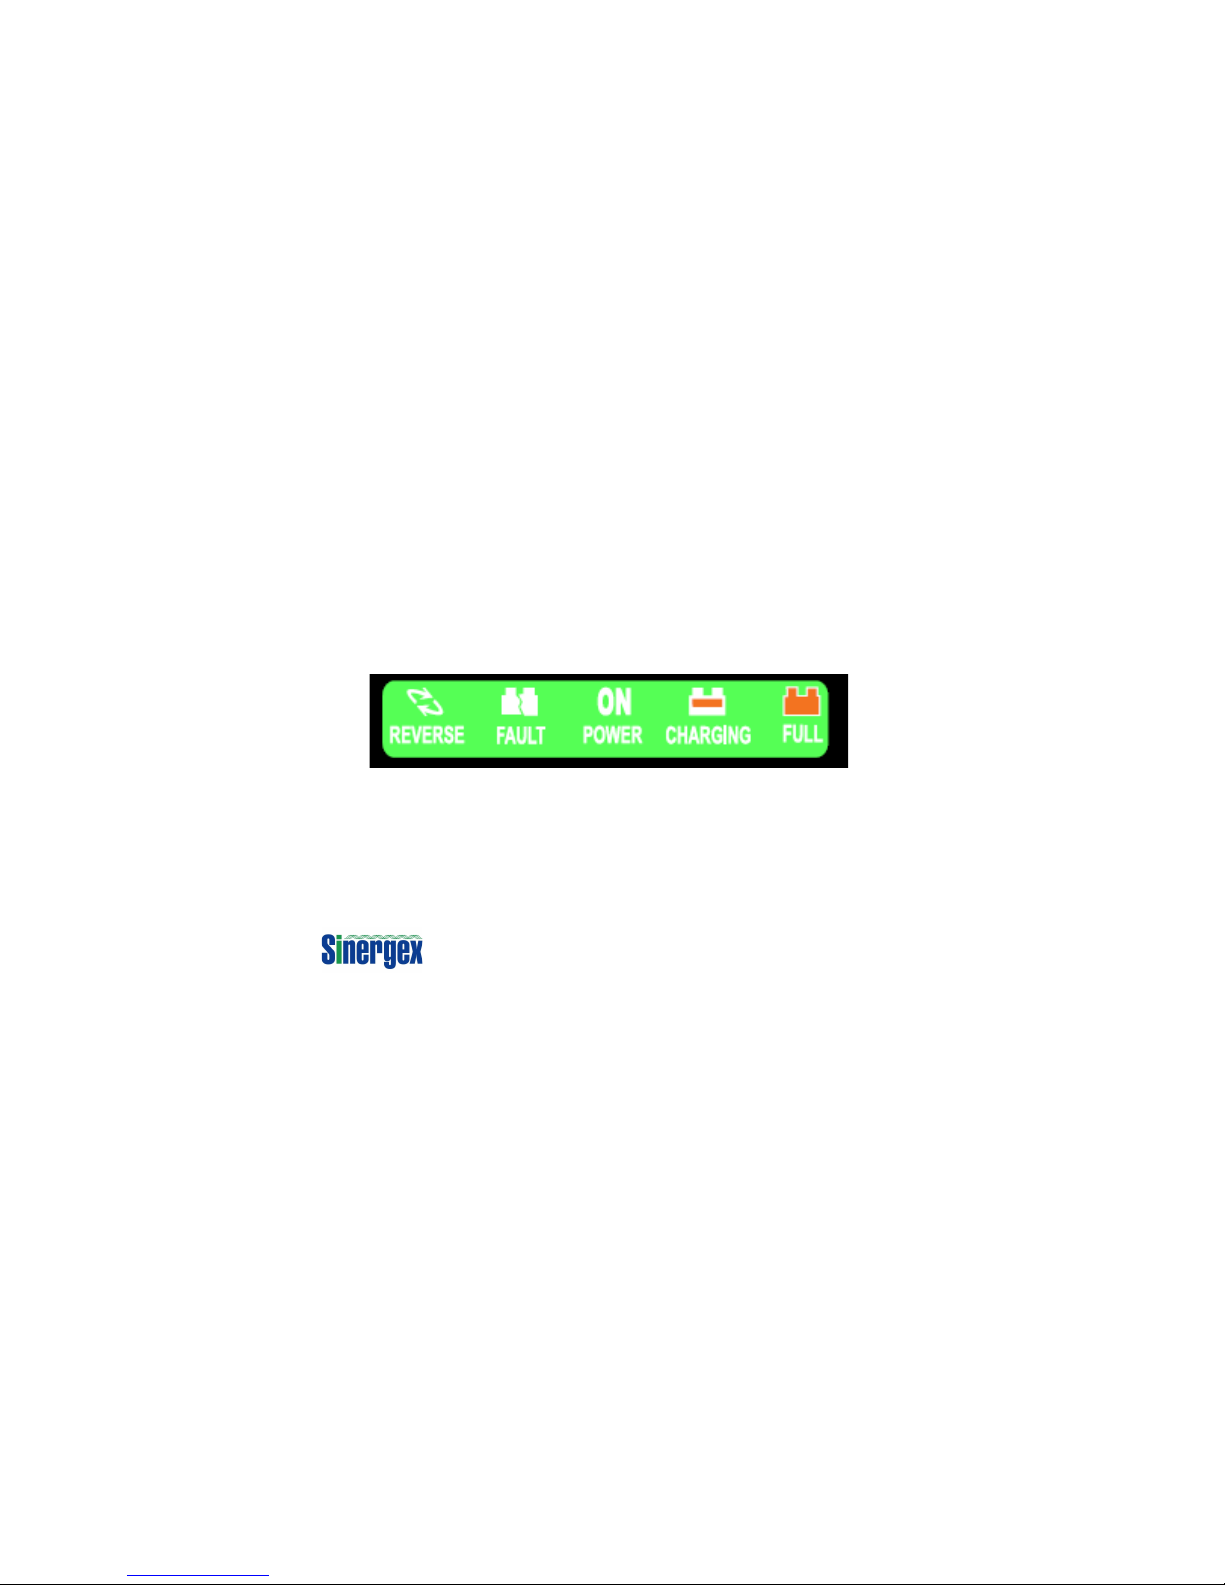
TOUCH PANEL INDICATORS
REVERSE = Reverse Polarity
FAULT = Battery Fault
ON = Charger is Connected to AC Power
CHARGING = Battery Charger is Charging
BATTERY CHARGED = Battery if Fully Charger and is now in
Float Mode.
GENERAL SAFETY PRECAUTIONS AND PRE-CHARGE
CHECK LIST
Do not install the Nitro Battery Charger in a zero-clearance
Compartment, overheating may be result. Allow enough room for
adequate air flow.
7
Page 8

To avoid risk of fire and electronic shock, make sure that existing
wiring and power cables are in good electrical condition. Do not
operate the Nitro charger if the wiring or power cable is damaged
in any way.
If the AC power cable is damaged, it must be replaced by the
manufacturer or its service agents or a similar qualified person to
avoid hazard and further damage
During charging, the battery must be placed in a well-ventilated
area.
The battery charger must only be plugged in to an earthed
AC outlet.
If the battery needs to be removed from the vehicle before
charging, always remove the grounded terminal from the battery
first. Also ensure that all accessories in the vehicle are turned off
to prevent arcing.
Ensure the battery terminals are clean.
Always refer to the manufacturer’s instructions regarding charging
and charging rates and battery maintenance.
OPERATION
The Nitro 6000 is suitable for charging 12 Volt Normal Lead
Acid, Sealed, AGM and or Gel Batteries between 10 – 120 Amp
Hours.
1. CONNECTION
The N-6000 has two options for connecting the charger to the
battery. Via the Quick Connect connector you can select which
connection you want to use:
8
Page 9
• DC clamps for quick connection.
• O-ring connectors for permanent installation to your battery.
(A protection plastic end cap is provided, please cover the
quick connector when it is not in use.)
Connect the positive charging DC cable (red) to the positive
terminal post of the battery ( P or +). Connect the negative
charging DC cable (black) to the negative terminal post of the
battery ( N or -). It is important to ensure that both DC clamps are
secure with their respective terminal posts.
Connect the charger’s AC power cable to an AC power outlet.
Once you have connected the Nitro 6000 to AC power, it will
sound a tone for 0.5 seconds and the Simple Touch power panel
LEDs light for two seconds.
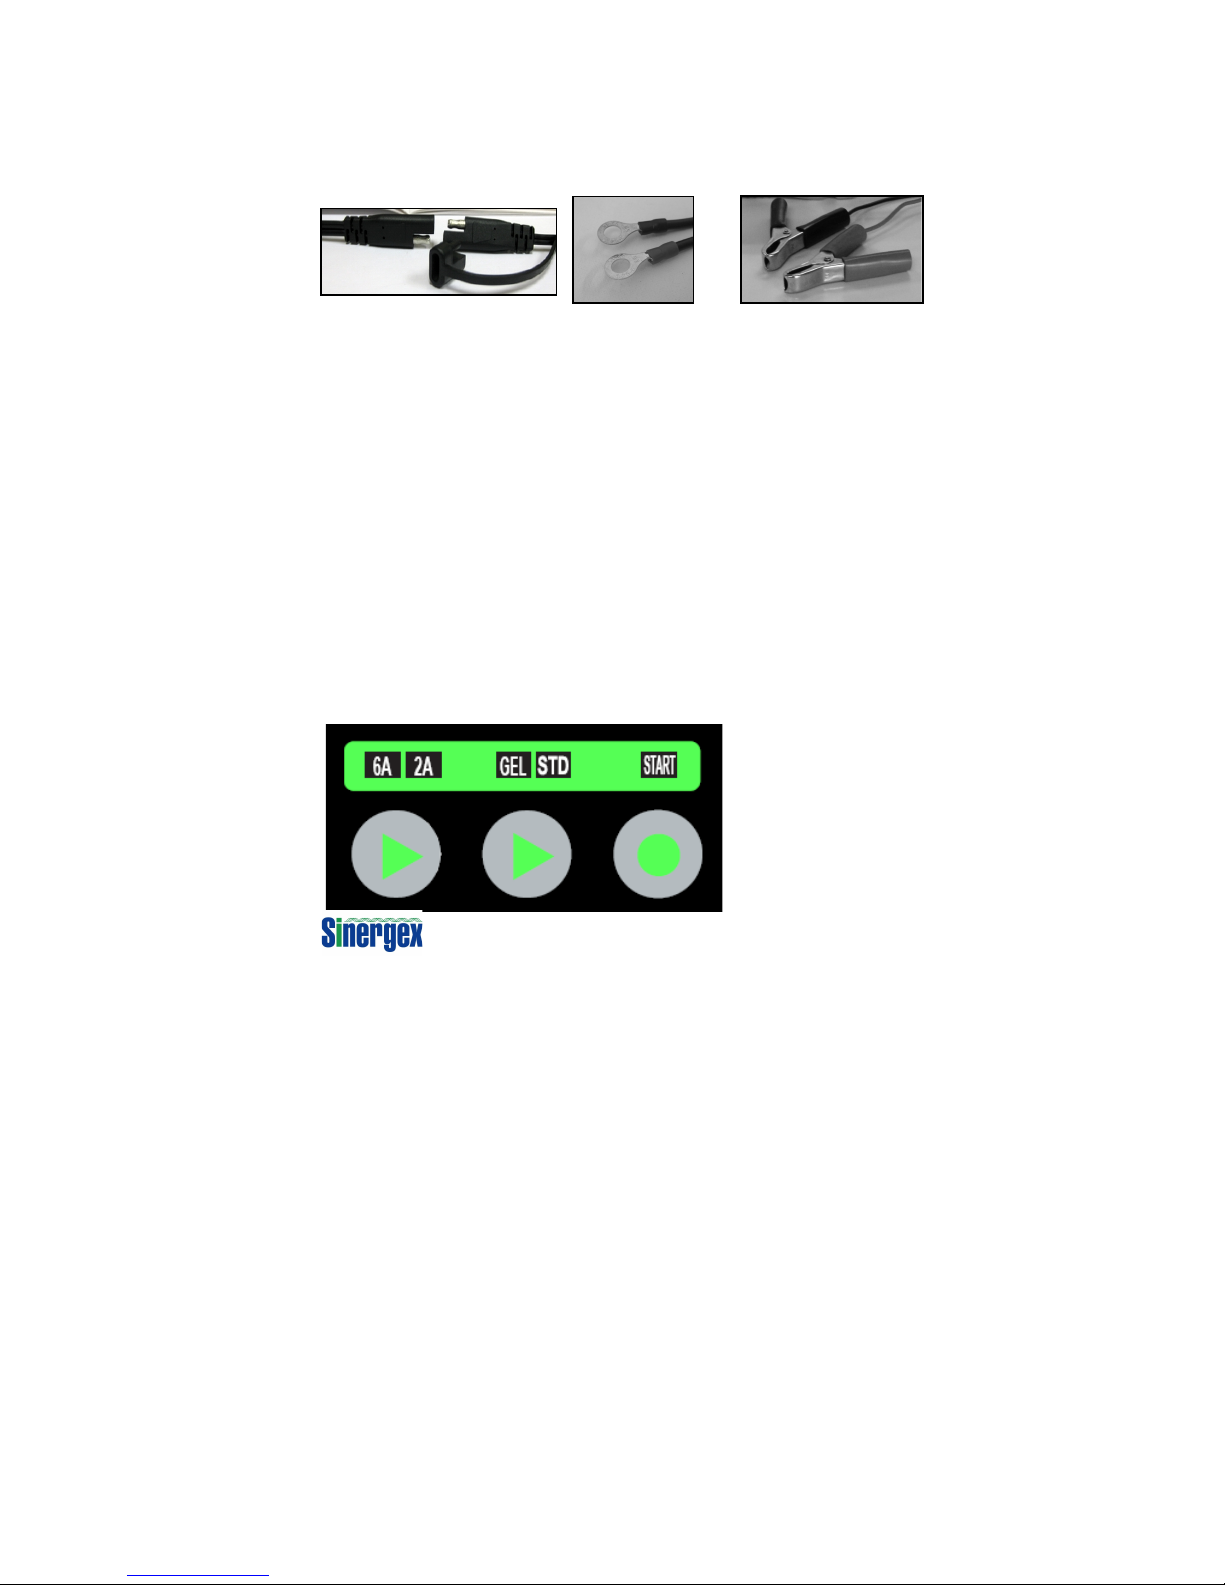
The battery charger is now in the Standby operating mode and
the “6 Amp”, “GEL” and “ON” LEDs are illuminated. This is the
standard charging mode and as soon as the START button is
pressed, the charger switches immediately into the 6 Amp GEL
cell battery charging mode.
9
Page 10

If you require an alternative selection, proceed as follows:
STEP 1 – Select the desired charge current: 2 Amps or 6 Amps.
STEP 2 – Select the battery type. GEL or Standard. “GEL” or
“STD”.
GEL indicates a common Maintenance Free battery, e.g. Gel Cell,
VRLA, AGM & etc. STD indicates a common lead acid battery or
calcium battery.
STEP 3 – Press the “START” button to begin charging the battery
The Nitro will now automatically assess the condition of your
battery and deliver the optimum charge.
When charging is completed, disconnect power cable from the AC
power and disconnect cables and clamps in reverse order from
which they were connected.
If using the Nitro for maintenance charging, leave charger
connected to the battery and the Nitro will keep your battery at the
optimum level of charge.
2. TROUBLE SHOOTING
INCORRECT CONNECTION – REVERSE POLARITY
If the DC battery clamps are connected incorrectly to the battery
terminals, the REVERSE POLARITY LED illuminates. The battery
charger’s warning buzzer will also sound. If this occurs simply
disconnect the battery charger from the AC power and connect the
DC clamps correctly to the battery terminals. Reconnect the
charger to the AC power.
10
Page 11

MY LAST CHARGE IS NOT COMPLETED AND I AM NOT ABLE
TO RECHARGE ANOTHER BATTERY PROPERLY.
If the last recharge is not completed, the charger automatically
memorizes the selected charging mode. When the charger is
connected to another battery, the charger will continue in the
selected mode. So, the charger does not recharge another battery
properly.
To erase the charge memory, connect the clamps to new battery,
then connect the charger to the AC power. The “START” LED will
illuminate. Disconnect the DC clamps from battery and wait for
“START” LED to turn OFF. Reconnect the DC clamps to battery
and follow the OPERATION steps as described in P.8.
BATTERY FAULT
A few seconds after switching THE Nitro 6000 on, the LED
indicator “FAULT” will illuminate if the following occurs:
A. Low battery voltage - < 3 V
B. High battery voltage - > 15 V (12 V battery)
C. Battery short circuit or battery cell short circuit
Under these conditions, the battery charger will stop charging. In
the event of A, B or C, the battery may be defective and we
advise you to consult your nearest battery service centre.
3. WHEN THE BATTERY IS COMPLETELY CHARGED
When the LED “FULL” illuminates, the battery is fully charged. The
battery charger now switches to the FLOAT or MAINTENANCE
mode and doesn’t require your attention until the next time it is
used. The Nitro battery charger will automatically maintain your
battery.
11
Page 12

When AC power is disconnected the charger will turn off and
discontinue charging.
The battery charger automatically switches back to the “Stand By”
mode if the charger DC clamps are removed from the battery while
the AC cable is still connected to the AC power supply.
CHARGING TIME
The table below is a guide to the typical charge time for different
batter sizes of 12 V /6 Cell batteries:
Battery Size
Charging Time
20Ah
6 hours
24Ah
7 hours
30Ah
9 hours
36Ah
10 hours
44Ah
13 hours
55Ah
16 hours
75Ah
20 hours
Waste electrical products should not be
disposed of with household waste.
Please recycle where facilities exist.
Check with your local authority or retailer for
recycling advice.
12
Page 13

WARRANTY
Sinergex Technologies warrants this product for a period of 2
years from the date of purchase to the original purchaser.
Warranty is not transferable. Warranty covers defect against
workmanship and materials only. To obtain warranty service,
please return the unit to the place of purchase or authorized
Sinergex dealer together with your proof of purchase. The
warranty is void if the product has been damaged or not used as
described in this manual. Warranty is void if a non-authorized
repair has been performed. Sinergex Technologies makes no
other warranty expressed or implied. Sinergex Technologies is
only responsible for repair or replacement (at Sinergex
Technologies’ Discretion) of the defective product and is not
responsible for any consequential damage or inconvenience
caused by the defect.
SINERGEX TECHNOLOGIES L.L.C. (USA)
WWW.SINERGEX.COM
13
 Loading...