

Page 1

SinclairLewis
ENTERPRISES
Page 1
Instruction Manual
Page 2
SinclairLewis
ENTERPRISES
Page 2
Page 3
SinclairLewis
ENTERPRISES
Page 3
Thank you...
...for purchasing the SinclairLewis slide projector—the coolest slide
projector in all of Second Life—and it contains only 9 prims!
Every SinclairLewis product is made with only the nest electrons—
hand-picked by Juan Valdez—to ensure years of trouble-free operation, so you can enjoy sharing your cherished photos with all your
Second Life friends.
While operation of the projector is
simple and explained in detail by
this manual, if you need help actually taking snapsnots to use in the
projector, please visit: http://wiki.
secondlife.com/wiki/User:Torley_
Linden/Snapshot_tips for an excel-
lent series of tutorials on taking
snapshots in Second Life
Note: When used in many PDF
viewers, this manual has functioning hyperlinks (such as the
link above in yellow) that, when
clicked, will take you to the referenced URL out on the web (using
your favorite web browser) or to
another page within this book.
—SinclairLewis Horczys
Your new SinclairLewis slide
projector is a great way to share real
life photos with Second Life friends
without actually giving them a copy
(which, as we all know, might later be
used for blackmail)
Page 4
SinclairLewis
ENTERPRISES
Page 4
•
Show slides manually
•
Set up an automatic show
•
Eject slide trays to change the
contents of the trays.
•
Swap two trays directly, mak-
ing it easy to quickly show two or
more pre-prepared slide shows.
•
Align the screen with the operat-
ing Avatar.
With the
SinclairLewis
slide projector you can:
In addition to explaining these ve
functions, this manual also gives
instructions for changing the con-
tent of a slide tray, for attaching a
slide tray, and for achieving world
peace through the increased use of
beauty pageants.*
The rst step to any function is
to click the blank screen.
Shut down the projector, if necessary,
by clicking on the slide tray.
*Use of this product does NOT guarantee world peace
TIP: If you click on any words
in yellow italics or blue type in
this booklet, you will be taken
to the web site or booklet
page to which the words refer.
Page 5

SinclairLewis
ENTERPRISES
Page 5
T
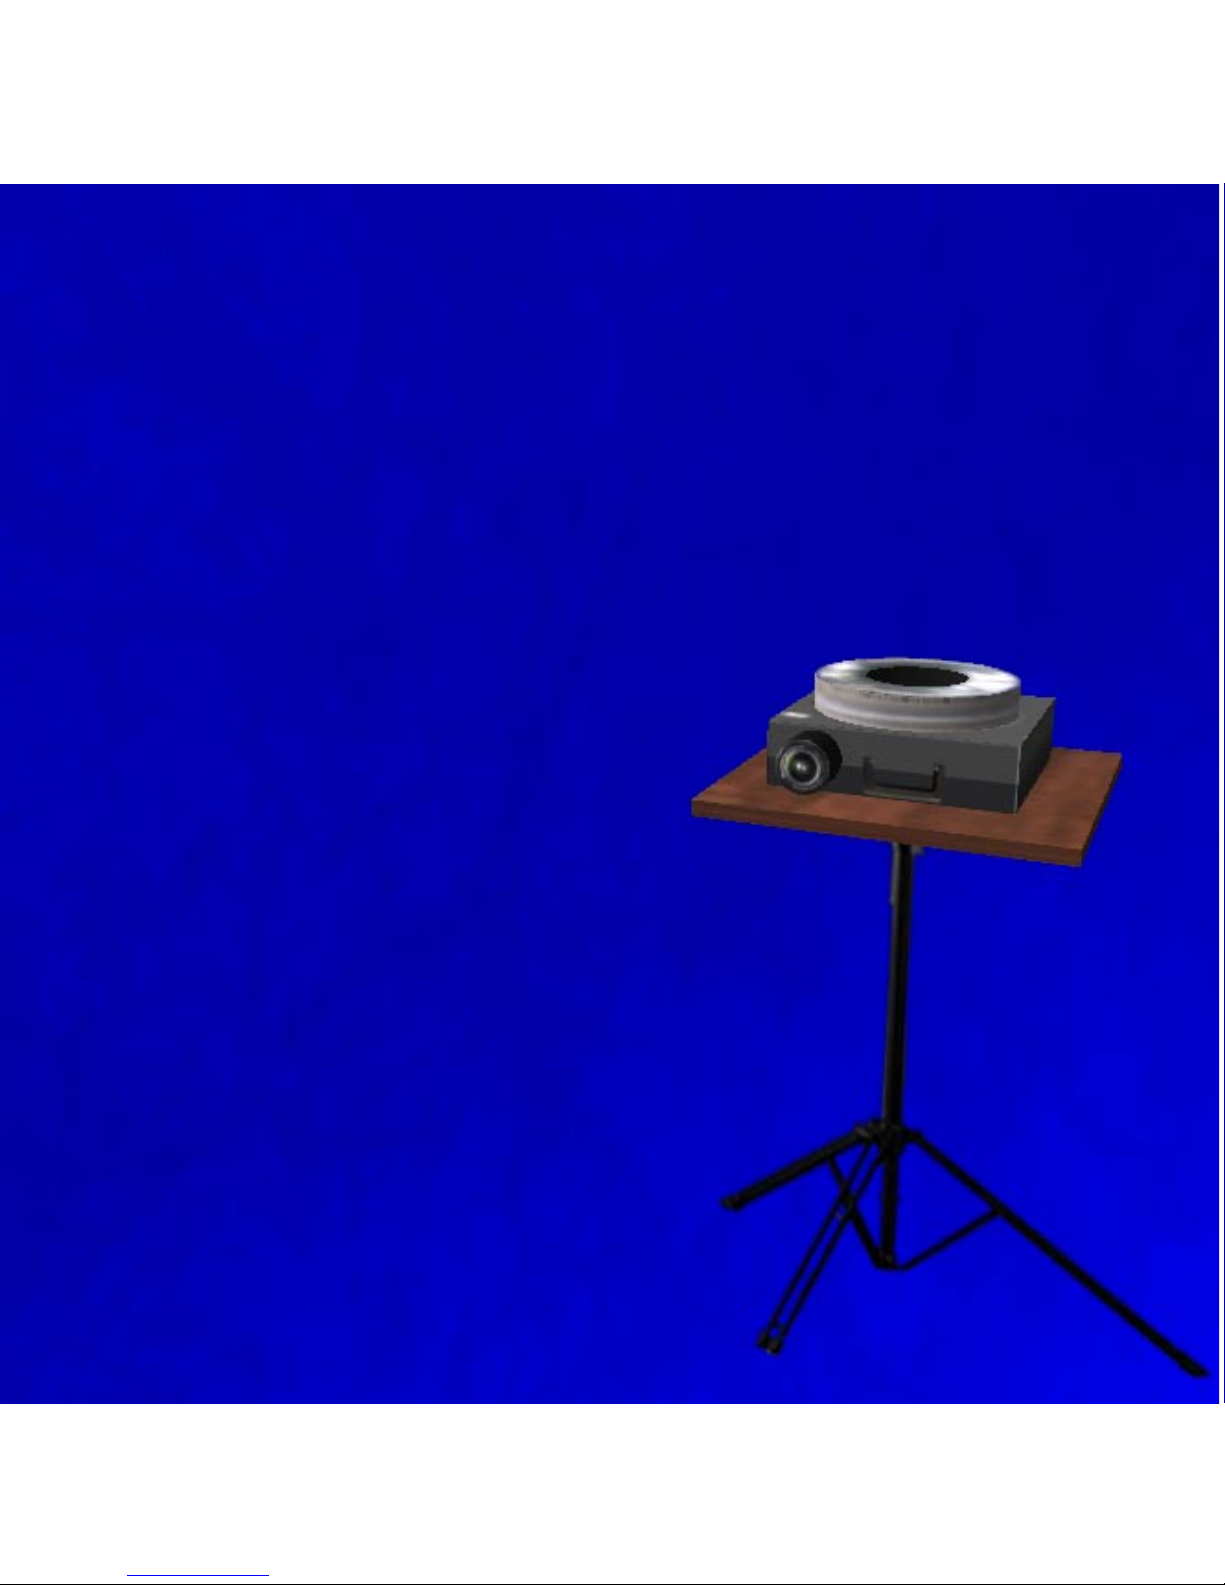
he rst thing you’ll probably want to do after rezzing your projector is to
align the screen so your audience gets a good view. Fortunately, the
SinclairLewis slide projector makes this easy.
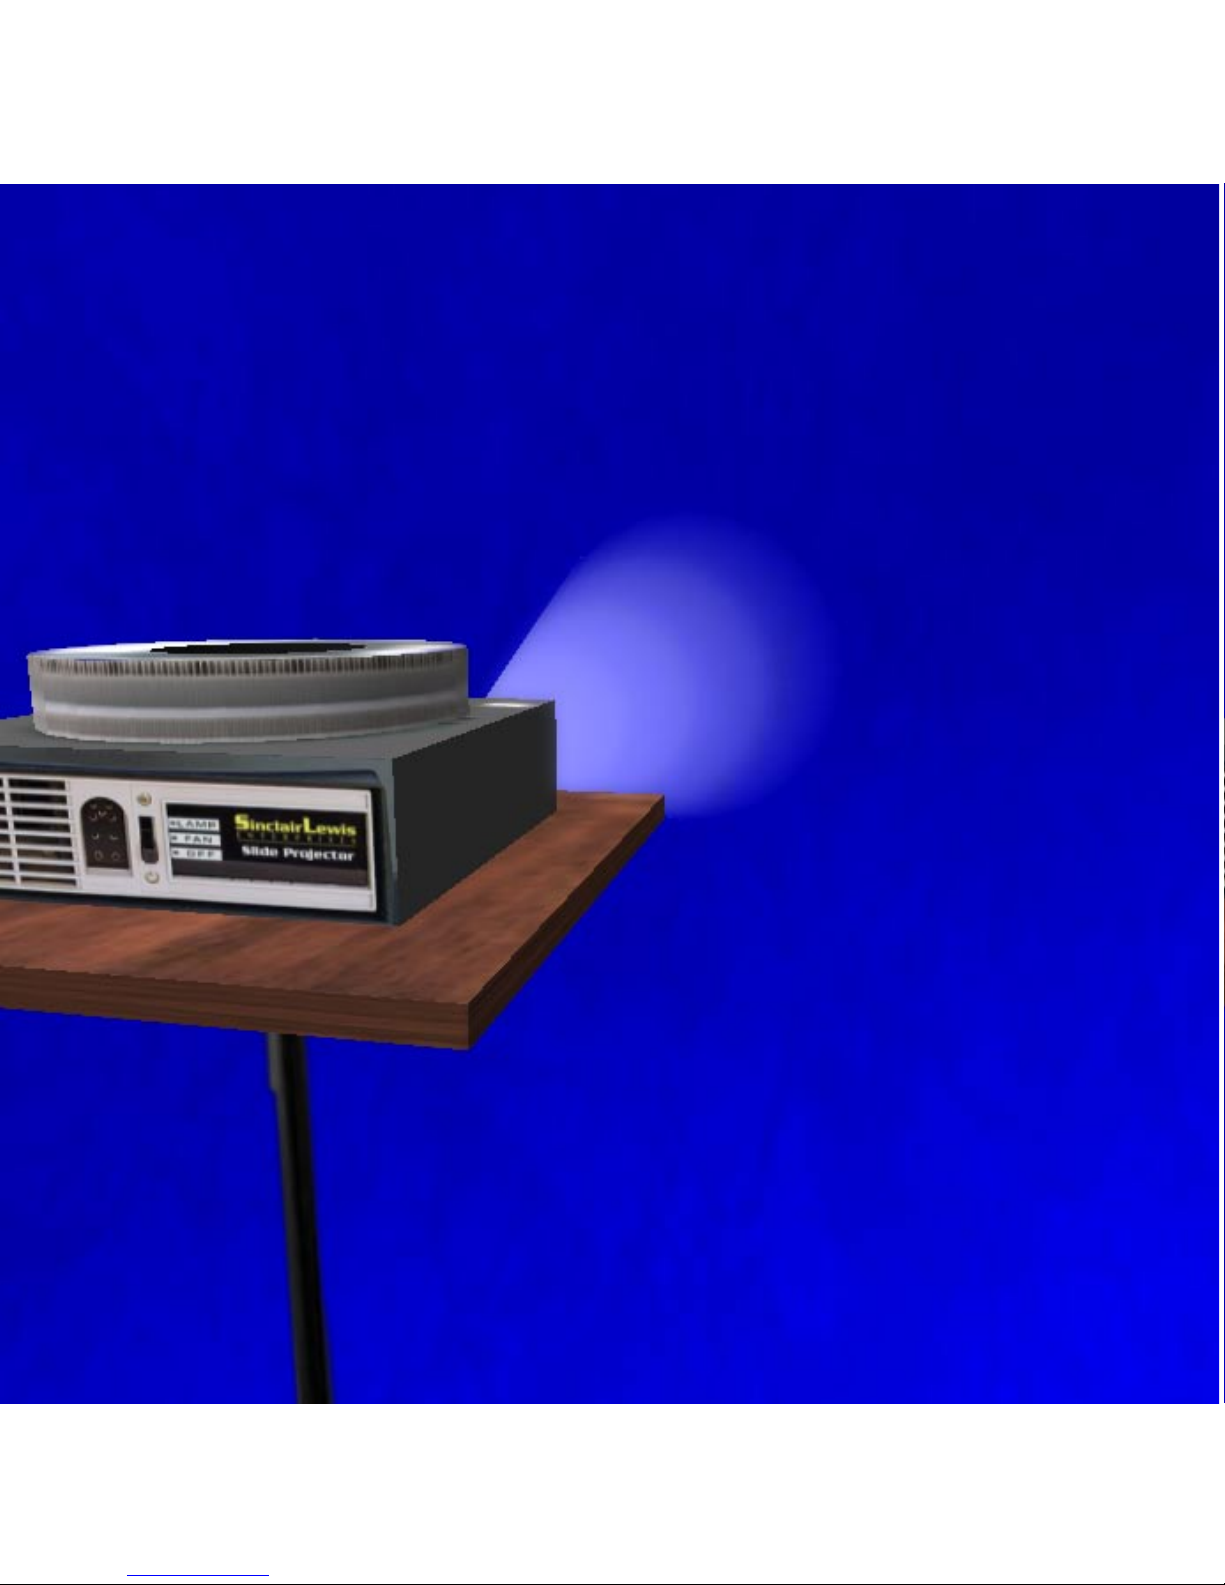
The rst step to almost any function is to click the screen while the projector
is shut down. If the projector was left running, click the slide tray to shut it
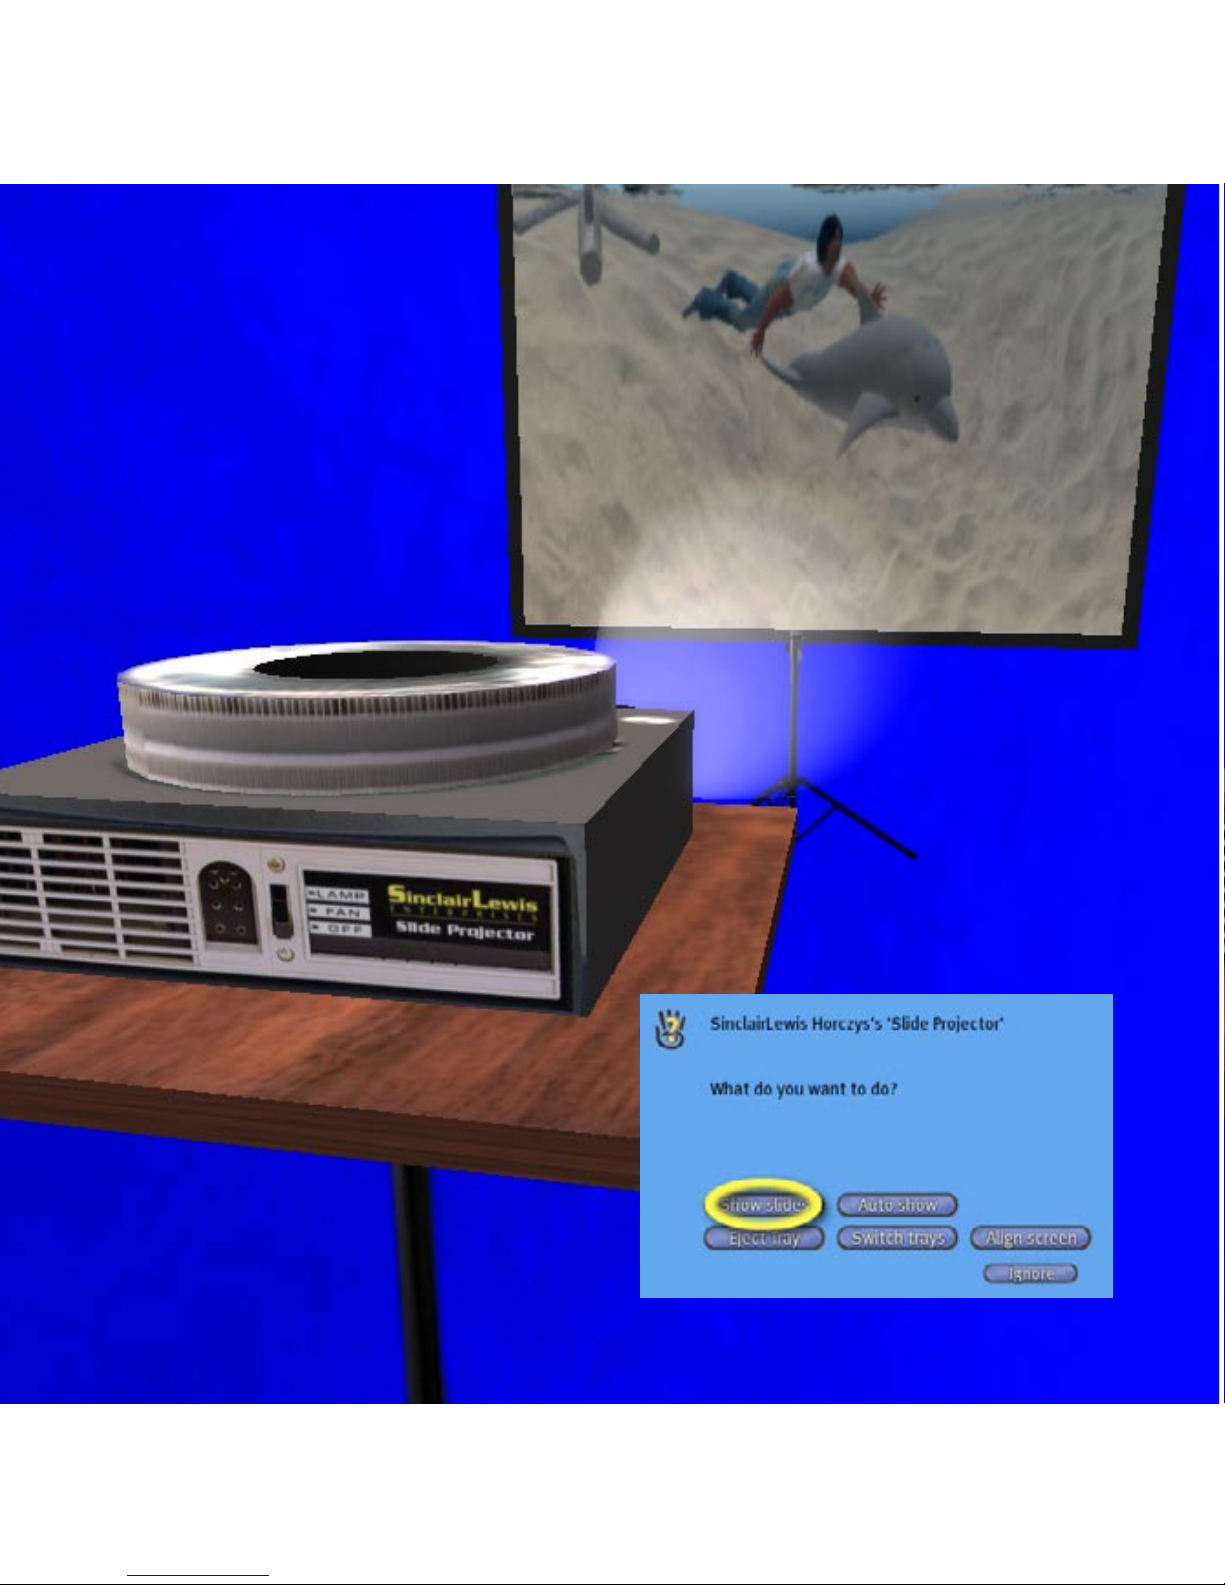
down (see p. 9). When you click the blank screen, this main menu will appear:
If you click “Align screen”, the screen will automatically sense the direction
your avatar is pointing, and align itself, slightly offset to the right, with that
position.
TIP: You may want
to ask your audience
to “Force Midnight” to
enjoy an even better
viewing experience.
Aligning the Screen
Presenting a slide show
Aligning the screen
Page 6
SinclairLewis
ENTERPRISES
Page 6
Presenting
a manual
slide show
Page 7
SinclairLewis
ENTERPRISES
Page 7
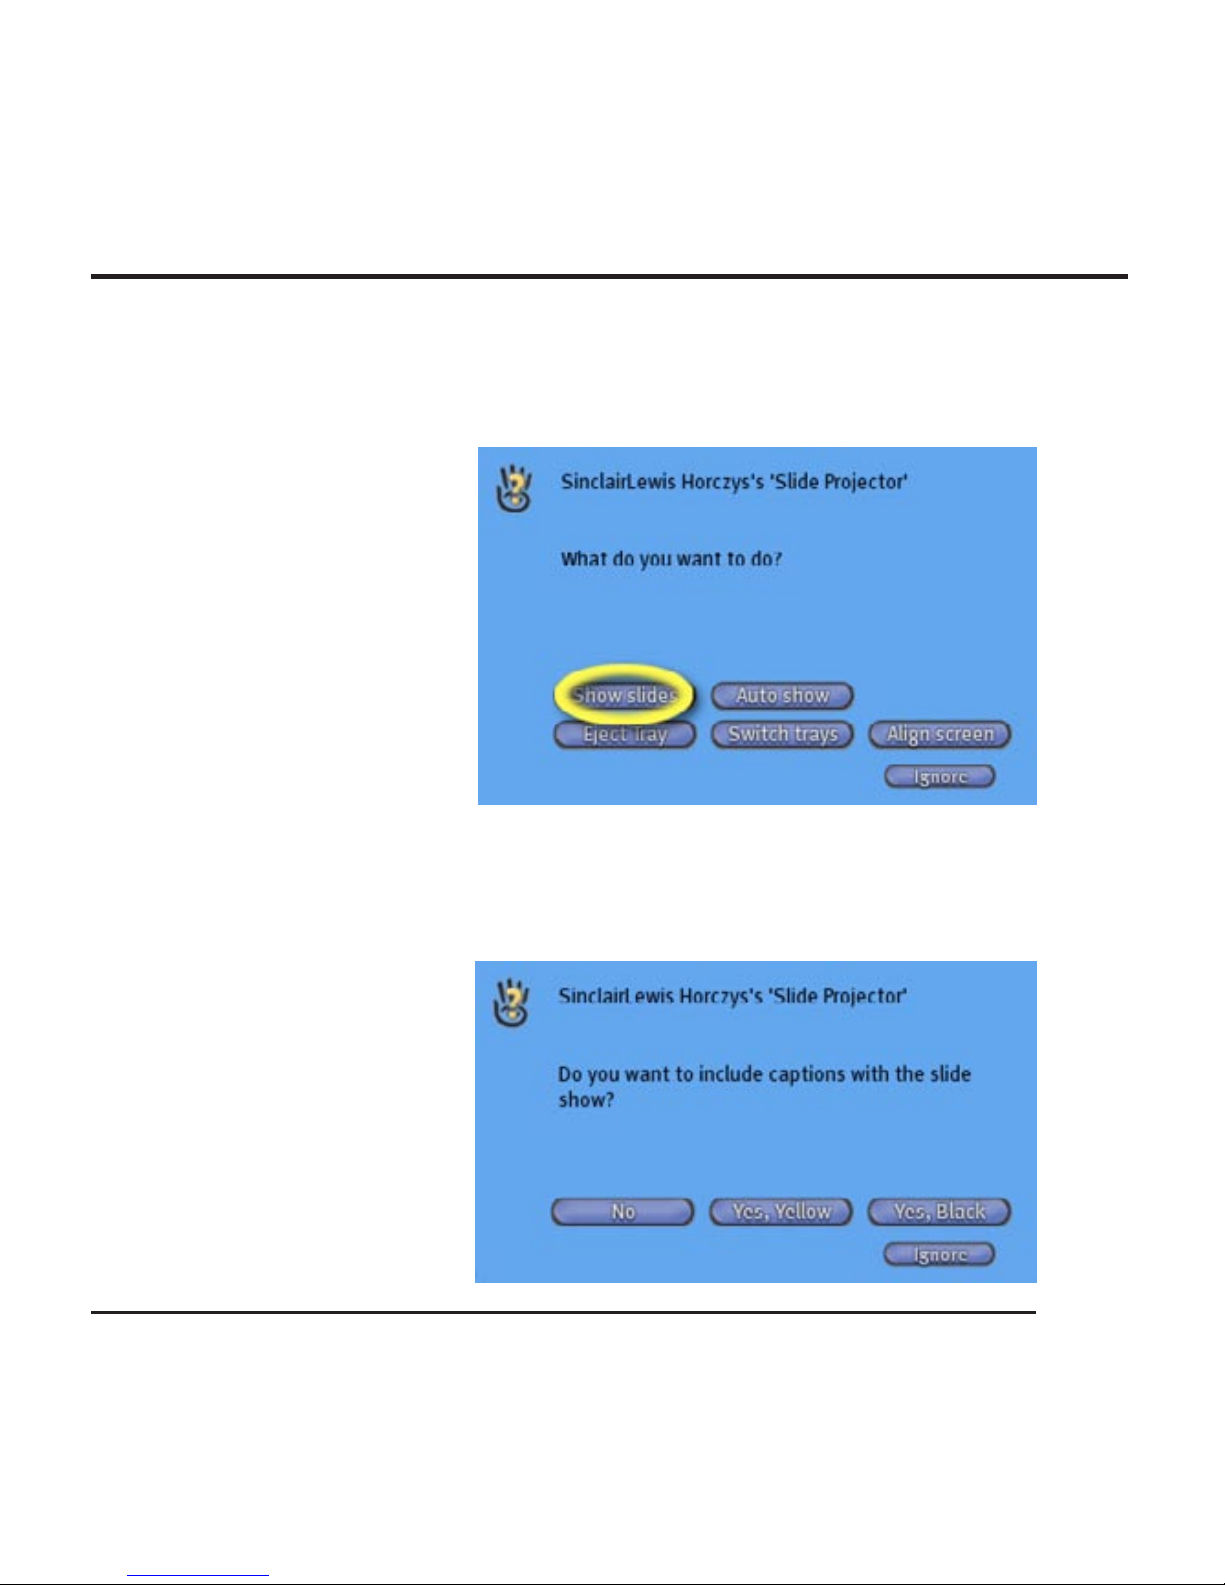
If you choose “Show Slides”
from the main menu, you
will be given the option to
include captions with your
slide show. The captions
are taken directly from the
names of the texture or
photo les in the tray, so
if you haven’t edited these
names, it’s best to answer
“no” to this question.
Presenting a manual slide show
Captions
If you have edited the le
names, you have the option
to display these captions in
either yellow or black text.
Choose the color based
on the background behind
the screen. Yellow almost
always works best in dark
settings.
A
s always, the rst step to almost any function is to click the screen while
the projector is shut down. If the projector was left running, click the
slide tray to shut it down.
Page 8
SinclairLewis
ENTERPRISES
Page 8
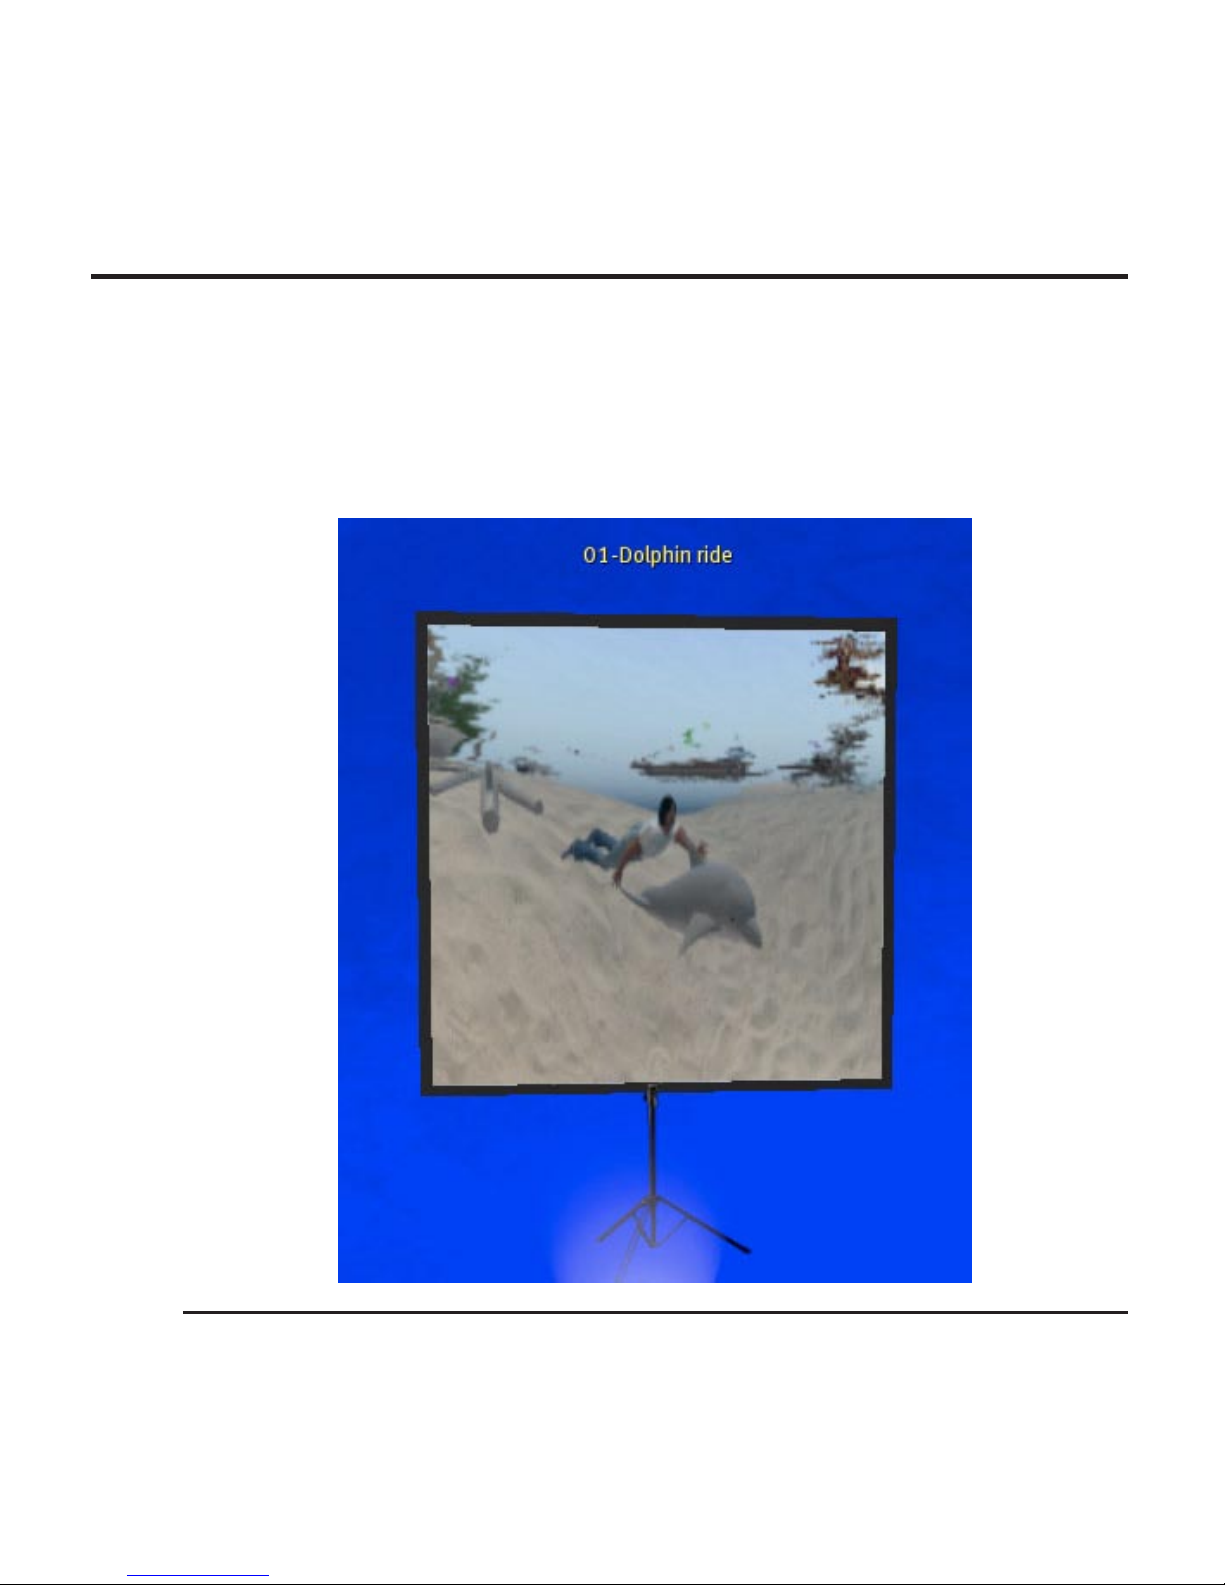
Below is an illustration of what the captions look like. The text for the captions
is taken from the name of the texture or photo le, so to change the caption
you need to edit the le name. See page 19 for instructions.
Presenting a manual slide show
Page 9
SinclairLewis
ENTERPRISES
Page 9
Presenting a manual slide show
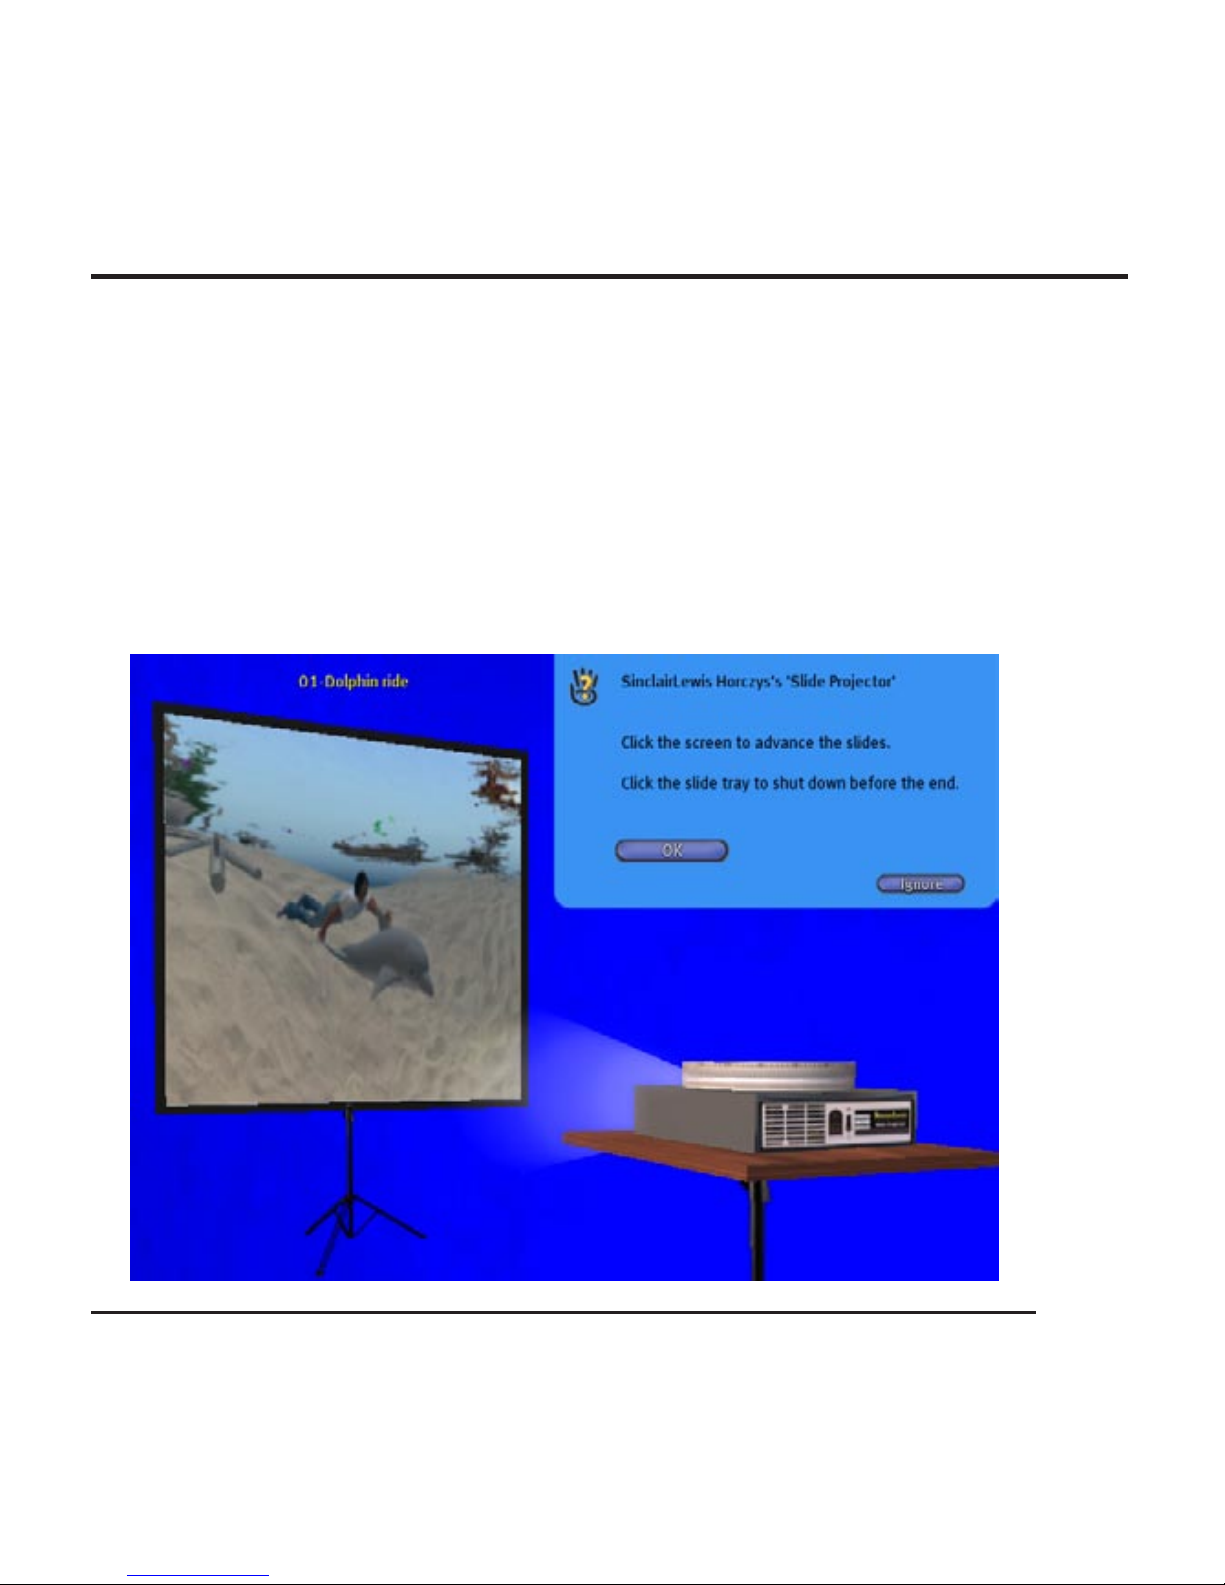
After you choose your caption preference, simply click on the screen to
advance the slides (after clicking “OK” to the instructions).
Shutting down
If you want to end the show before reaching the end of your slides
(a common occurrence if you cram too many slides into a single tray and the
resulting snoring from audience members disturbs your neighbors), click on
the slide tray, instead of the screen. You will then be presented with the menu
on the following page.
Page 10

SinclairLewis
ENTERPRISES
Page 10
To shut down and reset the projector, choose “Shut down.”
If you choose “Show again,” the slide show will restart from the beginning of
your presentation.
If you change your mind, choose “Continue” to resume showing your slides
where you left off.
Presenting a manual slide show
Page 11
SinclairLewis
ENTERPRISES
Page 11
Presenting an
automatic
slide show
Page 12

SinclairLewis
ENTERPRISES
Page 12
Presenting an automatic slide show
Y
our new SinclairLewis slide projector also includes an Auto Show fea-
ture that allows you to continuously cycle through the slides in a tray and
display each for a xed length of time. This mode is perfect for use as a pointof-sale instruction tool for Second Life merchants and shop owners.
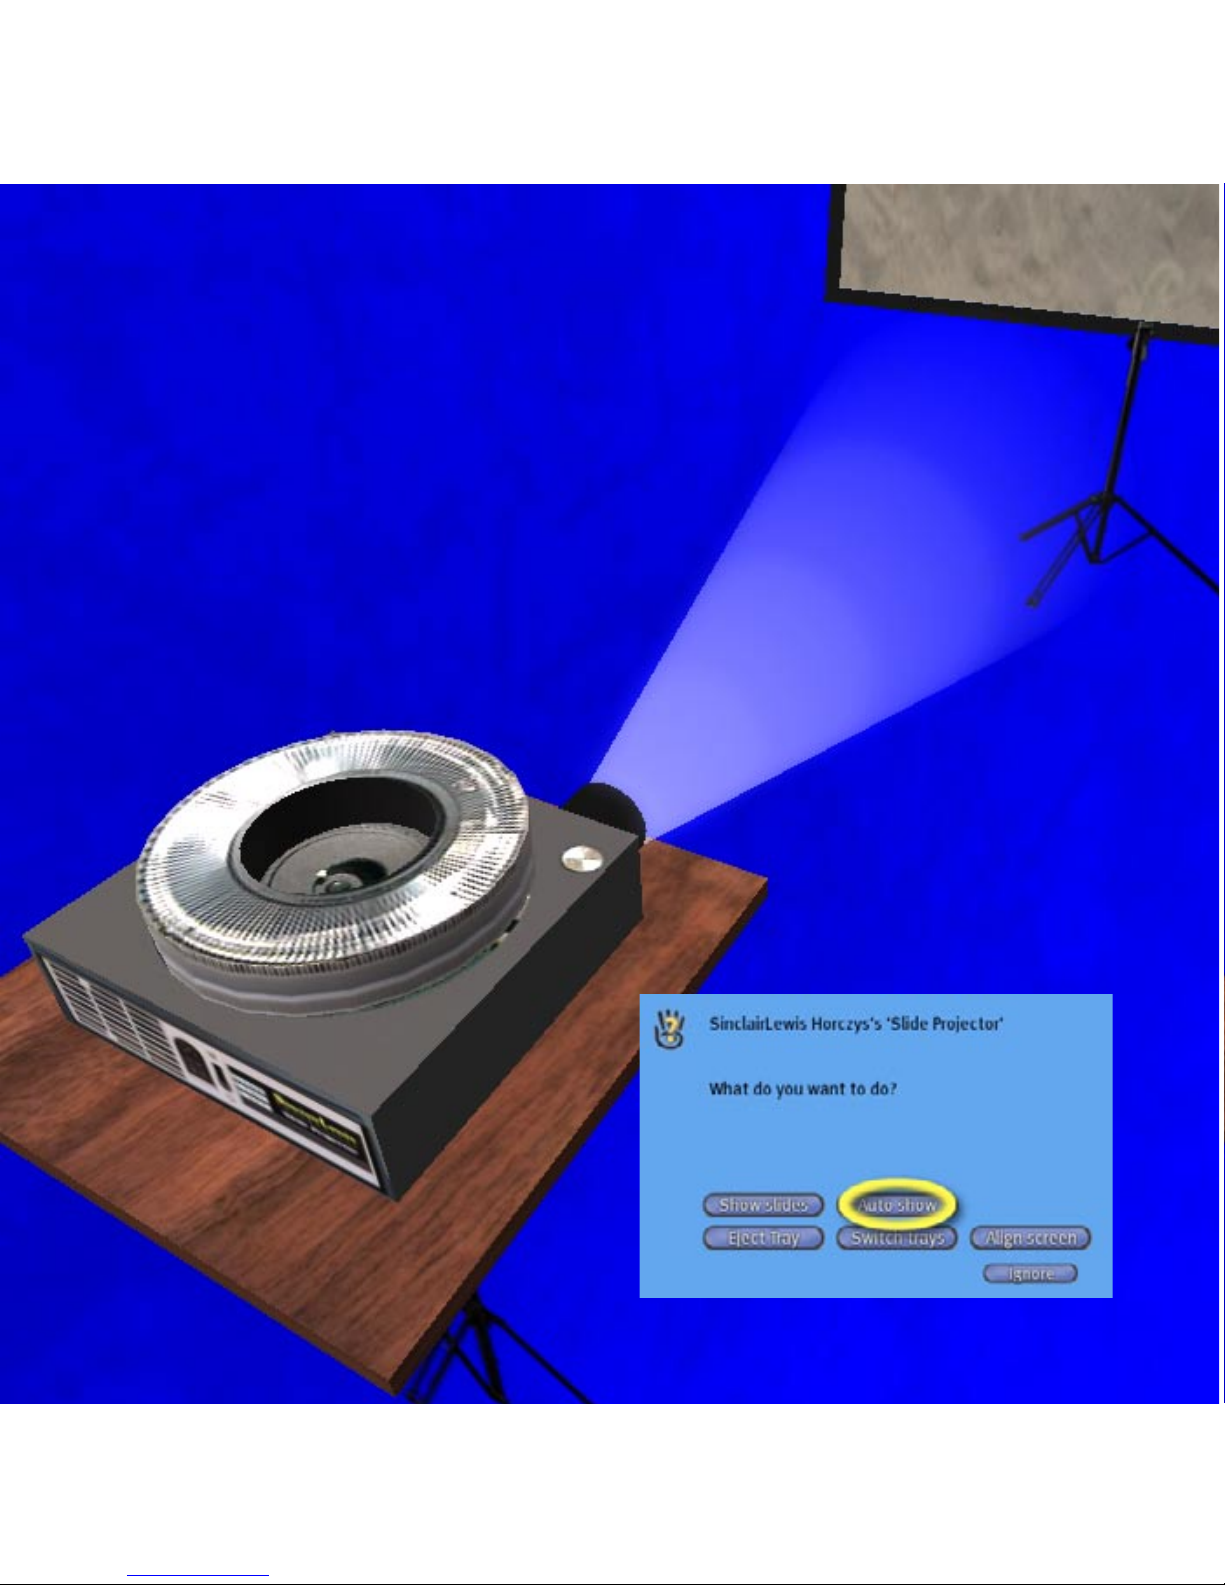
When set to the Auto Show mode, only the operator or the owner can shut
it down; no one else can operate it. So you can leave it unattended anywhere
it’s needed to perform its point-of-sale magic on your behalf.
To use the projector in the Auto Show mode, click the blank screen to display the main menu and choose “Auto show.” You will then be presented with
the following menu:
Page 13

SinclairLewis
ENTERPRISES
Page 13
Choose the length of time you want each slide to stay on screen before the
projector advances to the next one. Once you’ve chosen this interval, only the
operator or the owner of the projector can take it out of Auto Show mode.
The instruction below will pop up as a reminder of how to exit the Auto Show
mode.
Presenting an automatic slide show
Page 14

SinclairLewis
ENTERPRISES
Page 14
Exiting Auto Show mode
When you’re ready to exit the Auto Show mode, just click on the slide tray,
and the menu below will pop up. Simply choose “Yes, exit” to leave the Auto
Show mode. Or, if you clicked the slide tray by mistake, choose “Continue” to
keep the slides automatically displaying.
Presenting an automatic slide show
Page 15

SinclairLewis
ENTERPRISES
Page 15
Ejecting a slide tray
Page 16

SinclairLewis
ENTERPRISES
Page 16
Ejecting a slide tray
Once again, click the screen while the projector isn’t running to bring up the
main menu. Then, if you click “Eject tray” from the main menu, the current
slide tray will be de-linked from the rest of the projector (you must give your
permission for this) so that you can delete the slides currently in the tray, or
add more to them. If you refuse permission, the operation will be canceled.
Ejecting a slide tray
Page 17

SinclairLewis
ENTERPRISES
Page 17
The slide tray will then hover
above the projector to allow you to
change the contents of the tray.
Ejecting a Slide Tray
Once you receive the message
“Slide Projector: The tray has been
ejected. You may now insert or
delete slides, if you wish.” you may
edit the contents of the slide tray
to add or delete slides. Right click
on the slide tray to bring up the
familiar circle menu and choose
“Edit...”
Page 18

SinclairLewis
ENTERPRISES
Page 18
Then choose the “Content” tab and you will be able to drag-n-drop textures or
photos from your Avatar’s inventory into the slide tray’s inventory. You may
have to set permissions of the textures to allow both copy and transfer before
you move them to the slide tray.
Changing the Content of a Slide Tray
Page 19

SinclairLewis
ENTERPRISES
Page 19
Changing the Content of a Slide Tray
If you want to get rid of any slides
currently in the tray, either drag
them to your inventory (if they are
set to no-copy) or right-click on
the slide you want to get rid of and
choose “Delete” from the pop-up
menu.
Changing captions
Since the captions displayed with the
slide show are based on the names
of the photo les, you may want to
rename some or all of them. You
can do so by right-clicking on the
photo and choosing “Rename” from
the pop-up menu. The photos are
displayed in alphabetical order, so
to make it easy to arrange them, I
suggest you start each le name with
the number in which you want it displayed. For example, you might label
your rst slide: “01-This is where we
start”.
Page 20

SinclairLewis
ENTERPRISES
Page 20
Once you’ve made all the changes to the tray’s contents, you need to either
reattach it to the projector, or put it away in your inventory.
To reattach it, start
by clicking on the
projector screen.
A dialog box will
pop up in the upper right corner of
your screen. Click
“Attach tray” in
the dialog box.
Then another
dialog box will
appear giving
instructions. It’s
important that
you click the “Yes
I Will” button before you click on
the tray you want
to attach.
Attaching a Slide Tray
Page 21

SinclairLewis
ENTERPRISES
Page 21
Attaching a Slide Tray
The slide tray you want to attach is probably hovering over the projector. Click
on it—or any other tray you desire— to nish the attachment process. Be sure
to give permission again to link.
If, in your haste to view the fascinating animation triggered by reattaching,
you accidentally click on the tray before clicking on the “Yes, I will” button,
don’t panic! Remain calm and simply go back to click the “Yes, I will” button
and then click the slide tray again.
Page 22

SinclairLewis
ENTERPRISES
Page 22
Switching slide trays
Page 23

SinclairLewis
ENTERPRISES
Page 23
S
uppose you have several slides trays, each containing a slide show you
previously set up (extra trays are available for purchase). Wouldn’t it be
nice if there was a fast way to swap the trays, so your audience doesn’t fall
asleep prematurely?
Oh sure, you could eject one tray, put it away, rez another, and then attach
it. But that just wouldn’t be as cool as swapping the trays directly. And the
SinclairLewis slide projector is all about cool.
As with just about any function, the rst step to switching trays is to click on
the blank projector screen. Make sure there is not any slide show in progress.
This brings up the main menu. Click on “Switch trays.”
Switching Slide Trays
Page 24

SinclairLewis
ENTERPRISES
Page 24
Switching Slide Trays
The following menu will come up that instructs you to click on the tray you
want to replace the currently attached tray. If you haven’t done so already, go
ahead and rez the tray you want from inventory.
Be sure to click the “I will” button before you click on the replacement tray.
Nothing will happen if you reverse the order. If you get excited (who wouldn’t
at the prospect of watching slide trays switch?) and click the tray rst, simply
go back and choose the “I will” button and then click the tray again.
Page 25

SinclairLewis
ENTERPRISES
Page 25
Switching Slide Trays
After you click the replacement tray, you will get a message that says “The new
slide tray is now ready to attach.” You must then grant permission for the
projector to delink and re-link these trays. To do so, simply click “Yes” in the
dialog box. If you do not grant permission, the operation will be canceled.
Page 26

SinclairLewis
ENTERPRISES
Page 26
Switching Slide Trays
Once you grant permission, the trays will switch positions, with the old tray
placed about half a meter above where new tray used to be. Your projector is
now ready to show the contents of the new tray. Don’t forget to put the old
tray back into your inventory.
Renaming Trays
So that you can more easily remember their contents, you may rename slide
trays in your inventory without affecting their function.
Page 27

SinclairLewis
ENTERPRISES
Page 27
Switching Slide Trays
While anyone can show slides or align the
screen (but only one person at a time), only
the owner can change slide trays or stop an
automatic show.
The rst step to any function is to
click the screen.
The privileges
of ownership
Page 28

SinclairLewis
ENTERPRISES
Page 28
Flexible operation
The SinclairLewis slide projector is designed to allow exibility in operation. As the owner, you’re not the only person who can operate the projector;
you may allow others to do so as well. For instance, the rst person to touch
the screen while the projector is shut down becomes the operator. Anyone
can operate it. Simply clicking the screen gives them control.
The operator is the only person who can advance slides during a manual
slide show. And is the only person, other than the owner, who can shut down
an automatic slide show.
To allow someone else to
operate the projector, just have
the current operator shut down
the projector. Once shut down,
the rst person to then touch the
screen becomes the new operator.
Even the owner can not advance
slides during a manual slide show
once someone else is in control.
Regaining control
The owner, however, may regain control of the projector at any time by clicking on the slide tray. When you do so, the projector will ask “Are you sure
you want to take control of the projector?” As soon as you answer “Yes,” you
become the new operator.
The privileges of ownership
Page 29

SinclairLewis
ENTERPRISES
Page 29
Troubleshooting
A
ll moving parts in the SinclairLewis slide projector are permanently
lubricated, so you’ll enjoy years of trouble-free operation with no maintenance on your part. In fact, the scientists in our labs have so far identied only
one potential problem that might detract from your unhindered enjoyment.
Every once in awhile, under unpredictable circumstances (spelled: w-e
d-i-d-n-t l-o-o-k a-l-l t-h-a-t h-a-r-d f-o-r i-t) you may nd the projector no
longer responds to any operator—even the owner.
Resetting the projector
If this happens, you can reset the projector by having the owner touch the
legs attached to the projector stand
twice. The rst time the owner touches, you’ll get a message “Click the table
legs again to reset the projector.”
When you click them again, you’ll get
the conrming message: “The projec-
tor has been reset.” It will then be
ready to accept a new operator. As
always, the rst person to touch the
screen will become that operator.
Click the
legs to
reset
Page 30

SinclairLewis
ENTERPRISES
Page 30
Instruction Manual
For questions or comments, contact
SinclairLewis Horczys
in-world with a notecard (preferred) or IM.
You can also contact me via email using
SinclairLewisH@gmail.com
Or visit me on the web at
www.freewebs.com/sinclairlewish
 Loading...