

Page 1
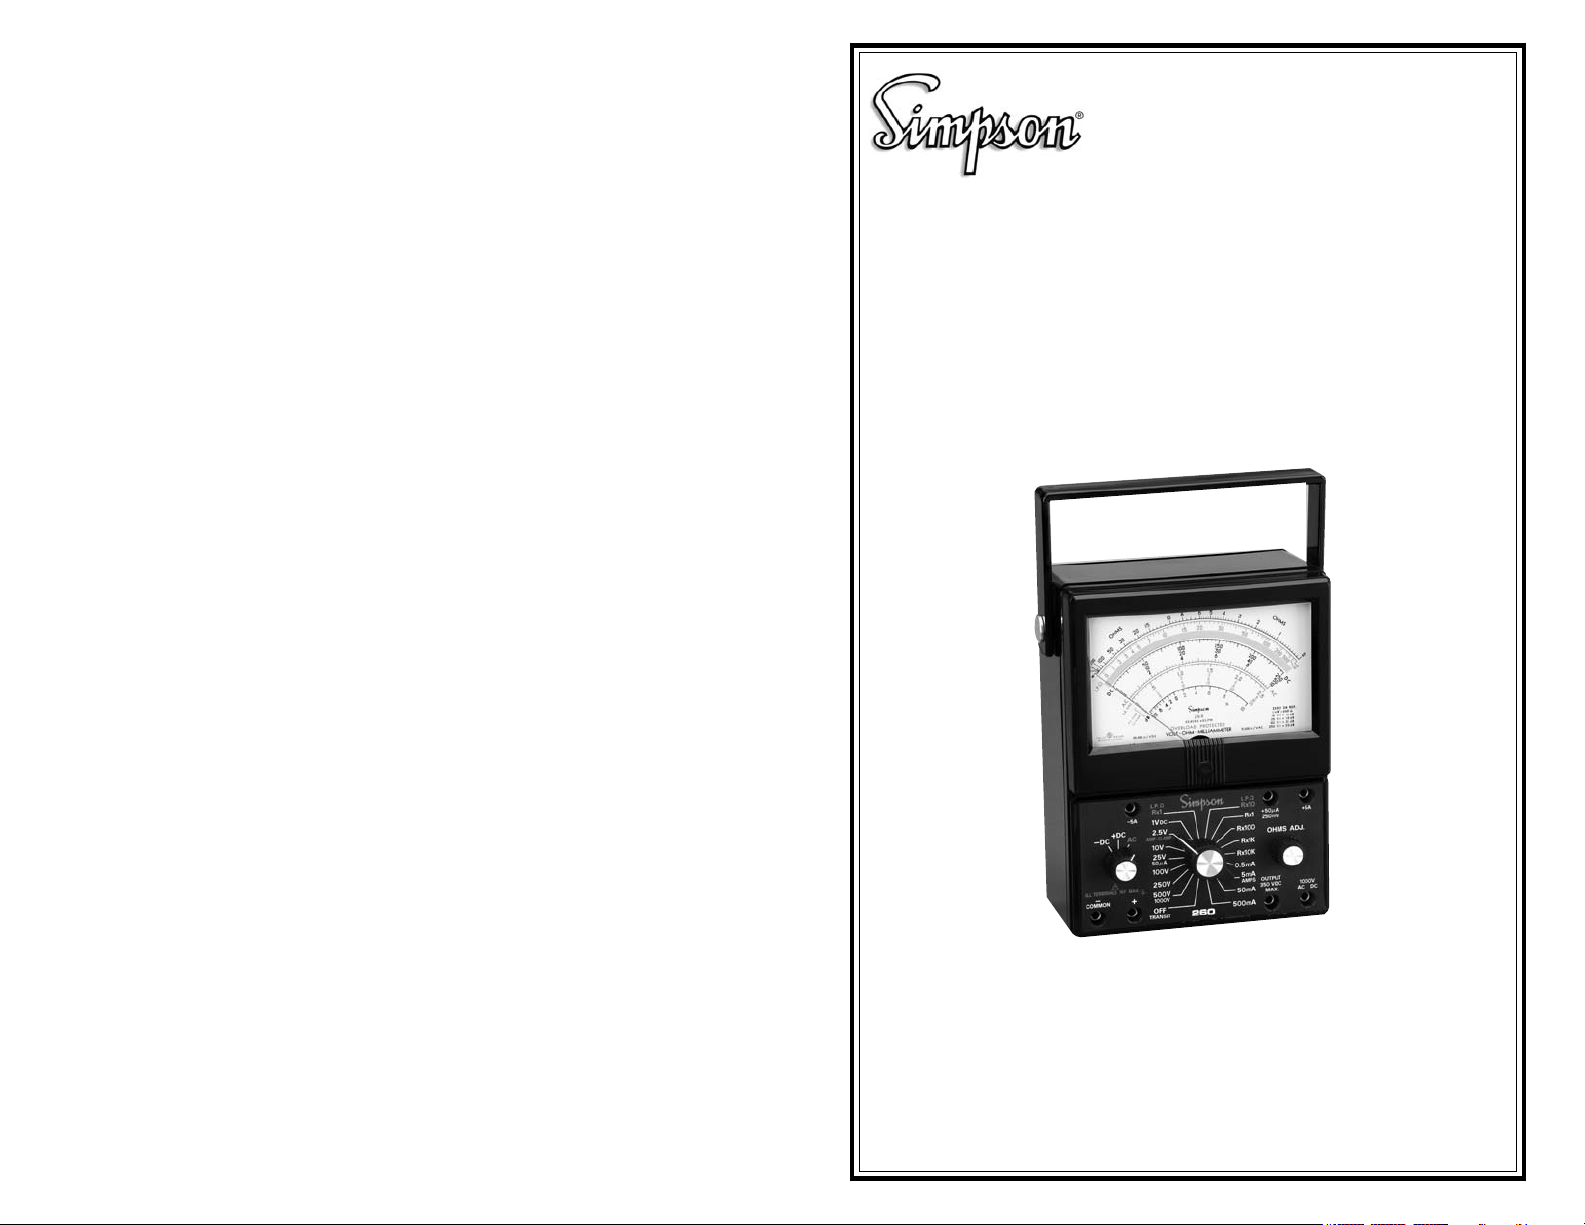
Simpson 260® Series 6XLM
Volt-Ohm-Milliammeter
INSTRUCTION MANUAL
SIMPSON ELECTRIC COMPANY 520 Simpson Avenue
Lac du Flambeau, WI 54538-0099 (715) 588-3311 FAX (715) 588-3326
Printed in U.S.A. Part No. 06-110935 Edition 14, 10/07
Visit us on the web at: www.simpsonelectric.com
Page 2

About this Manual
To the best of our knowledge and at the time written, the information contained in
this document is technically correct and the procedures accurate and adequate to
operate this instrument in compliance with its original advertised specifications.
Notes and Safety Information
This Operator’s Manual contains warning headings which alert the user to check
for hazardous conditions. These appear throughout this manual where applicable,
and are defined below. To ensure the safety of operating performance of this instrument, these instructions must be adhered to.
Warning, refer to accompanying documents.
Warning. Refer to accompanying documents
!
NOTES:
Caution, risk of electric shock.
!
This instrument is designed to prevent accidental shock to the operator when
properly used. However, no engineering design can render safe an instrument
whick is used carelessly. Therefore, this manual must be read carefully and completely before making any measurements. Failure to follow directions can result in
ser ious or fatal accident.
Shock Hazard: As defined in American National Standard, C39.5, Safety
Requrements for Electrical and Electronic Measuring and Controlling Instrumentation, a shock hazard shall be considered to exist at any part involving a potential
in excess of 30 volts RMS (sine wave) or 42.4 volts DC or peak and where a
leakage current from that part to ground exceeds 0.5 milliampere, when measured with anappropriate measuring instrument defined in Section 11.6.1 of ANSI
Technical Assistance
SIMPSON ELECTRIC COMPANY offers assistance Monday through Friday
8:00 am to 4:30 pm Central Time. To receive assistance contact Technical Support or Customer Service at (715) 588-3311.
Internet: http://www.simpsonelectric.com
Warranty and Returns
SIMPSON ELECTRIC COMPANY warrants each instrument and other articles
manufactured by it to be free from defects in material and workmanship under
normal use and service, its obligation under this warranty being limited to making
good at its factory or other article of equipment which shall within one (1) year
after delivery of such instrument or other article of equipment to the original purchaser be returned intact to it, or to one of its authorized service centers, with
transportation charges prepaid, and which its examination shall disclose to its
satisfaction to have been thus defective; this warranty being expressly in lieu of all
other warranties expressed or implied and of all other obligations or liabilities on
its part, and SIMPSON ELECTRIC COMPANY neither assumes nor authorizes
any other persons to assume for it any other liability in connection with the sales of
its products.
This warranty shall not apply to any instrument or other article of equipment which
shall have been repaired or altered outside the SIMPSON ELECTRIC COMPANY
factory or authorized service centers, nor which has been subject to misuse, negligence or accident, incorrect wiring by others, or installation or use not in accord
with instructions furnished by the manufacturer.
®
260
is a Registered Trademark of the Simpson Electric Company.
2
23
Page 3

temperature and humidity extremes, vibration, mechanical shock, dust, corrosive fumes, or strong electrical or electromagnetic interfaces.
d. Verify Instrument accuracy by performing operational checks using known,
accurate, stable sources. If proper calibration equipment is unavailable, contact your nearest Simpson Authorized Service Center. If the Instrument has
not been used for 30 days, check the batteries for leakage and replace, if
necessary.
e. It is recommended that the Instrument be returned annually to an Authorized
Service Center or the factory for a complete overall check and calibration.
f. When not in use, store the Instrument in a location free from temperature
extremes, dust and corrosive fumes, and mechanical vibration or shock.
NOTES:
22
3
Page 4

Contents
I. INTRODUCTION .............................................................................. 7
1.1 General Description ................................................................................ 7
1.2 Test Leads ..............................................................................................7
1.3 Accessories and Supplies ...................................................................... 7
1.4 Technical Data ........................................................................................ 7
1.5 Definition of Accuracy ............................................................................. 9
1.6 Safety Considerations .......................................................................... 10
2. INSTALLATION ............................................................................... 10
2.1 Unpacking and Inspection .................................................................... 10
2.2 Shipping ................................................................................................ 10
2.3 Power Source Requirements ................................................................ 10
2.4 Operating Positions .............................................................................. 10
3. CONTROLS, CONNECTORS & INDICATORS ............................... 11
3.1 Front Panel ........................................................................................... 11
4. OPERATION ................................................................................... 12
4.1 Safety Precautions ............................................................................... 12
4.2 Adjust Pointer for Zero .......................................................................... 13
4.3 Polarity Correction ................................................................................ 13
4.4 DC Voltage Measurement ..................................................................... 13
4.4.1 Measuring DC Voltage: 0-250 mV .......................................................... 14
4.4.2 Measuring DC Voltage: 0-1 through 0-500V ........................................... 14
4.4.3 Measuring DC Voltage: 0-1000V ............................................................. 14
4.5 AC Voltage Measurement ..................................................................... 15
4.5.1 Measuring AC Voltage ............................................................................ 15
4.5.2 Measuring AC Voltage: 0-1000 V ............................................................ 16
4.6 Output Voltage Measurements ............................................................. 16
4.7 Measuring Decibels .............................................................................. 17
4.8 Direct Current Measurements .............................................................. 17
4.8.1 Measuring Direct Current: 0-50 µA ......................................................... 18
4.8.2 Measuring Direct Current: 0-0.5 through 0-500 mA ............................... 18
4.8.3 Measuring Direct Current: 0-5 µA ........................................................... 18
4.9 Resistance Measurement ..................................................................... 19
4.9.1 Measuring Resistance: Low Power Ohms Ranges................................. 19
4.9.2 Measuring Resistance: Conventional Ohms Ranges ............................. 19
5. OPERATING SERVICING............................................................... 20
5.1 Battery and Fuse Replacement ............................................................ 20
5.2 Case Removal ...................................................................................... 21
5.3 Fuse Protection .................................................................................... 21
5.4 Care ......................................................................................................21
and then gently push the + side of the battery into place.
b. To replace the 9V battery
1.withdraw old battery and mating connector from the compartment.
2. Remove the connector from the old battery and connect it to new battery.
3. Put the new battery into the compartment.
4. Place the connector leads so they rest between the cavity walls and clear
the fuse terminals. Place the extended leads between the battery holder and
top wall of the case.
1A or 2A fuse replacement is necessary when there is no meter deflection on any
of the DC VOLTS, AC VOLTS or OHMS ranges, but the DC AMPS range operates
properly.
c. To Replace the 1 Amp Fuse:
1. Pull the defective fuse from its retaining spring clips (fuse holder).
2. Snap in the replacement fuse and reinstall cover.
NOTE: A spare fuse is located in a cavity next to the fuse clip.
5.2 Case Removal
When maintenance other than battery and 1 ampere fuse replacement is required,
remove the Instrument from its case. Proceed as follows:
a. Place the Instrument face down on a soft padded surface.
b. Remove the battery and fuse compartment cover, located at the top rear of
the 260 case (paragraph 5.2). Unscrew the four screws located at the four
corners of the case.
c. Lift the case off the Instrument and set it aside. Maintenance now can be
performed on the Instrument.
5.3 Fuse Protection
A 1 Amp 250 Volt quick-acting and 2 Amp high voltage, high interruption capacity
fuse is connected in series with the input circuit an additional protection to the
VOM against excessive energy fault current, such as a power line overload.
It is important to replace the 1 Amp fuse with Littlefuse Type 312001 only to prevent the 2 Amp high interruption capacity fuse from opening on nominally high
overload.
If the Instrument fails to indicate, the 1 Amp or the 2 Amp fuses may be burned out.
(Refer to Paragraph 5.2 for fuse replacement.) A 1 Amp spare fuse is furnished
with each Instrument. (Both 1 Amp fuses are located in the battery and fuse compartment.) The 2 Amp fuse is located on the instrument panel under the printed
circuit board.
5.4 Care
a. Immediately clean all spilled materials from the Instrument and wipe dry. If
necessary, moisten a cloth with soap and water to clean plastic surfaces.
b. When the Instrument is not in use, rotate the range selector switch to the
OFF/TRANSIT position.
c. Whenever possible, avoid exposure or usage in areas which are subject to
4
21
Page 5

5. OPERATING SERVICING
The 260 has been designed and constructed with high-quality components. By
providing reasonable care and following the instructions in this manual, the user
can expect a long service life from these Instruments.
!
Before opening the battery compartment cover, disconnect the test leads from live
circuits.
5.1 Battery and Fuse Replacement
The batteries and 1A fuse are located inside an isolated compartment at the toprear of the Instrument case. To access the battery and fuse compartment, proceed as follows:
a. Place the Instrument face down on a soft padded surface.
b. Unscrew the single captivated screw on the cover.
c. Remove the cover from the case and set it aside. Batteries and fuse can now
be replaced.
NOTE: If replacement of the 2A high current interrupting fuse is necessary, the
Instrument case must be removed (see paragraph 5.3).
Battery replacement is necessary whenever the Instrument cannot be adjusted to
infinity () with open test leads on the low power ohm ranges, or with shorted test
leads on the conventional ohm ranges. If these adjustments cannot be made,
replace the 1.5V D size cell. If the ohms adjustment cannot be made on the R X
10k range or the reset button does not trip on overload circuit and battery test,
replace the 9V battery.
BATTERIES
NOTES:
WARNING
MADE IN U.S.A.
ELGIN, ILLINOIS
ADAPTOR LOCK
+
SPARE FUSE
6-11814
FUSE
I
To avoid electrical shock make certain that test leads are disconnected from any circuits
before removing covers.
NOTE: If instrument fails to operate after replacing fuse (F1) check and replace (F2)
inside case if required before returning for repair. See Operator's manual. No other
serviceable parts inside. Refer servicing to qualified personnel only.
CARELESSNESS AND MISUSE OF THIS INSTRUMENT CAN BE DANGEROUS
1. Do not attempt any measurements unless trained, qualified and
authorized to do so.
2. Do not connect to any circuit where the voltage with respect to earth
ground may exceed 1000 volts
3. Whenever making measurements with the instrument a. Turn OFF power and discharge any capacitance in the circuit before
connecting or disconnecting test leads or changing switch settings.
b. Double-check for correct switch settings and test lead connections
before applying power.
c. Do not use any instrument or test leads or the circuit while the power is on.
d. Do not use any instrument or test leads that are damaged contaminated
deteriorated moist or have missing parts
4. Voltages as low as 30 volts rms or 42 4 volts peak can redner an electric shock
5. Read the Operator's Manual for additional precautions and instructions.
SIMPSON ELECTRIC COMPANY
a. To replace the D size battery
1. grasp the old battery at the center and pull directly up.
2. Insert the new battery – end first; push against the –terminal spring clip
20
5
Page 6

NOTES:
4.9 Resistance Measurement
!
Before making resistance measurements, remove all power to the circuit under
test. Discharge all capacitors.
The 260 has six resistance ranges. Two are low power ohms and the other four
are conventional ohm ranges powered by two batteries. The low power ohms
ranges are used for accurate and safe measurements of resistance in semiconductor and integrated circuits. The low open-circuit voltage of 100 mV assures
that the circuit being measured will not be damaged or have its resistance affected
by conducting diodes. Depending on the range selected, the open-circuit voltage
for the conventional ohms ranges is 1.5V or 9V.
A single OHMS ADJ control is provided for all the resistance ranges. This control
compensates for variations in battery voltage and allows the user to zero the Instrument prior to measuring resistance.
4.9.1 Measuring Resistance: Low Power Ohms Ranges
a. Turn the range switch to the desired resistance range mark in blue. Turn the
function switch to either the -DC or +DC position.
b. Plug the black test lead into the -COMMON jack and the red test lead into the
+jack.
c. With the test leads separated, rotate the OHMS ADJ control to set the Instru-
ment pointer at infinity (), on the blue low power ohms arc. If the pointer
cannot be adjusted to infinity (), replace the 1.5V battery. Refer to para-
graph 5.2 for instructions.
d. Connect the test leads to the circuit whose resistance is to be measured.
Read the resistance on the blue arc and multiply it by the factor indicated on
the range switch.
e. Disconnect the test leads and return the range switch to the OFF/TRANSIT
position.
NOTE: When the Instrument is not in use, never leave the range switch in the low
power ohms position because power is drawn continuously from the 1.5V battery.
4.9.2 Measuring Resistance: Conventional Ohms Ranges
a. Turn the range switch to the desired range and the function switch to either
the +DC or -DC position.
b. Plug the black test lead into the -COMMON jack and the red test lead into the
+jack.
c. Connect the ends of the test leads to short-circuit the Instrument’s resistance
measuring circuit.
d. Rotate the OHMS ADJ control to set the Instrument pointer to 0 on the black
ohms arc. If the pointer cannot be adjusted to 0, replace the 1.5V battery.
Replace the 9V battery if the R X 10k range cannot be adjusted to full-scale
(zero ohms). For battery replacement, refer to paragraph 5.2.
e. Disconnect ends of test leads and connect to component being measured.
f. Read the resistance on the black ohms scale. Multiply the reading by the
factor indicated on the range switch.
g. Disconnect ends of test leads and return the range switch to the OFF/TRAN-
SIT position.
6
19
Page 7

Always turn the power off and discharge all the capacitors before resetting the
switches or disconnecting the leads.
Always connect the Instrument in series with the ground side of the circuit under
measurement and never exceed the circuit to ground voltage (Table 1-1, item 7).
4.8.1 Measuring Direct Current: 0-50 µA
a. Set the function switch to +DC.
b. Plug the black test lead into the -COMMON jack and the red test lead into the
+50 µA/250V jack.
c. Set the range switch at the 25V (50 µA) position.
d. Be sure the power is off in the circuit being measured and all capacitors are
discharged.
e. Open the circuit in which the current is to be measured. Connect the red test
lead at the positive side and the black test lead at the negative side.
f. Turn the power on and read the current on the black DC scale. Use the 0-50
figures to read directly in µA.
g. Turn the power off, disconnect test leads and return the range switch to the
OFF/TRANSIT position.
NOTE: In all direct current measurements make certain that the power to the cir-
cuit being tested has been turned off before connecting and disconnecting test
leads or restoring circuit continuity.
4.8.2 Measuring Direct Current: 0-0.5 through 0-500 mA
a. Set the function switch to +DC.
b. Plug the black test lead into the -COMMON jack and the red test lead into the
+jack.
c. Set the range switch at one of the four range positions marked 0.5 mA, 5 mA
or 500 mA.
d. Turn the power off, discharge all capacitors, and open the circuit in which the
current is being measured. Connect the Instrument in series with the circuit.
Connect the red test lead to the positive side and the black test lead to the
negative side.
e. Turn on the power to the circuit under test.
f. Read the current in mA on the black DC scale marked 0-50. For the 0.5 mA
and 5 mA ranges, divide the reading by 100 or 10, respectively. Read the 50
mA range directly. Multiply the reading on the 500 mA range by 10.
g. Turn power off, disconnect test leads and return the range switch to the OFF/
TRANSIT position.
4.8.3 Measuring Direct Current: 0-5 A
a. Plug the black test lead into the -5A jack and the red test lead into the +5A
jack.
b. Set the range switch to the 5A position (dual position with 5 mA).
c. With power OFF, open the circuit in which the current is being measured.
Connect the Instrument in series with the circuit. Connect the red test lead to
the positive side and the black test lead to the negative side.
d. Turn on power in the circuit under test.
NOTE: The function switch has no effect on polarity for the 5A range.
e. Read current directly on the black DC scale. Use the 0-50 figures; divide by
10 to read amperes.
f. Turn power off and disconnect test leads. Return the range switch to the
OFF/TRANSIT position.
18
I. INTRODUCTION
1.1 General Description
The Simpson Volt-Ohm-Milliammeter 260 Series 6XLM (hereafter referred to as
the 260 or the Instrument) is equipped with a mirrored dial to eliminate parallax.
The 260 is a high performance, battery-operated Volt-Ohm-Milliammeter capable
of making a wide variety of electrical measurements simply and accurately. Features are overload protection, conventional and low-power ohms, and a wide range
coverage. The cases are made of high-impact (ABS) plastic, and are contemporary styled. These features, in combination with extended range coverage (Table
1-1) make these Instruments general-purpose, portable, or laboratory Instruments.
They are well suited to servicing, production, inspection and engineering applications.
The 260 uses the Simpson taut-band movement, which is self-shielding. The tautband suspension provides a high degree of repeatability and is highly resistant to
shock or vibration.
1.2 Test Leads
Each Instrument is furnished with one pair of test leads four feet long. For polarity
identification, one lead is black and the other red. The test lead wire consists of a
large number of fine strands to ensure flexibility.
The insulation of the wire is high-grade rubber and is more than adequate for the
highest voltage the Instrument is intended to measure. The red and black test
leads have probe tips which are threaded near the base. The alligator clips may
be screwed on or off either test lead to provide a probe or a clip for the operator’s
convenience.
1.3 Accessories and Supplies
All Accessories and supplies required for the operation of the 260 are furnished
with the Instrument, and listed in Table 1-2. (Replacement parts are listed in Table
5-1.)
1.4 Technical Data
Table 1-1 lists the technical specifications for the Simpson 260-6XLM Volt-OhmMilliammeter.
NOTE: Accuracy specifications apply to measurements made with the Instrument
in a horizontal position (meter facing upward). Reference Conditions: +25°C, ±5°C;
45% to 75% relative humidity.
Table 1-1. Technical Data
1. DC VOLTAGE
Ranges (full scale): 250 mV, 1.0 V, 2.5 V, 10 V, 25 V, 100 V, 250 V, 500V
and 1000 V
Accuracy: ±2% of full scale on all ranges
Sensitivity: 20,000 /V
7
Page 8

2. AC VOLTAGE:
Ranges (full scale): 2.5V, 10V, 25V, 100V, 250V, 500V and 1000V
Accuracy: ±3% of full scale on all ranges
Sensitivity: 5000 /V
Frequency Response: See curve in Figure 4-1
3. OHMS CONVENTIONAL:
Ranges: R X 1, R X 100, R X 1k and R X 10k
Ohms Center: 6, 600, 6000 and 60k
Max. Scale Reading: 1000 (R X 1)
Accuracy: ±2.5° of an arc on the R X 1 range; ±2.0° of arc
on all other ranges. The nominal open-circuit voltage for all ranges up to R X 1k is 1.5V. The R X
10k range has an open circuit voltage of 9 V. The
maximum current drawn from the 1.5V battery is
250 mA (R X 1 with test leads shorted).
4. LOW POWER OHMS:
Ranges: R X 1 and R X 10
Ohms Center: 20 and 200
Max. Scale Reading: 1000 (R X 1)
Accuracy: ±2.5° of arc. The maximum open circuit voltage
for the low power ohms ranges is 100 mV and the
maximum measuring power is 0.125 mW. The
battery quiescent current is 4.3 mA at R X 1 and
0.43 mA at R X 10.
5. DC CURRENT:
c. Set the range switch to one of the range positions marked 2.5V, 10V, 25V,
100V or 250V.
d. Be sure the power is off in the circuit being measured.
e. Connect the test leads across the circuit being measured with the black test
lead to the ground side.
f. Turn on the power in the test circuit. Read the output voltage on the appropri-
ate AC voltage scale. For the 0-2.5V range, read the value directly on the red
scale marked 2.5V. For the 10V, 25V, 100V or 250V ranges, use the red scale
marked AC and read the black figures immediately above the scale.
+10
+8
+6
+4
+2
0
-2
-4
PERCENT RELATIVE ERROR
-6
-8
-10
Figure 4-2. Typical Frequency Response, Output Ranges
AC VOLTAGE RANGES
2.5 VAC RANGE
10VAC RANGE
25 VAC RANGE
100 VAC RANGE
250 VAC RANGE
10
100
1000
FREQUENCY
10 KHZ
100 KHZ 1MHZ
!
4. OUTPUT JACK:
VOLTAGE( AC)
Ranges (full scale): 2.5V, 10V, 25V, 100V, 250
Frequency Response: See curves in Figure 4-2
6. DECIBELS (dB):
CA(egnaR)Bd(egnaR
V5.2
V01
V52
V001
V052
6. ACCURACY: ±1.0 dB at the zero dB point
tceriddaeR
gnidaerotBd11ddA
gnidaerotBd91ddA
gnidaerotBd13ddA
Bd93ddA
gnidaerot
8
4.7 Measuring Decibels
To read voltages in terms of decibels, use the decibel (dB) scale on the bottom of
the dial, marked from -20 to +10. Read the dB scale by first following the instructions for measuring AC. When the range switch is set on the 2.5V position, read
the dB scale directly. The dB readings on the scale are referenced to zero dB
power level of 0.001 W into 600, or 0.775V AC across 600 . For the 10V range,
read the dB scale and add +11 dB to the reading. For the 25V range, read the dB
scale and add 19 dB to the reading. On the 100V range, read the dB scale and
add +31 dB to the reading; on the 250V range, add +39 dB to the reading.
4.8 Direct Current Measurements
NOTE: The voltage drop across the 260 on all milliampere current ranges is
approximately 250 millivolts measured at the jacks. An exception is the 0-500 mA
range, where the drop is approximately 480 millivolts. The voltage drop will not
affect most circuits whose current is being measured. In some transistor circuits,
it might be necessary to take the voltage drop into account when making voltage
measurements.
!
While the circuit is energized do not change the setting of the function or range
switches or disconnect the test leads.
17
Page 9

have been discharged.
e. Connect the test lead across the voltage source with the black lead on the
ground side.
f. Turn on the power in the circuit being measured and read the voltage on the
red scale marked AC.
g. For the 0-2.5V range, read the value directly on the red scale marked 2.5V
AC. For the 10V, 25V, 100V, 250V and 500V ranges, read the red scale marked
AC and use the black figures immediately above the scale. For the 10V and
250V ranges, read directly using the 0-10 and 0-250 figures respectively. For
the 500V range, read directly on the 0-50 figures and multiply the reading by
10. For the 100V range, read the 0-10 figures directly and multiply the reading by 10. For the 25V range, use the 0-250 figures and divide by 10.
h. Turn power off, disconnect the test leads and return the range switch to the
OFF/TRANSIT position.
4.5.2 Measuring AC Voltage: 0-1000 V
7. RATED CIRCUIT-TO
-GROUND VOLTAGE*
(FLOAT POTENTIAL): 1000V AC/DC (1500 V peak) maximum
8. READOUT 4-1/2 inch, 50 µA (full scale) taut-band meter
*Per ANSI C39.5, April 1974 - “The specified voltage with respect to ground which
may be safely and continuously applied to the circuits of an instrument.”
9. POWER
REQUIREMENTS: Two Batteries: One 1.5V, NEDA 13F. One 9V cell,
NEDA 1604. Refer to Paragraph 5.2 for installation instructions.
10. FUSES: 1A, 250V, Type 3 AG; 2A, Littlefuse Type BLS 600V,
Bussman BBS.
11. DIMENSIONS:
12. WEIGHT: 2-1/2 pounds (1.14 kg)
5-1/4” wide x 7" long x 3-1/8" high (133 x 178 x 79 mm)
!
For maximum safety, avoid touching the Instrument or test leads while the power
is on in the circuit being measured.
a. Set the function switch to AC.
b. Set the range switch to 1000V (dual position with 500V).
c. Plug the black test lead into the -COMMON jack and the red test lead into the
1000V jack.
d. Be sure the power is off in the circuit being measured and that all its capaci-
tors have been discharged. Connect the test leads to the circuit with the black
lead on the ground side.
e. Turn on the power in the circuit being measured.
f. Read the voltage on the red scale marked AC. Use the 0-10 figures and
multiply by 100.
g. Turn power off, disconnect the test leads and return the range switch to the
OFF/TRANSIT position.
4.6 Output Voltage Measurements
It is often necessary to measure the AC component of a voltage consisting of a
mixture of AC and DC voltages, as in amplifier circuits. The 260s have a 0.1 µf,
400V capacitor in series with the OUTPUT jack. The capacitor blocks the DC
component of the voltage in the test circuit, but passes the AC component. The
blocking capacitor alters the AC response of each Instrument at low frequencies.
When using the OUTPUT mode, do not connect the Instrument to a circuit whose
DC voltage component exceeds 350 volts.
a. Set the function switch to AC.
b. Plug the black test lead into the -COMMON jack and the red test lead into the
OUTPUT jack.
Table 1-2. Items and Accessories Supplied with Each Instrument
Quantity Description Catalog Number
1 Test Lead Set. One red and one black,
4 ft. long, with 00125 probe tip and
removable rubber-sleeved alligator
clip at one end and banana plug on
opposite end.
*1 Battery, 1.5V, D Cell, NEDA 13F
*1 Battery, 9V, NEDA 1604
1 Operator’s Manual 6-110935
*Batteries are standard items replaceable from local retail stores.
Table 1-3. Additional Accessories
Description Catalog Number
Ever-Redy Carrying Case 00805
Vinyl Carrying Case 01818
Deluxe Carrying Case 00812
Utility Vinyl Case 00549
Model 150-2 Amp-Clamp 00541
1.5 Definition of Accuracy
The voltage and current accuracy of this Instrument is commonly expressed as a
percent of full scale. This should not be confused with accuracy of reading (indication). For example, +2% of full scale on the 10 volt range allows an error of ±0.20V
at any point on the dial. This means that at full scale, the accuracy of the reading
would be ±2%, but at half scale it would be ±4%. Therefore, it is advantageous to
select a range which gives an indication as near as possible to full scale.
16
9
Page 10

1.6 Safety Considerations
+2
0
-2
-4
-6
-8
-10
10
1000
100
10 KHZ
100 KHZ 1MHZ
PERCENT RELATIVE ERROR
FREQUENCY
+10
+8
+6
+4
2.5 VAC RANGE
10VAC RANGE
25 VAC RANGE
100 VAC RANGE
250 VAC RANGE
AC VOLTAGE RANGES
This Operator’s Manual contains cautions and warnings alerting the user to hazardous operating and servicing conditions. This information is flagged by CAUTION or WARNING symbols throughout this publication, where applicable, and is
defined on the inside front cover under NOTES AND SAFETY INFORMATION.
Adhere to these instructions in order to ensure the safety of operating and servicing personnel and to retain the operating conditions of the Instrument.
2. INSTALLATION
d. Plug the black test lead into the -COMMON jack and the red test lead into the
1000V jack. Connect the black test lead to the negative side of the circuit
being measured and the red test lead to the positive side.
e. Turn on power in the circuit being measured.
f. Read the voltage on the black scale marked DC, using the 0-10 figures. Mul-
tiply the reading by 100.
g. Turn the power off, disconnect test leads and return the range switch to the
OFF/TRANSIT position.
4.5 AC Voltage Measurement
This section contains information and instructions for the installation and shipping
of the Instrument. Included are unpacking and inspection procedures, shipping,
power source requirements, operating position and care.
2.1 Unpacking and Inspection
Examine the shipping carton for any sign of damage. Inspect the Instrument and
packing material for obvious damage from mechanical shock, water leakage, or
other causes. Check the electrical performance as soon as possible. If there is
any indication of damage, file a complaint with the carrier immediately. Also check
that all accessories are included (Table 1-2). Save the shipping carton and packing materials for future storing or shipping of the Instrument.
On unpacking the Instrument from the box, a 1.5V and a 9V battery will be found
packed in separate envelopes. Two alligator clips for the test leads are packed in
a polyethylene bag. A pair of test leads, one black and one red, are also included.
2.2 Shipping
Pack the Instrument carefully and ship it, prepaid, to the proper destination. Insure the Instrument.
2.3 Power Source Requirements
Two batteries are in the ohmmeter circuits, a NEDA 13F, D size battery that furnishes 1.5V all ranges up to R X 1k and a NEDA 1604 battery which furnishes 9V
for the R X 10k range.
2.4 Operating Positions
The Instrument may be set horizontally or on its back and can be operated in
either position. The Instrument can also be set at an included angle by positioning a stand under the unit.
10
!
Prior to making voltage measurements, review the SAFETY PRECAUTIONS listed
in paragraph 4.2.
4.5.1 Measuring AC Voltage
NOTE: The Simpson 260-6XLM responds to the full-wave average value of an
AC waveform. They are calibrated in terms of the RMS value of a pure sine wave.
If the waveform is nonsinusoidal, the reading might be either higher or lower than
the true RMS value, and could result in a substantial error. Also, accuracy is
lessened at higher input frequencies (Figure 4-1).
Figure 4-1. Typical Frequency Response, AC Voltage Ranges
a. Set the function switch to AC.
b. Set the range switch to one of the six voltage range positions marked 2.5V,
10V, 25V, 100V, 250V or 500V. When in doubt about the approximate voltage
in the circuit being measured, always use a sufficiently high voltage range as
a protection to the Instrument. If the voltage is within a lower range, the
switch then may be set to a lower range to obtain a more accurate reading.
c. Plug the black test lead into the -COMMON jack and the red test lead into the
+jack.
d. Be sure the power is off in the circuit being measured and all the capacitors
15
Page 11

4.4.1 Measuring DC Voltage: 0-250 mV
When using the Instrument as a millivoltmeter, care must be taken to prevent
excessive voltage from damaging it. Before using the 250 millivolt range, first use
the 1.0 volt DC range to affirm that the voltage measured is no greater than 250
millivolts.
a. Set the function switch to +DC.
b. Plug the black test lead into the -COMMON jack and the red test
lead into the +50 µA/250 mV jack.
c. Set the range switch to the 25V (50 µA) position.
d. Connect the black test lead to the negative side of the circuit being measured
and the red test lead to the positive side of the circuit.
e. Turn power on and read the voltage on the black scale marked DC and use
the figures marked 0-250. Read directly in millivolts.
f. Turn the power off and disconnect the test leads. Return the range switch to
the OFF/TRANSIT position.
4.4.2 Measuring DC Voltage: 0-1 through 0-500V
a. Set the function switch to +DC.
b. Plug the black test lead into the -COMMON jack and the red test lead into the
+jack.
c. Set the range switch to one of the seven voltage range positions marked 1V,
2.5V, 10V, 25V, 100V, 250V or 500V. When in doubt about the approximate
voltage present, always use a sufficiently high voltage range to protect the
Instrument. If the voltage reading is within the limits of a lower range, the
switch then may be set to that range to obtain a more accurate reading.
d. Be sure the power is off in the circuit being measured and all capacitors have
been discharged.
e. Connect the black test lead to the negative side of the circuit being measured
and red test lead to the positive side of the circuit.
f. Turn on the power of the circuit and read the voltage of the black scale marked
DC. For the 2.5V and 25V ranges, use the 0-250 figures and divide the read-
ing by 100 and 10 respectively. For the 10V and 250V ranges, read the 0-10
and 0-250 figures directly. For the 500V range, use the 0-50 figures and
multiply the reading by 10. For the 100V range use the 0-10 figures and
multiply by 10. For the 1V range, use the 0-10 figures and divide by 10.
g. Turn the power off, disconnect test leads and return the range switch to the
OFF/TRANSIT position.
4.4.3 Measuring DC Voltage: 0-1000V
!
Use extreme care when working with high voltage circuits. For maximum safety,
avoid touching the Instrument or test leads while power is on in the circuit being
measured.
a. Set the function switch to +DC.
b. Set the range switch to 1000V (dual position with 500V).
c. Be sure the power is off in the circuit being measured and all capacitors have
been discharged.
14
3. CONTROLS, CONNECTORS & INDICATORS
All operating and adjustment controls, connectors and indicators are described in
this section along with a list (Table 3-1) describing their function. Become familiar
with each item prior to operating the Instrument.
3.1 Front Panel
The 260 has a large, easy-to-read, 4-1/2” indicating instrument. Below the indicating instrument are three controls and seven circuit jacks. Switch positions and
circuit jacks are marked in white, blue, green and red characters printed on a
subsurface vinyl panel overlay. The colors on the overlay correspond to the dial
graphics.
Table 3-1. Controls and Connectors
1. Range Switch: The range switch has 18 positions. It may be turned to any
position from either direction. There are seven voltage positions, four direct current, six resistance and an OFF/TRANSIT position. Two of the resistance positions are for Low
Power Ohms.
2. Function Switch: The function switch has three positions: -DC, +DC and AC.
To measure DC current or DC voltage, set the function switch
at -DC or +DC, depending on the polarity of the signal applied across the test leads. For resistance measurements,
the switch may be in either the +DC or -DC position. The
function switch can reverse the test leads without need for
removing the test leads from the circuit under test. To measure AC voltage, set the function switch into its AC position.
4.
L.P.
RESET
2.
ALL TERMINAL 1KV MAX.
COMMON
Rx1
5A
1V DC
+DC
DC
AC
2.5V
AMP-CLAMP
10V
25V
50uA
100V
250V
500V
1000V
+
OFF
TRANSIT
Figure 3-1. Front Panel
11
L.P.
Rx10
Rx1
Rx100
Rx1K
Rx10K
0.5mA
5mA
AMPS
50mA
500mA
1.
+50 uA
250 mV
OUTPUT
350 VCD
MAX.
OHMS ADJ.
+5A
1000 V
AC DC
3.
Page 12

3. Ohms Adjust: The ohms adjust control is a variable resistor in the ohmmeter circuit, which permits adjustment at infinity () and at
0 for the low power and conventional ohms ranges, respectively.
4. Circuit Jacks: There are seven jacks on the front panel marked with the
functions they represent. These are the connections for the
test leads. The elbow prods of the test leads are plugged
into the proper jacks for the circuit and range desired for
each application. At the lower left are -COMMON and +
jacks. The black test lead is connected to -COMMON for all
circuits and ranges except the 5A, DC range. The red test
lead is used in the + jack for all functions and ranges, except those designated by the other jacks. Across the top of
the panel are three jacks individually marked -5A, dual marking of +50 µA/250 mV at a single jack, and +5A.
For the 50 µA or 250 mV DC range, the red test lead is
connected to this dual-marked jack. For the 5A DC range,
the blacktest lead and the red test lead are connected to
the -5A and +5A jacks, respectively. At the lower right are
the OUTPUT and 1000V jacks. For all output ranges and
for 1000V AC or DC, the red test lead is connected to the
appropriate jack with black lead in the left of the -COMMON
jack.
e. Do not measure in a circuit where corona is present. Corona can be identi-
fied by a pale blue color emanating from sharp metal points in the circuit, or
by a buzzing sound, or by the odor of ozone. In rare instances, such as
around germicidal lamps, ozone might be generated as a normal function.
Ordinarily, the presence of ozone indicates the presence of high voltage and
probably an electrical malfunction.
f. Hands, shoes, floor and workbench must be dry. Avoid making measure-
ments under humid, damp or other environmental conditions that could affect
the dielectric withstanding voltage of the test leads or the Instrument.
g. For maximum safety, do not touch test leads or Instrument while power is
applied to the circuit under test.
h. Use extreme caution when making measurements where a dangerous com-
bination of voltages could be present, such as in an RF amplifier.
i. Do not make measurements using test leads of lesser safety than those origi-
nally furnished with the Instrument.
j. Do not touch any object which could provide a current path to the common
side of the circuit under test or power line ground. Always stand on a dry
insulated surface capable of withstanding the voltage being measured.
k. Do not connect to an electrically energized circuit in a hazardous area.
l. No General Purpose VOM is to be used to make electrical measurements on
blasting circuits or blasting caps.
4.2 Adjust Pointer for Zero
4. OPERATION
This section of the manual contains information required to use and operate the
260 in a safe and proper manner.
!
Before proceeding with the operation of the 260, review the SHOCK HAZARD
definition printed at the beginning of the manual. Do not use the Instrument and
its accessories on induction heating, x-ray machines, or power substations where
high voltage and low impedance equipment is used.
4.1 Safety Precautions
a. The 260 should only be used by personnel qualified to recognize shock haz-
ards and trained in the safety precautions required to avoid possible injury.
b. Do not work alone when measuring circuits where a shock hazard might ex-
ist. Notify a nearby person that you are making, or intend to make such measurements.
c. Locate all voltage sources and accessible current paths before making mea-
surement connections. Be sure that the equipment is properly grounded and
the right rating and type of fuse(s) is installed. Set the Instrument to the
proper range before applying power. Voltage might appear unexpectedly in
defective equipment. An open bleeder resistor can result in a capacitor retaining a dangerous charge. Turn the power off and discharge all capacitors
before connecting or disconnecting the Instrument.
d. Inspect the test leads for cracks, breaks or crazes in the insulation, probes
and connectors before each use. If any defects are noted, replace the test
leads immediately.
12
With the Instrument in the operating position, check the pointer for zero indication
at the left end of the scale when there is no input. If pointer is off zero, adjust the
screw located in the meter cover below the center of the dial. Use a small screwdriver to turn the screw slowly clockwise or counterclockwise until the pointer rests
freely over the zero mark at the left end of the scale. This procedure will avoid
disturbances to the zero setting by subsequent changes in temperature, humidity,
vibration and other environmental conditions.
4.3 Polarity Correction
When making DC measurements with the test leads connected to the + and COMMON jacks, polarity can be reversed with the function switch without reversing the test leads. When making measurements of the 50 µA/250 mV range, or 5
A range, polarity can be corrected only by reversing the test leads.
NOTE: Change the range switch or function switch positions only when the power
to the circuit being measured is turned off or when the test leads are disconnected. In addition to ensuring safety, this practice will eliminate arcing at switch
contacts and prolong the life of the Instrument.
4.4 DC Voltage Measurement
!
Prior to making voltage measurement, review the SAFETY PRECAUTIONS listed
in paragraph 4.2.
13
 Loading...