

Page 1
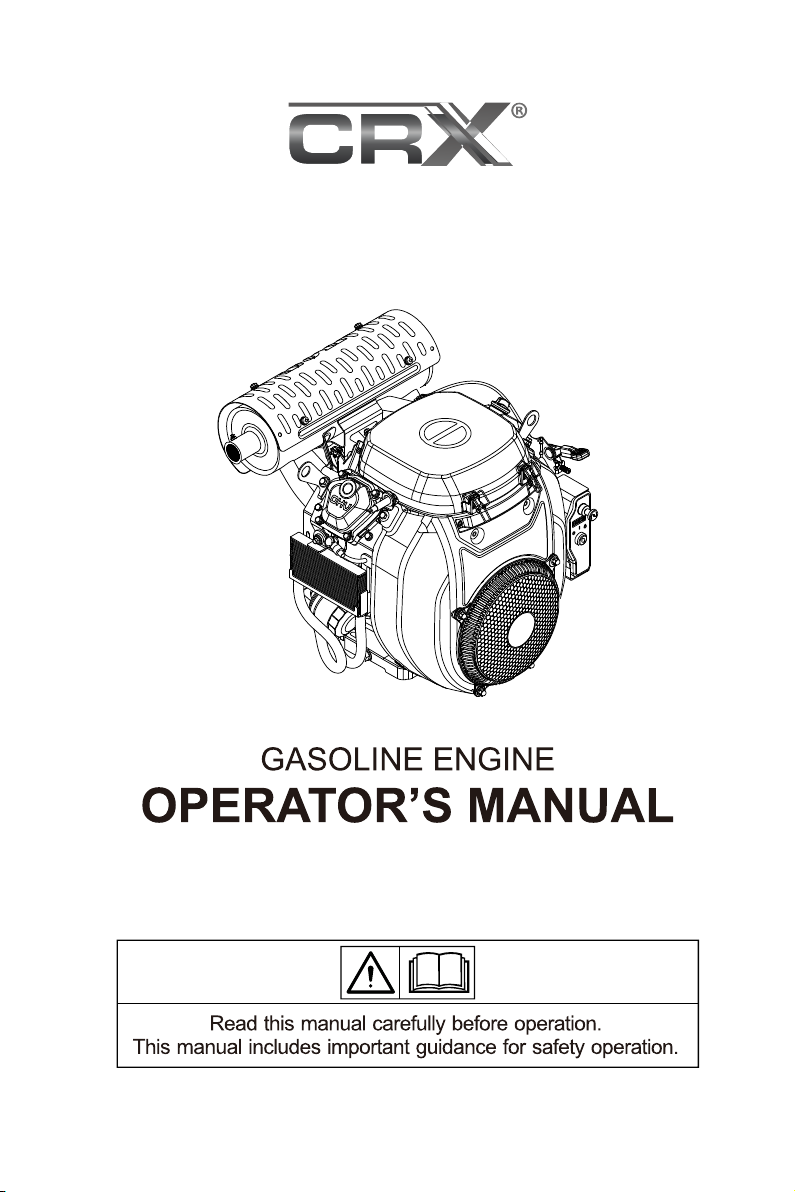
CRX680/CRX750
If your engine is not working properly or if there are parts missing or broken,
please DO NOT RETURN IT TO THE PLACE OF PURCHASE. Contact our
Customer Service Department at 1-877-362-4271 or [email protected]
7118266 Rev B JULY 2022
Page 2

Page 3
Page 4
Page 5
1-ENG
Page 6
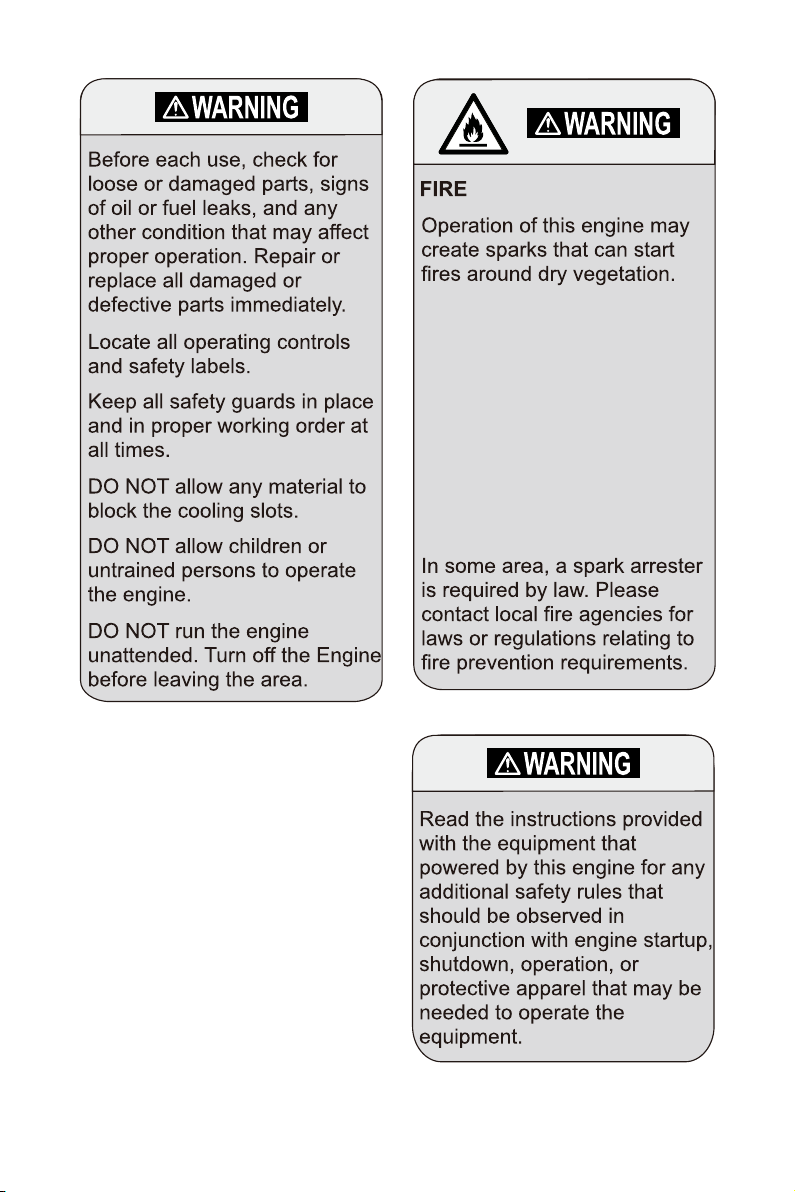
This engine is equipped with a
spark arresting muffler. If the
engine will be used around
flammable materials or on
land covered with materials
such as agricultural crops,
forest, brush, grass or other
similar items, then a USDA
Forest Service spark arrester
must be installed.
2-ENG
Page 7
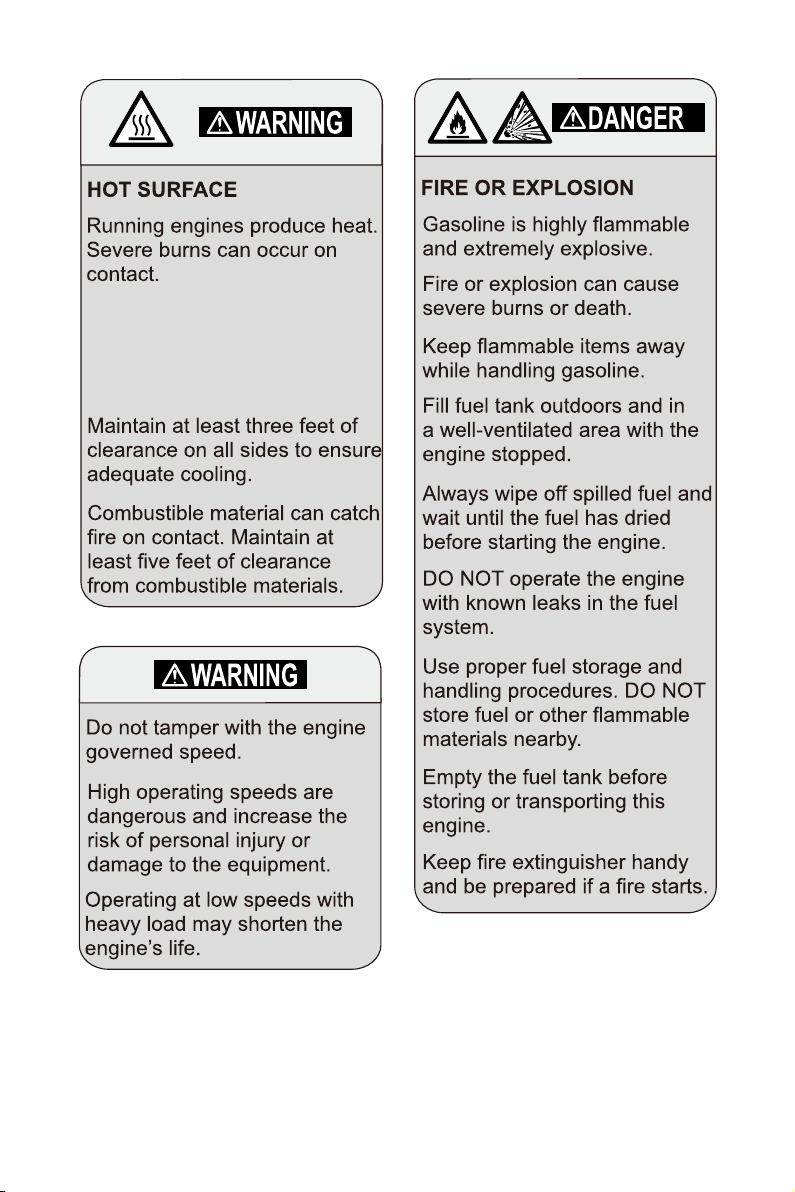
DO NOT touch hot surfaces
while operating or just after
stopping the engine. Avoid
contact with hot exhaust gases.
3-ENG
Page 8

4-ENG
Page 9
5
1
6
2
3
4
7
8
9
10
11
2
12
13
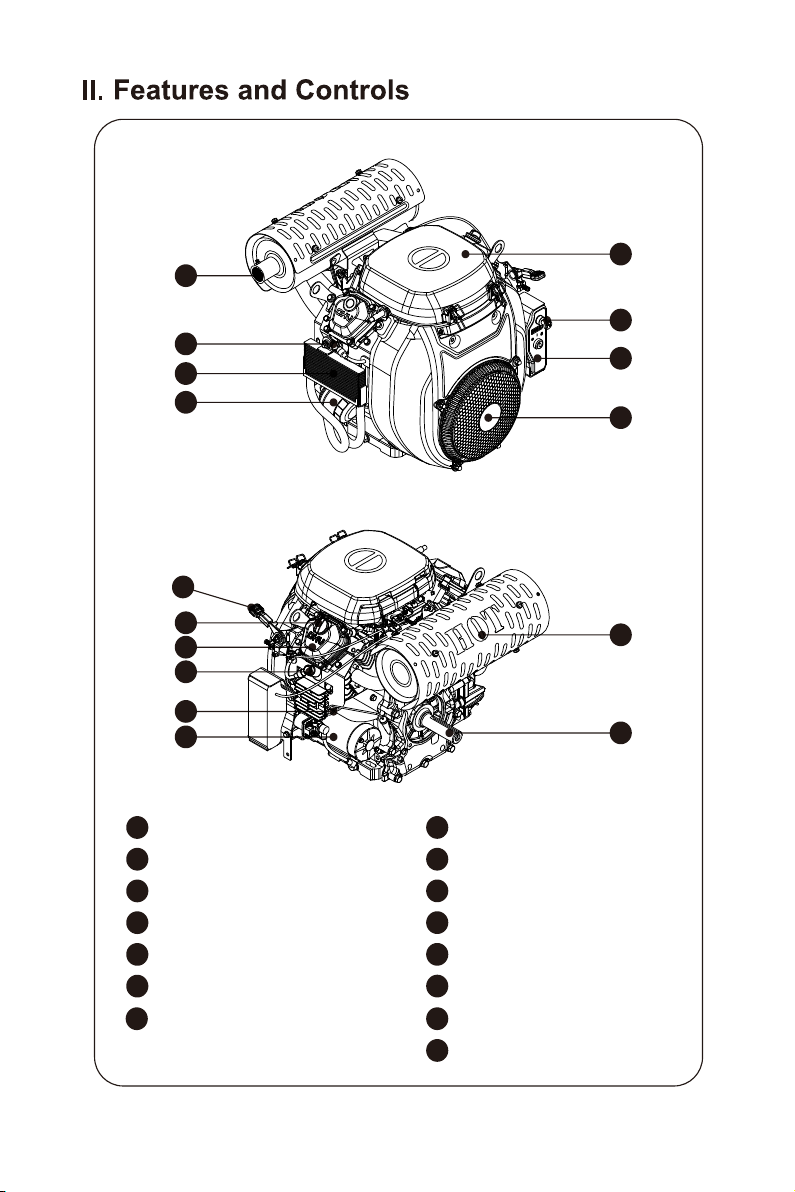
Exhaust port / Spark Arrester
1
2
Spark plug
3
Oil cooler
4
Oil filter
5
Air filter cover
6
Choke control
Control box / Key start /
7
Choke control
8
Static screen
9
Throttle lever(If equipped)
10
Oil fill cap
11
Cylinder head cover
12
Dipstick
13
Starting motor
1415Muffler with heat shield
Crankshaft
5-ENG
14
15
Page 10
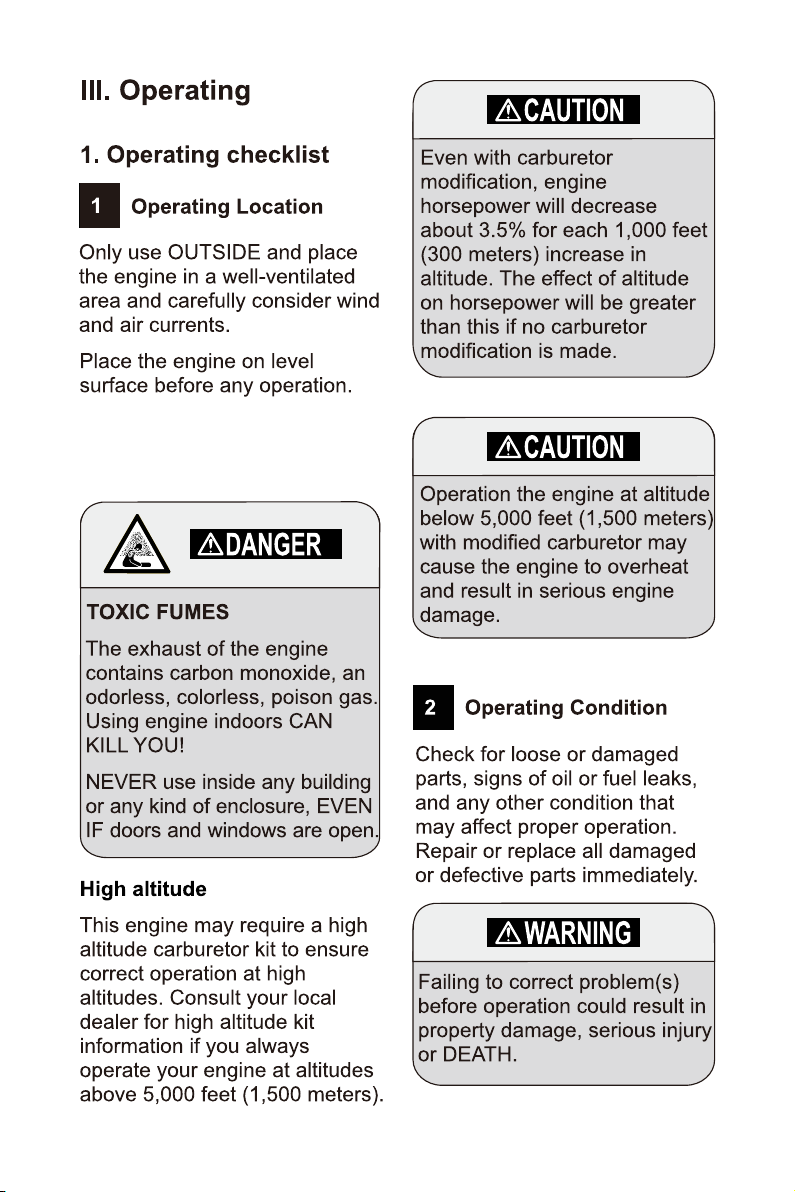
Allow three feet of clearance on
all sides of the engine while
operating it outdoors.
6-ENG
Page 11
Remove any excessive dirt or
debris, especially around the
muffler and static guard.
7-ENG
Page 12
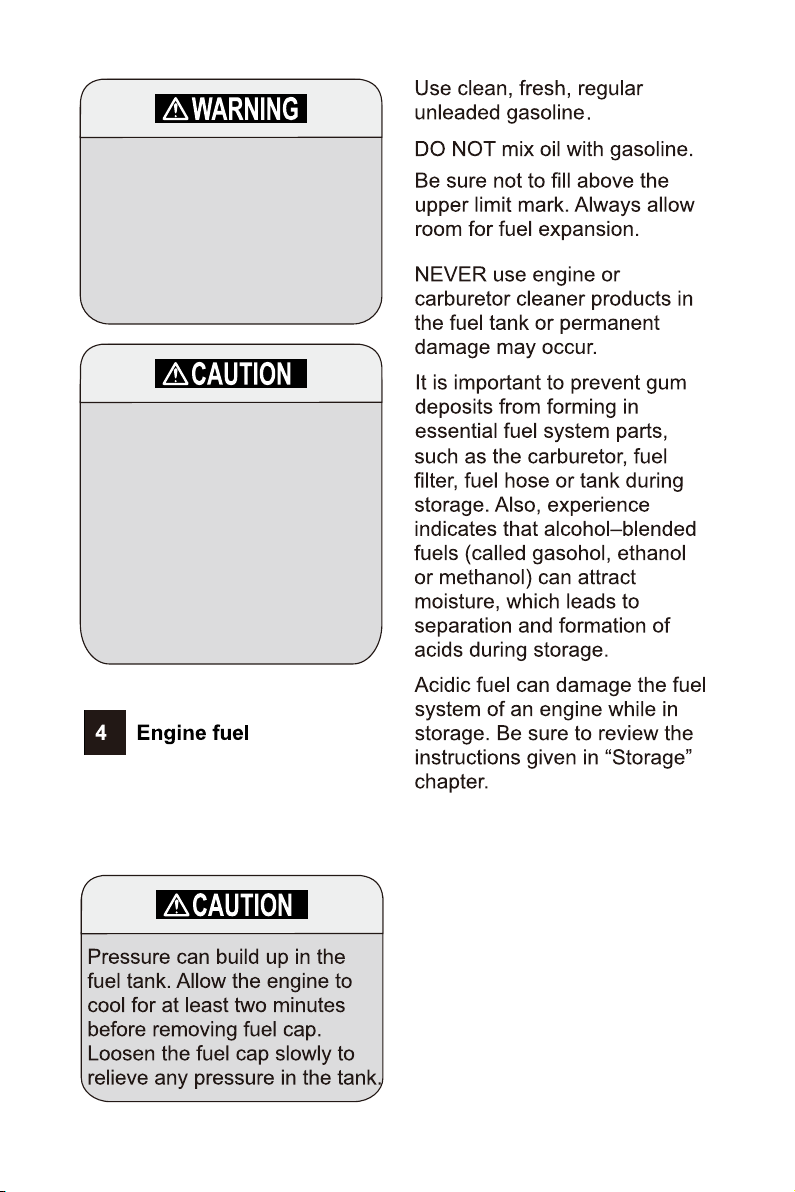
Oil is a major factor affecting
performance and service life.
Use SAE 10W-30 API SG or
newer automotive detergent oil
as recommended in the
MAINTENANCE section of this
manual.
Only run the engine on a level
surface. The engine is
equipped with a low oil level
sensor. The unit will shut off in
the situation where the oil falls
below the proper crankcase
sump level. To avoid
unexpected shutdown, fill the
oil to the upper limit and check
the oil level before each usage.
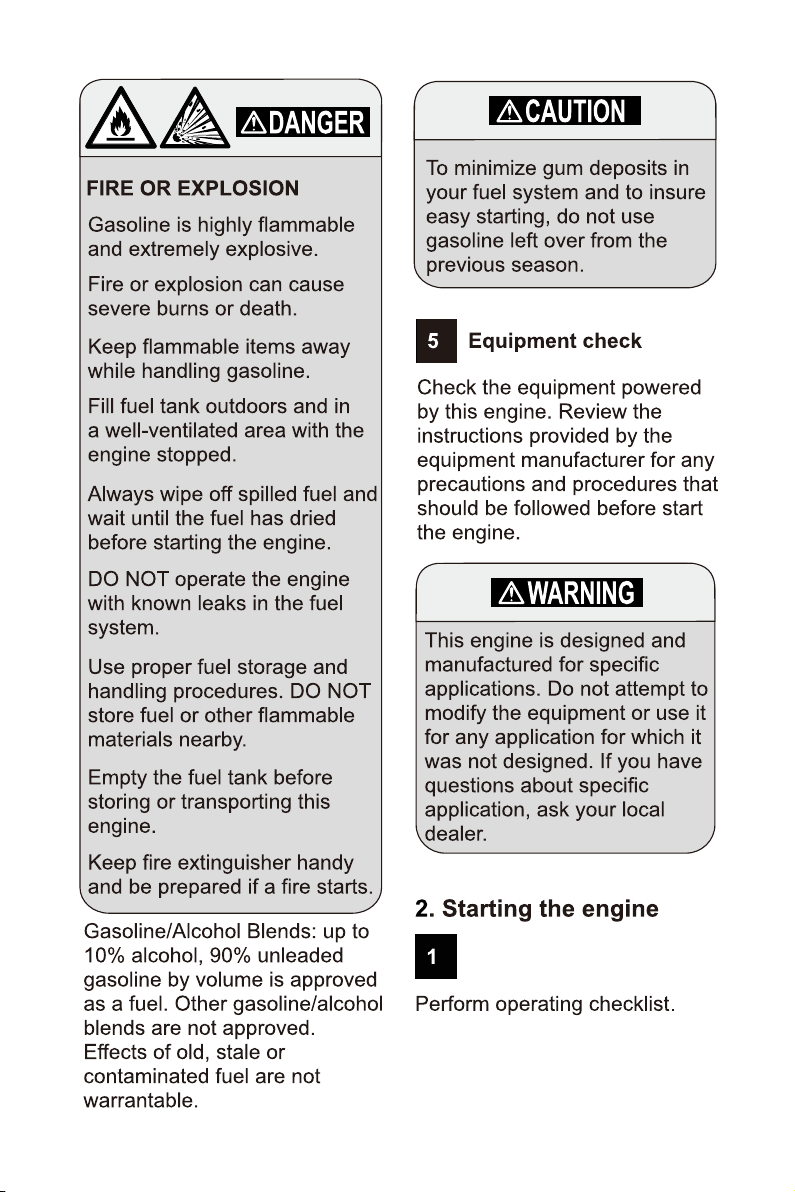
With the engine stopped, check
the fuel level gauge. Refill the
fuel tank (not supplied) if
necessary.
8-ENG
Page 13
9-ENG
Page 14
The starting position of the
choke will vary depending on
the engine temperature. To start
a cold engine, pull the choke
fully to the “CLOSED” position.
If starting a warm engine, move
the choke to the midway
position between “OPEN” and
“CLOSED”.
Move the throttle to the “FAST”
position (if equipped). Turn the
fuel valve to “ON” or “OPEN” (if
equipped).
If the engine fails to start after
three attempts, verify that the
engine is on a level surface
and the oil level is maintained
at the proper level. Check to
verify the fuel valve is open, (if
equipped).
The engine is equipped with a
low oil sensor; a low oil level
will prevent the engine from
starting.
Routinely inspect the oil level
before each usage of the
engine.
Turn the key past the “ON”
position to the “START”
position. After the engine has
started release the key allowing
it to return the “ON” position.
If the starter does not start the
engine, do not continue to crank
the engine as damage to the
starter may occur.
Do not try to continuously
crank the engine for more
than five seconds at one time.
If the engine fails to start,
allow the starter to cool one
minute before trying to restart
the engine. Continuously
trying to start the engine will
damage the starter.
If the engine will not start, allow
it to stop rotating before
attempting to restart the engine.
Should you try to start the
engine while the flywheel is still
rotating may cause damage to
the starter pinion.
10-ENG
Page 15
4
Once the engine starts, push
the choke to the “OPEN”
position. If the engine does not
run smoothly, pull the choke
midway between the “OPEN”
and “CLOSED” positions. As the
engine warms, slowly push the
choke to the fully “OPEN”
position.
On cold engines, pull the
choke fully to the “CLOSED”
position. If starting a warm
engine, move the choke to the
midway position between
“OPEN” and “CLOSED”.
Use the throttle lever (if
equipped) to adjust the engine
speed to the requirement of
your application.
If you have any questions about
using this engine for a specific
application, please review the
product operators manual
and/or contact your local
authorized dealer for
assistance.
11-ENG
Page 16
If you need to stop the engine in
an emergency, simply turn the
key to “OFF”. For a normal
shutdown, first move the throttle
to “SLOW” (if equipped). Allow
the engine speed to slow then
turn the key to “OFF”. If your
fuel system is equipped with a
valve, turn it to “OFF” or
“CLOSED”.
If the engine has any abnormal
noise, severe vibrations,
hunting, popping or any other
abnormal condition while
running, turn the key to “OFF”
before troubleshooting.
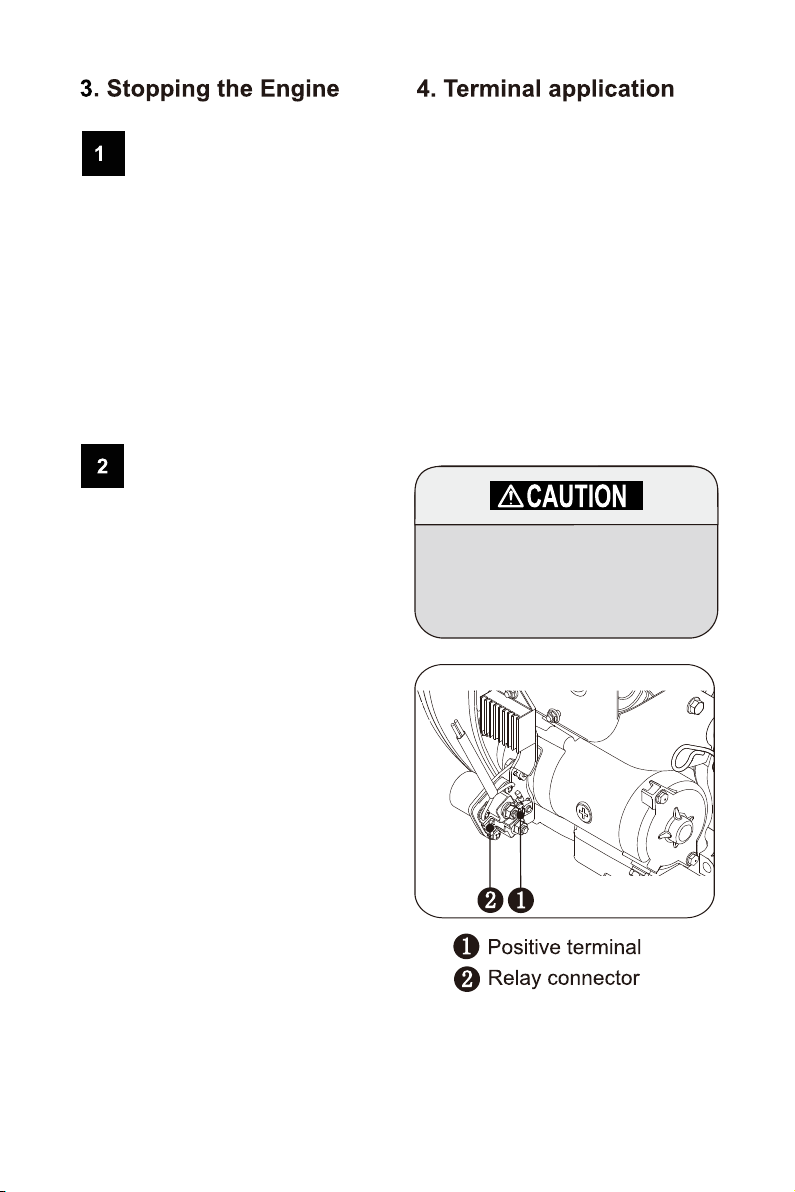
The engine starter requires the
electrical system to be started
or powered by a 12-volt (V)
battery with a minimum capacity
of 21 ampere-hours (Ah). The
positive (+) lead from the
battery connects to the positive
terminal on the starter relay.
Connect the negative (-) lead
from the battery to an engine
mounting bolt, the conductive
frame supporting the engine or
any other engine grounding
point.
DO NOT connect the negative
(-) battery lead to the oil filter
mounting base or any part of
the fuel system.
12-ENG
Page 17
If the engine will not be used for
a period of two months or more,
drain the fuel system into an
approved container. Store the
engine in a cool, dry location.
• Disconnect the black,
negative (-) battery lead.
• See Section VI, Storage and
Transportation.
Accidental starts can cause
severe injury or death. Before
servicing, disconnect the
negative (-) battery lead and
disconnect both spark plug
leads.
Before servicing, disconnect the
negative (-) battery lead and
disconnect both spark plug
leads. Allow the engine to cool if
hot.
13-ENG
Page 18
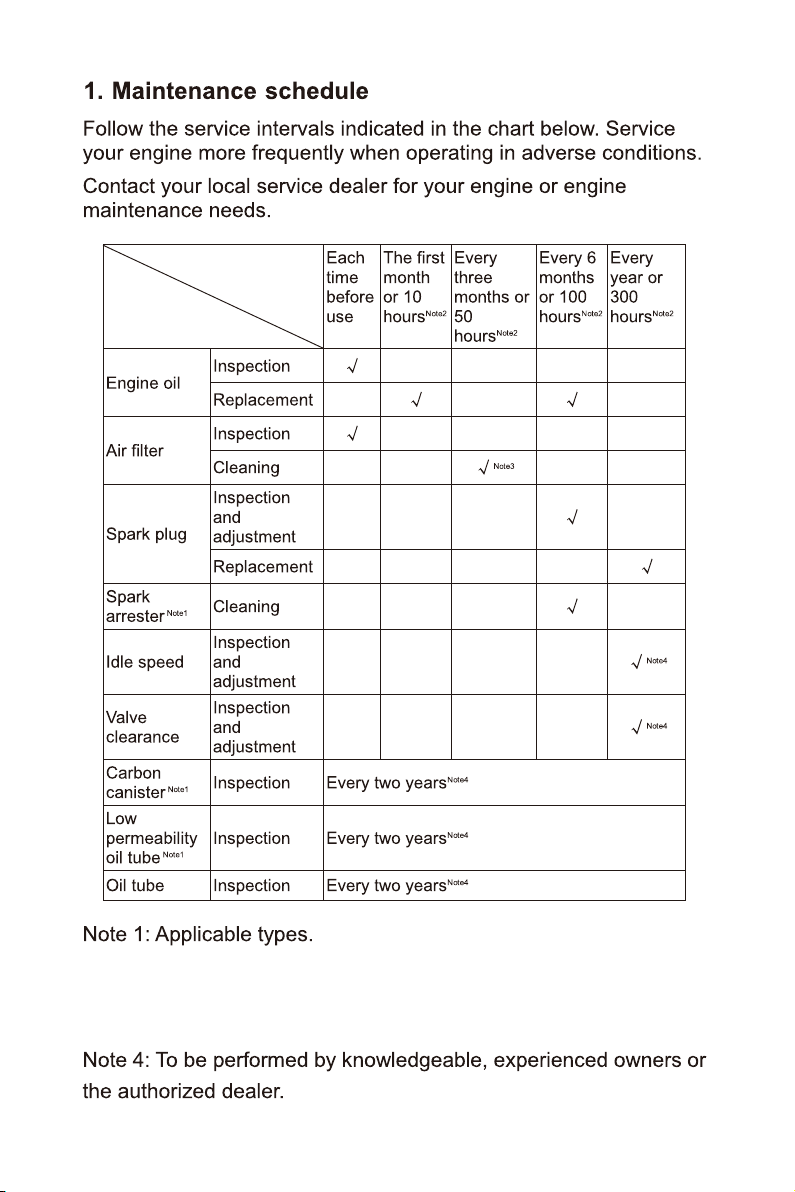
Note 2: Before each season, then follow the prescribed service interval.
Note 3: Service more frequently when operating the engine under
severe, dusty and/or dirty conditions.
14-ENG
Page 19
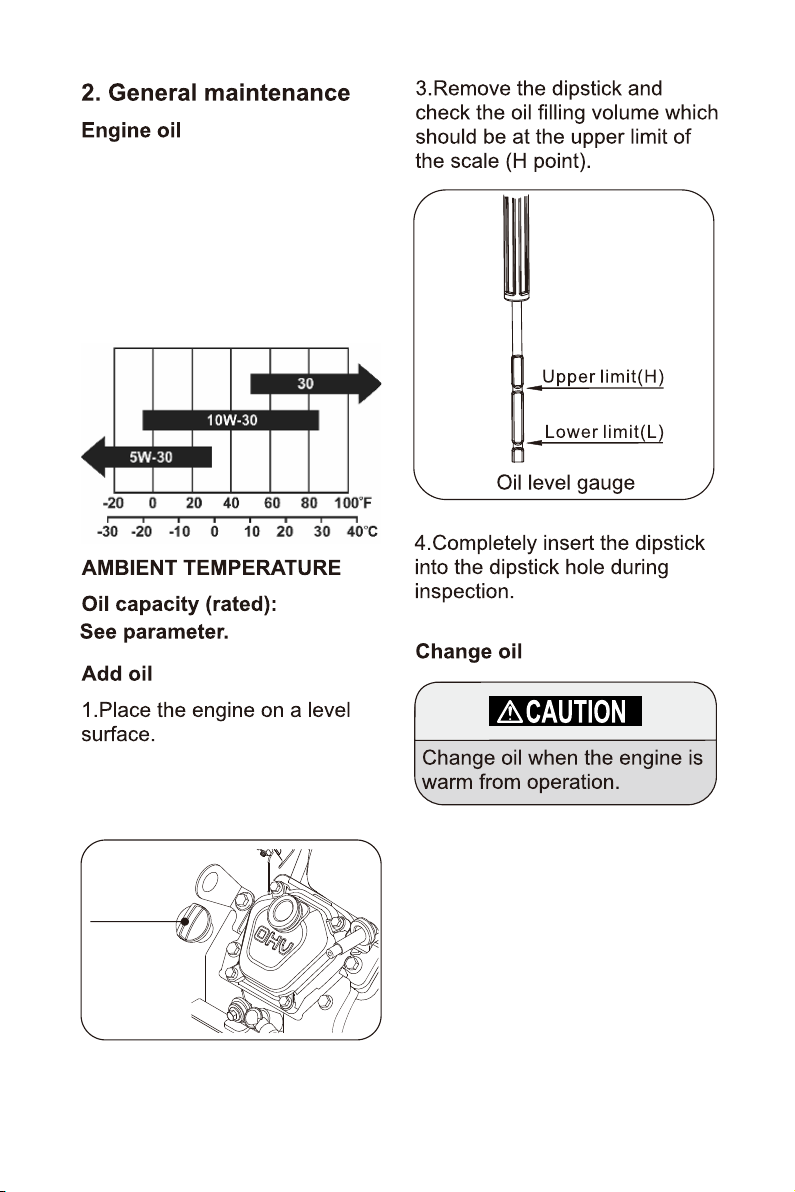
SAE 10W-30 API SG or newer
automotive detergent oil is
recommended for general, all-
temperature use. Other
viscosities shown in the chart
may be used when the average
temperature in your area is
within the indicated range.
2. Remove the oil fill cap. Fill
using oil of the proper
recommended type.
Oil fill cap
To change the oil, it is
recommended to allow the
engine to run for a few minutes
to warm the oil. This will ensure
the used oil will drain the engine
completely.
15-ENG
Page 20
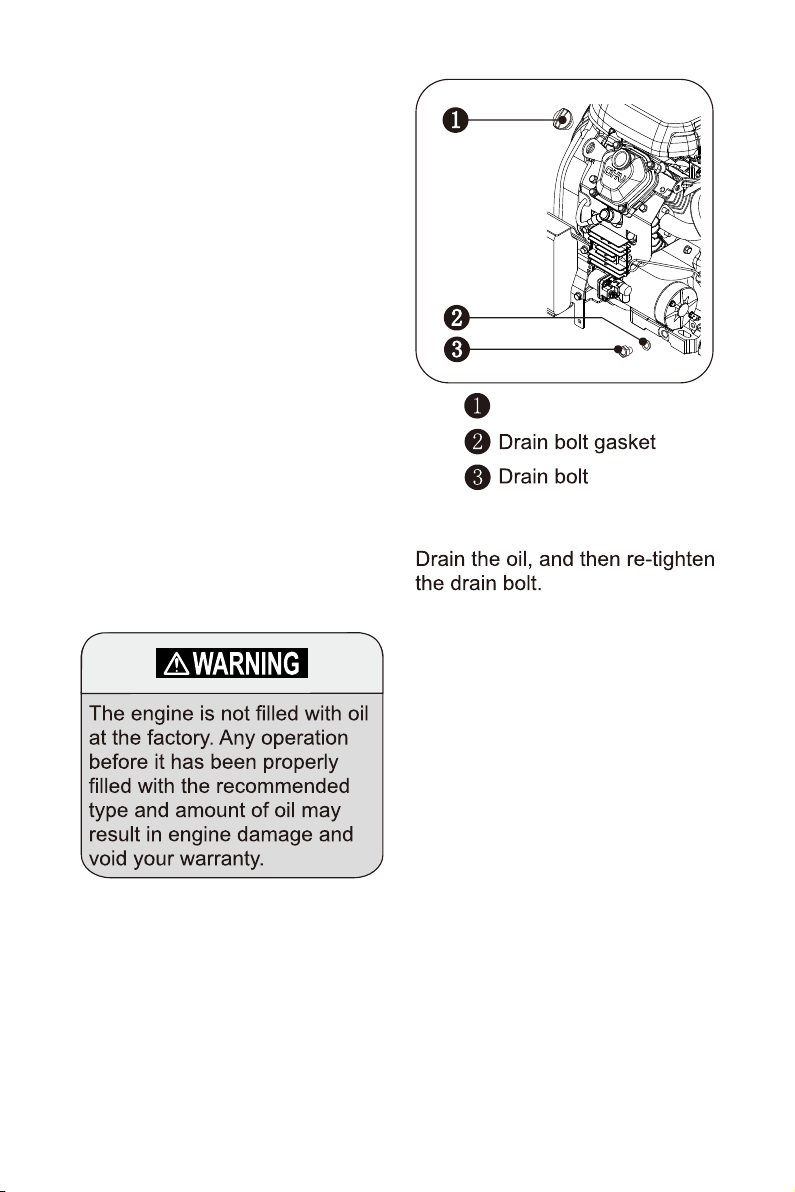
1. Place an appropriate
container below the oil drain
bolt. Remove the oil filler cap.
Next, using a wrench, loosen
the drain bolt counterclockwise.
Once loose, fully unthread the
bolt with your fingers removing
it and the bolt gasket.
2. When the oil is completely
drained, inspect the drain bolt
gasket for damage; replace if
required. Hand thread the drain
bolt. Using a wrench, tighten
until snug.
3. Ensuring the engine is on a
level surface, use the
recommended grade of oil to fill
the engine to the upper limit of
the dipstick. Do not overfill.
4. Return and tighten the oil fill
cap.
Oil fill cap
Replacing the oil filter
1. Using an oil filter removal
wrench, loosen the filter and
remove. Pour the oil contained
in the filter into the pan of waste
oil.
Promptly clean up any spilled oil
on the engine or the
surrounding area. Clean your
hands with soap and warm
water.
Only dispose of the waste oil at
a local waste oil recycler.
2. Clean any waste oil or debris
from the oil filter port. Using
fresh oil, lubricate the seal on
the new oil filter.
3. Tighten the filter by hand or
as per the filter instructions.
4. Ensuring the engine is on a
level surface, use the
recommended grade of oil to fill
the engine to the upper limit of
the dipstick. Do not overfill.
16-ENG
Page 21
The air filter element and filter
container may contain
Polycyclic Aromatic
Hydrocarbons (PAHs). Some
PAHs may cause cancer. To
avoid exposure to PAHs, wear
gloves when performing air
filter maintenance.
5. Paper filter element: Brush
way any debris thoroughly
before reinstalling the filter.
Replace the element if it is
heavily soiled.
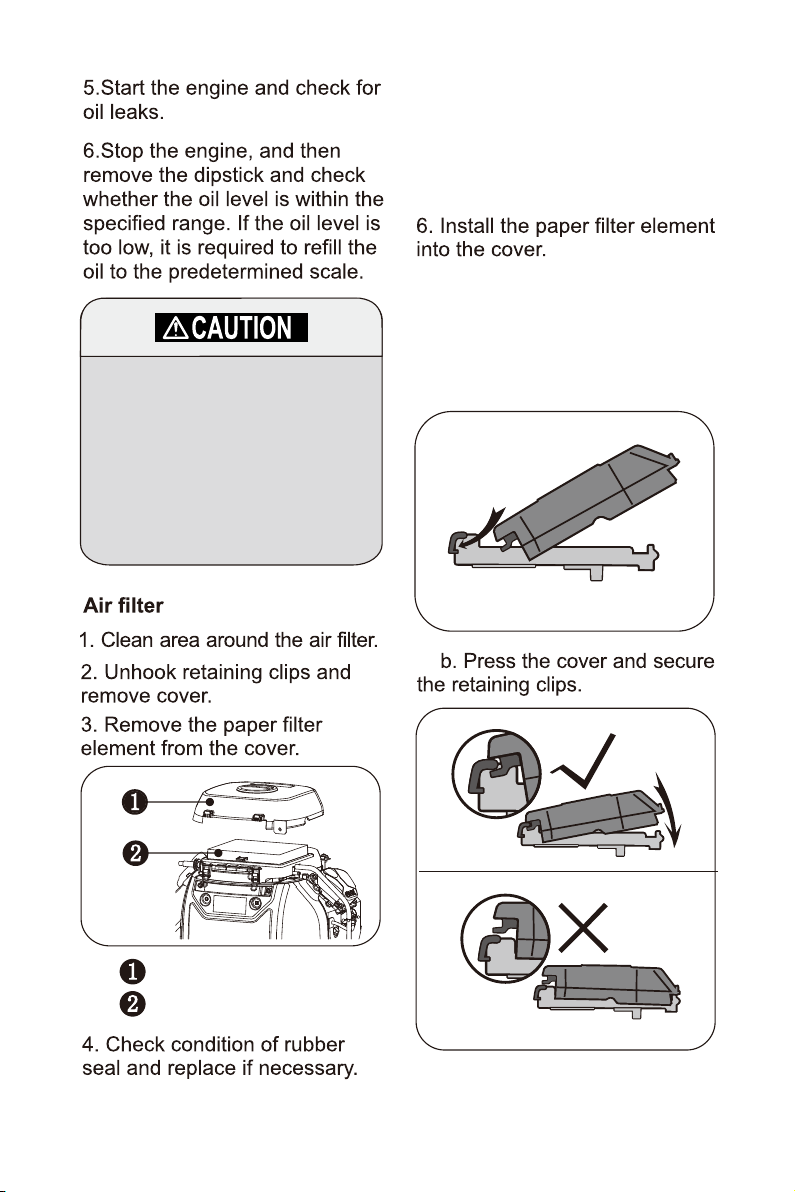
7. Reinstall air filter cover: a.
Lean the cover against the base
as illustrated below. Push the
cover forward until the tabs slip
into the mating slots.
Air filter cover
Paper filter
17-ENG
Page 22
The air cleaner is a critical
emission related component
and should not be altered or
modified in any way.
Operating the engine with
loose or damaged air cleaner
components could cause
engine wear and failure, and
invalidate your warranty.
Do not run the engine when
the paper element is not
installed; otherwise, this may
cause damage to the engine.
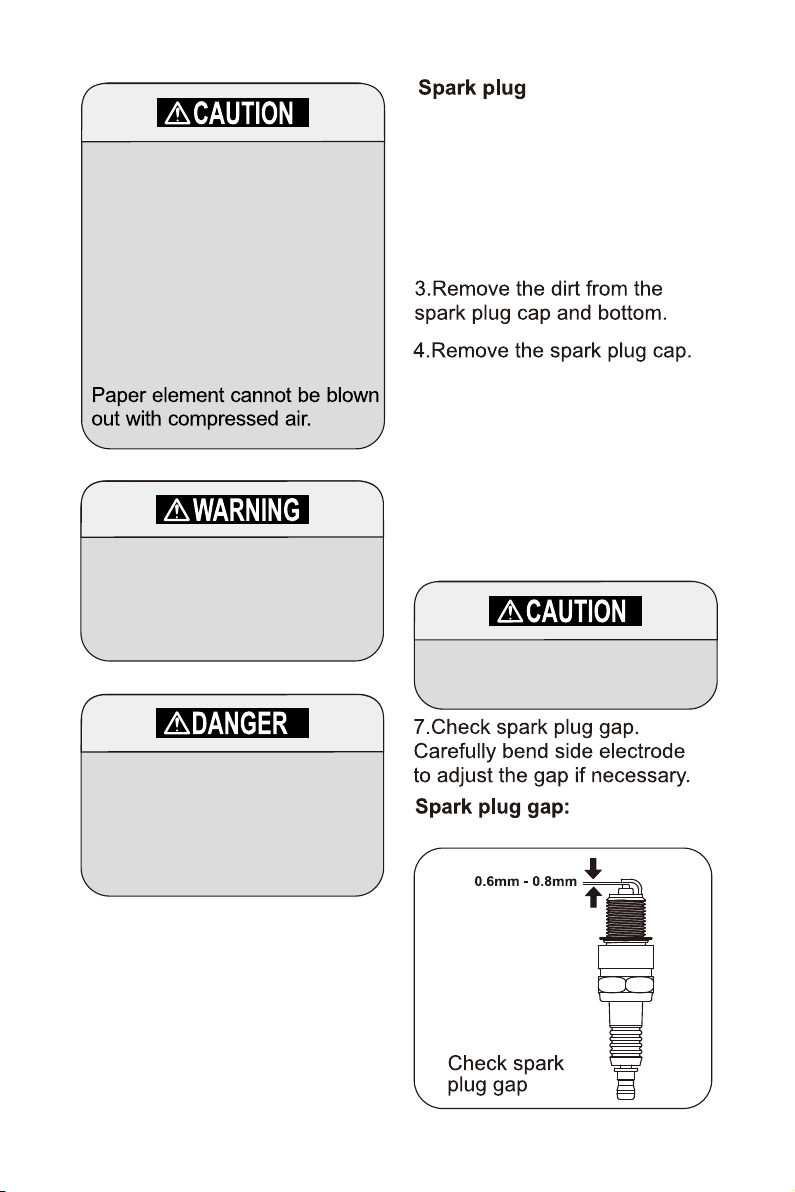
1.Recommended spark plugs:
F6RTC. Always replace the
spark plugs in pairs.
2. Use of a non-recommended
spark plug style may cause
damage to the engine.
5. Use a spark plug wrench or
socket of the proper size to
loosen the spark plugs for
removal or reinstall.
6. Inspect the spark plug and
the spark plug washer. Replace
the plug if it or the washer are
damaged.
Always replace both spark
plugs at the same time.
Never use gasoline or a
flammable solvent to clean
the filter housing. Use of any
flammable agent may cause
an explosion.
0.024 – 0.031” (0.6 – 0.8mm)
18-ENG
Page 23
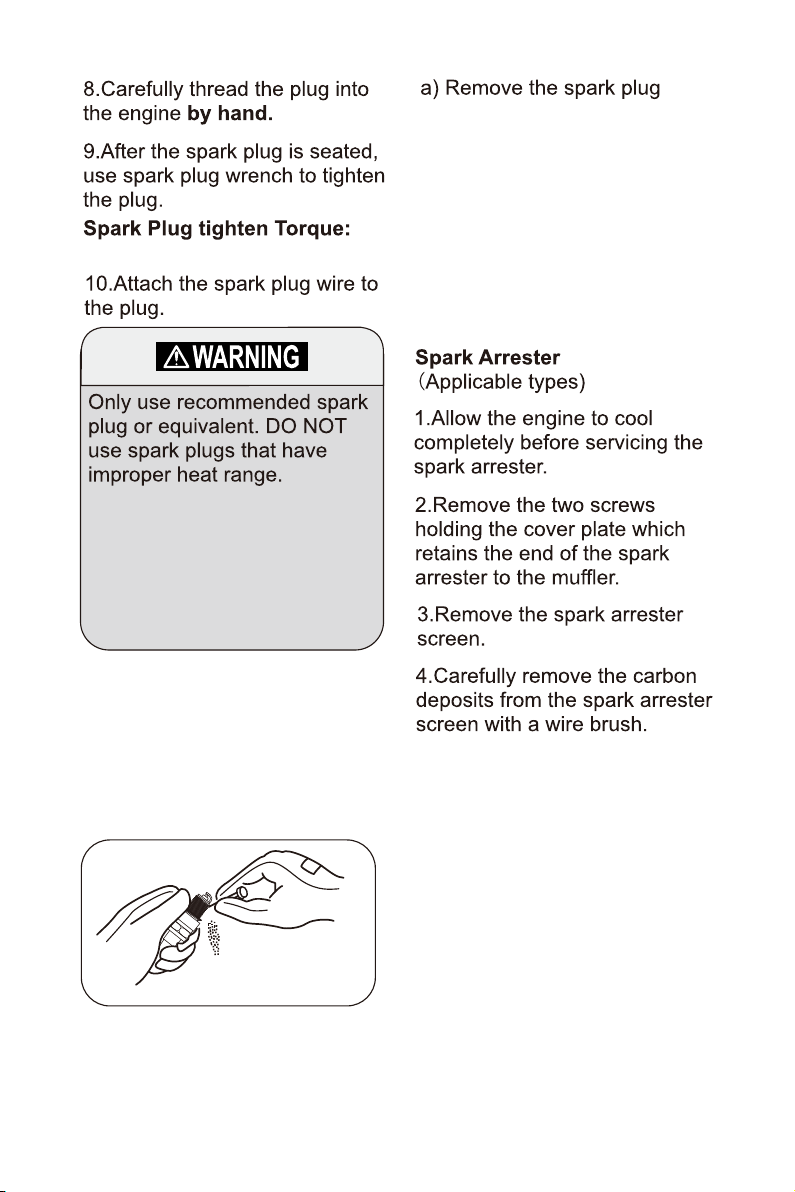
15-18 ft. lb. (20 – 25 N.m)
The spark plugs must be
tightened to the proper torque.
Loose spark plug(s) will cause
compression leaks leading to
hard starting and decreased
engine power.
To ensure proper operation of
the engine, the spark plug gap
must be maintained and be free
of deposits. Clean the spark
plug according to the steps
shown below.
b) Slight amount of buildup on
the electrodes can be cleaned
with a wire brush. Replace the
plug if heavily soiled. Spark
plug(s) that look wet, oily or
have extreme electrode wear
indicate the engine needs to be
serviced by a trained small
engine technician.
19-ENG
Page 24
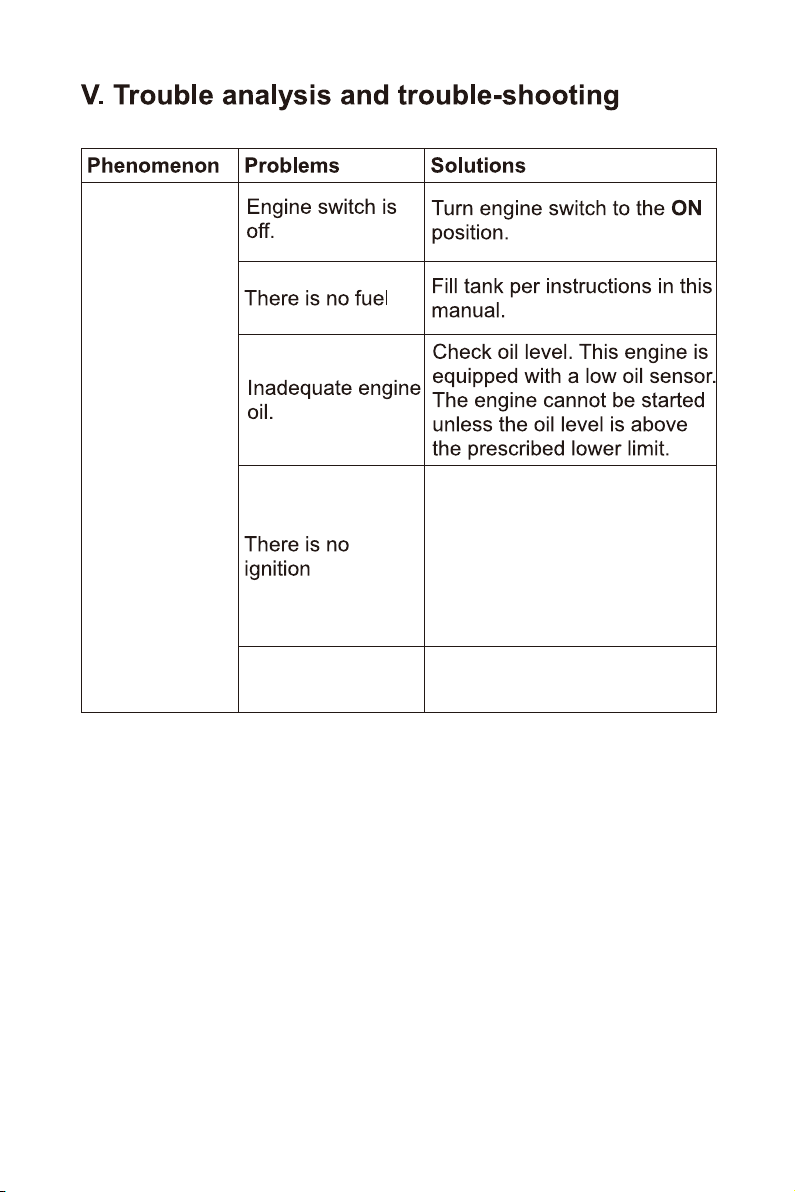
Engine will
not start
Using an external spark
tester, assure that both
cylinders have proper spark.
If the spark is weak or
missing from one or both
cylinders, contact your local
authorized service dealer.
Choke is open
Close choke then repeat the
starting process.
If your engine is not working properly or if there are parts missing or
broken,please DO NOT RETURN IT TO THE PLACE OF
PURCHASE. Contact our Customer Service Department at 1-877-
362-4271 or [email protected].
20-ENG
Page 25
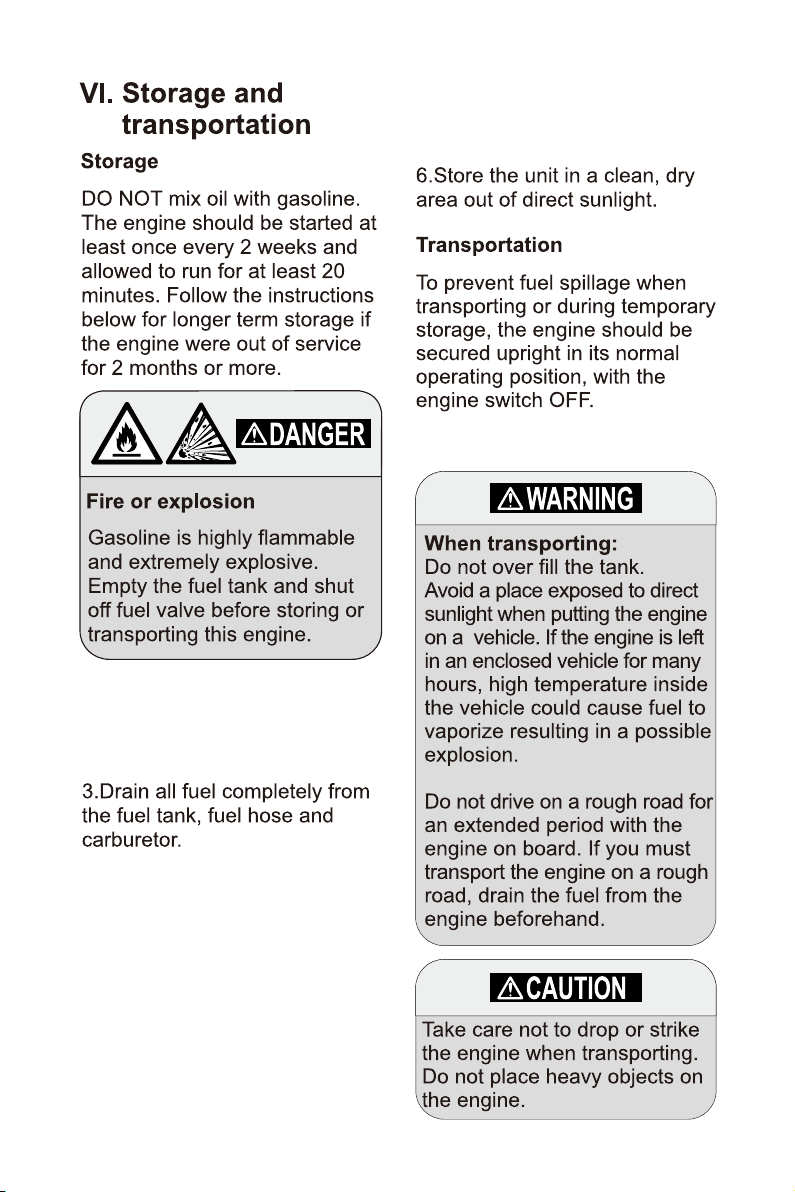
5. Disconnect the negative (-)
battery lead. Wipe the engine of
any dirt and debris.
Turn the fuel valve to “OFF” or
“Closed” (if equipped).
1. Allow a hot engine to cool.
2. Change the oil while the
engine is warm.
4. Remove both spark plugs
and pour 1oz. of engine oil into
the cylinders. Reinstall the
spark plugs but do not connect
the spark leads. Turn the engine
over for one second by rotating
the key to “START”. Connect
the spark leads.
21-ENG
Page 26
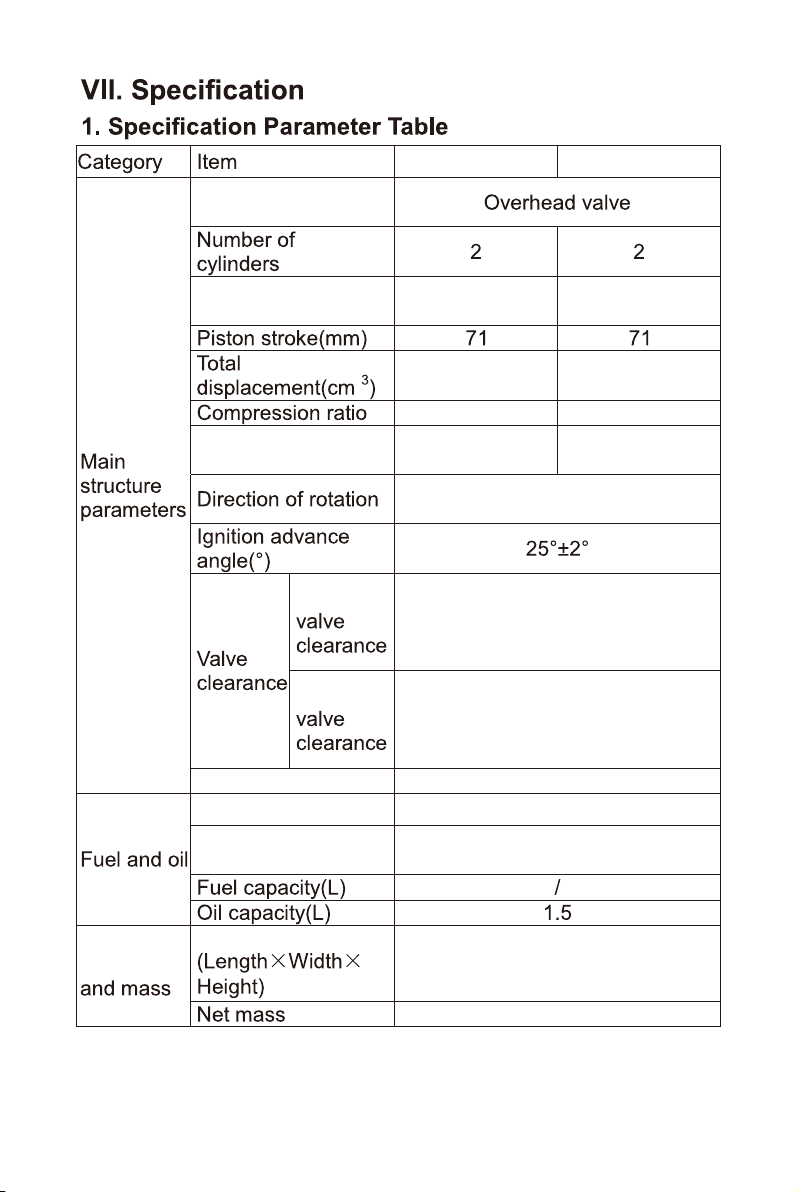
Type
CRX680
CRX750
Piston
diameter (mm)
Rated power (kW)
net
Intake
Exhaust
Spark plug gap
Oil
Fuel
78
679
8.5:1
CI 14.5/3600 per
SAE J1349 Net Power
SAE J1349 Net Power
82
750
8.8:1
CI 16.0/3600 per
Counterclockwise
(While viewing the PTO)
0.004 – 0.006”
(0.10 – 0.15mm)
0.006 – 0.008”
(0.15 – 0.20mm)
0.024 – 0.031” (0.6 – 0.8mm)
SAE 10W-30 API SG or newer
Regular gas
Dimension
Dimension
19.64 x 21.14 x 18.23”
(499 x 537 x 463mm)
110.2lbs (50.0kg)
Note: Engine data may be updated at any time without notice or
obligation. Please contact your local authorized dealer for engine
information.
22-ENG
Page 27
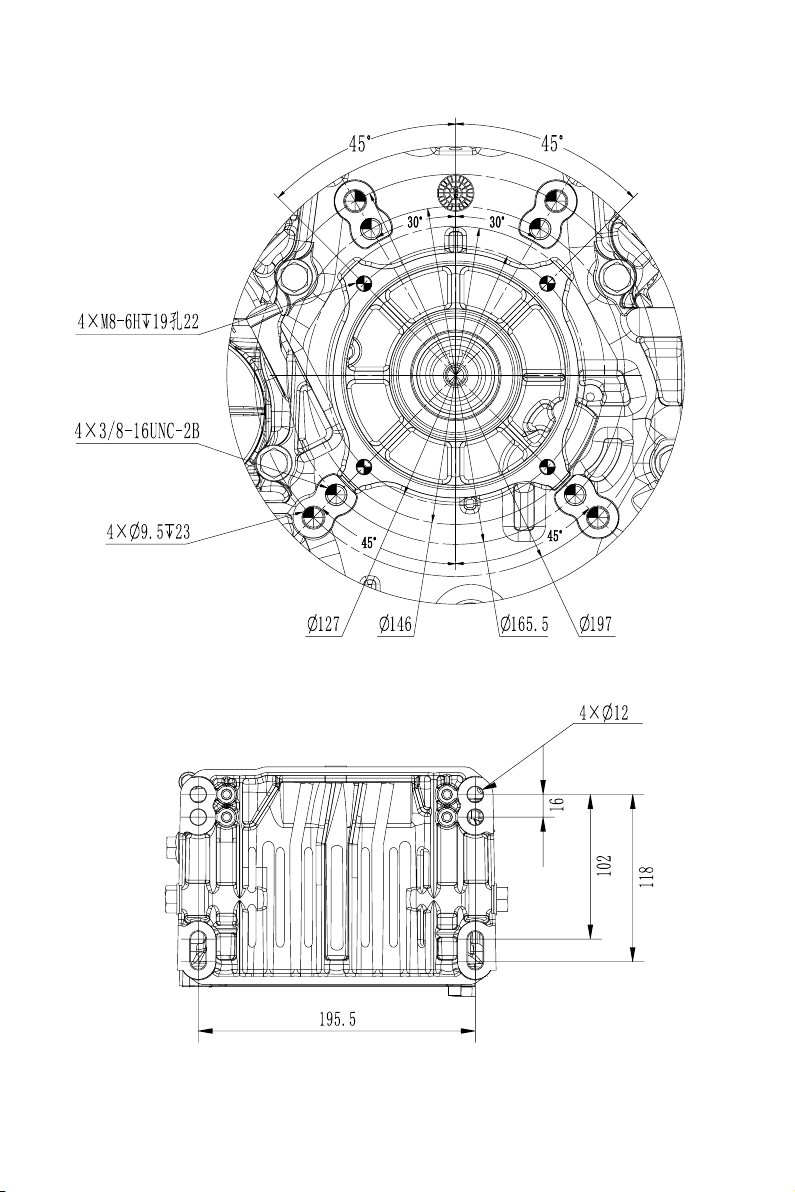
2.Case cover installation dimension
23-ENG
Page 28
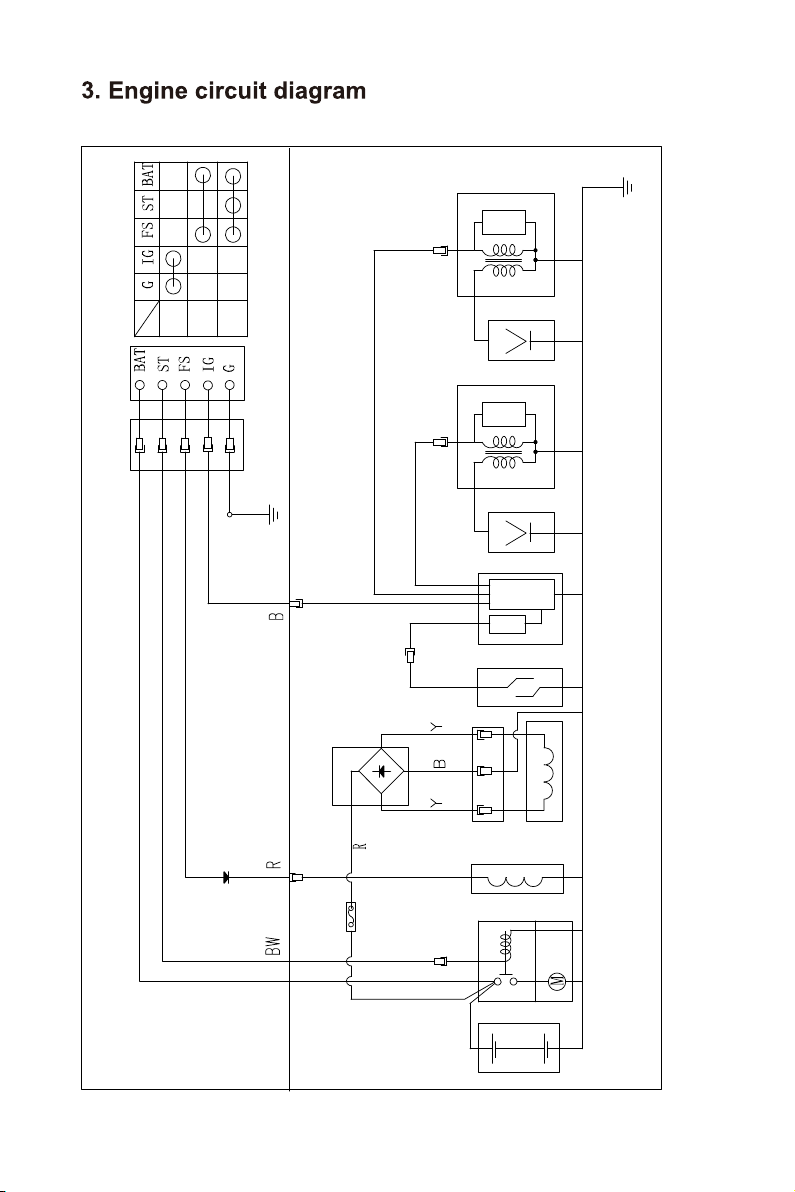
CRX680/CRX750 electrical schematic
ON
OFF
START
Engine control switch
coil
Ignition
plug
Spark
coil
Ignition
plug
Spark
Oil
alarm
sensor
Oil
sensor
pressure
30A Fuse
24-ENG
coil
Charge
Fuel
valve
supply
relay
Starter
Battery
Page 29

3 YEAR COMMERCIAL LIMITED WARRANTY
WARRANTY COVERAGE TERMS:
The manufacturer of this product agrees to repair or replace designated parts that prove
defective within the warranty period listed below at the manufacturer’s sole discretion. Specific
limitations/extensions and exclusions apply.
This warranty covers defects in material and workmanship and not parts failure due to normal
wear, depreciation, abuse, accidental damage due to chemical deterioration, scale buildup, rust
corrosion or thermal expansion, negligence, improper use, maintenance, water quality or
storage. To make a claim under the terms of the warranty, all parts said to be defective must be
retained and available for return upon request to a designated Warranty Service Center for
warranty inspection. The judgments and decisions of the manufacturer concerning the validity
of warranty claims are final.
These warranties pass through to the end user and are non-transferable. As a factory
authorized and trained Warranty Service Center, the factory will honor the terms of all
component warranties and satisfy claims of the appropriate warranty provisions.
Normal wear items include, but are not limited to, spark plugs, carburetor adjustments, ignition
adjustments, filters, oil changes, recoil starter ropes, electric motor brushes, cotter pins,
gaskets, valves, pistons or any other parts considered to be wear items, which are not covered
by this warranty. The foregoing warranty is exclusive and in lieu of all other warranties whether
written, oral, expressed, or implied. There are no warranties of merchantability or fitness of any
product for a particular purpose. The FNA Group’s only liability shall be the repair or
replacement of parts as stated above. In no event shall the FNA Group be responsible for any
losses or damages that are indirect, consequential, punitive, special, exemplary, or for
economic loss, commercial loss, lost revenues, lost profits, or lost business opportunities,
regardless of whether such liability is based on breach of contract, tort, strict liability, breach of
warranties, failure of essential purpose or otherwise, or is a direct result of the FNA Group’s
own actions or inactions. Because some states do not allow limitations on how long an implied
warranty lasts, the above limitation may not apply to you.
The FNA Group assumes no responsibility for incidental, consequential, or other damages
including,but not limited to, expenses related to transporting the product to or from an
authorized service, a mechanic’s travel time, any telephone or communication charges, the
rental of a like product while the warranty service is being performed, any other travel time or
expenses, loss or damage to personal property, loss of revenue, loss of use of the product, loss
of time, or any other inconvenience. Some states do not allow the exclusion or limitation of
incidental or consequential damages, so the above limitation or exclusion may not apply to you.
This warranty replaces all other warranties, express or implied, including without limitation any
warranties of merchantability or fitness for a particular purpose and all such warranties are
hereby disclaimed and excluded by the manufacturer. The manufacturer’s warranty obligation is
limited to repair and replacement of defective products as provided herein and the
manufacturer shall not be liable for any further loss, damages, or expenses - including
damages from shipping, accident, abuse, acts of God, misuse, or neglect. Neither is damage
from repairs using parts not purchased from the manufacturer or alterations performed by non-
factory authorized personnel. Failure to install and operate equipment according to the
guidelines put forth in the instruction manual shall void warranty.
RESPONSIBILITY OF ORIGINAL PURCHASER (INITIAL USER):
To process a warranty claim, report the concern to 1-877-362-4271 or [email protected]
for authorization and direction to the nearest authorized service center in your area.
Retain original cash register sales receipt as proof of purchase for warranty work.
Use reasonable care in the operation and maintenance of the product as described in the
Operator’s Manual(s).
25-ENG
Page 30

The United States Environmental Protection Agency (EPA), the California Air Resources Board, and FNA Group
(FNA) are pleased to explain the exhaust emission control system’s warranty on your 2022 small off-road engine
(SORE). In California, new small off-road engines must be designed, built and equipped to meet the State’s stringent
anti-smog standards. FNA must warrant the exhaust emission control system on your SORE for the periods of time
listed below provided there has been no abuse, neglect or improper maintenance of your small off-road engine.
1-877-362-4271
26-ENG
Page 31
27-ENG
 Loading...