

Page 1
Getting Started
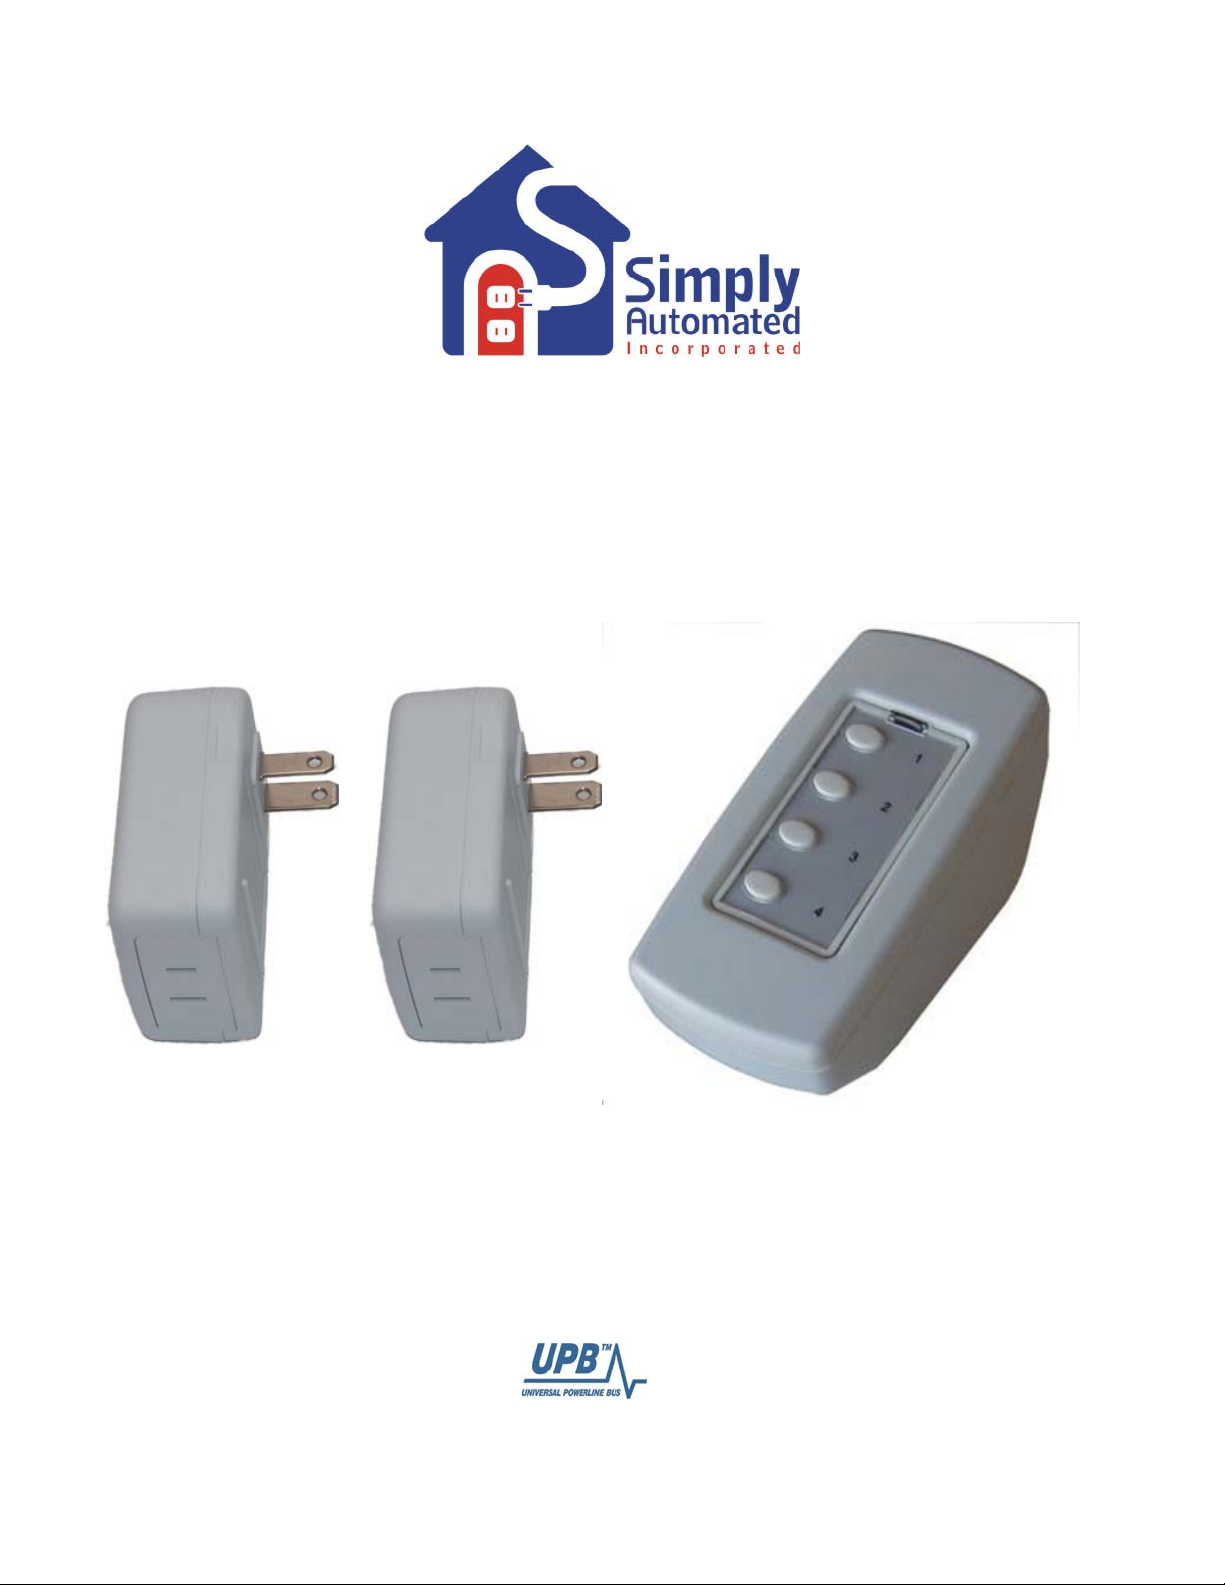
Lamp Starter Kit
Model DKIT-02
Simply Automated Pre-Configured SimplySmartTM Series
Utilizes SimplySmart
No computer programming required!
Simple-n-easy, ready to use lighting control.
TM
technology to make installation a breeze.
Page 2

Getting Started
DKIT-02 Lamp Starter Kit
Simply Automated Pre-Configured SimplySmartTM Series
Utilizes SimplySmart
Simple-n-easy, ready to use lighting control.
IMPORTANT SAFETY INSTRUCTIONS
When using electrical products, basic safety precautions should always be followed, including the following:
1. READ AND FOLLOW ALL SAFETY INSTRUCTIONS.
2. Keep away from water. If product comes into contact with water or other liquid, disconnect immediately.
3. Never use products that have been dropped or damaged.
4. Do not use this product outdoors.
5. Do not use this product for other than its intended use.
6. Do not connect multiple lamps that, when combined, exceed the maximum load rating of the product.
7. To avoid risk of fire, burns, personal injury and electric shock, install this product out of reach of small children.
8. Do not install in areas that can exceed 120°F (e.g., in an attic).
9. Do not cover the product with any material when in use.
10. This product uses polarized plugs and sockets (one blade is wider than the other) to reduce the risk of electric shock. These plugs and
sockets fit only one way. If they do not fit, consult a technician. Do not use with an extension cord unless plugs can be fully inserted.
Do not alter plugs.
11. SAVE THESE INSTRUCTIONS.
TM
technology to make installation a breeze. No computer programming required!
DKIT-02 Lamp Starter Kit
Includes 2 Lamp Modules and 1 Tabletop Scene Controller with 4-Buttons
Getting Started
Section 1: Very Important Pre-Installation Notes
• Your home should be no more than 2500 square feet and have only one breaker panel. A phase coupler is
required in some home installations; especially homes > 2500 square feet or homes with m ore than 1
breaker panel. See Section 5 for more information.
• Not intended for use in multi-dwelling (condo, apartment) buildings with 3-phase power.
• Do not reset to factory default configuration, pre-configured settings will be lost.
• UPStart
software and a computer interface module or Scheduler-Timer can be used with a PC for
customizing pre-configured units and checking performance.
Section 2: Installation of Lamp Modules and Tabletop Controller
Choose a convenient location you would like to use for the main controller and plug in the Tabletop Controller
with 4-buttons. Locate 2 lamps you would like to turn ON/OFF. Plug a lamp module into a wall outlet, then
plug-in a lamp into the socket on the bottom of the lamp module. Turn the lamp ON using the lamp’s ON/OFF
switch. Repeat this process for second lamp module. You're done with the installation process! If necessary,
please refer to the User Guide enclosed in the lamp module product box, or see http://simply-
automated.com/documents/452-0112-0201_RevC_UML-E-W_UserGuide_090512.pdf.
Test Tabletop Controller with 4-buttons to ensure proper installation:
•
Button 1 turns on/off lamp module labeled #4: Press (tap) button 1 one time to turn on lamp module #4,
press and hold to dim up/down, press (quickly tap) two times to turn off.
• Button 2 turns on/off lamp module labeled #5: Press (tap) button 2 one time to turn on lamp module #5,
press and hold to dim up/down, press (quickly tap) two times to turn off.
•
Button 3 turns on/off both lamp modules: Press (tap) button 3 one time to turn on both lamp modules,
press and hold to dim up/down, press (quickly tap) two times to turn off.
•
Button 4 turns off both lamp modules: Press (tap) button 4 one time to turn off both lamp modules.
2 Simply Automated, Incorporated
6108 Avenida Encinas, Suite B, Carlsbad, CA 92011 USA
Technical Support: www.simply-automated.com
452-0002-1001 Rev. D Revised: September 13, 2011
or 800-630-9234
Page 3
Getting Started
DKIT-02 Lamp Starter Kit
Helpful Hint: If tapping a button does not turn on a lamp, the lamp's switch may be in the off position. Go to the
lamp and turn on using the lamp's on/off switch. Tapping should be done quickly ensurin g contact is made from
the button to the base sensor.
Both lamps can still be turned ON/OFF manually. For manual operation of either lamp, simply turn the lamp
ON, OFF and ON again using the lamp’s ON/OFF switch.
Important Note: If you are using compact florescent or non-dimmable florescent lighting, you should
not attempt to change the dimming level. Most florescent lighting cannot be dimmed, can only be
turned on at a 100% dim level.
The lamp modules have been programmed from the factory to turn on at 100%. If you would like a different
lighting level when the lamp is off, press and hold button 1, 2 or 3 until the desired lamp dim level(s) is (are)
achieved, then release. If you would like a different lighting level when the light is on at 100%, press and hold
the button until the desired lamp dim level(s) is (are) achieved, then release. The ‘press and hold’ to dim
function toggles between dim up and dim down, so you may have to press and hold the button two times to dim
(up or down) as desired. If you are using compact florescent or non-dimmable florescent lighting, you sho uld
not attempt to change the dimming level. Most florescent lighting cannot be dimmed, can only be turned on at a
100% dim level.
Important Note: Each lamp module has a unique ID number. You can find the ID number on the back of
each lamp module. One of the lamp modules for the Lamp Starter Kit (DKIT-02) will have ID #4 and the
other will have ID #5. This is important information to note as it relates to operation with the SchedulerTimer accessory (sold separately).
Section 3: Editing Buttons (Scenes) on Tabletop Controller with 4-Buttons
Each button on the Tabletop Controller with 4-Buttons controls a SCENE that can easily be edited from the
factory pre-sets. Button 1 turns on/off lamp module #4, button 2 turns on/off lamp module #5, button 3
turns both lamp modules on/off, button 4 turns both lamp modules off. You can change the dimming level or
number of lamp modules controlled by each button to create your own custom scenes!
Section 3.a. Changing the Dimming Level
Important Note: If you are using compact florescent or non-dimmable florescent lighting, you should
not attempt to change the dimming level. Most florescent lighting cannot be dimmed, can only be
turned on at a 100% dim level.
Button 1. Button 1 is programmed from the factory to turn on lamp module #4
at a 100% dim level. To change the dimming level:
• Go to the Tabletop Controller, press button 1 to activate the scene (lamp
should be on). Next, press and hold button 1, dimming down to the
desired dim level for lamp module #4.
• On the Tabletop Controller, press (quickly tap) button 1 seven times. The
lamp will flash off and back on indicating the new level was stored
correctly. You have created a new scene by re-programming button 1
from the factory pre-set dimming level.
Helpful Hint: Pressing and holding a button toggles between dimming down and dimming up. First press and
hold dims down and the second press and hold dims up. If tapping button 1 seven times does not change the
stored dimming level, repeat the two steps outlined above. Tapping should be done quickly ensuring contact is
made from the button to the base sensor.
3 Simply Automated, Incorporated
6108 Avenida Encinas, Suite B, Carlsbad, CA 92011 USA
Technical Support: www.simply-automated.com
452-0002-1001 Rev. D Revised: September 13, 2011
or 800-630-9234
Page 4

Getting Started
DKIT-02 Lamp Starter Kit
Helpful Hint: The Tabletop Controller can inadvertently be placed in the program m ode by tapping button 1 five
times. The indicator above button 1 will continuously blink green for five minutes. To exit the programming
mode, quickly tap any Tabletop Controller button two times.
Button 2. You can repeat the process outlined above for button 2. Button 2 is programmed from the factory to
turn on lamp module #5 at a 100% dim level. To change the dimming level for button 2:
• Go to the Tabletop Controller, press button 2 to activate the scene (lamp should be on). Next, press and
hold button 2, dimming down to the desired dim level for lamp module #5.
• On the Tabletop Controller, press (quickly tap) button 2 seven times. The lamp will flash off and back on
indicating the new level was stored correctly. You have created a new scene by re-programming button 2
from the factory pre-set dimming level.
Editing buttons 3 or 4. Button 3 is programmed to turn on both lamp modules at 100%. Button 4 is
programmed to turn off both lamp modules. We recommend not editing these buttons since all devices (up to
ten or more dimmers/modules) in the Pre-Configured SimplySmart
TM
Series have similar settings -- one tap of
button 3 turns all devices on, one tap of button 4 turns all devices off. This pre-programming is a very powerful
and convenient feature using both the Tabletop Controller with 4-buttons and Deluxe Dimmer with 4-buttons.
Examples include entering a home (button 3 for ALL ON), leaving a home (button 4 for ALL OFF), bedside for
security and nighttime convenience (button 3 for ALL ON or button 4 for ALL OFF).
Edit Button 3 so both Lamp Modules dim to the same level. Button 3 is programmed from the factory to
turn on both lamp modules at a 100% dim level. To change the dimming level for both of the lamp modules
controlled by button 3:
• Go to the Tabletop Controller, press button 3 to activate the scene (both lamps should be on). Next, press
and hold button 3 dimming down to the desired dim level for both of the lamp modules. If necessary, press
and hold button 3 a second time to dim up.
• On the Tabletop Controller, press (quickly tap) button 3 seven times. Both lamps will flash off and back on
indicating the new level was stored correctly. You have created a new scene by re-programming button 3
from the factory pre-set dimming level.
Edit Button 4 so both Lamp Modules dim to the same level. You can repeat the process outlined above for
button 4. Button 4 is programmed from the factory to turn off both lamps.
Edit Button 3 so each Lamp Module dims to a different level. Button 3 is programmed from the factory to
turn on both lamp modules at a 100% dim level. To change the dimming level for each of the lamp modules
controlled by button 3:
• Go to the Tabletop Controller, press button 3 to activate the scene (both lamps should be on). Next, press
and hold button 1 dimming down lamp module #4 to the desired dim level. If necessary, press and hold
button 1 a second time to dim up.
•
On the Tabletop Controller, press and hold button 2 dimming down lamp module #5 to the desired dim
level. If necessary, press and hold button 2 a second time to dim up.
• On the Tabletop Controller, press (quickly tap) button 3 seven times. Both lamps will flash off and back on
indicating the new level was stored correctly. You have created a new scene by re-programming button 3
from the factory pre-set dimming level.
Edit Button 4 so each Lamp Module dims to a different level. You can repeat the process outlined above
for button 4. Button 4 is programmed from the factory to turn off both lamps.
4 Simply Automated, Incorporated
6108 Avenida Encinas, Suite B, Carlsbad, CA 92011 USA
Technical Support: www.simply-automated.com
452-0002-1001 Rev. D Revised: September 13, 2011
or 800-630-9234
Page 5
Getting Started
DKIT-02 Lamp Starter Kit
Important Note: If it is not possible to individually change the lamp module dim level with button 1 or 2
(as described above) because multiple lamp modules or other devices are being controlled by those
buttons, then refer to Section 3.d.
Section 3.b. Adding a Lamp Module
Button 1. Button 1 is pre-programmed from the factory to turn on/off lamp module
#4. To add lamp module #5 to button 1:
• Go to the Tabletop Controller, press button 1 to activate the scene. Lamp Module
#4 should be on. If the lamp light is not lit, turn the lamp’s on/off switch on.
• Go to the lamp connected to module #5. Turn on using the lamps on/off switch.
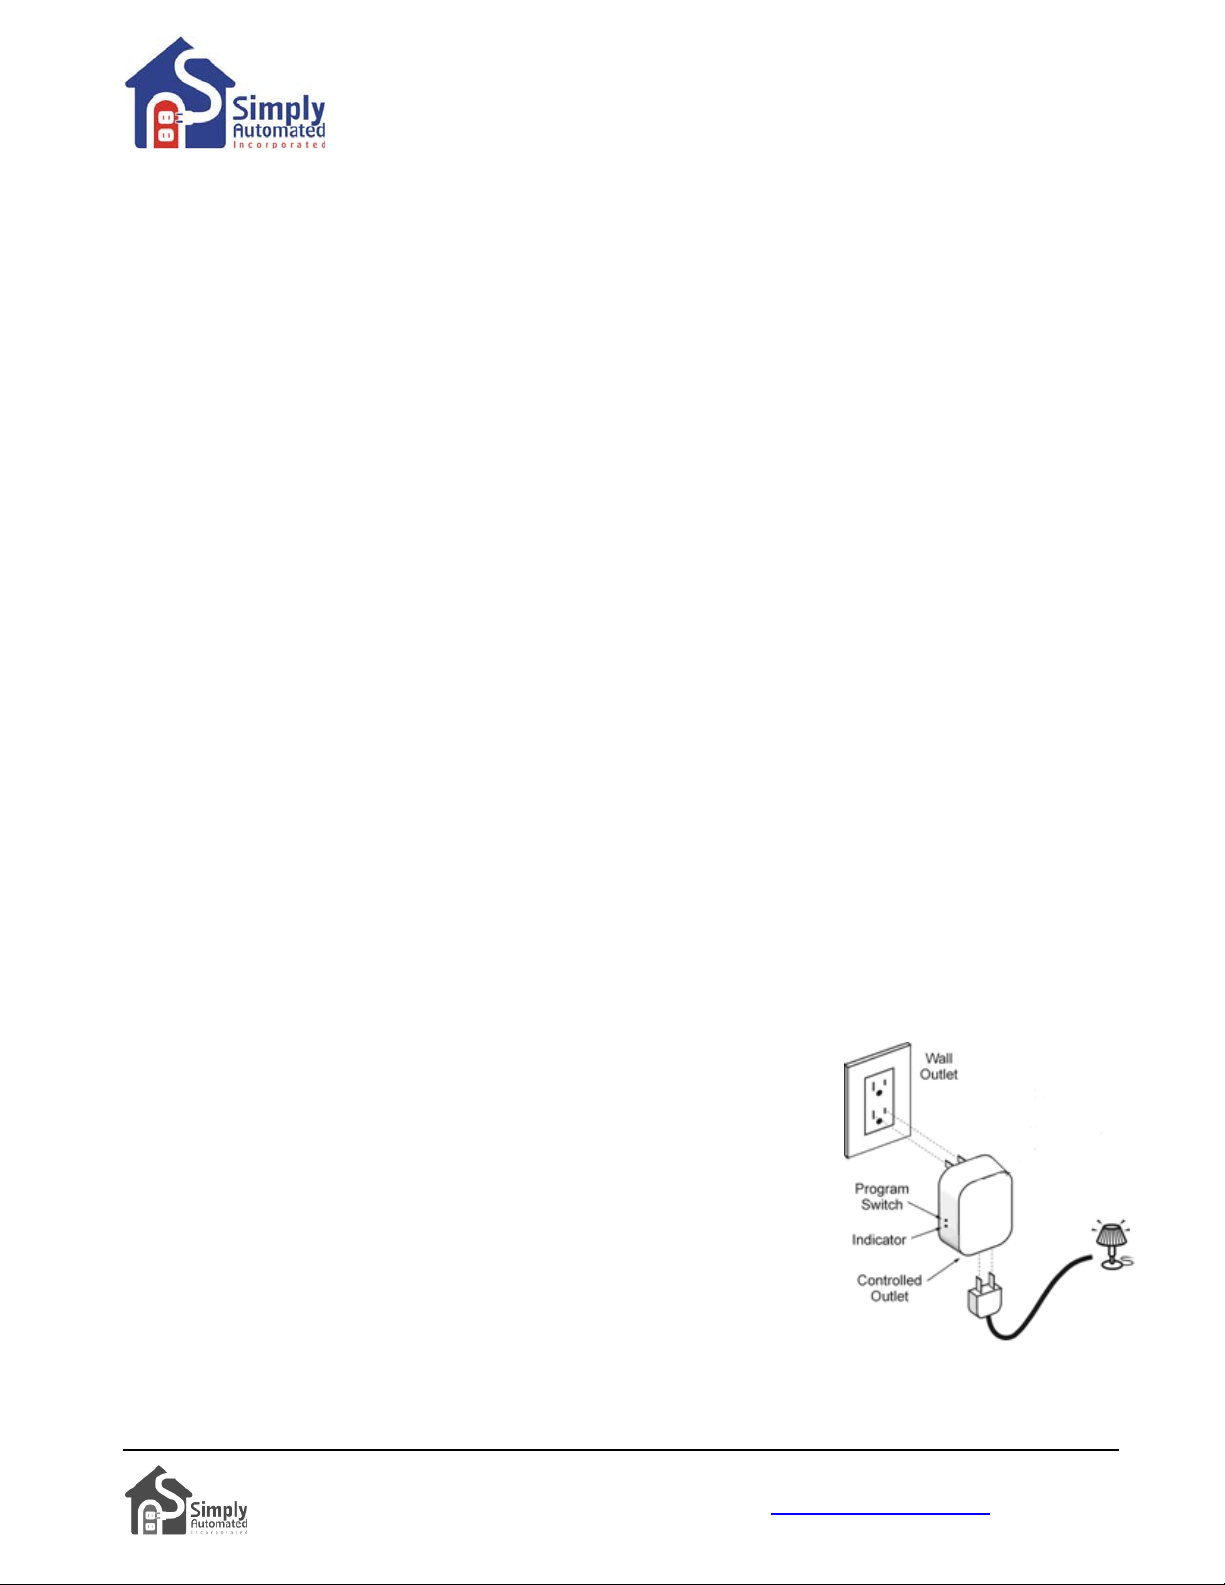
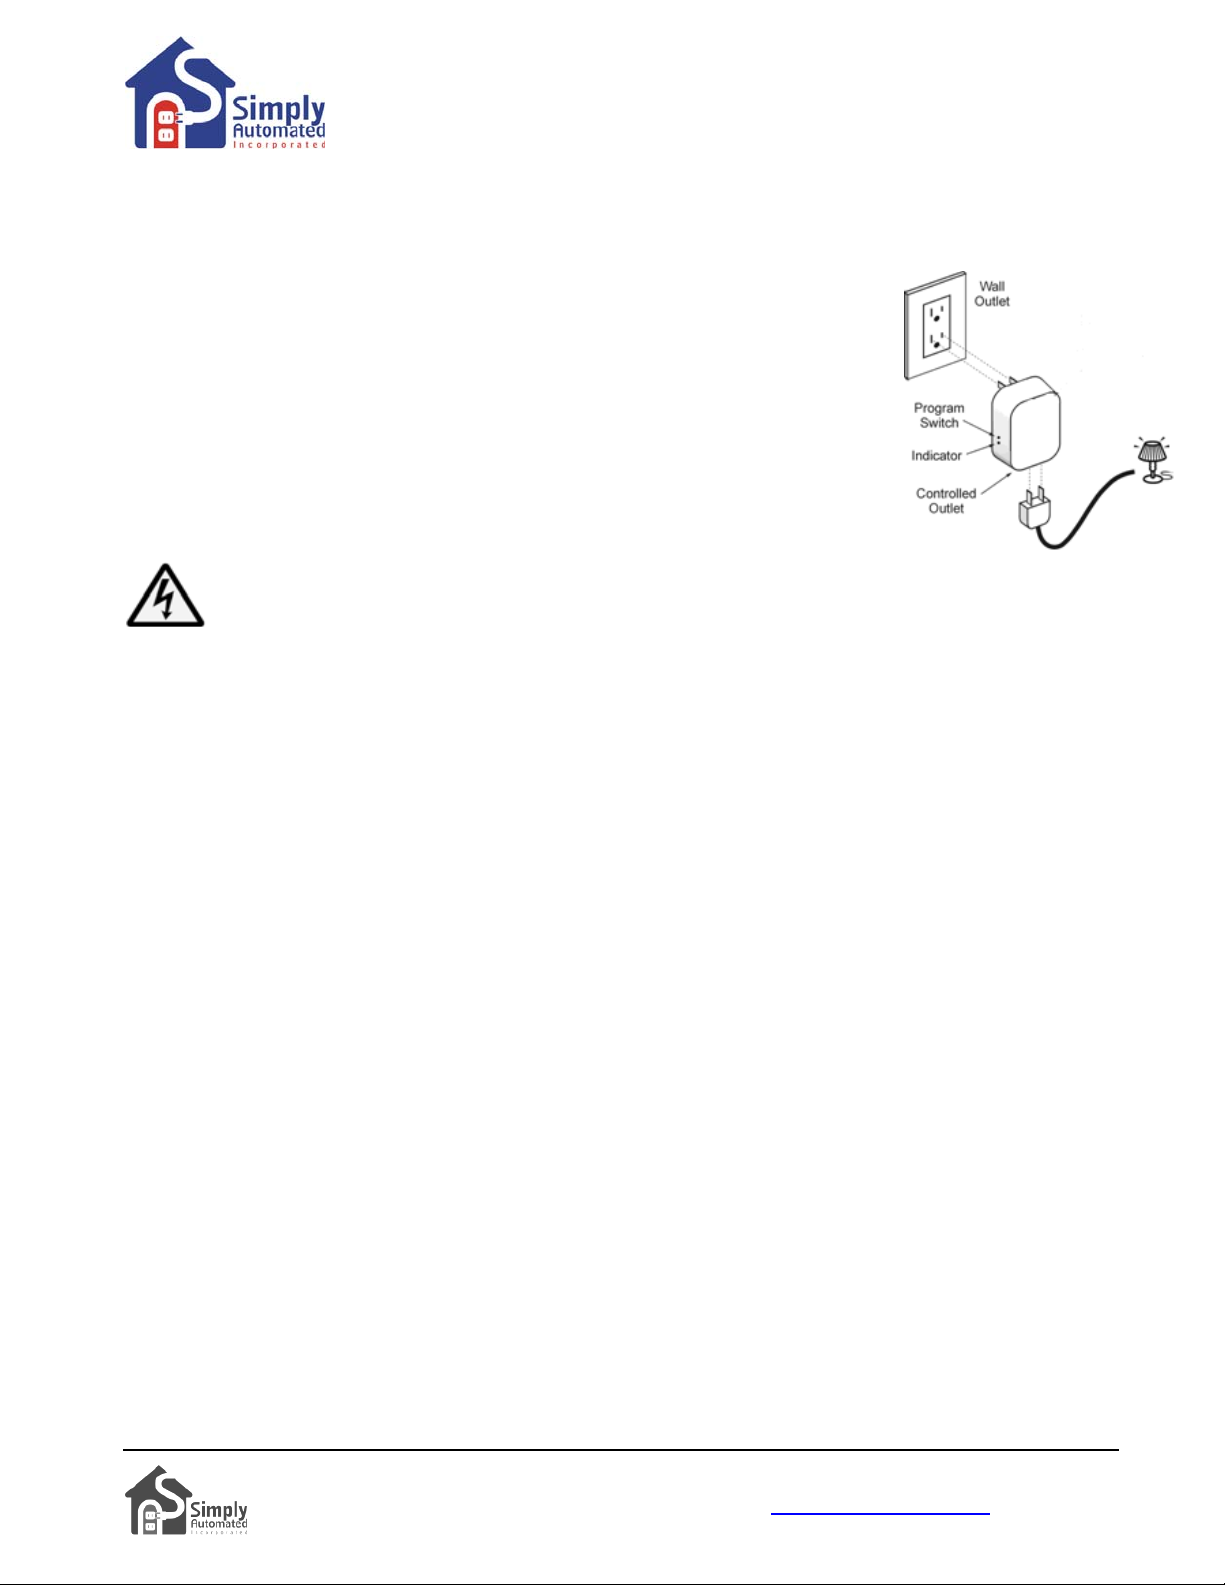
• Go to lamp module #5, press (quickly tap) the program switch (see illustration) 5
times using a non-metallic toothpick to place in the program mode. The indicator
will continuously blink green to confirm the lamp module is in the program mode.
• Go back to the Tabletop Controller, press (quickly tap) button 1 seven times. You have created a new
scene by re-programming lamp module #5 from the factory pre-set dimming level.
Helpful Hint: If tapping button 1 does not turn on lamp module #5, the lamp's switch may be in the off position.
Go to the lamp and turn on using the lamp's on/off switch, repeat the three steps outlined above. Tapping
should be done quickly ensuring contact is made from the button to the base sensor.
Helpful Hint: The Tabletop Controller can inadvertently be placed in the program m ode by tapping button 1 five
times. The indicator above button 1 will continuously blink green for five minutes. To exit the programming
mode, quickly tap the lamp module’s program switch two times.
Button 2. Button 2 is pre-programmed from the factory to turn on/off lamp module #5. To add lamp module #4
to button 2:
• Go to the Tabletop Controller, press button 2 to activate the scene. Lamp Module #5 should be on. If the
lamp light is not lit, turn the lamp’s on/off switch on.
• Go to the lamp connected to module #4. Turn on using the lamps on/off switch.
• Go to lamp module #4, press (quickly tap) the program switch (see illustration) 5 times using a non-metallic
toothpick to place in the program mode. The indicator will continuously blink green to confirm the lamp
module is in the program mode.
• Go back to the Tabletop Controller, press (quickly tap) button 2 seven times. You have created a new
scene by re-programming button 2 from the factory pre-set dimming level.
Important Note: To change the dimming level for one lamp module, refer to Section 3.a., or for multiple
devices refer to section 3.d.
Helpful Hint: After tapping lamp module program switch five times, the lamp module will stay in the program
mode for approximately 5 minutes. You can always confirm if the lamp module is in the program mode by
checking for a blinking green indicator next to the program switch. If the lamp module indicator is not flashing
green, to place in the program mode, quickly tap the program switch five times. To exit the program mode,
quickly tap the program switch two times.
CAUTION: When programming the lamp module, do not insert any metal object (paperclip) into the
module while it is connected to power.
5 Simply Automated, Incorporated
6108 Avenida Encinas, Suite B, Carlsbad, CA 92011 USA
Technical Support: www.simply-automated.com
452-0002-1001 Rev. D Revised: September 13, 2011
or 800-630-9234
Page 6
Getting Started
DKIT-02 Lamp Starter Kit
Section 3.c. Deleting a Lamp Module
If you would like to edit a scene and delete a lamp module from any button:
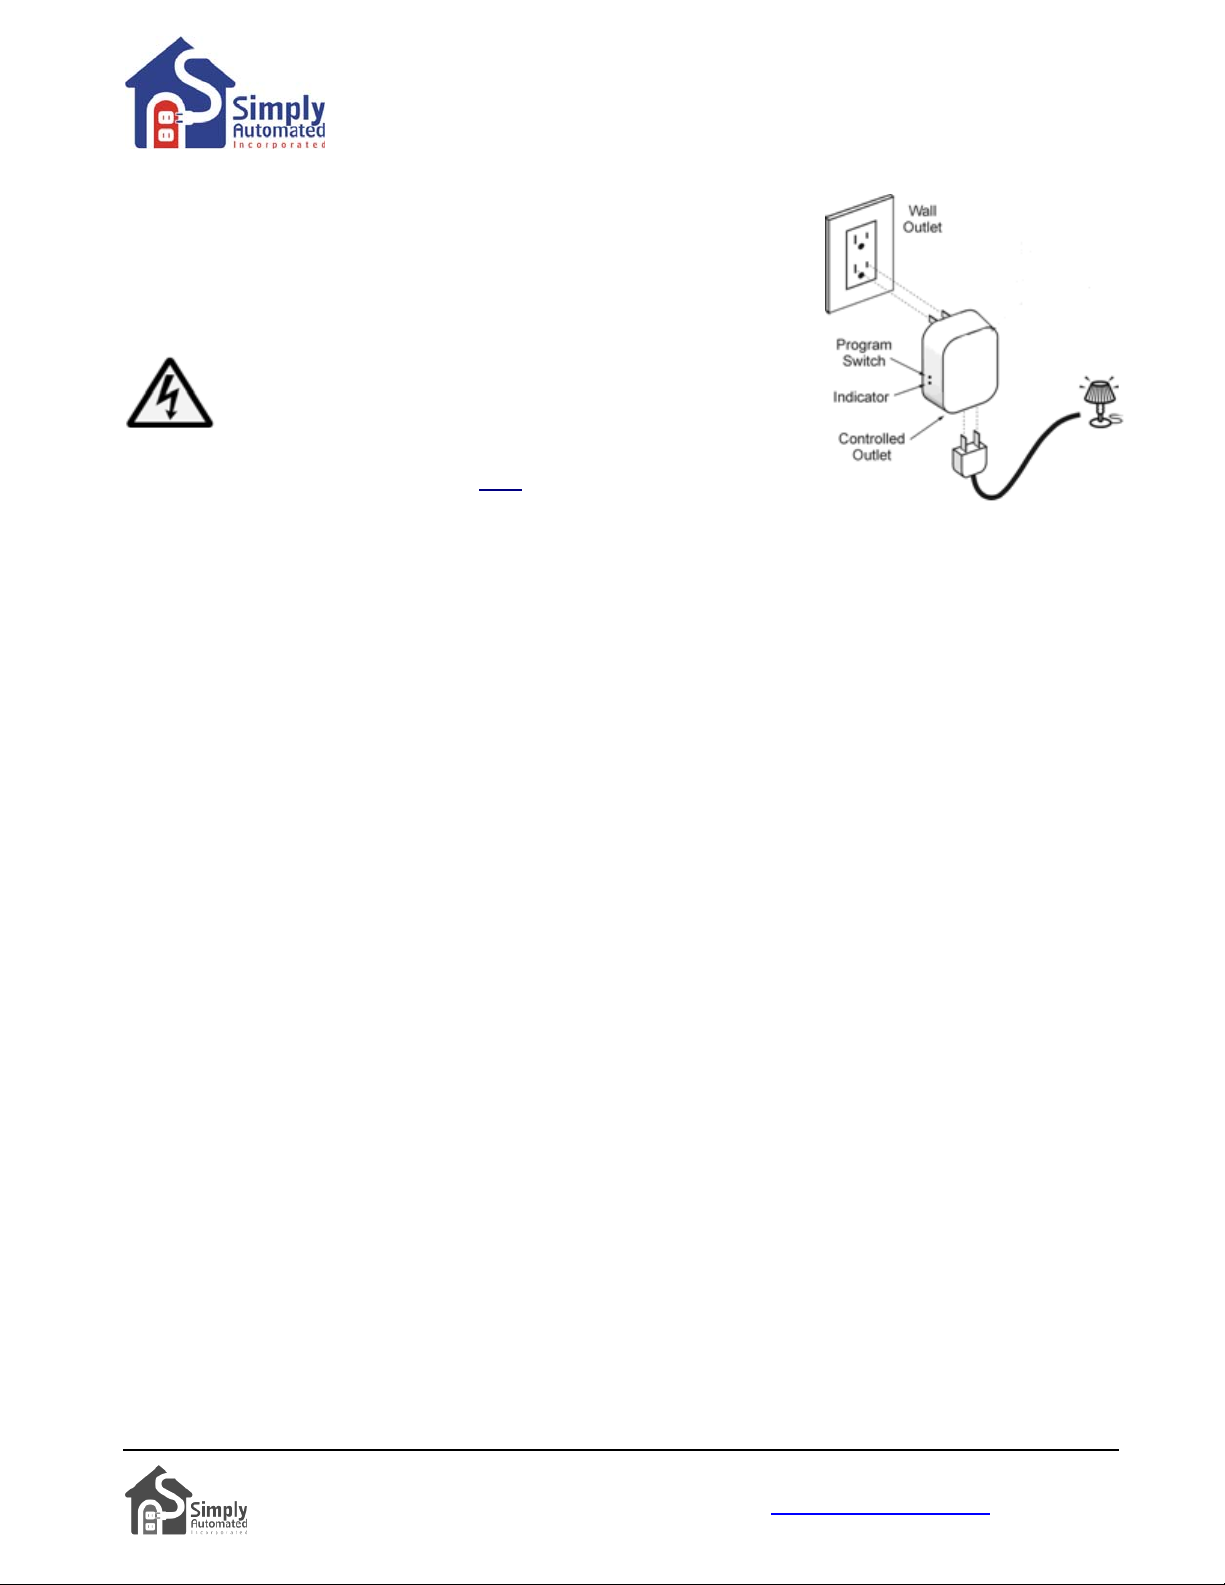
• Go to lamp module you would like to delete, press (quickly tap) the
program switch (see illustration) 5 times using a non-metallic toothpick to
place in the program mode. The indicator will continuously blink green
to confirm the lamp module is in the program mode.
• Go to the Tabletop Controller, press (quickly tap) the button you would
like to delete the lamp module from eight times.
Helpful Hint: If you press (tap) a button and the lamp module you deleted still turns on, repeat the two steps
outlined above. Tapping should be done quickly ensuring contact is made from the button to the base sensor.
Helpful Hint: You may add or delete as many devices as you like at one time by putting them in the program
mode at the same time. Note when adding devices to a scene or changing dim levels in a scene make sure the
scene is activated first (i.e. press the button 1 time), before changing dim levels or adding a device.
Section 3.d. Adding or Editing Multiple Devices at the Same Time
You can add or edit multiple lamp modules with custom dimming levels as well as multiple dimmers,
receptacles and relay modules to each button at the same time. To add or edit the devices for buttons 1, or 2:
Important Note: If you are using compact florescent or non-dimmable florescent lighting, you should
not attempt to change the dimming level. Most florescent lighting cannot be dimmed, can only be
turned on at a 100% dim level.
Button 1.
• Go to the Tabletop Controller, press button 1 one time to activate the scene. Any modules or dimmers you
previously configured for this scene button should be ON. If a lamp plugged into a lamp module in the
scene is not on, turn the lamp’s ON/OFF switch ON.
• Go to each dimmer you would like to add or edit, press and hold the top rocker to the desired dimming level.
And, go to the other devices you would like to add or edit and turn them ON:
• For dimmers (or modules) that are to be added to the scene press (quickly tap) the top rocker of each
dimmer (or program switch of each module) to be added 5 times to place in the program mode. A green
indicator light will flash above each dimmer rocker or next to the module’s program switch (for 5 minutes or
until programmed) to confirm the device is in the program mode.
• Go to the Tabletop Scene Controller with 4-buttons, press (quickly tap) button 1 seven times. Button 1 will
now turn ON/OFF all dimmers and modules you programmed to the dimming levels you selected. Press
(tap) button 1 one time to turn ON the dimmers, press (quickly tap) two times to turn OFF dimmers. You
have created a new scene!
CAUTION: When programming the lamp module, do not insert
any metal object (paperclip) into the module while it is connected
to power.
o For lamp modules, turn ON using the lamp’s on/off switch.
o For appliance modules, press and hold the program switch (see illustration above) using a no n-
metallic toothpick until the indicator flashes red. And then, press the program switch to toggle ON.
Press and hold the program switch to stop flashing red indicator.
o For receptacles and fixture modules, press (quickly tap) the program switch 9 times, the indicator
will begin flashing. Then press the program switch again to toggle ON. Press program switch two
times quickly to stop indicator flashing.
6 Simply Automated, Incorporated
6108 Avenida Encinas, Suite B, Carlsbad, CA 92011 USA
Technical Support: www.simply-automated.com
452-0002-1001 Rev. D Revised: September 13, 2011
or 800-630-9234
Page 7

Getting Started
DKIT-02 Lamp Starter Kit
Helpful Hint: Lamp modules can also be added and edited in the same way. However changing the dim level
of the lamp module by pressing and holding a Tabletop Controller button may change the dim level of other
devices in the scene. To set the dim level of one or more lamp modules, first adjust the lamp module (dim)
level by pressing and holding the Tabletop Controller button 3 to the desired dim level for the lam p module.
Once at the desired (dim) level unplug the lamp module. Then adjust the next lamp module in the same way,
unplugging the module after achieving the desired level. When all lamp m odules have been adjusted and are
unplugged; press the scene button to be edited one time activating all devices that are in the scene and
powered, then plug in the lamp modules. The lamp modules will resume at the dim level they were when
unplugged. If any new dimmers or modules need to be added to the scene, turn them ON to the desired level
then put them in program mode by tapping the program switch (or any button or rocker on a dimmer) 5 times.
The indicator will flash green to confirm the dimmer / module is in program mode. With all the dim levels
adjusted and new dimmers/modules to be added in the program mode, press the Tabletop Controller’s scene
button to be edited 7 times quickly to save the scene.
Important Note: If you program a dimmer (or lamp module) for a dimmable (incandescent or halogen)
light bulb and later change to a compact florescent bulb that cannot be dimmed, press the scene button
to activate the scene. Go to the dimmer, press and continue to hold the top rocker until the comp act
florescent light reaches its brightest level, approximately 10 seconds. Or for lamp modules, press and
hold the scene button for 10 seconds then unplug the lamp module. Next, press the scene button to be
edited one time so all other devices are ON at their desired levels. Plug the lamp module back in, it
should resume the 100% level you adjusted. Go back to the scene button to be edited, press the button
you wish to re-program seven times.
Button 2. Follow the instructions outlined in Section 3.d. for Button 2, noting you will need to press (quickly tap)
button 2 seven times to program the new scene.
Important Note: Buttons 1 and 2 operate independently for the Tabletop Scene Controller Access ories
(model USQT22, US2TP11 and US28OTP23) and the Tabletop Controller included with the Lamp Starter
Kit (model DKIT-02) allowing one touch button control of more than 14 unique custom scenes. Create
one scene for button 1 of the Tabletop Controller Accessory (model USQT22) and a s econd scene for
button 1 of the Tabletop Controller from the Lamp Starter Kit (model DKIT-02). Create a third scene for
button 2 of the Tabletop Controller Accessory (model USQT22) and a fourth scene for button 2 of the
Tabletop Controller from the Lamp Starter Kit (model DKIT-02). And, the 8-button Tabletop Controller
(model US28OTP23) has 6 independent buttons (1, 2, 5, 6, 7 & 8) available for custom scene control .
Buttons 3 and 4. Button 3 is programmed from the factory to turn on all modules and dimmers at a 100% (dim)
level. Button 4 is programmed from the factory to turn off all modules and dimmers. We recommend not editing
these buttons since all devices (up to ten or more dimmers/modules) in the Pre-Configured SimplySmart
Series have similar settings -- one tap of button 3 turns all devices on, one tap of button 4 turns all devices off.
This pre-programming is a very powerful and convenient feature using both the Tabletop Controllers with 4- or
8-buttons and Deluxe Dimmer with 4-buttons. Examples include entering a home (button 3 for ALL ON),
leaving a home (button 4 for ALL OFF), bedside for security and nighttime convenience (button 3 for ALL ON o r
button 4 for ALL OFF).
Editing Buttons 3 and 4. Button 3 is programmed from the factory to turn ON/OFF all appliance modules,
dimmers and accessories. Button 4 is programmed from the factory to turn OFF all devices. These buttons can
be edited using the procedures for buttons 1 and 2: changing the dimming level Section 3.a., adding a lam p
module Section 3.b., deleting a lamp module Section 3.c., adding or editing multiple devices Section 3.d.
To make button 3 available for an independent scene and edit button 4 so that it turns all devices ON/OFF
(instead of just off):
• Go to the Tabletop Controller, press button 3 one time to activate the ‘All ON’ scene. Any modules or
dimmers configured for this scene button should be ON. If the lamp light is not lit, turn the lamp’s ON/OFF
switch ON.
TM
7 Simply Automated, Incorporated
6108 Avenida Encinas, Suite B, Carlsbad, CA 92011 USA
Technical Support: www.simply-automated.com
452-0002-1001 Rev. D Revised: September 13, 2011
or 800-630-9234
Page 8
Getting Started
DKIT-02 Lamp Starter Kit
• Press (quickly tap) button 4 seven times to store the ‘All ON’ levels. The modules and dimmers will turn off
and back on indicating the level was stored.
• To test, press (quickly tap) button 4 two times to turn OFF all modules and dimmers, then press button 4
one time to turn ON all modules and dimmers. Congratulations you have created a new scene! Button 3 is
now available to edit for another scene and you can still turn all devices ON/OFF with button 4.
Helpful Hint: The Tabletop Controller can inadvertently be placed in the program m ode by tapping button 1 five
times. The indicator above button 1 will continuously blink green for five minutes. To exit the programming
mode, quickly tap tabletop controller button 1 two times.
Section 4: Simple-n-Easy Expansion for SimplySmartTM Series. Fully Compatible.
All Starter Kits and Accessories -- Dimmers, Tabletop Controllers, Controlled
Receptacles, Lamp, Appliance and Fixture Modules, plus Scheduler-Timer.
Simply Automated Pre-Configured SimplySmart
the Dimmer or Lamp Starter Kit, add other starter kits, additional standard dimmers, additional Deluxe Dimmers
with 4-buttons, additional modules, Tabletop Controllers with 4 or 8-buttons or any of the other pre-configured
kits or accessories. All the pre-configured kits and accessories can be edited and added to scenes as
previously described – only limitation being not more than one of each model number or kit number per
installation. One touch button convenience to turn ON/OFF up to ten or more Simply Automated devices –
custom scenes you create!
TM
Series offers simple-n-easy expansion capability. Begin with
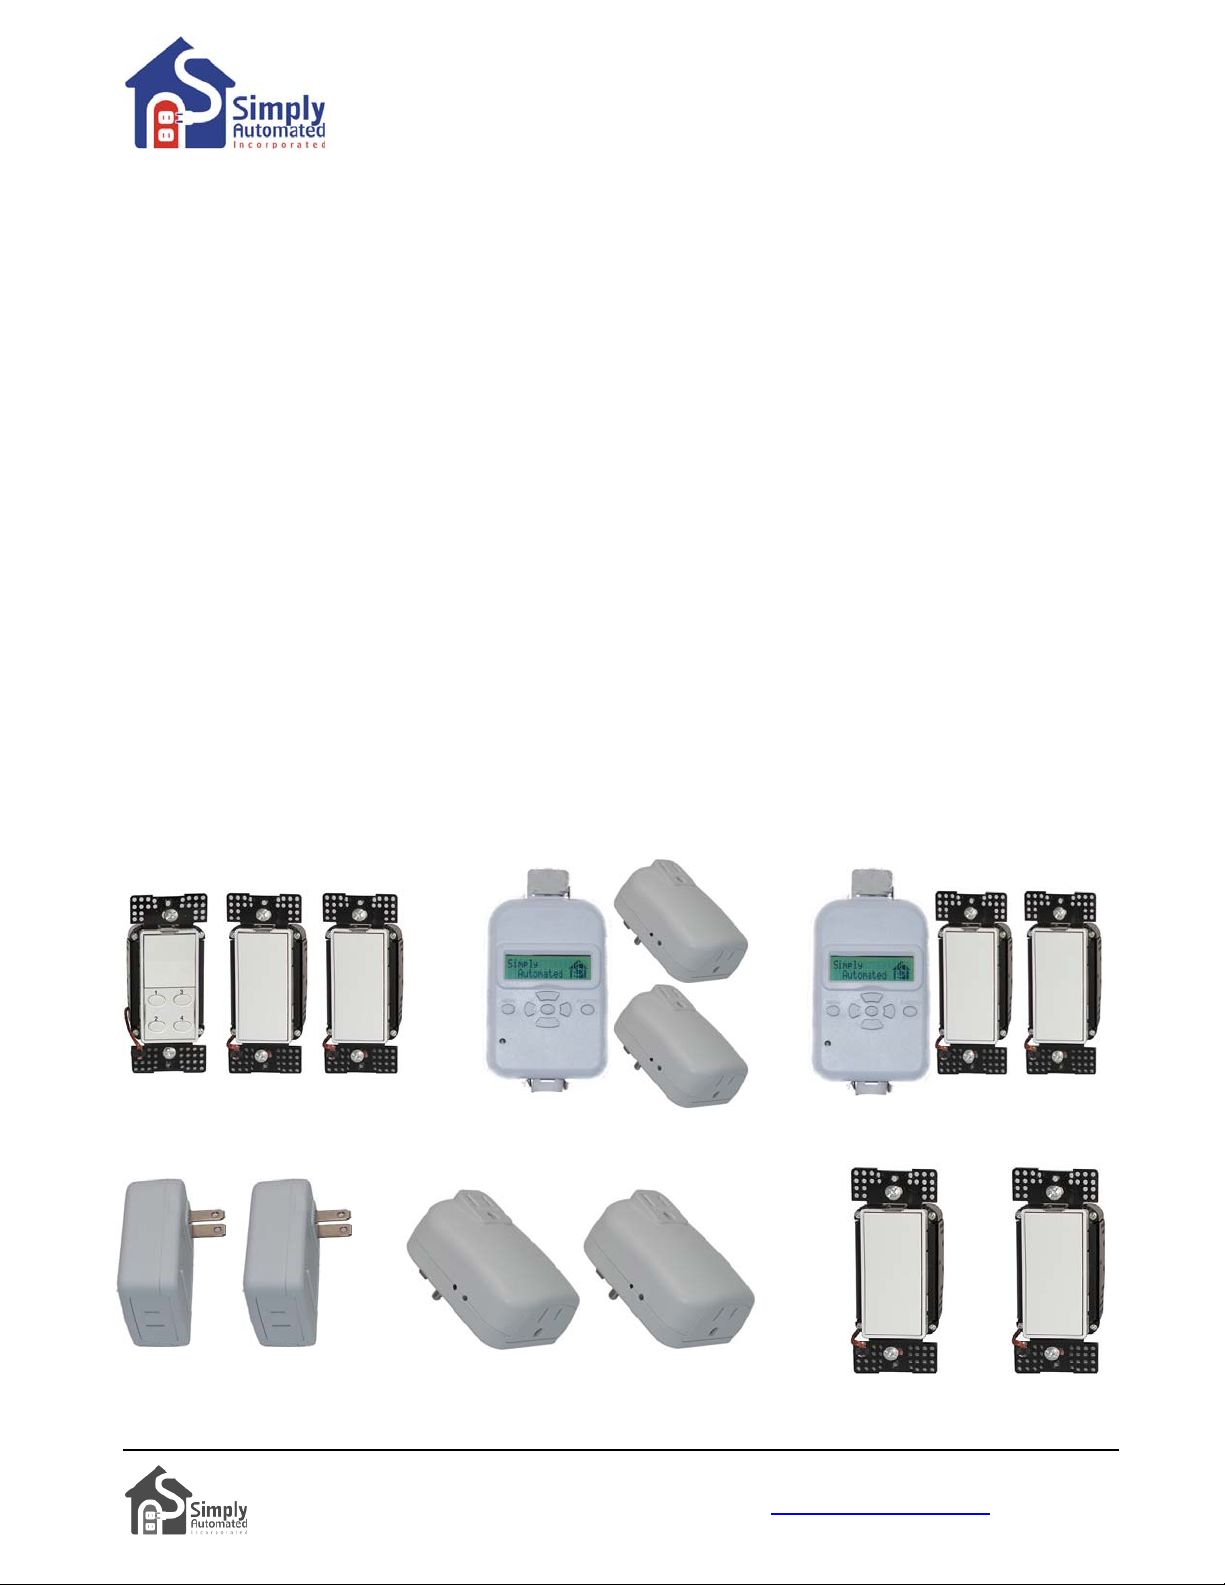
Dimmer Starter Kit Landscape Relay Landscape Dimmer
Includes 2 dimmers and deluxe Starter Kit Includes 2 relay Starter Kit Includes 2 standard
dimmer with 4-button scene modules and scheduler-timer standard dimmers and schedulercontroller (model: DKIT-01) (model: DKIT-05) timer (model: DKIT-06)
Lamp (Dimmer) Modules Appliance (Relay) Modules Dimmers
UML7 UML8 UMA25 UMA26
US1W9 US1W10
8 Simply Automated, Incorporated
6108 Avenida Encinas, Suite B, Carlsbad, CA 92011 USA
Technical Support: www.simply-automated.com
452-0002-1001 Rev. D Revised: September 13, 2011
or 800-630-9234
Page 9
Getting Started
DKIT-02 Lamp Starter Kit
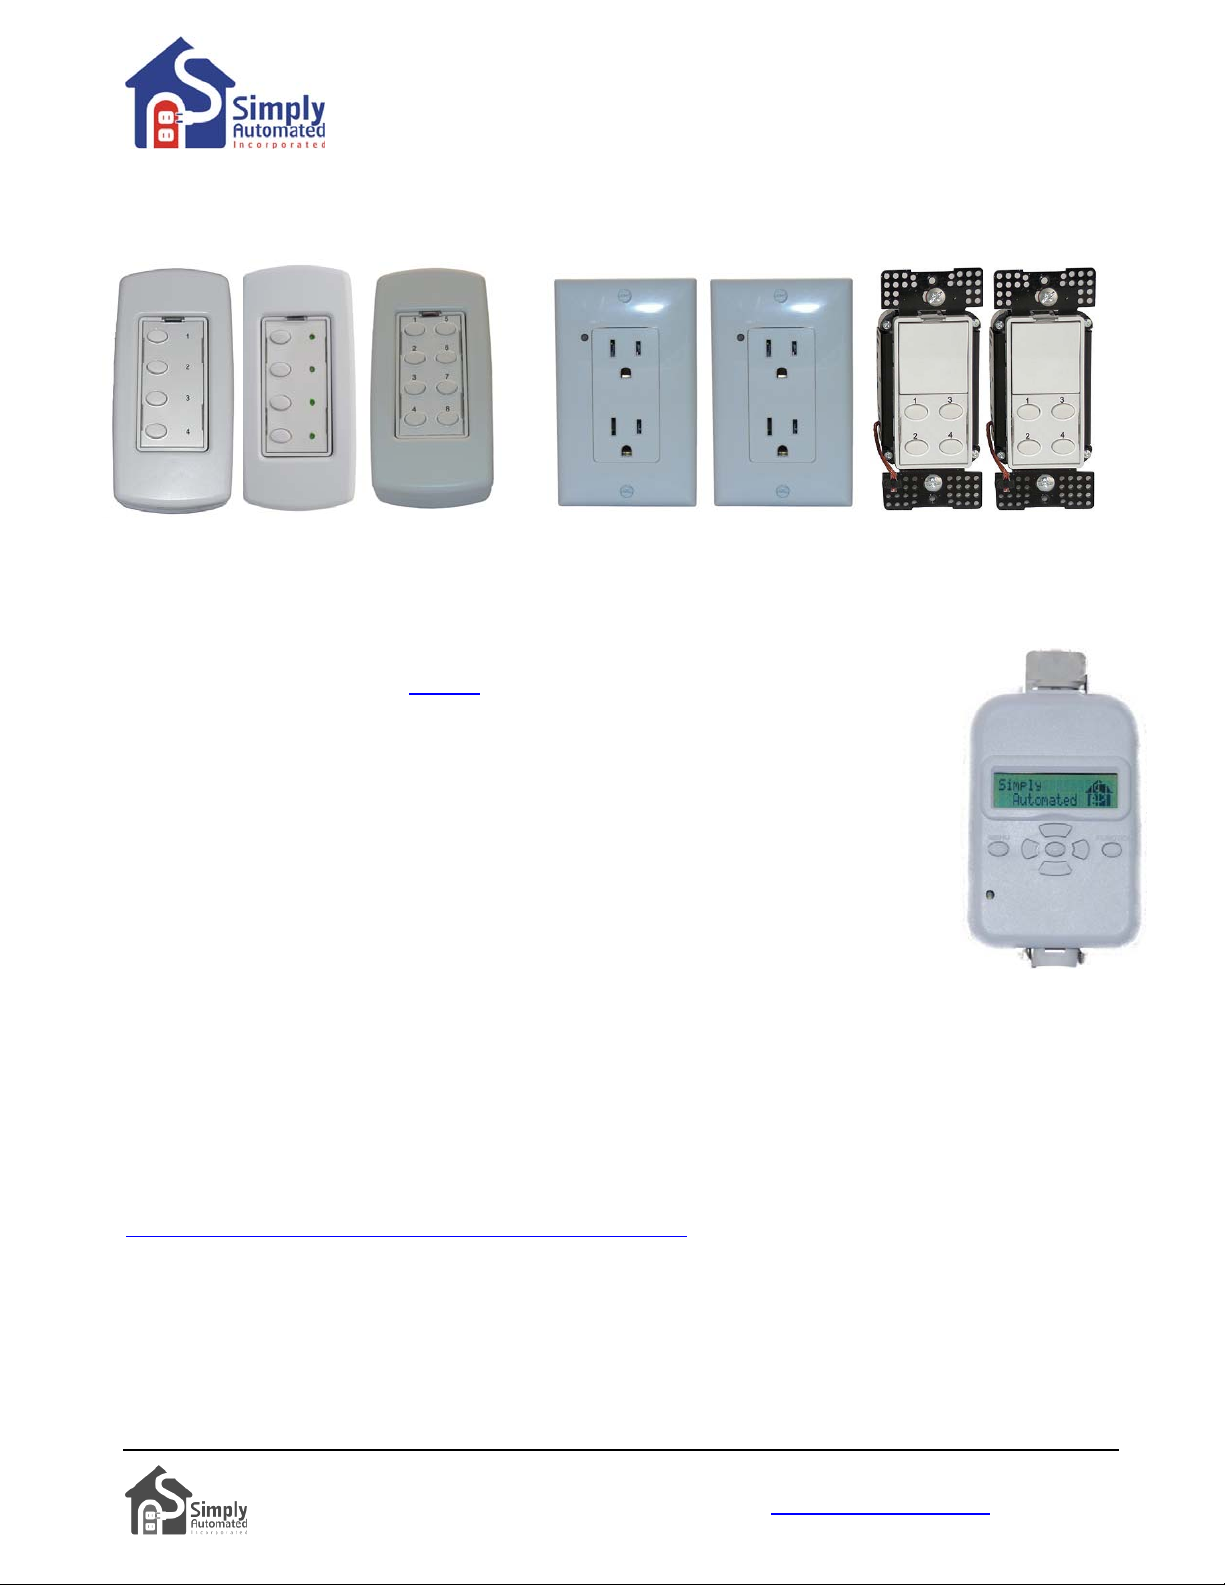
Tabletop Controllers Controlled Receptacles Deluxe Dimmer
(with 4-button, 4-button with LEDs (top outlet controlled, bottom (with 4-button scene
or 8–button scene control) outlet always on) control)
US2TP11 USQT22 US2O8TP23 URD27 URD28 US2W12 US2W24
Important Note: only one of each pre-configured accessory model number can be ordered per home
installation.
Add a Scheduler-Timer (model: UCS-01) to automatically or manually turn ON/OFF indoor
or outdoor security lighting. Or to create night time convenience pathway lighting. Energy
savings dimming feature (from 10%, 20%, 30%, 40%, to 90% dimming levels). Random
'vacation mode' setting gives a home the ‘lived in’ look. Built-in celestial clock computes
sunrise and sunset. Calculates daylight savings time.
The Scheduler-Timer is easily and quickly programmed -- no PC connection is necessary.
Just set the time, your location (using your zip code), the Network ID # (250), and you’re
ready to input on/off/dim events using the ID # for each dimmer (each dimmer has a unique
ID number). You can find the ID number on the front of each dimmer or the back of each
module. For the Lamp Starter Kit (DKIT-02), the lamp modules have ID #4 and #5.
Section 5: In Case of a Problem
Phone: 760-431-2100 Ext. 138 Monday-Friday 8AM-5PM (Pacific Time) for assistance, or write to
[email protected].
Phase Coupler: Your home should be no more than 2500 square feet and have only one breaker panel. A
phase coupler is required in some home installations; especially homes > 2500 square feet or homes with more
than 1 breaker panel. If you have tested the buttons for each lamp module, but one or more of the lamp
modules do not turn on, the circuits in your home may need phase coupling or phase alignment. All homes
have a 240V feed to the main breaker panel box, where the 240V is separated into 120V in two phases, an A
and B. You will need to install a phase coupler, or use dimmers and modules on one phase (align or move
lighting circuits, at the breaker, that have these dimmers and modules to either A or B, not both) see
http://simply-automated.com/products/cats/phase_couplers.php
Model # Description
ZPCI-P30A Plug-In Inverting Phase Coupler, fits a standard (NEMA 10-30) 240VAC / 30 Amp
clothes dryer type outlet
ZPCI-P50A Plug-In Inverting Phase Coupler, fits a standard (NEMA 10-50) 240VAC / 50Amp
clothes dryer type outlet
ZPCI-W Wire-in Inverting Phase Coupler
ZPCI-B Breaker Panel Inverting Phase Coupler
for options.
9 Simply Automated, Incorporated
6108 Avenida Encinas, Suite B, Carlsbad, CA 92011 USA
Technical Support: www.simply-automated.com
452-0002-1001 Rev. D Revised: September 13, 2011
or 800-630-9234
Page 10
Getting Started
DKIT-02 Lamp Starter Kit
Network ID #: The default Network ID # setting for the Pre-Configured Series is 250. This information is
needed when using the Scheduler-Timer.
Section 6: Simply Automated Custom Expansion Series
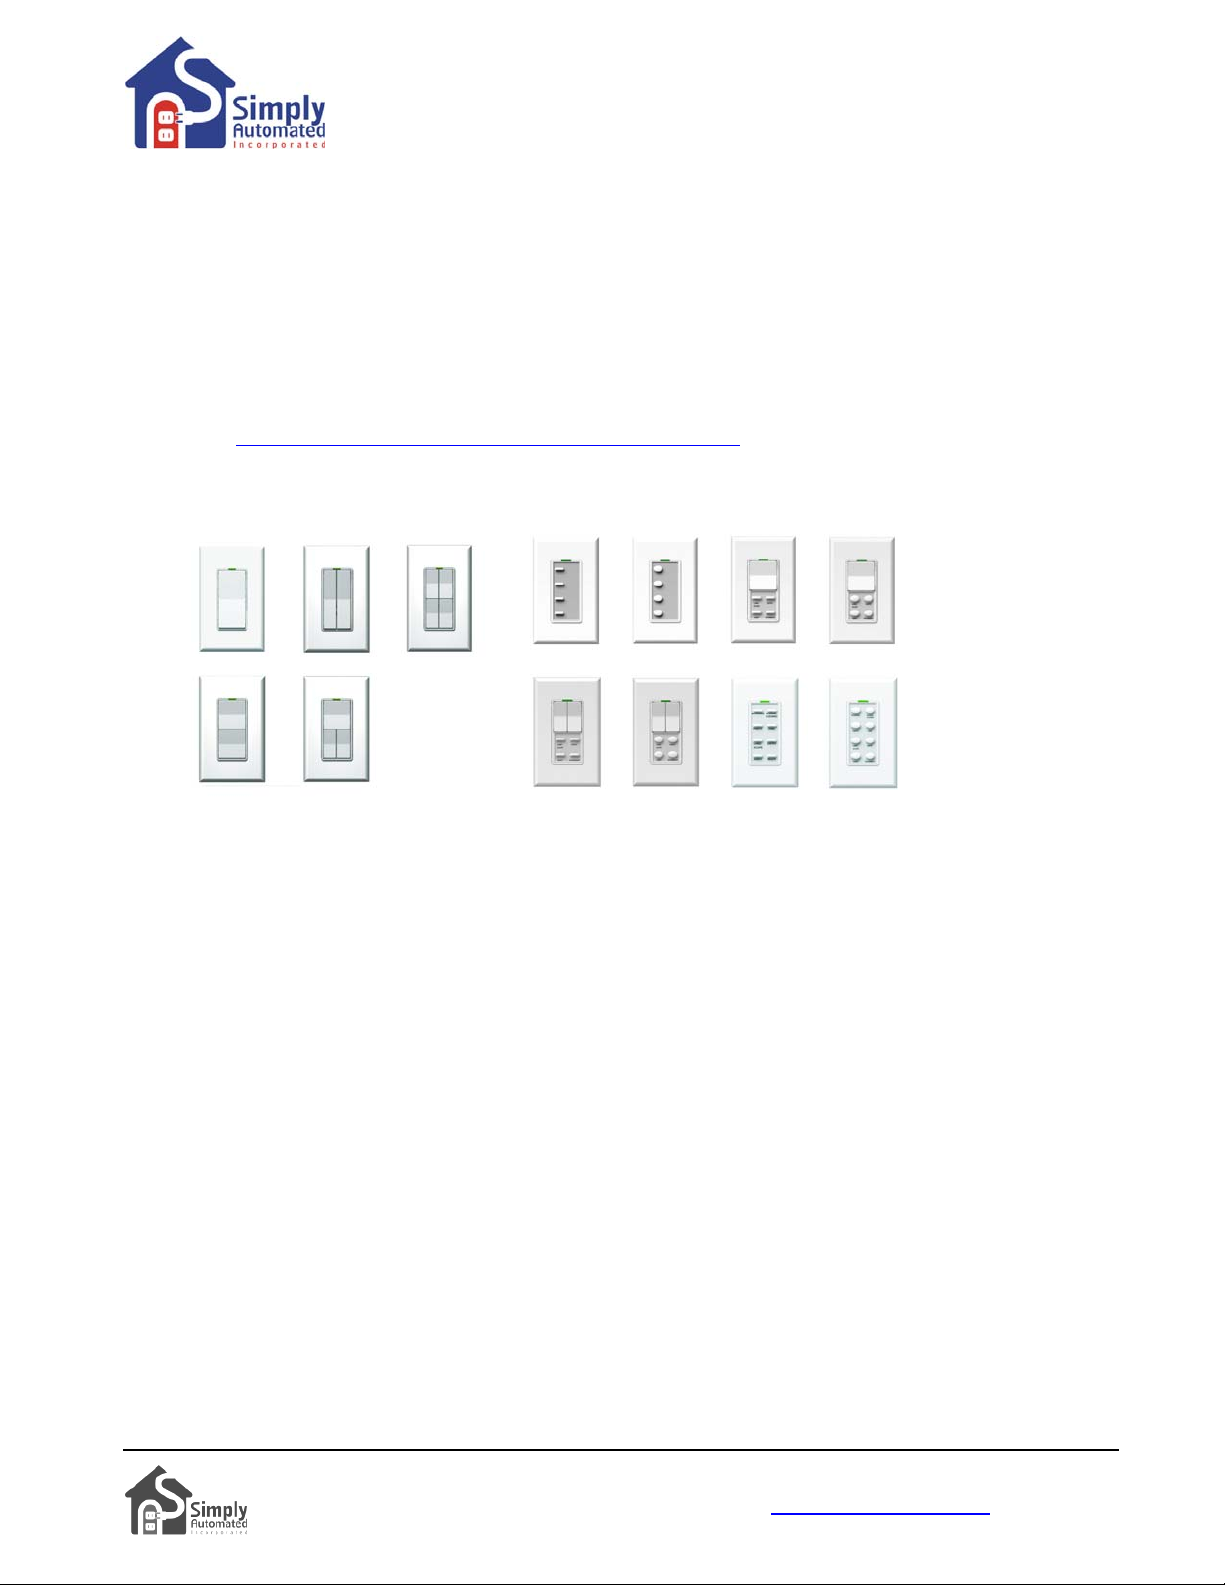
Powerful Custom Expansion Capability – up to 250 devices – using your PC and UPStart software! Devices
include single rocker dimmers, deluxe dimmers with different faceplates (up to 8 buttons), lamp or appliance
modules, tabletop pedestal with 4 or 8 buttons, wall receptacle, fixture relay, fixture dimmer or scheduler-timer.
Control lighting and 120VAC appliances, heaters, fans, motors or pumps. Programmable dimming rates (1
second, 5 second, up to 4 hours). Energy saving countdown timer function. Lighting control for your entire
home! Visit http://www.simply-automated.com/products/products.php
10 Simply Automated, Incorporated
6108 Avenida Encinas, Suite B, Carlsbad, CA 92011 USA
Technical Support: www.simply-automated.com
452-0002-1001 Rev. D Revised: September 13, 2011
or 800-630-9234
 Loading...