

Page 1

en
Operator’s Manual
da
de
fr
it
nl
Betjeningsvejledning
Bedienungsanleitung
Manuel d’utilisation
Manuale dell’operatore
Gebruikershandleiding
Conquest Series Riding Mower
24HP Hydro Tractor
Mfg. No. Description
2690879 Conquest, 24H524WD (CE)
2690931 Conquest, 24H522WD (CE)
2690932 Conquest, 24H524WDF (CE)
2690933 Conquest, 24H522WDF (CE)
52” Mower Deck
Mfg. No. Description
1695796 Mower Deck 52” (132 cm) (CE)
1739907
Revision C
Page 2

2
Page 3
2
A
B
3
C
B
A
H
G
F E
4
D
C
5
A
B
C
A
B
6
B
A
A
B
7
3
Page 4
8
A
D
B
C
C
A
9
E
B
4
Page 5
CONTENTS
Illustrations ..........................................................................................................3
Operator Safety....................................................................................................6
Features and Controls.......................................................................................13
Operation............................................................................................................17
Safety Interlock System Tests ..........................................................................17
Maintenance.......................................................................................................20
Troubleshooting.................................................................................................23
Warranty .............................................................................................................25
Specifications ....................................................................................................26
Parts and Accessories ......................................................................................26
General Information
Thank you for purchasing this quality-built SIMPLICITY riding mower. We’re pleased that you’ve placed your confidence in
the SIMPLICITY brand. When operated and maintained according to the instructions in this manual, your SIMPLICITY
product will provide many years of dependable service.
This manual contains safety information to make you aware of the hazards and risks associated with riding mowers and
how to avoid them. This product and its approved attachments/accessories are designed and intended only for lawn work
or snow removal and are not intended for any other purpose. It is important that you read and understand these
instructions thoroughly before attempting to start or operate this equipment. Save these original instructions for future
reference.
Product Reference Data
Record your model name/number, manufacturer’s
identification numbers, and engine serial numbers in the
space provided for easy access. These numbers can be
found in the locations shown.
When contacting your authorized dealer for
replacement parts, service, or information you MUST
have these numbers.
PRODUCT REFERENCE DATA
Model Description Name/Number
Unit MFG Number Unit SERIAL Number
Mower Deck MFG Number Mower Deck SERIAL Number
Dealer Name Date Purchased
ENGINE REFERENCE DATA
Engine Make Engine Model
CE Identification Tag
A. Manufacturer’s Identifi cation Number
B. Manufacturer’s Serial Number
C. Manufacturer’s Name and Address
D. Maximum Engine Speed in Rotations per Minute
E. Power Rating in Kilowatts
F. Mass of Unit in Kilograms
H. Year of Manufacture
G. CE Compliance Logo
I. Guaranteed Sound Power in Decibels
A
MODEL NO. xxxxxxx
SERIAL NO. xxxxxxxxxx
B
C
XXXXXXXXXXXXXXXXXXXXXX
XXXXXXXXXXXXXXXXX
D
xxxx min
E
x.x kW
xxx kg
F
G
20xx
H
-1
xxx
I
dB
Engine Type/Spec Engine Code/Serial Number
The Illustrated Parts List for this machine can be downloaded from www.simplicitymfg.com. Please provide model and
serial number when ordering replacement parts.
Copyright © 2011 Briggs & Stratton Power Products Group, LLC
Milwaukee, WI, All rights reserved.
SIMPLICITY is a trademark of Briggs & Stratton Power Products
Group, LLC Milwaukee, WI USA.
5
Page 6
OPERATOR SAFETY
Operating Safety
Congratulations on purchasing a superior-quality piece of lawn and
garden equipment. Our products are designed and manufactured to
meet or exceed all industry standards for safety.
Power equipment is only as safe as the operator. If it is misused, or
not properly maintained, it can be dangerous! Remember, you are
responsible for your safety and that of those around you.
Use common sense, and think through what you are doing. If you
are not sure that the task you are about to perform can be safely
done with the equipment you have chosen, ask a
professional: contact your local authorized dealer.
Read the Manual
The operator’s manual contains important safety information you need to
be aware of BEFORE you operate your unit as well as DURING operation.
Safe operating techniques, an explanation of the product’s features
and controls, and maintenance information is included to help you
get the most out of your equipment investment.
Be sure to completely read the Safety Rules and Information found
on the following pages. Also completely read the Operation section.
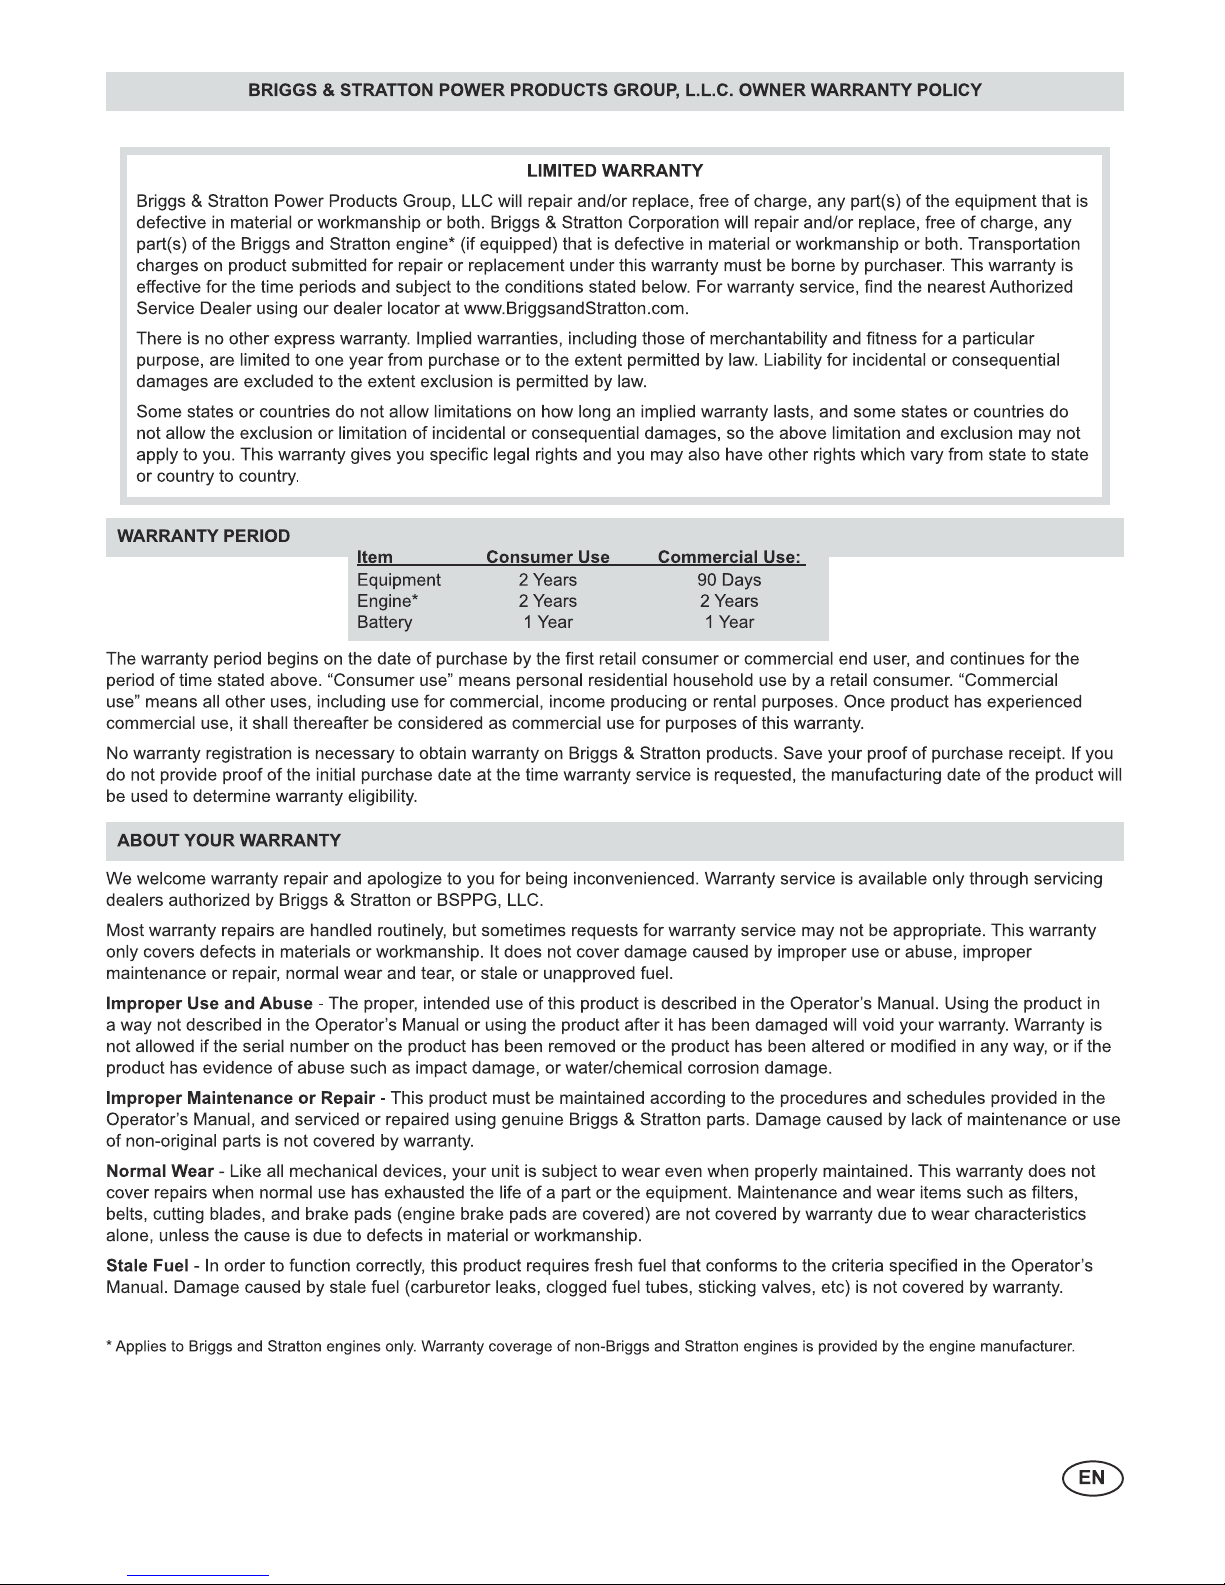
Children
Tragic accidents can occur with children. Do not allow them
anywhere near the area of operation. Children are often attracted to the unit and mowing activity. Never assume that
children will remain where you last saw them. If there is a
risk that children may enter the area where you are mowing, have another responsible adult watch them.
DO NOT GIVE CHILDREN RIDES ON THIS UNIT! This
encourages them to come near the unit in the future while it
is running, and they could be seriously hurt. They may then
approach the unit for a ride when you are not expecting it,
and you may run over them.
6 www.simplicitymfg.com
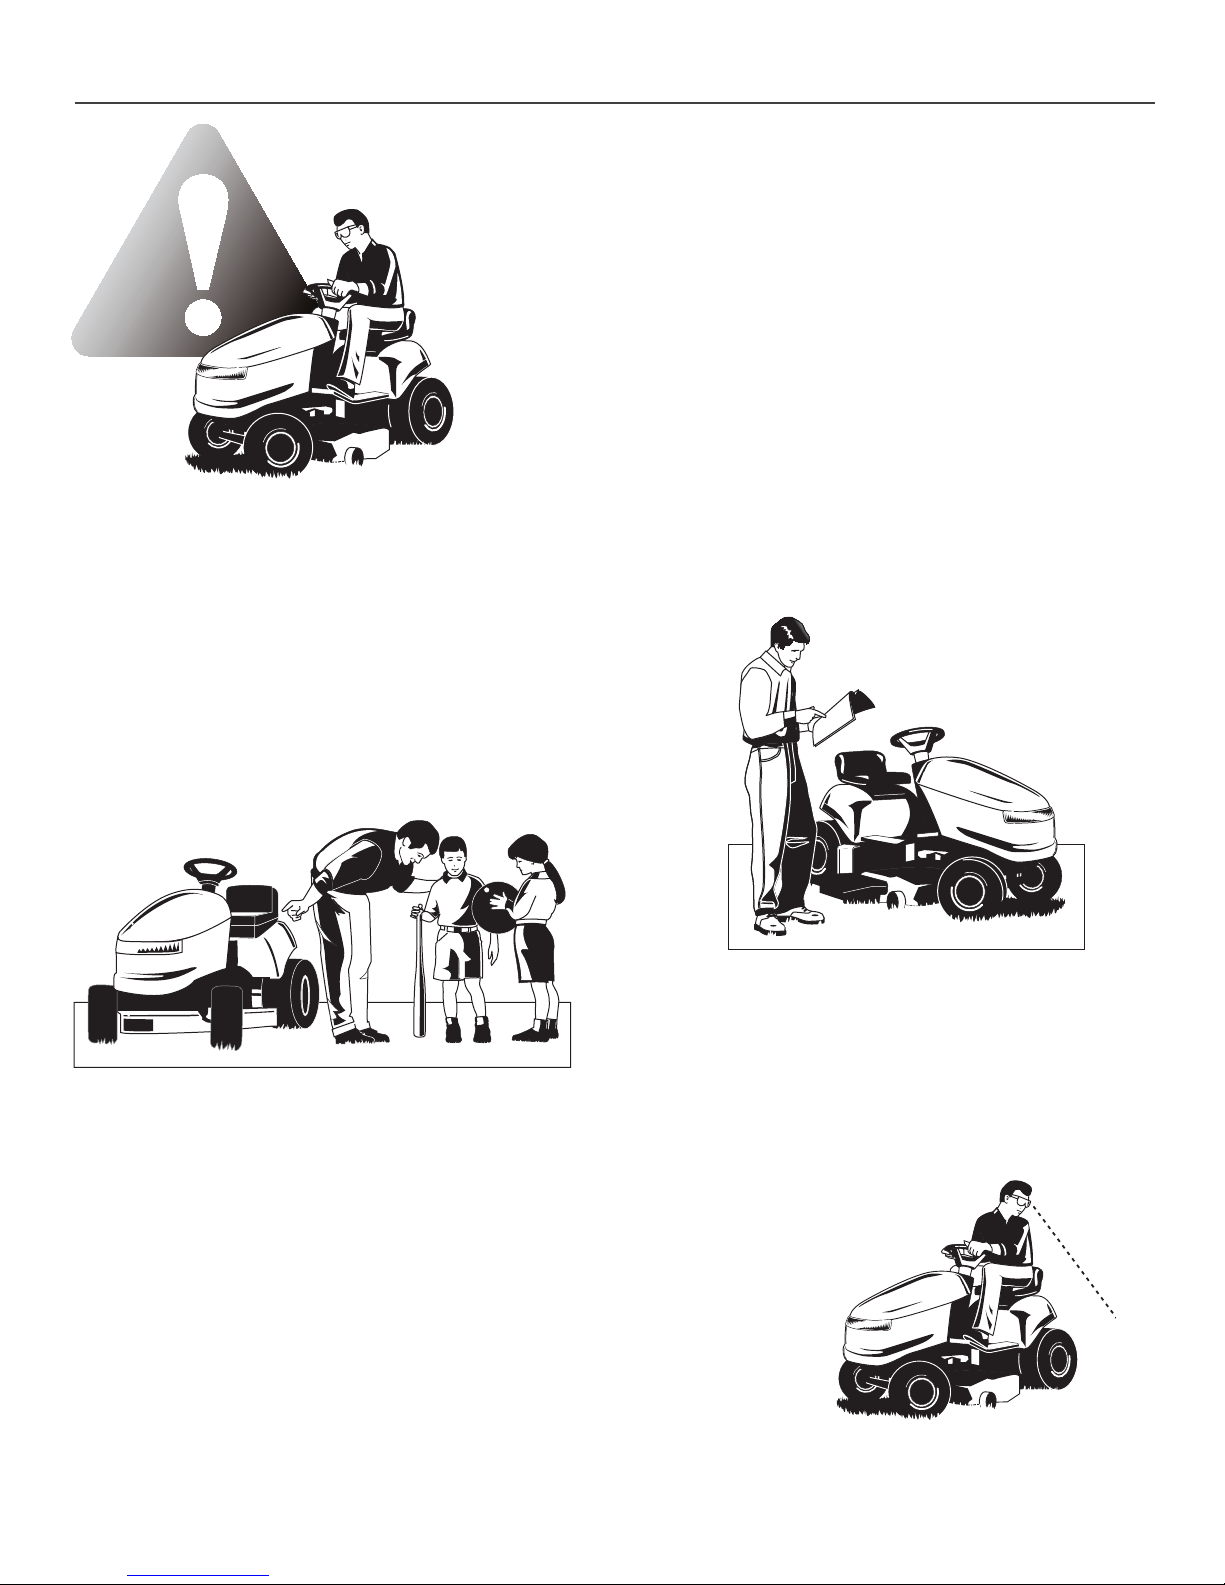
Reverse
Do not mow in reverse unless absolutely necessary. Always look
down and behind before and
while traveling in reverse
even with the mower
blades disengaged.
Page 7
3.5 ft
(1,5 m)
20.0 ft (6,0 m)
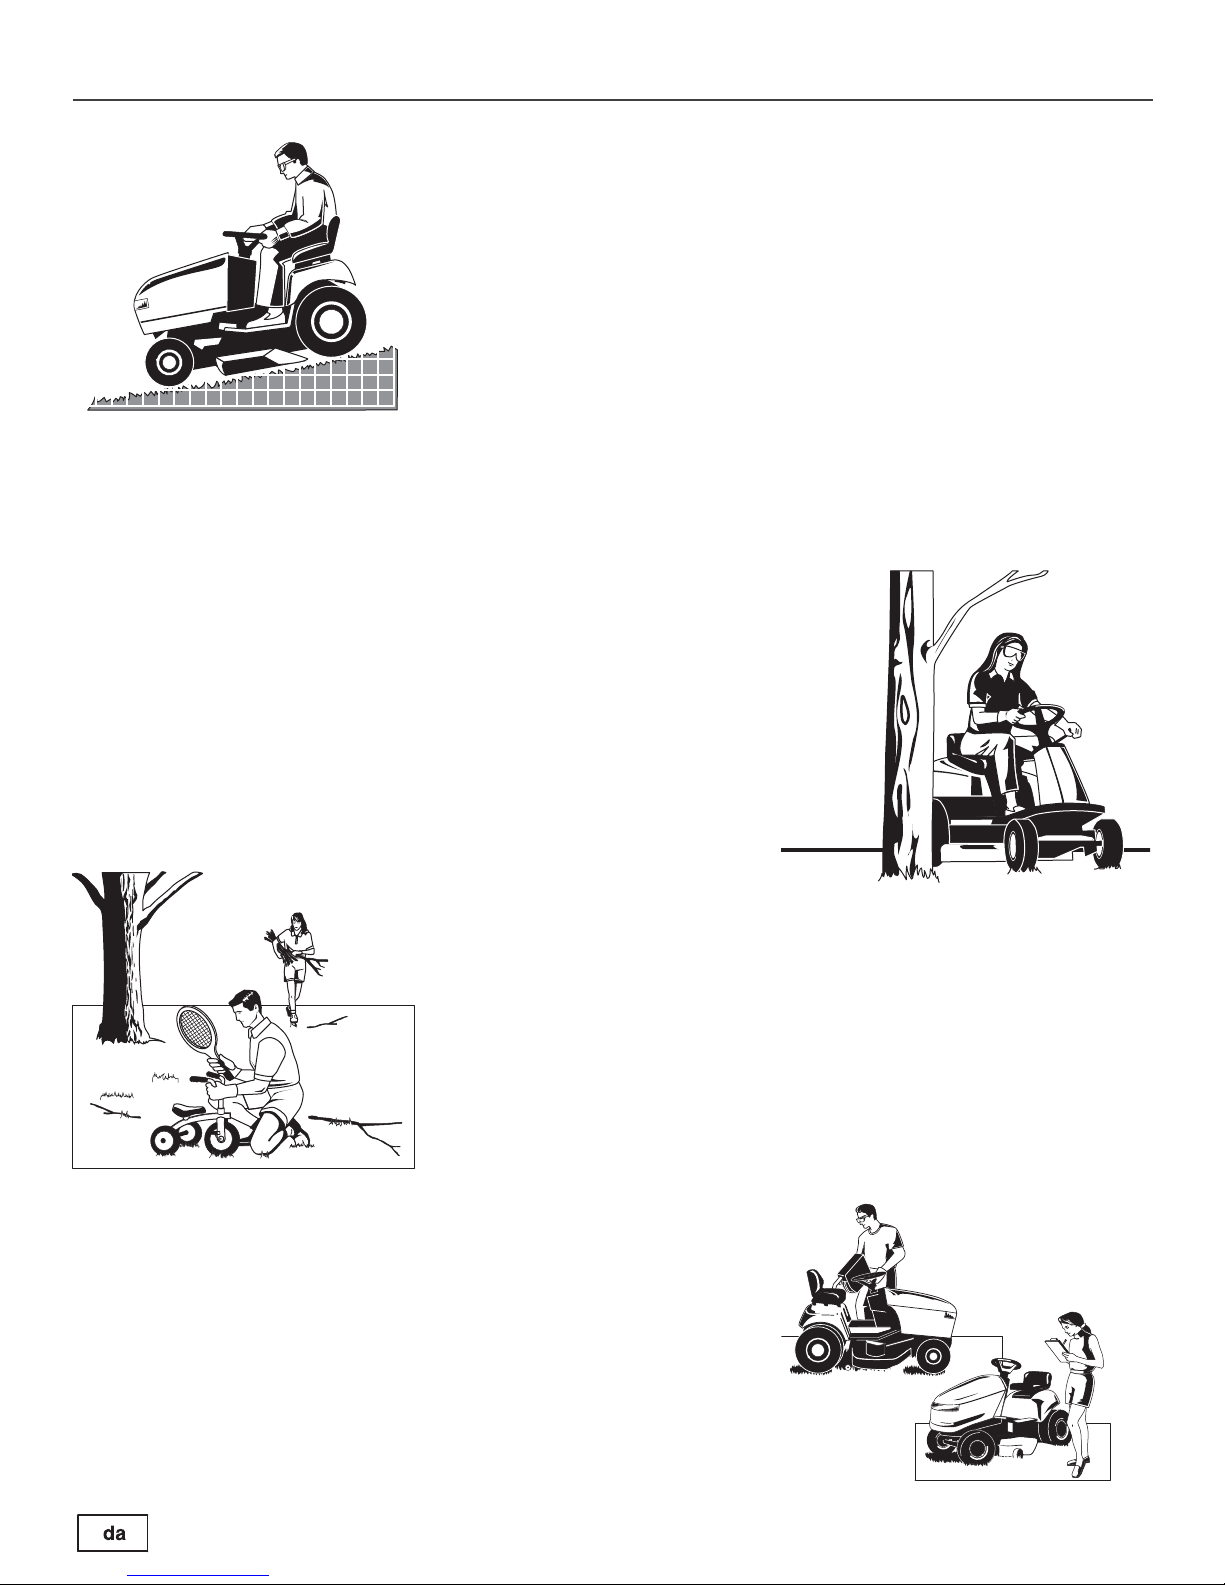
Slope Operation
You could be seriously injured or even killed if you use this unit on too
steep an incline. Using the unit on a slope that is too steep or where you
don’t have adequate traction can cause you to lose control or roll over.
A good rule of thumb is to not operate on any slope you cannot back up
(in 2-wheel drive mode). You should not operate on inclines with a slope
greater than a 3.5 ft (1,5 m) rise over a 20.0 ft (6,0 m) length. Always
drive up and down slopes: never cross the face.
Also note that the surface you are driving on can greatly impact stability
and control. Wet grass or icy pavement can seriously affect your ability
to control the unit.
If you feel unsure about operating the unit on an incline, don’t do it. It’s
not worth the risk.
Moving Parts
This equipment has many moving parts that can injure you or someone else. However, if you are seated in the seat properly, and follow all the rules in this book, the
unit is safe to operate.
The mower deck has spinning mower blades that can amputate hands and feet.
Do not allow anyone near the equipment while it is running!
To help you, the operator, use this equipment safely, it is equipped with an operatorpresent safety system. Do NOT attempt to alter or bypass the system. See your
dealer immediately if the system does not pass all the safety interlock system
tests found in this manual.
OPERATOR SAFETY
Fuel and Maintenance
Gasoline is extremely flammable. Its vapors are also extremely flammable and
can travel to distant ignition sources. Gasoline must only be used as a fuel, not
as a solvent or cleaner. It should never be stored any place where its vapors
can build up or travel to an ignition source like a pilot light. Fuel belongs in an
approved, plastic, sealed gas can, or in the tractor fuel tank with the cap securely closed. Spilled fuel needs to be cleaned up immediately.
Proper maintenance is critical to the safety and performance of your unit. Be
sure to perform the maintenance procedures listed in this manual, especially periodically testing the safety system.
Thrown Objects
This unit has spinning mower blades. These blades can pick up and throw debris
that could seriously injure a bystander. Be sure to clean up the area to be
mowed BEFORE you start mowing.
Do not operate this unit without the entire grass catcher or discharge guard (deflector) in place.
Also, do not allow anyone in the area while the unit is running! If someone does
enter the area, shut the unit off immediately until they leave.
7
Page 8

OPERATOR SAFETY
Read these safety rules and follow them closely. Failure to obey these rules could result in loss of control
of unit, severe personal injury or death to you, or bystanders, or damage to property or equipment.
This mowing deck is capable of amputating hands and feet and throwing objects.
The triangle in text signifies important cautions or warnings which must be followed.
GENERAL OPERATION
1. Read, understand, and follow all instructions in the
manual and on the unit before starting.
2. Do not put hands or feet near rotating parts or under
the machine. Keep clear of the discharge opening at
all times.
3. Only allow responsible adults, who are familiar with
the instructions, to operate the unit (local regulations
can restrict operator age).
4. Clear the area of objects such as rocks, toys, wire,
etc., which could be picked up and thrown by the
blade(s).
5. Be sure the area is clear of other people before mowing. Stop the unit if anyone enters the area.
6. Never carry passengers.
7. Do not mow in reverse unless absolutely necessary.
Always look down and behind before and while travelling in reverse.
8. Never direct discharge material toward anyone. Avoid
discharging material against a wall or obstruction.
Material may ricochet back toward the operator. Stop
the blade(s) when crossing gravel surfaces.
9. Do not operate the machine without the entire grass
catcher, discharge guard (deflector), or other safety
devices in place.
10. Slow down before turning.
11. Never leave a running unit unattended. Always disengage the PTO, set parking brake, stop engine, and remove keys before dismounting.
12. Disengage blades (PTO) when not mowing. Shut off
engine and wait for all parts to come to a complete
stop before cleaning the machine, removing the grass
catcher, or unclogging the discharge guard.
13. Operate the machine only in daylight or good artificial
light.
14. Do not operate the unit while under the influence of
alcohol or drugs.
15 Watch for traffic when operating near or crossing
roadways.
16. Use extra care when loading or unloading the unit
into a trailer or truck.
17. Always wear eye protection when operating this unit.
18. Data indicates that operators, age 60 years and
above, are involved in a large percentage of power
equipment-related injuries. These operators should
evaluate their ability to operate the equipment safely
enough to protect themselves and others from injury.
19. Follow the manufacturer’s recommendations for wheel
weights or counterweights.
20. Keep in mind the operator is responsible for accidents
occurring to other people or property.
21. All drivers should seek and obtain professional and
practical instruction.
22. Always wear substantial footwear and trousers.
Never operate when barefoot or wearing sandals.
23. Before using, always visually check that the blades
and blade hardware are present, intact, and secure.
Replace worn or damaged parts.
24. Disengage attachments before: refueling, removing
an attachment, making adjustments (unless the adjustment can be made from the operator’s position).
25. When the machine is parked, stored, or left unattended, lower the cutting means unless a positive mechanical lock is used.
26. Before leaving the operator’s position for any reason,
engage the parking brake (if equipped), disengage
the PTO, stop the engine, and remove the key.
27. To reduce fire hazard, keep the unit free of grass,
leaves, & excess oil. Do not stop or park over dry
leaves, grass, or combustible materials.
28. It is a violation of California Public Resource Code
Section 4442 to use or operate the engine on or near
any forest-covered, brush-covered, or grass-covered
land unless the exhaust system is equipped with a
spark arrester meeting any applicable local or state
laws. Other states or federal areas may have similar
laws.
TRANSPORTING AND STORAGE
1. When transporting the unit on an open trailer, make
sure it is facing forward, in the direction of travel. If
the unit is facing backwards, wind lift could damage
the unit.
2. Always observe safe refueling and fuel handling practices when refueling the unit after transportation or
storage.
3. Never store the unit (with fuel) in an enclosed poorly
ventilated structure. Fuel vapors can travel to an ignition source (such as a furnace, water heater, etc.)
and cause an explosion. Fuel vapor is also toxic to
humans and animals.
8 www.simplicitymfg.com
4. Always follow the engine manual instructions for
storage preparations before storing the unit for both
short and long term periods.
5. Always follow the engine manual instructions for
proper start-up procedures when returning the unit to
service.
6. Never store the unit or fuel container inside where
there is an open flame or pilot light, such as in a
water heater. Allow unit to cool before storing.
Page 9

OPERATOR SAFETY
SLOPE OPERATION
Slopes are a major factor related to loss-of-control and tipover accidents, which can result in severe injury or death.
Operation on all slopes requires extra caution. If you cannot back up the slope or if you feel uneasy on it, do not operate on it.
Control of a walk-behind or ride-on machine sliding on a
slope will not be regained by the application of the brake.
The main reasons for loss of control are: insufficient tire
grip on the ground, speed too fast, inadequate braking, the
type of machine is unsuitable for its task, lack of awareness
of the ground conditions, incorrect hitching and load distribution.
1. Mow up and down slopes, not across.
2. Watch for holes, ruts, or bumps. Uneven terrain could
overturn the unit. Tall grass can hide obstacles.
3. Choose a slow speed so that you will not have to stop
or change speeds while on the slope.
4. Do not mow on wet grass. Tires may loose traction.
5. Always keep unit in gear especially when traveling
down slopes. Do not shift to neutral and coast downhill.
6. Avoid starting, stopping, or turning on a slope. If tires
lose traction, disengage the blade(s) and proceed
slowly straight down the slope.
7. Keep all movement on slopes slow and gradual. Do
not make sudden changes in speed or direction,
which could cause the machine to rollover.
8. Use extra care while operating machines with grass
catchers or other attachments; they can affect the
stability of the unit. Do not use on steep slopes.
9. Do not try to stabilize the machine by putting your
foot on the ground (ride-on units).
10. Do not mow near drop-offs, ditches, or embankments.
The mower could suddenly turn over if a wheel is
over the edge of a cliff or ditch, or if an edge caves in.
11. Do not use grass catchers on steep slopes.
12. Do not mow slopes you cannot back up them.
13. See your authorized dealer/retailer for recommendations of wheel weights or counterweights to improve
stability.
14. Remove obstacles such as rocks, tree limbs, etc.
15. Use slow speed. Tires may lose traction on slopes
even through the brakes are functioning properly.
16. Do not turn on slopes unless necessary, and then,
turn slowly and gradually downhill, if possible.
WARNING
Never operate on slopes greater than 17.6 percent
(10°) which is a rise of 3-1/2 feet (106 cm) vertically in
20 feet (607 cm) horizontally.
When operating on slopes use additional wheel
weights or counterweights. See your dealer/retailer to
determine which weights are available and
appropriate for your unit.
Select slow ground speed before driving onto slope.
In addition to front weights, use extra caution when
operating on slopes with rear-mounted grass
catchers.
Mow UP and DOWN the slope, never across the face,
use caution when changing directions and DO NOT
START OR STOP ON SLOPE.
CHILDREN
Tragic accidents can occur if the operator is not alert to the
presence of children. Children are often attracted to the
unit and the mowing activity. Never assume that children
will remain where you last saw them.
1. Keep children out of the mowing area and under the
watchful care of another responsible adult.
2. Be alert and turn unit off if children enter the area.
3. Before and during reverse operation, look behind and
down for small children.
4. Never carry children, even with the blade(s) off. They
may fall off and be seriously injured or interfere with
safe unit operation. Children who have been given
rides in the past may suddenly appear in the mowing
area for another ride and be run over or backed over
by the machine.
5. Never allow children to operate the unit.
6. Use extra care when approaching blind corners,
shrubs, trees, or other objects that may obscure vision.
EMISSIONS
1. Engine exhaust from this product contains chemicals
known, in certain quantities, to cause cancer, birth
defects, or other reproductive harm.
2. Look for the relevant Emissions Durability Period and
Air Index information on the engine emissions label.
TOWED EQUIPMENT (RIDE-ON UNITS)
1. Tow only with a machine that has a hitch designed for
towing. Do not attach towed equipment except at the
hitch point.
2. Follow the manufacturer’s recommendations for
weight limit for towed equipment and towing on
slopes.
3. Never allow children or others in or on towed equipment.
4. On slopes, the weight of the towed equipment may
cause loss of traction and loss of control.
5. Travel slowly and allow extra distance to stop.
6. Do not shift to neutral and coast down hill.
IGNITION SYSTEM
1. This spark ignition system complies with Canadian
ICES-002.
9
Page 10

OPERATOR SAFETY
SERVICE AND MAINTENANCE
Safe Handling of Gasoline
1. Extinguish all cigarettes, cigars, pipes, and other
sources of ignition.
2. Use only approved gasoline containers.
3. Never remove the gas cap or add fuel with the engine
running. Allow the engine to cool before refueling.
4. Never fuel the machine indoors.
5. Never store the machine or fuel container where there
is an open flame, spark, or pilot light such as near a
water heater or other appliance.
6. Never fill containers inside a vehicle or on a truck bed
with a plastic bed liner. Always place containers on
the ground away from your vehicle before filling.
7. Remove gas-powered equipment from the truck or
trailer and refuel it on the ground. If this is not possible, then refuel such equipment on a trailer with a
portable container, rather than from a gasoline dispenser nozzle.
8. Keep nozzle in contact with the rim of the fuel tank or
container opening at all times until fueling is complete. Do not use a nozzle lock-open device.
9. If fuel is spilled on clothing, change clothing immediately.
10. Never over-fill the fuel tank. Replace gas cap and
tighten securely.
11. Use extra care in handling gasoline and other fuels.
They are flammable and vapors are explosive.
12. If fuel is spilled, do not attempt to start the engine but
move the machine away from the area of spillage and
avoid creating any source of ignition until fuel vapors
have dissipated.
13. Replace all fuel tank caps and fuel container caps securely.
Service & Maintenance
1. Never run the unit in an enclosed area where carbon
monoxide fumes may collect.
2. Keep nuts and bolts, especially blade attachment
bolts, tight and keep equipment in good condition.
3. Never tamper with safety devices. Check their proper
operation regularly and make necessary repairs if
they are not functioning properly.
4. Keep unit free of grass, leaves, or other debris buildup. Clean up oil or fuel spillage. and remove any fuelsoaked debris. Allow machine to cool before storage.
5. If you strike an object, stop and inspect the machine.
Repair, if necessary, before restarting.
6. Never make adjustments or repairs with the engine
running.
7. Check grass catcher components and the discharge
guard frequently and replace with manufacturer’s recommended parts, when necessary.
8. Mower blades are sharp. Wrap the blade or wear
gloves, and use extra caution when servicing them.
9. Check brake operation frequently. Adjust and service
as required.
10. Maintain or replace safety and instructions labels, as
necessary.
11. Do not remove the fuel filter when the engine is hot
as spilled gasoline may ignite. Do not spread fuel line
clamps further than necessary. Ensure clamps grip
hoses firmly over the filter after installation.
12. Do not use gasoline containing METHANOL, gasohol
containing more than 10% ETHANOL, gasoline additives, or white gas because engine/fuel system damage could result.
13. If the fuel tank must be drained, it should be drained
outdoors.
14. Replace faulty silencers/mufflers.
15. Use only factory authorized replacement parts when
making repairs.
16. Always comply with factory specifications on all settings and adjustments.
17. Only authorized service locations should be utilized
for major service and repair requirements.
18. Never attempt to make major repairs on this unit unless you have been properly trained. Improper service
procedures can result in hazardous operation, equipment damage and voiding of manufacturer’s warranty.
19. On multiple blade mowers, take care as rotating one
blade can cause other blades to rotate.
20. Do not change engine governor settings or overspeed the engine. Operating the engine at excessive
speed can increase the hazard of personal injury.
21. Disengage drive attachments, stop the engine, remove the key, and disconnect the spark plug wire(s)
before: clearing attachment blockages and chutes,
performing service work, striking an object, or if the
unit vibrates abnormally. After striking an object, inspect the machine for damage and make repairs before restarting and operating the equipment.
22. Never place hands near the moving parts, such as a
hydro pump cooling fan, when the tractor is running.
(Hydro pump cooling fans are typically located on top
of the transaxle).
23. Units with hydraulic pumps, hoses, or motors: WARNING: Hydraulic fluid escaping under pressure may
have sufficient force to penetrate skin and cause serious injury. If foreign fluid is injected into the skin it
must be surgically removed within a few hours by a
doctor familiar with this form of injury or gangrene
may result. Keep body and hands away from pin
holes or nozzles that eject hydraulic fluid under high
pressure. Use paper or cardboard, and not hands, to
search for leaks. Make sure all hydraulic fluid connections are tight and all hydraulic hoses and lines
are in good condition before applying pressure to the
system. If leaks occur, have the unit serviced immediately by your authorized dealer.
24. WARNING: Stored energy device. Improper release
of springs can result in serious personal injury.
Springs should be removed by an authorized technician.
25. Models equipped with an engine radiator: WARNING:
Stored energy device. To prevent serious bodily injury
from hot coolant or steam blow-out, never attempt to
remove the radiator cap while the engine is running.
Stop the engine and wait until it is cool. Even then,
use extreme care when removing the cap.
10
www.simplicitymfg.com
Page 11
OPERATOR SAFETY
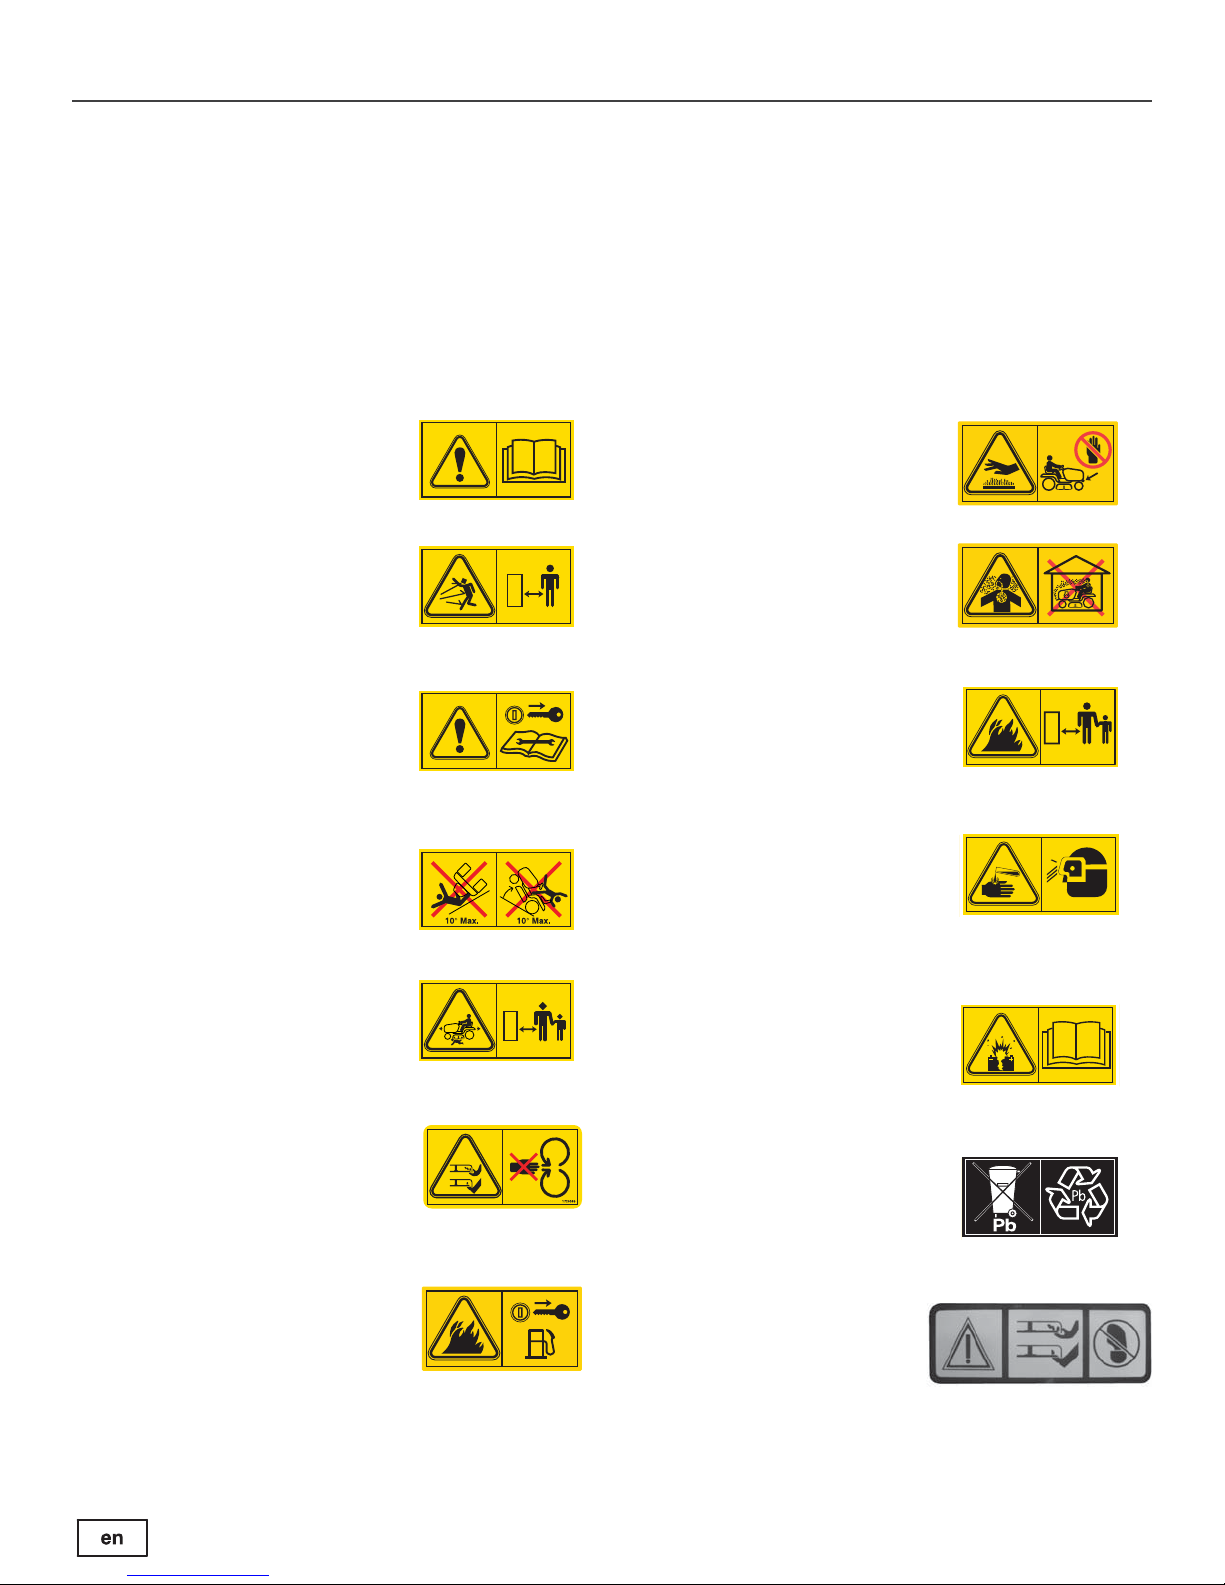
Safety Decals
All DANGER, WARNING, CAUTION and instructional
messages on your rider and mower should be carefully
read and obeyed. Personal bodily injury can result when
these instructions are not followed. The information is for
your safety and it is important! The safety decals below
are on your rider and mower.
Safety Icons
Warning: Read Operator’s Manual.
Read and understand the Operator’s
Manual before using this machine.
Danger: Thrown Objects.
This machine is capable of throwing
objects and debris. Keep bystanders
away.
Warning: Remove Key Before
Servicing.
Remove the key and consult technical
literature before performing repairs or
maintenance.
If any of these decals are lost or damaged, replace them
at once. See your local dealer for replacements.
These labels are easily applied and will act as a constant
visual reminder to you, and others who may use the
equipment, to follow the safety instructions necessary for
safe, effective operation.
Danger: Hot Surface.
Allow machine to cool before
touching this area.
Danger: Carbon Monoxide
Poisoning.
Do not operate the engine in an
unventilated area.
Warning : Fire hazard
Keep children, open flames and
sparks away from the battery, which
could ignite explosive gases.
Danger: Machine Rollover.
Do not use this machine on slopes
greater than 10°.
Danger: Dismemberment.
This machine can amputate limbs.
Keep bystanders and children away
when engine is running.
Danger: Dismemberment.
This mower deck can amputate limbs.
Keep hands and feet away from
blades.
Danger: Fire Hazard.
Do not add fuel while engine is hot or
running. Stop engine and allow to cool
for 3 minutes prior to adding fuel.
Warning: Sulfuric acid can cause
blindness or severe burns
Always wear safety goggles or a face
shield when working on or near a
battery.
Warning: Batteries produce
explosive gases
Read and understand the Operator’s
Manual before using this machine.
Important: Do not discard a
battery in the trash
Contact local authorities for disposal
and/or recycling of batteries.
Danger: Dismemberment.
This mower deck can amputate
limbs. Keep hands and feet away
from blades.
11
Page 12
OPERATOR SAFETY
SS
OO
SSTTOO
PP
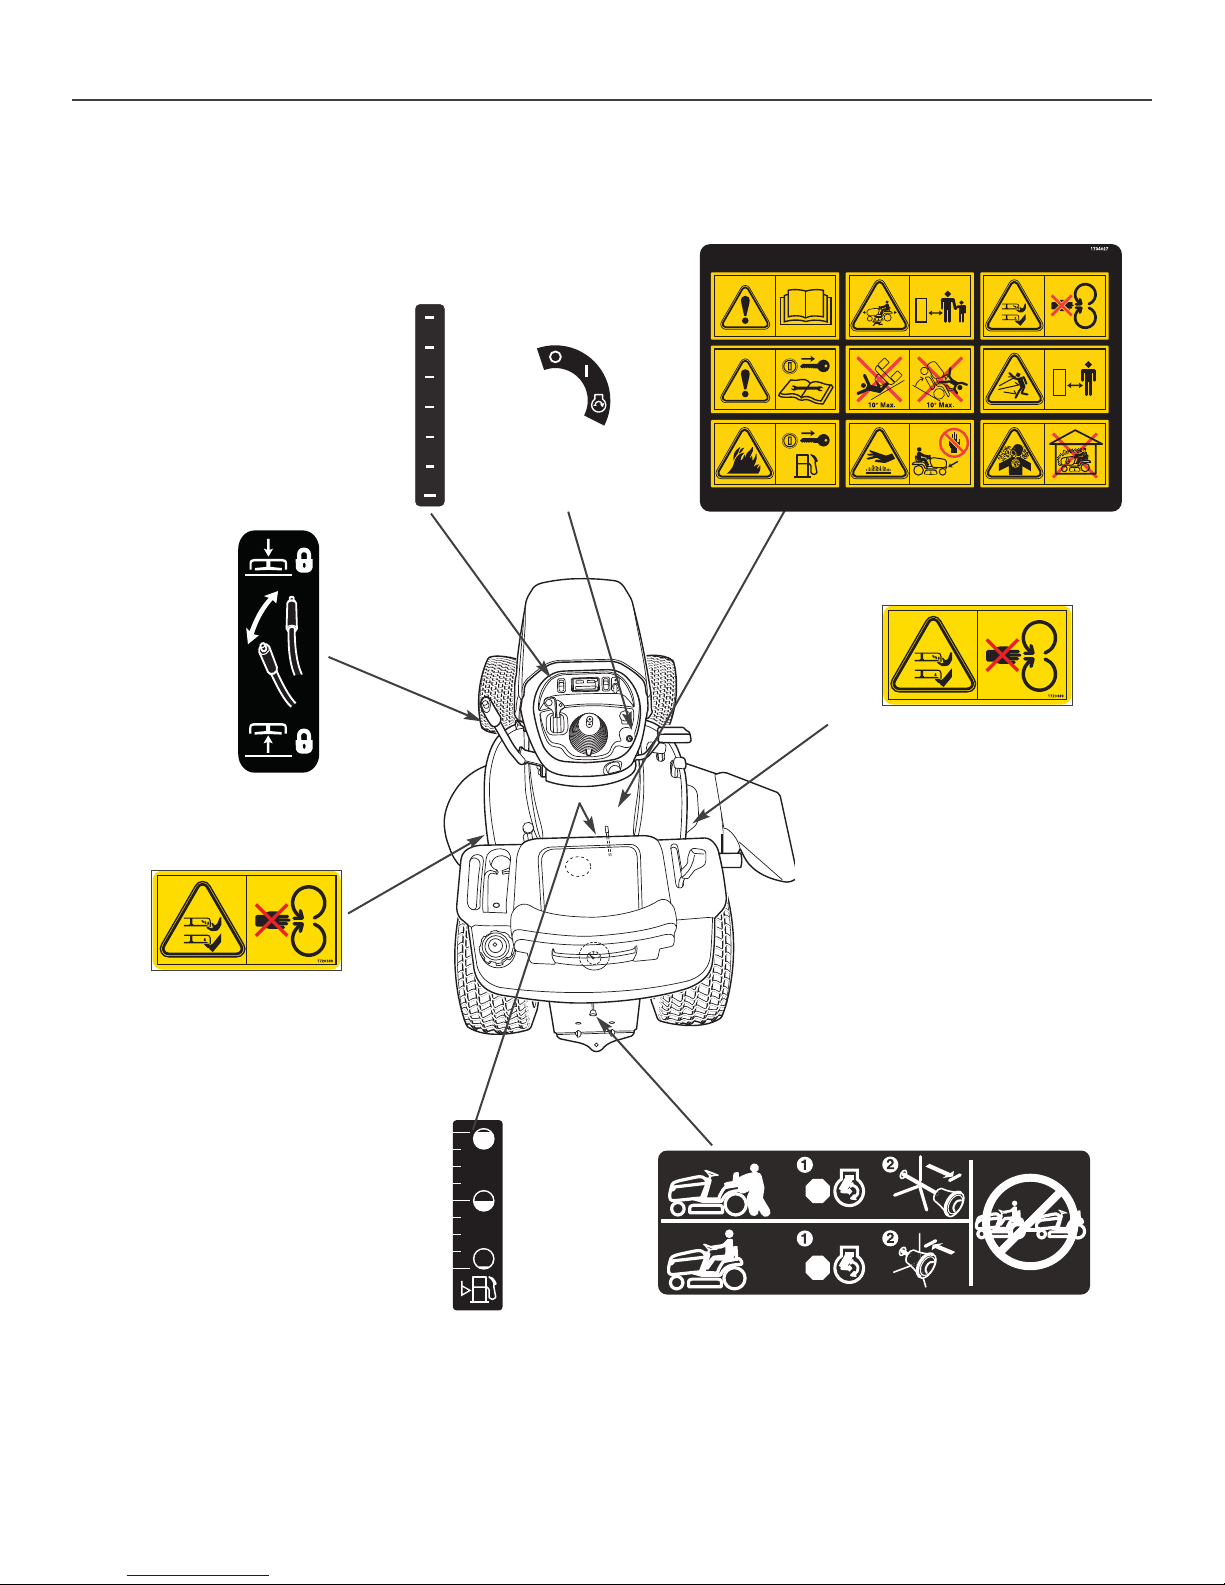
Decal Locations
Decal - Cutting
Height
Part No. 1737541
Operating Instructions,
CE Models, Part No. 1734027
1
2
3
4
5
6
+
Ignition Switch
Positions
Part No. 1722806
1723143
Attachment Lift
Part No. 1723143
CE-Danger, Rotating Blades,
Part No. 1720389
1730172
Fuel Level
Part No. 1730172
CE-Danger, Rotating Blades,
Part No. 1720389
PP
1723160
Transmission
Release
Part No. 1723160
12
www.simplicitymfg.com
Page 13
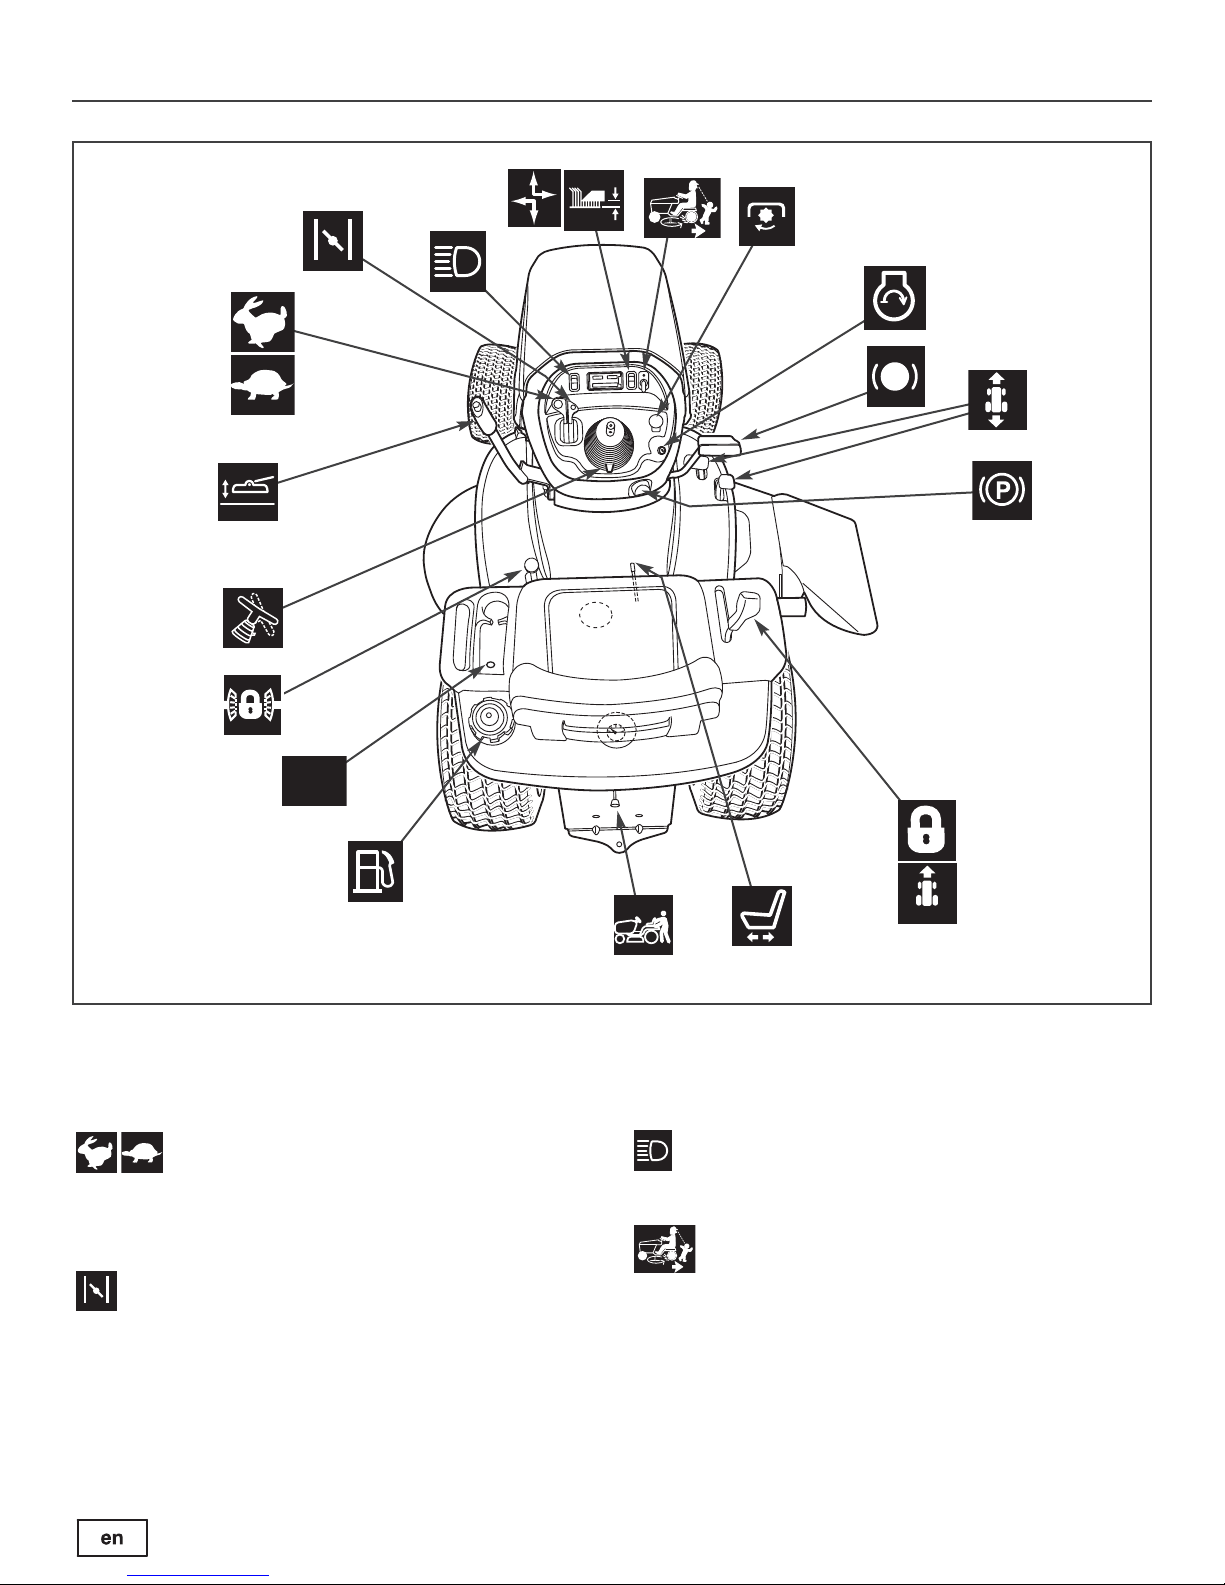
FEATURES AND CONTROLS
12V
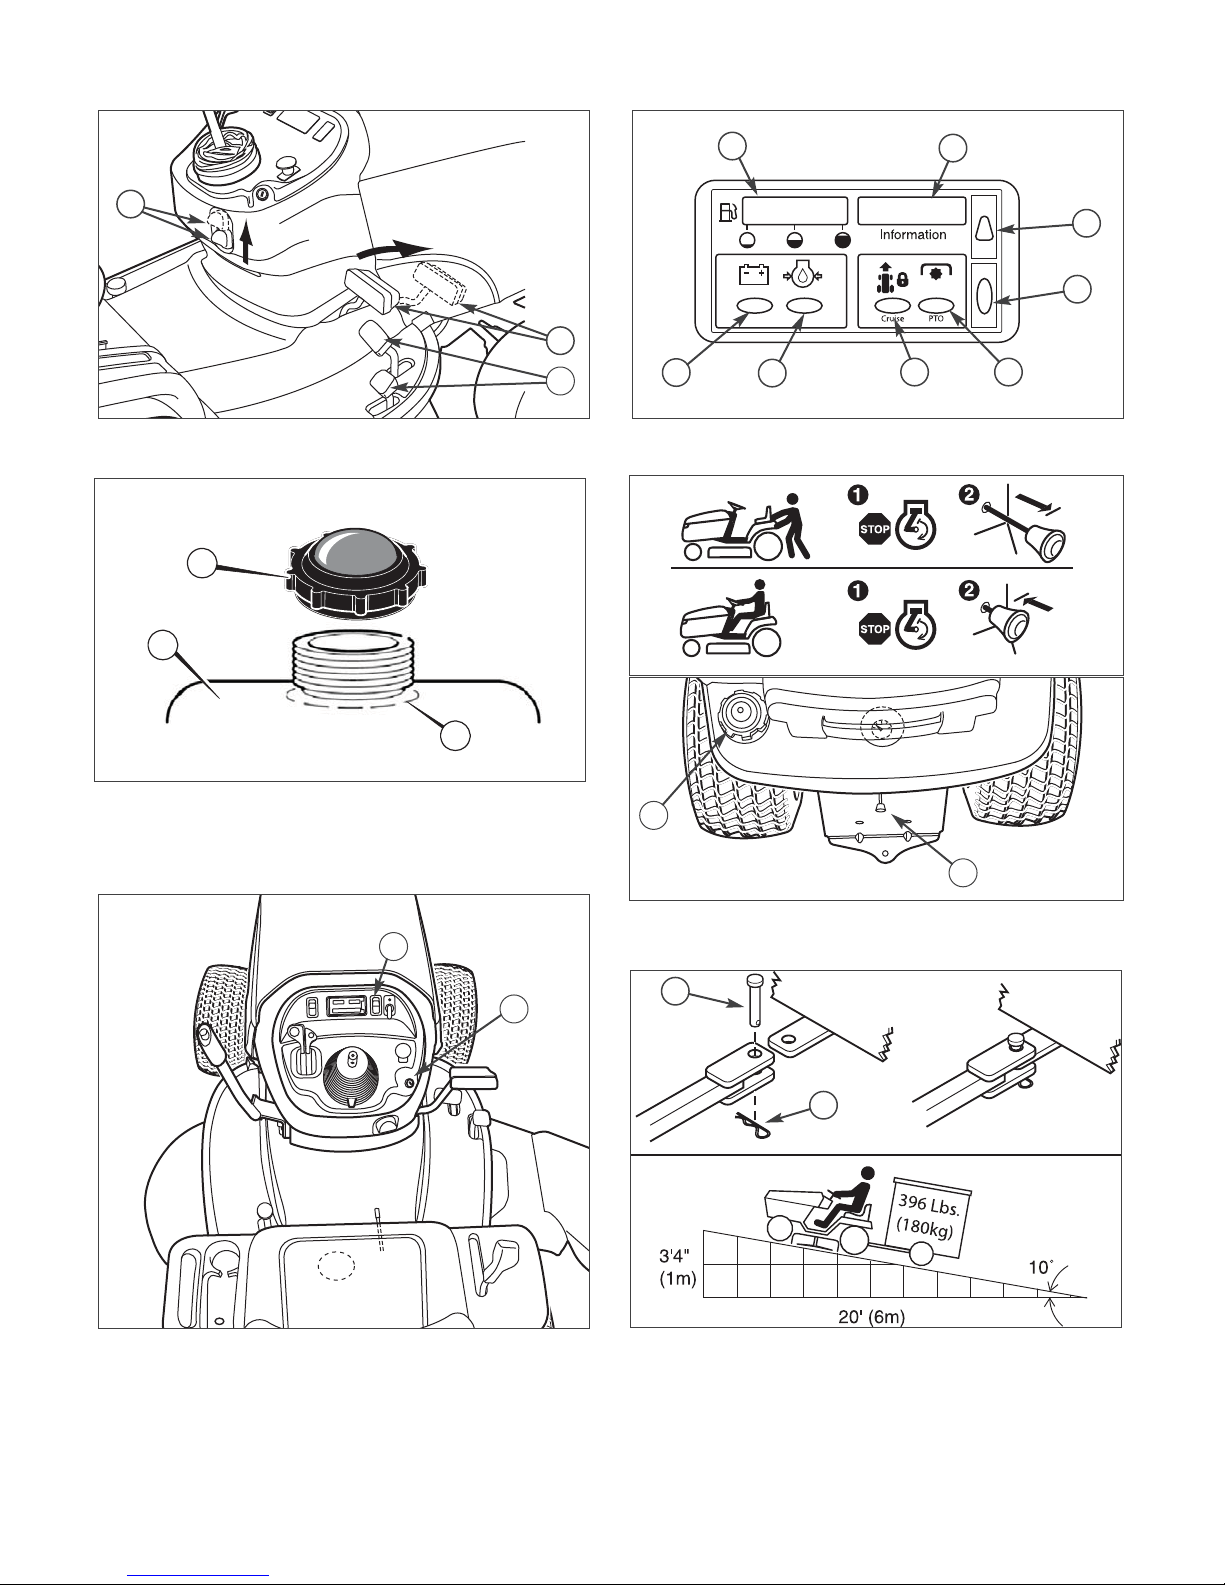
Tractor Controls Figure 1
Tractor Controls
Throttle Control
The throttle controls engine speed. Move the throttle forward to increase engine speed and back to decrease engine speed. Always operate at FULL throttle.
Choke
Close the choke for cold starting. Open the choke once the
engine starts. A warm engine may not require choking.
Move the lever forward to close the choke.
Headlights
The light switch turns the tractor headlights on and off.
Reverse Mowing Option (RMO)
The Reverse Mowing Option allows for mowing (or use of
other PTO driven attachments) while traveling in reverse. If
you choose to mow or operate another attachment in reverse, turn the RMO key after the PTO is engaged. The
L.E.D. light will illuminate, and the operator can then mow
in reverse. Each time the PTO is disengaged the RMO
needs to be reactivated if desired.
13
Page 14

FEATURES AND CONTROLS
12V
PTO Switch
The PTO (Power Take-Off) switch engages and disengages
attachments that use the PTO. To engage the PTO, pull UP
on the switch. Push DOWN to disengage. Note that the op-
erator must be seated firmly in the tractor seat for the PTO
to function.
Ignition Switch
The ignition switch starts and stops the engine, it has three
positions:
OFF Stops the engine and shuts off the electri-
cal system.
RUN Allows the engine to run and powers the
electrical system.
START Cranks the engine for starting.
NOTE: Never leave the ignition switch in the RUN position
with the engine stopped–this drains the battery.
Brake Pedal
Depressing the brake pedal applies the tractor brake.
Mower Height of Cut Adjustment
The cutting height is infinitely adjustable between 1.5 - 4.0”
(3,8 - 10,2 cm).
The cutting height adjustment switch controls the mower
cutting height. This same switch also controls the spout rotator motor when a snowthrower is installed. The arrows on
the switch correspond to the direction of adjustment (UP
arrow raises cutting height, RIGHT arrow rotates the spout
right, etc). When the adjustment indicator has reached the
end of its travel, release the switch; holding the switch down
will damage the motor.
Cruise Control
The cruise control is used to lock the ground speed control
in forward. Move the lever forward until the desired ground
speed is reached. To disengage the cruise control move the
lever back. In the event you need to stop quickly, depressing
the brake pedal will also return the cruise control to neutral.
Seat Adjustment Lever
The seat can be adjusted forward and back. Move the lever,
position the seat as desired, and release the lever to lock
the seat into position.
Ground Speed Pedals
The tractor’s forward ground speed is controlled by the forward ground speed control pedal. The tractor’s reverse
ground speed is controlled by the reverse ground speed
control pedal.
Depressing either pedal will increase ground speed. Note
that the further down the pedal is depressed, the faster the
tractor will travel.
Parking Brake
The parking brake knob is used to lock the parking brake
when the tractor is stopped. Fully depressing the brake pedal
and pulling up on the knob engages the parking brake
Transmission Release Valve Lever
The transmission release valve lever deactivates the transmission so that the tractor can be pushed by hand. See
Pushing the Tractor by Hand.
Fuel Tank
To remove the cap, turn counterclockwise. On models with a
dashboard display, the fuel gauge is part of the dashboard.
Models without a dashboard display have a fuel gauge located under the seat.
12-Volt Power Outlet
The power outlet is 12V-DC. Accessory must be rated at 14
amps or less.
14 www.simplicitymfg.com
Page 15

Differential Lock Pedal (Select Models)
Depressing this pedal locks the transmission differential,
locking both rear wheels into “drive”.
Use this feature if the tractor is stuck because one wheel is
slipping. Engage the differential lock at slow ground
speeds only.
Steering Tilt Adjust
Use the tilt knob located on the bellows to release the pivot
mechanism and pivot the wheel to the desired position. Release the tilt knob to lock in position.
Attachment Lift Control Lever
When using the mower deck, lift the deck off the ground
while transporting to and from the job site. DO NOT cut with
the mower in the raised, transport position.
The attachment lift control lever raises and lowers attachments that utilize the tractor’s manual lift linkage. To lower
an attachment: pull the lever back slightly, depress the release button, and push the lever forward until it locks in the
lowered position. To raise an attachment: push the lever forward slightly, depress the release button, then pull the lever
back until it locks in the raised position.
Parking Brake Function
Applying the Parking Brake - See Figure 2. To lock the
parking brake, release the ground speed pedals (A), fully
depress the brake pedal (B), pull UP on the parking brake
knob (C), and then release brake pedal.
Releasing the Parking Brake - See Figure 2. To release
the parking brake, fully depress the brake pedal (B) and
push the parking brake knob (C) DOWN.
IMPORTANT NOTE: The tractor’s hydraulic attachment lift
will not work when the parking brake is engaged.
FEATURES AND CONTROLS
Dashboard Display & Functions
Display Items
Refer to Figure 3.
A. FUEL LEVEL
Indicates the amount of fuel in the fuel tank. Left is empty;
right is full.
B. HOUR METER / CLOCK / SERVICE INDICATOR
Displays the clock, hour meter, and maintenance reminder.
The hour meter measures the number of hours the key
has been in the RUN position. The hour meter will flash an
initial oil change indicator at 5 hours, and a lubrication reminder every 50 hours. These reminders display for approximately two hours and will automatically reset
themselves.
NOTE: The hour meter will register the passage of time
when the key is in the RUN position, even if the engine is
not running. The hour meter has a self contained power
source so the total hours are always visible.
C. SELECT BUTTON
Used to set the clock and reset the maintenance reminder.
D. SET BUTTON
Used to set the clock and reset the maintenance reminder.
E. PTO LIGHT
Indicates the PTO switch is in the ON position.
F. CRUISE CONTROL LIGHT
Indicates that the cruise control is engaged.
G. LOW OIL PRESSURE LIGHT
Indicates that the engine oil pressure is low. The light will
turn on when the tractor is first started and then go out. IF
THIS LIGHT TURNS ON WHILE THE TRACTOR IS IN
USE, TURN THE ENGINE OFF IMMEDIATELY. Contact
your authorized dealer for service.
H. LOW VOLTAGE LIGHT
Indicates that the electrical system voltage is low. The light
will turn on when the tractor is first started and then go out. IF
THIS LIGHT TURNS ON WHILE THE TRACTOR IS IN
USE, TURN THE ENGINE OFF IMMEDIATELY. Contact
your authorized dealer for service.
15
Page 16

FEATURES AND CONTROLS
Functions
DASHBOARD DISPLAY MODELS
Display Total Running Hours - When the key switch is
first turned to the RUN position, all warning indicators will
light and the total running hours will be displayed. Be sure
all lights are functioning.
Display PTO Hours -Turn the key OFF, engage the PTO,
and turn the key to RUN (engine off).
Set the Clock - Start the engine, leave the engine running.
Depress the select button (C, Figure 3) for three (3) seconds and release. Depress set button and HOLD to advance time. Depress select button to select minutes.
Depress and HOLD set button (D) to advance time. Leave
alone for 5 seconds and clock will activate. Shut off engine.
Demonstration Mode - With the engine off, hold down the
set button (D) and turn the key switch to RUN.
Maintenance Reminder - A maintenance reminder will display in the information window (B) after the first 5 hours of
operation, and then after every 50 hours. The reminder will
automatically reset after 5 hours. The reminder can be manually reset by turning the key switch from OFF to RUN (with
engine off) and then depressing the set (D) and select (C)
buttons simultaneously for 5 seconds.
12-Volt Power Outlet
The 12-volt accessory plug is located in the left side pod
(see Figure 1). It can be used to power small electronic devices. The accessory must be rated at 14 amps or less.
NOTE: Operating a 12-volt accessory, especially with the engine at idle, may cause battery discharge. When not using
the accessory plug it must be covered with the rubber plug to
prevent moisture from causing a short circuit. Entrance of
water into plug can cause a short circuit.
16 www.simplicitymfg.com
Page 17
OPERATION
Safety Interlock System Tests
This unit is equipped with safety interlock switches and
other safety devices. These safety systems are present
for your safety: do not attempt to bypass safety switches,
and never tamper with safety devices.
WARNING
If the unit does not pass a safety test, do not
operate it. See an authorized dealer.
Test 1 — Engine should NOT crank if:
• PTO switch is ON, OR
• Brake pedal is NOT fully depressed (parking brake
OFF), OR
• The cruise control lever is NOT in NEUTRAL.
Test 2 — Engine SHOULD crank and start if:
• Operator is sitting in seat, AND.
• PTO switch is OFF, AND
• Brake pedal is fully depressed (parking brake ON),
AND
• The cruise control lever is in NEUTRAL.
Test 3 — Engine should SHUT OFF if:
• Operator rises off seat with PTO engaged, OR
• Operator rises off seat with brake pedal NOT fully depressed (parking brake OFF).
Test 4 — Check Mower Blade Stopping Time
Mower blades and mower drive belt should come to a complete stop within five seconds after electric PTO switch is
turned OFF (or operator rises off seat). If mower drive belt
does not stop within five seconds, see an authorized dealer.
Test 5 — Reverse Mow Option (RMO) Check
• Engine should shut off if reverse travel is attempted if the
PTO has been switched on and RMO has not been activated.
• RMO light should illuminate when RMO has been activated.
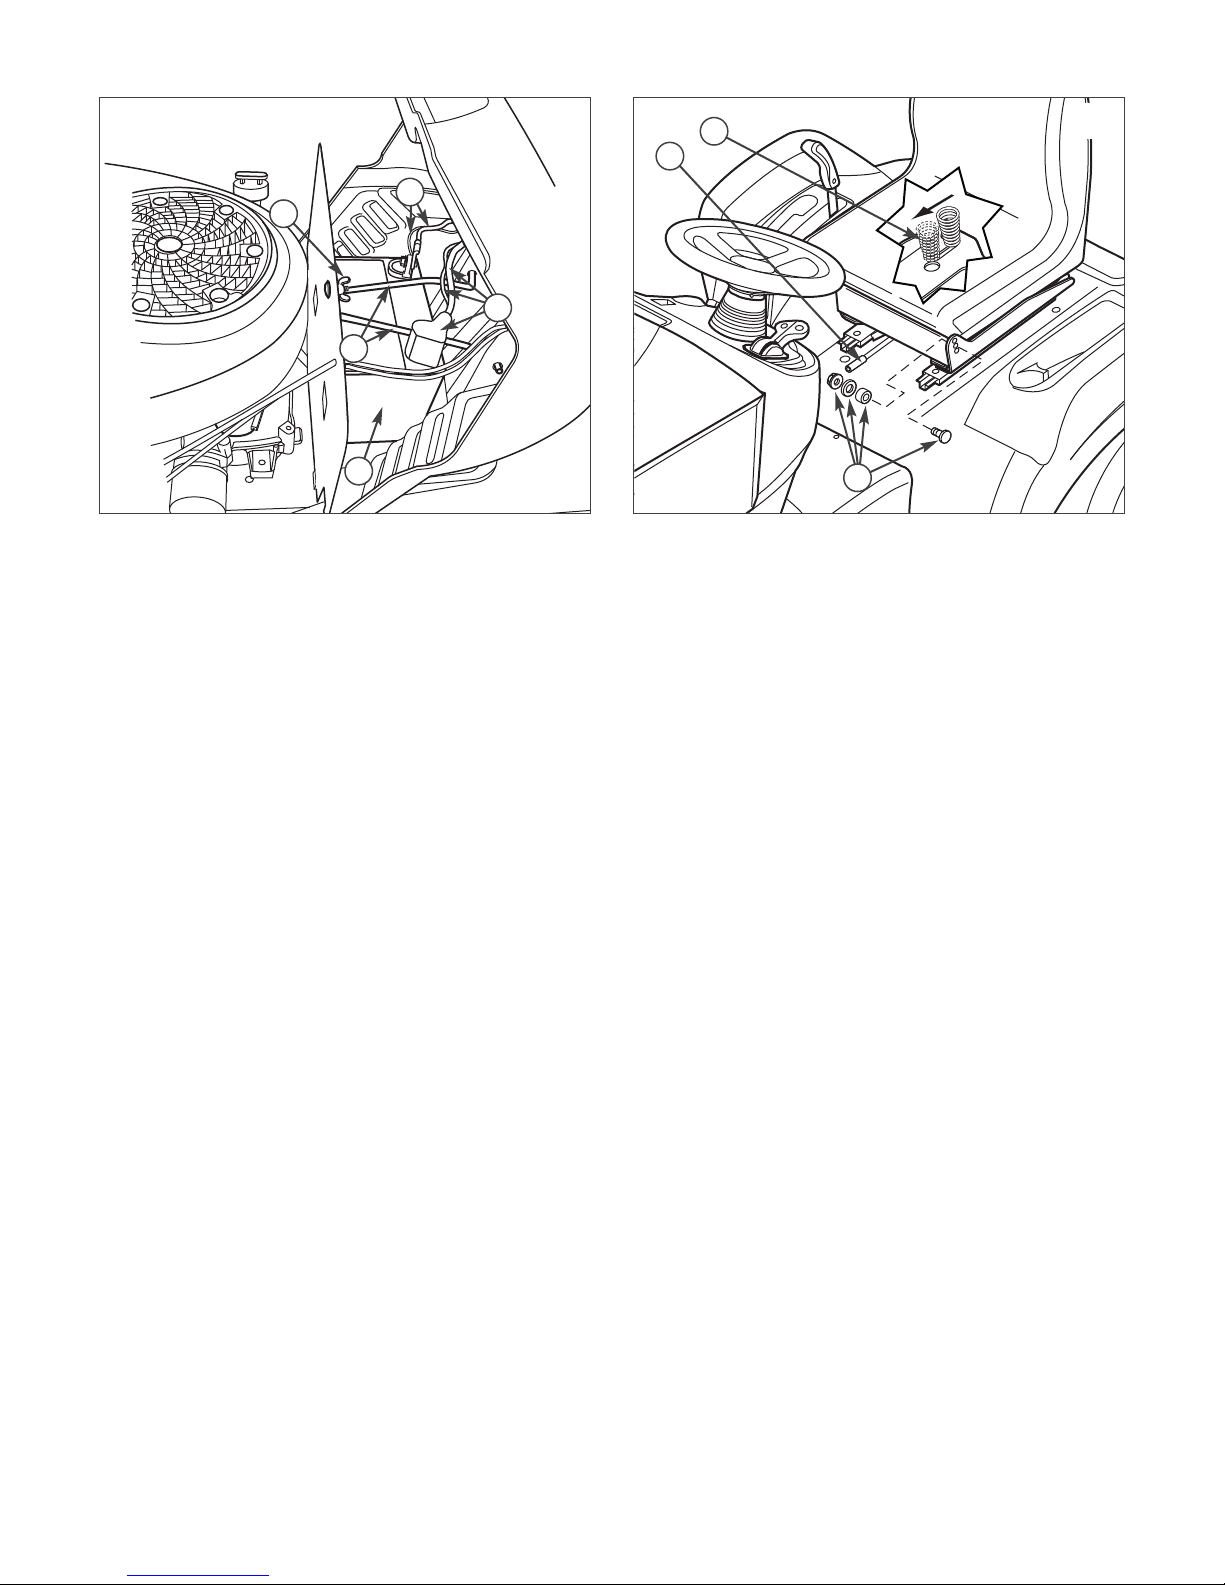
Adding Fuel
WARNING
Fuel and its vapors are extremely flammable
and explosive.
Fire or explosion can cause severe burns or
death.
When Adding Fuel
• Turn engine off and let engine cool at least 3
minutes before removing the fuel cap.
• Fill fuel tank outdoors or in well-ventilated area.
• Do not overfill fuel tank. To allow for expansion of
the fuel, do not fill above the bottom of the fuel tank
neck.
• Keep fuel away from sparks, open flames, pilot
lights, heat, and other ignition sources.
• Check fuel lines, tank, cap, and fittings frequently
for cracks or leaks. Replace if necessary.
• If fuel spills, wait until it evaporates before starting
engine.
1. Clean the fuel cap area of dirt and debris. Remove
the fuel cap (A, Figure 4).
2. Fill the fuel tank (B) with fuel. To allow for expansion
of the fuel, do not fill above the bottom of the fuel tank
neck (C).
3. Reinstall the fuel cap.
Starting the Engine
WARNING
Fuel and its vapors are extremely flammable
and explosive.
Fire or explosion can cause severe burns or
death.
When Starting Engine
• Ensure that spark plug, muffler, fuel cap and air
cleaner (if equipped) are in place and secured.
• Do not crank engine with spark plug removed.
• If engine floods, set choke (if equipped) to OPEN/RUN
position, move throttle (if equipped) to FAST position
and crank until engine starts.
17
Page 18

OPERATION
WARNING
Engines give off carbon monoxide, an
odorless, colorless, poison gas.
Breathing carbon monoxide can cause
nausea, fainting or death.
• Start and run engine outdoors.
• Do not start or run engine in enclosed area, even if
doors or windows are open.
1. While sitting in the operator’s seat, fully depress the
brake pedal or set the parking brake.
2. Make sure that your feet are not depressing the ground
speed control pedals and that the cruise control lever is
in neutral.
3. Disengage the PTO clutch.
4. Set the throttle to FULL.
5. Close the choke.
NOTE: A warm engine may not require choking.
6. Insert the ignition key and turn it to START.
7. After the engine starts, move the engine throttle control
to half speed. Warm up the engine by running it for at
least 30 seconds.
8. Set throttle to FULL.
NOTE: In the event of an emergency the engine can be
stopped by simply turning the ignition switch to STOP. Use
this method only in emergency situations. For normal engine shut down follow the procedure given in Stopping the
Tractor and Engine.
Driving the Tractor
1. Sit in the seat and adjust the seat so that you can comfortably reach all the controls and see the dashboard
display.
6. Depress the forward ground speed control pedal to
travel forward. Release the pedal to stop. Note that the
further down the pedal is depressed the faster the tractor will travel.
7. Stop the tractor by releasing the ground speed control
pedals, setting the parking brake, and stopping the engine (see Stopping the Tractor and Engine).
Mowing
1. Set the mower cutting height to the desired level using
the mower lift lever.
2. Engage the parking brake. Make sure the PTO switch is
disengaged.
3. Start the engine (see Starting the Engine).
4. Set the throttle to FULL.
5. Engage the PTO to activate the mower blades.
6. Begin mowing.
7. When finished, shut off the PTO and raise the deck
using the mower lift lever.
8. Stop the engine (see Stopping the Tractor and
Engine).
WARNING
The engine will shut off if the reverse ground speed
pedal is depressed while the PTO is on and the
RMO has not been activated. The operator should
always turn the PTO off prior to driving across on
roads, paths or any area that maybe used by other
vehicles. Sudden loss of drive could create a
hazard.
2. Engage the parking brake.
3. Make sure the PTO switch is disengaged.
4. Start the engine (see Starting the Engine).
5. Disengage the parking brake and release the brake
pedal.
18 www.simplicitymfg.com
WARNING
Mowing in reverse can be hazardous to bystanders.
Tragic accidents can occur if the operator is not
alert to the presence of children. Never activate
RMO if children are present. Children are often
attracted to the unit and the mowing activity.
Page 19

OPERATION
Mowing in Reverse
If an operator chooses to mow in reverse, the RMO system can be used. To use the Reverse Mowing Option
(RMO) turn the RMO key after the PTO is engaged. The
L.E.D. light will illuminate, and the operator can then mow
in reverse. Each time the PTO is engaged the RMO needs
to be reactivated if desired. The key should be removed to
restrict access to the RMO feature.
Pushing the Tractor by Hand
1. Disengage the PTO and turn the engine off.
2. Push the lever approximately 2.3/8” (6 cm) to release
the transmission (B, Figure 5).
3. The tractor can now be pushed by hand.
DO NOT TOW TRACTOR
Towing the unit will cause transmission damage.
• Do not use another vehicle to push or pull
this unit.
• Do not actuate the transmission release
valve lever while the engine is running.
Attaching a Trailer
The maximum horizontal drawbar force allowed is
444 Newton. The maximum vertical drawbar force is
222 Newton. This equates to a 396 lbs (180 kg) trailer on a
10 degree hill. Secure the trailer with an appropriately
sized clevis pin (A, Figure 7) and clip (B).
Stopping the Tractor and Engine
1. Return the ground speed control(s) to neutral.
2. Disengage the PTO and wait for all moving parts to stop.
3. Move the throttle control to SLOW position and turn
the ignition key (A, Figure 6) to OFF. Remove the key.
Adjusting Mower Cutting Height
The cutting height is infinitely adjustable between approximately 1.5 - 4.0” (3,8 - 10,2 cm).
The cutting height adjustment switch controls the mower
cutting height (B, Figure 6). This same switch also controls
the spout rotator motor when a snowthrower is installed.
The arrows on the switch correspond to the direction of adjustment (UP arrow raises cutting height, RIGHT arrow rotates the spout right, etc). When the adjustment indicator
has reached the end of its travel, release the switch; holding the switch down will damage the motor.
19
Page 20

MAINTENANCE
Maintenance Chart
TRACTOR AND MOWER
Every 8 Hours or Daily
Check safety interlock system
Clean debris off tractor and mower deck
Clean debris from engine compartment
Every 25 Hours or Annually *
Check mower blade stopping time
Check tractor and mower for loose hardware
Check tire pressure
Every 50 Hours or Annually *
Check tractor brakes
Clean battery and cables
See Dealer Annually to
Lubricate tractor and mower
Check mower blades **
* Whichever comes first
** Check blades more often in regions with sandy soils or
high dust conditions.
ENGINE
First 5 Hours
Change engine oil - see engine manual
Every 8 Hours or Daily
Check engine oil level - see engine manual
Every 25 Hours or Annually *
Clean engine air filter and pre-cleaner **
Every 50 Hours or Annually *
Change engine oil
Replace oil filter
Annually
Replace air filter
Replace pre-cleaner
See Dealer Annually to
Inspect muffler and spark arrester
Replace spark plug
Replace fuel filter
Clean engine air cooling system
* Whichever comes first
** Clean more often in dusty conditions or when airborne
debris is present.
Check Tire Pressure
Tire pressure should be checked periodically, and maintained at
the levels shown in the chart. Note that these pressures may
differ slightly from the “Max Inflation” stamped on the side-wall
of the tires. The pressures shown provide proper traction, improve cut quality, and extend tire life.
Size PSI bar
23 x 10.5-12 6-8 0,41-0,55 bar
16 x 6.5-8 10-12 0,8-1,0 bar
Check Mower Blade Stopping Time
Mower blades and mower drive belt should come to a complete stop within five seconds after the electric PTO switch
is turned off.
1. With tractor in neutral, PTO disengaged and operator in
seat, start the engine.
2. Look over the left-hand footrest at the mower drive belt.
Engage the PTO and wait several seconds. Disengage
the PTO and check the amount of time it takes for the
mower drive belt to stop.
3. If mower drive belt does not stop within five seconds,
see an authorized dealer.
20 www.simplicitymfg.com
Page 21

MAINTENANCE
Battery Maintenance
WARNING
When removing or installing battery cables,
disconnect the negative cable FIRST and
reconnect it LAST. If not done in this order,
the positive terminal can be shorted to the
frame by a tool.
Cleaning the Battery and Cables
1. Disconnect the cables from the battery, negative cables
first (A, Figure 8) then the cover and positive cables
(B).
2. Loosen the wingnut and washer (D).
3. Pivot the hold-down rod (C) up and away from battery.
Secure to steering tower.
4. Remove the battery (E).
5. Clean the battery compartment with a solution of baking soda and water.
6. Clean the battery terminals and cable ends with a wire
brush and battery terminal cleaner until shiny.
7. Reinstall the battery (E) in the battery compartment.
Secure with the battery hold-down rod (C) and wingnut
and washer (D).
8. Re-attach the battery cables, positive cables and cover
first (B) then the negative cables (A).
9. Coat the cable ends and battery terminals with petroleum jelly or non-conducting grease.
Seat Adjustment
Pitch Adjustment
The pitch of the seat can be adjusted to one of three positions. To adjust, remove the carriage bolts, spacers, washers, and nuts (B, Figure 9) from the hinge and reinstall them
in the desired holes.
Seat Slide Adjustment
The seat can also be adjusted forward and back. Move the
lever (A, Figure 9), position the seat as desired, and release
the lever to lock the seat into position.
Seat Spring Adjustment
The seat springs (C, Figure 9) can be adjusted to provide a
softer or firmer ride. Tilt the seat forward and slide the
spring assembly forward for a softer ride, and back for a
firmer ride.
Manual Lift Assist Adjustment
Models with large, left-side lift lever. If the manual lift does
not function properly, see your dealer.
Battery Charging
WARNING
Keep open flames and sparks away from
the battery; the gasses coming from it are
highly explosive. Ventilate the battery well
during charging.
A dead battery or one too weak to start the engine may be
the result of a defect in the charging system or other electrical component. If there is any doubt about the cause of
the problem, see your dealer. If you need to replace the
battery, see the
tion.
To charge the battery, follow the instructions provided by
the battery charger manufacturer as well as all warnings
included in the
Charge the battery until fully charged. Do not charge at a
rate higher than 10 amps.
Cleaning the Battery and Cables
Operator Safety
section of this manual.
sec-
21
Page 22

MAINTENANCE
Storage
WARNING
Never store the unit (with fuel) in an enclosed,
poorly ventilated structure. Fuel vapors can travel to
an ignition source (such as a furnace, water
heater, etc.) and cause an explosion. Fuel
vapor is also toxic to humans and animals.
When Storing Fuel Or Equipment With Fuel In Tank
• Store away from furnaces, stoves, water heaters or
other appliances that have pilot lights or other ignition
sources because they can ignite fuel vapors.
Equipment
Disengage the PTO, set the parking brake, and remove
the key.
Battery life will be increased if it is removed. Put in a cool,
dry place and fully charged about once a month. If the
battery is left in the unit, disconnect the negative cable.
Fuel System
Fuel can become stale when stored over 30 days. Stale
fuel causes acid and gum deposits to form in the fuel system or on essential carburetor parts. To keep fuel fresh,
use Briggs & Stratton FRESH START® fuel stabilizer,
available as a liquid additive or a drip concentrate cartridge.
There is no need to drain gasoline from the engine if a
fuel stabilizer is added according to instructions. Run the
engine for 2 minutes to circulate the stabilizer throughout
the fuel system. The engine and fuel can then be stored
up to 24 months.
If gasoline in the engine has not been treated with a fuel
stabilizer, it must be drained into an approved container.
Run the engine until it stops from lack of fuel. The use of a
fuel stabilizer in the storage container is recommended to
maintain freshness.
Engine Oil
While the engine is still warm, change the engine oil. See
Engine Manual.
Before starting the unit after it has been stored:
• Check all fluid levels. Check all maintenance items.
• Perform all recommended checks and procedures
found in this manual.
• Allow the engine to warm up for several minutes before use.
22 www.simplicitymfg.com
Page 23

Troubleshooting the Tractor
PROBLEM LOOK FOR REMEDY
Brake pedal not depressed. Fully depress brake pedal.
PTO (electric clutch) switch is in
ON position.
Cruise control engaged. Move knob to NEUTRAL/OFF position.
Out of fuel. If engine is hot, allow it to cool, then refill the fuel tank.
Engine flooded. Disengage the choke.
Fuse is blown. See authorized dealer.
Engine will not turnover
or start.
Battery terminals require
cleaning.
Battery discharged or dead. Recharge or replace battery.
Wiring loose or broken. Visually check wiring. If wires are frayed or broken, see authorized dealer.
Solenoid or starter motor faulty. See authorized dealer.
Safety interlock switch faulty. See authorized dealer.
TROUBLESHOOTING
Place in OFF position.
See Cleaning the Battery and Cables section.
Engine starts hard or runs
poorly.
Engine knocks.
Excessive oil consumption.
Engine exhaust is black.
Engine runs, but tractor
will not drive.
Water in fuel. See authorized dealer.
Gas is old or stale. See authorized dealer.
Fuel mixture too rich. Clean air filter.
Engine has other problem. See authorized dealer.
Low oil level. Check/add oil as required.
Using wrong grade oil. See Engine Manual.
Engine running too hot. See authorized dealer.
Using wrong grade oil. See Engine Manual.
Too much oil in crankcase. Drain excess oil.
Dirty air filter. See Engine Manual.
Choke closed. Open choke.
Ground speed control pedals
not depressed.
Transmission release lever in
PUSH position.
Parking brake is engaged. Disengage parking brake.
Traction drive belt is broken or
slipping.
Depress pedals.
Move into DRIVE position.
See authorized dealer.
23
Page 24

TROUBLESHOOTING
Troubleshooting the Tractor (Continued)
PROBLEM LOOK FOR REMEDY
Brake will not hold.
Internal brake worn. See authorized dealer.
Steering linkage is loose. See authorized dealer.
Tractor steers hard or
handles poorly.
Improper tire inflation. See Check Tire Pressure section.
Front wheel spindle bearings
dry.
Troubleshooting the Mower
PROBLEM LOOK FOR REMEDY
Mower will not raise.
Mower cut is uneven.
Mower cut is rough
looking.
Lift linkage not properly
attached or damaged.
Mower not leveled properly. See authorized dealer.
Tractor tires not properly
inflated.
Engine speed too slow. Set to full throttle.
Ground speed too fast. Slow down.
Mower has other problem. See authorized dealer.
Engine speed too slow. Set to full throttle.
See authorized dealer.
See authorized dealer.
See Check Tire Pressure section.
Engine stalls easily with
mower engaged.
Excessive mower vibration.
Engine runs and tractor
drives, but mower will not
drive.
Ground speed to fast. Slow down.
Dirty or clogged air filter. See Engine Manual.
Cutting height set too low. Cut tall grass at maximum cutting height during first pass.
Engine not up to operating
temperature.
Starting mower in tall grass. Start the mower in a cleared area.
Mower has other problem. See authorized dealer.
PTO not engaged. Engage the PTO.
Mower has other problem. See authorized dealer.
Run engine for several minutes to warm-up.
24 www.simplicitymfg.com
Page 25
25
Page 26

SPECIFICATIONS
ENGINE
Briggs & Stratton
Make Briggs & Stratton®
Model Professional Series™
Displacement 44.2 cu in. (724 cc)
Electrical System Alternator: 16 amp
Battery: 12 Volt, 230 CCA
Oil Capacity 62-64 oz (1,8-1,9 L)
Spark Plug Gap 0.030 in. (0,76 mm)
Spark Plug Torque 180 in-lbs (20 Nm)
CHASSIS
Fuel Tank Capacity Capacity: 4.0 gal (15,1 L)
Rear Wheels Tire Size: 23 x 10.5-12
Inflation Pressure: 6-8 psi (0,41-0,53 bar)
Front Wheels Tire Size: 16 x 6.5-8
Inflation Pressure: 10-12 psi (0,8-1,0 bar)
TRANSMISSION
K66
Type Hydrostatic Tuff Torq K66
Engine Oil 10w 30 Premium Engine Oil
Capacity 2.6 qt (2,5 L)
Speeds Forward: 0-5.8 MPH (9.3 km/h)
@ 3400 rpm Reverse: 0-3.5 MPH (5.6 km/h)
Continuous Torque 310 ft-lbs (419 Nm)
Output
Drawbar Rating 440 lbs (200 Kg)
Maximum Weight 697 lbs (316 Kg)
on Axle
K664
Type Hydrostatic Tuff Torq K664
Engine Oil 10w 50 Synthetic Engine Oil
Capacity 5.4 qt (5,1 L)
Speeds Forward: 0-6.1 MPH (0-9,8 km/h)
@ 3400 rpm Reverse: 0-3.0 MPH (0-4,8 km/h)
Continuous Torque 310 ft-lbs (419 Nm)
Output
Drawbar Rating 440 lbs (200 kg)
Maximum Weight 697 lbs (316 kg)
on Axle
MOWER
Width of Cut 52” (132 cm)
Number of Blades 3
Base Deck Platform Side Discharge
Cutting Height 1.5 - 4.0 in. (3,8 - 10,2 cm)
Cutting Positions Infinite
DIMENSIONS
Overall Length 75.2” (191 cm)
Overall Width with Deflector 65.7” (167 cm)
Overall Width without Deflector 52.0” (132 cm)
Overall Height 46.9” (119 cm)
Wheelbase 53.1” (135 cm)
Power Rating
The gross power rating for individual gas engine models is labeled in accordance with SAE (Society of Automotive Engineers) code J1940 (Small Engine Power & Torque Rating Procedure), and rating performance has been obtained and corrected in accordance with SAE J1995 (Revision 2002-05). Torque values are derived at 3060 RPM; horsepower values are
derived at 3600 RPM. Net power values are taken with exhaust and air cleaner installed whereas gross power values are
collected without these attachments. Actual gross engine power will be higher than net engine power and is affected by,
among other things, ambient operating conditions and engine-to-engine variability. Given the wide array of products on
which engines are placed, the gas engine may not develop the rated gross power when used in a given piece of power
equipment. This difference is due to a variety of factors including, but not limited to, the variety of engine components (air
cleaner, exhaust, charging, cooling, carburetor, fuel pump, etc.), application limitations, ambient operating conditions (temperature, humidity, altitude), and engine-to-engine variability. Due to manufacturing and capacity limitations, Briggs & Stratton may substitute an engine of higher rated power for this Series engine.
PARTS AND ACCESSORIES
Contact an authorized dealer for details.
26
www.simplicitymfg.com
Page 27

INDHOLD
Illustrationer.........................................................................................................3
Førersikkerhed.....................................................................................................6
Funktioner og Betjeningsorganer....................................................................13
Brug.....................................................................................................................17
Test af sikkerhedsblokeringssystemet............................................................17
Vedligeholdelse..................................................................................................20
Fejlfinding...........................................................................................................23
Garanti ................................................................................................................25
Specifikationer...................................................................................................26
Reservedele og tilbehør....................................................................................26
Generel Information
Ta k for at du har købt denne kvalitetsbyggede rider-plæneklipper fra SIMPLICITY. Det glæder os, at du har tillid til
SIMPLICITY-mærket. Hvis du bruger og vedligeholder dit SIMPLICITY-produkt ifølge instruktionerne i denne vejledning, vil
det give dig mange års pålidelig drift.
Denne manual indeholder sikkerhedsinformation, som gør dig opmærksom på farer og risici forbundet med
plæneklippere, samt hvordan de kan undgås. Dette produkt og dets godkendte vedhæftninger/tilbehør er fremstillede og
beregnede til græsslåning eller snekastning og ingen andre formål. Det er vigtigt, at du læser og forstår disse instruktioner
fuldt ud før du forsøger at starte eller betjene dette udstyr. Gem denne vejledning til fremtidigt brug.
Produktets referencedata
Notér modellens navn/nummer, producentens
identifikationsnumre og motorens serienumre i de angivne
felter, så de er lette at finde frem. Disse numre forefindes
på de viste steder.
Når du henvender dig til din autoriserede forhandler
for at få reservedele, service eller vejledning SKAL
du bruge disse numre.
PRODUKTETS REFERENCE DATA
Model Beskrivelse Navn/Nummer
Maskine MFG-nummer Apparat SERIE-nummer
Klippeaggregat MFG nummer Klippeaggregat SERIE-nummer
Forhandlernavn Købsdato
MOTORENS REFERENCE DATA
Motorfabrikat Motormodel
CE-identifikationsmærkat
A. Producentens Identifikationsnummer
B. Producentens Serienummer
C. Producentens navn og adresse
D. Højeste Motorhastighed i Omdrejninger per Minut
E. Motoreffekt i Kilowatt
F. Maskinens Vægt i Kilogram
G. CE-Mærke
H. Fabrikationsår
I. Garanteret lydstyrke i decibel
A
MODEL NO. xxxxxxx
SERIAL NO. xxxxxxxxxx
B
C
XXXXXXXXXXXXXXXXXXXXXX
XXXXXXXXXXXXXXXXX
D
xxxx min
E
x.x kW
xxx kg
F
G
20xx
H
-1
xxx
I
dB
Motortype/Specif. Motorkode/Serienummer
Den illustrerede reservedelsliste til denne maskine kan downloades fra www.simplicitymfg.com. Oplys venligst model og
serienummer ved bestilling af reservedele.
Copyright © 2011 Briggs & Stratton Power Products Group, LLC
Milwaukee, WI, alle rettigheder forbeholdes.
SIMPLICITY er et varemærke tilhørende Briggs & Stratton Power Products
Group, LLC Milwaukee, WI USA.
5
Page 28
FØRERSIKKERHED
Betjeningssikkerhed
Tillykke med købet af en plæne- og havetraktor af enestående kvalitet.
Vore produkter er udviklet og fabrikeret til at imødekomme eller overgå alle
industristandarder for sikkerhed.
Motoriseret udstyr er kun så sikkert som føreren. Hvis det misbruges eller
ikke vedligeholdes korrekt, kan det være farligt! Husk, at du er ansvarlig
for både din egen og omkringståendes sikkerhed.
Brug sund fornuft og gennemtænk, hvad du vil gøre. Hvis du ikke er sikker
på, at det arbejde, du er i færd med at påbegynde, kan udføres på en
sikker måde med det udstyr, du har valgt, så spørg en professionel. Henvend dig til din autoriserede forhandler.
Læs manualen
Betjeningsvejledningen indeholder vigtige sikkerhedsoplysninger, som man skal
være bekendt med FØR såvel som UNDER brug af udstyret.
Sikker betjening, forklaringer af produktets egenskaber og kontrolfunktioner, samt vedligeholdelsesoplysninger er inkluderet for at hjælpe dig få
mest muligt ud af din investering i udstyret.
Læs de sikkerhedsregler og oplysninger, som findes på de følgende
sider, grundigt og fuldstændigt. Læs også afsnittet Betjening fuldstændigt.
Børn
Tragiske ulykker kan forekomme med børn. Lad dem end ikke
komme tæt på det område, hvor du arbejder med traktoren.
Børn føler sig ofte tiltrukket af maskinen og klippeaktiviteten.
Gå aldrig ud fra, at børnene vil forblive, hvor du sidst så dem.
Hvis der er risiko for, at børn kan komme ind i det område,
hvor du klipper, skal du have en anden ansvarsbevidst voksen
til holde øje med dem.
LAD IKKE BØRN KØRE MED PÅ TRAKTOREN! Dette kunne
på et senere tidspunkt opmuntre dem til at komme tæt på
traktoren, mens den kører, og de kunne komme alvorligt til
skade. De kan måske komme tæt op på traktoren for at køre
med, når du mindst venter det, og du kunne køre over dem.
6 www.simplicitymfg.com
Bakgear
Klip ikke under baglænskørsel, med
mindre det er strengt nødvendigt. Se
altid nedad og bagud, før eller
imens du kører baglæns,
selv med klipperen
koblet fra.
Page 29
Kørsel på skråninger
3.5 ft
(1,5 m)
20.0 ft (6,0 m)
Du kan komme alvorligt til skade eller endda miste livet, hvis du kører
med traktoren på en skråning, som er for stejl. Hvis du bruger maskinen på en skråning, som er for stejl, eller hvor du ikke har god traktion,
kan du miste kontrollen og vælte.
En god tommelfingerregel er ikke at bruge maskinen på nogen skråning, hvor du ikke kan bakke op (med 2-hjulstræk). Bør ikke anvendes
på skråninger med en hældning der er større end 1,5 m (3,5 ft) og med
en stigning over 6,0 m (20 ft) i længden.Kør altid op og ned ad
skråninger, aldrig på tværs.
Bemærk også, at den overflade, du kører på, har stor indflydelse på
stabilitet og kontrol. Vådt græs eller isbelagte overflader kan mindske
din kontrol over maskinen betydeligt.
Hvis du ikke føler dig sikker på, om du burde bruge maskinen på en
skråning, så lad være. Det er ikke risikoen værd.
Bevægelige dele
Denne maskine har mange bevægelige dele, som kan forårsage tilskadekomst for
dig selv eller andre. Men hvis du sidder rigtigt i sædet og følger reglerne i denne
håndbog, er det sikkert at bruge maskinen.
Klipperen har roterende knive, som kan amputere hænder og fødder. Lad ingen
omkringstående komme nær maskinen, mens den kører!
For at hjælpe dig, føreren, med at bruge denne maskine på en sikker måde, er
den udstyret med et “føreren til stede”-sikkerhedssystem. Forsøg IKKE på at
modificere eller omgå systemet. Henvend dig omgående til din forhandler, hvis
systemet ikke består alle de sikkerhedsblokeringsprøver, som findes i denne
håndbog.
FØRERSIKKERHED
Udslyngende genstande
Denne maskine har roterende klipperknive. Disse knive kan gribe fat i og kaste
genstande og andet materiale ud således, at omkringstående kan komme til
skade. Gør det område, der skal klippes, rent FØR du begynder at klippe!
Brug ikke maskinen med mindre hele græsopsamleren, udkastskærmen (deflektor) og andet nødvendigt sikkerhedsudstyr er installeret.
Og tillad ingen omkringstående i området, mens maskinen kører! Hvis nogen
kommer ind på området, så sluk straks for maskinen, indtil de går bort igen.
Brændstof og vedligeholdelse
Benzin er meget brandfarligt. Dens dampe er også yderst brandfarlige, og
kan drive hen til fjernereliggende antændelseskilder. Benzin må kun bruges
som brændstof, ikke som opløsningsmiddel eller rengøringsmiddel. Den må
aldrig opbevares i noget område, hvor dampe kan ansamles eller drive hen
til antændelseskilder som f.eks vågeblus. Brændstof hører hjemme i en
godkendt, aflukket benzindunk i plastik, eller i traktorens brændstoftank med
dækslet forsvarligt skruet til. Spildt brændstof skal viskes op omgående.
Korrekt vedligeholdelse er kritisk for maskinens sikkerhed og god ydeevne.
Vær sikker på, at du får alle vedligeholdelsesprocedurer udført, ikke mindst
regelmæssig afprøvning af sikkerhedssystemet.
7
Page 30

FØRERSIKKERHED
Læs disse sikkerhedsregler og følg dem omhyggeligt. Hvis du ikke overholder disse sikkerhedsregler, kan det
medføre tab af kontrol over maskinen, personlig tilskadekomst eller død for dig selv eller omkringstående,
eller beskadigelse af maskinen eller anden ejendom.
Klipperen er i stand til at amputere hænder og fødder og til at kaste genstande omkring.
Trekanten hvor den forekommer i teksten, angiver vigtige forholdsregler eller advarsler, som skal følges.
GENEREL BETJENING
1. Læs, forstå og følg alle anvisninger i håndbogen og
på maskinen før start.
2. Hold ikke hænder eller fødder nær de roterende dele
eller under maskinen. Hold dig altid på afstand af udkaståbningen.
3. Tillad kun ansvarsbevidste voksne, som er bekendt
med betjeningsanvisningerne, at køre med dette udstyr (lokale forordninger kan muligvis pålægge begrænsninger vedrørende førerens alder).
4. Gør området rent for genstande som sten, legetøj,
ståltråd og andet, som ellers kan blive samlet op og
kastet ud fra klipperen knive.
5. Vær sikker på, at omkringstående har forladt området, før du begynder at klippe. Stands maskinen,
hvis nogen kommer ind i området.
6. Tillad aldrig passagerer.
7. Klip ikke under baglænskørsel, med mindre det er
strengt nødvendigt. Se altid nedad og bagud, før og
imens du kører baglæns.
8. Vend aldrig udkastmaterialet efter nogen. Undgå at
udkaste materiale imod en mur eller nogen anden
forhindring. Materialet kan slynges tilbage mod føreren. Stands kniven(e), når du kører over grusbelagte overflader.
9. Brug ikke maskinen med mindre hele græsopsamleren, udkastskærmen (deflektor) eller andet nødvendigt sikkerhedsudstyr er installeret.
10. Tag farten af, før du drejer.
11. Efterlad aldrig en maskine gående uden opsyn. Slå
altid knivene (PTO) fra, sæt parkeringsbremsen til,
stands motoren og fjern nøglerne, før du står af maskinen.
12. Kobl knivene (PTO) fra, når du ikke umiddelbart er i
færd med at klippe. Sluk for motoren og vent, indtil
alle maskinens dele er standset helt, før rengøring af
maskinen, aftagning af græsopsamleren eller udrensning af udkastskærmen.
13. Brug kun maskinen i dagslys eller ved godt kunstigt lys.
14. Brug ikke maskinen, mens du er under indflydelse af
alkohol, medicin eller narkotika.
15 Hold øje med trafikken, når du bruger maskinen nær
ved eller kører over veje.
16. Vær ekstra forsigtig ved af- eller pålæsning af maskinen på en påhængsvogn eller lastvogn.
17. Brug altid sikkerhedsbriller under kørsel med maskinen.
18. Statistikker antyder, at førere på 60 år eller derover er
involveret i en stor andel af ulykker, som involverer
selvkørende maskiner. Disse førere bør kritisk
overveje deres evne til at betjene sådanne maskiner
på en sikker måde, så hverken de selv eller andre
risikerer tilskadekomst.
19. Følg fabrikantens anbefalinger for brug af hjulvægte
eller kontravægte.
20. Hold dig for øje, at føreren er ansvarlig for uheld, som
medfører personskade eller materiel skade på andres
ejendom.
21. Alle førere bør opsøge og få professionel undervisning i betjeningen af udstyret.
22. Brug altid solidt fodtøj og benklæder. Kør aldrig med
maskinen barfodet eller med sandaler.
23. Før brug skal du sikre, at knivene og alt tilhørende
isenkram er solidt på plads og i god stand. Udskift
slidte eller beskadigede dele.
24. Kobl udstyret ud før: påfyldning af brændstof, aftagning af udstyr eller udførelse af justeringer (medmindre
disse kan foretages fra førersædet).
25. Når maskinen parkeres, opbevares eller efterlades
uden opsyn, skal klipperknivene sænkes, medmindre
der anvendes en absolut, mekanisk låsemekanisme.
26. Før du forlader førersædet, uanset grunden dertil,
skal du slå parkeringsbremsen til (hvis maskinen har
en), slå knivene (PTO) fra, standse motoren og fjerne
nøglen.
27. Hold maskinen fri for græs, blade og overskydende
olie for at mindske brandfare. Undgå at standse eller
parkere over tørre blade, græs eller andet antændeligt materiale.
TRANSPORT OG OPBEVARING
1. Under transport af maskinen på en åben
påhængsvogn skal det sikres, at den vender fremad, i
kørselsretningen. Hvis den vender baglæns, kan opdrift fra vinden beskadige maskinen.
2. Påfyldning af brændstof efter transport eller opbevaring skal altid gøres i overensstemmelse med
gældende sikkerhedsanvisninger.
3. Maskinen må aldrig opbevares (med brændstof) i en
indelukket, dårligt ventileret bygning. Brændstofdampe kan drive hen til antændelseskilder (som
f.eks. varmefyr eller varmtvandsbeholdere) og kan
forårsage eksplosion. Brændstofdampe er også
giftige for både mennesker og dyr.
8 www.simplicitymfg.com
4. Følg altid anvisningerne i motorhåndbogen for nødvendigt forberedende arbejde, før maskinen opbevares i såvel korte som længere perioder.
5. Følg altid anvisningerne i motorhåndbogen for korrekt
startprocedure, når maskinen tages i brug igen.
6. Opbevar aldrig maskinen eller brændstoftanke inden
døre, hvor der forefindes åben flamme eller et vågeblus som i f.eks. en varmtvandsbeholder. Lad motoren køle af før opbevaring.
Page 31

FØRERSIKKERHED
KØRSEL PÅ SKRÅNINGER
Skråninger er ofte årsag til tab af kontrol over maskinen
eller væltning, hvilket kan medføre alvorlig tilskadekomst
eller død. Kørsel på skråninger kræver ekstra påpasselighed.
Hvis du ikke er i stand til at bakke op ad en skråning eller
ikke føler dig godt tilpas ved at køre der, bør du ikke gøre det.
Kontrol over en maskine, som glider ned ad en skråning,
kan ikke genvindes ved brug af bremsen, hvad enten det
er en maskine, man sidder på eller går bagved. De
væsentligste grunde til tab af kontrol er: utilstrækkelig kontakt mellem dækkene og jorden, for høj hastighed, utilstrækkelig bremsning, forkert anvendelse af maskinen til et
givent stykke arbejde, manglende overblik over jordbundsforholdene, forkert tilkobling af udstyr eller forkert vægtfordeling.
1. Klip op og ned ad skråninger, ikke på tværs.
2. Hold øjnene åbne for huller, hjulspor og ujævnheder.
Ujævnt terræn kan vælte maskinen. Højt græs kan
gemme forhindringer.
3. Vælg en langsom hastighed, så det ikke vil være
nødvendigt at standse eller skifte hastighed, mens du
befinder dig på skråningen.
4. Klip ikke græs, når det er vådt. Hjulene kan miste
deres traktion.
5. Hold altid traktoren i gear, især ved kørsel ned ad
skråninger. Skift aldrig til frigear og rul ned ad bakken.
6. Undgå at starte, standse eller vende på en skråning.
Hvis hjulene mister traktion, skal man koble knivene
fra og fortsætte langsomt lige ned ad skråningen.
7. Hold al kørsel på skråninger i et langsomt og gradvist
tempo. Foretag ingen pludselige ændringer i fart eller
retning, som kunne få maskinen til at vælte.
8. Vær ekstra forsigtig, mens du bruger maskinen med
græsopsamlere eller andet tilbehør, idet de kan
påvirke maskinens stabilitet. Anvend ikke maskinen
på stejle skråninger.
9. Prøv aldrig at stabilisere maskinen ved at sætte en
fod på jorden (med maskiner, som man sidder på).
10. Klip ikke tæt på stejle skrænter, grøfter eller andre
stejle terrænændringer. Maskinen kan pludeselig
vælte, hvis et hjul kommer ud over kanten af en grøft
eller skrænt, eller hvis en kant skrider sammen.
11. Brug ikke græsopsamlere på stejle skråninger.
12. Klip ikke græs på skråninger, der er for stejle til at
bakke op ad.
13. Henvend dig til den autoriserede forhandler for anbefalinger vedrørende hjulvægte eller kontravægte, som
kan forbedre maskinens stabilitet.
14. Fjern forhindringer så som sten, og grene.
15. Kør langsomt. Hjulene kan miste deres traktion på
skråninger, selv om bremserne fungerer, som de skal.
16. Drej ikke på skråninger medmindre det er nødvendigt,
og i så fald drej langsomt og gradvist ned ad bakke,
hvis det er muligt.
BUGSERET UDSTYR (MASKINER TIL AT
SIDDE PÅ)
1. Udstyr må kun bugseres med en maskine, der har
træktøj beregnet til bugsering. Bugseret udstyr må
kun fastgøres til træktøjet.
2. Følg fabrikantens anvisninger vedr. vægtgrænser for
bugseret udstyr og bugsering på skråninger.
ADVARSEL
Traktoren må aldrig køres på skråninger på mere end
10 ° (17 %), hvilket er en hældning på 1 m vertikalt for
hver 6 m horisontalt (17 cm/m).
Ved kørsel på skråninger skal der bruges ekstra
hjulvægte eller modvægte. Henvend dig til
forhandleren for oplysninger om, hvilke vægte, der
kan fås, og er hensigtsmæssige for din traktor.
Vælg langsom kørehastighed, før du kører på en
skråning. Udover at have monteret vægte fortil skal
du udvise speciel forsigtighed ved kørsel på
skråninger med græsopsamler monteret bagtil.
Kør OP og NED ad bakke, aldrig på tværs af skråningen, når du klipper græs, og vær yderst forsigtig, når
du er nødt til at dreje. MAN MÅ IKKE STANDSE
ELLER STARTE PÅ EN SKRÅNING.
3. Lad aldrig børn eller andre sidde i eller på det
bugserede udstyr.
4. På skråninger kan vægten af det bugserede udstyr
forårsage tab af traktion og tab af kontrol.
5. Kør langsomt, og tillad ekstra plads til at standse på.
6. Skift aldrig til frigear så du blot ruller ned ad bakke.
BØRN
Tragiske ulykker kan forekomme, hvis føreren ikke er bevidst om tilstedeværende børn. Børn føler sig ofte tiltrukket
af maskinen og klippeaktiviteten. Gå aldrig ud fra, at
børnene vil forblive, hvor du sidst så dem.
1. Hold børn væk fra klippeområdet og under opsyn af
en anden ansvarlig voksen.
2. Vær opmærksom, og sluk for maskinen, hvis børn
kommer ind på arbejdsområdet.
3. Se bagud og nedefter for småbørn før og under
baglænskørsel.
4. Lad aldrig børn køre med på maskinen, selv med
kniven(e) standset. De kan falde af og komme
alvorligt til skade, eller de kan være til hinder for
sikker kørsel med maskinen. Børn, som man har ladt
køre med på et tidligere tidspunkt, kan pludselig
dukke op, hvor man klipper, for at køre med igen og
kan blive påkørt, for-eller baglæns, af maskinen.
5. Lad aldrig børn føre maskinen.
6. Vær ekstra forsigtig, når du kører omkring blinde
hjørner, buske, træer eller andre ting, som kan nedsætte udsynet.
EMISSION
1. Udstødnigsgasser fra dette produkt indeholder
kemikalier, som i visse mængder vides at forårsage
cancer, fødselsmisdannelser eller anden reproduktiv
skade.
2. Se efter de relevante emissions varighed- og luftindeksoplysninger på motorens emissionsmærkat.
TÆNDINGSSYSTEM
1. Dette tændingssystem er i overensstemmelse med
Canadiske ICES-002.
9
Page 32

FØRERSIKKERHED
SERVICE OG VEDLIGEHOLDELSE
Sikker håndtering af benzin
1. Sluk alle cigaretter, cigarer, piber og alle andre antændelseskilder.
2. Brug kun godkendte benzindunke.
3. Tag aldrig benzindækslet af eller fyld brændstof på
med motoren gående. Lad motoren køle af før påfyldning af brændstof.
4. Fyld aldrig brændstof på inden døre.
5. Opbevar aldrig maskinen eller brændstoftanke, hvor
der forefindes åben flamme, gnister eller et vågeblus
som i f.eks. en varmtvandsbeholder eller andre husholdningsmaskiner.
6. Fyld aldrig beholdere inden i et køretøj eller på ladet
af en lastbil med en plastikindsats. Placer altid beholdere på jorden i nogen afstand fra køretøjer før påfyldning.
7. Fjern benzindrevet udstyr fra ladet på en lastbil eller
påhængsvogn og påfyld brændstof på jorden. Hvis
dette ikke er muligt, skal sådant udstyr, som sidder på
en påhængsvogn, fyldes op med en dunk i stedet for
med benzinstationens slange.
8. Hold slangens mundstykke i kontakt med kanten af
benzintankens eller dunkens åbning hele tiden, indtil
du er færdig med at fylde brændstof på. Brug ikke
anordninger, der holder mundstykket åbent.
9. Hvis du spilder benzin på tøjet, skal du omgående
skifte tøj.
10. Overfyld aldrig brændstoftanken. Sæt benzindækslet
på og stram det forsvarligt igen.
11. Vær ekstra forsigtig under håndtering af benzin og
andet brændstof. De er brandfarlige, og dampene kan
eksplodere.
12. Hvis du spilder brændstof, må du ikke forsøge at
starte motoren, men skal flytte maskinen bort fra det
område, hvor der blev spildt, og undgå at skabe antændelseskilder, indtil brændstofdampene er afluftet.
13. Sæt dækslerne forsvarligt på benzintanke og -dunke
igen.
Service og vedligeholdelse
1. Lad aldrig maskinen køre i et lukket rum, hvor
kuliltedampe kan samles.
2. Se efter, at bolte og møtrikker, især dem, der holder
knivene på plads, sidder godt fast, og hold maskinen i
god stand.
3. Sæt aldrig sikkerhedsudstyr ud af kraft. Efterse dets
funktion regelmæssigt og foretag nødvendige reparationer, hvis det ikke fungerer, som det skal.
4. Hold maskinen ren for græs, blade og andet ophobet
materiale. Visk spildt olie eller brændstof op og fjern
materiale, som er blevet gennemvædet dermed. Lad
motoren køle af før opbevaring.
5. Hvis du rammer en genstand, bør du standse og
efterse maskinen. Foretag nødvendige reparationer,
før du starter maskinen igen.
6. Foretag aldrig justeringer eller reparationer med motoren gående.
7. Efterse græsopsamlerens komponenter og udkastskærmen ofte og udskift med reservedele som anbefalet af fabrikanten, når det er nødvendigt.
8. Klipperknivene er skarpe. Vikl noget om knivene eller
brug handsker og vær ekstra forsigtig ved servicearbejde, som involverer knivene.
9. Efterse bremsernes funktion regelmæssigt og ofte.
Juster eller reparer efter behov.
10. Vedligehold sikkerheds- og anvisningsmærkater, og
udskift dem, hvis det er nødvendigt.
10 www.simplicitymfg.com
11. Fjern ikke benzinfilteret, mens motoren er varm, idet
spildt benzin kan antændes. Spred ikke benzinslangeklemmerne mere end nødvendigt. Vær
sikker på, at klemmerne holder slangerne godt fast på
filteret efter installation.
12. Brug ikke benzin, som indeholder METANOL, eller
benzin som indeholder mere end 10 % ETANOL, benzinadditiver eller hvid benzin, idet det kan resultere i
beskadigelse at motoren/brændstofsystemet.
13. Hvis brændstoftanken skal tømmes, skal det gøres
udendørs.
14. Udskift lydpotter, som er i dårlig stand.
15. Brug kun fabrikantautoriserede reservedele ved reparation.
16. Overhold altid fabrikantens specifikationer ved justeringer og indstillinger.
17. For væsentligt service- eller reparationsarbejde bør
du kun anvende autoriserede serviceforhandlere.
18. Prøv aldrig at udføre væsentligt reparationsarbejde på
maskinen, medmindre du har den rette træning. Forkert udført servicearbejde kan gøre anvendelse af
maskinen farlig, medføre beskadigelse af maskinen
og ugyldiggøre fabrikantens garanti.
19. På klippere med flere knive skal man være forsigtig,
idet drejning af én kniv kan få andre knive til at drejes.
20. Lav ikke modifikationer på motorens regulator eller
andre hastighedskontroller. Kørsel med motoren ved
for høj hastighed kan øge faren for personskade.
21. Kobl udstyrsdrev fra, stands motoren, tag startnøglen
ud, og tag tændrørskabler af før rengøring af udkaståbninger, ved alt servicearbejde, hvis knivene har
ramt noget, eller hvis maskinen vibrerer unormalt.
Efter at man har ramt en genstand, skal maskinen
efterses for beskadigelse og nødvendigt reparationsarbejde udføres, før maskinen startes og køres
igen.
22. Hold hænderne borte fra roterende dele som f.eks.
hydrauliske pumpers køleventilator, mens traktoren
går. (Hydrauliske pumpers køleventilatorer er typisk
placeret ovenpå transakslen).
23. Enheder med hydrauliske pumper, slanger eller motorer: ADVARSEL: Hydraulisk væske, som slippes ud
under tryk, kan ramme hårdt nok til at gennemtrænge
huden og forårsage alvorlig tilskadekomst. Hvis
fremmedartet væske skydes ind i huden, skal den
fjernes operativt indenfor nogle få timer af en doktor,
som er bekendt med denne form for skade. Ellers kan
det forårsage gangræn. Hold krop og fingre væk fra
små huller og dyser, som udsender hydraulisk væske
under højt tryk. Brug papir eller pap - ikke hænderne
- til at søge efter lækager. Vær sikker på, at alle
tilslutninger, der fører hydraulisk væske, sidder stramt,
og at alle hydrauliske slanger og rør er i god stand, før
der sættes tryk på systemet. Hvis der forekommer
lækager, skal enheden omgående til service hos den
autoriserede forhandler.
24. ADVARSEL: Dele og væsker kan være under tryk.
Forkert udløsning af fjedre kan forårsage alvorlig personskade. Fjedre bør kun fjernes af en autoriseret
reparatør.
25. Modeller, som er udstyret med en motorkøler: ADVARSEL: Dele og væsker kan være under tryk. For
at undgå alvorlig legemsbeskadigelse fra varm
kølervæske eller udløst damp, må man aldrig forsøge
at fjerne kølerdækslet, mens motoren går. Stands
motoren, og vent indtil den er kølet af. Så skal man
endda stadig udvise forsigtighed.
Page 33

FØRERSIKKERHED
Sikkerhedsmærkater
Alle advarende mærkater (FARE, ADVARSEL og FORSIGTIG) og alle instruktive mærkater på traktor og klipper bør læses omhyggeligt og efterleves. Det kan føre til
personskade, hvis disse anvisninger ikke følges. De
gives af hensyn til din sikkerhed, og de er vigtige! De nedenstående sikkerhedsmærkater er at finde på traktoren
og klipperen.
Sikkerhedssymboler
Advarsel: Se
Betjeningsvejledningen.
Læs og forstå betjeningsvejledningen
før brug af maskinen.
Fare: Udslyngende genstande.
Denne maskine er i stand til at kaste
genstande og andet materiale. Hold
omkringstående væk.
Advarsel: Fjern startnøglen før
servicearbejde.
Fjern nøglen og gennemlæs den
tekniske vejledning, før du udfører
reparationer eller
vedligeholdelsesarbejde.
Fare: Fare for at vælte.
Brug ikke denne maskine på
skråninger over 10°.
Fare: Fare for amputering.
Denne maskine kan amputere lemmer.
Hold omkringstående, deriblandt børn
borte, når motoren går.
Fare: Fare for amputering.
Denne maskine kan amputere
lemmer. Hold hænder og fødder
borte fra knivene.
Fare: Brandfare.
Brændstof må ikke påfyldes, mens
motoren er varm eller går. Stands
motoren og lad den køle af i 3
minutter, før du fylder brændstof på.
Hvis nogen af disse mærkater er beskadiget eller gået tabt
skal de omgående udskiftes. Henvend dig til din lokale
forhandler for nye mærkater.
Disse mærkater er nemme at montere, og de fungerer som
en stadig og synlig påmindelse til dig selv og andre, som
måtte betjene udstyret, om at følge alle de sikkerhedsanvisninger, som er af betydning for betryggende og hensigtsmæssig betjening.
Fare: Varme komponenter.
Lad motoren køle af, før du berører
området.
Fare: Kulilteforgiftning.
Lad ikke motoren gå i et dårligt
ventileret område.
Advarsel: Brandfare.
Hold børn, åben ild og gnister væk fra
batteriet, for at undgå antændelse af
eksplosive gasser.
Advarsel: Svovlsyre kan forårsage
blindhed og alvorlige
forbrændinger.
Bær altid sikkerhedsbriller eller
ansigtsskærm, når der arbejdes med
eller i nærheden af batteriet.
Advarsel: Batterier udvikler
eksplosive gasser.
Læs og forstå Brugermanualen inden
denne maskine tages i brug.
Vigtigt: Må ikke bortskaffes med
almindeligt affald.
Kontakt de lokale myndigheder mht.
bortskaffelse og/eller genbrug af
batterier.
Fare: Fare for amputering.
Denne maskine kan amputere
lemmer. Hold hænder og fødder
borte fra knivene.
11
Page 34

FØRERSIKKERHED
SS
OO
SSTTOO
PP
Placering af mærkater
Mærkat Reservedelsnr.
1737541
Sikkerhedssymboler,
Reservedelsnr. 1734027
1
2
3
4
5
6
+
Tændingskontaktpositioner
Reservedelsnr.
1722806
1723143
Plæneklipper lift
Reservedelsnr.
1723143
Forsigtig, klemmepunkt,
delnr. 1720389
1730172
Brændstofniveau,
delnr. 1730172
Forsigtig, klemmepunkt,
delnr. 1720389
PP
1723160
Transmissionsudløser
Reservedelsnr.
1723160
12 www.simplicitymfg.com
Page 35

FUNKTIONER OG BETJENINGSORGANER
12V
Traktor betjeningshåndtag figur 1
Traktor betjeningshåndtag
Gashåndtag
Gashåndtaget regulerer motorens omdrejningshastighed.
Skub gashåndtaget fremad for at øge motorhastigheden og
bagud for at sænke den. Man skal altid arbejde med
gashåndtaget i fuld fart stilling.
Choker
Luk for chokeren ved koldstart. Åbn chokeren, når motoren
er startet. En varm motor behøver som regel ikke at chokes.
Flyt håndtaget fremad for at lukke chokeren.
Kørelys
Lygtekontakten tænder og slukker for traktorlygterne.
Baglæns klipning (Reverse Mowing
Option, RMO)
Baglæns klipning tillader klipning (eller brug af andet PTOdrevet udstyr) under baglænskørsel. For at bruge baglæns
klipning (RMO) skal RMO-nøglen drejes, efter PTO er koblet
til. Lysdioden vil tændes og føreren kan nu udføre baglæns
klipning. Hver gang PTO kobles fra, skal der tændes for
RMO igen, hvis man ønsker at fortsætte i baglæns retning.
13
Page 36

FUNKTIONER OG BETJENINGSORGANER
12V
PTO-kontakt
PTO-kontakten til- og frakobler udstyr, som drives af
kraftudtaget. Træk op i kontakten for at koble PTO til. Skub
kontakten ned for at koble PTO fra.
BEMÆRK: Føreren skal sidde ned i traktorsædet, for at PTO
virker.
Tændingskontakt
Tændingskontakten starter og stopper motoren. Den har tre
stillinger:
Fra Stopper motoren og slår det elektriske
kredsløb fra.
Kør Tillader motoren at arbejde og sætter
strøm på det elektriske kredsløb.
Start Aktiverer selvstarteren.
BEMÆRK: Lad aldrig tændingskontakten stå i kør
positionen, når motoren er slukket; det aflader batteriet.
Bremsepedal
Når bremsepedalen trykkes ned, aktiveres traktorens
bremser.
Justering af klippehøjde
Klippehøjden kan indstilles trinløst mellem 3,8 - 10,2 cm
(1,5 - 4,0”).
Kontakten for klippehøjdeindstilling regulerer
plæneklipperens klippehøjde. Den samme kontakt regulerer
også udkastrørets drejemotor, når en sneslynge er monteret.
Pilene på kontakten svarer til justeringsretningen (OP-pil
øger klippehøjden, HØJRE-pil drejer udkastrøret til højre
osv). Når justeringsviseren er nået til en yderposition, skal
du slippe kontakten; hvis du fortsat holder den til, vil du
beskadige motoren.
Cruise Control
Cruise Control bruges til at fastlåse fartkontrollen til kørsel
fremad. Flyt håndtaget fremad, indtil den ønskede fart nås.
Flyt håndtaget bagud for at udkoble Cruise Control. Hvis det
bliver nødvendigt at standse hurtigt, vil Cruise Control gå i
neutral, når man træder på bremsepedalen.
Håndtag til sædeindstilling
Førersædet kan indstilles fremad og bagud. Frigør sædet
med håndtaget, kør sædet i den ønskede stilling, og slip så
håndtaget for at låse sædet fast i denne position.
Kørselspedaler
Traktorens fart fremad styres med pedalen til fremadkørsel.
Traktorens fart bagud styres med pedalen til bagudkørsel.
Når en af pedalerne trykkes ned, øges fremdriftshastigheden.
Bemærk, at jo længere pedalen trykkes ned, jo hurtigere
kører traktoren.
Parkeringsbremse
Håndtaget til parkeringsbremsen bruges til at aktivere
parkeringsbremsen, når traktoren er standset. Parkerings bremsen aktiveres ved at trykke bremsepedalen helt i bund
og derefter trække op i håndtaget.
Udløserhåndtag til transmissionen
Udløserhåndtaget til transmissionen slår transmissionen fra,
så traktoren kan skubbes med håndkraft. Se “Skubning af
traktoren med håndkraft” angående betjeningsvejledning.
Brændstoftank
Når dækslet skal aftages, drejes det mod venstre.
12V Kraftstikdåse
Stikdåsen er på 12 V jævnstrøm. Tilbehørets mærkestrøm
skal være 14 A eller mindre.
14 www.simplicitymfg.com
Page 37

FUNKTIONER OG BETJENINGSORGANER
Pedal til differentialespærre (særlige modeller)
Når denne pedal trykkes ned, spærres differentialet, så
begge baghjul bringes til at trække samtidigt.
Brug denne metode, hvis traktoren sidder fast, fordi det ene
hjul spinder. Man må kun slå differentialespærren til ved
lave hastigheder.
Indstilling af rathældning
Brug håndtaget, som sidder på bælgen, til at frigøre
vippemekanismen og vip rattet i den ønskede stilling. Slip
håndtaget for at låse rattet i denne stilling.
Håndtag til udstyrsløfter
Når klipperen anvendes, skal den løftes op fra jorden, når
man kører til og fra arbejdsstedet. UNDLAD at klippe med
klipperen i løftet transportstilling.
Håndtaget til udstyrsløfteren hæver og sænker udstyr, som
anvender traktorens manuelle løftegrej. Sådan sænkes
udstyret: Træk håndtaget en smule tilbage, tryk
udløserknappen ned og skub håndtaget frem, indtil det låser
i nedsænket stilling. Sådan løftes udstyret: Skub håndtaget
en smule fremad, tryk udløserknappen ned og træk derefter
håndtaget bagud, til det låser i hævet stilling.
Parkeringsbremsefunktioner
Aktivering af parkeringsbremsen - Se Figur 2. Sådan
låses parkeringsbremsen: Slip begge kørselspedaler (A),
tryk bremsepedalen (B) helt ned, træk OP i håndtaget til
parkeringsbremse (C) og slip så bremsepedalen.
Udløsning af parkeringsbremsen - Se Figur 2. Sådan
udløses parkeringsbremsen: Tryk bremsepedalen (B) helt
ned og skub håndtaget til parkeringsbremse (C) NED.
VIGTIGT AT BEMÆRKE: Ved modeller, der er udstyret
med hydraulisk løfter, virker løfteren ikke, når
parkeringsbremsen er aktiveret.
Instrumentbrætsymbolernes Betydning
Se Figur 3.
Når tændingsnøglen drejes i kørestilling, lyser alle
advarselslamper og det totale antal driftstimer vises.
Undersøg, at alle lamper fungerer.
A. Brændstofniveau
Viser mængden af brændstof i tanken. Tom til venstre; fuld
til højre. De sidste to bjælker blinker, når tanken er næsten
tom.
B. Timetæller / ur / serviceindikator
Viser uret, timetæller og vedligeholdelsespåmindelse.
Timetælleren måler det antal timer, hvor nøglen har stået i
stillingen RUN (kørsel). Timetællerens indikator vil blinke
med et indledende olieskift efter 5 timer og en påmindelse
om smøring hver 50 timer. Disse påmindelser vises i ca. to
timer og vil automatisk blive nulstillet.
Bemærk: Timetælleren vil registrere tidsforløbet, når
nøglen står i stillingen RUN (kørsel), også selvom motoren
ikke kører. Timetælleren har en selvstændig strømkilde, så
det samlede timetal er altid synligt.
C. Knap til ciffervalg
Bruges til at stille uret.
D. Stilleknap
Bruges til at stille uret.
E. Lampe for PTO
Viser at PTO-kontakten er i stilling til.
F. Cruise Control lys
Viser at Cruise Control er slået til.
G. Lampe for lavt olietryk
Viser at olietrykket i motoren er lavt. Lampen tænder, så
snart traktoren startes og slukker så igen. HVIS DENNE
LAMPE TÆNDER, MENS TRAKTOREN ER I BRUG, SÅ
SLUK OMGÅENDE FOR MOTOREN. Opsøg
forhandleren for at få lavet service.
H. Lampe til lav spænding
Viser at spændingen i det elektriske system er lav. Lampen
tænder, så snart traktoren startes og slukker så igen. HVIS
DENNE LAMPE TÆNDER, MENS TRAKTOREN ER I
BRUG, SÅ SLUK OMGÅENDE FOR MOTOREN. Opsøg
forhandleren for at få lavet service.
15
Page 38

FUNKTIONER OG BETJENINGSORGANER
Funktioner
INSTRUMENTBRÆT DISPLAY MODELLER
Viser den samlede kørselstid - Når nøgleafbryderen først
bliver drejet til positionen KØR, vil alle indikatorlamperne
lyse og den samlede kørselstid vil blive vist. Sørg venligst
for at alle lamperne virker.
Viser PTO tid - Drej nøglen til SLUK, aktiver PTO’en og
drej nøglen til positionen KØR (motor stoppet).
Indstil uret - Start motoren og lad den køre. Tryk på
valgmulighedsknappen (SELECT) (C, Figur 3) i tre (3)
sekunder og giv slip. Tryk på indstillingsknappen (SET) og
HOLD for at indstille timer. Tryk på valgmulighedsknappen
(SELECT) og vælg minutter. Tryk på og HOLD
indstillingsknappen (SET) (D) for at indstille tid. Lad den
være i 5 sekunder og uret vil blive aktiveret. Stop motoren.
Demonstrationstilstand - Med motoren stoppet, holdes
indstillingsknappen (SET) (D) nede og nøgleafbryderen
drejes hen på KØR positionen.
Vedligeholdelses påmindelse - En vedligeholdelses
påmindelse vises i informationsvinduet (B) efter de første 5
timers drift og derefter for hver 50 timer. Påmindelsen vil
automatisk bliver nulstillet efter 5 timer. Påmindelsen kan
manuelt nulstilles ved at dreje nøgleafbryderen fra SLUK til
KØR (med motoren stoppet) hvorefter trykkes på
indstillings- (SET) (D) og valgmulighedsknappen (SELECT)
(C) samtidigt i 5 sekunder.
12 V Kraftstikdåse
Tilbehørsstikdåsen på 12 volt sidder i venstre sidekapsel.
Den kan bruges til strøm til små elektroniske anordninger.
Tilbehørets mærkestrøm må være højst 14 A.
BEMÆRK: Hvis man kører 12 volts tilbehør, især hvis
maskinen går i tomgang, kan det få batteriet til at aflades.
Når man ikke anvender tilbehørsstikket, skal det dækkes
med gummiproppen for at forhindre fugtighed i at trænge
ind og forårsage kortslutning. Hvis der kommer vand i proppen, kan det forårsage kortslutning.
16 www.simplicitymfg.com
Page 39

BRUG
Test af sikkerhedsblokeringssystemet
Denne maskine er udstyret med et sikkerhedsblokeringssystem og andet sikkerhedsudstyr. Dette sikkerhedssystem er installeret af hensyn til din sikkerhed. Forsøg ikke at omgå
sikkerhedsafbryderne, eller på anden måde sætte sikkerhedssystemet ud af kraft.
ADVARSEL
Hvis maskinen ikke består en af disse
sikkerhedsprøver, må den ikke bruges. Henvend
dig til din autoriserede forhandler.
Prøve 1 — Motoren bør IKKE tørne, hvis:
• PTO-koblingen er slået TIL, ELLER
• Bremsepedalen IKKE er helt trådt i bund (med parkeringsbremsen slået FRA), ELLER
• Cruise control-håndtaget IKKE er i NEUTRAL.
Prøve 2 — Motoren BØR tørne og starte, hvis:
• Føreren sidder i sædet, OG
• PTO er koblet fra (OFF), OG
• Bremsepedalen er helt trådt i bund (med parkeringsbremsen slået TIL), OG
• Cruise control-håndtaget er i NEUTRAL.
Prøve 3 — Motor skulle STOPPE hvis:
• Føreren hæver sig fra sædet mens kraftudtaget er koblet
til ELLER
• Føreren hæver sig fra sædet mens bremsepedalen IKKE
er helt trådt ned (uden håndbremse)
Prøve 4 —
knive
Knivene og klipperens drivremme skal standse fuldstændigt
inden for 5 sekunder efter, at den elektriske PTO-koblingskontakt er slået fra (eller føreren rejser sig fra sædet). Hvis plæneklipperens drivrem ikke standser indenfor fem sekunder, besøg en
autoriseret forhandler.
Prøve 5 — Baglæns klipning (RMO) afprøvning
• Motoren skal standse, hvis det forsøges at køre baglæns
med PTO allerede tilkoblet, men hvor RMO ikke er blevet
aktiveret.
• RMO -lyset skal lyse op, når RMO aktiveres.
Kontroller stoptiden af plæneklipperens
Påfyldning af brændstof
ADVARSEL
Benzin og benzindampe er yderst brandfarlige
og eksplosive. Brand eller eksplosion kan
medføre alvorlige forbrændinger eller døden.
Påfyldning af brændstof
• Sluk for motoren, og lad motoren køle af i mindst 3
minutter, før tankdækslet fjernes.
• Påfyld kun benzin udendørs eller på et sted med god
udluftning.
• Undlad at fylde for meget brændstof i
brændstoftanken. Undlad at fylde helt op til kanten på
påfyldningsstudsen, således at der er plads til at
brændstoffet kan udvide sig.
• Brændstof skal opbevares i sikker afstand fra gnister,
åben ild, vågeblus, varme og andre mulige
antændelseskilder.
• Foretag hyppige eftersyn af brændstofslanger, tanken
og tankdækslet samt fittings for revner og utætheder.
Udskift om nødvendigt.
• Hvis du spilder benzin, så vent med at starte motoren,
indtil benzinen er fordampet.
1. Rengør brændstofdækselområdet for snavs og rester.
Fjern brændstofdækslet (A, figur 4).
2. Fyld brændstoftanken (B) op med brændstof. Undlad at
fylde helt op til kanten på påfyldningsstudsen (C),
således at der er plads til at brændstoffet kan udvide
sig.
3. Genmontér tankdækslet.
Start af motoren
ADVARSEL
Benzin og benzindampe er yderst brandfarlige
og eksplosive.
Brand eller eksplosion kan medføre alvorlige
forbrændinger eller døden.
Start af motoren
• Sørg for, at tændrøret, lyddæmperen, tankdækslet og
luftfilteret (hvis monteret) er på plads og forsvarligt
fastgjort.
• Tørn ikke motoren, når tændrøret er afmonteret.
• Hvis motoren er druknet, sættes chokeren (hvis
monteret) i ”OPEN/RUN”-position (kør) og
gasspjældsregulatoren i fast-position (hurtig),
hvorefter motoren tørnes, indtil den starter.
17
Page 40

BRUG
ADVARSEL
Motorer udsender kulilte, der er en lugtfri og
farveløs, giftig gasart.
Indånding af kulilte kan medføre kvalme,
besvimelse eller døden.
• Motoren må kun startes og anvendes udendørs.
• Motoren må aldrig startes og anvendes i lukkede rum.
Dette gælder også, selv om døre og vinduer er åbne.
1. Mens man sidder i førersædet, skal man trykke bremsepedalen helt i bund eller sætte parkeringsbremsen.
2. Sørg for, at fødderne ikke trykker på speederpedalerne,
og at cruise-control-grebet står i frigear.
3. PTO koblingen frakobles.
4. Gasspjældet sættes på FULL/FULD.
5. Chokeren lukkes.
BEMÆRK: En varm motor har næppe behov for chokeren.
6. Startnøglen sættes i og drejes til START.
7. Efter motoren starter, skal motorens gasspjældsregulering flyttes til halv hastighed. Motoren varmes op ved at
lade den køre i mindst 30 sekunder.
8. Gasspjældet sættes på FULL/FULD.
BEMÆRK: I tilfælde af en nødsituation kan motoren standses ved simpelthen at dreje nøglen om til STOP. Denne
metode må kun bruges i en nødsituation. Motoren standses
normalt ved at følge den procedure, der er beskrevet i afsnittet
Stop af traktor og motor
.
6. Træd ned på fremad-kørehastighedspedalen. Tag foden
af pedalen for at standse. Bemærk, at jo mere pedalen
trædes ned, jo hurtigere kører traktoren.
7. Stop traktoren ved at tage foden af kørehastighedspedalen; slå så parkeringsbremsen til og stop motoren
(se
Stop af traktor og motor
).
Græsslåning
1. Indstil plæneklipperens klippehøjde på den ønskede
indstilling med håndtaget til klippehøjde.
2. Træk parkeringsbremsen. Sørg for at kontakten til
kraftudtaget er frakoblet.
3. Start motoren (se afsnittet
4. Sæt gasreguleringen til FULD.
5. Tilkobl PTO’en for at aktivere plæneklipperknivene.
6. Begynd at slå græs.
BEMÆRK: Når alarmen for ”fyldt opsamler” lyder, sluk
øjeblikkeligt PTO’en for at forhindre at udstødningsrøret
tilstoppes. Kør til det ønskede sted og tøm opsamleren
(se afsnittet Tømning af opsamleren).
7. Når du er færdig, slå PTO/kraftudtaget fra og hæv
plæneklipperen med lift håndtaget.
8. Stop motoren (se afsnittet
toren
).
Start motoren
Stop traktoren og mo-
).
Kørsel med traktoren
1. Sæt dig i sædet og juster sædet, så du nemt kan nå
alle betjeningsgreb og se instrumentbrættet.
2. Slå parkeringsbremsen til.
3. Forvis dig om, at PTO er koblet fra.
4. Start motoren (se
5. Slå parkeringsbremsen fra og tag foden af bremsepedalen.
Start af motoren
).
ADVARSEL
Motoren vil slukkes, hvis baglænskørehastighedspedalen trædes ned, mens PTO er
koblet til eller RMO (baglæns klipning – Reverse
Mowing Option) ikke er blevet aktiveret. Føreren
skal altid slukke for PTO, før der køres over veje,
stier eller andre områder, der muligvis anvendes af
andre køretøjer. Pludseligt tab af drivkraft kan
medføre sikkerhedsfare.
ADVARSEL
Baglæns klipning kan være farligt for
omkringstående. Tragiske ulykker kan forekomme,
hvis føreren ikke er bevidst om tilstedeværende
børn. Brug aldrig RMO, hvis der er børn til stede.
Børn føler sig ofte tiltrukket af maskinen og
klippeaktiviteten.
18 www.simplicitymfg.com
Page 41

BRUG
Betjening af ekstraudstyr ved baglænskørsel
Hvis føreren ønsker at anvende et PTO-drevet redskab i
bakgear kan RMO-systemet anvendes. For at anvende
RMO-systemet drejes RMO-nøglen efter PTOen er
tilkoblet. LED lampen lyser og føreren kan derefter arbejde i
bakgear. Hver gang PTOen slås fra skal RMO-systemet
genaktiveres hvis det påkræves. Nøglen bør fjernes for at
begrænse adgangen til RMO-systemet.
Skubning af traktoren med håndkraft
1. Kobl PTO fra og stop motoren.
2. Skub håndtaget ca. 6 cm (2-3/8″) for at frigøre transmissionen (B, figur 5).
3. Traktoren kan nu skubbes med håndkraft.
TRAKTOREN MÅ IKKE BUGSERES
Bugsering af traktoren vil forårsage beskadigelse af transmissionen.
• Brug aldrig noget andet køretøj til at skubbe
eller trække denne maskine med.
• Transmissionsudløser-ventilens håndtag må
ikke aktiveres, mens motoren går.
Brug af påhængsvogn
Den maksimale tilladelige horisontale kraftpåvirkning på
trækstangen er 280 Newton. Den maksimale tilladelige
vertikale kraftpåvirkning på trækstangen er 160 Newton.
Dette svarer til en 113 kg påhængsvogn på en 10°
bakke. Fastgør påhængsvognen med en passende splitpind (A, figur 7) og en clips (B).
Stop af traktor og motor
1. Tag foden af kørehastighedspedalen.
2. Kobl PTO fra, og vent til alle roterende dele er standset.
3. Skub gaskontrollen til LANGSOM, og drej startnøglen
til OFF (A, figur 6). Fjern nøglen.
Justering af slåmaskinens klippehøjde
Klippehøjden kan indstilles trinløst mellem 3,8 - 10,2 cm (1,5
- 4,0”).
Kontakten for klippehøjdeindstilling regulerer
plæneklipperens klippehøjde (B, figur 6). Den samme
kontakt regulerer også udkastrørets drejemotor, når en
sneslynge er monteret. Pilene på kontakten svarer til
justeringsretningen (OP-pil øger klippehøjden, HØJRE-pil
drejer udkastrøret til højre osv). Når justeringsviseren er nået
til en yderposition, skal du slippe kontakten; hvis du fortsat
holder den til, vil du beskadige motoren.
19
Page 42

VEDLIGEHOLDELSE
Vedligeholdelses diagrammet
TRAKTOR OG PLÆNEKLIPPER
Hver 8 timer eller dagligt
Kontroller sikkerhedslåsesystemet
Rengør traktor og plæneklipper
Rengør motorafdelingen
Hver 25 timer eller årligt *
Kontroller dæktrykket
Afprøv klipperknivenes bremsetid
Kontroller traktor og plæneklipper for løst hardware
Hver 50 timer eller årligt *
Rens batteri og kabler
Kontroller traktorens bremser
Besøg en forhandler en gang om året for at
Smør traktor og plæneklipper
Kontrollér plæneklipperens knive **
* Hvad der end kommer først
** Kontroller skærene oftere i tilfælde af meget sandet
jord eller høje forekomster af støv.
MOTOR
Første 5 timer
Skiftmotorolie
Hver 8 timer eller dagligt
Kontroller motorens olieniveau
Hver 25 timer eller årligt *
Rengør motorens luftfilter og forfilter **
Hver 50 timer eller årligt *
Skift motorolie
Udskift oliefilteret
Årligt
Udskift luftfilter
Udskift forfilter
Besøg en forhandler en gang om året for at
Kontroller lydpotte og gnistfanger
Udskift tændrør
Udskift brændstoffilter
Rengør motorens luftkølingssystem
Eftersyn af dæktrykket
Dæktrykket skal efterses regelmæssigt og holdes inde for de
rammer, som er angivet i skemaet. Bemærk at disse tryk kan
variere en smule fra det ”maksimale tryk”, som angives på
siden af dækkene. Det angivne tryk giver den rette traktion,
forbedrer klippekvaliteten og forlænger dækkets levetid.
Størrelse psi bar
23 x 10,5-12 6-8 0,41-0,55 bar
15 x 6,5-8 10-12 0,8-1,0 bar
* Hvad der end kommer først
** Hyppigere rengøring er påkrævet i støvede omgivelser
eller hvis der findes urenheder i luften.
Kontroller stoptiden af plæneklipperens knive
Klipperens knive og remme skal standse helt indenfor 5
sekunder efter, at den elektriske PTO-kobling er blevet
slået fra.
1. Med traktoren i neutral skal PTO kobles fra og føreren
skal sidde i sædet og starte motoren.
2. Se ud over venstre sides fodhviler og iagttag klipperens
drivrem. Kobl PTO til og vent i adskillige sekunder. Kobl
PTO ud og tag tid på, hvor længe klipperens rem er om
at standse.
3. Hvis plæneklipperens drivrem ikke standser indenfor
fem sekunder, besøg en autoriseret forhandler.
20 www.simplicitymfg.com
Page 43

VEDLIGEHOLDELSE
Batterivedligeholdelse
ADVARSEL
Når man fjerner eller installerer batterikabler
skal det negative kabel tages af FØRST og
sættes på SIDST igen. Hvis det ikke gøres i
denne rækkefølge, kan den positive terminal
nemt blive kortsluttet til chassiset af et stykke
værktøj.
Rengøring af batteri og kabler
1. Kobl batterikablerne fra batteriet, de negative kabler
først (A, figur 8), derefter dækslet og de positive kabler
(B).
2. Løsn fløjmøtrikken og spændeskiven (D).
3. Sving holdebeslaget (C) op og bort fra batteriet. Fast-
gør det til ratsøjlen.
4. Fjern batteriet (E).
5. Gør batterirummet rent med en opløsning af bagesoda
og vand.
6. Gør batteriterminalerne og kabelenderne rene med en
stålbørste og terminalrenser indtil de skinner.
7. Sæt batteriet (E) i batterirummet igen. Sæt batteriets
holdebeslag (C) og fløjmøtrik og spændeskive (D) på.
8. Sæt batterikabler på igen, de positive kabler og dækslet først (B), derefter de negative kabler (A).
9. Påfør vaselin eller et andet ikke-ledende smøremiddel
på batteriterminalerne og kabelklemmerne.
Indstilling af førersædet
Indstilling af hældning
Sædets hældning kan indstilles i en af tre stillinger.
Indstilling sker ved at fjerne bæreboltene, afstands stykkerne, skiverne og møtrikkerne (B, figur 9) fra
hængslet og montere dem igen i de ønskede huller.
Indstilling af sædeforskydning
Førersædet kan indstilles fremad og bagud. Frigør sædet
med håndtaget (A, figur 9), kør sædet i den ønskede
stilling, og slip så håndtaget for at låse sædet fast i denne
position.
Indstilling af sædeaffjedring
Sædefjedrene (C, figur 9) kan indstilles til at give en
blødere eller fastere kørsel. Vip sædet forover og skyd
fjedermontagen fremad til blødere kørsel og bagud til
fastere kørsel.
Justering af løftehjælp
Kun på modeller med manuelt løft rigtigt, skal man
kontakte forhandleren.
Batteriopladning
ADVARSEL
Hold ild og gnister væk fra batteriet; det
afgiver gasser der er højeksplosive. Sørg for
ordentlig ventilation under opladning af
batteriet.
Hvis dit batteri er dødt eller for svagt til at starte motoren,
kan det være på grund af en fejl i ladesystemet eller en
anden elektrisk komponent. Hvis der er tvivl om årsagen til
problemet, skal du henvende dig til din forhandler. Hvis du
er nødt til at udskifte batteriet, så se
og kabler
For at oplade batteriet, skal du følge instruktionerne fra
producenten af batteriopladeren såvel som alle advarsler
indeholdt i
batteriet indtil det er fuldt opladet. Oplad ikke med en
ladestrøm højere end 10 ampere.
afsnittet.
Førersikkerhed
afsnittet i denne manual. Oplad
Rengøring af batteri
21
Page 44

VEDLIGEHOLDELSE
Opbevaring
ADVARSEL
Rideren må aldrig opbevares (med brændstof)
i en indelukket, dårligt ventileret bygning.
Brændstofdampe kan drive hen til
antændelseskilder (som f.eks. varmefyr eller
varmtvandsbeholdere) og forårsage
eksplosion. Brændstofdampe er også giftige
for både mennesker og dyr.
Når brændstof eller udstyr med brændstof i tanken
opbevares
• Opbevar væk fra fyr, ovne, vandvarmere eller andet
udstyr, som kan have en tændflamme eller anden
antændelseskilde, fordi de kan antænde benzindampe.
Udstyr
Frakobl PTO, træk håndbremsen og tag nøglen ud.
Batteriets levetid vil blive forlænget hvis det udtages.
Opbevar på et køligt og tørt sted og oplad fuldstændigt ca.
en gang om måneden. Hvis batteriet forbliver i maskinen,
skal det negative kabel tages af.
Brændstofsystem
Brændstof kan blive forældet når det opbevares i over
30 dage. Gammelt brændstof kan forårsage dannelse af
syre- og gummiaflejringer i brændstofsystemet eller på
væsentlige karburatordele. For at bevare brændstoffet
frisk, brug Briggs & Stratton FRESH START® brændstof
stabilisator der er tilgængelig som et flydende additiv eller
en dryp koncentratpatron.
Der er ingen grund til at tømme motoren for brændstof hvis
en brændstof stabilisator anvendes ifølge vejledningen.
Lad motoren køre i 2 minutter for at stabilisatoren kan
cirkulere gennem brændstofsystemet. Motoren og
brændsoffet kan derefter opbevares i op til 24 måneder.
Hvis benzinen i motoren ikke er blevet behandlet med en
brændstof stabilisator, skal den udtømmes i en godkendt
beholder. Lad motoren køre indtil der ikke er mere
brændstof tilbage. Brugen af en brændstof stabilisator i
opbevaringsbeholderen anbefales for at bevare det frisk.
Motorolie
Skift motorolien mens motoren stadig er varm. Se
motormanualen.
Før du starter maskinen efter opbevaring:
• Kontrollér alle væskeniveauer. Kontrollér alle
vedligeholdelsesdetaljer.
• Udfør samtlige anbefalede kontroller og procedurer der
er beskrevet i denne manual.
• Lad motoren varme op i et par minutter, inden du
bruger maskinen.
22 www.simplicitymfg.com
Page 45

Fejlfinding af traktoren
PROBLEM SE EFTER AFHJÆLPNING
Motor vil ikke dreje eller
starte.
Motor svær at starte eller
kører ujævnt.
Motor banker.
For højt olieforbrug.
Sort udstødningsrøg.
Motoren kører men
traktoren vil ikke bevæge
sig.
FEJLFINDING
Der er ikke trykket på
bremsepedalen.
PTO (elektrisk kobling)
kontakten er i TÆND position.
Cruisekontrol er aktiveret. Skift knappen til NEUTRAL/SLUK position.
Løbet tør for brændstof. Hvis motoren er varm, lad den køle ned, fyld så brændstoftanken op.
Motoren er druknet. Deaktiver chokeren.
Sikringen er sprunget. Henvend dig til din autoriserede forhandler.
Batteriterminaler skal renses. Se Rengøring af batteri og kabler afsnittet.
Batteri er afladt eller fladt. Genoplad eller udskift.
Løse eller afbrudte forbindelser. Undersøg manuelt ledningerne. Hvis ledninger er flosset eller ødelagte så besøg en
Magnetspole eller selvstarter
defekt.
Sikkerhedsaflåsningskontakt
defekt.
Der er vand i brændstoffet. Henvend dig til din autoriserede forhandler.
Brændstoffet er gammelt eller
forurenet.
Brændstofblandingen er for fed. Rens luftfilteret.
Motoren har et andet problem. Henvend dig til din autoriserede forhandler.
Lavt olieniveau. Kontrollér/påfyld olie efter behov.
Brug af forkert oliekvalitet. Se motormanualen.
Motoren bliver overophedet. Henvend dig til din autoriserede forhandler.
Brug af forkert oliekvalitet. Se motormanualen.
For meget olie i krumtaphuset. Aftap overskydende olie.
Snavset luftfilter. Se motormanualen.
Choker lukket. Åbn chokeren.
Der er ikke trykket på
speederen.
Håndtagene til gearudløsning i
SKUB position.
Håndbremsen er ikke trukket. Slå håndbremsen fra.
Drivremmen er knækket eller
den glider.
Tryk bremsepedalen helt i bund.
Sæt den i SLUK position.
autoriseret forhandler.
Henvend dig til din autoriserede forhandler.
Henvend dig til din autoriserede forhandler.
Henvend dig til din autoriserede forhandler.
Tryk på pedalerne.
Gå til KØR position.
Henvend dig til din autoriserede forhandler.
23
Page 46

FEJLFINDING
Fejlfinding af traktoren (fortsat)
PROBLEM SE EFTER AFHJÆLPNING
Bremsen kan ikke holde.
Traktoren styrer hårdt eller
er svær at håndtere.
Fejlfinding af plæneklipperen
PROBLEM SE EFTER AFHJÆLPNING
Plæneklipperen løfter sig
ikke.
Plæneklipperen klipper
uensartet.
Græsklippet ser groft ud.
Motoren går nemt i stå
med klipperen tilkoblet.
For kraftig klippervibration.
Motoren er i gang og
traktoren kører men
plæneklipperen vil
ikke køre.
Indvendig bremse er slidt. Henvend dig til din autoriserede forhandler.
Styretilkoblingen er løs. Henvend dig til din autoriserede forhandler.
Forkert dæktryk. Se Kontroller dæktryk afsnittet.
Forhjuls spindellejer er tørre. Henvend dig til din autoriserede forhandler.
Løftetilkoblingen er ikke
fastgjort korrekt eller er defekt.
Klippeaggregatet er ikke parallelt
med jordoverfladen.
Dækkene er ikke korrekt
pumpet.
Motorhastighed for lav. Sæt den på fuld gas.
For høj kørselshastighed. Sæt farten ned.
Plæneklipperen har et andet
problem.
Motorhastighed for lav. Sæt den på fuld gas.
For høj kørselshastighed. Sæt farten ned.
Snavset eller tilstoppet luftfilter. Se motormanualen.
Klippehøjden er indstillet for
lavt.
Motoren har ikke nået
driftstemperatur.
Start af plæneklipperen i højt
græs.
Plæneklipperen har et andet
problem.
PTO’en er ikke aktiveret. Aktiver PTO’en.
Plæneklipperen har et andet
problem.
Henvend dig til din autoriserede forhandler.
Henvend dig til din autoriserede forhandler.
Se Kontroller dæktryk afsnittet.
Henvend dig til din autoriserede forhandler.
Klip højt græs med maksimal klippehøjde i første omgang.
Lad motoren køre i adskillige minutter for at varme op.
Start græsslåning i et ryddet område.
Henvend dig til din autoriserede forhandler.
Henvend dig til din autoriserede forhandler.
24 www.simplicitymfg.com
Page 47

25
Page 48

SPECIFIKATIONER
MOTOR
Briggs & Stratton
Fabrikat Briggs & Stratton®
Model Professional Series™
Slagvolumen 724 cc (44,2 cu in.)
Elektrisk System Generator: 16 amp
Batteri: 12 Volt, 230 CCA
Oliemængde 1,8-1,9 L (62-64 oz)
Tændrørs mellemrum 0,76 mm (0,030 in.)
Tændrør moment 20 Nm (180 in-lbs)
CHASSIS
Brændstoftank Indhold Indhold: 15,1 L (4,0 gal)
Baghjul Dækstørrelse: 23 x 10,5-12
Dæktryk: 0,41-0,53 bar (6-8 psi)
Forhjul Dækstørrelse: 15 x 6,5-8
Dæktryk: 0,8-1,0 bar (10-12 psi)
TRANSMISSIE
K66
Fabrikat Hydrostatisk Tuff Torq K66
Motorolie 10W-30 motorolie
Oliekapacitet 2,5 L (2,6 qt)
Hastigheder @ 3400 o./min. Fremad: 0-9,3 km/t (0-5,8 MPH)
Bakgear: 0-5,6 km/t (0-3,5 MPH)
Vedvarende drejningsmoment 419 Nm (310 ft-lbs)
Trækkrogeffekt 200 kg (440 lbs)
Maksimalt akseltryk 316 kg (697 lbs)
K664
Fabrikat Hydrostatisk Tuff Torq K664
Motorolie Syntetisk 10w 50
Oliekapacitet 5,1 L (5,4 qt)
Hastigheder @ 3400 o./min. Fremad: 0-9,8 km/h (0-6,1 MPH)
Bak: 0-4,8 km/h (0-3,0 MPH)
Vedvarende drejningsmoment 419 Nm (310 ft-lbs)
Trækkrogeffekt 200 kg (440 lbs)
Maksimalt akseltryk 316 kg (697 lbs)
PLÆNEKLIPPER
Klippebredde 132 cm (52 in.)
Antal knive 3
Klippeaggregat platform Sideudkast
Klippehøjde 3,8-10,2 cm (1,5-4,0 in.)
Klippepositioner Grænseløs
DIMENSIONER
Totallængde 191 cm (75,2”)
Totalbredde med udkastskærmen 167 cm (65,7”)
Totalbredde uden udkastskærmen 132 cm (52,0”)
Totalhøjde 119 cm (46,9”)
Akselafstand 135 cm (53,1”)
Nominel effekt
Den nominelle bruttoeffekt for individuelle benzinmotormodeller er mærket i overensstemmelse med den amerikanske
organisation SAEs (Society of Automotive Engineers) lovsamling J1940 (Small Engine Power & Torque Rating Procedure),
og effektydelsen er opnået og rettet til i overensstemmelse med SAE J1995 (Revidering 2002-05). Tilspændingsmomenter
fås ved et omdrejningstal på 3060 omdr./min.; antallet af hestekræfter fås ved et omdrejningstal på 3600 omdr./min.
Nettoværdier tages med udstødning og luftfilter installeret, hvorimod bruttoværdier indhentes uden dette tilbehør. Den
effektive motors bruttoeffekt vil være højere end nettoværdien og være påvirket af, bl.a. omgivende arbejdsforhold og
maskine-til-maskine foranderligheder. Under forudsætning af både den brede vifte af produkter, som motorerne er
monteret på og variationen af de miljømæssige hensyn, der skal tages ved drift af udstyret, vil benzinmotoren da ikke
udvikle den nominelle bruttoeffekt, når denne anvendes i et nærmere angivet effektudstyr. Denne forskel skyldes en række
faktorer, der inkluderer, men som ikke er begrænset til komponenter (luftfiltre, udstødning, ladning, afkøling, karburator,
brændstofpumpe, mv.), anvendelsesbegrænsninger, omgivende arbejdsforhold (temperatur, fugt, højde) og maskine-tilmaskine foranderlighed. Grundet fabrikations- og.
RESERVEDELE OG TILBEHØR
Kontakt en autoriseret forhandler for yderligere
oplysninger.
26
www.simplicitymfg.com
Page 49

INHALT
Abbildungen.........................................................................................................3
Betriebssicherhei.................................................................................................6
Funktionen und Steuerungen...........................................................................13
Betrieb ................................................................................................................17
Kontrollen des Sicherheitsverriegelungssystems .........................................17
Wartung ..............................................................................................................20
Fehlersuche und -behebung ............................................................................23
Garantie ..............................................................................................................25
Technische Daten ..............................................................................................26
Teile und Zubehör ..............................................................................................26
Allgemeine Informationen
Vielen Dank, dass Sie sich für den Kauf dieses qualitativ hochwertigen Aufsitzmähers von SIMPLICITY entschieden
haben und Ihr Vertrauen auf unsere Marke gesetzt haben. Bedienen und warten Sie das Produkt gemäß den Angaben
dieser Bedienungsanleitung, damit ein zuverlässiger und jahrelanger Betrieb gewährleistet ist.
Dieses Handbuch beinhaltet Sicherheitsinformationen, um Ihnen die Gefahren und Risiken im Zusammenhang mit
Mähern bewusst zu machen, und Ihnen zu vermitteln, wie man sie vermeidet. Dieses Produkt und seine zugelassenen
Anbauten/Zubehörteile sind nur für Rasenarbeiten und die Schneeberäumung und keine anderen Zwecke gedacht. Es ist
wichtig, dass Sie sich diese Bedienungsanleitung durchlesen und sie verstehen, bevor Sie die Maschine in Betrieb
nehmen oder nutzen. Bewahren Sie diese Original-Bedienungsanleitung für späteres Nachschlagen auf.
Produktdaten
Geben Sie den Namen und die Nummer des Modells, die
Identifikationsnummern des Herstellers und die
Seriennummern des Motors in den entsprechenden
Feldern an. Diese Nummern stehen auf den jeweiligen
abgebildeten Teilen.
Sie MÜSSEN über diese Angaben verfügen, um
Ersatzteile, Serviceleistungen oder Informationen
vom zugelassenen Fachhändler zu erhalten.
PRODUKTDATEN
Modellbezeichnung, Name/Nummer
Nummer der Baueinheit Seriennummer
Baugruppennummer der
Schneidwerkabdeckung
Händlername Kaufdatum
MOTORANGABEN
Motorbezeichnung Motormodell
Motortyp/Spezif. Motorkennzeichen/Seriennummer
Seriennummer der Schneidwerkabdeckung
CE Identifikationsetikett
A. Identifikationsnummer des Herstellers
B. Seriennummer des Herstellers
C. Name und Adresse des Herstellers
D. Maximale Motorendrehzahl in Umdrehungen pro
Minute
E. Nutzleistung in Kilowatt
F. Gewicht des Geräts in Kilogramm
G. CE-Konformitätslogo
H. Baujahr
I. Gwährte Schalleistung in Dezibel
A
MODEL NO. xxxxxxx
SERIAL NO. xxxxxxxxxx
B
C
XXXXXXXXXXXXXXXXXXXXXX
XXXXXXXXXXXXXXXXX
D
xxxx min
E
x.x kW
xxx kg
F
G
20xx
H
-1
xxx
I
dB
Die Liste der abgebildeten Bauteile für diese Maschine kann unter diesem Link runtergeladen werden:
www.simplicitymfg.com. Bitte geben Sie das Modell und die Seriennummer bei der Bestellung von Ersatzteilen an.
Copyright © 2011 Briggs & Stratton Power Products Group, LLC
Milwaukee, WI, USA, Alle Rechte vorbehalten.
SIMPLICITY ist eine Handelsmarke der Gruppe Briggs & Stratton Power Products
Group, LLC Milwaukee, WI USA.
5
Page 50

BETRIEBSSICHERHEIT
Betriebssicherheit
Wir beglückwünschen Sie zum Kauf eines erstklassigen Rasen- und
Gartengeräts. Unsere Produkte sind so konstruiert und gefertigt, dass
sie alle Industrienormen bezüglich Sicherheit erfüllen oder übertreffen.
Motorgetriebene Geräte sind nur so sicher wie ihre Bediener. Wenn sie
falsch gebraucht oder unzureichend gewartet werden, können sie
gefährlich sein. Denken Sie daran, Sie sind für Ihre eigene Sicherheit
und die der Personen in Ihrem Umkreis verantwortlich.
Lassen Sie gesunden Menschenverstand walten und durchdenken Sie
Ihre Vorgehensweise. Wenn Sie sich nicht sicher sind, dass die Aufgabe,
die Sie ausführen wollen, mit dem von Ihnen gewählten Gerät sicher bewältigt werden kann, fragen Sie einen Experten: wenden Sie sich an
Ihren örtlichen Vertragshändler.
Lesen Sie die Bedienungsanleitung
Die Bedienungsanleitung enthält wichtige Sicherheitsinformationen, die Sie kennen
müssen, BEVOR Sie Ihr Gerät in Betrieb nehmen und WÄHREND des Betriebs.
Sie umfasst sichere Bedienungstechniken, eine Erklärung zu den Funktionen
und Bedienelementen des Produkts und Wartungsinformationen,
sodass Sie Ihr Gerät optimal nutzen können.
Lesen Sie die Sicherheitsrichtlinlien und Informationen auf den folgenden Seiten vollständig durch. Lesen Sie außerdem den Abschnitt zum
Betrieb komplett durch.
Kinder
Es können tragische Unfälle passieren, bei denen Kinder beteiligt
sind. Kinder dürfen sich auf keinen Fall im Betriebsbereich des
Gerätes aufhalten. Kinder fühlen sich häufig von einer solchen
Maschine und dem Vorgang des Mähens angezogen. Man darf
niemals davon ausgehen, dass Kinder an der Stelle bleiben, an
der sie zuletzt gesichtet wurden. Wenn das Risiko besteht, dass
Kinder in den Bereich gelangen, in dem Sie mähen, müssen sie
von einem anderen verantwortungsbewussten Erwachsenen
beaufsichtigt werden.
LASSEN SIE KINDER AUF KEINEN FALL AUF DIESEM GERÄT
MITFAHREN! Sie werden dadurch ermuntert, sich auch in
Zukunft dem Gerät zu nähern, während es in Betrieb ist, und sie
könnten ernsthaft verletzt werden. Sie laufen u. U. auf das Gerät
zu und wollen mitgenommen werden, wenn Sie es nicht erwarten,
und Sie könnten sie womöglich überfahren.
6 www.simplicitymfg.com
Rückwärtsgang
Nicht rückwärts mähen, wenn dies nicht
absolut notwendig ist. Sie sollten stets
nach unten und hinten blicken,
wenn Sie rückwärts fahren,
selbst wenn die Mähwerkmesser ausgekuppelt
sind.
Page 51

Betrieb auf Gefällen
3.5 ft
(1,5 m)
20.0 ft (6,0 m)
Sie könnten ernsthaft verletzt oder sogar getötet werden, wenn Sie dieses
Gerät auf einem zu steilen Abhang benutzen. Die Verwendung des Geräts auf
einem zu steilen Abhang oder bei unzureichender Bodenhaftung kann zu einem
Verlust der Kontrolle oder zum Umkippen führen.
Eine gute Faustregel lautet, das Gerät nicht auf einem Abhang zu benutzen, auf
dem Sie nicht zurückstoßen können (im Zweiradantriebsmodus). Bitte nicht an
Abhängen mit einem Gefälle von mehr als 1,5 m (3,5 Fuß) über eine Länge von
6,0 m (20 Fuß) betreiben. Fahren Sie auf Gefällen stets auf und ab, niemals in
Querrichtung.
Beachten Sie auch, dass sich die befahrene Oberfläche erheblich auf die Stabilität und Kontrolle auswirken kann. Nasses Gras oder eisiger Asphalt kann Ihre
Fähigkeit, das Gerät zu beherrschen, stark einschränken.
Wenn Sie sich über das Befahren eines Abhangs unsicher sind, gehen Sie
keine Risiko ein. Es ist die Sache nicht wert.
Bewegliche Teile
Dieses Gerät hat zahlreiche bewegliche Teile, an denen Sie und andere sich verletzen
können. Wenn Sie jedoch richtig im Sitz sitzen und alle Richtlinien in dieser Anleitung
befolgen, kann das Gerät sicher bedient werden.
Das Mähwerk ist mit rotierenden Mähwerkmessern ausgestattet, die Hände und Füße
amputieren können. Lassen Sie niemanden in die Nähe des Geräts, während es in Betrieb ist!
Um Ihnen, dem Bediener, bei der sicheren Bedienung dieses Geräts zu helfen, ist
dieses mit einem Bedieneranwesenheits-Sicherheitssystem ausgestattet. Es darf
NICHT versucht werden, das System zu modifizieren oder zu umgehen. Setzen Sie
sich umgehend mit Ihrem Händler in Verbindung, wenn das System nicht alle Sicherheitssperrsystemtests in diesem Handbuch besteht.
BETRIEBSSICHERHEIT
Kraftstoff und Wartung
Benzin ist extrem brennbar. Benzindämpfe sind ebenfalls extrem brennbar und
können sich zu entfernt gelegenen Zündquellen ausbreiten. Benzin darf nur als
Kraftstoff, nicht als Lösungsmittel oder Reiniger verwendet werden. Es sollte nie an
einem Ort aufbewahrt werden, wo sich Dämpfe ansammeln oder sich zu einer
Zündquelle wie etwa einer Zündflamme ausbreiten können. Kraftstoffe gehören in
einen zugelassenen, abgedichteten Benzinkanister aus Kunststoff oder in den
Kraftstofftank des Traktors bei fest verschlossenem Tankdeckel. Verschütteter Kraftstoff muss umgehend beseitigt werden.
Eine ordnungsgemäße Wartung ist für die Sicherheit und Leistung Ihres Geräts
äußerst wichtig. Führen Sie auf jeden Fall die in dieser Anleitung aufgeführten
Wartungsverfahren durch, besonders die regelmäßigen Tests des Sicherheitssystems.
Herumschleudern von Gegenständen
Dieses Gerät ist mit rotierenden Mähwerkmessern ausgestattet. Diese Messer können Schmutzteile erfassen und herumschleudern, die eine in der Nähe befindliche
Person ernsthaft verletzen können. Räumen Sie den zu mähenden Bereich auf,
BEVOR Sie mit dem Mähen beginnen.
Dieses Gerät darf nur mit angebrachtem Grasfänger oder Auswurfschutz (Abweiser)
betrieben werden.
Außerdem darf sich niemand im Umfeld befinden, während das Gerät in Betrieb ist.
Wenn jemand den Mähbereich betritt, muss das Gerät sofort ausgeschaltet werden,
bis die betreffende Person den Bereich wieder verlässt.
7
Page 52

BETRIEBSSICHERHEIT
Diese Sicherheitsvorschriften müssen gelesen und genau befolgt werden. Die Nichtbeachtung dieser Vorschriften könnte zu einem Verlust der Kontrolle über das Gerät, bei Ihnen oder umstehenden Personen zu ernsthaften Verletzungen
oder zum Tode oder zu Schäden an Eigentum oder Ausrüstung führen.
Dieses Mähwerk kann Hände und Füße durchschneiden und Gegenstände wegschleudern.
Das im Text aufgeführte Dreieck weist auf wichtige Vorsichts- oder Achtungshinweise hin, die befolgt werden müssen.
ALLGEMEINER BETRIEB
1. Vor dem Start alle Anweisungen im Handbuch und am
Gerät lesen, verstehen und befolgen.
2. Hände und Füße nicht in die Nähe rotierender Teile oder
unter die Maschine bringen. Stets einen ausreichenden
Abstand von der Auswurföffnung einhalten.
3. Nur verantwortungsbewusste Erwachsene, die mit den Anweisungen vertraut sind, dürfen das Gerät bedienen (das
Alter des Bedieners kann durch örtliche Vorschriften
beschränkt sein).
4. Den Bereich von Gegenständen wie Steinen, Spielzeug,
Draht usw. säubern, die von dem/den Messer(n) erfasst und
weggeschleudert werden könnten.
5. Vor dem Mähen sicherstellen, dass sich keine Personen im
Bereich befinden. Das Gerät sofort anhalten, wenn jemand
den Bereich betritt.
6. Auf keinen Fall irgendwelche Fahrgäste mitführen.
7. Nicht rückwärts mähen, wenn dies nicht absolut notwendig
ist. Vor und während der Rückwärtsfahrt stets nach unten
und hinten blicken.
8. Auf keinen Fall mit Auswurfmaterial auf jemanden zielen.
Der Auswurf von Material gegen eine Wand oder ein Hindernis sollte vermieden werden. Das Material könnte nämlich abprallen und zurück zum Bediener geschleudert
werden. Beim Überqueren von Kiesflächen das/die
Messer anhalten.
9. Die Maschine darf nicht benutzt werden, wenn nicht der
gesamte Grasfänger, der Auswurfschutz (Abweiser) bzw.
sonstige Sicherheitsvorrichtungen richtig angebracht sind.
10. Vor dem Wenden die Fahrt verlangsamen.
11. Einen Mäher mit laufendem Motor auf keinen Fall unbeaufsichtigt lassen. Stets den Zapfwellenantrieb auskuppeln, die
Parkbremse feststellen, den Motor abstellen und die
Schlüssel abziehen, bevor Sie absteigen.
12. Die Messer (Zapfwellenantrieb) auskuppeln, wenn nicht
gemäht wird. Den Motor abstellen und warten, bis alle Teile
völlig zum Stillstand gekommen sind, bevor das Gerät gereinigt, der Grasfänger ausgebaut oder der Auswurfschutz
gesäubert wird.
13. Die Maschine nur bei Tageslicht oder bei guter künstlicher
Beleuchtung bedienen.
14. Wenn Sie unter dem Einfluss von Alkohol oder Medikamenten stehen, das Gerät nicht benutzen.
15 Auf den Verkehr achten, wenn Sie in der Nähe von Straßen
arbeiten oder diese überqueren müssen.
16. Beim Auf- und Abladen des Geräts auf einen Anhänger
oder LKW besonders vorsichtig vorgehen.
17. Bei der Bedienung dieses Geräts stets einen Augenschutz tragen.
18. Laut Statistik sind Bediener mit einem Alter von 60 Jahren
oder darüber an einem großen Prozentsatz der Verletzungen
im Zusammenhang mit Geräten und Maschinen beteiligt.
Diese Bediener sollten ihre Fähigkeit, das Gerät so sicher
zu bedienen, dass sie selbst und andere vor Verletzungen
geschützt werden, eingehend überprüfen.
19. Für Radgewichte oder Gegengewichte die Empfehlungen
des Herstellers befolgen.
20. Sie müssen sich dessen bewusst sein, dass der Bediener
für Unfälle, in die andere Personen oder Gegenstände verwickelt sind, verantwortlich ist.
21. Alle Fahrer sollten an professionellen und praktischen
Schulungsmaßnahmen teilnehmen.
22. Immer gutes Schuhwerk und lange Hosen tragen. Auf
keinen Fall das Gerät barfuß oder in Sandalen bedienen.
23. Vor der Verwendung stets visuell überprüfen, ob die Messer
und die Befestigungsmittel der Messer vorhanden, intakt
und sicher befestigt sind. Abgenutzte oder beschädigte
Teile ersetzen.
24. Zubehörgeräte müssen ausgekuppelt werden, bevor folgende Vorgänge ausgeführt werden: Kraftstoff nachfüllen,
Zubehörgerät ausbauen, Einstellungen vornehmen (wenn
die Einstellung nicht von der Bedienerposition aus
vorgenommen werden kann).
25. Wenn die Maschine geparkt, gelagert und unbeaufsichtigt
gelassen wird, das Schneidwerk absenken, es sei denn, es
wird eine mechanische Verriegelung verwendet.
26. Bevor Sie aus irgendeinem Grund die Bedienerposition verlassen, müssen die Parkbremse betätigt (falls vorhanden),
der Zapfwellenantrieb ausgekuppelt, der Motor abgestellt
und der Schlüssel abgezogen werden.
27. Um die Brandgefahr zu reduzieren, das Gerät frei von Gras,
Blättern und überschüssigem Öl halten. Nicht auf trockenen Blättern, Gras oder brennbaren Materialien stoppen
oder parken.
TRANSPORT UND LAGERUNG
1. Beim Transport des Geräts auf einem offenen Anhänger muss sichergestellt werden, dass es nach
vorne und in Fahrtrichtung weist. Wenn das Gerät
nach hinten weist, könnte es durch Windeinwirkung
beschädigt werden.
2. Beim Betanken des Geräts nach Transport oder
Lagerung stets auf Sicherheit beim Umgang mit dem
Kraftstoff achten.
3. Das Gerät auf keinen Fall (mit Kraftstoff) in einem
geschlossenen, schlecht belüfteten Raum lagern.
Kraftstoffdämpfe können mit einer Zündquelle in
Berührung kommen (z. B. einem Brennofen, Wassererhitzer usw.) und eine Explosion verursachen. Kraftstoffdämpfe sind außerdem für Menschen und Tiere
giftig.
8 www.simplicitymfg.com
4. Stets die Anweisungen im Motorhandbuch bezüglich
der Vorbereitungen für eine Lagerung befolgen, bevor
das Gerät über eine kurze oder lange Zeit gelagert
wird.
5. Stets die Anweisungen im Motorhandbuch bezüglich
der korrekten Verfahren zur Inbetriebnahme befolgen,
wenn das Gerät wieder in Betrieb genommen wird.
6. Das Gerät oder den Kraftstoffbehälter auf keinen Fall
in Innenräumen lagern, wo eine offene Flamme oder
eine Zündflamme (z. B. Wassererhitzer) vorhanden
ist. Das Gerät vor der Lagerung abkühlen lassen.
Page 53

BETRIEBSSICHERHEIT
BETRIEB AUF GEFÄLLEN
Gefälle sind ein wesentlicher Faktor im Zusammenhang mit Unfällen durch den Verlust der Kontrolle oder durch Umkippen, was
zu ernsthaften Verletzungen oder zum Tod führen kann. Die Bedienung auf Gefällen erfordert besondere Umsicht. Wenn Sie auf
einem Gefälle nicht zurückfahren können oder wenn Sie sich unsicher fühlen, sollten Sie das Gerät nicht bedienen.
Wenn ein handgeführter oder Aufsitzmäher auf einem Gefälle zu
rutschen beginnt, kann die Kontrolle über das Gerät nicht durch
Betätigen der Bremse wieder erlangt werden. Die Hauptgründe für
den Verlust der Kontrolle sind: unzureichende Bodenhaftung der
Reifen, zu hohe Geschwindigkeit, ungenügendes Bremsen, die
Art der Maschine ist für die Aufgabe nicht geeignet, Unkenntnis
über die Bodenverhältnisse, fehlerhaft vorgenommene Anbauten
und falsche Lastverteilung.
1. Auf einem Gefälle auf und ab, nicht in Querrichtung mähen.
2. Auf Löcher, Rinnen oder Buckel achten. Unebenes
Gelände könnte zum Umkippen des Geräts führen. Hohes
Gras kann Hindernisse verdecken.
3. Eine langsame Geschwindigkeit wählen, damit Sie auf dem
Gefälle nicht anhalten oder die Geschwindigkeit ändern müssen.
4. Nicht auf nassem Gras mähen. Die Reifen können die Bodenhaftung verlieren.
5. Stets einen Gang einlegen, besonders bei Abwärtsfahrten
auf Gefällen. Die Maschine nicht in die Neutralposition
schalten und hangabwärts rollen lassen.
6. Auf einem Gefälle sollte möglichst nicht angefahren, angehalten oder gewendet werden. Wenn die Reifen die Bodenhaftung verlieren, die Messer auskuppeln und langsam den
Hang herunterfahren.
7. Alle Bewegungen auf einem Gefälle langsam und allmählich
durchführen. Keine plötzlichen Geschwindigkeitsänderungen
oder Richtungswechsel durchführen, die zum Umkippen
der Maschine führen könnten.
8. Beim Bedienen von Maschinen mit Grasfängern oder sonstigen Zubehörgeräten muss besonders vorsichtig vorgegangen werden; sie können die Stabilität des Geräts
beeinträchtigen. Nicht auf steilen Gefällen verwenden.
9. Es darf nicht versucht werden, die Maschine durch Aufstellen
der Füße auf den Boden zu stabilisieren (Aufsitzmäher).
10. Nicht in der Nähe von Böschungen, Gräben oder Dämmen
mähen. Der Mäher könnte plötzlich umkippen, wenn ein
Rad über den Rand eines Kliffs oder Grabens ragt oder
wenn ein Rand einbricht.
11. Auf steilen Gefällen keine Grasfänger verwenden.
12. Nicht auf Gefällen mähen, wenn Sie auf Ihnen nicht rückwärts fahren können.
13. Empfehlungen zu Radgewichten oder Gegengewichten zur
Verbesserung der Stabilität erhalten Sie von Ihrem Vertragshändler/Einzelhändler.
14. Hindernisse wie Steine, Äste usw. aus dem Weg räumen.
15. Eine langsame Geschwindigkeit verwenden. Auf Gefällen
kann die Bodenhaftung der Reifen verloren gehen, selbst
wenn die Bremsen richtig funktionieren.
16. Auf abschüssigem Gelände nur dann wenden, wenn es
unbedingt erforderlich ist. Dabei langsam und nach
Möglichkeit allmählich hangabwärts fahren.
GEZOGENE GERÄTE (AUFSITZMÄHER)
1. Nur mit einer Maschine ziehen, die über einen Anbau
speziell zum Ziehen von Geräten ausgestattet ist. Gezogene Geräte nur am Anbaupunkt befestigen.
2. Beim Ziehen von Geräten und Ziehen auf Gefällen die Empfehlungen
des Herstellers bezüglich der Gewichtsgrenze befolgen.
3. Auf keinen Fall Kinder oder andere Personen in oder auf
gezogenen Geräten fahren lassen.
4. Auf Gefällen kann das Gewicht des gezogenen Geräts zu
einem Verlust der Bodenhaftung und Kontrolle führen.
5. Langsam fahren und zum Anhalten eine zusätzliche Entfernung einkalkulieren.
6. Die Maschine nicht in die Neutralposition schalten und
hangabwärts rollen lassen.
WARNUNG
Das Gerät darf auf keinen Fall auf Gefällen betrieben
werden, die eine Neigung von mehr als 17,6 Prozent (10°)
aufweisen, d. h. einen vertikalen Anstieg von 106 cm bei
einer Horizontalen von 607 cm.
Beim Einsatz auf Gefällen müssen zusätzliche Radgewichte
oder Gegengewichte verwendet werden. Wenden Sie sich
an Ihren Händler, um zu erfragen, welche Gewichte für Ihr
Gerät erhältlich und angemessen sind.
Bevor Sie auf ein Gefälle fahren, muss eine langsame
Fahrtgeschwindigkeit gewählt werden. Benutzen Sie nicht
nur vorne zusätzliche Gewichte, sondern seien Sie auch
besonders vorsichtig bei der Verwendung von
heckmontierten Grasauffangvorrichtungen.
Auf einem Gefälle sollte immer nach OBEN und nach UNTEN
gemäht werden, niemals in Querrichtung. Seien Sie vorsichtig, wenn Sie die Richtung wechseln. AUF KEINEN
FALL AUF EINEM GEFÄLLE STARTEN ODER ANHALTEN.
KINDER
Es können tragische Unfälle passieren, wenn der Bediener
nicht auf Kinder achtet. Kinder fühlen sich häufig von einer
solchen Maschine und dem Vorgang des Mähens angezogen. Man darf niemals davon ausgehen, dass Kinder an
der Stelle bleiben, an der sie zuletzt gesichtet wurden.
1. Kinder aus dem zu mähenden Bereich fern halten
und unter die Aufsicht eines verantwortungsbewussten Erwachsenen stellen.
2. Stets aufmerksam sein und das Gerät ausschalten,
wenn sich Kinder dem Bereich nähern.
3. Vor und während dem Rückwärtsfahren nach hinten
und unten schauen und auf kleine Kinder achten.
4. Auf keinen Fall Kinder mitfahren lassen, selbst wenn
keine Messer installiert sind. Sie können herunterfallen und sich ernsthaft verletzen oder den sicheren
Betrieb des Geräts beeinträchtigen. Kinder, die in der
Vergangenheit schon einmal mitfahren durften, können plötzlich in dem zu mähenden Bereich auftauchen, um wieder mitgenommen zu werden. Dabei
könnten sie überfahren werden.
5. Kinder dürfen auf keinen Fall das Gerät bedienen.
6. Besondere Vorsicht ist angesagt, wenn Sie sich toten
Winkeln, Büschen, Bäumen oder anderen Objekten
nähern, welche die Sicht verdecken können.
EMISSIONEN
1. Motorauspuff von diesem Produkt enthält
Chemikalien, von denen es bekannt ist, dass sie in
gewissen Mengen zu Krebs, Geburtsschäden oder
sonstigen Schäden des Reproduktionssystems
führen.
2. Die relevanten Informationen zur Emissions Durability Period (Emissionsbeständigkeitsperiode – EDP)
und zum Luftindex finden Sie auf dem Emissionsschild des Motors.
ZÜNDSYSTEM
1. Dieses Zündfunkensystem entspricht der kanadischen Norm ICES-002.
9
Page 54

BETRIEBSSICHERHEIT
SERVICE UND WARTUNG
Sicherer Umgang mit Kraftstoff
1. Alle Zigaretten, Zigarren, Pfeifen und sonstige
Zündquellen löschen.
2. Nur zugelassene Kraftstoffbehälter verwenden.
3. Auf keinen Fall bei laufendem Motor den Kraftstofftankdeckel abnehmen oder Kraftstoff nachfüllen. Vor
dem Auftanken den Motor abkühlen lassen.
4. Auf keinen Fall die Maschine in geschlossenen Räumen
auftanken.
5. Die Maschine oder den Kraftstoffbehälter auf keinen Fall
dort lagern, wo eine offene Flamme, ein Funke oder
eine Zündflamme (z. B. in der Nähe eines Wassererhitzers oder sonstigen Haushaltsgeräts) vorhanden ist.
6. Behälter auf keinen Fall in einem Fahrzeug oder auf
einer Pritschenfläche mit einem Pritschenschutz aus
Kunststoff füllen. Behälter stets auf den Boden und vom
Fahrzeug weg stellen, bevor Sie sie füllen.
7. Mit Kraftstoff betriebene Geräte aus dem LKW oder Anhänger abladen und auf dem Boden betanken. Wenn
dies nicht möglich ist, solche Geräte auf einem Anhänger mit einem tragbaren Behälter und nicht direkt mit
einem Kraftstoffeinfüllstutzen betanken.
8. Der Einfüllstutzen muss bis zum Abschluss des Tankvorgangs immer den Rand des Kraftstofftanks oder der Behälteröffnung berühren. Keinen offen arretierbaren
Einfüllstützen verwenden.
9. Wenn Kraftstoff auf die Kleidung gelangt, müssen Sie
sich sofort umziehen.
10. Auf keinen Fall den Kraftstofftank überfüllen. Den Kraftstofftankdeckel wieder aufsetzen und fest zudrehen.
11. Beim Umgang mit Benzin und anderen Kraftstoffen
besonders vorsichtig vorgehen. Sie sind brennbar und
die Dämpfe sind explosiv.
12. Wenn Kraftstoff verschüttet wird, den Motor nicht
starten, sondern die Maschine aus dem Bereich des
verschütteten Kraftstoffs bringen und jegliche
Zündquellen vermeiden, bis die Kraftstoffdämpfe verflogen sind.
13. Alle Kraftstofftankdeckel und Kraftstoffbehälterdeckel
fest zudrehen.
Service u. Wartung
1. Das Gerät nie in einem geschlossenen Bereich laufen
lassen, wo sich Kohlenmonoxiddämpfe ansammeln können.
2. Muttern und Schrauben, insbesondere Schrauben zur
Befestigung von Messern, auf ihren festen Sitz überprüfen und das Gerät in gutem Zustand halten.
3. Auf keinen Fall irgendwelche Sicherheitsvorrichtungen
manipulieren. Ihren ordnungsgemäßen Betrieb
regelmäßig überprüfen und notwendige Reparaturen
durchführen, wenn sie nicht richtig funktionieren.
4. Das Gerät von Gras, Blättern und sonstigen Verschmutzungen frei halten. Verschüttetes Öl oder Benzin
aufwischen und alle mit Kraftstoff getränkten Verschmutzungen beseitigen. Vor der Lagerung die Maschine abkühlen lassen.
5. Wenn Sie gegen ein Objekt fahren, anhalten und die
Maschine inspizieren. Vor dem erneuten Start nach Bedarf reparieren.
6. Keine Einstellungen oder Reparaturen vornehmen,
wenn der Motor läuft.
7. Die Bauteile des Grasfängers und den Auswurfschutz
häufig überprüfen und nach Bedarf gegen vom Hersteller empfohlene Teile austauschen.
8. Die Mähermesser sind scharf. Bei der Durchführung
von Servicearbeiten an den Messern besonders vorsichtig vorgehen und diese umwickeln oder Handschuhe
tragen.
9. Den Betrieb der Bremse häufig überprüfen. Einstellen
und nach Bedarf warten.
10. Ggf. Sicherheits- und Anweisungsaufkleber wiederherstellen oder ersetzen.
11. Den Kraftstofffilter nicht ausbauen, wenn der Motor noch
heiß ist, da verschüttetes Benzin sich entzünden kann.
Die Kraftstoffleitungsklemmen auf keinen Fall mehr als
notwendig spreizen. Sicherstellen, dass die Klemmen
nach dem Einbau die Schläuche über dem Filter fest
greifen.
12. Keinen Kraftstoff mit METHANOL, kein Gasohol mit
mehr als 10% ETHANOL, keine Benzinadditive bzw. kein
Weißbenzin verwenden, da ansonsten das
Motor-/Kraftstoffsystem beschädigt werden könnte.
13. Falls der Kraftstofftank entleert werden muss, sollte dies
im Freien geschehen.
14. Defekten Schalldämpfer/Auspuff ersetzen.
15. Bei der Durchführung von Reparaturen nur ab Werk
zugelassene Ersatzteile verwenden.
16. Bei allen Einstellungen und Justierungen stets die werkseitigen Spezifikationen einhalten.
17. Für größere Wartungs- und Reparaturarbeiten sollten
nur Vertragswerkstätten verwendet werden.
18. Auf keinen Fall irgendwelche größeren Reparaturen an
diesem Gerät durchführen, wenn Sie nicht entsprechend
geschult wurden. Falsche Serviceverfahren können zu
einer Gefährdung des Betriebs, zu Geräteschäden und
zur Ungültigkeit der Herstellergarantie führen.
19. Bei Mähwerken mit mehreren Messern muss vorsichtig
vorgegangen werden, da sich beim Drehen eines
Messers auch andere Messer drehen können.
20. Auf keinen Fall die Motorreglereinstellungen ändern oder
den Motor überdrehen. Das Bedienen des Motors bei
überhöhter Geschwindigkeit kann zu einer größeren Verletzungsgefahr führen.
21. Antriebszubehörgeräte auskuppeln, den Motor abstellen, den Schlüssel abziehen und die Zündkerzendrähte abtrennen, bevor Sie folgende Vorgänge
ausführen: verstopfte Zubehörgeräte und Schächte reinigen, Servicearbeiten durchführen, gegen ein Objekt
fahren oder bei abnormen Vibrationen. Nachdem Sie
gegen ein Objekt fahren, die Maschine auf Schäden
überprüfen und Reparaturen vornehmen, bevor das
Gerät wieder gestartet und in Betrieb genommen wird.
22. Auf keinen Fall die Hände in die Nähe von beweglichen
Teilen (z. B. Hydropumpenlüfter) bringen, wenn der Traktor läuft. (Hydropumpenlüfter befinden sich in der Regel
oben auf der Transachse).
23. Geräte mit Hydraulikpumpen, -schläuchen oder -motoren:
ACHTUNG: Unter Druck austretende Hydraulikflüssigkeit
kann u. U. so stark spritzen, dass die Haut durchdrungen
wird und ernsthafte Verletzungen entstehen. Wenn Fremdflüssigkeit in die Haut eindringt, muss sie innerhalb
einiger weniger Stunden von einem Arzt, der mit dieser
Art von Verletzung vertraut ist, chirurgisch entfernt werden, da ansonsten eine Gewebenekrose eintreten kann.
Körper und Hände von Nadellöchern oder Düsen, die
Hydraulik-flüssigkeit unter hohem Druck spritzen, fern
halten. Bei der Suche nach Leckagen Papier oder
Pappe verwenden, nicht die Hände. Sicherstellen, dass
alle Hydraulikflüssigkeitsanschlüsse fest sitzen und dass
alle Hydraulikschläuche und -leitungen sich in gutem Zustand befinden, bevor das System unter Druck gesetzt
wird. Wenn Leckagen auftreten, muss das Gerät sofort
von Ihrem Vertragshändler repariert werden.
24. ACHTUNG: Energiespeichervorrichtung. Das unsachgemäße Lösen von Federn kann zu ernsthaften
Verletzungen führen. Federn sollten nur von einem autorisierten Techniker ausgebaut werden.
25. Modelle mit einem Motorwasserkühler: ACHTUNG: Energiespeichervorrichtung. Um ernsthafte Körperverletzungen durch heißes Kühlmittel oder austretenden
Dampf zu vermeiden, darf auf keinen Fall versucht werden, den Kühlerdeckel bei laufendem Motor
abzunehmen. Den Motor stoppen und warten, bis er
abgekühlt ist. Selbst dann muss beim Abnehmen des
Deckels äußerst vorsichtig vorgegangen werden.
10 www.simplicitymfg.com
Page 55

BETRIEBSSICHERHEIT
Sicherheitsaufkleber
Alle Hinweise mit der Bezeichnung GEFAHR, ACHTUNG,
VORSICHT sowie Anweisungen auf Ihrem Aufsitzmäher
und Mähwerk sollten sorgfältig gelesen und beachtet werden. Die Nichtbeachtung dieser Anweisungen kann zu Verletzungen führen. Diese Informationen dienen zu Ihrer
Sicherheit und sind wichtig! Die nachstehenden Sicherheitsaufkleber befinden sich auf Ihrem Aufsitzmäher und Mähwerk.
Sicherheitssymbole
Achtung: Benutzerhandbuch lesen.
Vor dem Gebrauch dieser Maschine
das Benutzerhandbuch lesen und
verstehen.
Gefahr: Umherschleudern von
Gegenständen.
Diese Maschine kann Gegenstände
und Schmutzteile umherschleudern.
Umstehende Personen fern halten.
Achtung: Vor der Wartung
Schlüssel abziehen.
Vor der Durchführung von Reparaturen
oder Wartungsarbeiten den Schlüssel
abziehen und die technischen
Handbücher konsultieren.
Falls irgendwelche Aufkleber verloren gehen oder beschädigt
werden, müssen sie sofort ersetzt werden. Ersatzaufkleber erhalten Sie von Ihrem örtlichen Händler.
Diese Aufkleber lassen sich leicht aufbringen und dienen
Ihnen und anderen, die eventuell dieses Gerät benutzen, als
visuelle Gedächtnisstütze, die Sicherheitsanweisungen zu befolgen, die für einen sicheren, effektiven Betrieb notwendig sind.
Gefahr: Heiße Oberfläche.
Vor Berühren dieses Bereichs
Maschine abkühlen lassen.
Gefahr: Kohlenmonoxidvergiftung.
Den Motor nicht in einem
unbelüfteten Bereich laufen lassen.
Warnung: Feuergefahr.
Batterien für Kinder unzugänglich
lagern. Offene Flammen und Funken
von der Batterie fernhalten, da sich
anderenfalls explosive Gase
entzünden könnten.
Gefahr: Umkippen der Maschine.
Diese Maschine nicht auf Gefällen von
mehr als 10 Grad verwenden.
Gefahr: Abtrennen von
Gliedmaßen.
Diese Maschine kann Gliedmaßen
abtrennen. Bei laufendem Motor
umstehende Personen und Kinder fern
halten.
Gefahr: Abtrennen von
Gliedmaßen.
Dieses Mähwerk kann Gliedmaßen
abtrennen. Hände und Füße von
Messern entfernt halten.
Gefahr: Brandgefahr.
Wenn der Motor heiß ist oder läuft,
keinen Kraftstoff nachfüllen. Den Motor
anhalten und 3 Minuten abkühlen
lassen, bevor Sie ihn betanken.
Warnung: Schwefelsäure kann zu
Blindheit oder schweren
Verbrennungen führen.
Beim Arbeiten an oder in der Nähe
von Batterien immer eine Schutzbrille
tragen.
Warnung: Batterien entwickeln
explosive Gase.
Bitte lesen und verstehen Sie die
Bedienungsanleitung, bevor Sie diese
Maschine benutzen.
Wichtig: Batterien nicht im
Hausmüll entsorgen.
Kontakt de lokale myndigheder mht.
Wenden Sie sich zur Entsorgung
und/oder zum Recyceln von Batterien
an die Behörden vor Ort.
Gefahr: Abtrennen von Gliedmaßen.
Dieses Mähwerk kann Gliedmaßen abtrennen. Hände und
Füße von Messern entfernt halten.
11
Page 56

BETRIEBSSICHERHEIT
SS
OO
SSTTOO
PP
Lage der Aufkleber
Aufkleber
Teilenr. 1727541
Betriebsanleitung, CE-Modelle, Teilenr. 1734027
1
2
3
4
5
6
+
Zündschalterstellungen,
Teilenr. 1722806
1723143
Anbaugeräthub,
Teilenr. 1723143
Vorsicht, Klemmstelle,
Teilenr. 1723089
1730172
Kraftstoffniveau
Teilenr. 1730172
Vorsicht, Klemmstelle,
Teilenr. 1723089
PP
1723160
Kraftstoffanzeige,
Teilenr. 1723160
12 www.simplicitymfg.com
Page 57

FUNKTIONEN UND STEUERUNGEN
12V
Steuerungen der Zugmaschine Abb. 2
Steuerungen der Zugmaschine
Gashebel
Der Gashebel regelt die Motorgeschwindigkeit. Zum Erhöhen
der Motorgeschwindigkeit den Hebel nach vorne bewegen,
und zum Verringern der Motorgeschwindigkeit den Hebel
zurück bewegen. Stets mit VOLLGAS arbeiten.
Choke
Beim Kaltstart wird der Choke geschlossen. Nachdem der
Motor startet, den Choke öffnen. Bei einem warmen Motor
braucht der Choke eventuell nicht betätigt werden. Zum
Schließen des Choke den Hebel nach vorne bewegen.
Scheinwerfer
Mit dem Lichtschalter werden die Scheinwerfer des Traktors ein- und ausgeschaltet.
Rückwärtsmähoption (RMO)
Die Rückwärtsmähoption ermöglicht das Mähen (bzw. die Verwendung anderer Zubehörgeräte mit Zapfwellenantrieb)
während der Rückwärtsfahrt. Wenn Sie im Rückwärtsgang
mähen möchten, den RMO-Schlüssel drehen, nachdem der
Zapfwellenantrieb eingekuppelt ist. Die LED-Lampe leuchtet,
und der Bediener kann jetzt im Rückwärtsgang mähen. Jedes
Mal, wenn der Zapfwellenantrieb eingekuppelt wird, muss die
RMO nach Wunsch neu aktiviert werden.
13
Page 58

FUNKTIONEN UND STEUERUNGEN
12V
Zapfwellenantriebsschalter
Der Zapfwellenantriebsschalter kuppelt die Zubehörgeräte, die
den Zapfwellenantrieb benutzen, ein und aus. Zum Einkuppeln
des Zapfwellenantriebs wird der Schalter nach OBEN gezogen.
Zum Auskuppeln wird er nach UNTEN gedrückt.
dass der Bediener fest im Traktorsitz sitzen muss, damit der
Zapfwellenantrieb funktioniert.
Beachten Sie,
Zündschalter
Der Zündschalter startet und stoppt den Motor; er hat drei Positionen:
AUS Hält den Motor an und schaltet das
Elektrosystem aus.
RUN Der Motor kann laufen, und das
Elektrosystem wird gespeist.
START Kurbelt die Maschine zum Anlassen.
HINWEIS: Den Zündschalter bei angehaltenem Motor auf
keinen Fall in der Position RUN stehen lassen - dadurch läuft
die Batterie leer.
Bremspedal
Schnitthöheneinstellung
Die Schnitthöhe kann zwischen 3,8 - 10,2 cm (1,5 - 4,0”)
stufenlos verstellt werden.
Die Schnitthöhe des Mähwerks wird mit dem SchnitthöhenEinstellschalter eingestellt. Bei Installation einer Schneefräse
dient dieser Schalter der Einstellung des
Auswurfdrehungsmotors. Die Pfeile am Schalter
entsprechen der Richtung der Einstellung (mit dem
AUFWÄRTS-Pfeil wird die Schnitthöhe erhöht, mit dem
RECHTEN Pfeil wird der Auswurf nach rechts gedreht usw.).
Wenn die Einstellungsanzeige am Ende des Einstellbereichs
angelangt ist, den Schalter freigeben. Andernfalls wird der
Motor beschädigt.
Tempomat
Der Tempomat wird dazu verwendet, die Fahrtgeschwindigkeitsteuerung im Vorwärtsgang zu arretieren. Er hat fünf Arretierpositionen.
Sitzeinstellhebel
Der Sitz kann zur Einstellung nach vorne und hinten
geschoben werden. Den Hebel anheben, den Sitz in die
gewünschte Position bringen und den Hebel loslassen,
um den Sitz in der Position zu verriegeln.
Durch Treten des Bremspedals wird die Traktorbremse
betätigt.
Fahrtgeschwindigkeitspedale
Die Vorwärtsfahrtgeschwindigkeit des Traktors wird durch das
Steuerpedal für die Vorwärtsfahrtgeschwindigkeit geregelt. Die
Rückwärtsfahrtgeschwindigkeit des Traktors wird durch das
Steuerpedal für die Rückwärtsfahrtgeschwindigkeit geregelt.
Durch Drücken eines der Pedale wird die Fahrtgeschwindigkeit erhöht. Beachten Sie, dass der Traktor umso schneller fährt, je
mehr Sie das Pedal durchtreten.
Parkbremse
Der Parkbremsenknopf wird zum Verriegeln der Parkbremse verwendet, wenn der Traktor angehalten hat. Durch
vollständiges Durchtreten des Bremspedals und
Hochziehen des Knopfs wird die Parkbremse betätigt.
Getriebeausrückventilhebel
Der Getriebeausrückventilhebel deaktiviert das Getriebe,
sodass der Traktor von Hand geschoben werden kann.
Betriebsinformationen finden Sie unter
schieben
.
Traktor von hand
Kraftstofftank
Zum Abnehmen des Deckels wird dieser gegen den
Uhrzeigersinn gedreht.
12-V Strombuchse
Die Strombuchse hat 12 V-DC. Zubehörteile müssen eine
Nennleistung von höchstens 9 Amp aufweisen.
14 www.simplicitymfg.com
Page 59

Verstellbares Lenkrad einstellen
Benutzen Sie den am Faltenbalg befindlichen Einstellknopf,
um den Schwenkmechanismus freizugeben und bringen Sie
das Lenkrad in die gewünschte Stellung. Geben Sie den
Einstellknopf frei, um ihn in der gewünschten Stellung zu
arretieren.
Zubehörhub-Steuerhebel
Heben Sie das Mähwerk stets an, wenn es nicht eingesetzt
wird (Strecke vom und zum Mäheinsatz). Setzen Sie das
Mähwerk NICHT ein, wenn es sich in der angehobenen
Transportposition befindet.
Der Zubehörhub-Steuerhebel hebt und senkt Zubehör, das
das manuelle Hubgestänge des Traktors benutzt. Absenken
von Zubehör: Hebel leicht nach hinten bewegen, den
Freigabeknopf hineindrücken und den Hebel nach vorne
bewegen, bis er in der abgesenkten Position arretiert.
Anheben von Zubehör: Hebel leicht nach vorne bewegen,
den Freigabeknopf hineindrücken und den Hebel nach
hinten bewegen, bis er in der angehobenen Position
arretiert.
Differentialsperrpedal (ausgewählte
Modelle)
Durch Niederdrücken des Pedals wird das Getriebe differential
gesperrt, wodurch die beiden hinteren Räder auf „Antrieb“
eingestellt sind.
Verwenden Sie dieses Merkmal, wenn der Traktor
steckengeblieben ist, weil ein Rad rutscht. Kuppeln Sie die
Differentialsperre nur bei niedriger
Grundgeschwindigkeit ein.
Parkbremsfunktionen
Parkbremse einsetzen - Siehe Abb. 2. Die Parkbremse
wird angezogen, indem Sie die Grundgeschwindigkeits pedale (A) freigeben, das Bremspedal (B) vollständig
nach unten drücken, und den Knopf für die Parkbremse
(C) HERAUSZIEHEN und dann das Bremspedal
freigeben.
Lösen der Parkbremse - Siehe Abb. 2. Die Parkbremse
wird gelöst, indem Sie das Bremspedal (B) vollständig
nach unten drücken und den Knopf für die Parkbremse
(C) HINEINDRÜCKEN.
WICHTIGER HINWEIS - Für Modelle mit Hydraulikhub:
Der Zubehörhydraulikhub ist bei eingekuppelter
Parkbremse nicht einsatzfähig.
FUNKTIONEN UND STEUERUNGEN
Armaturenbrett-Anzeigefunktionen
Siehe Abb. 3.
Wenn der Zündschlüssel in die Stellung „Lauf“ gedreht
wird, leuchten die Warnanzeigen auf und die Gesamtzahl
der Einsatzstunden wird angezeigt. Achten Sie darauf,
dass alle Anzeigeleuchten funktionieren.
A. Kraftstoff-Füllstand
Zeigt die im Kraftstofftank befindliche Kraftstoffmenge an.
Links ist leer, rechts ist voll. Die letzten beiden Striche
blinken, wenn der Tank fast leer ist.
B. Stundenzähler / Uhr / Service-Anzeige
Zeigt die Uhr, den Stundenzähler und eine
Wartungserinnerung an.
Der Stundenzähler zählt, wie viele Stunden der Schlüssel
in der RUN-Position steht. Der Stundenzähler blendet
nach 5 Stunden eine erste Ölwechselanzeige und alle 50
Stunden eine Schmierungserinnerung ein. Diese Erinnerungsmeldungen werden ca. zwei Stunden lang
angezeigt und stellen sich dann automatisch zurück.
HINWEIS: Der Stundenzähler erfasst die Zeit, wenn sich
der Schlüssel in der Position RUN befindet, selbst wenn
der Motor nicht läuft. Der Stundenzähler hat eine eigene
Stromversorgung, sodass die Gesamtzahl der Stunden
immer sichtbar ist.
C. Taste „Auswahl“
Wird zum Einstellen der Uhr benutzt.
D. Taste „Einstellen“
Wird zum Einstellen der Uhr benutzt.
E. Zapfwellenkupplungsschalterleuchte
Zeigt an, dass sich der Zapfwellenkupplungsschalter in
der Stellung „Ein" befindet.
F. Automatische Geschwindigkeitsregelungsleuchte
Zeigt an, daß die automatische Geschwindigkeitsregelung
eingekuppelt ist.
G. Niedrige Öldruckleuchte
Zeigt an, daß der Motoröldruck niedrig ist. Leuchtet beim
Starten des Traktors auf und erlischt dann. WENN DIESE
LEUCHTE BEI BENUTZUNG DES TRAKTORS
LEUCHTET, MUSS DER MOTOR SOFORT
ABGESTELLT WERDEN. Setzen Sie sich mit Ihrem
Vertragshändler in Verbindung.
H. Niedrige Spannungsanzeige
Zeigt an, dass die Spannung des Elektrosystems niedrig
ist. Leuchtet beim Starten des Traktors auf und erlischt
dann. WENN DIESE LEUCHTE BEI BENUTZUNG DES
TRAKTORS LEUCHTET, MUSS DER MOTOR SOFORT
ABGESTELLT WERDEN. Setzen Sie sich mit Ihrem
Vertragshändler in Verbindung.
15
Page 60

FUNKTIONEN UND STEUERUNGEN
Funktionen
MODELLE MIT ARMATURENBRETTANZEIGE
Anzeige der Gesamtbetriebsstunden - Wenn der
Schlüsselschalter erstmalig auf die Stellung BETRIEB
gedreht wird, leuchten alle Warnanzeigen auf und die
Gesamtbetriebsstunden werden angezeigt. Achten Sie darauf, dass alle Leuchten funktionieren.
Anzeige der Zapfwellenbetriebsstunden - Drehen Sie
den Schlüssel auf AUS, kuppeln Sie die Zapfwelle ein und
drehen Sie den Schlüssel auf BETRIEB (Motor aus).
Einstellung der Uhr - Starten Sie den Motor und lassen
Sie ihn laufen. Drücken Sie die Taste SELECT (wählen) (C,
Abb. 3) drei (3) Sekunden lang und lassen Sie sie danach
los. Halten Sie die Taste SET gedrückt, um die Zeit
vorlaufen zu lassen. Drücken Sie die Taste SELECT
(wählen), um die Minuten auszuwählen. Halten Sie die
Taste SET (D) gedrückt, um die Zeit vorlaufen zu lassen.
Warten Sie 5 Sekunden nach Loslassen der Tasten.
Danach wird die Uhr aktiviert. Stellen Sie den Motor ab.
Demonstrationsmodus - Halten Sie bei abgestelltem
Motor die Taste SET (D) gedrückt und drehen Sie den
Schlüsselschalter auf BETRIEB.
Wartungserinnerung - Eine Erinnerung an eine
notwendige Wartung wird nach den ersten 5
Betriebsstunden und danach alle 50 Betriebsstunden im
Informationsfenster angezeigt (B). Die Erinnerung wird nach
5 Stunden automatisch zurückgesetzt. Die Erinnerung kann
manuell zurückgesetzt werden. Drehen Sie dazu den
Schlüsselschalter von AUS auf BETRIEB (bei abgestelltem
Motor) und drücken Sie die Tasten SET (D) und SELECT
(wählen) (C) gleichzeitig 5 Sekunden lang.
12-Volt Steckdose
Die 12-Volt-Zubehörbuchse befindet sich in der linken Instrumentenverkleidung. Sie kann zur Speisung von
kleinen elektronischen Geräten verwendet werden. Das
Zubehör muss für eine Stromaufnahme von max. 14 A
ausgelegt sein.
HINWEIS: Der Betrieb eines 12-Volt-Zubehörgeräts kann,
besonders beim Leerlaufbetrieb des Motors, zum Entladen der Batterie führen. Wenn die Zubehörbuchse nicht
verwendet wird, muss sie mit dem Gummistopfen verschlossen werden, um Eindringen von Feuchtigkeit und
Kurzschlüsse zu verhindern. Eindringen von Wasser in die
Buchse kann einen Kurzschluss.
16 www.simplicitymfg.com
Page 61

BETRIEB
Tests des Sicherheitssperrsystems
Dieses Gerät ist mit einem Sicherheitssperrschalter und anderen Sicherheitsvorrichtungen ausgestattet. Diese Sicherheitssysteme dienen zur Ihrer Sicherheit: Auf keinen Fall
versuchen, Sicherheitsschalter zu umgehen und irgendwelche
Sicherheitsvorrichtungen zu manipulieren.
WARNUNG
Wenn das Gerät eine Sicherheitsprüfung nicht
besteht, darf es nicht in Betrieb genommen werden.
Wenden Sie sich an Ihren Vertragshändler.
Test 1 — Motor sollte NICHT kurbeln, wenn:
• der Zapfwellenantriebsschalter auf EIN steht ODER
• das Bremspedal NICHT ganz gedrückt ist (Parkbremse auf
AUS) ODER
• der Tempomathebel sich NICHT in der Stellung NEUTRAL
befindet.
Test 2 — Motor SOLLTE kurbeln und starten, wenn:
• der Bediener im Sitz sitzt UND
• der Zapfwellenantriebsschalter auf AUS steht UND
• das Bremspedal vollständig gedrückt ist (Parkbremse auf
EIN) UND
• der Tempomathebel sich in der Stellung NEUTRAL befindet.
Test 3 — Motor SOLLTE kurbeln und starten, wenn:
• sich die Bedienperson bei eingekuppelter PTO vom Sitz erhebt ODER
• wenn sich die Bedienperson bei NICHT vollständig durchgedrücktem Bremspedal (Parkbremse AUS) vom Sitz erhebt.
Test 4 —
Die Messer des Mähwerks und der Mähwerkantriebsriemen
sollten nach Ausschalten des elektrischen Zapfwellenantriebsschalters (oder wenn der Bediener vom Sitz aufsteht) innerhalb
von fünf Sekunden zum Stillstand kommen. Wenn der MäherAntriebsriemen nicht innerhalb von fünf Sekunden stoppt, setzen
Sie sich mit Ihrem autorisierten Händler in Verbindung.
Test 5 — Rückwärtsmähoption (RMO) prüfen
• Der Motor sollte sich ausschalten, wenn versucht wird, den
• Die RMO-Lampe sollte leuchten, wenn die aktiviert wurde.
Stoppzeit der Mäher-Klinge überpüfen
Rückwärtsgang einzulegen und der Zapfwellenantrieb
eingeschaltet, die RMO aber nicht aktiviert wurde.
Nachfüllen von Kraftstoff
WARNUNG
Kraftstoff und Kraftstoffdämpfe sind extrem
leicht entflammbar und explosiv.
Feuer oder Explosionen können zu schweren
Verbrennungen oder Tod führen.
Beim Nachfüllen von Kraftstoff
• Den Motor ausschalten und mindestens 3 Minuten
lang abkühlen lassen, bevor der Tankdeckel
abgenommen wird.
• Den Kraftstofftank im Freien oder in einem gut
belüfteten Bereich füllen.
• Den Kraftstofftank nicht überfüllen. Um dem Kraftstoff
Platz zum Ausdehnen zu lassen, nicht über die
Unterkante des Kraftstofftankstutzens hinaus füllen.
• Kraftstoff von Funken, offenen Flammen,
Dauerflammen, Wärmequellen und anderen
Entzündungsherden fernhalten.
• Kraftstoffleitungen, Tank, Deckel und Anschlüsse
regelmäßig auf Sprünge und undichte Stellen
untersuchen und bei Bedarf austauschen.
• Wenn Kraftstoff verschüttet wurde, warten, bis sich die
Dämpfe verflüchtigt haben, bevor der Motor gestartet
wird.
1. Den Bereich um den Tankdeckel von Schmutz und
Fremdkörpern reinigen. Den Tankdeckel (A, Abb. 4) abnehmen.
2. Den Kraftstofftank (B) mit Kraftstoff füllen. Um dem
Kraftstoff Platz zum Ausdehnen zu lassen, nicht über
die Unterkante des Kraftstofftankstutzens (C) hinaus
füllen.
3. Den Tankdeckel wieder anbringen.
Starten des Motors
WARNUNG
Kraftstoff und Kraftstoffdämpfe sind extrem
leicht entflammbar und explosiv.
Feuer oder Explosionen können zu schweren
Verbrennungen oder Tod führen.
Beim Start des Motors
• Darauf achten, dass Zündkerze, Schalldämpfer,
Tankdeckel und Luftfilter (falls vorhanden) an ihrem
Platz und sicher befestigt sind.
• Nicht den Motor anlassen, wenn die Zündkerze
entfernt wurde.
• Wenn der Motor überfettet ist, den Choke (falls
vorhanden) auf offene/Betriebs-Position und den
Gashebel (falls vorhanden) auf schnelle Position
stellen und den Motor anlassen, bis er anspringt.
17
Page 62

BETRIEB
WARNUNG
Motoren erzeugen Kohlenmonoxid, ein
geruchloses, farbloses, giftiges
Gas. Wenn Kohlenmonoxid eingeatmet wird, kann
es zu Übelkeit, Ohnmacht oder Tod kommen.
• Den Motor im Freien starten und laufen lassen.
• Den Motor nicht in geschlossenen Räumen starten
oder laufen lassen, selbst wenn Türen oder Fenster
geöffnet sind.
1. Im Fahrersitz sitzen, das Bremspedal ganz durch
drücken oder die Parkbremse anziehen.
2. Sicherstellen, dass die Fahrgeschwindigkeitspedale
nicht nieder gedrückt werden und dass der Hebel für
die automatische Geschwindigkeitsregelung in der
Neutralstellung ist.
3. Die Zapfwellenkupplung auskuppeln.
4. Den Gashebel auf VOLLGAS stellen.
5. Den Choke schließen.
HINWEIS: Bei warmem Motor ist die Anwendung des
Chokes ggf. nicht notwendig.
6. Den Schlüssel in den Zündschalter stecken und auf
START drehen.
7. Nach dem Anlassen des Motors den Gashebel auf
halbe Motornenndrehzahl einstellen. Den Motor mindestens 30 Sekunden lang warm laufen lassen.
8. Den Gashebel auf VOLLGAS stellen.
HINWEIS: Bei einem Notfall kann der Motor gestoppt werden, indem der Zündschalter in die Stellung STOP gedreht
wird. Diese Methode darf jedoch nur in Notsituationen
angewendet werden. Zum normalen Abstellen des Motors
die Anleitungen im Abschnitt Traktor und Motor anhal-
ten.
6. Auf das Vorwärts-Fahrtgeschwindigkeitspedal treten,
um vorwärts zu fahren. Zum Anhalten den Fuß vom
Pedal nehmen. Beachten Sie, dass der Traktor umso
schneller fährt, je mehr Sie das Pedal durchtreten.
7. Der Traktor wird angehalten, indem Sie den Fuß von
den Fahrtgeschwindigkeitspedalen nehmen, die Parkbremse betätigen und den Motor ausschalten (siehe
Anhalten des traktors und motors
).
Mähen
1. Stellen Sie die Schnitthöhe des Mähers mithilfe des
Mäher-Hebearms auf die gewünschte Höhe ein.
2. Lassen Sie die Parkbremse einrasten. Vergewissern
Sie sich, dass die Antriebswelle ausgekuppelt ist.
3. Starten Sie den Motor (siehe
4. Stellen Sie die Geschwindigkeit auf VOLLGAS.
5. Kuppeln Sie die Antriebswelle ein, um die Mäherklingen
zu aktivieren.
6. Beginnen Sie mit dem Mähen.
HINWEIS: Wenn der Alarmton „Grasfangeinrichtung
voll“ ertönt, kuppeln Sie die Antriebswelle sofort aus,
um ein Verstopfen des Auswurfkanals zu verhindern.
Fahren Sie in die gewünschte Richtung und entleeren
Sie die Grasfangeinrichtung (siehe Entleeren der
Grasfangeinrichtung).
7. Wenn Sie damit fertig sind, kuppeln Sie die Antriebswellenkupplung aus und heben Sie das Gehäuse mithilfe des Mäher-Hebearms an.
8. Stoppen Sie den Motor (siehe
chine und des Motors
Den Motor starten
Stoppen der Zugmas-
).
).
Traktor fahren
1. So in den Sitz setzen und den Sitz so einstellen, dass
Sie bequem alle Bedienelemente erreichen und die
Instrumententafelanzeige sehen können.
2. Die Parkbremse betätigen.
3. Sicherstellen, dass der Zapfwellenantriebsschalter
ausgekuppelt ist.
4. Den Motor starten (siehe
5. Die Parkbremse lösen und den Fuß vom Bremspedal
nehmen.
18 www.simplicitymfg.com
Starten des motors
WARNUNG
Der Motor schaltet sich aus, wenn das RückwärtsFahrtgeschwindigkeitspedal betätigt wird, während der
Zapfwellenantrieb eingeschaltet ist und die RMO nicht
aktiviert wurde. Der Bediener sollte den
Zapfwellenantrieb vor dem Überqueren von Straßen,
Wegen oder sonstigen Bereichen, in denen auch andere
Fahrzeuge fahren, stets ausschalten. Ein plötzlicher
).
Antriebsverlust könnte zu einer Gefahr werden.
WARNUNG
Das Mähen im Rückwärtsgang kann für umstehende
Personen gefährlich sein. Es können tragische Unfälle
passieren, wenn der Bediener nicht auf Kinder achtet.
Auf keinen Fall die RMO aktivieren, wenn Kinder
vorhanden sind. Kinder fühlen sich häufig von einer
solchen Maschine und dem Vorgang des Mähens
angezogen.
Page 63

BETRIEB
Im Rückwärtsgang mähen
Wenn ein Bediener im Rückwärtsgang mäht, dann das
RMO-System verwendet werden. Um die Rückwärtsmähoption (RMO) zu verwenden, den RMO-Schlüssel
drehen, nachdem der Zapfwellenantrieb eingekuppelt ist.
Die LED-Lampe leuchtet, und der Bediener kann jetzt im
Rückwärtsgang mähen. Jedes Mal, wenn der
Zapfwellenantrieb eingekuppelt wird, muss die RMO nach
Wunsch neu aktiviert werden. Der Schlüssel sollte abgezogen werden, um den Zugriff auf die RMO-Funktion
einzuschränken.
Traktor mit der Hand schieben
1. Den Zapfwellenantrieb auskuppeln und den Motor abschalten.
2. Drücken Sie ein Hebel ca. 6 cm (2-3/8 Zoll), um das
Getriebe auszukuppeln (B, Abb. 5).
3. Der Traktor kann jetzt von Hand geschoben werden.
TRAKTOR NICHT ZIEHEN
Das Ziehen des Geräts verursacht
Getriebeschäden.
• Dieses Gerät nicht mit einem anderen
Fahrzeug schieben oder ziehen.
• Den Getriebeausrück-ventilhebel nicht
betätigen, während der Motor läuft.
Einen Anhänger anbringen
Die maximale horizontale Lastbegrenzung der
Zugstange beträgt 444 N. Die maximale vertikale Lastbegrenzung der Zugstange beträgt 222 N. Das entspricht
einem Anhänger mit 180 kg Gewicht auf einem Geländeanstieg von 10 Grad. Den Anhänger mit einem ausreichend bemessenen Lastbolzen (A, Abb. 7) und Splint
(B) befestigen.
Traktor und Motor anhalten
1. Den/die Grundgeschwindigkeitssteuerung(en) in die
Neutralposition zurückstellen.
2. Die Zapfwellenkupplung auskuppeln und warten, bis
alle beweglichen Teile zum Stillstand gekommen sind.
3. Den Gashebel in die Position LANGSAM stellen und
den Zündschlüssel (A, Abb. 6) auf AUS drehen. Den
Zündschlüssel abziehen.
Einstellung der Mähwerkhöhe
Die Schnitthöhe kann zwischen 3,8 - 10,2 cm (1,5 - 4,0”)
stufenlos verstellt werden.
(B, Abb. 6) Die Schnitthöhe des Mähwerks wird mit dem
Schnitthöhen-Einstellschalter eingestellt. Bei Installation
einer Schneefräse dient dieser Schalter der Einstellung
des Auswurfdrehungsmotors. Die Pfeile am Schalter
entsprechen der Richtung der Einstellung (mit dem
AUFWÄRTS-Pfeil wir-d die Schnitthöhe erhöht, mit dem
RECHTEN Pfeil wird der Auswurf nach rechts gedreht
usw.). Wenn die Einstellungsanzeige am Ende des
Einstellbereichs angelangt ist, den Schalter freigeben.
Andernfalls wird der Motor beschädigt.
19
Page 64

WARTUNG
Wartungstabelle
ZUGMASCHINE UND MÄHER
Alle 8 Stunden oder täglich
Sicherheitsverriegelungssystem überprüfen
Beseitigen Sie Ablagerungen von der Zugmaschine
und dem Motorgehäuse
Beseitigen Sie Ablagerungen vom Motorfach
Alle 25 Stunden oder jährlich *
Überprüfen Sie den Reifendruck
Überprüfen Sie die Zeit, die Mäherklinge zum Anhalten
braucht
Überprüfen Sie die Zugmaschine auf lose Teile
Alle 50 Stunden oder jährlich *
Säubern Sie Batterie und Kabel
Überprüfen Sie die Bremsen der Zugmaschine
Suchen Sie Ihren Händler einmal jährlich auf, um
Schmieren Sie Zugmaschine und Mäher
Überprüfen Sie die Mäherklingen **
* Je nachdem, was zuerst eintritt
** Überprüfen Sie die Klingen in Gegenden mit sandigen
Böden oder starkem Staub öfter. * Je nachdem, was zuerst eintritt
MOTOR
Erste 5 Stunden
Wechseln Sie das Motoröl
Alle 8 Stunden oder täglich
Prüfen Sie den Ölstand des Motors
Alle 25 Stunden oder jährlich *
Reinigen Sie den Motorluftfilter und Vorreiniger **
Alle 50 Stunden oder jährlich *
Wechseln Sie das Motoröl
Wechseln Sie den Ölfilter
Jährlich
Wechseln Sie den Luftfilter aus
Wechseln Sie den Vorreiniger aus
Suchen Sie Ihren Händler einmal jährlich auf, um
Untersuchen Sie Schalldämpfer und Funkenfänger
Wechseln Sie die Zündkerze aus
Wechseln Sie den Kraftstofffilter aus
Reinigen Sie das Luftkühlsystem
** Bei staubigen Umwelbedigungen oder wenn in der Luft
schwebende feste Teilchen vorhanden sind, häufiger
reinigen.
Reifendruck prüfen
Der Reifendruck sollte regelmäßig überprüft werden, wobei der
im Diagramm aufgeführte Wert aufrechterhalten werden muss.
Beachten Sie, dass diese Drücke sich leicht von dem Wert für
„Max. Fülldruck“ unterscheiden können, der auf der Seitenwand
der Reifen aufgeprägt ist. Die aufgeführten Drücke gewährleisten eine gute Bodenhaftung, verbessern die Schnittqualität und
verlängern die Reifenlebensdauer.
Größe PSI bar
23 x 10,5-12 6-8 0,41-0,55
15 x 6,5-8 10-12 0,8-1,0
Stoppzeit der Mäher-Klinge überpüfen
Die Messer des Mähwerks und der Mähwerkantriebsriemen sollten nach Ausschalten des elektrischen
Zapfwellenantriebsschalters innerhalb von fünf Sekunden
zum Stillstand kommen.
1. Während der Traktor in der Neutral-Stellung steht, der
Zapfwellenantrieb ausgekuppelt ist und der Bediener
auf dem Traktor sitzt, den Motor starten.
2. Über die linke Fußstütze am Mähwerkantriebsriemen
blicken. Den Zapfwellenantrieb einkuppeln und einige
Sekunden warten. Den Zapfwellenantrieb auskuppeln
und prüfen, wie lange es dauert, bis der Mähwerkantriebsriemen zum Stillstand kommt.
3. Wenn der Mäher-Antriebsriemen nicht innerhalb von
fünf Sekunden stoppt, setzen Sie sich mit Ihrem autorisierten Händler in Verbindung.
20 www.simplicitymfg.com
Page 65

WARTUNG
Batteriewartung
WARNUNG
Beim Ausbauen oder Einbauen von Batteriekabeln das negative Kabel ZUERST abtrennen
und ZULETZT wieder anschließen. Wenn diese
Reihenfolge nicht eingehalten wird, kann die
positive Klemme durch ein Werkzeug am Rahmen kurz geschlossen werden.
Reinigen der Batterie und Kabel
1. Die Kabel von der Batterie abtrennen, das negative Kabel
zuerst (A, Abb. 8) dann die Abdeckung und positiven Kabel
(B).
2. Die Flügelmutter und Unterlegscheibe lösen (D).
3. Die Haltestange (C) nach oben und von der Batterie weg
drehen. Am Lenkturm befestigen.
4. Die Batterie (E) ausbauen.
5. Das Batteriefach mit einer Lösung aus Backnatron und
Wasser reinigen.
6. Die Batterieklemmen und Kabelenden mit einer Drahtbürste
und einem Batterieklemmenreiniger reinigen, bis sie glänzen.
7. Die Batterie (E) erneut in das Batteriefach einlegen. Mit der
Batteriehaltestange (C) und der Flügelmutter und Unterlegscheibe (D) sichern.
8. Die Batteriekabel wieder anbringen, die positiven Kabel und
die Abdeckung zuerst (B), dann das negative Kabel (A).
9. Die Kabelenden und Batterieklemmen mit Vaseline oder nicht
leitendem Fett beschichten.
Sitzeinstellung
Neigungseinstellung
Die Neigung des Sitzes kann auf drei verschiedene
Positionen eingestellt werden. Um die Einstellung
vorzunehmen, entfernen Sie die Schlossschrauben,
Abstandsstücke, Unterlegscheiben und Muttern (B, Abb.
9) vom Gelenk und bringen Sie sie in der gewünschten
Position wieder an.
Sitzschienenstellung
Der Sitz kann vorwärts und rückwärts verstellt werden.
Hebel (A, Abb. 9) bewegen, Sitz in die gewünschte
Position bringen und Hebel loslassen. Der Sitz arretiert in
der gewünschten Position.
Sitzfedereinstellung
Die Sitzfedern (C, Abb. 9) können fester oder weicher
eingestellt werden. Kippen Sie den Sitz nach vorne und
schieben Sie den Federnbausatz nach vorne, um ein
weicheres Fahrverhalten zu erreichen, und nach hinten,
um ein festeres Fahrverhalten zu erreichen.
Einstellung der Manuellen Hubunterstützung
Wenn der manuelle Aufzug nicht ordnungsgemäß
funktioniert, muss der Händler aufgesucht werden.
Aufladen der Batterie
WARNUNG
Halten Sie offene Flammen und Funkten von
der Batterie fern; die austretenden Gase sind
hoch explosiv. Die Batterie beim Aufladen gut
belüften.
Eine tote Batterie oder eine, die zu schwach ist, um den
Motor zu starten, kann zu einem Defekt im Aufladesystem
oder an anderen elektrischen Komponenten führen. Wenn
Zweifel an der Ursache des Problems bestehen, setzen Sie
sich mit Ihrem lokalen Händler in Verbindung. Wenn sie die
Batterie auswechseln müssen, siehe im Abschnitt
Reinigen der Batterie und Kabel
Um die Batterie auszuwechsln, befolgen Sie die
Anleitungen, die vom Hersteller des Batterieladegeräts
angegeben werden, sowie den Warnungen in diesem Buch
im Kapitel bezüglich der
Batterie vollständig auf. Laden Sie nicht bei einer höheren
Frequenz als 10 amps.
Betriebssicherheit
.
. Laden Sie die
21
Page 66

WARTUNG
Lagerung
WARNUNG
Das Gerät auf keinen Fall (mit Kraftstoff) in
einem geschlossenen, schlecht belüfteten Raum
lagern. Kraftstoffdämpfe können mit einer
Zündquelle in Berührung kommen (z. B. einem
Brennofen, Wassererhitzer usw.) und eine
Explosion verursachen. Kraftstoffdämpfe sind
außerdem für Menschen und Tiere giftig.
Beim Lagern von Kraftstoff oder der Maschine mit Kraftstoff
im Tank
• Die Lagerung findet immer außerhalb der Reichweite von
Brennöfen, Heizöfen, Wasserkochern oder anderen Geräten,
die über eine Zündflamme oder andere Glühquellen verfügen
die die Kraftstoffdämpfe anzünden könnten.
Equipment
Kuppeln Sie die Antriebswelle aus, ziehen Sie die Parkbremse
und ziehen Sie den Schlüssel ab.
Die Lebenszeit der Batterie, wenn diese herausgenommen wird.
Lagern Sie sie vollstädig geladen ca. einen Monat lang an einem
kühlen, trockenen Ort. Wird die Batterie im Gerät gelassen,
ziehen Sie das negative Kabel ab.
Motoröl
Wechseln Sie das Motoröl, so lange der Motor noch warm ist.
Siehe Motorhandbuch.
Bevor Sie die Einheit nach der Lagerung starten:
• Überprüfen Sie alle Flüssigkeitsstände. Überprüfen Sie alle
Wartungsbereiche.
• Führen Sie alle im Motorhandbuch empfohlenen
Überprüfungen und Verfahren durch.
• Lassen Sie den Motor vor der Verwendung einige Minuten
warmlaufen.
Kraftstoffsystem
Kraftstoff kann abgestanden werden, wenn er über 30 Tage lag
gelagert wird. Abgestandener Kraftstoff führt dazu, dass sich
Säure und Gummiablagerungen im Kraftstoffsystem oder auf
wichtige Teile des Vergasers bilden. Um den Kraftstoff frisch zu
halten, verwenden Sie Briggs & Stratton FRESH START®Kraftstoffstabilisierer, der als flüssiger Zusatz oder
Tropfkonzentrat-Patrone erhältlich ist.
Es ist nicht nötig, den Kraftstoff aus dem Motor abzulassen,
wenn ein Kraftstoffstabilisierer gemäß den Anweisungen
hinzugefügt wird. Lassen Sie den Motor 2 Minuten lang laufen,
um den Stabilisierer durch das Kraftstoffsystem laufen zu lassen.
Der Motor und Kraftstoff kann dann bis zu 24 Monate lag
gelagert werden.
Falls der Kraftstoff im Motor nicht mit eiem Kraftstoffstabilisierer
behandelt wurde, muss er in einen zugelassenen Behälter
abgelassen werden. Lassen Sie de Motor so lange laufen, bis er
aufgrund von Kraftstoffmangel stoppt. Die Verwendung eines
Kraftstoffstabilisierers im Lagerungsbehälter wird empfohlen, um
die Frische aufrecht zu erhalten.
22 www.simplicitymfg.com
Page 67

Fehlersuche und-behebung bei der Zugmaschine
PROBLEM ÜBERPRÜFEN PROBLEMLÖSUNG
Bremspedal nicht durchgedrückt. Bremspedal vollständig durchdrücken.
Der Motor überträgt oder
startet nicht.
Der Motor startet schwer
oder läuft schlecht.
Motor klopft.
Zu hoher Ölverbrauch.
Motorauspuff ist schwarz.
Motor läuft aber die
Zugmaschine fährt nicht.
Antriebswellenkupplungsschalter
(elektrische Kupplung) steht in der
Position EIN.
Fahrkontrolle ist eingekuppelt. Bewegen Sie den Knopf in die Stellung NEUTRAL/AUS.
Kraftstoff ist alle. Lassen Sie den Motor abkühlen, wenn er heiß ist, und dann füllen Sie den
Motor abgesoffen. Kuppeln Sie die Klingen aus.
Sicherung durchgebrannt. Suchen Sie einen autorisierten Händler auf.
Batterieanschlüsse müssen
gereinigt werden.
Batterien sind leer oder tot. Laden Sie die Batterie neu auf oder ersetzten Sie sie.
Kabel lose oder gebrochen. Sichtinspektion der Kabel durchführen. Falls die Kabel gebrochen oder
Zylinderspule oder
Startermotorschaden.
Sicherheitsverriegelungsschalter
defekt.
Wasser im Kraftstoff. Suchen Sie einen autorisierten Händler auf.
Kraftstoff ist alt oder abgestanden. Suchen Sie einen autorisierten Händler auf.
Kraftstoffgemisch zu stark. Den Luftfilter reinigen.
Der Motor hat ein anderes
Problem.
Niedriger Ölstand. Überprüfen Sie das Öl/füllen Sie gegebenenfalls etwas nach.
Es wurde Öl mit dem falschen Grad
verwendet.
Motor läuft zu heiß. Suchen Sie einen autorisierten Händler auf.
Es wurde Öl mit dem falschen Grad
verwendet.
Zuviel Öl im Motorgehäuse. Lassen Sie überschüssiges Öl ab.
Den schmutzigen Luftfilter
reinigen.
Choke geschlossen. Den Choke öffnen.
Die Grundgeschwindigkeitspedale
sind nicht durchgedrückt.
Die Übertragungs-Lösehebel
stehen in der Position SCHIEBEN.
Parkbremse ist eingerastet. Lösen Sie die Parkbremse.
Der Fahrantriebsriemen ist
gerissen oder rutscht.
Stellen Sie ihn auf die Position AUS.
Kraftstofftank wieder auf.
Sieh hierzu im Abschnitt Reinigen der Batterie und Kabel.
ausgefranst sind, wenden Sie sich an einen autorisierten Händler.
Suchen Sie einen autorisierten Händler auf.
Suchen Sie einen autorisierten Händler auf.
Suchen Sie einen autorisierten Händler auf.
Siehe Motorhandbuch.
Siehe Motorhandbuch.
Siehe Motorhandbuch.
Pedale durchdrücken.
Hebel in die Position FAHRE bringen.
Suchen Sie einen autorisierten Händler auf.
FEHLERSUCHE UND -BEHEBUNG
23
Page 68

FEHLERSUCHE UND -BEHEBUNG
Fehlersuche und-behebung bei der Zugmaschine (Fortsetzung)
PROBLEM ÜBERPRÜFEN PROBLEMLÖSUNG
Parkbremse lässt sich nicht
feststellen.
Zugmaschine lenkt schlecht
oder lässt sich nicht gut
handhaben.
Fehlersuche beim Mäher
PROBLEM ÜBERPRÜFEN PROBLEMLÖSUNG
Mäher lässt sich nicht
anheben.
Der Schnitt ist uneben.
Der Schnitt sieht grob aus.
Motor stirbt leicht ab wenn
der Mäher angestellt ist.
Übermäßige Vibration des
Mähers.
Notor läuft und
Zugmaschine fährt, der
Mäher fährt jedoch nicht.
Bremse abgenutzt. Suchen Sie einen autorisierten Händler auf.
Lenkstange ist locker. Suchen Sie einen autorisierten Händler auf.
Reifendruck stimmt nicht. Siehe hierzu im Abschnitt Überprüfen des Reifendrucks.
Achslager der Vorderräder sind
trocken.
Hebegestänge ist nicht richtig
befestigt oder beschädigt.
Der Mäher ist nicht richtig
nivelliert.
Die Reifen der Zugmaschine sind
nicht richtig aufgepumpt.
Motorgeschwindigkeit zu niedrig. Setzen Sie die Geschwindigkeit auf Vollgas.
Grundgeschwindigkeit zu schnell. Verlangsamen.
Der Mäher hat ein anderes
Problem.
Motorgeschwindigkeit zu niedrig. Setzen Sie die Geschwindigkeit auf Vollgas.
Grundgeschwindigkeit zu schnell. Verlangsamen.
Schmutziger oder verstopfter
Luftfilter.
Schnitthöhe ist zu niedrig
eingestellt.
Motor hat keine
Betriebstemperatur.
Starten des Mähers in hohem Gras. Starten Sie den Mäher in einem bereinigten Bereich.
Der Mäher hat ein anderes
Problem.
PTO nicht eingekuppelt. PTO einkuppeln.
Der Mäher hat ein anderes
Problem.
Suchen Sie einen autorisierten Händler auf.
Suchen Sie einen autorisierten Händler auf.
Suchen Sie einen autorisierten Händler auf.
Siehe hierzu im Abschnitt Überprüfen des Reifendrucks.
Suchen Sie einen autorisierten Händler auf.
Siehe Motorhandbuch.
Schneiden Sie hohes Gras während des ersten Schnitts bei maximaler
Schnitthöhe.
Lassen Sie den Motor einige Minuten lang warm laufen.
Suchen Sie einen autorisierten Händler auf.
Suchen Sie einen autorisierten Händler auf.
24 www.simplicitymfg.com
Page 69

25
Page 70

TECHNISCHE DATEN
MOTOR
Briggs & Stratton
Fabrikat Briggs & Stratton®
Modell Professional Series™
Schwenkbereich 44,2 cm
Elektrisches System Generator: 16 amp
Ölinhalt 1,8-1,9 L (62-64 Unzen)
Zündkerzenspalt 0,76 mm (0,030 Zoll)
Drehmoment des
Zündkerzensteckers 20 Nm (180 in-lbs)
3
(724 Kubikzoll)
Batterie: 12 Volt, 230 CCA
FAHRGESTELL
Volumen des Kraftstofftanks Volumen: 15,1 L (4,0 Gallonen)
Heckräder Reifengröße: 23 x 10,5-12
Vorderräder Reifengröße: 15 x 6,5-8
Auffülldruck: 0,41-0,53 bar (6-8 psi)
Auffülldruck: 0,8-1,0 bar (10-12 psi)
KRAFTÜBERTRAGUNG
K66
Type Hydrostatisch Tuff Torq K66
Motoröl 10W-30 Super-Motoröl
Öleinfüllmenge 2,5 L (2,6 qt)
Geschwindigkeiten @ 3400 U/min Vorwärts: 0-9,3 km/h (0-5,8 MPH)
Antriebsdrehmoment 419 Nm (310 ft-lbs)
Kupplungsstangen-Belastung 200 kg (440 lbs)
Maximalgewicht auf der Achse 316 kg (697 lbs)
Rückwärts: 0-5,6 km/h (0-3,6 MPH)
K664
Type Hydrostatisch Tuff Torq K664
Motoröl Synthetisch 5W30
Öleinfüllmenge 5,1 L (5,4 qt)
Geschwindigkeiten @ 3400 U/min Vorwärts: 0-9,8 km/h (0-6,1 MPH)
Rückwärts: 0-4,8 km/h (0-3,0 MPH)
Antriebsdrehmoment 419 Nm (310 ft-lbs)
Kupplungsstangen-Belastung 200 kg (440 lbs)
Maximalgewicht auf der Achse 316 kg (697 lbs)
MÄHER
Schnittbreite 132 cm (52 Zoll)
Anzahl der Klingen 3
Mähwerksgehäuse-Platte Seitlicher Auswurfschacht
Schnitthöhe 3,8-10,2 cm (1,5-4,0 Zoll)
Schneidpositionen Unbegrenzt
MASSE
Gesamtlänge 191 cm (75,2 Zoll)
Gesamtbreite mit Auswurfklappe 167 cm (65,7 Zoll)
Gesamtbreite ohne Auswurfklappe 132 cm (52,0 Zoll)
Gesamthöhe 119 cm (46,9 Zoll)
Radstand 135 cm (53,1 Zoll)
Angegebene Motorleistung
Die Brutto-Nennleistung für individuelle Benzinmotormodelle ist entsprechend dem SAE-Code (Society of Automotive
Engineers) J1940 (Leistungs- & Drehmomentbestimmung für kleine Motoren) gekennzeichnet, und der Leistungsgrad
wurde entsprechend SAE J1995 (überarbeitete Fassung 2002-05) ermittelt und korrigiert. Drehmomentwerte wurden bei
3060 U/min, Leistungswerte in PS bei 3600 U/min gemessen. Netto-Nennleistungswerte wurden bei eingebauten Abgasund Luftfiltern ermittelt, die Brutto-Leistungswerte wurden ohne diese Systeme ermittelt. Die tatsächliche BruttoMotorleistung ist höher als die Nettoleistung und wird u. a. von den Einsatzbedingungen sowie von motorspezifischen
Faktoren beeinträchtigt. Aufgrund des breiten Produktangebots, an dem die Motoren eingesetzt werden, entwickelt der
Benzinmotor beim Einsatz an einem spezifischen Motorgerät eventuell nicht die angegebene Brutto-Nennleistung. Dieser
Unterschied beruht auf einer Vielzahl von Faktoren wie u. a. Motorkomponenten (Luftfilter, Auspuff, Ladung, Kühlung,
Vergaser, Kraftstoffpumpe usw.), Anwendungseinschränkungen, Einsatzbedingungen (Temperatur, Feuchtigkeit, Höhe)
und Abweichungen von Motor zu Motor. Aufgrund von Herstellungs- und Kapazitätsengpässen kann Briggs & Stratton für
einen Motor dieser Serie ersatzweise einen Motor mit höherer Nennleistung liefern.
OPTIONEN UND ZUBEHÖR
Für nähere Informationen kontaktieren Sie einen
autorisierten händler.
26
www.simplicitymfg.com
Page 71

CONTENU
Illustrations ..........................................................................................................3
Sécurité de l’opérateur........................................................................................6
Fonctions et commandes .................................................................................13
Fonctionnement.................................................................................................17
Tests de système d'interverrouillage de sécurité ..........................................17
Entretien .............................................................................................................20
Dépannage .........................................................................................................23
Garantie ..............................................................................................................25
Spécifications ....................................................................................................26
Pièces et accessoires .......................................................................................26
Généralités
Merci d’avoir acheté cette acheté cette tondeuse autoportée construit avec la qualité SIMPLICITY. Nous sommes heureux
que vous ayez placé votre confiance dans la marque SIMPLICITY. Si vous utilisez et entretenez le produit conformément
aux instructions du manuel, vous pourrez l’utiliser pendant de nombreuses années.
Ce manuel contient des informations relatives à la sécurité afin que vous connaissiez les dangers et risques qui sont liés
aux tondeuses autoportées et la façon de les éviter. Ce produit ainsi que ses accessoires agréés sont conçus et destinés
uniquement à des travaux de tonte de gazon ou de déneigement et ils n’ont pas d’autres finalités. C’est important que vous
lisez et comprenez ces instructions complètement avant d’essayer de mettre en marche ou de faire fonctionner cet
équipement. Conservez ces instructions d’origine pour vous y reporter dans le futur.
Données de référence du produit
Noter le nom/numéro du modèle, les numéros
d’identification du fabricant et les numérosde série du
moteur dans l’espace prévu pour accès facile. Ces
numéros se trouvent aux emplacements illustrés.
Lorsque l’on contacte le distributeur homologué
pour obtenir des pièces de rechange, des
réparations ou toute information, il FAUT avoir ces
numéros.
DONNÉES DE RÉFÉRENCE DU PRODUIT
Nom/Numéro de désignation du modèle
Numéro de fabricant d’unité Numéro de SÉRIE d’unité
Numéro de fabricant du plateau de coupe
de tondeuse
Nom du distributeur Date d’achat
DONNÉES DE RÉFÉRENCE DU MOTEUR
Marque du moteur Modèle du moteur
Numéro de SÉRIE du plateau de coupe de
tondeuse
Étiquettes d’identification CE
A. Numéro d’identification du fabricant
B. Numéro de série du fabricant
C. Nom et adresse du fabricant
D. Régime maximal du moteur en tours par minute
E. Puissance nominale en kilowatts
F. Masse d’unité en kilogrammes
G. Logo de conformité CE
H. Année de fabrication
I. Puissance sonore en décibels garantie
A
MODEL NO. xxxxxxx
SERIAL NO. xxxxxxxxxx
B
C
XXXXXXXXXXXXXXXXXXXXXX
XXXXXXXXXXXXXXXXX
D
xxxx min
E
x.x kW
xxx kg
F
G
20xx
H
-1
xxx
I
dB
Type/Spécifications du moteur Numéro de code/série du moteur
La liste des pièces détachées pour cette machine peut être téléchargée à partir de www.simplicitymfg.com. Veuillez
fournir le modèle et le numéro de série au moment de commander les pièces de rechange.
Copyright © 2011 Briggs & Stratton Power Products Group, LLC
Milwaukee, WI, Tous droits réservés.
SIMPLICITY est une marque déposée de Briggs & Stratton Power Products
Group, LLC Milwaukee, WI USA.
5
Page 72

SÉCURITÉ DE L’OPÉRATEUR
Sécurité de fonctionnement
Félicitations pour avoir fait l’achat d’un matériel de pelouse et jardin de qualité
supérieure. Nos produits sont conçus et fabriqués pour satisfaire à toutes les
normes de sécurité de l’industrie, voire même pour les excéder.
Un matériel motorisé est sûr tant que l’est son utilisateur. Il peut être dangereux
s’il n’est pas utilisé à bon escient ou s’il n’est pas correctement entretenu ! Rappel : l’utilisateur est responsable de sa propre sécurité et de celle de ceux qui
sont à ses côtés.
Faire preuve de bon sens et bien penser à ce que l’on fait. En cas de doute sur
une opération à effectuer sans danger avec l’équipement choisi, s’adresser à un
professionnel : contacter le distributeur local homologué.
Lecture du manuel
Le manuel d’instructions contient des renseignements importants sur la sécurité qu’il vous faut connaître AVANT d’utiliser la machine ainsi que PENDANT son utilisation.
Ce manuel comporte des techniques de fonctionnement en toute sécurité, une explication des caractéristiques et des commandes de la machine et des informations relatives à l’entretien pour profiter au maximum de l’investissement dans la machine.
S’assurer de lire, dans son intégralité, la section sur les règles et informations relatives à la sécurité figurant dans les pages suivantes. Lire également la section sur
le fonctionnement dans son intégralité.
Enfants
Des accidents tragiques peuvent se produire avec des enfants.
Ne jamais leur permettre de se tenir à proximité de la zone
d’opération. Les enfants sont souvent attirés par la machine et
l’activité de tonte. Ne jamais supposer que les enfants resteront
là où ils ont été vus pour la dernière fois. S’il existe un risque
que des enfants puissent venir à proximité de l’endroit où l’on
tond, demander à un autre adulte responsable de les surveiller.
NE JAMAIS PERMETTRE À DES ENFANTS DE MONTER
SUR LA MACHINE ! Et ce, pour ne pas les encourager à s’en
approcher à l’avenir quand elle est en marche car ils pourraient
gravement se blesser. Ils risqueraient de s’en approcher pour
monter dessus quand on ne s’y attend pas et de se faire
écraser.
6 www.simplicitymfg.com
Marche arrière
Ne pas tondre en marche arrière à moins
que cela ne soit absolument indispensable. Toujours regarder vers le bas et
vers l’arrière avant et pendant
une marche arrière même
avec les lames de tondeuse désembrayées.
Page 73

SÉCURITÉ DE L’OPÉRATEUR
3.5 ft
(1,5 m)
20.0 ft (6,0 m)
Fonctionnement en pente
Il existe un danger grave de blessure, voire de mort, en cas d’utilisation de cette
machine dans une pente trop raide. Utiliser la machine sur une pente trop raide
ou sur laquelle la traction est inadéquate peut entraîner la perte de contrôle ou
le retournement de la machine.
En règle générale, il est recommandé de ne pas faire fonctionner la machine sur
une pente sur laquelle on ne peut pas faire marche arrière (en mode 2 roues
motrices). Ne pas utiliser la machine sur des plans inclinés ayant une pente
supérieure à une élévation de 1,5 m (3,5 pieds) sur une longueur de 6,0 m (20
pieds). Toujours conduire en montant ou en descendant les pentes : ne jamais
en travers.
Noter également que la surface sur laquelle on conduit peut considérablement
affecter la stabilité et le contrôle. De l’herbe mouillée ou une chaussée verglacée peut gravement affecter la capacité de contrôle de l’unité.
En cas de doute sur l’utilisation de l’unité sur un plan incliné, ne pas l’utiliser. Ça
ne vaut pas le coup.
Pièces en mouvement
Cette machine comporte de nombreuses pièces en mouvement qui peuvent blesser l’utilisateur ou autrui. Néanmoins si l’utilisateur est assis correctement sur le siège et suit
scrupuleusement toutes les règles figurant dans ce manuel, il n’y a aucun danger à se
servir de cette machine.
Le plateau de coupe de la tondeuse comporte des lames de tondeuse rotatives susceptibles d’amputer les mains et les pieds. Ne jamais laisser qui que ce soit près de la machine
quand elle est en marche !
Pour permettre à l’utilisateur de se servir de cette machine en toute sécurité, elle est
équipée d’un dispositif de sécurité avec utilisateur présent. NE PAS tenter d’altérer ni de
contourner le dispositif. Consulter le distributeur immédiatement si le dispositif ne réussit
pas tous les tests du système de verrouillage de sécurité figurant dans ce manuel.
Objets projetés
Cette unité comporte des lames de tondeuse rotatives. Ces lames peuvent ramasser et
projeter des débris susceptibles de gravement blesser un spectateur. S’assurer de bien
nettoyer la zone à tondre AVANT de commencer à tondre.
Ne pas utiliser cette unité avant d’avoir mis le bac de ramassage complet ou la protection
d’évacuation (déflecteur) en place.
En outre, ne jamais laisser qui que ce soit près de la machine quand elle est en marche !
Si quelqu’un se trouve dans la zone, arrêter immédiatement la machine et attendre que
cette personne parte.
Carburant et entretien
L’essence est extrêmement inflammable. Ses vapeurs sont également extrêmement
inflammables et peuvent se déplacer vers des sources de combustion à distance.
Utiliser l’essence uniquement comme carburant, non pas comme solvant ou nettoyant. Ne jamais remiser l’essence dans des endroits où ses vapeurs peuvent s’accumuler ou se déplacer vers une source de combustion telle qu’une veilleuse. Le
carburant doit être remisé dans des bidons en plastique, hermétiques et homologués,
ou dans le réservoir d’essence du tracteur, le bouchon étant bien fermé. Essuyer immédiatement toute éclaboussure d’essence.
Un entretien adéquat est essentiel à la sécurité et à la performance de la machine.
S’assurer d’effectuer les procédures d’entretien indiquées dans ce manuel et surtout,
de tester périodiquement le dispositif de sécurité.
7
Page 74

SÉCURITÉ DE L’OPÉRATEUR
Lire ces règles de sécurité et les suivre de près. Ne pas observer ces consignes pourrait entraîner une perte de contrôle
de l’unité, des blessures corporelles graves, voire la mort, pour l’utilisateur ou les spectateurs, ou endommager le
matériel ou l’équipement. Ce plateau de coupe peut amputer des mains et des pieds, et projeter des objets.
angle dans le texte indique que des mises en garde ou avertissements importants doivent être respectés.
Le tri-
FONCTIONNEMENT GÉNÉRAL
1. Lire, comprendre et suivre toutes les instructions figurant
sur la machine et dans le manuel avant de se servir de la
machine.
2. Ne pas placer les mains ou les pieds près des pièces en
mouvement ou sous la machine. Toujours se tenir à l’écart
de l’ouverture d’éjection.
3. Ne laisser que des adultes responsables, qui connaissent
les instructions, utiliser la machine (des réglementations locales peuvent limiter l’âge de l’opérateur).
4. Retirer de la zone à tondre les objets tels que des pierres,
des jouets, des câbles, etc., qui pourraient être aspirés puis
projetés par les lames.
5. S’assurer que personne ne se trouve dans la zone avant de
tondre. Arrêter la machine si une personne pénètre dans la
zone.
6. Ne jamais transporter de passagers.
7. Ne pas tondre en marche arrière à moins que cela ne soit
absolument indispensable. Toujours regarder vers le bas et
vers l’arrière avant et pendant une marche arrière.
8. Ne jamais diriger le matériau de décharge vers quiconque.
Éviter de décharger du matériau contre un mur ou une obstruction. Le matériau risque de ricocher vers l’opérateur.
Arrêter les lames pour traverser des surfaces en gravier.
9. Ne pas faire fonctionner la machine sans le bac de ramassage complet, la protection d’évacuation (déflecteur) ou tout
autre dispositif de sécurité en place.
10. Ralentir avant de tourner.
11. Ne jamais laisser une machine en marche sans supervision.
Toujours débrayer la prise de force, mettre le frein de stationnement, arrêter le moteur et retirer les clés avant de descendre de la machine.
12. Débrayer les lames (Prise de force) quand on ne tond pas.
Arrêter le moteur et attendre que toutes les pièces soient
complètement arrêtées avant de nettoyer la machine, de retirer le bac de ramassage ou de dégager la protection d’évacuation.
13. N’utiliser la machine qu’à la lumière du jour ou dans une lumière artificielle de bonne qualité.
14. Ne pas utiliser la machine sous l’emprise de l’alcool ou de
drogues.
15. Surveiller la circulation lors de l’utilisation à proximité des
routes ou en les traversant.
16. Faire très attention lors du chargement ou du déchargement
de la machine sur une remorque ou un camion.
17. Toujours porter une protection oculaire lors de l’utilisation
de cette unité.
18. Les données indiquent que les opérateurs, âgés d’au moins
60 ans, sont impliqués dans un fort pourcentage des
blessures associées au matériel motorisé. Ces utilisateurs
doivent évaluer leur capacité à faire fonctionner la machine
de manière suffisamment sûre pour se protéger et protéger
autrui de toute blessure.
19. Suivre les recommandations du fabricant concernant les
poids de roues ou contre-poids.
20. Ne pas oublier que l’utilisateur est responsable des accidents blessant autrui ou des biens matériels.
21. Tous les conducteurs doivent obtenir une instruction professionnelle et pratique.
22. Toujours porter des chaussures et des pantalons résistants.
Ne jamais faire fonctionner la machine pieds nus ou en sandales.
23. Avant toute utilisation, toujours inspecter visuellement que
les lames et leur visserie sont présentes, intactes et
sécurisées. Remplacer les pièces usées ou endommagées.
24. Débrayer les accessoires avant de : faire le plein, retirer un
accessoire, effectuer des réglages (sauf si le réglage peut
se faire de la position de l’opérateur).
25. Lorsque la machine est stationnée, remisée ou laissée sans
supervision, abaisser les moyens de coupe à moins d’utiliser un dispositif de verrouillage mécanique positif.
26. Avant d’abandonner la position de l’opérateur pour quelque
raison que ce soit, enclencher le frein à main (le cas
échéant), débrayer la prise de force, arrêter le moteur et retirer la clé.
27. Pour diminuer les risques d’incendie, conserver l’unité exempte d’herbe, de feuilles et d’excès d’huile. Ne pas s’arrêter ou se garer sur des feuilles sèches, de l’herbe ou des
matériaux combustibles.
TRANSPORT ET REMISAGE
1. Lors du transport de l’unité sur une semi-remorque découverte, s’assurer que l’unité est dirigée vers l’avant, dans le
sens de la marche. Si l’unité est dirigée vers l’arrière, la
poussée éolienne risquerait d’endommager l’unité.
2. Toujours respecter les pratiques sûres de plein d’essence et
de manipulation d’essence pour faire le plein de la machine
après transport ou remisage.
3. Ne jamais remiser l’unité (avec le carburant) dans une
structure médiocrement ventilée. Les vapeurs de carburant
peuvent se déplacer vers une source d’inflammation (telle
qu’une chaudière, un chauffe-eau, etc.) et entraîner une explosion. Les vapeurs de carburant sont également toxiques
pour les humains et les animaux.
8 www.simplicitymfg.com
4. Toujours suivre les instructions du manuel de moteur pour
les préparatifs de remisage avant de remiser la machine
pour de courtes et longues périodes.
5. Toujours suivre les instructions du manuel du moteur pour
les procédures adéquates de mise en marche lors de la
remise en service de la machine.
6. Ne jamais remiser l’unité ou le bidon de carburant à l’intérieur où il y a une flamme nue ou une veilleuse, comme
avec un chauffe-eau. Laisser l’unité refroidir avant de
remiser.
Page 75

SÉCURITÉ DE L’OPÉRATEUR
FONCTIONNEMENT EN PENTE
Les pentes sont un facteur important dans les accidents dus aux
pertes de contrôle et aux renversements, qui peuvent résulter en
blessures graves voire la mort. Le fonctionnement sur toutes les
pentes requiert une prudence supplémentaire. Si on ne peut pas
reculer sur une pente ou si on n’est pas confortable, ne pas faire
fonctionner.
Le contrôle d’une machine poussée ou autoportée qui glisse sur
une pente ne sera pas recouvré par l’application du frein. Les
principales raisons de la perte de contrôle sont les suivantes : adhérence de pneus insuffisante au sol, vitesse trop rapide, freinage
inadéquat, type de machine non adapté à sa tâche, manque de
connaissance des conditions de terrain, attelage et distribution de
la charge incorrects.
1. Tondre en montant ou en descendant la pente, non pas en
travers.
2. Faire attention aux trous, sillons ou bosses. La machine
peut se renverser sur un terrain irrégulier. L’herbe haute
peut cacher des obstacles.
3. Choisir une vitesse lente permettant de gravir la pente sans
avoir à s’arrêter ou changer de vitesses.
4. Ne pas tondre de l’herbe mouillée. Les pneus risquent de
perdre de leur traction.
5. Toujours conserver la machine embrayée, surtout en descendant des pentes. Ne pas mettre au point mort et rouler
en roue libre pour descendre la pente.
6. Éviter de démarrer, de s’arrêter ou de tourner sur une
pente. Si les pneus perdent de leur traction, débrayer la ou
les lames et descendre lentement la pente en ligne droite.
7. En pente, tous les mouvements doivent être lents et progressifs. Ne pas effectuer de changements brusques de
vitesse ou de direction et ce, pour ne pas faire faire un tonneau à la machine.
8. Faire preuve d’extrême prudence lors de l’utilisation de machines munies de bacs de ramassage ou d’autres accessoires car ceux-ci peuvent affecter la stabilité de l’unité. Ne
pas utiliser sur des pentes raides.
9. Ne pas essayer de stabiliser la machine en mettant le pied
au sol (unités autoportées).
10. Ne pas tondre à proximité d’à-pics, de fossés ou de talus.
La tondeuse pourrait brusquement se renverser si une roue
passe au bord d’un à-pic ou d’un fossé ou si un bord s’effondre.
11. Ne pas utiliser le bac de ramassage sur des pentes raides.
12. Ne pas tondre sur des pentes si on ne peut pas faire
marche arrière.
13. Consulter le distributeur/revendeur agréé pour toute recommandation concernant les poids de roues ou les contrepoids pour améliorer la stabilité.
14. Retirer tous les obstacles tels que pierres, branches d’arbres, etc.
15. Conduire lentement. Les pneus risquent de perdre de leur
traction sur les pentes même si les freins fonctionnent correctement.
16. Ne pas tourner sur les pentes sauf si nécessaire ; tourner
alors lentement et progressivement en descendant la pente,
si possible.
ÉQUIPEMENT REMORQUÉ (UNITÉS AUTOPORTÉES)
1. Ne remorquer qu’avec une machine munie d’un attelage
prévu pour le remorquage. Ne pas attacher l’équipement remorqué sauf au point d’attelage.
2. Suivre les recommandations du fabricant pour la limite de
poids d’équipement remorqué et le remorquage sur des
pentes.
AVERTISSEMENT
Ne jamais faire fonctionner sur des pentes supérieures à
17,6 pour cent (10°), soit une élévation de 106 cm
(3-1/2 pieds) verticalement sur 607 cm (20 pieds)
horizontalement.
Lors de l’utilisation de la machine sur des pentes, utiliser
des poids de roues ou contrepoids supplémentaires.
Consulter le distributeur/revendeur pour déterminer quels
poids sont disponibles et adéquats pour la machine.
Sélectionner une vitesse de déplacement lente avant de
conduire sur une pente. En plus des poids avant, faire
preuve d’extrême prudence lors de l’utilisation sur les
pentes de la machine munie de bacs de ramassage à
fixation arrière.
Tondre en MONTANT et en DESCENDANT la pente, jamais
en travers, faire preuve de prudence pour changer de directions et NE PAS DÉMARRER NI S’ARRETER SUR UNE
PENTE.
3. Ne jamais laisser des enfants ou toute autre personne monter dans ou sur un équipement remorqué.
4. Sur les pentes, le poids de l’équipement remorqué risque
d’entraîner une perte de traction et une perte de contrôle.
5. Se déplacer lentement et prévoir une distance supplémentaire pour s’arrêter.
6. Ne pas mettre au point mort et rouler en roue libre pour descendre la pente.
ENFANTS
Des accidents tragiques peuvent se produire lorsque l’opérateur
n’est pas averti de la présence d’enfants. Les enfants sont souvent attirés par la machine et l’activité de tonte. Ne jamais supposer que les enfants resteront là où ils ont été vus pour la
dernière fois.
1. Éloigner les enfants de la zone à tondre et les laisser sous
la surveillance d’un adulte autre que l’opérateur.
2. Faire preuve de vigilance et arrêter la machine si des enfants pénètrent dans la zone.
3. Avant et pendant une marche arrière, regarder derrière et
vers le bas pour la présence éventuelle de petits enfants.
4. Ne jamais transporter d’enfants même lorsque les lames
sont arrêtées. Ils risquent de tomber et de gravement se
blesser ou d’interférer avec l’utilisation sûre de la machine.
Les enfants que l’on a transportés par le passé risquent
d’apparaître brusquement dans la zone à tondre pour se
faire transporter à nouveau et risquent de se faire écraser
ou passer dessus par la machine.
5. Ne jamais laisser les enfants se servir de la machine.
6. Faire preuve de prudence à l’approche d’angles morts, d’arbustes, d’arbres et d’autres objets susceptibles de masquer
la vision.
ÉMISSIONS
1. L’échappement du moteur de cet article contient des produits chimiques connus, dans certaines quantités, pour
provoquer cancer, anomalies congénitales ou autre danger
de reproduction.
2. Consulter l’information concernant la période de durabilité
des émissions et l’indice d’air sur I’étiquette d’émissions du
moteur.
DISPOSITIF D’ALLUMAGE
1. Ce dispositif d’allumage par étincelle est conforme à la
norme canadienne ICES-002.
9
Page 76

SÉCURITÉ DE L’OPÉRATEUR
RÉPARATIONS ET ENTRETIEN
Manipulation sans danger de l’essence
1. Éteindre cigarettes, cigares, pipes et autres sources de
combustion.
2. Utiliser uniquement des conteneurs d’essence homologués.
3. Ne jamais retirer le bouchon d’essence ou ajouter du carburant lorsque le moteur tourne. Laisser le moteur refroidir
avant de faire le plein.
4. Ne jamais faire le plein de la machine à l’intérieur.
5. Ne jamais remiser la machine ou le bidon de carburant où il
y a une flamme nue, une étincelle ou une veilleuse, comme
près d’un chauffe-eau ou de tout autre appareil ménager.
6. Ne jamais remplir les bidons à l’intérieur d’un véhicule ou
sur un plateau de camion recouvert de plastique. Toujours
placer les bidons sur le sol, éloignés de tout véhicule, avant
de les remplir.
7. Retirer tout équipement à essence du camion ou de la remorque et faire le plein sur le sol. Quand cela n’est pas possible, faire le plein d’un tel équipement sur une
semi-remorque avec un bidon portable plutôt qu’avec un
distributeur d’essence.
8. Garder le bec en contact avec le bord du réservoir
d’essence ou de l’ouverture du bidon à tout moment jusqu’à
obtention du plein. Ne pas utiliser de dispositif à ouverture
bloquée de bec.
9. En cas d’éclaboussures d’essence sur les vêtements, en
changer immédiatement.
10. Ne jamais remplir excessivement le réservoir d’essence.
Remettre le bouchon d’essence en place et bien serrer.
11. Faire preuve d’extrême prudence lors de la manipulation de
l’essence et de tout autre carburant. Ils sont inflammables et
les vapeurs sont explosives.
12. En cas de déversement de carburant, ne pas essayer de
faire démarrer le moteur mais éloigner la machine de la
zone du déversement et éviter de créer toute source d’inflammation avant la dissipation des vapeurs d’essence.
13. Remettre tous les bouchons de réservoir d’essence et les
bouchons de bidons de carburant en place en les serrant
bien.
Réparation et entretien
1. Ne jamais faire fonctionner dans un endroit clos où des
fumées de monoxyde de carbone peuvent s’accumuler.
2. Conserver les écrous et boulons bien serrés, en particulier
les boulons de fixation de lames, et la machine en bon état
de marche.
3. Ne jamais altérer les dispositifs de sécurité. Vérifier
régulièrement leur bon fonctionnement et réparer le cas
échéant.
4. Conserver l’unité exempte d’herbe, de feuilles ou de toute
autre accumulation de débris. Nettoyer tout déversement
d’huile et de carburant, et éliminer tout débris trempé de
carburant. Laisser la machine refroidir avant de la remiser.
5. En cas de contact avec un objet, arrêter et inspecter la machine. Réparer, si besoin est, avant de redémarrer.
6. Ne jamais effectuer de réglages ou de réparations lorsque
le moteur tourne.
7. Inspecter fréquemment les composantes du bac de ramassage et la protection d’évacuation, et remplacer avec les
pièces recommandées du fabricant, selon le besoin.
8. Les lames de la tondeuse sont coupantes. Enrober les
lames ou porter des gants, et faire très attention en les réparant.
9. Vérifier fréquemment le fonctionnement des freins. Ajuster
et réparer le cas échéant.
10. Prendre soin des étiquettes de sécurité et d’instructions et
les remplacer au besoin.
11. Ne pas retirer le filtre de carburant lorsque le moteur est
chaud car de l’essence renversée risque de s’enflammer.
Ne pas écarter les colliers de conduites de carburant plus
qu’il ne le faut. S’assurer que les colliers maintiennent les
tuyaux fermement sur le filtre après l’installation.
12. Ne pas utiliser d’essence contenant du MÉTHANOL, du
gasohol contenant plus de 10 % d’ÉTHANOL, des additifs
d’essence ou de l’essence minérale car cela risquerait d’endommager le moteur/circuit de carburant.
13. Si le réservoir d’essence doit être vidé, le faire à l’extérieur.
14. Remplacer les silencieux défectueux.
15. Utiliser uniquement des pièces de rechange homologuées
par l’usine lors de réparations.
16. Toujours se conformer aux spécifications d’usine sur tous
les paramètres et réglages.
17. Seuls les centres de service homologués doivent être utilisés pour effectuer les entretiens et réparations importants.
18. Ne jamais tenter d’effectuer des réparations importantes sur
cette machine à moins d’avoir reçu une formation adéquate.
Des procédures d’entretien inadéquates peuvent entraîner
un fonctionnement hasardeux, endommager le matériel et
annuler la garantie du fabricant.
19. Sur les tondeuses à lames multiples, faire preuve de prudence étant donné qu’une lame peut entraîner la rotation
des autres lames.
20. Ne pas modifier les paramètres du régulateur de vitesse du
moteur ni emballer le moteur. Faire fonctionner le moteur à
une vitesse excessive peut accroître le risque de blessures
corporelles.
21. Débrayer les accessoires d’entraînement, arrêter le moteur,
retirer la clé et déconnecter les fils de bougie avant de : dégager les obstructions d’accessoires et les goulottes, effectuer des réparations ou lorsque l’unité vibre
anormalement. En cas de contact avec un objet, inspecter
la machine pour tout dommage et réparer avant de redémarrer et d’utiliser l’équipement.
22. Ne jamais placer les mains à proximité des pièces en mouvement telles que le ventilateur de refroidissement de la
pompe hydro lorsque le moteur tourne. (Les ventilateurs de
refroidissement de pompe hydro sont généralement situés
sur le dessus de la boîte-pont.)
23. Unités munies de pompes hydrauliques, tuyaux ou
moteurs : AVERTISSEMENT : Toute fuite de liquide hydraulique sous pression peut avoir suffisamment de force
pour pénétrer la peau et provoquer des blessures graves. Si
du liquide étranger est injecté sous la peau, il doit être éliminé par voie chirurgicale dans les heures qui suivent par un
médecin connaissant ce type de blessure et ce, pour éviter
la gangrène. Garder le corps et les mains à l’écart des trous
de goupilles ou des becs qui projètent du liquide hydraulique sous haute pression. Utiliser du papier ou du carton, non pas les mains, pour rechercher les fuites. S’assurer
que toutes les connexions du liquide hydraulique sont bien
serrées et que tous les tuyaux et conduites hydrauliques
sont en bon état avant d’appliquer de la pression au système. Si les fuites ont lieu, faire réparer immédiatement l’unité par un distributeur agréé.
24. AVERTISSEMENT : Dispositif à énergie accumulée. Un
relâchement inadéquat des ressorts peut entraîner de
graves blessures corporelles. Les ressorts doivent être enlevés par un technicien agréé.
25. Modèles munis d’un radiateur de moteur : AVERTISSEMENT : Dispositif à énergie accumulée. Pour éviter toute
blessure corporelle grave d’une éruption de réfrigérant
chaud ou de vapeur, ne jamais tenter de retirer le bouchon
du radiateur lorsque le moteur tourne. Arrêter le moteur et
attendre qu’il refroidisse. Même à ce point, faire preuve
d’extrême prudence lors de la dépose du bouchon.
10 www.simplicitymfg.com
Page 77

SÉCURITÉ DE L’OPÉRATEUR
Étiquettes de sécurité
Lire attentivement et respecter tous les autocollants DANGER,
AVERTISSEMENT, MISE EN GARDE et instructions figurant sur
la tondeuse autoportée et la tondeuse. Des blessures corporelles
peuvent résulter du non-respect de ces instructions. Les informations sont prévues pour la sécurité de l’utilisateur et sont importantes ! Les autocollants de sécurité ci-dessous se trouvent sur la
tondeuse autoportée et la tondeuse.
Icônes de sécurité
Avertissement : Lire le manuel
d’utilisation.
Lire et comprendre le manuel d’utilisation
avant d’utiliser la machine.
Danger : Objets projetés.
Cette machine est capable de projeter des
objets et des débris. Tenir les spectateurs
à distance.
Avertissement : Retirer la clé avant
toute réparation.
Retirer la clé et consulter la documentation
technique avant d’effectuer toute
réparation ou tout entretien.
Danger : Renversement de la machine.
Ne pas utiliser cette machine sur des
pentes supérieures à 10°.
Danger : Démembrement.
Cette machine peut amputer des membres.
Garder les spectateurs et les enfants à
distance lorsque le moteur tourne.
Danger : Démembrement.
Le plateau de coupe de cette tondeuse
peut amputer des membres. Tenir les
mains et les pieds à l’écart des lames.
Danger : Risques d’incendie.
Ne pas ajouter de carburant quand le
moteur est encore chaud ou en cours de
fonctionnement. Arrêter le moteur et
laisser refroidir pendant trois (3) minutes.
Puis faire l’appoint.
Si l’une de ces étiquettes est perdue ou endommagée, la remplacer immédiatement. Consulter le distributeur local pour tout
remplacement.
Ces étiquettes s’appliquent facilement et serviront de constant
rappel visuel pour l’utilisateur, et toute autre personne utilisant
l’équipement, de respecter les instructions de sécurité nécessaires pour un fonctionnement sûr et efficace.
Danger : Surface chaude.
Laisser la machine refroidir avant tout
contact avec cette zone.
Danger : Empoisonnement au
Monoxyde de Carbone.
Ne pas manipuler l’engin au sein d’une
zone non ventilée.
Avertissement : Risque d'incendie.
Gardez les enfants, les feux nus et les
étincelles éloignés de la batterie qui
pourrait faire exploser des gaz.
Avertissement : L'acide sulfurique peut
entraîner la cécité ou de graves
brûlures.
Portez toujours des lunettes de protection
ou un écran facial quand vous travaillez
sur une batterie ou à proximité.
Avertissement : Les batteries
produisent des gaz explosifs.
Lisez et comprenez le Manuel de
l'utilisateur avant d'utiliser cette machine.
Important : Ne jetez pas de batterie
dans les ordures.
Mettez-vous en relation avec les autorités
locales pour l'élimination et/ou le recyclage
des batteries.
Danger : Démembrement.
Le plateau de coupe de cette tondeuse
peut amputer des membres. Tenir les
mains et les pieds à l’écart des lames.
11
Page 78

SÉCURITÉ DE L’OPÉRATEUR
SS
OO
SSTTOO
PP
Emplacement des autocollants
1
2
3
4
Autocollant
Réf. 1737541
5
6
+
Icônes de sécurité
Réf. 1734027
Positions de
contacteur
Réf. 1722806
1723143
Levage d’accessoire,
Réf. 1723143
Attention, Point de pincement, Réf. 1720389
1730172
Niveau de carburant,
Réf. 1730172
Attention, Point de pincement, Réf. 1720389
PP
1723160
Débrayage de
transmission
Réf. 1723160
12 www.simplicitymfg.com
Page 79

FONCTIONS ET COMMANDES
12V
Commandes du tracteur Figure 2
Commandes du tracteur
Manette des gaz
La commande des gaz contrôle la vitesse du moteur. Faire
avancer la commande des gaz pour augmenter la vitesse du moteur et la faire reculer pour diminuer la vitesse du moteur. Toujours
faire fonctionner à PLEIN régime.
Starter
Fermer le starter pour un démarrage à froid. Ouvrir le starter une
fois que le moteur démarre. Il n’est pas nécessaire d’utiliser le
starter avec un moteur chaud. Pousser la manette vers l’avant
pour fermer le starter.
Phares
L’interrupteur d’éclairage allume et éteint les phares du tracteur.
Option de tonte en marche arrière (RMO)
L’option de tonte en marche arrière permet de tondre (ou d’utiliser
d’autres accessoires entraînés par la prise de force) lors du déplacement en marche arrière. Pour tondre en marche arrière,
tourner la clé RMO après avoir embrayé la prise de force. Le voyant DEL s’allumera et l’opérateur peut alors tondre en marche arrière. Chaque fois que la prise de force est engagée, la RMO doit
être réactivée pour être utilisée.
13
Page 80

FONCTIONS ET COMMANDES
12V
Commutateur de prise de force
Le commutateur de PDF (prise de force) permet d’engager ou
de débrayer les accessoires utilisant la PDF. Pour embrayer la
prise de force, tirer le commutateur vers le haut. Pousser vers
le bas pour débrayer.
ment assis dans le siège du tracteur pour que la prise de force
fonctionne.
Noter que l’opérateur doit être ferme-
Contacteur
Le contacteur démarre et arrête le moteur ; il a trois positions :
OFF/ARRÊT Arrête le moteur et coupe le cir-
cuit électrique.
RUN/MARCHE Permet au moteur de fonctionner
et alimente le circuit électrique.
START/DÉMARRAGE Lance le moteur pour le faire dé-
marrer.
REMARQUE : Ne jamais laisser le contacteur en position
RUN lorsque le moteur est arrêté. Ceci décharge la batterie.
Pédale de frein
Appuyer sur la pédale de frein pour appliquer le frein du
tracteur.
Pédales de vitesse de déplacement
La vitesse de déplacement en marche avant du tracteur est
contrôlée par la pédale de commande de vitesse de déplacement avant. La vitesse de déplacement en marche arrière du
tracteur est contrôlée par la pédale de commande de vitesse
de déplacement arrière.
Enfoncer l’une ou l’autre pédale pour augmenter la vitesse.
Noter que plus la pédale est enfoncée, plus le tracteur se déplacera vite.
Frein de stationnement
Le bouton de frein de stationnement sert à verrouiller le frein
de stationnement lorsque le tracteur est à l’arrêt. Pour engager
le frein de stationnement, enfoncer la pédale de frein à fond et
tirer le bouton vers le haut.
Réglage de hauteur de coupe
La hauteur de coupe est réglable à l'infini, de 3,8 - 10,2 cm (1,5
- 4,0”) terminées.
Le commutateur de réglage de hauteur de coupe contrôle la
hauteur de coupe de la tondeuse. Le même commutateur
contrôle également le moteur de rotation du bec lorsqu’une
souffleuse à neige est installée. Les flèches sur le
commutateur correspondent au sens du réglage (la flèche
UP/HAUT remonte la hauteur de coupe, la flèche
RIGHT/DROITE oriente le bec vers la droite, etc). Lorsque
l’indicateur de réglage a atteint la fin de sa course, relâcher le
commutateur ; maintenir le commutateur enfoncé
endommagera le moteur.
Régulateur de vitesse
Le régulateur de vitesse sert à bloquer la commande de
vitesse de déplacement en marche avant. Le régulateur comporte cinq positions de blocage de vitesse.
Levier de réglage du siège
Le siège peut être réglé d’avant en arrière. Déplacer le levier,
positionner le siège comme souhaité et relâcher le levier pour
bloquer le siège en position.
Levier de soupape de débrayage de
transmission
Le levier de soupape de débrayage de transmission désactive
la transmission de manière à pouvoir pousser le tracteur à la
main. Consulter les informations opérationnelles sur
le tracteur à la main.
Pousser
Réservoir de carburant
Pour retirer le bouchon, tourner dans le sens contraire des
aiguilles d’une montre.
12 V Prise de courant
La prise de courant est de 12 V c.c. L’accessoire doit être d’intensité nominale 9 A ou moins.
14
www.simplicitymfg.com
Page 81

FONCTIONS ET COMMANDES
Pédale de blocage de différentiel
(sur certains modèles)
Appuyer sur cette pédale pour bloquer le différentiel de
transmission, en verrouillant les deux roues arrière en
« marche ».
Utiliser cette fonction si le tracteur est coincé parce que l'une
des roues patine. Engager la pédale de blocage de
différentiel à des vitesses de déplacement lentes
uniquement.
Réglage de l'inclinaison du volant
A l'aide du bouton d'inclinaison situé sur le soufflet, relâcher le
mécanisme de pivot et faire pivoter le volant dans la position
désirée. Relâcher le bouton d'inclinaison pour verrouiller en
position.
Levier de relevage d'accessoires
Lors de l'utilisation de la tondeuse, soulever la tondeuse du sol
lors de son transport à destination et en provenance du
chantier. NE PAS couper lorsque la tondeuse se trouve en
position relevée de transport.
Le levier de relevage d'accessoires relève et abaisse les
accessoires qui utilisent la timonerie de relevage manuel du
tracteur. Pour abaisser un accessoire : tirer légèrement le levier
vers l'arrière, enfoncer sur le bouton de déclenchement et
appuyer le levier vers l'avant jusqu'à ce qu'il se verrouille en
position abaissée. Pour relever un accessoire : enfoncer
légèrement le levier vers l'avant, appuyer sur le bouton de
déclenchement et tirer ensuite le levier vers l'arrière jusqu'à ce
qu'il se bloque en position relevée.
Fonction du frein de stationnement
Serrage du frein de stationnement - Voir la Figure 2. Pour
verrouiller le frein de stationnement, relâcher les pédales de
vitesse de déplacement (A), appuyer à fond sur la pédale de
frein (B), TIRER le bouton de frein de stationnement (C) et
relâcher la pédale de frein.
Desserrage du frein de stationnement - Voir la Figure 2.
Pour desserrer le frein de stationnement, appuyer à fond sur la
pédale de frein (B) et ENFONCER le bouton de frein de
stationnement (C).
REMARQUE IMPORTANTE : Sur les modèles équipés de
relevage hydraulique, le relevage d’accessoires ne
fonctionnera pas lorsque le frein de stationnement est
enclenché.
Fonctions de l’affichage du tableau de bord
Voir la Figure 3.
La première fois que la clé de contact est mise en position de
marche, tous les voyants témoins s’allumeront et le total
d’heures de fonctionnement s’affichera. S’assurer du bon
fonctionnement de tous les voyants.
A. Jauge de carburant
Indique le niveau de carburant dans le réservoir. Vers la
gauche, le réservoir est vide ; vers la droite, le réservoir est
plein. Les deux dernières barres clignoteront lorsque le
réservoir est presque vide.
B. Compteur d'heures / Horloge / Indicateur de service
Affiche l'horloge, le compteur d'heures et le rappel
d'entretien.
Le compteur d’heures mesure le nombre d’heures pendant
lequel la clé a été sur RUN. Le compteur d’heures fera
clignoter un indicateur initial de changement d’huile après
5 heures et un rappel de graissage toutes les 50 heures. Ces
rappels seront affichés pendant environ 2 heures et se
remettront automatiquement à zéro.
REMARQUE : Le compteur d’heures enregistrera la durée
pendant laquelle la clé sera sur RUN. même si le moteur ne
tourne pas. Le compteur d’heures a une source indépendante
d’électricité si bien que le nombre total d’heures est toujours
visible.
C. Bouton Sélectionner
A utiliser pour mettre l’horloge à l’heure.
D. Bouton Régler
A utiliser pour mettre l’horloge à l’heure.
E. Témoin de PDF
Indique que le commutateur de PDF est en position de
marche.
F. Témoin de régulateur de vitesse
Indique que le régulateur de vitesse est engagé.
G. Témoin de basse pression d’huile
Indique que la pression d’huile moteur est basse. Le voyant
s’allumera lorsqu’on fait démarrer le tracteur pour la première
fois et s’éteindra ensuite. SI CE VOYANT S’ALLUME
PENDANT QUE LE TRACTEUR EST EN MARCHE,
COUPER LE MOTEUR IMMEDIATEMENT. Contacter un
concessionnaire agréé pour entretien.
H. Voyant de basse tension
Indique que la tension du circuit électrique est basse. Le
voyant s’allumera lorsqu’on fait démarrer le tracteur pour la
première fois et s’éteindra ensuite. SI CE VOYANT
S’ALLUME PENDANT QUE LE TRACTEUR EST EN
MARCHE, COUPER LE MOTEUR IMMEDIATEMENT.
Contacter un concessionnaire agréé pour entretien.
15
Page 82

FONCTIONS ET COMMANDES
Fonctions
MODES D’AFFICHAGE DU TABLEAU DE BORD
Totaliseur d’heures de fonctionnement - Quand on
tourne d’abord la clé de contact sur la position MARCHE,
tous les voyants s’éclairent et le total des heures de fonctionnement s’affiche. Assurez-vous que tous les voyants
fonctionnent.
Affichage des heures de PDF - Tournez la clé sur ARRÊT,
embrayez la PDF et tournez la clé sur MARCHE (moteur
éteint).
Réglage de l’horloge - Démarrez le moteur, laissez fonctionner le moteur. Appuyez sur le bouton de SELECT
(sélection) (C, Figure 3) pendant trois (3) secondes et
relâchez. Appuyez sur le bouton de SET (réglage) et MAINTENEZ-LE enfoncé pour faire avancer l’heure. Appuyez sur
le bouton de SELECT (sélection) pour sélectionner les minutes. Appuyez sur le bouton de SET (réglage) (D) et MAINTENEZ-LE enfoncé pour faire avancer l’heure. Attendez 5
secondes et l’horloge se réactivera. Coupez le moteur.
Mode de démonstration - Le moteur étant éteint, enfoncez le bouton de SET (réglage) (D) et tournez la clé de con-
tact sur MARCHE.
Rappel d’entretien - Un rappel d’entretien s’affichera dans
la fenêtre d’informations (B) après les 5 premières heures
d’utilisation, et ensuite toutes les 50 heures. Le rappel se
réinitialisera automatiquement après 5 heures. Le rappel
peut être réinitialisé manuellement en tournant la clé de
contact et en l’amenant de la position ARRÊT à MARCHE
(le moteur étant coupé) et en appuyant ensuite
simultanément pendant 5 secondes sur les boutons de SET
(réglage) (D) et de SELECT (sélection) (C).
12 V Prise de courant
La prise accessoire 12 V se trouve dans le carénage
gauche (voir la Figure 1). Elle permet d’alimenter de petits
appareils électroniques. L’accessoire doit être d’intensité
nominale 14 A ou moins.
REMARQUE : L’utilisation d’un accessoire 12 V, en particulier lorsque le moteur est au ralenti, peut décharger la
batterie. Lorsqu’elle n’est pas utilisée, la prise accessoire
doit être couverte par le bouchon en caoutchouc pour
écarter tour risque de court-circuit causé par l’humidité. La
pénétration d’eau dans la prise peut entraîner un court-circuit.
16
www.simplicitymfg.com
Page 83

FONCTIONNEMENT
Tests de système d’interverrouillage de
sécurité
Cette unité est munie de commutateurs d’interverrouillage
de sécurité et d’autres dispositifs de sécurité. Ces systèmes de sécurité sont présents par mesure de sécurité :
ne pas tenter de contourner les commutateurs de sécurité
et ne jamais altérer les dispositifs de sécurité.
AVERTISSEMENT
Si l’unité échoue à un test de sécurité, ne pas s’en servir.
Contacter un distributeur agréé.
Test 1 — Le moteur ne doit PAS tourner si :
• Le commutateur de prise de force est sur ON (Marche),
OU
• Que la pédale de frein n’est PAS complètement appuyée (frein de stationnement OFF (Arrêt)), OU
• Le levier du régulateur de vitesse n'est PAS en position
NEUTRAL (Point mort).
Test 2 — Le moteur DOIT tourner et démarrer si :
• L’opérateur est assis sur son siège ET
• La commutateur de prise de force est sur OFF (Arrêt),
ET
• La pédale de frein est complètement appuyée (frein de
stationnement ON (Marche)) ET
• Le levier du régulateur de vitesse est en position NEUTRAL (Point mort).
Test 3 — Le moteur devrait S’ARRÊTER si :
• le conducteur se lève de son siège alors que la PDF est
embrayée, OU
• le conducteur se lève de son siège alors que la pédale
de frein N’EST PAS complètement enfoncée (frein à
main DESSERRÉ).
Test 4 —
tondeuse
Les lames de la tondeuse et la courroie d’entraînement de
la tondeuse doivent complètement s’arrêter dans les cinq
secondes après avoir mis le commutateur de prise de force
en position OFF (Arrêt) (ou si l’opérateur se lève de son
siège). Si la courroie d’entraînement de la tondeuse ne
s’arrête pas dans les cinq secondes, voir un revendeur
agréé.
Test 5 — Option de tonte en marche arrière (RMO)
Contrôle
• Le moteur doit s’arrêter si une marche arrière est tentée
• Le voyant RMO doit s’allumer lorsque la RMO est ac-
Contrôle du temps d’arrêt des lames de
et que la prise de force a été activée et que la RMO n’a
pas été activée.
tivée.
Plein d’essence
AVERTISSEMENT
Le combustible et ses vapeurs sont
extrêmement inflammables et
explosifs.
Un incendie ou une explosion peut entraîner
des blessures très graves ou même la mort.
Pour faire le plein
• Couper le moteur et le laisser refroidir au moins 3
minutes avant d’ouvrir le bouchon du réservoir.
• Remplir le réservoir de carburant à l’extérieur ou dans
un local extrêmement bien ventilé.
• Ne pas trop remplir le réservoir. Pour permettre la
dilatation du carburant, ne pas remplir plus haut que le
bas du col du réservoir.
• Maintenir le carburant à l’écart des étincelles, des
flammes directes, des veilleuses, de la chaleur et des
autres sources d’étincelles.
• Contrôler que les durites, le réservoir, le bouchon et
les raccords de carburant ne présentent ni fissures ni
fuites. Remplacer si nécessaire.
• Si du carburant a été renversé, attendre son
évaporation complète avant de démarrer le moteur.
1. Nettoyer le pourtour du bouchon d’essence de la poussière et des débris. Enlever le bouchon d’essence (A,
Figure 4).
2. Faire le plein (B) de carburant. Pour permettre la dilatation du carburant, ne pas remplir au-delà du bas du col
de remplissage (C).
3. Remettre le bouchon du réservoir en place.
Démarrage du moteur
AVERTISSEMENT
Le combustible et ses vapeurs sont
extrêmement inflammables et
explosifs.
Un incendie ou une explosion peut entraîner
des blessures très graves ou même la mort.
Pour démarrer le moteur
• S’assurer que la bougie, le bouchon du réservoir de
carburant et le filtre à air sont le cas échéant montés
et solidement fixés.
• Ne pas faire tourner le moteur avec la bougie enlevée.
• Si le moteur est noyé, placer le starter (le cas échéant)
sur OPEN/RUN, amener l’accélérateur sur FAST et
lancer le moteur jusqu’à ce qu’il démarre.
17
Page 84

FONCTIONNEMENT
AVERTISSEMENT
Les moteurs produisent du monoxyde de
carbone, qui est un gaz toxique inodore et
invisible.
L’inhalation de monoxyde de carbone peut
provoquer des nausées, un évanouissement et
entraîner la mort.
• Démarrer et faire fonctionner le moteur à
l’extérieur.
• Ne pas démarrer ou faire fonctionner le moteur dans un
local fermé, même si les portes et les fenêtres sont
ouvertes.
1. En étant assis sur le siège du tracteur, enfoncer complètement la pédale de frein ou serrer le frein de stationnement.
2. Veiller à ne pas appuyer sur les pédales de déplacement avec les pieds et s’assurer que le levier du régulateur de vitesse est au point mort.
3. Désengager la PDF.
4. Mettre la manette des gaz à plein régime.
5. Fermer le starter.
REMARQUE : le starter peut ne pas être nécessaire si le
moteur est chaud.
6. Introduire la clé de contact et la tourner en position de
DÉMARRAGE.
7. Une fois le moteur en marche, mettre la manette des
gaz à mi-régime. Laisser chauffer le moteur pendant
au moins 30 secondes.
8. Mettre la manette des gaz à PLEIN RÉGIME.
REMARQUE : en cas d’urgence, le moteur peut être arrêté en tournant simplement la clé de contact en position
ARRÊT. N’utiliser cette méthode que pour les cas d’urgence. Pour l’arrêt normal du moteur, suivre la procédure
indiquée dans la section « ARRÊTER LE TRACTEUR ET
LE MOTEUR ».
Conduire le tracteur
1. S’asseoir sur le siège et le régler de manière à pouvoir confortablement atteindre toutes les commandes
et voir le tableau de bord.
2. Engager le frein de stationnement.
3. S’assurer que le commutateur de prise de force jaune
est débrayé.
4. Démarrer le moteur (voir
moteur
5. Débrayer le frein de stationnement et relâcher la pédale de frein.
).
Mise en marche du
6. Appuyer sur la pédale de commande de vitesse de
marche avant pour avancer. Relâcher la pédale pour
s’arrêter. Noter que plus la pédale est enfoncée, plus le
tracteur se déplacera vite.
7. Arrêter le tracteur en relâchant les pédales de commande de vitesse de déplacement, en mettant le frein
de stationnement et en arrêtant le moteur (voir
le tracteur et le moteur
).
Arreter
Opération de tonte
1. Réglez la hauteur de coupe de la tondeuse au niveau
voulu en utilisant le levier de relevage du carter de
coupe.
2. Serrez le frein de stationnement. Assurez-vous que le
commutateur de prise de force soit débrayé.
3. Démarrez le moteur (voir
4. Amenez la manette des gaz sur PLEIN.
5. Embrayez la PDF pour activer les lames de la tondeuse.
6. Commencez à tondre.
Démarrer le moteur
).
REMARQUE : quand le son de l’alarme « collecteur
rempli » se fait entendre, coupez immédiatement la
PDF pour éviter que le tube d’évacuation ne se bouche.
Rendez-vous à l’endroit prévu et videz le collecteur à
herbe (voir Vider le collecteur).
7. Une fois terminé, coupez la PDF et levez le carter en
utilisant le levier de levage du carter de coupe.
8. Arrêtez le moteur (voir
moteur
).
Arrêter le tracteur et le
AVERTISSEMENT
Le moteur se coupera si on appuye sur la pédale de
déplacement en marche arrière alors que la PDF est
embrayée et que la commande RMO n'est pas activée.
L’opérateur doit toujours désactiver la prise de force
avant de traverser des routes, des allées ou toute autre
zone pouvant être utilisée par d’autres véhicules. Une
perte soudaine de contrôle pourrait créer un risque.
AVERTISSEMENT
Tondre en marche arrière risque d’être dangereux
pour les spectateurs. Des accidents tragiques
peuvent se produire lorsque l’opérateur n’est pas
averti de la présence d’enfants. Ne jamais activer la
RMO en présence d’enfants. Les enfants sont
souvent attirés par la machine et l’activité de tonte.
18 www.simplicitymfg.com
Page 85

FONCTIONNEMENT
Tonte en marche arrière
Si un opérateur choisit de tondre en marche arrière, il peut
utiliser le système RMO. Pour utiliser l’option de tonte en
marche arrière (RMO), tourner la clé de RMO après avoir
embrayé la prise de force. Le voyant DEL s’allumera et
l’opérateur peut alors tondre en marche arrière. Chaque
fois que la prise de force est engagée, la RMO doit être
réactivée pour être utilisée. Retirer la clé pour limiter l’accès à la fonction RMO.
Pousser le tracteur à la main
1. Débrayer la prise de force et arrêter le moteur.
2. Poussez le levier d’environ 6 cm (2-3/8 po.) pour
débrayer la transmission (A, Figure 5).
3. Le tracteur peut maintenant être poussé à la main.
NE PAS REMORQUER LE TRACTEUR
Remorquer l’unité endommagera la transmission.
• Ne pas utiliser un autre véhicule pour pousser ou
tirer cette unité.
• Ne pas activer le levier de soupape de débrayage
de transmission pendant que le moteur tourne.
Fixation d’une remorque
La force de barre d'attelage horizontale maximum admissible
est de 444 Nm. La force de barre d'attelage verticale
maximum est de 222 Nm. Ceci correspond à une remorque
de 180 kg sur une pente de 10 degrés. Attacher la remorque
avec une broche à épaulement (A, Figure 7) et une goupille
(B) de calibre suffisant.
Arrêter le tracteur et le moteur
1. Ramener la ou les commandes de déplacement au point
mort.
2. Désengager la PDF et attendre l’arrêt complet de toutes
les pièces en mouvement.
3. Ramener la manette des gaz en position BAS régime et
mettre la clé de contact (A, Figure 6) sur ARRÊT. Enlever
la clé.
Reglage de la hauteur de la tondeuse
La hauteur de coupe est réglable à l'infini, de 3,8 - 10,2 cm
(1,5 - 4,0”) terminées.
Le commutateur de réglage de hauteur de coupe (B, Figure
6) contrôle la hauteur de coupe de la tondeuse. Le même
commutateur contrôle également le moteur de rotation du
bec lorsqu’une souffleuse à neige est installée. Les flèches
sur le commutateur correspondent au sens du réglage (la
flèche UP/HAUT remonte la hauteur de coupe, la flèche
RIGHT/DROITE oriente le bec vers la droite, etc). Lorsque
l’indicateur de réglage a atteint la fin de sa course, relâcher le
commutateur ; maintenir le commutateur enfoncé
endommagera le moteur.
19
Page 86

ENTRETIEN
Tableau de maintenance
TRACTEUR ET TONDEUSE
Toutes les 8 heures ou chaque jour
Vérifiez le système de verrouillage de sécurité
Retirez les débris du tracteur et du plateau de coupe de
la tondeuse
Retirez les débris du compartiment moteur
Toutes les 25 heures ou tous les ans *
Vérifiez la pression des pneus
Vérifiez le temps d’arrêt complet des lames
Vérifiez le tracteur et la tondeuse pour qu’il n’y ait pas
d’éléments desserrés
Toutes les 50 heures ou tous les ans *
Nettoyez la batterie et les câbles
Vérifiez les freins du tracteur
Voir le revendeur tous les ans pour
Lubrifiez le tracteur et la tondeuse
Vérifiez les lames de la tondeuse **
* Selon la première éventualité
** Vérifier plus fréquemment les lames dans les régions
ayant des sols sablonneux ou dans lesquelles il y a
beaucoup de poussière.
MOTEUR
Les 5 premières heures
Changez l’huile du moteur
Toutes les 8 heures ou chaque jour
Vérifiez le niveau d’huile du moteur
Toutes les 25 heures ou tous les ans *
Nettoyez le filtre à air et le dépoussiéreur du moteur **
Toutes les 50 heures ou tous les ans *
Changez l’huile du moteur
Remplacez le filtre à huile
Tous les ans
Remplacez le filtre à air
Remplacez le dépoussiéreur
Voir le revendeur tous les ans pour
Inspectez le pot d’échappement et le pare-étincelles
Remplacez la bougie d’allumage
Remplacez le filtre à carburant
Nettoyer l’installation de refroidissement de l’air
* Selon la première éventualité
** Nettoyez plus fréquemment lorsqu’il y a beaucoup de
poussière dans l’air ou lorsque des débris sont en
suspension dans l’air.
Vérification de la pression des pneus
Vérifier la pression des pneus périodiquement et maintenir
cette pression aux niveaux indiqués dans la table (voir Figure
14). Noter que ces pression risquent de différer légèrement
du « gonflage maximum » indiqué sur le flanc des pneus.
Les pressions indiquées offrent une traction adéquate,
améliorent la qualité de coupe et prolongent la durée de vie
des pneus.
Dimension PSI bar
23 x 10,5-12 6-8 0,41-0,55
16 x 6,5-8 10-12 0,8-1,0
Contrôle du temps d’arrêt des lames de
tondeuse
Les lames de coupe et leur courroie d’entraînement
doivent s’arrêter complètement dans les cinq secondes
qui suivent la coupure du commutateur de PDF.
1. Une fois le tracteur au point mort, la prise de force
débrayée et l’opérateur sur son siège, démarrer le
moteur.
2. Observer la courroie d’entraînement des lames par
dessus le repose-pied gauche. Embrayer la prise de
force et attendre plusieurs secondes. Désengager la
PDF et mesurer le temps écoulé jusqu’à l’arrêt complet de la courroie d’entraînement du carter de coupe.
3. Si la courroie d’entraînement ne s’arrête pas dans les
cinq secondes, consulter le concessionnaire.
20 www.simplicitymfg.com
Page 87

ENTRETIEN
Entretien de la batterie
AVERTISSEMENT
Lors de la dépose ou de la pose des câbles de batterie, déconnecter EN PREMIER le câble négatif et le
reconnecter EN DERNIER. Si cette procédure est
effectuée dans l’ordre inverse, la borne positive
risque d’être court-circuitée au châssis par un outil.
Nettoyage de la batterie et des câbles
1. Débrancher les câbles de la batterie, le câbles négatifs en
premier (A, Figure 8) puis le cache et les câbles positifs
(B).
2. Desserrer l’écrou à ailettes et la rondelle (D).
3. Relever la tige de maintien (C) pour la dégager de la bat-
terie. La bloquer sur la colonne de direction.
4. Déposer la batterie (E).
5. Nettoyer le compartiment de batterie à l’aide d’une solution de bicarbonate de soude et d’eau.
6. Nettoyer les bornes de la batterie et les extrémités des
câbles avec une brosse métallique et un nettoyant pour
bornes de batterie jusqu’à ce qu’elles brillent.
Reglage du siege
Réglage de l’inclinaison
L’inclinaison du siège peut être réglée sur une des trois
positions. Pour la régler, retirer les boulons mécaniques,
écarteurs, rondelles et écrous (B, Figure 9) de la
charnière et les remonter dans les trous souhaités.
Réglage du coulisseau du siège
Le siège peut être réglé d’avant en arrière. Actionner le
levier (A, Figure 9), mettre le siège sur la position désirée
et relâcher le levier pour le verrouiller en place.
Réglage des ressorts du siège
Les ressorts du siège (C, Figure 9) peuvent être réglés
pour procurer une conduite plus douce ou plus ferme.
Incliner le siège vers l’avant et faire glisser l’ensemble de
ressort vers l’avant pour une conduite plus douce, vers
l’arrière pour une conduite plus ferme.
Reglage de l’aide au relevage manuel
La tension du ressort de l’aide au relevage manuel. Se
l'ascenseur manuel ne fonctionne pas correctement,
consulter le concessionnaire.
7. Remettre la batterie (E) en place dans son logement. La
fixer avec la tige de maintien (C) et l’écrou à ailettes et la
rondelle (D).
8. Rebrancher les câbles de batterie, les câbles positifs et le
cache (B) en premier, puis les câbles négatifs (A).
9. Enduire les extrémités des câbles et les bornes de batterie avec de la vaseline ou une graisse non conductrice.
Charge de la batterie
AVERTISSEMENT
Tenir la batterie à l’écart des flammes nues et
des étincelles ; les gaz en émanant sont
hautement explosifs. Bien ventiler la batterie
pendant sa charge.
Une batterie morte ou pas suffisamment chargée pour faire
démarrer le moteur risque d’être le résultat d’un système de
charge ou de toute autre composante électrique défectueux.
En cas de doute sur la cause du problème, contacter un
distributeur. Pour remplacer la batterie, consulter la section
Nettoyage de la batterie et des câbles
Pour charger la batterie, suivre les instructions fournies par le
fabricant du chargeur de batterie ainsi que tous les
avertissements figurant dans la section
l’opérateur
charge maximale. Ne pas charger à une puissance
supérieure à 10 A.
de ce manuel. Recharger la batterie jusqu’à sa
.
Sécurité de
21
Page 88

ENTRETIEN
Remisage
AVERTISSEMENT
Ne jamais remiser l’unité (avec le carburant) dans
une structure close médiocrement ventilée. Les
vapeurs de carburant peuvent se déplacer vers une
source d’inflammation (telle qu’une chaudière, un
chauffe-eau, etc.) et entraîner une explosion. Les
vapeurs de carburant sont également toxiques pour
les humains et les animaux.
Quand vous entreposez du carburant ou de l’équipement
ayant du carburant dans le réservoir
• Entreposez-les en les tenant à l’écart de chaudières,
poêles, chauffe-eau ou autres appareils ménagers ayant
une veilleuse ou une autre source d’allumage pouvant
enflammer les vapeurs d’essence.
Équipement
Débrayer la prise de force, mettre le frein de stationnement et
retirer la clé.
La durée de vie de la batterie augmentera si on la retire.
Placez-la dans un endroit frais et sec en la rechargeant
environ une fois par mois. Si la batterie est laissée dans
l’unité, déconnecter le câble négatif.
Circuit d’alimentation
Le carburant peut s’éventer quand il est stocké plus de
30 jours. Le carburant éventé entraîne la formation de dépôts
d’acide et de gomme dans le circuit d’alimentation ou sur les
pièces essentielles du carburateur. Pour que le carburant
conserve toutes ses propriétés, utilisez le stabilisateur de
carburant FRESH START® de Briggs & Stratton qui est
disponible sous forme d’additif liquide ou en cartouche
compte-gouttes de concentré.
Il n’est pas nécessaire de purger l’essence dans le moteur si
un stabilisateur de carburant a été ajouté selon les
instructions. Faites fonctionner le moteur pendant 2 minutes
pour faire circuler le stabilisateur dans le circuit d’alimentation.
Le moteur et le carburant peuvent être stockés pendant une
période allant jusqu’à 24 mois.
Si le carburant dans le moteur n’a pas été traité avec un
stabilisateur de carburant, il doit être purgé dans un récipient
approuvé. Faites fonctionner le moteur jusqu’à ce qu’il s’arrête
par manque de carburant. L’utilisation d’un stabilisateur de
carburant dans le récipient de remisage est recommandée
pour que le carburant conserve toutes ses propriétés.
Huile moteur
Pendant que le moteur est encore chaud, vidangez l’huile du
moteur. Voir
Avant de démarrer l’unité après qu’elle ait été remisée :
• Contrôler tous les niveaux de liquide. Contrôler tous les
points d’entretien.
• Faites toutes les vérifications et procédures
Vidanger l’huile.
recommandées se trouvant dans ce manuel.
• Laisser le moteur se réchauffer pendant quelques
minutes avant toute utilisation.
22 www.simplicitymfg.com
Page 89

Dépannage du tracteur
PROBLÈME VÉRIFIEZ SOLUTION
Pédale de frein pas enfoncée. Enfoncer complètement la pédale de frein.
Moteur ne tourne pas
ou ne démarre pas.
Moteur démarre
difficilement ou ne
fonctionne pas bien.
Le commutateur de prise de force
(embrayage électrique) est sur la
position MARCHE.
Régulateur de vitesse engagé. Amenez le bouton de commande sur la position POINT MORT/ARRÊT.
Panne de carburant. Si le moteur est chaud, laisser refroidir et refaire le plein de carburant.
Moteur noyé. Débrayez le starter.
Un fusible a sauté. Voir un revendeur agréé.
Bornes de la batterie sales. Voir la section Nettoyage de la batterie et des câbles.
Batterie déchargée ou morte. Rechargez ou changez la batterie.
Câble désserré ou sectionné. Vérifiez visuellement le câblage. S’il y a des câbles effilochés ou cassés, consultez
Bobine ou démarreur défectueux. Voir un revendeur agréé.
Contacteur de verrouillage de sécurité
défectueux.
Eau dans le carburant. Voir un revendeur agréé.
Essence vieille ou éventée. Voir un revendeur agréé.
Mélange trop riche. Nettoyer le filtre à air.
Le moteur a un autre problème. Voir un revendeur agréé.
Placer en position ARRÊT.
un revendeur agréé.
Voir un revendeur agréé.
DÉPANNAGE
Détonations au
niveau du moteur.
Consommation
excessive d’huile.
Échappement du
moteur est noir.
Le moteur tourne
mais le tracteur
n’avance pas.
Niveau d’huile insuffisant. Contrôler/compléter le niveau d’huile.
Huile de type incorrect. Voir le manuel du moteur.
Moteur trop chaud. Voir un revendeur agréé.
Huile de type incorrect. Voir le manuel du moteur.
Excès d’huile dans le carter moteur. Vidanger l’excédent d’huile.
Filtre à air encrassé. Voir le manuel du moteur.
Starter fermé. Ouvrir le starter.
Pédales de déplacement pas
enfoncées.
Levier de débrayage de transmission
en position POUSSER.
Frein de stationnement serré. Desserrer le frein de stationnement.
La courroie de traction est cassée ou
bien patine.
Enfoncer les pédales.
Amenez le levier sur la position CONDUITE.
Voir un revendeur agréé.
23
Page 90

DÉPANNAGE
Dépannage du tracteur (suite)
PROBLÈME VÉRIFIEZ SOLUTION
Le frein de
stationnement ne
tient pas.
Direction du tracteur
dure ou difficile à
manœuvrer.
Dépannage de la tondeuse
PROBLÈME VÉRIFIEZ SOLUTION
La tondeuse ne
s’élève pas.
Coupe de tondeuse
irrégulière.
Coupe de tondeuse
irrégulière.
Moteur cale
facilement lorsque
tondeuse embrayée.
Vibrations excessives
de la tondeuse.
Le moteur tourne et
le tracteur se
déplace, mais la
tondeuse n'est pas
entraînée.
Frein interne usé. Voir un revendeur agréé.
Tringlerie de direction desserrée. Voir un revendeur agréé.
Pneus mal gonflés. Voir la section Vérifier la pression des pneus.
Paliers de fusées du roue avant secs. Voir un revendeur agréé.
Tringlerie de levage mal fixée ou
endommagée.
Carter de coupe pas de niveau. Voir un revendeur agréé.
Pneus du tracteur mal gonflés. Voir la section Vérifier la pression des pneus.
Régime moteur trop bas. Mettre à plein régime.
Vitesse de déplacement excessive. Ralentir.
La tondeuse a un autre problème. Voir un revendeur agréé.
Régime moteur trop bas. Mettre à plein régime.
Vitesse de déplacement trop rapide. Ralentir.
Filtre à air encrassé ou obstrué. Voir le manuel du moteur.
Hauteur de coupe réglée trop bas. Tondre les herbes hautes à la hauteur de coupe maximale lors d’un premier
Moteur pas à sa température de
fonctionnement.
Démarrage de la tonte dans des herbes
hautes.
La tondeuse a un autre problème. Voir un revendeur agréé.
La PDF n’est pas embrayée. Embrayez la PDF.
La tondeuse a un autre problème. Voir un revendeur agréé.
Voir un revendeur agréé.
passage.
Faire tourner le moteur quelques minutes pour le laisser chauffer.
Engager les lames de coupe dans une zone dégagée.
24
www.simplicitymfg.com
Page 91

25
Page 92

SPÉCIFICATIONS
MOTEUR
Briggs & Stratton
Marque Briggs & Stratton®
Modèle Professional Series™
Cylindrée 724 cc (44,2 po3)
Circuit électrique Alternateur : 16 A
Batterie : 12 V, 230 CCA
Capacité d’huile 1,8-1,9 L (62-64 oz)
Entrefer de la bougie d’allumage 0,76 mm (0,030 po)
Couple de serrage de bougie 20 Nm (180 po-lb)
CHASSIS
Capacité du réservoir d’essence Capacité : 15,1 L (4,0 gal)
Pneus arrière Dimensions des pneus : 23 x 10,5-12
Pression de gonflage :
0,41-0,53 bar (6-8 psi)
Pneus avant Dimensions des pneus : 16 x 6,5-8
Pression de gonflage :
0,8-1,0 bar (10-12 psi)
TRANSMISSION
K66
Type Tuff Torq K66 (hydrostatique)
Huile moteur Huile moteur 10W-30 Premium
Contenance en huile 2,5 L (2,6 qt)
Vitesse à 3400 tr/min Marche avant :
0-9,3 km/h (0-5,8 MPH)
Marche arrière :
0-5,6 km/h (0-3,5 MPH)
Couple de sortie continue 419 Nm (310 pi-lb)
Capacité de traction 200 kg (440 lbs)
Poids maximum sur essieu 316 kg (697 lbs)
K664
Type Tuff Torq K664 (hydrostatique)
Huile moteur Synthétique 5W30
Contenance en huile 5,1 L (5,4 qt)
Vitesse à 3400 tr/min Marche avant :
0-9,8 km/h (0-6,1 MPH)
Marche arrière :
0-4,8 km/h (0-3,0 MPH)
Couple de sortie continue 419 Nm (310 pi-lb)
Capacité de traction 200 kg (440 lbs)
Poids maximum sur essieu 316 kg (697 lbs)
TONDEUSE
Largeur de coupe 132 cm (52 po)
Npmbre de lames 3
Plateau de coupe de la tondeuse Décharge latérale
Hauteur de coupe 3,8 - 10,2 cm (1,5 - 4,0 po)
Positions de coupe Infini
DIMENSIONS
Longueur hors tout 191 cm (75,2”)
Largeur hors tout avec déflecteur 167 cm (65,7”)
Largeur hors tout sans déflecteur 132 cm (52,0”)
Hauteur hors tout 119 cm (46,9”)
Empattement 135 cm (53,1”)
Puissance théorique
La puissance théorique brute pour chaque modèle de moteur à essence est indiquée conformément à la norme J1940
(procédure de calcul de la puissance et du couple des petits moteurs) de la SAE (Society of Automotive Engineers) et les
performances théoriques ont été obtenues et corrigées selon SAE J1995 (révision 2002-05). Les valeurs de couple sont
définies à 3 060 tr/min et les valeurs de puissance sont définies à 3 600 tr/min. Les valeurs nettes de puissance sont
établies avec l’échappement et le filtre à air installés tandis que les valeurs brutes de puissance sont définies sans ces
accessoires. La puissance brute réelle du moteur sera supérieure à la puissance nette et est influencée notamment par
les conditions ambiantes de fonctionnement et les variations d’un moteur à l’autre. Compte tenu de la grande variété de
machines sur lesquelles nos moteurs sont utilisés, il se peut que le moteur à essence ne développe pas sa puissance
brute théorique une fois qu’il est monté sur une machine particulière. Cette différence s’explique par un grand nombre de
facteurs, tels que (liste non limitative), les accessoires (filtre à air, échappement, admission, refroidissement, carburateur,
pompe à essence, etc.), les limites d’utilisation, les conditions ambiantes d’utilisation (température, humidité, altitude) et
les variations d’un moteur à l’autre. Pour des raisons de fabrication et de capacité limitées, Briggs & Stratton est
susceptible de remplacer un moteur par une version plus puissante pour ces moteurs de série.
Pièces et accessoires
Veuillez joindre un revendeur agréé pour obtenir plus de
détails.
26
www.simplicitymfg.com
Page 93

INDICE
Illustrazioni...........................................................................................................3
Sicurezza dell’operatore .....................................................................................6
Caratteristiche e comandi.................................................................................13
Conduzione ........................................................................................................17
Test del sistema di interblocchi di sicurezza..................................................17
Manutenzione.....................................................................................................20
Individuazione e correzione dei problemi.......................................................23
Garanzia..............................................................................................................25
Dati tecnici..........................................................................................................26
Pezzi di ricambio e accessori...........................................................................26
Informazioni di carattere generale
La ringraziamo per avere acquistato questa falciatrice con seggiolino SIMPLICITY di qualità. Siamo lieti che abbia posto
la sua fiducia nel marchio SIMPLICITY. Se viene usato e mantenuto seguendo le istruzioni contenute nel presente
manuale, questo prodotto SIMPLICITY le darà molti anni di servizio affidabile.
Il presente manuale contiene istruzioni sulla sicurezza finalizzate a rendere l’utente consapevole dei pericoli e dei rischi
associati con questo tagliaerba e sul modo di evitarli. Questo prodotto e tutti i suoi componenti/accessori sono progettati e
destinati solo per lavori su prato o per la rimozione della neve e non per alcun altro scopo. È importante leggere e
comprendere completamente queste istruzioni prima di cercare di avviare o utilizzare la macchina. Conservare queste
istruzioni originali per futuro riferimento.
Dati di riferimento del prodotto
Per averli facilmente a portata di mano, annotare
nome/numero del modello, numeri di riconoscimento del
produttore e numeri di matricola del motore nello spazio
apposito. Detti numeri si trovano nelle posizioni indicate.
Quando ci si mette in contatto con il concessionario
autorizzato locale per ordinare pezzi di ricambio, per
richiedere interventi o per ottenere informazioni si
DEVONO avere a disposizione questi numeri.
DATI DI RIFERIMENTO DEL PRODOTTO
Numero/Nome di descrizione del motore
Codice del PRODUTTORE dell’unità Numero di MATRICOLA dell’unità
Codice del PRODUTTORE dell’accessorio
di falciatura
Nome del concessionario Data di acquisto
DATI DI RIFERIMENTO DEL MOTORE
Marca del motore Modello del motore
Numero di MATRICOLA dell’elemento di
falciatura
Targhetta di riconoscimento CE
A. Codice di riconoscimento del produttore
B. Numero di matricola del produttore
C. Potenza nominale in kW
D. Velocità massima del motore in giri al minuto
E. Indirizzo e nome del produttore
F. Anno di produzione
G. Simbolo di conformità CE
H. Massa dell’unità in kg
I. Potenza acustica in decibel garantita
A
MODEL NO. xxxxxxx
SERIAL NO. xxxxxxxxxx
B
C
XXXXXXXXXXXXXXXXXXXXXX
XXXXXXXXXXXXXXXXX
D
xxxx min
E
x.x kW
xxx kg
F
G
-1
xxx
20xx
H
I
dB
Tipo/Dati del motore Numero di matricola/codice del motore
La lista delle parti illustrate di questa macchina può essere scaricata da www.simplicitymfg.com. Quando si ordinano
pezzi di ricambio fornire modello e numero di serie.
Copyright © 2011 Briggs & Stratton Power Products Group, LLC
Milwaukee, WI, tutti i diritti riservati.
SIMPLICITY è un marchio commerciale di Briggs & Stratton Power Products
Group, LLC Milwaukee, WI USA.
5
Page 94

SICUREZZA DELL’OPERATORE
Uso in condizioni di sicurezza
Ci congratuliamo per l’acquisto di una macchina per manto erboso e giardino di
qualità superiore. I nostri prodotti sono progettati e fabbricati per soddisfare o superare gli standard sulla sicurezza del settore.
Le attrezzature automatiche sono però tanto sicure solo quanto lo è il loro operatore. Un’attrezzatura usata male o non mantenuta in modo adeguato può divenire
pericolosa! Ricordarsi che si è responsabili non solo della propria sicurezza ma
anche di quella degli astanti.
Usare buon senso e valutare tutti gli aspetti di ciò che si sta facendo. Se non si ha
la certezza che il compito che si sta per intraprendere possa essere eseguito in
modo sicuro, con l’attrezzatura scelta per farlo, riferirsi a un professionista mettendosi in contatto con il concessionario autorizzato locale.
Leggere il manuale
Il manuale per l’operatore contiene informazioni importanti sulla sicurezza che è necessario conoscere
PRIMA di usare l’unità e DURANTE l’uso.
Le tecniche di uso in condizioni di sicurezza, una spiegazione delle caratteristiche del
prodotto e dei comandi e le informazioni sulla manutenzione sono forniti per garantire
che l’utente possa trarre il massimo vantaggio dall’investimento fatto nella macchina.
Accertarsi di leggere completamente le norme e le informazioni sulla sicurezza
trovate nelle pagine seguenti. Inoltre, leggere completamente la sezione sull’uso.
Bambini
Con i bambini si possono verificare incidenti tragici. Non permettere
che si avvicino a nessuna delle aree in cui si sta usando la macchina. I
bambini sono attratti dall’unità al lavoro e dall’attività che la circonda.
Non assumere mai che i bambini rimarranno dove sono stati visti l’ultima volta. Se esiste la possibilità che ci siano bambini nell’area che si
sta falciando, farsi aiutare da un altro adulto responsabile che possa
guardarli.
NON PERMETTERE CHE NESSUN BAMBINO OPERI QUESTA
UNITÀ! Ciò invoglia il bambino ad avvicinarsi all’unità in futuro e a
trovarsi in posizione da essere coinvolto in un serio infortunio. I bambini
possono avvicinarsi all’unità per fare un giro quando meno lo si aspetta
e si può correre il rischio di investirli.
6 www.simplicitymfg.com
Retromarcia
Non falciare in retromarcia a meno che la
cosa non sia assolutamente necessaria.
Guardare sempre in basso e dietro prima di
mettersi in retromarcia e
quando ci si sposta in
retromarcia anche se le
lame di falciatura non
sono impegnate.
Page 95

SICUREZZA DELL’OPERATORE
3.5 ft
(1,5 m)
20.0 ft (6,0 m)
Uso su terreno in pendenza
L’uso di questa macchina su terreno in forte pendenza può essere causa di lesioni
serie o fatali. L’uso dell’unità su terreno in forte pendenza, o in condizioni in cui non
si ha una trazione adeguata sul terreno, può causare la perdita del controllo e la
cappottata della macchina.
Una buona regola pratica è di non usare la macchina su di un terreno in pendenza
su cui non si può salire all’indietro (in modalità a 2 ruote motrici). Non si dovrebbe
usare la macchina su terreni con una pendenza superiore a 1,5 m (3,5 piedi) di differenza in altezza su una distanza di 6,0 m (20 piedi). Su terreno in pendenza
guidare sempre in marcia avanti: non andare mai di traverso.
Notare anche che il tipo di superficie su cui si guida può avere molta influenza sulla
stabilità e sul controllo dell’unità. Erba bagnata o pavimentazione ghiacciata possono influire moltissimo sulla capacità di riuscire a controllare la macchina.
Se non ci si sente sicuri a usare l’unità su terreno inclinato, è meglio non farlo. Il rischio non vale la pena.
Parti in movimento
Questa macchina è dotata di molte parti che si muovono e possono provocare lesioni personali o
ad altri. Però, se si sta seduti correttamente sul sedile e si seguono le regole contenute nel presente manuale, l’unità può essere utilizzata in modo sicuro.
Il piano di falciatura è dotato di lame di falciatura ruotanti che possono amputare mani e piedi.
Non lasciare che nessuno si avvicini alla macchina mentre essa è in marcia!
Per aiutare l’operatore a usarla in condizioni di sicurezza, la macchina è stata dotata di un sistema di sicurezza che rileva la presenza dell’operatore. NON cercare di modificare o alterare
questo sistema. Se il sistema non passa i test del presente manuale per il controllo del sistema di
interblocchi di sicurezza, rivolgersi immediatamente al concessionario locale.
Oggetti scagliati
L’unità è dotata di lame di falciatura che girano rapidamente. Le lame possono raccogliere
detriti e scagliarli intorno lesionando gravemente gli astanti. Accertarsi di pulire l’area di
lavoro togliendo oggetti estranei PRIMA di falciare.
Non usare l’unità senza che l’intero raccoglitore dell’erba o la protezione di scarico (deflettore) siano al loro posto.
Inoltre, non consentire a nessuno di stare attorno nell’area in cui si sta lavorando! Se
qualcuno si avvicina, spegnere immediatamente l’unità e aspettare che la persona si allontani.
Carburante e manutenzione
La benzina è altamente infiammabile. E lo sono anche i suoi vapori che possono spostarsi
e raggiungere fonti di iniezione distanti. La benzina deve essere usata solo come carburante e non come solvente o agente di pulizia. Essa non dovrebbe essere mai conservata
in un posto in cui i suoi vapori possono concentrarsi o raggiungere fonti di accensione
come, ad esempio, una fiamma pilota. Il carburante deve essere conservato in contenitori
a tenuta di plastica approvati per la benzina o nel serbatoio del trattore con il tappo chiuso
in modo sicuro. Il carburante versato deve essere pulito immediatamente.
Una manutenzione adeguata è essenziale per la sicurezza e per le prestazioni dell’unità.
Accertarsi di eseguire le procedure di manutenzione elencate nel presente manuale, specialmente le
prove periodiche del sistema di sicurezza.
7
Page 96

SICUREZZA DELL’OPERATORE
Leggere le regole sulla sicurezza e seguirle strettamente. La mancata osservanza di queste regole potrà risultare in
perdita di controllo dell’unità, lesioni gravi o mortali all’operatore e agli astanti o danni materiali o alle attrezzature. Il
piano di falciatura può amputare mani e piedi e scagliare oggetti. Il triangolo inserito nel testo indica importanti
messaggi di attenzione o avvertenza che devono essere osservati.
GENERALITÀ OPERATIVE
1. Prima di avviare questa macchina, leggere, comprendere e
seguire tutte le istruzioni applicate sull’unità e fornite nel
manuale.
2. Non avvicinare le mani o i piedi agli elementi in rotazione o
sotto la macchina. Non stare mai davanti alle aperture di
scarico.
3. Permettere che l’unità sia operata solo da adulti responsabili e a conoscenza delle istruzioni (la normativa locale
può limitare l’età dell’operatore).
4. Liberare l’area da oggetti estranei come sassi, giocattoli, fili,
ecc. che potrebbero essere afferrati e scagliati dalla lama o
lame.
5. Accertarsi che non ci siano altre persone nell’area prima di
cominciare a falciare. Fermare l’unità se qualcuno entra nell’area in cui si sta lavorando.
6. Non trasportare mai altre persone.
7. Non falciare in retromarcia a meno che la cosa non sia assolutamente necessaria. Prima di muoversi e quando ci si
sposta in retromarcia guardare in basso e alle spalle.
8. Non dirigere mai lo scarico verso qualcuno. Evitare di scaricare materiali contro un muro o un ostacolo. Il materiale
potrebbe rimbalzare indietro contro l’operatore. Fermare la
lama o lame quando si attraversa una zona ghiaiosa.
9. Non operare la macchina senza il raccoglitore dell’erba e la
protezione di scarico (deflettore), o senza che gli altri dispositivi di sicurezza siano al loro posto.
10. Rallentare prima di sterzare.
11. Non lasciare l’unità in funzione senza supervisione. Prima
di scendere, disimpegnare sempre il PTO (presa di forza),
mettere il freno di parcheggio, fermare il motore e togliere la
chiave.
12. Disimpegnare le lame (PTO, presa di forza) quando non si
sta falciando. Prima di pulire la macchina, togliere il raccoglitore dell’erba o disincagliare la protezione di scarico,
spegnere il motore e aspettare che tutte le parti siano completamente ferme.
13. Usare la macchina solo di giorno o in buone condizioni di illuminazione artificiale.
14. Non operare l’unità in stato di ebbrezza o sotto l’effetto di
medicinali o sostanze stupefacenti.
15. Fare attenzione al traffico quando si lavora in prossimità di
una strada o di un incrocio.
16. Fare attenzione particolare quando si carica o scarica l’unità da un rimorchio o da un autocarro.
17. Quando si lavora con l’unità indossare sempre occhiali di
protezione.
18. Risultati di studio indicano che gli operatori di 60 anni di età
o di età maggiore sono coinvolti in molti degli infortuni
dovuti all’uso di macchine automatiche. Tali operatori
dovranno valutare la propria capacità di usare la macchina
in modo sufficientemente sicuro da garantire che non
causeranno lesioni a se stessi o ad altri.
19. Osservare i consigli del produttore riguardanti il peso o contrappeso delle ruote.
20. Tenere presente che l’operatore è responsabile per qualsiasi incidente nei riguardi di terzi o proprietà.
21. Tutti gli operatori dovrebbero richiedere e ricevere addestramento professionale e pratica.
22. Indossare sempre calzature e pantaloni robusti. Non operare a piedi scalzi o indossando dei sandali.
23. Prima dell’uso, controllare sempre a vista che le lame e gli
elementi associati siano presenti, senza danni e in condizioni di sicurezza. Sostituire i pezzi consumati o danneggiati.
24. Disimpegnare gli accessori prima di: fare rifornimento di
carburante, togliere un accessorio o eseguire una regolazione (a meno che la regolazione non possa essere eseguita dalla posto dell’operatore).
25. Quando la macchina è parcheggiata, in rimessa o senza
supervisione, abbassare gli elementi di taglio a meno che
non venga usato un sistema di bloccaggio meccanico.
26. Prima di abbandonare il posto dell’operatore per una qualsiasi ragione, impegnare il freno di parcheggio (se in
dotazione), disimpegnare il PTO (presa di forza), fermare il
motore e togliere la chiave.
27. Per ridurre il pericolo di incendio, togliere erba, foglie e olio
in eccesso. Non fermarsi o parcheggiare sopra foglie secche, erba o materiali infiammabili.
TRASPORTO E RIMESSAGGIO
1. Quando la si trasporta su di un rimorchio aperto, accertarsi
che l’unità sia rivolta in avanti nella direzione di viaggio. Se
l’unità è rivolta all’indietro il vento potrebbe sollevarla e danneggiarla.
2. Quando si rifornisce l’unità dopo il trasporto o il rimessaggio, osservare sempre le norme di rifornimento e trattamento sicuro del carburante.
3. Non rimessare mai l’unità (con carburante all’interno) in una
struttura mal ventilata. I vapori del carburante possono raggiungere una fonte di accensione (ad esempio, una caldaia,
uno scaldaacqua, ecc.) e provocare un’esplosione. Inoltre i
vapori del carburante sono tossici per gli essere umani e
per gli animali.
8 www.simplicitymfg.com
4. Prima di mettere in rimessa l’unità per breve o lungo tempo,
seguire sempre le istruzioni di preparazione al rimessaggio
fornite dal manuale del motore.
5. Quando si rimette l’unità in funzione, seguire sempre le procedure di corretto avviamento fornite dal manuale del motore.
6. Non conservare mai la macchina o i contenitori del carburante in un luogo in cui ci sia una fiamma accesa o una fiamma pilota, come quella di uno scaldaacqua. Prima di
mettere in rimessa lasciare che l’unità si raffreddi.
Page 97

SICUREZZA DELL’OPERATORE
USO SU TERRENO IN PENDENZA
I terreni in pendenza sono una delle cause maggiori di incidenti
provocati da perdita di controllo o da ribaltamento e che possono
risultare in lesioni gravi o fatali. L’uso su terreno in pendenza
richiede attenzione particolare. Se non si riesce a indietreggiare
sul terreno in pendenza, o non ci si sente a proprio agio nel farlo,
non operare la macchina.
Frenando no si potrà riprendere il comando di una macchina dietro la quale si sta camminando, o sulla quale si sta viaggiando,
se si perde il controllo su terreno in pendenza. Le ragioni principali
per cui si perde il controllo sono: presa insufficiente delle gomme
sul terreno, velocità troppo elevata, frenatura non adeguata, tipo di
macchina inadatto al lavoro, mancata consapevolezza delle condizioni del terreno e aggancio erroneo di carico o della sua distribuzione.
1. Falciare in salita o in discesa e non trasversalmente sul terreno in pendenza.
2. Fare attenzione a buche, solchi o cunette. Il terreno disuguale può far ribaltare l’unità. L’erba alta nasconde gli ostacoli.
3. Scegliere una velocità in modo da non doversi fermare o
cambiare marcia quando si è su un terreno in pendenza.
4. Non falciare erba bagnata. Le gomme potrebbero perdere
aderenza.
5. Tenere sempre la marcia innestata specialmente in discesa.
Non mettere in folle per procedere per inerzia in discesa.
6. Evitare avviamento, fermate o sterzate su terreno in pendenza. Se le gomme perdono trazione sul terreno, disimpegnare le lame e procedere lentamente in linea retta in
discesa.
7. Su terreno in pendenza muoversi sempre lentamente e in
modo graduale. Non cambiare improvvisamente velocità
perché l’unità potrebbe ribaltarsi.
8. Fare attenzione particolare quando si usa la macchina con
il raccoglitore di erba o altri accessori che potrebbero influenzarne la stabilità. Non usare su terreno in forte pendenza.
9. Non cercare di stabilizzare la macchina mettendo un piede
a terra (unità su cui si guida).
10. Non falciare in prossimità di abbassamenti di terreno, fossati o alzaie. La macchina potrebbe ribaltarsi improvvisamente se una ruota va oltre il bordo di un dirupo o fossato o
se il bordo cede.
11. Non usare il raccoglitore di erba su terreno in forte pendenza.
12. Non falciare su di un terreno sul quale non si può indietreggiare.
13. Per consigli su pesi o contrappesi per le ruote che possono
migliorare la stabilità, rivolgersi al rivenditore autorizzato locale.
14. Togliere tutti gli ostacoli, ad esempio sassi, rami di albero,
ecc.
15. Usare velocità bassa. Su terreno in pendenza le gomme
potrebbero perdere aderenza anche se i freni funzionano.
16. Non sterzare su terreno in pendenza a meno che non sia
assolutamente necessario, e in tal caso curvare lentamente
e gradualmente, in discesa se possibile.
ATTREZZATURE TRAINATE (SOLO UNITÀ
SU CUI SI GUIDA)
1. Trainare solo con macchine che sono dotate di apposito aggancio per il traino. Attaccare le attrezzature da trainare solamente all’apposito punto di aggancio.
2. Seguire i consigli del produttore per quanto riguarda i limiti
di peso in traino e il traino su terreno in pendenza.
AVVERTENZA
Non usare mai su terreno con una pendenza
superiore al 17,6 percento (10°), cioè con una
differenza verticale di 106 cm (3,5 piedi) su una
distanza orizzontale di 607 cm (20 piedi).
Quando si usa la macchina su terreno in pendenza
usare pesi o contrappesi delle ruote supplementari.
Riferirsi al concessionario/rivenditore per stabilire
quali pesi siano disponibili e adatti alla propria unità.
Prima di immettersi su un terreno in pendenza
scegliere una velocità bassa. Oltre a usare pesi sulle
gomme anteriori, prestare attenzione particolare
quando si usa su terreno in pendenza un’unità con
raccoglitore di erba posteriore.
Falciare in SU e GIÙ sul terreno in pendenza, mai di
traverso, facendo attenzione quando si cambia direzione e NON PARTIRE O FERMARSI SUL TERRENO IN PENDENZA.
3. Non consentire mai che bambini o altri viaggino sull’attrezzatura trainata.
4. Su terreno in pendenza, il peso del traino può provocare la
perdita di aderenza e di controllo.
5. Viaggiare lentamente e lasciare spazio supplementare per
frenare.
6. Non mettere in folle per procedere per inerzia in discesa.
BAMBINI
Si possono verificare incidenti tragici se l’operatore non presta attenzione alla presenza di bambini. I bambini sono attratti dall’unità
al lavoro e dall’attività che la circonda. Non assumere mai che i
bambini rimarranno dove sono stati visti l’ultima volta.
1. Tenere i bambini fuori dall’area in cui si sta lavorando e
sotto la supervisione attenta di un altro adulto responsabile.
2. Essere pronti a spegnere l’unità se i bambini entrano nell’area.
3. Prima di iniziare una retromarcia e quando si va all’indietro
guardarsi alle spalle e in basso per controllare che non ci
siano bambini piccoli attorno.
4. Non trasportare mai bambini, neppure con la lama o lame
non operative. Possono cadere e lesionarsi o interferire con
l’uso dell’unità in condizioni di sicurezza. Una volta che abbiano fatto un giro sulla macchina i bambini possono venire
improvvisamente nell’area di lavoro per chiedere di fare un
altro giro e possono essere travolti.
5. Non consentire mai a un bambino di operare l’unità.
6. Prestare attenzione particolare quando ci si avvicina ad angoli ciechi o ad arbusti, alberi o altri oggetti che possono essere di impedimento alla visibilità.
EMISSIONI
1. Gli scarichi del motore di questo prodotto contengono
sostanze chimiche che, in certe quantità, sono note come
causa di cancro, difetti genetici o altre disfunzioni all’apparato riproduttivo.
2. Vedere le informazioni pertinenti di Emission Durability Period (periodo di durata delle emissioni) e Air Index (indice
dell’aria) sull’etichetta delle emissioni del motore.
SISTEMA DI ACCENSIONE
1. Il sistema di accensione a scintilla si conforma alla normativa canadese ICES-002.
9
Page 98

SICUREZZA DELL’OPERATORE
SERVIZIO E MANUTENZIONE
Gestione sicura della benzina
1. Spegnere sigarette, sigari, pipe e altre fonti di accensione.
2. Usare solo contenitori approvati per benzina.
3. Non togliere mai il tappo del serbatoio e fare il rifornimento
con il motore acceso. Lasciare che il motore si raffreddi
prima di fare rifornimento.
4. Non fare mai il rifornimento al chiuso.
5. Non conservare mai la macchina o i contenitori del carburante in un luogo in cui ci sia una fiamma viva o una fiamma
pilota, come in vicinanza di uno scaldaacqua o altro elettrodomestico.
6. Non riempire mai recipienti all’interno di un’auto o sul pianale di un autocarro o di un rimorchio foderati in plastica.
Prima di riempire, sistemare sempre il recipiente sul terreno
e lontano dal veicolo.
7. Rimuovere dall’autocarro o dal rimorchio apparecchiature
alimentate a benzina e riempire il serbatoio con l’unità a
terra. Quando ciò non sia possibile, rifornire tali apparecchiature sul rimorchio usando un recipiente portatile piuttosto che direttamente da una pompa di benzina.
8. Tenere sempre il boccaglio a contatto con il bordo del serbatoio o contenitore di carburante finché il rifornimento non
sia finito. Non usare boccagli che possono essere tenuti
aperti automaticamente.
9. Cambiarsi immediatamente se si è versato carburante sui
proprio indumenti.
10. Non riempire mai il serbatoio del carburante in modo eccessivo. Rimettere il tappo e serrare in modo sicuro.
11. Usare sempre molta cura nel gestire benzina e altri combustibili. Essi sono infiammabili e i loro vapori possono esplodere.
12. Quando si è versato del carburante non cercare di avviare il
motore ma spostare l’unità dall’area in cui si è versato il carburante per evitare la possibilità di accensione dei vapori
finché questi non si siano dispersi.
13. Rimettere a posto in modo sicuro i tappi dei serbatoi e dei
contenitori di carburante.
Servizio e manutenzione
1. Non mettere mai in moto l’unità in un’area in cui i vapori di
ossido di carbonio si possono addensare.
2. Tenere i dadi e i bulloni ben serrati e l’unità in buone condizioni operative, specialmente i dadi dell’accessorio a
lama.
3. Non alterare mai i dispositivi di sicurezza. Controllare regolarmente che funzionino in modo corretto ed eseguire le riparazioni necessarie in caso di malfunzionamento.
4. Tenere l’unità libera da erba, foglie o altri detriti. Pulire versamenti di olio e combustibile e rimuovere i detriti che ne
fossero imbevuti. Prima di mettere in rimessa lasciare che la
macchina si raffreddi.
5. Se si urta un oggetto fermare la macchina e ispezionarla.
Eseguire eventuali riparazioni prima di ripartire.
6. Non eseguire mai regolazioni o riparazioni con il motore in
moto.
7. Controllare frequentemente gli elementi del raccoglitore di
erba e la protezione di scarico e sostituire con pezzi consigliati dal produttore, se necessario.
8. Le lame dell’elemento di falciatura sono affilate. Quando si
esegue la manutenzione di una lama, coprirla o indossare
guanti e prestare attenzione particolare.
9. Controllare spesso il funzionamento del freno. Regolare e
intervenire come richiesto.
10. Mantenere in ordine e sostituire se necessario le etichette
contenenti istruzioni e informazioni relative alla sicurezza.
11. Non rimuovere il tappo del carburante quando il motore è
caldo perché si potrebbe verificare un versamento di benzina che può prendere fuoco. Non spaziare i morsetti del
tubo del carburante più di quanto non sia necessario. Dopo
l’installazione, accertarsi che i morsetti fissino le manichette
in modo sicuro sul filtro.
12. Non usare benzina che contiene METANOLO, gasolio che
contiene più del 10% di ETANOLO, addittivi per benzina o
benzina bianca perché potrebbero danneggiare l’impianto
del motore/combustibile.
13. Se si rende necessario svuotare il serbatoio del carburante,
lo si dovrà fare all’aperto.
14. Sostituire silenziatori/marmitte difettose.
15. Nel fare le riparazioni usare solamente i pezzi di ricambio
autorizzati dalla fabbrica.
16. Nell’eseguire regolazioni e nel fare impostazioni, attenersi
sempre alle specifiche della fabbrica.
17. Per operazioni di manutenzione e riparazioni maggiori ci si
dovrebbe rivolgere solo a un centro di assistenza autorizzato.
18. Non tentare mai di eseguire riparazioni maggiori sull’unità a
meno di non essere opportunamente addestrati. L’esecuzione incorretta di una procedura di manutenzione può
creare condizioni operative pericolose, procurare danni all’unità e annullare la garanzia del produttore.
19. Prestare attenzione quando si gestisce un elemento di falciatura con più lame perché una lama che si muove può
mettere in rotazione le altre lame.
20. Non modificare le impostazioni del regolatore del motore o
alzare il limitatore di velocità del motore. Il funzionamento
del motore a velocità troppo alta aumenta il pericolo di lesioni alla persona.
21. Disimpegnare gli accessori, fermare il motore, togliere la
chiave e scollegare il filo o fili della candela o candele prima
di: pulire ostruzioni degli accessori e scarichi, eseguire lavoro di manutenzione o se l’unità vibra in modo eccessivo.
Dopo avere urtato un oggetto, ispezionare la macchina per
verificare che non ci siano danni ed eseguire eventuali riparazioni prima di riavviare e riutilizzare l’apparecchiatura.
22. Non mettere mai le mani vicino a parti in movimento, come
ad esempio la ventola di raffreddamento dell’idropompa,
quando il trattore è in moto. (Le ventole di raffreddamento di
idropompa sono normalmente situate sulla parte superiore
della trasmissione a trazione anteriore).
23. Unità dotate di pompe, manichette o motori idraulici:
AVVERTENZA: Il fluido idraulico che fuoriesce ad alta pressione può possedere forza sufficiente da perforare la pelle e
causare lesioni gravi. Per evitare cancrena, fluidi estranei
iniettati nella pelle devono essere tolti chirurgicamente entro
poche ore dell’incidente da un medico pratico di questo tipo
di infortuni. Tenere il corpo e le mani lontani dai fori degli
spinotti o ugelli che possono espellere fluido a pressione elevata. Per controllare se ci sono perdite usare un pezzo di
carta o di cartone, non una mano. Prima di mettere
l’impianto sotto pressione, accertarsi che le connessioni del
fluido idraulico siano tutte ben serrate e che tutte le
manichette e i tubi siano in buone condizioni. Se si verifica
una perdita, fare intervenire immediatamente il rivenditore
autorizzato.
24. AVVERTENZA: Dispositivo di accumulo di energia. Il disimpegno inopportuno di una molla può essere causa di gravi
lesioni alla persona. Le molle dovrebbero essere rimosse
solo da parte di un tecnico autorizzato.
25. Modelli dotati di radiatore del motore: AVVERTENZA: Dispositivo di accumulo di energia. Per evitare lesioni serie alla
persona causate da liquido refrigerante ad alta temperatura,
non togliere mai il tappo del radiatore quando il motore è in
marcia. Fermare il motore e aspettare che si raffreddi. E
anche a quel punto, prestare molta attenzione quando si
toglie il tappo.
10 www.simplicitymfg.com
Page 99

SICUREZZA DELL’OPERATORE
Etichette sulla sicurezza
Tutti i messaggi di PERICOLO, AVVERTENZA, ATTENZIONE e
istruzione sul telaio e sull’elemento di falciatura vanno letti e osservati. La mancata osservanza di queste istruzioni può essere
causa di lesioni alla persona. Le informazioni sono fornite per la
sicurezza dell’utente e sono importanti! Le etichette sottostanti
sono apposte sul telaio e sull’elemento di falciatura.
Icone di sicurezza
Avvertenza: Leggere il manuale per
l’operatore.
Prima di usare questa macchina, leggere
e comprendere il Manuale per l’operatore.
Pericolo: Oggetti scagliati.
Questa unità è capace di scagliare oggetti
e detriti. Tenere lontani gli astanti.
Avvertenza: Togliere la chiave prima di
eseguire la manutenzione.
Togliere la chiave e consultare la
documentazione tecnica prima di fare
riparazioni o eseguire procedure di
manutenzione.
Pericolo: Cappottata della macchina.
Non usare la macchina su terreni con
pendenza superiore ai 10°.
Pericolo: Smembramento.
Questa macchina può amputare gli arti.
Tenere lontani astanti e bambini quando il
motore è in marcia.
Pericolo: Smembramento.
Il piano per falciatura è capace di
amputare gli arti. Tenere mani e piedi
lontani dalle lame.
Pericolo: Pericolo d’incendio.
Non fare rifornimento con il motore caldo
o in marcia. Arrestare il motore e lasciar
raffreddare per tre (3) minuti prima di
aggiungere carburante.
Sostituire immediatamente qualsiasi etichetta mancante o danneggiata. Per i pezzi di ricambio rivolgersi al concessionario locale.
Queste etichette sono facili da seguire e costituiscono un
costante promemoria, per l’operatore e altri che potrebbero utilizzare l’attrezzatura, delle istruzioni sulla sicurezza indispensabili per un uso sicuro ed efficace.
Pericolo: Superfici estremamente
calde.
Lasciar raffreddare la macchina prima di
toccare la superficie.
Pericolo: Avvelenamento da ossido di
carbonio.
Non mettere in moto il motore in un’area
non ventilata.
Avvertenza: Pericolo d'incendio.
Tenere la batteria lontano da bambini,
fiamme e scintille. Rischio di innesco dei
gas esplosivi.
Avvertenza: L'acido solforico può
provocare cecità o ustioni gravi.
Indossare sempre occhiali di protezione
ed uno schermo per il viso quando si
lavora sulla o in prossimità della batteria.
Avvertenza: Le batterie producono
gas esplosivi.
Prima di usare questa macchina, leggere
e comprendere il Manuale per l'operatore.
Importante: Non smaltire la batteria
con i normali rifiuti.
Contattare le autorità locali per lo
smaltimento e/o il riciclaggio delle
batterie.
Pericolo: Smembramento.
l piano per falciatura è capace di
amputare gli arti. Tenere mani e piedi
lontani dalle lame.
11
Page 100

SICUREZZA DELL’OPERATORE
SS
OO
SSTTOO
PP
Emplacement des autocollants
1
2
3
4
Decalcomania Codice
1737541
5
6
+
Instructions d’utilisation,
modèles Union européenne
(CE) Réf. 1734027
Positions de la
clé de contact,
Réf. 1722806
1723143
Levage d’accessoire,
Réf. 1723143
Attention, Point de pincement, Réf. 1720389
1730172
Niveau de carburant,
Réf. 1730172
Attention, Point de pincement, Réf. 1720389
PP
1723160
Débrayage
transmission,
Réf. 1730202
12 www.simplicitymfg.com
 Loading...