

Page 1
Not for
Reproduction
Operator’s Manual
Návod k obsluze
Bedienungsanleitung
Ohjekirja
Manual de l’opérateur
Felhasználói kézikönyv
Manuale dell’operatore
Vartotojo vadovas
Bruksanvisningen
Instrukcja obsługi
Руководство по эксплуатации
Návod na obsluhu
Uporabniški priročnik
Instruktions handbok
Copyright © 2014 Briggs & Stratton Corporation, Milwaukee, WI, USA
All rights reserved.
Part No.: 1752194
Revision: H
Page 2
Not for
Reproduction
1
2
A
B
4
5
3
B
A
O
F G
K
L
K
M
N
C
D
6
7
J E
H
I
2
Page 3
Not for
Reproduction
8
10
11
9
12
English
en
3
Page 4
Not for
Reproduction
13
14
16
17
15
18
4
Page 5
Not for
Reproduction
19
English
en
5
Page 6
Not for
Reproduction
Products Covered by This Manual
The following products are covered by this manual:
1695856
1695994
1695995
1695996
1695996-00
1695996-01
1695996-02
1695997
1695997-00
1695997-01
1695997-02
1696009
1696010
1696011
1696011-00
1696011-01
1696011-02
1696012
1696012-00
1696012-01
1696012-02
1696053
1696054
1696055
1696055-00
1696055-01
1696056
1696061
1696062
1696062-00
1696062-01
1696063
1696065
1696066
1696067
1696199-00
1696199-01
1696200-00
1696201-00
1696201-01
1696202-00
1696202-01
1696203-00
1696203-01
1696206-00
1696207-00
1696207-01
1696212-00
1696212-01
1696220-00
1696221-00
1696221-01
1696222-00
1696222-01
1696223-00
1696223-01
1696224-00
1696224-01
1696226-00
1696227-00
1696227-01
1696228-00
1696229-00
1696230-00
1696253-00
1696253-01
1696254-00
1696254-01
1696255-00
1696255-01
1696256-00
1696256-01
1696257-00
1696257-01
1696277-00
1696278-00
1696300-00
1696301
1696301-00
1696302-00
1696381-00
1696382-00
1696390-00
1696391-00
1696392-00
1696481-00
1696482-00
1696483-00
1696484-00
1696485-00
1696486-00
1696487-00
1696488-00
1696489-00
1696490-00
1696491-00
1696493-00
1696494-00
1696495-00
1696522-00
1696523-00
1696524-00
Manual Contents:
Operator Safety ..................................................................6
Safety System Tests ....................................................... 11
Features and Controls .................................................... 11
Operation ......................................................................... 12
Maintenance .................................................................... 16
Operator Safety
Safety Alert Symbol and Signal Words
The safety alert symbol indicates a potential personal
injury hazard. A signal word (DANGER, WARNING, or
CAUTION) is used with the alert symbol to designate a
degree or level of hazard seriousness. A safety symbol may
be used to represent the type of hazard. The signal word
NOTICE is used to address practices not related to personal
injury.
DANGER indicates a hazard which, if not avoided, will
result in death or serious injury.
WARNING indicates a hazard which, if not avoided, could
result in death or serious injury.
CAUTION indicates a hazard which, if not avoided, could
result in minor or moderate injury.
NOTICE indicates an action that could result in damage to
the product.
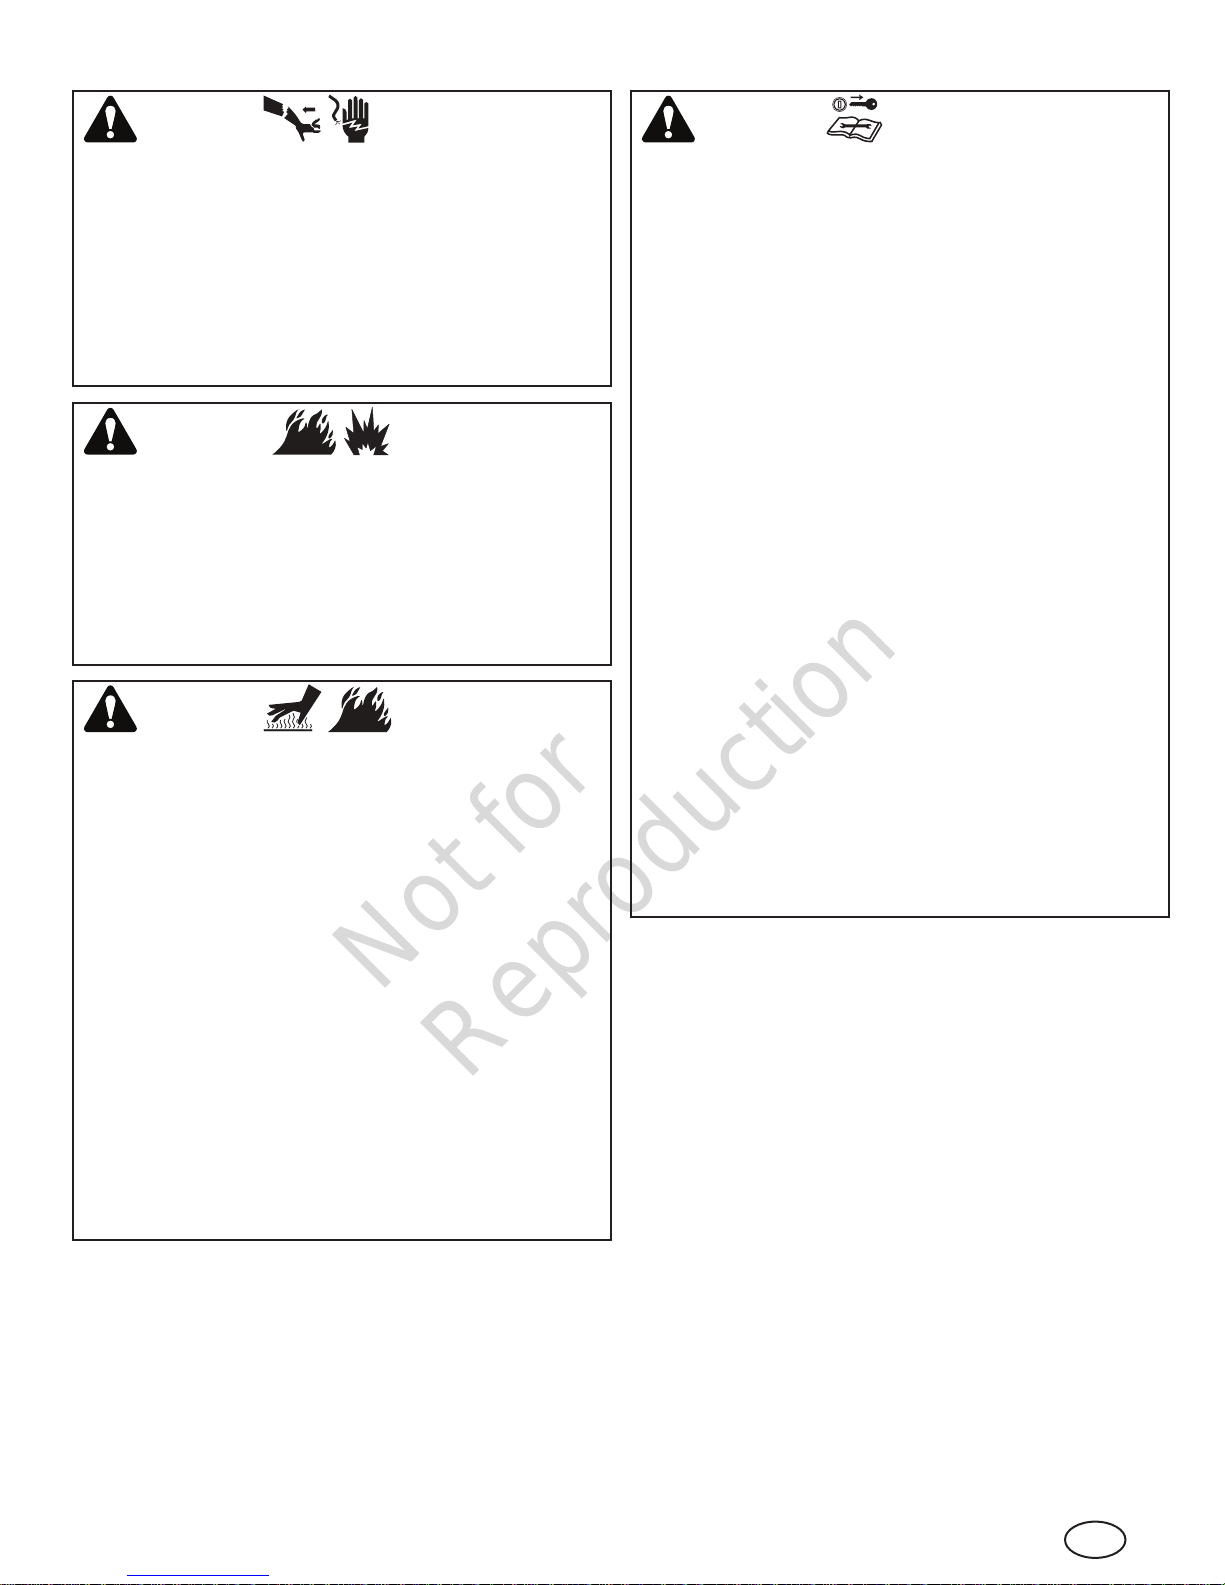
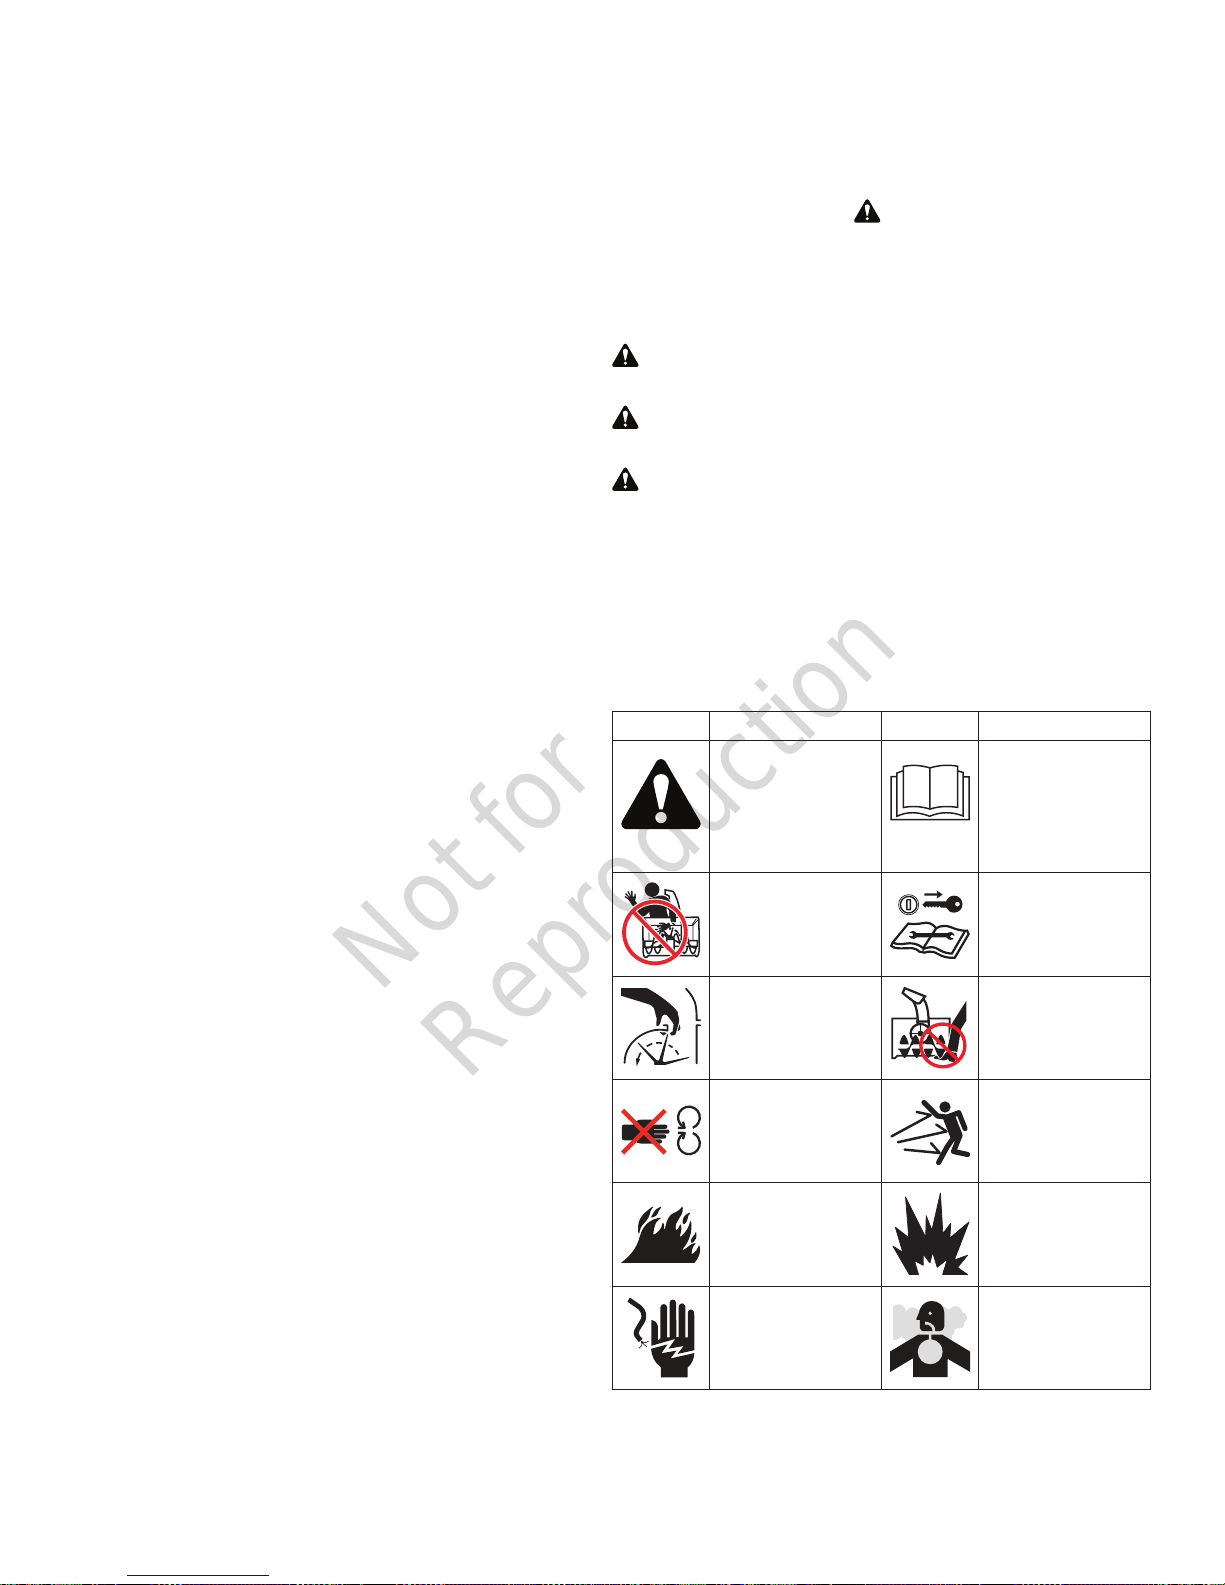
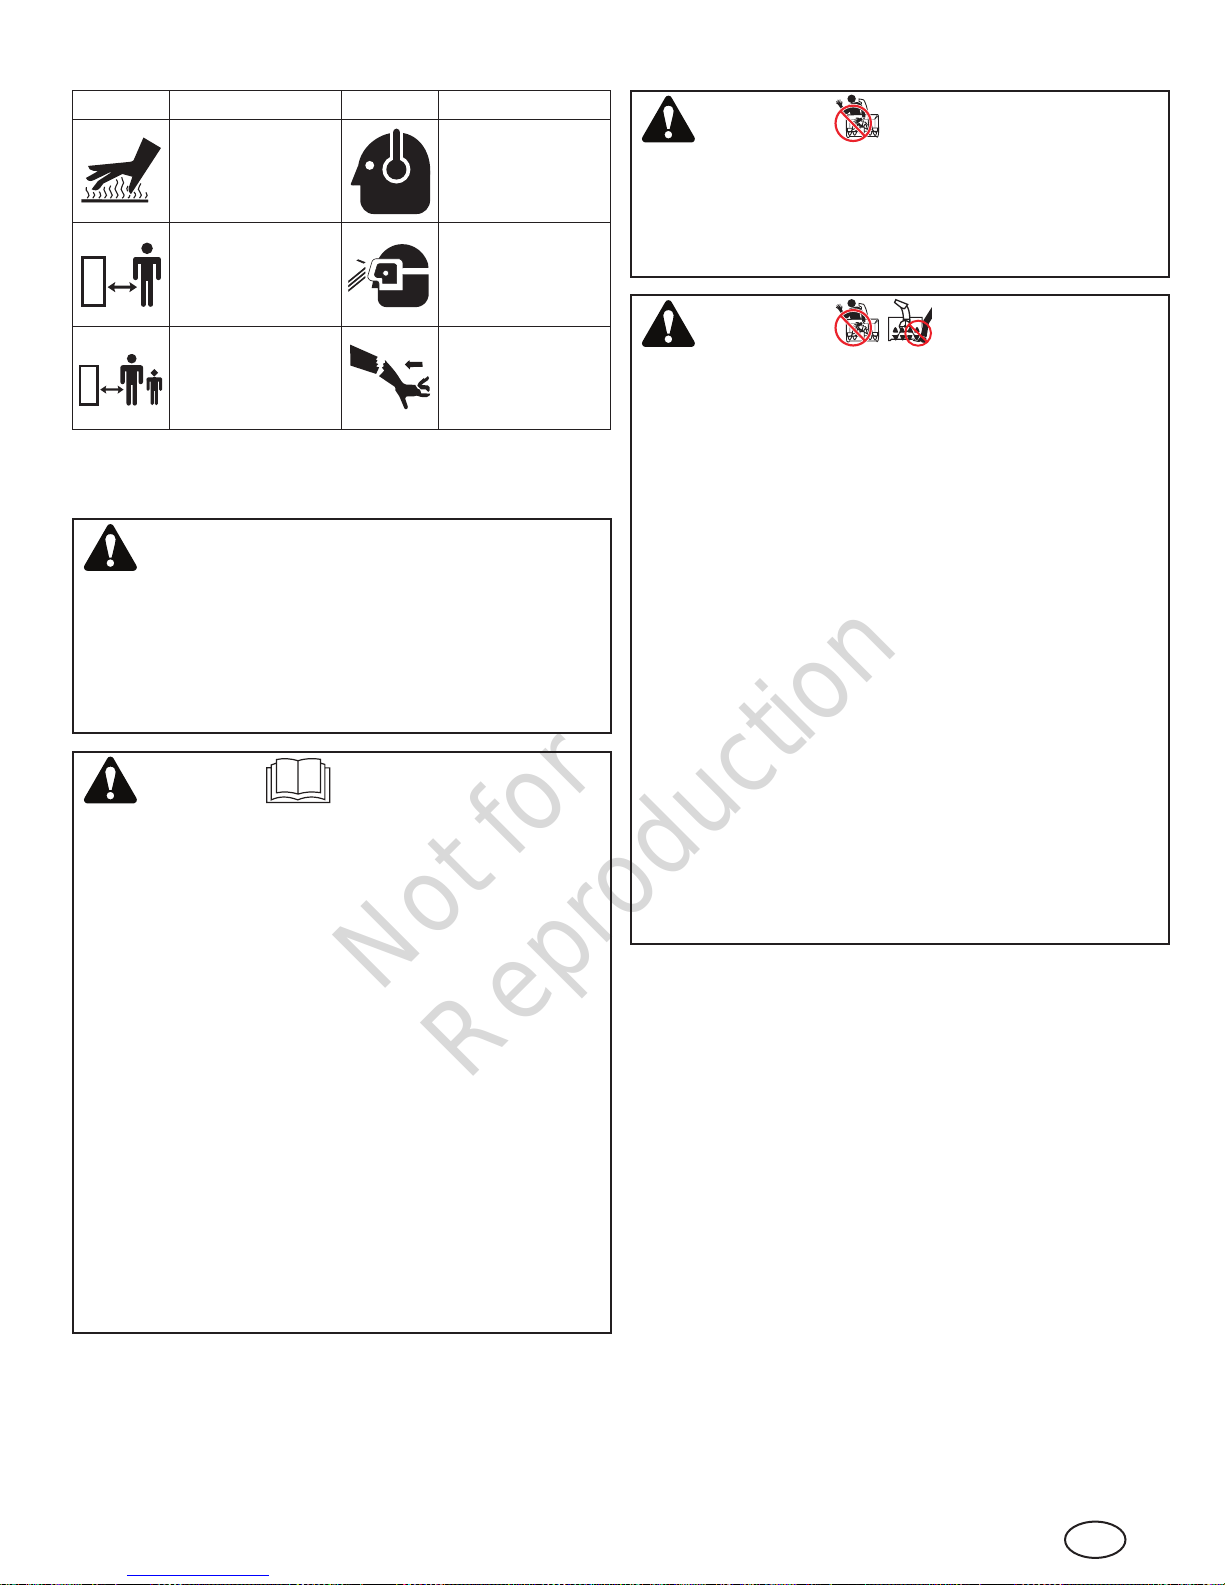
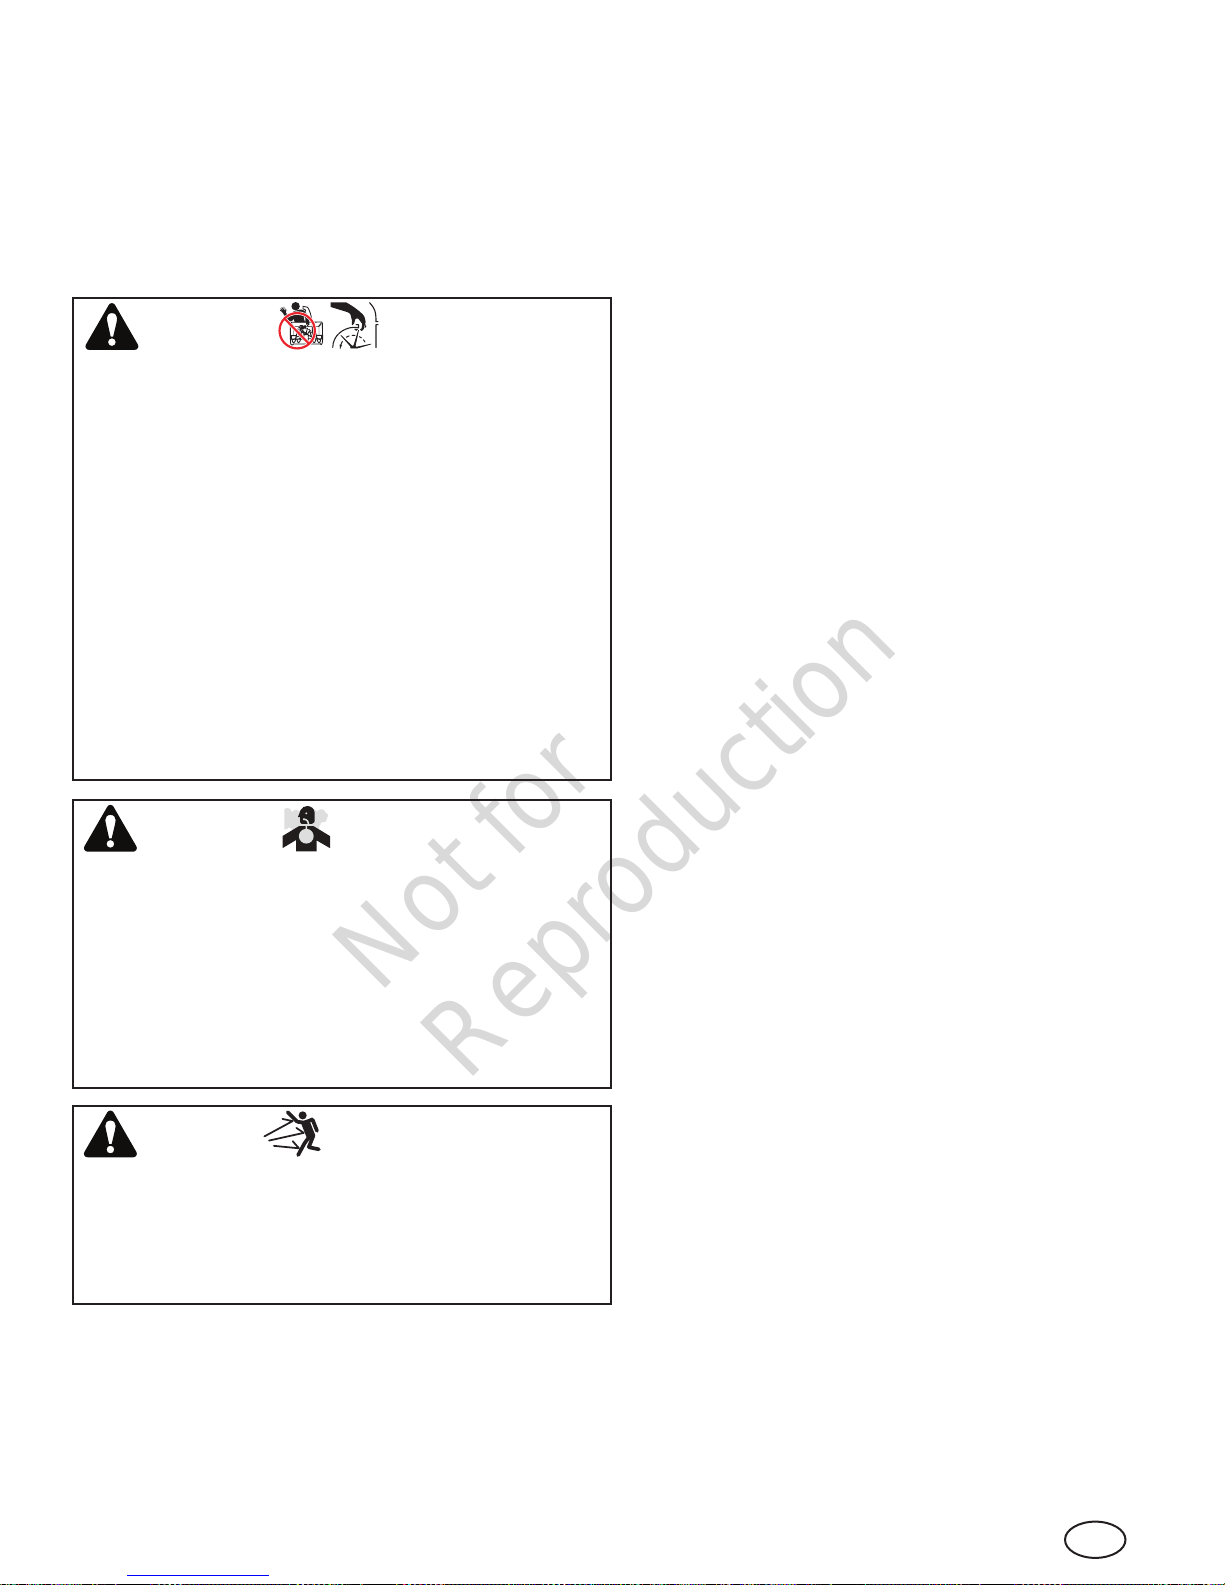
Hazard Symbol Charts
Snowthrower Hazard Symbols
Symbol Meaning Symbol Meaning
Safety information about hazards that can
result in personal
injury.
Amputation
hazard - rotating
impeller.
Read and understand the operator’s manual
before operating
or servicing the
unit.
Remove the key
before performing service.
Troubleshooting .............................................................. 19
NOTE: Please refer to the Customer Contact Guide and
Setup Instructions for additional information.
The images in this document are representative, and are
meant to complement the instructional copy they accompany.
Your unit may vary from the images displayed. LEFT and
RIGHT are as seen from the operator’s position.
The spark ignition system on this snowthrower complies with
Canadian standard ICES-002.
6
Amputation
hazard - rotating
impeller.
Amputation hazard - do not touch
moving parts.
Fire hazard. Explosion haz-
Shock hazard. Toxic fume haz-
Amputation
hazard - rotating
auger.
Thrown objects
hazard.
ard.
ard.
Page 7
Not for
Reproduction
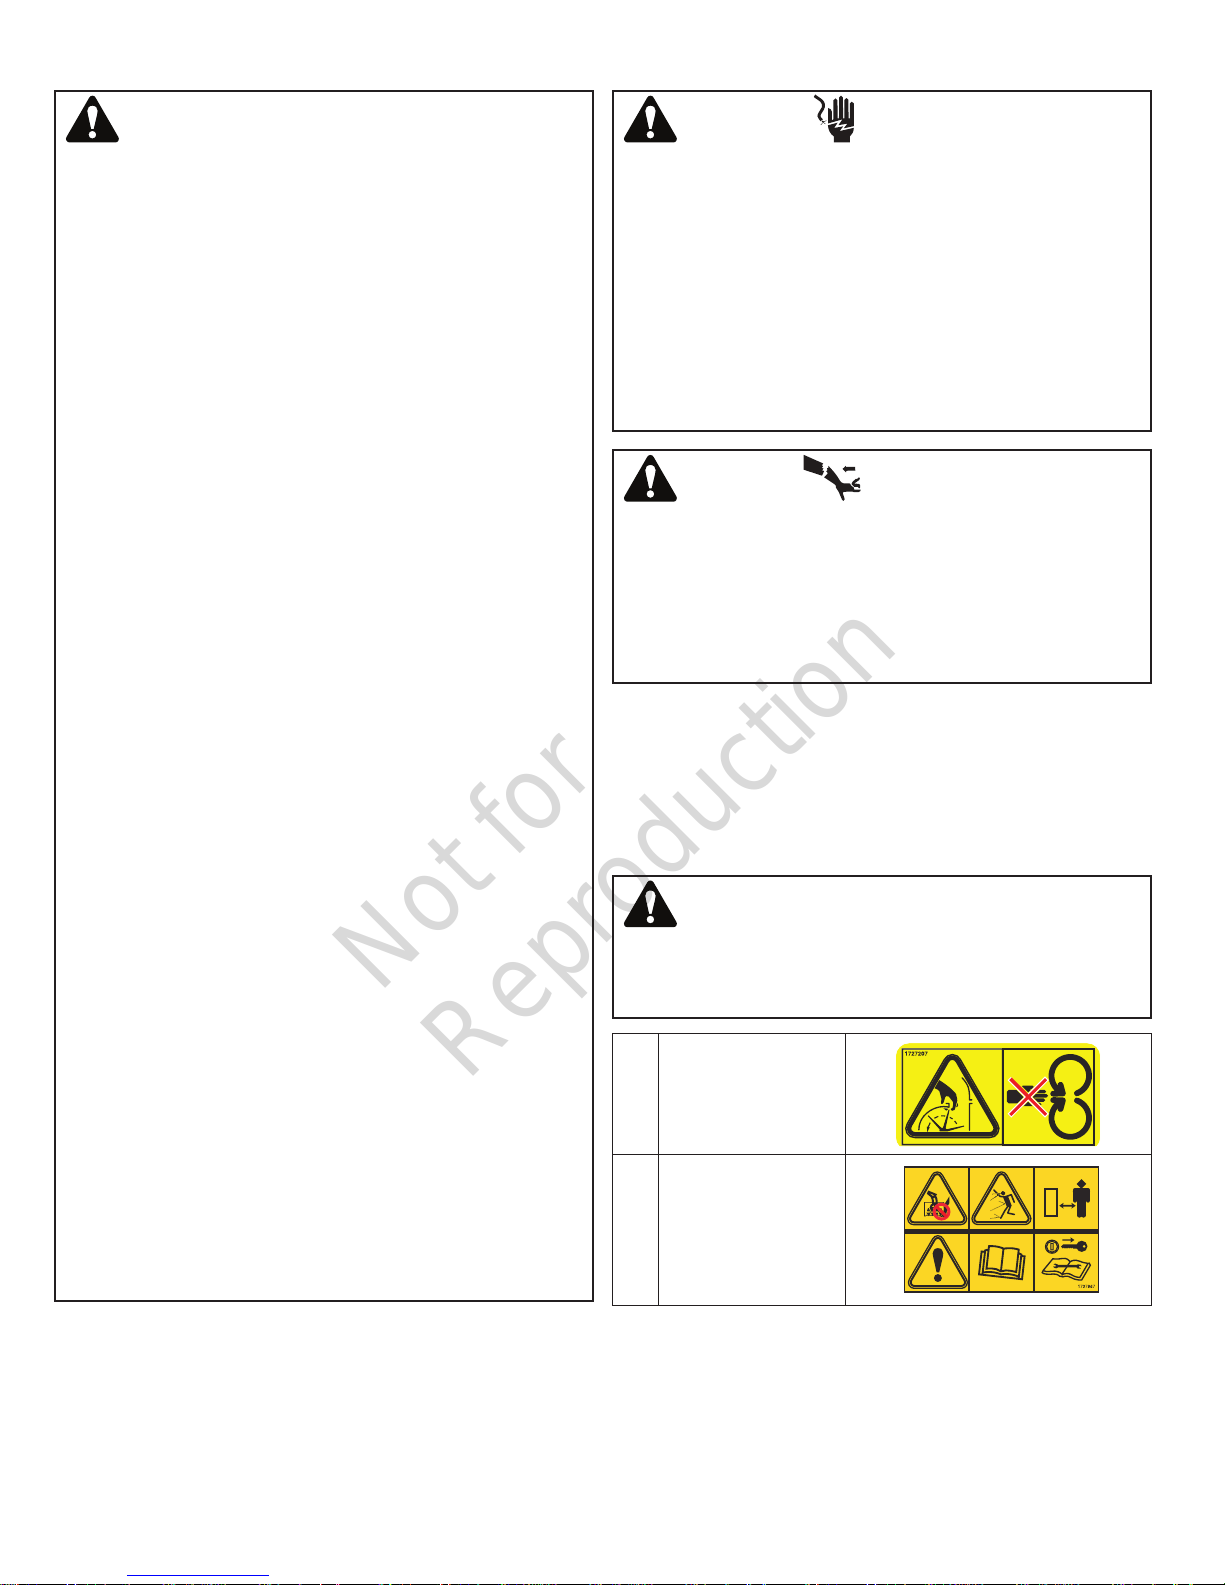
Symbol Meaning Symbol Meaning
Hot surface hazard.
Keep a safe distance.
Ear protection
recommended
for extended use.
Wear safety
glasses.
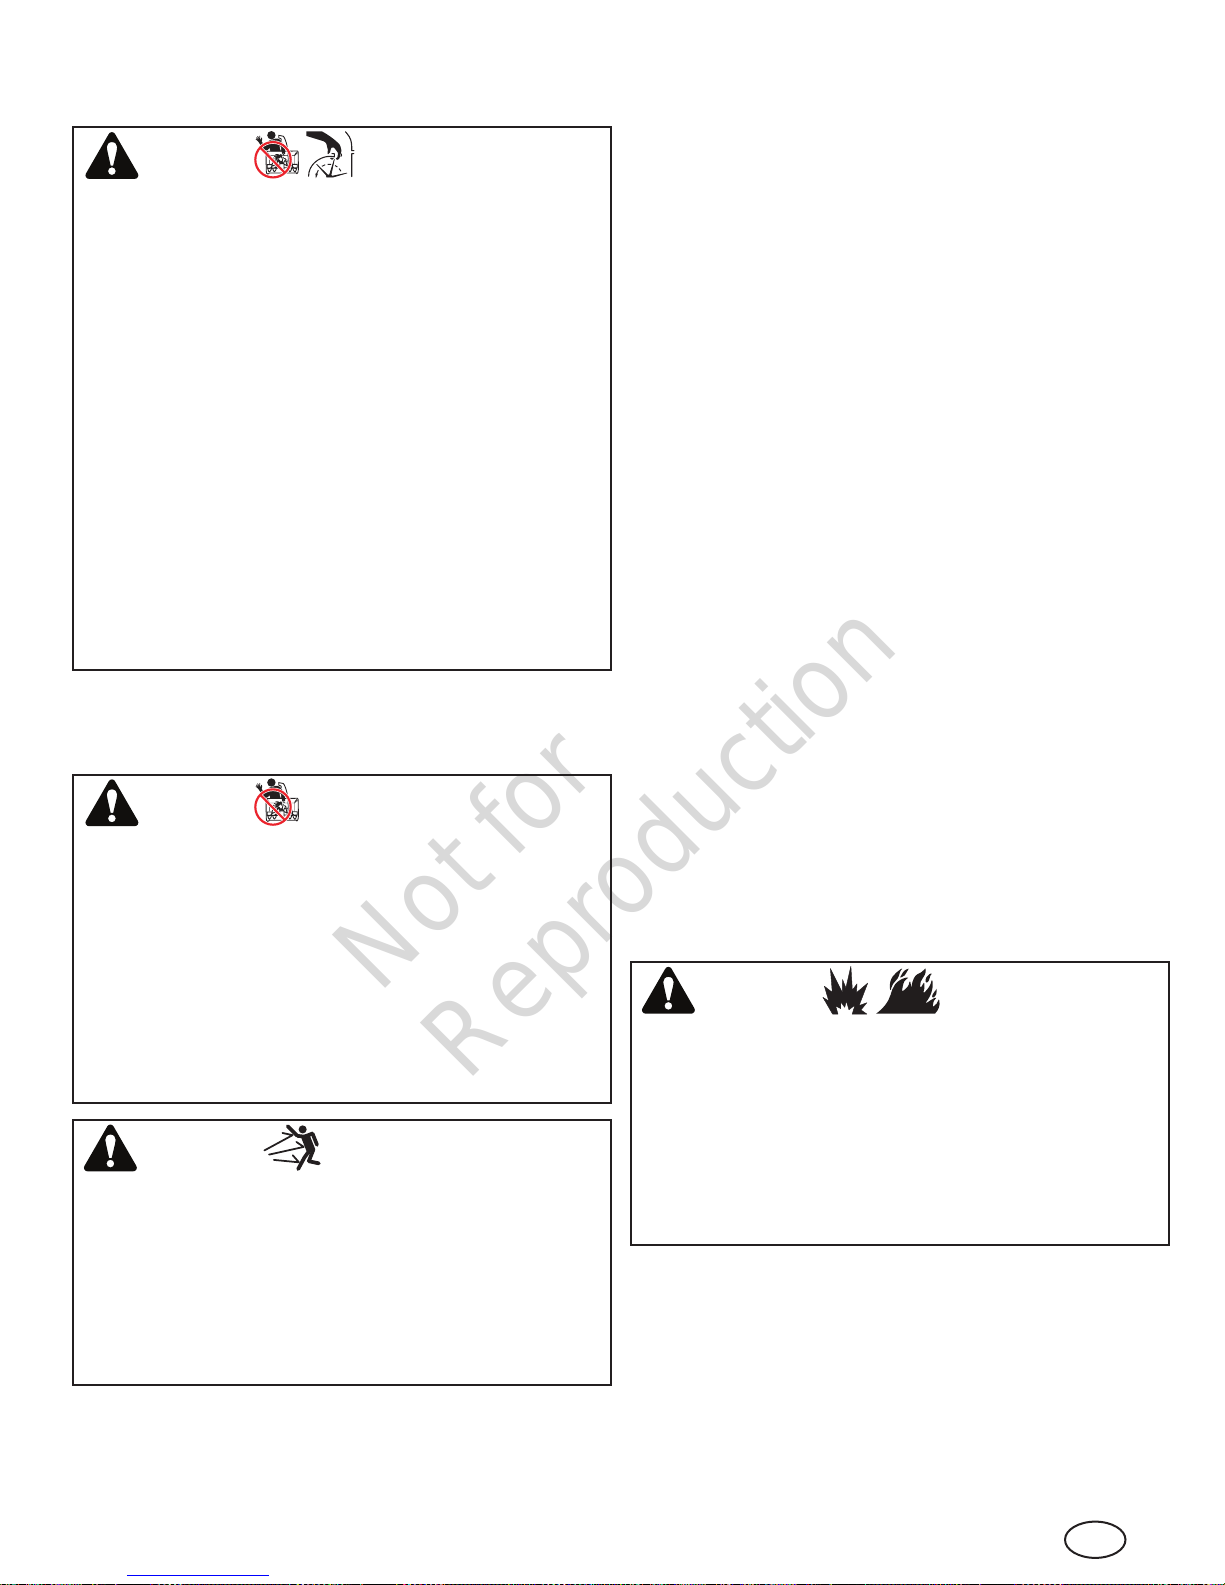
DANGER
The discharge chute contains a rotating impeller to throw
snow. Never clear or unclog the discharge chute with your
hands. Fingers can quickly become caught in the impeller.
Always use a clean-out tool.
Failure to observe these safety instructions will result in
traumatic amputation or severe laceration.
Keep children
away.
Kickback hazard.
General Safety Warnings
WARNING
• Hand contact with the rotating impeller inside the
discharge chute is the most common cause of injury
associated with snowthrowers.
• This snowthrower is capable of amputating hands
and feet, and throwing objects. Read and observe all
the safety instructions in this manual. Failure to do so
could result in death or serious injury.
WARNING
Read, understand, and follow all the instructions on the
snowthrower and in the operator’s manual before operating
this unit.
Failure to observe the safety instructions in this manual
could result in death or serious injury.
• Be thoroughly familiar with the controls and the proper
use of the snowthrower.
• Make sure you are properly trained before operating
the snowthrower.
• Know how to stop the unit and disengage the controls
quickly.
• Never allow anyone to operate the snowthrower without proper instruction.
• Always follow the instructions in the operator’s manual,
if the snowthrower will be stored for an extended period.
• Maintain or replace safety and instruction labels as
necessary.
• Never attempt to make major repairs on the
snowthrower unless you have been properly trained.
Improper servicing of the snowthrower can result in
hazardous operation, equipment damage, and voiding
of the product warranty.
DANGER
Keep hands, feet, and clothing away from rotating parts.
Rotating parts can contact or entangle hands, feet, hair,
clothing, or accessories.
Failure to observe these safety instructions will result in
traumatic amputation or severe laceration.
• Whenever cleaning, repairing, or inspecting the
snowthrower, make sure the engine is OFF, spark
plug wire is disconnected, and all moving parts have
stopped.
• Do not put hands or feet near or under rotating parts.
Keep clear of the discharge opening at all times.
• Never operate the snowthrower without proper guards,
and other safety devices in place and working.
• Never leave the snowthrower unattended while engine
is running. Always disengage the auger and traction
controls, stop engine, and remove keys.
• Keep all loose clothing away from the front of the
snowthrower and auger. Scarves, mittens, dangling
drawstrings, loose clothes, and pants can quickly
become caught in the rotating device and amputation
will occur. Tie up long hair and remove jewelry.
• Run the machine a few minutes after discharging snow
to prevent freeze-up of the collector/impeller.
• Disengage power to the collector/impeller when
snowthrower is transported or not in use.
English
en
7
Page 8
Not for
Reproduction
WARNING
Objects can be picked up by the auger and thrown from
the chute. Never discharge snow toward bystanders
or allow anyone in front of the snowthrower. Failure to
observe these safety instructions will result in death or
serious injury.
• Always wear safety glasses or eye shields during operation, and while performing an adjustment or repair.
• Always be aware of the direction the snow is being
thrown. Nearby pedestrians, pets, or property may be
harmed by objects being thrown.
• Be aware of your environment while operating the
snowthrower. Don’t run over items such as gravel,
doormats, newspapers, toys, and rocks hidden under
snow, as they can all be thrown from the chute or jam
in the auger.
• Use extreme caution when operating on or crossing
gravel drives, walks, or roads.
• Adjust the collector housing height to clear gravel or
crushed rock surface.
• Never operate the snowthrower near glass enclosures, automobiles, window wells, drop-offs, and the
like without proper adjustment of the discharge chute
angle.
• Familiarize yourself with the area in which you plan to
operate the snowthrower. Mark off boundaries of walkways and driveways.
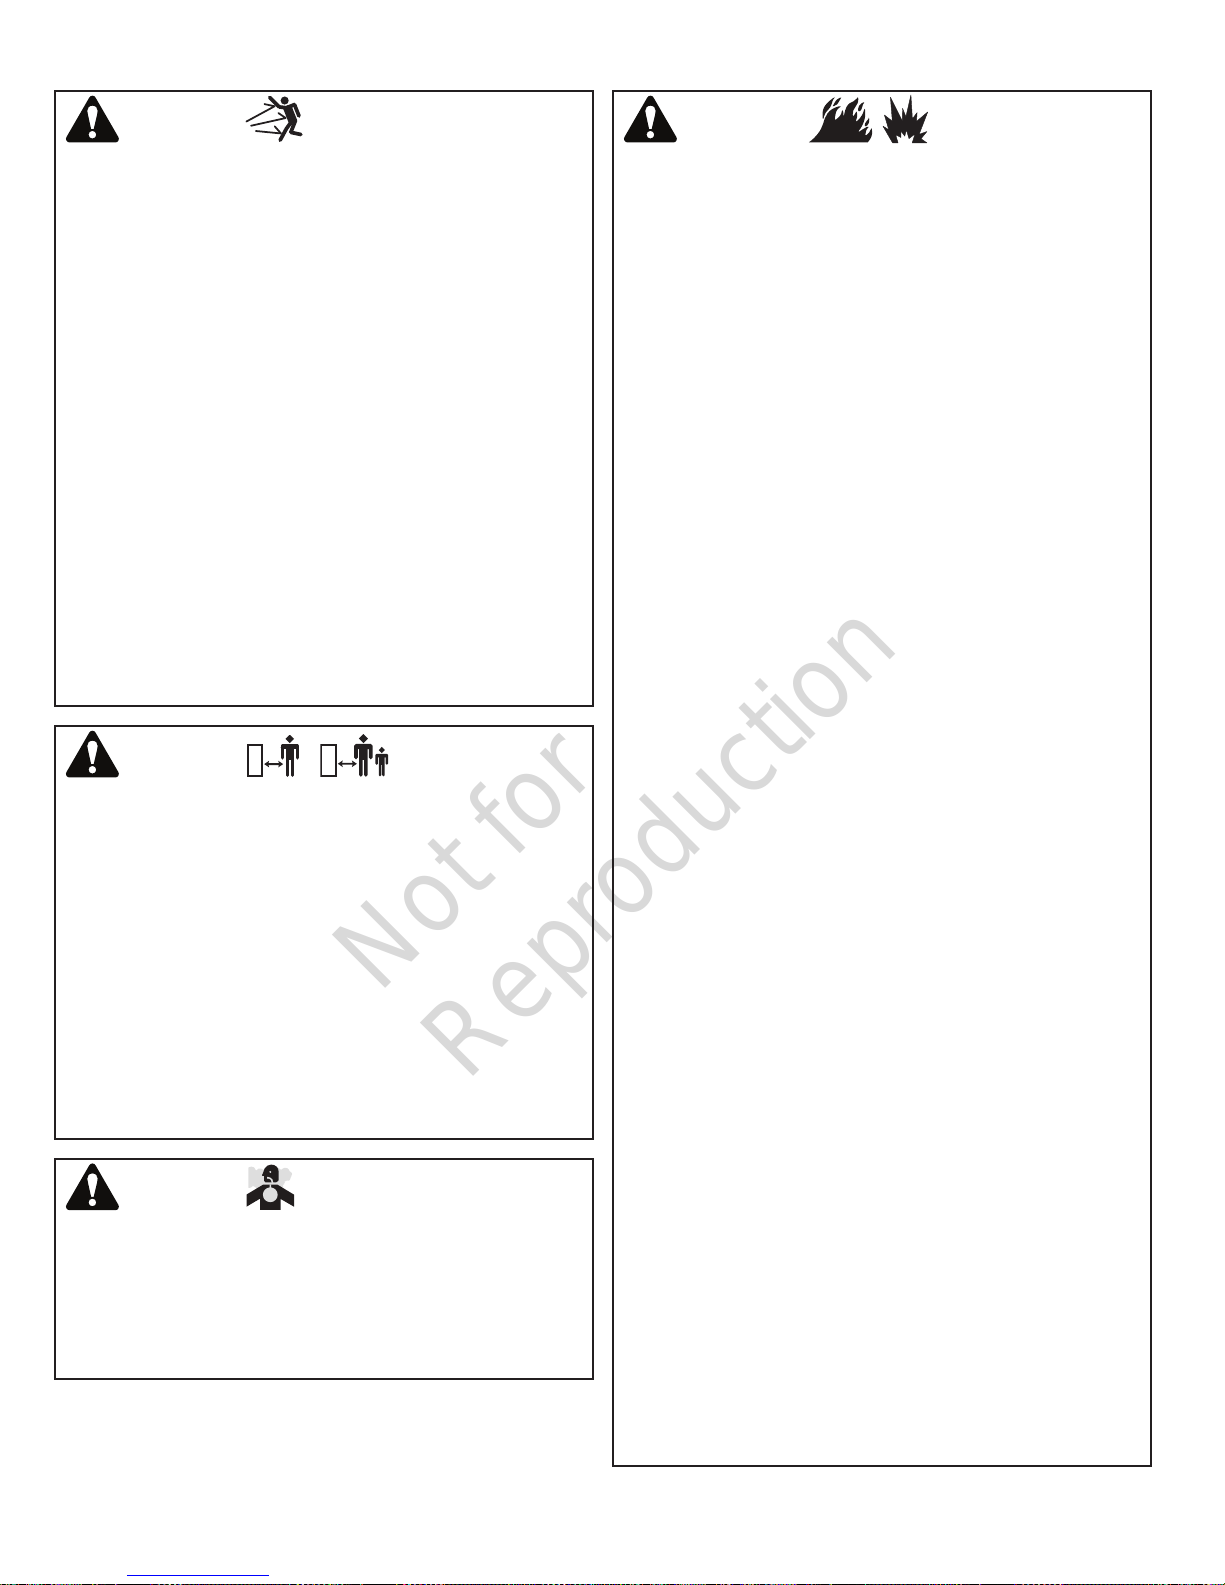
WARNING
Tragic accidents can occur if the operator is not alert to the
presence of children. Children are often attracted to the
unit and the operating activity. Never assume that children
will remain where you last saw them.
• Keep children out of the area during operation.
Children are often attracted to the equipment. Be
mindful of all persons present.
• Be alert and turn the unit off if children enter the area.
• Never allow children to operate the unit.
• Use extra care when approaching blind corners,
shrubs, trees, or other objects that may obscure vision.
Children may be present.
WARNING
Engines give off carbon monoxide, an odorless, colorless,
poison gas. Breathing carbon monoxide can cause nausea, fainting, or death.
• Start and run the engine outdoors.
• Do not run the engine in an enclosed area, even if
doors and windows are open.
WARNING
Fuel and its vapors are extremely flammable and explosive. Always handle fuel with extreme care.
Failure to observe these safety instructions can cause a
fire or explosion which will result in severe burns or death.
When Adding Fuel
• Turn off engine and let cool at least 2 minutes before
removing the fuel cap and adding fuel.
• Fill fuel tank outdoors or in a well ventilated area.
• Do not overfill the fuel tank. To allow for the expansion
of gasoline, do not fill above the bottom of the fuel tank
neck.
• Keep fuel away from sparks, open flames, pilot lights,
heat, and other ignition sources.
• Check fuel lines, cap, and fittings frequently for cracks
or leaks. Replace if necessary.
• Use an approved fuel container.
• If fuel spills, wait until it evaporates before starting
engine.
When Starting Engine
• Ensure that spark plug, muffler, fuel cap, and air cleaner (if equipped) are in place and secured.
• Do not crank the engine with the spark plug removed.
• If fuel is spilled, do not attempt to start the engine, but
move the snowthrower away from the area of the spill,
and avoid creating any source of ignition, until the fuel
vapors have dissipated.
• Do not over-prime the engine. Follow the engine starting instructions in this manual.
• If the engine floods, set choke (if equipped) to OPEN/
RUN position, move throttle (if equipped) to FAST
position and crank until engine starts.
When Operating Equipment
• Do not tip the snowthrower at an angle which causes
the fuel to spill.
• Do not choke the carburetor to stop the engine.
• Never run the engine with the air cleaner assembly (if
equipped) or the air filter (if equipped) removed.
When Changing Oil
• If you drain the oil from the top oil fill tube, the fuel tank
must be empty or fuel can leak out and result in a fire
or explosion.
When Transporting Equipment
• Transport with fuel tank EMPTY, or with fuel shut-off
valve OFF.
When Storing Gasoline or Equipment With Fuel in
Tank
• Store away from furnaces, stoves, water heaters, or
other appliances that have pilot light or other ignition
source because they can ignite fuel vapors.
8
Page 9
Not for
Reproduction
WARNING
Safe operation of the snowthrower requires the proper care
and maintenance of the engine.
• Disengage all clutches and shift into neutral before
starting the engine.
• Let the engine adjust to outdoor temperatures before
starting to clear snow.
• Use a grounded three-wire plug for all snowthrowers
equipped with electric drive motors or electric starting
motors.
WARNING
Starting the engine creates sparking.
Sparking can ignite nearby flammable gases.
Explosion and fire could result.
• If there is natural gas or LP gas leakage in the area, do
not start the engine.
• Do not use pressurize starting fluids because their
vapors are flammable.
WARNING
Running the engine produces heat. Engine parts, especially the muffler, become extremely hot.
Failure to observe these safety instructions could result in
severe thermal burns on contact.
• Never touch a hot engine or muffler. Allow muffler,
engine cylinder, and fins to cool before touching.
• Remove debris from muffler area and cylinder area.
• Install and maintain in working order a spark arrester
before using equipment on forest-covered, grass-covered, or brush-covered unimproved land.
• U.S.A. Models: It is a violation of California Public
Resource Code Section 4442 to use or operate the
engine on any forest-covered, brush-covered, or
grass-covered land unless the exhaust system is
equipped with a spark arrester, as defined in Section
4442, maintained in effective working order. Other
states or federal jurisdictions may have similar laws.
Contact the original equipment manufacturer, retailer,
or dealer to obtain a spark arrester designed for the
exhaust system installed on this engine.
WARNING
This snowthrower must be properly maintained to ensure
safe operation and performance. Failure to observe the
safety instructions in this manual could result in death or
serious injury.
• When performing any maintenance or repairs on the
snowthrower, shut OFF the engine, disconnect spark
plug wire, and keep the wire away from the plug to prevent someone from accidently starting the engine.
• Check shear bolts and other hardware at frequent
intervals for proper tightness.
• Keep nuts and bolts tight and keep snowthrower in
good condition.
• Never tamper with safety devices. Check their proper
operation regularly and make necessary repairs if they
are not functioning properly.
• Components are subject to wear, damage, and deterioration. Frequently check components and replace
with recommended parts, when necessary.
• Check control operation frequently. Adjust and service
as required.
• Use only factory authorized replacement parts, or like,
parts when making repairs.
• Always comply with factory specifications on all settings and adjustments.
• Use only factory authorized, or like, attachments and
accessories such as wheel weights, counterweights,
or cabs.
• Never attempt to make any adjustments while the
engine is running (except when specifically recommended by the factory).
English
en
9
Page 10
Not for
Reproduction
WARNING
This snowthrower is only as safe as the operator. If it is
misused, or not properly maintained, it can be dangerous.
Remember you are responsible for your safety and those
around you.
• Keep the area of operation clear of all persons, particularly small children and pets.
• Thoroughly inspect the area where the snowthrower
will be used and remove all doormats, sleds, boards,
wires, and other foreign objects.
• Do not operate the snowthrower without wearing adequate winter clothing.
• Wear footwear that will improve footing on slippery surfaces.
• Use caution to avoid slipping or falling especially when
operating the snowthrower in reverse.
• Never operate the snowthrower without good visibility
or light. Always be sure of your footing, and keep a firm
hold on the handles.
• Do not clear snow across the face of slopes. Use
extreme caution when changing direction on slopes.
Do not attempt to clear steep slopes.
• Do not overload the machine capacity by attempting to
clear snow too quickly.
• Never operate the snowthrower at high transport
speeds on slippery surfaces. Look behind the
snowthrower and use care when operating in reverse.
• Do not use the snowthrower on surfaces above ground
level such as roofs of residences, garages, porches, or
other such structures or buildings.
• Operators should evaluate their ability to operate the
snowthrower safely enough to protect themselves and
others from injury.
• The snowthrower is intended to remove snow only. Do
not use the snowthrower for any other purpose.
• Do not carry passengers.
• After striking a foreign object, shut OFF the engine,
disconnect the cord on electric motors, thoroughly
inspect the snowthrower for any damage, and repair
the damage before restarting and operating the
snowthrower.
• If the snowthrower vibrates abnormally, shut OFF the
engine. Vibration is generally a warning of trouble. See
an authorized dealer if necessary for repairs.
• For models equipped with electric starting motors, disconnect the power cord after the engine starts.
WARNING
Damaged or ungrounded power cords could cause electric
shock.
Electric shock could cause severe burns or death.
When Using the Electric Starter
• The power cord must be properly grounded at all
times.
• Use only a three-conductor power cord properly
grounded to the power source.
• If the power cord is damaged, it must be replaced by a
qualified person to avoid a hazard.
WARNING
Rapid retraction of the starter cord (kickback) will pull your
hand and arm toward the engine faster than you can let go.
Broken bones, fractures, bruises, or sprains could result.
When starting the engine
• Pull the starter cord slowly until resistance is felt and
then pull rapidly to avoid kickback.
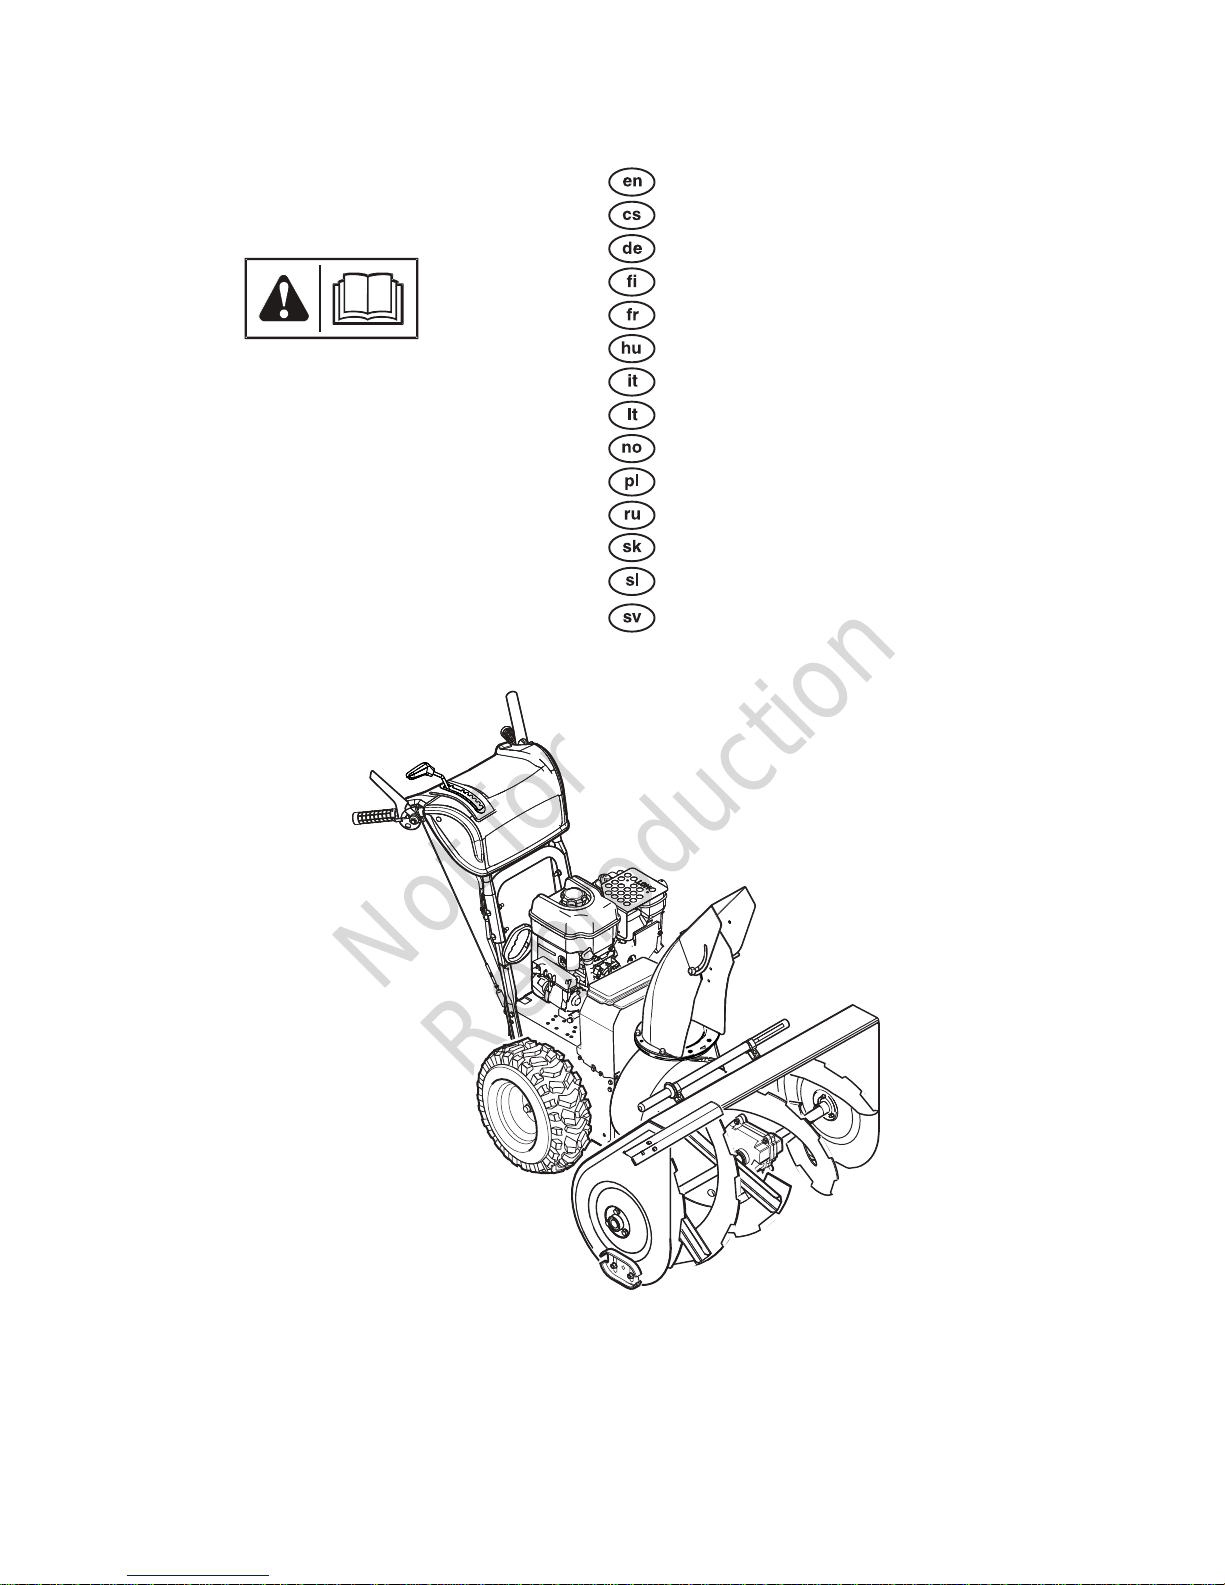
Safety Decals
Before operating your unit, read the safety decals. Compare
Figure 1 with the table below. The cautions and warnings are
for your safety. To avoid a personal injury or damage to the
unit, understand and follow all the safety decals.
WARNING
If any safety decals become worn or damaged, and
cannot be read, order replacement decals from your
local dealer.
A Chute Danger
Decal
(P/N 1727207)
B Auger Danger
Decal
(P/N 1737867)
10
Page 11
Not for
Reproduction
Safety System Tests
Determining Which Test to Use
Please select the appropriate Safety System Test for your
unit:
Models without Free Hand™ Control: On units without
Free Hand, the auger and traction controls operate independently, and the Free Hand icon set shown in Figure 2 is not
found on the dashboard.
Models with Free Hand™ Control: After engaging the traction control (left hand) and auger control (right hand), Free
Hand allows the operator to release the auger control, and for
the auger control to remain engaged until the traction control
is released. Free Hand models have the icon set shown in
Figure 2 on the dashboard.
Safety System Test (units without Free
Hand control)
DANGER
Amputation hazard
This snowthrower is equipped with several mechanical
safety systems designed to keep the operator safe while
using the unit. Check the operation of these systems regularly using the safety system tests listed. If the unit fails to
operate as described, DO NOT operate it. See your authorized dealer for service immediately.
Test 1 - Auger/Impeller Control
With the engine running:
• Press down on the auger control lever. (The auger/
impeller should rotate)
• Release the auger control lever. (The auger/impeller
must stop within 5 seconds)
Test 2 - Traction Drive Control
With the engine running and speed control in 1st gear:
• Press down on the traction control lever. (The unit
should move forward)
• Release the traction control lever. (The unit must stop)
Safety System Test (units with Free
Hand control)
DANGER
Amputation hazard
This snowthrower is equipped with several mechanical
safety systems designed to keep the operator safe while
using the unit. Check the operation of these systems regularly using the safety system tests listed. If the unit fails to
operate as described, DO NOT operate it. See your authorized dealer for service immediately.
Test 1 - Auger/Impeller Control
With the engine running:
• Press down on the auger control lever. (The auger/
impeller should rotate)
• Release the auger control lever. (The auger/impeller
must stop within 5 seconds)
Test 2 - Traction Drive Control
With the engine running and speed control in 1st gear:
• Press down on the traction control lever. (The unit
should move forward)
• Release the traction control lever. (The unit must stop)
Test 3 - Free Hand Control
With the engine running:
• Engage the auger and traction control levers, then
release the auger control lever. (Both controls should
remain engaged)
• Next, release the traction control lever. (Both controls
must release)
Features and Controls
Engine Features and Controls
For engine features and controls, please refer to the engine
operator’s manual.
Snowthrower Features and Controls
Compare Figure 3 with the table below.
A Auger Control Lever - Used
to engage and disengage the
auger and impeller. To engage,
push down. To disengage,
release.
English
en
11
Page 12

Not for
Reproduction
B
1
R1
R2
2
3
C
D Chute Rotation Crank -
E Chute Rotation Switch -
F Free Hand™ Control (if
G
H
I
J Deflector Control - Electric
Speed Select Lever - Allows
the operator to select forward
and reverse speeds. To shift,
move speed select lever to
desired position.
NOTICE: Do not move speed
select lever while Traction
Control is engaged. This
may result in severe damage
to the drive system.
Chute Rotation Crank In-Dash (if equipped) - Used
to rotate the discharge chute to
the left or right.
Lefthand Crank (if equipped)
- Used to rotate the discharge
chute to the left or right.
Electric (if equipped) - Used
to rotate the discharge chute to
the left or right.
equipped) - After engaging
the traction control (left hand)
and auger control (right hand),
allows the operator to release
the auger control lever to use
other controls.
Traction Control Lever - Used
to propel snowthrower forward or reverse. Push down to
engage, release to disengage.
See also, “Free-Hand Control”.
Deflector Control - In-Dash
(if equipped) - Used to control
the angle of the deflector (up or
down).
Deflector Control - Manual
(if equipped) - Used to control
the angle of the deflector (up or
down).
(if equipped) - Used to control
the angle of the deflector (up or
down).
K Easy Turn™ Traction
Control (if equipped) - When
engaged, allows the operator
to release one drive wheel, but
allows the other wheel to continue driving for easy turning.
Grip Warmer Switch (if
equipped) - Used to operate
the heated hand grips. The
switch has three positions High, Off, and Low.
NOTE: Not all models feature heated hand grips. Also,
some models feature automatic heated hand grips that
are operational whenever the
snowthrower is running.
Clean-Out Tool - Used to
remove snow and debris from
the discharge chute and the
auger housing.
Skid Shoes - Used to adjust
the ground clearance of the
auger housing.
Headlight (if equipped) Illuminates the area in front of
the snowthrower.
NOTE: Headlight design varies
according to model.
M
N
O
L
-
-
-
Operation
Before Operating the Snowthrower
WARNING
Read the operator’s manual before operating the
machine. This machine can be dangerous if used
carelessly.
• Never operate the snowthrower without all guards,
covers, and shields in place.
• Stop the engine whenever leaving the operating position.
• Remove the key before unclogging the impeller housing or discharge chute, and before making repairs or
adjustments.
• When leaving the machine, remove the key.
• To reduce the risk of fire, keep the machine clean and
free from spilled fuel, oil, and debris.
12
Page 13
Not for
Reproduction
• On electric start models, disconnect the extension cord
before operating.
• Be sure to check the engine oil level before starting the
engine. See the engine operator’s manual for oil recommendations.
Operating the Snowthrower
DANGER
Amputation hazard
The discharge chute contains a rotating impeller to
throw snow. Fingers can quickly become caught in
the impeller. Never clear or unclog the discharge
chute with your hands. Always use a clean-out tool.
Failure to observe these safety instructions will result
in traumatic amputation or severe laceration.
Hand contact with the rotating impeller inside the discharge chute is the most common cause of injury associated with snowthrowers. Never use your hands to clean out
the discharge chute.
To safely clear a clogged discharge chute, follow
these instructions:
1. Shut OFF the engine.
2. Wait 10 seconds to be sure the impeller blades have
stopped rotating.
3. Always use a clean-out tool, not your hands.
DANGER
Toxic fume hazard
Engines give off carbon monoxide, an odorless, col-
orless, poison gas.
Breathing carbon monoxide can cause nausea, faint-
ing, or death.
• Start and run the engine outdoors.
• Do not run the engine in an enclosed area, even if
doors and windows are open.
WARNING
Thrown objects hazard
This machine is capable of throwing objects that could
injure bystanders, or cause damage to buildings.
Be sure the operating area is clear of bystanders. Never
direct the discharge toward anyone, or toward buildings or
cars.
1. Start the engine. Please refer to the engine operator’s
manual for engine information.
2. Rotate the chute rotation crank (C or D, Figure 3) or use
the chute rotation switch (E) to set the direction of the
discharge chute.
3. Models with manual defector adjustment: Loosen the
wingnut securing the chute deflector (I, Figure 3). Raise
the deflector to throw snow further. Set the defector to the
desired position and tighten the wingnut.
Models with in-dash deflector control lever: Use the
deflector control lever (H, Figure 3) to move the deflector
up or down. Raise the deflector to throw snow further.
Models with electric deflector control: Use the deflec-
tor control switch (J, Figure 3) to move the deflector up or
down. Raise the deflector to throw snow further.
4. Use the speed select lever (B, Figure 3) to select the
forward or reverse drive speed. Use lower speeds when
clearing wet, heavy snow. Use higher speeds for light
snow or transporting.
NOTE: Always set engine speed to FAST (full throttle).
5. Fully press the auger control lever (A, Figure 3) to
engage the auger. Release the lever to stop the auger.
6. Fully press and hold the traction control lever / Free Hand
control (F/G, Figure 3) to engage the traction drive and
begin moving the snowthrower. To stop, release the lever.
NOTE: Always release the traction control lever before
changing speeds.
7. On models equipped with Free Hand controls, when both
the auger (A, Figure 3) and traction control levers (F) are
pressed, the Free Hand control is activated. This allows
you to release the auger control lever (A) to use other
controls. The auger will continue to rotate until the traction control lever/Free Hand control lever is released.
8. If desired, use the grip warmer switch (L, Figure 3) to turn
on the heated hand grips (if equipped).
NOTE: Be sure to turn off the heated hand grips before stopping the snowthrower.
NOTE: Some models are equipped with automatic heated
hand grips that are operational whenever the snowthrower is
running.
9. Some models are equipped with a headlight (O, Figure
3) to help illuminate the area in front of the snowthrower.
The headlight is operational whenever the snowthrower
is running.
English
en
13
Page 14

Not for
Reproduction
Stopping the Snowthrower
1. Release the auger control lever (A, Figure 3).
2. Release the traction control lever (F).
3. Stop the engine. Please refer to the engine operator’s
manual for engine instructions.
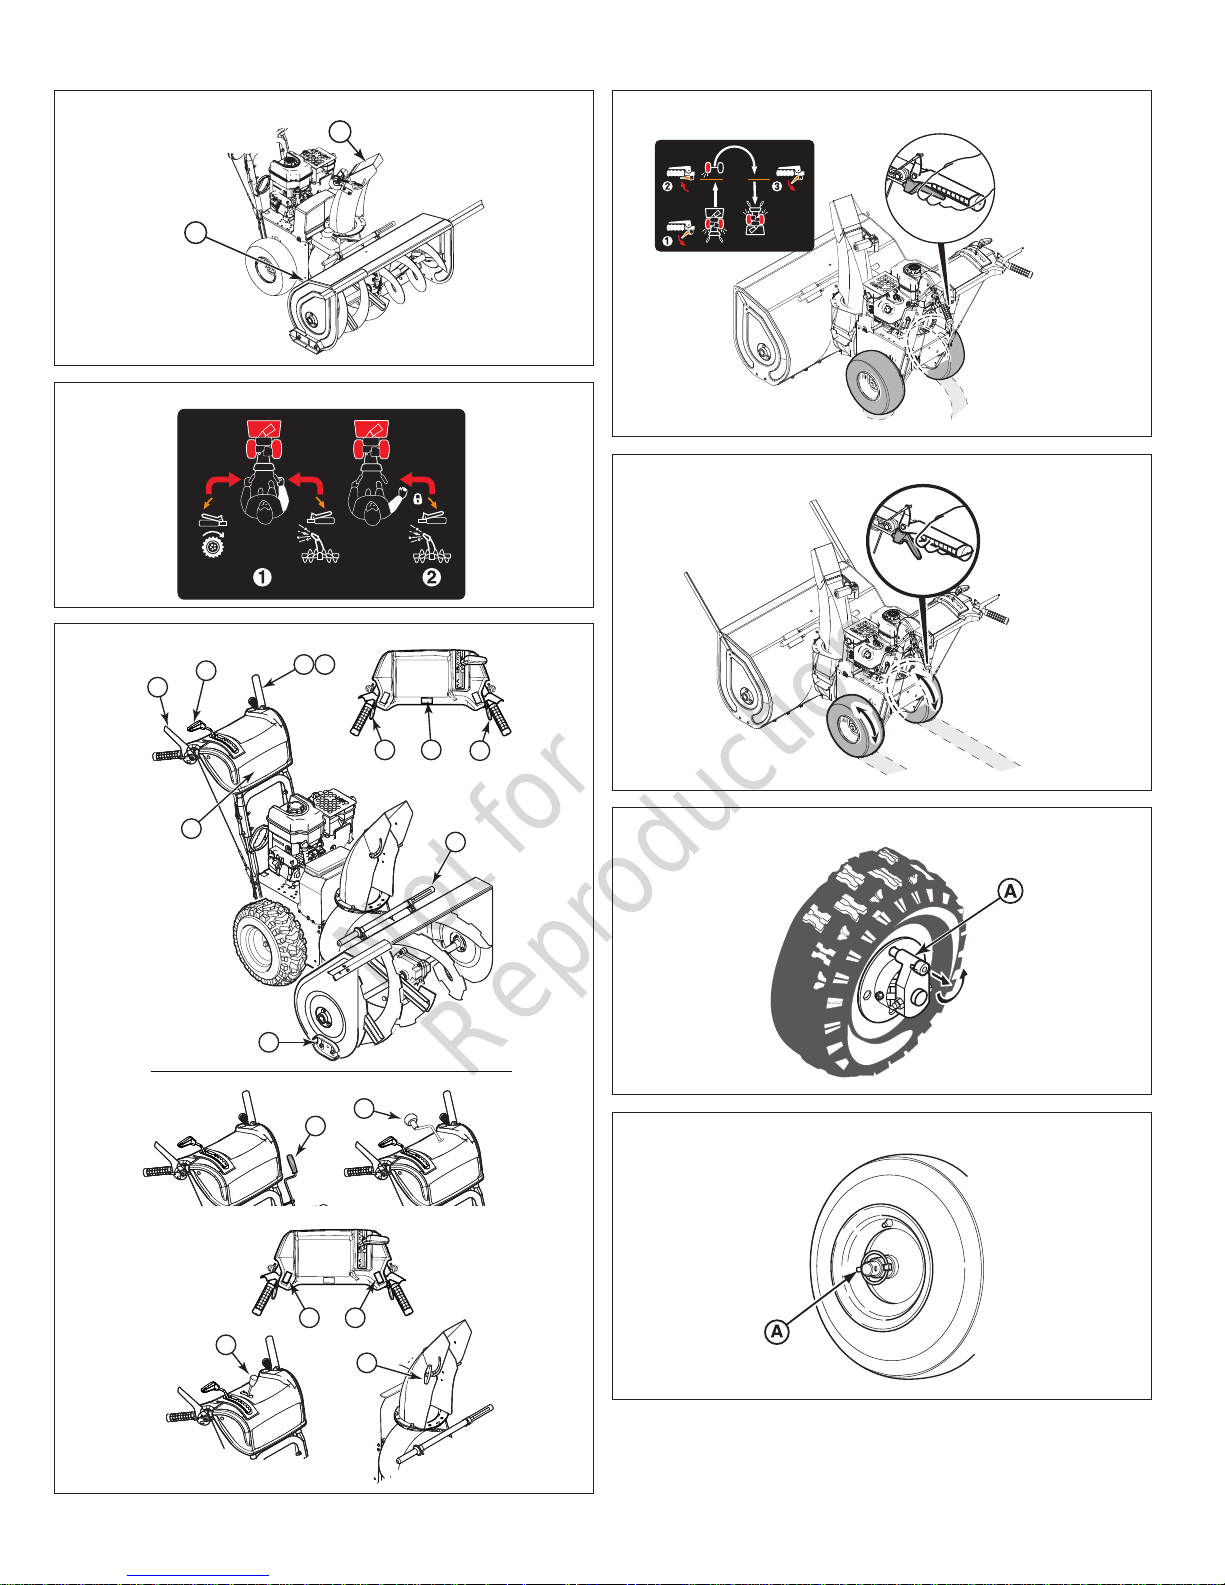
Deflector Adjustment
A. Manual Deflector Control (if equipped)
Loosen the deflector knob (A, Figure 8), adjust the deflector
to the desired position, and then tighten the knob to secure.
Raise the deflector to throw snow further.
Easy Turn™ Traction Control (if
equipped)
For easy turning when using the snowthrower, squeeze the
Easy Turn traction control lever (Figure 4).
NOTE: Some models feature Easy Turn traction control for
one wheel only, while other models feature it for both wheels.
NOTE: Easy Turn traction control will be more difficult to activate under a heavy load. Activate the lever before beginning
a turn.
Engaging the Easy Turn traction control lever releases one
of the traction wheels, but allows the other wheel to continue
driving. Releasing the Easy Turn traction control lever automatically engages both drive wheels for full traction (Figure
5).
Wheel Release - Lock Knob (if
equipped)
Some models are equipped with a drive wheel release that
allows you to disengage one of the drive wheels, for easier
transporting of the unit with the engine off.
Models with Traction Lock Knob: Wheels equipped with a
traction lock knob (A, Figure 6) can be completely released
by pulling the knob out away from the wheel until the locking
pin is disengaged from the wheel. Then rotate the knob so
the pin does not re-engage the wheel. Reverse this process
to engage the drive wheel.
B. Electric Deflector Control (if equipped)
While the engine is running, press either side of the deflector control switch (B, Figure 8) to move the deflector up and
down. Raise the deflector to throw snow further.
C. In-Dash Deflector Control (if equipped)
Move the deflector control lever (C, Figure 8) forward or
backward to raise and lower the deflector. Raise the deflector
to throw snow further.
Chute Rotation Adjustment
A. Electric Chute Rotation Control (if equipped)
While the engine is running, press either side of the chute
rotation switch (A, Figure 9) to rotate the chute left or right.
B. In-Dash Chute Rotation Control (if equipped)
Locate the in-dash chute rotation crank (B, Figure 9). Rotate
the crank to rotate the chute.
C. Lefthand Crank Chute Rotation Control (if
equipped)
Locate the lefthand chute rotation crank (C, Figure 9) Rotate
the crank to rotate the chute.
Filling the Fuel Tank
Please refer to the engine operator’s manual for information
about filling the fuel tank, and for fuel recommendations.
Wheel Release - Lock Pins (if equipped)
Wheels equipped with a traction lock pin (A, Figure 7) can be
completely released by removing the pin and installing it in
the outer axle hole. Reverse this process to engage the drive
wheel.
14
Page 15
Not for
Reproduction
Clearing a Clogged Discharge Chute
DANGER
Amputation hazard
The discharge chute contains a rotating impeller to
throw snow. Fingers can quickly become caught in
the impeller. Never clear or unclog the discharge
chute with your hands. Always use a clean-out tool.
Failure to observe these safety instructions will result
in traumatic amputation or severe laceration.
Hand contact with the rotating impeller inside the discharge chute is the most common cause of injury associated with snowthrowers. Never use your hands to clean out
the discharge chute.
To safely clear a clogged discharge chute, follow
these instructions:
1. Shut OFF the engine.
2. Wait 10 seconds to be sure the impeller blades have
stopped rotating.
3. Always use a clean-out tool, not your hands.
This snowthrower is equipped with two height adjust skids,
secured to the outside of the auger housing. These elevate
the front of the snowthrower.
When removing snow from a hard surface area such as a
paved driveway or walk, adjust the skids up to bring the front
of the snowthrower down.
When removing snow from gravel-covered or uneven surfaces, raise the front of the snowthrower by moving the skids
down. This will help to prevent rocks and other debris from
being picked up and thrown by the augers.
1. Determine how much clearance you want between the
scraper bar at the bottom of the auger housing and the
ground. If clearing a gravel surface, enough ground clearance is needed to prevent the unit from picking up rocks.
2. Place a block equal to the desired ground clearance
under the scraper bar.
3. Loosen the skid shoe mounting nuts (A, Figure 11) and
push the skid shoe (B) down until it touches the ground.
Re-tighten mounting nuts.
4. Set the skid shoe on the other side at the same height.
A clean-out tool (A, Figure 10) is provided with the unit.
Skid Shoe Height Adjustment
DANGER
Amputation hazard
The discharge chute contains a rotating impeller to throw
snow. Fingers can quickly become caught and traumatic
amputation or severe laceration will result. Hand contact
with the rotating impeller inside the discharge chute is the
most common cause of injury associated with snowthrowers.
Turn the engine OFF, wait for all moving parts to stop, and
remove the engine key before performing any maintenance
or repairs.
WARNING
Thrown objects hazard
Objects such as gravel, rocks, or other debris, if struck
by the impeller, may be thrown with sufficient force to
cause personal injury, property damage, or damage to the
snowthrower.
Be sure to set the skid shoes at the proper height to maintain ground clearance for the type of surface being cleared.
Off-Season Storage
If the unit will be stored for 30 days or more at the end of the
season, the following steps are recommended to prepare it
for storage. Always refer to the operator’s manual for important details if the unit is to be stored for an extended period.
Please refer to the engine operator’s manual for engine storage information.
NOTE: Fuel must be removed or treated to prevent gum
deposits from forming in the tank, filter, hose, and carburetor
during storage.
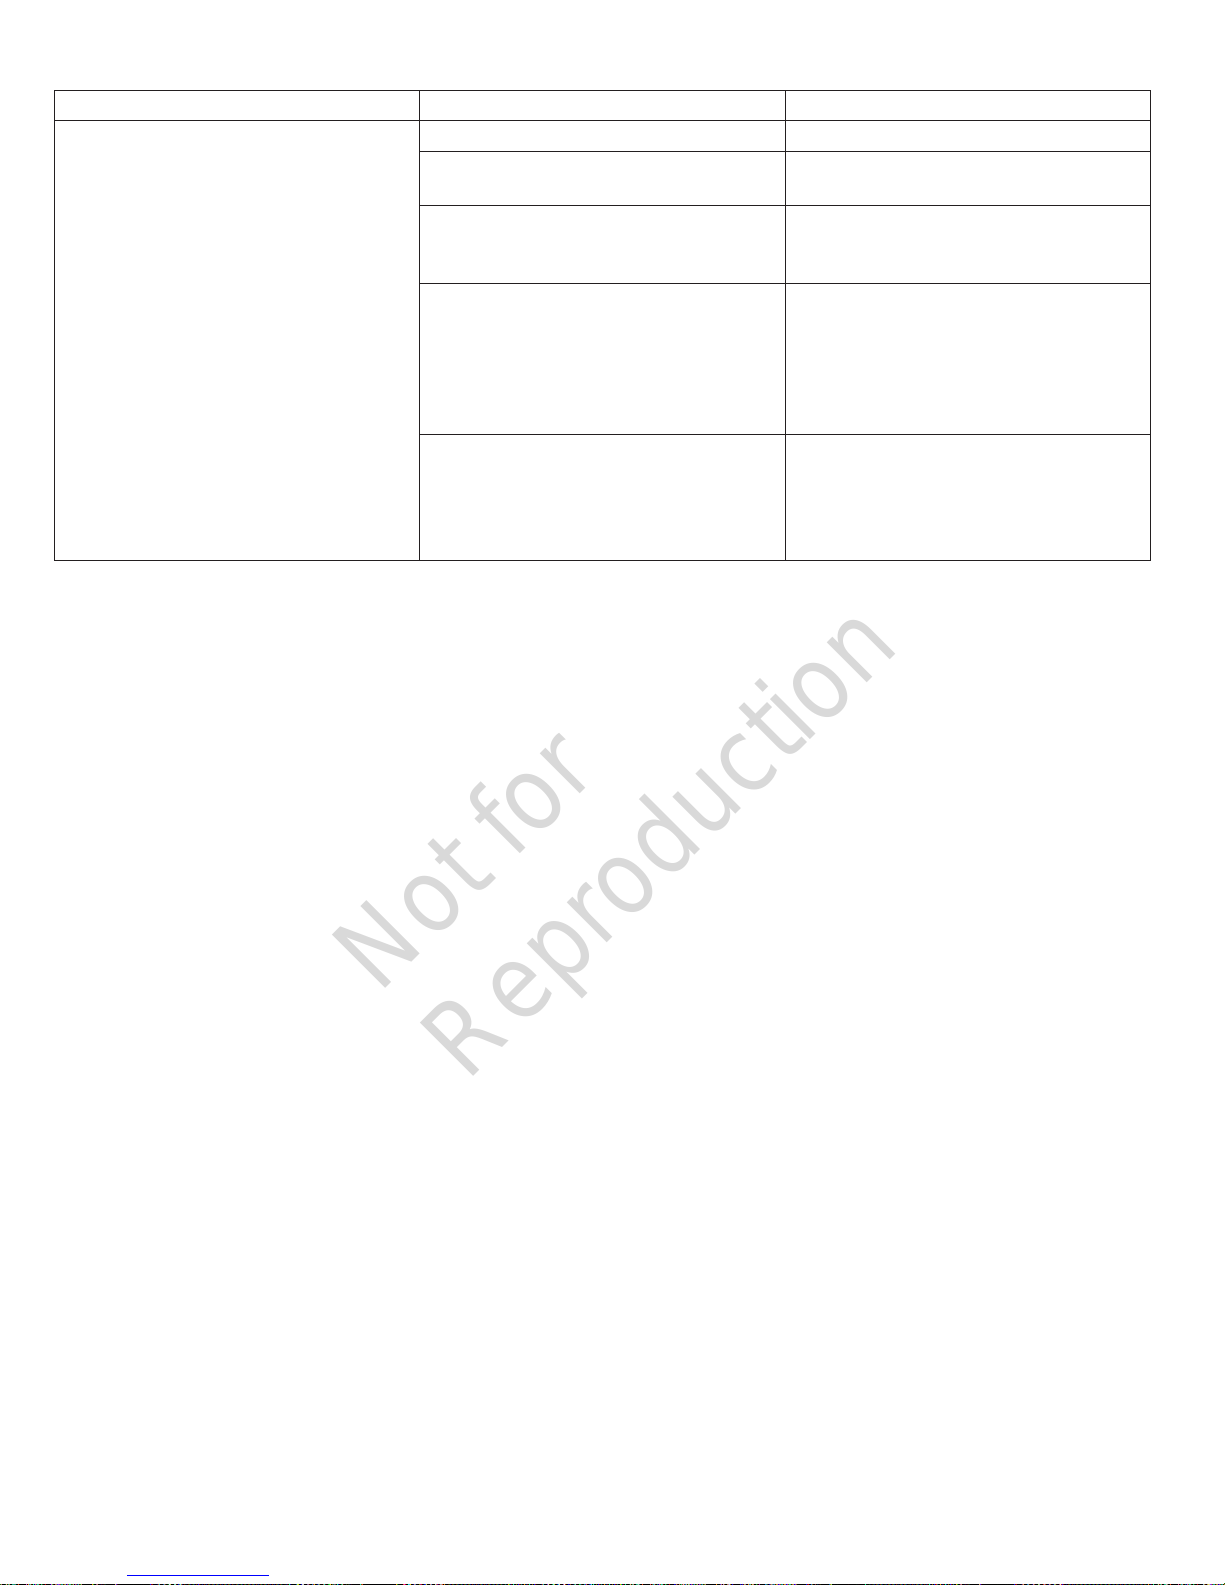
WARNING
Fire and explosion hazard
Gasoline is highly flammable and its vapors are explosive.
Fumes may travel to a distant ignition source and an explosion and/or fire may result.
Handle gasoline carefully. Never store the unit, with fuel in
the tank, indoors or in a poorly ventilated enclosure where
fuel fumes could reach an open flame, spark, pilot light,
such as a furnace, water heater, or clothes dryer.
• Thoroughly clean the unit.
• Lubricate all lubrication points (see Maintenance section).
• Make sure all nuts, bolts, and screws are securely fastened. Inspect all visible moving parts for damage, breakage, and wear. Replace if necessary.
• Touch up all rusted or chipped paint surfaces; sand lightly before painting.
English
en
15
Page 16
Not for
Reproduction
• Cover the bare metal parts of the snowthrower housing
auger, and the impeller with rust preventative.
• If possible, store your unit indoors and cover it to give
protection from dust and dirt.
• If the machine must be stored outdoors, cover with a
heavy tarpaulin.
To Return to Service:
• Fill the fuel tank with a fresh fuel.
• Make sure all fasteners are tight.
• Make sure all guards, shields, and covers are in place.
Maintenance
Maintenance Schedule
Before Each Use
• Check engine oil level
• Perform Safety System Test
Every 8 Hours or Daily
• Check engine oil level
Every 25 Hours or Annually
• Lubricate control lever linkages
• Lubricate the auger assembly
• Lubricate the discharge chute rotation gear and
deflector
• Lubricate the hex shaft with 5w-30 synthetic motor oil,
and chains with grease
• Lubricate the disc drive system (if equipped)
Every 50 Hours or Annually
• Check muffler and spark arrester (if equipped)
• Check tire pressure
Engine Maintenance
For engine maintenance schedules and procedures, please
refer to the engine operator’s manual.
Control Lever Linkage Lubrication
WARNING
Amputation hazard
It is critical for safe operation of the unit that the controls
disengage when released. Under no circumstances should
the unit be used if the controls do not function properly.
See Safety Systems Tests to confirm correct operation.
Lubricate the unit at the locations show in Figure 12. Where
an oil can is pictured, lubricate with engine oil. Where a
grease gun is pictured, lubricate with lithium grease.
Auger Assembly Lubrication
Lubricate Auger Gear Box
The auger gear box is lubricated at the factory and should
not require additional lubrication. However, if lubricant has
leaked out or the auger gear box has been serviced, additional lubricant may be required.
To check the auger gear box grease level, remove the filler
plug (A, Figure 13). Using a piece of wire as a dipstick, check
to confirm the presence of grease in the gearbox. If grease is
visible, do not add. If grease is not visible, add the required
lubricant. Use the color of the remaining grease to determine
what type of lubricant to add. If the grease is white in color,
add Lubriplate GR132 Grease or equivalent. If the grease is
brown in color, add EP1 lithium grease. Gearbox lubricant
capacity is 3-1/4 ounces (92 grams).
NOTE: Some auger gear boxes do not have a filler plug.
Please see your dealer for maintenance.
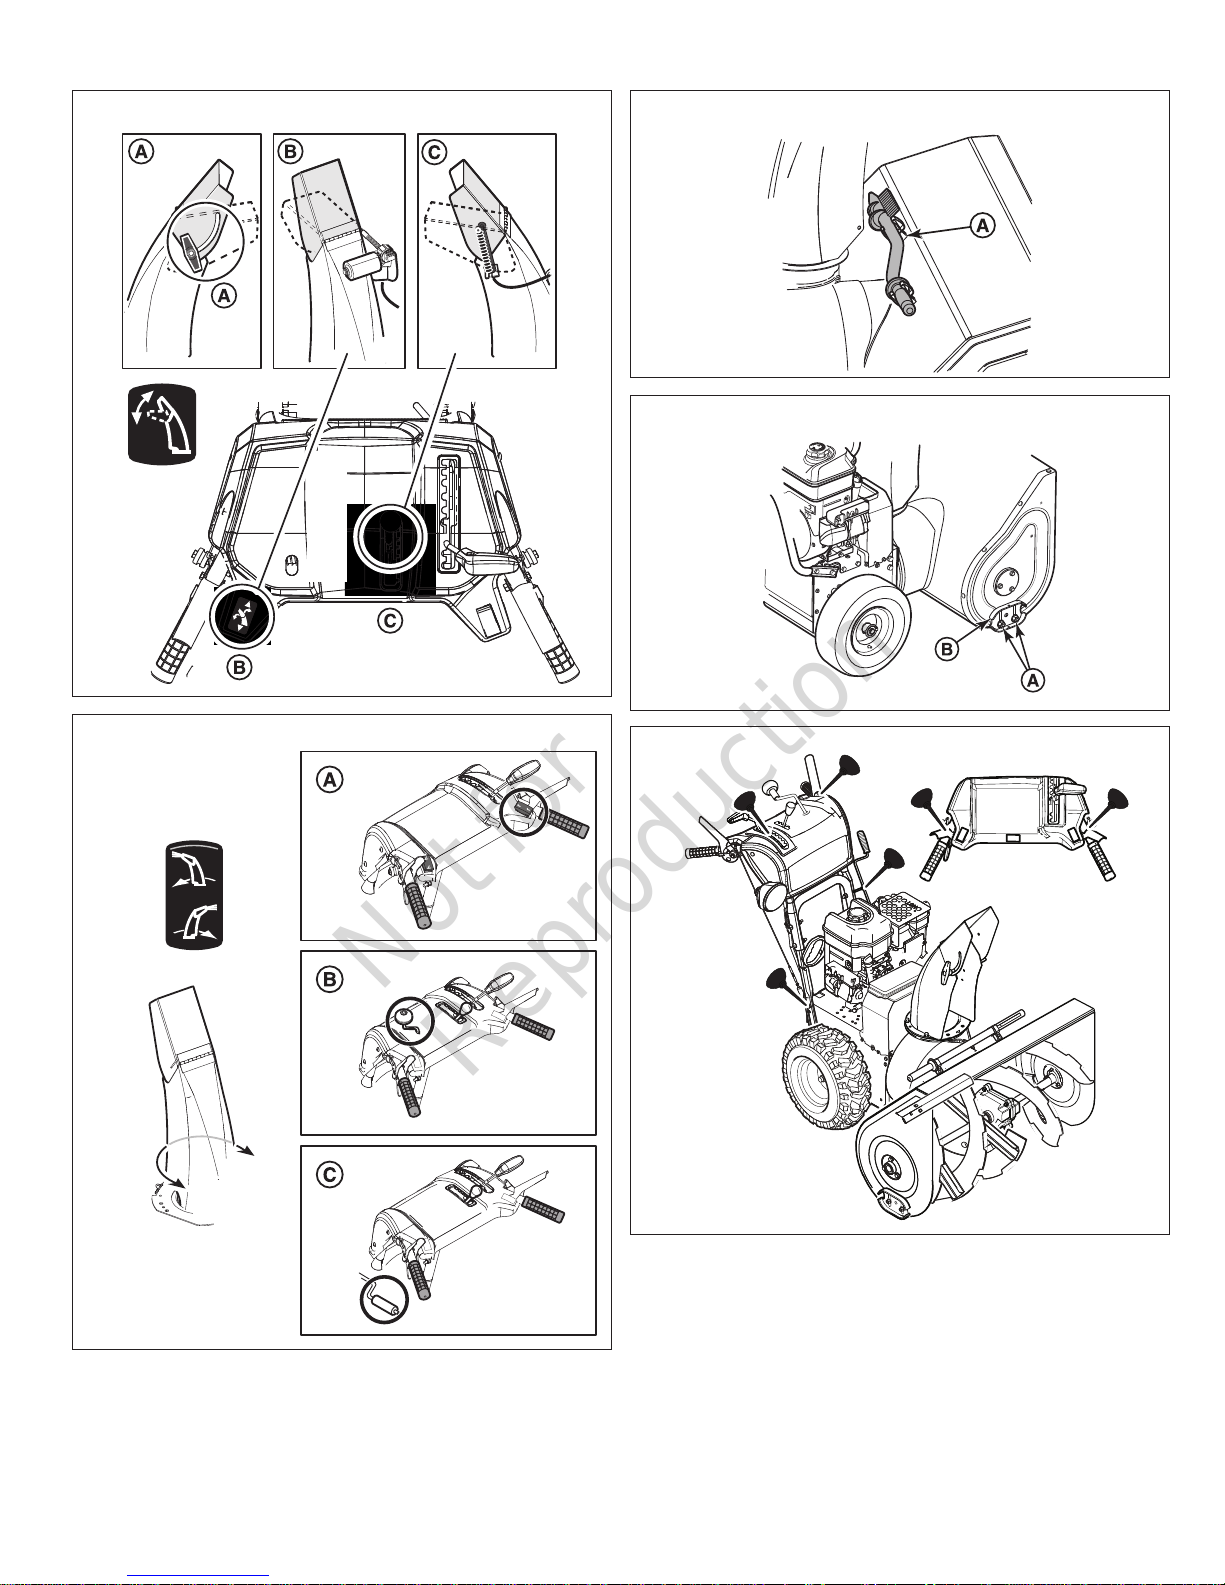
Lubricate Auger Shaft Fittings
Using a grease gun, lubricate the auger shaft fittings (B,
Figure 13). Refer to the Maintenance Schedule. Each time a
shear bolt or pin (C) is replaced, the auger shaft MUST be
greased.
For storage or when replacing shear bolts or pins, remove
the shear bolts or pins (C), lubricate the shaft fittings (B),
and rotate the augers several times to distribute the grease.
Reinstall the shear bolts or pins when complete.
NOTE: Some models are not equipped with grease fittings
and are exempt from these requirements.
Discharge Chute and Deflector
Lubrication
Lubricate the chute rotation gear (Figure 14) with grease, and
the deflector mechanism with automotive type oil. Refer to
the Maintenance Schedule.
Where an oil can is pictured, lubricate with engine oil. Where
a grease gun is pictured, lubricate with lithium grease.
Hex Shaft and Chain Lubrication (if
equipped)
The hex shaft and drive chains must be lubricated at the
interval specified in the Maintenance Schedule. Please have
your authorized dealer perform this maintenance.
Gear Drive System (if equipped)
The gear drive system requires no maintenance or adjustment. Should you have a problem with the gear drive system,
contact your authorized service dealer.
16
Page 17

Not for
Reproduction
Traction Cable Inspection
The cables are adjusted at the factory and no adjustment
should be necessary. However, if the cables have become
stretched or are sagging, adjustment will be necessary.
Please see your dealer for this adjustment.
Traction Drive Belt Adjustment
The traction drive belt is under constant spring tension and
does not require any adjustment. If the traction drive belt is
slipping, see your authorized dealer.
Determine Which Shear Bolt/Pin System
You Have
Augers are secured to the auger shaft with special hardware
designed to break if an object becomes lodged in the auger
housing.
Please refer to the Illustrated Parts List to determine if your
unit requires a shear pin, shear bolt, or shear bolt and spacer
combination.
Use only factory spec hardware or equivalent.
Speed Control Rod Adjustment
If the speed control rod requires adjustment, see an authorized dealer.
Easy Turn™ Cable Adjustment
If the Easy Turn cable has stretched, the gears will not disengage when the control lever is activated. Adjust the cable
using the following procedure.
1. Turn the engine off and remove the key.
2. Loosen the jam nut (A, Figure 15).
3. Turn the adjustment nut (B) to lengthen or shorten the
cable. The cable should be tightened until all slack is
removed from the lever. However, it must not engage the
Easy Turn without depressing the control lever.
4. Tighten the jam nut (A).
Auger Cable Adjustment
WARNING
Amputation hazard
Over-tightening the auger cable may cause the auger drive
to engage without depressing the auger drive control.
Follow the adjustment procedure to ensure the cable is not
over-tightened.
1. With the auger control lever released, the hook (A, Figure
16) should barely touch the lever (B) without raising it.
There can be a maximum of 1/32” (0.8 mm) clearance.
2. To adjust, loosen the nut (C) by holding the adjusting
flats (D) and turning the nut. Then, turn the adjusting
flats and hold the adjustment screw (E). The adjustment
screw is a phillips screw and the head can be held or
turned by inserting a screwdriver through the spring (F).
3. Hold the adjusting flats and tighten the nut.
WARNING
Amputation hazard
The discharge chute contains a rotating impeller to throw
snow. Fingers can quickly become caught and traumatic
amputation or severe laceration will result. Hand contact
with the rotating impeller inside the discharge chute is the
most common cause of injury associated with snowthrowers.
Turn the engine OFF, wait for all moving parts to stop, and
remove the engine key before performing any maintenance
or repairs.
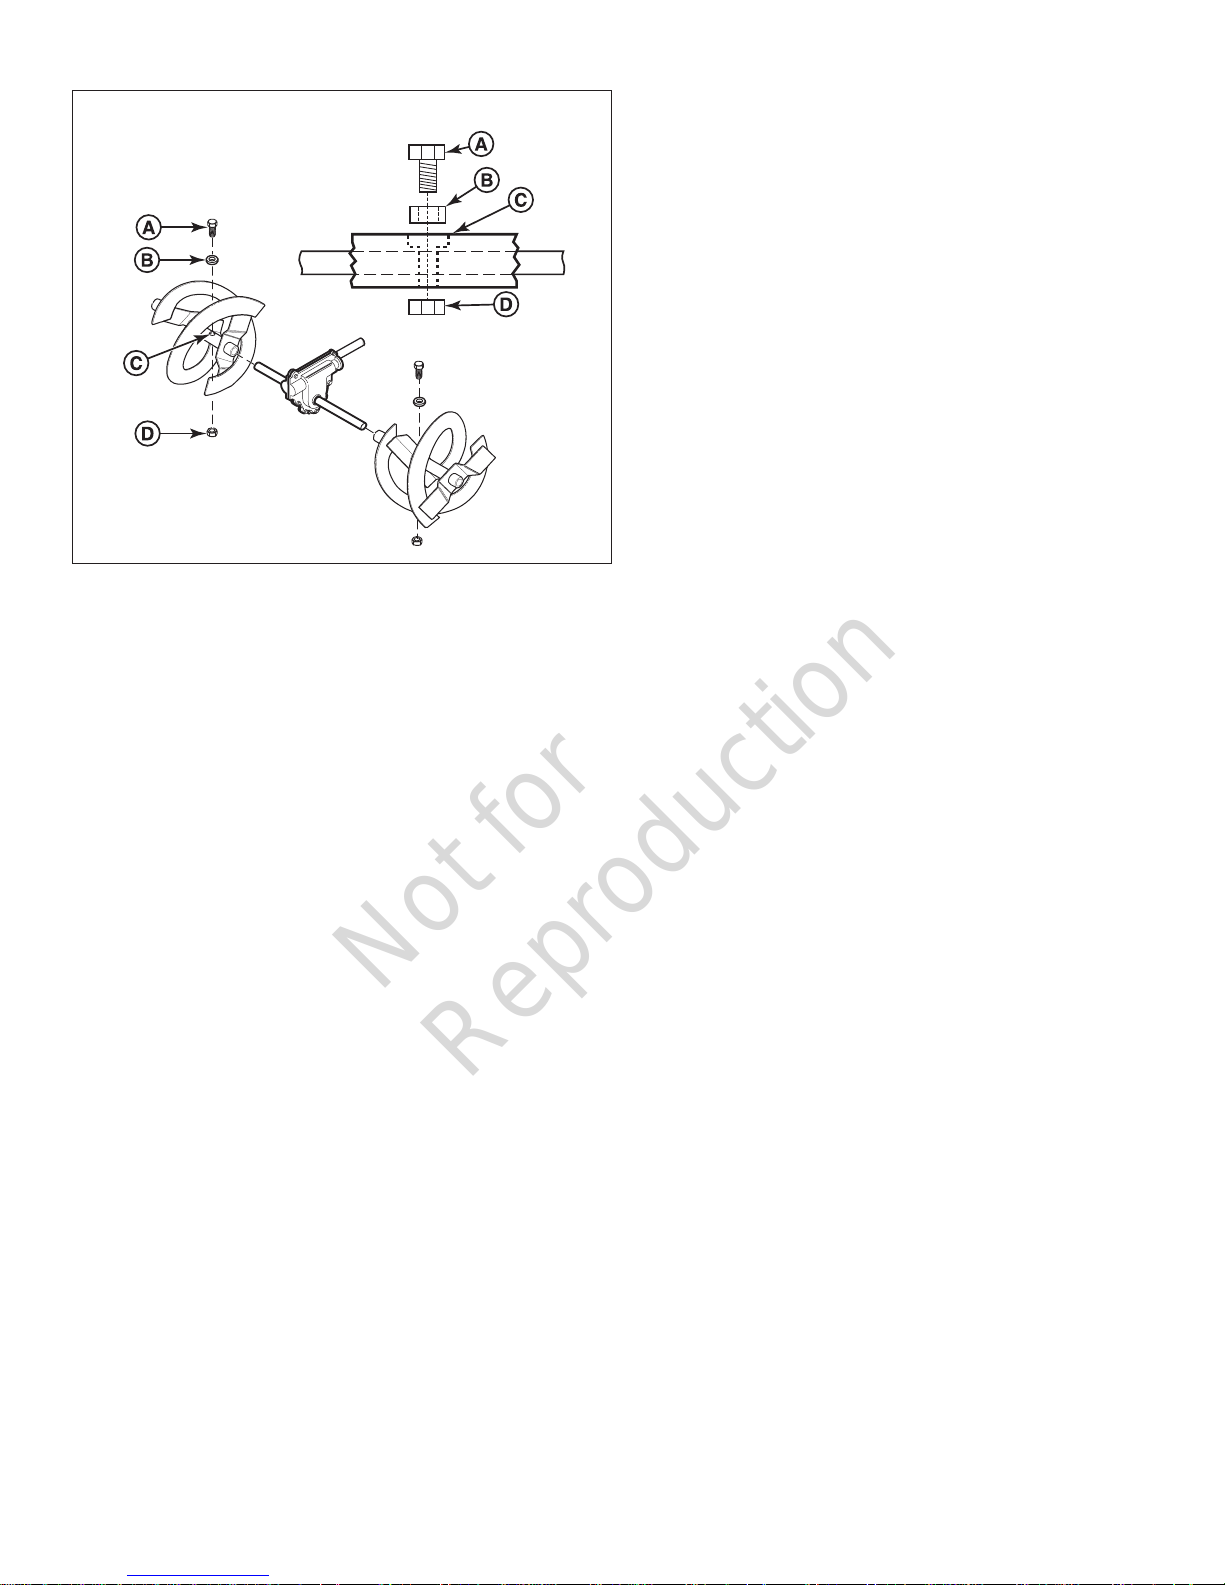
Shear Pin Replacement
1. Turn off the engine and wait for all moving parts to stop.
2. Remove the existing shear pin.
3. Lubricate the auger grease fittings and rotate the auger
to lubricate the auger shaft.
NOTE: Some models are not equipped with grease fittings
and are exempt from this step.
4. Align the shear pin holes. Install the new shear pin (A,
Figure 17) through the auger shaft (C). Secure with a cotter pin (B).
Shear Bolt Replacement
1. Turn off the engine and wait for all moving parts to stop.
2. Remove the existing shear bolt.
3. Lubricate the auger grease fittings. Spin the auger to
lubricate the auger shaft.
4. Align the bolt holes. Install the new shear bolt (A, Figure
18) through the auger shaft (B). Secure with the locknut
(C).
4. To ensure that the auger does not engage unless the
control is fully depressed, please perform the Safety
System Tests. The auger must stop within 5 seconds
of the control being released.
English
en
17
Page 18

Not for
Reproduction
Shear Bolt and Spacer Replacement
1. Turn off the engine and wait for all moving parts to stop.
2. Remove the existing shear bolt.
3. Lubricate the auger grease fittings. Spin the auger to
lubricate the auger shaft.
4. Align the bolt and spacer holes. Install the new shear bolt
(A, Figure 19) and spacer (B), through the auger shaft
(C). Secure with the locknut (D).
Checking Tire Pressure
Tire pressure should be checked periodically. Recommended
tire pressure varies by tire manufacturer. A good rule of
thumb is to inflate the tire up to, but not exceeding, the “Max
Inflation” stamped on the side-wall of the tire.
18
Page 19

Not for
Reproduction
Troubleshooting
Troubleshooting Chart
Perform the inspection or repair as indicated in the Troubleshooting Chart.
Problem Look for Remedy
Auger does not stop within 5 seconds
after right control lever is released.
Discharge chute or deflector does not
work (electric).
Discharge chute or deflector does not
work
(remote-manual).
Drive fails to move snowthrower at slow
speeds.
Engine fails to start. Key is in OFF position. Set key to ON position.
Engine starts hard or runs poorly. Water in fuel, or old fuel. Drain tank. (Dispose of fuel at an autho-
Excessive vibration. Loose parts or damaged impeller. Stop engine immediately. Tighten all
Snowthrower does not stop when traction control lever is released.
Scraper bar does not clean hard surface.
Unit fails to propel itself. Drive belt loose or damaged. Replace drive belt. See authorized
Free Hand control (if equipped) is
ACTIVE.
Auger drive belt out of adjustment. See authorized dealer.
Auger belt guide out of adjustment. See authorized dealer.
Electrical failure. See authorized dealer.
Discharge chute or deflector out of
adjustment or needs lubrication.
Traction control out of adjustment. See authorized dealer.
Failure to prime a cold engine. Press primer button twice and restart.
Fuel shut-off valve, if equipped, is in
CLOSED position.
Out of fuel. Fill fuel tank.
Choke turned to OPEN/RUN with cold
engine.
Engine flooded. Move the choke to OPEN/RUN posi-
No spark. See authorized dealer.
Spark plug faulty, fouled, or gapped
improperly.
Fuel cap vent is blocked. Clear vent.
Traction control out of adjustment. See authorized dealer.
Skid shoes and scraper bar improperly
adjusted.
Incorrect adjustment of traction drive
cable.
Worn or damaged friction disc. Replace friction disc. See authorized
Release both auger control and Free
Hand control (if equipped) to stop
auger.
Adjust and/or lubricate control linkage.
Turn valve to OPEN position.
Turn choke to CLOSED/START, set
throttle to FAST.
tion, move throttle to FAST position,
and crank until the engine starts.
rized hazardous waste facility.) Fill with
fresh fuel.
See authorized dealer.
hardware. If vibration continues, have
the unit serviced by an authorized
dealer.
Raise or lower skid shoes and scraper
bar.
dealer.
See authorized dealer.
dealer.
English
en
19
Page 20
Not for
Reproduction
Problem Look for Remedy
Unit fails to discharge snow. Auger drive belt loose or damaged. See authorized dealer.
Auger control cable not adjusted correctly.
Broken shear pin or shear bolt. Replace shear pin or bolt. Refer to
Discharge chute clogged. Stop engine immediately. Always use
Foreign object lodged in auger. Stop engine immediately. Always use
Adjust auger control cable. Refer to
Maintenance section of this manual.
Maintenance section of this manual, or
see an authorized dealer.
the clean-out tool to clear a clogged
discharge chute, not your hands. Clean
discharge chute and inside of auger
housing. Refer to Discharge Chute
Warning in the Operator Safety section.
the clean-out tool to clear a clogged
chute, not your hands. Remove object
from auger. Refer to WARNINGS in the
Operator Safety section.
20
Page 21

Not for
Reproduction
English
en
21
Page 22
Not for
Reproduction
Výrobky, kterých se týká tento návod
Tento návod týká následujících produktů:
1695856
1695994
1695995
1695996
1695996-00
1695996-01
1695996-02
1695997
1695997-00
1695997-01
1695997-02
1696009
1696010
1696011
1696011-00
1696011-01
1696011-02
1696012
1696012-00
1696012-01
1696012-02
1696053
1696054
1696055
1696055-00
1696055-01
1696056
1696061
1696062
1696062-00
1696062-01
1696063
1696065
1696066
1696067
1696199-00
1696199-01
1696200-00
1696201-00
1696201-01
1696202-00
1696202-01
1696203-00
1696203-01
1696206-00
1696207-00
1696207-01
1696212-00
1696212-01
1696220-00
1696221-00
1696221-01
1696222-00
1696222-01
1696223-00
1696223-01
1696224-00
1696224-01
1696226-00
1696227-00
1696227-01
1696228-00
1696229-00
1696230-00
1696253-00
1696253-01
1696254-00
1696254-01
1696255-00
1696255-01
1696256-00
1696256-01
1696257-00
1696257-01
1696277-00
1696278-00
1696300-00
1696301
1696301-00
1696302-00
1696381-00
1696382-00
1696390-00
1696391-00
1696392-00
1696481-00
1696482-00
1696483-00
1696484-00
1696485-00
1696486-00
1696487-00
1696488-00
1696489-00
1696490-00
1696491-00
1696493-00
1696494-00
1696495-00
1696522-00
1696523-00
1696524-00
Obsah návodu:
Bezpečnost obsluhy ..........................................................6
Bezpečnostní testy systému .......................................... 11
Funkce a ovládání ........................................................... 11
Provoz ............................................................................... 12
Bezpečnost obsluhy
Bezpečností varovné značky a signální
slova
Bezpečnostní varovný symbol poukazuje na možné riziko
poranění. Signální slova (NEBEZPEČÍ, VAROVÁNÍ nebo POZOR)
jsou používána s varovnou značkou k upozornění na stupeň
vážnosti rizika. Bezpečnostní značka může být navíc použita k
reprezentaci typu rizika. Signální slovo UPOZORNĚNÍ se používá k
upozornění na postupy, které nejsou spojeny s poraněními.
NEBEZPEČÍ ukazuje riziko, které, jestliže se mu nevyvarujete,
povede ke smrti nebo vážnému poranění.
VAROVÁNÍ ukazuje na riziko, které, jestliže se mu nevyvarujete,
může vést ke smrti nebo vážnému poranění.
POZOR ukazuje na riziko, které, jestliže se ho nevyvarujete,
může vést k malému či střednímu poranění.
UPOZORNĚNÍ ukazuje na situaci, která by mohla vést k poškození
výrobku.
Tabulky značek rizik
Značky rizik pro sněhovou frézu
Značka Význam Značka Význam
Bezpečnostní
informace o
rizicích, která
mohou vést k
poraněním.
Riziko amputace rotor.
Před provozem či
servisem jednotky
si přečtěte návod
k obsluze a
porozumějte mu.
Před prováděním
servisu vyndejte
klíč.
ÚDRŽBA ............................................................................ 16
Řešení problémů ............................................................. 19
POZNÁMKA: Další informace naleznete v Průvodci pro kontakt se
zákazníky a v Pokynech pro nastavení.
Obrázky v tomto dokumentu jsou pro ilustraci, doprovázejí
dokument s pokyny, se kterým jsou dodány. Vaše jednotka se může
od zobrazených obrázků lišit. LEVÁ a PRAVÁ jsou zobrazeny z
pozice obsluhy.
Systém svíčky u této sněhové frézy splňuje kanadskou normu
ICES-002.
6
Riziko amputace rotor.
Riziko amputace
- nedotýkejte se
pohybujících se
částí.
Riziko požáru. Riziko výbuchu.
Riziko šoku. Riziko toxických
Riziko amputace rotující šnek.
Nebezpečí
odhazovaných
předmětů.
plynů.
Page 23
Not for
Reproduction
Značka Význam Značka Význam
Riziko horkého
povrchu.
Udržujte
bezpečnou
vzdálenost.
Nedovolte přístup
dětem.
Při delším použití
se doporučuje
ochrana uší.
Používejte
ochranné brýle.
Riziko zpětného
rázu
Obecná bezpečnostní varování
VAROVÁNÍ
• Nejčastější poranění při použití sněhové frézy vznikají při
kontaktu rukou s poháněčem odpadového nosníku.
• Tato sněhová fréza je schopna amputovat ruce a nohy
a odhazovat předměty. Přečtěte si a dodržujte všechny
bezpečnostní pokyny v tomto návodu. Jestliže tak neučiníte,
může to vést ke smrti či vážným poraněním.
VAROVÁNÍ
Před spuštěním této jednotky si přečtěte, porozumějte a
dodržujte všechny pokyny na sněhové fréze a v návodu k
obsluze.
Nedodržení bezpečnostních pokynů v tomto návodu může vést
ke smrti či vážnému poranění.
• Důkladně se seznamte s ovladači a s řádným použitím
sněhové frézy.
• Ujistěte se, že před použitím sněhové frézy jste řádně
vyškoleni.
• Ujistěte se, že víte, jak rychle přístroj zastavit a deaktivovat.
• Nikdy nedovolte, aby se sněhovou frézou zacházely osoby
bez řádných pokynů.
• Jestliže má být fréza uložena na delší dobu, vždy postupujte
podle pokynů v návodu k obsluze.
• Udržujte bezpečnostní nálepky a, jestliže je to nutné,
vyměňte je.
• Jestliže jste k tomu nebyli řádně vyškoleni, nikdy se sami
nepokoušejte provést žádné větší opravy sněhové frézy.
Nesprávný servis sněhové frézy může vést k nebezpečnému
provozu, poškození zařízení a porušení záruky.
NEBEZPEČÍ
Odpadový žlab zahrnuje rotujícího šneka k odhazování sněhu.
Odpadový žlab nikdy nečistěte rukama. V rotoru může snadno
dojít k zachycení prstů. Vždy používejte čistící nástroj.
Nedodržení těchto bezpečnostních pokynů může vést k
amputacím či vážným laceracím.
NEBEZPEČÍ
Nohy a ruce udržujte z dosahu rotujících částí. Rotující části
mohou přijít do kontaktu s rukama, nohama, vlasy, oděvy či
doplňky.
Nedodržení těchto bezpečnostních pokynů může vést k
amputacím či vážným laceracím.
• Při čištění, opravách či kontrolách sněhové frézy se ujistěte,
že motor je v poloze VYPN, svíčka je odpojená a všechny
pohyblivé části se zastavily.
• Pod rotující části či do jejich blízkosti nedávejte ruce nebo
nohy. Nikdy neblokujte výstup.
• Frézu nikdy nepoužívejte bez řádných krytů a jiných
ochranných pomůcek.
• Jestliže běží motor, sněhovou frézu nikdy neponechávejte
bez dozoru. Vždy deaktivujte šneka a kontrolu trakce,
vypněte motor a vyndejte klíčky.
• Udržujte všechny volné oděvy z dosahu přední části frézy
a šneku. Šály, rukavice, šňůrky a volné oděvy se mohou
rychle zachytit v rotujícím zařízení a může dojít k amputacím.
Svažte si dlouhé vlasy a sundejte šperky.
• Po ukončení odstraňování sněhu frézu nechte několik minut
běžet, aby se předešlo zamrznutí sběrače a rotoru.
• Jestliže se fréza nepoužívá nebo je převážená, deaktivujte
pohon sběrače/rotoru.
Česky
cs
7
Page 24
Not for
Reproduction
VAROVÁNÍ
Šnek může sebrat předměty a vyhodit je ze žlábku. Sníh nikdy
neodhazujte ve směru chodců, nikomu nedovolujte pohyb před
sněhovou frézou. Nedodržení těchto bezpečnostních pokynů
může vést ke smrti či vážnému poranění.
• Při provozu či úpravách a opravách vždy používejte
bezpečnostní brýle nebo chrániče očí.
• Vždy dbejte na směr odhazování sněhu. Může dojít k
poškození blízkých chodců, zvířat a budov odhozenými
předměty.
• Při práci se sněhovou frézou dávejte pozor na okolí. Přejezd
přes předměty jako kameny, rohožky, noviny, hračky ukryté
pod sněhem může vést k jejich vyhození nebo k ucpání
šneka.
• Dávejte si velký pozor při překračování vjezdů, chodníků či
silnic.
• Umístění sběrače nastavte tak, aby se nedotýkal štěrku
nebo povrchu z rozbitých kamenů.
• Se sněhovou frézou nikdy nepracujte poblíž sklem
ohrazených prostor, automobilů, oken a podobných bez
toho, abyste nejdříve upravili úhel odpadového nosníku.
• Seznamte se s místem, kde sněhovou frézu plánujete
používat. Označte hranice chodníků a vjezdů.
VAROVÁNÍ
Jestliže si obsluha neuvědomí přítomnost dětí, může dojít k
tragickým nehodám. Děti jsou často přitahované k jednotce a k
její činnosti. Nikdy se nedomnívejte, že děti zůstanou tam, kde
jste je naposledy viděli.
• Při provozu udržujte děti mimo pracovní oblast. Zařízení
často přitahuje děti. Mějte na paměti všechny přítomné
osoby.
• Dávejte pozor a jednotku vypněte, jestliže se poblíž objeví
děti.
• Nikdy nedovolte, aby s přístrojem zacházely děti.
• Jestliže se blížíte do zatáček, kde nevidíte, ke keřům,
stromům nebo jiným předmětům, které omezují vaši
viditelnost, dávejte prosím zvýšený pozor. Mohou tam být
děti.
VAROVÁNÍ
Z motoru vychází oxid uhelnatý (bezbarvý nezapáchající otravný
plyn). Vdechování oxidu uhelnatého může vést k nevolnostem,
mdlobám nebo smrti.
• Motor startujte a provozujte venku.
• Motor nespouštějte uvnitř, i když jsou otevřená okna nebo
dveře.
VAROVÁNÍ
Palivo a jeho páry jsou velice hořlavé a výbušné. S palivem vždy
zacházejte velice opatrně.
Nedodržení těchto bezpečnostních pokynů může vést k požáru či
explozi, které způsobí vážné popáleniny nebo smrt.
TANKOVÁNÍ
• Vypněte motor a před sundáním krytu nádrže a přidáním
paliva ho nechte nejméně 2 minuty chladnout.
• Tankujte venku nebo v dobře ventilovaném prostoru.
• Nádrž nepřeplňujte. Aby se umožnila expanze benzínu,
netankujte nad spodní část hrdla nádrže.
• Palivo udržujte mimo otevřený oheň, jiskry, pilotní světla,
teplo nebo jiné zdroje vzplanutí.
• Palivové trubičky, uzávěr a příslušenství často kontrolujte pro
známky poškození či úniků. Jestliže je to nutné, nahraďte je
novými.
• Používejte schválenou nádobu na palivo.
• Jestliže dojde k rozlití paliva, před dalším startováním
vyčkejte, než znovu vyschne.
Při startování motoru
• Ujistěte se, že svíčky, dusítko, uzávěr nádrže a filtr (kde
existují) jsou na svém místě a bezpečné.
• Nestartuje s odstraněnými svíčkami.
• Jestliže dojde k rozlití paliva, nepokoušejte se nastartovat
motor, sněhovou frézu namísto toho přeneste z místa rozlití
a vyvarujte se tvorbě jakýchkoli zdrojů ohně do té doby, než
dojde k odchodu par paliva.
• Motor nepřesycujte. Postupujte podle pokynů pro startování
motoru v tomto návodu.
• Jestliže dojde k přeplnění motoru palivem, nastavte sytič,
kde existuje, do polohy OTEVŘÍT/SPUSTIT, plyn, kde
existuje, přeneste do polohy RYCHLE a startujte, až se
motor nastartuje.
Při obsluze zařízení
• Sněhovou frézu nenaklánějte na úhel, který vede k rozlití
paliva.
• NEHASTE karburátor k zastavení motoru.
• Motor nikdy nenechávejte běžet s vyndaným čističem
vzduchu nebo vzduchovým filtrem (kde existují).
Při výměně oleje
• Jestliže vypouštíte olej z horní plnící trubice, musí být
prázdná nádrž, protože jinak může dojít k úniku paliva, což
může vést k požáru či explozi.
Při přepravě zařízení
• Přepravujte s PRÁZDNOU nádrží či s ventilem paliva v
poloze OFF.
Při skladování paliva či zařízení s palivem v nádrži
• Skladujte odděleně od kamen, trub, ohřívačů vody či jiných
zařízení, která mají pilotní světlo nebo jiný zdroj vznětu,
protože by mohlo dojít ke vznícení palivových plynů.
8
Page 25
Not for
Reproduction
VAROVÁNÍ
Bezpečný provoz sněhové frézy si vyžaduje řádnou péči a
údržbu motoru.
• Před nastartováním motoru vyřaďte rychlosti a přejděte do
neutrálu.
• Před začátkem odklízení sněhu vyčkejte, než se motor
přizpůsobí venkovní teplotě.
• Pro všechny sněhové frézy s elektrickými motory či
elektrickými startéry používejte uzemněnou zástrčku se třemi
vidlicemi.
VAROVÁNÍ
Startování motoru vede k jiskrám.
Jiskření může zažehnout přítomné hořlavé plyny.
Může dojít k požáru nebo explozi.
• Jestliže je v oblasti únik zemního plynu nebo LPG,
nespouštějte motor.
• Nepoužívejte stlačené startovací tekutiny, protože jejich páry
jsou hořlavé.
VAROVÁNÍ
Při chodu motoru se vytváří teplo. Části motoru, zvláště tlumič,
budou velice horké.
Nedodržení těchto bezpečnostních pokynů může vést k vážným
popáleninám při kontaktu.
• Nedotýkejte se horkého motoru nebo tlumiče. Před dotykem
vyčkejte, až tlumič, cylindry motoru a lopatky motoru
vychladnou.
• Odpad odstraňte z tlumiče a oblasti cylindru.
• Namontujte zachycovač jisker a udržujte ho v dobrém stavu,
jestliže frézu budete používat na povrchu pokrytém stromy,
trávou nebo křovím.
• USA modely:Použití zařízení na jakékoli zalesněné či
zatravněné ploše bez řádně udržovaného lapače jisker
v souladu s definicí v části 4442 je porušením předpisů
Veřejných pravidel pro Kalifornii, část 4442. Jiné státy
nebo federální jurisdikce mohou mít podobné zákony.
Chcete-li zakoupit lapač jisker vhodný pro výfukový systém
nainstalovaný na tomto motoru, kontaktujte výrobce
původního zařízení, prodejce nebo dodavatele.
VAROVÁNÍ
Tuto sněhovou frézu je nutno řádně udržovat, aby se zajistil
bezpečný provoz a výkon. Nedodržení bezpečnostních pokynů v
tomto návodu může vést ke smrti či vážnému poranění.
• Při provádění jakékoli údržby nebo oprav sněhové frézy
vypněte motor, odpojte svíčky a drát svíček udržujte od nich,
aby se předešlo náhodnému startování motoru.
• Šrouby a jiné součástky pravidelně kontrolujte pro řádné
utažení.
• Matice a šrouby udržujte utažené a sněhovou frézu udržujte
v dobrém stavu.
• Nikdy neměňte bezpečnostní zařízení. Jejich řádnou funkci
pravidelně kontrolujte a, jestliže řádně nefunguje, proveďte
nutné opravy.
• Součástky jsou předmětem opotřebování, poškození nebo
zhoršení časem. Součástky často kontrolujte a nahraďte je
doporučenými součástkami, jestliže je to nutné.
• Pravidelně kontrolujte funkci ovládání. Jestliže je to nutné,
opravte a proveďte servis.
• Při opravách používejte pouze schválené náhradní díly či
stejné součástky.
• Při všech nastaveních a úpravách vždy dodržujte výrobní
specifikace.
• Používejte pouze připojení a doplňky, jako jsou závaží na
kola, vyvažovací závaží či kabiny, které jsou specifikované
výrobcem či podobné.
• Nikdy se nepokoušejte provést žádné změny, zatímco běží
motor (kromě těch případů, kdy to doporučil výrobce).
Česky
cs
9
Page 26

Not for
Reproduction
VAROVÁNÍ
Bezpečnost této sněhové frézy závisí na obsluze. Jestliže
není použita správně nebo není správně udržována, může
být nebezpečná. Pamatujte si, že jste zodpovědní za vaši
bezpečnost a za bezpečnost osob kolem vás.
• Udržujte pracovní oblast bez osob, zvláště pak malých dětí,
a zvířat.
• Důkladně prohlédněte oblast, kde sněhovou frézu budete
používat, a odstraňte všechny rohožky, saně, prkna, dráty a
jiné cizí předměty.
• Sněhovou frézu nepoužívejte bez toho, abyste na sobě měli
vhodné zimní oblečení.
• Používejte boty, které vám poskytnou oporu i na kluzkém
povrchu.
• Dávejte pozor, abyste předešli uklouznutí nebo pádu, zvláště
pak při zpětném pohybu sněhové frézy.
• Frézu nikdy nepoužívejte za špatné viditelnosti nebo bez
světla. Vždy se ujistěte o dobrém podkladu a udržujte si
pevné uchycení držadel.
• Neodstraňujte s ní sníh napříč svahů. Buďte zvláště opatrní
při změně směru na svahu. Nepokoušejte se odstraňovat
sníh na příkrých svazích.
• Nepřekračujte kapacitu zařízení tím, že se budete sníh snažit
čistit příliš rychle.
• Sněhovou frézu nikdy nepoužívejte za velké rychlosti na
kluzkém povrchu. Při zpátečním pohybu sněhové frézy
kontrolujte, co je za vámi, a dávejte pozor.
• Sněhovou frézu nepoužívejte na površích nad zemí – jako
například na střechách obytných budov, garáží, verand nebo
na jiných takových budovách.
• Obsluha musí zhodnotit své schopnosti bezpečně ovládat
zařízení tak, aby ochránila sebe i ostatní před poraněním.
• Sněhová fréza je určena pouze k odstraňování sněhu.
Nepoužívejte ji pro žádné jiné účely.
• Nevozte pasažéry.
• Po zasažení cizího předmětu zastavte motor, odpojte kabel
elektrických motorů, frézu důkladně prohlédněte pro známky
jakéhokoli poškození, a před nastartováním a dalším
použitím sněhové frézy opravte jakákoli poškození.
• Jestliže se sněhová fréza neobvykle třese, VYPNĚTE motor.
Vibrace jsou normálně známkou problému. Jestliže je to
nutné, vyhledejte autorizovaného zástupce pro opravu.
• U modelů s elektrickým startérem po nastartování motoru
odpojte napájecí kabel.
VAROVÁNÍ
Poškozené či neuzemněné kabely mohou způsobit elektrický
šok.
Elektrický šok může způsobit vážné popáleniny či smrt.
Test pomocí elektrického startéru
• Kabel napájení musí být vždy řádně uzemněn.
• Ke zdroji používejte pouze třídrátový řádně uzemněný kabel.
• Jestliže je napájecí kabel poškozen, aby se předešlo
nebezpečí, musí ho nahradit kvalifikovaná osoba.
VAROVÁNÍ
Rychlé stažení startovacího kabelu zatáhne vaši ruku nebo paži
směrem k motoru rychleji, než můžete spustit držení kabelu.
Může to vést k zlomeninám, pohmožděninám či odřeninám.
Při startování motoru:
• Při startování motoru za startovací kabel táhněte pomalu,
až ucítíte odpor, aby se předešlo zpětnému tlaku, pak
zatáhněte rychle.
Bezpečnostní štítky
Před provozem vaší jednotky si přečtěte bezpečnostní štítky.
Obrázek 1 porovnejte s níže uvedenou tabulkou. Upozornění a
varování jsou pro vaši bezpečnost. Aby se předešlo poranění
či poškození sněhové frézy, porozumějte těmto bezpečnostním
štítkům a dodržujte je.
VAROVÁNÍ
Jestliže budou jakékoli bezpečnostní štítky opotřebované,
poškozené či nečitelné, od vašeho místního prodejce si
objednejte náhradní.
A Štítek nebezpečí
žlabu
(číslo součástky
1727207)
B Štítek nebezpečí
šneka
(číslo součástky
1737867)
10
Page 27
Not for
Reproduction
Bezpečnostní testy systému
Určení toho, který test použít
Vyberte si prosím vhodný bezpečnostní test systému pro vaši
jednotku:
Modely bez ovladače Free Hand™: Na jednotkách bez nástroje
Free Hand fungují ovladače šneka a trakce nezávisle, na desce
řízení zobrazené v Obrázku 2 nebude ikona Free Hand.
Modely s ovladačem Free Hand™: Po aktivaci ovladače trakce
(levá ruka) a ovladače šneka (pravá ruka) zařízení Free Hand
obsluze umožní uvolnit ovladač šneka a ovladač nadále zůstane
aktivní do doby, než bude uvolněn ovladač trakce. Modely Free
Hand mají ikonu zobrazenou na Obrázku 2 na desce řízení.
Bezpečnostní test systému (jednotky s
ovladačem Free Hand)
NEBEZPEČÍ
Riziko amputace
Tato sněhová fréza je vybavena řadou mechanických
bezpečnostních systémů určených k udržení bezpečnosti obsluhy
při používání jednotky. Pravidelně kontrolujte provoz těchto
systémů s použitím uvedených testů bezpečnostních systémů.
Jestliže jednotky nepracuje tak, jak je uvedeno, NEPOUŽÍVEJTE
ji. Okamžitě kontaktujte autorizovaného prodejce pro servis.
Test 1 - Ovládání šneka/rotoru
Se spuštěným motorem:
Bezpečnostní test systému (jednotky
bez ručního ovladače)
NEBEZPEČÍ
Riziko amputace
Tato sněhová fréza je vybavena řadou mechanických
bezpečnostních systémů určených k udržení bezpečnosti
obsluhy při používání jednotky. Pravidelně kontrolujte provoz
těchto systémů s použitím uvedených testů bezpečnostních
systémů. Jestliže jednotky nepracuje tak, jak je uvedeno,
NEPOUŽÍVEJTE ji. Okamžitě kontaktujte autorizovaného
prodejce pro servis.
Test 1 - Ovládání šneka/rotoru
Se spuštěným motorem:
• Stiskněte směrem dolů páku ovládání šneka. (Šnek/rotor by
se měl otáčet)
• Uvolněte páku ovládání šneku. (Šnek/rotor se musí do 5
sekund zastavit)
Test 2 - Ovládání trakčního pohonu
Se spuštěným motorem a řazením v první rychlosti:
• Páku ovládání trakce stiskněte směrem dolů. (Jednotka by
se měla pohybovat dopředu)
• Uvolněte páku ovládání trakce. (Jednotka se musí zastavit)
Test 3 - Ovladač Free Hand
Se spuštěným motorem:
• Aktivujte páky šneka a trakce, pak uvolněte páku ovládání
šneka. (Oba ovladače by měly zůstat aktivní)
• Pak uvolněte páku ovládání trakce. (Oba ovladače se musí
uvolnit)
Funkce a ovládání
Funkce a ovládání motoru
Pro funkce a ovladače motoru si prosím prostudujte návod k
obsluze motoru.
Funkce a ovládání sněhové frézy
Obrázek 3 porovnejte s níže uvedenou tabulkou.
A Páka řízení šneka - Používá se
k aktivaci a deaktivaci šneka a
rotoru. K aktivaci stiskněte dolů. K
deaktivaci uvolněte.
Česky
cs
11
Page 28

Not for
Reproduction
B
1
R1
R2
2
3
C
D
E
F
G
H
I Ovladač deflektoru - ruční
Páka k volbě rychlosti -
Umožňuje obsluze používat
jednu z šest rychlostí vpřed či
dvou rychlostí zpět. K změně
rychlosti přeneste řadící páku do
požadované polohy.
POZOR: Řadící pákou
nepohybujte, když je aktivní
spojka trakčního pohonu.
Mohlo by to vést k vážnému
poškození systému pohonu.
Hřídel rotace žlabu - na desce
(kde je) - Používá se k otočení
žlabu doleva či doprava.
Hřídel rotace žlabu levostranná hřídel (kde je) -
Používá se k otočení žlabu doleva
či doprava.
Spínač rotace žlabu - elektrický
(kde je) - Používá se k otočení
žlabu doleva či doprava.
Ovladač Free Hand™ (kde
existuje) - Po aktivaci řízení
trakce (levá ruka) a řízení šneka
(pravá ruka) obsluze umožní
uvolnění páky šneka k použití
jiných ovladačů.
Páka řízení trakce - Používá se
k posunu sněhové frézy vpřed či
zpět. Stiskněte k aktivaci, uvolněte
k deaktivaci. Viz ovladač Free
Hand.
Ovladač deflektoru - na desce
(kde je) - Používá se k řízení úhlu
deflektoru (nahoru či dolů).
(kde je) - Používá se k řízení úhlu
deflektoru (nahoru či dolů).
K Řízení trakce Easy Turn™
(kde existuje) - Po aktivaci
obsluze umožní uvolnit jedno
poháněné kolo, druhé kolo bude
pokračovat při řízení pro snadné
zatáčení.
L
M
N
O
-
-
-
Spínač zahřívání držadla (kde
existuje) - Používá se k řízení
zahřívání držadel. Spínač má
tři polohy: vysokou, vypnutou a
nízkou.
POZNÁMKA: Ne všechny modely
mají zahřívání držadel. Některé
modely také mají automatické
zahřívání držadel, které je aktivní,
kdykoli fréza běží.
Čistící nástroj - Používá se k
odstranění sněhu a odpadu z
odpadového žlabu a krabice
šneka.
Protismykové botičky - Používají
se k úpravě vzdálenosti krabice
šneka od země.
Světlo (kde existuje) - osvětluje
plochu před frézou.
POZNÁMKA: Design světla se liší
podle modelu.
Provoz
Před provozem sněhové frézy
VAROVÁNÍ
Před použitím tohoto stroje si přečtěte Manuál obsluhy.
Jestliže je používán nedbale,tento stroj může být
nebezpečný.
• Sněhovou frézu nikdy nepoužívejte bez všech chráničů,
krytů a štítů.
• Při odchodu z provozní pozice vždy vypněte motor.
• Před čištěním rotoru či odpadového žlabu či před opravami
a úpravami vždy vyndejte klíč.
• Při odchodu od stroje odpojte klíč.
• Ke snížení rizika požáru stroj udržujte čistý a bez rozlitého
paliva, oleje či odpadu.
J Ovladač deflektoru - elektrický
(kde je) - Používá se k řízení úhlu
deflektoru (nahoru či dolů).
12
Page 29
Not for
Reproduction
• U modelů s elektrickým startérem před provozem odpojte
prodlužovací kabel.
• Ujistěte se, že před nastartováním motoru překontrolujete
množství oleje. Pro doporučení oleje si prostudujte návod pro
obsluhu motoru.
Provoz sněhové frézy
NEBEZPEČÍ
Riziko amputace
Odpadový žlab zahrnuje rotujícího šneka k odhazování
sněhu. V rotoru může snadno dojít k zachycení prstů.
Odpadový žlab nikdy nečistěte rukama. Vždy používejte
čistící nástroj.
Nedodržení těchto bezpečnostních pokynů může vést k
amputacím či vážným laceracím.
Nejčastější poranění při použití sněhové frézy vznikají při
kontaktu rukou s poháněčem odpadového nosníku. K čištění
odpadového nosníku nikdy nepoužívejte holé ruce.
Pro bezpečné vyčištění ucpaného odpadního žlabu
postupujte následovně:
1. VYPNĚTE MOTOR.
2. Vyčkejte 10 sekund, abyste si byli jistí, že nože
se přestali otáčet.
3. Vždy používejte nářadí k vyčištění, nikdy nepoužívejte ruce.
NEBEZPEČÍ
Riziko toxických plynů
Z motoru vychází oxid uhelnatý (bezbarvý nezapáchající
otravný plyn).
Vdechování oxidu uhelnatého může vést k nevolnostem,
mdlobám nebo smrti.
• Motor startujte a provozujte venku.
• Motor nespouštějte uvnitř, i když jsou otevřená okna nebo
dveře.
1. Nastartujte motor. Informace o motoru naleznete v návodu k
obsluze motoru.
2. Otočte kliku rotace žlabu (C nebo D, Obrázek 3) či použijte
spínač rotace žlabu (E) k nastavení směru žlabu.
3. Modely s ručním nastavením deflektoru: Uvolněte křídlovou
matici upevňující deflektor žlabu (I, Obrázek 3). K odhazování
sněhu dále deflektor zvedněte. Deflektor nastavte do
požadované polohy a utáhněte křídlovou matici.
Modely s pákou ovládání deflektoru na desce: Použijte
páku ovladače deflektoru (H, Obrázek 3) k posunu deflektoru
nahoru či dolů. K odhazování sněhu dále deflektor zvedněte.
Modely s elektrickým ovládáním deflektoru: Použijte spínač
ovladače deflektoru (J, Obrázek 3) k posunu deflektoru nahoru
či dolů. K odhazování sněhu dále deflektor zvedněte.
4. Použijte řadící páku (B, Obrázek 3) k výběru rychlosti vpřed
či zpět. Jestliže čistíte mokrý, těžký sníh, používejte nižší
rychlosti. Pro lehký sníh či při přepravě používejte vyšší
rychlosti.
POZNÁMKA: Rychlost motoru nastavte vždy na RYCHLE (plný
plyn).
5. Plně stiskněte páku ovládání šneka (A, Obrázek 3) k jeho
aktivaci. K zastavení šneka páku uvolněte.
6. Plně stiskněte a držte páku ovladače trakce/Free Hand (F/G,
Obrázek 3) k aktivaci trakce a spuštění pohybu frézy. K
zastavení páku uvolněte.
POZNÁMKA: Páku ovladače trakce uvolněte před každou změnou
rychlosti.
7. Na modelech s ovládáním Free Hand, když jsou stisknuty obě
páky šneka (A, Obrázek 3) i trakce (F), ovladač Free Hand
je aktivní. To umožní uvolnění páky ovládání šneka (A) k
použití jiných ovladačů. Šnek se bude nadále otáčet až do
uvolnění pák ovládání trakce/Free-Hand.
8. Jestliže se to vyžaduje, použijte spínač ohřívače držadla (L,
Obrázek 3) k zapnutí ohřívání.
POZNÁMKA: Ujistěte se, že zahřátá držadla vypnete před
zastavením frézy.
POZNÁMKA: Některé modely také mají automatické zahřívání
držadel, které je aktivní, kdykoli fréza běží.
9. Některé modely mají světlo (O, Obrázek 3) pro pomoc s
osvětlením plochy před frézou. Světlo funguje, když fréza běží.
VAROVÁNÍ
Nebezpečí odhazovaných předmětů
Tento stroj je schopný odhazovat předměty, které by mohly
poranit poblíž stojící osoby, či způsobit škody budovám.
Ujistěte se, že na pracovní ploše nejsou žádné osoby. Odpad
nikdy nesměrujte na jiné osoby či směrem k budovám či vozům.
Česky
cs
13
Page 30

Not for
Reproduction
Zastavení sněhové frézy
1. Uvolněte páku ovládání šneku (A, Obrázek 3).
2. Uvolněte páku ovladače trakce (F).
3. Zastavte motor. Pokyny k motoru naleznete v návodu k obsluze
motoru.
Ovladač trakce Easy Turn™, kde je
dodáván
Pro snadné zatáčení při použití sněhové frézy stiskněte páku trakce
Easy Turn (Obrázek 4).
POZNÁMKA: Některé modely mají ovladač trakce Easy Turn pouze
pro jedno kole, zatímco jiné modely ho mají pro obě kola.
POZNÁMKA: Ovladač trakce Easy Turn je obtížnější aktivovat s
těžkým nákladem. Páku aktivujte dříve, než začněte zahýbat.
Zařazení páky Easy Turn uvolní jedno z trakčních kol, druhému kolu
však nadále umožní řídit. Uvolnění páky Easy Turn automaticky
aktivuje obě kola pohonu pro plnou trakci (Obrázek 5).
Úprava deflektoru
A. Ruční ovladač deflektoru (kde je)
Uvolněte knoflík deflektoru (A, Obrázek 8), deflektor upravte do
požadované polohy a pak k upevnění znovu utáhněte knoflík. K
odhazování sněhu dále deflektor zvedněte.
B. Elektrický ovladač deflektoru (kde je)
Zatímco běží motor, stiskněte obě strany spínače deflektoru (B,
Obrázek 8) k posunu deflektoru nahoru a dolů. K odhazování sněhu
dále deflektor zvedněte.
C. Ovladač deflektoru na desce (kde je)
Páku ovládání deflektoru (C, Obrázek 8) přeneste vpřed či zpět ke
zvednutí či snížení deflektoru. K odhazování sněhu dále deflektor
zvedněte.
Úprava rotace žlabu
A. Spínač rotace žlabu - elektrický (kde je)
Zatímco běží motor, stiskněte obě strany spínače rotace žlabu (A,
Obrázek 9) k otočení žlabu doleva či doprava.
Uvolnění kola - Pojistný knoflík (kde je
dodáván)
Některé modly mají uvolnění kola s pohonem, což umožňuje
deaktivaci kola pro snadnější přepravu jednotky s vypnutým
motorem.
Modely s knoflíkem uzamčení trakce: Kola vybavená s trakčním
zamykacím knoflíkem (A, Obrázek 6) lze zcela uvolnit zatažením
knoflíku směrem od kola, až se od kola uvolní sponka. Pak otočte
knoflík tak, že sponka se nespojuje s kolem. K aktivaci kola tento
postup obraťte.
Uvolnění kola - Pojistné kolíky (kde
jsou dodávány)
Kola vybavená s trakčními pojistnými kolíky (A, Obrázek 7) mohou
být zcela uvolněna odstraněním kolíku a jeho vložením do vnějšího
otvoru na nápravě. K aktivaci kola tento postup obraťte.
B. Ovladač rotace žlabu na desce (kde je)
Nalezněte ovladač rotace žlabu na terminálu (B, Obrázek 9). K
otočení žlabu otočte pákou.
C. Levý spínač rotace žlabu (kde je)
Nalezněte levou hřídel rotačního žlabu (C, Obrázek 9). Otočte hřídel
k rotaci žlabu.
Naplňte palivovou nádrž
Informace o plnění nádrže palivem a doporučení paliva naleznete v
návodu k provozu motoru.
14
Page 31

Not for
Reproduction
Čistění ucpaného odpadového nosníku
NEBEZPEČÍ
Riziko amputace
Odpadový žlab zahrnuje rotujícího šneka k odhazování
sněhu. V rotoru může snadno dojít k zachycení prstů.
Odpadový žlab nikdy nečistěte rukama. Vždy používejte
čistící nástroj.
Nedodržení těchto bezpečnostních pokynů může vést k
amputacím či vážným laceracím.
Nejčastější poranění při použití sněhové frézy vznikají při
kontaktu rukou s poháněčem odpadového nosníku. K čištění
odpadového nosníku nikdy nepoužívejte holé ruce.
Pro bezpečné vyčištění ucpaného odpadního žlabu
postupujte následovně:
1. VYPNĚTE MOTOR.
2. Vyčkejte 10 sekund, abyste si byli jistí, že nože
se přestali otáčet.
3. Vždy používejte nářadí k vyčištění, nikdy nepoužívejte ruce.
Čistící nástroj (A, Obrázek 10) je poskytován s jednotkou.
Úprava protismykových botiček
NEBEZPEČÍ
Riziko amputace
Odpadový žlab zahrnuje rotujícího šneka k odhazování sněhu.
Velice rychle může dojít k zachycení prstů a jejich amputacím
či vážným poraněním. Nejčastější poranění při použití sněhové
frézy vznikají při kontaktu rukou s poháněčem odpadového
nosníku.
Než začnete provádět jakoukoli údržbu či opravy, VYPNĚTE
motor, vyčkejte, až se pohyblivé části zastaví, a pak vyndejte klíč
motoru.
VAROVÁNÍ
Nebezpečí odhazovaných předmětů
Předmìty jako kameny, štěrk nebo jiný odpad mohou po
odhození šnekem letět takovou silou, že způsobí poranění, škody
na majetku nebo poškození sněhové frézy.
Ujistěte se, že pluhy jsou v řádné výšce k udržování volného
prostoru pro typ čištěného povrchu.
Tato sněhová fréza má pluhy s dvěma různými výškami, tyto jsou
připevněny na vnější straně krabice šneka. Tyto smyky zvedají
přední stranu frézy.
Při odstraňování sněhu z tvrdých podkladů, jako jsou dlažbové
vjezdy či chodníky, upravte pluhy tak, že je na přední straně frézy
přenesete dolů.
Při odstraňování sněhu z kamenitých či nerovných podkladů
zvedněte přední část sněhové frézy posunem pluhů směrem dolů.
Toto pomůže zabránit sbíraní kamenů a jiného odpadu a jeho
odhazováním šnekem.
1. Určete, kolik prostoru chcete mezi pluhem na spodní straně
krabice šneka a zemí. Jestliže čistíte štěrk, požaduje se
dostatečný prostor na to, aby se předešlo sběru kamenů
jednotkou.
2. Pod pluh umístěte kostku o stejné výšce, jako je požadovaná
vzdálenost od země.
3. Uvolněte matice upevnění pluhu (A, Obrázek 11) a pluh
zatlačte dolů (B), až se dotkne země. Znovu utáhněte matici.
4. Na druhé straně výšku upravte na stejnou velikost.
Skladování mimo sezónu
Jestliže bude sněhová fréza skladována po dobu 30 dnů či déle po
sezóně, pro přípravu ke skladování se doporučují následující kroky.
Jestliže má být jednotka uložena po delší dobu, vždy překontrolujte
důležité údaje v návodu k obsluze.
Informace o skladování motoru naleznete v návodu k obsluze
motoru.
POZNÁMKA: Palivo je nutno vypustit či ošetřit, aby se při
skladování předešlo tvorbě depozitů v nádrži, filtru, hadicích a
karburátoru.
VAROVÁNÍ
Riziko požáru a výbuchu
Benzín je vysoce hořlavý a páry jsou také výbušné. Výpary
mohou cestovat ke vzdálenějším zdrojům vznícení, může tak
dojít k výbuchu či ohni.
S benzínem zacházejte opatrně. Motor nikdy neskladujte s
palivem v nádrži, uvnitř či ve špatně větraném uzavřeném
prostoru, kde by výpary paliva mohly dosáhnou na otevřený
plamen, jiskry nebo pilotní světlo hořáku či sušičky prádla.
• Jednotku důkladně vyčistěte.
• Promažte všechny mazací místa. Viz sekci Údržba.
• Prověřte, že všechny šrouby a matice jsou bezpečně utažené.
Prohlédněte všechny pohyblivé části pro známky poškození a
opotřebování. Jestliže je to nutné, nahraďte je novými.
• Přemalujte všechny povrchy s rezem či prasklinami; před
malováním je jemně odřete skelným papírem.
• Pokryjte otevřené kovové části krabice šneku a rotoru sněhové
frézy s mazadlem proti rezu.
Česky
cs
15
Page 32

Not for
Reproduction
• Jestliže je to možné, jednotku ukládejte uvnitř a přikryjte ji k
ochraně před prachem a nečistotami.
• Jestliže je nutné zařízení skladovat venku, přikryjte ho silnou
plachtou.
K návratu do provozu:
• Nádrž naplňte čerstvým palivem.
• Zkontrolujte, že všechna upevnění jsou utažená.
• Ujistěte se, že všechny vodiče, kryty a chrániče jsou na místě.
ÚDRŽBA
Plán údržby
Před každým použitím
• Překontrolujte množství oleje
• Proveďte bezpečnostní test systému
Každých 8 hodin či denně
• Překontrolujte množství oleje
Každých 25 hodin nebo jednou za rok
• Namažte spojení ovládací páky
• Namažte šneka
• Namažte rotační část a deflektor žlabu
• Hnací hřídel namažte syntetickým motorovým olejem 5w-30
a řetězy namažte mazivem
• Namažte diskový pohon (kde existuje)
Každých 50 hodin nebo jednou za rok
• Překontrolujte tlumič a zachycovač jisker (kde je)
• Překontrolujte nahuštění pneumatiky
Údržba motoru
Pro postupy a plány údržba motoru si prosím prostudujte návod k
obsluze motoru.
Mazání šneka
Namažte krabici rychlostí šneka
Převodovka šneka je namazaná z továrny a nevyžaduje si další
mazání. Jestliže mazací látka unikne či jestliže byl proveden servis
převodů šneka, může se vyžadovat další mazání.
Ke kontrole množství maziva vyndejte plnící uzávěr (A, Obrázek 13).
S použitím kusu drátu jako měrky překontrolujte přítomnost maziva
v převodovce. Jestliže je mazivo viditelné, nepřidávejte ho. Jestliže
viditelné není, přidejte požadované mazivo. Barvu zbývajícího
maziva použijte k určení typu lubrikantu. Jestliže je bílé, přidejte
Lubriplate GR123 či ekvivalent. Jestliže je hnědé, přidejte lithiové
mazadlo EP1. Kapacita pro mazání převodovky je 92 gramů.
POZNÁMKA: Některé převodovky šneků nemají zátku. K této
úpravě prosím kontaktujte autorizovaného prodejce.
Namažte upevnění hřídele šneka
S použitím mazací pistole namažte upevnění hřídele šneka (B,
obrázek 13). Viz Plán údržby. Po každé náhradě kolíku či závlačky
(C) MUSÍ být pohon šneku namazán .
Ke skladování či při výměně šroubů či kolíků vyndejte šrouby či
kolíky (C), namažte upevnění hřídele (B) a šneka několikrát otočte k
distribuci mazadla. Po dokončení vložte šrouby či kolíky zpět.
POZNÁMKA: Některé modely nemají části na mazání a tuto činnost
si nevyžadují.
Mazání odpadového žlabu a deflektoru
Namažte rychlosti rotace žlabu (Obrázek 14) s mazadlem a
mechanismus deflektoru s motorovým olejem. Viz Plán údržby.
Kde je zakreslena olejová konévka, použijte motorový olej. Kde je
zakreslen přístroj s mazadlem, použijte lithiové mazadlo.
Mazání hřídele a řetězu (kde jsou)
Hřídel a hnací řemeny je nutno mazat v intervalech uvedených
v Plánu údržby. O tuto službu požádejte vašeho autorizovaného
prodejce.
Mazání spojení páky řízení
VAROVÁNÍ
Riziko amputace
Pro bezpečné ovládání jednotky je důležité, aby byly ovladače
po uvolnění deaktivovány. Jednotka nesmí být v žádném
případě používána, jestliže ovladače řádně nefungují. Viz Testy
bezpečnostních systémů k potvrzení správného provozu.
Jednotku namažte na místech zobrazených v Obrázku 12. Kde je
symbol konévky s olejem, použijte motorový olej. Kde je zakreslen
přístroj s mazadlem, použijte lithiové mazadlo.
16
Převodový systém (kde existuje)
Převodový systém si nevyžaduje údržbu či úpravy. Jestliže
máte problém s převodovým systémem, kontaktujte vašeho
autorizovaného servisního prodejce.
Page 33

Not for
Reproduction
Kontrola trakčního kabelu
Kabely byly upraveny v továrně a neměla by být nutná jejich další
úprava. Jestliže se však kabely natáhnou či propadávají, bude
nezbytná úprava. K této úpravě prosím kontaktujte autorizovaného
prodejce.
Úprava řemenu trakce
Řemen trakce má stálé napětí a nevyžaduje si úpravy. Jestliže
trakční řemen padá, kontaktujte autorizovaného prodejce.
Úprava tyče řízení rychlosti
Jestliže si tyč řízení rychlosti vyžaduje úpravu, kontaktujte
autorizovaného prodejce.
Úprava kabelu Easy Turn™
Jestliže došlo k natažení kabelu Easy-Turn, nedojde k vyřazení
rychlostí při aktivaci kontrolní páky. Kabel upravte následovně.
1. Vypněte motor a vyndejte klíček.
2. Uvolněte matici (A, Obrázek 15).
Určete, který systém šroubů či sponek
máte
Šnek je k hřídeli šneka připevněn s pomocí speciálních částí, které
jsou vyrobeny tak, aby se zlomily, jestliže v krabici šneka uvázne
předmět.
Použijte prosím ilustraci součástek k určení toho, zda vaše jednotka
potřebuje šroub či šroub a kombinaci podložek.
Používejte pouze části splňující požadavky výrobce či ekvivalent.
VAROVÁNÍ
Riziko amputace
Odpadový žlab zahrnuje rotujícího šneka k odhazování sněhu.
Velice rychle může dojít k zachycení prstů a jejich amputacím
či vážným poraněním. Nejčastější poranění při použití sněhové
frézy vznikají při kontaktu rukou s poháněčem odpadového
nosníku.
Než začnete provádět jakoukoli údržbu či opravy, VYPNĚTE
motor, vyčkejte, až se pohyblivé části zastaví, a pak vyndejte klíč
motoru.
3. Otočte matici (B) k prodloužení či zkrácení kabelu. Kabel je
nutno utáhnout tak, až bude z páky odstraněna jakákoli volnost.
Nesmí však dojít k žádné aktivaci kabelu Easy Turn bez stisku
kontrolní páky.
4. Utáhněte pojistnou matici (A).
Úprava kabelu šneka
VAROVÁNÍ
Riziko amputace
Nadměrné natažení kabelu šneka může vést k aktivaci pohonu
šneka bez stisku ovladač.
Postupujte podle následujícího postupu k zajištění toho, že kabel
není přetažený.
1. Při uvolněné páce ovládání šneka by se měl hák (A, Obrázek
16) sotva dotýkat páky (B) bez jejího zvedání. Maximální
mezera je 0,8 mm.
2. K úpravě uvolněte matici (C) držením upravovacích ploch
(D) a otočením matice. Upravovací plochy pak otočte a držte
upravovací šroub (E). Upravovací šroub je určený pro křížový
šroubovák, lze ho držet či otočit vložením šroubováku skrze
pružinu (F).
Výměna sponek
1. Vypněte motor a vyčkejte, až se zastaví všechny pohyblivé
části.
2. Vyndejte stávající sponku.
3. Namažte upevnění šneka, pak ho otočte k namazání hřídele
šneka.
POZNÁMKA: Některé modely nemají části na mazání a tento krok
si nevyžadují.
4. Vyrovnejte otvory na sponky. Vložte nový kolík (A, Obrázek 17)
skrze hřídel šneka (C). Upevněte s pomocí kolíku (B).
Náhrada šroubu
1. Vypněte motor a vyčkejte, až se zastaví všechny pohyblivé
části.
2. Vyndejte stávající šroub.
3. Namažte upevnění šneka. Šneka otočte k lubrikaci všech částí.
4. Vyrovnejte otvory na šrouby. Vložte nový šroub (A, Obrázek
18) skrze hřídel šneka (B). Upevněte s pomocí matice (C).
3. Upravovací plochy držte dolů a utáhněte matici.
4. Aby se zajistilo, že šnek se neaktivuje bez toho, aby byl
plně stisknut ovladač, proveďte prosím Bezpečnostní testy
systému. Šnek se musí zastavit do 5 sekund od uvolnění
ovladače.
Česky
cs
17
Page 34

Not for
Reproduction
Výměna šroubu a podložky
1. Vypněte motor a vyčkejte, až se zastaví všechny pohyblivé
části.
2. Vyndejte stávající šroub.
3. Namažte upevnění šneka. Šneka otočte k lubrikaci všech částí.
4. Vyrovnejte otvory na šrouby a podložky. Vložte nový šroub (A,
Obrázek 19), podložku (B) skrze hřídel šneka (C). Upevněte s
pomocí matice (D).
Kontrola tlaku pneumatik
Tlak pneumatiky je nutno kontrolovat pravidelně. Doporučený
tlak pneumatiky se liší podle výrobce pneumatiky. Doporučuje se
nafouknutí pneumatiky na tlak až do Maximálního tlaku, který je
uveden na straně pneumatiky.
18
Page 35

Not for
Reproduction
Řešení problémů
Diagram řešení problémů
Proveďte kontrolu či opravu uvedenou v diagramu řešení problémů
PROBLÉM Zkontrolujte Řešení
Šnek nezastaví do 5 pěti sekund po
uvolnění pravé páky.
Odpadový žlab či deflektor nepracuje
(elektrický).
Odpadový žlab či deflektor nepracuje.
(dálkový návod)
Pohon neposunuje sněhovou frézu při
nízkých rychlostech.
Motor nestartuje. Klíč je ve VYPNUTÉ poloze. Klíč dejte do ZAPNUTÉ polohy.
Obtížné startování motoru či problémy s
funkcí motoru.
Nadměrné vibrace. Volné části nebo poškozený rotor. Okamžitě zastavte motor. Utáhněte
Sněhová fréza se nezastaví po uvolnění
páky ovládání trakce.
Škrabací lišta nečistí tvrdé povrchy. Nastavení botiček a pluhů potřebuje upravit. Zvedněte či snižte botičky a pluh.
Jednotka se nezvedá. Hnací řemen je uvolněný nebo poškozený. Vyměňte hnací řemen. Kontaktujte
Nástroj Free Hand (kde je) je AKTIVNÍ. Uvolněte oba ovladače šneka a Free Hand
(kde je) k zastavení šneka.
Řemen pohonu šneka je mimo polohu. Kontaktujte autorizovaného prodejce.
Vodič řemenu šneka je mimo polohu. Kontaktujte autorizovaného prodejce.
Elektrické selhání. Kontaktujte autorizovaného prodejce.
Odpadový žlab či deflektor je mimo polohu
nebo potřebuje mazání.
Ovladač trakce je mimo polohu. Kontaktujte autorizovaného prodejce.
Selhání při přípravě studeného motoru. Tlačítko přípravy stiskněte dvakrát a znovu
Palivový ventil, kde je, je v ZAVŘENÉ
poloze.
Došlo palivo. Naplňte palivovou nádrž.
Sytič otočen na OTEVŘÍN/SPUSTIT se
studeným motorem.
Motor je zalitý. Sytič přeneste do polohy OTEVŘÍT/
Nedochází k jiskře. Kontaktujte autorizovaného prodejce.
Voda v palivu či staré palivo. Vyprázdněte nádrž. (Palivo zlikvidujte na
Rozbitá svíčka či nesprávná mezera. Kontaktujte autorizovaného prodejce.
Otvor palivové zátky je zablokovaný. Otvor vyčistěte.
Ovladač trakce je mimo polohu. Kontaktujte autorizovaného prodejce.
Nesprávné nastavení kabelu trakce. Kontaktujte autorizovaného prodejce.
Opotřebované či poškozené frikční kolečko. Vyměňte ho. Kontaktujte autorizovaného
Upravte a/nebo namaže spojení ovladačů.
startujte.
Ventil přeneste do OTEVŘENÉ polohy.
Sytič otočte na ZAVŘEN/START, plyn
nastavte na RYCHLE.
SPUSTIT, plyn do polohy RYCHLE a
startujte, až dojde k nastartování motoru.
schválené skládce pro nebezpečný odpad.)
Natankujte čerstvé palivo.
všechny součástky. Jestliže vibrace
pokračují, nechte jednotku opravit
oprávněným prodejcem.
autorizovaného prodejce.
prodejce.
Česky
cs
19
Page 36

Not for
Reproduction
PROBLÉM Zkontrolujte Řešení
Jednotka neodhazuje sníh. Řemen pohonu šneka je uvolněn nebo
poškozen.
Řídící kabely šneka nejsou řádně
nastavené.
Zlomená sponka nebo šroub. Vyměňte sponku nebo šroub. Prostudujte
Odpadový nosník je ucpaný. Okamžitě zastavte motor. K čištění
Ve šneku se zachytil cizí předmět. Okamžitě zastavte motor. K čištění
Kontaktujte autorizovaného prodejce.
Upravte řídící kabely šneka. Prostudujte si
část Údržba tohoto návodu.
si část Údržba tohoto návodu či kontaktujte
oprávněného prodejce.
ucpaného žlabu vždy používejte čistící
nástroj, nepoužívejte holé ruce. Vyčistěte
odpadový nosník a vnitřek šneka.
Prostudujte si Varování pro odpadový
žlábek v části Bezpečnost obsluhy.
ucpaného žlabu vždy používejte čistící
nástroj, nepoužívejte holé ruce. Odstraňte
předmět ze šneka. Prostudujte si
VAROVÁNÍ v části Bezpečnost obsluhy.
20
Page 37

Not for
Reproduction
Česky
cs
21
Page 38

Not for
Reproduction
Produkte, für die diese
Bedienersicherheit
Bedienungsanleitung gilt
Diese Bedienungsanleitung gilt für folgende Produkte:
1695856
1695994
1695995
1695996
1695996-00
1695996-01
1695996-02
1695997
1695997-00
1695997-01
1695997-02
1696009
1696010
1696011
1696011-00
1696011-01
1696011-02
1696012
1696012-00
1696012-01
1696012-02
1696053
1696054
1696055
1696055-00
1696055-01
1696056
1696061
1696062
1696062-00
1696062-01
1696063
1696065
1696066
1696067
1696199-00
1696199-01
1696200-00
1696201-00
1696201-01
1696202-00
1696202-01
1696203-00
1696203-01
1696206-00
1696207-00
1696207-01
1696212-00
1696212-01
1696220-00
1696221-00
1696221-01
1696222-00
1696222-01
1696223-00
1696223-01
1696224-00
1696224-01
1696226-00
1696227-00
1696227-01
1696228-00
1696229-00
1696230-00
1696253-00
1696253-01
1696254-00
1696254-01
1696255-00
1696255-01
1696256-00
1696256-01
1696257-00
1696257-01
1696277-00
1696278-00
1696300-00
1696301
1696301-00
1696302-00
1696381-00
1696382-00
1696390-00
1696391-00
1696392-00
1696481-00
1696482-00
1696483-00
1696484-00
1696485-00
1696486-00
1696487-00
1696488-00
1696489-00
1696490-00
1696491-00
1696493-00
1696494-00
1696495-00
1696522-00
1696523-00
1696524-00
Sicherheitshinweissymbol und
Signalwörter
Dieses Sicherheitswarnsymbol zeigt eine potenzielle
Verletzungsgefahr an. Ein Signalwort (GEFAHR, WARNUNG oder
VORSICHT) wird zusammen mit dem Warnsymbol verwendet, um
das Ausmaß der Gefährdung anzuzeigen. Ein Gefahrensymbol
kann verwendet werden, um die Art der Gefahr darzustellen. Das
Signalwort HINWEIS wird für Informationen zu Praktiken verwendet,
die keine Verletzungsgefahr in sich bergen.
GEFAHR weist auf eine Gefahr hin, die zum Tod oder zu
schweren Verletzungen führt, wenn sie nicht vermieden wird.
WARNUNG weist auf eine Gefahr hin, die zum Tod oder zu
schweren Verletzungen führen könnte, wenn sie nicht vermieden
wird.
VORSICHT weist auf eine Gefahr hin, die zu leichten bis mit-
telschweren Verletzungen führen könnte, wenn sie nicht vermieden
wird.
ACHTUNG weist auf eine Situation hin, in der das Produkt beschädigt werden könnte.
Tabellen der Gefahrensymbole
Schneefräsen-Gefahrensymbole
Inhaltsverzeichnis:
Bedienersicherheit .............................................................6
Prüfungen des Sicherheitssystems .............................. 11
Funktionen und Bedienelemente .................................. 11
Bedienung ........................................................................ 12
Wartung ............................................................................ 16
Fehlersuche und -behebung .......................................... 19
HINWEIS: Weitere Informationen finden Sie im KundenkontaktLeitfaden und in den Vorbereitungsanweisungen.
Die Abbildungen in diesem Dokument sind repräsentativ und zur
Ergänzung der textlichen Anleitung gedacht, zu der sie gehören.
Ihre Maschine kann u. U. von den Abbildungen abweichen. LINKS
und RECHTS werden entsprechend der Bedienerposition angegeben.
Das Zündsystem dieser Schneefräse entspricht der kanadischen
Norm ICES-002.
Symbol Bedeutung Symbol Bedeutung
Warnhinweis zu
Gefahren, die zu
Verletzungen führen können.
Gefahr der
Abtrennung von
Gliedmaßen
- rotierendes
Gebläserad.
Gefahr der
Abtrennung von
Gliedmaßen
- rotierendes
Gebläserad.
Gefahr der
Abtrennung von
Gliedmaßen - keine
sich bewegenden
Teile berühren.
Brandgefahr! Explosionsgefahr!
Lesen und verstehen Sie die
Bedienungsanleitung,
bevor Sie mit der
Maschine arbeiten
oder diese warten.
Vor der Durchführung
von Wartungsarbeiten
den Schlüssel
abziehen.
Gefahr der
Abtrennung von
Gliedmaßen - rotierende Schnecke
Gefahr durch
umhergeschleuderte
Gegenstände.
6
Stromschlaggefahr. Gefahr durch giftige
Dämpfe.
Page 39

Not for
Reproduction
Symbol Bedeutung Symbol Bedeutung
Gefahr durch heiße
Oberflächen.
Sicherheitsabstand
bewahren.
Bei längerer Arbeit
mit der Maschine wird
ein Gehörschutz empfohlen.
Schutzbrille tragen!
GEFAHR
Der Auswurfschacht verfügt über ein rotierendes Wurfgebäse,
um Schnee auszuwerfen. Beseitigen Sie Blockierungen im
Auswurfschacht nie mit den Händen. Ihre Finger könnten schnell
im Gebläserad eingequetscht werden. Verwenden Sie immer ein
Reinigungswerkzeug.
Die Nichteinhaltung dieser Sicherheitshinweise kann dazu führen, dass Gliedmaßen abgetrennt oder schwer verletzt werden.
Kinder auf sicheren
Abstand halten.
Rückschlaggefahr.
Allgemeine Warnhinweise
WARNUNG
• Handkontakt mit dem rotierenden Gebläserad im Inneren
des Auswurfschachts ist die häufigste Ursache von
Verletzungen im Zusammenhang mit Schneefräsen.
• Diese Schneefräse kann Gliedmaßen abtrennen und
wirft Gegenstände aus. Lesen und befolgen Sie strikt alle
Sicherheitshinweise dieser Bedienungsanleitung. Das
Nichtbeachtung dieser Hinweise kann schwere oder tödliche
Verletzungen zur Folge haben.
WARNUNG
Lesen und befolgen Sie vor Bedienung dieser Maschine
alle Anweisungen auf der Schneefräse und in der
Bedienungsanleitung.
Die Nichtbeachtung der Sicherheitshinweise in dieser Bedienungsanleitung kann zum Tod oder zu schweren
Verletzungen führen.
• Sie müssen mit den Bedienelementen und der ordnungsgemäßen Bedienung der Schneefräse vertraut sein.
• Lassen Sie sich vor der Nutzung der Schneefräse entsprechend schulen.
• Sie müssen wissen, wie Sie die Einheit schnell stoppen und
die Bedienelemente schnell auskuppeln können.
• Lassen Sie niemanden die Schneefräse ohne entsprechende Einweisung bedienen.
• Folgen Sie bei längerer Lagerung der Schneefräse den
Anweisungen in der Bedienungsanleitung.
• Belassen Sie Sicherheits- und Anleitungsaufkleber an
ihrem Platz oder ersetzen Sie sie, falls es erforderlich ist.
• Versuchen Sie niemals größere Reparaturen an der
Schneefräse vorzunehmen, es sei denn Sie wurden entsprechend ausgebildet. Der unsachgemäße Gebrauch der
Schneefräse kann zu gefährlichen Situationen, zu Schäden
an der Maschine und zum Verlust der Gewährleistung führen.
GEFAHR
Halten Sie Körperteile und Kleidungsstücke von den rotierenden Teilen fern. Die rotierenden Teile können mit den Händen,
Füßen, dem Haar, Kleidungsstücken oder ähnlichem in Kontakt
kommen oder diese einklemmen.
Die Nichteinhaltung dieser Sicherheitshinweise kann dazu
führen, dass Gliedmaßen abgeschnitten oder schwer verletzt
werden.
• Vergewissern Sie sich vor Reinigungs-, Reparatur- oder
Inspektionsarbeiten an der Schneefräse stets, dass der
Motor ABGESTELLT, das Zündkabel von der Zündkerze
abgezogen wurde und alle beweglichen Teile stillstehen.
• Kommen Sie nicht mit Händen oder Füßen in die Nähe
oder unter rotierende Teile. Halten Sie sich immer von der
Auswurföffnung fern.
• Betreiben Sie die Schneefräse niemals, ohne dass
Schutzvorrichtungen und andere Sicherheitseinrichtungen
an der Maschine angebracht und funktionstüchtig sind.
• Lassen Sie die Schneefräse niemals unbeaufsichtigt, wenn
der Motor läuft. Kuppeln Sie immer die Schnecke und die
Fahrantriebselemente aus, stellen Sie den Motor ab und entfernen Sie die Schlüssel.
• Halten Sie lose Kleidungsstücke vom vorderen Bereich der
Schneefräse und der Schnecke fern. Weite Kleidungsstücke,
Schals, Fausthandschuhe, Schnüre und Hosen können
schnell in rotierenden Teile eingezogen werden, was zum
Abtrennen von Gliedmaßen führen kann. Stecken Sie lange
Haare hoch und legen Sie Schmuck ab.
• Lassen Sie die Maschine nach der Schneeräumung einige
Minuten weiterlaufen, um ein Einfrieren des Sammlers/
Gebläserades zu verhindern.
• Schalten Sie den Antrieb des Sammlers/Gebläserads aus,
wenn die Schneefräse transportiert oder nicht betrieben
wird.
Deutsch
de
7
Page 40

Not for
Reproduction
WARNUNG
Gegenstände können durch die Schnecke aufgenommen und
aus dem Auswurf geschleudert werden. Werfen Sie den Schnee
niemals auf umstehende Personen und sorgen Sie dafür, dass
niemand vor der Schneefräse steht. Die Nichtbeachtung der
Sicherheitshinweise in dieser Bedienungsanleitung kann zum
Tod oder zu schweren Verletzungen führen.
• Tragen Sie stets eine Schutzbrille oder Augenschutz
während der Bedienung sowie bei Einstellungs- oder
Wartungsarbeiten.
• Beachten Sie immer die Richtung, in die der Schnee ausgeworfen wird. Passanten, Tiere oder Eigentum können durch
weggeschleuderte Gegenstände verletzt bzw. beschädigt
werden.
• Achten Sie bei der Benutzung der Schneefräse immer auf
die Umgebung. Wenn Sie über Gegenstände fahren, die im
Schnee versteckt liegen, z. B. Kies, Fußabtreter, Zeitungen,
Spielsachen und Steine, dann können diese durch den
Auswurfschacht geschleudert werden oder die Schnecke
blockieren.
• Gehen Sie äußerst vorsichtig vor, wenn Sie auf Wegen,
Pfaden oder Straßen aus Schotter arbeiten oder diese überqueren.
• Stellen Sie die Höhe des Sammelgehäuses auf Räumung
von Schotter oder Kiesoberflächen ein.
• Betreiben Sie die Schneefräse in der Nähe von Glaswänden,
Fahrzeugen, Fensterschächten, Laderampen usw. nur mit
geeigneter Einstellung des Auswurfwinkels.
• Machen Sie sich mit dem Gebiet vertraut, in dem Sie die
Schneefräse verwenden werden. Sperren Sie Geh- und
Fahrwege während der Arbeit ab.
WARNUNG
Unzureichende Aufmerksamkeit des Bedieners in der Nähe von
Kindern kann zu tragischen Unfällen führen. Kinder sind häufig
an Maschinen und deren Betrieb interessiert. Gehen Sie niemals
davon aus, dass Kinder dort bleiben, wo Sie sie zuletzt gesehen
haben.
• Halten Sie Kinder vom Arbeitsbereich fern. Kinder sind häufig an Maschinen interessiert. Achten Sie auf umstehende
Personen.
• Seien Sie wachsam und schalten Sie die Maschine ab,
wenn sich Kinder dem Arbeitsbereich nähern.
• Lassen Sie die Maschine nie von Kindern bedienen.
• Seien sie besonders vorsichtig, wenn Sie sich unübersichtlichen Ecken, Büschen, Bäumen oder anderen Objekten
nähern, die die Sicht behindern. Es könnten Kinder anwesend sein.
WARNUNG
Der Motor setzt Kohlenmonoxid frei, ein geruchloses, farbloses
und giftiges Gas. Wird Kohlenmonoxid eingeatmet, kann dies zu
Übelkeit, Ohnmacht oder zum Tod führen.
• Starten und betreiben Sie den Motor im Freien.
• Lassen Sie den Motor nicht in geschlossenen Räumen
laufen, auch wenn Türen und Fenster geöffnet sind.
WARNUNG
Der Kraftstoff und die Dämpfe sind leicht entzündbar und es
besteht Explosionsgefahr. Gehen Sie mit Kraftstoff besonders
sorgfältig um.
Die Nichtbeachtung dieser Sicherheitshinweise kann zu einem
Brand oder einer Explosion mit schweren oder tödlichen
Verletzungen führen.
Bei der Betankung
• Stellen Sie den Motor ab und lassen Sie diesen für mindestens 2 Minuten abkühlen, bevor Sie den Tankdeckel entfernen und Kraftstoff einfüllen.
• Füllen Sie den Tank an einem gut entlüfteten Ort oder im
Freien auf.
• Überfüllen Sie den Kraftstofftank nicht. Füllen Sie
den Kraftstoff nicht weiter als bis zur Unterkante des
Tankstutzens am Kraftstofftank auf, damit sich das Benzin
ausdehnen kann.
• Halten Sie den Kraftstoff von Funken, offenen Flammen,
Zündflammen, Hitze oder anderen Zündquellen fern.
• Überprüfen Sie die Kraftstoffleitungen, den Deckel und
Dichtungen regelmäßig auf Brüchigkeit und Durchlässiglkeit.
Wechseln Sie die Teile gegebenenfalls aus.
• Verwenden Sie einen zugelassenen Kraftstoffbehälter.
• Sollte Kraftstoff auslaufen, warten Sie ab, bis dieser verdunstet ist und starten Sie erst dann den Motor.
Beim Anlassen des Motors
• Stellen Sie sicher, dass die Zündkerze, der Schalldämpfer,
der Tankdeckel und der Luftfilter (je nach Ausstattung) sicher montiert sind.
• Kurbeln Sie den Motor nicht ohne Zündkerze an.
• Wenn Kraftstoff verschüttet wurde, starten Sie den
Motor nicht, sondern entfernen Sie die Schneefräse aus
dem Bereich der Verschüttung und vermeiden Sie alle
Zündquellen, bis sich die Kraftstoffdämpfe verflüchtigt
haben.
• Füllen Sie den Motor nicht mit zu viel Kraftstoff. Folgen
Sie den Anweisungen dieses Handbuchs bezüglich des
Motorstarts.
• Sollte der Motor abwürgen, stellen Sie den Choke (falls
vorhanden) auf die Position OFFEN/BETRIEB, bewegen Sie
den Gashebel (falls vorhanden) in die Position SCHNELL
und lassen Sie den Motor an.
Beim Betrieb der Maschine
• Kippen Sie die Schneefräse nicht soweit um, dass es zum
Auslaufen von Kraftstoff kommt.
• Drosseln Sie nicht den Vergaser, um den Motor abzustellen.
• Starten Sie niemals den Motor, wenn der Luftreiniger (falls
vorhanden) oder der Luftfilter (falls vorhanden) entfernt worden sind.
Beim Ölwechsel
• Wenn Sie das Öl über das oben befindliche Öleinfüllrohr
ablassen, muss der Kraftstofftank leer sein, da ansonsten Kraftstoff auslaufen kann und somit Feuer- und
Explosionsgefahr besteht.
Beim Transport der Maschine
• Transportieren Sie die Maschine mit einem LEEREN
Kraftstofftank bzw. mit geschlossenem Kraftstoffventil.
Beim Lagern von Kraftstoff oder beim Lagern der
Maschine mit Kraftstoff im Tank
• Die Lagerung muss stets abseits von Brennöfen, Heizöfen,
Wassererhitzern oder anderen Geräten erfolgen, die über
eine Zündflamme oder andere Zündquellen verfügen, die
Kraftstoffdämpfe entzünden könnten.
8
Page 41

Not for
Reproduction
WARNUNG
Für einen sicheren Betrieb der Schneefräse ist eine ordnungsgemäße Pflege und Wartung des Motors erforderlich.
• Rücken Sie alle Kupplungen aus und schalten Sie auf
Leerlauf, bevor Sie den Motor starten.
• Warten Sie, bis sich der Motor an die Außentemperaturen
angepasst hat, bevor Sie mit der Schneeräumung beginnen.
• Verwenden Sie einen Schutzkontaktstecker (dreiadrig) für
alle Schneefräsen, die mit einem elektrischen Antriebsmotor
oder einem elektrischen Anlasser ausgestattet sind.
WARNUNG
Beim Starten des Motors entstehen Funken.
Die Funken können entflammbare Gase entzünden.
Dies kann zu einer Explosion oder einem Brand führen.
• Besteht die Gefahr der Ausströmung von Erd- oder
Flüssiggas, darf der Motor nicht gestartet werden.
• Verwenden Sie keine Starthilfeflüssigkeiten unter Druck, da
deren Dämpfe leicht entzündbar sind.
WARNUNG
Der Betrieb des Motors verursacht Wärme. Teile des Motors,
besonders der Schalldämpfer, können sehr heiß werden.
Die Nichteinhaltung dieser Sicherheitshinweise kann bei direktem Kontakt zu Brandverletzungen führen.
• Berühren Sie niemals einen heißen Motor oder
Schalldämpfer. Lassen Sie den Schalldämpfer, die Zylinder
und die Rippen des Kühlers abkühlen, bevor Sie sie anfassen.
• Entfernen Sie die Ablagerungen vom Schalldämpfer und
Zylinder.
• Bauen Sie einen Funkenfänger ein und halten Sie ihn in
gutem Zustand, bevor Sie das Gerät in Wald-, Wiesen- oder
Dickichtbereichen verwenden.
• Modelle aus den USA: Der Einsatz des Motors im
Wald, auf Busch- oder Grasland verstößt gegen das kalifornische Gesetz (public resource code, section 4442),
wenn die Auspuffanlage nicht mit einem vorgeschriebenen
betriebsfähigen Funkenfänger ausgestattet ist. In anderen
Bundesstaaten können ähnliche Gesetze gelten. Andere
Staaten oder Bundesgebiete können ähnliche Gesetze
haben. Einen passenden Funkenfänger für die an diesem Motor installierte Auspuffanlage finden Sie beim
Gerätehersteller oder Händler.
WARNUNG
Diese Schneefräse muss einwandfrei gewartet werden,
um einen sicheren Betrieb und die Leistungsfähigkeit zu
gewährleisten. Die Nichtbeachtung der Sicherheitshinweise in
dieser Bedienungsanleitung kann zum Tod oder zu schweren
Verletzungen führen.
• Vor Wartungs- oder Reparaturarbeiten an der Schneefräse:
Stellen Sie den Motor ab, ziehen Sie das Zündkabel von
der Zündkerze ab und sorgen Sie dafür, dass niemand den
Motor versehentlich anlassen kann.
• Überprüfen Sie Scherbolzen und andere
Befestigungselemente in kurzen Abständen auf Festigkeit.
• Halten Sie Muttern und Schrauben fest angezogen und
bewahren Sie die Schneefräse in einem guten Zustand auf.
• Manipulieren Sie niemals Sicherheitsvorrichtungen.
Überprüfen Sie deren einwandfreien Betrieb regelmäßig und
nehmen Sie die nötigen Reparaturen vor, wenn sie nicht
ordnungsgemäß funktionieren.
• Die Bestandteile unterliegen Abnutzung, Schäden und
Alterung. Überprüfen Sie die Maschinenkomponenten
regelmäßig und ersetzen Sie sie wenn nötig durch vom
Hersteller empfohlene Teile.
• Überprüfen Sie die Funktionsweise der Bedienelemente
häufig. Nehmen Sie Einstellungen und Wartungsarbeiten wie
vorgeschrieben vor.
• Verwenden Sie nur vom Hersteller zugelassene oder gleichwertige Austauschteile für Reparaturen.
• Halten Sie sich bei allen Einstellungen und Ausrichtungen
immer an die Herstellerangaben.
• Verwenden Sie nur vom Hersteller zugelassene oder gleichwertige Anbaugeräte und Zubehörkomponenten, z. B.
Radgewichte, Ausgleichsgewichte oder Führerhäuser.
• Versuchen Sie niemals beliebige Einstellungen bei laufendem Motor vorzunehmen (es sei denn dies wird speziell
durch den Hersteller empfohlen).
Deutsch
de
9
Page 42

Not for
Reproduction
WARNUNG
Die Schneefräse ist nur so sicher, wie sie der Bediener verwendet. Wird die Schneefräse nicht gemäß den Angaben genutzt
oder nicht ordnungsgemäß gewartet, so kann dies zu gefährlichen Situationen führen. Denken Sie daran, dass Sie für Ihre
Sicherheit und die Ihres Umfelds verantwortlich sind.
• Halten Sie den Betriebsbereich frei von Personen, insbesondere von kleinen Kindern und Haustieren.
• Überprüfen Sie, dass sich im Arbeitsbereich der
Schneefräse keine Fußabtreter, Schlitten, Bretter, Kabel
oder andere Fremdkörper befinden und entfernen Sie diese
gegebenenfalls.
• Tragen Sie zur Bedienung der Schneefräse entsprechende
Winterkleidung.
• Tragen Sie festes Schuhwerk, das für eine sichere
Trittfestigkeit auf glatten Oberflächen sorgt.
• Arbeiten Sie vorsichtig und vermeiden Sie somit, dass
Sie ausrutschen oder stürzen, besonders wenn Sie die
Schneefräse im Rückwärtsgang betätigen.
• Betreiben Sie die Schneefräse nie bei schlechter Sicht oder
Dunkelheit. Achten Sie stets auf guten Stand und halten Sie
die Griffe fest.
• Entfernen Sie mit der Schneefräse keinen Schnee an einer
Böschung. Seien Sie sehr vorsichtig beim Richtungswechsel
an Neigungen. Versuchen Sie nicht, steile Neigungen zu
räumen.
• Überlasten Sie die Maschine nicht, indem Sie den Schnee
zu schnell räumen.
• Betreiben Sie die Maschine auf glatten Oberflächen nie mit
hohen Fahrgeschwindigkeiten. Schauen Sie nach hinten,
wenn Sie rückwärts fahren.
• Verwenden Sie die Schneefräse nicht auf hochliegenden
Flächen, wie z. B. auf Dächern von Wohngebäuden oder
Garagen, auf Vordächern sowie ähnlichen Bauten oder
Gebäuden.
• Die Bediener müssen selbst einschätzen, ob sie das Gerät
sicher genug bedienen können, um sich und andere vor
Verletzungen zu schützen.
• Die Schneefräse ist ausschließlich zum Schneeräumen
gedacht. Verwenden Sie daher die Schneefräse nicht für
andere Zwecke.
• Transportieren Sie keine Personen.
• Bei Kontakt mit einem Fremdkörper, stellen Sie den Motor
sofort AB, ziehen Sie bei einem Elektromotor den Stecker
ab, untersuchen Sie die Maschine auf Schäden und beheben Sie Schäden, bevor Sie die Schneefräse erneut in
Betrieb nehmen.
• Stellen Sie den Motor AB, wenn die Schneefräse ungewöhnlich vibriert. Die Vibration weist in der Regel auf eine
Störung hin. Setzen Sie sich für die Reparatur mit einem
Vertragshändler in Verbindung.
• Bei Modellen, die über einen elektrischen Anlasser verfügen,
ziehen Sie nach dem Anschalten das Stromkabel ab.
WARNUNG
Beschädigte oder nicht geerdete Netzkabel können zu
Stromschlag führen.
Stromschlag kann schwere oder tödliche Verletzungen verursachen.
Test mit einem elektrischen Anlasser
• Das Netzkabel muss jederzeit ordnungsgemäß geerdet sein.
• Verwenden Sie nur ein Drei-Leiter-Netzkabel, welches an
der Stromquelle ordnungsgemäß geerdet ist.
• Wenn das Netzkabel beschädigt ist, muss es von einer qualifizierten Person ersetzt werden, um eine Gefahrenquelle zu
beseitigen.
WARNUNG
Der schnelle Rücklauf des Startkabels (Kickback) zieht Ihre Hand
oder Arm schneller in Richtung Motor, als Sie loslassen können.
Letzteres kann zu Knochenbrüchen, Prellungen oder
Verstauchungen führen.
Beim Anlassen des Motors:
• Beim Anlassen des Motors ziehen Sie langsam am Seilzug,
bis der Widerstand spürbar ist. Ziehen Sie dann einmal
schnell, um ein Kickback zu vermeiden.
Sicherheitsaufkleber
Lesen Sie vor der Bedienung der Maschine die Sicherheitsaufkleber
durch. Vergleichen Sie Abbildung 1 mit der Tabelle unten. Die
Warnungen und Hinweise dienen Ihrer Sicherheit. Um Verletzungen
oder Schäden an der Schneefräse zu vermeiden, müssen Sie alle
Sicherheitshinweise auf den Schildern verstehen und befolgen.
WARNUNG
Ist ein Sicherheitsaufkleber abgenutzt oder beschädigt und
somit unlesbar, bestellen Sie Ersatzaufkleber von Ihrem
Händler vor Ort.
A Warnaufkleber am
Auswurfschacht
(Teile-Nr. 1727207)
B Warnaufkleber an
der Schnecke
(Teile-Nr. 1737867)
10
Page 43

Not for
Reproduction
Prüfungen des Sicherheitssystems
Bestimmung der durchzuführenden
Prüfungen
Wählen Sie die entsprechende Prüfung des Sicherheitssystems für
Ihr Gerät aus.
Modelle ohne Free Hand™-Bedienung: Bei Geräten ohne Free
Hand-Funktion funktionieren die Bedienelemente für die Schnecke
und den Fahrantrieb unabhängig voneinander und die Free HandSymbolgruppe befindet sich nicht auf dem Armaturenbrett, wie dargestellt in Abb. 2.
Modelle mit Free Hand™-Bedienung: Nach dem Einrasten
des Fahrantriebshebels (links) und des Schneckenhebels
(rechts) ermöglicht die Free Hand-Funktion das Loslassen des
Schneckenhebels. Danach bleibt der Schneckenhebel eingerastet,
bis der Fahrantriebshebel losgelassen wird. Modelle mit Free HandFunktion weisen auf dem Armaturenbrett die in Abbildung 2 dargestellte Symbolgruppe auf dem Armaturenbrett.
Kontrolle des Sicherheitssystems
(Geräte ohne Free Hand-Bedienung)
GEFAHR
Amputationsgefahr
Diese Schneefräse ist mit verschiedenen mechanischen
Sicherheitseinrichtungen ausgestattet, die für die Sicherheit des
Bedieners während der Verwendung der Maschine gedacht sind.
Überprüfen Sie die Funktion dieser Systeme regelmäßig durch
die angeführten Prüfungen des Sicherheitssystems. Wenn die
Maschine nicht wie beschrieben funktioniert, verwenden Sie sie
NICHT weiter. Wenden Sie sich zur Reparatur sofort an eine
Vertragswerkstatt.
Prüfung 1 - Schnecken-/Gebläseradhebel
Bei laufendem Motor:
Prüfungen des Sicherheitssystems
(Geräte mit Free Hand-Bedienung)
GEFAHR
Amputationsgefahr
Diese Schneefräse ist mit verschiedenen mechanischen
Sicherheitseinrichtungen ausgestattet, die für die Sicherheit des
Bedieners während der Verwendung der Maschine gedacht sind.
Überprüfen Sie die Funktion dieser Systeme regelmäßig durch
die angeführten Prüfungen des Sicherheitssystems. Wenn die
Maschine nicht wie beschrieben funktioniert, verwenden Sie sie
NICHT weiter. Wenden Sie sich zur Reparatur sofort an eine
Vertragswerkstatt.
Prüfung 1 - Schnecken-/Gebläseradhebel
Bei laufendem Motor:
• Drücken Sie den Schneckenhebel nach unten. (Die
Schnecke bzw. das Gebläserad sollten sich drehen.)
• Lassen Sie den Frässchnecken-Steuerhebel los. (Die
Schnecke bzw. das Gebläserad sollte innerhalb von 5
Sekunden zum Stillstand kommen.)
Prüfung 2 - Fahrantriebshebel
Bei laufendem Motor und im ersten Gang:
• Drücken Sie den Fahrantriebshebel nach unten. (Die
Maschine sollte sich nach vorn bewegen.)
• Lassen Sie den Fahrantriebshebel los. (Die Maschine sollte
anhalten.)
Prüfung 3 - Free Hand-Bedienung
Bei laufendem Motor:
• Betätigen Sie den Schnecken- und den Fahrantriebshebel.
Lassen Sie danach den Schneckenhebel los. (Beide
Bedienelemente sollten eingerastet bleiben)
• Lassen Sie anschließend den Fahrantriebshebel los. (Beide
Bedienelmente sollten freigegeben werden.)
• Drücken Sie den Schneckenhebel nach unten. (Die
Schnecke bzw. das Gebläserad sollten sich drehen.)
• Lassen Sie den Frässchnecken-Steuerhebel los. (Die
Schnecke bzw. das Gebläserad sollte innerhalb von 5
Sekunden zum Stillstand kommen.)
Prüfung 2 - Fahrantriebshebel
Bei laufendem Motor und im ersten Gang:
• Drücken Sie den Fahrantriebshebel nach unten. (Die
Maschine sollte sich nach vorn bewegen.)
• Lassen Sie den Fahrantriebshebel los. (Die Maschine sollte
anhalten.)
Funktionen und Bedienelemente
Merkmale und Bedienelemente des
Motors
Informationen über den Motor und seine Bedienelemente finden Sie
in der Bedienungsanleitung für den Motor.
Funktionen und Bedienelemente der
Schneefräse
Vergleichen Sie Abbildung 3 mit der Tabelle unten.
A Hebel der Schneckensteuerung-
Er wird verwendet, um die
Schnecke und das Gebläse
ein- und auszuschalten. Drücken
Sie zum Einkuppeln nach unten.
Lassen Sie ihn zum Auskuppeln
los.
Deutsch
de
11
Page 44

Not for
Reproduction
B
1
R1
R2
2
3
C
D
E
F
G
H
I
J
Geschwindigkeitshebel-
Ermöglicht dem Benutzer
die Auswahl unter sechs
(6) Vorwärts- und zwei (2)
Rückwärtgeschwindigkeiten.
Zum Schalten bewegen Sie den
Geschwindigkeitshebel in die
gewünschte Position.
HINWEIS: Bewegen Sie den
Geschwindigkeitshebel
nicht, wenn die Kupplung
eingerückt ist. Dies kann das
Antriebssystem schwer beschädigen.
Kurbel für
Auswurfschachtdrehung - im
Armaturenbrett (sofern vorhanden) - Wird für die Drehung des
Auswurfschachts nach links oder
rechts verwendet.
Kurbel für
Auswurfschachtdrehung - links
(sofern vorhanden) - Wird für
die Drehung des Auswurfschachts
nach links oder rechts verwendet.
Schalter für die
Auswurfschachtdrehung
- elektrisch (sofern vorhanden) - Wird für die Drehung des
Auswurfschachts nach links oder
rechts verwendet.
Free Hand™ Bedienung
(falls vorhanden) - Nach der
Betätigung des Fahrantriebshebels
(links) und des Schneckenhebels
(rechts) kann der Benutzer den
Schneckenhebel loslassen und
somit die anderen Bedienelemente
bedienen.
Hebel des Fahrantriebs - Er wird
verwendet, um die Schneefräse
vorwärts oder rückwärts zu
bewegen. Zum Einschalten runterdrücken, zum Ausschalten
loslassen. Siehe auch „Free HandBedienung“.
Bedienelement für das
Auswurfschacht-Leitblech - im
Armaturenbrett (sofern vorhanden) - Wird für die Einstellung des
Auswurfschacht-Leitblechwinkels
(nach oben oder unten) verwendet.
Bedienelement für das
Auswurfschacht-Leitblech manuell (sofern vorhanden)
- Wird für die Einstellung des
Auswurfschacht-Leitblechwinkels
(nach oben oder unten) verwendet.
Bedienelement für das
Auswurfschacht-Leitblech elektrisch (sofern vorhanden)
- Wird für die Einstellung des
Auswurfschacht-Leitblechwinkels
(nach oben oder unten) verwendet.
K Easy Turn™
L
M
N
O
-
-
-
Fahrantriebssteuerung (falls
vorhanden) - Wenn diese
aktiviert ist, kann der Bediener ein
Antriebsrad freigeben, während
das andere Rad weiter angetrieben wird. Dadurch wird das
Fahren von Kurven erleichtert.
Griffwärmer-Schalter (falls
vorhanden) - Wird für die
Erwärmung der Griffe verwendet.
Der Schalter hat drei Positionen stark, au, und schwach.
HINWEIS: Nicht alle Modelle
sind mit beheizten Griffen ausgestattet. Einige Modelle sind mit
automatisch beheizten Griffen
ausgestattet, die bei laufender
Schneefräse immer aktiviert sind.
Reinigungswerkzeug - Es
wird verwendet, um Schnee
und andere Rückstände aus
dem Auswurfschacht und
Schneckengehäuse zu entfernen.
Gleitkufen - Sie werden verwendet, um die Bodenfreiheit des
Schneckengehäuses einzustellen.
Scheinwerfer (falls vorhanden) - Dient zur Ausleuchtung des
Bereichs vor der Schneefräse.
HINWEIS: Die Ausführung des
Scheinwerfers hängt vom jeweiligen Modell ab.
Bedienung
Vor Inbetriebnahme der Schneefräse
WARNUNG
Lesen Sie vor der Arbeit mit dieser Maschine die
Bedienungsanleitung aufmerksam durch. Die Maschine
kann bei nicht ordnungsgemäßen Gebrauch gefährlich
sein.
• Die Schneefräse darf nicht ohne Schutzeinrichtungen,
Abdeckungen und Blenden betrieben werden.
• Stellen Sie stets den Motor ab, wenn Sie die Bedienposition
verlassen.
• Ziehen Sie den Schlüssel ab, bevor Sie das Gehäuse des
Gebläserads oder den Auswurfschacht von Verstopfungen
befreien und bevor Sie Reparaturen oder Einstellungen
vornehmen.
• Ziehen Sie den Schlüssel ab, wenn Sie die Maschine
unbeaufsichtigt lassen.
• Um das Brandrisiko zu reduzieren, halten Sie die Maschine
sauber und frei von verschüttetem Kraftstoff, Öl oder
Schmutz.
12
Page 45

Not for
Reproduction
• Entfernen Sie bei Modellen mit elektrischem Anlasser vor dem
Betrieb das Verlängerungskabel.
• Kontrollieren Sie vor dem Anlassen des Motors unbedingt
den Motorölstand. Empfehlungen zum Öl finden Sie in der
Bedienungsanleitung für den Motor.
Bedienung der Schneefräse
GEFAHR
Amputationsgefahr
Der Auswurfschacht verfügt über ein rotierendes
Wurfgebäse, um Schnee auszuwerfen. Ihre Finger könnten
schnell im Gebläserad eingequetscht werden. Beseitigen
Sie Blockierungen im Auswurfschacht nie mit den Händen.
Verwenden Sie immer ein Reinigungswerkzeug.
Die Nichteinhaltung dieser Sicherheitshinweise kann dazu
führen, dass Gliedmaßen abgetrennt oder schwer verletzt
werden.
Handkontakt mit dem rotierenden Gebläserad im Inneren des
Auswurfschachts ist die häufigste Ursache von Verletzungen
im Zusammenhang mit Schneefräsen. Reinigen Sie den
Auswurfschacht niemals mit der Hand.
Beachten Sie die folgenden Anleitungen, um eine
Verstopfung im Auswurfschacht sicher zu beseitigen:
1. Stellen Sie den Motor ab.
2. Warten Sie 10 Sekunden, damit sichergestellt ist, dass
die Gebläseblätter nicht mehr rotieren.
3. Verwenden Sie immer ein Reinigungswerkzeug, nicht die
Hände.
GEFAHR
Gefahr durch giftige Dämpfe
Der Motor setzt Kohlenmonoxid frei, ein geruchloses, farb-
loses und giftiges Gas.
Wird Kohlenmonoxid eingeatmet, kann dies zu Übelkeit,
Ohnmacht oder zum Tod führen.
• Starten und betreiben Sie den Motor im Freien.
• Lassen Sie den Motor nicht in geschlossenen Räumen
laufen, auch wenn Türen und Fenster geöffnet sind.
WARNUNG
Gefahr durch umhergeschleuderte Gegenstände
Diese Maschine kann Objekte umherschleudern, die in der Nähe
befindliche Personen verletzen oder Schäden an Gebäuden verursachen könnten.
Achten Sie darauf, dass sich keine Personen im Arbeitsbereich
aufhalten. Richten Sie den Auswurf nicht auf Personen, Gebäude
oder Fahrzeuge.
1. Lassen Sie den Motor an. Schlagen Sie für Informationen zum
Motor bitte in der Bedienungsanleitung für den Motor nach.
2. Drehen Sie an der Kurbel für die Drehung des Auswurfschachts
(C oder D, Abb. 3) oder verwenden Sie den Schalter für
die Auswurfschachtdrehung (E), um die Richtung des
Auswurfschachts einzustellen.
3. Modelle mit manueller Einstellung des Auswurfschacht-
Leitblechs: Lösen Sie die Flügelmutter, mit der das
Auswurfschacht-Leitblech (I) befestigt ist. Heben Sie das
Auswurfschacht-Leitblech an, um den Schnee weiter weg zu
werfen. Stellen Sie das Auswurfschacht-Leitblech in die gewünschte Position und ziehen Sie die Flügelmutter an.
Modelle mit Auswurfschacht-Leitblechhebel auf dem
Armaturenbrett: Verwenden Sie den AuswurfschachtLeitblechhebel (H) für das Bewegen des AuswurfschachtLeitblechs nach oben oder unten. Heben Sie das
Auswurfschacht-Leitblech an, um den Schnee weiter weg zu
werfen.
Modelle mit elektrischer Auswurfschacht-
Leitblechverstellung: Verwenden Sie den AuswurfschachtLeitblechschalter (J) für das Bewegen des AuswurfschachtLeitblechs nach oben oder unten. Heben Sie das
Auswurfschacht-Leitblech an, um den Schnee weiter weg zu
werfen.
4. Verwenden Sie den Gangschalthebel (B) um die Vorwärtsoder Rückwärtsfahrgeschwindigkeit auszuwählen. Verwenden
Sie niedrigere Geschwindigkeiten für das Räumen von nassem
und schwerem Schnee. Wählen Sie höhere Geschwindigkeiten
für Pulverschnee oder zum Fortbewegen der Maschine ohne
Schneeräumung.
HINWEIS: Stellen Sie die Motordrehzahl immer auf SCHNELL
(Vollgas).
5. Drücken Sie den Schneckenhebel (A) vollständig durch, um
die Schnecke einzukuppeln. Lassen Sie den Hebel los, um die
Schnecke anzuhalten.
6. Drücken Sie den Fahrantriebs-/Free Hand-Hebel (F/G) vollständig durch und halten Sie ihn, um den Fahrantrieb einzukuppeln
und die Schneefräse zu bewegen. Lassen Sie zum Anhalten
den Hebel los.
HINWEIS: Lassen Sie vor dem Einlegen der Gänge stets den
Fahrantriebshebel los.
7. Wenn bei Modellen mit der Free Hand-Bedienung sowohl der
Schneckenhebel (A, Abb. 3) als auch der Fahrantriebshebel
(F) gedrückt werden, wird die Free Hand-Bedienung aktiviert.
Dadurch können Sie den Schneckenhebel (A) loslassen, um
andere Bedienelemente zu betätigen. Die Schnecke dreht sich
so lange weiter, bis Sie den Fahrantriebs-/Free-Hand-Hebel
loslassen.
8. Sofern gewünscht, verwenden Sie den Griffwärmer-Schalter
(H), um die Heizung für die Handgriffe einzuschalten.
HINWEIS: Vergessen Sie nicht die beheizten Griffe auszuschalten,
bevor Sie die Schneefräse anhalten.
HINWEIS: Einige Modelle sind mit automatisch beheizten Griffen
ausgestattet, die bei laufender Schneefräse immer aktiviert sind.
9. Einige Modelle sind mit einem Scheinwerfer (O, Abb. 3) ausgestattet, der den Bereich vor der Schneefräse ausleuchtet.
Der Scheinwerfer ist immer in eingeschaltet, wenn die
Schneefräse in Betrieb ist.
Deutsch
de
13
Page 46

Not for
Reproduction
Anhalten der Schneefräse
1. Lassen Sie den Schneckenhebel (A, Abb. 3).
2. Lassen Sie den Fahrantriebshebel (F) los.
3. Stellen Sie den Motor ab. Schlagen Sie für Anleitungen zum
Motor bitte in der Bedienungsanleitung für den Motor nach.
Easy Turn™-Fahrantriebssteuerung
(sofern vorhanden)
Für ein leichtes Wenden bei der Verwendung der Schneefräse,
drücken Sie den Easy Turn-Hebel (Abb. 4).
HINWEIS: Einige Modelle sind nur an einem Rad mit der Easy TurnFahrantriebssteuerung ausgestattet, andere Modelle an beiden
Rädern.
HINWEIS: Die Easy Turn-Fahrantriebssteuerung ist unter starker
Belastung schwieriger zu aktivieren. Aktivieren Sie den Hebel,
bevor Sie eine Drehung beginnen.
Durch Betätigung des Easy Turn-Hebels wird eines der
Antriebsräder freigegeben, während das andere Rad weiter angetrieben wird. Beim Loslassen des Easy Turn-Hebels rasten automatisch beide Antriebsräder ein, um einen vollständigen Kraftschluss
herzustellen (Abb. 5).
Radfreigabe - Sperrknopf (sofern
vorhanden)
Einige Modelle sind mit einer Antriebsradfreigabe ausgestattet, mit
der Sie eines der Antriebsräder auskuppeln können. Damit kann
das Gerät mit abgestelltem Motor leichter transportiert werden.
Modelle mit Fahrantriebssperrknopf: Räder, die mit einem
Fahrantriebssperrknopf ausgestattet sind (A, Abb. 6) können
vollständig freigegeben werden, indem der Knopf vom Rad
weggezogen wird, bis der Sperrstift das Rad freigibt. Drehen Sie
anschließend den Knopf, so dass der Stift nicht wieder im Rad
einrastet. Zum Einkuppeln des Antriebsrades ist dieser Vorgang
umzukehren.
Radfreigabe - Sperrstifte (sofern
vorhanden)
Räder, die mit einem Antriebssperrstift ausgestattet sind (A, Abb.
7), können vollständig freigegeben werden, indem der Stift herausgezogen und in die äußere Bohrung auf der Achse gesteckt wird.
Zum Einkuppeln des Antriebsrades ist dieser Vorgang umzukehren.
Einstellung des AuswurfschachtLeitblechs
A. Manuelles Bedienelement für das
Auswurfschacht-Leitblech (sofern vorhanden)
Lösen Sie die Griffschraube am Auswurfschacht-Leitblech (A, Abb.
8), stellen Sie das Auswurfschacht-Leitblech in die gewünschte
Position und ziehen Sie danach die Griffschraube fest an. Heben
Sie das Auswurfschacht-Leitblech an, um den Schnee weiter weg
zu werfen.
B. Elektrisches Bedienelement für das
Auswurfschacht-Leitblech (sofern vorhanden)
Drücken Sie bei laufendem Motor eine der beiden Seiten
des Auswurfschacht-Leitblechschalters (B, Abb. 8), um das
Auswurfschacht-Leitblech nach oben oder unten zu verstellen.
Heben Sie das Auswurfschacht-Leitblech an, um den Schnee weiter
weg zu werfen.
C. Bedienelement für das AuswurfschachtLeitblech im Armaturenbrett (sofern vorhanden)
Schieben Sie den Auswurfschacht-Leitblechhebel (C, Abb. 8) nach
vorn oder zurück, um das Auswurfschacht-Leitblech anzuheben
oder abzusenken. Heben Sie das Auswurfschacht-Leitblech an, um
den Schnee weiter weg zu werfen.
Einstellen der Auswurfschachtdrehung
A Bedienelement für die elektrische
Auswurfschachtdrehung (sofern vorhanden)
Sie bei laufendem Motor eine der beiden Seiten des Schalters für
die Auswurfschachtdrehung (A, Abb. 9), um den Auswurfschacht
nach links oder rechts zu drehen.
B. Bedienelement für die Auswurfschachtdrehung
im Armaturenbrett (sofern vorhanden)
Suchen Sie die Kurbel für die Auswurfschachtdrehung im
Armaturenbrett (B, Abb. 9). Drehen Sie die Kurbel, um den
Auswurfschacht horizontal zu drehen.
C. Kurbel für die Auswurfschachtdrehung auf der
linken Seite (sofern vorhanden)
Suchen Sie die Kurbel für die Auswurfschachtdrehung auf
der linken Seite (C, Abb. 9). Drehen Sie die Kurbel, um den
Auswurfschacht zu drehen.
14
Befüllen des Kraftstofftanks
Informationen über das Befüllen des Kraftstofftanks sowie
Empfehlungen zum Kraftstoff finden Sie in der Bedienungsanleitung
für den Motor.
Page 47

Not for
Reproduction
Freiräumen eines verstopften
Auswurfschachts
GEFAHR
Amputationsgefahr
Der Auswurfschacht verfügt über ein rotierendes
Wurfgebäse, um Schnee auszuwerfen. Ihre Finger könnten
schnell im Gebläserad eingequetscht werden. Beseitigen
Sie Blockierungen im Auswurfschacht nie mit den Händen.
Verwenden Sie immer ein Reinigungswerkzeug.
Die Nichteinhaltung dieser Sicherheitshinweise kann dazu
führen, dass Gliedmaßen abgetrennt oder schwer verletzt
werden.
Handkontakt mit dem rotierenden Gebläserad im Inneren des
Auswurfschachts ist die häufigste Ursache von Verletzungen
im Zusammenhang mit Schneefräsen. Reinigen Sie den
Auswurfschacht niemals mit der Hand.
Beachten Sie die folgenden Anleitungen, um eine
Verstopfung im Auswurfschacht sicher zu beseitigen:
1. Stellen Sie den Motor ab.
2. Warten Sie 10 Sekunden, damit sichergestellt ist, dass
die Gebläseblätter nicht mehr rotieren.
3. Verwenden Sie immer ein Reinigungswerkzeug, nicht die
Hände.
Mit dem Gerät wird ein Reinigungswerkzeug (A, Abb. 10) mitgeliefert.
Höheneinstellung der Gleitkufen
GEFAHR
Amputationsgefahr
Der Auswurfschacht verfügt über ein rotierendes Wurfgebäse,
um Schnee auszuwerfen. Ihre Finger könnten schnell eingequetscht werden und diese könnten abgeschnitten oder ernsthaft
verletzt werden. Handkontakt mit dem rotierenden Gebläserad
im Inneren des Auswurfschachts ist die häufigste Ursache von
Verletzungen im Zusammenhang mit Schneefräsen.
Stellen Sie den Motor ab, warten Sie, bis alle beweglichen Teile
zum Stillstand gekommen sind und ziehen Sie den Schlüssel ab,
bevor Sie Wartungs- oder Reparaturarbeiten durchführen.
WARNUNG
Gefahr durch umhergeschleuderte Gegenstände
Gegenstände wie Schotter, Steine oder Geröll können im
Wurfgebläse stecken bleiben und mit entsprechender Kraft herausgeschleuert werden, was zu Verletzungen, Sachschäden
oder Schäden an der Schneefräse führen kann.
Stellen Sie die Gleitkufen unbedingt auf die richtige Höhe ein,
um die geeignete Bodenfreiheit für die Art der zu beräumenden
Fläche zu gewährleisten.
Diese Schneefräse verfügt über zwei höhenverstellbare Gleitkufen,
die an der Außenseite des Schneckengehäuses befestigt sind. Die
Gleitkufen heben den vorderen Teil der Schneefräse an.
Stellen Sie für die Schneeräumung auf befestigten Oberflächen, z.
B. befestigte Einfahrten oder Fußgängerwege, die Gleitkufen nach
oben, um den vorderen Teil der Schneefräse abzusenken.
Für die Schneeräumung auf steinigen und unebenen Untergründen
heben Sie den vorderen Teil der Schneefräse an, indem Sie die
Kufen nach unten verschieben. Dadurch wird vermieden, dass
Steine oder andere Gegenstände von der Fräse aufgenommen und
ausgeworfen werden.
1. Entscheiden Sie selbst, wie viel Abstand Sie zwischen
dem Räumschild unten am Schneckengehäuse und dem
Untergrund haben möchten. Wenn Sie eine Schotteroberfläche
räumen, ist ein ausreichend großer Abstand notwendig, um die
Aufnahme von Steinen zu vermeiden.
2. Legen Sie einen Klotz, der die Höhe des gewünschten
Abstands zum Boden hat, unter das Räumschild.
3. Lösen Sie die Befestigungsmuttern der Gleitkufe (A, Abb.
11) und drücken Sie die Gleitkufe (B) nach unten, bis sie den
Boden berührt. Ziehen Sie die Befestigungsmuttern wieder an.
4. Stellen Sie die Gleitkufe auf der anderen Seite auf dieselbe
Höhe ein.
Einlagerung nach der Saison
Soll die Maschine, z. B. nach dem Ende des Winters, länger als
30 Tage eingelagert werden, befolgen Sie die nachstehenden
Empfehlungen zur Vorbereitung der Einlagerung. Beachten Sie
stets die Bedienungsanleitung, die wichtige Hinweise für die
Einlagerung der Maschine für einen längeren Zeitraum enthält.
Schlagen Sie für Informationen zur Einlagerung des Motors bitte in
der Bedienungsanleitung für den Motor nach.
HINWEIS: Kraftstoff muss abgelassen oder entsprechend behandelt werden, damit während der Lagerung keine Ablagerungen im
Tank, Filter, Schlauch oder Vergaser entstehen.
WARNUNG
Brand- und Explosionsgefahr
Benzin ist hochgradig entflammbar, und seine Dämpfe sind
explosiv. Die Dämpfe können an eine entfernte Zündquelle
gelangen und zu einer Explosion bzw. zu einem Brand führen.
Gehen Sie sorgfältig mit Benzin um. Lagern Sie die Maschine
niemals mit gefülltem Tank in Innenräumen oder in schlecht
belüfteten Bereichen, in denen Kraftstoffdämpfe eine offene
Flamme, Funken oder eine Zündflamme (z. B. an einem Ofen,
Wassererhitzer oder Wäschetrockner) erreichen könnten.
• Reinigen Sie die Maschine gründlich.
• Schmieren Sie alle Schmierstellen. Siehe Wartungs-Abschnitt.
• Vergewissern Sie sich, dass alle Muttern, Bolzen und
Schrauben fest angezogen sind. Untersuchen Sie alle sichtbaren beweglichen Teile auf Schäden, Brüche und Abnutzung.
Wechseln Sie die Teile gegebenenfalls aus.
• Bessern Sie alle verrosteten oder abgeblättern Lackstellen mit
Farbe aus; vor dem Streichen abschmirgeln.
Deutsch
de
15
Page 48

Not for
Reproduction
• Tragen Sie ein Rostschutzmittel auf alle blanken Metallteile des
Schneckengehäuses und des Gebläses der Schneefräse auf.
• Lagern Sie die Schneefräse nach Möglichkeit in einem
Innenraum und decken Sie sie ab, um sie vor Staub und
Verschmutzung zu schützen.
• Wenn die Maschine im Freien gelagert wird, sollte sie mit einer
schweren Plane abgedeckt werden.
Rücksendung zur Reparatur:
• Befüllen Sie den Tank mit frischem Kraftstoff.
• Stellen Sie sicher, dass alle Befestigungselemente fest
angezogen sind.
• Vergewissern Sie sich, dass alle Schutzvorrichtungen, Blenden
und Abdeckungen angebracht sind.
Wartung
Wartungsplan
Vor jeder Verwendung
• Motorölstand prüfen
• Prüfungen des Sicherheitssystems durchführen
Alle 8 Betriebsstunden oder täglich
• Motorölstand prüfen
Alle 25 Stunden oder jährlich
• Bedienhebelgestänge schmieren
• Schneckenbaugruppe schmieren
• Schwenkgetriebe des Auswurfschachts und
Auswurfschacht-Leitblech schmieren
• Sechskantwelle des Antriebssystems mit einem synthetischen Motoröl 5W-30 und die Ketten mit Fett schmieren
• Schmieren Sie das Antriebsscheibensystem (sofern vorhanden)
Alle 50 Stunden oder jährlich
• Schalldämpfer und Funkenfänger (sofern vorhanden) überprüfen
• Reifendruck kontrollieren
Wartung des Motors
Schlagen Sie für Wartungspläne und -verfahren bitte in der
Bedienungsanleitung für den Motor nach.
Schmierung der Bedienhebelgestänge
WARNUNG
Amputationsgefahr
Für den sicheren Betrieb der Maschine ist es wichtig, dass
die Bedienelemente beim Loslassen ausrücken. Unter keinen
Umständen sollte die Maschine verwendet werden, wenn
die Steuerungen nicht ordnungsgemäß funktionieren. Siehe
Prüfungen des Sicherheitssystems, um sich von der ordnungsgemäßen Funktion zu überzeugen.
Schmieren Sie das Gerät an den Stellen, die in Abb. 12 dargestellt
werden. Wenn eine Ölkanne dargestellt ist, schmieren Sie mit
Motoröl. Wenn eine Fettpresse dargestellt ist, schmieren Sie mit
Lithiumfett.
Schmierung der Schneckenbaugruppe
Schmierung des Schneckengetriebes
Das Fräswerkantriebsgehäuse wird im Werk geschmiert und sollte
keine weitere Schmierung benötigen. Wenn jedoch Schmiermittel
ausgetreten ist oder das Schneckengetriebe gewartet wurde, kann
zusätzliches Schmiermittel erforderlich sein.
Zum Prüfen des Schneckengetriebe-Füllstands entfernen Sie
den Füllstopfen (A, Abb. 13). Verwenden Sie ein Stück Draht als
Ölmessstab und prüfen Sie, ob Schmiermittel im Getriebe vorhanden ist. Wenn Schmiermittel sichtbar ist, muss keines nachgefüllt
werden. Wenn kein Schmiermittel sichtbar ist, fügen Sie das
erforderliche Schmiermittel hinzu. Ermitteln Sie anhand der Farbe
der Schmiermittelrückstände, welche Art von Schmiermittel nachgefüllt werden muss. Wenn das Schmiermittel weiß ist, füllen Sie
Lubriplate GR132 oder ein gleichwertiges Schmiermittel nach.
Wenn das Schmiermittel braun ist, füllen Sie EP1 Lithiumfett nach.
Das Getriebefassungsvermögen beträgt 92 g.
HINWEIS: Einige Schneckengetriebe haben keinen Füllstopfen.
Wenden Sie sich zur Wartung an eine Vertragswerkstatt.
Nippel auf Achse der Frässchnecke schmieren
Schmieren Sie mit einer Fettpresse die Schneckenwellennippel
(B, Abb. 13) Siehe Wartungsplan. Nach jedem Austausch eines
Scherbolzens (C) MUSS die Schneckenachse geschmiert werden.
Für die Einlagerung oder für den Austausch sind die Scherbolzen
(C) zu entfernen und die Wellennippel (B) zu schmieren. Danach ist
die Schnecke mehrmals zu drehen, damit sich das Schmiermittel
verteilen kann. Montieren Sie danach die Scherbolzen wieder.
HINWEIS: Einige Modelle sind nicht mit Schmiernippeln versehen;
diese Anforderungen treffen daher nicht zu.
Schmierung des Auswurfschachts und
des Auswurfschacht-Leitblechs
Schmieren Sie das Schachtdrehzahnrad (Abb. 14) mit Fett und den
Leitblechmechanismus mit Kfz-Öl. Siehe Wartungsplan.
Wenn eine Ölkanne dargestellt ist, schmieren Sie mit Motoröl.
Wenn eine Fettpresse dargestellt ist, schmieren Sie mit Lithiumfett.
Schmierung von Sechskantwelle und
Antriebskette (falls vorhanden)
Die Sechskantwelle und die Antriebsketten müssen in den im
Wartungsplanangegebenen Intervallen geschmiert werden. Lassen
Sie diese Wartungsarbeiten von einer Vertragswerkstatt durchführen.
Zahnantriebssystem (sofern vorhanden)
Das Zahnantriebssystem erfordert keine Wartung oder Einstellung.
Sollten Sie ein Problem mit dem Zahnantriebssystem haben, wenden Sie sich an eine Vertragswerkstatt.
16
Page 49

Not for
Reproduction
Überprüfung des Antriebsseilzugs
Die Seilzüge werden im Werk angepasst und sollten keine weitere
Anpassung benötigen. Sind die Seilzüge jedoch zu straff gespannt
oder hängen durch, ist eine Anpassung notwendig. Wenden Sie
sich für diese Einstellung an eine Vertragswerkstatt.
Einstellung des Fahrantriebsriemens
Der Fahrantriebsriemen ist mit konstantem Federdruck
gespannt und es ist keine Einstellung erforderlich. Wenn
der Fahrantriebsriemen rutscht, wenden Sie sich an eine
Vertragswerkstatt.
Stellen Sie fest, welches
Scherbolzensystem Ihr Gerät aufweist.
Die Schnecken sind mit speziellen Bolzen an der Schneckenwelle
befestigt, die so ausgelegt sind, dass sie brechen, wenn ein
Fremdkörper in das Schneckengehäuse gerät.
Schauen Sie in der illustrierten Teileliste nach, um festzustellen, ob Ihr Gerät einen Scherbolzen oder eine Kombination aus
Scherbolzen und Distanzstück benötigt.
Verwenden Sie nur Befestigungselemente, die den Werksangaben
entsprechen.
Einstellung des Gangschalthebels
Wenn der Gangschalthebel eingestellt werden muss, wenden Sie
sich an eine Vertragswerkstatt.
Easy Turn™-Seilzugeinstellung
Falls der Easy Turn-Seilzug gedehnt wurde, rastet das Getriebe
nicht aus, wenn der Bedienhebel aktiviert wird. Stellen Sie den
Seilzug mithilfe des folgenden Verfahrens ein.
1. Stellen Sie den Motor ab und ziehen Sie den Schlüssel ab.
2. Lockern Sie die Gegenmutter (A, Abb. 15).
3. Drehen Sie die Einstellmutter (B), um den Seilzug zu lockern
oder festzuziehen. Der Seilzug muss straff gezogen werden,
bis am Hebel kein Spiel mehr vorhanden ist. Allerdings darf
die Easy Turn-Funktion nicht aktiviert werden, wenn der
Bedienhebel nicht betätigt wird.
4. Ziehen Sie die Gegenmutter (A) fest an.
Einstellung des FrässchneckenSteuerseilzugs
WARNUNG
Amputationsgefahr
Ein zu straffer Schneckenseilzug kann dazu führen, dass der
Schneckenantrieb ohne Betätigung des Schneckenhebels einkuppelt.
Befolgen Sie das Einstellungsverfahren, um zu gewährleisten,
dass dieser Seilzug nicht zu straff gespannt ist.
1. Bei losgelassenem Schneckenhebel sollte der Haken (A, Abb.
16) den Hebel (B) gerade so berühren, ohne ihn anzuheben.
Der Freiraum darf maximal 0,8 mm (1/32") betragen.
2. Lösen Sie zum Einstellen die Mutter (C), indem Sie die
Einstellflächen (D) festhalten und die Mutter drehen. Drehen
Sie danach die Einstellflächen und halten die Stellschraube
(E). Die Einstellschraube ist eine Kreuzschlitzschraube,
und der Kopf der Schraube kann durch Einführen eines
Schraubendrehers in die Feder (F) festgehalten oder gedreht
werden.
3. Halten Sie die Einstellflächen und ziehen Sie die Mutter an.
WARNUNG
Amputationsgefahr
Der Auswurfschacht verfügt über ein rotierendes Wurfgebäse,
um Schnee auszuwerfen. Ihre Finger könnten schnell eingequetscht werden und diese könnten abgeschnitten oder ernsthaft
verletzt werden. Handkontakt mit dem rotierenden Gebläserad
im Inneren des Auswurfschachts ist die häufigste Ursache von
Verletzungen im Zusammenhang mit Schneefräsen.
Stellen Sie den Motor ab, warten Sie, bis alle beweglichen Teile
zum Stillstand gekommen sind und ziehen Sie den Schlüssel ab,
bevor Sie Wartungs- oder Reparaturarbeiten durchführen.
Auswechseln des Scherbolzens
1. Stellen Sie den Motor ab und warten Sie, bis alle bewegten
Teile zum Stillstand gekommen sind.
2. Entfernen Sie den vorhandenen Scherbolzen.
3. Schmieren Sie die Schmiernippel der Schnecke und drehen
Sie die Schnecke, um die Schneckenwelle zu schmieren.
HINWEIS: Einige Modelle sind nicht mit Schmiernippel nversehen;
dieser Schritt trifft daher nicht zu.
4. Richten Sie die Scherbolzenbohrungen aus. Montieren Sie den
neuen Scherbolzen (A, Abb. 17) durch die Schneckenwelle (C).
Sichern Sie ihn mit einem Splint (B).
Scherbolzenaustausch
1. Stellen Sie den Motor ab und warten Sie, bis alle bewegten
Teile zum Stillstand gekommen sind.
2. Entfernen Sie den vorhandenen Scherbolzen.
3. Schmieren Sie die Schmiernippel an der Schnecke. Drehen Sie
die Schnecke, um die Schneckenwelle zu schmieren.
4. Richten Sie die Bolzenbohrungen aus. Montieren Sie den
neuen Scherbolzen (A, Abb. 18) durch die Schneckenwelle (B).
Sichern Sie mit der Kontermutter (C).
4. Um sicherzustellen, dass die Schnecke nur dann eingreift, wenn der Hebel ganz durchgedrückt ist, führen Sie die
Prüfungen des Sicherheitssystems durch. Die Schnecke
muss innerhalb von 5 Sekunden nach Loslassen des
Hebels zum Stillstand gekommen sein.
Deutsch
de
17
Page 50

Not for
Reproduction
Scherbolzen- und
Distanzhülsenaustausch
1. Stellen Sie den Motor ab und warten Sie, bis alle bewegten
Teile zum Stillstand gekommen sind.
2. Entfernen Sie den vorhandenen Scherbolzen.
3. Schmieren Sie die Schmiernippel an der Schnecke. Drehen Sie
die Schnecke, um die Schneckenwelle zu schmieren.
4. Richten Sie die Bolzen mit den Distanzhülsenbohrungen aus.
Montieren Sie den neuen Scherbolzen (A, Abb. 19) und die
Distanzhülse (B) durch die Schneckenwelle (C). Sichern Sie
mit der Kontermutter (D).
Prüfung des Reifendrucks
Der Reifenluftdruck muss regelmäßig überprüft werden. Der empfohlene Reifenluftdruck variiert je nach Reifenhersteller. Eine gute
Faustregel ist das Aufpumpen des Reifens bis zum maximalen
Luftdruck, der auf der Seitenwand des Reifens aufgeprägt ist.
18
Page 51

Not for
Reproduction
Fehlersuche und -behebung
Tabelle zur Fehlersuche und -behebung
Führen Sie die Inspektion oder Reparatur gemäß der Fehlerbehebungstabelle durch.
Problem Suchen Sie nach Abhilfe
Die Schnecke stoppt nicht innerhalb von 5
Sekunden nach dem Loslassen des rechten
Bedienhebels.
Auswurfschacht oder Leitblech funktionieren nicht (elektrisch).
Auswurfschacht oder Leitblech funktionieren nicht
(Remote-Manuell).
Der Antrieb bewegt die Schneefräse nicht
bei niedrigen Gängen.
Motor startet nicht. Der Schlüssel steht in der Stellung AUS. Stellen Sie den Schlüssel in die Stellung
Der Motor startet schwer oder läuft
schlecht.
Zu starke Vibration. Teile locker oder Wurfgebläse beschädigt. Stellen Sie den Motor sofort ab. Ziehen Sie
Die Schneefräse hält nicht an, wenn der
Fahrantriebshebel losgelassen wird.
Schürfleiste reinigt keine harte Oberfläche. Die Gleitkufen und das Räumschild sind
Die Free Hand-Bedienung (sofern vorhanden) ist AKTIV.
Fräswerkantriebsriemen nicht eingestellt. Bringen Sie die Maschine zum
Riemenführung des Fräswerkantriebs nicht
eingestellt.
Elektroschaden. Bringen Sie die Maschine zum
Auswurfschacht und Leitblech sind nicht
richtig eingestellt oder müssen geschmiert
werden.
Fahrantriebsteuerung ist nicht eingestellt. Bringen Sie die Maschine zum
Kraftstoffansaugung bei kaltem Motor fehlgeschlagen.
Das Kraftstoffabsperrventil ist in der
Stellung ZU.
Kein Kraftstoff. Kraftstofftank befüllen.
Choke bei kaltem Motor auf OFFEN/
BETRIEB gestellt.
Motor ist mit Kraftstoff geflutet. Schieben Sie den Choke in die Position
Kein Zündfunke. Bringen Sie die Maschine zum
Wasser im Kraftstoff oder alter Kraftstoff. Entleeren Sie den Tank. (Entsorgen
Zündkerze defekt, verrußt oder falscher
Elektrodenabstand.
Belüftungsöffnung im Tankdeckel blockiert. Reinigen Sie die Belüftungsöffnung.
Fahrantriebsteuerung ist nicht eingestellt. Bringen Sie die Maschine zum
nicht richtig eingestellt.
Lassen Sie sowohl den Schneckenhebel
als auch den Free Hand-Hebel (sofern
vorhanden) los, um die Schnecke zu stoppen.
Fachhändler.
Bringen Sie die Maschine zum
Fachhändler.
Fachhändler.
Bediengestänge anpassen und/oder
schmieren.
Fachhändler.
EIN.
Drücken Sie zweimal auf die
Handansaugpumpe und starten Sie erneut.
Drehen Sie das Ventil in die Stellung
OFFEN.
Stellen Sie den Choke auf
GESCHLOSSEN/START und den
Gashebel auf SCHNELL.
OFFEN/BETRIEB, schieben Sie den
Gashebel in die Stellung SCHNELL und
drehen Sie den Motor durch, bis er startet.
Fachhändler.
Sie den Kraftstoff in einer autorisierten
Sondermüllanlage.) Tanken Sie frischen
Kraftstoff auf.
Bringen Sie die Maschine zum
Fachhändler.
alle Teile fest. Besteht die Vibration weiterhin, lassen Sie die Maschine von einem
zugelassenen Händler warten.
Fachhändler.
Heben oder senken Sie Gleitkufen und das
Räumschild.
Deutsch
de
19
Page 52

Not for
Reproduction
Problem Suchen Sie nach Abhilfe
Der Antrieb der Maschine versagt. Antriebsriemen sind lose oder beschädigt. Ersetzen Sie den Antriebsriemen. Bringen
Sie die Maschine zum Fachhändler.
Falsche Einstellung des Seilzuges des
Fahrantriebes.
Abgenutzte oder beschädigte
Friktionsscheibe.
Es wird kein Schnee ausgeworfen. Schneckenantriebsriemen lose oder
beschädigt.
Fräswerksteuerungsseilzug ist nicht richtig
angepasst.
Gebrochener Scherbolzen. Ersetzen Sie den Scherbolzen.
Auswurfschacht verstopft. Stellen Sie den Motor sofort ab. Verwenden
Fremdkörper in Schnecke. Stellen Sie den Motor sofort ab. Verwenden
Bringen Sie die Maschine zum
Fachhändler.
Ersetzen Sie die Friktionsscheibe. Bringen
Sie die Maschine zum Fachhändler.
Bringen Sie die Maschine zum
Fachhändler.
Stellen Sie den Fräswerk-Steuerseilzug
ein. Siehe Abschnitt Wartung in dieser
Bedienungsanleitung.
Siehe Abschnitt Wartung in dieser
Bedienungsanleitung oder wenden Sie sich
an eine Vertragswerkstatt.
Sie immer ein entsprechendes Werkzeug,
um den Auswurfschacht zu reinigen, niemals mit der Hand reinigen. Reinigen Sie
den Auswurfschacht und das Innere des
Schneckengehäuses. Siehe Warnung
zum Auswurfschacht im Abschnitt
Bedienersicherheit.
Sie immer ein entsprechendes Werkzeug,
um den Auswurfschacht zu reinigen, niemals mit der Hand reinigen. Entfernen
Sie den Fremdkörper aus der Schnecke.
Siehe WARNHINWEISE im Abschnitt
Bedienersicherheit.
20
Page 53

Not for
Reproduction
Deutsch
de
21
Page 54

Not for
Reproduction
Tämän käsikirjan kattamat tuotteet
Seuraavat tuotteet ovat tämän käsikirjan kattamia:
1695856
1695994
1695995
1695996
1695996-00
1695996-01
1695996-02
1695997
1695997-00
1695997-01
1695997-02
1696009
1696010
1696011
1696011-00
1696011-01
1696011-02
1696012
1696012-00
1696012-01
1696012-02
1696053
1696054
1696055
1696055-00
1696055-01
1696056
1696061
1696062
1696062-00
1696062-01
1696063
1696065
1696066
1696067
1696199-00
1696199-01
1696200-00
1696201-00
1696201-01
1696202-00
1696202-01
1696203-00
1696203-01
1696206-00
1696207-00
1696207-01
1696212-00
1696212-01
1696220-00
1696221-00
1696221-01
1696222-00
1696222-01
1696223-00
1696223-01
1696224-00
1696224-01
1696226-00
1696227-00
1696227-01
1696228-00
1696229-00
1696230-00
1696253-00
1696253-01
1696254-00
1696254-01
1696255-00
1696255-01
1696256-00
1696256-01
1696257-00
1696257-01
1696277-00
1696278-00
1696300-00
1696301
1696301-00
1696302-00
1696381-00
1696382-00
1696390-00
1696391-00
1696392-00
1696481-00
1696482-00
1696483-00
1696484-00
1696485-00
1696486-00
1696487-00
1696488-00
1696489-00
1696490-00
1696491-00
1696493-00
1696494-00
1696495-00
1696522-00
1696523-00
1696524-00
Ohjekirjan sisältö:
Käyttäjän turvallisuus
Varoitusmerkki ja varoitussanat
Varoitussymboli ilmaisee mahdollisten henkilövahinkojen
vaaraa. Varoitussanaa (VAARA, VAROITUS tai HUOMAUTUS) käytetään varoitussymbolin kanssa osoittamaan vaaran vakavuuden
astetta tai tasoa. Varoitussymbolia voidaan käyttää edustamaan
vaaran tyyppiä. Varoitusssanaa HUOMIO käytetään osoittamaan
toimintoja, jotka eivät liity henkilövahinkoihin.
VAARA tarkoittaa vaaraa, joka toteutuessaan johtaa kuolemaan
tai vakavaan vammaan.
VAROITUS tarkoittaa vaaraa, joka toteutuessaan saattaa johtaa
kuolemaan tai vakavaan vammaan.
HUOMAUTUStarkoittaa vaaraa, joka toteutuessaan saattaa
aiheuttaa lievän tai kohtalaisen vamman.
HUOMIO tarkoittaa tilannetta, jossa laite voi vahingoittua.
Varoitusmerkintätaulukot
Lumilingon varoitusmerkit
Symboli Merkitys Symboli Merkitys
Turvallisuustietoja
vaaroista, jotka
voivat johtaa henkilövahinkoihin.
Lue ja ymmärrä
Käyttäjän käsikirja
ennen laitteen käyttöä tai huoltoa.
Käyttäjän turvallisuus ........................................................6
Turvajärjestelmän testit .................................................. 11
Toiminnot ja hallintalaitteet ............................................ 11
Käyttö ............................................................................... 12
Huolto ............................................................................... 16
Vianmääritys .................................................................... 19
HUOMIO: Katso lisätiedot Asiakkaan yhteydenotto-oppaasta and
Käyttöönotto-ohjeista.
Tässä asiakirjassa olevat kuvat ovat kuvaavia, ja ne on tarkoitettu
täydentämään sitä käyttöohjeiden kappaletta, johon ne kuuluvat.
Laitteesi voi poiketa näytetyistä kuvista. VASEN ja OIKEA viittaavat
käyttäjän asemasta käsin nähtävään näkymään.
Tämän sytytystulpallinen sytytysjärjestelmä täyttää ICES-002standardin (Kanada).
Jäsenten irtoamisvaara - pyörivä
juoksupyörä.
Jäsenten irtoamisvaara - pyörivä
juoksupyörä.
Jäsenten irtoamisvaara - älä koske
liikkuviin osiin.
Tulipalon vaara. Räjähdysvaara.
Iskun vaara. Myrkyllisten kaasu-
Kuumien pintojen
vaara.
Poista avain ennen
huoltotöiden suorittamista.
Jäsenten irtoamisvaara - pyörivä
ruuvisyötin.
Sinkoutuvien esineiden vaara.
jen vaara.
Kuulosuojaimia
suositellaan pitkäaikaiseen käyttöön.
6
Page 55

Not for
Reproduction
Symboli Merkitys Symboli Merkitys
Pysy turvallisen
etäisyyden päässä.
Pidä lapset poissa. Takapotkun vaara.
Käytä suojalaseja.
Yleiset turvallisuutta koskevat varoitukset
VAROITUS
• Lumilingon aiheuttaman vamman syynä on useimmiten
käden koskettaminen heittotorven sisällä pyörivään puhaltimeen.
• Tämä lumilinko on toiminnaltaan sellainen, että kädet tai jalat
voivat leikkaantua irti ja lisäksi sen sisälle joutuneet esineet
linkoutuvat ulos. Lue kaikki tämän ohjekirjan turvaohjeet ja
noudata niitä. Niiden laiminlyönti voi johtaa vakavaan loukkaantumiseen tai kuolemaan.
VAROITUS
Lue ennen lumilingon käyttöä kaikki laitteessa ja ohjekirjassa olevat ohjeet siten, että ymmärrät ne. Noudata näitä ohjeita.
Tämän ohjekirjan turvaohjeiden noudattamatta jättäminen voi
johtaa kuolemaan tai vakavaan loukkaantumiseen.
• Tutustu perusteellisesti ohjauslaitteisiin ja lumilingon oikeaan
käyttöön.
• Varmista, että olet kouluttautunut kunnolla ennen lumilingon
käyttöä.
• Selvitä, miten laite pysäytetään ja ohjaimet kytketään nopeasti irti.
• Älä koskaan anna kenenkään käyttää lumilinkoa ilman asianmukaista ohjeistusta.
• Noudata aina käyttäjän käsikirjassa olevia ohjeita, jos lumilinkoa varastoidaan kauemman aikaa.
• Pidä turva- ja ohjemerkinnät kunnossa tai vaihda ne tarvittaessa uusiin.
• Älä koskaan yritä tehdä lumilinkoon isoja korjauksia, ellet ole
saanut siihen kunnollista koulutusta. Lumilingon vääränlainen huolto voi johtaa vaaralliseen toimintaan, laitteen vahingoittumiseen ja tuotteen takuun mitätöintiin.
VAARA
Lumenlinkousputken sisällä on pyörivä siipiratas, joka linkoaa
lunta. Älä koskaan käytä kättäsi heittotorven puhdistamiseen tai
tukkeuman poistamiseen. Sormet tarttuvat nopeasti puhaltimeen.
Käytä aina puhdistustyökalua.
Näiden turvaohjeiden noudattamatta jättäminen johtaa raajojen
irtoamiseen tai vahingoittumiseen erittäin vakavasti.
VAARA
Pidä kädet, jalat ja vaatteet kaukana pyörivistä osista. Pyörivät
osat voivat osua tai vetää mukaansa käden, jalan, hiukset, vaatteet tai lisälaitteet.
Näiden turvaohjeiden noudattamatta jättäminen johtaa raajojen
irtoamiseen tai vahingoittumiseen erittäin vakavasti.
• Aina kun puhdistat, korjaat tai tarkastat lumilinkoa, varmista,
että moottori on sammutettu, sytytystulppa irrotettu ja kaikki
liikkuvat osat pysähtyneet.
• Älä pane käsiä tai jalkoja pyörivien osien lähelle tai alle. Pysy
koko ajan poissa poistoaukolta.
• Älä koskaan käytä lumilinkoa ilman paikallaan olevia ja toimivia kunnollisia suojaimia ja muita suojalaitteita.
• Älä koskaan jätä lumilinkoa valvomatta, kun moottori on
käynnissä. Kytke aina syöttöruuvi ja veto irti, sammuta moottori ja irrota avaimet.
• Pidä kaikki löysät vaatteet poissa lumilingon ja ruuvisyöttimen etupäästä. Kaulaliinat, lapaset, roikkuvat nyörit, löysät
vaateet ja housut tarttuvat helposti pyörivään laitteeseen,
jolloin ruumiinjäsen irtoaa. Sido pitkät hiukset ja riisu korut.
• Käytä konetta useita minuutteja lumen poistamisen jälkeen,
jotta kerääjä/puhallin ei jäädy.
• Kytke virta pois kerääjästä/puhaltimesta, kun lumilinkoa kuljetetaan tai se ei ole käytössä.
Suomi
7
Page 56

Not for
Reproduction
VAROITUS
Ruuvisyöttimeen voi tarttua esineitä, jotka voivat sinkoutua heittotorvesta. älä koskaan suuntaa lumisuihkua läsnäolijoihin äläkä
päästä ketään lumilingon eteen. Tämän ohjekirjan turvaohjeiden
laiminlyönti johtaa kuolemaan tai vakavaan loukkaantumiseen.
• Käytä aina työskentelyn, säädön tai korjauksen aikana suojalaseja tai silmäsuojaimia.
• Pidä aina mielessä, mihin suuntaan lumi sinkoutuu laitteesta. Lähellä olevat jalankulkijat, lemmikit tai omaisuus voivat
saada vahinkoja sinkoutuvista esineistä.
• Muista ympäristö käyttäessäsi lumilinkoa. Esimerkiksi soran,
ovimattojen, sanomalehtien, lelujen ja lumen alla olevien
kivien yli ajettaessa ne voivat lentää torvesta tai tukkia syöttöruuvin.
• Noudata erityistä varovaisuutta työskennellessäsi sorapäällysteisillä ajo-, kävely- tai maanteillä tai ylittäessäsi soratien.
• Säädä kerääjän rungon korkeus siten, että se on irti sora- tai
murskekivipinnasta.
• Älä koskaan käytä lumilinkoa lasiseinien, autojen, ikkunaaukkojen, alamäkien ja vastaavien lähellä ilman, että heittotorven kulma on säädetty oikein.
• Tutustu ensin alueeseen, jolla aiot käyttää lumilinkoa.
Merkitse kävely- ja ajoteiden rajat.
VAROITUS
Järkyttäviä onnettomuuksia voi tapahtua, jos käyttäjä ei ole
varautunut lasten läsnäoloon. Lapset ovat usein kiinnostuneita
laitteesta ja sen toiminnasta. Älä koskaan oleta, että lapset pysyvät siinä, missä viimeksi näit heidät.
• Pidä lapset poissa alueelta käytön aikana. Lapset ovat usein
kiinnostuneita koneista. Muista seurata kaikkia läsnäolijoita.
• Ole varuillasi ja sammuta laite, jos lapsia tulee alueelle.
• Älä koskaan anna lasten käyttää laitetta.
• Ole erityisen huolellinen, kun lähestyt kuolleita kulmia, pensaita, puita tai muita kohteita, jotka saattavat peittää näkyvyyden. Näkymättömissä voi olla lapsia.
VAROITUS
Moottorit tuottavat häkää, joka on hajuton ja väritön myrkkykaasu. Hään hengittäminen voi aiheuttaa pahoinvointia, pyörtymisen
ja lopulta kuoleman.
• Käynnistä ja käytä moottoria ulkona.
• Älä käytä moottoria suljetussa tilassa, vaikka ovet ja ikkunat
olisivatkin auki.
VAROITUS
Polttoaine ja polttoainehöyryt syttyvät erittäin herkästi ja ovat
räjähdysherkkiä. Käsittele polttoainetta erityisen varovasti.
Näiden turvallisuutta koskevien ohjeiden noudattamatta jättäminen voi aiheuttaa tulipalon tai räjähdyksen, joka voi johtaa vakaviin palovammoihin tai kuolemaan.
Kun lisäät polttoainetta säiliöön
• Sammuta laite ja annan sen jäähtyä vähintään 2 minuutin
ajan, ennen kuin avaat polttoainesäiliön korkin ja lisäät polttoainetta.
• Täytä polttoainesäiliö ulkotiloissa tai hyvin tuuletetussa sisätilassa.
• älä täytä liikaa. Jotta polttoaine pääsee laajenemaan, älä
täytä polttoainesäiliön kaulan alareunaan korkeammalle.
• Suojaa polttoaine kipinöiltä, avotulelta, sytytysliekiltä, lämmöltä ja muilta sytytyslähteiltä.
• Tarkista polttoaineputket, korkki ja liitokset murtumien ja
vuotojen varalta. Vaihda tarvittaessa.
• Käytä hyväksyttyä polttoainesäiliötä.
• Jos polttoainetta läikkyy koneelle, odota sen haihtumista,
ennen kuin käynnistät moottorin.
Kun käynnistät moottoria
• Varmista, että sytytystulppa, äänenvaimennin, polttoainekorkki ja ilmanpuhdistin ovat paikoillaan ja kiinnitettyinä (jos
laitteessa sellaisia on).
• Äläkä pyöritä moottoria sytytystulppa irrotettuna.
• Jos polttoainetta roiskuu, älä yritä käynnistää moottoria,
vaan siirrä lumilinko pois roiskealueelta ja vältä syttymislähteiden luomista, kunnes polttoainehöyryt ovat haihtuneet.
• Älä ruiskuta moottoriin liikaa polttoainetta. Noudata tässä
ohjekirjassa annettuja moottorin käynnistysohjeita.
• Jos moottorissa on liikaa polttoainetta, aseta (mahdollinen)
rikastin AUKI/AJO-asentoon, siirrä (mahdollinen) kaasu
NOPEA-asentoon ja pyöritä moottoria, kunnes se käynnistyy.
Kun käytät laitetta
• Älä kallista lumilinkoa sellaiseen kulmaan, jossa polttoainetta
roiskuu.
• Älä sammuta moottoria käyttämällä rikastinta.
• Älä koskaan käytä moottoria, jos ilmanpuhdistimen asennelma tai ilmanpuhdistin on irrotettu (ja laitteessa sellainen on).
Kun vaihdat öljyä
• Jos haluat tyhjentää öljyn öljyntäyttöputken kautta, polttoainesäiliön on oltava tyhjä. Muussa tapauksessa polttoaine voi
aiheuttaa valuessaan tulipalon tai räjähdyksen.
Kun kuljetat laitetta
• Kuljeta laite tankki TYHJÄNÄ tai polttoainehana
SULJETTUNA.
Kun säilytät polttoainetta ja laitetta, jonka säiliössä on
polttoainetta
• Säilytä kaukana uuneista, kiukaista, lämmityskattiloista ja
muista laitteista, joissa on sytytysliekki tai muu sytytyslähde,
koska ne voivat sytyttää polttoainehöyryt.
8
Page 57

Not for
Reproduction
VAROITUS
Lumilingon turvallinen käyttö edellyttää moottorin asianmukaista
hoitoa ja huoltoa.
• Kytke irti kaikki kytkimet ja siirrä vapaa-vaihteelle ennen
moottorin käynnistämistä.
• Anna moottorin olla ulkolämpötilassa lämpötilan tasaantumiseksi ennen lumen puhdistuksen aloittamista.
• Käytä sähkökäyttöisissä tai sähkökäynnisteisissä lumilingoissa maadoitettua pistoketta.
VAROITUS
Moottorin käynnistäminen synnyttää kipinöintiä.
Kipinöinti voi sytyttää lähistöllä sijaitsevan palavan kaasun.
Tuloksena voi olla räjähdys ja tulipalo.
• Jos alueella on maa- tai nestekaasuvuoto, älä käynnistä
moottoria.
• Älä käytä paineistettuja käynnistysapunesteitä, koska niiden
höyryt syttyvät herkästi.
VAROITUS
Moottorin käydessä syntyy lämpöä. Moottorin osat, erityisesti vaimennin, tulevat erittäin kuumiksi.
Näiden turvaohjeiden laiminlyönti voi johtaa vakaviin palovammoihin näihin osiin kosketettaessa.
• Älä koskaan koske kuumaan moottoriin tai vaimentimeen.
Anna vaimentimen, moottorin, sylinterin ja jäähdytysripojen
jäähtyä ennen niihin koskemista.
• Poista roskat vaimentimen ja sylinterin läheltä.
• Asenna kipinäsuoja ja varmista sen toimintakuntoisuus,
ennen kuin käytät laitetta metsä-, pensas- tai ruohopeitteisellä alueella.
• USA ssa myytävät mallit:Kalifornian luonnonvaralain 4442
§:n mukaan on kiellettyä käyttää tai ajaa laitetta metsä-,
pensas- tai ruohopeitteisellä maalla tai sellaisen lähellä, ellei
pakojärjestelmään ole asennettu 4442 §:n mukaista toimintakuntoista kipinäsuojaa. Muissa osavaltioissa tai liittovaltion
alueella voi olla voimassa samanlaisia lakeja. Ota yhteys
alkuperäisen laitteen valmistajaan, jälleenmyyjään tai vähittäiskauppiaaseen saadaksesi tälle moottorille suunniteltuun
pakokaasujärjestelmään sopivan kipinänsammuttimen.
VAROITUS
Tätä lumilinkoa on huollettava oikein, jotta se toimii turvallisesti ja
tehokkaasti. Tämän ohjekirjan turvaohjeiden noudattamatta jättäminen voi johtaa kuolemaan tai vakavaan loukkaantumiseen.
• Kun huollat tai korjaat lumilinkoa, sammuta moottori, irrota
sytytystulpan johto ja vie johto kauas sytytystulpasta, jottei
kukaan käynnistä moottoria vahingossa.
• Tarkista usein, että murtopultit ja muut pultit ovat oikeassa
tiukkuudessa.
• Pidä mutterit sekä pultit kireällä ja pidä lumilinko hyvässä
kunnossa.
• Älä koskaan kajoa turvalaitteisiin. Tarkista säännöllisesti,
että turvalaitteet toimivat oikein ja tee tarvittavat korjaukset,
jos ne eivät toimi oikein.
• Osat ovat kuluvia, vaurioituvia ja käytössä heikkeneviä.
Tarkista ne usein ja vaihda tarvittaessa valmistajan suosittelemiin osiin.
• Tarkista laitteen toiminta usein. Säädä ja huolla tarvittavalla
tavalla.
• Käytä korjauksiin ainoastaan tehtaan hyväksymiä varaosia
tai vastaavia osia.
• Noudata aina kaikissa asetuksissa ja säädöissä tehtaan
ohjearvoja.
• Käytä ainoastaan tehtaan hyväksymiä tai vastaavia lisälaitteita ja varusteita (pyörien korkeus, vastapainot, hytti).
• Älä koskaan yritä tehdä säätöjä moottorin käydessä (paitsi
valmistajan erityisesti niin suositellessa).
Suomi
9
Page 58

Not for
Reproduction
VAROITUS
Lumilinko on yhtä turvallinen kuin käyttäjänsä. Väärin käytettynä
tai virheellisesti huollettuna se voi olla vaarallinen. Muista, että
olet vastuussa omasta ja muiden turvallisuudesta.
• Älä päästä työskentelyalueelle ketään, ei etenkään pieniä
lapsia tai kotieläimiä.
• Tutki perusteellisesti alue, jolla lumilinkoa käytetään, ja poista kaikki ovimatot, kelkat, lumilaudat, johdot ja muut vieraat
esineet.
• Älä käytä lumilinkoa pitämättä sopivaa talvivaatetusta.
• Käytä jalkineita, jotka parantavat pitoa liukkailla pinnoilla.
• Ole varovainen liukastumisen ja kaatumisen välttämiseksi,
erityisesti käyttäessäsi lumilinkoa peruutussuunnassa.
• Älä koskaan käytä lumilinkoa, ellei näkyvyys tai valaistus ole
hyvä. Varmista aina jalansijasi ja pidä luja ote kahvoista.
• Älä käytä lumilinkoa mäessä poikittain. Noudata äärimmäistä
varovaisuutta vaihtaessasi suuntaa rinteissä. Älä yritä puhdistaa jyrkkiä rinteitä.
• Älä ylikuormita laitetta yrittämällä puhdistaa lunta liian nopeasti.
• Älä koskaan käytä laitetta suurella nopeudella liukkailla
pinnoilla. Katso lumilingon taakse ja noudata huolellisuutta
peruuttaessasi.
• Älä käytä lumilinkoa maanpinnan tason yläpuolella olevilla
pinnoilla, kuten asuintalojen katoilla, autotallien päällä, porraskatosten päällä tai muilla vastaavilla rakenteilla tai vastaavien rakennusten päällä.
• Käyttäjien tulee arvioida kykyään käyttää lumilinkoa tarpeeksi turvallisesti itsensä ja muiden loukkaantumiselta suojelemiseksi.
• Lumilinko on tarkoitettu ainoastaan lumen poistamiseen. Älä
käytä sitä mihinkään muuhun tarkoitukseen.
• Älä kuljeta matkustajia.
• Sen jälkeen, kun lumilinko on osunut vieraaseen esineeseen, laita moottori POIS päältä, irrota sähkömoottorien
johto, tarkasta lumilinko perusteellisesti vahinkojen varalta ja
korjaa vahingot ennen lumilingon uudelleen käynnistämistä
ja käyttöä.
• Jos lumilinko tärisee poikkeavasti, laita moottori POIS päältä. Tärinä varoittaa yleensä ongelmasta. Ota tarvittaessa
yhteyttä valtuutettuun jälleenmyyjään korjausta varten.
• Sähkökäynnisteisillä moottoreilla varustettujen laitteiden sähköjohto on irrotettava pistorasiasta moottorin käynnistyttyä.
VAROITUS
Vahingoittuneet tai maadoittamattomat sähköjohdot voivat aiheuttaa sähköiskun.
Sähköisku voi aiheuttaa vakavan palovamman tai kuoleman.
Sähkökäynnistintä käytettäessä
• Sähköjohdon on aina oltava maadoitettu.
• Käytä ainoastaan kolmijohtimista sähköjohtoa, joka on asianmukaisesti maadoitettu pistorasian kautta.
• Jos virtajohto on vioittunut, pätevän asentajan on vaihdettava se uuteen, ettei vaaratilanteita pääse syntymään.
VAROITUS
Käynnistinnarun nopea vetäytyminen (takapotku) vetää kättäsi
kohti moottoria nopeammin kuin ehdit reagoida.
Seurauksena voi olla luunmurtuma, mustelmia tai venähdys.
Moottoria käynnistettäessä
• Kun käynnistät moottoria, vedä käynnistinnarua hitaasti, kunnes tunnet vastuksen, ja vetäise sen jälkeen nopeasti. Näin
vältät takapotkun.
Turvallisuustarrat
Lue turvatarrat ennen laitteesi käyttöä. Vertaa Kuvaa 1 alla olevaan
taulukkoon. Huomautukset ja varoitukset on tehty sinun turvallisuutesi vuoksi. Välttääksesi henkilövahinkoja tai laitevahinkoja ymmärrät kaikki turvatarrat ja noudata niitä.
VAROITUS
Jos jotkut turvatarrat kuluvat tai vahingoittuvat, eikä niitä
voi enää lukea, tilaa varatarrat paikalliselta jälleenmyyjältäsi.
A Heittotorven turva-
tarra
(osanro 1727207)
B Ruuvisyöttimen tur-
vatarra
(osanro 1737867)
10
Page 59

Not for
Reproduction
Turvajärjestelmän testit
Sen määrittäminen, mitä testiä tulee
käyttää
Valitse sopiva Turvajärjestelmän testi laitteellesi:
Mallit, joissa ei ole Free Hand™ -ohjauslaitetta: Laitteissa,
joissa ei ole Free Handiä, ruuvisyöttimen ja vedon ohjauslaitteet
toimivat itsenäisesti, eikä kojelaudassa ole kuvassa 2 näkyvää Free
Hand -kuvakesarjaa.
Mallit, joissa on Free Hand™ -ohjauslaite: Sen jälkeen, kun olet
kytkenyt päälle vedon ohjauslaitteen (vasemmanpuoleinen) ja ruuvisyöttimen ohjauslaitteen (oikeanpuoleinen), Free Hand mahdollistaa
käyttäjälle ruuvisyöttimen ohjauslaitteen vapauttamisen ja ruuvisyöttimen ohjauslaitteen päälle kytkettynä säilymisen siihen asti, että
vedon ohjauslaite vapautetaan. Free Hand -malleissa kuvakesarja
näkyy kuvassa 2 kojelaudassa.
Turvajärjestelmän testi (laitteet ilman
Free Hand -ohjauslaitetta)
VAARA
Jäsenten irtoamisvaara
Tämä lumilinko on varustettu useilla mekaanisilla turvajärjestelmillä, jotka on suunniteltu pitämään käyttäjä turvassa laitetta
käyttäessään. Tarkasta säännöllisesti näiden järjestelmien toiminta lueteltuja turvallisuusjärjestelmän testejä käyttäen. Jos laite
ei toimi kuvatulla tavalla, ÄLÄ käytä sitä. Ota välittömästi yhteyttä
valtuutettuun jälleenmyyjääsi huoltoa varten.
Testi 1 - Ruuvisyöttimen/Juoksupyörän ohjauslaite
Moottorin ollessa käynnissä:
• Paina syöttöruuvin ohjausvipua. (Ruuvisyöttimen/juoksupyörän pitäisi pyöriä)
• Vapauta syöttöruuvin ohjausvipu. (Ruuvisyöttimen/juoksupyörän pitäisi pysähtyä 5 sekunnissa)
Turvajärjestelmän testi (laitteet Free
Hand -ohjauslaitteella)
VAARA
Jäsenten irtoamisvaara
Tämä lumilinko on varustettu useilla mekaanisilla turvajärjestelmillä, jotka on suunniteltu pitämään käyttäjä turvassa laitetta käyttäessään. Tarkasta säännöllisesti näiden järjestelmien toiminta
lueteltuja turvallisuusjärjestelmän testejä käyttäen. Jos laite ei
toimi kuvatulla tavalla, ÄLÄ käytä sitä. Ota välittömästi yhteyttä
valtuutettuun jälleenmyyjääsi huoltoa varten.
Testi 1 - Ruuvisyöttimen/Juoksupyörän ohjauslaite
Moottorin ollessa käynnissä:
• Paina syöttöruuvin ohjausvipua. (Ruuvisyöttimen/juoksupyörän pitäisi pyöriä)
• Vapauta syöttöruuvin ohjausvipu. (Ruuvisyöttimen/juoksupyörän pitäisi pysähtyä 5 sekunnissa)
Testi 2 - Vetokäytön ohjauslaite
Moottorin ollessa käynnissä ja ajonopeuden ohjauslaitteen ollessa 1.-vaihteella:
• Paina vedon ohjauslaitteen vipua alas. (Laitteen pitäisi liikkua eteenpäin)
• Vapauta vedon ohjausvipu. (Laitteen pitäisi pysähtyä)
Testi 3 - Free Hand -ohjauslaite
Moottorin ollessa käynnissä:
• Kytke päälle syöttöruuvin ja vedon ohjausvivut ja vapauta
sen jälkeen syöttöruuvin ohjausvipu. (Kummankin ohjauslaitteen pitäisi pysyä päälle kytkettynä)
• Vapauta seuraavaksi vedon ohjausvipu. (Kummankin
ohjauslaitteen pitäisi vapautua)
Testi 2 - Vetokäytön ohjauslaite
Moottorin ollessa käynnissä ja ajonopeuden ohjauslaitteen ollessa 1.-vaihteella:
• Paina vedon ohjauslaitteen vipua alas. (Laitteen pitäisi liikkua eteenpäin)
• Vapauta vedon ohjausvipu. (Laitteen pitäisi pysähtyä)
Toiminnot ja hallintalaitteet
Moottorin ominaisuudet ja ohjauslaitteet
Katso moottorin ominaisuudet ja ohjauslaitteet Moottorin käyttäjän
käsikirjasta.
Lumilingon ominaisuudet ja ohjauslaitteet
Vertaa Kuvaa 3 alla olevaan taulukkoon.
A Ruuvisyöttimen ohjausvipu
- Käytetään ruuvisyöttimen ja
juoksupyörän päälle kytkemiseen
ja irrottamiseen. Paina alas kytkeäksesi päälle. Vapauta irroittamista
varten.
Suomi
11
Page 60

Not for
Reproduction
B
1
R1
R2
2
3
c
D
E
F
G
h
I Suihkun ohjauslaite -
Vaihdevipu - Mahdollistaa käyt-
täjälle yhden kuudestä eteenpäinmeno- ja kahdesta peruutusajonopeudesta käytön. Vaihdetta
vaihdetaan siirtämällä vaihdevipu
haluttuun asentoon.
HUOM: Älä siirrä nopeuden
valintavipua, kun Vedon ohjauslaite on päälle kytkettynä.
Voimansiirtojärjestelmä voi
vahingoittua pahasti.
Heittotorven kääntövipu In-Dash (jos on)- Käytetään
heittotorven kääntämiseen vasemmalle tai oikealle.
Heittotorven kääntövipu Vasemmanpuoleinen vipu (jos
on)- Käytetään heittotorven kään-
tämiseen vasemmalle tai oikealle.
Heittotorven kääntökytkin Sähköinen (jos on)- Käytetään
heittotorven kääntämiseen vasemmalle tai oikealle.
Free-Hand™ -ohjaus (jos varusteena) - Kun olet kytkenyt vedon
(vasemmalla) ja syöttöruuvin
(oikealla), voit vapauttaa syöttöruuvin ohjausvivun ja keskittyä muihin
säätimiin.
Vedon ohjausvipu - Käytetään
lumilingon ajamiseen eteenpäin
tai taaksepäin. Paina alas kytkemistä varten, vapauta irrottamista
varten. Katso myös "Free-Handohjauslaite".
Suihkun ohjauslaite - In-Dash
(jos on) - Käytetään suihkun
ohjaimen kulman säätöön (ylös tai
alas).
Manuaalinen (jos on) - Käytetään
suihkun ohjauskulman säätöön
(ylös tai alas).
K Easy Turn™ vedon ohjauslaite
(jos varusteena) - Kun toiminto
on kytkettynä päälle, käyttäjä voi
vapauttaa yhden vetopyörän mutta
toinen pyörä jatkaa vetämistä helpottaen kääntymistä.
l
M
N
O
-
-
-
Kahvanlämmittimen kytkin (jos
varusteena) - Käytetään käsikah-
vojen lämmitykseen. Kytkimessä
on kolme asentoa: suuri teho, pois
ja pieni teho.
HUOMIO: Kaikissa malleissa ei ole
kahvanlämmittimiä. Joissain malleissa kahvanlämmittimet toimivat
automaattisesti aina, kun lumilinko
on käynnissä.
Puhdistustyökalu - Käytetään
lumen ja roskien poistamiseen
heittotorvesta ja ruuvisyöttimen
kotelosta.
Liukukengät - Käytetään ruuvisyöttimen kotelon maavaran säätämiseen.
Ajovalo (jos varusteena) Valaisee lumilingon edessä olevan
alueen.
HUOMIO: Ajovalon rakenne vaihtelee malleittain.
Käyttö
Ennen lumilingon käyttöä
VAROITUS
Lue käyttöohjekirja ennen koneen käyttöä. Kone voi olla
vaarallinen varomattomasti käytettynä.
• Älä koskaan käytä lumilinkoa, jos kaikki suojaimet, kannet ja
suojalevyt eivät ole paikoillaan.
• Pysäytä kone aina, kun poistut sen ohjaimista.
• Irrota avain aina, ennen kuin puhdistat puhaltimen koteloa tai
heittotorvea ja ennen kuin teet korjauksia tai säätöjä.
• Kun poistut koneesta, irrota avain.
• Pidä kone puhtaana ja vapaana polttoaine- ja öljyroiskeista
sekä roskista tulipaloriskin vähentämiseksi.
j Suihkun ohjauslaite -
Sähköinen (jos on) - Käytetään
suihkun ohjauskulman säätöön
(ylös tai alas).
12
Page 61

Not for
Reproduction
• Irrota sähköisissä käynnistysmalleissa jatkojohto ennen käyttöä.
• Varmista, että tarkastat moottorin öljytason ennen moottorin
käynnistämistä. Katso öljysuositukset moottorin käyttäjän käsikirjasta.
Lumilingon käyttö
VAARA
Jäsenten irtoamisvaara
Lumenlinkousputken sisällä on pyörivä siipiratas, joka
linkoaa lunta. Sormet tarttuvat nopeasti puhaltimeen. Älä
koskaan käytä kättäsi heittotorven puhdistamiseen tai tukkeuman poistamiseen. Käytä aina puhdistustyökalua.
Näiden turvaohjeiden noudattamatta jättäminen johtaa raajojen irtoamiseen tai vahingoittumiseen erittäin vakavasti.
Lumilingon aiheuttaman vamman syynä on useimmiten käden
koskettaminen heittotorven sisällä pyörivään puhaltimeen. Älä
koskaan käytä kättäsi heittotorven puhdistamiseen.
Voit puhdistaa tukkeutuneen heittotorven turvallisesti seuraavien ohjeiden mukaisesti:
1. Sammuta moottori.
2. Odota 10 sekuntia, jotta puhaltimen siivet ovat varmasti
pysähtyneet.
3. Käytä aina puhdistustyökalua, äläkä käsiäsi.
VAARA
Myrkyllisten kaasujen vaara
Moottorit tuottavat häkää, joka on hajuton ja väritön myrk-
kykaasu.
Hään hengittäminen voi aiheuttaa pahoinvointia, pyörtymi-
sen ja lopulta kuoleman.
• Käynnistä ja käytä moottoria ulkona.
• Älä käytä moottoria suljetussa tilassa, vaikka ovet ja ikkunat
olisivatkin auki.
VAROITUS
Sinkoutuvien esineiden vaara
Laitteesta voi singota esineitä ja roskia, jotka voivat aiheuttaa
henkilövahinkoja laitteen lähellä oleville ihmisille tai vaurioittaa
rakennuksia.
Varmista, ettei laitteen toiminta-alueella ole muita ihmisiä. Älä
koskaan suuntaa poistoputken suihkua henkilöitä, rakennuksia
tai autoja kohti.
1. Käynnistä moottori. Katso moottorin tiedot moottorin käyttäjän
käsikirjasta.
2. Käännä heittotorven kääntökampea (C tai D, kuva 3) tai käytä
heittotorven kääntökytkintä (E) heittotorven suunnan asettamiseen.
3. Mallit, joissa on manuaalinen suihkun ohjaimen säätö:
Löysää heittotorven suihkun ohjainta (I, kuva 3) paikallaan
pitävä siipimutteri. Nosta suihkun ohjainta lumen heittämiseksi
pidemmälle. Aseta suihkun ohjain haluttuun asentoon ja kiristä
siipimutteri.
Mallit, joissa on in-dash -suihkun ohjausvipu: Käytä heit-
totorven suunnan ohjaimen ohjausvipua (H, kuva 3) suunnan
ohjaimen siirtämiseen ylös tai alas. Nosta suihkun ohjainta
lumen heittämiseksi pidemmälle.
Mallit, joissa on sähköinen suihkun ohjauslaite: Käytä
heittotorven suunnan ohjaimen ohjausvipua (J, kuva 3) suunnan ohjaimen siirtämiseen ylös tai alas. Nosta suihkun ohjainta
lumen heittämiseksi pidemmälle.
4. Käytä vaihdevipua (B, kuva 3) eteenpäinajon tai peruutuksen
ajonopeuden valitsemiseen. Käytä alhaisempia ajonopeuksia
puhdistaessasi märkää, raskasta lunta. Käytä suurempia ajonopeuksia keveään lumeen tai kuljetukseen.
HUOMIO: Aseta moottorin ajonopeudeksi aina NOPEA (kaasu
maksimiasentoon).
5. Paina syöttöruuvin ohjausvipu (A, kuva 3) pohjaan syöttöruuvin
päälle kytkemiseksi. Vapauta vipu pysäyttääksesi ruuvisyöttimen.
6. Paina vedon ohjausvipu / Free Hand -ohjauslaite (F/G, kuva 3)
pohjaan sekä pidä pohjassa kytkeäksesi vetokäytön päälle ja
aloittaaksesi lumilingon liikuttamisen. Pysäytä vivun vapautuksella.
HUOMIO: Vapauta aina vedon ohjausvipu ennen ajonopeuksien
vaihtamista.
7. Kun sekä ruuvisyöttimen (A, kuva 3) että vedon ohjausvipuja
(F) painetaan, Free Hand -ohjauslaite aktivoidaan. Tämä mahdollistaa syöttöruuvin ohjausvivun (A) vapauttamisen muiden
ohjauslaitteiden käyttöä varten. Ruuvisyötin jatkaa pyörimistä,
kunnes vedon ohjauslaitteen / Free-Hand -ohjauslaitteen vipu
vapautetaan.
8. Käytä halutessasi kahvanlämmittimen kytkintä (L, kuva 3) lämmitettyjen käsikahvojen päälle laittamiseen (jos varusteena).
HUOMIO: Varmista, että sammutat käsikahvojen lämmityksen,
ennen kuin pysäytät lumilingon.
HUOMIO: Joissain malleissa kahvanlämmittimet toimivat automaattisesti aina, kun lumilinko on käynnissä.
9. Joissain malleissa on ajovalo (O, kuva 3), joka valaisee lumilingon edessä olevan alueen. Ajovalo toimii aina, kun lumilinko on
käynnissä.
Suomi
13
Page 62

Not for
Reproduction
Lumilingon pysäytys
1. Vapauta syöttöruuvin ohjausvipu (A, kuva 3).
2. Vapauta vedon ohjausvipu (F).
3. Sammuta moottori. Katso moottorin ohjeet moottorin käyttäjän
käsikirjasta.
Suihkun ohjaimen säätö
A. Manuaalinen suihkun ohjaimen ohjauslaite (jos
on)
Löysää suihkun ohjaimen nuppi (A, kuva 8), säädä suihkun ohjain
haluttuun asentoon ja kiristä sen jälkeen nuppi ohjaimen varmistamiseksi. Nosta suihkun ohjainta lumen heittämiseksi pidemmälle.
Easy Turn™ -vedon ohjauslaite (jos on)
Purista helppoa kääntöä varten lumilinkoa käyttäessäsi Easy Turn
-vedon ohjausvipua (kuva 4).
HUOMIO: Joissain malleissa Easy Turn -vedon ohjaus vaikuttaa
vain yhteen pyörään, toisissa malleissa kumpaankin pyörään.
HUOMIO: Easy Turn -vedon ohjaus on vaikeampi aktivoida raskaalla kuormalla. Käytä vipua ennen kuin ryhdyt kääntämään laitetta.
Easy Turn -vedon ohjausvivun päälle kytkeminen vapauttaa yhden
vetopyöristä, mutta mahdollistaa toiselle pyörälle ajamisen jatkamisen. Easy Turn -vedon ohjausvivun vapauttaminen kytkee automaattisesti kummankin vetopyörän vetämään täydellä teholla (kuva
5).
Pyörien vapautus - Lukitusnuppi (jos on)
Jotkin mallit on varustettu vetopyörien vapautuksella, joka mahdollistaa yhden vetopyörän irti kytkemisen laitteen helpompaa kuljetusta varten moottorin ollessa sammutettuna.
Mallit, joissa on vedon lukitusnuppi: Vedon lukitusnupilla (A,
kuva 6) varustetut pyörät voidaan vapauttaa täysin vetämällä nuppia
ulos pyörästä poispäin, kunnes pidätintappi on kytketty irti pyörästä.
Käännä sen jälkeen nuppia, jotta tappi ei kytke pyörää uudelleen
päälle. Suorita tämä menettely päinvastaisessa järjestyksessä vetopyörän päällekytkemistä varten.
B. Sähköinen suihkun ohjaimen ohjauslaite (jos
on)
Kun moottori on käynnissä, paina suihkun ohjaimen ohjauslaitteen
kytkimen (B, kuva 8) jompaakumpaa puolta siirtääksesi suihkun
ohjainta ylös ja alas. Nosta suihkun ohjainta lumen heittämiseksi
pidemmälle.
C. In-Dash -suihkun ohjaimen ohjauslaite (jos on)
Siirrä suihkun ohjaimen ohjausvipua (C, kuva 8) eteenpäin tai taaksepäin nostaaksesi ja laskeaksesi suihkun ohjainta. Nosta suihkun
ohjainta lumen heittämiseksi pidemmälle.
Heittotorven käännön säätö
A. Sähköinen heittotorven kääntämisen ohjauslaite
(jos on)
Kun moottori on käynnissä, paina heittotorven kääntökytkimen (A,
kuva 9) jompaakumpaa puolta kääntääksesi heittotorven vasemmalle tai oikealle.
B. In-Dash -heittotorven kääntämisen ohjauslaite
(jos on)
Paikanna in-dash-heittotorven kääntökampi (B, kuva 9). Käännä
heittotorvea kampea kääntämällä.
Pyörien vapautus - Pidätintapit (jos on)
Pyörät, jotka on varustettu vedon pidätintapeilla (A, kuva 7) voidaan
vapauttaa täysin poistamalla tappi ja asentamalla se ulkoiseen
akselireikään. Suorita tämä menettely päinvastaisessa järjestyksessä vetopyörän päällekytkemistä varten.
C. Vasemmanpuoleisen vivun heittotorven kääntämisen ohjauslaite (jos on)
Paikanna vasemmanpuoleinen heittotorven kääntökampi (C, kuva
9) Käännä heittotorvea kampea kääntämällä.
Polttoainesäiliön täyttö
Katso polttoainesäiliön täyttöä koskevat tiedot sekä polttoainesuositukset moottorin käyttäjän käsikirjasta .
14
Page 63

Not for
Reproduction
Tukkeutuneen heittotorven puhdistaminen
VAARA
Jäsenten irtoamisvaara
Lumenlinkousputken sisällä on pyörivä siipiratas, joka
linkoaa lunta. Sormet tarttuvat nopeasti puhaltimeen. Älä
koskaan käytä kättäsi heittotorven puhdistamiseen tai tukkeuman poistamiseen. Käytä aina puhdistustyökalua.
Näiden turvaohjeiden noudattamatta jättäminen johtaa raajojen irtoamiseen tai vahingoittumiseen erittäin vakavasti.
Lumilingon aiheuttaman vamman syynä on useimmiten käden
koskettaminen heittotorven sisällä pyörivään puhaltimeen. Älä
koskaan käytä kättäsi heittotorven puhdistamiseen.
Voit puhdistaa tukkeutuneen heittotorven turvallisesti seuraavien ohjeiden mukaisesti:
1. Sammuta moottori.
2. Odota 10 sekuntia, jotta puhaltimen siivet ovat varmasti
pysähtyneet.
3. Käytä aina puhdistustyökalua, äläkä käsiäsi.
Puhdistustyökalu (A, kuva 10) toimitetaan laitteen mukana.
Liukukenkien korkeuden säätö
VAARA
Jäsenten irtoamisvaara
Lumenlinkousputken sisällä on pyörivä siipiratas, joka linkoaa
lunta. Sormet tarttuvat puhaltimeen nopeasti, jolloin sormet irtoavat tai vahingoittuvat erittäin vakavasti. Lumilingon aiheuttaman
vamman syynä on useimmiten käden koskettaminen heittotorven
sisällä pyörivään puhaltimeen.
Sammuta moottori ja odota, että kaikki liikkuvat osat pysähtyvät,
ja irrota virta-avain ennen huoltotöiden tai korjausten suorittamista.
VAROITUS
Sinkoutuvien esineiden vaara
Sora, kivet tai muut roskat voivat puhaltimeen osuessaan lentää
niin suurella voimalla, että ne aiheuttavat henkilö- tai omaisuusvahingon tai vahingoittavat lumilinkoa.
Säädä jalakset oikealle korkeudelle, jotta maavara on sopii kohteena olevaan maastoon.
Tämä lumilinko on varustettu kahdella korkeudensäätöjalalla, jotka
on kiinnitetty ruuvisyöttimen kotelon ulkopuolelle. Nämä nostavat
lumilingon etupäätä.
Kun poistat lunta kovan pinnan alueelta, kuten kivetyltä kadulta tai
jalkakäytävältä, säädä jalat ylöspäin niin, että lumilingon etupää
osoittaa alaspäin.
Kun poistat lunta sorapinnalta tai epätasaiselta pinnalta, nosta
lumilingon etupäätä siirtämällä jalkoja alaspäin. Näin kivet ja muut
esineet eivät mene syöttöruuviin eivätkä lennä ilmaan.
1. Määritä, kuinka suuren välyksen haluat ruuvisyöttimen kotelon
alaosassa olevan kolan ja maan välille. Jos puhdistat sorapintaa, tarvitaan tarpeeksi suuri maavara kivien laitteeseen tarttumisen välttämiseksi.
2. Aseta halutun maavaran pituinen este kolan alle.
3. Löysää liukukengän kiinnitysmutterit (A, kuva 11) ja paina liukukenkää (B) alas, kunnes se koskettaa maata. Kiristä kiinnitysmutterit uudelleen.
4. Aseta toisella puolella oleva liukukenkä samaan korkeuteen.
Hiljaisen kauden varastointi
Jos laitetta varastoidaan kolmekymmentä (30) päivää tai enemmän,
suositellaan seuraavia vaiheita sen valmistelemiseksi varastointia
varten. Katso käyttäjän käsikirjasta tärkeät yksityiskohdat, jos laite
on tarkoitus varastoida pitkähköksi ajaksi.
Katso moottorin varastoinnin tiedot moottorin käyttäjän käsikirjasta.
HUOMIO: Polttoaine on poistettava, tai se on käsiteltävä, jotta estetään kumijäämien muodostuminen säiliöön, suodattimeen, letkuun
ja kaasuttimeen.
VAROITUS
Palo- ja räjähdysvaara
Bensiini syttyy erittäin helposti, ja sen höyryt ovat räjähdysherkkiä. Höyryt voivat kulkeutua etäiseen sytytyslähteeseen, ja seurauksena voi olla räjähdys ja/tai tulipalo.
Käsittele bensiiniä huolellisesti. Älä koskaan varastoi konetta,
jossa on polttoainetta säiliössä, sisällä huonosti ilmastoidussa
suljetussa tilassa, jossa polttoainehöyryt voivat saavuttaa avotulen, kipinän tai sytytysliekin, jollainen voi olla uuneissa, lämmityskattiloissa tai pyykinkuivaimissa.
• Puhdista laite perusteellisesti.
• Voitele kaikki voitelupisteet. Katso luku Huolto.
• Varmista, että kaikki mutterit, pultit ja ruuvit ovat tiukasti kiinni.
Tarkista kaikkien näkyvien liikkuvien osien vauriot, murtumat ja
kuluminen. Vaihda tarvittaessa.
• Korjaa kaikki ruostuneet tai hilseilleet maalipinnat; hio hiekkapaperilla kevyesti ennen maalaamista.
• Peitä lumilingon ruuvisyöttimen kotelon paljaat metalliosat ja
juoksupyörä ruosteenestoaineella.
Suomi
15
Page 64

Not for
Reproduction
• Mikäli mahdollista, säilytä laitettasi sisätiloissa sekä suojaa se
pölyltä ja lialta peittämällä laitteen.
• Jos konetta täytyy säilyttää ulkona, peitä raskaalla suojapeitteellä.
Huoltoon palauttaminen:
• Täytä polttoainesäiliöön tuoretta polttoainetta.
• Varmista, että kaikki kiinnittimet ovat tiukalla.
• Varmista, että kaikki suojaimet, suojalevyt ja kannet ovat paikoillaan.
Huolto
Kunnossapidon huoltoaikataulu
Ennen kutakin käyttökertaa
• Tarkasta moottorin öljytaso
• Suorita turvajärjestelmän testi
8 tunnin välein tai päivittäin
• Tarkasta moottorin öljytaso
Joka 25. tunti tai vuosittain
• Voitele ohjausvivun nivelistö
• Voitele ruuvisyötin-kokoonpano
• Voitele heittotorven kääntökoneisto ja suihkun ohjain
• Voitele kuusioakseli 5w-30 synteettisellä moottoriöljyllä ja
ketjut rasvalla
• Voitele levyvetojärjestelmä (jos varusteena).
Joka 50. tunti tai vuosittain
• Tarkasta vaimennin ja kipinänsammutin (jos on)
• Tarkista rengaspaineet
Moottorin huolto
Katso moottorin huoltoaikataulut ja -toimenpiteet moottorin käyttäjän
käsikirjasta.
Ohjausvivun nivelistön voitelu
Ruuvisyöttimen kokoonpanon voitelu
Voitele ruuvisyöttimen vaihdelaatikko
Syöttöruuvin vaihteisto on voideltu tehtaalla, eikä sitä tarvitse enää
voidella. Jos voiteluainetta jostain syystä vuotaa ulos tai jos ruuvisyöttimen vaihteistoa on huollettu, voidaan tarvita lisää voiteluainetta.
Tarkasta ruuvisyöttimen vaihteiston rasvan taso Irrottamalla täyttötulppa (A, kuva 13). Tarkista rasvan määrä vaihteistossa ohuella
rautalangalla. Jos rasvaa näkyy, älä lisää. Jos rasvaa ei näy, lisää
tarvittavaa voiteluainetta. Määritä jäljellä olevan rasvan värin perusteella, millaista voiteluainetta on lisättävä. Jos rasva on valkoista,
lisää Lubriplate GR132 -rasvaa tai vastaavaa. Jos rasva on ruskeaa, lisää EP1-litiumrasvaa. Vaihteiston voiteluaineen vetoisuus on
92 grammaa.
HUOMIO: Kaikissa ruuvisyöttimen vaihteistoissa ei ole täyttötulppaa. Ota yhteyttä jälleenmyyjääsi tätä huoltoa varten.
Voitele syöttöruuvin akselin kiinnikkeet
Voitele rasvapistoolia käyttäen ruuvisyöttimen akseliliitännät (B,
kuva 13). Katso Huoltovälit. Joka kerta, kun murtopultti tai tappi (C)
vaihdetaan, ruuvisyöttimen akseli TÄYTYY voidella.
Varastointia varten tai vaihtaessasi murtopultteja tai tappeja poista
murtopultit tai tapit (C), voitele akseliliitännät (B) ja käännä ruuvisyöttimiä useita kertoja rasvan jakamiseksi. Asenna murtopultit tai
tapit uudelleen työn ollessa valmis.
HUOMIO: Kaikissa malleissa ei ole rasvanippoja, joten nämä vaatimukset eivät koske tällaisia malleja.
Suorita Heittotorven ja suihkun ohjaimen voitelu
Voitele heittotorven kääntökoneisto (kuva 14) voiteluaineella ja suihkun ohjainmekanismi autotyyppisellä öljyllä. Katso Huoltovälit.
Voitele moottoriöljyllä paikasta, missä on öljykannun kuva. Voitele
litiumrasvalla paikasta, missä on rasvapistoolin kuva.
Kuusioakselin ja ketjujen voitelu (jos
varusteena)
Kuusioakseli ja voimansiirtoketjut täytyy voidella Huoltotaulukossa
ilmoitetun välein. määritetyin välein.
VAROITUS
Jäsenten irtoamisvaara
Laitteen turvallisen käytön kannalta on ratkaisevan tärkeää, että
ohjauslaitteet irtoavat vapautettaessa. Laitetta ei saa missään
olosuhteissa käyttää, jos sen hallintalaitteet eivät toimi kunnolla.
Katso Turvallisuusjärjestelmän testit vahvistaaksesi oikean käytön.
Voitele laite kuvassa 12 esitetyistä kohdista. Voitele moottoriöljyllä
paikasta, missä on öljykannun kuva. Voitele litiumrasvalla paikasta,
missä on rasvapistoolin kuva.
16
Hammaspyöräveto (jos varusteena)
Hammaspyörävetojärjestelmä ei tarvitse huoltoa eikä säätöä. Jos
hammaspyörävetojärjestelmässä ilmenee ongelmia, ota yhteys paikalliseen valtuutettuun huoltoliikkeeseen.
Page 65

Not for
Reproduction
Vetokaapelin tarkastus
Vaijerit on säädetty tehtaalla, eikä säätöä yleensä tarvita. Jos vaijerit
kuitenkin ovat venyneet tai roikkuvat, säätö on tarpeen. Ota yhteyttä
jälleenmyyjääsi tätä säätöä varten.
Vetohihnan säätö
Vetohihnassa on jatkuva jousijännite, eikä se vaadi mitään säätöä.
Jos vetohihna on irtoamassa, ota yhteys valtuutettuun jälleenmyyjääsi.
Ajonopeuden ohjaustangon säätö
Jos ajonopeuden ohjaustanko vaatii säätöä, ota yhteys valtuutettuun jälleenmyyjään.
Easy-Turn™-vaijerin säätö
Jos Easy Turn -vaijeri venyy, vaihteet eivät kytkeydy irti ohjausvipua
käytettäessä. Säädä vaijeri seuraavasti.
1. Sammuta moottori ja poista avain.
2. Löysää lukitusmutteri (A, Kuva 15).
3. Pidennä tai lyhennä vaijeria kiertämällä säätömutteria (B).
Vaijeri on kiristettävä niin tiukalle, ettei vivussa ole välystä.
Mutta Easy-Turn ei saa kytkeytyä päälle itsestään ohjausvipua
painamatta.
4. Kiristä lukitusmutteri (A).
Määritä, mikä murtopultti-/sokkajärjestelmä sinulla on
Ruuvisyöttimet kiinnitetään ruuvisyöttimen akseliin erityisillä pulteilla, jotka on suunniteltu murtumaan, jos esine jää kiinni ruuvisyöttimen koteloon.
Selvitä Kuvitetusta varaosaluettelosta, vaatiiko laitteesi murtopultin
vai murtopultin ja välikappaleen yhdistelmän.
Käytä vain tehtaan määrittämiä tai vastaavia osia.
VAROITUS
Jäsenten irtoamisvaara
Lumenlinkousputken sisällä on pyörivä siipiratas, joka linkoaa
lunta. Sormet tarttuvat puhaltimeen nopeasti, jolloin sormet irtoavat tai vahingoittuvat erittäin vakavasti. Lumilingon aiheuttaman
vamman syynä on useimmiten käden koskettaminen heittotorven
sisällä pyörivään puhaltimeen.
Sammuta moottori ja odota, että kaikki liikkuvat osat pysähtyvät,
ja irrota virta-avain ennen huoltotöiden tai korjausten suorittamista.
Murtosokkien vaihto
1. Sammuta moottori ja odota, että kaikki liikkuvat osat pysähtyvät.
2. Poista olemassa oleva murtosokka.
Syöttöruuvin vaijerin säätö
VAROITUS
Jäsenten irtoamisvaara
Ruuvisyöttimen kaapelin liiallinen kiristäminen voi johtaa ruuvisyöttimen käyttökoneiston päälle kytkeytymiseen ilman ruuvisyöttimen käyttökoneiston ohjauslaitteen painamista.
Noudata säätömenettelyä varmistaaksesi, että kaapeli ei ole liian
kireällä.
1. Kun syöttöruuvin ohjausvipu on vapautettuna, koukku (A, kuva
16) saa juuri ja juuri koskettaa vipua (B) nostamatta sitä ylöspäin. Välys saa olla enintään 0,8 mm (1/32").
2. Säädä löysäämällä mutteria (C) pitämällä säätötankoja (D)
paikallaan ja kiertämällä mutteria. Käännä sen jälkeen säätötankoja ja pidä säätöruuvia (E) paikallaan. Säätöruuvi on
ristipääruuvi, ja sen päätä voidaan pitää paikallaan tai kääntää
työntämällä ruuvimeisselin jousen (F) läpi.
3. Pidä säätötankoja paikallaan ja kiristä mutteri.
4. Varmistaaksesi, että ruuvisyötin ei kytkeydy päälle, ellei
ohjauslaitetta paineta pohjaan, suorita Turvallisuusjärjestelmän
testi. Ruuvisyöttimen täytyy pysähtyä 5 sekunnin sisällä
ohjauslaitteen vapauttamisesta.
3. Voitele ruuvisyöttimen rasvanipat ja käännä ruuvisyötintä voidellaksesi ruuvisyöttimen akselin.
HUOMIO: Kaikissa malleissa ei ole rasvanippoja, joten tämä vaihe
ei koske tällaisia malleja.
4. Kohdista murtosokkien reiät. Asenna uusi murtosokka (A, kuva
17) ruuvisyöttimen akselin (C) läpi. Kiinnitä sokkanaulalla (B).
Murtopultin vaihto
1. Sammuta moottori ja odota, että kaikki liikkuvat osat pysähtyvät.
2. Poista olemassa oleva murtopultti.
3. Voitele ruuvisyöttimen voitelunipat. Pyöritä ruuvisyötintä voidellaksesi ruuvisyöttimen akselin.
4. Kohdista pulttien reiät. Asenna uusi murtopultti (A, kuva 18)
ruuvisyöttimen akselin (B) läpi. Kiinnitä lukkomutterilla (C).
Suomi
17
Page 66

Not for
Reproduction
Murtopultin ja välilevyn vaihto
1. Sammuta moottori ja odota, että kaikki liikkuvat osat pysähtyvät.
2. Poista olemassa oleva murtopultti.
3. Voitele ruuvisyöttimen voitelunipat. Pyöritä ruuvisyötintä voidellaksesi ruuvisyöttimen akselin.
4. Kohdista pultti ja välilevyn reiät. Asenna uusi murtopultti (A,
kuva 19) ja välilevy (B), ruuvisyöttimen akselin (C) läpi. Kiinnitä
lukkomutterilla (D).
Rengaspaineiden tarkastus
Rengaspaine tulee tarkastaa määräajoin. Suositeltu rengaspaine
vaihtelee renkaiden valmistajan mukaan. Hyvä nyrkkisääntö on
täyttää rengas renkaan sivuseinämälle leimattuun "Max Inflation"- eli
maksimitäyttömäärään asti, mutta ei sen yli.
18
Page 67

Not for
Reproduction
Vianmääritys
Vianmäärityskaavio
Suorita tarkastus tai korjaus Vianetsintätaulukossa ilmaistulla tavalla.
Ongelma Tarkasta Ratkaisu
Syöttöruuvi ei pysähdy 5 sekunnin kuluessa
oikeanpuoleisen ohjausvivun vapautuksesta.
Heittotorvi tai suihkun ohjain ei toimi (sähköinen).
Heittotorvi tai suihkun ohjain ei toimi
(kauko-ohjattava/käsikäyttöinen).
Käyttökoneisto ei pysty siirtämään lumilinkoa hitailla ajonopeuksilla.
Moottori ei käynnisty. Avain on POIS-asennossa. Aseta avain PÄÄLLÄ-asentoon.
Moottori käynnistyy huonosti ja käy epätasaisesti.
Voimakas tärinä. Osia irti tai vahingoittunut puhallin. Sammuta moottori välittömästi. Kiristä kaik-
Lumilinko ei pysähdy, kun vedon ohjausvipu
vapautetaan.
Kolan reuna ei puhdista kovia alustoja. Liukukengät ja kola säädetty väärin. Nosta tai laske liukukenkiä ja kolaa.
Laite ei jaksa vetää. Vetohihna löysällä tai vahingoittunut. Vaihda vetohihna. Käänny valtuutetun jäl-
Free Hand -ohjauslaite (jos on) on
AKTIIVINEN.
Syöttöruuvin käyttöhihnan säätö on väärä. Käänny valtuutetun jälleenmyyjän puoleen.
Syöttöruuvin hihnanohjaimen säätö on
väärä.
Sähköhäiriö. Käänny valtuutetun jälleenmyyjän puoleen.
Heittotorven tai suihkun ohjaimen säätö on
väärä tai se tarvitsee voitelua.
Vedon ohjaus on väärin säädetty. Käänny valtuutetun jälleenmyyjän puoleen.
Kylmä moottori ei saa polttoainetta. Paina pumpun ensikäynnistyspainiketta
Polttoaineen sulkuventtiili, jos on, on
KIINNI-asennossa.
Polttoaine loppu. Täytä polttoainesäiliö.
Rikastin on AUKI/RUN-asennossa ja moot-
tori on kylmä.
Sylinterissä on liikaa polttoainetta. Siirrä rikastin AUKI/AJO -asentoon, siirrä
Ei kipinää. Käänny valtuutetun jälleenmyyjän puoleen.
Vettä polttoaineessa tai polttoaine on van-
haa.
Viallinen sytytystulppa, likaa tai väärä välys. Käänny valtuutetun jälleenmyyjän puoleen.
Polttoainesäiliön ilma-aukko on tukossa. Puhdista ilma-aukko.
Vedon ohjaus on väärin säädetty. Käänny valtuutetun jälleenmyyjän puoleen.
Vedon ohjausvaijeri väärin säädetty. Käänny valtuutetun jälleenmyyjän puoleen.
Kulunut tai vahingoittunut kitkalevy. Vaihda kitkalevy. Käänny valtuutetun jäl-
Vapauta sekä ruuvisyöttimen ohjauslaite
että Free Hand -ohjauslaite (jos on) ruuvisyöttimen pysäyttämiseksi.
Käänny valtuutetun jälleenmyyjän puoleen.
Säädä ja/tai voitele säätövivusto.
kahdesti ja käynnistä uudelleen.
Käännä venttiili AUKI-asentoon.
Käännä rikastin asentoon KIINNI/START ja
säädä kaasu asentoon NOPEA.
kaasuläppä NOPEA-asentoon ja väännä
kampea, kunnes moottori käynnistyy.
Tyhjennä polttoainesäiliö. (Hävitä polttoaine valtuutetussa ongelmajätelaitoksessa.)
Täytä säiliö tuoreella polttoaineella.
ki kiinnitysosat. Jos tärinä jatkuu, huollata
laite valtuutetulla jälleenmyyjällä.
leenmyyjän puoleen.
leenmyyjän puoleen.
Suomi
19
Page 68

Not for
Reproduction
Ongelma Tarkasta Ratkaisu
Laite ei linkoa lunta. Syöttöruuvin vetohihna löysällä tai vahin-
goittunut.
Syöttöruuvin ohjausvaijeri väärin säädetty. Säädä syöttöruuvin ohjausvaijeri. Katso
Murtunut murtosokka tai murtopultti. Vaihda murtosokka tai -pultti. Katso tämän
Heittotorvi tukossa. Sammuta moottori välittömästi. Puhdista
Vieras esine syöttöruuvissa. Sammuta moottori välittömästi. Puhdista
Käänny valtuutetun jälleenmyyjän puoleen.
tämän käsikirjan Huolto-osio.
käsikirjan Huolto-osio tai ota yhteys valtuutettuun jälleenmyyjään.
tukkeutunut heittotorvi aina puhdistustyökalulla äläkä käsilläsi. Puhdista heittotorvi
ja syöttöruuvin kotelon sisäpuoli. Katso
Heittotorven varoitus Käyttäjän turvallisuus
-osiosta.
tukkeutunut heittotorvi aina puhdistustyökalulla äläkä käsilläsi. Poista esine syöttöruuvista. Katso Käyttäjän turvallisuus -osion
VAROITUKSET-kohta.
20
Page 69

Not for
Reproduction
Suomi
21
Page 70

Not for
Reproduction
Produits couverts par ce manuel
Les produits suivants sont couverts dans ce manuel :
1695856
1695994
1695995
1695996
1695996-00
1695996-01
1695996-02
1695997
1695997-00
1695997-01
1695997-02
1696009
1696010
1696011
1696011-00
1696011-01
1696011-02
1696012
1696012-00
1696012-01
1696012-02
1696053
1696054
1696055
1696055-00
1696055-01
1696056
1696061
1696062
1696062-00
1696062-01
1696063
1696065
1696066
1696067
1696199-00
1696199-01
1696200-00
1696201-00
1696201-01
1696202-00
1696202-01
1696203-00
1696203-01
1696206-00
1696207-00
1696207-01
1696212-00
1696212-01
1696220-00
1696221-00
1696221-01
1696222-00
1696222-01
1696223-00
1696223-01
1696224-00
1696224-01
1696226-00
1696227-00
1696227-01
1696228-00
1696229-00
1696230-00
1696253-00
1696253-01
1696254-00
1696254-01
1696255-00
1696255-01
1696256-00
1696256-01
1696257-00
1696257-01
1696277-00
1696278-00
1696300-00
1696301
1696301-00
1696302-00
1696381-00
1696382-00
1696390-00
1696391-00
1696392-00
1696481-00
1696482-00
1696483-00
1696484-00
1696485-00
1696486-00
1696487-00
1696488-00
1696489-00
1696490-00
1696491-00
1696493-00
1696494-00
1696495-00
1696522-00
1696523-00
1696524-00
Contenu du contenu :
Sécurité de l'opérateur ......................................................6
Tests du système de sécurité ........................................ 11
Fonctions et commandes ............................................... 11
Utilisation ......................................................................... 12
Entretien ........................................................................... 16
Dépannage ....................................................................... 19
REMARQUE : Veuillez vous reporter au guide fourni au client ainsi
qu’aux directives de configuration pour des informations supplémentaires.
Les images de ce document sont des illustrations destinées à renforcer les instructions qui les accompagnent. Votre machine peut
être différente de celle illustrée sur les images. GAUCHE et DROIT
correspondent à la position de l’utilisateur.
Le système de bougie d’allumage sur cette souffleuse à neige est
conforme à la norme canadienne ICES-002.
Sécurité de l'opérateur
Symboles de sécurité et mots indicateurs
Le symbole d’alerte de sécurité indique un risque potentiel de dommages corporels. Un mot-indicateur (DANGER,
AVERTISSEMENT ou MISE EN GARDE) est utilisé avec le symbole
d’alerte pour indiquer la probabilité ou la gravité du danger. Un symbole de sécurité peut être utilisé pour représenter le type de danger.
Le mot-indicateur REMARQUE est utilisé pour faire référence à des
conditions d’utilisation non associées à des dommages corporels.
DANGER indique un danger qui, si non évité, résultera à la mort
ou blessure grave.
AVERTISSEMENT indique un danger qui, si non évité, peut
résulter à la mort ou blessure grave.
MISE EN GARDE indique un danger qui, si non évité, peut
résulter à une blessure mineure.
AVIS indique une situation pouvant endommager le produit.
Tableaux des symboles de danger
Symboles de danger pour les souffleuses à
neige
Symbole Signification Symbole Signification
Informations de
sécurité sur les
dangers pouvant
provoquer des
dommages corporels.
Danger d’amputation - turbine
rotative.
Danger d’amputation - turbine
rotative.
Danger d’amputation - ne pas
toucher les parties
mobiles.
Risque d’incendie. Danger d'explo-
Lisez et comprenez
bien le contenu du
manuel d’utilisation
avant de faire fonctionner la machine
ou d’intervenir
dessus.
Retirer la clé avant
d’effectuer des
réparations ou de
l’entretien.
Risque d'amputation - tarière en
mouvement.
Danger de projection d’objets.
sion.
6
Danger de
décharge éléectrique.
Danger de fumées
toxiques.
Page 71

Not for
Reproduction
Symbole Signification Symbole Signification
Danger de surface
chaude.
Garder une distance de sécurité.
Protection des
oreilles recommandée pour une utilisation prolongée.
Porter des lunettes
de sécurité.
DANGER
Le conduit d'éjection contient un impulseur rotatif pour éjecter la
neige. Ne débouchez ou ne dégagez jamais le conduit d'éjection
avec vos mains. Les doigts peuvent facilement être prises dans
l'impulseur. Utilisez toujours un outil de nettoyage.
La faillite d'observer ces instructions de sécurité résultera à une
amputation traumatique ou dilacératon grave.
Tenir les enfants à
distance.
Danger d’effet de
recul.
Avertissements généraux de sécurité
AVERTISSEMENT
• Le contact des mains avec la turbine rotative dans la goulotte d'éjection est la cause la plus courante de blessure
associée aux souffleuses à neige.
• Cette souffleuse à neige est capable d’amputer les mains
ou les pieds et de jeter des objets. Lire et observer toutes
instructions de sécurité dans ce manuel. L'omission de cette
étape peut entraîner de graves blessures voire la mort.
AVERTISSEMENT
Lire, comprendre et suivre toutes les instructions sur la souffleuse à neige dans le manuel de l’opérateur avant de faire fonctionner cette machine.
La faillite d'observer les instructions de sécurité dans ce manuel
peut résulter à la mort ou une blessure grave.
• Bien se familiariser avec les commandes et l’utilisation
appropriée de la souffleuse à neige.
• S'assurer d'être bien entraîné avant de faire fonctionner la
souffleuse à neige.
• Savoir arrêter la machine et débrayer rapidement les commandes.
• Ne jamais laisser une autre personne faire fonctionner la
souffleuse à neige sans surveillance.
• Toujours suivre les instructions du manuel de l’utilisateur au
cas où la souffleuse de neige aurait été remisée pendant
une période prolongée.
• Prendre soin des étiquettes de sécurité et d'instructions et
les remplacer au besoin.
• Ne jamais tenter d'effectuer des réparations importantes
sur la souffleuse à neige à moins d'avoir reçu une formation
adéquate. L'entretien inadéquat de la souffleuse à neige
peut résulter à un fonctionnement dangeureux, dommage à
l'équipement et l'invalidation de la garantie du produit.
DANGER
Garder les mains, les pieds et les vêtements loin des pièces rotatives. Les pièces rotatives peuvent contacter ou enchevêtrer les
mains, les pieds, les cheveux, les vêtements ou accessoires.
La faillite d'observer ces instructions de sécurité résultera à une
amputation traumatique ou dilacératon grave.
• Toutes les fois que vous nettoyez, réparez ou inspectez
la souffleuse à neige, assurez-vous que le moteur soit
ARRÊTÉ, que le câble de la bougie soit débranché et que
toutes les pièces en mouvement soit arrêtées.
• Ne pas mettre les mains ou les pieds à proximité ou sous
les pièces rotatives. Toujours se tenir à l'écart de
l'ouverture d'éjection.
• Ne pas fairr fonctionner la souffleuse à neige sans de protection approuvés et autres dispositifs de sécurité en place
lors du fonctionnement.
• Ne jaimas laisser votre souffleuse à neige sans surveillance
lorsque le moteur est en marche. Toujours débrayer les
commandes de tarière et de traction, arrêter le moteur et
retirer les clés.
• Maintenir vos vêtements à l'écart du devant de la souffleuse
à neige et de la tarière. Les foulards, les mitaines, les cordons pendantes, les vêtements lâches et pantalons peuvent
rapidement être prises dans le dispositif rotatif et une amputation se produira. Attacher les cheveux longs et enlever les
bijoux.
• Faire tourner la machine quelques minutes après avoir
déblayé la neige pour empêcher le collecteur ou la turbine
de geler.
• Débrayer la commande de l'ensemble de la tarière et de la
turbine pour transporter la souffleuse à neige et lorsqu'elle
n'est pas utilisée.
Français
fr
7
Page 72

Not for
Reproduction
AVERTISSEMENT
Des objets peuvent se prendre dans la tarière et être rejetés par
la goulotte. Ne jamais jeter la neige vers les spectateurs et ne
permettre à personne de se placer devant la souffleuse à neige.
La faillite d'observer ces instructions de sécurité dans ce manuel
résultera à la mort ou blessure grave.
• Portez toujours des lunettes de sécurité ou un masque de
protection pendant l’utilisation et lors de réglages ou de
réparations.
• Être toujours attentif de la direction d'où la neige est éjectée. Les piétons tous près, les animaux domestiques ou les
propriétés peuvent être endommagés par la projection des
objets.
• Être attentif de votre environnement pendant le fonctionnement de la souffleuse à neige. Ne passez pas par-dessus
des éléments tels que du gravier, des tapis, des journaux,
des jouets ou des roches cachées sous la neige, dans la
mesure où ils peuvent être tous rejetés par la goulotte ou se
bloquer dans la tarière.
• Être très prudent lors du fonctionnement sur ou traversant
les voies d'accès, les trottoirs ou les routes de gravel.
• Régler la hauteur du carter de la tarière pour éviter tout
contact avec les surfaces en gravier ou en pierre concassée.
• Ne jamais utiliser la souffleuse à neige à proximité de vitres,
de voitures, d'encadrements de soupirail, de stationnements
ou autres sans réglage adéquat de l'angle du conduit d'éjection.
• Se familiariser avec la zone dans laquelle vous prévoyez
d’utiliser la souffleuse à neige. Marquer les bornes des voies
d'accès et des trottoirs.
AVERTISSEMENT
Des accidents tragiques peuvent se produire lorsque l'opérateur
n'est pas averti de la présence d'enfants. Les enfants sont souvent attirés par la machine et le soufflage de neige. Ne supposez
jamais que les enfants resteront là où ils ont été vus pour la dernière fois.
• Garder les enfants éloignés de la zone pendant l’utilisation.
Les enfants sont souvent attirés par l'équipement. Être attentif aux personnes présentes.
• Être vigilant et arrêter la machine si des enfants pénètrent
dans la zone d’utilisation.
• Ne jamais laisser les enfants se servir de la machine.
• Faire preuve de prudence à l’approche d’angles morts, d’arbustes, d’arbres et d’autres objets susceptibles de masquer
la vision. Les enfants peuvent être présents.
AVERTISSEMENT
Les moteurs émettent du monoxyde de carbone, un gaz toxique
sans odeur ni couleur. Respirer du monoxyde de carbone peut
provoquer des nausées, des évanouissements, voire même la
mort.
• Démarrer et faire tourner le moteur à l’extérieur.
• Ne pas faire tourner le moteur dans un endroit clos, même si
les portes ou les fenêtres sont ouvertes.
AVERTISSEMENT
Le carburant et ses vapeurs sont extrêmement inflammables et
explosifs. Toujours manipuler l'essence avec la plus grande des
précautions.
La faillite d'observer ces instructions de sécurité peut causer un
feu ou explosion qui résultera à des brûlures graves ou la mort.
Lors de l'addition du carburant
• Arrêter le moteur et laisser refroidir pour au moins 2 minutes
avant d'enlever le bouchon de réservoir pour ajouter le carburant.
• Remplir le réservoir de carburant dehors ou dans un endroit
bien ventilé.
• Ne pas remplir trop le réservoir de carburant. Pour permettre
l'expansion de l'essence, ne pas remplir au-dessus le bas du
cou du réservoir de carburant.
• Maintenir le carburant éloigné d'étincelles, de flammes nues,
de veilleuses, de sources de chaleur ou d'autres sources
d'allumage.
• Vérifier souvent les lignes de carburant, le bouchon et les
accessoires pour fissures et fuites. Remplacez si nécessaire.
• Utiliser un réservoir de carburant approuvé.
• Si du carburant se répand, attendre jusqu'à ce qu'il s'évapore avant de démarrer le moteur.
Mise en marche du moteur
• S'assurer que la bougie, le pot d’échappement, le bouchon
de réservoir de carburant et le filtre à air (si l’unité en est
équipée) sont en place et attachés.
• Lorsque la bougie d'allumage est enlevée, ne pas mettre en
marche le moteur.
• Si du carburant se répand, ne pas tenter de démarrer le
moteur, mais éloigner la souffleuse à neige de la zone du
déversement et éviter de créer toute source d’inflammation
jusqu’à ce que les vapeurs de carburant se soient dissipées.
• Ne pas amorcer trop le moteur. Suivre les instructions dans
ce manuel pour mettre le moteur en marche.
• Si le moteur est noyé, régler le volet de départ (si équippé) à
la position OUVERT / MARCHE, déménager l'accélateur (si
équippé) à la position VITE et mettre en marche le moteur.
Opération de la machine
• Ne pas faire basculer la souffleuse à neige au-delà d’un
angle qui provoquerait le renversement du carburant.
• Ne pas étrangler le carburateur pour arrêter le moteur.
• Ne jamais faire fonctionner le moteur si l'épurateur d'air (si
équippé) ou le filtre à air est enlevé.
Lors du changement de l’huile
• Si la vidange de l’huile est faite depuis la partie supérieure
du tube de remplissage d’huile, le réservoir de carburant
doit être vide, sinon une fuite de carburant peut être cause
d’incendie ou d’explosion.
Transport de la machine
• Transporter lorsque le réservoir est VIDE, ou lorsque la soupape d'arrêt est fermée.
Entreposer du carburant ou une machine ayant du carburant dans le réservoir
• Entreposer loin des fournaises, des poêles, des chauffeeaux ou autres appareils qui ont une flamme d'allumage ou
autre source d'allumage qui peut allumer les vapeurs de carburant.
8
Page 73

Not for
Reproduction
AVERTISSEMENT
Le fonctionnement sans danger de la souffleuse à neige
demande un soin et entretien vigilant.
• Débrayer toutes les manettes et passer au point mort avant
de démarrer le moteur.
• Laissez le moteur s'ajuster à la température extérieure avant
de commencer de déblayer la neige.
• Utilisez un branchement à trois fils avec mise à la terre pour
toutes les souffleuses à neige équipées de moteur à traction
électrique ou de moteur à démarrage électrique.
AVERTISSEMENT
Le démarrage du moteur produit des étincelles.
L'étencelle peut mettre le feu au gaz inflammable tout près.
Explosion et feu peu en résulter.
• S’il y a une fuite de gaz naturel ou de GPL dans les environs, ne pas démarrer le moteur.
• Ne pas utiliser de fluides de démarrage sous pression en
raison de l’inflammabilité des vapeurs.
AVERTISSEMENT
Le mis en marche du moteur produit de la chaleur. Les pièces du
moteur, spécialement le pot d’échappement, deviennent extrêmement chaudes.
La faillite d'observer ces instruction de sécurité peut résulter à
des brûlures thermiques graves au contact.
• Ne jamais toucher un moteur ou un silencieux chaud.
Laisser le silencieux, le cylindre de moteur et les ailettes
refroidir avant de toucher.
• Enlever tous débris de la section du silencieux et de la section du cylindre.
• Installer et entretenir en bon état le pare-étincelles avant
d'utiliser l'équipement sur une terre brute de couverture de
forêt, de gazon ou de brousse.
• Modèles pour les États-Unis :L’utilisation ou le fonctionnement du moteur sur des terrains forestiers, broussailleux
ou herbeux constituent une violation de la Section 4442
du Code des ressources publiques de Californie, à moins
que le système d’échappement ne soit équipé d’un pareétincelles, comme le définit la Section 4442, maintenu en
bon état de marche. D'autres états ou juridictions fédérales
peuvent avoir des lois similaires. Contactez le fabriquant,
détaillant ou revendeur d'origine de la machine pour obtenir
un pare-étincelles conçu pour le système d'échappement
installé sur ce moteur.
AVERTISSEMENT
Cette souffleuse à neige doit être proprement entretenue pour
assurer un fonctionnement et une performance en toute sécurité.
La faillite d'observer les instructions de sécurité dans ce manuel
peut résulter à la mort ou une blessure grave.
• Lors de tout entretien ou réparation sur la souffleuse à neige,
arrêtez le moteur, débranchez le fil de bougie et gardez-le
éloigné de la bougie pour empêcher quiconque de démarrer
accidentellement le moteur.
• Vérifiez à intervalles fréquents que les boulons de cisaillement et la visserie soient convenablement serrés.
• Conserver les écrous et boulons bien serrés et la souffleuse
à neige en bon état de marche.
• Ne jamais altérer les dispositifs de sécurité. Vérifier régulièrement leur bon fonctionnement et réparer le cas échéant.
• Les composantes sont soumises à l'usure, aux dommages
et à la détérioration. Vérifier fréquemment les composants et
remplacer les pièces recommandés au besoin.
• Vérifier fréquemment le fonctionnement des commandes.
Ajuster et réparer le cas échéant.
• Lors de réparations, utilisez uniquement des pièces de
rechange d’origine homologuées ou identiques.
• Toujours se conformer aux spécifications d’usine sur tous
les paramètres et réglages.
• Utilisez uniquement des accessoires homologués par le
fabricant ou identiques, comme par exemple les masses
d’équilibrage, les contrepoids ou les modules de conduite).
• Ne jamais essayer de faire des ajustements pendant que le
moteur est en marche ( à l'exception de la recommendation
spécifique du fabricant).
Français
fr
9
Page 74

Not for
Reproduction
AVERTISSEMENT
Cette souffleuse à neige est aussi sûre que son utilisateur puisse
l’être. Si mal utilisé ou mal entretenu, ceci peut être dangereux.
Souvenez-vous que vous êtes responsable pour votre sécurité et
de ceux près de vous.
• Garder toutes les personnes, en particulier les enfants et les
animaux de compagnie, à distance.
• Inspecter complètement l'endroit où la souffleuse à neige
sera utilisée et enlever tous tapis d'accueils, les luges, les
planches à neige, les cordons d'alimentation et autres corps
étrangers.
• Ne pas faire fonctionner la souffleuse à neige sans porter
des vêtements de neige convenables.
• Le port de chaussures améliorera la stabilité sur des surfaces glissantes.
• Utiliser des précautions pour éviter de glisser ou de tomber
particulièrement lors du fonctionnement de la souffleuse à
neige en marche arrière.
• Ne jamais utiliser la machine si la visibilité est mauvaise ou
si la lumière est insuffisante. Toujours garder un bon équilibre et tenir fermement les poignées.
• Ne pas déblayer la neige de la surface des pentes. Utiliser
une précaution extrême lors du changement de direction sur
les pentes. Ne pas tenter de déblayer des pentes raides.
• Ne pas surcharger la capacité de la machine en essayant de
déblayer la neige trop vite.
• Ne jamais déplacer rapidement la souffleuse à neige sur des
surfaces glissantes. Regarder derrière la souffleuse à neige
et faites preuve de prudence lors des marches arrière.
• Ne pas utiliser la souffleuse à neige sur des surfaces audessus du sol comme les toits des résidences, les garages, les
vérandas ou toutes autres structures ou édifices.
• Les opérateurs doivent évaluer leur habilité de faire fonctionner la souffleuse à neige en toute sécurité suffisamment
pour protéger eux-mêmes et les autres de blessures.
• La souffleuse à neige est conçue pour enlever la neige seulement. Ne pas utiliser la souffleuse à neige à d’autres fins.
• Ne pas transporter de passagers.
• Après avoir frappé un corps étranger, arrêter le moteur,
déconnecter le cordon des moteurs électriques, inspecter
complètement la souffleuse à neige pour aucun dommage,
et réparer le dommage avant de recommencer et de faire
fonctionner la souffleuse à neige.
• Si la souffleuse à neige secousse d'une manière anormale,
arrêter le moteur. Toute vibration est généralement un avertissement de problème. Consulter un concessionnaire agréé
si nécessaire pour des réparations.
• Pour des modèles munis avec des moteurs de démarrage
électrique, débrancher le cordon d'alimentation après que le
moteur est mis en marche.
AVERTISSEMENT
Les cordons d'alimentation endommagés ou non mis à la terre
peuvent être à l'origine de décharges électriques.
Les décharges électriques peuvent entraîner de graves brûlures,
voire même la mort.
Lors de l'utilisation du démarreur électrique
• Le cordon d'alimentation doit être en permanence correctement mis à la terre.
• Utiliser uniquement un cordon d'alimentation trifilaire correctement relié à la terre et à la source d'alimentation.
• Si le cordon d’alimentation est endommagé, il doit être remplacé par une personne qualifiée pour éviter tout risque.
AVERTISSEMENT
Une rétraction rapide du cordon de démarreur (effet de rebond)
tirera la main ou le bras de l'opérateur vers le moteur plus rapidement que l'on ne peut relâcher le cordon de démarreur.
Des os cassés, des fractures, des blessures, ou des foulures
peuvent en résulter.
Avant le démarrage du moteur
• Tirer lentement la corde de lancement jusqu'à ce qu'une
résistance se fasse sentir et tirer ensuite rapidement pour
éviter tout effet de recul.
Étiquettes de sécurité
Avant d'utiliser votre unité, lire les étiquettes autocollantes de sécurité. Comparer la figure 1 avec le tableau ci-dessous. Les précautions et les avertissements sont pour votre sécurité. Pour éviter tout
dommage corporel ou dégât de la machine, comprendre et suivre
toutes les instructions des étiquettes autocollantes de sécurité.
AVERTISSEMENT
Si les étiquettes autocollantes de sécurité sont usées ou
endommagées et sont illisibles, commander d’autres étiquettes de remplacement auprès de votre revendeur local.
A Décal. danger du
conduit
(N° de pièce
1727207)
B Étiquette Danger
Tarière
(N° de pièce
1737867)
10
Page 75

Not for
Reproduction
Tests du système de sécurité
Déterminer quel test utiliser
Sélectionner le test de système de sécurité le plus approprié pour
votre machine :
Modèles sans commande Free HandMC : Sur les unités sans
Free Hand, les commandes de tarière et de traction fonctionnent
indépendamment et la série de pictogrammes Free Hand, illustrée
sur la figure 2, est absente du tableau de bord.
Modèles avec commande Free Hand™ (main libre) : Une fois
que la commande de traction (à gauche) et la commande de tarière
(à droite) sont embrayées, Free Hand permet à l’utilisateur de
relâcher la commande de tarière pour que la commande de tarière
reste embrayée jusqu’à ce que la commande de traction soit relâchée. Les modèles Free Hand ont la série de pictogrammes illustrée dans la Figure 2 sur le tableau de bord.
Test du système de sécurité (unités
sans commande Free Hand)
DANGER
Danger d’amputation
Cette souffleuse à neige est équipée de plusieurs systèmes
mécaniques de sécurité conçus pour la sécurité de l’opérateur
pendant qu’il utilise cette machine. Vérifier régulièrement le
fonctionnement de ces systèmes en utilisant la liste des tests du
système de sécurité. Si la machine ne fonctionne pas comme
décrit, NE PAS l’utiliser. Contacter votre revendeur agréé pour
une maintenance immédiate.
Test 1 - Commande de tarière/turbine
Alors que le moteur tourne :
• pousser le levier de commande de tarière vers le bas (la
tarière/turbine devrait tourner)
• Relâcher le levier de commande de tarière. (La tarière/turbine doit s'arrêter dans les 5 secondes).
Test 2 - Commande d’entraînement de traction
Pendant que le moteur tourne et que la commande de vitesse est
enclenchée sur la première :
• Pousser le levier de commande d’entraînement de traction
vers le bas. (l’unité devrait se déplacer vers l’avant).
• Relâcher le levier de commande de traction (la machine doit
s'arrêter).
Test du système de sécurité (machines
sans commande Free Hand)
DANGER
Danger d’amputation
Cette souffleuse à neige est équipée de plusieurs systèmes
mécaniques de sécurité conçus pour la sécurité de l’opérateur
pendant qu’il utilise cette machine. Vérifier régulièrement le
fonctionnement de ces systèmes en utilisant la liste des tests du
système de sécurité. Si la machine ne fonctionne pas comme
décrit, NE PAS l’utiliser. Contacter votre revendeur agréé pour
une maintenance immédiate.
Test 1 - Commande de tarière/turbine
Alors que le moteur tourne :
• pousser le levier de commande de tarière vers le bas (la
tarière/turbine devrait tourner)
• Relâcher le levier de commande de tarière. (La tarière/turbine doit s'arrêter dans les 5 secondes).
Test 2 - Commande d’entraînement de traction
Pendant que le moteur tourne et que la commande de vitesse est
enclenchée sur la première :
• Pousser le levier de commande d’entraînement de traction
vers le bas. (l’unité devrait se déplacer vers l’avant).
• Relâcher le levier de commande de traction (la machine doit
s'arrêter).
Test 3 - Commande Free Hand
Alors que le moteur tourne :
• Embrayer les leviers de commande de tarière et de traction,
puis relâcher le levier de commande de tarière (les deux
commandes doivent rester embrayées).
• Puis relâcher le levier de commande de traction (les deux
commandes doivent être relâchées)
Fonctions et commandes
Fonctions et commandes du moteur
Pour les fonctions et commandes moteur, veuillez vous reporter au
manuel d’utilisation du moteur.
Fonctions et commandes de la
souffleuse à neige
Comparer la figure 3 avec le tableau ci-dessous.
A Levier de commande de la
tarière - Utiliser pour embrayer et
débrayer la tarière et l'impulseur.
Pour embrayer, pousser vers le
bas. Pour débrayer, relâcher.
Français
fr
11
Page 76

Not for
Reproduction
B
1
R1
R2
2
3
c
D
E
F
G
H
I
J Commande de déflecteur -
Levier du sélecteur de vitesse -
Permets à l’opérateur d’utiliser une
des six vitesses en marche avant
et des deux vitesses en marche
arrière. Pour changer de vitesse,
déplacer le levier à une position
désirée.
AVIS : Ne pas déplacer le levier
de sélection de vitesse pendant
que la commande de traction
est embrayée. Ceci peut résulter à un dommage grave au
système d'entraînement.
Bielle de rotation de goulotte - Sur tableau de bord (si
la machine en est équipée)
- Utilisée pour faire pivoter la goulotte d’éjection vers la gauche ou
la droite.
Bielle de rotation de goulotte Bielle gauche (si la machine en
est équipée) - Utilisée pour faire
pivoter la goulotte d’éjection vers
la gauche ou la droite.
Commutateur de rotation de
goulotte - Électrique (si la
machine en est équipée) -
Utilisée pour faire pivoter la goulotte d’éjection vers la gauche ou
la droite.
Commande Free Hand™ (si la
machine en est équipée)- Une
fois que la commande de traction
(à gauche) et que la commande de
tarière (à droite) sont embrayées,
permet à l’utilisateur de relâcher
le levier de commande de tarière
pour utiliser d’autres commandes.
Levier de commande de traction - Utilisé pour propulser la
souffleuse à neige en marche
avant ou arrière. Appuyer
pour embrayer, relâcher pour
débrayer. Consultez également
« Commande main-libre ».
Commande de déflecteur - Sur
tableau de bord (si la machine
en est équipée) - Utilisé pour
contrôler l’angle du déflecteur de
goulotte (en haut ou en bas).
Commande de déflecteur Manuelle (si la machine en est
équipée) - Utilisé pour contrôler
l’angle du déflecteur de goulotte
(en haut ou en bas).
Électrique (si la machine en est
équipée) - Utilisé pour contrôler
l’angle du déflecteur de goulotte
(en haut ou en bas).
K Commande de traction Easy
L
M
N
O
-
-
-
Turn™ (si la machine en
est équipée) - Quand elle est
embrayée, permet à l’utilisateur de
débrayer une roue tractrice tout
en permettant à l’autre roue de
continuer à rouler pour faciliter les
virages.
Commutateur de poignées
chauffantes (si la machine en
est équipée) - Utilisé pour action-
ner les poignées chauffantes. Le
commutateur a trois positions –
Élevée, éteint et faible.
REMARQUE : Tous les modèles
ne sont pas pourvus de poignées
chauffantes. En outre, certains
modèles comportent des poignées
chauffantes qui fonctionnent
lorsque la souffleuse à neige est
en marche.
Outil de nettoyage - Utilisez
pour enlever la neige et débris du
conduit d'éjection et du boîtier de
tarière.
Patins - Utilisés pour régler le
dégagement au sol du carter de
tarière.
Phare (si la machine en est
équipée) - Illumine la zone devant
la souffleuse à neige.
REMARQUE : Le phare diffère
selon le modèle.
Utilisation
Avant d’utiliser la souffleuse à neige
AVERTISSEMENT
Lisez le manuel de l’utilisateur avant d’utiliser la machine.
Cette machine peut être dangeureuse si utilisée d'une
manière négligente.
• N’utilisez jamais la souffleuse à neige sans que les protections, caches et éléments protecteurs soient en place.
• Arrêter le moteur lorsque vous éloigner de la machine.
• Retirer la clé avant de débloquer le boîtier d'impulseur our le
conduit d'éjection et avant de faire de la réparation ou des
ajustements.
• Retirer la clé quand vous quittez la machine.
• Pour réduire le risque d’incendie, garder la machine propre
et libre de tout déversement de carburant, d’huile et de
débris.
12
Page 77

Not for
Reproduction
• Sur les modèles à démarrage électrique, déconnecter la rallonge avant utilisation.
• S’assurer de vérifier le niveau d’huile du moteur avant de
démarrer le moteur. Consultez le manuel d’utilisation du moteur
pour des recommandations sur l’huile.
Utilisation de la souffleuse à neige
DANGER
Danger d’amputation
Le conduit d'éjection contient un impulseur rotatif pour
éjecter la neige. Les doigts peuvent facilement être prises
dans l'impulseur. Ne débouchez ou ne dégagez jamais le
conduit d'éjection avec vos mains. Utilisez toujours un outil
de nettoyage.
La faillite d'observer ces instructions de sécurité résultera
à une amputation traumatique ou dilacératon grave.
Le contact des mains avec la turbine rotative dans la goulotte
d'éjection est la cause la plus courante de blessure associée aux
souffleuses à neige. N’utilisez jamais vos mains pour curer la
goulotte d’éjection.
Pour déboucher en toute sécurité une goulotte d'éjection
obstruée, suivre ces instructions :
1. Arrêter le moteur.
2. Attendre 10 secondes pour s’assurer que les lames de la
turbine ont arrêté de tourner.
3. Utilisez toujours un outil de nettoyage, non vos mains.
DANGER
Danger de fumées toxiques
Les moteurs émettent du monoxyde de carbone, un gaz
toxique sans odeur ni couleur.
Respirer du monoxyde de carbone peut provoquer des
nausées, des évanouissements, voire même la mort.
• Démarrer et faire tourner le moteur à l’extérieur.
• Ne pas faire tourner le moteur dans un endroit clos, même si
les portes ou les fenêtres sont ouvertes.
AVERTISSEMENT
d'objets projetés
Cette machine est capable de projeter des objets pouvant blesser des spectateurs ou endommager des bâtiments.
S’assurer que la zone où vous opérez soit dégagée de tout
spectateur. Ne jamais diriger l’éjection vers des personnes, des
bâtiments ou des voitures.
1. Démarrer le moteur. Veuillez vous reporter au manuel d’utilisation du moteur pour des informations sur le moteur.
2. Faire tourner la bielle de rotation de goulotte (C ou D, Figure
3) ou utiliser le commutateur de rotation de goulotte (E) pour
régler la goulotte d'éjection dans la bonne direction.
3. Modèles avec réglage de déflecteur manuel : Desserrer
l’écrou à oreilles maintenant le déflecteur de goulotte (I, Figure
3). Relever le déflecteur pour rejeter plus loin la neige. Placer
le déflecteur dans la direction voulue et resserrer l’écrou à
oreilles.
Modèle avec levier de commande de déflecteur sur
tableau de bord : Utiliser le levier de commande de déflecteur
(H, Figure 3) pour déplacer le déflecteur vers le haut ou le bas.
Relever le déflecteur pour rejeter plus loin la neige.
Modèles avec commande de déflecteur électrique : Utiliser
le commutateur de commande de déflecteur (H, Figure 3) pour
déplacer le déflecteur vers le haut ou le bas. Relever le déflecteur pour rejeter plus loin la neige.
4. Utiliser le levier de sélection de vitesse (B, Figure 3) pour
choisir la vitesse d’entraînement vers l’avant ou vers l’arrière.
Utiliser des vitesses réduites pour déblayer de la neige trempée et lourde. Utiliser des vitesses supérieures pour de la
neige légère ou pour le transport.
REMARQUE : Régler toujours la vitesse du moteur sur RAPIDE
(plein gaz).
5. Appuyer à fond sur le levier de commande de tarière (A, Figure
3) pour embrayer la tarière. Relâcher le levier pour arrêter la
tarière.
6. Appuyer à fond sur le levier de commande de traction/FreeHand (F/G, Figure 3) pour embrayer l’entraînement de traction
et commencer à déplacer la souffleuse à neige. Pour arrêter,
relâcher le levier.
REMARQUE : Toujours relâcher le levier de commande de traction
avant de changer de vitesse.
7. Sur les modèles équipés de commandes Free Hand, quand on
appuie sur les deux leviers de commande de tarière (A, Figure
3) et de traction (F), la commande Free Hand est activée. Ce
qui vous permet de relâcher le levier de commande de tarière
(A) pour utiliser d’autres commandes. La tarière continuera à
tourner jusqu'à ce que le levier de commande de traction ou de
commande Free-Hand soit relâché.
8. Si on le désire, utiliser le commutateur de poignées chauffantes (L, Figure 3) pour allumer les poignées chauffantes (si la
machine en est équipée).
REMARQUE : Ne pas oublier d’éteindre les poignées chauffantes
avant d’arrêter la souffleuse à neige.
REMARQUE : Certains modèles comportent des poignées chauffantes automatiques qui fonctionnent lorsque la souffleuse à neige
est en marche.
9. Certains modèles sont équipés d’un phare (O, Figure 3) pour
illuminer la zone devant la souffleuse à neige. Le phare fonctionne lorsque la souffleuse à neige est en marche.
Français
fr
13
Page 78

Not for
Reproduction
Arrêter la souffleuse à neige
1. Relâcher le levier de commande de tarière (A, Figure 3).
2. Relâcher le levier de commande de traction (F).
3. Arrêter le moteur. Veuillez vous reporter au manuel d’utilisation
du moteur pour des instructions sur le moteur.
Réglage du déflecteur
A. Commande de déflecteur manuelle (si l’unité en
est équipée)
Desserrer le bouton du déflecteur (A, Figure 8), régler le réflecteur
sur la position voulue et resserrer ensuite le bouton pour maintenir
la position. Relever le déflecteur pour rejeter plus loin la neige.
Commande de traction Easy Turn™ (si
l’unité en est équipée)
Pour tourner plus facilement quand on utilise la souffleuse à neige,
serrer le levier de commande de traction Easy Turn (Figure 4).
REMARQUE : Certains modèles sont pourvus du contrôle de traction Easy Turn sur une roue seulement, alors que d’autres modèles
le sont sur les deux roues.
REMARQUE : La commande de traction Easy Turn sera plus difficile à activer avec une charge lourde. Activez le levier avant d'entamer un virage.
Embrayer le levier de commande Easy Turn fait débrayer une des
roues tractrices mais permet à l’autre roue de continuer à fonctionner. Relâcher le levier de commande Easy Turn embraye automatiquement les deux roues d’entraînement en pleine traction (Figure
5).
Débrayage des roues - Goupille de verrouillage (si la machine en est équipée)
Certains modèles sont équipés d’un débrayage de roue motrice
vous permettant de débrayer une des roues motrices pour déplacer
plus facilement la machine le moteur coupé.
Modèles avec goupille de verrouillage de traction : Les roues
équipées d’une goupille de verrouillage de traction (A, Figure 6)
peuvent être complètement débrayées en tirant la poignée vers
l’extérieur et en l’éloignant de la roue jusqu’à ce que la goupille de
verrouillage soit désengagée de la roue. Tourner ensuite la poignée
pour que la goupille ne se réengage pas dans la roue. Inverser
cette procédure pour embrayer la roue d’entraînement.
B. Commande de déflecteur électrique (si l’unité
en est équipée)
Pendant que le moteur tourne, appuyer sur l’un ou l’autre des côtés
du commutateur de commande du déflecteur (B, Figure 8) pour
déplacer le déflecteur vers le haut ou vers le bas. Relever le déflecteur pour rejeter plus loin la neige.
C. Commande de déflecteur sur tableau de bord
(si l’unité en est équipée)
Déplacer le levier de commande du déflecteur (C, Figure 8) vers
l’avant ou l’arrière pour relever ou abaisser le déflecteur. Relever le
déflecteur pour rejeter plus loin la neige.
Réglage de rotation de goulotte
A. Commande électrique de rotation de goulotte
(si la machine en est équipée)
Pendant que le moteur tourne, appuyer sur l’un ou l’autre des côtés
du commutateur de commande du déflecteur (A, Figure 9) pour
faire pivoter la goulotte à droite ou à gauche.
B. Commande de rotation de goulotte sur tableau
de bord (si la machine en est équipée)
Repérer la bielle de la rotation de goulotte sur tableau de bord (B,
Figure 9). Faire pivoter la bielle pour faire tourner la goulotte.
C. Commande de rotation de goulotte avec bielle
sur le côté gauche (si la machine en est équipée)
Repérer la bielle de la rotation de goulotte gauche (C, Figure 9)
pour faire pivoter la bielle et faire tourner la goulotte.
Dégagement des roues - Goupilles de verrouillage (si la machine en est équipée)
Les roues équipées de goupille de verrouillage de traction (A,
Figure 7) peuvent être complètement débrayées en retirant la goupille et en l’installant dans le trou extérieur de l’essieu. Inverser cette
procédure pour embrayer la roue d’entraînement.
14
Remplissage du réservoir de carburant
Veuillez vous reporter au manuel d’utilisation du moteur pour des
informations sur le remplissage du réservoir de carburant et pour
des recommandations sur le carburant.
Page 79

Not for
Reproduction
Dégagement d'une goulotte d'éjection
colmatée
DANGER
Danger d’amputation
Le conduit d'éjection contient un impulseur rotatif pour
éjecter la neige. Les doigts peuvent facilement être prises
dans l'impulseur. Ne débouchez ou ne dégagez jamais le
conduit d'éjection avec vos mains. Utilisez toujours un outil
de nettoyage.
La faillite d'observer ces instructions de sécurité résultera
à une amputation traumatique ou dilacératon grave.
Le contact des mains avec la turbine rotative dans la goulotte
d'éjection est la cause la plus courante de blessure associée aux
souffleuses à neige. N’utilisez jamais vos mains pour curer la
goulotte d’éjection.
Pour déboucher en toute sécurité une goulotte d'éjection
obstruée, suivre ces instructions :
1. Arrêter le moteur.
2. Attendre 10 secondes pour s’assurer que les lames de la
turbine ont arrêté de tourner.
3. Utilisez toujours un outil de nettoyage, non vos mains.
Un outil de curage (A, Figure 10) est fourni avec la machine.
Réglage de hauteur des patins
DANGER
Danger d’amputation
Le conduit d'éjection contient un impulseur rotatif pour éjecter
la neige. Les doigts peuvent facilement être pris piège et une
amputation traumatique ou dilacération grave en résultera.
Le contact des mains avec la turbine rotative dans la goulotte
d'éjection est la cause la plus courante de blessure associée aux
souffleuses à neige.
Couper le moteur, attendre que toutes les pièces mobiles s’arrêtent et retirer la clé de contact avant de procéder à un entretien
ou à des réparations.
AVERTISSEMENT
d'objets projetés
Les objets tels que le gravel, les pierres, ou les autres débris,
si frappés par l'impulseur, peuvent être projetés avec une force
suffisamment pour causer des blessures personnels, des dommages aux propriétés ou du dommage à la souffleuse à neige.
S’assurer de régler les patins à la hauteur correcte pour maintenir un dégagement au sol suffisant pour le type de surface à
déblayer.
Cette souffleuse à neige est munie avec deux patins ajustables
pour hauteur, attacher à l'extérieur du boîtier de la tarière. Ceux-ci
élèvent le devant de la souffleuse à neige.
Lors de l'enlèvement de la neige d'une surface dur tels que les
voies d'accès ou les trottoirs pavés, ajuster les patins vers le haut
pour incliner le devant de la souffleuse à neige vers le bas.
Lors de l’enlèvement de la neige d’un endroit couvert de gravier ou
non nivelé, élever le devant de la souffleuse à neige en déplaçant
les patins vers le bas. Ceci aidera à empêcher les pierres et les
autres débris dêtre ramassés et rejetés par les tarières.
1. Déterminer combien de dégagement vous désirez entre la
barre de raclage se trouvant en bas du carter de tarière et le
sol. Lors du déblayage d’une surface de graviers, un dégagement suffisant du sol est nécessaire pour empêcher la machine
de ramasser des pierres.
2. Placer un bloc égal au dégagement de sol voulu sous la barre
de raclage.
3. Desserrer les écrous de montage du patin (A, Figure 11) et
pousser le patin (B) vers le bas jusqu’à ce qu’il touche le sol.
Resserrer les écrous de montage.
4. Régler le patin de l’autre côté à la même hauteur.
Remisage hors saison
Si la machine doit être remisée pendant 30 jours ou plus à la fin de
la saison, les étapes suivantes sont recommandées pour la préparer pour le remisage. Il faut toujours se reporter au manuel d'utilisation pour obtenir des informations importantes si la machine doit
être remisée pendant une période prolongée.
Veuillez vous reporter au manuel d’utilisation du moteur pour des
informations sur le remisage du moteur.
REMARQUE : Le carburant doit être retiré ou traité pour empêcher
que des dépôts de gomme ne se forment dans le réservoir, le filtre,
le boyau et le carburateur pendant le remisage.
AVERTISSEMENT
Danger d’incendie et d’explosion
L’essence est extrêmement inflammable et ses vapeurs sont
explosives. Les émanations peuvent se propager jusqu'à une
source d’ignition éloignée et peuvent causer une explosion et/ou
un incendie.
Manipuler l'essence avec prudence. Ne jamais remiser la
machine avec du carburant dans le réservoir, à l’intérieur ou
dand d’une enceinte mal aérée ou les émanations pourraient
atteindre une flamme nue, une étincelle ou une veilleuse, telle
que celle d’une chaudière, un chauffe-eau ou une sécheuse à
linge.
• Nettoyer soigneusement la machine.
• Lubrifier tous les points de lubrifications (voir la section
Entretien).
• S'assurer que tous les écrous, les boulons et les vis sont fixés
solidement. Inspecter toutes les pièce amovibles pour dommage, brisure et usure. Remplacez si nécessaire.
• Retoucher toutes les surfaces rouillées ou écaillées; ponçer
légèrement avant de peindre.
Français
fr
15
Page 80

Not for
Reproduction
• Couvrir les pièces nues de métal du boîtier de la tarière de la
souffleuse à neige, et de l'impulseur avec un antirouille.
• Si possible, remiser votre machine à l'intérieur et la couvrir pour
la protéger de la poussière et de la saleté.
• Si la machine doit être remisée à l’extérieur, couvrir d’une
épaisse toile de bâche.
Pour retourner la machine pour un entretien :
• Remplir le réservoir de carburant avec du carburant récemment
acheté.
• Bien serrer toutes les fixations.
• S’assurer que les protections, les éléments protecteurs et les
carters soient en place.
Entretien
Programme d'entretien
Avant chaque utilisation
• Vérifier le niveau d'huile du moteur
• Effectuer le test du système de sécurité
Toutes les 8 heures ou chaque jour
• Vérifier le niveau d'huile du moteur
Toutes les 25 heures ou tous les ans
• Lubrifier la tringlerie du levier de commande
• Lubrifier l'assemblage de tarière
• Lubrifier l'engrenage de rotation de goulotte et le déflecteur
• Lubrifier l'arbre à tête hexagonale du système d'entraînement avec de l'huile de moteur synthétique 5w-30 et les
chaînes avec de la graisse
• Lubrifier le système de transmission par engrenages (si la
machine en est équipée)
Toutes les 50 heures ou tous les ans
• Inspecter le silencieux et le pare-étincelles (si la machine en
est équipée)
• Vérification de la pression des pneus
Entretien du moteur
Pour les fréquences d'entretien du moteur et les procédures,
consultez le manuel d'utilisation du moteur.
Lubrification de la tringlerie du levier de
commande
AVERTISSEMENT
Danger d’amputation
Il est essentiel pour une utilisation de la machine en toute sécurité que les commandes se débrayent quand on les relâche.
L'appareil ne devrait pas en aucun cas être utilisé si les commandes ne fonctionne pas correctement. Voir Test du système
de sécurité pour confirmer une utilisation correcte.
Lubrifier la machine aux endroits indiqués dans la figure 12. À l’endroit où un bidon d’huile est illustré, lubrifier avec de l’huile moteur.
À l’endroit où un pistolet graisseur est illustré, lubrifier avec de la
graisse au lithium.
Lubrification de l’assemblage de tarière
Lubrifier la boîte à engrenage de tarière
Le boîtier d'engrenage et de tarière est lubrifié à l'usine et ne
requiert pas de lubrification additionnel. Cependant, s’il y a eu une
fuite du lubrifiant ou si le boîtier d’engrenages de la tarière a été
réparé, il sera peut-être nécessaire d’ajouter du lubrifiant.
Pour vérifier le niveau de graisse du boîtier d’engrenages de la
tarière, enlever le bouchon de remplissage (A, figure 13). À l’aide
d’une section de câble utilisée comme jauge, vérifier la présence de
graisse dans la boîte d’engrenages. Si de la graisse est visiblement
présente, ne pas en ajouter. Si de la graisse n’est pas visiblement
présente, ajouter le lubrifiant préconisé. Utiliser la couleur de la
graisse restante pour déterminer le type de lubrifiant à ajouter. Si la
couleur de la graisse est blanche, ajouter de la graisse Lubriplate
GR132 ou l’équivalent. Si la couleur de la graisse est marron, ajouter de la graisse au lithium EP1. La capacité en lubrifiant de la boîte
d’engrenages est de 92 grammes (3 ¼ onces).
REMARQUE : Certains boîtiers d’engrenages de tarière ne sont pas
pourvus d’un bouchon de remplissage. Consulter votre revendeur
pour l’entretien.
Lubrifier les accessoires de l'arbre de la
tarière
Lubrifier la visserie de l’arbre de tarière à l’aide d’un pistolet graisseur (B, Figure 13). Consulter le programme d'entretien. Chaque
fois qu’une goupille de cisaillement ou une goupille (C) est remplacée, l’arbre de tarière DOIT être graissé.
Pour le remisage ou pour remplacer les goupilles de cisaillement ou
les goupilles (C), les retirer, lubrifier la visserie (B) et faire tourner
les tarières plusieurs fois pour bien répartir la graisse. Réinstaller
les goupilles de cisaillement ou les goupilles une fois terminé.
REMARQUE : Certains modèles ne sont pas équipés de graisseurs
et ne sont pas soumis à ces exigences.
Lubrification de la goulotte d'éjection et
du déflecteur
Lubrifier l’engrenage de rotation de goulotte (Figure 14) avec de la
graisse et le mécanisme du déflecteur avec de l’huile de type automobile. Consulter le programme d'entretien.
À l’endroit où un bidon d’huile est illustré, lubrifier avec de l’huile de
moteur. À l’endroit où un pistolet graisseur est illustré, lubrifier avec
de la graisse au lithium.
Lubrification de l'arbre à tête hexagonale et de la chaîne (si équipé)
L’arbre à tête hexagonale et les chaînes d’entraînement doivent
être lubrifiés à intervalle spécifié dans le Programme d'entretien.
Veuillez faire effectuer cet entretien par un revendeur agréé.
Système de transmission par engrenages (si la machine en est équipée)
Le système de transmission par engrenages ne nécessite ni entretien ni réglage. Si vous avez le moindre problème avec le système
de transmission par engrenages, n'hésitez pas à contacter votre
réparateur agréé.
16
Page 81

Not for
Reproduction
Inspection du câble de traction
Les câbles sont ajustés à l'usine et pas d'ajustements devront être
nécessaires. Toutefois, si les câbles sont étirés ou s’ils flèchent,
un réglage sera nécessaire. Consulter votre revendeur pour ce
réglage.
Réglage de la traction de courroie
d'entraînement
La traction de la courroie d’entraînement est constamment sous la
tension des ressorts et ne nécessite aucun réglage. Si la traction de
la courroie d’entraînement patine, voir votre revendeur agréé.
Réglage de la tige de commande de
vitesse
Si la tige de commande de vitesse nécessite un réglage, voir votre
distributeur agréé.
Réglage des câbles Easy Turn™
Si le câble Easy-Turn s’est détendu, les engrenages ne se débrayeront pas si le levier de commande est activé. Ajuster le câble en
suivant la procédure suivante.
1. Couper le moteur et retirer la clé.
Déterminer le système de goupille de
cisaillement/goupille que vous avez
Les tarières sont fixées à l'arbre de la tarière avec de la quincaillerie
spéciale conçue pour briser si un objet est coincé dans le boîtier de
la tarière.
Veuillez vous référer à la liste des pièces illustrées pour déterminer
si votre unité exige une goupille de cisaillement ou à la fois une
goupille de cisaillement et une entretoise.
Utiliser uniquement de la quincaillerie d’usine ou son équivalent.
AVERTISSEMENT
Danger d’amputation
Le conduit d'éjection contient un impulseur rotatif pour éjecter
la neige. Les doigts peuvent facilement être pris piège et une
amputation traumatique ou dilacération grave en résultera.
Le contact des mains avec la turbine rotative dans la goulotte
d'éjection est la cause la plus courante de blessure associée aux
souffleuses à neige.
Couper le moteur, attendre que toutes les pièces mobiles s’arrêtent et retirer la clé de contact avant de procéder à un entretien
ou à des réparations.
2. Desserrer le contre-écrou (A, Figure 15).
3. Tourner l’écrou de réglage (B) pour allonger ou raccourcir le
câble Le câble doit être resserré jusqu’à ce qu’il n’y ait plus
de jeu dans le levier. Cependant, Il ne doit pas embrayer la
commande Easy-Turn si on n’appuie pas sur le levier de commande.
4. Resserrer le contre-écrou (A).
Réglage du câble de tarière
AVERTISSEMENT
Danger d’amputation
Trop serrer le câble de tarière pourrait forcer l'entraînement de
tarière à s'embrayer sans que le levier d'entraînement de tarière
soit relâché.
Suivre la procédure de réglage pour s’assurer que le câble ne
soit pas trop serré.
1. Le levier de la tarière relâché, le crochet (A, Figure 16) devrait
à peine toucher le levier (B) sans le lever. Il peut avoir un dégagement maximal de 0,8 mm (1/32 po).
2. Pour ajuster, desserrer l’écrou (C) en maintenant les méplats
d’ajustement (D) et en tournant l’écrou. Tourner ensuite les
méplats d’ajustement en tenant l’écrou d’ajustement (E). La vis
de réglage est une vis cruciforme et sa tête peut être tenue ou
tournée en insérant un tournevis dans le ressort (F).
Remplacement de goupille de cisaillement
1. Arrêter le moteur et attendre que toutes les parties mobiles
s’arrêtent.
2. Retirer la goupille de cisaillement existante.
3. Lubrifier les points de graissage de la tarière et faire pivoter la
tarière pour lubrifier l’arbre de tarière.
REMARQUE : Certains modèles ne sont pas équipés de graisseurs et ne nécessitent pas cette vérification.
4. Aligner les trous de goupille de cisaillement. Installer la nouvelle goupille de cisaillement (A, Figure 17) à travers de l’arbre
de la tarière (C). Attacher à l’aide d’une goupille fendue (B).
Remplacement de goupille de cisaillement
1. Arrêter le moteur et attendre que toutes les parties mobiles
s’arrêtent.
2. Retirer la goupille de cisaillement existante.
3. Lubrifier les points de graissage de tarière. Faire pivoter la
tarière pour lubrifier l’arbre de tarière.
4. Aligner les trous des écrous. Installer la nouvelle goupille de
cisaillement (A, Figure 18) en la faisant passer à travers l’arbre
de tarière (B). Attacher à l’aide du contre-écrou (C).
3. Tenir les méplats d'ajustement et serrer l'écrou.
4. Pour s’assurer que la tarière ne s’embraye pas à moins que la
commande ne soit complètement enfoncée, veuillez procéder
aux Tests du système de sécurité. La tarière doit s’arrêter
dans les 5 secondes une fois que la commande est relâchée.
Français
fr
17
Page 82

Not for
Reproduction
Remplacement du boulon de cisaillement et de la douille d’écartement
1. Arrêter le moteur et attendre que toutes les parties mobiles
s’arrêtent.
2. Retirer la goupille de cisaillement existante.
3. Lubrifier les points de graissage de tarière. Faire pivoter la
tarière pour lubrifier l’arbre de tarière.
4. Aligner le boulon et les trous de la douille d’écartement.
Installer le nouveau boulon de cisaillement (A, Figure 19),
la douille d’écartement (B), à travers l’arbre de tarière (C).
Attacher à l’aide du contre-écrou (D).
Contrôle de la Pression Pneumatique
La pression des pneus doit être vérifiée régulièrement. La pression
de pneus recommandée diffère selon le fabricant de pneus. Une
bonne règle empirique consiste à gonfler le pneu jusqu’à la pression
« Gonflage max. » figurant sur le flanc du pneu, mais sans gonfler
au-delà.
18
Page 83

Not for
Reproduction
Dépannage
Tableau de dépannage
Procéder à l’inspection ou aux réparations comme indiqué dans le Tableau de dépannage.
Problème Vérifier que Solution
la tarière s’arrête dans les 5 secondes suivant le relâchement du levier de commande
droit.
La goulotte d’éjection ou le déflecteur ne
fonctionne pas (commande électrique).
La goulotte d’éjection ou le déflecteur ne
fonctionne pas
(commande à distance manuelle).
La souffleuse à neige ne réussit pas à se
déplacer à faibles vitesses.
Le moteur ne réussit pas à démarrer. La clé est sur la position OFF (ARRÊT). Tourner la clé sur la position ON
Moteur démarre difficilement ou ne fonctionne pas bien.
Vibrations excessives. Pièces desserrées ou turbine endomma-
La souffleuse à neige ne s’arrête pas quand
le levier de commande de traction est relâché.
La barre-grattoir ne nettoie pas les surfaces
en dur.
La machine ne peut pas se propulser d’ellemême.
La commande Free Hand (si la machine en
est équipée) est ACTIVE.
Courroie de transmission de la vis déréglée. Consulter le distributeur homologué.
Rouleau de guidage de la courroie de trans-
mission de la vis déréglé.
Panne électrique. Consulter le distributeur homologué.
La goulotte d’éjection ou le déflecteur sont
déréglés ou nécessitent d’être lubrifiés.
La commande de traction est déréglée. Consulter le distributeur homologué.
Impossibilité de démarrer au starter un
moteur froid.
La soupape d’arrêt de carburant, si la
machine en est équipée, est sur la position
CLOSED (FERMÉ).
Panne de carburant. Remplir le réservoir de carburant.
L’étrangleur tourné sur OPEN/RUN avec le
moteur froid.
Moteur noyé. Amener le starter sur la position OPEN/
Pas d'étincelle. Consulter le distributeur homologué.
Eau dans le carburant ou carburant usagé. Vider le réservoir. (Se débarrasser du car-
Bougies mal écartées ou mal vissées. Consulter le distributeur homologué.
La calotte d'aération est bloquée. Dégager les orifices de ventilation.
gée.
La commande de traction est déréglée. Consulter le distributeur homologué.
Patins et barre de raclage mal réglés. Lever ou baisser les patins et la barre de
Courroie d’entraînement lâche ou bien
endommagée.
Mauvais réglage du câble d’entraînement
de traction.
Disque de friction usé ou endommagé. Remplacer le disque de friction. Consulter
Relâcher à la fois la commande de tarière
et la commande Free Hand (si la machine
en est équipée) pour arrêter la tarière.
Consulter le distributeur homologué.
Régler et/ou lubrifier la tringlerie de commande.
(MARCHE).
Appuyer sur le bouton d'amorceur à deux
reprises et redémarrer.
Tourner la soupape sur la position
OUVERT.
Tourner l'étrangleur sur CLOSED/START,
positionner la manette des gaz sur FAST.
RUN (OUVERT/MARCHE), amener la
manette des gaz sur la position FAST
(RAPIDE) et lancer le moteur jusqu’à ce
qu’il démarre.
burant dans un dépôt de déchets dangereux). Remplir avec du carburant frais.
Arrêter immédiatement le moteur. Serrer
toute la boulonnerie. Si les vibrations continuent, faites réviser la machine par un
revendeur agréé.
raclage.
Changez la courroie. Consulter le distribu-
teur homologué.
Consulter le distributeur homologué.
un concessionaire agéé.
Français
fr
19
Page 84

Not for
Reproduction
Problème Vérifier que Solution
La machine refuse d’éjecter la neige. Courroie d’entraînement de tarière lâche ou
bien endommagée.
Le câble de contrôle de tarière n’est pas
réglé correctement.
Goupille de cisaillement ou boulon de cisaillement cassé
Éjecteur obstrué. Arrêter immédiatement le moteur. Toujours
Objet étranger logé dans la tarière. Arrêter immédiatement le moteur. Toujours
Consulter le distributeur homologué.
Régler le câble de commande de tarière.
Se reporter à la section Entretien de ce
manuel.
Remplacer la goupille de cisaillement ou le
boulon. Consulter la section Entretien de ce
manuel ou consulter un revendeur agréé.
utiliser un outil de nettoyage pour déboucher une goulotte d’éjection obstruée,
et non les mains. Nettoyer la goulotte
d’éjection et l’intérieur du carter de tarière.
Consulter Avertissement concernant la gou-
lotte d'éjection dans la section Sécurité de
l'opérateur.
utiliser un outil de nettoyage pour déboucher une goulotte d’éjection obstruée, et
non les mains. Retirer l’objet de la tarière.
Se reporter à AVERTISSEMENTS dans la
section Sécurité de l'opérateur.
20
Page 85

Not for
Reproduction
Français
fr
21
Page 86

Not for
Reproduction
A jelen útmutató kiterjedése alá
A felhasználó biztonsága
eső termékek
Az útmutató a következő termékekre terjed ki:
1695856
1695994
1695995
1695996
1695996-00
1695996-01
1695996-02
1695997
1695997-00
1695997-01
1695997-02
1696009
1696010
1696011
1696011-00
1696011-01
1696011-02
1696012
1696012-00
1696012-01
1696012-02
1696053
1696054
1696055
1696055-00
1696055-01
1696056
1696061
1696062
1696062-00
1696062-01
1696063
1696065
1696066
1696067
1696199-00
1696199-01
1696200-00
1696201-00
1696201-01
1696202-00
1696202-01
1696203-00
1696203-01
1696206-00
1696207-00
1696207-01
1696212-00
1696212-01
1696220-00
1696221-00
1696221-01
1696222-00
1696222-01
1696223-00
1696223-01
1696224-00
1696224-01
1696226-00
1696227-00
1696227-01
1696228-00
1696229-00
1696230-00
1696253-00
1696253-01
1696254-00
1696254-01
1696255-00
1696255-01
1696256-00
1696256-01
1696257-00
1696257-01
1696277-00
1696278-00
1696300-00
1696301
1696301-00
1696302-00
1696381-00
1696382-00
1696390-00
1696391-00
1696392-00
1696481-00
1696482-00
1696483-00
1696484-00
1696485-00
1696486-00
1696487-00
1696488-00
1696489-00
1696490-00
1696491-00
1696493-00
1696494-00
1696495-00
1696522-00
1696523-00
1696524-00
A kézikönyv tartalma
A felhasználó biztonsága ..................................................6
A biztonsági rendszer ellenőrzése ................................ 11
A készülék kezelőszervei ............................................... 11
Üzemeltetés ..................................................................... 12
Karbantartás .................................................................... 16
Hibakeresés ..................................................................... 19
MEGJEGYZÉS: További információt talál az Ügyfélkapcsolati
útmutatóban és a Telepítési utasításokban.
A jelen dokumentumban található képek bemutató jellegűek, céljuk
az útmutató kiegészítése. Az Ön készüléke eltérhet a bemutatott
illusztrációktól. A BAL és JOBB irány a kezelő helyzetéből nézve
értendő.
A jelen hókotró szikragyújtású indítórendszere megfelel a kanadai
ICES-002 szabványnak.
Biztonsági figyelmeztető jel és
figyelmeztető szavak
A biztonsági figyelmezető jel potenciális személyi sérülés
veszélyét jelenti. Jelzőszavakkal (VESZÉLY, FIGYELMEZTETÉS
vagy VIGYÁZAT) ellátott figyelmeztető jelekkel utalunk a veszély
komolyságának mértékére vagy szintjére. Egy biztonsági jel is
használatos a veszély jellegének feltüntetésére. A MEGJEGYZÉS
figyelmeztető szót használjuk a személyi sérüléssel nem
kapcsolatos gyakorlatok ismertetésére.
VESZÉLY olyan veszélyre utal, amely, ha nem sikerül elkerülni,
halált, vagy komoly sérülést okoz.
FIGYELMEZTETÉS olyan veszélyre utal, amely, ha nem sikerül
elkerülni, halált, vagy komoly sérülést okozhat.
VIGYÁZAT olyan veszélyre utal, amely, ha nem sikerül
elkerülni, kisebb vagy közepes sérülést okozhat.
A MEGJEGYZÉS olyan tevékenységet jelöl, mely a termék
sérülését okozhatja.
Veszélyjelek táblázata
Hókotró veszélyjelek
Szimbólum Jelentés Szimbólum Jelentés
Biztonsági
információ
a személyi
sérülést
okozható
veszélyekről.
Amputáció
veszélye - forgó
kerék.
Amputáció
veszélye - forgó
kerék.
Amputáció
veszélye - ne
érintse meg
a mozgó
részeket.
Tűzveszély. Robbanásveszély.
Olvassa el
és értse meg
a Kezelői
kézikönyvet,
mielőtt a
berendezést
működtetni vagy
javítani kezdi.
Szervizelés
elvégzése előtt
vegye ki a kulcsot.
Végtag levágás
veszélye áll fenn a
forgó csiga által.
Kirepülő tárgyak
veszélye.
6
Áramütés
veszélye.
Mérgező gázok
veszélye.
Page 87

Not for
Reproduction
Szimbólum Jelentés Szimbólum Jelentés
Forró felület
veszélye.
Tartson
biztonságos
távolságot.
Hosszabb
használat
esetén fülvédő
használata
javasolt.
Viseljen
védőszemüveget.
VESZÉLY
A kiöntő garatban egy mozgó kerék található, amely a havat
dobálja ki. Az eltömődések vagy a garat tisztítását sose végezze
a kezével. Az ujjai beakadhatnak a forgókerékbe. Mindig a
tisztítóeszközt használja.
Ezen biztonsági utasítások be nem tartása sérüléses amputációt
vagy súlyos zúzódást okozhat.
Tartsa távol a
gyermekeket.
Visszaütés
veszélye.
Általános biztonsági figyelmeztetések
FIGYELEM
• A hókotrókkal kapcsolatos leggyakoribb baleseti ok, hogy a
felhasználó benyúl a kiöntő garatba és a mozgó kerékhez ér.
• Ez a hókotró levághatja a végtagokat, és különböző
tárgyakat hajíthat ki. Olvassa el és tartsa be az útmutatóban
lévő összes biztonsági utasítást. Az utasítások be nem
tartása halált vagy súlyos sérülést okozhat.
FIGYELEM
A készülék üzembe helyezése előtt olvassa el, értse meg és
tartsa be a hókotrón és a használati útmutatóban lévő összes
utasítást.
A biztonsági utasítások be nem tartása halált vagy súlyos
sérülést okozhat.
• Alaposan ismerkedjen meg a vezérlőkkel és a hókotró
megfelelő használatával.
• A hókotró üzemeltetése előtt megfelelően ismerkedjen meg
a készülékkel.
• Tanulja meg, hogyan kell megállítani a készüléket és
gyorsan kikapcsolni a vezérlőeszközöket.
• Senkit se engedjen, hogy megfelelő ismertetés nélkül
használja a készüléket.
• Ha hosszabb időszakra tárolná a hókotrót, mindig tartsa be
a használati útmutatóban lévő utasításokat.
• Szükség esetén tartsa karban vagy cserélje ki a biztonsági
és kezelési címkéket.
• Soha ne kíséreljen meg nagyobb javítást végrehajtani a
hókotrón, ha nincs megfelelő gyakorlata. A hókotró nem
megfelelő szervizelése veszélyes működéshez, a készülék
meghibásodásához és a gyártói garancia elveszítéséhez
vezethet.
VESZÉLY
Tartsa távol a kezét, lábát és ruházatát a forgó részektől. A
forgó alkatrészek érintkezésbe kerülhetnek a kézzel, lábbal,
hajjal, ruházattal és más, a testen viselt tárgyakkal, vagy
beleakadhatnak azokba.
Ezen biztonsági utasítások be nem tartása sérüléses amputációt
vagy súlyos zúzódást okozhat.
• A hókotró tisztításakor, javításakor vagy ellenőrzésekor
bizonyosodjon meg afelől, hogy a motor KI van kapcsolva,
a gyújtógyertya vezetéke ki van kötve és az összes mozgó
rész leállt.
• Ne tegye a kezét vagy lábát a forgó alkatrészek közelébe
vagy azok alá. Mindig tartsa tisztán a kiengedő nyílást.
• Soha ne működtesse a hókotrót megfelelő védők vagy más
biztonsági eszközök nélkül, melyek a helyükön vannak és
működnek.
• Soha ne hagyja felügyelet nélkül a hókotrót járó motorral.
Mindig oldja ki a csigát és a vonóerő szabályozást, állítsa le
a motort és vegye ki a kulcsokat.
• A laza ruházatot tartsa távol a hókotró és a garat elejétől. A
sálak, kesztyűk, lógó húzózsinórok, laza ruházat ás nadrág
beakadhat forgóeszközbe, ami súlyos sérüléshez vezethet.
A hosszú hajat kösse fel és vegye le az ékszereket.
• Működtesse a gépet pár percig hókotrás után, hogy
megelőzze a gyűjtő/forgókerék fagyását.
• Amikor a hókotrót szállítják, vagy nincs használatban, ne
adjon áramot a gyűjtő/forgókeréknek.
Magyar
hu
7
Page 88

Not for
Reproduction
FIGYELEM
A csiga tárgyakat szedhet fel és kirepítheti azokat a garaton.
Sose ürítse a havat a közelben álló személyek felé, és ne
engedjen senkit se a hókotró elé. A biztonsági utasítások be nem
tartása halált vagy súlyos sérülést okozhat.
• Üzemeltetés közben, a beállítások végrehajtásakor vagy
javításkor mindig viseljen biztonsági szemüveget vagy
szemellenzőt.
• Mindig ügyeljen a hó kiürítés irányára. A közelben lévő
gyalogosok, háziállatok vagy vagyontárgyak megsérülhetnek
a kirepülő tárgyaktól.
• Figyeljen a környezetére a hókotró üzemeltetése közben.
Ha a készülékkel olyan tárgyakra hajt, mint sóder, lábtörlő,
újságok, játékok és a hó alatt lévő kövek, ezek kirepülhetnek
a garatból vagy elakadhatnak a csigában.
• Különös óvatossággal járjon el, amikor kavicsos felhajtón,
járdán vagy úton üzemelteti a készüléket, vagy ezeken halad
át.
• Állítsa be a gyűjtő borításának magasságát, kavicsos, vagy
zúzott köves felület tisztításához.
• Soha ne használja a készüléket üvegfal, gépjárművek,
ablaktáblák, szakadékok és ehhez hasonlók közelében a
kiöntő garat szögének megfelelő beállítása nélkül.
• Ismerkedjen meg azzal a területtel, ahol a hókotrót fogja
használni. Jelölje meg a járdák és az utak határait.
FIGYELEM
Tragikus balesetek történhetnek, ha a felhasználó nem figyel a
gyerekek jelenlétére. A gyermekeket gyakran vonzza az eszköz
és annak működtetése. Soha ne feltételezze, hogy a gyerekek ott
maradnak, ahol utoljára látta őket.
• Üzemeltetés közben tartsa a gyermekeket távol a
munkaterülettől. A gyermekeket gyakran vonzza a készülék.
Legyen figyelemmel az összes jelenlévő személyre.
• Legyen résen és állítsa le a készüléket, ha gyerekek vannak
a területen.
• Soha se engedje, hogy gyermekek használják a készüléket.
• Legyen különösen gondos beláthatatlan sarkok, cserjék, fák,
vagy más tárgyak esetén, melyek a látást korlátozhatják.
Gyermekek lehetnek a közelben.
FIGYELEM
A motor kipufogógáza szénmonoxidot tartalmaz, ami egy
szagtalan, színtelen, mérgező gáz. A szénmonoxid belélegzése
hányingert, ájulást vagy halált okozhat.
• A motort szabadban indítsa be és járassa.
• Ne üzemeltesse a motort zárt helyiségekben, még nyitott
ajtók és ablakok mellett se.
FIGYELEM
Az üzemanyag és gőzei rendkívül gyúlékony és
robbanásveszélyes anyagok. Mindig különös figyelemmel bánjon
az üzemanyaggal.
Ezen biztonsági utasítások nem betartása tűzet vagy robbanást
okozhat, ami súlyos égési sérülésekhez vagy halálhoz vezethet.
Üzemanyag betöltésekor
• Állítsa le a motort és hagyja lehűlni legalább 2 percig mielőtt
levenné az üzemanyagsapkát és üzemanyagot töltene be.
• Az üzemanyagtartályt szabadtéren vagy egy jól szellőztetett
helyen töltse fel.
• Ne töltse fel túlságosan az üzemanyagtartályt. Az
üzemanyag kitágulása miatt ne töltsön a tartálynyak alsó
részénél több üzemanyagot.
• Az üzemanyagot tartsa távol szikráktól, nyílt lángtól,
gyújtólángtól, hőtől és más tűzforrásoktól.
• Rendszeresen ellenőrizze az üzemanyag-vezetékeket,
tartálysapkát és szerelvényeket repedések vagy szivárgás
szempontjából. Szükség esetén cserélje ki.
• Engedélyezett üzemanyag tárolót használjon.
• Ha az üzemanyag kiömlik, mielőtt beindítaná a motort, várja
meg, amíg az üzemanyag elpárolog.
A motor beindításakor
• Ellenőrizze, hogy a gyújtógyertya, a kipufogódob, az
üzemanyagsapka és a légtisztító (ha van) a helyükön, illetve
rögzítve vannak-e.
• Ne indítsa be a motort, ha a gyújtógyertya nincs a helyén.
• Ha az üzemanyag kilöttyent ne kísérelje meg a hókotró
újraindítását, hanem távolítsa el a gépet a kiömlés helyéről
és kerülje el, hogy az üzemanyag meggyulladjon, amíg az
üzemanyag el nem párolog.
• Ne szívassa túl a motort. Tartsa be a használati útmutatónak
a motor indítására vonatkozó utasításait.
• Ha a motor túlfolyik, a szivatót (ha van) állítsa KINYITÁS/
ÜZEM pozícióba, a gázkart (ha van) állítsa GYORS
pozícióba, majd indítsa be a motort.
Berendezés működésekor
• A hókotrót ne döntse olyan szögben, amikor az üzemanyag
kiömölhet.
• A motor leállításához ne fojtsa el a karburátort.
• Sose üzemeltesse a motort, ha a légtisztító (ha van) vagy a
légszűrő (ha van) el van távolítva.
Olajcsere közben
• A felső olajfeltöltő cső kiürítésekor az üzemanyagtartálynak
üresnek kell lennie, ellenkező esetben üzemanyag-szivárgás
léphet fel, ami tűzet vagy robbanást okozhat.
A készülék szállításakor
• A hókotró szállítását ÜRES üzemanyagtartállyal vagy a
zárószelepet a KI pozícióba állítva kell elvégezni.
Benzin vagy a tartályban üzemanyagot tartalmazó
berendezés tárolásakor
• Kályháktól, tűzhelyektől, vízmelegítőktől vagy egyéb,
gyújtólángot, illetve egyéb szikraforrást használó
készülékektől távol tartandó, mert ezek begyújthatják az
üzemanyag kipárolgásokat.
8
Page 89

Not for
Reproduction
FIGYELEM
A hókotró biztonságos üzemeltetéséhez a motor megfelelő
gondozása és karbantartása szükséges.
• A motor elindítása előtt oldja ki és állítsa üresbe a
tengelykapcsolót és sebességváltót.
• Mielőtt elkezdené a hó eltakarítását, hagyja, hogy a motor
megszokja a külső hőmérsékletet.
• Az elektromos meghajtású vagy elektromos indítású
motorral működő hókotrókhoz földelt háromvezetékes
csatlakozóaljzatot használjon.
FIGYELEM
A motor beindítása szikrákat képez.
A szikrázás gyúlékony gázok közelében azok meggyulladását
eredményezheti.
Ennek robbanás és tűz lehet az eredménye.
• Ha a környezetben természetes vagy cseppfolyósított
petróleum-alapú gáz szivárgás van, ne indítsa el a motort.
• Ne alkalmazzon nyomás alatt lévő indítófolyadékokat, mert
azok gőzei gyúlékonyak.
FIGYELEM
A motor üzemeltetése hőt termel. A motor alkatrészei,
különösképpen a kipufogódob rendkívül felforrósodnak.
Ezen biztonsági utasítások nem betartása súlyos égési
sérüléseket okozhat érintéskor.
• Soha ne érintse meg a forró motort vagy kipufogódobot.
Hagyja, hogy a kipufogódob, a henger és a hűtőbordák
lehűljenek, mielőtt megérintené őket.
• Távolítsa el a hulladékokat a kipufogódob és a henger
környékéről.
• Helyezzen fel egy szikrafogót és tartsa azt üzemi állapotban,
mielőtt parlagon hagyott erdős, bokros vagy füves területen
üzemelteti a készüléket.
• U.S.A. modellek:A California Public Resources törvény
4442. fejezetének megsértésének minősül, ha a motort
parlagon hagyott erdős, bokros vagy füves területen,
illetve ezek mellett használja vagy üzemelteti, ha a
kipufogórendszer nincs felszerelve megfelelő állapotban
fenntartott szikrafogóval, a 4442. fejezet meghatározása
szerint. Hasonló törvényeket más államok vagy szövetségi
fennhatóság alá tartozó területek is előírhatnak. Lépjen
kapcsolatba az eredeti gyártóval, kiskereskedővel vagy
viszonteladóval a jelen motor kipufogórendszeréhez
meghatározott szikrafogó beszerzése érdekében.
FIGYELEM
A hókotrót megfelelően kell karban tartani a biztonságos
üzemeltetés és teljesítmény érdekében. A biztonsági utasítások
be nem tartása halált vagy súlyos sérülést okozhat.
• A hókotró karbantartási vagy javítási munkálatainak
elvégzésekor, állítsa LE a motort, csatlakoztassa le a
gyújtógyertya kábelt, és tartsa azt a gyertyától távol, nehogy
valaki véletlenül beindítsa a motort.
• Rendszeresen ellenőrizze a szárnyas csavarok és más
szerelvények megfelelő feszességét.
• Az anyákat és a csavarokat tartsa szorosan, hogy megőrizze
a hókotró jó állapotát.
• Soha se módosítsa a biztonsági eszközöket. Rendszeresen
ellenőrizze, hogy azok megfelelően működnek-e, és
végezze el a szükséges javításokat, ha nem.
• Az alkatrészek elkophatnak, megsérülhetnek és
megrongálódhatnak. Rendszeresen ellenőrizze az
alkatrészeket, és a gyártó által javasoltakkal cserélje ki őket,
amikor szükséges.
• Rendszeresen ellenőrizze a vezérlő működését. Ha
szükséges állítsa be, vagy javítsa meg.
• Javításkor csak gyárilag engedélyezett vagy azonos
pótalkatrészeket használjon.
• Minden beállítást a gyári műszaki leírásnak megfelelően
hajtson végre.
• Csak gyárilag engedélyezett vagy azonos szerelékeket
és tartozékokat használjon, mint pl. kerék kiellensúlyozó
nehezékek, ellensúlyok vagy fülkék.
• Soha ne kíséreljen meg beállításokat végrehajtani miközben
a motor működik (kivéve, ha a gyártó kifejezetten nem így
javasolja).
Magyar
hu
9
Page 90

Not for
Reproduction
FIGYELEM
Ez a hókotró annyira biztonságos, amennyire a felhasználó
az. Nem megfelelő használat vagy nem megfelelően végzett
karbantartás esetén a hókotró veszélyes lehet. Ne feledje, hogy
a készülék működtetője felelős a saját maga és a körülötte lévők
biztonságáért.
• Távolítson el mindenkit, főleg a kisgyermekeket és
háziállatokat arról a területről, ahol a készüléket használni
fogja.
• Alaposan vizsgálja meg azt a területet, ahol a hókotró
üzemeltetve lesz, és távolítson el minden lábtörlőt, szánkót,
lécet, vezetéket, valamint minden más idegen tárgyat.
• A hókotró használatakor mindig viseljen megfelelő téli
ruházatot.
• Olyan lábbelit viseljen, mely megóvja az elcsúszástól
csúszós felszínen is.
• Óvatosan járjon el, hogy elkerülje az elcsúszást vagy elesést
különösen amikor hátramenetben használja a hókotrót.
• Soha ne működtesse a hókotrót megfelelő látótávolság vagy
fény hiányában. Mindig álljon biztosan, és szorosan fogja a
fogantyúkat.
• Ne dolgozzon a készülékkel lejtők oldalán keresztirányban.
Legyen különlegesen elővigyázatos, amikor lejtőkön vált
irányt. Ne próbáljon meredek lejtőket letakarítani.
• Ne lépje túl a gép kapacitását úgy, hogy a havat túl gyorsan
próbálja eltakarítani.
• Soha ne működtesse a hókotrót nagy sebességgel csúszós
felszínen. Nézzen a hókotró mögé és legyen óvatos, amikor
hátrafelé halad.
• Ne üzemeltesse a hókotrót talajszint felett lévő felületeken,
beleértve az épületek, garázsok, tornácok, illetve egyéb
hasonló szerkezetek és épületek tetejét.
• A felhasználóknak fel kell mérniük, hogy elég biztonságosan
tudják-e működtetni a hókotrót ahhoz, hogy saját maguk és
mások sérülését elkerüljék.
• A hókotró csak hó eltakarítására lett tervezve. A hókotrót
tilos bármely más célra felhasználni.
• Ne szállítson utasokat a készüléken.
• Miután egy idegen tárgyat eltalált, kapcsolja KI a motort,
kösse ki az elektromos motorok kábelét, alaposan vizsgálja
meg a hókotrót, nem érte-e sérülés, és javítsa meg a
sérülést, mielőtt újraindítaná és működtetné a hókotrót.
• Ha a hókotró rendellenesen rezeg, kapcsolja KI a motort. A
rezgés általában valamilyen gondot jelez. Szükség esetén
forduljon egy hivatalos márkakereskedéshez a javítással
kapcsolatban.
• Elektromos indítású motorral felszerelt modellek esetében
kösse ki az elektromos motorok kábelét a motor indítása
után.
FIGYELEM
A sérült vagy nem földelt hálózati vezetékek áramütést
okozhatnak.
Az áramütést súlyos égési sérüléseket vagy halált okozhat.
Elektromos indító használatakor
• A hálózati vezeték mindig legyen megfelelően leföldelve.
• Csak a tápforráshoz megfelelően földelt, háromerű hálózati
vezetéket használjon.
• A tápellátó kábel sérülése esetén képzett szakembernek kell
kicserélnie, a veszély elkerülése érdekében.
FIGYELEM
Az indítóhuzal gyors visszahúzása (visszaütés) az elvártnál
gyorsabban fogja húzni a kezét és karját a motorhoz.
Ez csonttörést, roncsolást, zúzódást vagy ficamodást okozhat.
A motor beindításakor
• A motor indításakor lassan húzza a berántózsinórt, amíg
ellenállást nem érez, majd gyorsan húzza meg, hogy
elkerülje a visszaütést.
Biztonsági matricák
A készülék üzemeltetése előtt olvassa el a biztonsági matricákat.
Hasonlítsa össze az 1. ábrát az alábbi táblázattal. Az előírások és
figyelmeztetések az Ön biztonságát szolgálják. A személyi sérülés
és a készülék meghibásodásának megelőzése érdekében értse
meg és tartsa be a biztonsági matricákon lévő utasításokat.
FIGYELEM
Ha a biztonsági matricák bármelyike elkopott vagy
megsérült, és nem olvasható, rendeljen pótmatricákat a
helyi márkakereskedésben.
A Garat-veszély
matrica
(1727207 cikkszámú)
B Csiga-veszély
matrica
(1737867 cikkszámú)
10
Page 91

Not for
Reproduction
A biztonsági rendszer ellenőrzése
Az alkalmazandó biztonsági ellenőrzés
megállapítása
Válassza ki a készülékének megfelelő biztonsági rendszer
ellenőrzést:
Free Hand™ rendszer nélküli készülékek: A Free
Hand rendszer nélküli készülékeken a csiga és a vonóerő
szabályozókarok függetlenül működnek, a Free Hand jelzések
nincsenek a műszerfalon.
Free Hand™ szabályozással felszerelt modellek esetén: A
vonóerő szabályozás (bal kéz felől) és a csiga szabályozás (jobb
kéz felől) bekapcsolása után a Free Hand rendszer lehetőséget
nyújt a felhasználónak, hogy elengedje a csiga szabályozókart,
és eközben a csiga szabályozókar bekapcsolva marad, amíg a
vonóerő szabályozókar el van engedve. A Free Hand rendszerű
modellek a 2. ábrán látható jelzésekkel rendelkeznek a
műszerfalon.
A biztonsági rendszer ellenőrzése (Free
Hand szabályozás nélküli készülékek)
VESZÉLY
Amputáció veszélye
Ez a hókotró több mechanikus biztonsági rendszerrel van
felszerelve, amelyek arra szolgálnak, hogy biztonságban
tartsák a kezelőt a készülék használata közben. Rendszeresen
ellenőrizze ezen rendszerek üzemelését a biztonsági rendszerek
felsorolt ellenőrzései segítségével. Ha a készülék nem a leírtak
szerint üzemel, NE üzemeltesse azt. Azonnal keressen fel egy
hivatalos szakkereskedést szervizelés céljából.
1. próba - Csiga/forgókerék ellenőrzés
Járó motor mellett:
• Nyomja le a csiga szabályozókart. (A csigának/
forgókeréknek forognia kell)
• Engedje el a csiga szabályozókart. (A csigának/
forgókeréknek 5 másodpercen belül meg kell állnia)
2. próba - Vonóerő meghajtó ellenőrzés
Járó motor mellett és a sebességszabályozót első sebességbe
állítva:
• Nyomja le a vonóerő szabályozókart. (A készüléknek előre
kell haladnia)
• Engedje el a vonóerő szabályozókart. (A készüléknek meg
kell állnia)
A biztonsági rendszer ellenőrzése (Free
Hand szabályozással felszerelt készülékek)
VESZÉLY
Amputáció veszélye
Ez a hókotró több mechanikus biztonsági rendszerrel van
felszerelve, amelyek arra szolgálnak, hogy biztonságban
tartsák a kezelőt a készülék használata közben. Rendszeresen
ellenőrizze ezen rendszerek üzemelését a biztonsági rendszerek
felsorolt ellenőrzései segítségével. Ha a készülék nem a leírtak
szerint üzemel, NE üzemeltesse azt. Azonnal keressen fel egy
hivatalos szakkereskedést szervizelés céljából.
1. próba - Csiga/forgókerék ellenőrzés
Járó motor mellett:
• Nyomja le a csiga szabályozókart. (A csigának/
forgókeréknek forognia kell)
• Engedje el a csiga szabályozókart. (A csigának/
forgókeréknek 5 másodpercen belül meg kell állnia)
2. próba - Vonóerő meghajtó ellenőrzés
Járó motor mellett és a sebességszabályozót első sebességbe
állítva:
• Nyomja le a vonóerő szabályozókart. (A készüléknek előre
kell haladnia)
• Engedje el a vonóerő szabályozókart. (A készüléknek meg
kell állnia)
3. próba - Free Hand szabályozás
Járó motor mellett:
• Kapcsolja be a csiga és a vonóerő szabályozókarokat,
majd engedje el a csiga szabályozókart. (Mindkét
szabályozókarnak bekapcsolva kell maradnia)
• Ezután, engedje el a vonóerő szabályozókart. (Mindkét
szabályozókarnak ki kell kapcsolnia)
A készülék kezelőszervei
A motor jellemzői és kezelőszervei
A motor jellemzőit és kezelőszerveit lásd a motor használati
útmutatójában.
A hókotró jellemzői és kezelőszervei
Hasonlítsa össze az 3. ábrát az alábbi táblázattal.
A Csiga szabályozókar - A csiga
és a forgókerék össze- illetve
szétkapcsolásához használjuk. Az
összekapcsoláshoz nyomja le. A
szétkapcsoláshoz engedje fel.
Magyar
hu
11
Page 92

Not for
Reproduction
B
1
R1
R2
2
3
C
D
E
F
G
Sebességválasztó kar -
Lehetőséget nyújt a kezelőnek
az hat előrehaladási és a két
hátrameneti sebességfokozat
egyikének használatára. A
sebességfokozatok váltásához
állítsa a sebességválasztó kart a
kívánt pozícióba.
MEGJEGYZÉS: Ne mozgassa
a sebességválasztó kart, amíg
a vonóerő szabályozó be
van kapcsolva. Ez az átviteli
rendszer súlyos sérülését
okozhatja.
Garat forgatókar szerelvényfalon (ha van) - A
kiöntő garat balra vagy jobbra
forgatásához használjuk.
Garat forgatókar - balkezes
kar (ha van) - A kiöntő garat
balra vagy jobbra forgatásához
használjuk.
Garat forgatókapcsoló elektromos (ha van) - A
kiöntő garat balra vagy jobbra
forgatásához használjuk.
Free Hand™ szabályozás- A
vonóerő szabályozás (bal kéz
felől) és a csiga szabályozás
(jobb kéz felől) bekapcsolása
után lehetőséget nyújt a
felhasználónak, hogy elengedje a
csiga szabályozókart és használja
a többi kezelőszervet.
Vonóerő szabályozókar - A
hókotró előre vagy hátrafelé
mozgatásához használjuk. Nyomja
le a kart az összekapcsoláshoz,
engedje fel a szétkapcsoláshoz.
Lásd még, „Free-Hand
szabályozás”.
K Easy Turn™ vonóerő
szabályozás (ha van) -
Bekapcsolt állapotban lehetővé
teszi a kezelőnek, hogy kioldja
az egyik vonókereket, miközben
a másik vonókerék tovább hajt,
megkönnyítve a kanyarodást.
L
M
N
O
-
-
-
Fogantyú melegítő kapcsoló
(ha van) - A fűtött kézi fogantyúk
működtetésére szolgál. A
kapcsolónak három helyzete van Magas, Ki, és Alacsony.
MEGJEGYZÉS: Nincs minden
modellen fűtött fogantyú. Egyes
modelleken ezen kívül opcionális
automata fűtött fogantyú van, mely
a hókotró működő állapotában
bekapcsol.
Tisztítóeszköz - A hót és a
hulladékokat távolítjuk el vele
a kiöntő garatból és a csiga
burkolatról.
Féksaruk - A csiga
burkolat hasmagasságának
szabályozására használjuk.
Fényszóró (ha van) - A hókotró
előtti területet világítja meg.
MEGJEGYZÉS: A fényszóró
kialakítása a modelltől függően
eltérő lehet.
Üzemeltetés
A hókotró üzemeltetése előtt
FIGYELEM
A készülék üzemeltetése előtt olvassa el a használati
útmutatót. Ez a készülék veszélyes lehet gondatlan
használat esetén.
H
I Terelő szabályozókar - kézi
J Terelő szabályozókar -
Terelő szabályozókar szerelvényfalon (ha van) - A
terelő szögének szabályozásához
(fel vagy le) használjuk.
(ha van) - A terelő szögének
szabályozásához (fel vagy le)
használjuk.
elektromos (ha van) - A terelő
szögének szabályozásához (fel
vagy le) használjuk.
12
• Soha se működtesse a hókotrót a védők, fedelek és
védőlapok nélkül, ha azok nincsenek a helyükön.
• Állítsa le a motort, amikor elhagyja a működtető pozíciót.
• Vegye ki a kulcsot, mielőtt kitisztítaná a forgókerék borítását
vagy a garatot, és javítást vagy beállítást hajtana végre.
• Vegye ki a kulcsot, amikor elhagyja a készüléket.
• A tűzveszély csökkentése érdekében tartsa tisztán a
készüléket a kilöttyent üzemanyagtól, olajtól és kosztól.
Page 93

Not for
Reproduction
• Elektromos indítású modellek esetében üzemeltetés előtt
csatlakoztassa le a hosszabbító kábelt.
• A motor beindítása előtt ellenőrizze a motor olajszintjét. Az
olajjal kapcsolatos javaslatokért lásd a motor használati
útmutatóját.
A hókotró üzemeltetése
VESZÉLY
Amputáció veszélye
A kiöntő garatban egy mozgó kerék található, amely a
havat dobálja ki. Az ujjai beakadhatnak a forgókerékbe.
Az eltömődések vagy a garat tisztítását sose végezze a
kezével. Mindig a tisztítóeszközt használja.
Ezen biztonsági utasítások be nem tartása sérüléses
amputációt vagy súlyos zúzódást okozhat.
A hókotrókkal kapcsolatos leggyakoribb baleseti ok, hogy a
felhasználó benyúl a kiöntő garatba és a mozgó kerékhez ér.
Soha ne kézzel tisztítsa ki a kiöntő garatot.
Az eltömődött kiöntő garat biztonságos tisztításához tartsa
be az alábbi utasításokat:
1. Állítsa le a motort.
2. Várjon 10 másodpercet, hogy a forgó pengék
biztosan leálljanak.
3. Mindig a tisztítóeszközt, ne a kezét használja.
VESZÉLY
Mérgező gázok veszélye
A motor kipufogógáza szénmonoxidot tartalmaz, ami egy
szagtalan, színtelen, mérgező gáz.
A szénmonoxid belélegzése hányingert, ájulást vagy halált
okozhat.
• A motort szabadban indítsa be és járassa.
• Ne üzemeltesse a motort zárt helyiségekben, még nyitott
ajtók és ablakok mellett se.
FIGYELEM
Kirepülő tárgyak veszélye
Ez a készülék képes tárgyak kihajítására, amelyek a nézelődők
sérülését vagy épületek károsodását okozhatják.
Győződjön meg, hogy a munkaterületen ne legyenek nézelődők.
Soha ne irányítsa a kiöntő garatot emberek, épületek vagy autók
felé.
1. Indítsa be a motort. A motorra vonatkozó információt lásd a
motor felhasználói kézikönyvben.
2. A garat forgatókar elfordításával (C vagy D, 3. ábra ) vagy a
garat forgatókapcsolóval (E) állíthatja be a kiöntő garat irányát.
3. Kézi terelő-beállítású modellek:Lazítsa meg a csatorna
terelőt (I, 3. ábra) rögzítő szárnyas anyát. Emelje meg a terelőt,
hogy távolabbra ürítse a hót. Állítsa a terelőt a kívánt helyzetbe,
majd húzza meg a szárnyas anyát.
Szerelvényfalon lévő terelő szabályozókaros modellek:A
terelő szabályozókar (H, 3. ábra) segítségével mozgathatjuk
a terelőt fel vagy lefelé. Emelje meg a terelőt, hogy távolabbra
ürítse a hót.
Elektromos terelőszabályozóval rendelkező modellek:A
terelő szabályozó kapcsoló (J, 3. ábra) segítségével
mozgathatjuk a terelőt fel vagy lefelé. Emelje meg a terelőt,
hogy távolabbra ürítse a hót.
4. Használja a sebességválasztó kart (B, 3. ábra) az előre- vagy
hátrameneti sebesség kiválasztásához. Nedves, vastag hó
eltakarításakor alacsonyabb sebességfokozatokat használjon.
Magasabb sebességfokozatokat használjon laza hóban vagy
szállításhoz.
MEGJEGYZÉS: A motor sebességét mindig a GYORS helyzetbe
(teljes gáz) állítsa.
5. Teljesen nyomja le a csiga szabályozókart (A, 3. ábra) a
csiga bekapcsolásához. Engedje el a szabályozókart a csiga
kikapcsolásához.
6. Teljesen nyomja le és tartsa lenyomva a vonóerő / Free
Hand szabályozókart (F/G, 3. ábra) a vonóerő meghajtó
bekapcsolásához és a hókotró elindításához. A kikapcsoláshoz
engedje el a kart.
MEGJEGYZÉS: Sebességfokozat váltás előtt mindig engedje el
vonóerő szabályozókart.
7. A Free Hand szabályozókarral felszerelt modelleknél a Free
Hand szabályozó aktiválódik, amikor a csiga (A, 3. ábra) és a
vonóerő szabályozókarok (F) le van nyomva. Ez lehetőséget
nyújt önnek, hogy elengedje a csiga szabályozókart (A) és
használja a többi kezelőszervet. A csiga folytatja a forgást,
amíg a vonóerő/Free-Hand szabályozókar el van engedve.
8. Szükség esetén a fogantyú-melegítő kapcsoló (L, 3. ábra)
segítségével kapcsolhatja be a fogantyúk melegítését (ha van).
MEGJEGYZÉS: Ne feledje el kikapcsolni a fogantyú fűtést a
hókotró lekapcsolása előtt.
MEGJEGYZÉS: Egyes modelleken ezen kívül opcionális
automata fűtött fogantyú van, mely a hókotró működő állapotában
bekapcsol.
9. Egyes modellek fényszóróval (O, 3. ábra) vannak felszerelve,
melyek bevilágítják a hókotró előtti területet. A fényszóró a
hókotró működő állapotában bekapcsolva van.
Magyar
hu
13
Page 94

Not for
Reproduction
A hókotró megállítása
1. Engedje el a csiga szabályozókart (A, 3. ábra).
2. Engedje el a vonóerő szabályozókart (F).
3. Állítsa le a motort. A motorra vonatkozó utasításokat lásd a
motor felhasználói kézikönyvben.
Easy Turn™ vonóerő-szabályozás (ha
van)
A könnyebb kanyarodás érdekében a hókotró használata közben
nyomja meg az Easy Turn szabályozókart (4. ábra).
MEGJEGYZÉS: Egyes modelleken csak az egyik kereket láttak el
Easy Turn vonóerőszabályozással, míg más modelleknél mindkét
kereket.
MEGJEGYZÉS: Az Easy Turn vonóerőszabályozó aktiválása
nehezebb lesz a készülék nagyobb megterhelése esetén. A kart a
kanyarodás kezdete előtt aktiválja.
Az Easy Turn vonóerő szabályozókar bekapcsolása kioldja az egyik
vonókereket, lehetővé téve a másik vonókerék további hajtását.
Az Easy Turn vonóerő szabályozókar elengedése automatikusan
bekapcsolja mind a két vonókereket, hogy a vonóerő teljes legyen
(5. ábra ).
Kerék kikapcsolása - rögzítőgomb (ha
van)
Bizonyos modellek hajtókerék kikapcsoló-rendszerrel rendelkeznek,
amely lehetővé teszi az egyik hajtókerék kikapcsolását a készülék
könnyebb szállítása érdekében, amikor a motor ki van kapcsolva.
Vonóerő rögzítőgombbal felszerelt modellek: A vonóerő
rögzítőgombbal felszerelt kerekek (A, 6. ábra) teljesen
kikapcsolhatóak a gomb kihúzásával a kerékből, amíg a rögzítőcsap
kioldódik a kerékből. Ezután fordítsa el a gombot, hogy a csap ne
kapcsolódjon vissza a kerékbe. Fordított sorrendben végezze el az
eljárást a hajtókerék bekapcsolásához.
Terelő beállítása
A. Kézi terelő szabályozókar (ha van)
Lazítsa meg a terelő tekerőgombját (A, 8. ábra ), állítsa a terelőt a
kívánt helyzetbe, majd a rögzítéshez húzza meg a tekerőgombot.
Emelje meg a terelőt, hogy távolabbra ürítse a hót.
B. Elektromos terelő szabályozókar (ha van)
Járó motor mellett nyomja meg a terelő szabályozókapcsoló
bármelyik oldalát (B, 8. ábra) a terelő fel vagy lefelé mozgatásához.
Emelje meg a terelőt, hogy távolabbra ürítse a hót.
C. Szerelvényfali terelő szabályozókar (ha van)
Mozgassa a terelő szabályozókart. (C, 8. ábra) előre vagy hátrafelé
a terelő megemeléséhez vagy lejjebb engedéséhez. Emelje meg a
terelőt, hogy távolabbra ürítse a hót.
A garatforgatás beállítása
A. Elektromos garat forgatókapcsoló (ha van)
Járó motor mellett nyomja meg a garat forgatókapcsoló bármelyik
oldalát (A, 9. ábra) a kiöntő garat balra vagy jobbra forgatásához.
C. Szerelvényfali garat forgatókar (ha van)
Találja meg a szerelvényfali garat forgatókart (B, 9. ábra ). Forgassa
a kart a garat forgatásához.
A. Bal oldali garat forgatókar (ha van)
Találja meg a bal oldali garat forgatókart (C, 9. ábra) Forgassa a
kart a garat forgatásához.
Az üzemanyagtartály megtöltése
Az üzemanyagtartály megtöltésére és a javasolt üzemanyagokra
vonatkozó információért lásd a motor használati útmutatóját.
Kerék kikapcsolása - rögzítőcsapok (ha
van)
A vonóerő rögzítőcsapokkal felszerelt kerekek (A, 7, ábra ) teljesen
kikapcsolhatók a szeg eltávolításával és annak behelyezésével a
külső tengely nyílásba. Fordított sorrendben végezze el az eljárást a
hajtókerék bekapcsolásához.
14
Page 95

Not for
Reproduction
Eltömődött kiöntőgarat tisztítása
VESZÉLY
Amputáció veszélye
A kiöntő garatban egy mozgó kerék található, amely a
havat dobálja ki. Az ujjai beakadhatnak a forgókerékbe.
Az eltömődések vagy a garat tisztítását sose végezze a
kezével. Mindig a tisztítóeszközt használja.
Ezen biztonsági utasítások be nem tartása sérüléses
amputációt vagy súlyos zúzódást okozhat.
A hókotrókkal kapcsolatos leggyakoribb baleseti ok, hogy a
felhasználó benyúl a kiöntő garatba és a mozgó kerékhez ér.
Soha ne kézzel tisztítsa ki a kiöntő garatot.
Az eltömődött kiöntő garat biztonságos tisztításához tartsa
be az alábbi utasításokat:
1. Állítsa le a motort.
2. Várjon 10 másodpercet, hogy a forgó pengék
biztosan leálljanak.
3. Mindig a tisztítóeszközt, ne a kezét használja.
A hókotró két magasságszabályozó saruval van felszerelve,
amelyek a csiga burkolat külső részéhez vannak rögzítve. A hókotró
elülső részének megemeléséhez használjuk őket.
Amikor havat takarítunk olyan kemény felületekről, mint a kövezett
utak vagy járdák, állítsa feljebb a sarukat, hogy a hókotró elülső
része lejjebb kerüljön.
Amikor köves vagy egyenetlen felületről takarítja el a havat,
emelje meg a hókotró elülső részét a saruk lefelé állításával. Ezzel
megelőzhető, hogy a készülék köveket és más koszt emeljen be és
hajítson ki a garaton.
1. Állapítsa meg, mekkora távolságot szeretne a csiga burkolat
alján lévő kaparólapát és a talaj között. Kavicsos felület
tisztításakor elegendő hasmagasságra van szükség, hogy
megelőzze a kövek felszedését.
2. Helyezzen egy olyan támaszt a kaparólapát alá, amelynek a
magassága megegyezik a kívánt hasmagassággal.
3. Lazítsa meg a féksarut rögzítő anyákat (A, 11. ábra ) és tolja
a féksarut (B) lefelé, amíg az el nem éri a talajt. Húzza meg a
rögzítő anyákat.
4. Ugyanerre a magasságra állítsa a másik oldalon lévő féksarut.
Egy tisztítóeszköz (A, 10. ábra ) tartozik a készülékhez.
A féksaru magasságának beállítása
VESZÉLY
Amputáció veszélye
A kiöntő garatban egy mozgó kerék található, amely a havat
dobálja ki. Az ujjai beakadhatnak és ez sérüléses amputációt
vagy súlyos zúzódást okozhat. A hókotrókkal kapcsolatos
leggyakoribb baleseti ok, hogy a felhasználó benyúl a kiöntő
garatba és a mozgó kerékhez ér.
Kapcsolja KI a motort, várja meg, amíg a mozgó részek
megállnak, majd vegye ki az indítókulcsot mielőtt karbantartási
vagy javítási munkálatokba kezdene.
FIGYELEM
Kirepülő tárgyak veszélye
A kavicsok, kövek és más kosz jelentős sebességgel repülhetnek
ki a garatból, ha bekerül a forgólapátba, ezzel személyi sérülést,
anyagi károsodást vagy a hókotró meghibásodását okozhatják.
A féksarukat mindig megfelelő magasságba állítsa, hogy
fenntartsa a területtípushoz illő hasmagasságot.
Használaton kívüli tárolás
Ha 30 napig, vagy annál tovább fogja tárolni a készüléket a szezon
befejezése után, javasolt az alábbi lépések elvégzése a készülék
tároláshoz való felkészítésére. Ha hosszabb időszakra tárolná a
készüléket, mindig tekintse át a használati útmutató idevonatkozó
részeit.
A motor tárolására vonatkozó információt lásd a motor használati
útmutatójában.
MEGJEGYZÉS: Az üzemanyagot le kell önteni vagy megfelelően
kezelni kell, hogy megelőzze a gumiüledékek megjelenését a
tartályban, szűrőben, tömlőben és a karburátorban a tárolás ideje
alatt.
FIGYELEM
Tűz és robbanás veszélye
A benzin rendkívül gyúlékony és a kipárolgásai robbanékonyak.
A kipárolgások elérhetik a távoli tűzforrásokat, ami robbanást és/
vagy tűzet okozhat.
Óvatosan bánjon a benzinnel. Sose tárolja a készüléket
üzemanyaggal a tartályban, épületen belül rosszul szellőztetett
helyen, ahol a kipárolgások nyílt lángot, szikrát vagy gyújtólángot
érhetnek el, pl. kályhában, vízmelegítőben, ruhaszárítóban.
• Gondosan tisztítsa meg a készüléket.
• Olajozza be az összes megfelelő helyet (lásd a Karbantartás
fejezetet).
• Győződjön meg, hogy az összes csavaranya, csavar és
fejes csavar szorosan meg legyen húzva . Vizsgálja meg az
összes látható mozgó alkatrészt sérülés, törés és elkopás
szempontjából. Szükség esetén cserélje ki.
• Javítsa meg az összes rozsdás vagy kicsorbult festett felületet;
festés előtt csiszolja le.
Magyar
hu
15
Page 96

Not for
Reproduction
• Vonja be a hókotró csiga és forgókerék burkolat fedetlen
fémrészeit rozsdavédő szerrel.
• Ha lehetőség van rá, épületen belül tárolja a készüléket, és
fedje le valamivel, hogy megóvja a portól és kosztól.
• Ha épületen kívül kell tárolni a készüléket, takarja le egy nehéz
ponyvával.
Tárolás utáni teendők:
• Az üzemanyagtartályt töltse meg friss üzemanyaggal.
• Győződjön meg arról, hogy az összes rögzítőelem szoros-e.
• Biztosítsa, hogy a védőberendezések, védőlemezek és
burkolatok a helyükön legyenek.
Karbantartás
Karbantartási táblázat
Minden használat előtt
• Ellenőrizze az olajszintet
• Végezze el a biztonsági rendszer ellenőrzését
8 óránként vagy naponta
• Ellenőrizze az olajszintet
25 óra elteltével vagy évente
• Olajozza be a szabályozókar csatlakozásait
• Olajozza be a csiga szerelvényt
• Olajozza be a garatforgató szerkezetet és a terelőt
• Olajozza be a meghajtó rendszer hatszögű tengelyét 5w-30
típusú szintetikus motorolajjal, valamint zsírozza meg a
láncokat
• Olajozza be a tárcsás meghajtó rendszert (ha van).
50 óra elteltével vagy évente
• Ellenőrizze a kipufogódobot és a szikrafogót (ha van)
• Ellenőrizze az abroncsok légnyomását
A motor karbantartása
A motor karbantartási ütemtervekért és eljárásokért lásd a motor
használati útmutatóját.
A szabályozókar csatlakozás olajozása
FIGYELEM
Amputáció veszélye
A készülék biztonságos üzemeltetése szempontjából kritikus,
hogy a vezérlőszervek kikapcsolódjanak, amikor elengedi azokat.
A készülék semmilyen körülmények közt sem üzemeltethető, ha
a vezérlőszervek nem megfelelően működnek. Lásd A biztonsági
rendszer ellenőrzése részt a megfelelő műveletért.
Kenje az egységet a 12. ábrán jelölt helyeken. Kenje motorolajjal az
olajkannával jelölt pontokat. Ahol zsírfecskendő van feltüntetve, ott
lítiumos kenőzsírt használjon.
A csiga szerelvény olajozása
A csiga sebességváltó olajozása
A csiga sebességváltó gyárilag van beolajozva, és nem igényel
kiegészítő olajozást. Ha azonban a kenőanyag kiszivárgott, vagy
a csiga hajtóműház javításra került, további kenőanyagra lehet
szükség.
A csiga hajtóműház kenőzsír szintjének ellenőrzéséhez vegye ki
a betöltő dugót (A, 13. ábra). Egy drótdarabot szintmérőpálcának
használva ellenőrizze, hogy van-e kenőzsír a hajtóműházban. Ha
kenőzsír látható, ne töltsön után. Ha nem látható kenőzsír, töltsön
után a kívánt a kenőanyagból. A megmaradt kenőzsír színe alapján
határozza meg, hogy milyen tíőusú kenőanyagot kell hozzáadni. Ha
a kenőzsír színe fehér, adjon hozzá Lubriplate GR132 vagy ahhoz
hasonló kenőzsírt. Ha a kenőzsír színe barna, adjon hozzán EP1
lítium kenőzsírt. A hajtóműház kenőanyag kapacitás3-1/4 uncia (92
gramm).
MEGJEGYZÉS: Egyes csiga hajtóműházak nem rendelkeznek
záródugóval a betöltőnyíláshoz. Keresse fel kereskedőját a
karbantartással kapcsolatoan.
A csiga tengely szerelvények olajozása
Zsírfecskendő segítségével olajozza be a csiga tengely
szerelvényeket (B, 13. ábra) Lásd a Karbantartás ütemezése című
részt. Minden alkalommal, amikor visszahelyezi a nyírócsavart vagy
a csapszeget (C), a csiga tengelyt meg KELL olajozni.
Tároláshoz, illetve a nyírócsavarok vagy a csapszegek cseréjekor,
távolítsa el a nyírócsavarokat vagy a csapszegeket (C), olajozza be
a csiga tengely szerelvényeket (B), majd forgassa meg néhányszor
a csigákat, hogy egyenletesen elossza a kenőanyagot. Miután
elkészült, helyezze vissza a nyírócsavarokat vagy a csapszegeket.
MEGJEGYZÉS: Egyes modellek nincsenek felszerelve kenőzsír
szerelvényekkel, és nem vonatkoznak rájuk ezek a követelmények.
Kiöntő garat és a csatorna terelő
olajozása
A garatforgató szerkezetet (14. ábra ) kenőanyaggal kenje be, a
terelő mechanizmusát gépjárművekhez való olajjal olajozza be.
Lásd a Karbantartás ütemezése című részt.
Ahol olajozókanna van feltüntetve, ott motorolajat használjon. Ahol
zsírfecskendő van feltüntetve, ott lítiumos kenőzsírt használjon.
A hatszögű tengely és a lánc olajozása
(ha van)
A karbantartási táblázatban feltüntetett időközönként végezze
el a hatszögű tengely és a láncok olajozását, lásd Karbantartási
táblázat. Ezt a karbantartást hivatalos szakkereskedővel végeztesse
el.
Fogaskerékhajtás-rendszer (ha van)
A fogaskerékhajtás-rendszer nem igényel karbantartást vagy
szabályozást. Ha gondja merülne fel a fogaskerékhajtás-
rendszerrel, forduljon hivatalos szakszervizhez.
16
Page 97

Not for
Reproduction
A vonóerő szabályozókábel ellenőrzése
A kábelek gyárilag vannak beszabályozva és nem igényelnek
beállítást. Ha a kábelek megfeszülnek vagy meglazulnak,
beszabályozást kell elvégezni. Keressen fel egy szakkereskedést
ezen beszabályozás elvégzéséhez.
Vonóerő meghajtószíj beállítás
A vonóerő meghajtószíj folyamatos rugónyomás alatt van és nem
igényel szabályozást. Ha a vonóerő meghajtószíj csúszik, keressen
fel egy hivatalos szakkereskedést.
A sebességszabályozó rúd beállítása
Ha szükségessé válik a sebességszabályozó rúd beállítása,
keressen fel egy hivatalos szakkereskedést.
Easy Turn™ kábel beállítás
Ha az Easy Turn kábel megnyúlt, a fogaskerekek nem kapcsolnak
ki, amikor aktiválja a szabályozókart. Szabályozza be a kábelt az
alábbi eljárás segítségével.
1. Kapcsolja ki a motort és vegye ki a kulcsot.
2. Lazítsa meg az ellenanyát (A, 15. ábra ).
Állapítsa meg, melyik nyírócsavar/
csapszeg rendszerrel rendelkezik
A csigák speciális szerelvényekkel vannak rögzítve a csiga
tengelyhez, amelyek úgy lettek tervezve, hogy eltörjenek, ha idegen
tárgy akad be a csiga burkolatba.
Lásd az illusztrált alkatrészlistát annak meghatározásához, hogy
a készülékhez nyírócsap vagy nyírócsavar vagy nyírócsavar és
távtartó szükséges-e.
Csak gyárilag meghatározott vagy azonos eszközöket használjon.
FIGYELEM
Amputáció veszélye
A kiöntő garatban egy mozgó kerék található, amely a havat
dobálja ki. Az ujjai beakadhatnak és ez sérüléses amputációt
vagy súlyos zúzódást okozhat. A hókotrókkal kapcsolatos
leggyakoribb baleseti ok, hogy a felhasználó benyúl a kiöntő
garatba és a mozgó kerékhez ér.
Kapcsolja KI a motort, várja meg, amíg a mozgó részek
megállnak, majd vegye ki az indítókulcsot mielőtt karbantartási
vagy javítási munkálatokba kezdene.
3. Az állítóanya (B) forgatásával állítsa hosszabbra vagy
rövidebbre a kábelt. A kábelt csak annyira kell megfeszíteni,
amíg az összes hézagot eltávolítja a karról. Eközben nem
kapcsolódhat be az Easy Turn rendszer a szabályozókar
megnyomása nélkül.
4. Húzza be az ellenanyát (A).
A csiga kábel beállítása
FIGYELEM
Amputáció veszélye
A csiga kábel túlzott megfeszítése miatt a csiga meghajtó
bekapcsolódhat a csiga szabályozókar lenyomása nélkül.
Végezze el a beállítási eljárást, hogy megbizonyosodjon arról,
hogy a kábel nincs túlfeszítve.
1. Ha a csiga szabályozókar el van engedve, a kampónak (A,
16. ábra) épp hogy csak érintkeznie kell a karral (B), annak
megemelése nélkül. A távolság ne legyen nagyobb, mint 0,8
mm (1/32").
2. A beállítás elvégzéséhez lazítsa meg az anyát (C), a
szabályozó szelvényeket (D) tartva, és elfordítva az anyát.
Ezután fordítsa el a szabályozó szelvényeket és tartsa a
szabályozó csavart (E). A szabályozó csavar egy csillagfejű
csavar, a fejét egy csavarhúzóval tudja tartani vagy csavarni,
amelyet a rugón (F) keresztül helyez be.
A csapszeg cseréje
1. Kapcsolja ki a motort és várja meg, amíg a mozgó részek
megállnak.
2. Vegye ki a meglévő csapszeget.
3. Olajozza be a csiga tengely szerelvényeket, majd forgassa el a
csigát, hogy beolajozza a csiga tengelyét.
MEGJEGYZÉS: Egyes modellek nincsenek felszerelve kenőzsír
szerelvényekkel, és nem vonatkoznak rájuk ezek a követelmények.
4. Igazítsa sorba a csapszeg nyílásokat. Helyezze be az új
nyíródó csapszeget (A, 17. ábra) a csiga tengelyen (C)
keresztül. Zárószeggel (B) rögzítse.
A nyírócsavar cseréje
1. Kapcsolja ki a motort és várja meg, amíg a mozgó részek
megállnak.
2. Vegye ki a meglévő nyírócsavart.
3. Olajozza be a csiga tengely szerelvényeket. Forgassa el a
csigát, hogy beolajozza a csiga tengelyét.
4. Állítsa egy vonalba a nyílásokat. Helyezze be az új nyírócsavart
(A, 18. ábra ) a csiga tengelyen (B) keresztül. Ellenanya (C)
segítségével rögzítse.
3. Tartsa a szabályozó szelvényeket és húzza meg az anyát.
4. Annak biztosítása érdekében, hogy a csiga nem kapcsol
be, ha a szabályozókar nincs teljesen lenyomva, végezze
el a Biztonsági rendszer ellenőrzését. A csigának a
szabályozókar elengedése után 5 másodpercen belül meg
kell állnia.
Magyar
hu
17
Page 98

Not for
Reproduction
A nyírócsavar és a távtartó cseréje
1. Kapcsolja ki a motort és várja meg, amíg a mozgó részek
megállnak.
2. Vegye ki a meglévő nyírócsavart.
3. Olajozza be a csiga tengely szerelvényeket. Forgassa el a
csigát, hogy beolajozza a csiga tengelyét.
4. Igazítsa egy vonalba a csavart és a távtartó nyílásait.
Helyezze be az új nyírócsavart (A, 19. ábra) és a távtartót (B)
a csiga tengelyen (C) keresztül. Rögzítse az ellenanya (D)
segítségével.
A keréknyomás ellenőrzése
Rendszeresen ellenőrizze a gumiabroncsok légnyomását. A
javasolt nyomásértékek különböznek az egyes gyártóknál. Alapvető
szabály, hogy az abroncs oldalfalára nyomtatott „Max. Inflation”
(Max felfújás) értékig fújjuk fel, nem haladva meg ezt az értéket.
18
Page 99

Not for
Reproduction
Hibakeresés
Hibaelhárítási táblázat
A hibaelhárítási táblázat szerint végezze el az ellenőrzést vagy javítást.
Probléma A probléma lehetséges oka Megoldás
A csiga nem áll meg 5 másodpercen belül a
jobb oldali szabályozókar elengedése után.
A kiöntő garat vagy a terelő nem működik
(elektromos).
A kiöntő garat vagy a terelő nem működik.
(távolsági kézikönyv).
A hókotró nem mozog lassú
sebességfokozatokon.
A motor nem indul. A kulcs a KI helyzetben van. Állítsa a kulcsot a BE helyzetbe.
A motor nehezen indul és rosszul jár. Víz van az üzemanyagban, vagy régi az
Túl erős vibráció. Meglazult alkatrészek vagy sérült
A hókotró nem áll meg, amikor elengedi a
vonóerő szabályozókart.
A kaparólapát nem tisztítja a kemény
felületeket.
A készülék nem halad előre. A meghajtószíj laza vagy sérült. Cserélje ki a meghajtószíjat. Keressen fel
A Free Hand szabályozás (ha van) AKTÍV A csiga megállításához engedje el a csiga
és a Free Hand szabályozókarokat (ha
van).
A csiga meghajtószíj nincs beállítva. Keressen fel egy hivatalos
szakkereskedést.
A csiga szíj vezető nincs beállítva. Keressen fel egy hivatalos
szakkereskedést.
Elektromos hiba. Keressen fel egy hivatalos
szakkereskedést.
A kiöntő garat vagy a terelő nincs beállítva,
vagy meg kell olajozni.
A vonóerő szabályozás nincs beállítva. Keressen fel egy hivatalos
A hideg motort nem lehet beindítani. Kétszer nyomja meg az indítógombot, majd
Az üzemanyag-zárószelep (ha van)
BEZÁRÁS helyzetben van.
Elfogyott az üzemanyag. Töltse meg az üzemanyagtartályt.
A szivatót NYITOTT/JÁR helyzetbe
fordították hideg motornál.
Befulladt motor. Állítsa a szívatót a KINYITÁS/ÜZEM
Nincs szikra. Keressen fel egy hivatalos
üzemanyag.
A gyújtógyertya hibás, piszkos vagy nem
megfelelő a szikraköz.
Az üzemanyagsapka szellőzőnyílása
bedugult.
forgókerék.
A vonóerő szabályozás nincs beállítva. Keressen fel egy hivatalos
A féksaruk és a kaparólapát helytelenül
vannak beállítva.
A vonóerő meghajtó kábel beállítása nem
megfelelő.
Elkopott vagy sérült dörzskerék. Cserélje ki a dörzskereket. Keressen fel egy
Végezze el a beállítást és/vagy olajozza
meg a vezérlő csatlakozásokat.
szakkereskedést.
ismét próbálja meg beindítani a motort.
Fordítsa a szelepet KINYITÁS helyzetbe.
A szivatót fordítsa ZÁRT/INDÍTÁS
helyzetbe, a gázkart állítsa GYORS
helyzetbe.
helyzetbe, a gázkart állítsa GYORS
helyzetbe, majd indítsa be a motort.
szakkereskedést.
Ürítse ki az üzemanyagtartályt. (A
régi üzemanyagot egy felhatalmazott
veszélyeshulladék-gyűjtő telepre adja le.)
Öntsön friss üzemanyagot a tartályba.
Keressen fel egy hivatalos
szakkereskedést.
Tisztítsa meg a szellőzőnyílást.
Azonnal állítsa le a motort. Húzza meg
az összes alkatrészt. Ha a vibráció
folytatódik, vigye a készüléket hivatalos
szakkereskedésbe szervizelésre.
szakkereskedést.
Emelje feljebb vagy engedje lejjebb a
féksarukat és a kaparólapátot.
egy hivatalos szakkereskedést.
Keressen fel egy hivatalos
szakkereskedést.
hivatalos szakkereskedést.
Magyar
hu
19
Page 100

Not for
Reproduction
Probléma A probléma lehetséges oka Megoldás
A készülék nem üríti ki a havat. A lapát hajtószíja laza vagy sérült. Keressen fel egy hivatalos
szakkereskedést.
A csiga szabályozókábel nincs megfelelően
beállítva.
Eltörött csapszeg vagy nyírócsavar. Cserélje ki a csapszeget vagy a
A kiöntő garat eldugult. Azonnal állítsa le a motort. Mindig a
Idegen tárgy van a csigában. Azonnal állítsa le a motort. Mindig a
Állítsa be a csiga szabályozókábelt. Lásd a
jelen útmutató Karbantartás fejezetét.
nyírócsavart. Lásd a Karbantartás fejezetet
az útmutatóban, vagy keressen fel egy
hivatalos szakkereskedést.
tisztítóeszközt használja az eltömődött
kiöntő garat tisztításához, nem a kezét.
Tisztítsa meg a kiöntő garatot és a
csigaház belsejét. Lásd a Kiöntő garat
figyelmeztetést a Felhasználó biztonsága
fejezetben.
tisztítóeszközt használja az eltömődött
garat tisztításához, nem a kezét. Távolítsa
el az idegen anyagot a csigából. Lásd
a FIGYELMEZTETÉSEK részt a
Felhasználó biztonsága fejezetben.
20
 Loading...