

Simple Motors Kit 14 Assembly Instructions Manual
Assembly Instructions: Kit #14
Rapid Assembly Advanced
QuikLock Reed Switch Motor
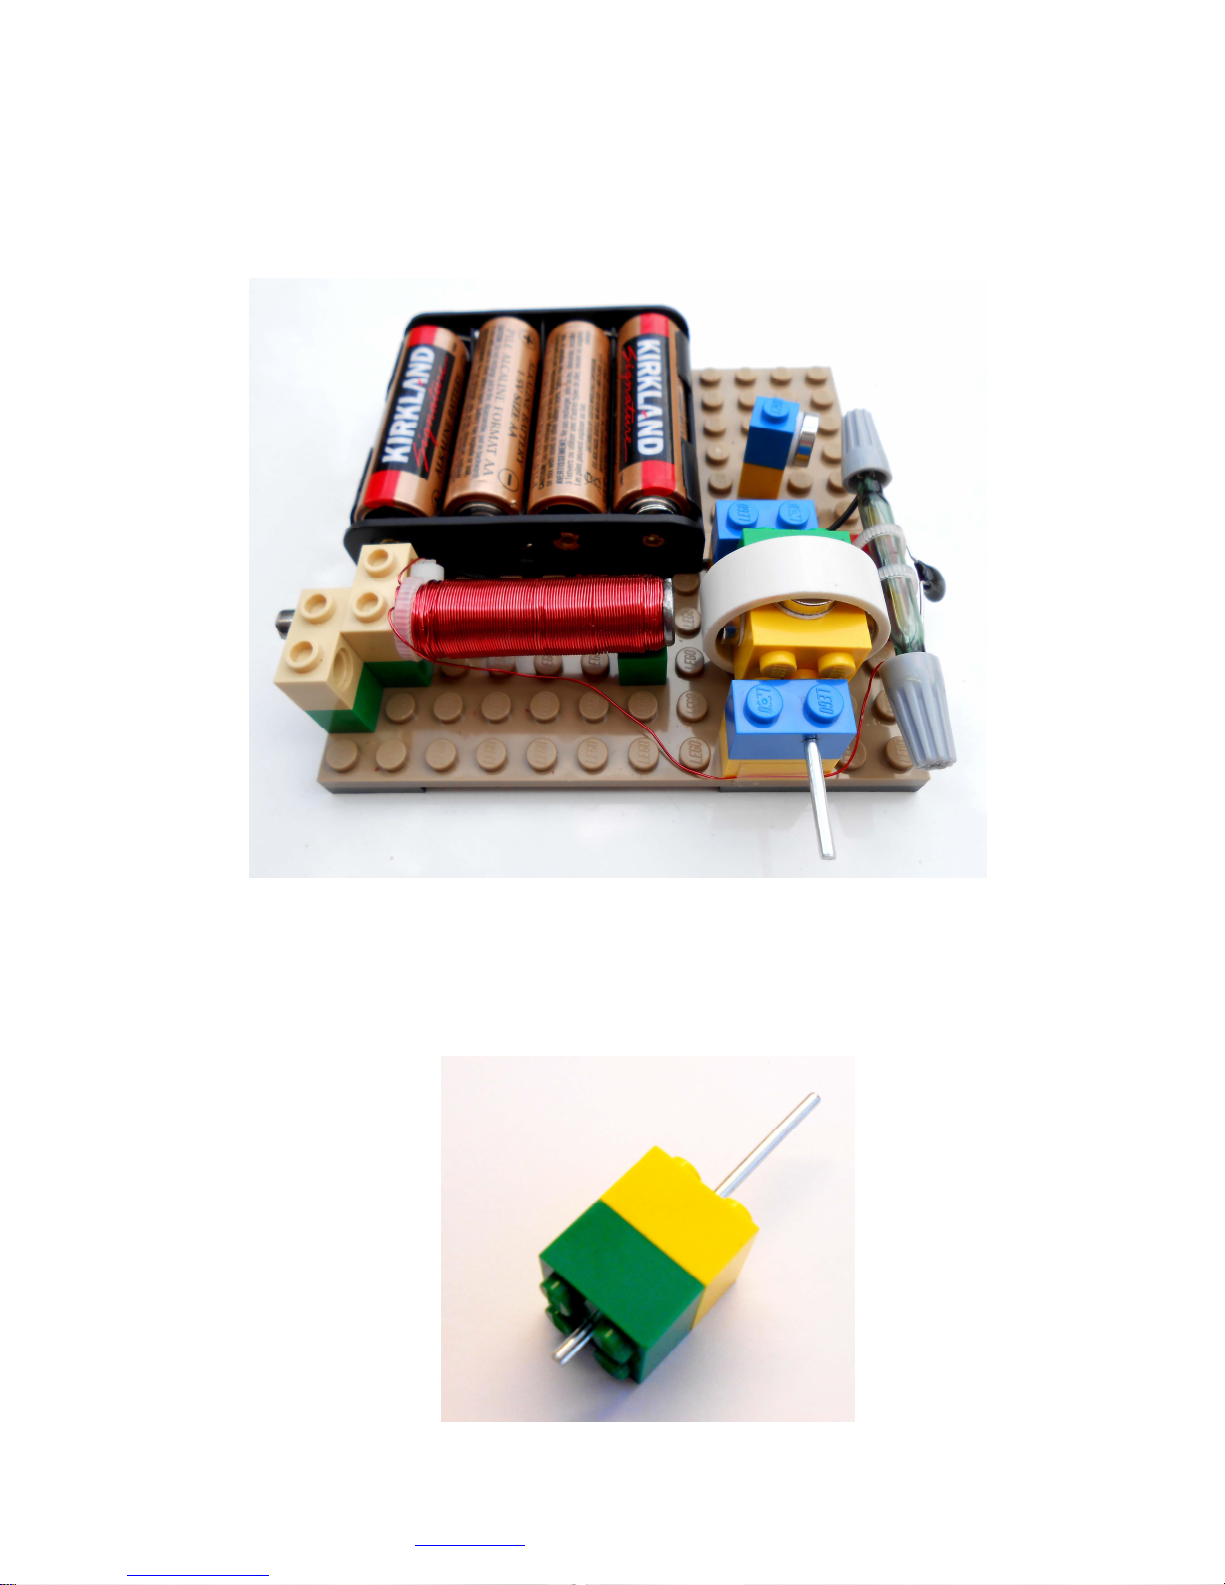
1. Insert the motor shaft through the holes in two 2x2 rotor pieces as shown*. Short end of
the shaft should stick out about 1/8” (3 mm) ab ove the surface of the knobs.
Assembl y instructions for kit #14 1
This is not a Lego® product even if it contains Lego® bricks and plates. All warranties pr ovided by Simple Motors.
LEGO® is a trademark of the LEGO Group of companies which does not sponsor , authorize or endorse this product.
All rights reserved. 2014 Simple Motors, LLC ♦ www.simplemotor.com ♦
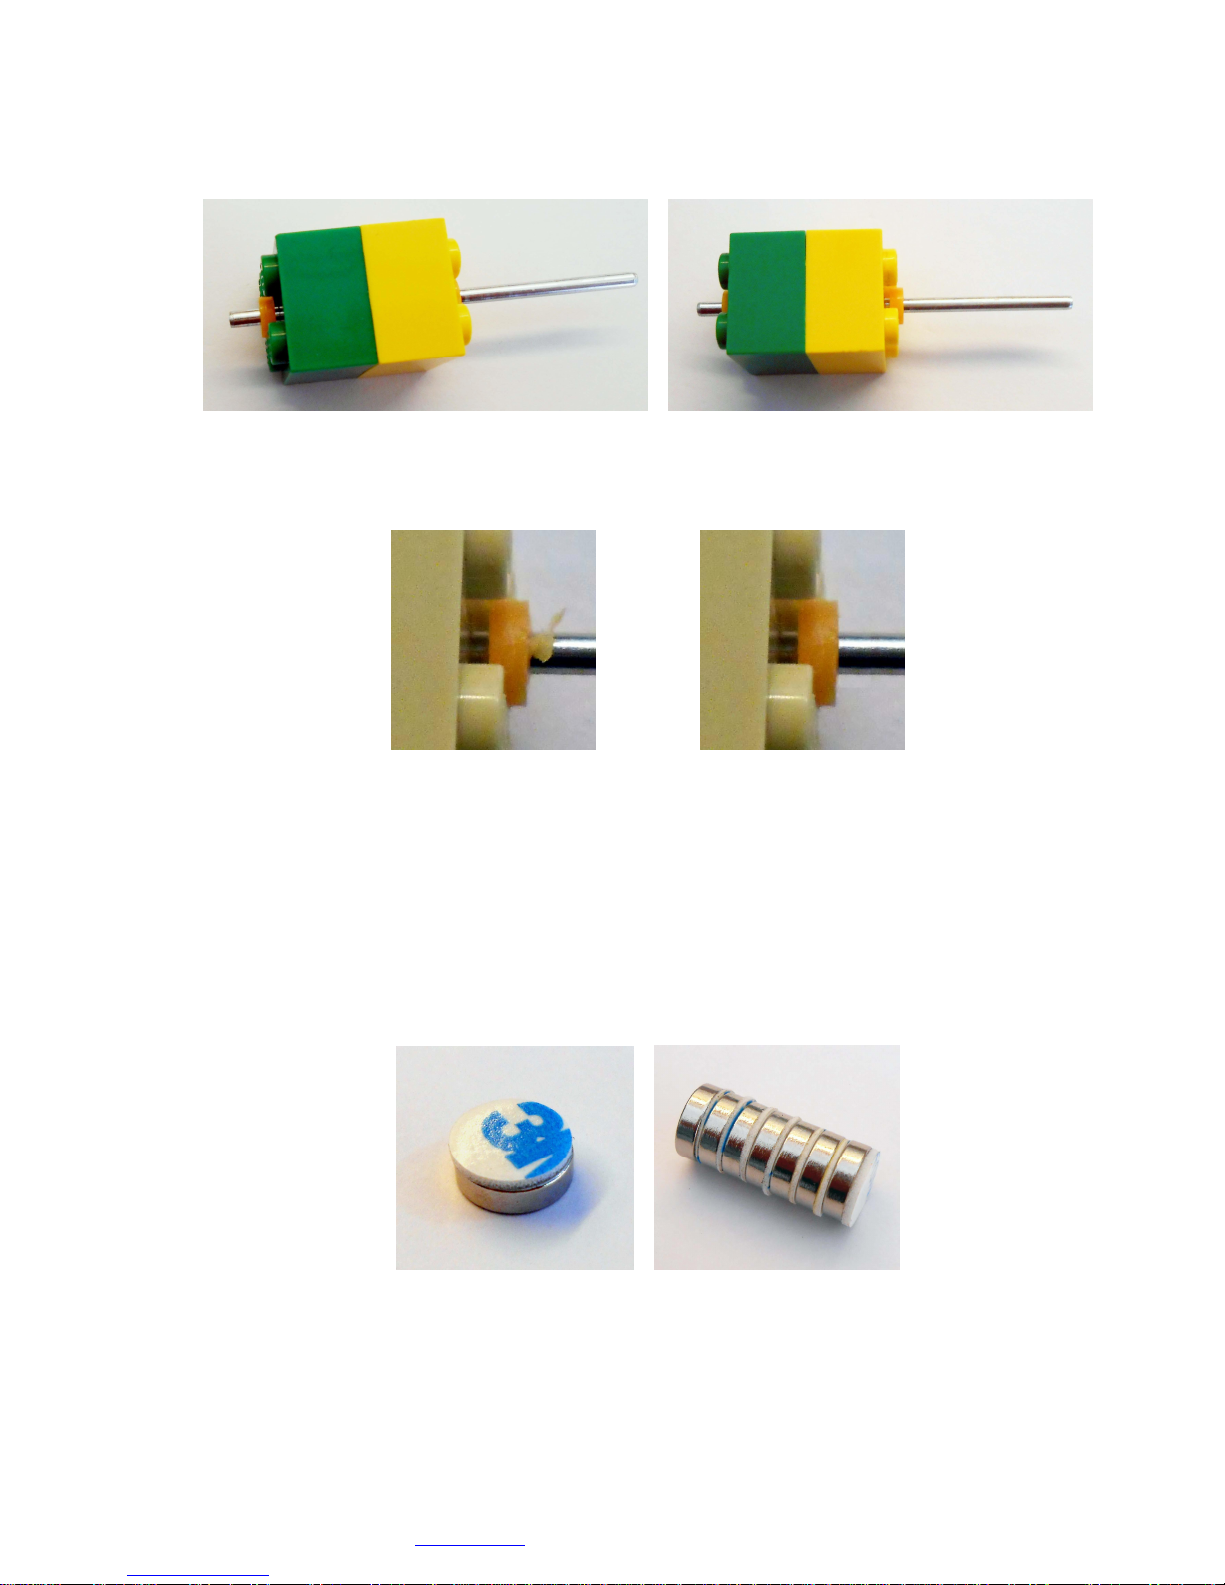
2. Add plastic sleeves (washers) to both ends of the shaft. They fit tightly and require some
effort. You may put the sleeve on the table and push the shaft in with the negative end of
the battery. Leave a small gap so the sleeves are slightly above the surface of the knobs.
If you notice the burrs on the plastic sleeves remove them with a sharp knife.
>
3. Attach double sided sticky pads to the magnets. It does not matter to which side you attach
them as long as you use the same po le for all magnets. This is very important! If you do
not use the same pole for all magnets your motor will not work.
The easiest way to achieve it is to attach the pad to the top of the stack and then move top
magnet to the bottom; after you attach all seven pads your stack should look as shown. Do
not remove the second liner from the pads yet.
Neodymium magnets used in this motor are very strong! Be very careful – if they are
allowed to fly to each other they may shatter.
Assembl y instructions for kit #14 2
This is not a Lego® product even if it contains Lego® bricks and plates. All warranties pr ovided by Simple Motors.
LEGO® is a trademark of the LEGO Group of companies which does not sponsor , authorize or endorse this product.
All rights reserved. 2014 Simple Motors, LLC ♦ www.simplemotor.com ♦

4. Attach four magnets to the rotor. Try to be accurate and center them on each side. Make
sure there is no gap between the plastic halves.
Make the second rotor with two ma gnets if you plan to compare them during your
experiments. Attach the magnets to the opposite sides. This step is optional and may be
done later.
5. If you assembled the motor properly and lubricated the axle this motor o n 6 Volts may
rotate with the speed exceeding 6000 RPM (with the speed control knob). In some of our
experiments we achieved more than 7000 RPM! This is really fast and due to centrifuga l
force the magnets may lose the adhesion and break the reed switch or fly off the rotor.
Add the safety ring that completely eliminates this possibility. It fits tightly and requires
some e ffort. Center the ring to cover the ma gnets. Squeeze the rotor halves together to
make sure that there is no gap between them.
Assembl y instructions for kit #14 3
This is not a Lego® product even if it contains Lego® bricks and plates. All warranties pr ovided by Simple Motors.
LEGO® is a trademark of the LEGO Group of companies which does not sponsor , authorize or endorse this product.
All rights reserved. 2014 Simple Motors, LLC ♦ www.simplemotor.com ♦
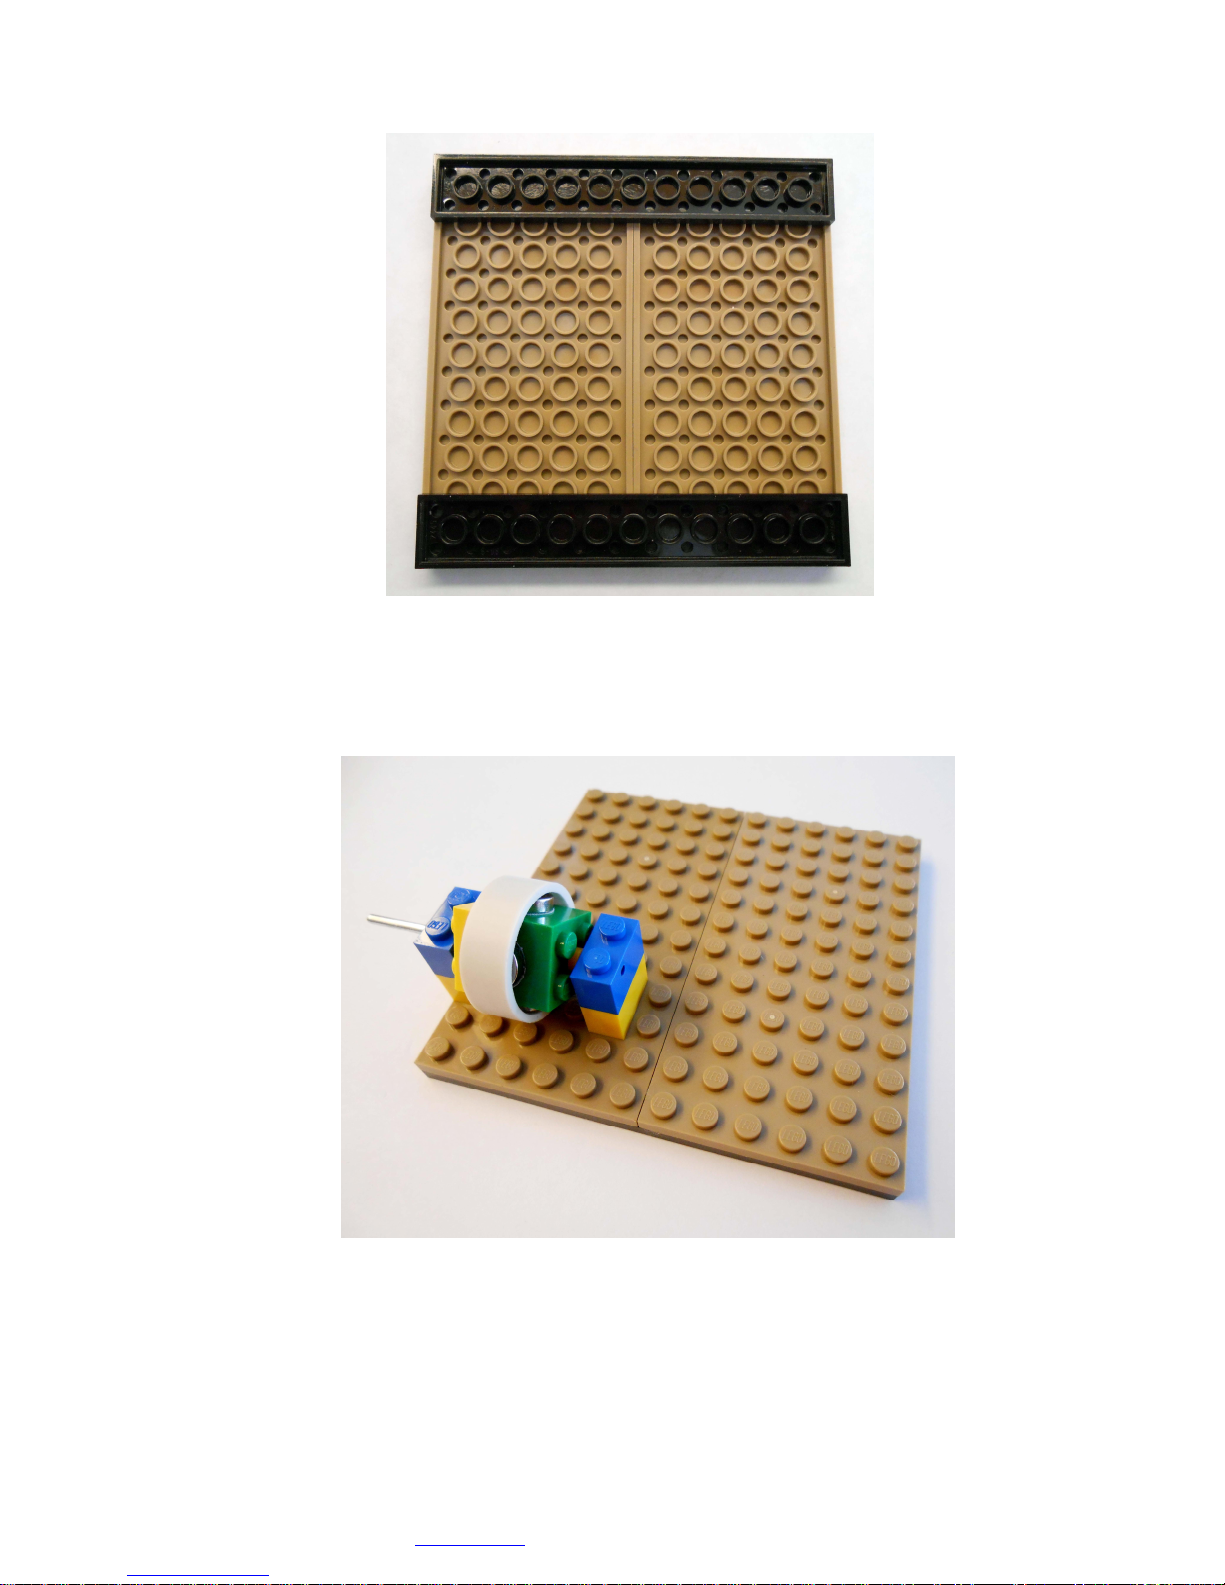
6. Assemble the motor base plate.
7. Assemble rotor on the base plate. Try to spin it by hand. If it does not sp in freely you might
need to squeeze blue bricks slightly together to push plastic shaft slee ves in. There should
be a tiny gap between sleeves and inner sides of the bricks with holes.
We strongly recommend lubricating the shaft ends where they co ntact blue bricks. It allows
the motor to run smoother and faster. You may use a drop of o il from your car dipstick,
WD-40, or even vegetable oil.
Assembl y instructions for kit #14 4
This is not a Lego® product even if it contains Lego® bricks and plates. All warranties pr ovided by Simple Motors.
LEGO® is a trademark of the LEGO Group of companies which does not sponsor , authorize or endorse this product.
All rights reserved. 2014 Simple Motors, LLC ♦ www.simplemotor.com ♦
 Loading...