

Page 1
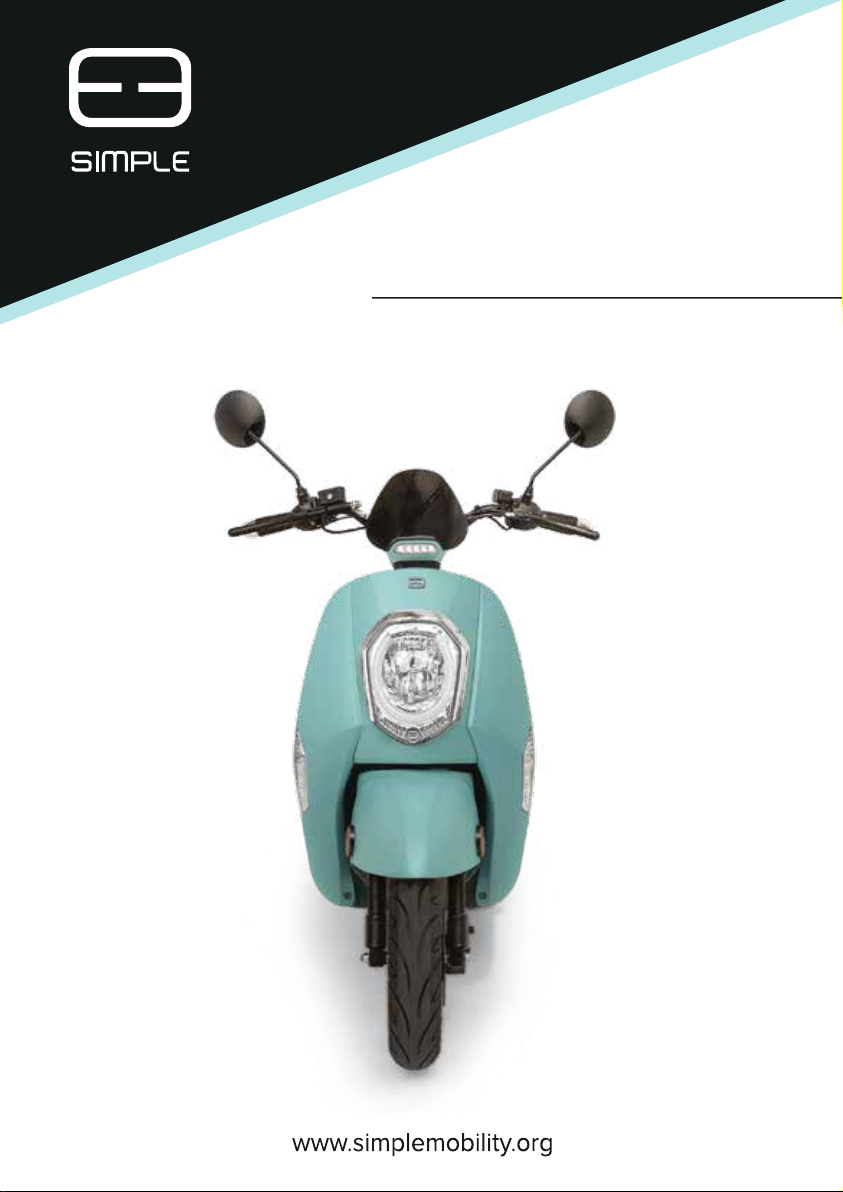
MANUAL 2018
SIMPLE e SCOOTER 1
Page 2
Please take time to record the following information:
Recording Your Serial Number
VIN:
DATE OF PURCHASE:
DISTRIBUTOR:
Read this manual before operating your e-scooter. A driver’s license is
required to operate this vehicle on public streets.
Your insurance policies may not provide coverage for accidents involving
the use of the e Scooter. To determine if coverage is provided please
contact your insurance company.
MODEL:
COLOR:
1
Page 3

Introduction
Dear Customer,
Wow! You are excited! You have just received your brand new e-Scooter! We are
excited too, because as designers and developers of our e-scooter, we want to make
you happy, and we believe that your new e-scooter will give you lots of fun.
I know that you want to get this scooter on the road immediately, but please STOP!
Why? Well, first of all, you need to charge your batteries fully before using it. So, while
your e-scooter is charging, take the time to read this manual. We have worked hard to
make it as readable and fun as possible! This manual will help prevent injury and
teach you how to care for your new e-scooter.
It is the owner's responsibility to carefully read all of the contents of this manual and
to comply with all laws pertaining to the operation of (electric) scooters in your local
jurisdiction. If you have any questions please consult your local department of motor
vehicles for clarification.
These electric motorscooters arc not classified as motor vehicles, however, to drive
them on the roads, various states have dierent laws.
We have worked hard to provide you a quality product, well designed, and without
defects. Regular maintenance from your side is required to keep the product in good
shape.
It is extremely important that you follow the safety guidelines contained in this manual
in order to ensure your driving safety. I f you lend your scooter to anyone make sure
they also know how to operate it safely.
When using, the weight of the scooter should not be greater than the maximum total
weight of 260kg, and please pay attention to road conditions especially during rain
and snowy days.
The scooter is resistent to rain, but cannot be submerged in water. Exposing critical
parts to water will cause short circuits and damage to the electric apparatus.
To prevent a short circuit and damage to the electric components of the scooter, the
exposed metal contact on the battery box should never be touched with wet hands at
the same time as the electronegative electrode.
Please don't dismantle and repair the scooter by yourself, please get in touch with us
at [email protected] go to the local distributor or the servicing station to repair
if necessary.
2
Page 4

TABLE OF CONTENTS
Record Your Serial Number...............................................
1
Introduction .........................................................................
2
Table of Contents ...............................................................
3
General safety guidelines ..................................................
4
Before each ride .................................................................
5
After each ride ....................................................................
6
Assembly instructions ........................................................
7
Battery instructions ............................................................
8
General Usage Notes .........................................................
9
Maintenance ........................................................................
10
Flat Tire Repair ....................................................................
11
12
Operating instructions .......................................................
Page 1
Page 2
Page 3
Page 4
Page 5
Page 6
Page 7-8
Page 9-10
Page 11
Page 12
Page 13
Page 14-15
13
Troubleshooting ..................................................................
14
Warranty ...............................................................................
Page 16
Page 17
3
Page 5

UNDERSTANDING THIS MANUAL
This manual contains WARNING notes concerning the consequences of failure to
maintain or inspect your E-SCOOTER! WARNING means that failure to follow the
instructions following may result in injury to the rider or others during use, which may
include loosing control and falling. Because any fall can result in serious injury or even
death, we do not repeat the warning of possible injury or death whenever the risk of
falling is mentioned! CAUTION on the other hand means the failure to follow the
instructions may result in damage to the E-SCOOTER or component during installation
or use. (i.e. risk or property (product) damage only).
Thank you for purchasing this electrical powered scooter. The scooter complies with
Electric Motor Vehicle Safety Regulations.
GENERAL SAFETY GUIDELINES & RESTRICTIONS
1. Don't weave through trac or make any moves that may surprise people with whom you
are sharing the road.
2. Never carry anything which obstructs your vision or your complete control of the
E-SCOOTER or which could become entangled in the moving parts of the E-SCOOTER.
3. Never hitch a ride by holding on to another vehicle.
4. The scooter should not be operated by any physically or mentally challenged person
5. The scooter should not be operated by any person with vision, balance, hearing or
coordination impairments
6. The scooter should not be operated by any person using headphones or a cellular
phone [ They mask trac sounds and emergency vehicle sirens, distract you from
concentrating on what's going on around you, and their wires can tangle in the moving
parts of the E-SCOOTER , causing you to lose control ].
7. The scooter should not be operated to carry more than 30kgs of cargo in the cargo
compartment (in addition to the rider).
8. The scooter should not be operated in excess of 45 kph.
9. The scooter should not be operated by barefoot riders or those wearing sandals, open
toed, high heeled, platform or slip on footwear
10. The scooter should not be operated by any person who has ingested any alcohol or
drug that could impair their ability to operate the E-SCOOTER.
11. The scooter should not be operated without both hands on the handle bar.
12. The scooter should only be operated while seated on the seat.
13. The scooter should not be operated to jump ramps, curbs, or objects or attempt any
stunts.
14. The scooter should not be operated with excessive speed for terrain, circumstances or
maneuver with clothing or extremities in close proximity to the drive chain or any moving
parts.
15. The scooter should not be operated beyond your ability or prior experience.
16. The scooter should not be operated by stopping with only the front brake. Use both
brakes simultaneously.
17. Do not try to accelerate and have the brake (s) on at the same time. This may cause
irreversible damage to the drive train and electrical components.
4
Page 6
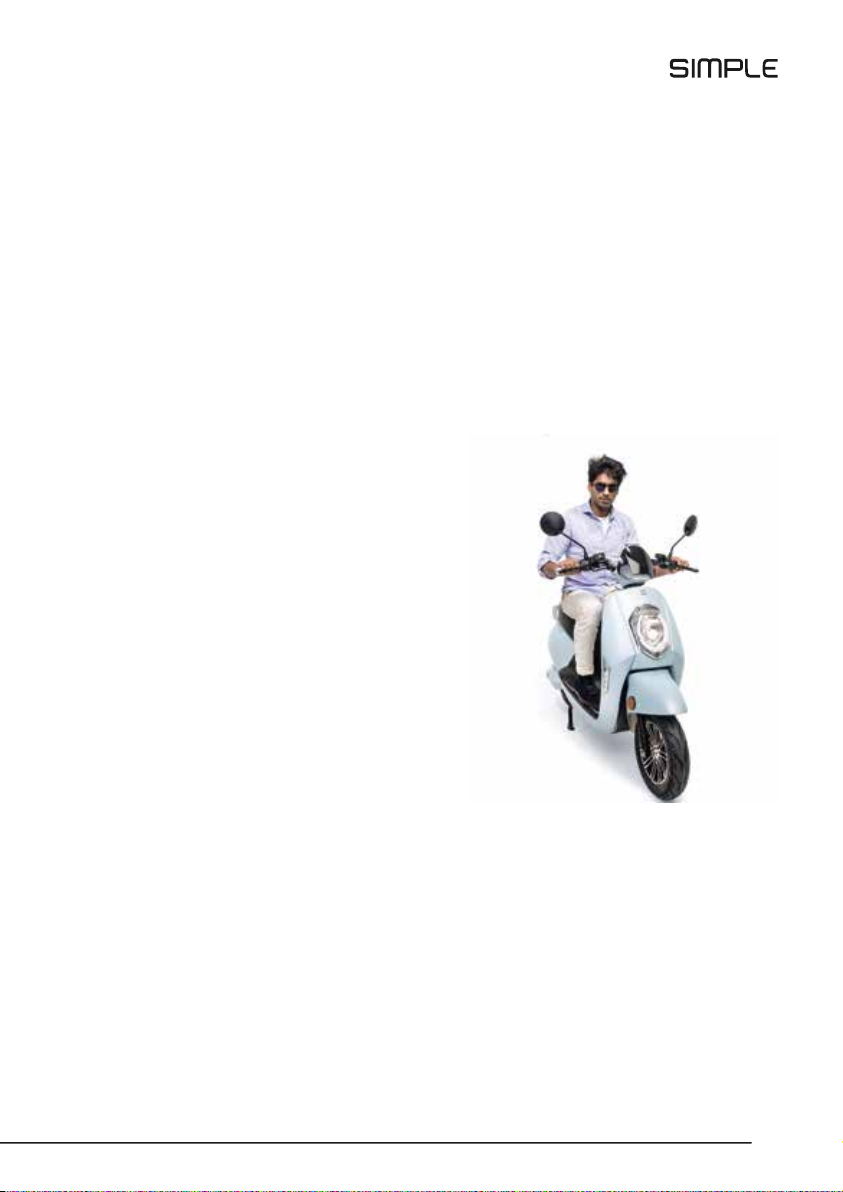
NEITHER MANUFACTURER OR THE RETAIL SELLER OF THE E-SCOOTER IS
RESPONSIBLE FOR THE CONSEQUENCES OF FAILURE TO COMPLY WITH
FEDERAL AND LOCAL ORDINANCES RELATING TO THE USE OF THE
E-SCOOTER.
! WARNING
ALWAYS USE A HELMET WHILE RIDING THE E-SCOOTER.
The safety regulations require that you use a helmet permissable for the vehicle while
riding the E-SCOOTER.
E-SCOOTER should not be used under any circumstances without properly wearing a
helmet.
! WARNING
IN ADDITION TO THE REQUIREMENTS ABOVE, THE E-SCOOTER IS NOT TO BE
RIDDEN / USED:
1. On any roadways where the speed limit is
In excess of 45 km/h
2. On any sidewalks or pedestrian walkways
3. On any bumpy, rough or unpaved surfaces
4. In darkness without lights on
5. On sandy or gravel covered surfaces
6. By any person weighing more than 150 kg
7. By any person smaller than 150cm
BEFORE EACH RIDE:
! WARNING ! CAUTION
1. Make sure that the ignition key is turned ON.
2. Make sure the battery is fullz charged and plugged in.
3. Make sure the throttle is rotated to the o position.
4. Ensure that the kickstand is used so the E-SCOOTER will not fall over and get
damaged.
5. Ensure the E-SCOOTER is not kept outdoors or where moisture can damage it.
6. Do not charge or store the E-SCOOTER closer than 20 feet from any flame (e.g.
furnace, fireplace, water heater, space heater).
7. Do not allow children under 16 to play on or near the unattended vehicle.
5
Page 7

AFTER EACH RIDE:
! WARNING ! CAUTION
1. Make sure that the ignition key is turned OFF and that all keys are removed and
kept in a safe place.
2. Make sure to plug the battery on charge.
3. Make sure the throttle is rotated to the o position.
4. Ensure that the kickstand is used so the E-SCOOTER will not fall over and get
damaged.
5. Ensure the E-SCOOTER is not kept outdoors or where moisture can damage it.
6. Do not charge or store the E-SCOOTER closer than 20 feet from any flame (e.g.
furnace, fireplace, water heater, space heater).
7. Do not allow children under 16 to play on or near the unattended E-SCOOTER.
! WARNING FAILURE TO FOLLOW THESE OPERATION INSTRUCTIONS CAN
RESULT IN SERIOUS INJURY OR DEATH OR COULD RESULT IN AN ELECTRICAL
SHORT CIRCUIT AND OR FIRE.
! WARNING DO NOT MAKE ANY ALTERATIONS OR MODIFICATIONS TO THE
MOTORING , OR ADD ANY PARTS NOT AUTHORIZED BY THE MANUFACTURER
EXCEPT THOSE DISCUSSED IN THIS MANUAL OR THOSE REQUIRED BY LAW.
DO NOT REMOVE ANY REFLECTORS, LIGHTS OR OTHER STANDARD
EQUIPMENT. DOING THAT WILL VOID YOUR WARRANTY.
All authorized replacement parts can be retrieved via [email protected].
6
Page 8
ASSEMBLY INSTRUCTIONS
Your E-SCOOTER may comes 95% assembled, you only need to install the mirrors
and the cargo box.
All instructions are described bellow with supporting pictures.
HANDLE BAR
Insert the top part of the handlebar into the
handlebar post as shown on the picture. Locate the
attachment bolt with the nut and the spacer and
insert the bolt in the hole from back to front. Slide the
spacer into the bolt with the round side facing the
handlebar post. Screw the nut on top and tighten it.
After attached, the handlebar should look as on the
picture below.
FRONT PANEL E-SCOOTER
Locate the front panel and connect the head light
wire plug to the correspondent plug at the front of
the scooter as shown on the picture. Insert the plastic
fins of the front panel at the corresponding channels
of the base (see the picture) and slide it upwards until
the holes of the back black cover match the Screw
holes of the cover. Insert the screws into the holes of
the black back cover and screw them onto the front
cover.
E-SCOOTER
Locate the front panel and connect the head
light wire plug to the correspondent plug at the front
of the scooter as shown on the picture. Locate the
front hole in the middle of the panel and use the
included short bolt to attach it to the body. Locate all
attachment points of the cover, insert the screws into
the holes of the black cover and screw them onto the
front cover.
7
Page 9
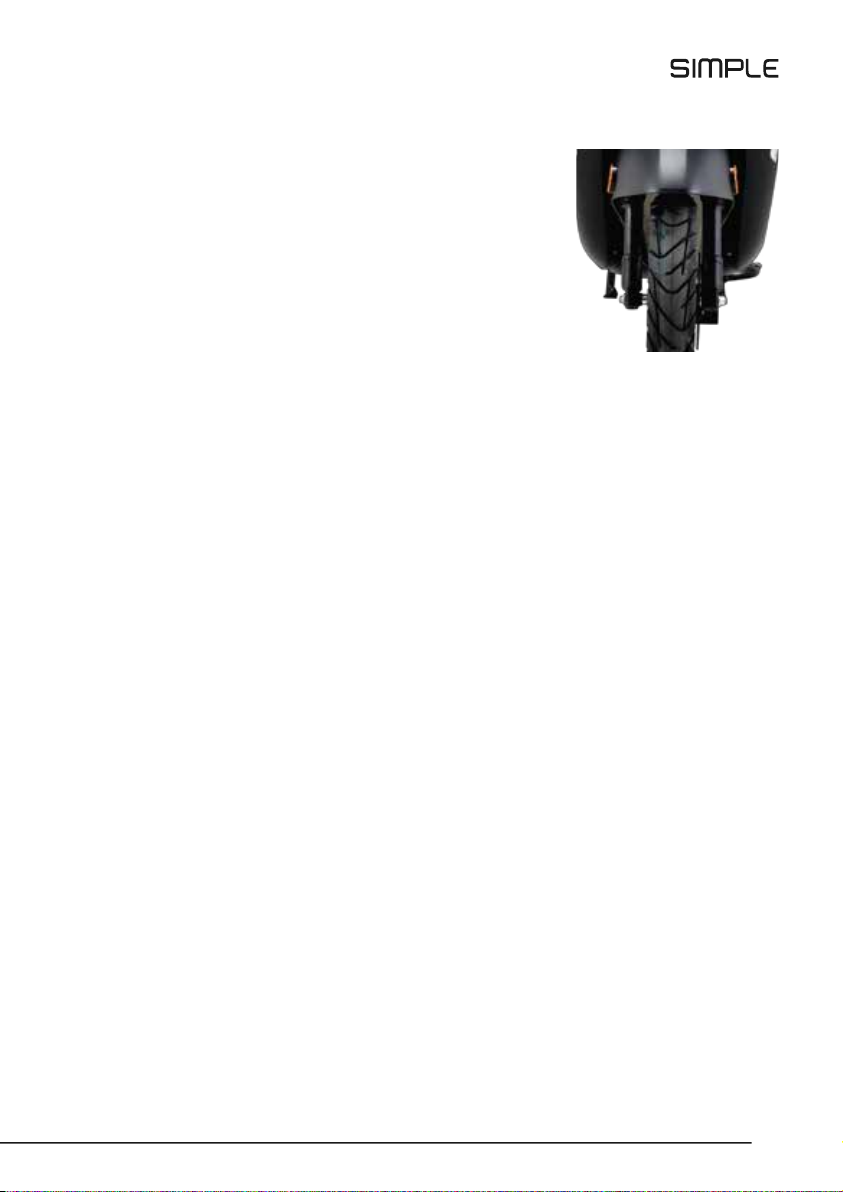
FRONT WHEEL WITH DISK BREAK
Before installing the front wheel gently take apart
disk break pads using a wide flat screwdriver, so the
wheel disk can squeeze between the pads. Push the
speedometer black cap against the wheel and
position
It in the way that the axle bolt can go through it.
Tighten firmly the nut at the opposite side.
8
Page 10

BATTERY INSTRUCTIONS
BEFORE OPERATING FOR THE FIRST TIME, CHARGE THE BATTERY FOR 4 HOURS
OR UNTIL FULLY CHARGED BUT UNDER NO CIRCUMSTANCES IN EXCESS OF 18
HOURS. Be sure to charge the E-SCOOTER after each use. Keeping the battery
properly charged will help extend the battery life. Do not use the E-SCOOTER while
the power indicator on the instrument panel shows low energy. lf the E-SCOOTER is
over-used the battery's life will be reduced. The E-SCOOTER uses a 48-72V (volt)
battery pack. To charge the battery, connect the 3-pin plug into the charging
receptacle located directly below the front seat. The Battery must be charged while
installing the E-SCOOTER. lf you notice anything unusual about the battery such as a
cracked or leaking battery case, a battery that gets hot while being used or charged,
a battery case that appears "puy'' or "bloated" etc, or there are any other problems
with the battery, please contact us or your local workshop. The battery is sealed and
is NOT user serviceable. Do not attempt to repair, remove, adjust or in any way alter
any internal or electrical components, controls or wiring without first speaking with a
customer service representative.
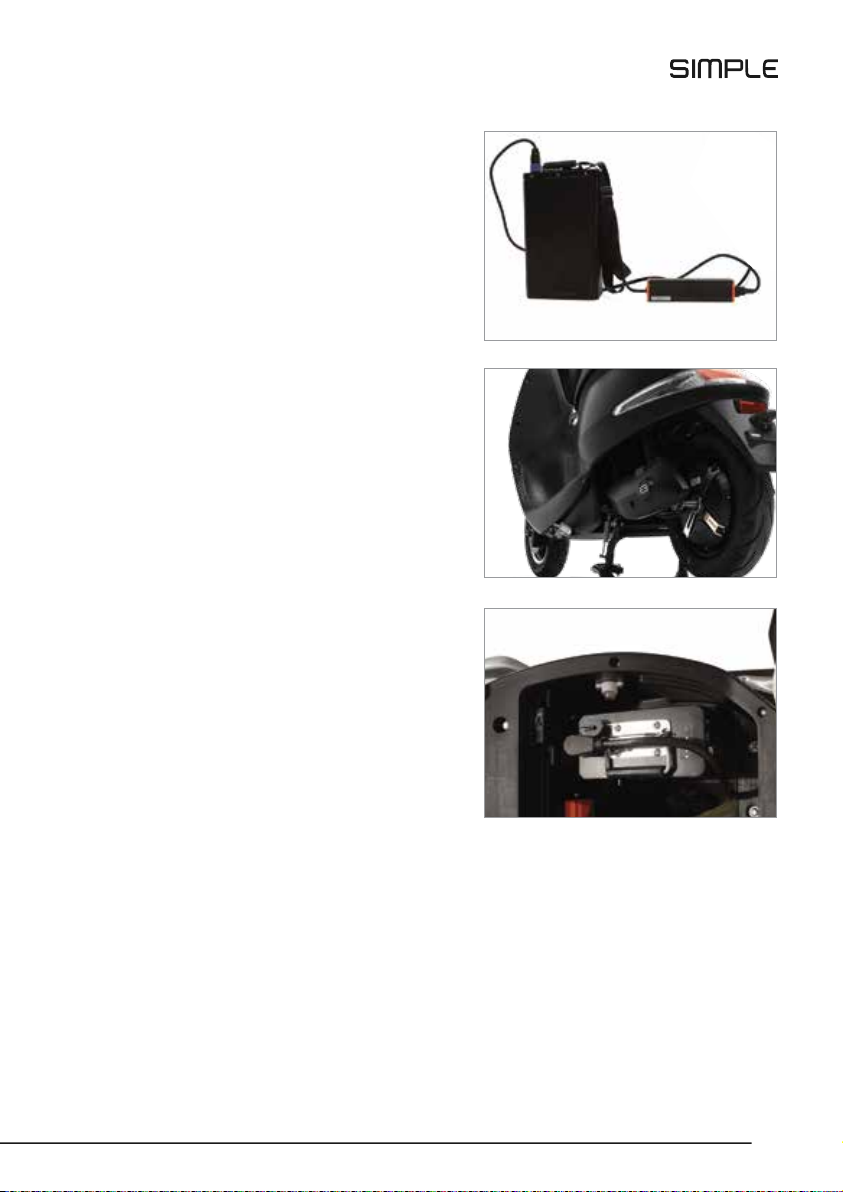
The main battery weighs approximately 9 kg. There is no need to remove it from the
E-SCOOTER unless you are replacing it. Use caution on removal. To replace the main
battery pack, lift the seat and unlock the lock located on the right side of the
E-SCOOTER using the ignition key. Proceed to pull the battery out utilizing the handle.
Disconnect the battery cable. The E-SCOOTER is equipped with a 48-72V battery
charger that will interrupt the charging process once the battery has received a
sucient charge. We hereby strongly suggests that the charger is not used in excess
of 18 hours to prevent any unnecessary wear o on the battery or charger itself.
Charging for periods greater than 18hours may reduce the overall life expectancy and
Eciency of these items.
!CAUTION DO NOT DROP THE BATTERY
!CAUTION TO AVOID DAMAGE TO THE BATTERY WHEN CHARGING, USE
ONLY THE CHARGER PROVIDED WITH YOUR E-SCOOTER
1. !WARNING DO NOT CHARGE OR STORE THE MOTORING CLOSER THAN 20 FEET
FROM ANY FLAME (E.G. FURNACE, FIREPLACE, WATER HEATER, SPACE HEATER)
2. Be sure to only use 110V AC charger for NA and 220V AC charger for Europe.
3. PLUG the POWER INPUT CORD into the E-SCOOTER charging receptacle located
below the front of the seat or directly on top of the battery. See picture above.
4. Plug the 48-72V battery charger into a 110V or 220V AC power source.
5. The CHARGER INDICATOR LIGHT will illuminate confirming that power is
connected to the charger. lf the light does not come on check all connections. lf it still
does not come on after checking all connections, fuses and that your AC plug is
working, unplug the charger and call your local dealer.
9
Page 11

6. !WARNING DO NOT KEEP THE CHARGER CONNECTED FOR LONGER THAN 18
HOURS UNDER ANY CIRCUMSTANCES! DOING SO COULD CAUSE THE BATTERY
OR CHARGER TO OVERHEAT AND CAUSE A FIRE.
7. When the light on the charger is red, the E-SCOOTER battery is being properly
charged. When the E-SCOOTER battery is fully charged, the light will turn green. lf this
does not occur after 16 hours of charging, unplug the charger and call your local
dealer. Normal recharge time for the main battery is 4- 6 hours (assuming it is not
100% discharged).
8. Always disconnect the charger from the 220V power source when not in use.
9. Always disconnect the input cord from the charging receptacle when not in use.
10. !WARNING NEVER LEAVE THE BATTERY CHARGER CONNECTED TO THE 220V
POWER SOURCE OR THE E-SCOOTER WHEN NOT CHARGING THE BATTERY.
KEEPING THE CHARGER PLUGGED INTO THE 110V/220V POWER SOURCE AND
NOT THE BATTERY COULD CAUSE THE CHARGER TO OVERHEAT AND OR CAUSE
A FIRE.
11. When storing your E-SCOOTER for lengthy periods of time, the battery should be
charged at least once a month to avoid full depletion.
!WARNING FAILURE TO KEEP THE E-SCOOTER BATTERY CHARGED WILL CAUSE
TOTAL BATTERY FAILURE. DO NOT ALLOW BATTERY TO BECOME FULLY
DISCHARGED!!! ALWAYS RECHARGE THE BATTERY BEFORE THE POWER
INDICATOR ON THE INSTRUMENT PANEL SHOWS NO POWER. ALLOWING THE
BATTERY TO FULLY DISCHARGE WILL REDUCE BATTERY LIFE AND MAY RUIN THE
BATTERY OR COULD CAUSE THE BATTERY OR CHARGER TO OVERHEAT AND
CAUSE A FIRE THE NEXT TIME THE E-SCOOTER IS CHARGED.
! WARNING BATTERY POSTS, TERMINALS, POWER CORDS AND BRAKE CABLES
MAY CONTAIN LEAD AND LEAD COMPOUNDS, AND OTHER CHEMICALS. WASH
HANDS AFTER HANDLING.
BATTERY RECYCLING
When maintained and used properly, (by
following charging and storage guidelines), the
Lead Acid Battery Pack used in this product has a
normal lifespan of two to three years. When the
battery pack no larger holds a charge or is
unable to be charged properly, it should be
removed from the E-SCOOTER and delivered to a
recycling facility. Federal Laws prohibit disposal
of lead-acid batteries in everyday trash. Please
contact your local solid waste or recycling
authority for recycling information in your area.
10
Page 12

GENERAL USAGE NOTES
Break usage and maintenance: Your E-SCOOTER will last longer and work better
when the breakes are used properly. Brake control cables, chains and axle nuts may
get loose when a new E-SCOOTER is first used and may require an adjustment. We
suggest that the brakes and axle nuts be checked every 30 days and adjusted if
necessary.
The E-SCOOTER scooter can be use without pedals but pedaling the E-SCOOTER
upon starting will save battery life and will make it easier to balance. The E-SCOOTER
can also be pedaled in situation where the battery power is too low due to a failure to
charge or exceeding its distance range. Turning the throttle all the way up and riding
the scooter all the time on a full throttle will also reduce the range and the battery life.
We suggest you to start smoothly and turn the throttle 1/4 turn down when you have
built a momentum.
lt is a good idea to keep a tool kit with you when you ride. You should also carry 2
spare inner tubes that fit the wheel and tire size as well as a manual air pump (with
gauge) to re-inflate the tire if you have a flat tire or it becomes deflated during use.
lf your E-SCOOTER is involved in a crash:
!WARNING A CRASH OR OTHER IMPACT CAN PUT EXTRAORDINARY STRESS ON
COMPONENTS, CAUSING THEM TO FATIGUE PREMATURELY. COMPONENTS
SUFFERING FROM PREVIOUS IMPACTS CAN FAIL SUDDENLY AND
CATASTROPHICALLY, CAUSING LOSS OF CONTROL, SERIOUS INJURY OR DEATH.
First, check yourself for injuries, and take care of others involved.
Seek medical help if necessary. Next, if your E-SCOOTER is damaged, perform the
checks described in this manual. lf you are unable to fix any damage/problems, or if
you find any bent, scored, or discolored parts, please coll your local SCOOTER
workshop.
!WARNING IF YOU HAVE ANY DOUBT ABOUT THE CONDITION OF THE SCOOTER
OR ANY OF ITS PARTS, DON’ T USE IT . CALL YOUR E-SCOOTER WORKSHOP.
11
Page 13
MAINTENANCE
Technological breakthroughs have made components more complex and the pace of
innovation is increasing. In order to help minimize accidents and possible injury, it is
critical that you have all repairs and maintenance performed regularly.
For more detailed maintenance instructions or for ordering replacement please
contact us at [email protected]. Local scooter or motorbike retail stores and
service facilities in your area can also assist you with certain nonelectrical
adjustments that you are not qualified to make or for which you do not need specific
tools for the repair.
The fact that these scooters have no combustion engine, no transmittals
no chains, no clutch, no ignition plugs, no carburetor, and use no gasoline or
lubricants means they require very limited maintenance.
In general all the regular mechanic maintenance is to:
Adjust the brakes
Check the nuts and bolts
Check tire pressure
Check the chain
BRAKES MAINTENANCE
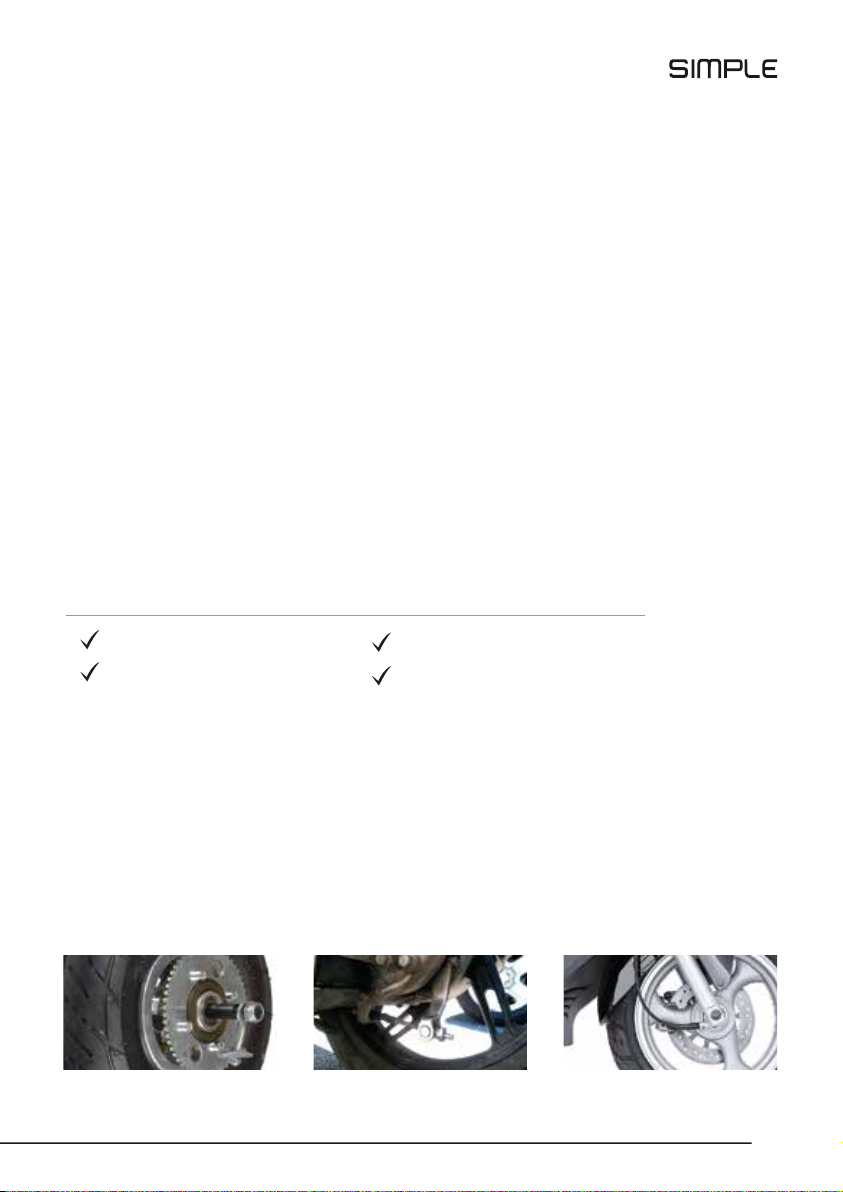
Front and rear break cables may get stretched. Tighten the nuts at the threaded end
of the cable to adjust them. lf the breaking power decrease, check the break pads. lt
is necessary to regularly clean them with sand paper. lf the break pads are worn out,
replace them. If the break cable is stretched to the point that there is no more thread
left at the end, unscrew the lever and turn it away from the cable.
Check both axle nuts regularly and especially the rear one. Make sure to tighten the
nuts firmly when you change a tube.
Rear axle nuts - Check them regularly!
12
Page 14
FLAT TIRE REPAIR
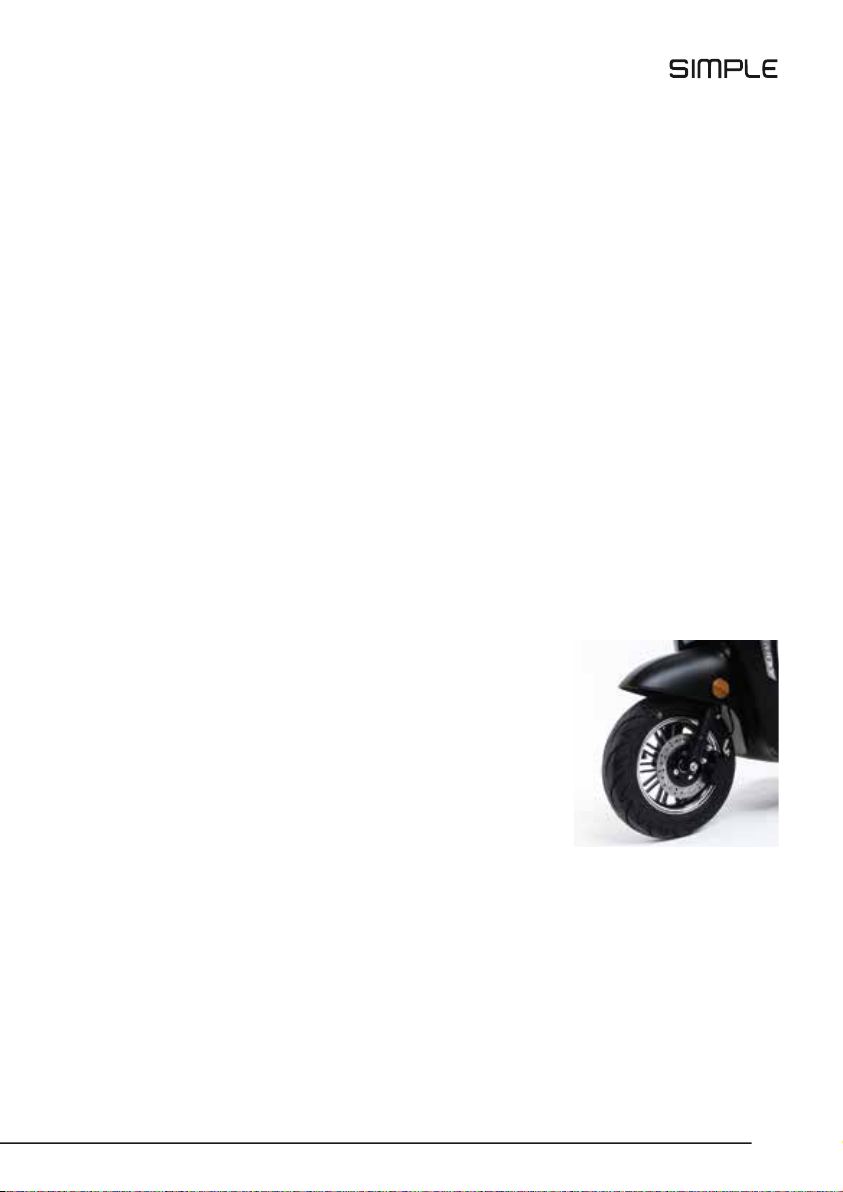
Your E-SCOOTER may come with tubeless tires or tires with tubes. For tubeless tires
we recommend to carry a tubeless tire repair kit with you and use it when needed.
Consult with zour workshop if the tire is fixed suciently.
!WARNING Don't ride or push your E-SCOOTER with a flat tire. This will cause the tire
beads to detach. Trim the rim and possibly bent the rim.
If your E-SCOOTER comes with tube tires, follow the next instructions:
1. Depress the tire valve to let all the air out of the tube, which will assist in removing
the wheel from the scooter.
2. Remove the wheel from the E-SCOOTER using a wrench. Loosen the nuts
counterclockwise and make sure to remove the wheel retention clips on the front
wheel. Be sure to remember where all the spacers and washers belong. For rear tire
removal you will also need to slip the chain oft the rear sprocket to remove the wheel.
The chain must be properly reinstalled when reinstalling the rear wheel.
3. Remove one bead of the tire from the rim by grasping it at a point opposite the
valve stem with both hands and, at the same time, lifting and peeling one side of the
tire oft the rim. lt the bead is on too tight for you to unseat it with your hands use tire
levers to lift the bead carefully over the tire rim. Tire levers can be purchased at any
local scooter shop. Push the valve stem through the wheel rim. Remove the inner
tube.
4. Carefully check the outside and inside of the tire for
the cause of the puncture and remove any debris or
damaging material from the inside or outside of the tire.
! WARNING IF THE TIRE IS CUT, YOU MUST REPLACE
THE TIRE TO PREVENT ANY SUDDEN AND
CATASTROPHIC FAILURE CAUSING LOSS OF
CONTROL, SERIOUS INJURY OR DEATH.
! WARNING PATCHING A TUBE IS AN EMERGENCY REPAIR. CARELESS PATCHING
OR APPLYING SEVERAL PATCHES CAN SERIOUSLY WEAKEN THE TUBE, RESULTING
IN POSSIBLE TUBE FAILURE, WHICH COULD CAUSE YOU TO LOOSE CONTROL AND
FALL. REPLACE A PATCH ED TUBE AS SOON AS POSSIBLE.
13
Page 15
5. Reinstall the tire and tube. Slip one tire bead over the rim. Insert the tube valve ,
through its hold in the rim. Feed the tube carefully into the cavity of the tire. Insert the
tube just enough to give it some shape. Starting at the valve stem and working
around both sides of the rim to the side opposite the valve stem, use your thumbs to
push and seat the other bead at the tire inside the rim. Be careful not to pinch the
tube between the tire bead and the wheel rim. lf you have trouble getting the last two
inches of bead over the edge with thumb pressure, use a tire lacer and be careful not
to pinch the tube.
! CAUTION IF YOU USE A SCREWDRIVER OR ANY TOOL OTHER THAN A TIRE
LEVER, YOU ARE LIKELY TO PUNCTURE THE TUBE.
6. Check to make sure that the tire is evenly seated around both sides of the rim and
that the tube is inside the tire beads. Push the valve stem into the tire to make sure
that its base is seated within the tire's beads. Inflate the tube slowly to the
recommended pressure on the tire sidewall, all the while checking to make sure that
the tire beads stay seated in the rim.
OPERATING INSTRUCTIONS
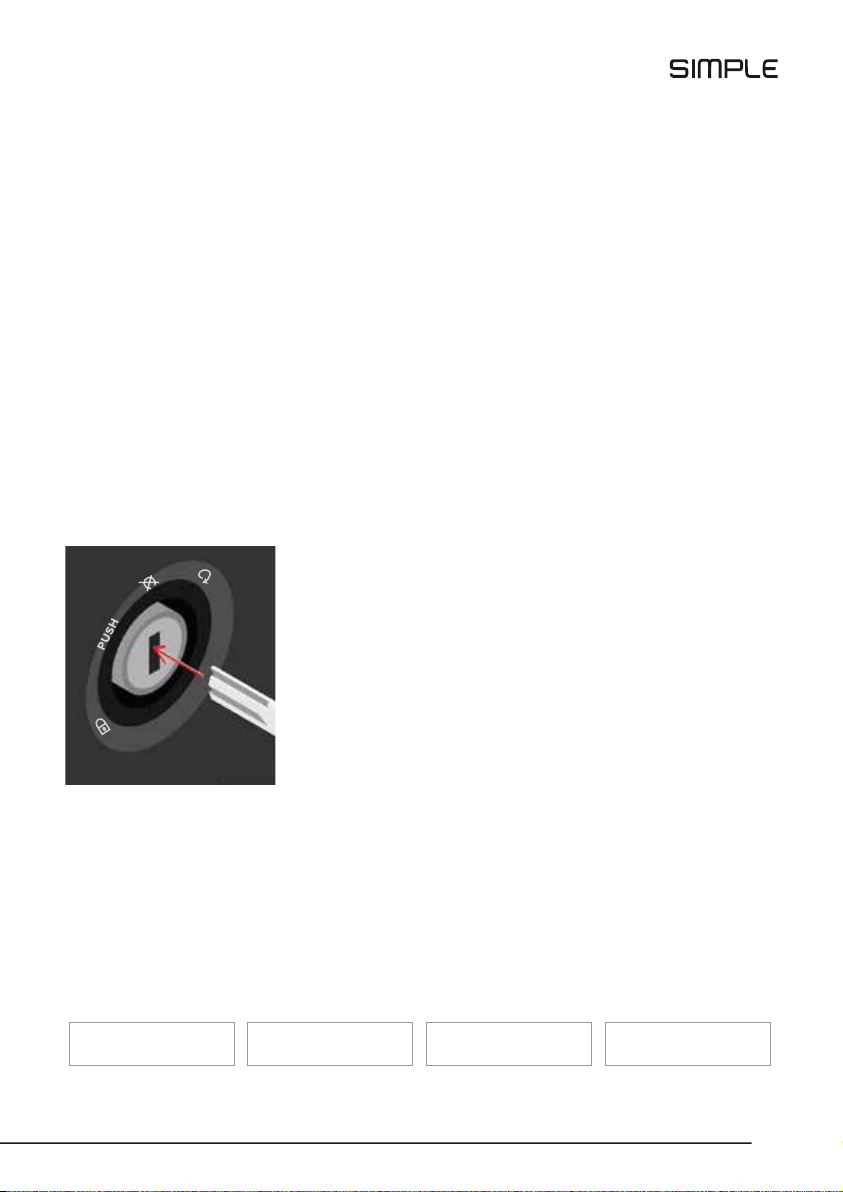
2.
1.
3.
4.
! CAUTION BEFORE OPERATING YOUR E-SCOOTER, MAKE SURE THAT THE
THROTTLE IS NOT ROTATED TO THE "ON" POSITION!!! MAKE ALSO SURE THAT YOUR
THROTTLE IS NOT "STICKY" AND ROTATES FREELY BACK TO THE INITIAL POSITION
SEE PICTURE FOR CORRECT PLACEMENT OF LEVER BEFORE USAGE!!!
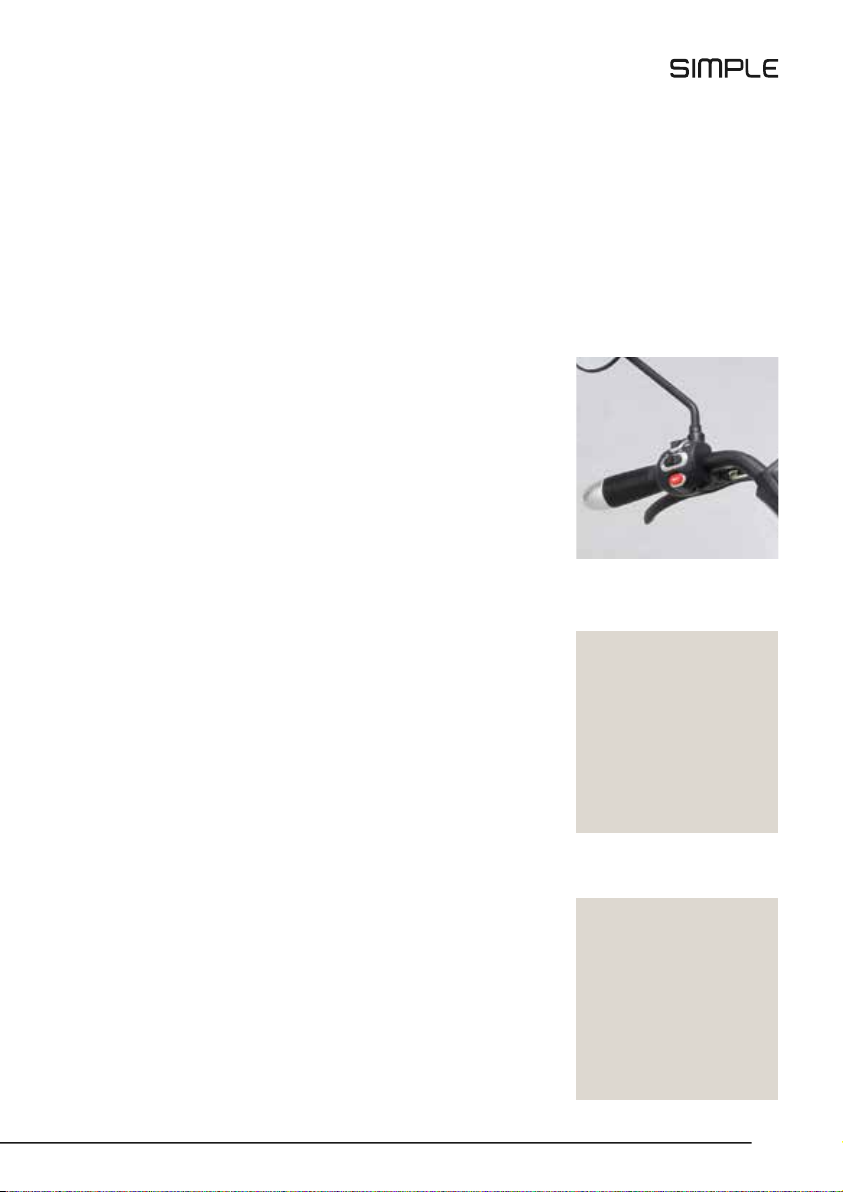
KEY AND THROTTLE OPERATION
ON/OFF/LOCK Switch: (ignition)
1. E-SCOOTER is ON. Turn it ON only when you are ready
to go. Turn it OFF when you are not riding and remove
key.
2. E-SCOOTER is OFF. Turn it OFF when not in use to
preserve the battery.
3. Push the key in on this position to lock the handlebar
and turn the handlebar to the left.
4. Handlebar is locked. The key can be removed.
OPERATING INSTRUCTIONS
The E-SCOOTER driving system consist of four main components:
Battery Throttle MotorController
14
Page 16
When the throttle is twisted, a signal goes to
the controller, in relation to the angle of turning.
Then the controller draws from the battery
current, in relation to the required speed,
controlled by the throttle and the power
necessary to start the scooter or drive it uphill.
Main battery
The higher the driving speed is and the
steeper the hill is, the lower the range of tho
E-SCOOTER. A second battery can be used to
extend the range.
The main power swith under the seat works as
a high current protector. 48V DC to 12V DC
inventor inverts the voltage to 12V. All light
bulbs work on 12V.
The alarm works on 48V. lt is vibration
sensitive. Even though it consumes very little
power, it is recommended that when the
E-SCOOTER is stored for a longer period of
time that the main power swith is turned OFF.
Controller
Motor
Second battery cable
15
Page 17

TROUBLESHOOTING
Problem Condition Check Solution
When I turn my
vehicle on
nothing
happens.
The throttle
does not work
or switch on,
the vehicle
moves without
acceleration.
1. No light
indications on
the display.
2. Power
indication
light is on.
3. Power
Indication
light is on
and the break
light is on.
1. The throttle
does not return
to stop position.
1. Check the main power
switch under the seat if it
is on "ON" position.
2. Check power
connection and battery
level.
3. Check battery and
motor connection.
4. Check the break
levers if they return to
normal position.
5. Battery voltage is
below 42 volts.
1 Check the grip for
damage.
2 Check the throttle
spring.
3. Throttle handle if it
is loose.
1. Flip the main power
switch on "ON"
2. Fasten connections.
3. Clean and fasten battery
terminal connectors.
4. Fasten the motor
connections with the
controller under seat
5. Loosen the break. If there
is any corrosion replace.
Contact the supplier.
6. Charge or replace battery.
Contact the supplier.
1. Use a flat head screwdriver
to adjust the gap between
the rubber handle and the
cover.
2. Readjust the throttle
spring position. Contact the
supplier.
3. Check throttle
connections. Contact the
supplier.
The range is
low.
The breaks
are not
working
properly.
Charger light is
o.
Battery doesn't
hold the
charge.
1. Break levers
go too deep.
2. No breaking
power.
1. Bad connection
between the charger and
the battery.
2. Charger doesn't charge.
1. Connections between
the batteries are not good
2. Bad battery cell
1. Needs adjustment.
2. Break pads are dirty
and need replacement.
1. Check the charger plug
position.
2. Replace the charger.
1. Check all connections
between the batteries.
2. Replace the bad battery
cell.
1. Adjust the break cable see instructions.
2. Clean break pads using
sand paper or replace .
16
Page 18

WARRANTY SERVICE OPTIONS:
To obtain service under this warranty you must call or email Simple Mobility for
customer service/technical support on your product BEFORE returning your product
back to the place of purchase. lf you return your product for warranty service you
must obtain a return authorization number by contacting dealer. Send your product
(with the return authorization number on the outside of the shipping container and
axed to the product), together with the retail seller's original receipt or other
satisfactory proof of the date of purchase to the dealer you have purchased it from
THE PRODUCT MUST BE RETURNED IN ITS ORIGINAL BOX, ALONG WITH ALL KEYS,
CHARGER, MIRRORS & LOCKS, FLOOR MATS, AND ANY OTHER ACCESSORIES
THAT CAME WITH YOUR UNIT. DUE TO TRANSPORTATION AND RECLAMATION
ISSUES, IF THE PRODUCT IS NOT IN THE ORIGINAL PACKAGE IT MAY NOT BE
RETURNED UNDER ANY CIRCUMSTANCES.
Any postage, insurance or other shipping costs incurred in sending your product for
service under either option above is your responsibility. Manufacture will not be
responsible for products lost or damaged in shipping.
Warranty Exclusions are listed below:
Retailers and sellers are not authorized to modify this warranty in any way. lt is your
responsibility to regularly examine the product to determine the need for normal
service or replacement. This warranty does not cover the following products that have
been modified, neglected or poorly maintained, used for commercial purposes,
misused or abused or involved in accidents.
Damage occurring during shipment of the products (such claims must be presented
directly to the shipper).
Damage to products resulting from improper assembly or repair, the use or
installation of parts or accessories not compatible with the original intended use of
the product, or the failure to follow the product warnings and usage instructions.
Damage or deterioration to the surface finish, aesthetics or appearance of the
product.
The work required to remove and/or re-fit and re-adjust the item is not covered by this
warranty.
Normal wear o on the product.
Light bulbs and tubes.
Any products for which the consumer does not follow the warranty procedures
outlined above.
17
Page 19
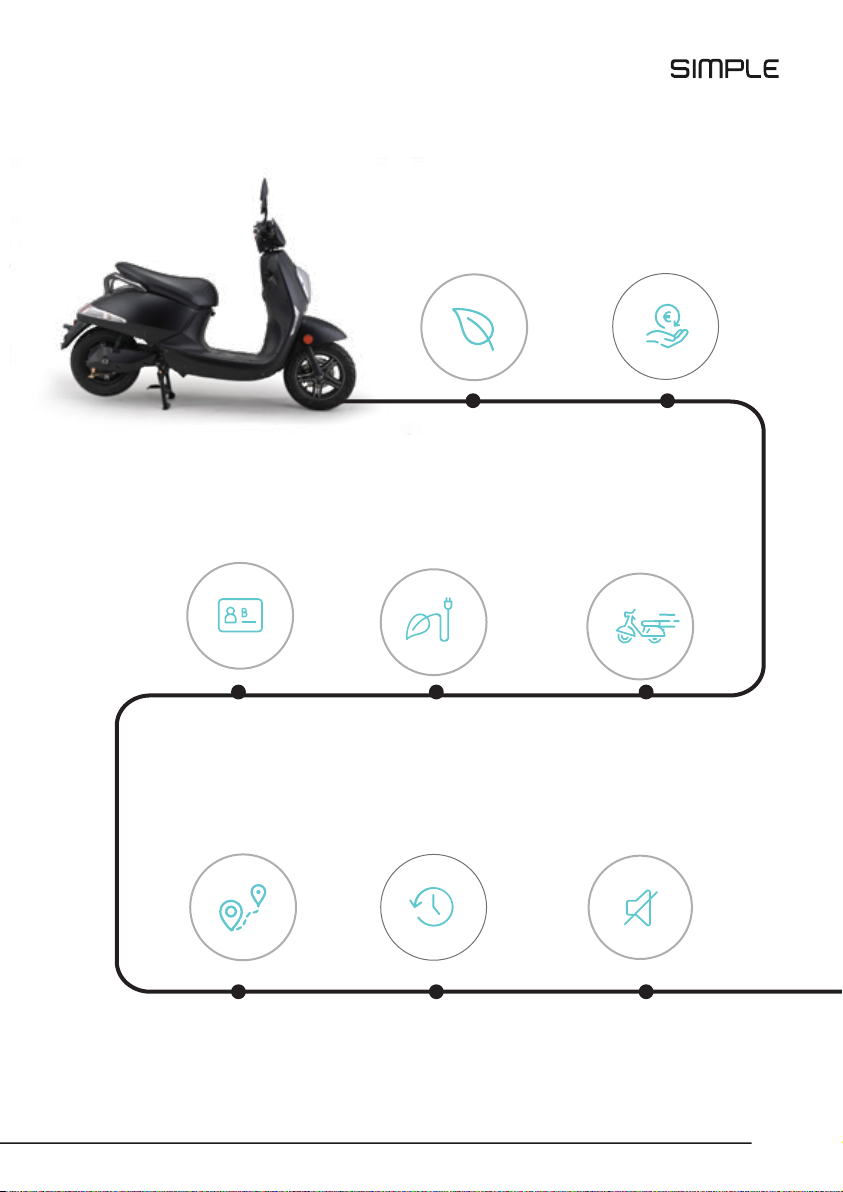
The new electric e-Scooter 1
all you need is your
driving licence...
We care about the
enviroment thats
why we are eco
friendly....
some electricity to
charge it,
in 4 hours is ...
...we care about
your pocket too so
0% axes
...ready to go really
fast ?
Or somewhere far
away ? We do long
distance too
In a very short time
without trac
and all that in
silence :)
18
Page 20

 Loading...