

Simonton Inovo Installation Instructions Manual
Inovo
®
Top Hung Screen
Installation Instructions
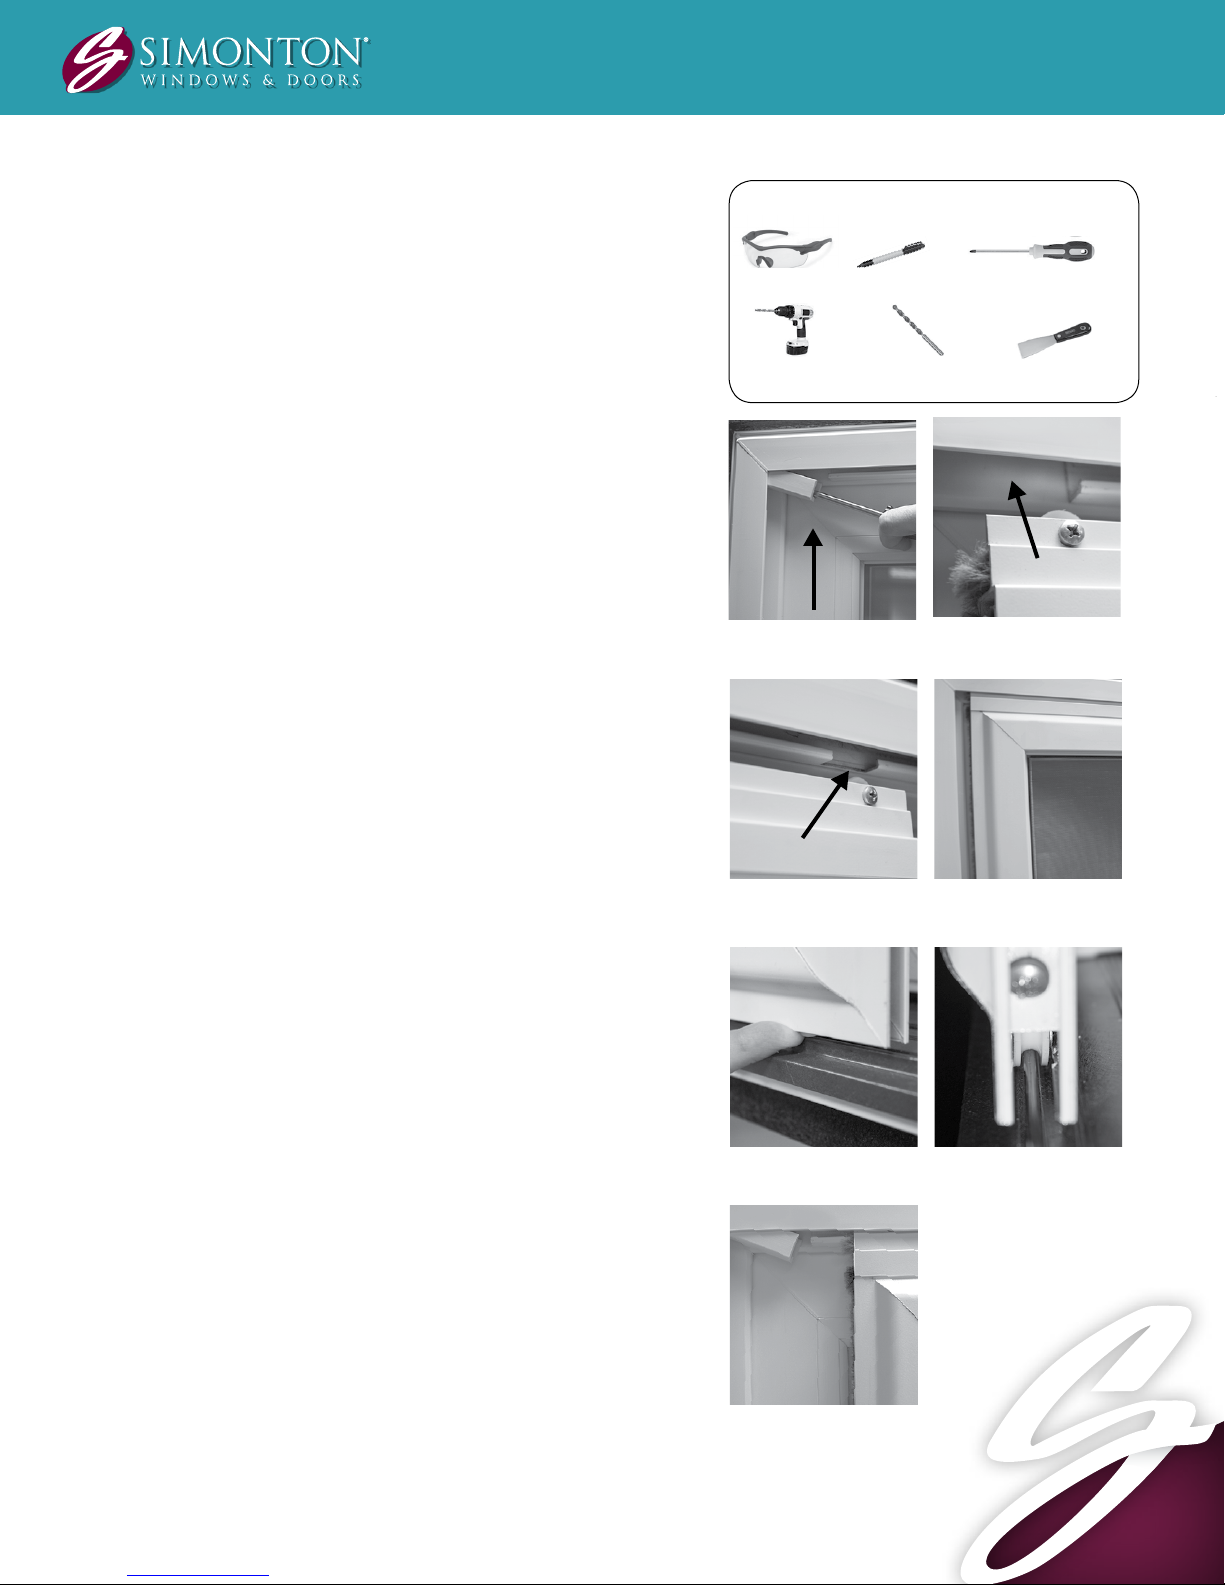
1. Remove Screen Stop
(a screwdriver is recommended) Insert tip of
screwdriver in open end of screen stop and rotate
downward (Fig 1). NOTE: If the door is assembled,
the stop will be installed. If the door frame is not
assembled and the screen stop is packaged in the
handle box, proceed to Step 2.
Simonton.com/installation
Tools Needed
Safety Glasses
Drill
Marker
7/64" Drill Bit Putty Knife
#2 Phillips Screwdriver
Effective Date: 4/24/17
2. Install Rollers on Track
a) Align the screen top rollers with the two openings
in the top of the roller track. Use the exterior
screws as a guide. (Fig 2 & 3).
b) Insert the top of the screen into the frame as far
as possible (Fig 4).
c) At the same time, swing the bottom of the
screen outward and slide the screen over to the
center of the door.
d) Next, use your finger or a putty knife to push
up the bottom roller wheel (Fig 5), while positioning
the screen so the roller can fully engage on the sill.
Position the roller wheels onto the sill track, making
sure both ends are fully aligned. (Fig 6)
e) Once aligned, roll the screen to ensure both
roller wheels remain engaged.
3. Install or Replace Screen Stop
a) Place the screen stop in the head at the end of
the screen roller track (Fig 7).
b) Screen stop should be fully seated into the
head. Push stop fully into the jamb to allow for
maximum screen opening.
c) Stop will need to be removed prior to
screen removal.
Figure 1
Figure 3
Figure 5
Figure 7
End of Door
Figure 2
Center of Door
Figure 4
Figure 6
1

Inovo
®
Top Hung Screen
Installation Instructions
4. Screen Adjustment
Due to manufacturing tolerances and other
factors, the Inovo patio door screen is
designed with an ability to adjust the height.
Primary adjustment is achieved by loosening
or tightening the two screws.
a) Loosen the two screws and lower the
screen (Fig 8) until the bottom of the screen
is approximately 1/4” – 5/16” from the
sill. (Fig 9)
b) Retighten the screws.
c) In rare instances, further adjustments may
be needed. Call 1-800-746-6686 to speak
with a Simonton Tech for more information.
Simonton.com/installation
Effective Date: 4/24/17
Figure 8
5. Screen Strike Installation
a) After identifying the position and track
direction of the latch, close the door into
the frame and mark the estimated position
in the screen pocket using the strike as
template. (Fig 10).
b) Pre-drill two 7/64" holes into the vinyl sill
pocket (Fig 11).
c) Install the strike over the holes using the
screws provided (Fig 12). NOTE: The
correct orientation of the screen handle
should require downward motion to
disengage the keeper.
Figure 9
Figure 11
Figure 10
Figure 12
Effective Date: 4.24.17
INOVO
INSTALLATION INSTRUCTIONS
®
TOP HUNG SCREEN
Simonton,® Simonton Windows,® StormBreaker® Plus and the stylized “S” are trademarks of Simonton
Windows & Doors, Inc. or its affiliates. ©2017 Simonton Building Products, LLC. Printed in U.S.A.
 Loading...