

Page 1

Kurzanleitung
Smart Cd
Manual SmartCD · Manuel SmartCD · Documentación SmartCD · Documentatie SmartCD · Manuale
SmartCD · Kvikstartguide SmartCD · Snabbguide
Smart CD · Краткое руководство SmartCD
V-2015-12
1
Page 2

4 Sicherheitshinweise.
4 Anschluss an PC oder Laptop.
5 Konguration Bluetooth Verbindung.
6 Konguration der USB Verbindung.
6 Inbetriebnahme des Smart CDs.
7 Programmieren mit dem Smart CD.
8 Bedeutung der leds.
8 Lieferumfang.
9 Safety Remarks.
9 Connection to PC or laptop.
10 Conguration of Bluetooth
connection.
11 Conguration of USB connection.
11 Starting up the Smart CD.
13 Meaning of the LEDs.
13 Scope of delivery.
14 Consignes de sécurité.
14 Branchement au PC ou à
l‘ordinateur portable.
15 Conguration de la liaison
Bluetooth.
16 Conguration de la liaison USB.
16 Mise en service du Smart CD.
17 Programmation avec le Smart CD.
18 Légende des diodes lumineuses.
18 Fournitures.
2
Page 3

19 Normas de seguridad.
19
Conexión a un PC o a un Notebook.
20 Conguración de la conexión
Bluetooth.
21 Conguración de la conexión USB.
21 Puesta en servicio del Smart CD.
22 Programación con el Smart CD.
23 Signicado de los LED.
23 Volumen de suministro.
24 Veiligheidsaanwijzingen.
24 Aansluiting op pc of laptop.
25 Conguratie Bluetooth verbinding.
26
Conguratie van de USB-verbinding.
26 Inbedrijfneming van de Smart CD.
27 Programmeren met de Smart CD.
28 Betekenis van de LED‘s.
28 Inhoud verpakking.
34 Sikkerhedshenvisninger.
34 Tilslutning til en PC eller laptop.
35 Konguration Bluetooth forbindelse.
36 Konguration af USB forbindelse.
36 Ibrugtagning af SmartCD’en.
36 Programmere med SmartCD’en.
37 Betydning af LEDs
38 Leverancen omfatter.
39 Säkerhetsanvisningar
39 Anslutning till PC eller bärbar dator
40 Kongurering av Bluetooth anslutning
40 Kongurering av USB-anslutning
41 Idrifttagning av Smart CD
41 Programmering med Smart CD
42 Lysdiodernas innebörd
43 I leveransen ingår
29 Indicazioni di sicurezza.
29 Collegamento ad un PC o computer
portatile.
30 Congurazione collegamento
Bluetooth.
31 Congurazione del collegamento.
31 Messa in funzione di Smart CD.
32 Programmazione con Smart CD.
33 Signicato dei LED.
33 Materiale in dotazione.
44 Указания по технике
безопасности
44 Подключение к ПК или ноутбуку
45 Конфигурация соединения
Bluetooth.
46 Конфигурация соединения с USB.
46 Запуск Smart CD.
48 Значение светодиодов.
48 Объем поставки.
3
Page 4

SiCherheitShinweiSe.
: : Direkte Sonneneinstrahlung vermeiden.
: : Von magnetischen Störquellen fernhalten.
: : Die in das Programmiergerät eingebauten Lithium-Akkus können bei Fehlbe-
handlung eine Feuer- oder Verbrennungsgefahr darstellen. Das Gerät nicht
öffnen, über 100°C erhitzen oder verbrennen.
: : Akkus nicht ausbauen oder tauschen.
: : Für den Ersatz verbrauchter Akkus hat SimonsVoss ein spezielles Angebot
für Sie. Bitte wenden Sie sich für weitere Informationen an unseren Vertriebs-
innendienst unter Tel. +49 89 99228333 oder
customerservice@simons-voss.com.
: : Eine fehlerfreie Funktion bei der Programmierung in Zusammenspiel mit einem
Windows Mobile PDA kann nur für von SimonsVoss freigegebene Geräte
gewährleistet werden.
: : Durch fehlerhaft installierte oder programmierte Zylinder kann der Zugang
durch eine Tür versperrt werden. Für die Folgen fehlerhafter Installationen, wie
nicht möglicher Zugang zu verletzten Personen, Sachschäden oder andere
Schäden, haftet die SimonsVoss Technologies GmbH nicht.
anSChluSS an PC oder laPtoP.
Das SmartCD kann mit dem mitgelieferten Kabel über eine freie USB-Schnittstelle
direkt an einen PC bzw. Laptop angeschlossen werden.
Achtung: Vor dem Anschließen des SmartCDs an die USB-Schnittstelle ist darauf
zu achten, dass die Bluetooth-Funktion manuell ausgeschaltet wurde, da sonst
eine Programmierung am Tisch per PC/Notebook nicht möglich ist. Die Bluetooth-
4
Page 5

Schnittstelle schaltet erst nach 15 min. automatisch ab. ActivSync-Vorgänge sind
hiervon unabhängig.
Mit dem SmartCD können direkt am PC/Laptop alle digitalen Komponenten des
SimonsVoss Systems 3060 programmiert werden.
Achtung: Wird mit PDA und SmartCD programmiert, muss das Verbindungskabel
vom SmartCD zum PC/Laptop wieder ausgesteckt werden.
Transponder können nur programmiert werden, wenn das SmartCD direkt (per
USB Kabel) an einen PC/Laptop angeschlossen ist.
Zum Laden der eingebauten Akkus bitte SmartCD per USB Kabel an den PC
anschließen (Achtung: Bei Laptops wird evtl. im ausgeschaltetem Zustand die
USB-Schnittstelle abgeschaltet). Die Akkus des SmartCDs werden dann über die
USB Schnittstelle aufgeladen.
Konfiguration Bluetooth VerBindung.
Bei der Koppelung des SmartCD mit dem PDA stellen Sie bitte sicher, dass beide
Geräte
: : eingeschaltet und für Bluetooth erkennbar sind.
: : sich in näherer Umgebung zueinander benden.
Zur weiteren Vorgehensweise zur Koppelung von SmartCD und PDA lesen Sie
bitte in das Benutzerhandbuch des PDA Herstellers. Als SimonsVoss Gerät wählen
Sie bitte „SV [Seriennummer Ihres Gerätes]“ aus.
5
Page 6

Konfiguration der uSB VerBindung.
Nachdem Sie das SmartCD mittels USB Kabel mit dem PC/Laptop erstmals angeschlossen haben, wird eine neue USB Hardware vom Windows Betriebsystem
entdeckt. Folgen Sie den Anweisungen des Installationsmenüs, und installieren Sie
den auf der beiliegenden CD enthaltenen Treiber auf Ihrem Desktoprechner.
inBetrieBnahme deS Smart CdS.
: : Die eingebauten Akkus sind vorgeladen und somit ist das Gerät direkt Einsatz
bereit. Wir empfehlen, das SmartCD vor der ersten Nutzung ca. 1Stunde am
USB Port aufzuladen.
: : SmartCD per USB mit dem PC/Laptop verbinden.
: : USB Treiber für das SmartCD auf dem PC/Laptop installieren (siehe beigelegte
CD)
Zur Verwendung des SmartCDs mit einem PDA folgende weitere Schritte durchführen:
: : Schließplan-Software LSM Mobile Edition über den ActiveSync auf den PDA
installieren.
: : SmartCD und PDA per Bluetooth koppeln.
: : COM-Port auf dem PDA und für das SmartCD einstellen.
6
Page 7

Programmieren mit dem Smart Cd.
Programmieren mit Smart Cd und PC/laPtoP.
Auf dem PC/Laptop muss die aktuelle Version der LSM installiert sein. Für die
Neuinstallation oder das Update der Software muss ein Programmiergerät an den
PC/Laptop angeschlossen werden.
Achtung:
Für die Installation der Software unter Windows benötigen Sie AdministratorRechte!
Vor einem Update unbedingt ein aktuelles Backup durchführen.
Programmieren mit dem Smart Cd und Pda.
Auf dem PC/Laptop muss die aktuelle Version der LSM installiert sein. Zusätzlich
muss die PDA Desktop-Software auf dem PC/Laptop eingerichtet werden. Bei der
Erstinstallation auf dem PDA muss ein ActiveSync durchgeführt werden. Auf dem
PDA muss die aktuelle Version der LSM Mobile Edition installiert werden.
Sie können jetzt einen auf dem PC/Laptop erstellten Schließplan durch einen
ActiveSync auf den PDA übertragen. Weitere Details entnehmen Sie bitte dem
PDA Benutzerhandbuch.
7
Page 8
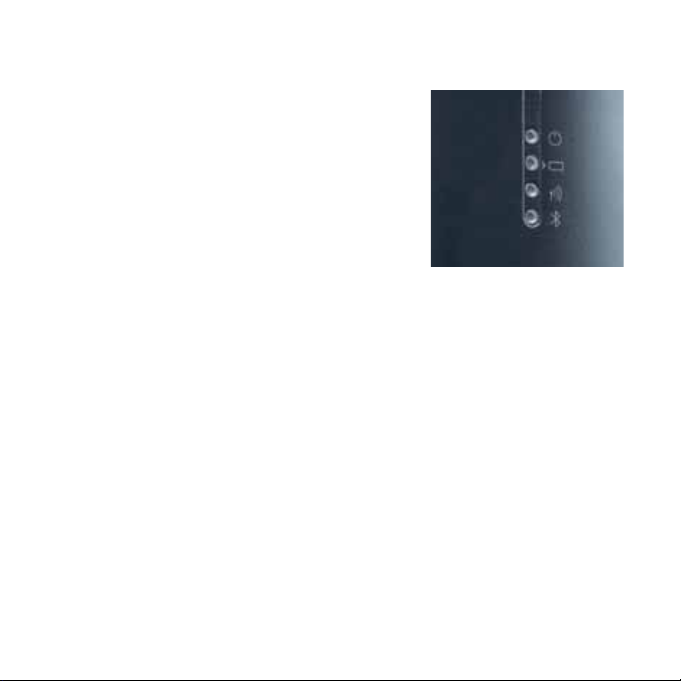
Bedeutung der ledS.
1. LED (grün) blinkend –> Gerät betriebsbereit
2. LED (gelb) leuchtend –> Akkus werden geladen
LED (gelb) aus –> Akkus sind aufgeladen
3. LED (grün) blinkend –> Gerät kommuniziert mit
der SV Schließung
4. LED (blau) leuchtend –> Bluetooth aktiv
Die 2. LED (gelb) leuchtet nur, wenn das SmartCD
zum Laden per USB mit dem Rechner verbunden ist.
lieferumfang.
1. SmartCD
2. Kabel zum Anschluss an eine USB-Schnittstelle
3. CD-ROM mit USB-Treibern
Bitte leSen Sie Vor inBetrieBnahme daS handBuCh deS PdaherStellerS.
8
Page 9

Safety remarKS.
: : Avoid direct sunlight.
: : Keep away from magnetic sources of interference.
: : The lithium batteries installed in the programming device may cause a re or
burning if not handled correctly. Do not open or burn the device, or heat it to
over 100 °C.
: : Do not remove or replace batteries.
: : SimonsVoss has a special offer to replace used batteries for you. Please con-
tact our in-house sales team on tel. +49 89 992 28 333 or at
customerservice@simons-voss.com for more information.
: : Proper function during programming in combination with a Windows Mobile
PDA can only be guaranteed for devices that have been approved by Simons-
Voss.
: : Incorrectly installed or incorrectly programmed cylinders can block the
access through a door. SimonsVoss Technologies GmbH is not liable for the
consequences of incorrect installation, such as obstructed access to injured
persons, damage to property or other damage.
ConneCtion to PC or laPtoP.
The SmartCD can be connected directly to a PC or laptop using the cable
supplied via a free USB interface.
Please note: Before connecting the SmartCD to the USB port, ensure that the
Bluetooth function has been manually deactivated. Otherwise you will not be able
to carry out programming on the PC / notebook. The Bluetooth function will only
switch off automatically after 15 minutes. ActivSync processes are not affected by
this.
9
Page 10

All the digital components of the SimonsVoss system 3060 can be programmed
directly from your PC or laptop using the SmartCD.
Warning: If programming is carried out with a PDA and SmartCD, the connection
cable from the SmartCD to the PC/laptop must be unplugged again.
Transponders can only be programmed if the SmartCD is connected directly (by
USB cable) to a PC/laptop.
To charge the built-in batteries, please connect the SmartCD by USB cable to the
PC (warning: it may be that the USB interface is switched off when the laptop is
switched off). The SmartCD batteries are then charged via the USB interface.
Configuration of Bluetooth ConneCtion.
When connecting the SmartCD to a PDA, please make sure that both devices are:
: : switched on and recognisable by Bluetooth,
: : fairly close to each other.
For further instructions for connecting the SmartCD and PDA, please consult your
PDA manufacturer‘s manual.
As the SimonsVoss appliance, please select „SV [serial number of your
appliance]“.
10
Page 11

Configuration of uSB ConneCtion.
After you have connected the SmartCD with the PC/laptop for the rst time using
the USB cable, the Windows operating system will state that it has discovered
new USB hardware. Follow the instructions in the installation menu and install the
driver enclosed on the CD provided onto your desktop computer.
Starting uP the Smart Cd.
: : The built-in batteries are precharged and the device is therefore ready to use
immediately. We recommend that you charge the SmartCD for about 1 hour at
the USB port before using it for the rst time.
: : Connect the SmartCD by USB with the PC/laptop.
: : Install USB driver for the SmartCD on the PC/laptop (see enclosed CD).
To use the SmartCD with a PDA, please carry out the following additional steps:
: : Install the LSM Mobile Edition locking plan software on the PDA using
ActiveSync.
: : Connect the SmartCD and PDA by Bluetooth.
: : Set the COM port on the PDA for the SmartCD.
11
Page 12

Programming with Smart Cd.
Programming with Smart Cd and PC/laPtoP.
The latest version of the LSM must be installed on the PC/laptop. To install or
update the software, a programming device must be connected to the PC/laptop.
Warning:
To install the software in Windows, you will require administrator rights.
Before updating, it is essential that you carry out an up-to-date back-up.
Programming with Smart Cd and Pda.
The latest version of the LSM must be installed on the PC/laptop. In addition, the
PDA desktop software must be congured on the PC/laptop. For initial installation
on the PDA, an ActiveSync must be carried out.
The current version of the LSM Mobile Edition must be installed on the PDA.
You can now transfer a locking plan produced on the PC/laptop to the PDA using
an ActiveSync. For further details, please check your PDA manual.
12
Page 13
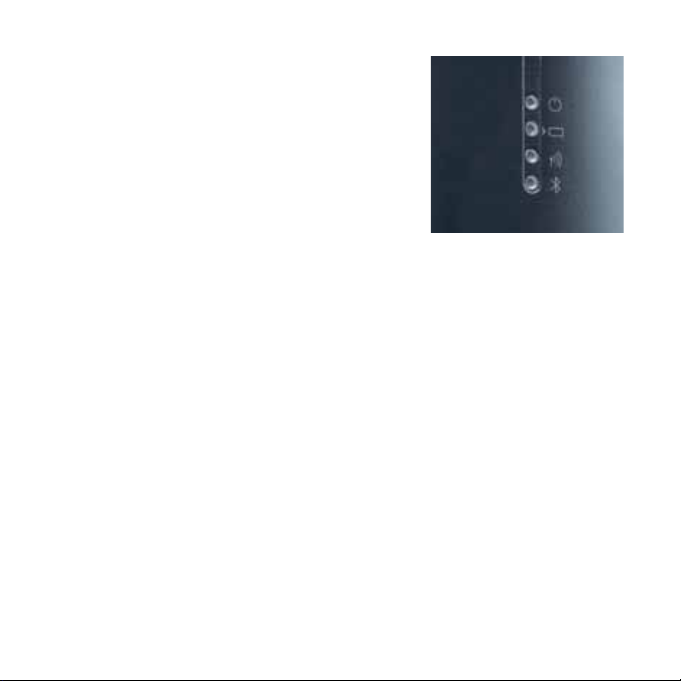
meaning of the ledS.
: : LED (green) ashing –> device ready for use
: : LED (yellow) steady –> batteries being charged
: : LED (yellow) off –> batteries charged
: : LED (green) ashing –> device communicating
with SV locking
: : LED (blue) steady –> Bluetooth active
The 2nd LED (yellow) only comes on if the SmartCD
is connected with the computer for charging by USB.
SCoPe of deliVery.
: : SmartCD
: : Cable for connection to a USB interface
: : CD-ROM with USB drivers
Before Starting uP, PleaSe read the Pda manufaCturer‘S
manual Carefully.
13
Page 14

ConSigneS de SéCurité.
: : Ne pas exposer au rayonnement direct du soleil.
: : Mettre à l‘abri des sources parasites magnétiques.
: : Les accus au lithium intégrés dans l‘outil de programmation peuvent consti-
tuer un risque d‘incendie ou de brûlure en cas de manipulation incorrecte. Ne
pas ouvrir, chauffer au-delà de 100°C ou brûler l’appareil.
: : Ne pas retirer ou remplacer les accus.
: : Pour le remplacement des accus usagés, SimonsVoss vous propose une
offre spéciale. Pour plus d’informations, veuillez s’il vous plaît contacter notre
service des ventes au numéro de téléphone : +49 89 99228333, ou par e-mail
à : customerservice@simons-voss.com.
: : Un parfait fonctionnement au cours de la programmation avec un organiseur
sous Windows Mobile, n‘est garanti que pour les appareils agréés Simons-
Voss.
: : Des erreurs d’installation ou de programmation des cylindres peuvent entraî-
ner le blocage de l’accès d’une porte. La société SimonsVoss Technologies
GmbH ne saurait être tenue responsable des conséquences d’une installation
erronée (impossibilité d’accéder à des personnes blessées, dégâts matériels
ou autres).
BranChement au PC ou à l‘ordinateur PortaBle.
À l‘aide du câble livré, on peut brancher directement le SmartCD à un port USB
du PC ou de l’ordinateur portable.
Attention: avant de raccorder le SmartCD à l’interface USB, veiller à ce que la
fonction Bluetooth soit désactivée manuellement. Sinon, la programmation au
14
Page 15

bureau via PC/ordinateur portable n’est pas possible. La fonction Bluetooth n‘est
automatiquement désactivée qu‘après 15 minutes. Les processus ActivSync ne
sont pas affectés.
Le SmartCD permet de programmer directement sur le PC/ordinateur portable
tous les composants numériques du Système 3060 de SimonsVoss.
Attention : Si la programmation se fait avec organiseur et SmartCD, il faut retirer le
câble reliant le SmartCD au PC/ ordinateur portable.
Les transpondeurs ne peuvent être programmés que si le SmartCD est directement branché (via câble USB) à un PC/ordinateur portable.
Pour recharger les accus intégrés, brancher le SmartCD au PC via câble USB
(Attention : sur les ordinateurs portables à l‘arrêt il se peut que le port USB ne
fonctionne plus !). Les accus de SmartCD se rechargent alors via le port USB.
Configuration de la liaiSon Bluetooth.
Lors du couplage du SmartCD à l‘organiseur, assurez-vous que les deux
appareils:
: : sont en marche et peuvent être reconnus par Bluetooth
: : sont à proximité l‘un de l‘autre
Pour plus de détails sur le couplage SmartCD et organiseur, merci de vous reporter au manuel du fabricant de l‘organiseur.
Pour l‘appareil SimonsVoss, veuillez sélectionner « SV [numéro de série de votre
appareil] ».
15
Page 16

Configuration de la liaiSon uSB.
Après avoir relié pour la première fois le SmartCD au PC/ordinateur portable à
l‘aide du câble USB, le système d‘exploitation Windows reconnaît un nouveau
matériel USB. Suivez les instructions du menu, et installez sur votre ordinateur le
pilote gurant sur le CD fourni avec le produit.
miSe en SerViCe du Smart Cd.
: : Les accus intégrés ont été chargés à l‘usine et l‘appareil est donc prêt à servir.
Avant la première utilisation du SmartCD nous vous recommandons de char-
ger celui-ci pendant env. 1 heure au port USB.
: : Via USB, connecter le SmartCD au PC/ordinateur portable.
: : Installer le pilote USB du SmartCD sur le PC/ordinateur portable (cf. le CD
fourni).
Si vous utilisez le SmartCD avec un organiseur, effectuer en outre les actions
suivantes :
: : installer le logiciel du plan de fermeture LSM Mobile Edition sur l‘organiseur,
via ActiveSync ;
: : coupler le SmartCD et l‘organiseur via Bluetooth ;
: : paramétrer le port COM de l‘organiseur pour le SmartCD.
16
Page 17

Programmation aVeC le Smart Cd.
Programmation aVeC Smart Cd et PC/ordinateur PortaBle.
Le PC/ l’ordinateur portable doit posséder la version actuelle du logiciel LSM. Pour
une nouvelle installation ou la mise à jour du logiciel, il faut connecter un outil de
programmation au PC/ordinateur portable.
Attention :
Pour l‘installation du logiciel sous Windows, vous avez besoin des droits administrateur !
Avant toute mise à jour, il est impératif d‘effectuer une sauvegarde des données
actuelles.
Programmation aVeC SmartCd et organiSeur.
Le PC/l’ordinateur portable doit posséder la version actuelle du logiciel LSM. De
plus, il faut que le logiciel de synchronisation de l‘organiseur soit installé sur le
PC/l’ordinateur portable. Lors de la première installation sur l‘organiseur, il faut
effectuer une procédure ActiveSync.
L‘organiseur doit posséder la version actuelle du logiciel LSM Mobile Edition.
Via la procédure ActiveSync, vous pouvez maintenant transférer à l‘organiseur un
plan de fermeture établi sur le PC/l’ordinateur portable. Veuillez consulter le
manuel de votre organiseur pour tous détails complémentaires.
17
Page 18

légende deS diodeS lumineuSeS.
: : Diode (verte) clignote –> l‘appareil est en
ordre de marche
: : Diode (jaune) allumée –> les accus sont
en cours de chargement
: : Diode (jaune) s‘éteint –> les accus sont
rechargés
: : Diode (verte) clignote –> l‘appareil
communique avec la fermeture SV
: : Diode (bleue) allumée –> Bluetooth est activé
La 2ème diode (jaune) ne s‘allume que si le SmartCD est connecté à l‘ordinateur
via USB, pour le rechargement.
fournitureS.
: : Le SmartCD
: : Le câble pour raccordement à un port USB
: : Un CD-ROM avec les pilotes USB
aVant la miSe en SerViCe, Veuillez lire le manuel fourni Par le
faBriquant de Votre organiSeur.
18
Page 19

normaS de Seguridad.
: : Evítar la radiación solar directa.
: : Mantener alejado de fuentes magnéticas perturbadoras.
: : Las baterías de litio incorporadas en el dispositivo programador pueden ocasi-
onar peligros de incendio o de quemaduras en caso de manejo incorrecto.
Abstenerse de abrir el aparato, calentarlo por encima de 100 °C o quemarlo.
: : No desmontar ni sustituir las baterías.
: : SimonsVoss tiene una oferta especial para usted relativa a la sustitución de
baterías gastadas. Si desea más información, póngase en contacto con
nuestro servicio interno de ventas llamando al teléfono +49 89 99228333 o
enviando un correo electrónico a customerservice@simons-voss.com.
: : Un funcionamiento correcto en la programación en combinación con un
PDA Windows Mobile, sólo puede garantizarse para aparatos habilitados por
SimonsVoss.
: : La instalación o programación incorrectas de un cilindro puede impedir el
paso a través de una puerta. SimonsVoss Technologies GmbH no se hace
responsable de las consecuencias causadas por una instalación inadecuada,
como la imposibilidad de acceder a personas heridas, daños materiales u
otros daños.
Conexión a un PC o a un noteBooK.
El SmartCD se puede conectar directamente al PC/Notebook con el cable suministrado, a través de una interfaz USB libre.
¡Atención! Antes de conectar el SmartCD al puerto USB debe comprobarse que
la función Bluetooth se ha desactivado de forma manual ya que, de lo contrario,
19
Page 20

no se podrá llevar a cabo la programación con un ordenador de mesa o portátil
conectados por cable. La función Bluetooth tarda 15minutos en desactivarse
automáticamente sin que ello afecte a los procesos ActivSync.
Con el SmartCD se pueden programar directamente en el PC/Notebook todos los
componentes digitales del sistema SimmonsVoss 3060.
Atención: Si se programa con PDA y SmartCD, se debe volver a desenchufar el
cable de conexión del SmartCD al PC/Notebook.
Los transponedores sólo se pueden programar si el SmartCD está conectado
directamente (por cable USB) a un PC/Notebook.
Para cargar las baterías incorporadas, conecte el SmartCD al PC por medio de
cable USB (atención: En algunos Notebooks, en estado de desconexión también
se desconecta la interfaz USB, ) En tal caso, las baterías del SmartCD se cargan
por medio de la interfaz USB.
ConfiguraCión de la Conexión Bluetooth.
Al acoplar el SmartCD al PDA, es preciso asegurarse de que los dos aparatos:
: : Estén conectados y son reconocibles para Bluetooth.
: : Se encuentren cercanos entre sí.
En cuanto al modo de proceder ulterior para el acoplamiento de SmartCD y PDA,
consultar el manual del usuario proporcionado por el fabricante del PDA..
Como aparato SimonsVoss selecciónese, por favor, “SV [número de serie de su
aparato]”.
20
Page 21

ConfiguraCión de la Conexión uSB.
Una vez que haya conectado el SmartCD mediante el cable USB con el PC/
Notebook, el sistema operativo Windows detecta un nuevo hardware USB. Siga
las instrucciones del menú de instalación, e instale en su ordenador el controlador contenido en el CD que se adjunta.
PueSta en SerViCio del Smart Cd.
: : Las baterías incorporadas están previamente cargadas, y por lo tanto, el
aparato está listo para el uso inmediato. Antes de utilizar por primera vez el
SmartCD , recomendamos cargarlo durante aprox. una hora por el puerto
USB.
: : Conecte el SmartCD por USB con el PC/Notebook.
: : Instale el controlador USB para el SmartCD en el PC/Notebook (véase CD
suministrado)
Para utilizar el SmartCD con un PDA deben llevarse a cabo los siguientes pasos:
: : Instale el software del plan de cierre del LSM Mobile Edition en el PDA por
medio del ActiveSync.
: : Acople el SmartCD y el PDA por Bluetooth.
: : Ajuste el puerto COM al PDA y para el SmartCD.
21
Page 22

ProgramaCión Con el Smart Cd.
ProgramaCión Con el Smart Cd PC/noteBooK.
En el PC/Notebook debe estar instalada la versión actual de LSM. Para una nueva
instalación o para la actualización del software debe estar conectado un aparato
programador al PC/Notebook.
Atención:
¡Para la instalación del software con Windows necesita derechos de administrador!
Antes de una actualización es imprescindible realizar una copia de seguridad
actual.
ProgramaCión Con el Smart Cd y Pda.
En el PC/Notebook debe estar instalada la versión actual de LSM. Además, debe
estar instalado el software de escritorio PDA en el PC/Notebook. Cuando se lleva
a cabo la primera instalación en el PDA, se ha de realizar un ActiveSync.
En el PDA se ha de instalar la versión actual de LSM Mobile Edition.
Ahora puede usted transferir un plan de cierre denido en el PC/Notebook al PDA
por medio de un ActiveSync. Para más detalles, véase el manual de usuario del
PDA.
22
Page 23

SignifiCado de loS led.
: : LED (verde) parpadeante –> aparato listo para el
servicio
: : LED (amarillo) iluminado –> se cargan las baterías
: : LED (amarillo) apagado –> las baterías están
cargadas
: : LED (verde) parpadeante –> el aparato se comu-
nica con el cierre SV
: : LED (azul) iluminado –> Bluetooth activo
El 2º LED (amarillo) sólo se ilumina si el SmartCD está conectado para la carga al
ordenador por USB.
Volumen de SuminiStro.
: : SmartCD
: : Cable para la conexión a una interfaz USB:
: : CD-ROM con controladores USB
anteS de la PueSta en SerViCio, lea Por faVorel manual del
faBriCante del Pda.
23
Page 24

VeiligheidSaanwijzingen.
: : Directe instraling van zonlicht vermijden.
: : Uit de buurt van magnetische storingsbronnen houden.
: : De in het programmeerrapparaat ingebouwde lithium-accu‘s kunnen bij
foutieve omgang een vuur- of verbrandingsgevaar inhouden. Het apparaat niet
openen, boven 100° C verhitten of verbranden.
: : Accu‘s niet uitbouwen of vervangen.
: : Voor de vervanging van gebruikte accu‘s heeft SimonVoss een speciale
aanbieding voor u. Neem voor meer informatie contact op met onze verkoop-
binnendienst onder tel. +49 89 99228333 of
customerservice@simons-voss.com.
: : Foutloos functioneren bij de programmering in combinatie met een Windows
Mobile PDA, kan alleen voor door SimonsVoss vrijgegeven apparaten gega-
randeerd worden.
: : Door onjuist gemonteerde of geprogrammeerde cilinders kan de toegang tot
een deur worden geblokkeerd. SimonsVoss Technologies GmbH is niet aan-
sprakelijk voor de gevolgen van onjuiste installatie, zoals het niet toegankelijk
zijn van ruimten met gewonden en materiële of andere schade.
aanSluiting oP PC of laPtoP.
De SmartCD kan met de meegeleverde kabel via een vrije USB-poort direct op
een pc resp. laptop aangesloten worden.
Belangrijk: Voor het aansluiten van de SmartCD aan de USB-verbinding moet erop
worden gelet, dat de Bluetooth-verbinding manueel is uitgeschakeld. Anders is
programmeren aan tafel via PC of notebook niet mogelijk. De Bluetooth-functie
24
Page 25

schakelt zich pas na 15 minuten automatisch uit. ActivSync-processen staan los
hiervan.
Met de SmartCD kunnen direct aan de pc/laptop alle digitale componenten van
het SimonsVoss System 3060 geprogrammeerd worden.
Let op: Als met PDA en SmartCD geprogrammeerd wordt, moet de verbindingskabel van de SmartCD naar de pc/laptop weer verwijderd worden.
Transponders kunnen alleen geprogrammeerd worden als de SmartCD direct (met
USB-kabel) op een pc/laptop is aangesloten.
Voor het opladen van de ingebouwde accu, de SmartCD a.u.b. met USB-kabel op
de pc aansluiten (let op: bij laptops wordt in uitgeschakelde toestand mogelijk de
USB-poort gedeactiveerd!). De accu‘s van de SmartCD worden dan via de USBpoort opgeladen.
Configuratie Bluetooth VerBinding.
Bij de verbinding van de SmartCD met de PDA dient u erop te letten dat beide
apparaten:
: : ingeschakeld en voor Bluetooth herkenbaar zijn.
: : zich dicht bij elkaar bevinden.
Voor de verdere handelwijze bij de koppeling van SmartCD en PDA raadpleeg de
gebruiksaanwijzing van de PDA-producent.
Als SimonsVoss apparaat selecteert u alstublieft „SV [serienummer van uw
apparaat]“.
25
Page 26

Configuratie Van de uSB-VerBinding.
Nadat u de SmartCD via een USB-kabel voor het eerst op de pc/laptop heeft
aangesloten, ontdekt het Windows besturingssysteem een nieuwe USB-hardware.
Volg de aanwijzingen van het installatiemenu en installeer de driver van de meegeleverde cd op de harde schijf van uw desktop.
inBedrijfneming Van de Smart Cd.
: : De ingebouwde accu‘s zijn vooraf al opgeladen, zodat het apparaat meteen
klaar voor gebruik is. Wij adviseren vóór het eerste gebruik van de SmartCD
deze ca. 1 uur aan de USB-poort op te laden.
: : De SmartCD via USB met de pc/laptop verbinden.
: : USB-driver voor de SmartCD op de pc/laptop installeren (zie meegeleverde
cd)
Voor het gebruik van de SmartCD met een PDA dient u de volgende stappen te
ondernemen:
: : Sluitschema-software LSM Mobile Edition via de ActiveSync op de PDA instal-
leren.
: : SmartCD en PDA via Bluetooth verbinden.
: : COM-poort op de PDA en voor de SmartCD instellen.
26
Page 27

Programmeren met de Smart Cd.
Programmeren met Smart Cd en PC/laPtoP.
Op de pc/laptop moet de actuele versie van de LSM geïnstalleerd zijn. Voor de
eerste installatie of het updaten van de software moet een programmeerapparaat
op de pc/laptop aangesloten worden.
Let op:
Voor de installatie van de software onder Windows heeft u administrator-bevoegdheden nodig!
Vóór een update beslist een actuele backup maken.
Programmeren met de Smart Cd en Pda.
Op de pc/laptop moet de actuele versie van de LSM geïnstalleerd zijn. Bovendien
moet de PDA desktop-software op de pc/laptop ingericht worden. Bij eerste installatie op de PDA moet een ActiveSync uitgevoerd worden.
Op de PDA moet de actuele versie van de LSM Mobile Edition geïnstalleerd
worden. U kunt nu een sluitschema dat op de pc/laptop gecreëerd werd door een
ActiveSync naar de PDA kopiëren. Verdere details vindt u in de gebruiksaanwijzing
van de PDA.
27
Page 28

BeteKeniS Van de led‘S.
: : LED (groen) knipperend –> Apparaat klaar voor
gebruik
: : LED (geel) brandend –> Accu‘s worden opgela-
den
: : LED (geel) uit –> Accu‘s zijn opgeladen
: : LED (groen) knipperend –> Apparaat commu-
niceert met de SV sluiting
: : LED (blauw) brandend –> Bluetooth actief
De 2de LED (geel) brandt alleen als de SmartCD voor het opladen via USB met de
computer verbonden is.
inhoud VerPaKKing.
: : SmartCD
: : Kabel voor aansluiting op een USB-poort
: : CD-ROM met USB-drivers
Lees alstublieft vóór ingebruikneming het handboek van de producent van de
PDA.
28
Page 29

indiCazioni di SiCurezza.
: : Evitare l‘esposizione alla luce solare diretta.
: : Tenere lontano da sorgenti che generano interferenze magnetiche.
: : L‘uso improprio delle batterie al litio incorporate nel dispositivo di program-
mazione, può causare incendi o ustioni. Non aprire, riscaldare oltre 100 °C o
bruciare il dispositivo.
: : Non smontare o sostituire le batterie ricaricabili.
: : Per la sostituzione delle batterie ricaricabili usate, SimonsVoss ha pensato
a una speciale offerta. Per maggiori informazioni, vi preghiamo di contatta-
re il nostro Ufcio commerciale interno, telefonicamente al numero +49 89
99228333 o tramite e-mail all‘indirizzo customerservice@simons-voss.com.
: : Il corretto funzionamento di programmazione in combinazione con un PDA
con sistema operativo Windows Mobile, può essere garantito solo per i dispo-
sitivi approvati da SimonsVoss.
: : Un cilindro installato o programmato in modo errato può impedire il passaggio
attraverso una porta. SimonsVoss Technologies GmbH non assume alcuna
responsabilità per conseguenze derivanti da errata installazione, ad esempio
per l’impossibilità di raggiungere persone ferite, per danni materiali o altro.
Collegamento ad un PC o ComPuter Portatile.
SmartCD può essere collegato direttamente ad una porta USB libera di un PC o di
un computer portatile con il cavo fornito in dotazione.
Attenzione: prima di collegare lo SmartCD all’interfaccia USB occorre accertarsi
che la funzione Bluetooth sia stata disinserita manualmente, altrimenti non sarebbe possibile effettuare una programmazione tramite PC/notebook. La funzione
29
Page 30

Bluetooth si disattiva automaticamente solo dopo 15 minuti. I processi ActivSync
sono indipendenti da ciò.
Con SmartCD è possibile programmare direttamente sul PC/computer portatile
tutti i componenti digitali del sistema SimonsVoss 3060.
Attenzione: se si effettua la programmazione con un PDA e SmartCD, è necessario scollegare nuovamente il cavo che collega SmartCD al PC/computer portatile.
I transponder possono essere programmati solo se SmartCD è collegato direttamente (tramite cavo USB) ad un PC/computer portatile.
Per ricaricare le batterie incorporate, collegare SmartCD al PC con il cavo USB (attenzione: se si utilizza un computer portatile, lo spegnimento di questo dispositivo
comporta anche la disattivazione della porta USB). Le batterie di SmartCD vengono ricaricate tramite l‘interfaccia USB.
Configurazione Collegamento Bluetooth.
Per l‘abbinamento di SmartCD con il PDA, assicurarsi che i due dispositivi:
: : siano accesi e possano essere riconosciuti tramite Bluetooth.
: : non siano distanti l‘uno dall‘altro.
Per la procedura abbinamento di SmartCD e PDA, consultare il manuale utente
del produttore del PDA.
Per scegliere il dispositivo SimonsVoss, selezionare „SV [numero di serie del
dispositivo]“.
30
Page 31

Configurazione del Collegamento.
Dopo aver collegato per la prima volta SmartCD al PC/computer portatile con il
cavo USB, il sistema operativo Windows rileverà un nuovo dispositivo hardware
USB. Seguire le istruzioni della guida di installazione e installare i driver contenuti
nel CD fornito in dotazione sul proprio desktop del computer.
meSSa in funzione di Smart Cd.
: : Le batterie incorporate sono precaricate, quindi il dispositivo è immediatamen-
te pronto per l‘uso. Prima di utilizzare SmartCD per la prima volta, si consiglia
di lasciarlo in carica per circa 1 ora collegato alla porta USB.
: : Collegare SmartCD al PC/computer portatile tramite interfaccia USB.
: : Installare i driver USB per SmartCD sul PC/computer portatile (ved. CD fornito
in dotazione)
Per utilizzare SmartCD con un PDA, seguire le istruzioni successive:
: : Installare il software per il piano di chiusura LSM Mobile Edition tramite
ActiveSync sul PDA.
: : Abbinare SmartCD e il PDA via Bluetooth.
: : Impostare la porta COM sul PDA e per SmartCD
31
Page 32

Programmazione Con Smart Cd.
Programmazione Con Smart Cd ed un PC/ComPuter Portatile.
Sul PC/computer portatile deve essere installata una versione aggiornata di LSM.
Per una nuova installazione o l‘aggiornamento del software, è necessario collegare
un dispositivo di programmazione al PC/computer portatile.
Attenzione:
Per installare il software nel sistema operativo Windows, sono necessari i diritti di
amministratore.
Prima di eseguire un aggiornamento, effettuare sempre un back-up dei dati
correnti.
Programmazione Con Smart Cd e Pda.
Sul PC/computer portatile deve essere installata una versione aggiornata di LSM.
Inoltre, il software desktop del PDA deve essere congurato sul PC/computer
portatile. Alla prima installazione sul PDA, è necessario eseguire una sincronizzazione (ActiveSync).
Sul PDA deve essere installata una versione aggiornata di LSM Mobile Edition.
A questo punto è possibile trasferire un piano di chiusura creato con il PC/computer portatile sul PDA tramite una sincronizzazione (ActiveSync). Per ulteriori
dettagli, consultare il manuale utente del PDA.
32
Page 33

SignifiCato dei led.
: : LED (verde) lampeggiante –> Dispositivo pronto
al funzionamento
: : LED (giallo) acceso –> Batterie in ricarica
: : LED (giallo) spento –> Ricarica terminata
: : LED (verde) lampeggiante –> Comunicazione in
corso tra il dispositivo e la chiusura SV
: : LED (blu) acceso à Bluetooth attivo
Il secondo LED (giallo) si accende solo se SmartCD
è collegato al computer per la ricarica tramite cavo USB.
materiale in dotazione.
: : SmartCD
: : Cavo per il collegamento ad una porta USB
: : CD-ROM con driver USB
Prima di mettere in funzione il diSPoSitiVo, leggere il manuale
del Produttore del Pda.
33
Page 34

SiKKerhedShenViSninger.
: : Må ikke udsættes for direkte sol.
: : Må ikke komme i nærheden af magnetiske forstyrrelser.
: : De i programmeringsværktøjet anvendte lithium-batterier kan udgøre en
brand- eller forbrændingsfare ved forkert behandling. Enheden må ikke opla-
des, åbnes, opvarmes over 100°C eller brændes.
: : Batteriet må ikke udvides eller ombyttes.
: : Til udskiftning af brugte batterier har SimonsVoss et specielt tilbud til Dem. For
yderligere information, kontakt vores serviceafdeling på tlf. +49 89 99228333
eller customerservice@simons-voss.com.
: : Vi kan kun garantere en fejlfri funktion ved programmeringen i samspil med en
Windows Mobile PDA for en enhed, der er godkendt af SimonsVoss.
: : I tilfælde af forkert installerede eller programmerede cylindere kan adgangen til
en dør være spærret. SimonsVoss Technologies GmbH hæfter ikke for tings-
skader eller andre skader, så som manglende adgang til sårede personer, som
følge af fejlagtig montering.
tilSlutning til en PC eller laPtoP.
SmartCD'en kan tilsluttes direkte til en PC eller laptop via en ledig USB-grænseade med det medfølgende kabel.
Bemærk: Inden tilslutningen af SmartCD'en til USB-grænseaden skal man sørge
for, at bluetooth-funktionen er afbrudt manuelt, da programmering ellers ikke er
mulig ved bordet pr. PC/notebook. Bluetooth-grænseaden slukker først automatisk efter 15 min. ActivSync-handlinger er uafhængige af dette.
Med SmartCD’en kan alle digitale komponenter i SimonsVoss System 3060 programmeres direkte på en PC/laptop.
34
Page 35

Bemærk:
Hvis der programmeres med PDA og SmartCD, skal forbindelseskablet fra
SmartCD’en til PC/laptop fjernes.
Transpondere kan kun programmeres, når SmartCD’en er tilsluttet direkte til en
PC/laptop (via USB-kabel).
For at oplade det indbyggede batteri skal SmartCD’en tilsluttes via USB kabel til
PC’en (Bemærk: ved laptops slukker USB-grænseaden muligvis i deaktiveret
tilstand). Så aades batterierne i SmartCD’en via USB-grænseaden.
Konfiguration Bluetooth forBindelSe.
Kontroller ved tilkobling af SmartCD’en til PDA, at begge enheder
: : er tændte og genkendelige for Bluetooth.
: : bender sig i nærheden af hinanden.
For yderligere vejledning til kobling af SmartCD og PDA henvises til PDA-producentens brugerhåndbog. Som SimonsVoss-enhed vælges SV [Deres enheds
serienummer]“
35
Page 36

Konfiguration af uSB forBindelSe.
Efter at De første gang har tilsluttet SmartCD’en via et USB-kabel til PC/laptop,
genkendes ny USB hardware af Windows styresystemet. Følg anvisningerne i
installationsmenuen, og installer den på vedlagte CD inkluderede driver på Deres
stationære computer.
iBrugtagning af Smart Cd’en.
: : De indbyggede batterier er allerede opladet og enheden er således klar til
direkte indsats. Vi anbefaler at lade SmartCD’en oplade ca. 1 time ved USB-
porten inden første ibrugtagning.
: : Forbinde SmartCD via USB med PC/laptop.
: : Installere USB-driver til SmartCD’en på PC/laptop (se vedlagte CD)
Til brug for SmartCD’en med en PDA skal følgende trin gennemføres:
: : Låseplans-software LSM Mobile Edition installeres over ActiveSync på
PDA’en.
: : Opkoble SmartCD og PDA via Bluetooth.
: : COM-porten på PDA’en indstilles til SmartCD’en.
Programmere med Smart Cd’en.
Programmere med Smart Cd’en og PC/laPtoP.
Den aktuelle version af LSM skal være installeret på PC/laptop. For nyinstallation
eller opdatering af softwaren skal der være tilsluttet et programmeringsværktøj til
PC/laptop.
36
Page 37

Bemærk:
Til installation af softwaren på Windows kræves administratorrettigheder!
Det er ubetinget nødvendigt at tage en aktuel backup inden opdatering.
Programmere med Smart Cd og Pda.
Den aktuelle version af LSM skal være installeret på PC/laptop. Desuden skal PDA
desktop-softwaren være tilpasset PC/laptop. Ved den første installation på PDA’en
skal der gennemføres en ActiveSync. Den aktuelle version af LSM Mobile Edition
skal være installeret på PDA’en.
De kan nu overføre en låseplan, oprettet på PC/laptop, til PDA’en via en ActiveSync. Se yderligere detaljer i PDA brugerhåndbogen.
Betydning af ledS
1. LED (grøn) blinker -> enheden er driftsklar
2. LED (gul) lyser -> batterierne indlæses
LED (gul) slukket -> batterierne er aadet
3. LED (grøn) blinker -> enheden kommunikerer
med SV lukningen
4. LED (blå) lyser -> Bluetooth aktiv
Den 2. LED (gul) lyser kun, når SmartCD’en
er forbundet via USB med computeren for at lade op.
37
Page 38

leVeranCen omfatter.
1. SmartCD
2. Kabel for tilslutning til en USB-grænseade
3. CD-rom med USB-drivere
læS Vejledningen fra Pda-ProduCenten inden iBrugtagning.
38
Page 39

SäKerhetSanViSningar
: : Undvik direkt solstrålning.
: : Håll enheten borta från magnetiska störkällor.
: : Litiumbatterierna som sitter i programmeringsenheten kan orsaka brand eller
brännskador om de hanteras på felaktigt sätt. Enheten får inte öppnas, vär-
mas över 100°C eller brännas.
: : Batterierna får inte tas ur eller bytas.
: : SimonsVoss har ett speciellt erbjudande om utbyte av förbrukade batterier.
Kontakta vår kundtjänst för mer information på tel. +498999228333 eller
customerservice@simons-voss.com.
: : Felfri funktion vid programmering tillsammans med en Windows Mobile PDA
kan endast garanteras för enheter som är frigivna av SimonsVoss.
: : Felaktigt installerade eller programmerade cylindrar kan leda till att dörrar
spärras. SimonsVoss Technologies GmbH ansvarar inte för konsekvenserna
av felaktig installation såsom spärrat tillträde till skadade personer, materiella
skador eller andra typer av skador.
anSlutning till PC eller BärBar dator
SmartCD kan anslutas direkt till en PC eller en bärbar dator via ett ledigt USBgränssnitt med den medföljande kabeln.
Obs! Innan SmartCD ansluts till USB-gränssnittet måste Bluetooth-funktionen
stängas av manuellt eftersom det annars inte går att programmera via tangentbordet på PC/Notebook. Bluetooth-gränssnittet stängs av automatiskt, men först
efter 15minuter. ActiveSync-funktioner är oberoende av det.
39
Page 40

Med SmartCD kan alla digitala komponenter i SimonsVoss System 3060 programmeras direkt på PC:n eller den bärbara datorn.
Obs! Vid programmering med PDA och SmartCD ska anslutningskabeln från
SmartCD till PC:n/bärbara datorn dras ut igen.
Transpondrar kan endast programmeras om SmartCD är ansluten direkt till en PC/
bärbar dator (via USB-kabel).
Anslut SmartCD via USB-kabel till PC:n för att ladda de inbyggda batterierna (Obs!
för bärbara datorer måste USB-gränssnittet eventuellt tas ur i avstängt läge). Batterierna i SmartCD laddas sedan via USB-gränssnittet.
Konfigurering aV Bluetooth-anSlutning
När SmartCD ansluts till PDA kontrollerar du att båda enheterna
: : är inkopplade och identierbara för Bluetooth
: : benner sig i närheten av varandra.
För mer information om kopplingen mellan SmartCD och PDA hänvisas till PDAtillverkarens bruksanvisning. Som SimonsVoss-enhet väljer du ”SV [seriennumret
på din enhet]”.
Konfigurering aV uSB-anSlutning
När SmartCD ansluts för första gången till PC:n eller den bärbara datorn via
USB-kabel hittar Windows operativsystem ny USB-hårdvara. Följ anvisningarna i
40
Page 41

installationsmenyn och installera drivrutinen som nns på den medföljande CD:n
på din dator.
idrifttagning aV Smart Cd
: : De inbyggda batterierna är redan laddade, så enheten är klar för användning.
Vi rekommenderar att du laddar SmartCD i en timme via USB-porten före
första användning.
: : Anslut SmartCD till PC:n/bärbara datorn via USB-porten.
: : Installera USB-drivrutin för SmartCD på PC:n/bärbara datorn (se medföljande
CD).
Utför följande steg för att använda SmartCD med en PDA:
: : Installera låsplanprogrammet LSM Mobile Edition via ActiveSync på PDA:n.
: : Anslut SmartCD och PDA via Bluetooth.
: : Ställ in COM-porten på PDA och för SmartCD.
Programmering med Smart Cd
Programmering med Smart Cd oCh PC/BärBar dator
Den aktuella versionen av LSM måste vara installerad på PC:n/bärbara datorn. För
nyinstallation eller uppdatering av programvaran ansluts en programmeringsenhet
till PC:n/bärbara datorn.
41
Page 42

Obs!
För att kunna installera programmet under Windows måste du ha administratörsbehörighet!
Skapa alltid en aktuell säkerhetskopia före uppdateringar.
Programmering med Smart Cd oCh Pda
Den aktuella versionen av LSM måste vara installerad på PC:n/bärbara datorn.
Dessutom ska desktopprogramet i PDA vara inställt på PC:n/bärbara datorn. Vid
den första installationen på PDA:n ska en ActiveSync utföras. Den aktuella versionen av LSM Mobile Edition måste vara installerad på PDA:n.
Nu kan du överföra ett låsschema som har skapats på PC:n/den bärbara datorn
till PDA:n genom en ActiveSync. Ytterligare information nns i PDA-bruksanvisningen.
lySdiodernaS inneBörd
1. Lysdiod (grön) blinkar –> enhet driftsklar
2. Lysdiod (gul) lyser –> batterierna laddas
Lysdiod (gul) slocknar –> batterierna är laddade
3. Lysdiod (grön) blinkar –> enheten kommunicerar
med SV-låsningen
4. Lysdiod (blå) lyser –> Bluetooth aktivt
42
Page 43

Den andra (gula) lysdioden lyser endast när SmartCD
är ansluten till datorn för laddning via USB.
i leVeranSen ingår
1. SmartCD
2. Kabel för anslutning till ett USB-gränssnitt
3. CD-ROM med USB-drivrutiner
läS Pda-tillVerKarenS BruKSanViSning innan du Börjar anVända enheten.
43
Page 44

Указания по технике безопасности
: : Избегать воздействия прямого солнечного излучения.
: : Беречь от источников магнитных помех.
: : Неправильно установленные в устройство программирования литиевые
аккумуляторы могут стать причиной пожара и ожогов при ненадлежащем
обращении. Не заряжать, не вскрывать, не нагревать прибор свыше
100°C и не сжигать его.
: : Не демонтировать и не менять аккумуляторы.
: : У компании SimonsVoss есть специальное предложение по замене
использованных батареек. Для получения подробной информации об-
ращаться во внутреннюю службу по сбыту тел. +49 89 99228333 или
customerservice@simons-voss.com.
: : Безошибочное функционирование в процессе программирования в со-
четании с КПК Windows Mobile может быть гарантировано исключитель-
но в случае приборов, разрешенных SimonsVoss.
: : Неправильно установленный или запрограммированный цилиндр может
стать причиной блокировки доступа через дверь. За последствия не-
правильного монтажа, такие как отсутствие доступа к пострадавшим,
материальный или иной ущерб, компания SimonsVoss Technologies GmbH
ответственности не несет.
подключение к пк или ноУтбУкУ
SmartCD можно подключить с помощью прилагаемого кабеля к свободному
USB-порту непосредственно к ПК или ноутбуку.
Внимание: Перед подключением SmartCDs к USB-порту убедиться в том,
что функция Bluetooth отключена вручную, в противном случае невозможно
44
Page 45

выполнить программирование настольного ПО посредством ПК/ноутбука.
Интерфейс Bluetooth автоматически отключится лишь через 15 мин. Процессы ActivSync выполняются независимо от этого.
С помощью SmartCD можно программировать любые цифровые компоненты SimonsVoss системы 3060 непосредственно на ПК/ноутбуке.
Внимание: Если программирование выполняется посредством КПК и
SmartCD, то необходимо снова подключить соединительный кабель от
SmartCD к ПК / ноутбуку.
Транспондеры можно запрограммировать только при условии, если SmartCD
напрямую подключен (через USB-кабель) к ПК/ноутбуку.
Для зарядки встроенного аккумулятора подключить SmartCD через USBкабель к компьютеру (внимание: для ноутбуков возможно выключение USBпорта в выключенном состоянии). Аккумуляторы в SmartCDs в этом случае
заряжаются через USB-порт.
конфигУрация соединения Bluetooth.
При подключении SmartCD к КПК убедиться в том, что оба прибора
: : включены и распознаваемы Bluetooth.
: : находятся в непосредственной близости друг от друга.
Подробное описание процедуры подключения SmartCD к PDA приведено в руководстве пользователя изготовителя КПК. В качестве прибора
SimonsVoss выбрать „SV [серийный номер данного прибора]“.
45
Page 46

конфигУрация соединения с uSB.
После первичного подключения SmartCD с помощью кабеля USB к ПК/ноутбуку, операционной системой Windows будет обнаружено новое оборудование USB. Выполняя указания меню установочной программы, установить
на настольном компьютере драйвер, находящийся на прилагаемом компактдиске.
запУск Smart CD.
: : Встроенные аккумуляторы предварительно заряжены и, таким образом,
прибор непосредственно готов к использованию. Рекомендуется заря-
жать SmartCD перед первичным использованием примерно в течение 1
часа от USB-порта.
: : Подключить SmartCD через USB к ПК/ноутбуку.
: : Установить USB-драйвер для SmartCD на ПК / ноутбуке (см. прилагае-
мый компакт-диск)
Для использования SmartCDs с КПК, выполнить следующие дополнительные
операции:
: : Установить ПО схемы запирания LSM Mobile Edition через ActiveSync на
КПК.
: : Подключить SmartCD к КПК через Bluetooth
: : Настроить COM-порт на КПК и SmartCD.
46
Page 47

Выполнить программироВание посредстВом Smart CD.
Выполнить программироВание посредстВом Smart CD и пк/
ноУтбУка.
На ПК/ноутбуке должна быть установлена актуальная версия LSM. Для переустановки или обновления программного обеспечения, устройство программирования должно быть подключено к ПК/ноутбуку.
Внимание:
Для установки программного обеспечения под Windows необходимы права
администратора!
Перед обновлением обязательно выполнить резервное копирование текущих
данных.
Выполнить программироВание посредстВом Smart CD и кпк.
На ПК/ноутбуке должна быть установлена актуальная версия LSM. Кроме
того, должны быть выполнены настройки ПО для настольных систем КПК
на ПК/ноутбуке. При первичной установке на КПК должно быть выполнено
ActiveSync. На КПК должна быть установлена актуальная версия LSM Mobile
Edition.
Теперь можно экспортировать созданную на ПК / ноутбуке схему запирания
через ActiveSync на КПК. Более подробная информация приведена в руководстве пользователя КПК.
47
Page 48

значение сВетодиодоВ.
1. Светодиод (зеленый) мигает -> прибор готов к
работе
2. Светодиод (желтый) светится -> выполняется
зарядка аккумуляторов
Светодиод (желтый) не светится -> аккумуля-
торы заряжены
3. Светодиод (зеленый) мигает -> прибор связы-
вается с устройством запирания SV
4. Светодиод (синий) светится -> Bluetooth вклю-
чено
2 светодиод (желтый) светится только в том случае, когда SmartCD
для зарядки подключено к компьютеру через USB.
объем постаВки.
1. SmartCD
2. Кабель для подключения к портуUSB
3. Компакт-диск с USB-драйверами
перед использоВанием ознакомиться с рУкоВодстВом
изготоВителя кпк.
48
Page 49

49
Page 50

© SimonsVoss Technologies GmbH
50
Page 51

ComPany
headquarterS
SimonsVoss
Technologies GmbH
Feringastraße 4
85774 Unterföhring
Germany
Tel. +49 89 992280
www.simons-voss.com
öSterreiCh
SimonsVoss
Technologies GmbH
Kärntner Ring 5-7
1010 Wien
Tel. +43 1 20511601146
SChweiz
Simons Voss
Technologies GmbH
Dreikönigstrasse 31a
8002 Zürich
Tel. +41 44 208 3241
italy
SimonsVoss
Technologies GmbH
Via Torino, 2
Milano 20123
Tel. +39 02 72 54 67 63
franCe
SimonsVoss
Technologies SAS
Immeuble „Les Portes des
Paris“
1/3 Rue du Remparts
93160 Noisy le Grand
Tél. 01-48 15 14 80
united Kingdom
SimonsVoss
Technologies Ltd.
1200 Century Way
Thorpe Park · Colton
Leeds · LS15 8ZA
Phone 01132 515036
Benelux
SimonsVoss
Technologies bv
The Base B
Evert van de Beekstraat 104
1118CN Schiphol
Nederland
Tel: +31 207991500
51
nordiC CountrieS
SimonsVoss Technologies GmbH
Ostermalmstorg 1
Stockholm 114 42
Sweden
middle eaSt
SimonsVoss Technologies
(Middle East) FZE
P.O.Box 184220
Dubai
UAE
Phone +971 4 227 4851
aSia
SimonsVoss
SecurityTechnologies
(Asia) Pte. Ltd.
151 Lorong Chuan
New Tech Park #05-02
Lobby B
Singapore 556741
Phone +65-62 27 73 18
Page 52

KB10.080040
About Allegion™
Allegion (NYSE: ALLE) is a global pioneer in safety and
security, with leading brands like CISA®, Interex®, LCN®,
Schlage® and Von Duprin®. Focusing on security around
the door and adjacent areas, Allegion produces a range of
solutions for homes, businesses, schools and other institutions. Allegion is a $2 billion company, with products sold in
almost 130 countries. Fore more, visit www.allegion.com
52
 Loading...