


AURELIA WAVE DIGIT - T
3
IT LIBRETTO ISTRUZIONI (Istruzioni Originali)
EN USER HANDBOOK (Translation of the Original Instructions)

INDICE / INDEX
3
10
17
18
20
24
28
30
36
110
113
PRESCRIZIONI DI SICUREZZA
SAFETY INDICATIONS
INFORMAZIONI GENERALI / GENERAL INFORMATIONS
DATI TECNICI / TECHNICAL DATA
DESCRIZIONE MACCHINA / MACHINE DESCRIPTION
INSTALLAZIONE / INSTALLATION
REGOLAZIONI DEL TECNICO QUALIFICATO / QUALIFIED TECHNICIAN
ADJUSTMENTS
UTILIZZO / USE
PROGRAMMAZIONE / PROGRAMMATION
PULIZIA / CLEANING
MANUTENZIONE / MAINTENANCE

3
AURELIA WAVE DIGIT-T
3
• Il presente libretto costituisce parte integrante ed essenziale del prodotto e
dovrà essere consegnato all’utilizzatore. Leggere attentamente le avvertenze
contenute nel presente libretto in quanto forniscono importanti indicazioni riguardanti la sicurezza di installazione, d’uso e manutenzione. Conservare con
cura questo libretto per ogni ulteriore consultazione.
• Questo apparecchio dovrà essere destinato solo all’uso descritto in questo
manuale. Il costruttore non può essere considerato responsabile per eventuali
danni causati da usi impropri, erronei ed irragionevoli.
• Prima di utilizzare la macchina leggere interamente il manuale d’uso o quan-
tomeno le prescrizioni di sicurezza e la messa a punto.
• L’apparecchio non è idoneo per l’utilizzo da parte dei bambini, persone con
ridotte capacità fisiche, sensoriali o mentali, o carenti di conoscenze a meno
che non sia data supervisione o istruzione. I bambini non devono giocare con
l’apparecchio. Pulizia e manutenzione non devono essere fatte da bambini
senza supervisione.
• Dopo aver tolto l’imballaggio assicurarsi dell’integrità dell’apparecchio. In
caso di dubbio non utilizzare l’apparecchio e rivolgersi a personale professionalmente qualificato. Gli elementi dell’imballaggio (sacchetti in plastica, polistirolo espanso, chiodi, ecc..) non devono essere lasciati alla portata dei bambini in quanto potenziali fonti di pericolo, né essere dispersi nell’ambiente.
• La macchina è adatta per essere installata in ambienti quali locali di servizio
per il personale presso negozi, uici e altri ambienti di lavoro, in agriturismi,
presso gli spazi per clienti in hotels, motels, bed and breakfast e altri ambiti
residenziali.
• L’apparecchio può essere installato solo in locali dove l’uso e la manutenzione
sono limitate a personale qualificato.
• L’apparecchio non deve essere installato dove possono essere usati getti d’ac-
qua.
• Il livello sonoro della macchina è inferiore a 70db.
• Per favorire l’areazione della macchina posizionarla a cm 15 da muri o altre
macchine dalla parte dell’areazione.
• Ricordare che prima di eettuare qualsiasi operazione di installazione, manu-
tenzione, scarico, regolazione, l’operatore qualificato deve indossare i guanti
da lavoro e le scarpe antinfortunistiche.
• Prima di collegare l’apparecchio accertarsi che i dati di targa siano rispondenti
a quelli della rete di distribuzione elettrica. La targa è visibile all’interno della
macchina rimuovendo la vaschetta raccogli acque. La macchina deve essere
installata secondo le norme (codici) applicabili federali, statali e locali in vigore
per gli impianti idraulici che comprendono dispositivi antiriflusso. Per questo
motivo, i collegamenti idraulici devono essere eseguiti da un tecnico qualifi-
IT PRESCRIZIONI DI SICUREZZA

4
AURELIA WAVE DIGIT-T
3
cato. La garanzia decade nel caso in cui le caratteristiche dell’alimentazione
elettrica non siano corrispondenti ai dati di targa.
• Durante l’installazione del dispositivo devono essere utilizzati i componenti e i
materiali in dotazione al dispositivo stesso. Qualora fosse necessario l’utilizzo
di altra componentistica, l’installatore deve verificare l’idoneità dello stesso
ad essere utilizzato a contatto con l’acqua per consumo umano. L’installatore
deve eseguire i collegamenti idraulici rispettando le norme di igiene e sicurezza idraulica di tutela ambientale vigenti nel luogo di installazione. Quindi per
l’impianto idraulico rivolgersi ad un tecnico autorizzato. Per l’eventuale collegamento alla rete idrica utilizzare sempre un tubo nuovo in dotazione, i tubi
vecchi non devono essere utilizzati.
• All’installazione, l’elettricista munito di patentino dovrà prevedere un interrut-
tore onnipolare come previsto dalle normative di sicurezza vigenti con distanza di apertura dei contatti e che consenta la disconnessione completa nelle
condizioni della categoria di sovratensione III.
• Il costruttore non può essere considerato re-
sponsabile per eventuali danni causati dalla
mancanza di messa a terra dell’impianto. Per la
sicurezza elettrica di questo apparecchio è obbligatorio predisporre l’impianto di messa a terra,
rivolgendosi ad un elettricista munito di patentino, che dovrà verificare che la portata elettrica
dell’impianto sia adeguata alla potenza massima
dell’apparecchio indicata in targa.
• L’uso di un qualsiasi apparecchio elettrico comporta l’osservanza di alcune re-
gole fondamentali. In particolare:
• Non toccare l’apparecchio con mani o piedi bagnati;
• Non usare l’apparecchio a piedi nudi;
• Non usare, prolunghe in locali adibiti a bagno o doccia;
• Non tirare il cavo di alimentazione, per scollegare l’apparecchio dalla rete di
alimentazione;
• Non lasciare esposto l’apparecchio ad agenti atmosferici (pioggia, sole, ecc..);
• Non permettere che l’apparecchio sia usato da bambini, o da personale non
autorizzato e che non abbia letto e ben compreso questo manuale.
• L’elettricista munito di patentino dovrà anche accertare che la sezione dei cavi
dell’impianto sia idonea alla potenza assorbita dall’apparecchio.
• È vietato l’uso di adattatori, prese multiple e prolunghe. Qualora il loro uso si
rendesse indispensabile è necessario chiamare un elettricista munito di patentino.
• Per evitare surriscaldamenti pericolosi si raccomanda di svolgere per tutta la
sua lunghezza il cavo di alimentazione. Non ostruire le griglie di aspirazione
e/o di dissipazione in particolare dello scaldatazze.

5
AURELIA WAVE DIGIT-T
3
• Il cavo di alimentazione di questo apparecchio non deve essere sostituito dall’u-
tente. In caso di danneggiamento, spegnere l’apparecchio e per la sua sostituzione rivolgersi esclusivamente a personale professionalmente qualificato.
• In caso di necessità di sostituzione del cavo di alimentazione questa può esse-
re eseguita solo da un centro assistenza autorizzato o dal costruttore.
• L’alimentazione del dispositivo deve essere eettuata con acqua idonea al
consumo umano conforme alle disposizioni vigenti nel luogo di installazione.
L’installatore deve acquisire dal proprietario/gestore dell’impianto conferma
che l’acqua rispetti i requisiti sopra indicati.
• Nel caso di macchina con connessione idrica alla rete la pressione minimo
deve essere 2 bar ed inoltre la pressione massima per il corretto funzionamento della macchina non deve superare il 4 bar.
• La temperatura di funzionamento deve essere compresa nel range [+5, +30]°C.
• Al termine dell’installazione, il dispositivo viene attivato e portato fino alla
condizione nominale di lavoro lasciandolo in condizioni di “pronto al funzionamento”. Dopo il raggiungimento dello stato di “pronto al funzionamento” si
eettuano le seguenti erogazioni:
• 100% del circuito caè attraverso l’erogatore caè (per più erogatori si divida
in uguale misura);
• Apertura dell’uscita vapore per 1 minuto.
Al termine dell’installazione sarebbe buona regola stilare un rapporto di quanto eettuato.
• È vietato lasciare la macchina accesa senza la presenza e la sorveglianza di
un operatore qualificato. Simonelli Group non è responsabile di danni causati
dall’inosservanza di questo divieto.
• L’operatore nel momento dell’aggiunta del caè, non deve mettere le mani
all’interno del contenitore.
• Durante l’uso della lancia del vapore, prestare molta attenzione e non mettere
le mani sotto di esso e non toccarla subito dopo l’uso.
• Per le operazioni di pulizia attenersi esclusivamente a quanto previsto nel pre-
sente libretto.
• Una volta iniziato il lavaggio della macchina, non interromperlo, possono ri-
manere dei residui di detergente all’interno del gruppo erogazione.
• In caso di guasto o di cattivo funzionamento dell’apparecchio, spegnerlo. È
severamente vietato intervenire. Rivolgersi esclusivamente a personale professionalmente qualificato. L’eventuale riparazione dei prodotti dovrà essere
eettuata solamente dalla casa costruttrice o da centro di assistenza autorizzato utilizzando esclusivamente ricambi originali. Il mancato rispetto di quanto sopra può compromettere la sicurezza dell’apparecchio.
• In caso di incendio togliere tensione alla macchina tramite l’interruttore gene-
rale. È assolutamente vietato spegnere l’incendio con acqua quando la macchina è in tensione.
• Il tecnico autorizzato deve, prima di eettuare qualsiasi operazione di manu-
tenzione, spegnere l’interruttore della macchina e staccare la spina.

6
AURELIA WAVE DIGIT-T
3
• Predisposizione luogo installazione.
L’acquirente deve predisporre una superficie di appoggio idonea a sostenere il
peso della macchina (vedere il capitolo di installazione).
• Predisposizione elettrica.
L’impianto elettrico deve essere conforme a quanto indicato dalle norme nazionali vigenti nel luogo di installazione e dotato di una eiciente messa a terra.
Installare un dispositivo onnipolare di sezionamento a monte della macchina.
Ai sensi dell’ art. 13 del Decreto Legislativo 25 luglio
2005, n. 151 “Attuazione delle Direttive 2002/95/CE,
2002/96/CE e 2003/108/CE, relative alla riduzione
dell’uso di sostanze pericolose nelle apparecchiature elettriche ed elettroniche, nonché allo smaltimento dei rifiuti”.
Il simbolo del cassonetto barrato riportato sull’apparecchiatura indica che il prodotto alla fine della
propria vita utile deve essere raccolto separatamente dagli altri rifiuti. L’utente dovrà, pertanto, conferire l’ apparecchiatura
giunta a fine vita agli idonei centri di raccolta dierenziata dei rifiuti elettronici
ed elettrotecnici, oppure riconsegnarla al rivenditore al momento dell’acquisto
di una nuova apparecchiatura di tipo equivalente, in ragione di uno a uno. L’adeguata raccolta dierenziata per l’avvio successivo dell’apparecchiatura dimessa
al riciclaggio,al trattamento e allo smaltimento ambientalmente compatibile
contribuisce ad evitare possibili eetti negativi sull’ambiente e sulla salute e
favorisce il riciclo dei materiali di cui è composta l’ apparecchiatura. Lo smaltimento abusivo del prodotto da parte dell’utente comporta l’ applicazione delle
sanzioni amministrative di cui al D.Lgs.n.22/1997” (articolo 50 e seguenti del D.Lgs.n.22/1997).
PREDISPOSIZIONE A CARICO DELL’ACQUIRENTE
INFORMAZIONE AGLI UTENTI
• Allorché si decida di non utilizzare più un appa-
recchio di questo tipo si raccomanda di renderlo
inoperante dopo aver staccato la spina, tagliare
il cavo di alimentazione.
• Non disperdere la macchina nell’ambiente: per
lo smaltimento rivolgersi ad un centro autorizzato o contattare il costruttore che darà indicazioni
in merito.
7
AURELIA WAVE DIGIT-T
3
• Predisposizione idrica.
Predisporre un idoneo scarico idrico e una rete idrica di alimentazione che fornisce acqua con durezza massima di 3/5° Francesi (60/85 ppm).
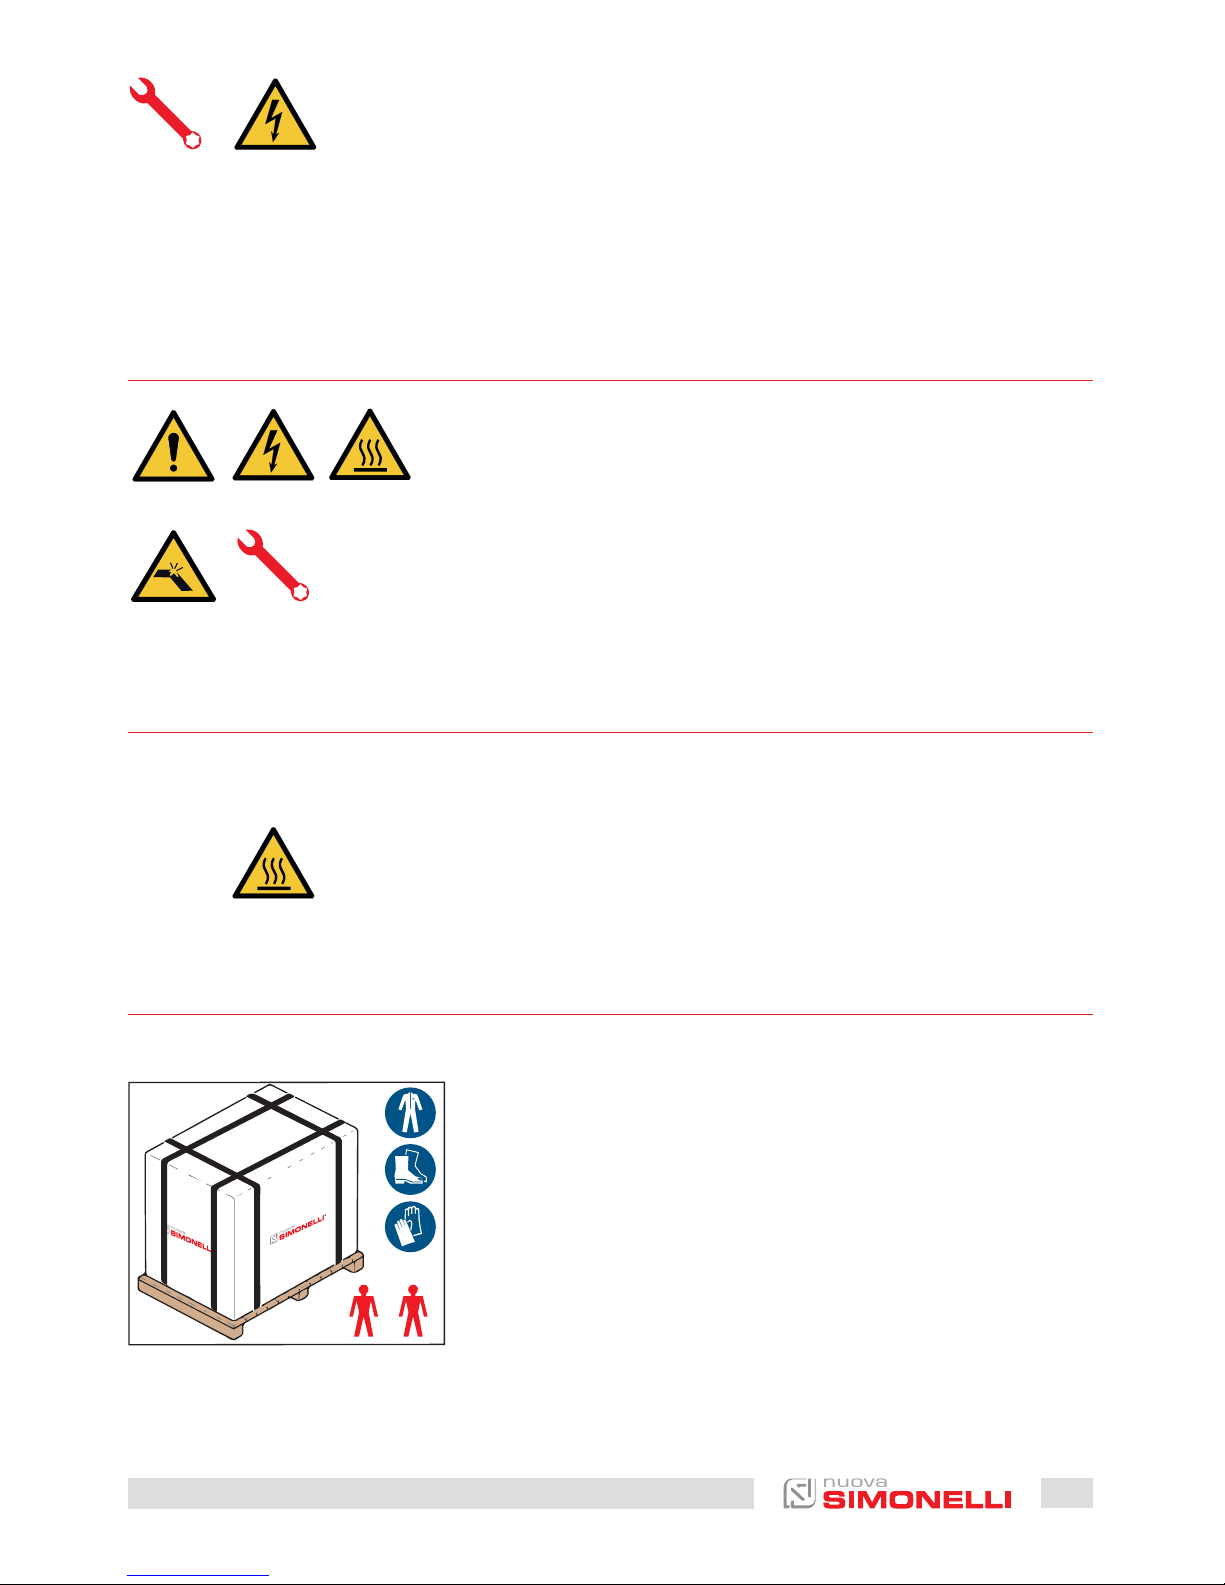
A Pericolo generico
B Pericolo di shock elettrico
C Pericolo di ustione
D Pericolo di danneggiamento macchina
E Operazione riservata al Tecnico Qualificato, nel
rispetto delle norme vigenti
I cavi elettrici di alimentazione devono essere dimensionati in funzione della massima corrente richiesta dalla macchina in modo che la caduta di
tensione totale, a pieno carico, risulti inferiore al 2%.
A
C
E
B
D
SIMBOLOGIE
RISCHI RESIDUI
Nonostante il Costruttore ha previsto dei sistemi di sicurezza meccanici ed elettrici, persistono delle zone pericolosa durante l’uso della macchina:
• Gruppi di erogazione caè.
• Lancia vapore.
• Lancia acqua calda.
• Scaldatazze.
La macchina viene trasportata in pallet con più
macchine dentro scatoloni assicurati al pallet con
delle centine.
Prima di procedere a qualsiasi operazione di trasporto o movimentazione, l’operatore deve indossare guanti e scarpe antinfortunistici ed una tuta
con elastici alle estremità.
La movimentazione della macchina deve essere
eseguita da 2 o più persone.
RICEZIONE MACCHINA
TRASPORTO
+

8
AURELIA WAVE DIGIT-T
3
• Sollevare lentamente il pallet a circa 30 cm da ter-
ra e raggiungere la zona di carico.
• Dopo aver verificato che non ci siano ostacoli,
cose o persone, procedere al carico.
• Una volta arrivati a destinazione, sempre con un
mezzo di sollevamento adeguato (es. muletto),
dopo essersi assicurati che non ci siano cose o
persone nell’area di scarico, portare il pallet a
terra e movimentarlo a circa 30 cm da terra, fino
all’area di immagazzinamento.
Il Costruttore declina ogni responsabilità per eventuali danni a cose o persone derivanti dall’inosservanza delle norme di sicurezza vigenti in materia di
sollevamento e spostamento di materiali.
La scatola contenente la macchina deve essere
stoccata al riparo dagli agenti atmosferici.
Prima della seguente operazione verificare che il
carico sia a posto e che con il taglio delle centine
non cada.
L’operatore con guanti e scarpe antinfortunistiche,
deve procedere al taglio delle centine e allo stoccaggio del prodotto, in questa operazione consultare le caratteristiche tecniche del prodotto per
vedere il peso della macchina da immagazzinare e
potersi regolare di conseguenza.
MOVIMENTAZIONE
STOCCAGGIO
> 50°C-5°C >
Una volta liberata la macchina del pallet o del contenitore, non disperderlo nell’ambiente.
DISIMBALLO

9
AURELIA WAVE DIGIT-T
3
Al ricevimento della scatola, verificare che l’imballo sia integro e visivamente
non danneggiato. All’interno dell’imballo deve esserci il libretto istruzioni e il relativo corredo.
In caso di danneggiamenti o anomalie, contattare il concessionario di zona.
Per qualsiasi comunicazione, citare sempre il numero di matricola.
La comunicazione deve essere eettuata entro 8 giorni dalla ricezione della
macchina.
1 Macchina (immagine esemplificativa)
2 Pressa caè (1 pz.)
3 Filtro singolo (1 pz.)
4 Filtro doppio (1 per ogni gruppo)
5 Filtro cieco (1 per ogni gruppo)
6 Molla (1 per ogni gruppo)
7 Portafiltro (n° gruppi + 1)
8 Beccuccio doppio (1 per ogni gruppo)
9 Beccuccio singolo (1 pz.)
10 Tubo carico 3/8” (1 pz.)
11 Tubo di scarico 3/4” (1 pz.)
A Modello e versione
B Numero di serie
C QR code
D Alimentazione elettrica
E Pressione di lavoro
F Frequenza
G Pressione max ingresso
H Optional
I Potenza
J Data di produzione
CONTROLLO CONTENUTI
1
J
I
H
11
11
2
3
4
5
6
7
8
9
10
A
B
C
D
FE G

10
AURELIA WAVE DIGIT-T
3
• The present manual is an integral and essential part of the product and is to be
delivered to the user. Carefully read all warnings in the manual as they provide
important information required to install, use and maintain the unit safely.
Keep this manual in a safe place for further consultation.
• This unit must only be used for the purposes described in the present manual.
The manufacturer cannot be held responsible for any damages caused by improper, mistaken and unreasonable use.
• Before using the machine, read this manual in its entirety or, at the very least,
read the safety and set up instructions.
• The appliance is not to be used by children or persons with reduced physical,
sensory or mental capabilities, or lack of experience and knowledge, unless
they have been given supervision or instruction. Children must not play with
the appliance. Cleaning and maintenance must not be carried out by children
unless supervised.
• Aer having removed the packaging, make certain that the unit is not dam-
aged in any way. If you have any doubts, do not use the unit and contact a
professionally qualified person. Always keep all packaging (plastic bags, polystyrene foam, nails, etc..) out of the reach of children as they are a potential
source of danger and never loiter the environment with such materials.
• The machine is can be installed in sta kitchen areas in shops, oices and oth-
er working environments, farm houses by clients in hotels, motels and other
residential type environments bed and breakfast type environments.
• The device can be installed only in places where the use and maintenance is
limited to qualified personnel.
• The appliance must not be installed where it may be used water jets.
• The noise level of the machine is less than 70db.
• To facilitate aeration of the unit, position the aeration portion of the machine
15 cm from walls or other machinery.
• Remember that to install, maintain, unload and regulate the unit, the qualified
operator must always wear work gloves and safety shoes.
• Before turning on the unit make certain that the rating indicated on the label
matches the available power supply. The nameplate can be seen inside the
machine when removing the water collection tray. The machine must be installed according to the applicable federal, state and local standards (codes) in
force with regard to plumbing systems including back-flow prevention devices. For this reason, the plumbing connections must be carried out by a qualified technician. The warranty expires if the characteristics of the power supply
do not correspond to the nameplate data.
EN SAFETY INDICATIONS

11
AURELIA WAVE DIGIT-T
3
• When installing the device, it is necessary to use the parts and materials sup-
plied with the device itself. Should it be necessary to use other parts, the installation engineer needs to check their suitability for use in contact with water
for human consumption. The installer must Make the hydraulic connections
respecting the rules of hygiene and water safety to environmental protection
in force in the place of installation. So for the hydraulic plant contact an authorized technician. Always utilise the new hose supplied for connection to the
water supply. Old hoses must not be utilised.
• On installation, the qualified electrician must fit a circuit breaker switch as
foreseen by the safety norms in force that has a contact open distance that
permits the complete disconnection under conditions of overload category III.
• The manufacturer cannot be held responsible
for any damages incurred if the system is not
grounded.
For electrical safety, this machine requires a
ground system. Contact a technically certified
electrician who must check that the line electrical capacity is adequate for the maximum capacity indicated on the unit label.
• There are some basic rules for the use of any electrical appliance. In particular:
• Never touch the unit with wet hands or feet;
• Never use the unit with bare feet;
• Never use extension cords in areas equipped with baths or showers;
• Never pull on the power supply cord to unplug the unit;
• Never leave the unit exposed to atmospheric agents (rain, direct sunlight,
etc..);
• Never let children, unauthorized personnel or anyone who has not read this
manual operate the unit.
• The qualified electrician must also check that the section of the installation’s
cables is large enough for the absorbed power of the appliance.
• Never use adapters, multiple jacks or extension cords. When such items prove
absolutely necessary, call in a qualified electrician.
• To prevent dangerous overheating, it is advisable to fully extend the power
supply cord. Never block the intake and/or heat dissipation grills, in particular
those for the cup warmer.
• The user must never replace the unit’s power supply cord. If this cord is dam-
aged, turn o the unit and have it replaced by a professionally qualified technician.
• Should it be necessary to replace the power cord, this replacement operation
must only be performed by an authorized service centre or by the manufacturer.

12
AURELIA WAVE DIGIT-T
3
• The device needs to be supplied with water that is suitable for human consump-
tion and compliant with the regulations in force in the place of installation. The
installation engineer needs confirmation from the owner/manager of the system
that the water complies with the requirements and standards stated above.
• For machines connected to the mains water supply, the minimum pressure
must be 2 bar and the maximum pressure for correct machine operation must
not exceed 4 bar.
• The operating temperature must be within the range of [+5, +30]°C.
• At the end of installation, the device is switched on and taken to rated operat-
ing conditions, leaving it in a state in which it is “ready for operation”.
• Aer reaching the “ready for operation” condition, the following dispensing
operations are carried out:
• 100% of the coee circuit through the coee dispenser (for more than one
dispenser, this is divided equally);
• Open the steam outlet for 1 minute.
At the end of installation, it is good practice to draw up a report of the operations.
• It is forbidden to leave the machine switched on without the presence and sur-
veillance of a qualified operator. Simonelli Group is not responsible for damages caused by failure to comply with this prohibition.
• When adding the coee, the operator must never put his hands into the con-
tainer.
• Be extremely careful when using the steam nozzle. Never place your hands un-
der the nozzle and never touch it right aer use.
• Before cleaning the unit follow the instructions given in this manual carefully.
• Once started the washing machine, do not interrupt, the detergent residue
may remain inside the delivery unit.
• In case of breakdown or poor function, turn o the unit. Never tamper with the
unit. Contact only professionally qualified personnel. Only the manufacturer
or an authorized service center can make repairs and only using original spare
parts. Non compliance with the above can compromise machine safety.
• In case of fire, disconnect power to the machine by turning o the main switch.
Its absolutely avoid to extinguish the fire with water while power to the machine is on.
• Before performing any sort of maintenance, the authorized technician must
turn o the unit and unplug it from the mains.

13
AURELIA WAVE DIGIT-T
3
• Preparation of the installation site.
The purchaser must prepare the surface on which the machine will stand suitable to support the machine weight (see the installation chapter).
• Electrical requirements.
The mains power installation must comply with the safely regulations and
standards in force in the country of installation and must include an eicient
earth system.
An omnipolar cut-o device must be installed on the power line
upstream of the machine.
Under the senses of the Directives/ Guidelines
2011/65/EU concerning the reduction of the use
of dangerous substances in electric and electronic
equipment, as well as the disposal of wastes“.
The symbol of the crossed large rubbish container
that is present on the machine points out that the
product at the end of its life cycle must be collected
separately from the other wastes. The user for this
reason will have to give the equipment that got to
its life cycle to the suitable separate waste collection centres of electronic and
electro-technical wastes, or to give it back to the seller or dealer when buying a
new equipment of equivalent type, in terms of one to one.
The suitable separate waste collection for the following sending of the disused
equipment to recycling, the dealing or handling and compatible environment
disposal contributes to avoid possible negative eects on the environment and
on the people’s health and helps the recycling of the materials the machine is
composed of. The user’s illegal disposal of the product implies the application
of administrative fines as stated in Law Decree n.22/1997” (article 50 and followings of the Law Decree n.22/1997).
PREPARATION BY THE PURCHASER
INFORMATION TO THE USERS
• Should you decide to stop using this type of unit,
we suggest you render it inoperable by unplugging it and cutting the power supply cord.
• Never dispose of the machine in the environ-
ment: to dispose of the machine, contact an authorized center or contact the manufacturer for
pertinent indications.

14
AURELIA WAVE DIGIT-T
3
• Plumbing requirements.
Prepare a suitable drain and a mains that supply water a maximum hardness
of 3/5 French degrees (60/85 ppm).
A General hazard
B Electrical shock hazard
C Burns hazard
D Hazard of damage to the machine
E Operation reserved for the qualified technician,
in compliance with current standards
The power wires must be sized according to the maximum current required by the machine to ensure a
total voltage loss under full load of less than 2%.
A
C
E
B
D
SYMBOLS
RESIDUAL RISKS
Although the manufacturer has provided mechanical and electrical safety systems, dangerous areas persist during the use of the machine:
• Coee dispensing groups.
• Steam wand.
• Hot water wand.
• Cup warmer.
The machine is transported on pallets containing
several machines inside cartons strapped to the
pallet.
Operators performing any shipping or handling operations must wear gloves, safety shoes and overalls with elasticized cus.
The machine must be moved by 2 or more operators.
MACHINE RECEIVING
TRANSPORT
+

15
AURELIA WAVE DIGIT-T
3
• Slowly li the pallet about 30 cm from the ground
and reach the loading area.
• Aer checking that there are no obstacles, things
or people, proceed with the loading.
• Once you arrive at your destination, always with
a suitable liing device (e.g. forkli), aer making sure that there are no things or people in the
unloading area, take the pallet to the ground and
move it about 30 cm from the ground, until to the
storage area.
Failure to respect current safety regulations and
standards on liing and handling materials absolves the Manufacturer from all liability for possible damage to person or things.
The package containing the machine must be
stored away from atmospheric agents.
Before performing the following operations, make
certain that the load is in stable and will not fall
when the straps are cut.
Wearing gloves and safety shoes, the operator must
cut the straps and store the product. During this operation, see the product technical features for the
weight of the machine being stored and proceed as
necessary.
MOVEMENTS
STOCCAGGIO
> 50°C-5°C >
Once the machine has been released from the pallet or container, do not pollute the environment
with these items.
UNPACKING

16
AURELIA WAVE DIGIT-T
3
Upon receipt of the box, check that the packaging is intact and visually undamaged. Inside the packaging must be the instruction manual and the relative kit.
In case of damage or faults, contact your local dealer.
For any communication, always communicate the serial number.
The communication must be carried out within 8 days from the receipt of the
machine.
1 Machine (example image)
2 Coee tamper (1 unit)
3 Single filter (1 unit.)
4 Double filter (1 for each group)
5 Blind filter (1 for each group)
6 Spring (1 for each group)
7 Filter-holder (group number + 1)
8 Double delivery spout (1 for each group)
9 Single delivery spout (1 for each group)
10 Filling tube 3/8” (1 unit)
11 Draining pipe 3/4” (1 unit)
A Model and version
B Serial number
C QR code
D Power supply
E Operating pressure
F Frequency
G Max inlet pressure
H Optional
I Power
J Production date
CONTENTS CHECK
1
J
I
H
11
11
2
3
4
5
6
7
8
9
10
A
B
C
D
FE G

17
AURELIA WAVE DIGIT-T
3
IT
COSTRUTTORE:
SIMONELLI GROUP - Via E. Betti, 1 - Belforte del Chienti, Macerata (MC) - Italy
MACCHINA DA CAFFÈ MODELLO: AURELIA WAVE DIGIT T
3
EN
MANUFACTURER:
SIMONELLI GROUP - Via E. Betti, 1 - Belforte del Chienti, Macerata (MC) - Italy
COFFEE MACHINE MODEL: AURELIA WAVE DIGIT T
3
1
INFORMAZIONI GENERALI
GENERAL INFORMATIONS

18
AURELIA WAVE DIGIT-T
3
2
DATI TECNICI
TECHNICAL DATA
X
Z
Y
A

19
AURELIA WAVE DIGIT-T
3
Versione
Version
DIGIT T
3
Gruppi
Groups
234 2 3
Voltaggio
Voltage
V 230/380 230/380
Potenza (con scaldatazze)
Power (with cup warmer)
W 5100 5900 6000 7000 8750
Potenza (senza scaldatazze)
Power (without cup warmer)
W 4700 5400 5400 6600 8250
Capacità caldaia caffè*
Coffee boiler capacity*
l / 0,8 0,8
Capacità caldaia vapore
Steam boiler capacity
l 14 17
22
14 17
Peso netto
Net weight
kg/lb 78/172 92/203
108/238
80/176 95/209
Peso lordo
Gross weight
kg 84/105
102/205 124/273
86/190 105/231
Livello sonoro
Noise level
dB <70 <70
Dimensioni / Dimensions
X
mm
inch
802
31 9/16’’
1032
40 10/16’’
1262
49 11/16’’
802
31 9/16’’
1032
40 10/16’’
Y
mm
inch
537
21 2/16’’
537
21 2/16’’
Z
mm
inch
605
23
1
3/16’’
605
23 13/16’’
A
mm
inch
135 - 180
5,3 - 7,1
135 - 180
5,3 - 7,1
IT
* capacità per ogni caldaia caèEN* capacity for each coee boiler

1.21 bar
°C
102.55
°C
90.58
°C
98.00
SUNDAY 20 MAY 12:34
20
AURELIA WAVE DIGIT-T
3
3
DESCRIZIONE MACCHINA
MACHINE DESCRIPTION
14 10
13
12
11
1
4
2
3
5
6
7
8
9
10
P1 P11
P11
P10P9P8
P16
P7P6P2 P12
P12
P3
P3
P13
P13
P4
P4
P14P5
P5
P15

21
AURELIA WAVE DIGIT-T
3
IT
1 Display touch screen
2 Regolatore Easycream (opt)
3 Scaldatazze
4 Display Easycream (opt)
5 Lancia Easycream (opt)
6 Gruppo erogazione
7 Griglia
8 Lancia acqua calda
9 Lancia vapore
10 Piedino macchina
11 Manometro
12 Led esterno
13 Leva vapore
14 Regolatore acqua calda
P1 Vapore 1
P2 Vapore 2
P3 Acqua calda 1
P4 Acqua calda 2
P5 Acqua calda 3
P6 1 caè corto
P7 2 caè corti
P8 Caè continuo
P9 1 caè lungo
P10 2 caè lunghi
P11 Lavaggio
P12 ON/OFF scaldatazze
P13 ON/OFF macchina
P14 Vapore 1(T3-DIGIT-V)
P15 Vapore 2(T3-DIGIT-V)
P16 START/STOP caè
EN
1 Touch screen display
2 Easycream regulator (opt)
3 Cup warmer
4 Easycream display (opt)
5 Easycream wand (opt)
6 Dispensing group
7 Grid
8 Hot water wand
9 Steam wand
10 Machine feet
11 Pressure gauge
12 External led
13 Steam lever
14 Hot water regulator
P1 Steam 1
P2 Steam 2
P3 Hot water 1
P4 Hot water 2
P5 Hot water 3
P6 1 short coee
P7 2 short coees
P8 Continuously coee
P9 1 long coee
P10 2 long coees
P11 Washing
P12 Cup warmer ON/OFF
P13 Machine ON/OFF
P14 Steam 1(T3-DIGIT-V)
P15 Steam 2(T3-DIGIT-V)
P16 Coee START/STOP
IT
Per ogni gruppo di erogazione, è presente un display che visualizza il tempo di erogazione. Se presente
il sistema Easycream (optional), ogni lancia vapore è provvista del relativo display e regolatore.
EN
For each delivery group, there is a display that displays the delivery time. If the Easycream system (optional) is present, each steam wand is provided with the relevant display and regulator.

22
AURELIA WAVE DIGIT-T
3
IT
3.1
USO PREVISTO
• Macchina progettata e co-
struita rispettando quanto
espresso nella dichiarazione
di conformità.
• Deve essere utilizzata da
professionisti del settore per
l’erogazione di caè, acqua e
vapore.
• È stata prevista una zona per
il preriscaldamento delle tazzine. Solo per questo utilizzo
deve essere utilizzata, qualsiasi altro utilizzo è da considerarsi uso improprio e quindi
pericoloso.
EN
3.1
INTENDED USE
• Machine designed and built re-
specting what is expressed in
the declaration of conformity.
• It must be used by profes-
sionals in the sector for the
supply of coee, water and
steam.
• An area for the preheating
of the cups has been provided. Only for this use must be
used, any other use is to be
considered improper use and
therefore dangerous.

23
AURELIA WAVE DIGIT-T
3
IT
3.2
USO IMPROPRIO
In questo paragrafo sono elencate solo alcune situazioni di
uso scorretto ragionevolmente
prevedibile.
L’uso corretto della macchina
deve rispettare quanto dichiarato nel presente manuale.
• Uso da operatori non profes-
sionisti.
• Uso di liquidi diversi da acqua
potabile addolcita con durezza massima di 3/5° Francesi
(60/85 ppm).
• Toccare con le mani i gruppi
di erogazione.
• Introdurre nei portafiltri, cose
o materiali diversi da caè.
• Posizionare sullo scaldatazze
altri oggetti diversi da tazze e
tazzine.
• Appoggiare contenitori con
liquidi sullo scaldatazze.
• Riscaldare bevande o altre
sostanze non alimentari.
• Ostruire le griglie di areazio-
ne con panni o altro, o coprire
lo scaldatazze con panni.
• Utilizzare la macchina bagna-
ta.
EN
3.2
IMPROPER USE
This chapter lists a number of
reasonably foreseeable improper uses. The machine must,
however, always be used in respect of the instructions given
in this manual.
• Use by non-professional op-
erators.
• Introduction of liquids other
than soened drinking water
with a maximum hardness
of 3/5 French degrees (60/85
ppm).
• Touching the delivery areas
with the hands.
• Introduction, into the filter
holder, ground dierent than
coee.
• Placing objects other than
cups on the cup warmer.
• Resting containers of liquid
on the cup warmer.
• Heating drinks or other non-
food substances.
• Covering the cup warmer
with cloths.
• Obstructing the vents with
cloths or other items.
• Using the machine if wet.

>900 mm
100
mm
> 30°C5 >
24
AURELIA WAVE DIGIT-T
3
4
INSTALLAZIONE
INSTALLATION
IT
Per sollevare la macchina sono
necessarie almeno 2 persone.
EN
To li the machine are necessary 2 or more operators.
4.1
POSIZIONAMENTO
Prima di installare la macchina,
controllare che l’area adibita sia
compatibile con le dimensioni
d’ingombro e il peso della stessa.
• Posizionare la macchina su
un piano orizzontale alto almeno 900 mm da terra.
• Mantenere almeno 100 mm
attorno alla macchina per
una corretta ventilazione.
• Regolare la macchina agendo
sui piedini.
4.1
POSITIONING
Before installing the machine,
make sure the area where it will
be installed is compatible for
the size and weight of the machine.
• Position the machine on a
horizontal plane at least 900
mm high from the ground.
• Keep at least 100 mm around
the machine for proper ventilation.
• Adjust the machine by acting
on the feet.

25
AURELIA WAVE DIGIT-T
3
4.2
ALLACCIAMENTO IDRICO
Evitare strozzature nei tubi di
collegamento. Verificare che lo
scarico sia in grado di eliminare gli scarti. È vietato utilizzare
tubi di collegamento già usati in
passato. La manutenzione dei
filtri è a carico dell’acquirente.
1 Filtro a maglia
2 Addolcitore
3 Scarico 50 mm
Non mantenere l’acqua entro le
dovute specifiche comporta il
decadimento della garanzia.
SPECIFICHE ACQUA
• Durezza totale 50-60 ppm
(parti per milione).
• Pressione rete idrica tra 2 e 4
bar (acqua fredda).
• Flusso minimo: 200 l/ora
• Filtrazione inferiore a 1.0 mi-
cron.
• Residuo fisso (tds: total dis-
solved solids) tra 50 e 250
ppm.
• Alcalinità tra 10 e 150 ppm.
• Cloro inferiore a 0,50 mg/l.
• ph tra 6,5 e 8,5.
4.2
WATER CONNECTION
Avoid throttling in the connecting tubes. Assess that the drain
pipe is able to eliminate waste.
It is forbidden to use connecting pipes already used in the
past. Filter maintenance is the
responsibility of the purchaser.
1 Mesh filter
2 Soener
3 Drain 50 mm
Failing to maintain water into
the correct levels will void the
warranty.
WATER SPECIFICATIONS
• Total hardness 50-60 ppm
(parts per million).
• Water line pressure between
2 – 4bar and water to be cold.
• Min flow rate: 200 l/hr.
• Filtration level below 1.0 mi-
cron.
• tds (total dissolved solids)
level between 50 – 250 ppm.
• Alkalinity level between 10 –
150 ppm.
• Chlorine level less than 0.50
mg/l.
• ph level between 6.5 and 8.5.
1
2
3

26
AURELIA WAVE DIGIT-T
3
IT
4.3
ALLACCIAMENTO ELETTRICO
Prima di allacciare la macchina
a una rete elettrica verificare
che i dati indicati sulla targa
della macchina corrisponda a
quello della rete.
SPECIFICHE ELETTRICHE
A 380 V - 3 fasi + neutro
B 230 V - monofase
1 Nero
2 Grigio
3 Marrone
4 Blu
5 Giallo-verde
EN
4.3
ELECTRICAL CONNECTION
Prior to connecting the machine
to the electrical mains, assess
that the voltage shown on the
machine’s data plate corresponds with that of the mains.
ELECTRICAL SPECIFICATIONS
A 380 V - 3 phases voltage +
Neutral
B 230 V - monophase voltage
1 Black
2 Gray
3 Brown
4 Blue
5 Yellow - green
1234
5
A
1234
5
B

27
AURELIA WAVE DIGIT-T
3
IT
4.4
OPERAZIONI PRELIMINARI
Al termine dell’installazione,
il dispositivo viene attivato e
portato fino alla condizione nominale di lavoro lasciandolo in
condizioni di “pronto al funzionamento”.
Dopo il raggiungimento dello
stato di “pronto al funzionamento” si eettuano le seguenti
erogazioni:
• 100% del circuito caè at-
traverso l’erogatore caè
(per più erogatori si divida in
uguale misura);
• Apertura dell’uscita vapore
per 1 minuto;
• Svuotamento completo del-
la caldaia vapore. Ripetere
l’intera operazione almeno 3
volte.
Al termine dell’installazione sarebbe buona regola stilare un
rapporto di quanto eettuato.
EN
4.4
PRELIMINARY OPERATIONS
At the end of installation, the
device is switched on and taken
to rated operating conditions,
leaving it in a state in which it is
“ready for operation”.
Aer reaching the “ready for operation” condition, the following dispensing operations are
carried out:
• 100% of the coee circuit
through the coee dispenser
(for more than one dispenser,
this is divided equally);
• Open the steam outlet for 1
minute;
• Complete emptying of the
steam boiler. Repeat this operation at least 3 times.
At the end of installation, it is
good practice to draw up a report of the operations.

28
AURELIA WAVE DIGIT-T
3
5
REGOLAZIONI DEL TECNICO QUALIFICATO
QUALIFIED TECHNICIAN ADJUSTMENTS
IT
Le operazioni di seguito descritte devono essere svolte solo da
tecnici specializzati.
Il Costruttore non risponde di
alcun danno a cose o persone
derivante da una mancata osservanza di quanto sopra detto.
EN
The operations described below must be carried out only by
specialized technicians.
The Manufacturer is not responsible for any damage to things
or persons deriving from a failure to comply with the above.
5.1
REGOLAZIONE
ECONOMIZZATORE
ACQUA CALDA
Operazione eseguibile anche a
macchina accesa.
Agire con un cacciavite sulla vite
posta nella parte superiore della macchina:
• Ruotare in senso ORARIO per
DIMINUIRE la temperatura
dell’acqua calda;
• Ruotare in senso ANTIORA-
RIO per AUMENTARE la temperatura dell’acqua calda.
5.1
HOT WATER
ECONOMISER
ADJUSTMENT
Operation carried out whit the
machine turned on.
Act with a screwdriver on the
screw located at the top of the
machine:
• Turn the adjustment screw
CLOCKWISE to DECREASE the
temperature of the hot water.
• Turn the adjustment screw
ANTICLOCKWISE to INCREASE the temperature of
the hot water.

29
AURELIA WAVE DIGIT-T
3
IT
5.2
SOSTITUZIONE
BATTERIA OROLOGIO
La centralina elettronica è provvista di una batteria al litio per
l’alimentazione dell’orologio
con autonomia di circa tre anni,
dopodiché può rendersi necessaria la sostituzione.
In caso di stop prolungato della
macchina, l’orologio può essere
bloccato.
Con la macchina che visualizza
OFF sul display, mantenere premuto il tasto lavaggio fino alla
comparsa della scritta “Orologio disabilitato”.
EN
5.2
REPLACING
THE CLOCK BATTERY
The electronic control unit has
a lithium battery to power the
clock; the battery has an autonomy of about three years,
aer which it will need to be
replaced.
In case of an extended period
of machine stoppage, the clock
can be stopped:
With the machine that displays
OFF, hold the cleaning button
until the emergence of the written “disabled Clock”.

30
AURELIA WAVE DIGIT-T
3
6
UTILIZZO
USE
IT
L’operatore deve prima di iniziare la lavorazione, accertarsi
di aver letto e ben compreso le
prescrizioni di sicurezza di questo manuale.
EN
Before starting to use the appliance, the operator must be sure
to have read and understood
the safety prescriptions contained in this booklet.
6.1
ACCENSIONE/
SPEGNIMENTO
DELLA MACCHINA
• Premere “I” per accendere la
macchina.
• Premere “0” per spegnere la
macchina.
Nel caso in cui l’autodiagnosi indichi anomalie o guasti, l’operatore NON DEVE intervenire; contattare il Centro di Assistenza.
Sul display:
• Illuminato: compare la ver-
sione del firmware per circa 1
secondo.
• Non illuminato: compare la
scritta OFF.
La macchina non è operativa, in
quanto l’interruttore generale
permette solo l’alimentazione
della scheda elettronica.
In caso di manutenzione alla
scheda elettronica, spegnere la
macchina tramite l’interruttore
generale esterno o scollegare il
cavo di alimentazione.
If the self-diagnostics report
anomalies or failures, the operator MUST NOT intervene.
Please contact the Assistance
Centre.
On the display:
• Illuminated: appear the firm-
ware version for about 1 second.
• Not illuminated: appear the
message OFF.
The machine is not operational,
since the main switch only powers the electronic card.
For electronic card maintenance, turn the machine o
by means of the external main
switch or disconnect the plug.
6.1
SWITCHING
THE MACHINE
ON/OFF
• Press “I” to switch on the ma-
chine.
• Press “0” to switch o the
machine.

31
AURELIA WAVE DIGIT-T
3
IT
6.1.1
ACCENSIONE /
SPEGNIMENTO MANUALE
ON - OFF Automatico
NON PROGRAMMATO
Assicurarsi che l’interruttore generale sia sempre in posizione
“I”.
ACCENSIONE
Premere il pulsante accensione/
spegnimento per circa 2 secondi fino all’illuminazione della
spia. La centralina effettua l’autodiagnosi delle funzioni, tutti i
tasti di selezione si illuminano.
Terminata la diagnosi, sul display compare la “Home Page”
Tutti i tasti di selezione sono
abilitati sin dalla fine della diagnosi.
SPEGNIMENTO
Premere il pulsante accensione/spegnimento per circa 2
secondi fino allo spegnimento
della spia.
La macchina si spegne e sul display è indicato OFF.
EN
6.1.1
MANUAL
SWITCHING ON/OFF
Automatic On/O
NOT PROGRAMMED
Make sure that the general
switch is always on the position
“I”.
SWITCH ON
Press the ON/OFF button for
about 2 seconds until the light
switches on. The control unit
will start up an auto diagnosis
cycle to check the functions, all
the selection keys will light up.
After the diagnostics stage, the
“Home Page” will open on the
screen”:
On completion of the check up
all the selection keys are activated.
SWITCHING OFF
Press the ON/OFF button for
about 2 seconds, until the light
switches o.
The machine will switch o and
the display will read OFF.
1.21 bar
°C
102.55
°C
90.58
°C
98.00
SUNDAY 20 MAY 12:34

32
AURELIA WAVE DIGIT-T
3
IT
ON - OFF Automatico
PROGRAMMATO
Assicurarsi che l’interruttore generale sia sempre in posizione
“I”.
La macchina si ACCENDERÀ al
primo orario di accensione programmato.
La centralina eettua l’autodiagnosi delle funzioni, tutti i tasti
di selezione si illuminano.
Terminata la diagnosi, sul display compare la “Home Page”.
Tutti i tasti di selezione sono
abilitati sin dalla fine della diagnosi.
La macchina si SPEGNERÀ al
primo orario di spegnimento
programmato.
STAND BY
Se la macchina è in stand by,
premere il tasto di accensione
(P13).
Per maggiori informazioni, vedere il paragrafo GESTIONE POTENZA.
EN
Automatic On/O
PROGRAMMED:
Make sure that the general
switch is always on the position
“I”.
The machine will SWITCH ON at
the first programmed switch-on
time.
The control unit will perform an
auto diagnosis of all functions
and all of the selection keys will
light up.
Aer the diagnostics stage, the
“Home Page” will open on the
screen.
Once the auto diagnosis has
been completed all the keys are
activated.
The machine will SWITCH OFF
at the first time set for stopping
the coee maker.
STAND BY
If the machine is in stand by,
press the ON/OFF button (P13).
For more information see the
POWER MANAGEMENT paragraph.
P13

33
AURELIA WAVE DIGIT-T
3
IT
6.2
EROGAZIONE CAFFÈ
Dopo aver messo a punto la
macchina:
• Inserire il filtro desiderato
(singolo o doppio all’interno
del portafiltro).
• Riempire il filtro con caè op-
portunamente macinato.
• Pressare il caè nel filtro in
maniera uniforme con l’apposito pressino.
• Pulire dai residui di polvere
di caè il bordo anulare del
filtro.
• Prima di inserire il portafil-
tro nel gruppo, è necessario
spurgare per almeno 2 secondi l’acqua presente nel circuito del gruppo attivando e
disattivando l’erogazione.
• Inserire il portafiltro nel grup-
po erogazione.
• Posizionare la/le tazzina/e
sotto i beccucci e premere il
pulsante caè desiderato.
Al termine di ogni erogazione di
caè lasciare il portafiltro innestato al gruppo ainché rimanga sempre caldo.
EN
6.2
COFFEE DISPENSING
After commissioning the machine:
• Insert the desired filter (sin-
gle or double inside the filter
holder).
• Fill the filter with coee ap-
propriately ground.
• Press the coee in the filter
uniformly using the appropriate presser.
• Clean the edge of the filter of
coee residues and insert the
filter holder into the dispensing unit.
• Before insert the filter holder,
the group must be purged for
at least 2 seconds to refresh
the water present in the circuit,
turning on and o the supply.
• Insert the filter holder inside
the dispensing group.
• Position the cup/s under the
spout/s and press the desired
coee button.
At the end of each coffee dispensing leave the filter-holder
inserted in the unit so that it will
keep warm.
11
2
2

34
AURELIA WAVE DIGIT-T
3
IT
6.3
EROGAZIONE VAPORE
Durante l’uso della lancia del
vapore, prestare molta attenzione a non mettere le mani sotto di essa e non toccarla subito
dopo.
Prima di usare la lancia vapore,
eseguire lo spurgo della condensa per almeno 2 secondi.
Tirare o spingere la leva vapore.
Tirando completamente, la leva
rimane bloccata nella posizione
di massima erogazione, spingendo, il ritorno della leva è automatico.
6.4
PREPARAZIONE
DEL CAPPUCCINO
Immergere il beccuccio del vapore in fondo al recipiente di
latte pieno per 1/3.
Aprire il vapore.
Prima che il latte abbia raggiunto la temperatura desiderata,
spostare il beccuccio del vapore
in superficie facendo sfiorare il
latte con piccoli spostamenti in
senso verticale.
Alla fine dell’operazione pulire
accuratamente la lancia con un
panno morbido.
EN
6.3
STEAM DISPENSING
While using the steam nozzle,
you must pay attention to not
place your hands beneath it
or touch just aer it has been
used.
Before use the steam wand,
cleaning out of the condensation for at least 2 seconds.
Pull or push the steam lever.
By pulling it completely the lever will hold a position of maximum delivery; by pushing it,
the lever will automatically give
way.
6.4
MAKING
CAPPUCCINO
Immerse the nozzle all the way
into a container 1/3 full of milk.
Turn on the steam.
Before the milk has reached the
desired temperature, pull the
nozzle slightly up and lightly
move it vertically across the
surface of the milk.
When you have completed the
procedure, clean the nozzle
carefully with a so cloth.

35
AURELIA WAVE DIGIT-T
3
IT
6.5
EROGAZIONE ACQUA CALDA
Durante l’uso della lancia
dell’acqua calda, prestare molta attenzione a non mettere le
mani sotto di essa e non toccarla subito dopo.
Prima di usare la lancia dell’acqua calda, eseguire lo spurgo
del circuito idraulico per almeno 2 secondi.
• Posizionare sotto la lancia ac-
qua calda un contenitore.
• Premere una volta sul pul-
sante selezione acqua calda,
la spia si illumina.
Dalla lancia acqua calda verrà
erogata acqua per un tempo
equivalente al valore programmato o ripremere il pulsante
per interrompere l’erogazione.
L’erogazione dell’acqua calda
può avvenire contemporaneamente a quella del caè.
EN
6.5
HOT WATER DISPENSING
While using the hot water nozzle, pay careful attention not
to place your hands beneath it
or touch it just aer it has been
used.
The use of the hot water wand
must always be preceded by the
purge of the hydraulic circuit for
at least 2 seconds.
• Place a suitable container un-
der the hot water nozzle.
• Press the hot water select
button once; the light will
switch on.
The hot water wand will deliver
water for the amount of time
equivalent to the set value or
press the button again to stop
pouring.
Hot water can be delivered at
the same time as coee.
6.6
EASYCREAM (optional)
Durante l’uso dell’Easycream,
prestare molta attenzione a non
mettere le mani sotto di essa e
non toccarla subito dopo.
• Consente l’erogazione del
vapore misto ad aria. La temperatura e la quantità di aria
sono programmabili, controllate da una sonda di temperatura e vengono impostate in
fase di programmazione.
• Premere il tasto vapore, la
spia si illumina.
Eseguire sempre lo spurgo prima dell’erogazione. L’erogazione del vapore può avvenire contemporaneamente a quella del
caè e terminerà nel momento
in cui si è raggiunta la temperatura del liquido impostata.
6.6
EASYCREAM (optional)
When using Easycream, take
great care not to place your
hands underneath it and never
touch it immediately aerwards.
• This serves to deliver steam
mixed with air. The temperature and the quantity of
air are programmable, controlled by a temperature
probe and are set during the
programming phase.
• Press the steam button, the
light will switch on.
Always purge before dispensing. The steam can be delivered
at the same time as coee and
the delivery will stop as soon as
the set temperature for the liquid is reached.

36
AURELIA WAVE DIGIT-T
3
7
PROGRAMMAZIONE
PROGRAMMATION
12 345 6 7 8
1.21 bar
°C
102.55°C90.58
°C
98.00
SUNDAY 20 MAY 12:34
IT
ZONE SENSIBILI
EN
SENSIBLE AREAS
M
A
B
C
D

37
AURELIA WAVE DIGIT-T
3
IT
Le schermate descritte nel presente manuale sono puramente
indicative.
HOME PAGE
A Pressione vapore e barra
informazioni
B Temperatura gruppi
C Icone gruppi
D Tempo di infusione
Premere (M) per accedere al
menu principale.
MENU PRINCIPALE
1 My coees
2 Impostazione tasti e display
3 Programma dosi
4 Pulizia macchina
5 Gestione potenza
6 Impostazione temperature
7 Contatori
8 Impostazioni
Premere una delle icone per accedere al relativo menù.
Interagire con il display della
macchina premendo sulle aree
sensibili.
EN
The screens described in this
manual are indicative only.
HOME PAGE
A Steam pressure and
informations bar
B Groups temperature
C Groups icon
D Brewing time
Press (M) to access the main
menu.
MAIN MENU
1 My coees
2 Display and button settings
3 Dose programming
4 Machine cleaning
5 Power management
6 Temperature settings
7 Counters
8 Settings
Press one of the icons to access
the relative menu.
Interact with the machine display by pressing on the sensitive areas.

38
AURELIA WAVE DIGIT-T
3
IT
7.1
MY COFFEES
Selezionare una ricetta impostata (max 12) per procedere
all’erogazione.
1 Ricetta impostata
2 Aggiungi ricetta
A Al menu precedente
B Al menu principale
C Pagina precedente
D Pagina successiva
EN
7.1
MY COFFEES
Select a recipe set (max 12) to
proceed with the dispensing.
1 Recipe set
2 Add recipe
A To the previous menu
B To the main menu
C Previous page
D Next page
DISPONIBILE SOLO NELLA
VERSIONE SOFTWARE
DEFINITIVA
AVAILABLE ONLY IN THE
EXECUTIVE SOFTWARE
VERSION
1
2
A CB D

39
AURELIA WAVE DIGIT-T
3
IT
7.1.1
ATTIVA RICETTA
Selezionare il gruppo in cui attivare la ricetta impostata.
1 Gruppo 1
2 Gruppo 2
3 Gruppo 3
4 Gruppo 4
A Al menu precedente
B Al menu principale
C Pagina precedente
D Pagina successiva
EN
7.1.1
ACTIVE RECIPE
Select the group to activate the
set recipe.
1 Group 1
2 Group 2
3 Group 3
4 Group 4
A To the previous menu
B To the main menu
C Previous page
D Next page
DISPONIBILE SOLO NELLA
VERSIONE SOFTWARE
DEFINITIVA
AVAILABLE ONLY IN THE
EXECUTIVE SOFTWARE
VERSION
A CB D
1 2 3 4

100 °C
91 °C
17 g
321 4
20 cc
40 cc
50 cc
100 cc
321 4
40
AURELIA WAVE DIGIT-T
3
IT
7.1.2
CREARE UNA RICETTA
Dopo aver selezionato il gruppo
a cui applicare una nuova ricetta, impostare:
1 Temperatura gruppo
2 Temp. caldaia caè (T
3
)
3 Grammi caè macinato
4 Dose 1 caè corto
5 Dose 1 caè lungo
6 Dose 2 caè corti
7 Dose 2 caè lunghi
A Al menu precedente
B Al menu principale
C Pagina precedente
D Pagina successiva
E Decremento
F Incremento
EN
7.1.2
CREATE A RECIPE
Aer selecting the group to apply a new recipe, set:
1 Group temperature
2 Coee boiler temp. (T
3
)
3 Grams ground coee
4 1 short coee dose
5 1 long coee dose
6 2 short coees dose
7 2 long coees dose
A To the previous menu
B To the main menu
C Previous page
D Next page
E Decrease
F Increase
DISPONIBILE SOLO NELLA
VERSIONE SOFTWARE
DEFINITIVA
AVAILABLE ONLY IN THE
EXECUTIVE SOFTWARE
VERSION
A
E
B
F
CD
1 4 52 3
6 7

1,5 sec 5 sec
321 4
10 sec
12 sec
8 sec
321 4
41
AURELIA WAVE DIGIT-T
3
IT
8 Tempo ON pre-infusione
9 Tempo OFF pre-infusione
10 Pre-infusione (T on - T o)
11 Infusione (T on - T o)
12 Post-infusione (T on - T o)
A Al menu precedente
B Al menu principale
C Pagina precedente
D Pagina successiva
E Decremento
F Incremento
EN
8 Pre-wetting time ON
9 Pre-wetting time OFF
10 Pre-wetting (T on - T o)
11 Wetting (T on - T o)
12 Post-wetting (T on - T o)
A To the previous menu
B To the main menu
C Previous page
D Next page
E Decrease
F Increase
DISPONIBILE SOLO NELLA
VERSIONE SOFTWARE
DEFINITIVA
AVAILABLE ONLY IN THE
EXECUTIVE SOFTWARE
VERSION
8 9 10 11 12
A
E
B
F
CD
4’ 9’
6’ 10’
5’ 11’
_
Z X C V B
space
123
SYM N M
A S D F G H J K L
Q
W E R T Y U I O P
42
AURELIA WAVE DIGIT-T
3
IT
Funzioni PULSEJET (optional)
13 Pulsejet pre-infusione
(T on - T o)
14 Pulsejet infusione
(T on - T o)
15 Pulsejet post-infusione
(T on - T o)
Salvare la ricetta con nome tramite la tastiera (16).
Per maggiori informazioni vedere “PROGRAMMA DOSI”.
A Al menu precedente
B Al menu principale
C Pagina precedente
D Pagina successiva
E Decremento
F Incremento
EN
PULSEJET functions (optional)
13 Pre-wetting pulsejet
(T on - T o)
14 Wetting pulsejet
(T on - T o)
15 Post-wetting pulsejet
(T on - T o)
Save the recipe with a name by
using the keyboard (16).
For more informations see
“DOSE PROGRAM”.
A To the previous menu
B To the main menu
C Previous page
D Next page
E Decrease
F Increase
DISPONIBILE SOLO NELLA
VERSIONE SOFTWARE
DEFINITIVA
AVAILABLE ONLY IN THE
EXECUTIVE SOFTWARE
VERSION
A
E
B
F
CD
13 161514

43
AURELIA WAVE DIGIT-T
3
IT
7.2
IMPOSTAZIONE
TASTI E DISPLAY
Premere una delle icone per accedere al relativo menu.
1 Unità di misura (°C o °F)
2 Luminosità led esterni
3 Luminosità display
4 Luminosità tasti
5 Visualizza temperatura
erogazione
6 Visualizza tempo
erogazione
7 Personalizza screensaver
A Al menu precedente
B Al menu principale
C Pagina precedente
D Pagina successiva
EN
7.2
DISPLAY AND
BUTTON SETTINGS
Press one of the icons to access
the relative menu.
1 Measurement units (°C or °F)
2 External led brightness
3 Screen brightness
4 Button pad brightness
5 Delivery temperature
displaying
6 Delivery time
displaying
7 Screensaver editing
A To the previous menu
B To the main menu
C Previous page
D Next page
A
C
B
D
1
2 4 7
53 6

44
AURELIA WAVE DIGIT-T
3
IT
7.2.1
UNITÀ DI MISURA
Scegliere l’unità di misura di
default.
1 Fahrenheit
2 Celsius
A Al menu precedente
B Al menu principale
EN
7.2.1
MEASUREMENT UNITS
Choose the default measurements units.
1 Fahrenheit
2 Celsius
A To the previous menu
B To the main menu
1 2
AB

45
AURELIA WAVE DIGIT-T
3
IT
7.2.2
LUMINOSITÀ
TASTI
Impostare la luminosità dei tasti.
A Al menu precedente
B Al menu principale
C Decremento
D Incremento
EN
7.2.2
BUTTON PAD LIGHT
INTENSITY
Set the button pad light intensity.
A To the previous menu
B To the main menu
C Decrease
D Increase
AB
CD

46
AURELIA WAVE DIGIT-T
3
IT
7.2.3
LUMINOSITÀ DISPLAY
Impostare la luminosità del display.
A Al menu precedente
B Al menu principale
C Decremento
D Incremento
EN
7.2.3
SCREEN LIGHT INTENSITY
Set the screen light intensity.
A To the previous menu
B To the main menu
C Decrease
D Increase
AB
CD

47
AURELIA WAVE DIGIT-T
3
IT
7.2.4
LUMINOSITÀ LED ESTERNI
Impostare la luminosità dei led
esterni.
A Al menu precedente
B Al menu principale
C Decremento
D Incremento
EN
7.2.4
EXTERNAL LED BRIGHTNESS
Set the external led brightness.
A To the previous menu
B To the main menu
C Decrease
D Increase
AB
CD
ONOFF
48
AURELIA WAVE DIGIT-T
3
IT
7.2.5
VISUALIZZA TEMPERATURA
EROGAZIONE
Impostare la visualizzazione
della temperatura di erogazione sul display.
1 Disabilitata
2 Abilitata
A Al menu precedente
B Al menu principale
EN
7.2.5
DELIVERY TEMPERATURE
DISPLAYING
Set the delivery temperature
displaying on the screen.
1 Disable
2 Enable
A To the previous menu
B To the main menu
AB
1
2

49
AURELIA WAVE DIGIT-T
3
IT
7.2.6
VISUALIZZA TEMPO
EROGAZIONE
Impostare la visualizzazione del
tempo di erogazione sul display.
1 Temporizzato
2 Persistente
A Al menu precedente
B Al menu principale
EN
7.2.6
DELIVERY TIME
DISPLAYING
Set the delivery time displaying
on the screen.
1 Timed
2 Persistent
A To the previous menu
B To the main menu
AB
1
2
USB
480 × 272 PIXEL
72 DPI
JPEG - PNG - GIF
50
AURELIA WAVE DIGIT-T
3
IT
7.2.7
PERSONALIZZA
SCREENSAVER
All’accesso, il sistema richiede
di collegare un dispositivo USB
(1) alla macchina.
L’immagine deve rispettare i requisiti indicati.
Viene rilevata la nuova immagine e viene richiesta la visualizzazione dell’anteprima.
1 Annulla
2 Conferma
A Al menu precedente
B Al menu principale
EN
7.2.7
SCREENSAVER
EDITING
On access, the system requires
that a USB device (1) be con-
nected to the machine.
The image must comply with
the indicated requirements.
The new image is detected and
the preview is requested.
1 Cancel
2 Confirm
A To the previous menu
B To the main menu
DISPONIBILE SOLO NELLA
VERSIONE SOFTWARE
DEFINITIVA
AVAILABLE ONLY IN THE
EXECUTIVE SOFTWARE
VERSION
AB
1 5 6

51
AURELIA WAVE DIGIT-T
3
IT
Dopo l’anteprima viene richiesta la conferma dell’impostazione.
3 Annulla
4 Conferma
EN
Confirmation of the setting is
requested aer the preview.
3 Cancel
4 Confirm
DISPONIBILE SOLO NELLA
VERSIONE SOFTWARE
DEFINITIVA
AVAILABLE ONLY IN THE
EXECUTIVE SOFTWARE
VERSION
1
2

52
AURELIA WAVE DIGIT-T
3
IT
7.3
PROGRAMMA DOSI
Premere una delle icone per accedere al relativo menu.
1 Programma gruppi
2 Impostazioni standard
3 Acqua calda
4 Trasferimento dosi gruppi
5 Preinfusione
6 Easycream (optional)
7 Tecnologia Pulse-Jet
(optional)
A Al menu precedente
B Al menu principale
C Pagina precedente
D Pagina successiva
EN
7.3
DOSE PROGRAMMING
Press one of the icons to access
the relative menu.
1 Groups program
2 Standard settings
3 Hot water
4 Groups doses transfer
5 Prewetting
6 Easycream (optional)
7 Pulse-Jet technology
(optional)
A To the previous menu
B To the main menu
C Previous page
D Next page
A CB D
2 64
1 53 7

20 cc
40 cc
50 cc
100 cc
321 4
53
AURELIA WAVE DIGIT-T
3
IT
7.3.1
PROGRAMMA GRUPPI
Ogni pagina corrisponde a un
gruppo da programmare.
Il gruppo erogazione 1 è il primo
da sinistra.
1 1 caè corto
2 2 caè corti
3 1 caè lungo
4 2 caè lunghi
A Al menu precedente
B Al menu principale
C Gruppo precedente
D Gruppo successivo
E Decremento
F Incremento
EN
7.3.1
GROUPS PROGRAM
Each page correspond to a
group to be programmed.
The dispensing group 1 is the
first from le.
1 1 short coee
2 2 short coees
3 1 long coee
4 2 long coees
A To the previous menu
B To the main menu
C Previous group
D Next group
E Decrease
F Increase
2 4
1 3
C E
A
D F
B

321 4
54
AURELIA WAVE DIGIT-T
3
IT
7.3.2
IMPOSTAZIONI
STANDARD
Scegliere il gruppo a cui applicare le impostazioni standard.
1 Gruppo 1
2 Gruppo 2
3 Gruppo 3
4 Gruppo 4
A Al menu precedente
B Al menu principale
C Pagina precedente
D Pagina successiva
EN
7.3.2
STANDARD
SETTINGS
Choose on which groups apply
the standard settings.
1 Group 1
2 Group 2
3 Group 3
4 Group 4
A To the previous menu
B To the main menu
C Previous page
D Next page
C
A
D
B
1 2 3 4

2 s
1 s
1,5 s
55
AURELIA WAVE DIGIT-T
3
IT
7.3.3
ACQUA CALDA
Impostare i tempi di erogazione
dell’acqua per le dosi da erogare.
1 Volume dose 1
2 Volume dose 2
3 Volume dose 3
A Al menu precedente
B Al menu principale
C Pagina precedente
D Pagina successiva
E Decremento
F Incremento
EN
7.3.3
HOT WATER
Set the water delivery time for
the deliverable doses.
1 Dose 1 volume
2 Dose 2 volume
3 Dose 3 volume
A To the previous menu
B To the main menu
C Previous page
D Next page
E Decrease
F Increase
1
2
3
C
E
A
D
F
B

321 4
56
AURELIA WAVE DIGIT-T
3
IT
7.3.4
TRASFERIMENTO DOSI
GRUPPI
Selezionare a quale gruppo
trasferire le dosi. Scorrendo le
pagine verso destra si hanno le
opzioni per sorgenti diverse.
1 Sorgente gruppo 1
2 Sorgente gruppo 2
3 Sorgente gruppo 3
4 Sorgente gruppo 4
A Al menu precedente
B Al menu principale
C Gruppo precedente
D Gruppo successivo
EN
7.3.4
GROUPS DOSES
TRANSFER
Choose on which groups transfer the doses. By scrolling the
pages to right, there are the options for dierent sources.
1 Group 1 source
2 Group 2 source
3 Group 3 source
4 Group 4 source
A To the previous menu
B To the main menu
C Previous group
D Next group
C
A
D
B
1 2 3 4

0,5 s 1,0 s
2121
57
AURELIA WAVE DIGIT-T
3
IT
7.3.5
PREINFUSIONE
Selezionare il gruppo a cui attivare la preinfusione.
La preinfusione viene impostata
prima del Pulse-Jet (optional).
1 Tempo ON
2 Tempo OFF
A Al menu precedente
B Al menu principale
C Pagina precedente
D Pagina successiva
E Decremento
F Incremento
EN
7.3.5
PRE-WETTING
Select the group to activate the
pre-wetting.
Pre-wetting is setting previously
respect Pulse-Jet (optional).
1 ON time
2 OFF time
A To the previous menu
B To the main menu
C Previous page
D Next page
E Decrease
F Increase
C
E
A
D
F
B
1 2

1,5 sec
35 °C
65 °C
58
AURELIA WAVE DIGIT-T
3
IT
7.3.6
EASYCREAM (OPTIONAL)
Impostare i parametri di erogazione vapore.
Ricordarsi di agire sulla vite di
regolazione dell’Easycream.
In caso di doppio Easycream,
sono disponibili due pagine sul
display.
1 Tempo ritardo aria
2 Temperatura finale aria
3 Temperatura finale
A Al menu precedente
B Al menu principale
C Decremento
D Incremento
EN
7.3.6
EASYCREAM (OPTIONAL)
Set the steam delivery parameters.
Remember to act on the Easycream adjustment screw.
In the case of double Easycream, two pages are available on
the display.
1 Air delay time
2 Air final temperature
3 Final temperature
A To the previous menu
B To the main menu
C Decrease
D Increase
1
3
2
A CB D

21
21
59
AURELIA WAVE DIGIT-T
3
IT
7.3.7
TECNOLOGIA
PULSE-JET (OPTIONAL)
Selezionare il gruppo e un’opzione preimpostata per il Pulse-Jet.
1 Preset 1
2 Preset 2
3 Preset 3
4 Pulse-Jet disattivato
A Al menu precedente
B Al menu principale
C Dose precedente
D Dose successiva
EN
7.3.7
PULSE-JET
TECHNOLOGY (OPTIONAL)
Select the group and a preset
option for the Pulse-Jet.
1 Preset 1
2 Preset 2
3 Preset 3
4 No Pulse-Jet
A To the previous menu
B To the main menu
C Previous dose
D Next dose
CA DB
3 4
21
60
AURELIA WAVE DIGIT-T
3
IT
7.4
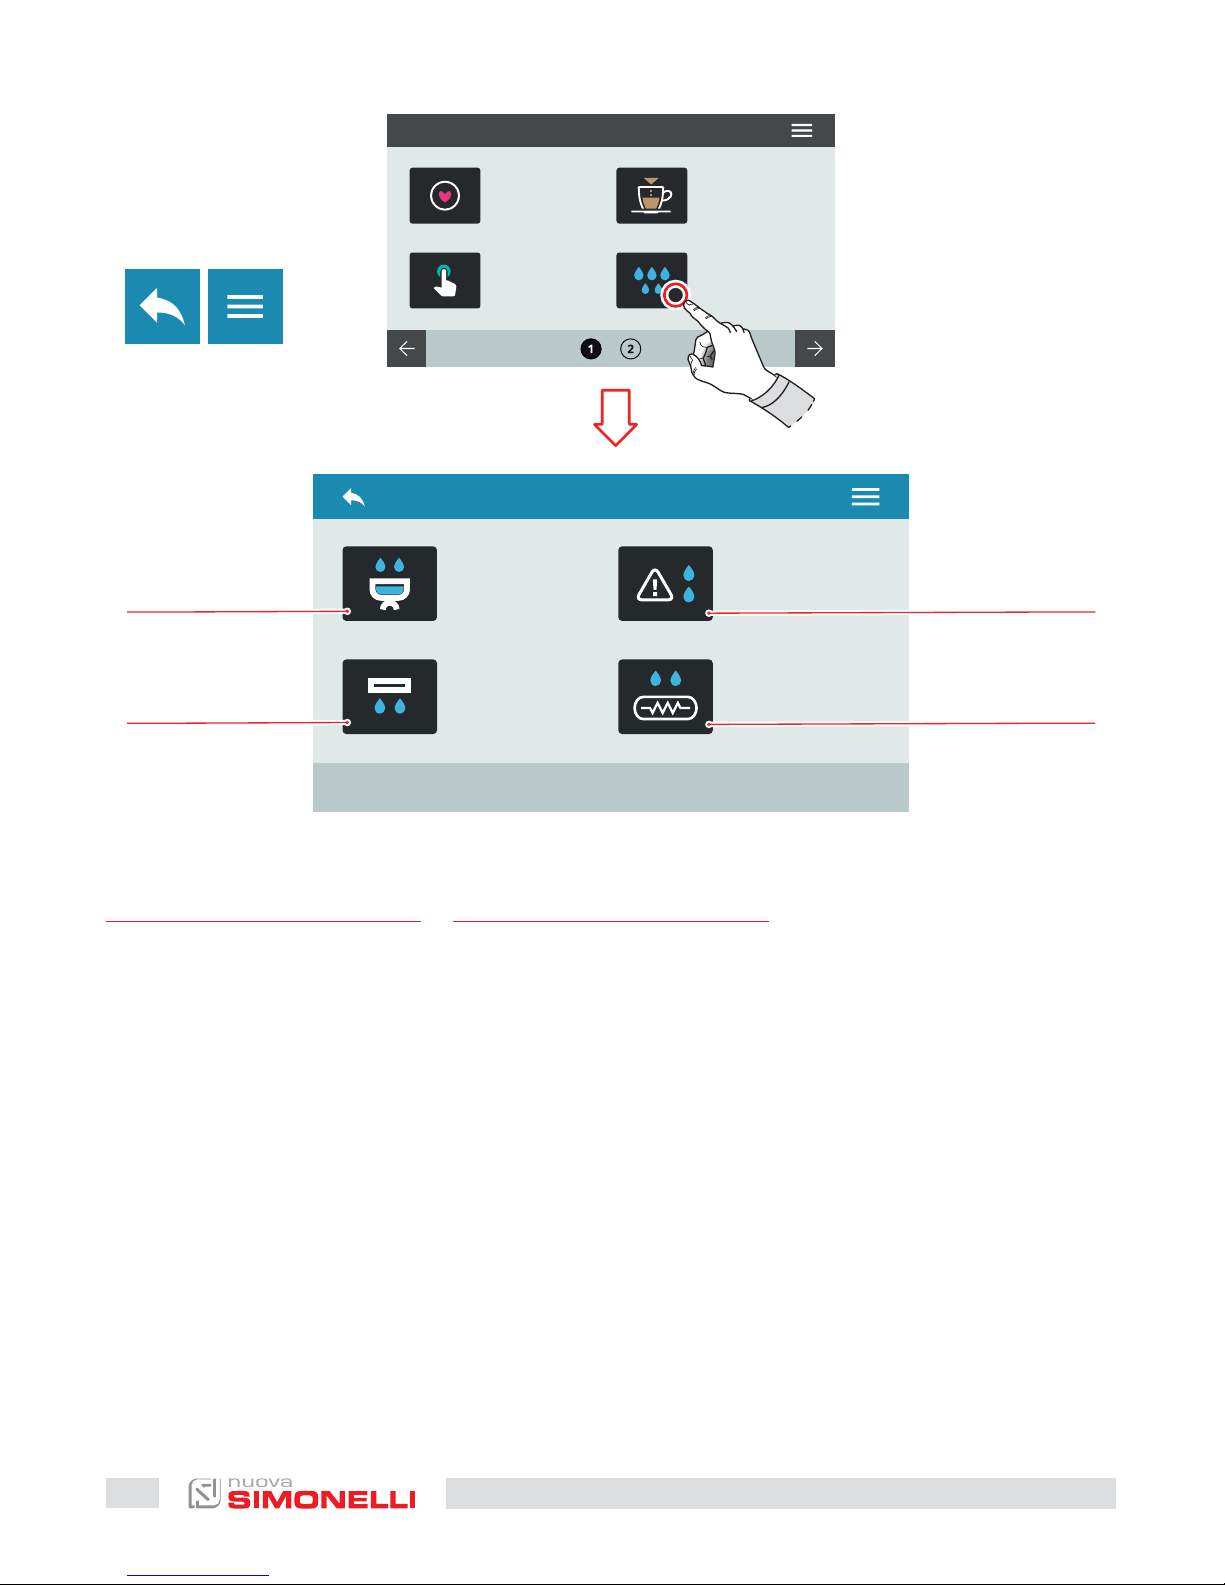
PULIZIA MACCHINA
Premere una delle icone per accedere al relativo menù.
1 Lavaggio dei gruppi
2 Spurgo automatico gruppi
(optional)
3 Allarme lavaggi
4 Spurgo caldaia (optional)
A Al menu precedente
B Al menu principale
EN
7.4
MACHINE CLEANING
Press one of the icons to access
the relative menu.
1 Washing groups
2 Automatic groups purge
(optional)
3 Washing alarms
4 Boiler purge (optional)
A To the previous menu
B To the main menu
1
2 4
3
AB

61
AURELIA WAVE DIGIT-T
3
IT
7.4.1
LAVAGGIO DEI GRUPPI
Impostare il ciclo di lavaggio
per i singoli gruppi.
1 Selezione gruppo
2 Quantità di acqua per il
lavaggio
3 Quantità di acqua per il
risciacquo
A Al menu precedente
B Al menu principale
EN
7.4.1
GROUPS CLEANING
Set the washing cycle for the
single group.
1 Groups selection
2 Washing water quantity
3 Rinse water quantity
A To the previous menu
B To the main menu
1
2
3
AB

3 s
2 s
ONOFF
62
AURELIA WAVE DIGIT-T
3
IT
7.4.2
SPURGO AUTOMATICO
GRUPPI (OPTIONAL)
Impostare lo spurgo automatico dei gruppi alla rimozione del
portafiltro.
1 Abilita/disabilita lo spurgo
automatico gruppi
2 Tempo di spurgo (0-8 sec.)
3 Tempo di ritardo (0-5 sec.)
A Al menu precedente
B Al menu principale
C Decremento
D Incremento
EN
7.4.2
AUTOMATIC GROUPS
PURGE (OPTIONAL)
Set the groups automatic purge
at the filter-holder removal.
1 Enable/disable the
automatic groups purge
2 Purge time (0-8 sec.)
3 Delay time (0-5 sec.)
A To the previous menu
B To the main menu
C Decrease
D Increase
AB
CD
1
3
2

ONOFF
00 00
:
63
AURELIA WAVE DIGIT-T
3
IT
7.4.3
ALLARME LAVAGGIO
Impostare il numero delle ore
prima dell’allarme lavaggio.
1 Abilita/disabilita il
messaggio di allarme
2 Imposta il tempo del
messaggio
Alla visualizzazione del messaggio del lavaggio:
3 Lavaggio eseguito
4 Avvia il lavaggio
A Al menu precedente
B Al menu principale
C Decremento
D Incremento
EN
7.4.3
WASHING ALARM
Set the time before the washing
alarm message.
1 Enable/disable the alarm
message
2 Set the message time
When the message is displayed:
3 Washing performed
4 Start washing
A To the previous menu
B To the main menu
C Decrease
D Increase
DISPONIBILE SOLO NELLA
VERSIONE SOFTWARE
DEFINITIVA
AVAILABLE ONLY IN THE
EXECUTIVE SOFTWARE
VERSION
AB
3 4
1 2

ONOFF
64
AURELIA WAVE DIGIT-T
3
IT
7.4.4
SPURGO CALDAIA
(OPTIONAL)
Impostare lo spurgo automatico della caldaia.
1 Abilita/disabilita lo spurgo
automatico
2 Messaggio funzionale
A Al menu precedente
B Al menu principale
EN
7.4.4
BOILER PURGE
(OPTIONAL)
Set the boiler automatic purge.
1 Enable/disable the
automatic purge
2 Functional message
A To the previous menu
B To the main menu
AB CD
21

65
AURELIA WAVE DIGIT-T
3
IT
7.5
GESTIONE POTENZA
Premere una delle icone per accedere al relativo menù.
1 Programmaz. settimanale
2 Stand by
3 Selezione attiva
4 Riduzione potenza
A Al menu precedente
B Al menu principale
EN
7.5
POWER MANAGEMENT
Press one of the icons to access
the relative menu.
1 Weekly programming
2 Stand by
3 Selection active
4 Power reduction
A To the previous menu
B To the main menu
1
2 4
3
AB

ONOFF
00 00
:
00 00
:
66
AURELIA WAVE DIGIT-T
3
IT
7.5.1
PROGRAMMAZIONE
SETTIMANALE
Impostare la programmazione settimanale per la gestione
delle accensione e degli spegnimenti automatici.
1 Abilita/disabilita la
programmazione
2 Selezione giorno (E/F)
3 Orario accensione
4 Orario spegnimento
A Al menu precedente
B Al menu principale
C Decremento
D Incremento
EN
7.5.1
WEEKLY
PROGRAMMING
Set the weekly program for the
automatic ON/OFF management.
1 Enable/disable the
programming
2 Day selection (E/F)
3 Switch ON time
4 Switch OFF time
A To the previous menu
B To the main menu
C Decrease
D Increase
1
3
4
AB
CD
EF
2

0.80 bar
67
AURELIA WAVE DIGIT-T
3
IT
7.5.2
STAND BY
Premere (C) o (D) per impostare
la pressione della caldaia in modalità risparmio energetico.
Per disattivarlo, impostare il valore a zero.
Viene visualizzato il messaggio
OFF.
A Al menu precedente
B Al menu principale
C Decremento
D Incremento
EN
7.5.2
STAND BY
Press (C) o (D) to set the boiler pressure in energy saving
mode.
To disable it, set the value to
zero.
Is displayed the OFF message.
A To the previous menu
B To the main menu
C Decrease
D Increase
CD
AB

ONOFF
ONOFF
ONOFF
ONOFF
68
AURELIA WAVE DIGIT-T
3
IT
7.5.3
SELEZIONE ATTIVA
Selezionare i gruppi a cui attivare
la programmazione settimanale.
1 Abilita/disabilita gruppo 1
2 Abilita/disabilita gruppo 2
3 Abilita/disabilita gruppo 3
4 Abilita/disabilita gruppo 4
A Al menu precedente
B Al menu principale
EN
7.5.3
ACTIVE SELECTION
Select the groups to activate the
weekly programming.
1 Group 1 enable/disable
2 Group 2 enable/disable
3 Group 3 enable/disable
4 Group 4 enable/disable
A To the previous menu
B To the main menu
1
2
3
4
AB

ONOFF
69
AURELIA WAVE DIGIT-T
3
IT
7.5.4
RIDUZIONE POTENZA
Abilita/disabilita (1) la riduzione di potenza per ottimizzare il
risparmio energetico.
La macchina riscalderà le varie
parti in maniera sequenziale
piuttosto che in parallelo.
Il tempo di riscaldamento può
aumentare sensibilmente.
A Al menu precedente
B Al menu principale
EN
7.5.4
POWER REDUCE
Enable/disable (1) the power
reduce to optimize the energy
saving.
Machine will warm up sequentially , instead than in parallel.
Warm up phase can take a
longer time.
A To the previous menu
B To the main menu
1
AB

70
AURELIA WAVE DIGIT-T
3
IT
7.6
IMPOSTAZIONE
TEMPERATURE
Premere una delle icone per accedere al relativo menù.
1 Temperatura gruppi (T
3
)
2 Impostazioni caldaia
vapore
3 Temperatura caldaie (T
3
)
4 Scaldatazze (optional)
5 Acqua calda (optional)
A Al menu precedente
B Al menu principale
C Pagina precedente
D Pagina successiva
EN
7.6
TEMPERATURE
SETTINGS
Press one of the icons to access
the relative menu.
1 Groups temperature (T
3
)
2 Steam boiler settings
3 Boiler temperatures (T
3
)
4 Cup warmer (optional)
5 Hot water (optional)
A To the previous menu
B To the main menu
C Previous page
D Next page
AB
2
4
1
3
5
C
D

94.0 °C 93.2 °C
71
AURELIA WAVE DIGIT-T
3
IT
7.6.1
TEMPERATURA
GRUPPI (T
3
)
Impostare la temperatura di lavoro dei gruppi.
1 Setpoint
2 Temperatura attuale
3 Selezione gruppo
A Al menu precedente
B Al menu principale
C Gruppo precedente
D Gruppo successivo
E Decremento
F Incremento
EN
7.6.1
GROUPS
TEMPERATURE (T
3
)
Set the groups working temperature.
1 Setpoint
2 Actual temperature
3 Group selection
A To the previous menu
B To the main menu
C Previous group
D Next group
E Decrease
F Increase
AB
1
2
EF
C
D
3

1.17 bar 0.86 bar
72
AURELIA WAVE DIGIT-T
3
IT
7.6.2
IMPOSTAZIONE
CALDAIA VAPORE
Impostare la pressione di lavoro
della caldaia vapore.
1 Setpoint
2 Pressione attuale
A Al menu precedente
B Al menu principale
C Decremento
D Incremento
EN
7.6.2
STEAM BOILER
SETTING
Set the boiler working pressure.
1 Setpoint
2 Actual pressure
A To the previous menu
B To the main menu
C Decrease
D Increase
AB
1
2
C
D

93.4 °C 92.0 °C
73
AURELIA WAVE DIGIT-T
3
IT
7.6.3
TEMPERATURE
CALDAIE (T
3
)
Impostare la temperatura delle
caldaie dei gruppi.
1 Setpoint
2 Temperatura attuale
3 Selezione gruppo
A Al menu precedente
B Al menu principale
C Caldaia precedente
D Caldaia successiva
E Decremento
F Incremento
EN
7.6.3
BOILERS
TEMPERATURE (T
3
)
Set the group’s boilers temperature.
1 Setpoint
2 Actual temperatures
3 Group selection
A To the previous menu
B To the main menu
C Previous boiler
D Next boiler
E Decrease
F Increase
AB
1
2
EF
C
D
3

74
AURELIA WAVE DIGIT-T
3
IT
7.6.4
SCALDATAZZE (OPTIONAL)
MANUALE
Impostare la tipologia dello
scaldatazze.
Attivare lo scaldatazze manualmente premendo il pulsante C.
1 Modalità scaldatazze
manuale attivato
A Al menu precedente
B Al menu principale
C Pulsante attivazione
scaldatazze
EN
7.6.4
MANUAL
CUPWARMER (OPTIONAL)
Set the cupwarmer type.
Activate the cupwarmer manually pressing the C button.
1 Manual cupwarmer mode
activated
A To the previous menu
B To the main menu
C Cupwarmer activated
button
A CB
1
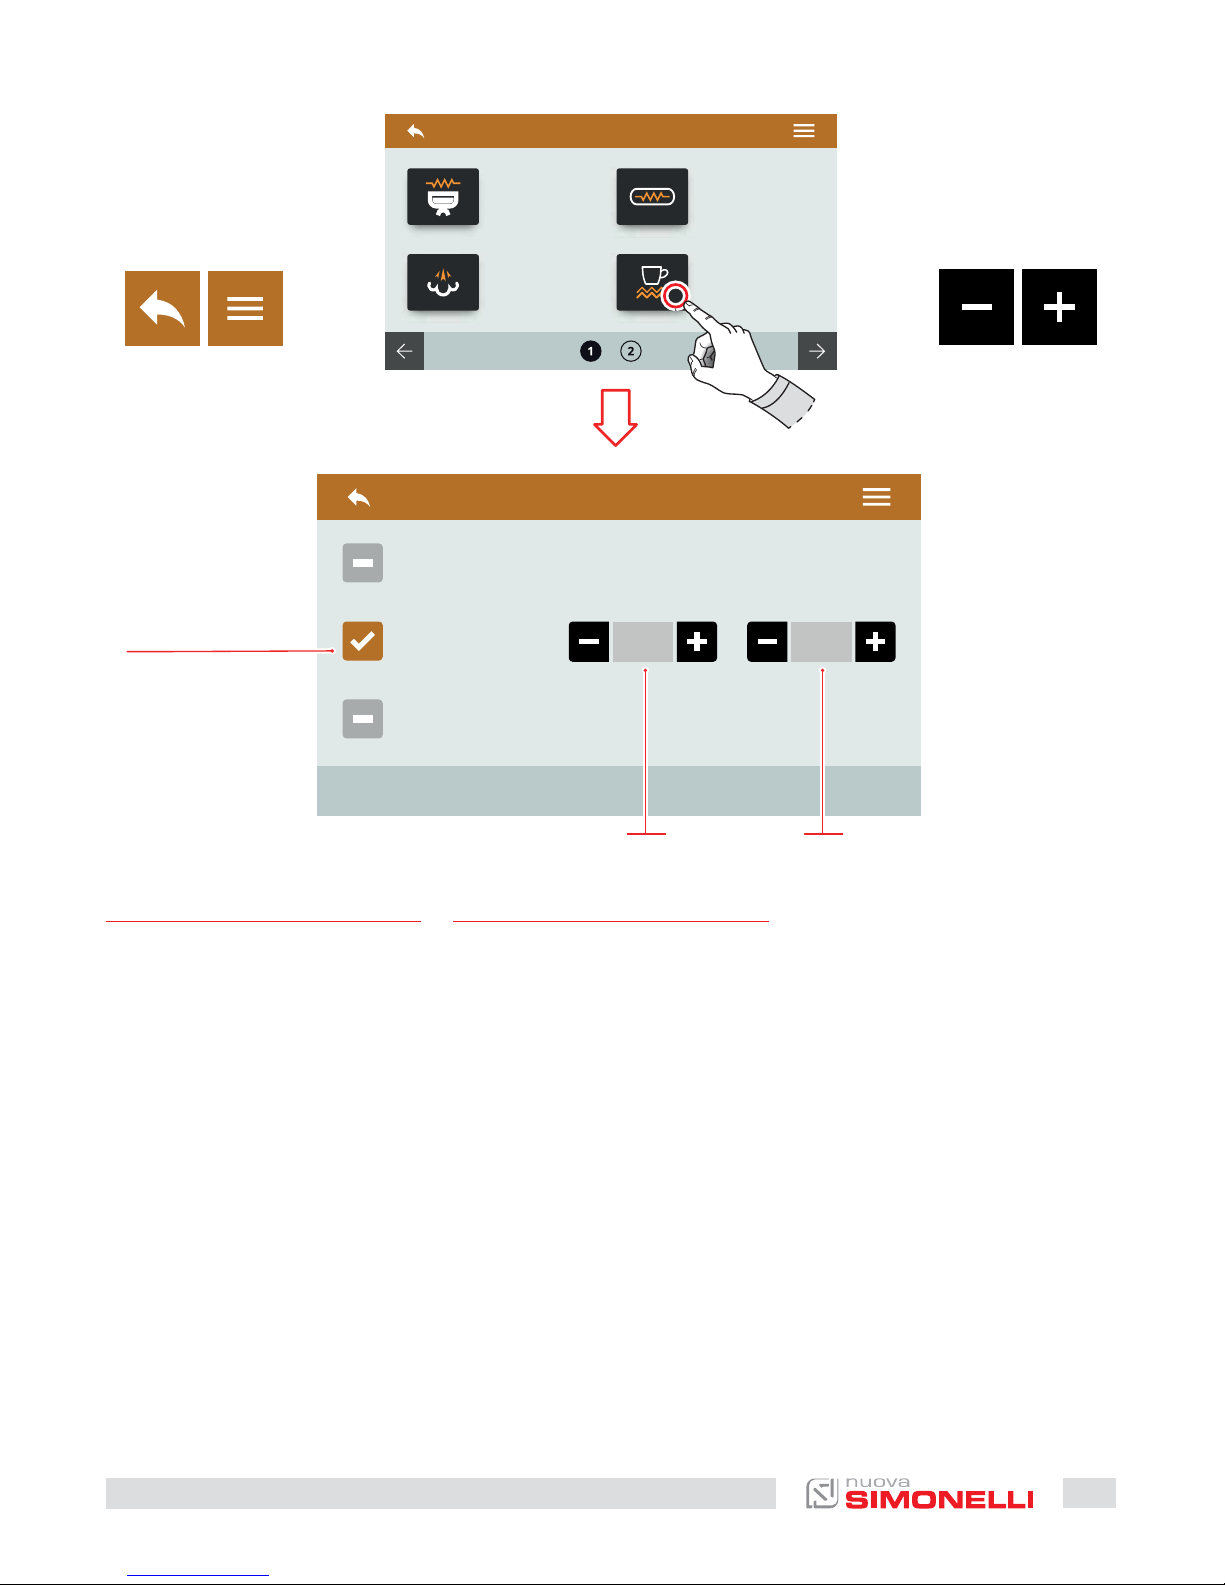
16’ 16’
75
AURELIA WAVE DIGIT-T
3
IT
7.6.5
SCALDATAZZE (OPTIONAL)
TEMPORIZZATO
Impostare la tipologia dello
scaldatazze.
1 Modalità scaldatazze
temporizzato attivato
2 Tempo ON (0÷30)
3 Tempo OFF (0÷60)
A Al menu precedente
B Al menu principale
C Decremento
D Incremento
EN
7.6.5
TIMED
CUPWARMER (OPTIONAL)
Set the cupwarmer type.
1 Timed cupwarmer mode
activated
2 ON time (0÷30)
3 OFF time (0÷60)
A To the previous menu
B To the main menu
C Decrease
D Increase
AB
1
2 3
CD

88.5 °C
76
AURELIA WAVE DIGIT-T
3
IT
7.6.6
SCALDATAZZE (OPTIONAL)
TERMOREGOLATO
Impostare la tipologia dello
scaldatazze.
1 Modalità scaldatazze
termoregolato attivato
2 Temperatura (50÷90)
A Al menu precedente
B Al menu principale
C Decremento
D Incremento
EN
7.6.6
THERMOREGULATED
CUPWARMER (OPTIONAL)
Set the cupwarmer type.
1 Thermoregulated
cupwarmer mode activated
2 Temperature (50÷90)
A To the previous menu
B To the main menu
C Decrease
D Increase
AB
1
2
CD

90 °C
85 °C
80 °C
77
AURELIA WAVE DIGIT-T
3
IT
7.6.7
ACQUA CALDA (OPTIONAL)
Impostazione presente solo se
installata la valvola proporzionale dell’acqua.
Impostare la temperatura di
erogazione acqua per i tre pulsanti (75÷98).
1 Temperatura dose 1
2 Temperatura dose 2
3 Temperatura dose 3
A Al menu precedente
B Al menu principale
C Decremento
D Incremento
EN
7.6.7
HOT WATER (OPTIONAL)
Available setting only if it’s installed the proportioning valve
for the hot water.
Set the water delivery temperature for the three buttons
(75÷98).
1 Dose 1 temperature
2 Dose 2 temperature
3 Dose 3 temperature
A To the previous menu
B To the main menu
C Decrease
D Increase
AB
1
2
3
CD

78
AURELIA WAVE DIGIT-T
3
IT
7.7
CONTATORI
Premere una delle icone per accedere al relativo menù.
1 Contatori gruppo 1
2 Contatori gruppo 2
3 Contatori gruppo 3
4 Contatori gruppo 4
5 Contatore totale gruppi
6 Contatore parziale
7 Contatore assoluto
8 Contatore manutenzioni
A Al menu precedente
B Al menu principale
EN
7.7
COUNTERS
Press one of the icons to access
the relative menu.
1 Group 1 counters
2 Group 2 counters
3 Group 3 counters
4 Group 4 counters
5 Groups total counter
6 Partial counter
7 Absolute counter
8 Maintenances counter
A To the previous menu
B To the main menu
AB
3 74 8
2 61 5

14 18 18 16 14 18 18 50
79
AURELIA WAVE DIGIT-T
3
IT
7.7.1
CONTATORI GRUPPO
I contatori dei gruppi sono identici fra loro. È possibile azzerare
questo contatore tenendo premuta la relativa icona.
I conteggi sono visibili sotto le
relative icone.
1 Dosi 1 caè corto
2 Dosi 2 caè corto
3 Dosi 1 caè lungo
4 Dosi 2 caè lunghi
5 Dosi continue
6 Spurghi eseguiti
7 Lavaggi eettuati
8 Contatore totale gruppo
A Al menu precedente
B Al menu principale
EN
7.7.1
GROUP COUNTER
The group counters are identical to each other. It can be reset
hold on pushing over the relative icon.
The counts are visible under the
relevant icons.
1 1 short coee doses
2 2 short coees doses
3 1 long coee doses
4 2 long coees doses
5 Continuous doses
6 Purges performed
7 Washing performed
8 Groups total counter
A To the previous menu
B To the main menu
AB
51 73 62 84

80 96 65 73
80
AURELIA WAVE DIGIT-T
3
IT
7.7.2
CONTATORE TOTALE
GRUPPI
Visualizza i contatori totali di
ogni singolo gruppo.
I conteggi sono visibili sotto le
relative icone.
A Al menu precedente
B Al menu principale
EN
7.7.2
GROUPS TOTAL
COUNTER
Displays the total counters for
each group.
The counts are visible under the
relevant icons.
A To the previous menu
B To the main menu
AB

15 8 12
81
AURELIA WAVE DIGIT-T
3
IT
7.7.3
CONTATORE PARZIALE
Visualizza le dosi erogate parziali. È possibile azzerare questo contatore tenendo premuta
la relativa icona.
I conteggi sono visibili sotto le
relative icone.
1 Erogazioni
2 Acqua
3 Optional
4 Optional
A Al menu precedente
B Al menu principale
EN
7.7.3
PARTIAL COUNTER
Displays the partial delivery
doses. It can be reset hold on
pushing over the relative icon.
The counts are visible under the
relevant icons.
1 Deliveries
2 Water
3 Optional
4 Optional
A To the previous menu
B To the main menu
AB
1 2 3 4

1000
82
AURELIA WAVE DIGIT-T
3
IT
7.7.4
CONTATORE ASSOLUTO
Visualizza le dosi erogate totali.
Non è possibile azzerare questo
contatore.
I conteggi sono visibili sotto le
relative icone.
A Al menu precedente
B Al menu principale
EN
7.7.4
ABSOLUTE COUNTER
Displays the total delivery doses. It cannot be reset.
The counts are visible under the
relevant icons.
A To the previous menu
B To the main menu
AB
1
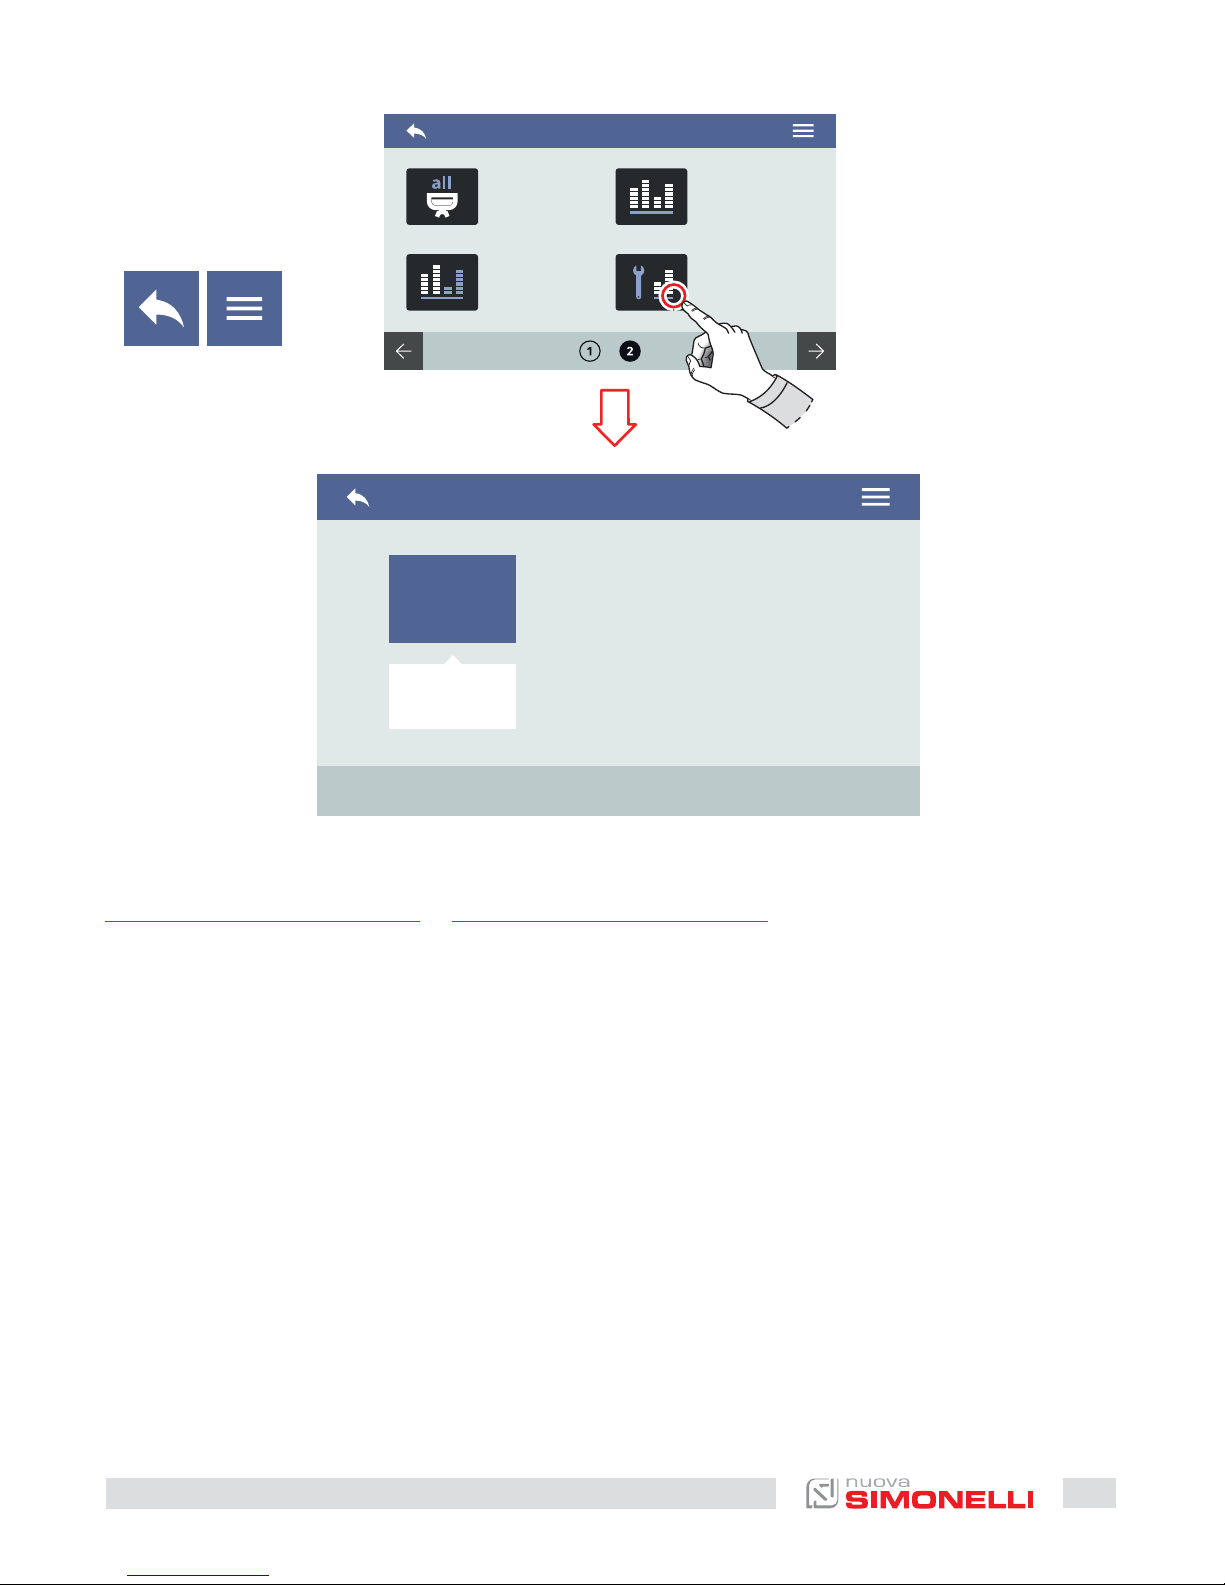
30
83
AURELIA WAVE DIGIT-T
3
IT
7.7.5
CONTATORE
MANUTENZIONI
Visualizza il numero delle dosi
erogate dall’ultima manutenzione eettuata.
Il conteggio è visibile sotto la relativa icona.
A Al menu precedente
B Al menu principale
EN
7.7.5
MAINTENANCES
COUNTER
Displays the number of delivery doses from the last maintenance performed.
The count is visible under the
relevant icon.
A To the previous menu
B To the main menu
AB

84
AURELIA WAVE DIGIT-T
3
IT
7.8
IMPOSTAZIONI
Premere una delle icone per accedere al relativo menù.
1 Impostazioni tecniche
2 Allarmi
3 Gestione password
4 Diagnostica
A Al menu precedente
B Al menu principale
EN
7.8
SETTINGS
Press one of the icons to access
the relative menu.
1 Technical settings
2 Alarms
3 Password management
4 Diagnostics
A To the previous menu
B To the main menu
1
2 4
3
AB

85
AURELIA WAVE DIGIT-T
3
IT
7.8.1
IMPOSTAZIONI TECNICHE
Impostazioni generali delle funzioni di sistema.
1 Data e ora
2 Configura centralina
3 Informazioni
4 Configura optional
5 Lingua
6 Modalità demo
7 Aggiorna versione
A Al menu precedente
B Al menu principale
EN
7.8.1
TECHNICAL SETTINGS
General settings of the system
functions.
1 Date and time
2 Main board configuration
3 Informations
4 Optional configuration
5 Language
6 Demo mode
7 Version update
A To the previous menu
B To the main menu
AB
1 3 5 7
2 4 6

00 00
:
86
AURELIA WAVE DIGIT-T
3
IT
7.8.1.1
DATA E ORA
Impostare la data e l’ora di sistema, visibili sul display.
1 Giorno
2 Mese
3 Anno
4 Ora
A Al menu precedente
B Al menu principale
C Pagina precedente
D Pagina successiva
E Decremento
F Incremento
EN
7.8.1.1
DATE AND TIME
Set the system date and time,
visible on the screen.
1 Day
2 Month
3 Year
4 Hour
A To the previous menu
B To the main menu
C Previous page
D Next page
E Decrease
F Increase
C
A
ED
B
F
1 2 3 4

321 4 3214
87
AURELIA WAVE DIGIT-T
3
IT
7.8.1.2
CONFIGURA
CENTRALINA
Impostare i parametri principali
della centralina.
1 Versione macchina
(Digit / T
3
)
2 Numero gruppi
3 Sensibilità sonda livello
4 Sensibilità sonda di
pressione
A Al menu precedente
B Al menu principale
C Pagina precedente
D Pagina successiva
EN
7.8.1.2
MAIN BOARD
CONFIGURATION
Set the main control unit parameters.
1 Machine version
(Digit / T
3
)
2 Group number
3 Level probe sensibility
4 Pressure probe sensibility
A To the previous menu
B To the main menu
C Previous page
D Next page
CA DB
1 3
2 4

ONOFF
ONOFF
3214
ONOFF
ONOFF
321 4
88
AURELIA WAVE DIGIT-T
3
IT
5 Autolivello durante
erogazione
6 Abilita/disabilita autolivello
con pompa
7 Abilita/disabilita acqua
calda con pompa
8 Autolivello con acqua
A Al menu precedente
B Al menu principale
C Pagina precedente
D Pagina successiva
EN
5 Auto-level during
deliveries
6 Enable/disable auto-level
pump
7 Enable/disable hot water
pump
8 Auto-level with water
A
To the previous menu
B To the main menu
C Previous page
D Next page
CA DB
5 6 7 8

TFT
X.XX
CONTROL UNIT
X.XX
OPTIONAL
X.XX
89
AURELIA WAVE DIGIT-T
3
IT
7.8.1.3
INFORMAZIONI
Visualizza le informazioni sul firmware e temperatura.
In caso di malfunzionamento
queste informazioni devono essere comunicate ai tecnici o ai
distributori.
1 Release firmware TFT
2 Release centralina
3 Release optional
A Al menu precedente
B Al menu principale
EN
7.8.1.3
INFORMATIONS
View the firmware and temperature informations.
In case of malfunctioning these
informations must be communicated to technician or dealer.
1 TFT firmware release
2 Control unit release
3 Internal temperature
A To the previous menu
B To the main menu
AB
1
2
3

23
ONOFF
ONOFF
ONOFF
2 3
90
AURELIA WAVE DIGIT-T
3
IT
7.8.1.4
CONFIGURA OPTIONAL
Permette di impostare e abilitare gli optional. Le opzioni
possono variare in base agli optional installati sulla macchina.
1 Numero di Easycream
(destro e/o sinistro)
2 Elenco optional:
• Sensore presenza porta-
filtro
• Valvola proporzionale
• Pulse-Jet
• Rilevatore di PH
A Al menu precedente
B Al menu principale
C Pagina precedente
D Pagina successiva
EN
7.8.1.4
OPTIONAL CONFIGURATION
Allow to set and enable the
optionals. The options can be
dierent based on the installed
optionals on the machine.
1 Number of Easycream
(right and/or le)
2 Optional list:
• Filter holder presence
sensor
• Proportioning valve
• Pulse-Jet
• PH TDS
A To the previous menu
B To the main menu
C Previous page
D Next page
CA DB
1 2

91
AURELIA WAVE DIGIT-T
3
IT
7.8.1.5
LINGUA
Impostare la lingua del display.
1 Italiano
2 Inglese
3 Francese
4 Tedesco
5 Spagnolo
A Al menu precedente
B Al menu principale
EN
7.8.1.5
LANGUAGE
Set the screen language.
1 Italian
2 English
3 French
4 German
5 Spanish
A To the previous menu
B To the main menu
AB
1
4
3
2
5

ONOFF
92
AURELIA WAVE DIGIT-T
3
IT
7.8.1.6
MODALITÀ DEMO
Questa modalità permette di
simulare il funzionamento della
macchina preservando tutte le
impostazioni attive.
Attivare o disattivare la modalità demo tramite il pulsante (1).
A Al menu precedente
B Al menu principale
EN
7.8.1.6
DEMO MODE
Questa modalità permette di
simulare il funzionamento della
macchina preservando tutte le
impostazioni attive.
Enable or disable the demo
mode by using the button (1).
A To the previous menu
B To the main menu
DISPONIBILE SOLO NELLA
VERSIONE SOFTWARE
DEFINITIVA
AVAILABLE ONLY IN THE
EXECUTIVE SOFTWARE
VERSION
AB
1
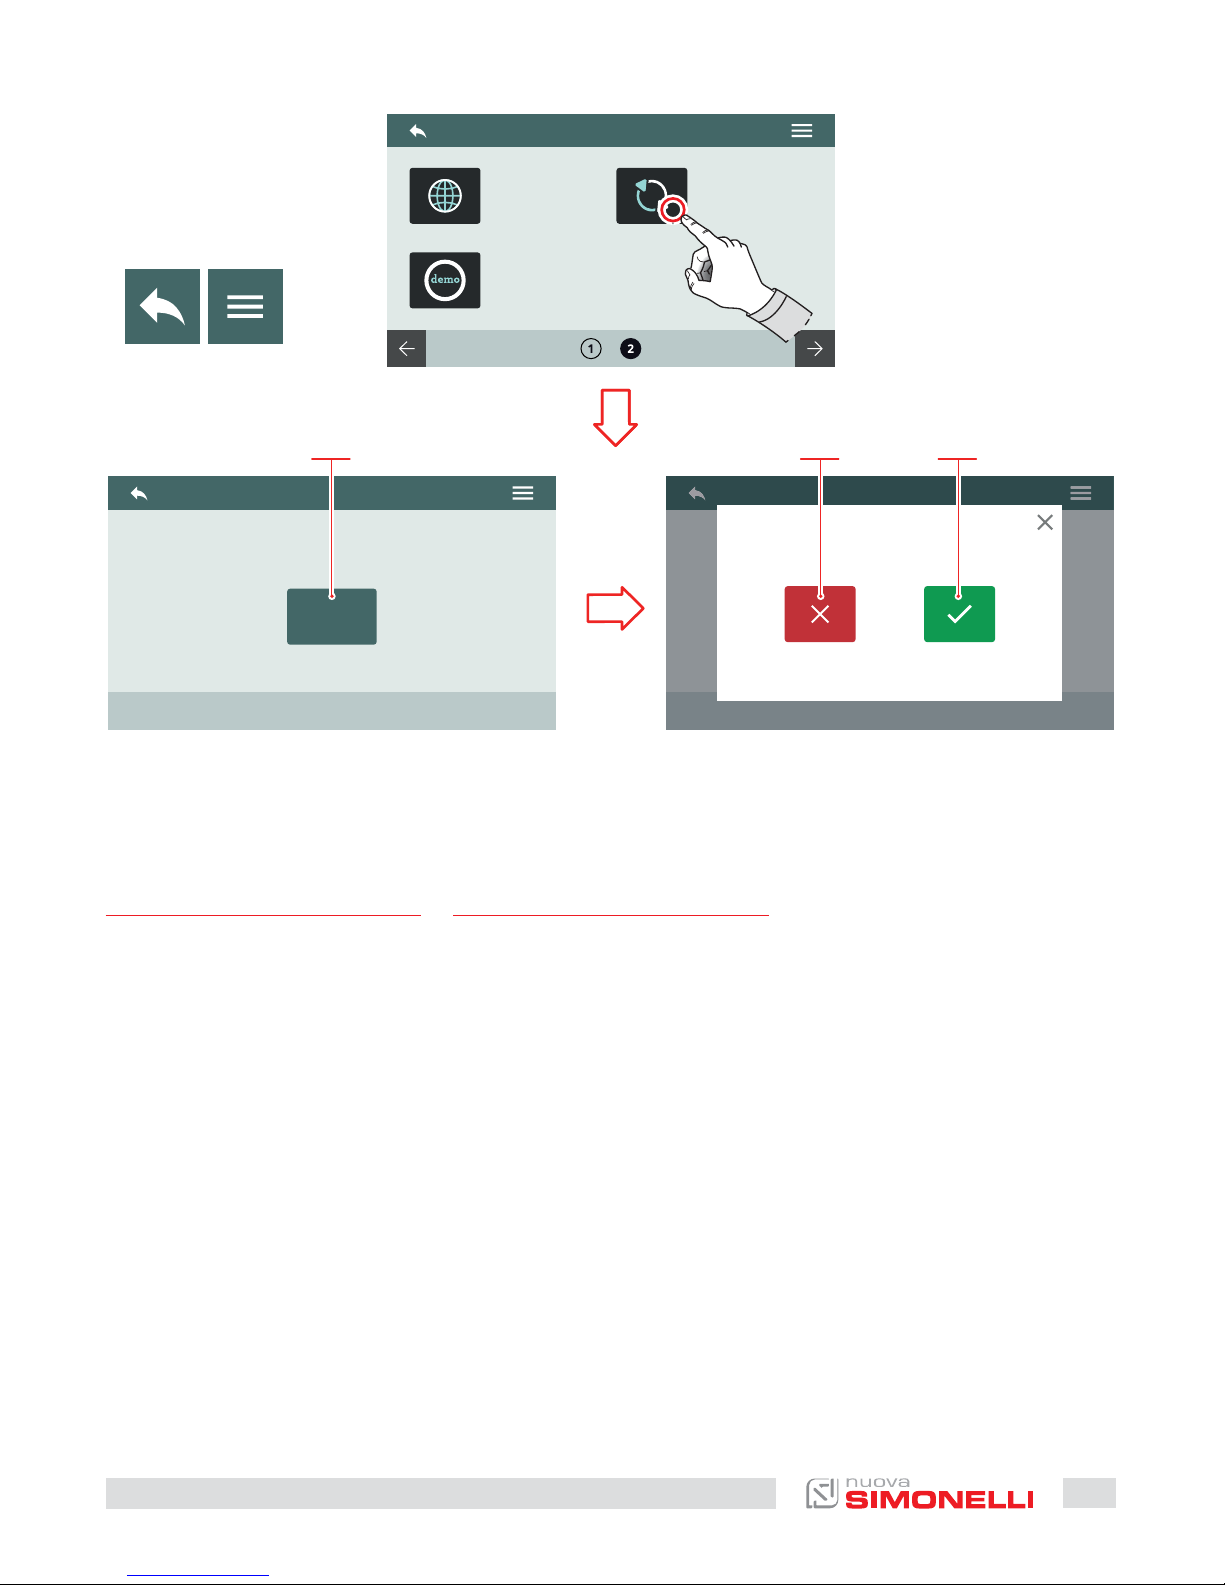
93
AURELIA WAVE DIGIT-T
3
IT
7.8.1.7
AGGIORNA VERSIONE
Collegare un dispositivo USB
alla macchina per poter aggiornare la versione soware.
1 Inizia l’aggiornamento
2 Annulla l’aggiornamento
3 Conferma l’aggiornamento
A Al menu precedente
B Al menu principale
EN
7.8.1.7
VERSION UPDATE
Connect an USB device to the
machine for update the soware version.
1 Update start
2 Update cancel
3 Update confirm
A To the previous menu
B To the main menu
AB
1 2 3

94
AURELIA WAVE DIGIT-T
3
IT
7.8.2
ALLARMI
Permette di visualizzare, gestire
e impostare gli allarmi di funzionamento sul display.
1 Storico allarmi
2 Allarmi manutenzione
A Al menu precedente
B Al menu principale
EN
7.8.2
ALARMS
Allow to displays, manage and
set the functional alarms on the
screen.
1 Alarm history
2 Maintenance alarms
A To the previous menu
B To the main menu
1 2
AB
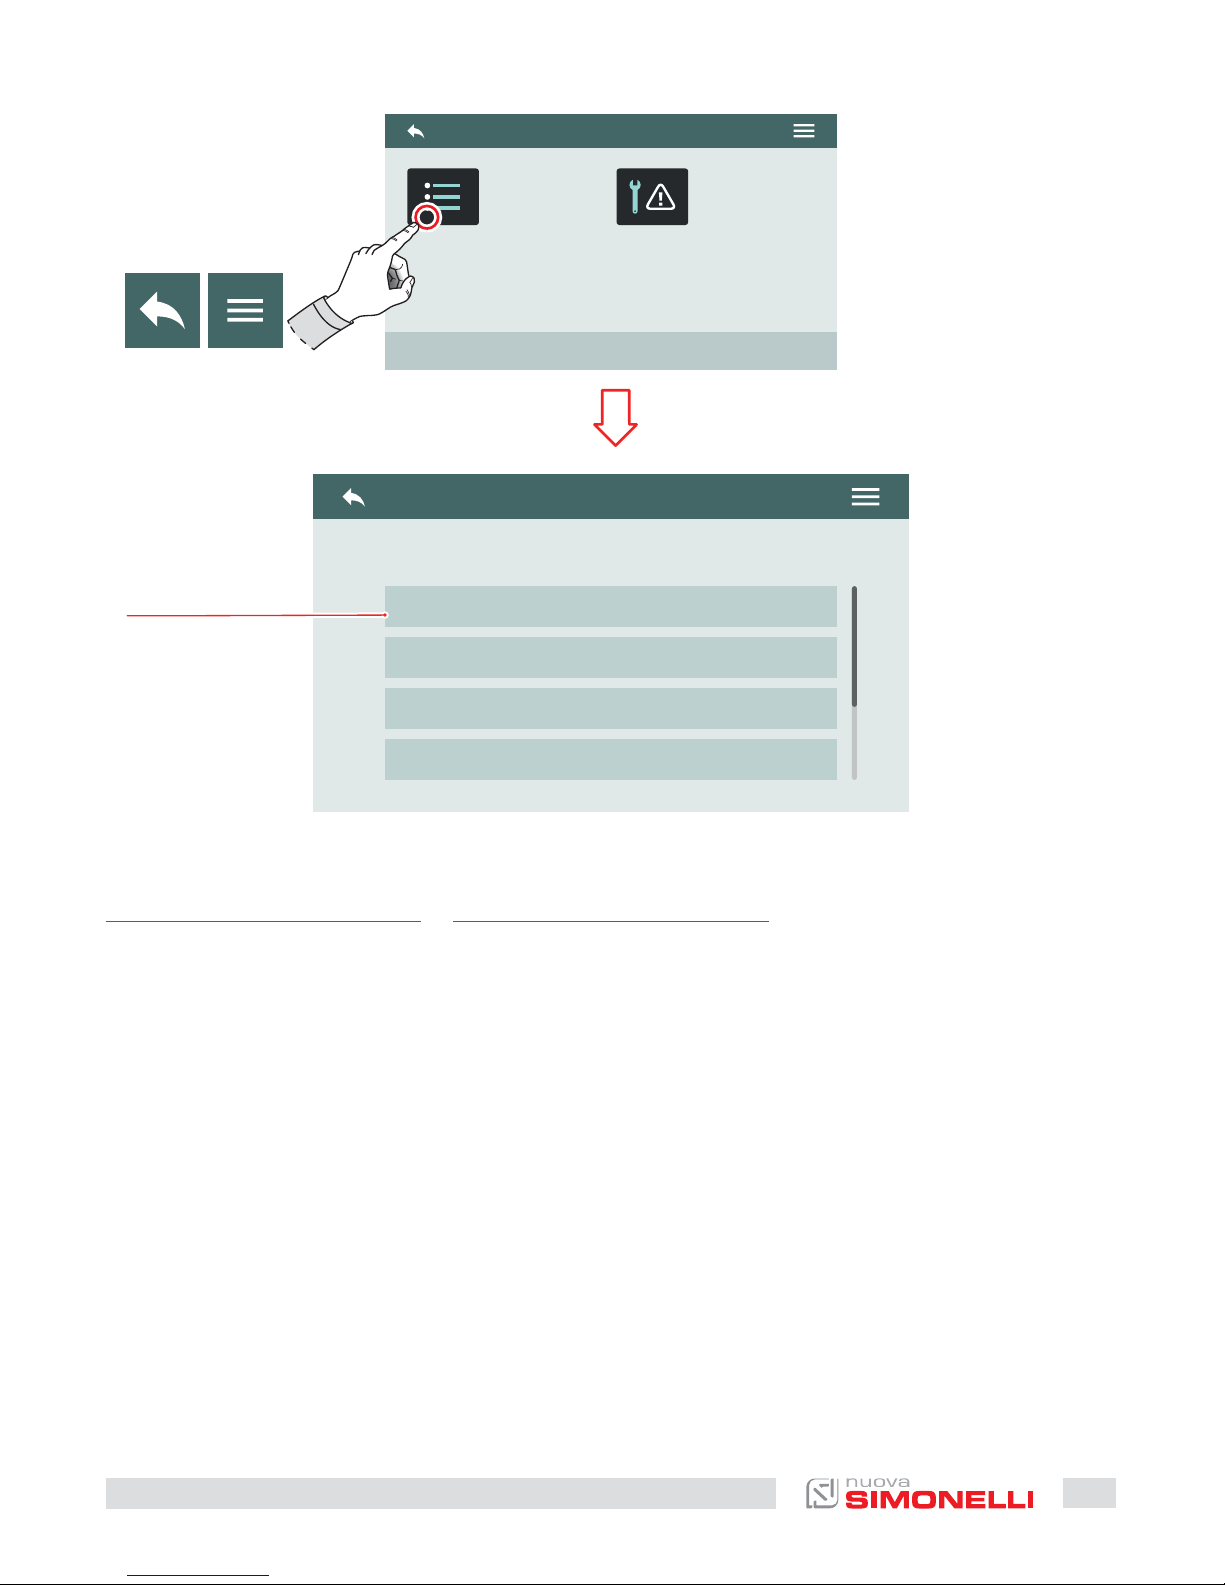
95
AURELIA WAVE DIGIT-T
3
IT
7.8.2.1
STORICO ALLARMI
Visualizza l’elenco degli allarmi
che si sono verificati. Scorrere
l’elenco (1) in alto o in basso per
vedere tutti gli allarmi.
Per azzerare la pagina tenere
premuto su un allarme.
A Al menu precedente
B Al menu principale
EN
7.8.2.1
ALARMS HISTORY
View the list of alarms that have
occurred.
Scroll the list (1) up or down to
view all the alarms.
To reset the page hold on pushing over an alarm.
A To the previous menu
B To the main menu
1
AB

ONOFF
20181231
100000
96
AURELIA WAVE DIGIT-T
3
IT
7.8.2.2
ALLARMI MANUTENZIONE
Abilita/disabilita la scadenza
dell’allarme di manutenzione o
il numero di cicli dopo il quale
verrà segnalato l’allarme di manutenzione.
1 Numero cicli
2 Azzera il contatore cicli
3 Giorno
4 Mese
5 Anno
A Al menu precedente
B Al menu principale
C Scorrimento valore
D Scorrimento valore
EN
7.8.2.2
MAINTENANCE ALARMS
Enable/disable the maintenance alarms deadline or the
cycles number representing
the threshold of maintenance
alarm.
1 Cycles number
2 Reset cycle counter
3 Day
4 Month
5 Year
A To the previous menu
B To the main menu
C Value scroll
D Value scroll
A CB D
4 5
3
1 2

97
AURELIA WAVE DIGIT-T
3
IT
7.8.3
GESTIONE PASSWORD
Permette l’accesso alle funzioni:
1 Modifica password
2 Gestione privilegi
A Al menu precedente
B Al menu principale
EN
7.8.3
PASSWORD MANAGEMENT
Allow to access the functions:
1 Password editing
2 Privilege management
A To the previous menu
B To the main menu
DISPONIBILE SOLO NELLA
VERSIONE SOFTWARE
DEFINITIVA
AVAILABLE ONLY IN THE
EXECUTIVE SOFTWARE
VERSION
AB
1 2

XYZ
|
Q W E R T Y U I O P
space
123
done
A S D F G H J K L
Z X C V B N M
98
AURELIA WAVE DIGIT-T
3
IT
7.8.3.1
MODIFICA PASSWORD
Impostare le password per:
• Utente
• Tecnico
A Al menu precedente
B Al menu principale
EN
7.8.3.1
PASSWORD EDITING
Set the password for:
• User
• Technician
A To the previous menu
B To the main menu
DISPONIBILE SOLO NELLA
VERSIONE SOFTWARE
DEFINITIVA
AVAILABLE ONLY IN THE
EXECUTIVE SOFTWARE
VERSION
AB

99
AURELIA WAVE DIGIT-T
3
IT
7.8.3.2
GESTIONE PRIVILEGI
PASSWORD LIVELLO TECNICO
Impostare i permessi e gli accessi alle funzioni per l’utente:
• Rosso: accesso negato
• Verde: accesso consentito
Alcune funzioni possono non
essere accessibili perché riservate al Costruttore.
A Al menu precedente
B Al menu principale
C Pagina successiva
D Pagina precedente
EN
7.8.3.2
PRIVILEGE MANAGEMENT
TECHNICIAN LEVEL PASSWORD
Set permissions and accesses to
functions for the user:
• Red: access denied
• Green: access allowed
Some functions may not be
accessible because they are reserved for the Manufacturer.
A To the previous menu
B To the main menu
C Next page
D Previous page
DISPONIBILE SOLO NELLA
VERSIONE SOFTWARE
DEFINITIVA
AVAILABLE ONLY IN THE
EXECUTIVE SOFTWARE
VERSION
AB CD

100
AURELIA WAVE DIGIT-T
3
IT
7.8.4
DIAGNOSTICA
Permette l’accesso alle funzioni:
1 Diagnostica generale
2 Tecnologia Smart Water
(optional)
3 Diagnostica gruppi
A Al menu precedente
B Al menu principale
EN
7.8.4
DIAGNOSTICS
Allow to access the functions:
1 General diagnostics
2 Smart Water technology
(optional)
3 Groups diagnostics
A To the previous menu
B To the main menu
AB
1
2
3
 Loading...