

Sima XL-72 Theater Instruction Manual
®
Sima XL-72 Theater
Inatable Indoor/Outdoor
Projection Screen
www.simaproducts.com

Table of Contents
TABLE OF CONTENTS......................................................................................................................................................2
INTRODUCTION................................................................................................................................................................3
LIST OF MATERIALS..........................................................................................................................................................4
SELECTING A SETUP SITE...............................................................................................................................................4
UNPACKING THE SCREEN...............................................................................................................................................5
INFLATING THE SCREEN...........................................................................................................................................5,6,7
SCREEN INSTALLATION WITH VELCRO PATCHES....................................................................................................8
SETTING UP THE INFLATABLE HOME THEATER FOR FRONT AND REAR PROJECTION..............................9
SECURING THE SCREEN AND FILLING WATER BALLASTS.................................................................................10
SCREEN DEFLATION & REPACKING............................................................................................................................11
TROUBLESHOOTING GUIDE.........................................................................................................................................12
SPECIFICATIONS SHEET..................................................................................................................................................13
CONSUMER WARRANTY AND DEFECTIVE RETURN POLICY..............................................................................14
Page 2

Introduction
Congratulations on purchasing the XL-72 Theater by Sima Products. Please read this instruction manual
carefully before installing your inatable screen. When used properly according to this manual it will provide hours of entertainment for you and your family.
General Information and Warnings
• Do not over inate. Use only the supplied air pump as directed. Never use an air compressor.
• This screen is not a otation device, do not use in any type of pool.
• To avoid danger of suocation, keep children away from the screen when inating and deating. Do not
let children sit or play on the screen. Always deate and store screen immediately after use. Adult super
vision is required.
• Do not use screen during high winds in excess of 15 mph or threat of lightning.
• Do not smoke near the screen. Keep away from re.
• Do not use sharp objects in any manner around the XL-72 Theater.
• Do not climb or sit on inated surfaces.
• Clean only with mild soap and water. Do not use harsh chemicals.
Sima Products has researched all regulations regarding the use of this XL-72 Theater. We have not found
any regulations related to the use of our screen; however we will not be responsible if some other regulations apply to this product in the country you intend to operate the system. It is the users responsibility to
be aware of such regulations and obey them. Sima Products will not accept any responsibility for failure to
meet local regulations.
Model XL-72
Size Inated 69” x 32” x 70” (with pontoons)
69” x 32” x 54.5” (without pontoons)
Weight (approximate) 28 lbs.
Page 3

List of Materials:
Your package should include the following materials:
Inatable Frame
72” White PVC Screen
16” Extra set of detachable pontoons
1 Air pump (inator / deator) Part # 52472
Select A Setup Site
• Select a site that has the necessary height clearance for the screen and enough room for your projector
to properly focus and size the projected image. The screen will stand nearly 63 inches in height. Allow
approximately 6 to 8 feet in front (or behind for rear-projection) of the screen to adjust the projector.
• Be sure there are no sharp objects lying on the surface that might puncture or tear the screen.
• Check to be sure that a 110V/120V AC wall outlet is within reach to plug in the air pump. Use a properly
grounded GFI outlet if using the product outdoors.
• Unpack the screen at the location in which it will be inated.
Page 4
Unpacking the Screen
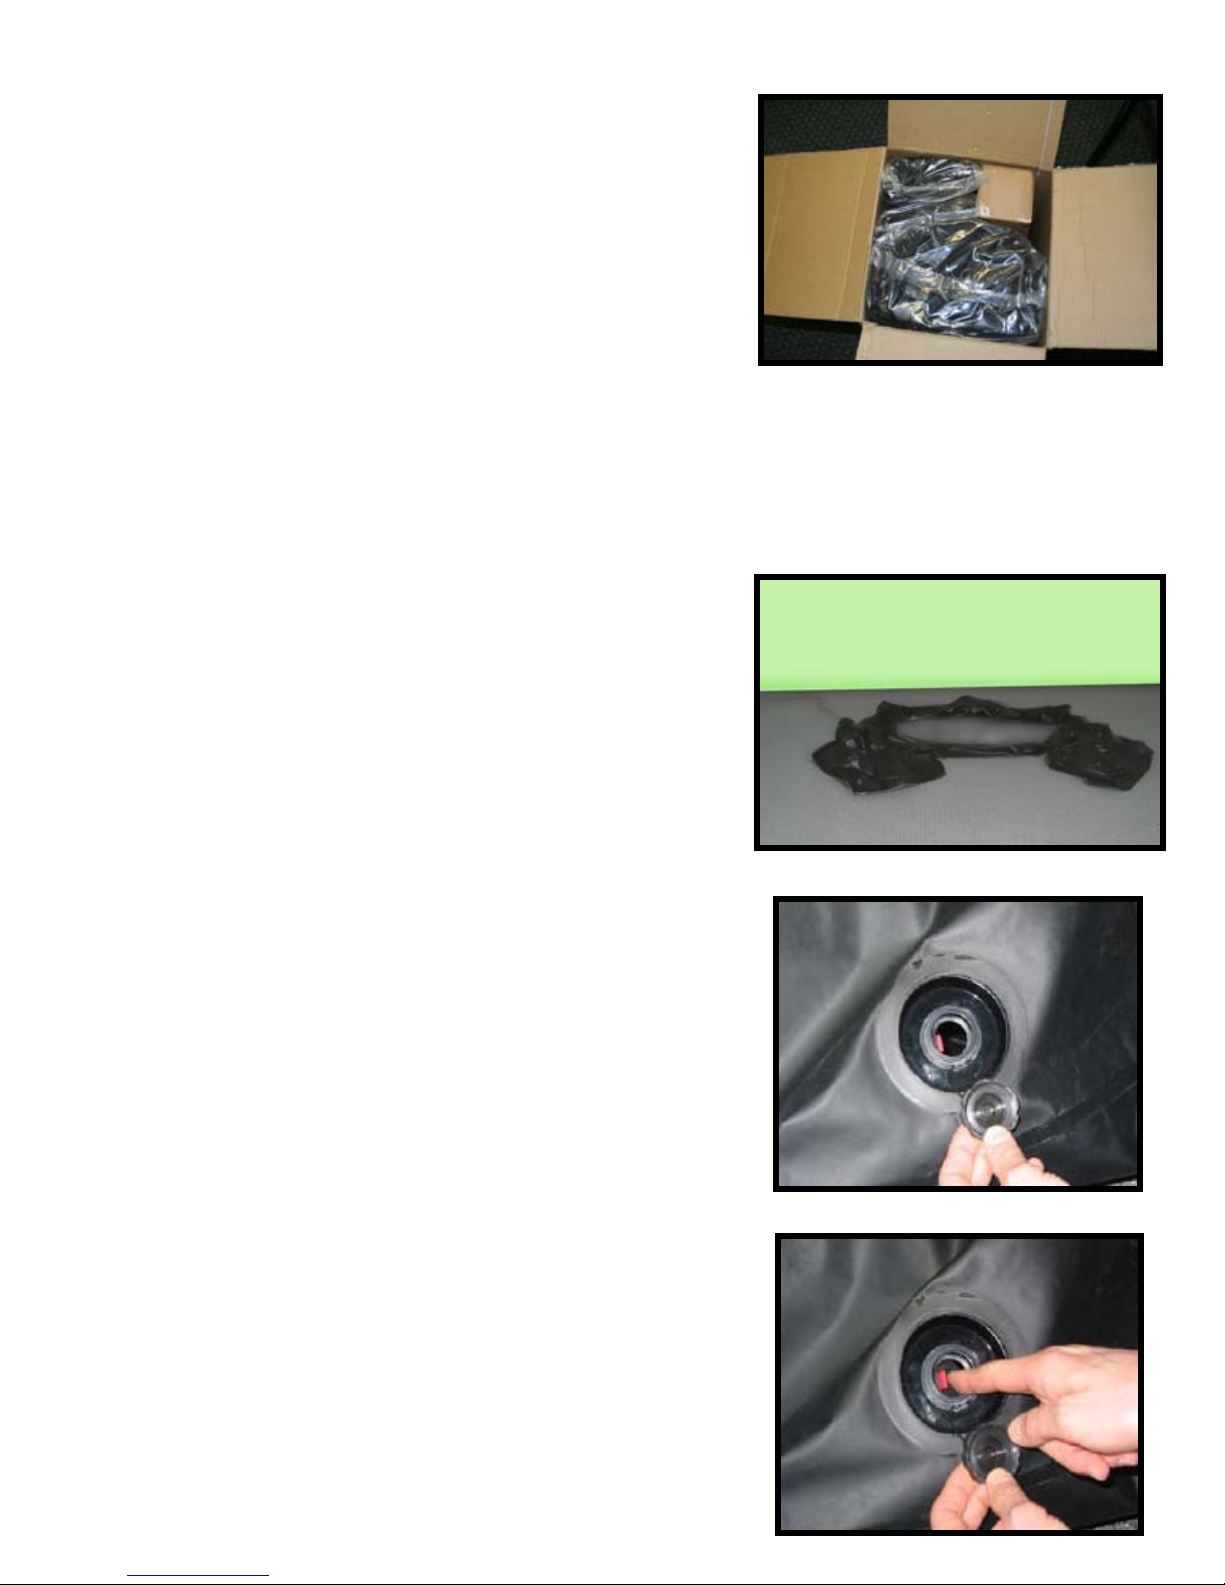
1. Remove all the items from box. Don’t cut the boxes too deep,
as this may damage the screen. (FIG 1)
Inating the screen
1. Remove the frame from the package. Unroll the
screen as shown at right. Be sure both bases are
facing the correct way. (Both air valves should be
facing the same direction.) (FIG. 2)
FIG 1
2. Plug the AC air pump into an AC power outlet.
NOTE:
POWER SUPPLY MUST BE 120V AC, 60 Hz. USE A
PROPERLY GROUNDED GFI OUTLET IF USING THE
PRODUCT OUTDOORS
3. Locate the air inlet/outlet valves. You will notice that
each valve on each base has two layers of seals that
cut o the airow. The outer seal is a threaded cap
that screws into place. (FIG. 3)
4. The inner seal is a rubber check valve designed to
hold in air when a certain amount of pressure is applied.
(FIG. 4)
FIG 2
FIG 3
Page 5
FIG 4
 Loading...