

Sima WX-167 Quick start guide
Quick Start Guide
Public Alert Radio
Model WX-167
Operation
1. Select a place for the radio
Place the unit where you are most likely to hear its alert tone and see the message indicator lights. Place the radio near windows
or other openings for best reception. Keep away from sources of interference.
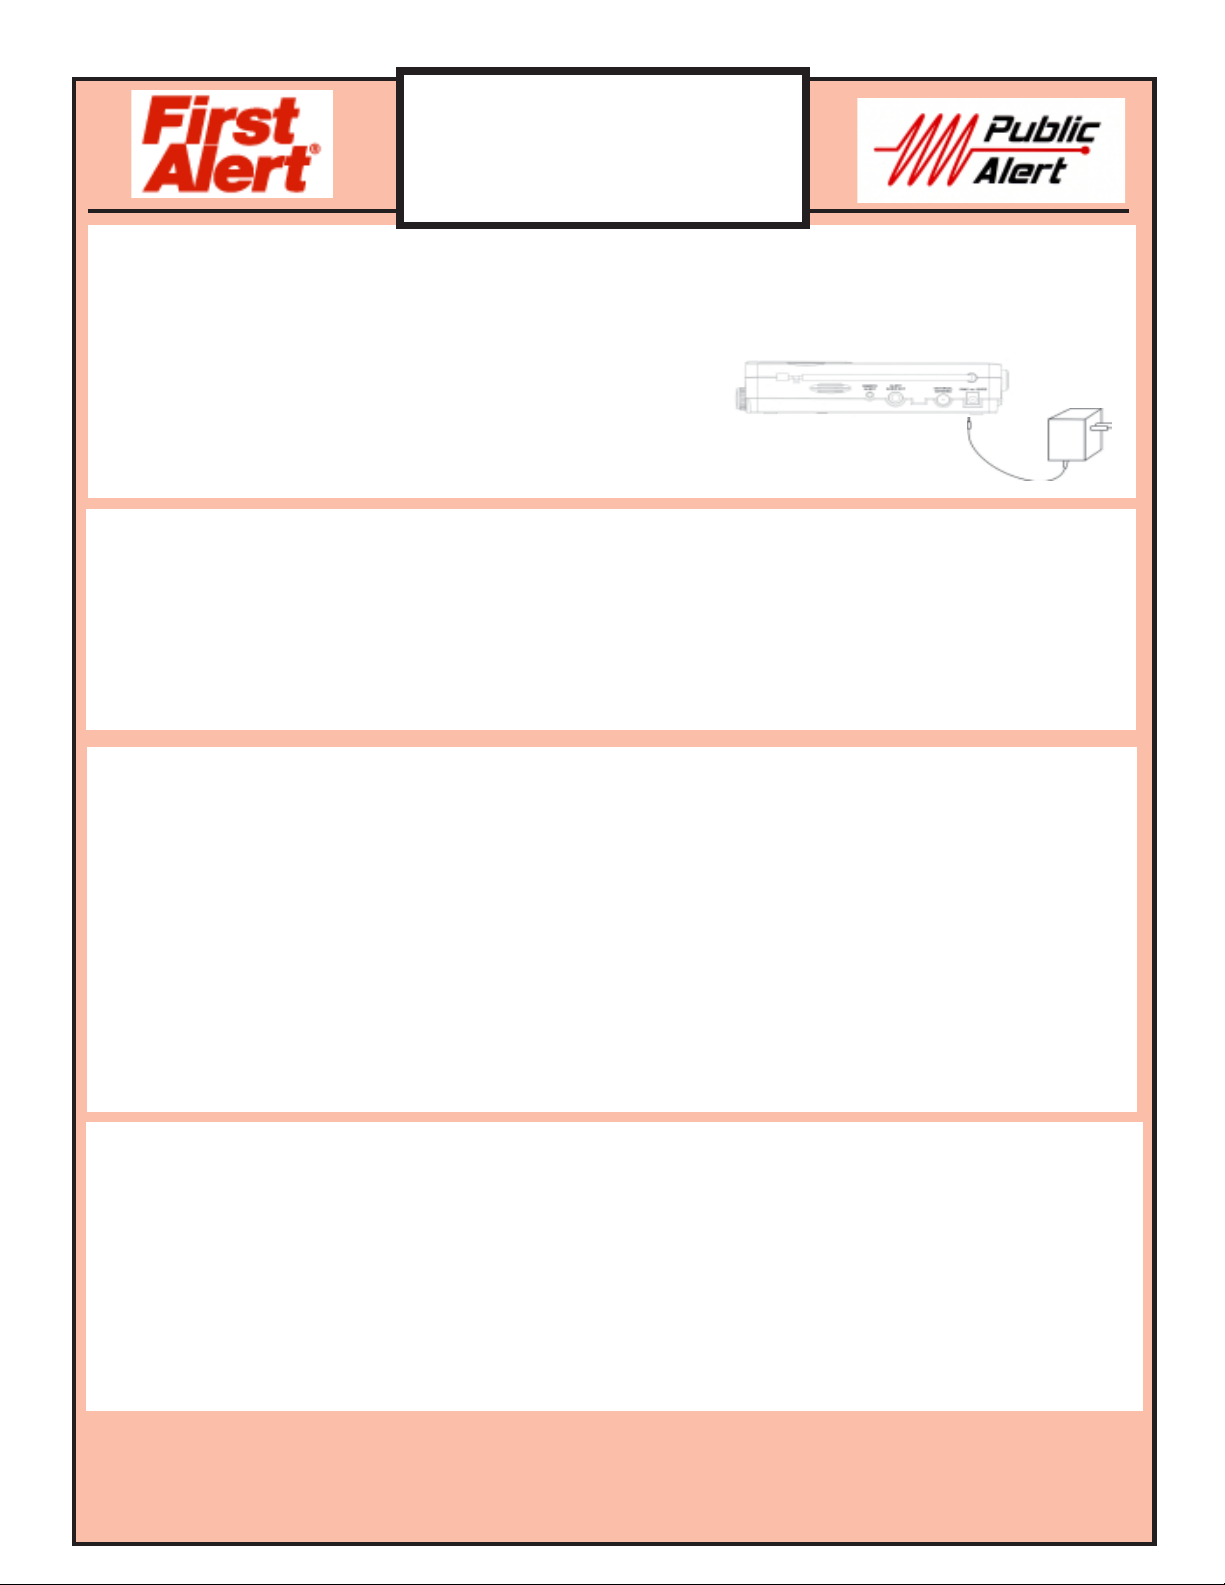
2. Connect Power - Standard 120V AC outlet
1. Plug the AC adapter cord into the 9V AC input jack on the back of the unit.
2. Plug the adapter into the wall outlet.
3. Set-up and Language Selection
When the radio is first powered up, the LCD screen will illuminate and the four lights located above it will light up for 3 seconds
and it will beep 3 times. Note: The radio will prompt you to select a language the first time you program it. You will not will be
required to do so when programming the radio at other times.
1. When powered up, the radio will prompt you to HOLD PROGRAM TO SETUP RADIO in English then in Spanish. Press
and hold the PROGRAM key for 3 seconds.
2. The LCD screen will display ENGLISH. Use the FUNCTION KNOB to toggle between English or Spanish language.
Select your language choice and press the NEXT ( “>”) key to save your selection. After setting the language selection
proceed to Step 2 in Setting the Clock and Calendar section.
4. Setting the Clock and Calendar
1. When powering up the radio, you will be prompted to HOLD PROGRAM TO SETUP RADIO. Press and hold the PROGRAM
key as prompted.
2. The SET DATE/TIME menu will be displayed. Press the NEXT ( “>”) key to enter the SET DATE/TIME menu.
3. SET YEAR will be displayed on the screen. Turn the FUNCTION knob to select the current year.
4. Press the NEXT ( “>”) key and SET MONTH will be displayed. Turn the FUNCTION knob to select the desired month.
5. Press the NEXT ( “>”) key and SET DAY will be displayed on the screen. Turn the FUNCTION knob to select the correct day
of the month.
6. Press the NEXT ( “>”) key to enter the TIME ZONE menu. Turn the FUNCTION KNOB to set the Time Zone - as follows:
Eastern - 0500, Central - 0600, Mountain - 0700 & Pacific - 0800.
7. Press the NEXT ( “>”) key and DAY SAVING will be displayed on the screen. Turn the FUNCTION knob to select either
Daylight Savings ON or OFF. Set to ON if it is currently Daylight Savings time in your location.
8. Press the NEXT ( “>”) key and CLOCK will be displayed next. Turn the FUNCTION knob to select between the 12-hour or
24-hour clock systems.
9. Press the NEXT ( “>”) key and SET TIME will be displayed. Use the FUNCTION knob to scroll to the current time.
10. Press the SAVE key to save all of the settings for your clock/calendar and return to normal operation.
5. Selecting the Weather Band Channel
To receive alerts for your area, you must select the correct weather channel. To identify the appropriate channel for your area,
visit the NOAA web site at: http://www.nws.noaa.gov/nwr/indexnw.html. Use the channel listed for your county when
programming the radio.If you are unable to access the NOAA website, you can select a weather channel by listening to each
channel and choosing the one with the best reception and includes information for your county. However, the best reception may
not come from the tower broadcasting to your area. To select the WB channel for your listening area:
1. Press the radio ON button to hear the voice broadcast. Adjust the volume knob as needed.
2. Press and hold the PROG key until SET DATE/TIME is displayed on the screen.
3. Turn the FUNCTION knob until SET WB CHANNEL is displayed on the screen.
4. Press the NEXT ( “>”) key to enter the WB Channels menu.
5. Turn the FUNCTION knob to select the correct channel for your area. Make sure you can hear the voice clearly.
6. Press the SAVE key to save the channel and return to normal operation.
Important Note! Be sure to Set the Alert Volume Switch
If the alert volume switch is in the OFF position, the siren will not sound.
Set to Lo or Hi as desired.
7. Setting the Specific Area Message Encoding (S.A.M.E.) location
Selecting your S.A.M.E. location can reduce unnecessary alerts. To select your S.A.M.E. location, simply select your
state, county and county subdivision at the menu prompts as described below.
1. Press and hold the PROG key until SET DATE/TIME is displayed on the screen.
2. Turn the FUNCTION knob to select the SETUP LOCATIONS menu.
3. Press the NEXT ( “>”) key to enter the SETUP LOCATIONS menu. SET LOCATION 01 will be displayed on the screen.
4. Press the NEXT ( “>”) key to enter the SELECT STATE menu.Turn the FUNCTION knob to locate the desired state.
5. Press the NEXT( “>”) key to enter the SELECT COUNTY menu. Turn the FUNCTION knob to locate the desired county.
7. Press the NEXT ( “>”) key to enter the SELECT SUBDIVISION menu. Turn the FUNCTION knob to scroll through the
subdivisions within a county. Note: Setting the subdivision to ANY (0) will receive all alerts broadcast in the entire county.
7. Press the NEXT ( “>”) key when you have selected the subdivision of your county.
8. Press the SAVE key to save your SAME location and return to normal operation
8. Basic Operation - Press the Radio ON button to hear the weather channel broadcast or alert voice message.
Press the Radio OFF button to turn off the radio. Press the Radio OFF button to silence the siren when an alert is received.
Note: Radio will alert in the Off position, as long as green POWER light is on and radio is tuned to the correct weather channel
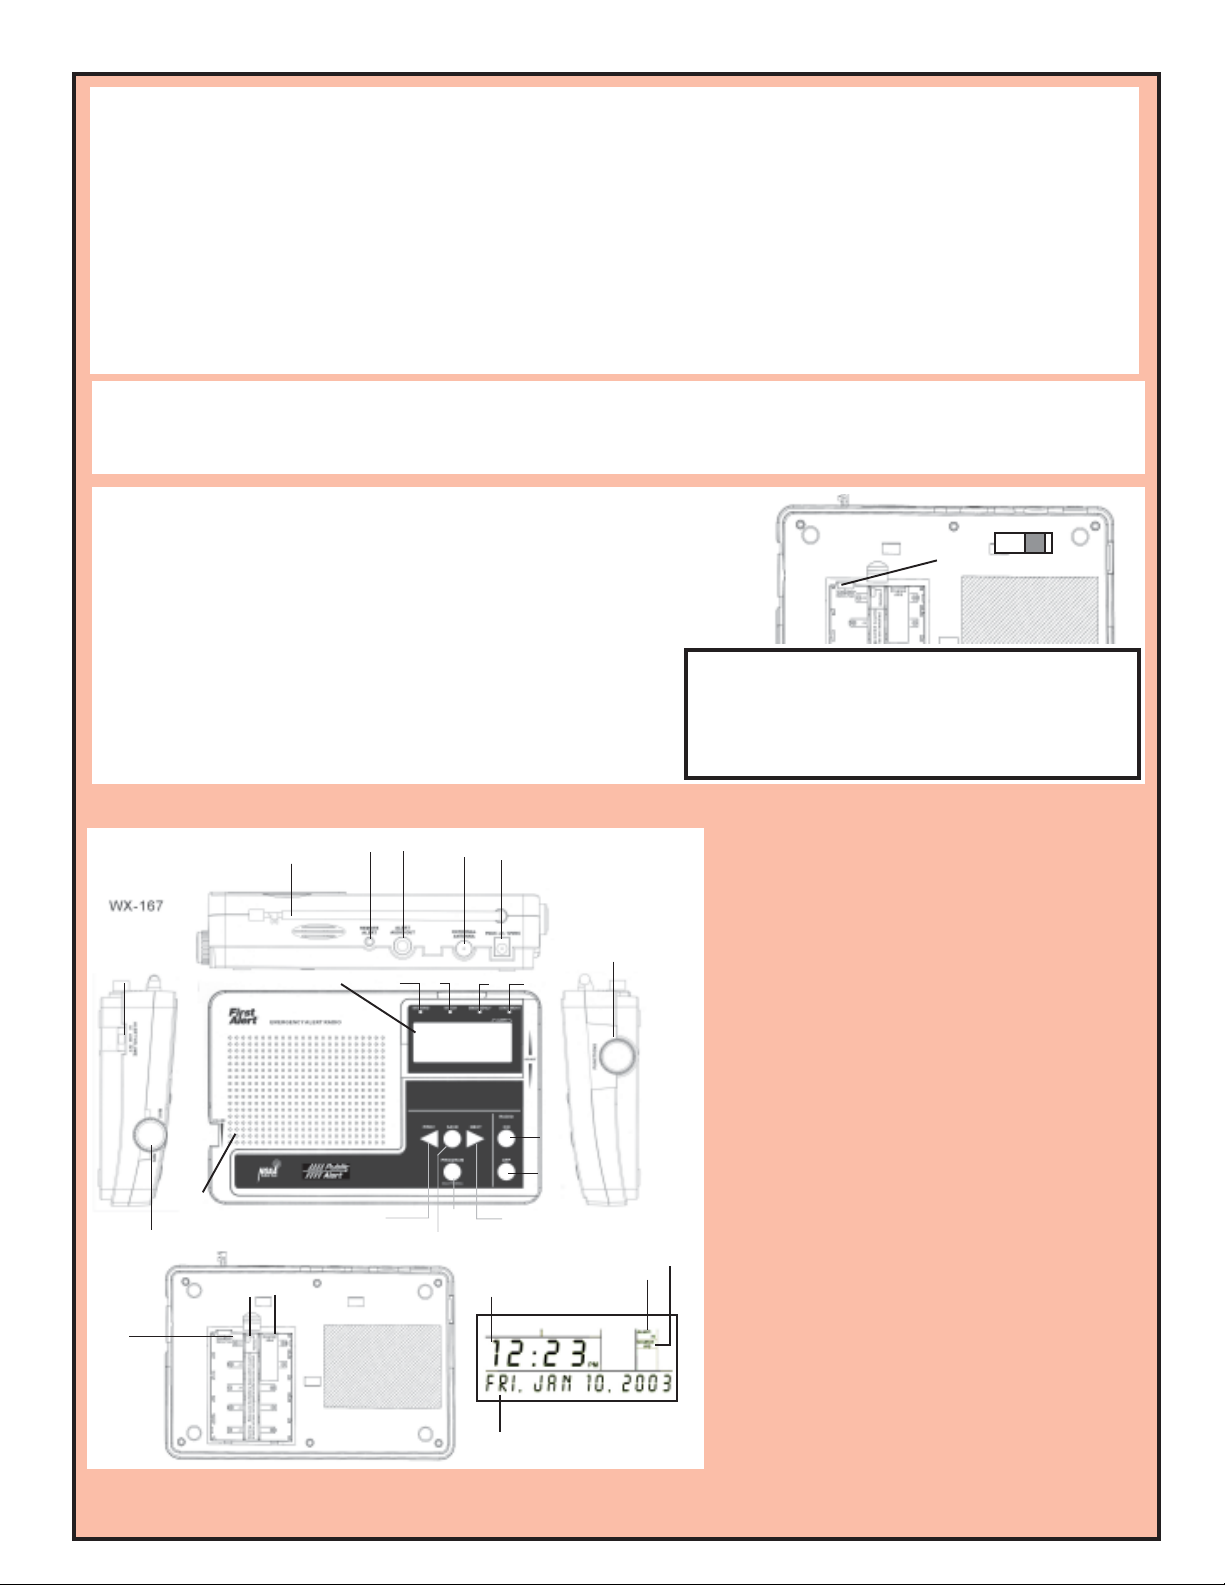
9. Installing batteries
The WX-167 uses 5 AA non-rechargeable alkaline, or rechargeable Nickel
Cadmium (Ni-Cad) or Nickel Metal Hydride (NiMH) batteries. Use the slide switch
located inside the battery compartment to select the battery type. To select
“Alkaline” when alkaline batteries are installed, push the switch to the right as
shown in Fig. 1. To select “Ni-Cad” when using rechargeable batteries,
push the switch to the left.
1. Turn the unit upside down. Locate the battery compartment door tab.
2. Press down on ARROW and slide cover open in direction of arrow.
3. Insert the batteries into the battery compartment.
Be sure to follow the polarity markings.
4. Place the batteries in the battery compartment and replace the cover.
When the switch located in the battery compartment is set
to “NiCad”, the internal battery charger automatically
charges the batteries. Charging non-rechargeable
When using alkaline batteries, set the switch to “Alkaline”
batteries can cause fire or explosion!
Fig. 1
NiCad Alkaline
Warning!
LOCATION OF CONTROLS AND FUNCTIONS
23
51
4
1. IntegratedTelescopic Antenna
2. Remote Alert Jack
3. Alert Audio Out Jack
4. External Antenna Jack/Connector
5. 9V AC or 12V DC Power Jack
6. Liquid Crystal Display (LCD)
7. Warning (Red) Indicator LED
8. Watch (Orange) Indicator LED
9. Advisory (Yellow) Indicator LED
12
11
7
6
8
9
10
10. Power (Green) Indicator LED
11. Function Knob
12. ALERT Volume/OFF Switch
13. Audio Volume Knob
14. Speaker
15. PREVious Button (Denoted as “<”)
16. SAVE Button
17. PROGRAM Button
18. NEXT Button (Denoted as “>”)
19. Radio OFF Button
20. Radio ON Button
21. Battery type switch
22. PC programming switch
23. PC connection jack
LCD Screen
21
13
14
22
23
15
16
17
1
18
Screen
20
19
LCD
3
2
1. Time of Day with AM/PM indicator
2. Alert volume setting
3. Stored alert messages
4
4. Scrolling text for messages and program
menus.
If you have problems or questions regarding the set-up or operation of the WX-167, call our First
Alert Customer Service department at 800-345-7462 or visit our website at www.simacorp.com
 Loading...