

Page 1
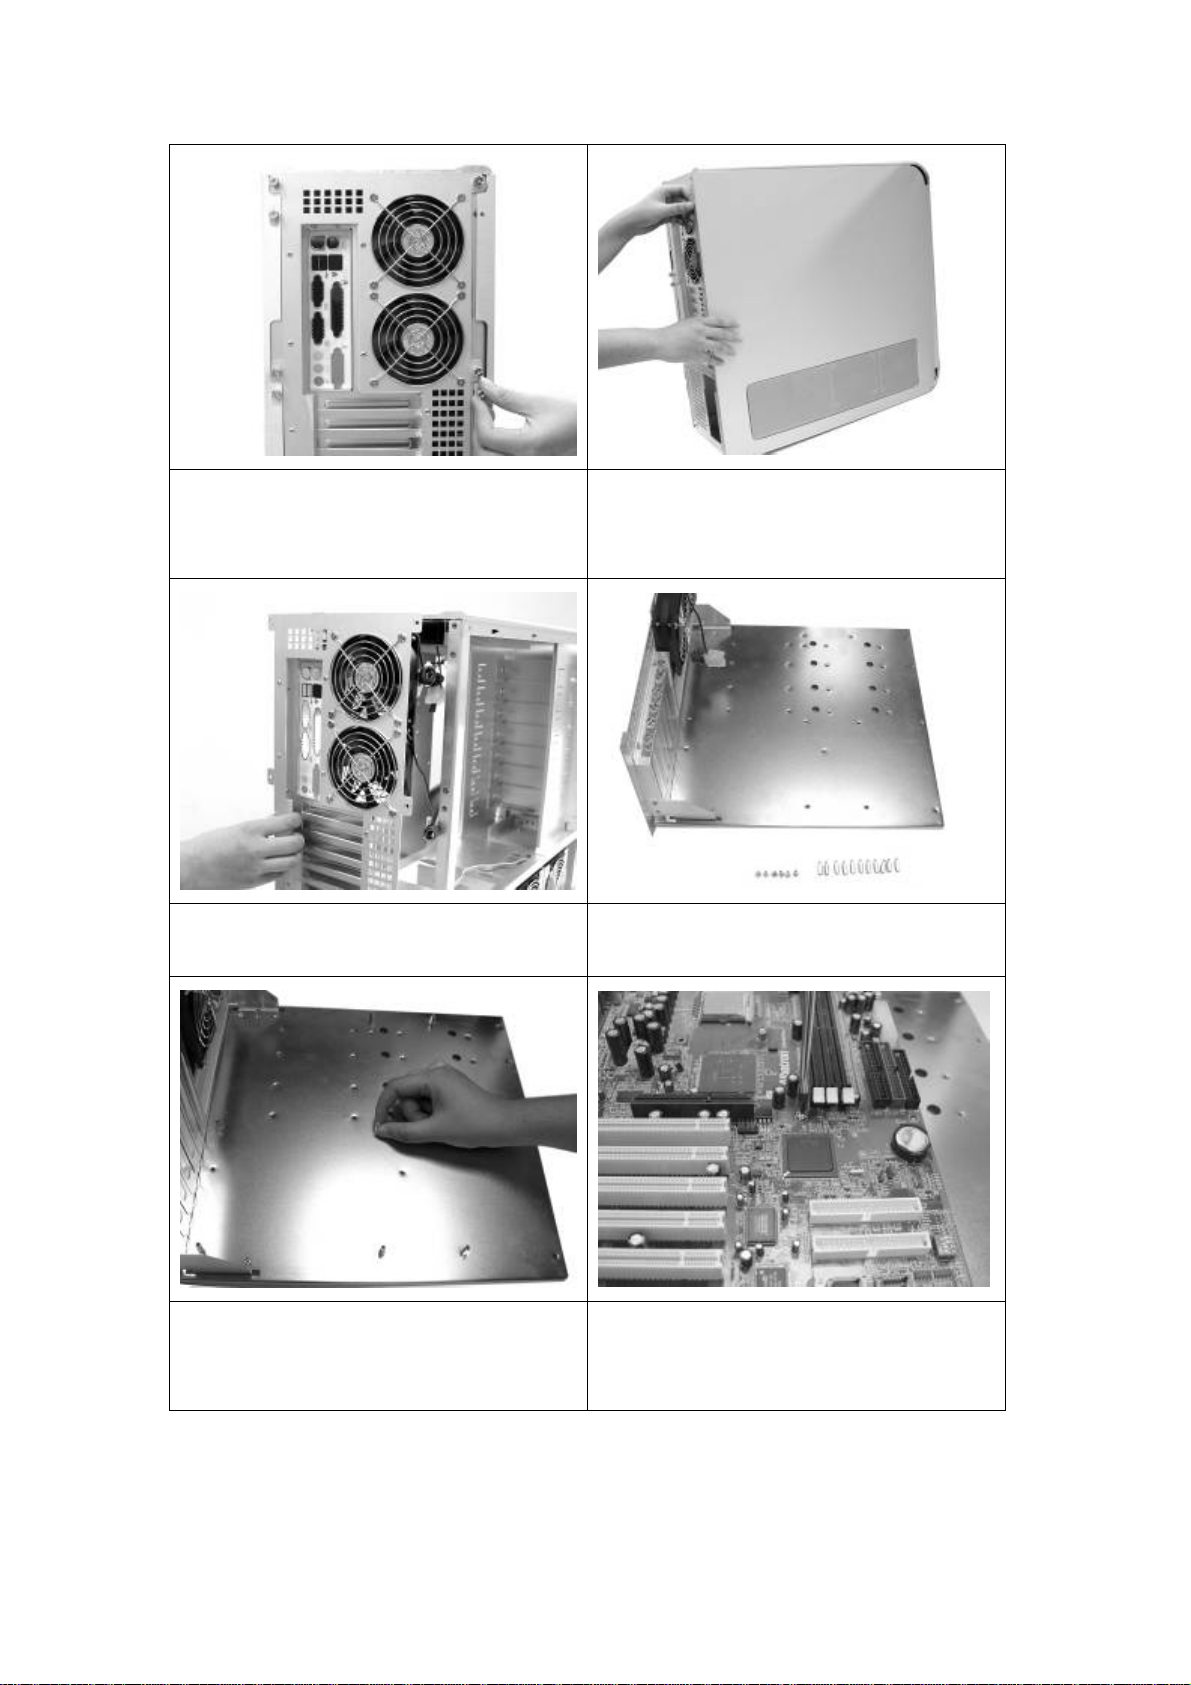
1. Remove all thumb screws from the back side
2. Remove side panels as shown
of the case (8 for side panels, 6 for motherboard
tray)
3. Pull the sliding motherboard tray out
4. Collect all motherboard stands as necessary
for your motherboard
5. Align and screw in each motherboard stands
onto the motherboard tray tightly
6. Place motherboard on the installed
motherboard stands and secure with screws
Page 2
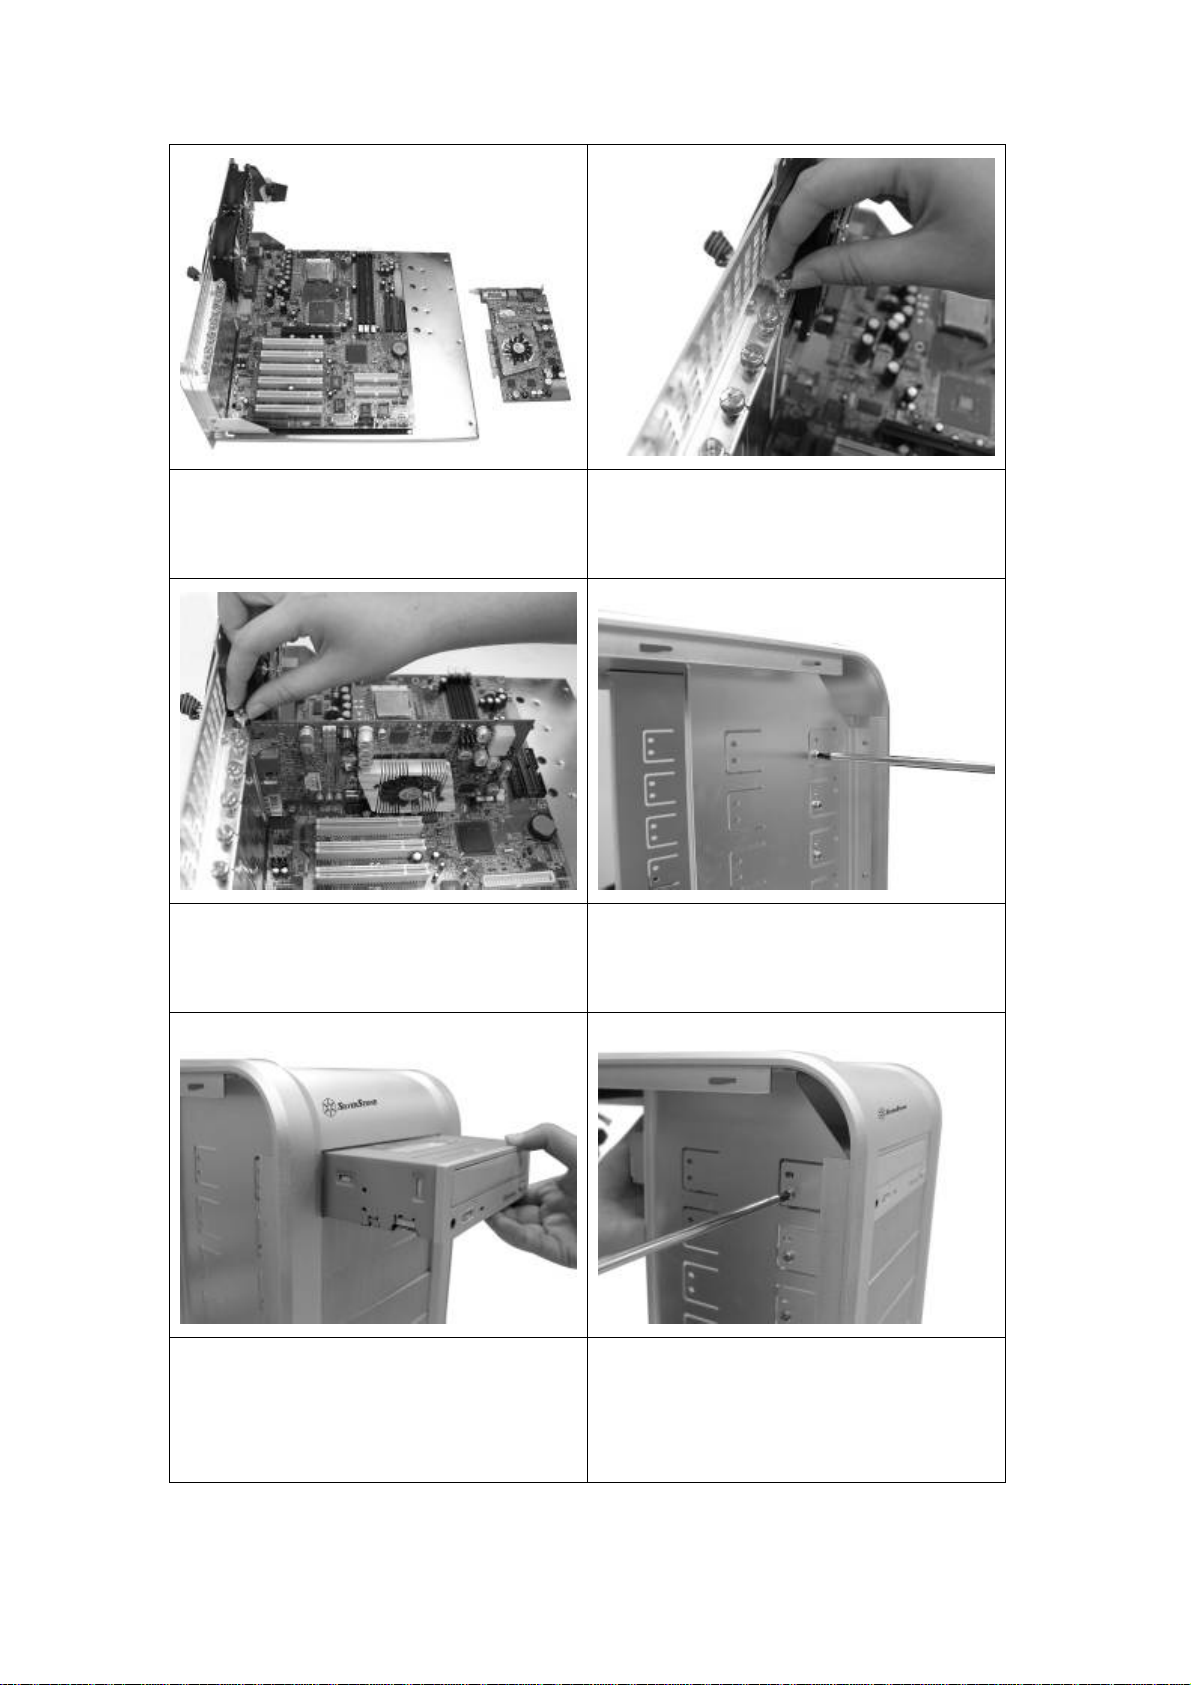
7. Expansion card installation
8. Remove all slot covers for the cards you wish
9. Insert all cards and secure with thumb screws
removed in the previous step
to install
10.. Look for drive bays you wish to use and
remove the screws in those bays
11. Insert optical dri ve or other 5.25” device into
the drive bay
12. Align the drive or device to appropriate
positions and secure with PW-M3*6 screws as
shown
Page 3

13. An installed optical drive shown
14. Loosen the thumb screw holding the 3.5”
15. Slide drive cage to one side as shown to
remove it
drive cage
16. A removed 3.5” drive cage shown
17. Insert hard drive into the drive cage and
secure with HW#6-32*6 screws
18. Each 3.5” drive cage can accommodate three
hard drives
Page 4

19. Insert 3.5” drive cage back into the case
20. Secure drive cages by tightening the thumb
screws
21. Remove four HW#6-32*6 screws on the
outer edge of PSU plate
23. Align the power supply to the PSU plate and
secure with HW#6-32*6 screws
22. Remove the PSU plate from the case to
prepare for installation
24. Install both PSU plate and the power supply
back into the case
Page 5

25. Slide completed motherboard tray (with
26. Secure motherboard tray with all six thumb
motherboard, cards, CPU, memory, etc…) back
into the case
27. Remount both side panels
screws and proceed to connect all cables and
wires to complete system install
28. Secure both side panels with thumb screws
29. TJ07 installation is now complete
 Loading...