

Page 1
PS05B
Page 2

Page 3
PS05B
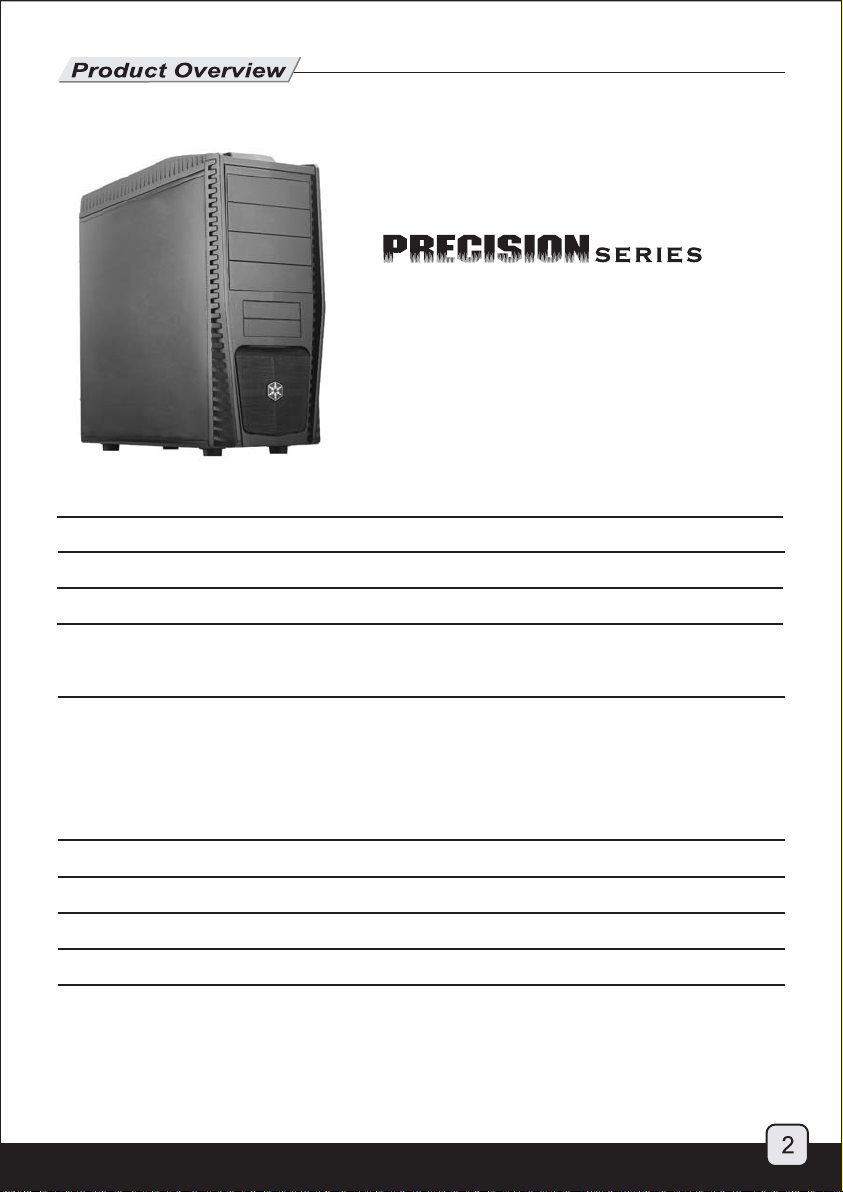
The Precision series PS05 is an excellent advancement for mid-size
tower chassis. It is designed to be both high performing with up to five
120mm fans and easy to assemble with almost all tool-less mechanisms
for installing components. Thoughtful details from high-end chassis
designs such as all black interior, cable tie down spots and vibration
dampening hard drive mounts are part of this model’s strength. For those
requiring a quality enclosure with great performance and ergonomics,
the PS05 is an excellent choice.
Page 4
PS05B
Model
Material
Motherboard
Drive Bay
Cooling System
Expansion Slot
Front I/O Port
Power Supply
Dimension
SST-PS05B (Black)
Plastic & mesh front panel and steel body
ATX, Micro ATX
External
Internal
Front
Rear
Top
Buttom
7
USB2.0 x 2, Audio x 1, MIC x 1
1 x Optional standard PS2 (ATX)
190 mm (W) x 466 mm (H) x 485 mm (D)
5.25" x 4, 3.5” x 2
3.5" x 4
1 x 120mm fan slot
1 x 120mm exhaust fan
2 x 120mm fan slot
1 x 120mm fan slot
Page 5

LEFT SIDE PANEL
12025 FAN x 2 (OPTION)
RIGHT SIDE PANEL
TOP I/O USB x 2 +
SPK + MIC
12025 FAN x 1
EXPANSION SLOTS x 7
(OPTION)
PS2 PSU (OPTION)
3.5”HDD TRAY
12025 FAN x 1 (OPTION)
3.5”DRIVE BAY x 4
RESET BUTTON
POWER BUTTON
5.25” DRIVE BAY x 4
3.5” DRIVE BAY x 2
12025 FAN x 1 (OPTION)
SCREWS
Secure power supply
and motherboard
SCREWS Secure motherboard
SCREWS Secure 5.25 drive and floppy
HOLDER Secure power supply
Manual
Page 6
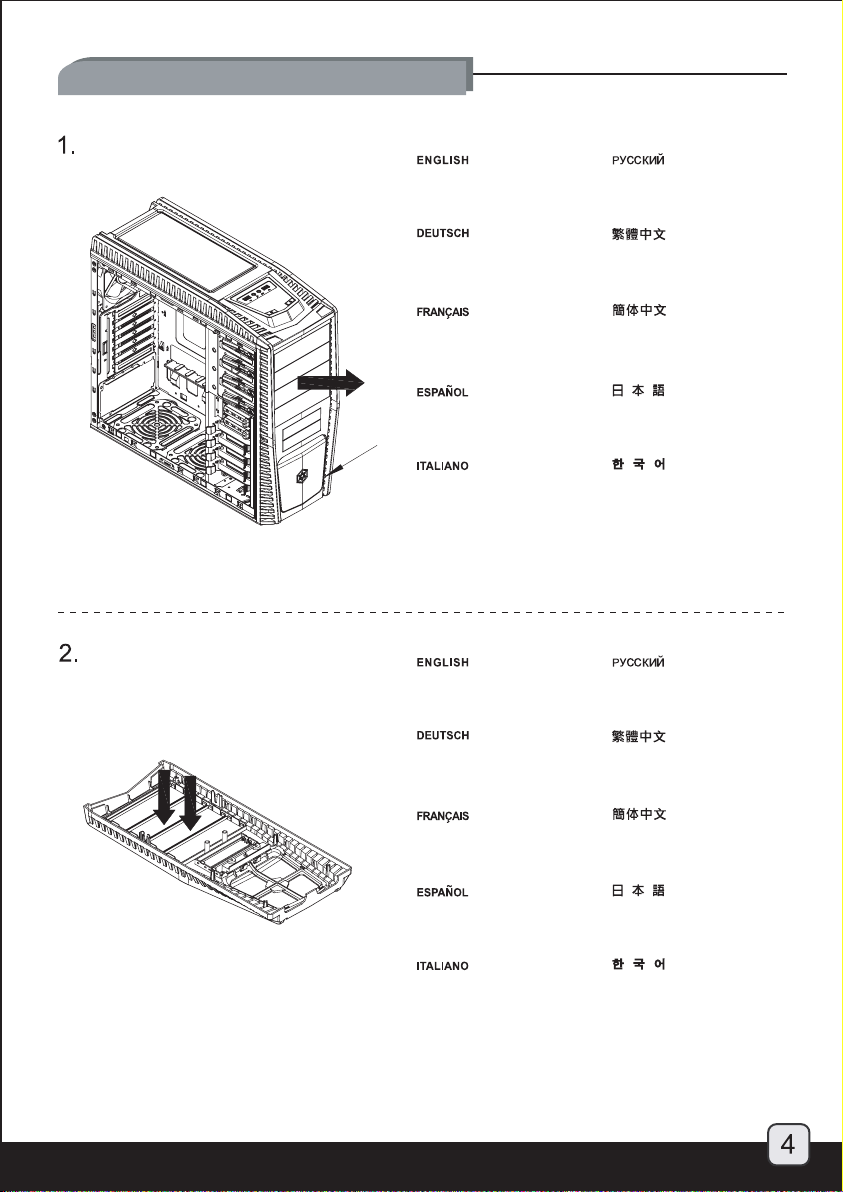
Optical drive/5.25” drive bay installation:
Remove the front panel
as shown.
Nehmen Sie die Frontblende
wie gezeigt ab.
Retirez le panneau frontal
comme montré.
Retire el panel frontal como
se muestra.
Rimuovere il pannello frontale
come mostrato in figura.
Remove the 5.25” drive bay
covers as shown.
Entfernen Sie die 5,25 ZollLaufwerkschachtabdeckungen
wie dargestellt.
Снимите переднюю панель,
как показано на рисунке.
請依圖示移除前面板。
请依图示移除前面板。
図示されるように、フロントパネル
を取り外します。
전편패널을 그림과 같이
제거합니다.
Снимите заглушки отсеков 5,25
дюйма, как показано на рисунке.
請依圖示移除5.25吋擋片。
Retirez les caches des baies
5.25” comme montré.
Retire las tapas para dispositivos
de 5,25” como se muestra.
Rimuovere i cover da 5.25”
come mostrato in figura.
请依图示移除5.25吋挡片。
図示されるように、5.25インチのド
ライブベイカバーを取り外します。
5.25” 드라이브베이 커버를
그림과 같이 제거합니다.
Page 7

Optical drive/5.25” drive bay installation:
Push the optical drive or 5.25” device into the 5.25” drive bay in all the way and PS05’s tool-less mechanism will lock it automatically.
Schieben Sie das optische Laufwerke oder 5,25 Zoll-Laufwerk bis zum Anschlag ein; es wird automatisch verriegelt.
Poussez le lecteur optique ou l'appareil 5.25” dans la baie 5.25” jusqu'au fond et le mécanisme sans outils du PS05’s le verrouillera
automatiquement.
Empuje el dispositivo óptico ó dispositivo de 5,25” dentro de la bahía para dispositivos de 5,25” hasta el fondo y el mecanismo sin
herramientas de la PS05 lo enganchará de forma automática
Spingere il drive ottico o la periferica da 5,25” nel bay fino a quando il sistema di bloccaggio tool-less di PS05 non bloccherà
automaticamente il dispositivo.
Вставьте привод оптических дисков или другое устройство формата 5,25 дюйма в отсек 5,25 дюйма до упора так, чтобы
устройство автоматически зафиксировалось механизмом корпуса PS05, не требующим применения инструментов.
將光碟機或5.25吋裝置由前方裝入機殼,PS05的免工具機構會自動固定5.25吋裝置。
将光驱或5.25吋装置由前方装入机箱,PS05的免工具机构会自动固定5.25吋装置。
光学ドライブまたは5.25インチデバイスを5.25インチドライブベイにきちんと固定されるまで押し込みます。そうすれば、
PS05の工具不要機構によって自動的にロックされます。
광드라이브 혹은 5.25” 장치를
5.25” 드라이브 베이로 끝까지 밀어 넣으면 PS05의 Tool-Less 메카니즘에 의해 자동으로 고정됩니다.
Page 8

Optical drive/5.25” drive bay installation:
Push the 3.5” device into the 3.5” drive bay and secure it by pushing the tool-less mechanism in the direction as shown to secure it.
Schieben Sie das 3,5 Zoll-Gerät in den 3,5 Zoll-Laufwerkschacht ein, fixieren Sie es, indem Sie die Mechanik in die angezeigte
Richtung schieben.
Poussez l'appareil 3,5” dans la baie 3,5” et fixez-le en poussant le mécanisme sans outils dans la direction montrée pour le fixer.
Empuje el dispositivo de 3,5” en la bahía para dispositivos de 3,5” y fíjelo empujando el mecanismo sin herramientas en la dirección
que se muestra para asegurarlo
Spingere la periferica da 3,5” nel bay ed assicurarla mediante la pressione del meccanismo tool-less nella direzione mostrata in figura.
Вставьте устройство формата 3.5 дюйма в отсек 3.5 дюйма и закрепите устройство, надавив на механизм, не требующий
применения инструментов, в направлении, показанном на рисунке.
依箭頭所示的方向推動,便能輕鬆固定3.5吋裝置。
依箭头所示的方向推动,便能轻松固定3.5吋装置。
3,5インチデバイスを3,5インチドライブベイに入れ、工具不要機構を押して固定します。
3,25” 디바이스를 3,5” 드라이브 베이로 밀어 넣은후, 그림에 나타난 방향으로 살짝 밀어 tool-less 메카니즘이 고정시키도록 합니다.
Page 9

Hard drive installation:
1.
2.
Remove the hard drive tray
from the drive cage.
Nehmen Sie den Festplatteneinschub
aus der Halterung.
Retirez le support du disque dur
du casier.
Retire la bandeja para discos duros
de la carcasa para discos duros.
Rimuovere il supporto hard
drive dalla gabbia.
Remove hard drive tray’s locking clips. Извлеките фиксаторы из
Извлеките лоток для жесткого
диска из корзины.
先將硬碟托盤自硬碟架中取出。
先将硬盘托盘自硬盘架中取出。
ハードドライブトレーをドライ
ブケージから取り出します。
하드 드라이브 트레이를
드라이브 케이지로 부터
제거합니다.
лотка для жесткого диска.
Entfernen Sie die Fixierclips vom
Festplatteneinschub.
Retirez les clips de verrouillage du
support du disque dur.
Retire los clips de enganche de la
bandeja para discos duros.
Rimuovere le clip di bloccaggio
dal supporto.
移除硬碟托盤兩側之固定卡榫。
移除硬盘托盘两侧之固定卡榫。
ハードドライブトレーのロック
ピンを取り外します。
하드 드라이브 트레이의 잠금
클립을 제거합니다.
Page 10

Hard drive installation:
3.
4.
Insert the hard drive into the tray and
then secure it with the locking clips.
Setzen Sie die Festplatte in den Einschub
ein, fixieren Sie die Platte anschließend
mit den Fixierclips.
Insérez le disque dur dans son
support et fixez-le ensuite avec
les clips de verrouillage.
Inserte el disco duro en la
bandeja y asegúrelo con los
clips de enganche.
Inserire il disco rigido nel supporto ed
assicurarlo allo stesso per mezzo delle
clip di bloccaggio rimosse al passo 2.
Insert the hard drive tray back into
the drive cage.
Вставьте жесткий диск в лоток и
закрепите диск фиксаторами.
將硬碟安裝至硬碟托盤並以
卡榫固定。
将硬盘安装至硬盘托盘并以
卡榫固定。
ハードドライブをトレーに入れて
から、ロックピンによって固定し
ます。
하드 드라이브를 트레이에 장착한
후 잠금클림을 이용해 고정합니다.
Вставьте лоток для жесткого
диска в корзину.
Setzen Sie den Festplatteneinschub
wieder in die Halterung.
Remettez le disque dur avec son
support dans le casier à disques
durs.
Inserte de nuevo la bandeja para
discos duros en la carcasa para
discos duros.
Inserire quindi il disco rigido nella
gabbia.
將硬碟托盤裝回硬碟架。
将硬盘托盘装回硬盘架。
ハードドライブトレーをドライ
ブケージに戻します。
하드 드라이브 트레이를 드라이브
케이지에 삽입합니다.
8
Page 11

Expansion card installation:
1.
2.
Loosen the expansion card’s tool-less
mechanism.
Lösen Sie den Mechanismus am
Erweiterungskartensteckplatz.
Desserrez le mécanisme sans
outils des cartes d'extension.
Afloje el mecanismo sin herramientas
para la tarjeta de expansión.
Allentare il meccanismo tool-less delle
schede di espansione.
Remove the required expansion slot
covers, the second to sixth covers are
not reusable once removed.
Ослабьте механизм фиксации
платы расширения, не требующий
применения инструментов.
鬆開擴充卡免工具裝置。
松开扩充卡免工具装置。
拡張カードの工具不要機構を緩
めます。
확장카드의 tool-less 메카니즘을
풀어 줍니다.
Снимите необходимые заглушки
слота расширения. Заглушки
со второй по шест ую нельзя
использовать повторно.
Entfernen Sie die jeweiligen
Steckplatzabdeckungen;
beachten Sie dabei, dass die
Abdeckungen 2 – 6 nicht
wiederverwendet werden können.
Retirez les caches des emplacements
d'extension, le deuxième des six caches
ne plus être réutilisé une fois retiré.
Retire las cubiertas de la ranura de la tarjeta
de expansión. Las cubiertas de la segunda
hasta la sexta no son reutilizables una vez
se retiren.
Rimuovere i necessari cover degli slot di
espansione, il secondo ed il sesto cover
non sono riutilizzabili se rimossi.
移除背板上的擴充卡擋片。請注意,
第2片至第6片無法重複安裝回PS05
機殼中。
移除背板上的扩充卡挡片。请注意,
第2片至第6片无法重复安装回PS05
机箱中。
必要な拡張スロットカバーを取り外
します。2番目から6番目のカバーは
一度外すと戻せません。
필요한 확장 슬롯의 커버를 제거합니다.
2번째에서 6번째의 커버는 제거하면 재
사용이 불가합니다.
Page 12

Expansion card installation:
3.
4.
Insert the expansion cards as
required by your system build.
Setzen Sie die Erweiterungskarten
ein.
Insérez les cartes d'extension selon
vos besoins.
Inserte la tarjeta de expansión
del modo oportuno según esté
distribuido su sistema.
Inserire le schede di espansione
necessarie.
Push the expansion card’s tool-less
mechanism back into locking position.
Вставьте платы расширения с
учетом требований системы.
請依需求安裝所需的擴充卡。
请依需求安装所需的扩充卡。
ご使用のシステム構成によって
必要に応じて、拡張カードを装
着します。
필요한 확장카드를 삽입합니다.
Верните в исходное положение
механизм фиксации платы
расширения, не требующий
применения инструментов.
Schieben Sie den Fixierungsmechanismus
wieder zurück in die Sperrposition.
Poussez le mécanisme sans outils
pour le verrouiller.
Empuje el mecanismo sin herramientas
para la tarjeta de expansión hasta la
posición de enganche.
Riportare il meccanismo tool-less nella
posizione di blocco.
將免工具裝置推至原位即完成
安裝與固定。
将免工具装置推至原位即完成
安装与固定。
拡張カードの工具不要機構をロ
ック位置にしてください。
확장카드의 tool-less 메카니즘을
잠금 위치로 밀어놓습니다.
Page 13

Fan installation:
Top fans:
1.
Remove the top cover.
Nehmen Sie obere Abdeckung ab. 移除上蓋。
Retirez le panneau supérieur. 移除上盖。
Снимите верхнюю крышку.
2.
Retire la cubierta superior.
Rimuovere il cover superiore.
Tilt the front fan forward and the rear
fan toward the rear at an angle to
install them into the fan bracket as
shown.
Neigen Sie den Frontlüfter etwas
nach vorne, den hinteren Lüfter
etwas nach hinten, bringen Sie die
Lüfter anschließend wie abgebildet
an der Lüfterhalterung an.
Penchez le ventilateur frontal vers l'avant
et le ventilateur arrière vers l'arrière avec
un certain angle pour les installer dans le
casier à ventilateurs comme montré.
Gire el ventilador frontal hacia delante y el
trasero hacia la parte posterior en ángulo
para instalarlo en el bracket para ventiladores
como se muestra.
上部カバーを取り外します。
상부커버를 제거합니다.
Наклоните передний вентилятор
вперед, а задний вентилятор –
назад так, чтобы установить их на
кронштейн для вентиляторов, как
показано на рисунке.
請採取斜向方式將風扇安裝至上蓋內部。
请采取斜向方式将风扇安装至上盖内部。
図示されるようにフロントファンは前方に、
後部ファンは後方に傾けてファンブラケット
上にインストールします。
Ruotare la ventola frontale in avanti e
la ventola posteriore verso un angolo
posteriore per installarle nel supporto
ventole come mostrato.
전면팬을 앞으로 기울이고, 후면팬은 뒤쪽을
기울여 그림에서와 같이 팬 브라켓에 팬을
장착합니다.
Page 14

Fan installation:
3.
4.
Route the fan cables through pass
through hole on the top of the case
for connecting to your motherboard
or power supply.
Verlegen Sie die Lüfterkabel durch die
Durchführungsöffnung im Oberteil des
Gehäuses, schließen Sie die Kabel an
das Motherboard oder Netzteil an.
Faîtes passer les câbles du ventilateur
à travers le trou dédié sur le dessus du
boîtier pour les brancher à la carte mère
ou à votre alimentation.
Enrute los cables para el ventilador a través
de los agujeros de la parte superior de la
carcasa y a sí conectarlos a la placa base
ó fuente de alimentación.
Utilizzare il fori passanti per i cavi delle
ventole, al fine di connetterli alla scheda
madre o all’alimentatore.
Reinsert the top cover back into
the case.
Вставьте кабели вентиляторов через
сквозное отверстие в верхней части
корпуса и подключите их к системной
плате или блоку питания.
將風扇電源線穿過機殼上方整線孔,
並連結主機板或電源供應器等供電
裝置。
将风扇电源线穿过机箱上方整线孔,
并连结主机板或电源供应器等供电
装置。
マザーボードまたは電源と接続するた
めのケーブルは、上部ケースの穴を通
して、取り回します。
팬 케이블을 상부의 패스스루를 통과시켜
메인보드나 파워 서플라이와 연결합니다.
Установите на место верхнюю
крышку корпуса.
Setzen Sie die obere Abdeckung
wieder auf das Gehäuse.
Remettez la panneau supérieur
sur le boîtier.
Reinserte la cubierta superior en la
carcasa.
Riposizionare il cover superiore
sul case.
將上蓋裝回機殼。
将上盖装回机箱。
ケースに上部カバーを戻します。
상부 커버를 케이스에 재 장착합니다.
Page 15

Fan installation:
Front fan:
1.
2.
Remove the front panel as shown. Снимите переднюю панель,
Nehmen Sie die Frontblende wie
gezeigt ab.
Retirez le panneau frontal
comme montré.
Retire el panel frontal como
se muestra.
Rimuovere il pannello frontale
come mostrato.
Loosen the thumb screws holding
the front fan bracket to remove it.
как показано на рисунке.
請依圖示移除前面板。
请依图示移除前面板。
図示されるように、フロントパ
ネルを取り外します。
전면패널을 그림과 같이
제거합니다.
Выкрутите винты с накатанной головкой,
прикрепляющие кронштейн переднего
вентилятора, и снимите кронштейн.
Lösen Sie die Rändelschrauben an
der Frontlüfterhalterung, nehmen
Sie die Halterung heraus.
Desserrez les vis à main fixant le
casier du ventilateur frontal pour
le retirer.
Afloje los tornillos manuales sujetando
el bracket del ventilador frontal para
retirarlo.
Allentare le viti che tengono la staffa
della ventola frontale per rimuoverla.
鬆開前方手扭螺絲,並將
風扇固定架取下。
松开前方手扭螺丝,并将
风扇固定架取下。
フロントファンブラケットを保持して
いるつまみネジを緩めて、ブラケット
を取り外します。
전면 브라켓을 고정하고 있는 손나사를
풀어 브라켓을 제거합니다.
Page 16

Fan installation:
3.
4.
Secure the fan into the bracket
with fan screws.
Bringen Sie den Lüfter mit
den Lüfterschrauben an der
Halterung an.
Fixez le ventilateur au casier
avec les vis du ventilateur.
Asegure el ventilador en el bracket
con los tornillos del ventilador.
Assicurare la ventola alla staffa
per mezzo delle viti.
Reinstall the fan bracket back
into the case.
Прикрепите вентилятор к кронштейну
специальными винтами.
以螺絲將風扇鎖在風扇固定架。
以螺丝将风扇锁在风扇固定架。
ファンのネジでブラケットにファンを
固定します。
팬을 브라켓에 삽입한 후 팬고정나사로
브라켓에 고정합니다.
Установите на место кронштейн
вентилятора.
Bauen Sie die Lüfterhalterung
wieder in das Gehäuse ein.
Réinstallez le casier du ventilateur
dans le boîtier.
Reinstale el bracket para el ventilador
de nuevo en la carcasa.
Reinstallare la staffa nel case. 팬브라켓을 케이스에 재설치 하고
裝回風扇固定架。
装回风扇固定架。
ケースにファンブラケットを戻します。
손나사로 고정시킵니다.
Page 17

Fan installation:
Bottom fan:
1.
2.
Place the case on its side as shown. Положите корпус на бок, как
Legen Sie das Gehäuse wie
abgebildet auf die Seite.
Placez le boîtier sur le côté comme
montré.
Ponga la carcasa de lado como
se muestra.
Disporre il case su un fianco come
mostrato.
Secure the fan onto the bottom of
the chassis with fan screws.
показано на рисунке.
依圖示將機殼側放。
依图示将机箱侧放。
図示されるように、ケースを横向きに
置いてください。
케이스를 그림과 같이 옆으로 놓습니다.
Прикрепите вентилятор к нижней части
корпуса специальными винтами.
Fixieren Sie den Lüfter mit
Lüfterschrauben am Boden
des Gehäuses.
Fixez le ventilateur par le dessous du
boîtier avec les vis du ventilateur.
Asegure el ventilador en el fondo
del chasis con los tornillos para
el ventilador.
Assicurare la ventola al fondo dello
chassis con le viti.
將風扇用螺絲鎖上機殼。
将风扇用螺丝锁上机箱。
ファンのネジでケースの底にファンを
固定します。
팬을 케이스하부에 팬나사로 고정합니다.
Page 18

16
Page 19

Page 20

Issue date: March, 2010
NO:G11211850
 Loading...