

Page 1
PS01-E
Page 2
PS01-E
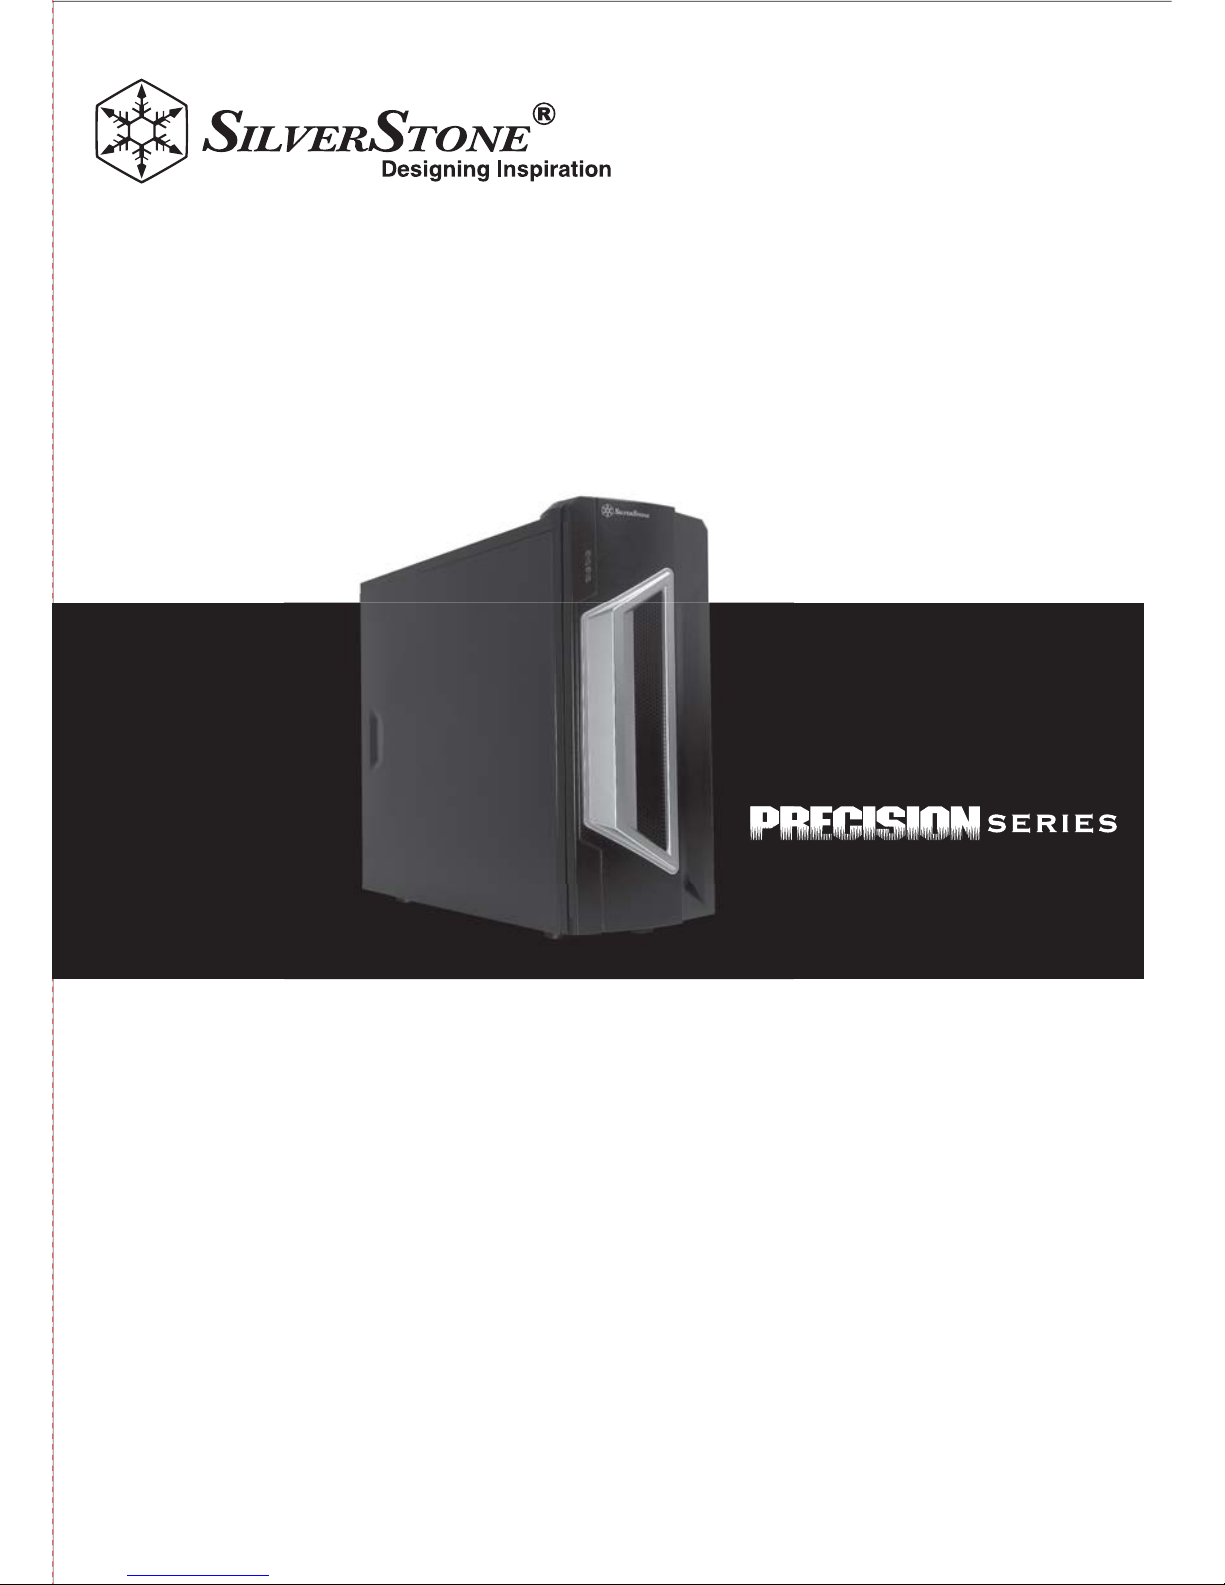
For SilverStone engineers, innovation is more than feature improvements;
it is about improving total user experience. The Precision series PS01-E
is designed for enthusiasts and users that appreciate quality computing
experience. With a heritage of conservative premium tower chassis as
the basis, the PS01-E takes a slightly different styling direction to achieve
a look akin to having heightened spirit. This new look is then precision
made to support a wide selection of components with smart layout, dual
120mm fans, and flexible drive storage options. For those requiring a
quality enclosure with colorful outlook, the PS01-E is an excellent choice.
Page 3

PS01-E
Model
Material
Motherboard
Drive Bay
Cooling System
Expansion Slot
Front I/O Port
Power Supply
Expansion Card
Dimension
SST-PS01B-E (Black)
SST-PS01B-EW (Black + window)
High-strength plastic front door, SECC body
ATX, Micro ATX
External
Internal
Front
Rear
Top
7
USB2.0 x 2, IEEE1394 x 1, Audio x 1, MIC x 1
1 x Optional standard PS2 (ATX)
Full size long cards capable (12”)
200mm (W) x 456 mm (H) x 500mm (D)
5.25" x 6 or 9 without HD cage,
3.5" converter x 1
3.5" x 3
1 x 120mm blue LED intake fan, 1200rpm
1 x 120mm exhaust fan, 1200rpm
1 x 120mm or 1 x 140mm fan slot
Page 4

LEFT SIDE PANEL
PSU (OPTION)
MOTHER BOARD
(OPTION)
12025 FAN
POWER SW
RIGHT SIDE PANEL
RESET SW
FRONT I/O
(USB2.0 x 2 + SPK + MIC + IEEE 1394)
3.5” CONVERTER BRACKET
5.25” BAY TO
3.5” BAY COVER
3.5” COVER
FRONT DOOR
12025 FAN
HDD CAGE
SCREWS Secure motherboard
3.5"device adapter
Secure 3.5"device
SCREWS Secure 3.5"device
Manual
SCREWS Secure PSU
SCREWS
Secure5.25drive/ MB
SCREWS Secure 3.5"device adapter
Page 5
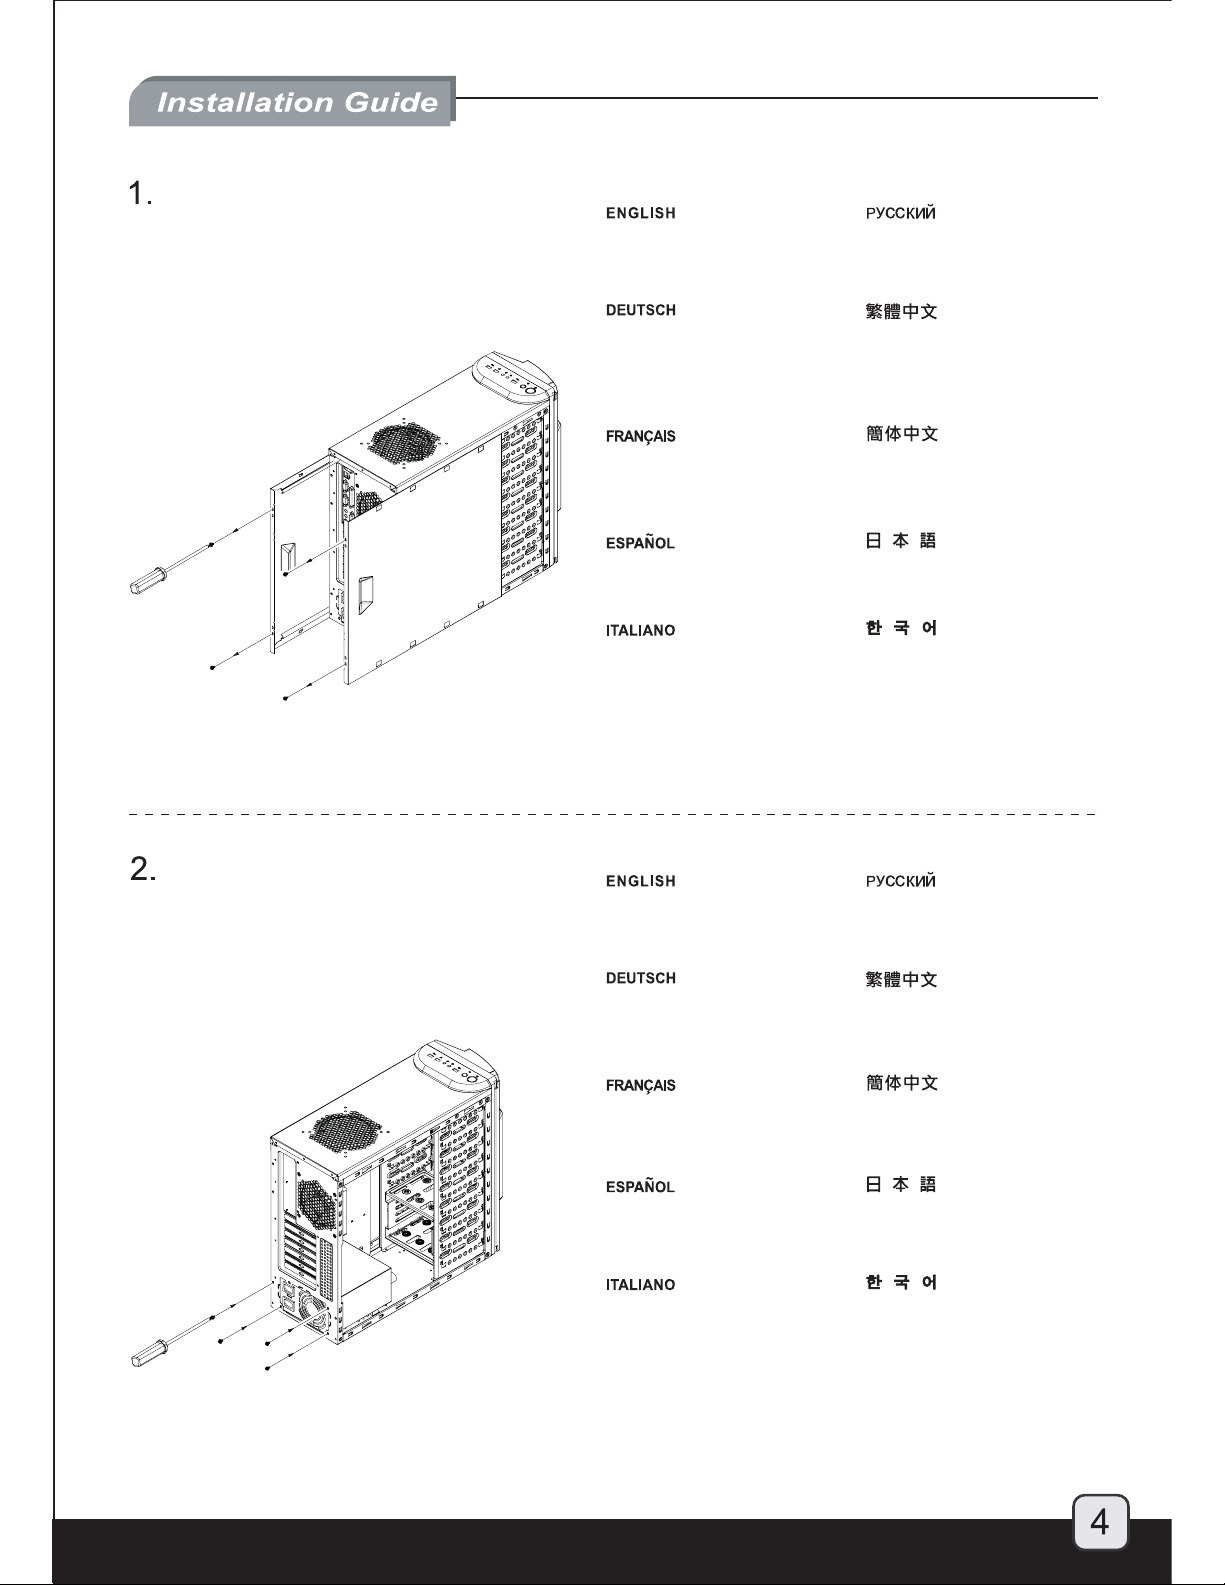
Please use a screws driver to
remove screws as shown and
remove the left and right panel.
Place your power supply from
the left side into chassis and
secure with included screws.
Поместите блок питания с левой
стороны в корпус и закрепите
прилагаемыми шурупами.
Setzen Sie das Netzgerät von
linker Seite in Chassis ein, und
befestigen Sie es mit mitgelieferten
Schrauben.
請從左側將您的電源供應器置入
機箱,並以內附螺絲鎖固。
Passez votre alimentation par
le côté gauche et fixez-la avec
les vis incluses.
请从左侧将您的电源供应器置入
机箱,并以内附螺丝锁固。
Coloque la fuente de alimentación
insertandola desde le lado derecho
del chasis y sujetela con los tornillos.
電源はケース左側に起き、付属
のネジで固定します。
Collocare l’alimentatore nel
chassis inserendolo dalla parte
sinistra del chassis e fissare con
le viti comprese.
파워서플라이를 왼쪽에서부터
설치하고, 설치한 후 동봉된
나사로 고정시키십시요.
Veuillez utiliser un tournevis pour
retirer les vis comme montré puis
démonter les panneaux droit et
gauche.
请使用螺丝起子依图示卸下螺丝
与左右两侧面板。
Destornille los tornillos de los
paneles derecho y izquierdo.
図のようにドライバーでネジを
外し、左右のパネルを取り外し
ます。
Svitare le viti come mostrato e
rimuovere i pannelli destro e
sinistro.
드라이버를 이용해, 그림과 같이
나사를 제거한 후 좌우 측 패널을
제거하십시요.
С помощью отвертки открутите
шурупы, как показано на рисунке,
и снимите левую и правую панели.
Benutzen Sie bitte einen
Schraubenzieher, um Schrauben
zu entfernen, wie gezeigt, und
entfernen Sie die linke und rechte
Platte.
請使用螺絲起子依圖示卸下螺絲
與左右兩側面板。
Page 6

Place the chassis as shown
then fasten and secure the
standoffs on the motherboard
tray as required.
Расположите корпус, как
показано на рисунке, затем
надежно закрепите опоры
на лотке для материнской
платы.
Bringen Sie das Chassis,
wie gezeigt, an und dann
befestigen und sichern Sie
die Abstandsbolzen am
Motherboardboden wie verlangt.
請依圖示放置機箱後依需求
鎖固螺柱於主機板托盤。
Remettez le boîtier comme
illustré puis serrez et fixez les
plots pour la carte mère sur
le support selon vos besoins.
请依图示放置机箱后依需求
锁固螺柱于主机板托盘。
Coloque el chasis como se
muestra y sujete los separadores
de la placa madre como se
requiere.
図のようにケースを置き、
マザーボードトレイに必要
なスペーサーを取り付けます。
Collocare il chassis come
mostrato e quindi fissare ed
avvitare i distanziatori sulla
scheda madre come richiesto.
그림에서와 같이 케이스를
위치시키고, 필요한 만큼
메인보드 트레이에 지지대를
조이고 고정시키십시요.
Install the motherboard and
secure it with the included
screws.
Установите материнскую
плату и закрепите
ее
прилагаемыми шурупами.
Setzen Sie das Motherboard
ein und befestigen Sie es mit
den enthaltenen Schrauben.
安裝主機板並以內附螺絲鎖固。
Installez la carte mère et fixez
-la avec les vis incluses.
安装主机板并以内附螺丝锁固。
Instale la placa base y sujetela
con los tornillos incluidos.
マザーボードを置き、付属
のネジで固定します。
Installare la scheda madre e
fissarla con le viti incluse.
메인보드를 설치하고, 동봉된
나사로 고정시키십시요.
Page 7

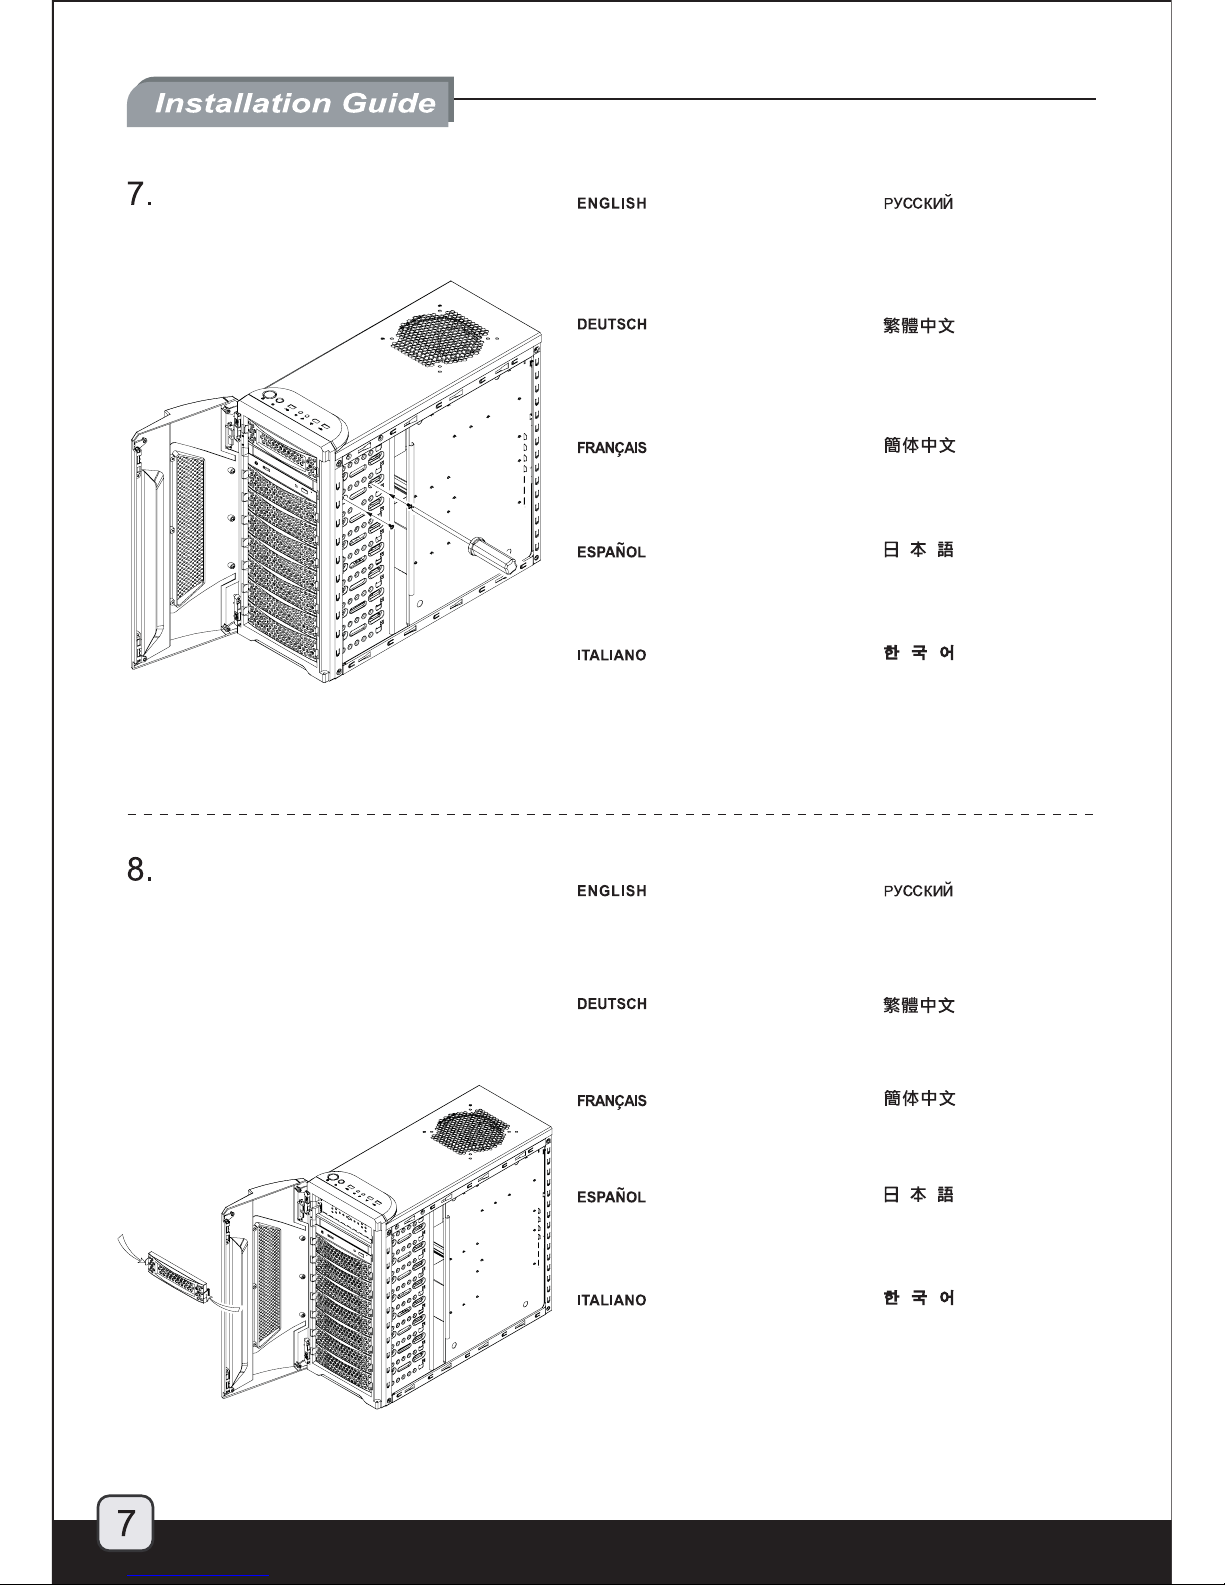
Install graphic card and
expansion cards as needed.
Уст анов ите графическую
карту и платы расширения.
Setzen Sie Grafikkarte und
Erweiterungskarte, wenn
benötigt, ein.
請依需求安裝顯示卡與擴
充卡。
Installez la carte graphique
et les cartes d'extension.
请依需求安装显示卡与扩
充卡。
Instale la tarjeta gráfica y
las de expansión como
requerido.
必要に応じてグラフィック
スカードおよび拡張カード
をインストールします。
Installare la card grafica e
le card d’espansione come
richiesto.
그래픽 카드 및 확장카드들을
필요한 만큼 설치하십시요.
Please remove 5.25” drive
bay cover to install 5.25”
device.
Снимите крышку отсек а
для дисковода формфактора 5,25 дюйма.
Entfernen Sie bitte die Abdeckung
von Laufwerkschacht 5,25”, um
das Laufwerk 5,25” zu installieren.
請卸下5.25吋裝置擋板以
安裝5.25吋裝置。
Veuillez retirer le cache de
la baie 5.25” pour installer
un appareil 5.25”.
请卸下5.25吋装置挡板以
安装5.25吋装置。
Quite la tapa de la bahía de
5.25” para instalar la unidad
de 5.25”.
5.25”デバイスをインス
トールするには、5.25”
ドライブベイカバーを外
してください。
Estrarre la mascherina dell’
alloggiamento da 5.25” per
installare l’unitá da 5.25”.
5.25” 드라이브 설치를
위해
5.25” 베이 커버를
제거하십시요.
Page 8
Insert optical drive from front panel
into chassis and secure with included
washer and screws.
Вставьте оптический привод
со стороны передней панели
и закрепите его прилагаемыми
шайбой и шурупами.
Legen Sie das optische Laufwerk
von Vorderplatte in Chassis ein, und
befestigen Sie es mit mitgelieferten
Unterlagscheiben und Schrauben.
將光碟裝置從面板前插入機箱
內並以內附螺絲與墊片鎖固。
Insérez un lecteur optique par l'avant
du boîtier et fixez-le avec les vis et
rondelles incluses.
将光盘装置从面板前插入机箱
内并以内附螺丝与垫片锁固。
Inserte el disco óptico desde el panel
frontal en el chasis y fijelo con los
tornillos y las arandelas incluidas.
光学ドライブをフロントパネル
側からケースに入れ、ワッシャ
ーとネジで固定します。
Inserire l’unità ottica dal pannello
frontale nel chassis e fissarla con le
viti e le rondelle incluse.
광 드라이를 전면 패널
쪽에서부터 삽입한 후, 동봉된
워셔와 나사로 고정시키십시요.
To release 3.5” drive bay cover, please
first remove the 5.25” drive cover.
Чтобы высвободить крышку
отсека для дисковода 3,5 дюйма,
сначала снимите крышку отсека
для дисковода 5,25 дюйма.
Um die Abdeckung von Laufwerkschacht
3,5” zu lösen, entfernen Sie bitte zuerst
die Abdeckung von Laufwerk 5,25”.
請先卸下5.25吋裝置擋版以卸除
3.5吋裝置擋版。
Pour détacher le cache de la baie 3.5”,
veuillez commencer par retirer celui
de la baie 5.25”.
请先卸下5.25吋装置挡版以卸除
3.5吋装置挡版。
Para desganchar la tapa de la bahía
de 3.5”, saque primero la tapa de la
bahía de 5.25”.
3.5”ドライブベイカバーを外
すには、まず5.25”ドライブ
カバーを外します。
Per sganciare la mascherina dell’
alloggiamento da 3.5”, rimuovere per
primo la mascherina dell’alloggiamento
da 5.25”.
3.5” 드라이브 베이 커버를
제거하기위새서 먼저 5.25”
드라이버 커버를 제거하십시요.
Page 9

Then press the areas shown to release the
3.5” drive bay cover from the 5.25” drive bay
cover.
Надавите на указанные области
и высвободите крышку отсека
для дисковода 3,5 дюйма из
крышки отсека для дисковода
5,25 дюйма.
Dann drücken Sie den gezeigten Bereich,
um die Abdeckung von Laufwerkschacht 3,5”
aus der Abdeckung von Laufwerkschacht
5,25” zu lösen
請依圖示從5.25吋裝置擋版卸下3.5吋
裝置擋版。
Ensuite pressez les zones montrées pour
séparer le cache de la baie 3.5” du cache
de la baie 5.25” .
请依图示从5.25吋装置挡版卸下3.5吋
装置挡版。
Entonces empuje donde se muestra y
desganche la tapa de 3.5” de la de 5.25”.
それから図の部分を押して、3.5”
ドライブベイカバーを5.25”ドラ
イブベイカバーから外します。
Quindi premere i punti indicati per sganciare
la mascherina dell’alloggiamento da 3.5” da
quella dell’alloggiamento da 5.25”.
그림에 나타난 위치를 눌러 3.5”
베이 커버를 5.25” 베이 커버로
부터 분리 시키십시요.
Install the included 3.5” device adapter onto
3.5” device and secure with included screws
and washers.
Установите входящий в комплект
поставки адаптер устройств 3,5
дюйма и закрепите его в 3,5дюймовом дисководе прилагаемыми
шурупами и шайбами.
Bringen Sie den mitgelieferten Adapter 3,5”
an dem Gerät 3,5” an und befestigen Sie
ihn mit mitgelieferten Schrauben und
Unterlagscheiben.
請將內附的3.5吋支架裝上3.5吋裝
置並以內附螺絲與墊片鎖固。
Installez l'adaptateur 3.5” inclus dans
votre appareil 3.5” et fixez-le avec les
vis et rondelles incluses.
请将内附的3.5吋支架装上3.5吋装
置并以内附螺丝与垫片锁固。
Instale el conversor de la unidad de 3.5”
incluido y sujetelo con las arandelas y los
tornillos.
付属の3.5”デバイスアダプタをネ
ジとワッシャーで3.5”デバイスに
固定します。
Installare l’adattatore da 3.5” incluso, sull’unitá
da 3.5” e fissare con viti e rondelle.
동봉된 3.5” 디바이스 어댑터를
3.5” 디바이스에 설치하고 동봉된
나사와 워셔를 이용해 고정시키십시요.
8
Page 10
Insert the 3.5” device and adapter into
chassis and secure with included screws
then reinstall the 5.25” drive cover.
Вставьте отсек для дисковода
3,5 дюйма и адаптер в корпус и
закрепите их прилагаемыми
шурупами, затем поставьте на
место крышку отсека для
дисковода 5,25 дюйма.
Setzen Sie das Gerät 3,5” und Adapter
3,5” in Chassis ein, und befestigen Sie
sie mit mitgelieferten Schrauben, dann
installieren Sie die Abdeckung von
Laufwerk 5,25” wieder.
將3.5吋裝置與3.5吋支架裝入機箱
並以內附螺絲鎖固後裝回5.25吋裝
置擋版。
Insérez l'appareil 3.5” avec son
adaptateur dans le boîtier et fixez-les
avec les vis incluses puis réinstallez
le cache de la baie 5.25”.
将3.5吋装置与3.5吋支架装入机箱
并以内附螺丝锁固后装回5.25吋装
置挡版。
Inserte el disco de 3.5” con el
conversor en el chásis y reinstale
la tapa de la bahía de 5.25”.
3.5”デバイスとアダプタをケー
スに入れ、付属のネジで固定し
てから5.25”ドライブカバーを
戻します。
Inserire l’unità da 3.5” e l’adattatore
nel chassis e fissare con le viti incluse.
Reinstallare la mascherian dell’
alloggiamento da 5.25”.
3.5” 디바이스와 어댑터를 케이스에
삽입한 후, 동봉된 나사로 고정시킨
후에 5.25” 드라이버 커버를 재차
설치하십시요.
3.5” device installation complete. Установка устройства формфактора 3,5 дюйма завершена.
Jetzt ist die Installation von Gerät 3.5”
fertiggestellt.
3.5吋裝置安裝完畢。
L'installation de l'appareil 3.5” est
maintenant finie.
3.5吋装置安装完毕。
Instalación del disco de 3.5” completada. 3.5”デバイスのインストールは
完了です。
Installazione dell’unitá da 3.5” completata. 3.5” 디바이스 설치가 끝났습니다.
Page 11
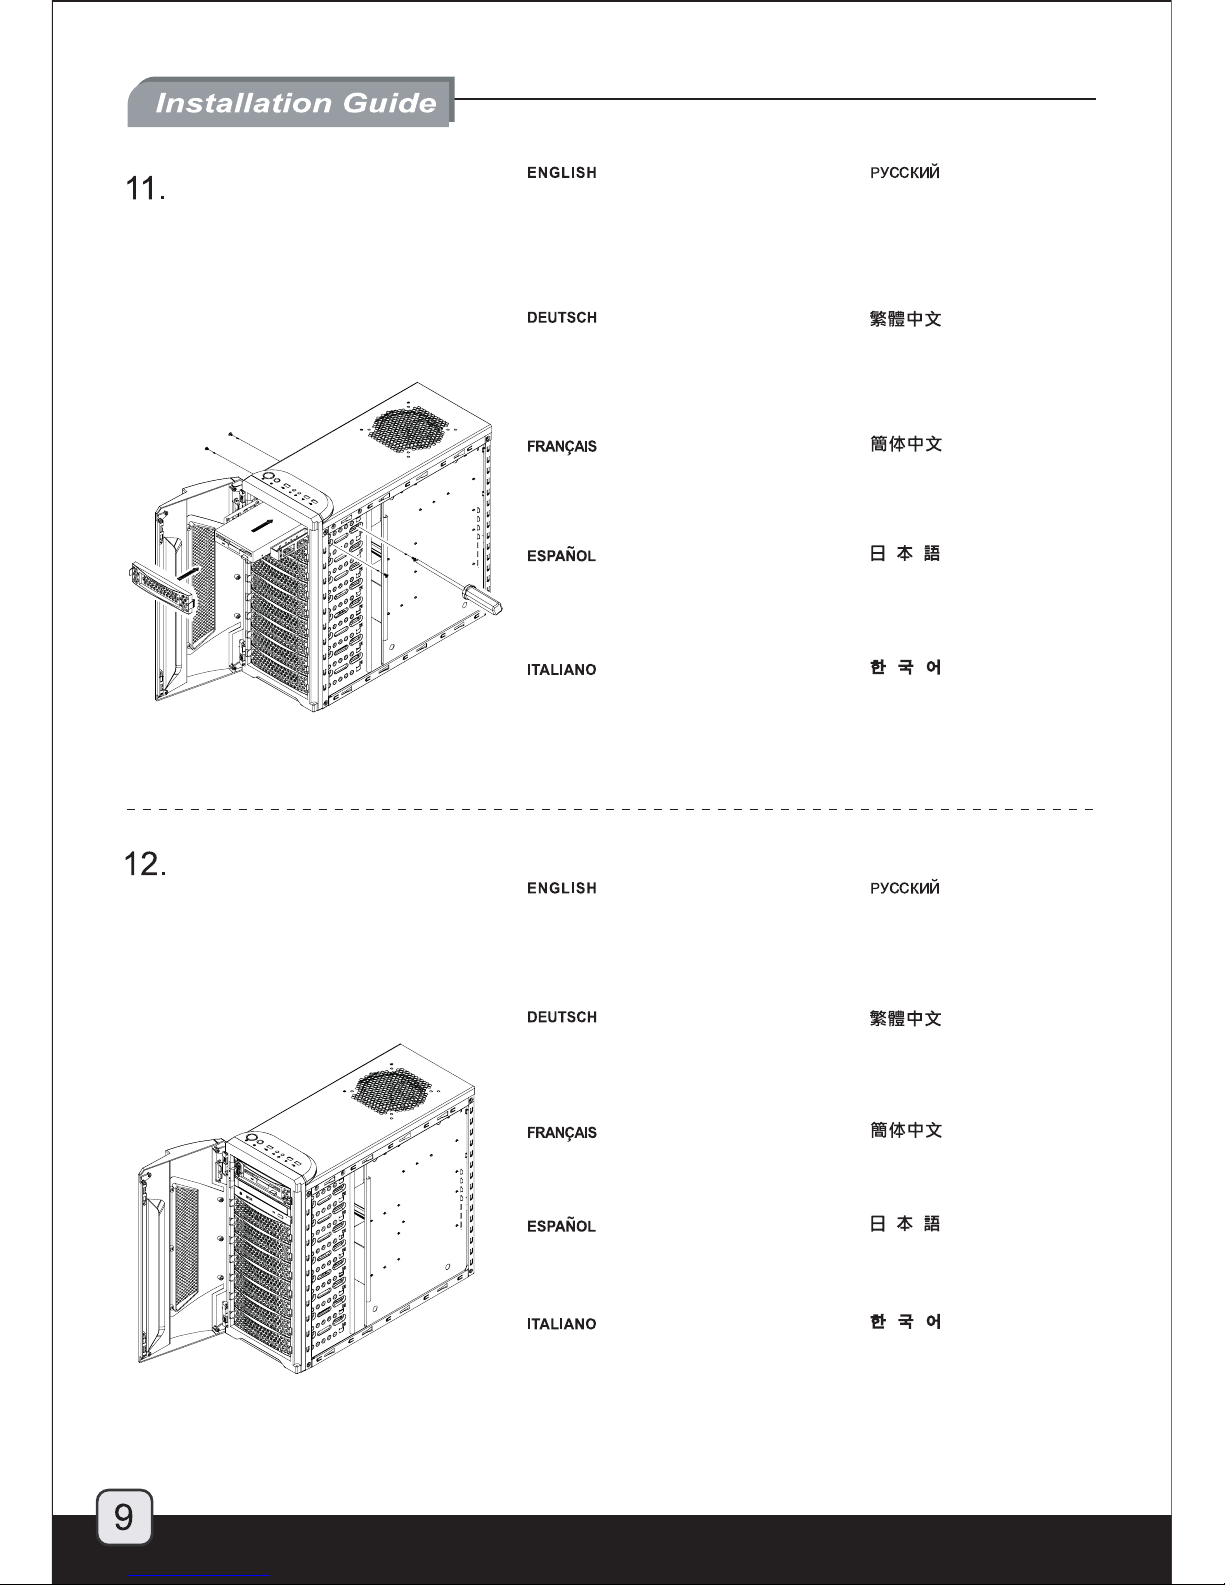
Remove the three 5.25” drive cover
as shown and remove the screws of
hard drive cage then pull the hard drive
cage out from chassis.
Retirez les trois caches des baies
5.25” comme montré et retirez les
vis du casier à disques durs puis
tirez celui-ci en dehors du châssis.
请依图示卸下5.25吋装置挡版并卸下硬
盘架螺丝后,从机箱拉出硬盘架。
Saque tres tapas de las bahías de
5.25” como se muestra y quite los
tormillos de la caja del disco duro.
Empuje la caja del disco duro para
sacarla del chasis.
図のように3個の5.25”ドライブカバ
ーを外し、ハードドライブケージの
ネジを外してブラケットをケースか
ら取り出します。
Rimuovere le tre mascherine da 5.25”
come mostrato e rimuovere le viti dal
box dell’hard disk. Quindi estrarre il
box dal chassis.
그림에서와 같이 3개의 5.25” 드라이버
커버를 제거하고, 하드 드라이브 케이지의
나사를 제거한 다음, 케이스에서 하드
드라이브 케이지를 분리하십시요.
Снимите три крышки отсека для
дисковода 5,25 дюйма, как показано
на рисунке, открутите шурупы корзины
для жестких дисков и выньте корзину
из корпуса.
Entfernen Sie die drei Abdeckungen
von Laufwerk 5,25” wie gezeigt, und
entfernen Sie die Schrauben von
Gehäuse von hartem Laufwerk, dann
ziehen Sie das Gehäuse von hartem
Laufwerk aus Chassis.
請依圖示卸下5.25吋裝置擋版並卸下硬
碟架螺絲後,從機箱拉出硬碟架。
Install hard drives into hard
drive cage and secure with
included screws.
Installez les disques durs dans
leur casier et fixez-les avec les
vis incluses.
将硬盘装入硬盘架中并以内附螺丝锁固。
Instale los discos duros en sus
caja y sujete con los tornillos.
ハードディスクドライブをハードドラ
イブケージに入れ、付属のネジでケー
ジを固定します。
Installare l’hard disk nel suo box
e fissare con le viti incluse.
하드 드라이브를 하드 드라이브 케이지에
설치한 후 동봉된 나사로 고정시키십시요.
Установите жесткие диски в корзину и
закрепите прилагаемыми шурупами.
Setzen Sie hartes Laufwerk in
Gehäuse von hartem Laufwerk
ein und sichern Sie es mit
mitgelieferten Schrauben.
將硬碟裝入硬碟架中並以內附螺絲鎖固。
Page 12

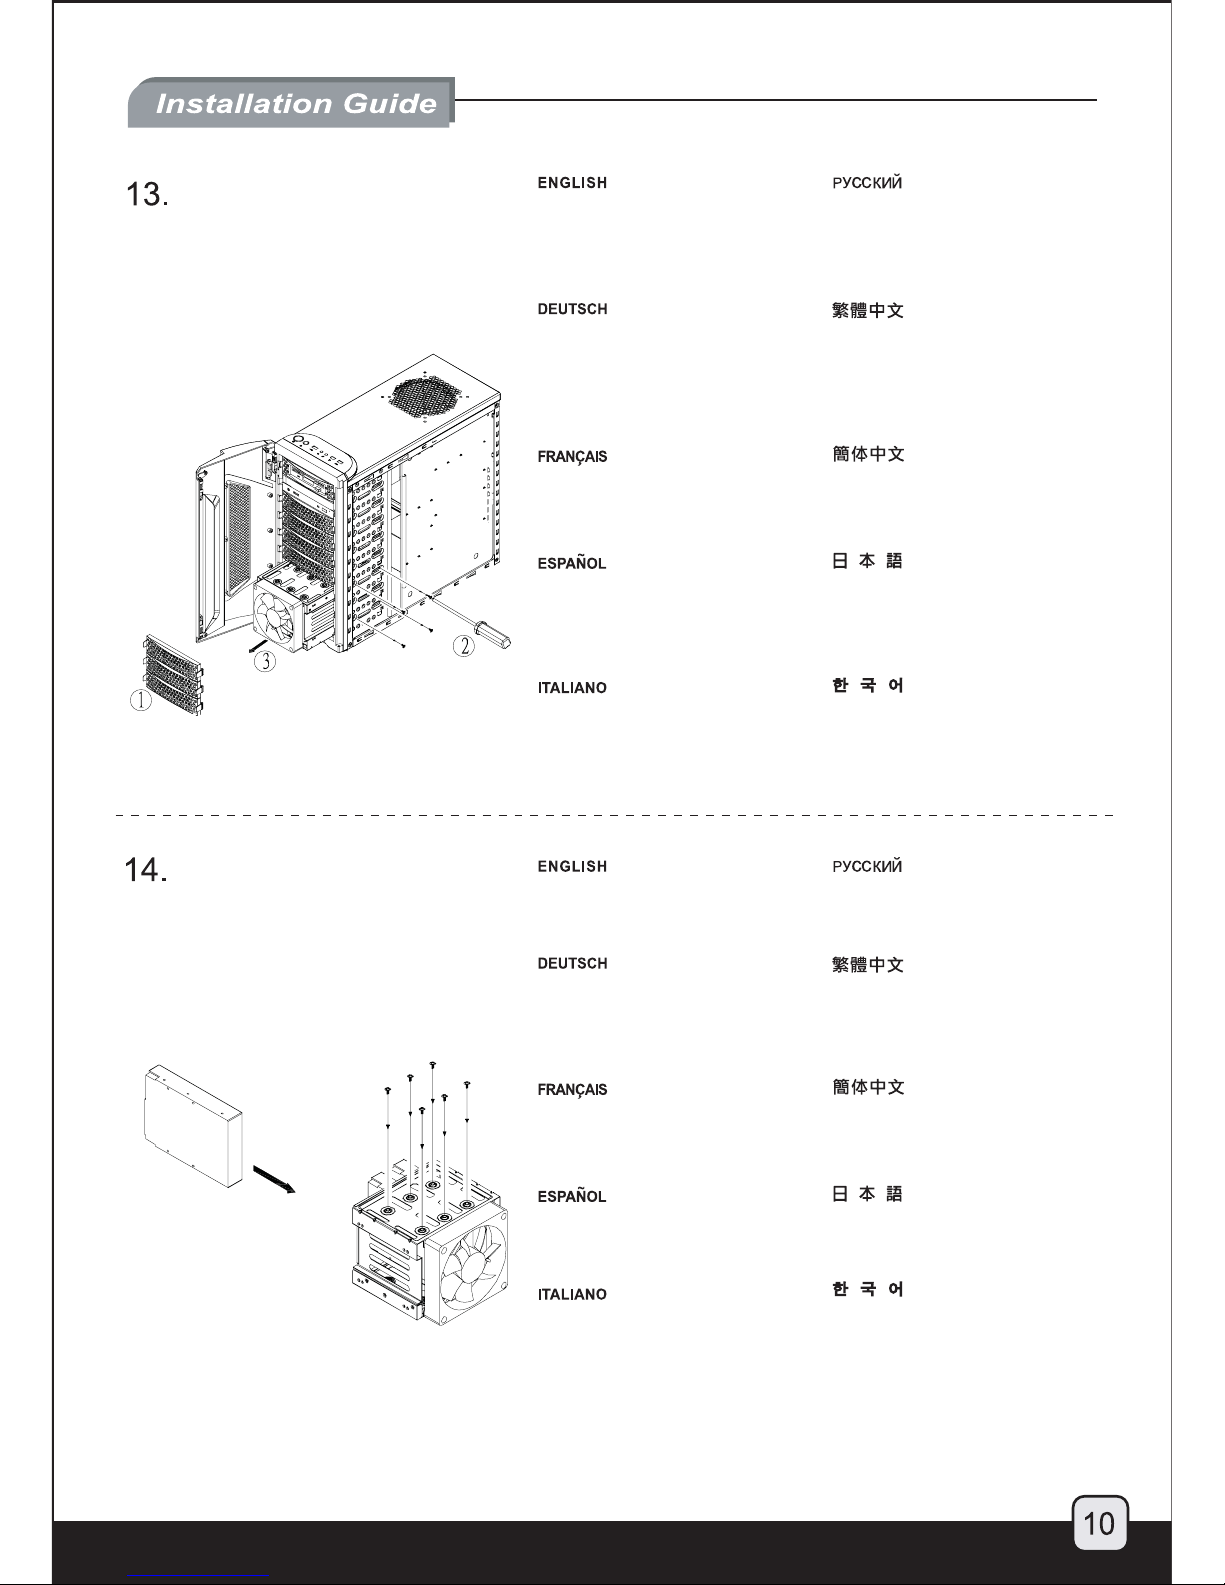
Reinstall the hard drive cage into
chassis and secure with screws
(step 13), then reinstall the 5.25”
drive cover.
Réinstallez le casier à disques durs
dans le boîtier et fixez-le avec des
vis (de l'étape 13), puis réinstallez
les caches des baies 5.25”.
将硬盘架装回机箱内并以步骤13卸下的
螺丝锁固后装回5.25吋装置挡版。
Reinstale la caja de los discos duros
en el chásis y sujete con los tornillos.
Entonces reinstale la tapa de la bahía
de 5.25”.
ケースにハードドライブケージを戻し、
ネジ止めします(ステップ13)。それから
5.25”ドライブカバーを戻します。
Reinstallare il box dell’hard disk nel
chassis e fissare con le viti, quindi
reinstallare la mascherina dell’
alloggiamento da 5.25”.
하드 드라이브 케이지를 케이스에 재
설치한 후 나사로 고정 시킨 후 (13 항목)
5.25” 드라이브 커버를 재 설치하십시요.
Установите корзину для жестких дисков
в корпус и закрепите шурупами (шаг 13),
затем поставьте на место крышку отсека
для дисковода 5,25 дюйма.
Setzen Sie das Gehäuse von hartem
Laufwerk wieder in Chassis ein und
sichern Sie es mit Schrauben (Schritt 13),
dann installieren Sie die Abdeckungen
von Laufwerk 5,25” wieder.
將硬碟架裝回機箱內並以步驟13卸下的
螺絲鎖固後裝回5.25吋裝置擋版。
Make sure all necessary cables
and wires are connected, then
reinstall the panels and secure
with screws.
Vérifiez bien que tout les câbles
nécessaires sont correctement
branchés, puis remettez les
panneaux latéraux et fixez-les
avec les vis préalablement
démontées.
请在确定所有的线路都已连接后,装回左
右侧面板并以螺丝锁固。
Asegurese de que todo los cables
estén conectados y reinstale los
paneles sujetandolos con los
tornillos.
全てのケーブル接続および配線を確認し
たら、パネルを戻してネジ固定します。
Assicurarsi che tutti cavi siano
connessi, quindi reinstallare i
panelli e fissare con le viti.
필요한 모든 케이블과, 선들이
연결되었는지를 확인하고,
패널을 재 설치한 후 나사로
고정시키십시요.
Убедитесь, что все кабели и провода
подключены, затем поставьте на место
левую и правую панели и закрепите их
шурупами.
Stellen Sie sicher, daß alle erforderlichen
Kabel und Drähten verbunden sind, dann
installieren Sie die Platten wieder und
sichern Sie sie mit Schrauben.
請在確定所有的線路都已連接後,裝回左
右側面板並以螺絲鎖固。
Page 13

Special feature: door hinge and spring in the PS01-E can be removed to enable the
front door to open on either side.
1
1
2
2
Pull down the hinge as shown
to remove the front door from
the chassis
Чтобы снять переднюю
дверцу корпуса, потяните
вниз дверную петлю, как
показано на рисунке.
Ziehen Sie das Scharnier
nach unten wie gezeigt,
um die Fronttür aus dem
Chassis zu entfernen.
依圖示拉下門閂從機殼卸下
前門。
Tirez vers le bas la charnière
comme montré pour retirer la
porte frontale du boîtier.
依图示拉下门闩从机壳卸下
前门。
Baje la bisagra como se muestra
para sacar la puerta frontal del chasis.
図のようにヒンジを外して、
ケースからフロントハッチ
を取り外します。
Abbassasre il cardine della porta
come mostrato per rimuovere la
porta frontale dal chassis.
그림에서와 같이 경첩을
당겨 내린 후, 문을 케이스로
부터 제거합니다.
Press the point as shown and
push the hinge out of the door
hinge slot. Then remove the
spring out of the door hinge slot.
Нажмите рычажок, как
показано на рисунке, и
вытолкните дверную
петлю из гнезда. Затем
выньте из гнезда дверную
пружину.
Drücken Sie den Punkt wie gezeigt
und schieben Sie das Scharnier
aus dem Scharnier-Schlitz. Dann
entfernen Sie den Feder aus dem
Scharnier-Schlitz.
請依圖示點下壓並將門閂推
出,並將彈簧取出。
Appuyez sur le point montré et
poussez la charnière en dehors
de ses gonds. Puis retirez le
ressort des gonds.
请依图示点下压并将门闩推
出,并将弹簧取出。
Empuje el punto que se muestra
y saque la bisagra de su posición.
Luego saque también el muelle.
図のようにポイントを押し
てヒンジをドアヒンジスロ
ットから外します。そして
スプリングをドアヒンジか
ら取り出します。
Premere il punto indicato e spingere
il cardine fuori dalla sua posizione.
Quindi rimuovere la molla.
그림에 나타난 지점을
누른 후, 경첩을 문에서
분리하십시요. 이후,
경첩 슬롯으로 부터
스프링을 제거하십시요.
Page 14

Special feature: door hinge and spring in the PS01-E can be removed to enable the
front door to open on either side.
Place the spring into the slot on the
other side. Then press the point as
shown to reinstall the hinge.
Поместите пружину в гнездо
на другой стороне дверцы.
Затем нажмите на рычажок,
как показано на рисунке, и
установите дверную петлю.
Legen Sie den Feder in den Schlitz
auf der anderen Seite ein. Dann
drücken Sie den Punkt wie gezeigt,
um das Scharnier wieder zu installieren.
將彈簧放入另一側門閂槽,並
依圖示點下壓裝回門閂。
Mettez le ressort dans l'emplacement
situé de l'autre côté. Puis appuyez sur
le point comme montré pour réinstallez
la charnière.
将弹簧放入另一侧门闩槽,并
依图示点下压装回门闩。
Coloque el muelle en su posición al
otro lado de la puerta. Empuje el
punto que se muestra para reinstalar
la bisagra.
スプリングをもう一方のスロ
ットに入れます。図のように
ポイントを押しながらヒンジ
を取り付けます。
Posizionare la molla nella parte
opposta della porta. Premere sul
punto indicato per reinstallare il
cardine.
반대방향에 있는 슬롯에
스프링을 위치시킨 후,
그림에서와 같은 지점을
누른 후, 경첩을 재
설치하십시요.
Reinstall the door to the chassis. Поставьте на место
дверцу корпуса.
Installieren Sie die Tür wieder
im Chassis.
將前門裝回機殼。
Remettez la porte au boîtier. 将前门装回机壳。
Reinstale la puerta sobre el chasis. ハッチをケースに戻します。
Reinstallare la porta sul chassis. 케이스에 도어를 다시
장착합니다.
Page 15

Page 16

Issue date:January, 2010
NO:G11211390
 Loading...