

Silver Spring SC500-V3 Instruction Manual

Deluxe Steel Folding Scooter & Wheelchair Carrier
Instructions for Part # SC500-V3
General Guidelines
• It is the user’s responsibility to read and follow all instructions.
• Keep these instructions with the product at all times and review before each use.
• It is the responsibility of this product’s owner to furnish the instructions to any person that borrows
or purchases the product.
• Inspect the product before use to ensure it is assembled properly and all parts are in safe working
order and free of defects.
• Never modify this product in any way.
• All circumstances cannot be addressed in these instructions. Please use common sense and
practice general safety measures when using this product.
• Parts and/or instructions are subject to change without notice.
Safety
• Follow all warnings and instructions marked on the product.
• Do not occupy the mobility aid while loading the carrier.
• Do not stand on the carrier.
• Never exceed vehicle tongue weight rating.
• The carrying capacity is 500 lbs.
• Hitch adapters may aect the weight capacity of the carrier. If using a hitch adapter, always check
its limitations before use.
• Always store the carrier in a safe place.
• Improper use, storage, or installation of the carrier could result in death or serious injury.
• Do not put the product on any kind of trailer.
• NOT recommended for tow-behind trailers including 5th wheel trailers and camping trailers.
• Periodically check nuts and bolts for tightness.
Tools Required
• 17mm wrench
• 13mm or 1/2" wrench
• 19mm or 3/4" wrench
DiscountRamps.com • 1-888-651-3431
• 7/8" or 22mm wrench
• Phillips screwdriver
• 10mm Allen wrench
Page 1Rev. 060518
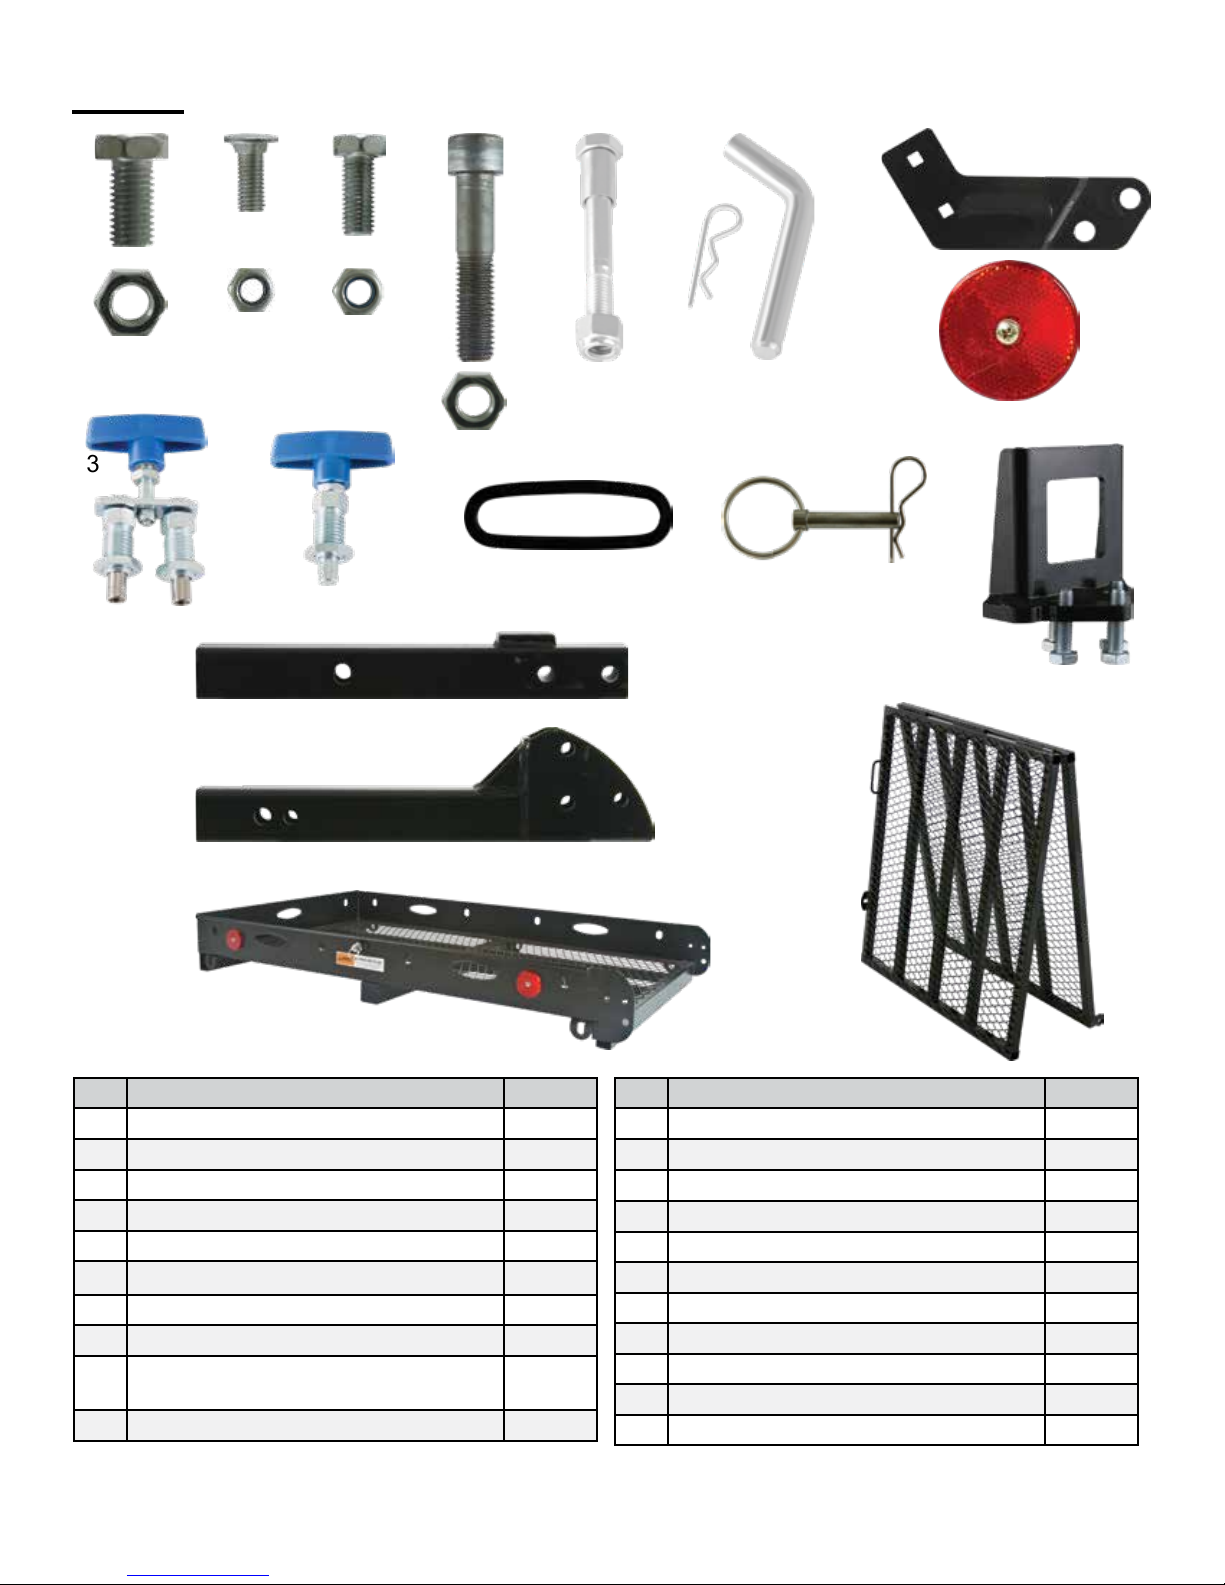
Parts
1
3
5
7
9 10
11
2
4
6
8
13 14 15 16
18
19
12
17
21
20
Part Description Quantity
1 M14x2.0x30 Bolt
2 M14x2.0 Nut
3 M8x1.0x20 Carriage Bolt 2
4 M8x1.0 Lock Nut
5 M10x1.5x30 Bolt
6 M10x1.5 Nut
7 M12x1.5x60 Bolt
8 M12x1.5 Lock Nut
9 Pinch Bolt Assembly - M12x1.5x99 Bolt
(use 19mm or 3/4" wrench)
10 Hitch Pin Set 1
(use 7/8" or 22mm wrench)
(use 7/8" or 22mm wrench)
(use 13mm or 1/2" wrench)
(use 17mm or 11/16" wrench)
(use 17mm or 11/16" wrench)
(use 10mm Allen wrench)
(use 19mm or 3/4" wrench)
2
2
2
2
2
1
1
1
DiscountRamps.com • 1-888-651-3431
Part Description Quantity
11 Ramp Bracket 1
12 Reector with Mounting Screw 2
13 Double Spring Pull Pin with Handle 1
14 Single Spring Pull Pin with Handle 1
15 Rubber Handle Insert 5
16 12mm Pin with Clip 2
17 Anti-Tilt Locking Device
18 Carrier Main Tube 1
19 Hitch Receiver Tube 1
20 Carrier Basket 1
21 Carrier Ramp 1
(use 17mm wrench)
1
Page 2Rev. 060518
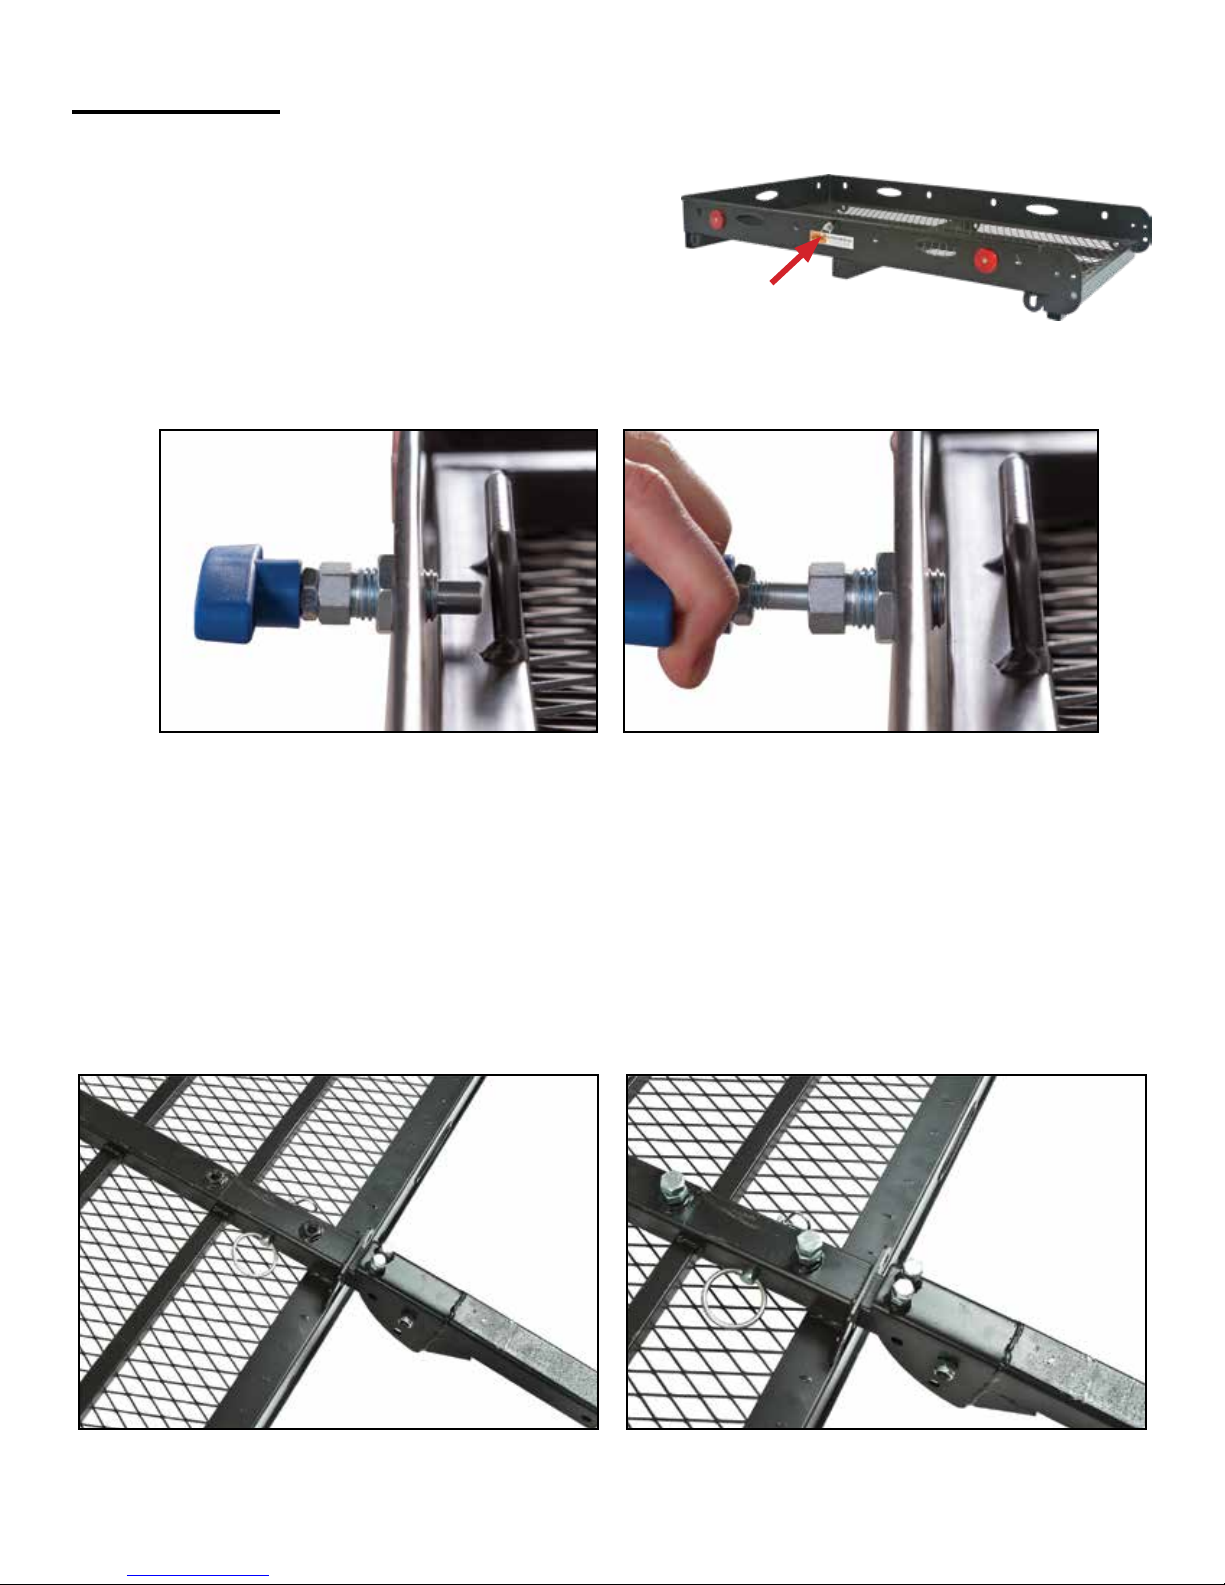
Assembly
Step 1. Install the spring pull pin (14) into the front of
the carrier basket (20). Allow the spring pull pin (14) to
partially cover the edge of the ramp (21).
Adjust the spring pull pin (14) with enough room that
when pulled back, the ramp (21) can be lifted out of
the carrier basket (20). Securely tighten jam nut.
Fig. 1b Fig. 1c
Fig. 1a
Step 2. Flip the carrier basket (20) upside down and slide the hitch tube assembly into the center
support tube. Align the holes and insert the pin with clip (16). Install two bolts (1) with nuts (2) and
tighten until seated using a 7/8" wrench. Do not over-tighten.
Note: To properly tighten the bolts (1) with jam nuts (2), rst thread the jam nut counterclockwise up
to the head of the bolt. Fully tighten the bolt into the carrier tube. Then tighten the jam nut clockwise
against the carrier tube to secure the bolt.
Fig. 2a
Fig. 2b
DiscountRamps.com • 1-888-651-3431
Page 3Rev. 060518
 Loading...