

Page 1
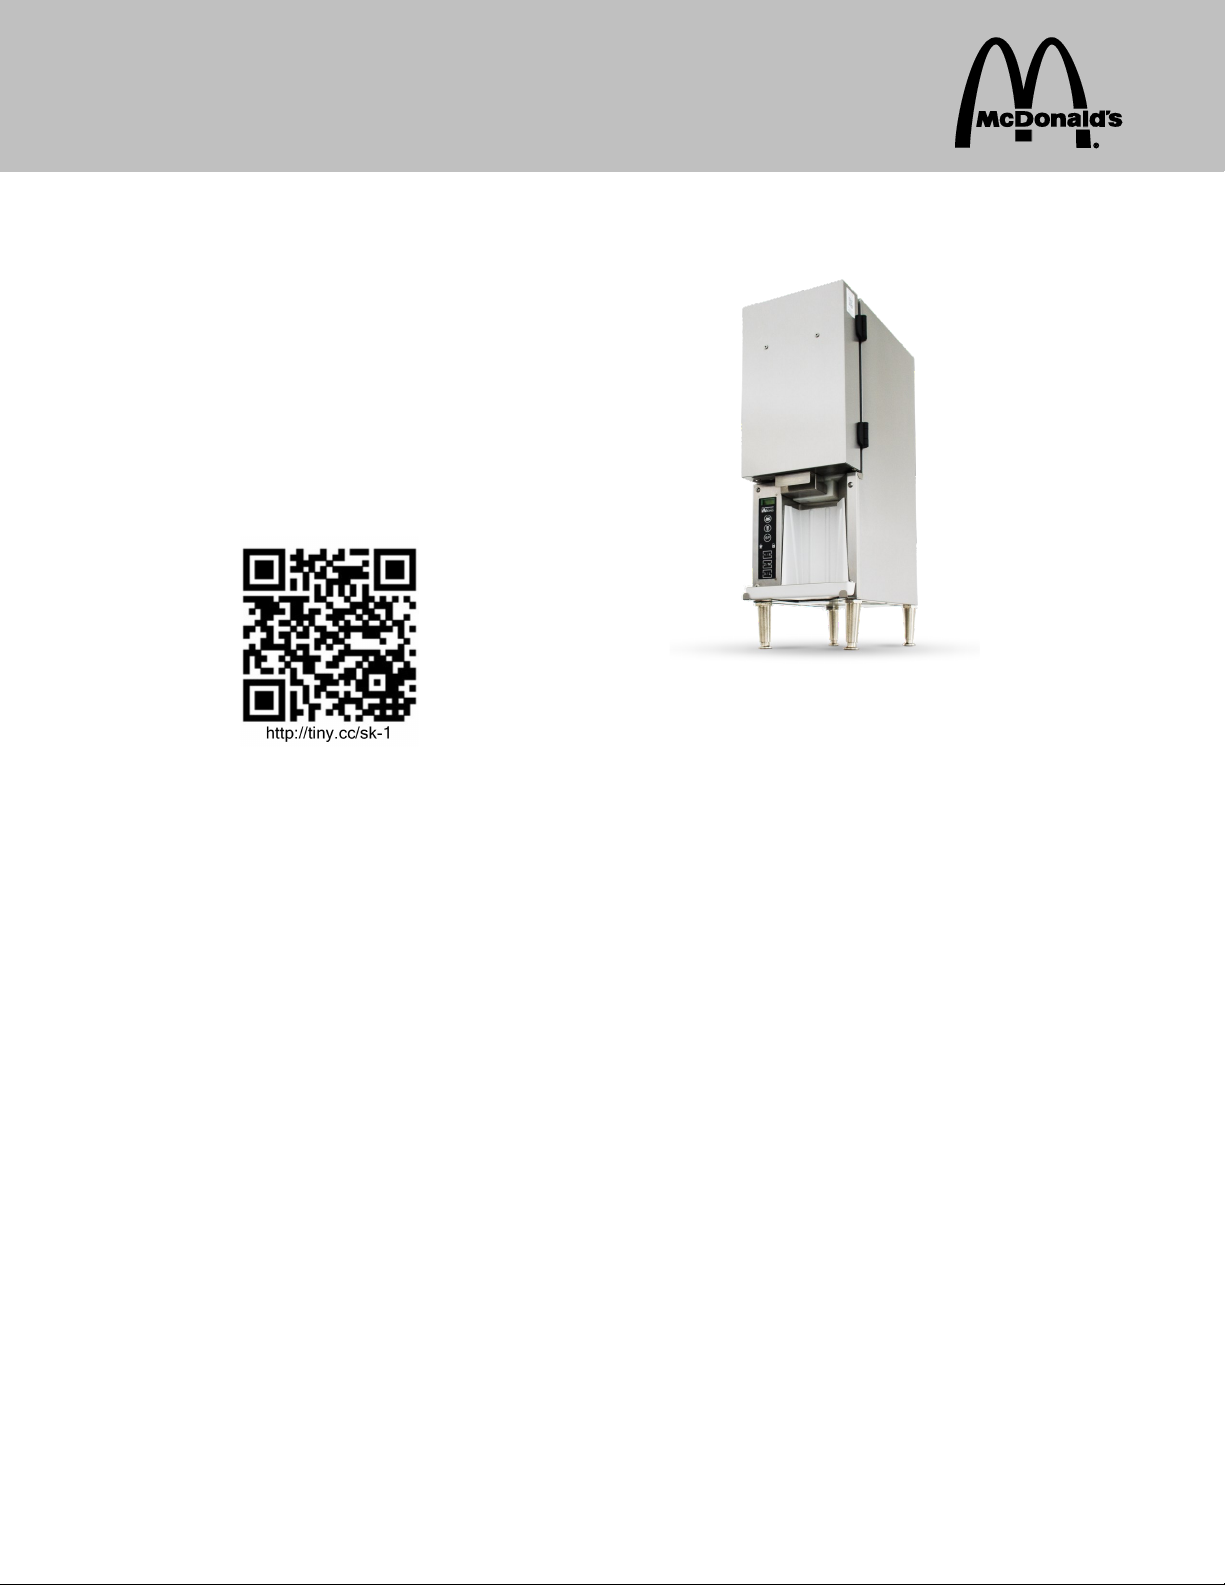
Cream Dispenser
Silver King Model SK-1
Manufactured exclusively for
McDonald’s®
By
Silver King
1600 Xenium Lane North
Minneapolis, MN 55441
customerservicemd@princecastle.com
TABLE OF CONTENTS
Product Identification…………………………………………….……...……………….Page 1
Table of Contents…..………………...……………………..…….…………………..…Page 1
Warranty Statement…………………..……………………………..………………..…Page 2
Electrical Specifications.…..….…………………..……………………………...…..…Page 3
Safety Information…...……………………….………………..….…………………..…Page 3
General…………………..……………………………………...………………………..Page 3
Important……..……….…………...………..…………………………..……………..…Page 3
Unpacking and Setup..…………………………………..……….…………………..…Page 4
Installation……………...………………………….……………………………………..Page 5
Initial Cleaning and Sanitizing…………………………..……….…………………..…Page 6
Initial Start-Up……..…………………...…..…………………………………………….Page 6
Operation— General…...………………....……..…………………………………..….Page 7
Operation — Dispensing Cream…..….….…..………………………………….…..…Page 7
Operational Flowchart……………………...……..……………………………………..Page 8
Manager Mode Flowchart………………………………..…………………...…..……..Page 9
Cleaning and Refilling the Dispenser…………..……..…..……...………………...….Page 10
Troubleshooting Guide….……………….………..……..…………...………...…....….Page 11
Parts and Exploded View……………….….………….…………………………..….…Page 13
Wiring Diagram……………………………..….……..…...……………..…..….…….…Page 14
© 2015 McDonald’s Corporation Printed in 10/2015 Printed in
All Rights Reserved EM Model 366-155 The United States of America
Page 2

Warranty Statement
Silver King warrants to the original purchaser of Silver King refrigerated equipment that the equipment shall be free from
defects in material and workmanship under normal use and service as outlined in the Technical Manual. This limited
warranty shall apply for a period of two (2) years from the date of original purchase. The Compressor will carry an
additional three (3) year warranty. All warranties are subject to specific limitations outlined below.
This limited warranty does not apply to repair or replacement required as a result of carelessness, neglect and/or abuse,
including improper installation, incorrect voltage supply, tampering with or altering components and/or equipment or failure
to perform proper maintenance. Equipment damaged in transit, by fire, flood or an act of God is not covered. This limited
warranty does not include freight, handling, installation, labor (following the two (2) year labor warranty period) or other
incidental or consequential costs including product and/or economic loss. This limited warranty is in lieu of all other
warranties, express or implied, including those of merchantability, and is non-transferable.
Specific provisions of this limited warranty are as follows:
Two (2) Year Parts Warranty
Silver King warrants to the original purchaser of new Silver King equipment that such equipment and all parts
thereof will be free of defects in material and workmanship, under normal use and service, for a period of two (2)
years from the date of original purchase or 25 months from the date of shipment from the factory, whichever
comes first, subject to all terms and conditions herein.
This warranty is limited to repairing or replacing any parts that, at Silver King’s discretion, are deemed to be
defective within the time period covered by this warranty. The warranty does not cover freight or handling charges
incurred to replace such parts. Use of non-OEM parts may, at Silver King’s discretion, void this warranty. If
approved, warranty credit for non-OEM parts will be issued at the OEM cost.
Replacement parts sold separately are warranted for 90-days from date of purchase.
Five (5) Year Compressor Warranty
Silver King warrants to the original purchaser for a period of five (5) years from the date of original purchase or five (5) years
and one (1) month from the date of shipment from the factory, whichever comes first, that it will replace the compressor with
one of similar design and capacity, exclusive of delivery and installation charges, if it is found to Silver King’s satisfaction to
be inefficient or inoperative due to defects in material or factory workmanship. It is the owner’s responsibility to return the
serial plate of the defective compressor or at Silver King’s option the complete compressor, to the factory. Failure to do so
will void the warranty.
Two (2) Year Labor Warranty
Silver King warrants to the original purchaser for a period of two (2) years from the date of purchase or 25 months from the
date of shipment from the factory, whichever comes first, a limited service labor warranty on Silver King refrigerated
equipment subject to the following terms;
A factory issued Service Authorization Number must be obtained prior to work being performed under the labor warranty.
Call your supplier or Silver King. Claims submitted without a Service Authorization Number will be paid at Silver King’s
discretion.
The labor warranty includes standard straight time labor charges in accordance with Silver King’s Labor Warranty Guidelines
and reasonable travel time, as determined by Silver King.
The warranty does not cover original installation, startup, normal adjustments or maintenance. Normal adjustments and
maintenance include, but are not limited to; temperature control adjustments, temperature indicator calibrations, coil and fi lter
cleaning, condensate drain cleaning.
A second service call for a related failure is not covered.
Use of refrigerants other than specified on the equipment serial plate voids the warranty.
All claims must include; model and serial number of equipment, date of purchase, date of failure, and a copy of the service
invoice detailing the defect and service performed. No claim will be processed without this information. All claims must be
filed within 60 days from date of service.
SK-1 Cream Dispenser 2 Printed in USA 10/15
366-155
Page 3
Safety Information
General Precautions
WARNING
Risk of Electric Shock.
Always unplug the power cord before servicing the unit or
removing the back panel or front apron to avoid electric
shock.
Unit MUST be plugged into a 3-prong plug for grounding.
Cutting off the grounding spike on the power cord could result in electric shock to the operator during operation.
Unit must be plugged into a 15 or 20 ampere fuse- or breaker
-protected circuit. Use of a larger fuse or breaker could result
in damage to the unit and electric shock to the operator.
Moving or Handling Hot Parts.
Some parts may remain hot even after being unplugged.
Always use caution when servicing.
Possible Back Injury.
Assistance in moving this piece of equipment is strongly
recommended to avoid injury.
Always lift with your legs and not your back when lifting this
unit.
Electrical Specification
115V 60 Hz 1 Phase
Important
Prince Castle reserves the right to change specifications
and product design without notice. Such revisions do not
entitle the buyer to corresponding changes, improvements,
additions or replacements for previously purchased
equipment.
General
The SK-1 Cream Dispenser is designed to hold and
dispense bulk coffee cream. It will dispense three portion sizes
– 1 cream packet, 2 cream packets or 3 cream packets.
Indicates information important to the proper operation of the
unit. Failure to observe may result in damage to the equipment
and/or severe bodily injury or death
WARNING
CAUTION
Indicates information important to the operation of the unit. Failure
to observe may result in damage to the equipment
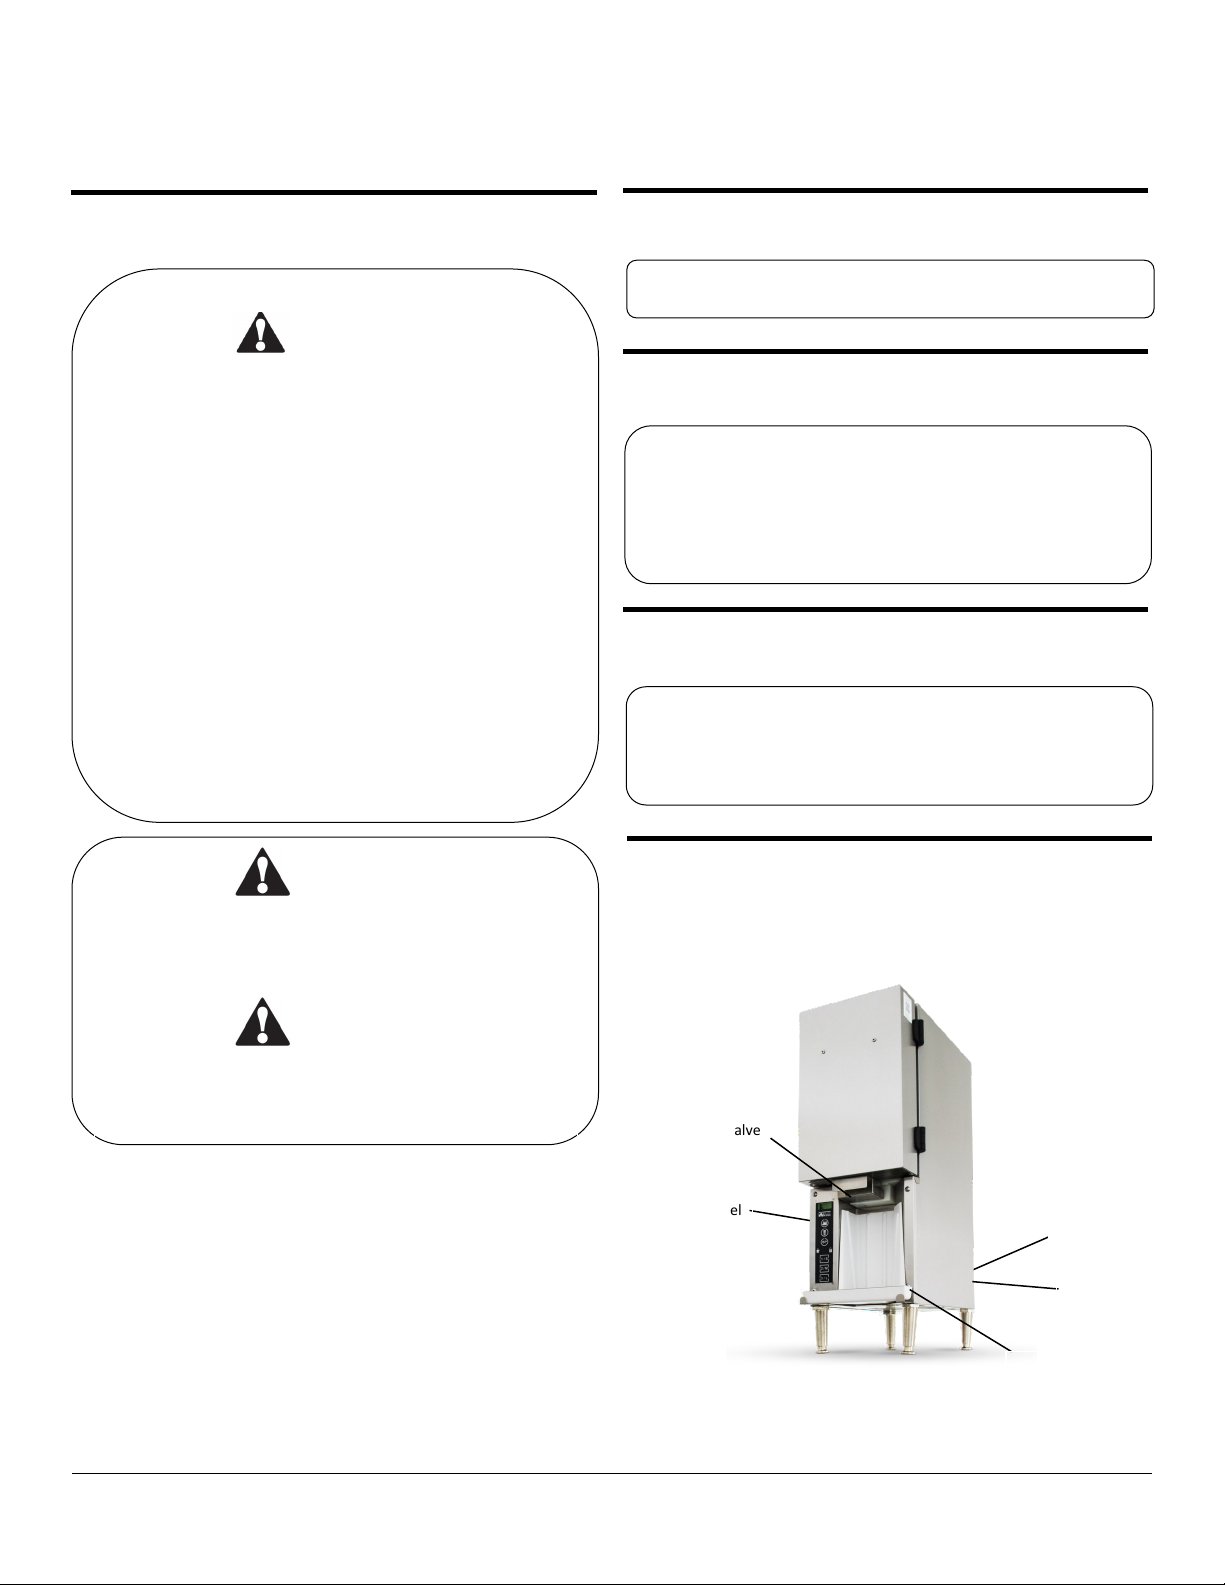
Product Identification
Product Valve
Control Panel
Power Switch
(on back side)
Power Cord
(on back side)
Drip Tray
SK-1 Cream Dispenser 3 Printed in USA 10/15
366-155
Page 4
Unpacking and Setup
1
2
3
Inspect for shipping damage. Examine the s hippi ng
container immediately upon receipt. Any damage to the
container or equipment due to shipping should be reported to the transportation company immediately.
Claims should be filed within 24 hours. Shipping damage is not the responsibility of Prince Castle nor
its Silver King division.
Unpack the unit. Take care wi th box cut ters or other sharp instruments not to nick the equipment when
opening the shipping container.
Carefully remove the unit from the shipping box. Be
sure to follow any orientation or caution labels on the
box.
Plan the unit’s location. When lo cati ng t hi s un it,
convenience and accessibility are important considerations, but the following factors must be observed:
Proximity to a 3-prong 110 VAC receptacle for
grounding (see Step 4).
When placing the unit on a counter, the counter
must be able to support a minimum of 100 lbs. (45
kg).
When placed on a counter, the unit must be on the
legs supplied. If the legs are removed, the unit will
not operate properly and the warranty will be void.
There must be at least 4" (10.2 cm) of space
above, on the sides and behind the unit and open
in front.
Correct serving height is important so that it can
be operated properly.
The unit must be level. The legs are adjustable to
aid in leveling the unit.
Avoid placing the unit next to an oven, heating
element or hot air source which would affect the
performance of the unit.
4
The power cord comes with a 3-prong plug for
grounding purposes. Any attempt to cut off this
grounding spike or to connect to an ungrounded
adapter plug could result in serious injury, will
void the warranty and terminates the
manufacturer’s responsibility.
Meet electrical requirements. Prior t o conn ecting
the unit to power, be sure to check the data plate located on the end panel of the cabinet for required voltage.
The specifications on the data plate supersede any
information contained in this manual.
The standard unit is equipped with a seven (7) foot
power cord that requires a 115 Volt, 60 Cycle, 1
Phase, properly grounded electrical receptacle,
protected with a 15 or 20 ampere fuse or breaker.
WARNING
SK-1 Cream Dispenser 4 Printed in USA 10/15
366-155
Page 5
Installation
WARNING
To avoid injury, it is recommended that the
unit be moved by two people
Locate the Unit. Move the u nit to its mount ing
1
location.
Install the four legs underneath the unit. The dis-
2
penser is shipped without legs attached. To install
them, carefully tilt the unit and thread the legs into the
four corner holes on the bottom of the dispenser.
Level the Unit. In or der for the uni t to fu nct ion
3
properly, level the unit front to back and side to side.
Adjust the legs to level the unit.
Connect the unit to power. Plug in the pow er c ord
5
on the back of the unit, at the left rear. Run the cord
along the rear of the shelf and plug it into the designated outlet.
The power cord comes with a 3-prong plug for grounding pur-
poses. Any aempt to cut o this grounding spike or to connect
to an ungrounded adapter plug could result in serious injury,
will void the warranty and terminates the manufacturer’s
responsibility.
After installation and assembly and before the unit goes into
service, it must be cleaned and sanitized
WARNING
IMPORTANT
Install the drip tray and drip tray cover
4
SK-1 Cream Dispenser 5 Printed in USA 10/15
366-155
Page 6

Initial Cleaning and Sanitizing Initial Start-Up
1
2
3
4
Make sure that the
switch on the back
of the unit is in the
“off position”. The
indicator panel should
be unlit
Wash the surfaces of the unit with warm, soapy
water.
Rinse the surfaces with warm water.
Turn the valve
insert. Pull and
turn valve to expose cold block.
Power Switch
1
2
3
Place the switch on
the back of the unit in
the “on” position. The
indicator panel should
display the current unit
temperature.
Allow the unit to run a minimum of two hours before loading it with product.
Note: It is completely normal for the exterior of the unit
to feel warm while it is running.
Load cream into the cream dispenser. Once the
unit has achieved proper operating temperature,
observe the procedures noted in the label on the
door liner for loading cream in the cream dispenser
Clean the valve and valve area. Use a brush and warm,
5
soapy water to clean the valve. Clean the valve area of the
dispenser with a brush and warm, soapy water. Rinse with
warm water.
Sanitize the valve and valve area. Wit h an appr oved
6
sanitizing solution, thoroughly clean the valve and valve
area. Allow to air dry.
SK-1 Cream Dispenser 6 Printed in USA 10/15
366-155
Page 7

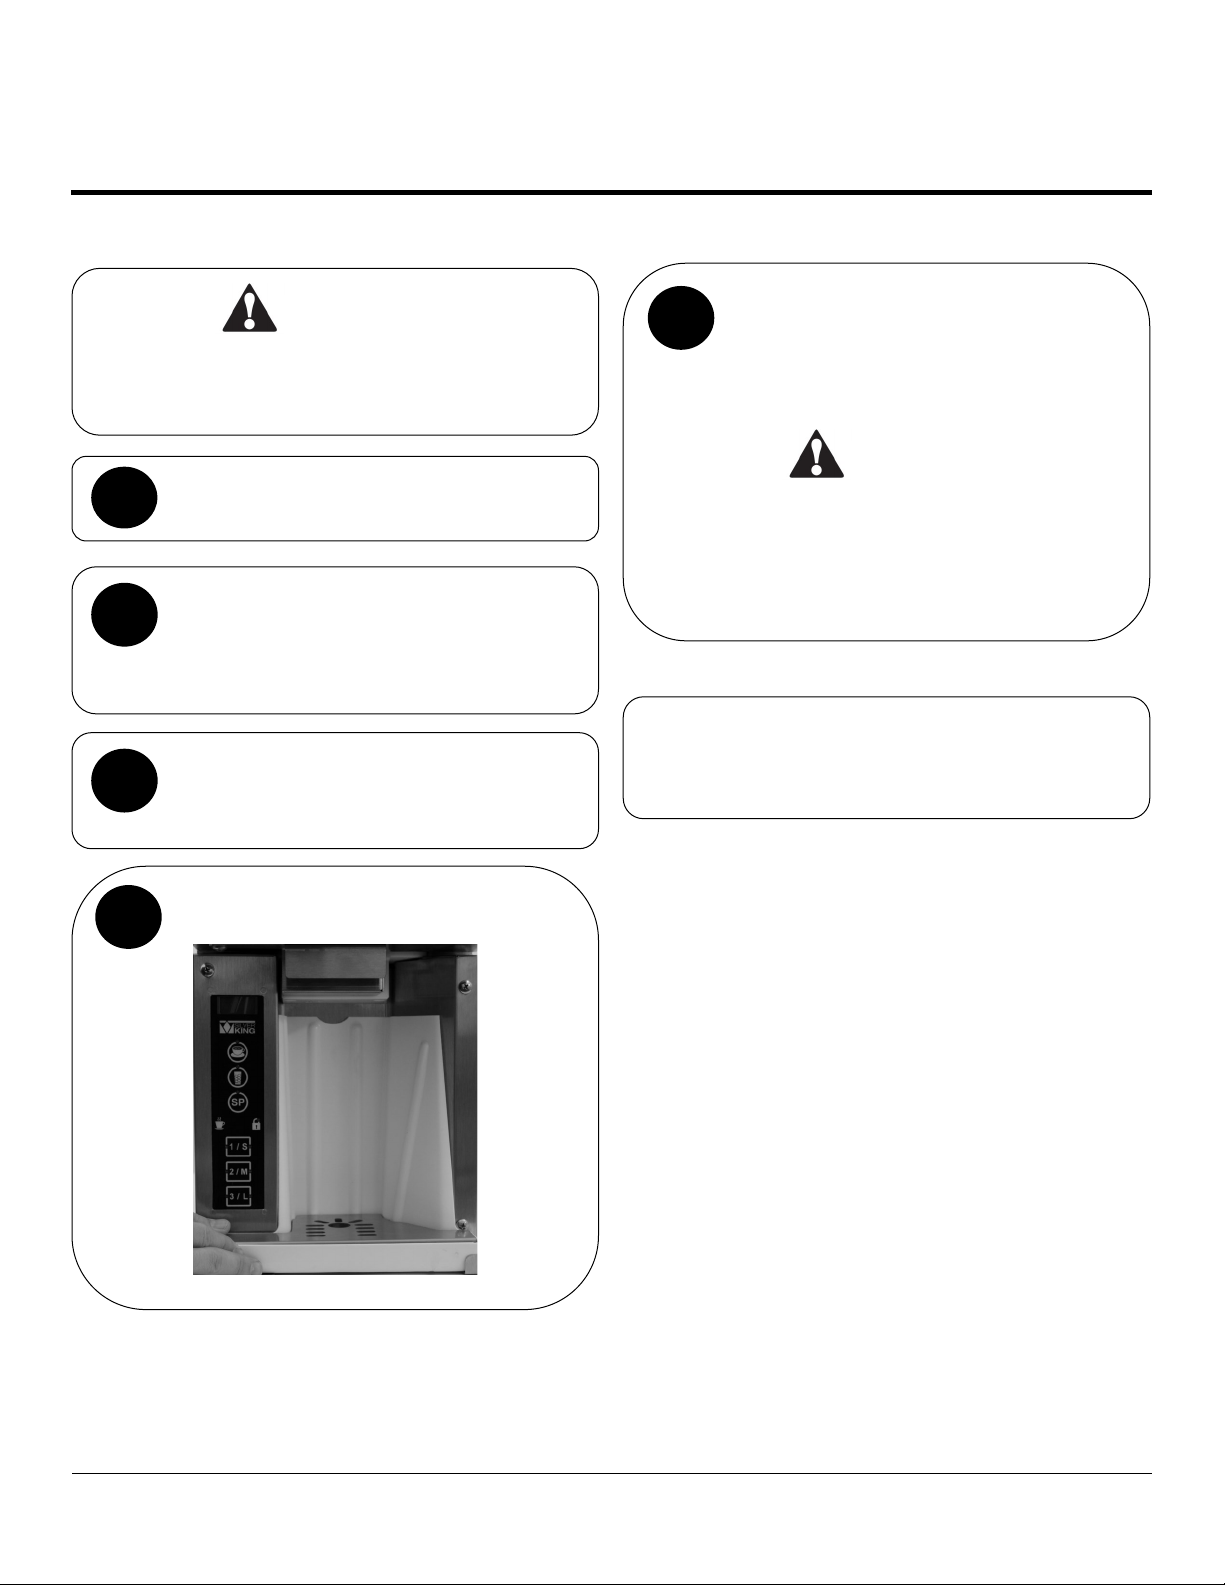
Operation—General Operation—Dispensing Cream
1
Indicator Panel — The in di cato r panel contain s
a digital LED display that reads the product temperature during normal operation
Drink Selection Buttons– The thr ee upp er buttons on the indicator panel are for selecting types
of drinks (Hot, Iced, Special)
Lock Button— Used t o lock butto ns o n touch
panel, and prevent any unwanted dispenses.
Size Buttons– The th ree lower bu ttons on t he
indicator panel are for selecting portion sizes (One
Shot, Two Shots, Three Shots)
Indicator Panel
Hot Drink Selection
Iced Drink Selection
Special Drink Selection
Lock Button
One Shot
Two Shots
Three Shots
1
2
3
Place the drink under the dispensing tube.
Select the Type of
Drink. Press t he
proper drink selection
button to dispense the
correct amount of
cream. The Hot Drink
Selection button is
selected by default if
no button is pressed.
Select the size. Press
the proper drink size
button to dispense the
correct amount of cream.
NOTE: The end of the
tube may need to be
cleaned daily with a
clean cloth to prevent
buildup which could affect the dispensing of the
correct amount of cream.
SK-1 Cream Dispenser 7 Printed in USA 10/15
366-155
Page 8

Operational Flowchart
SK-1 Cream Dispenser 8 Printed in USA 10/15
366-155
Page 9

Manager Mode Flowchart
SK-1 Cream Dispenser 9 Printed in USA 10/15
366-155
Page 10

Cleaning the Dispenser
Tools and Supplies Required
1
2
Bucket, Clean and
Sanitized Towels
Turn the Creamer off
and remove empty
creamer bag. Pull and
turn valve to release
cream tube. Remove
the cream bag from the
compartment
Clean drip tray.
Take the drip tray
to 3 compartment
sink to wash,
rinse, and sanitize
Bucket, Soiled
Towels
Gastro norm Metal
Pan
Gloves, Neoprene McD All Purpose
Wipe down creamer once it has defrosted com-
3
pletely. Wipe down the col d bloc k and insid e of
creamer with APSC and Sanitizer Solution.
Refill Creamer. In-
4
sert a new bag of
cream into dispenser.
Pull and turn valve to
secure cream tube.
Replace the drip tray.
Super Concentrate
(APSC) solution
SK-1 Cream Dispenser 10 Printed in USA 10/15
366-155
Page 11

Troubleshooting Steps
Master Display Messages
PROBLEM PROBABLE CAUSE SOLUTION
Compressor will not run No Voltage at wall receptacle Check circuit breaker or fuse
Service cord pulled out of wall receptacle Call for service (888-375-2938).
Low voltage causing compressor to cycle on
overload
Power switch is in “Off” position Turn switch on
Inoperative Control Call for service (888-375-2938).
Compressor stuck Call for service (888-375-2938).
Compressor windings open Call for service (888-375-2938).
Compressor overload stuck open Call for service (888-375-2938).
Relay lead loose Call for service (888-375-2938).
Relay loose or inoperative Call for service (888-375-2938).
Power cord disconnected from dispenser Call for service (888-375-2938).
Faulty cabinet wiring Call for service (888-375-2938).
Compressor runs but no refrigeration System out of refrigerant Call for service (888-375-2938).
Compressor not pumping Call for service (888-375-2938).
Restricted filter drier Call for service (888-375-2938).
Restricted capillary tube Call for service (888-375-2938).
Moisture in system Call for service (888-375-2938).
Compressor short cycles Erratic Control Thermostat Call for service (888-375-2938).
Low Voltage Contact power company and confirm that
Compressor draws excessive wattage Call for service (888-375-2938).
Faulty relay Call for service (888-375-2938).
Compressor runs too much or constantly Temperature too low Adjust temperature control
Erratic Control Call service technician
Abnormally high room temperature Reduce room temperature or relocate dis-
Door or lid gaskets not sealing Adjust or Call for service (888-375-2938).
System undercharged due to leaks Call for service (888-375-2938).
System undercharged from factory Call for service (888-375-2938).
System overcharged Call for service (888-375-2938).
Contact power company and confirm that
voltage fluctuation does not exceed 10%
plus or minus from the nominal rating.
voltage fluctuation does not exceed 10%
plus or minus from the nominal rating.
penser
System not clean Call for service (888-375-2938).
Restricted filter drier Call for service (888-375-2938).
Restricted capillary tube Call for service (888-375-2938).
SK-1 Cream Dispenser 11 Printed in USA 10/15
366-155
Page 12

Troubleshooting Steps (Continued)
Master Display Messages
PROBLEM PROBABLE CAUSE SOLUTION
Noisy Tubing Vibrates Call for service (888-375-2938).
Internal compressor noise Call for service (888-375-2938).
Compressor vibrating on cabinet frame Call for service (888-375-2938).
Beverage leaking or not flowing Tube Kinked Remove valve and pull tube straight through
valve area.
Valve stuck Clean valve and valve area or call for
service (888-375-2938).
SK-1 Cream Dispenser 12 Printed in USA 10/15
366-155
Page 13

Parts List and Exploded View
Item Part Number Description Qty
1 366-124S ASSY DOOR SKMCD1P 1
2 31126S GSKT DOOR 1
3 25226S HINGE W/SCREWS & COVERS 2
4 25473S COMPR 115V/60HZ EM20HHR 1
5 30876S ASSY EXCHNGR HEAT 1
6 26378 SWITCH ROCKER 115V/230V 1
7 35826
8 20481P GROMMET MTG COMPR LONG 4
9 98106P CLIP HAIRPIN 4
10 22401P WASHER MOUNT COMPR 4
11 37133S ASSY VALVE PLUNGER 1
12 366-132S ASSY RACK SOLENOID 1
13 24048S
14 24050S
MODULE POWER ENTRY 115V
(W/1 FUSE)
LABEL CAUTION HAZARDOUS
MOVING
LABEL ELECTRIC SHOCK HAZ-
ARD
1
1
1
Item Part Number Description Qty
15 366-135S POWER SUPPLY ASSY 1
16 366-139S ASSY APRON 1
17 366-142S ASSY TRAY, DRIP - CREAMER 1
18 366-151S
19 366-137S ELECTRONICS ASSEMBLY 1
20 366-144S LOAD CELL ASSY 1
21 10314-89 LEG 4" NP FLG FOOT 1
22 24904S TUBE WELL GUARD 1
23 37364S PROBE TEMP SKBD3LS 1
24 33883 CORDSET 115V 1
25 37358S ERGONOMICS PLUG 1" DIA. 1
26 366-149S BAG GUARD **(NOT SHOWN)** 1
CONTAINER CREAM PLASTIC
SINGLE
1
SK-1 Cream Dispenser 13 Printed in USA 10/15
366-155
Page 14

Wiring Diagram
SK-1 Cream Dispenser 14 Printed in USA 10/15
366-155
 Loading...