

Page 1
A
6
1
5 2
4
7
11
3
10
8
9
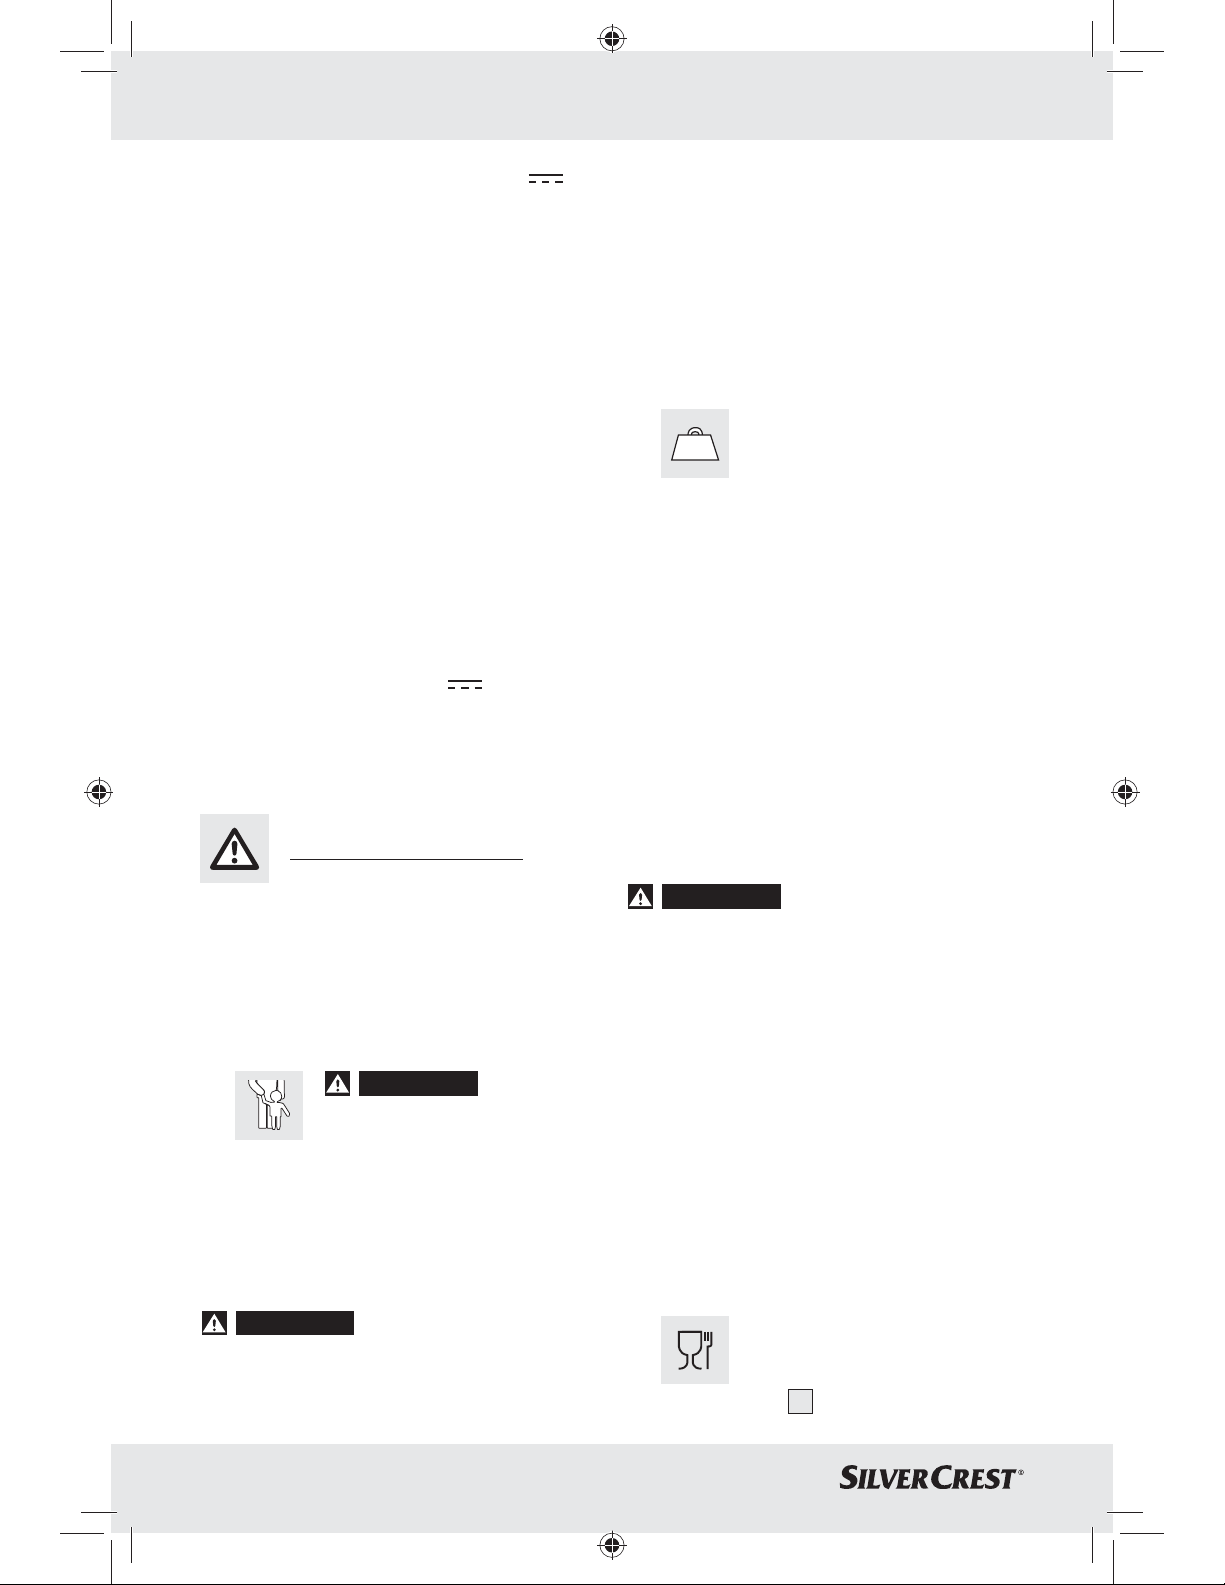
B
C
5
4
21
20
19
18
17 16 15
2
3
12
13
14
3
63925_silv_Digitale_Küchenwaage_content_LB3.indd 3 23.02.11 15:49
Page 2

Table of Contents
Introduction
Proper Use .................................................................................................................Page 5
Description of parts ...................................................................................................Page 5
Technical data ...........................................................................................................Page 5
Includes ......................................................................................................................Page 6
Safety Instructions
General Safety Instructions ......................................................................................Page 6
Electrical safety .........................................................................................................Page 7
Safety Instructions for Batteries ................................................................................Page 7
Installation ...........................................................................................................Page 7
Bringing into use
Setting the time ..........................................................................................................Page 8
Operation
Using the time display ...............................................................................................Page 8
Using the scale ..........................................................................................................Page 8
Using the temperature display .................................................................................Page 9
Using the alarm function ...........................................................................................Page 9
Using the digital timer ...............................................................................................Page 10
Resetting the settings .................................................................................................Page 10
Replacing the batteries .............................................................................................Page 10
Troubleshooting ..............................................................................................Page 11
Cleaning and Maintenance ....................................................................Page 11
Disposal ..................................................................................................................Page 11
4 GB/IE
63925_silv_Digitale_Küchenwaage_content_LB3.indd 4 23.02.11 15:49
Page 3
Introduction
Digital Kitchen Scale
Introduction
Before assembling and using the
device for the first time, take time to
familiarise yourself with the product
first. In addition please refer carefully to the installation and operating instructions below and
to the safety advice. Only use the product as
described and for the designated areas of application. Please keep these instructions in a
safe place. If you hand this product on to a third
party, you must also pass on all documents
relating to the product.
Proper Use
This appliance is designed to weigh out and
tare quantities of food. The digital kitchen
measures the weight of non-aggressive, non-corrosive and non-abrasive liquids or solids. It is not
intended for weighing medication or prohibited
materials.
As well as having a digital countdown
timer and an alarm, the device also displays the
temperature and the time of day. Any use other
than that described above or any modification
of the product is not permissible and will result
in damage. Misuse may also result in other lifethreatening risks and injury. The product is for
private use only and is not intended for medical
or commercial use.
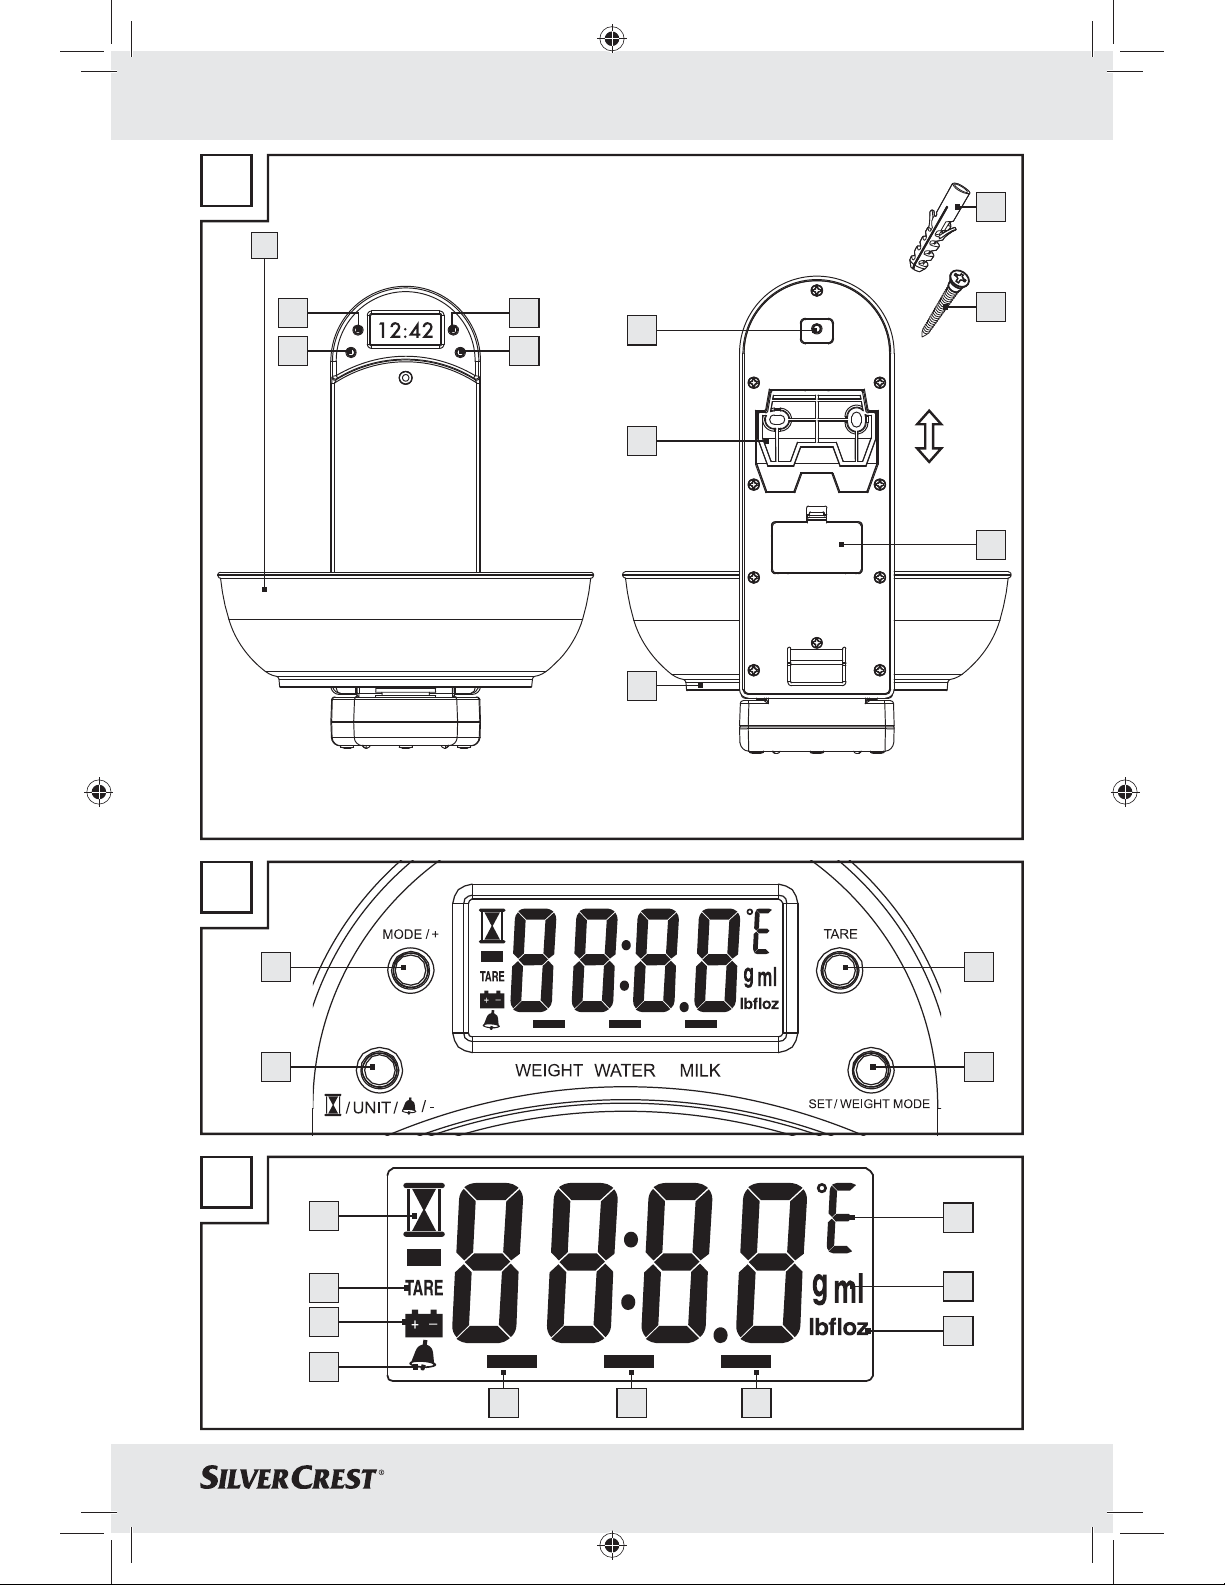
scale
10
Wall bracket
11
Reset button
12
°Celsius / °Fahrenheit indicator
13
Grams / millilitres indicator
14
Pounds (lb) and fluid ounces (floz) indicator
15
Milk-weighing mode indicator
16
Water-weighing mode indicator
17
Weight-weighing mode indicator
18
Alarm symbol
19
Battery charge state indicator
20
Tare indicator
21
Digital timer indicator
Technical data
Dimensions:
Folded up: approx. 12.9 x 21.9 x
5.6 cm (W x H x D)
Measuring range:
Weight: 0 – 5100 g, accuracy
± (0.1 % + 1 g)
0 – 11 lb 4 oz, accuracy
± (0.1 % + 1 oz)
Water: 0 – 5100 ml, accuracy
± (0.1 % + 1 ml)
0 – 179.5 floz, accuracy
± (0.1 % + 1 floz)
Milk: 0 – 4950 ml, accuracy
± (0.1 % + 1 ml)
0 – 174.2 floz, accuracy
± (0.1 % + 1 floz)
Description of parts
Measurement divisions:
Weight: 1 g
1
Weighing bowl
2
TARE button (“zero reset”)
3
SET / WEIGHT MODE button
4
Digital timer / UNIT / Alarm / - button
5
MODE / + button
6
Dowel (ø 6 mm)
7
Screw
8
Battery compartment
9
Glass plate
63925_silv_Digitale_Küchenwaage_content_LB3.indd 5 23.02.11 15:49
Water / milk: 1 ml
Digital timer: Up to 99 minutes and
59 seconds (± 1 s)
Temperature display: 0.0 °C – 50.0 °C,
accuracy ± 2.0 °C
32.0 °F – 122.0 °F,
accuracy ± 3.6 °F
5 GB/IE
Page 4
Introduction / Safety Instructions
Battery: 2 x CR2032, 3 V
(included)
Material:
Housing /
Weighing bowl: Plastic
Includes
Immediately after unpacking please check the
package contents for completeness and if all
parts and the product are in good condition. Do
not under any circumstances use the product if
the delivery is incomplete.
1 Kitchen scale
1 Weighing bowl
1 Wall bracket
2 Batteries type CR2032, 3 V
2 Dowels (ø 6 mm)
2 Screws
1 Operating manual
Safety Instructions
KEEP ALL THE SAFETY ADVICE AND
INSTRUCTIONS IN A SAFE PLACE FOR
FUTURE REFERENCE!
General Safety Instructions
WARNING!
DANGER
OF DEATH AND ACCIDENTS
FOR TODDLERS AND CHIL-
DREN! Never leave children unsupervised
with the packaging material. The packaging
material represents a danger of suffocation.
Children frequently underestimate the
dangers. Always keep children away from
the packaging material.
WARNING!
DANGER TO LIFE!
Batteries can be swallowed, which may
represent a danger to life. If a battery has
been swallowed, medical help is required
immediately.
Children or persons who lack the knowledge
or experience to use the device or whose
physical, sensory or intellectual capacities
are limited must never be allowed to use the
device without supervision or instruction by a
person responsible for their safety. Children
must never be allowed to play with the device.
5 kg
CAUTION! RISK OF INJURY!
Do not place more than 5 kg on
the scale. This could damage
the product.
Do not expose the product to
– extreme temperatures,
– strong vibrations,
– heavy mechanical loads,
– direct sunlight
– magnetic fields,
– moisture.
These can damage the product.
Protect the product from electrostatic charge /
discharge. This could hinder the internal
data exchange, which causes errors in the
LCD readout.
Check the product for damage before use.
Never use a damaged product.
WARNING!
Never open the housing of
the product. This can result in injury and
damage to the product. Repairs must be
carried out by an electrician only.
Do not allow anyone inexperienced to use the
product. Make sure that anyone intending
to use the product has read the operating
manual and is capable of operating the
product safely.
The product may not function properly if it is
subject to electrical interference or highfrequency radio transmissions. If this is the
case, briefly remove the batteries from the
product
as described
and replace them again. Proceed
in the section on “Replacing
the batteries“.
FOOD-SAFE! The taste and
smell of your food are not
detrimentally affected by the
weighing bowl
1
.
6 GB/IE
63925_silv_Digitale_Küchenwaage_content_LB3.indd 6 23.02.11 15:49
Page 5
Safety Instructions / Installation
Use the weighing bowl 1 only for weighing
food. Do not place other things on the
weighing bowl
Failure to observe this advice may result in
damage to the product.
When you press the buttons on the display,
do so carefully. Do not use sharp objects to
press the buttons.
Ꮨ CAUTION! RISK OF ELECTRIC
SHOCK! Before installation please ensure
that there is no concealed wiring where you
are intending to drill.
CAUTION! WATER DAMAGE! Before
installation please ensure that there are
no concealed water pipes where you are
intending to drill.
Electrical safety
Do not hang the device above hot surfaces
or in the vicinity of open flames, otherwise the
housing may melt. Ensure that the device is
not at risk in the closed or in the opened state.
Keep the device away from sources of water
or moisture. Water penetration increases
the risk of electric shock.
Never use the scale with wet hands.
Remove the batteries if the device breaks
down or is defective.
Do not use the device if it is damaged.
WARNING!
housing. Always have any repairs carried out
or replacement parts fitted by an electrical
equipment repair specialist only.
1
or the kitchen scale.
Never open the device’s
you insert a battery. This is indicated in the
battery compartment
If necessary, clean the batteries and device
contacts before inserting the batteries.
Remove spent batteries immediately from
the device. There is an increased danger of
leaks!
Batteries must not be disposed of in the
normal domestic waste!
Every consumer is legally obliged to dis-
pose of batteries in the proper manner!
throw batteries in the fire, short-circuit bat-
teries or take them apart.
If the above instructions are not complied
with, the batteries may discharge themselves beyond their end voltage. There is
then a danger of leaking. If the batteries
have leaked inside your device, you should
remove them immediately in order to prevent damage to the device!
Avoid contact with the skin, eyes and mu-
cous membranes. Any parts of the body
coming into contact with battery acid should
be rinsed off with copious amounts of water
and / or a doctor contacted if necessary!
Installation
Note: You can use this product either wall
mounted or as a tabletop unit. In the following we
will describe how to mount the product to a wall.
CAUTION! DANGER OF
EXPLOSION! Keep batteries
away from children; do not
8
.
Ensure that you do not strike electrical ca-
Safety Instructions
for Batteries
Remove the batteries from the device if they
are not going to be used for a prolonged
period.
Make sure that the polarity is correct when
63925_silv_Digitale_Küchenwaage_content_LB3.indd 7 23.02.11 15:49
CAUTION! DANGER OF
EXPLOSION! The batteries
must never be recharged!
bles, gas or water pipes when you are
working with a drill. If necessary, check the
area using a suitable detector before you
drill. Read the operating instructions for
your drill.
Install the scale in such a way that it functions
perfectly and can be used properly.
Note: The recommended maximum height
of the kitchen scale when mounted to a wall
is approx. approx. 1.5 m.
7 GB/IE
Page 6

Installation / Bringing into use / Operation
1. Remove the wall bracket 10 from the back of
the housing by sliding it downwards (Fig. A).
2. Mount the wall bracket
10
vertically in the
desired position on the wall with the supplied screws
7
and dowels 6.
Note: The supplied dowels are intended for
use in ordinary solid masonry. Seek expert
advice on suitable fixings if the device is to
be fixed to another type of wall construction.
3. Pull the separation strip out of the battery
compartment
4.
Then mount the scale on to the wall bracket 10.
8
.
Note: Measuring accuracy may be detrimentally affected if the device is not installed vertically.
Bringing into use
Setting the time
Press the MODE / + button 5 until the
device enters the clock mode.
Press the SET / WEIGHT MODE button
3
to enter the settings mode. The minute display value flashes.
You can use the MODE / + button
Digital timer / UNIT / Alarm / - button
5
or the
4
to set the value.
Note: If you keep these buttons
4, 5
pressed, you can accelerate the process
and reach the desired value more quickly.
Press the SET / WEIGHT MODE button
3
to store the set value and move on to setting
the hour display value. The hour value flashes.
You can use the MODE / + button
Digital timer / UNIT / Alarm / - button
5
or the
4
to
set the value.
Press the SET / WEIGHT MODE button
3
to store the set value and leave the settings
mode.
Note: If no key is pressed within 10 seconds,
the set value will stop flashing and the time
is set to the value shown in the display.
Operation
The device has five functions:
1. Time display
2. Weighing
3. Temperature display
4. Alarm function
5. Digital countdown timer
You can switch between the various func-
tions by pressing the MODE / + button
Using the time display
Press the MODE / + button 5 until the de-
vice enters the clock mode.
The display shows the time (hours:minutes).
If you wish to change the time to another
value, proceed as described in the section
“Setting the time”.
Note: The device continues to show the
time unless the device is switched to another function by you pressing the MODE /
+ button
Using the scale
5
.
Note: When using this product as a tabletop
unit, make sure it is placed on a solid and flat
surface for the weighing process.
Fold down the glass plate
Place the weighing bowl
9
.
1
on the device’s
weighing platform.
If necessary press the MODE / + button
until the device enters the weighing mode.
This comes after the time display.
You can press the SET / WEIGHT MODE
button
mode settings for weight
milk
3
to switch between the weighing
17
, water 16 and
15
. The selected weighing mode setting is indicated by a small bar indicator in
the display.
5
.
5
8 GB/IE
63925_silv_Digitale_Küchenwaage_content_LB3.indd 8 23.02.11 15:49
Page 7
Operation
Note: In the weighing mode settings for
water and milk, the device displays the volume (ml / floz) of the liquid in the bowl. This
function is intended to replace the use of a
measuring jug for liquids. Please note that
in particular the volume of milk depends on
the fat content, the origin of the milk and
other factors. The volume displayed therefore corresponds to an average value.
You can press the Digital timer / UNIT /
Alarm / - button
displayed units
4
to switch between the
13
14
,
. The following units
can be used in the measurements:
Weight: Gram (default setting), oz, lb
Water: ml (default setting), floz
Milk: ml (default setting), floz
Note: The measurement unit oz (ounce) is
still in common use for foods and is the
equivalent of approx. 28.35 g. The measurement unit lb (libra = Latin for pound) is
the equivalent of approx. 453.59 g and
equals 16 oz. The measurement unit floz
(fluid ounce) is the equivalent of approx.
28.4 ml. 100 ml is therefore the equivalent
of approx. 3.5 floz.
Weighing out foods:
Note: When you are weighing heavy items,
place them slowly and carefully on to the
weighing bowl
1
to avoid damaging the kitch-
en scale.
1. Place an ingredient into the weighing bowl
1
. The weight is immediately shown in the
display.
2. Press the TARE button
2
to zero reset the
display. The display shows “0” and the tare
indicator
20
will light up.
3. Now add the desired quantity of the second
ingredient. You can read the added quantity
directly in the display.
4. Repeat steps 2 and 3 until all the required
ingredients have been added.
Note that the maximum load on
5 kg
the scale is 5 kg.
Note: If the scale is overloaded, then the
display shows “
”.
Note: If no button is pressed within a period
of two minutes, the kitchen scale’s display
automatically shows the time.
Using the temperature
display
Press the MODE / + button 5 until the
device enters the temperature mode. This
comes after the weighing mode.
Temperature measurement is carried out at
an interval of approximately 10 seconds.
You can press the Digital timer / UNIT /
Alarm / - button
between °C and °F.
Note: If no button is pressed within a period
of two minutes, the kitchen scale’s display
automatically shows the time.
Using the alarm function
Press the MODE / + button 5 until the
device enters the alarm mode. This comes
after the temperature display.
Press the SET / WEIGHT MODE button
to enter the settings mode. The minute value
flashes.
You can use the MODE / + button
Digital timer / UNIT / Alarm / - button
set the value.
Press the SET / WEIGHT MODE button
to store the set value and move on to setting
the hours. The hour value flashes.
You can use the MODE / + button
Digital timer / UNIT / Alarm / - button
set the value.
Press the SET / WEIGHT MODE button
to store the set value and leave the settings
mode.
Note: If no key is pressed within 10 seconds,
the set value will stop flashing and the alarm
time is set to the value shown in the display.
4
to switch the indicator 12
5
or the
4
5
or the
4
3
to
3
to
3
9 GB/IE
63925_silv_Digitale_Küchenwaage_content_LB3.indd 9 23.02.11 15:49
Page 8

Operation
Press the Digital timer / UNIT / Alarm / -
button
Alarm symbol
4
to start the alarm function. The
18
appears in the display.
You can switch off the alarm function by
pressing the Digital timer / UNIT / Alarm / -
button
4
again. The Alarm symbol 18
disappears from the display.
When the set alarm time is reached, an
audible alarm signal sounds for about one
minute.
No audible alarm signal sounds if the set
time is reached when the device is in the
weighing mode. Instead the Alarm symbol
flashes in the display.
Note: If no button is pressed within a period
of two minutes, the kitchen scale’s display
automatically shows the time.
Using the digital timer
Press the MODE / + button 5 until the
device enters the digital timer mode. This
comes after the alarm function.
Press the SET / WEIGHT MODE button
to enter the settings mode. The seconds
display value flashes.
You can use the MODE / + button
Digital timer / UNIT / Alarm / - button
5
or the
4
set the value.
Press the SET / WEIGHT MODE button
to store the set value and move on to setting
the minute display value. The minute display
value flashes.
You can use the MODE / + button
Digital timer / UNIT / Alarm / - button
5
or the
4
set the value.
Press the SET / WEIGHT MODE button
to store the set value and leave the settings
mode.
Press the Digital timer / UNIT / Alarm /
- button
timer indicator
4
to start the digital timer. The digital
21
appears in the display.
Note: While the digital timer continues to
run, you can switch the device to another
function by pressing the MODE / + button
The digital timer indicator
21
to appear in the display.
You can switch off the digital timer by press-
ing the Digital timer / UNIT / Alarm /
- button
21
4
again. The digital timer indicator
disappears from the display.
When the set time expires, an audible alarm
signal sounds for about one minute and the
previously set time appears on the display.
No audible alarm signal sounds if the set
time is reached when the device is in the
weighing mode. Instead the digital timer
18
indicator
21
flashes in the display.
Note: If no button is pressed within a period
of two minutes, the kitchen scale’s display
automatically shows the time.
Resetting the settings
The reset button 11 can be found on the
back of the housing. Press this button to reset
all the settings to the default factory settings.
3
Replacing the batteries
When the batteries become weaker, the
to
battery charge state indicator
display will light up.
3
Replace the batteries as soon as the symbol
“
” appears in the display. Weak or exhausted batteries can affect the accuracy of
the measurement results.
Open the battery compartment
to
back of the scale.
Remove the discharged batteries and dispose
3
of them properly in accordance with the applicable regulations (see section “Disposal”).
Insert two new batteries type CR2032,
3 V
into the battery compartment 8.
Make sure you fit the batteries the right way
round (polarity). The correct polarity is
shown under the battery compartment
Then close the battery compartment
5
.
then continues
19
in the
8
on the
8
.
8
.
10 GB/IE
63925_silv_Digitale_Küchenwaage_content_LB3.indd 10 23.02.11 15:49
Page 9
Troubleshooting / Cleaning and Maintenance / Disposal
Troubleshooting
= Fault
= Cause
= Solution
=
= The scale is unstable or not quite plumb.
= Ensure the device is firmly fixed in place
and exactly plumb.
=
= The scale is overloaded.
= Remove the overload.
= Displays out2, then switches to the
clock display
= The scale was loaded with 1000 g before
you switched into weighing mode.
= Remove the overload within 10 seconds.
The display returns to the weighing mode
within five seconds.
=
= The batteries are too weak to weigh.
= Replace the batteries (see section “Replac-
ing the batteries”).
Cleaning and Maintenance
Contact your local refuse disposal authority for
more details of how to dispose of your worn-out
product.
To help protect the environment,
please dispose of the product properly when it has reached the end of
its useful life and not in the household
waste. Information on collection
points and their opening hours can
be obtained from your local authority.
Faulty or used batteries must be recycled in
accordance with Directive 2006 / 66 / EC.
Please return the batteries and / or the device
to the available collection points.
Environmental damage
through incorrect disposal of
Pb
Batteries may not be disposed of with the usual
domestic waste. They may contain toxic heavy
metals and are subject to hazardous waste
treatment rules and regulations. The chemical
symbols for heavy metals are as follows:
Cd = cadmium, Hg= mercury, Pb = lead. That is
why you should dispose of used batteries at a
local collection point.
the batteries!
Do not use chemical cleaners, scouring
agents or sharp objects for cleaning. These
can damage the product.
Never immerse the product in water or other
liquids. This can damage the product.
Clean the product with a slightly dampened,
non-fluffing cloth. To remove more stubborn
dirt, you can also dampen the cloth with a
weak soap solution.
Product Description:
Digital Kitchen Scale
Model No.: Z30170
Version: 04 / 2011
EMC
Disposal
The packaging is made entirely of
recyclable materials, which you may
dispose of at local recycling facilities.
11 GB/IE
63925_silv_Digitale_Küchenwaage_content_LB3.indd 11 23.02.11 15:49
Page 10
Sisällysluettelo
Johdanto
Käyttötarkoitus ............................................................................................................Sivu 13
Osien kuvaus ..............................................................................................................Sivu 13
Tekniset tiedot .............................................................................................................Sivu 13
Toimituksen sisältö ......................................................................................................Sivu 14
Turvaohjeet
Yleiset turvallisuusohjeet ............................................................................................Sivu 14
Sähköturvallisuus ........................................................................................................Sivu 15
Paristojen turvallisuusohjeet .......................................................................................Sivu 15
Asennus ...................................................................................................................Sivu 15
Käyttöönotto
Kellonajan asetus .......................................................................................................Sivu 16
Käyttö
Kellonajan näyttö .......................................................................................................Sivu 16
Vaa’an käyttö .............................................................................................................Sivu 16
Lämpötilanäytön käyttö .............................................................................................Sivu 17
Hälytystoiminnon käyttö ............................................................................................Sivu 17
Ajastimen käyttö .........................................................................................................Sivu 17
Asetusten nollaus ........................................................................................................Sivu 18
Paristojen vaihto .........................................................................................................Sivu 18
Vikojen korjaus ................................................................................................Sivu 18
Puhdistus ja hoito ............................................................................................Sivu 19
Jätehuolto ..............................................................................................................Sivu 19
12 FI
63925_silv_Digitale_Küchenwaage_content_LB3.indd 12 23.02.11 15:49
Page 11
Johdanto
Digitaalinen keittiövaaka
Johdanto
Tutustu laitteeseen ennen ensimmäistä
käyttöönottoa. Lue myös seuraava
asennus- jakäyttöohje sekä turvallisuusohjeet tarkkaavaisesti läpi. Käytä laitetta
ainoastaan kuvatulla tavalla ja mainitussa käyttötarkoituksessa. Säilytä käyttöohje huolellisesti.
Anna kaikki asiakirjat laitteen mukana mahdolliselle uudelle omistajalle.
Käyttötarkoitus
Tämä laite on tarkoitettu elintarvikkeiden tavanomaisten määrien punnitukseen, myös lisää ja
punnitse-toiminnolla. Keittiövaaka on tarkoitettu
mietojen, syövyttämättömien ja hankaamattomien
nesteiden tai kiinteiden aineiden painon mittaukseen. Sitä ei ole tarkoitettu lääkeaineiden tai
kiellettyjen aineiden punnitukseen. Sen tehtävänä
on näyttää lämpötila ja kellonaika ja siinä on
ajastin ja hälytystoiminto. Tuotetta ei saa käyttää
muulla kuin edellä kuvatulla tavalla eikä sitä saa
muuttaa. Se voi aiheuttaa loukkaantumisia ja / tai
tuotteen vanhingoittumista. Lisäksi seurauksena
voi olla muita hengenvaarallisia vahinkoja ja
loukkaantumisia. Tuote on tarkoitettu ainoastaan
henkilökohtaiseen käyttöön, ei lääketieteelliseen
tai kaupalliseen käyttöön.
11
Reset-painike
12
Näyttö °Celsius/°Fahrenheit
13
Näyttö gramma/millilitra
14
Näyttö pauna (lb) ja nesteunssit (floz)
15
Näyttö maito-punnitustila
16
Näyttö vesi-punnitustila
17
Näyttö paino-punnitustila
18
Hälytyssymboli
19
Pariston latausnäyttö
20
Taara-näyttö (Tare)
21
Ajastinnäyttö
Tekniset tiedot
Mitat:
Kokoon taitettuna: n. 12,9 x 21,9 x 5,6 cm
(l x k x s)
Punnitusalue:
Paino: 0 – 5100 g, poikkeama ±
(0,1 % + 1 g)
0 – 11 lb 4 oz, poikkeama
± (0,1 % + 1 oz)
Vesi: 0 – 5100 ml, poikkeama ±
(0,1 % + 1 ml)
0 – 179,5 floz, poikkeama
± (0,1 % + 1 floz)
Maito: 0 – 4950 ml, poikkeama ±
(0,1 % + 1 ml)
0 – 174,2 floz, poikkeama
± (0,1 % + 1 floz)
Osien kuvaus
Astejako:
Paino: 1 g
1
Punnituskulho
2
TARE-painike (”nolla-asento“)
3
SET/WEIGHT MODE-painike
4
Ajastin/UNIT/hälytys/- - painike
5
MODE/+ - painike
6
Tulppa (ø 6 mm)
7
Ruuvi
8
Paristotila
9
Lasilevy
10
Seinäkiinnitin
63925_silv_Digitale_Küchenwaage_content_LB3.indd 13 23.02.11 15:49
Vesi/maito: 1 ml
Ajastin: maksimi 99 minuuttia ja
59 sekuntia (± 1 s)
Lämpötilanäyttö: 0,0 °C – 50,0 °C,
Poikkeama ± 2,0 °C
32,0 °F – 122,0 °F,
Poikkeama ± 3,6 °F
13 FI
Page 12
Johdanto / Turvaohjeet
Paristo: 2 x CR2032, 3 V
(sisältyy toimitukseen)
Materiaali:
Kotelo /
Punnituskulho: muovia
Toimituksen sisältö
Tarkista heti avattuasi pakkaukset toimituksen
täydellisyys sekä tuotteen ja osien moitteeton
kunto. Älä missään tapauksessa asenna tuotetta,
jos toimitus ei ole täydellinen.
1 keittiövaaka
1 punnituskulho
1 seinäkiinnitin
2 paristoa CR2032, 3 V
2 tulppaa (ø 6 mm)
2 ruuvia
1 käyttöohje
Turvaohjeet
SÄILYTÄ KAIKKI TURVA- JA MUUT OHJEET
TULEVAA TARVETTA VARTEN!
Yleiset turvallisuusohjeet
VAROLTUS!
HENGENJA TAPATURMANVAARA
PIKKULAPSILLE JA LAPSILLE!
Älä koskaan jätä lapsia pakkausmateriaalien
läheisyyteen ilman valvontaa. Pakkausmateriaaleihin liittyy tukehtumisvaara. Lapset
aliarvioivat usein vaarat. Pidä lapset aina
loitolla pakkausmateriaalista.
VAROLTUS!
HENGENVAARA! Paristojen
nieleminen voi olla hengenvaarallista. Pariston
nielleen henkilön on välittömästi mentävä
lääkärille.
Tämä laite ei ole tarkoitettu sellaisten henki-
löiden (lapset mukaan luettuina) käyttöön,
joiden fyysinen, aistimuksellinen tai henkinen
kunto on rajoittunut tai joilla ei ole kokemusta /
tietoja laitteen käytöstä. He saavat käyttää
laitetta ainoastaan turvallisuudesta vastuussa
olevan henkilön valvonnassa tai jos heille on
annettu opastusta laitteen käytössä. Lapsia
on valvottava ja varmistauduttava, etteivät
he pääse leikkimään laitteen kanssa.
VARO! LOUKKAANTUMIS-
5 kg
VAARA! Älä kuormita vaakaa
yli 5 kg. Tuote voi vaurioitua.
Älä altista laitetta
– äärimmäisille lämpötiloille,
– voimakkaalle tärinälle,
– minkäänlaiselle voimakkaalle mekaaniselle
rasitukselle,
– suoralle auringonpaisteelle,
– magneettiselle ympäristölle,
– kosteudelle.
Muuten tuote voi vaurioitua.
Suojaa tuote sähköstaattiselta varaukselta /
purkaukselta. Ne voivat estää sisäisen
tiedonvaihdon, mikä saa aikaan virheellisen
näytön.
Tarkista tuote ennen käyttöönottoa vaurioiden
varalta. Älä ota vaurioitunutta tuotetta käyttöön.
VAROLTUS!
Älä koskaan avaa tuotteen
koteloa. Seurauksena saattaa olla loukkaan-
tuminen ja / tai esinevahinko. Anna ainoastaan asiantuntijan suorittaa korjaukset.
Älä anna henkilöiden, jotka eivät tunne
tuotteen käyttöä, käyttää sitä. Varmista, että
jokainen tuotetta käyttävä on lukenut sen
käyttöohjeen ja pystyy käyttämään tuotetta
turvallisesti.
Tuotteen toimintoja voivat häiritä magneetti-
set häiriökentät/korkeataajuussäteily. Jos
sellaisia häiriöitä esiintyy, ota paristot hetkeksi pois ja laita ne uudelleen paikoilleen.
Toimi siinä luvun “Paristojen vaitho“ mukaan.
ELINTARVIKKEITA KESTÄ-
VÄ! Punnituskulho
1
ei vaikuta
maku- eikä hajuominaisuuksiin.
Käytä punnituskulhoa
1
vain elintarvikkeiden
punnitukseen. Älä aseta mitään muita esineitä
punnituskulholle
1
tai keittiövaa’alle. Tämän
14 FI
63925_silv_Digitale_Küchenwaage_content_LB3.indd 14 23.02.11 15:49
Page 13
Turvaohjeet / Asennus
ohjeen huomioimatta jättäminen voi vaurioittaa tuotteen.
Paina varovasti näytön painikkeita. Älä
käytä mitään teräviä esineitä painikkeiden
painamiseen.
VARO! SÄHKÖISKUVAARA! Varmis-
taudu ennen porausta, ettei porauskohdassa
kulje mitään johtoja.
VARO! VESIVAHINKOVAARA! Varmis-
taudu ennen porausta, ettei porauskohdassa
kulje mitään putkia.
Sähköturvallisuus
Älä ripusta laitetta kuumien pintojen yläpuo-
lelle tai avointen liekkien läheisyyteen, jotta
välttyisit kotelon vaurioitumisen. Varmistaudu,
ettei laite ole vaarassa suljetussa eikä avatussa tilassa.
Pidä tuote loitolla kosteudesta. Veden pääsy
laitteeseen kohottaa sähköiskuriskiä.
Älä käytä vaakaa märin käsin.
Poista paristot häiriön esiintyessä tai jos
laite on vaurioitunut.
Älä ota vaurioitunutta laitetta käyttöön.
VAROLTUS!
Älä koskaan avaa laitteen
koteloa. Anna korjaus- tai osien vaihtotyöt
vain sähköalan ammattimiehen tai huoltopalvelun tehtäväksi.
Paristojen
turvallisuusohjeet
Ota paristot pois laitteesta, jos laitetta ei
käytetä pitkään aikaan.
Noudata paristoa paikoilleen asettaessasi
napaisuusmerkintöjä! Ne näytetään paristotilassa
Puhdista paristo- ja laitekosketus tarvittaessa,
ennen kuin laitat paristot lokeroon.
Ota käytetyt paristot pikaisesti pois laitteesta.
Paristot voivat vuotaa!
VARO! RÄJÄHDYSVAARA!
Älä missään tapauksessa lataa
paristoja uudelleen!
8
.
Paristoja ei saa hävittää tavallisen kotita-
lousjätteen mukana!
Laki velvoittaa jokaista käyttäjää hävittämään
paristot määräysten mukaisesti!
VARO! RÄJÄHDYSVAARA!
Säilytä paristot lasten ulottumattomissa. Älä koskaan heitä paris-
toja tuleen äläkä oikosulje tai pura niitä!
Jos edellä mainittuja ohjeita ei noudateta,
paristot voivat tyhjentyä loppujännitettä
tyhjemmiksi. Se voi silloin alkaa vuotaa. Jos
laitteessa olevat paristot ovat vuotaneet, ota
ne pois välittömästi laitteen vioittumisen
estämiseksi!
Vältä kosketusta ihoon, silmiin ja limakalvoihin.
Jos pariston happoa joutuu iholle, huuhtele
kyseinen kohta runsaalla määrällä vettä
ja / tai mene lääkäriin!
Asennus
Huomautus: Voit käyttää tuotetta sekä seinällä
että pöytälaitteena. Seuraavassa kuvataan
seinäasennusta.
Varmistaudu, ettet sähkötyökalulla työsken-
nellessäsi osu sähkö-, kaasu tai vesijohtoihin.
Tarkista seinä tarvittaessa johtojen etsintälaitteella, ennen kuin ryhdyt poraamaan
sitä. Tutustu tätä varten myös porakoneesi
käyttöohjeeseen.
Asenna vaaka niin, että sen moitteeton
toiminto ja käyttö on taattu.
Huomautus: Keittiövaa’an maksimi korkeus seinäasennukseen on n. 1,5 m.
1. Poista seinäkiinnitin
10
kotelon takapuolelta
työntämällä se alas (kuva A).
2. Asenna seinäkiinnitin
10
haluttuun kohtaan
seinälle luotisuoraan toimitukseen kuuluvilla
ruuveilla
7
ja tulpilla 6.
Huomautus: Toimitukseen kuuluvat tulpat
on tarkoitettu normaaliin kiinteään kiviseinään.
Pyydä tarvittaessa alan liikkeestä tietoja muista
sopivista seinään kiinnitysmateriaaleista.
3. Poista suojaliuskat paristotilasta
8
.
15 FI
63925_silv_Digitale_Küchenwaage_content_LB3.indd 15 23.02.11 15:49
Page 14

Asennus / Käyttöönotto / Käyttö
4. Aseta vaaka tämän jälkeen seinäkiinnitti-
10
meen
.
Huomautus: Ellei asennus ole luotisuorassa,
se voi vaikuttaa punnituksen tarkkuuteen.
Käyttöönotto
Kellonajan asetus
Paina MODE/+-painiketta 5, kunnes olet
kellotilassa.
Paina SET/WEIGHT MODE-painiketta
3
päästäksesi säätötilaan. Minuuttinäyttö
vilkkuu.
Voit käyttää MODE/+ -painiketta
ajastin/UNIT/hälytys /- -painiketta
5
tai
4
arvon
säätämiseen.
Huomautus: Kun pidät painikkeita
4, 5
painettuina, se nopeuttaa arvojen asetusta.
Paina SET/WEIGHT MODE-painiketta
3
säädetyn arvon tallentamiseen ja tuntien
asetuksen vaihtoon. Tuntinäyttö vilkkuu.
Voit käyttää MODE/+-painiketta
ajastin/UNIT/hälytys/- -painiketta
5
4
tai
arvon
asetukseen.
Paina SET/WEIGHT MODE-painiketta
3
säädetyn arvon tallentamiseen ja poistumiseen säätötilasta
Huomautus: Ellei 10 sekuntiin ole painettu
mitään painiketta, säädetty arvo lakkaa vilkkumasta. Aika asetetaan sitten automaattisesti
näytettyyn arvoon.
Käyttö
Laitteessa on viisi toimintoa:
1. Kellonajan näyttö
2. Punnitus
3. Lämpötilan näyttö
4. Hälytystoiminto
5. Ajastin
MODE/+-painikkeella
5
voit vaihtaa eri
toimintojen välillä.
Kellonajan näyttö
Paina MODE/+-painiketta 5, kunnes olet
kellotilassa.
Näytössä näkyy kellonaika (tunnit:minuutit).
Mikäli haluat asettaa kellonajan johonkin
muuhun arvoon, menettele, kuten kappaleessa ”Kellonajan asetus“ on kuvattu.
Huomautus: Laite näyttää niin kauan
kellonajan, kunnes MODE/+-painikkeella
5
vaihdetaan laitteen johonkin muuhun
toimintaan.
Vaa’an käyttö
Huomautus: Kun tuotetta käytetään pöytälait-
teena, se on sijoitettava tasaiselle ja vakaalle
alustalle.
Käännä lasilevy
Aseta punnituskulho
9
alas.
1
laitteen punnitusle-
vylle.
Paina tarvittaessa MODE/+-painiketta
kunnes olet punnitustilassa. Tämä seuraa
kellonaikanäytön jälkeen.
Voit käyttää SET/WEIGHT MODE-paini-
3
ketta
ja maidon
vaihtaaksesi painon 17, veden 16
15
punnitussäätöjen välillä. Valittu
punnitussäätö näytetään pienellä palkilla
näyttöruudussa.
Huomautus: Veden ja maidon mittaussäädössä näytetään nesteen laskettu tilavuus
(ml/floz). Tämä toiminto korvaa nesteiden
mitta-astian. Ota huomioon, että etenkin
maidon tilavuus on riippuvainen rasvapitoisuudesta, maidon alkuperästä ja muista
tekijöistä. Tilavuuden näyttö vastaa siksi
keskimääräistä arvoa.
Voit käyttää ajastin/UNIT/hälytys/- -paini-
4
ketta
näytetyn yksikön 13, 14 vaihtoon.
Seuraavia yksiköitä voidaan äyttää mittaussäädöissä:
Paino: Gramma (perussäätö), oz, lb
Vesi: ml (perussäätö), floz
Maito: ml (perussäätö), floz
Huomautus: Mittayksikköä oz (ounce =
5
,
16 FI
63925_silv_Digitale_Küchenwaage_content_LB3.indd 16 23.02.11 15:49
Page 15

Käyttö
engl. unssi) käytetään silloin tällöin elintarvikkeiden punnituksessa ja se vastaa noin
28,35 g. Mittayksikkö lb (libra = lat. pauna)
vastaa noin 453,59 g tai 16 oz. Mittayksikkö
floz (fluid ounce= engl. nesteunssi) vastaa
noin 28,4 ml. 100 ml vastaa näinollen noin
3,5 floz.
Lisättyjen elintarvikkeiden
punnitseminen:
Huomautus: Jos punnitset painavia esineitä,
pane ne hitaasti ja varovasti vaa’alle
1
, näin
estät vaa’an vauriot.
1. Lisää jokin aine punnituskulhoon
1
. Paino
näytetään näyttöruudussa.
2. Paina TARE-painiketta
2
, kun haluat palata
takaisin näyttöön. Näytössä näkyy ”0“ ja
Taara-näyttö
20
syttyy.
3. Lisää nyt haluttu määrä toista ainetta. Voit
lukea täytetyn määrän suoraan näytöstä.
4. Toista vaiheet 2 ja 3, kunnes kaikki tarvittavat
aineet on lisätty.
Ota huomioon, että vaa’an enim-
5 kg
mäiskuormitus on 5 kg.
Huomautus: Jos vaaka on ylikuormitettu
näyttöön tulee ”
“.
Huomautus: Jos mitään painiketta ei
paineta kahteen minuuttiin, keittiövaa’an
näytössä näkyy automaattisesti aika.
Lämpötilanäytön käyttö
Paina MODE/+-painiketta 5, kunnes olet
lämpötilannäyttötilassa. Tämä seuraa punnitustilan jälkeen.
Lämpötilan mittaus tapahtuu noin 10 sekunnin
välein.
Voit käyttää ajastin/UNIT/hälytys/- -paini-
4
ketta
, kun haluat vaihtaa näytössä 12
yksiköiden °C ja °F välillä.
Huomautus: Jos mitään painiketta ei paineta kahteen minuuttiin, keittiövaa’an näytössä näkyy automaattisesti aika.
Hälytystoiminnon käyttö
Paina MODE/+-painiketta 5, kunnes olet
hälytystilassa. Tämä seuraa lämpötilanäytön
jälkeen.
Paina SET/WEIGHT MODE-painiketta
3
päästäksesi säätötilaan. Minuuttinäyttö
vilkkuu.
Voit käyttää MODE/+-painiketta
ajastin/UNIT/hälytys/- -painiketta
5
tai
4
arvon
asetukseen.
Paina SET/WEIGHT MODE-painiketta
3
asetetun arvon tallentamiseen ja tuntien
asetuksen vaihtoon. Tuntinäyttö vilkkuu.
Voit käyttää MODE/+ -painiketta
ajastin/UNIT/hälytys/- -painiketta
5
tai
4
arvon
asetukseen.
Paina SET/WEIGHT MODE-painiketta
3
asetetun arvon tallentamiseen ja poistumiseen säätötilasta.
Huomautus: Ellei 10 sekuntiin ole painettu
mitään painiketta, asetettu arvo lakkaa
vilkkumasta. Hälytysaika asetetaan sitten
automaattisesti näytettyyn arvoon.
Paina ajastin/UNIT/hälytys/- -painiketta
4
hälytyksen käynnistämiseksi. Hälytyssymboli
18
tulee näyttöön.
Voit kytkeä hälytyksen pois päältä painamalla
ajastin/UNIT/hälytys/- -painiketta
delleen. Hälytyssymboli
18
sammuu näytös-
4
uu-
sä.
Kun asetettu hälytysaika on saavutettu,
kuuluu noin minuutin ajan hälytysääni.
Mikäli laite on punnitustilassa, kun asetettu
aika on saavutettu, ei kuulu hälytysääntä.
Tämän asemasta näytössä vilkkuu hälytyssymboli
18
.
Huomautus: Jos mitään painiketta ei
paineta kahteen minuuttiin, keittiövaa’an
näytössä näkyy automaattisesti aika.
Ajastimen käyttö
Paina MODE/+-painiketta 5, kunnes olet
ajastintilassa. Tämä seuraa hälytystoiminnon
jälkeen.
17 FI
63925_silv_Digitale_Küchenwaage_content_LB3.indd 17 23.02.11 15:49
Page 16

Käyttö / Vikojen korjaus
Paina SET/WEIGHT MODE-painiketta 3
päästäksesi säätötilaan. Sekuntinäyttö vilkkuu.
Voit käyttää MODE/+-painiketta
ajastin/UNIT/hälytys/- painiketta
5
4
tai
arvon
asetukseen.
Paina SET/WEIGHT MODE-painiketta
3
asetetun arvon tallentamiseen ja minuuttien
säädön vaihtamiseen. Minuuttinäyttö vilkkuu.
Voit käyttää MODE/+ -painiketta
ajastin/UNIT/hälytys/- -painiketta
5
tai
4
arvon
asetukseen.
Paina SET/WEIGHT MODE-painiketta
3
asetetun arvon tallentamiseen ja poistumiseen säätötilasta
21
4
Paina ajastin/UNIT/hälytys/- -painiketta
ajastimen käynnistämiseksi. Ajastimen
näyttö näkyy näyttöruudussa.
Huomautus: Ajastimen ollessa käynnissä
voit MODE/+ -painikkeella
5
vaihtaa lait-
teen johonkin muuhun toimintaan. Ajastimen
21
näyttö näkyy silloin edelleenkin näyttö-
ruudussa.
Voit kytkeä ajastimen pois päältä painamalla
ajastin/UNIT/hälytys/- -painiketta
uudelleen. Ajastimen
21
näyttö sammuu
4
näyttöruudussa.
Kun asetettu aika on kulunut umpeen, kuuluu
noin minuutin ajan hälytysääni ja tätä ennen
asetettu aika tulee näyttöön.
Mikäli laite on punnitustilassa, kun asetettu
aika on saavutettu, ei kuulu hälytysääntä.
Tämän sijasta ajastimen
21
näyttö vilkkuu
näyttöruudussa.
Huomautus: Jos mitään painiketta ei
paineta kahteen minuuttiin, keittiövaa’an
näytössä näkyy automaattisesti aika.
Asetusten nollaus
Kotelon takapuolella on Reset-painike 11.
Paina tätä painiketta palauttaaksesi asetukset
tehtaan asetuksiin.
Paristojen vaihto
Kun paristot heikkenevät, näytössä syttyy
pariston latausnäyttö
19
.
Vaihda paristot viimeistään, kun näyttöön
tulee symboli “
”. Heikko tai tyhjä paristo
voi vaikuttaa punnitustuloksen tarkkuuteen.
Avaa paristotila
8
vaa’an takapuolella.
Poista tyhjät paristot ja toimita ne määräys-
tenmukaiseen jätteiden hävityspisteeseen
(katso kappale ”Jätehuolto“).
Aseta kaksi uutta paristoa tyyppi CR2032,
3V
paristotilaan 8. Tarkista samalla,
että napaisuus on oikea. Tämä näytetään
paristotilan
Sulje tämän jälkeen paristotila
Vikojen korjaus
8
alla.
8
.
= Vika
= Syy
= Korjaus
=
= Vaaka ei ole kiinnitetty kunnolla tai se ei ole
tarkasti pystysuorassa.
= Tarkista, että kiinnitys on stabiili ja tarkalleen
pystysuorassa.
=
= Vaaka on ylikuormitettu.
= Poista liika paino.
= Näyttö out2, silloin vaihto lämpöti-
lan näyttöön
= Vaaka on kuormitettu 1000 grammalla,
ennen kuin kytket sen punnitustilaan.
= Poista liika paino 10 sekunnin sisällä. Näyttö
palaa viiden sekunnin sisällä takaisin punnitustilaan.
=
= Paristot ovat liian heikot punnitukseen
= Vaihda paristot (katso kappale „Paristojen
vaihto”)
18 FI
63925_silv_Digitale_Küchenwaage_content_LB3.indd 18 23.02.11 15:49
Page 17

Puhdistus ja hoito / Jätehuolto
Puhdistus ja hoito
Älä käytä puhdistukseen kemiallisia puhdis-
tusaineita, hankausaineita tai teräviä esineitä.
Muutoin tuote voi vahingoittua.
Älä upota tuotetta koskaan veteen tai muihin
nesteisiin. Muuten tuote voi vahingoittua.
Puhdista tuote hieman kostealla, nukkaamat-
tomalla liinalla. Jos lika ei lähde näin, voit
kostuttaa liinaa myös miedolla saippuavedellä.
Jätehuolto
Pakkaus on ympäristöystävällista
materiaalia, jonka voit viedä paikalliseen kierrätyspisteeseen.
Saat lisätietoa käytettyjen tuotteiden jätehuoltomahdollisuuksista kunnan- tai kaupungintoimistosta.
Tuotenimi:
Digitaalinen keittiövaaka
Tyyppi-nro: Z30170
Versio: 04 / 2011
EMC
Älä heitä käytettyä tuotetta talousjät-
teisiin. Toimi ympäristöystäväl-lisesti
toimittamalla se asianmukaiseen jätehuoltoon. Paikallisesta kunnan- tai
kaupungintoimistosta saat lisätietoa
kierrätyspisteistä ja aukioloajoista.
Vialliset ja käytetyt paristot on toimitettava kierrätykseen direktiivin 2006 / 66 / EC mukaisesti.
Palauta paristot ja / tai laite tarjolla olevaan
keräyslaitokseen.
Akkujen väärä hävittäminen
Pb
Akkuja ei saa hävittää talousjätteenä. Ne voivat
sisältää myrkyllisiä raskasmetalleja ja ne kuuluvat
ongelmajätekäsittelyyn. Raskasmetallien kemialliset merkit ovat seuraavat: Cd = kadmium,
Hg= elohopea, Pb = lyijy. Toimita tästä syystä
vanhat käytetyt akut kunnalliseen keräyspisteeseen.
aiheuttaa ympäristövahinkoja!
19 FI
63925_silv_Digitale_Küchenwaage_content_LB3.indd 19 23.02.11 15:49
Page 18

Innehållsförteckning
Inledning
Ändamålsenlig användning ...................................................................................Sidan 21
Beskrivning av komponenterna ..............................................................................Sidan 21
Tekniska data ..........................................................................................................Sidan 21
Leveransomfång ......................................................................................................Sidan 22
Säkerhetsinformation
Allmän säkerhetsinformation ..................................................................................Sidan 22
Elektrisk säkerhet .....................................................................................................Sidan 23
Säkerhetsanvisningar för batterier .........................................................................Sidan 23
Montering ...........................................................................................................Sidan 23
Idrifttagning
Ställa in klockslag ...................................................................................................Sidan 24
Användning
Klockslagsindikering ...............................................................................................Sidan 24
Använda vågen.......................................................................................................Sidan 24
Använda temperaturindikering ...............................................................................Sidan 25
Använda larmfunktion .............................................................................................Sidan 25
Använda nedräkningsur .........................................................................................Sidan 25
Återställa inställningar ............................................................................................Sidan 26
Byta batterier ...........................................................................................................Sidan 26
Åtgärda fel .........................................................................................................Sidan 26
Rengöring och skötsel ..............................................................................Sidan 26
Avfallshantering ...........................................................................................Sidan 26
20 SE
63925_silv_Digitale_Küchenwaage_content_LB3.indd 20 23.02.11 15:49
Page 19

Inledning
Digital köksvåg
Inledning
Gör dig bekant med produkten innan
du använder den. Läs nedanstående
säkerhetsanvisningar och monteringsoch bruksanvisning. Använd endast produkten i
enlighet med beskrivningen och för angivna
ändamål. Förvara denna bruksanvisning på
säker plats. Se till att bruksanvisningen alltid finns
tillgänglig även vid vidare användning av tredje
man.
Ändamålsenlig användning
Denna produkt är avsedd för att väga livsmedel
i vanliga hushållsmängder. Den digitala köksvågen är avsedd för att fastställa vikten på icke
aggressiva, ej frätande och ej nötande vätskor
eller fasta ämnen. Den är ej avsedd för vägning
av medikament eller otillåtet material. Den används
för indikering av temperatur och klockslag och har
ett nedräkningsur och en larmfunktion. Annan
användning än den som beskrivits eller en förändring av produkten är inte tillåten och kan
förorsaka skador på produkten. Detta kan dessutom leda till livsfarliga situationer och personskador. Produkten är avsedd för eget bruk, ej
för medicinsk eller kommersiell användning.
Beskrivning av
komponenterna
1
Vågskål
2
TARE (”nollställning”)
3
SET/WEIGHT MODE
4
Nedräkningsur/UNIT/Alarm/-
5
MODE/+
6
Plugg (ø 6 mm)
7
Skruv
8
Batterifack
9
Glasplatta
10
Vägghållare
11
Reset
12
Indikerig för °Celsius/°Fahrenheit
13
Indikering för gram/milliliter
14
Indikering för pund (lb) och ounze (floz)
15
Indikering för mjölkvägningsläge
16
Indikering för vattenvägningsläge
17
Indikering för viktvägningsläge
18
Larmsymbolen
19
Batteriladdningsindikering
20
Taraindikering (Tare)
21
Indikering för nedräkningsur
Tekniska data
Mått:
hopfälld: ca. 12,9 x 21,9 x 5,6 cm
(B x H x D)
Mätområde:
Vikt: 0 – 5100 g, avvikelse ±
(0,1 % + 1 g)
0 – 11 lb 4 oz, avvikelse
± (0,1 % + 1 oz)
Vatten: 0 – 5100 ml, avvikelse ±
(0,1 % + 1 ml)
0 – 179,5 floz, avvikelse
± (0,1 % + 1 floz)
Mjölk: 0 – 4950 ml, avvikelse ±
(0,1 % + 1 ml)
0 – 174,2 floz, avvikelse
± (0,1 % + 1 floz)
Mätskala:
Vikt: 1 g
Vatten/mjölk: 1 ml
Nedräkningsur: upp till 99 minuter och 59
sekunder (± 1 s)
Temperaturindikering: 0,0 °C – 50,0 °C,
avvikelse ± 2,0 °C
32,0 °F – 122,0 °F,
avvikelse ± 3,6 °F
21 SE
63925_silv_Digitale_Küchenwaage_content_LB3.indd 21 23.02.11 15:49
Page 20

Inledning / Säkerhetsinformation
Batteri: 2 x CR2032, 3 V
(ingår i leveransen)
Material:
Hus / Vågskål: plast
Leveransomfång
Kontrollera att leveransomfånget är fullständigt
omedelbart efter att du har packat upp produkten.
Kontrollera även att produkten och alla dess
delar är i felfritt skick. Montera aldrig produkten,
om leveransomfånget inte är fullständigt komplett.
1 köksvåg
1 vågskål
1 vägghållare
2 batterier CR2032, 3 V
2 pluggar (ø 6 mm)
2 skruvar
1 bruksanvisning
Säkerhetsinformation
FÖRVARA ALLA SÄKERHETSINSTRUKTIONER
OCH ANVISNINGAR FÖR FRAMTIDA BEHOV!
Allmän säkerhetsinformation
inte barn leka med förpackningsmaterialet.
Kvävningsrisk föreligger vid hantering av
förpackningsmaterialet. Mindre barn förstår
inte farorna som lurar. Håll alltid mindre barn
på avstånd från förpackningsmaterialet.
VARNING!
att svälja vilket innebär livsfara. Uppsök
omedelbart läkare om någon svalt ett batteri.
Barn och personer med bristande kunskaper
och / eller erfarenhet samt personer med
nedsatta fysiska, motoriska hinder, handikappade personer eller barn skall om möjligt
VARNING!
RISK FÖR
LIVSFARLIGA SKADOR FÖR
SPÄDBARN OCH BARN! Låt
LIVSFARA! Batterier är lätta
inte använda produkten utan uppsikt eller
handledning av säkerhetsansvarig person.
Barn skall hållas under uppsikt och får
absolut inte använda produkten som leksak.
OBSERVERA! RISK FÖR
5 kg
PERSONSKADOR! Belasta
inte vågen över 5 kg. Produkten
kan skadas.
Utsätt ej apparaten för
– extrema temperaturer,
– starka vibrationer,
– stark mekanisk belastning,
– direkt solljus,
– magnetiska fält,
– fuktighet.
Produkten kan annars skadas.
Skydda produkten mot elektrostatisk ladd-
ning / urladdning. Detta kan förhindra det
inre dataflödet och leda till fel i LC-displayen.
Kontrollera att produkten ej är skadad innan
du tar den i bruk. Använd aldrig produkten
om den är skadad.
VARNING!
Öppna aldrig produktens
hölje. Detta kan leda till person- och / eller
materiella skador. Låt endast kvalificerad
elpersonal uföra reparationer.
Låt inga oerfarna personer använda pro-
dukten. Säkerställ att alla som använder
produkten har läst bruksanvisningen och
kan använda produkten på ett säkert sätt.
Produktens funktioner kan störas av magne-
tiska störfält/högfrekventa signaler. Ta i sådana fall ur batterierna och sätt i dem igen
efter ett tag. Följ härför anvisningarna i kapitlet ”Byta batterier“.
LÄMPLIG FÖR LIVSMEDEL!
Vågskålen
1
påverkar inte
smak och lukt.
Använd endast vågskålen
1
för att väga
livsmedel. Placera inga andra föremål i vågskålen
1
resp. på köksvågen. Risk för ska-
dad produkt föreligger.
Tryck försiktigt på displayens knappar.
Använd inga spetsiga föremål för att trycka
på knapparna.
22 SE
63925_silv_Digitale_Küchenwaage_content_LB3.indd 22 23.02.11 15:49
Page 21

Säkerhetsinformation / Montering
OBSERVERA! RISK FÖR ELSTÖTAR!
Kontrollera att inga dolda ledningar ligger
bakom borrhålen innan hålen borras upp.
OBSERVERA! VATTENSKADOR! Kon-
trollera att inga dolda rör ligger bakom
borrhålen innan hålen borras upp.
Elektrisk säkerhet
Häng inte upp produkten över heta ytor
eller i närheten av öppen flamma för att
undvika att huset smälter. Kontrollera att
produkten inte riskeras, vare sig stängd eller
öppen.
Produkten får inte utsättas för väta. Inträng-
ande vatten ökar risken för elstötar.
Använd inte vågen med våta händer.
Ta bort batterierna om störning föreligger
eller om produkten är defekt.
Använd aldrig en defekt produkt.
VARNING!
Öppna aldrig produktens
hus. Låt endast behörig elektriker utföra
reparationer eller utbytesarbeten.
Säkerhetsanvisningar
för batterier
Ta ur batterierna om produkten inte skall
användas under längre tid.
Kontrollera att polerna är korrekt placerade.
Detta visas på batterifacket
Rengör batteri- och apparatkontakter om
nödvändigt.
Ta alltid ur gamla eller förbrukade batterier
ur produkten. Risk för att batterisyra läcker
ut föreligger.
Kasta inte batterierna i hushållssoporna.
Varje användare är förpliktad att avfallshan-
teras batterier enligt gällande miljöregler.
OBSERVERA! EXPLO-
SIONSRISK! Ladda aldrig
batterierna!
8
.
OBSERVERA! EXPLO-
SIONSRISK! Se till att barn
inte handskas med batterierna,
kasta inte batterierna i öppen eld, batte-
rierna får inte kortslutas eller öppnas.
Vid icke beaktande av dessa anvisningar
kan batterierna djupurladdas. Risk för läckage föreligger. Ta ur batterierna ur produkten
om dessa är tomma, annars kan produkten
skadas.
Undvik kontakt med huden, ögonen och
slemhinnor. Spola omedelbart av den plats
som kommit i kontakt med batterisyran,
använd rent vatten och uppsök läkare.
Montering
Obs: Du kan hänga upp produkten på väggen
eller använda den som bordsvåg. Väggmonteringen beskrivs nedan.
Kontrollera att inga dolda ström-, gas- eller
vattenledningar ligger bakom borrhålen när
du använder ett borrverktyg. Kontrollera
eventuellt väggen med strömprövare innan
du borrar i väggen. Läs även borrverktygets
bruksanvisning.
Montera vågen så att felfri funktion och
användning kan garanteras.
Obs: Maximalt rekommenderad höjd för
väggmontering av köksvågen är ca. 1,5 m.
1. Ta bort vägghållaren
10
på husets baksida
genom att skjuta den nedåt (bild A).
2. Montera vägghållaren
10
på bestämd plats
vertikalt mot väggen med hjälp av medlevererade skruvar
7
och pluggar 6.
Obs: Medlevererade pluggar är avsedda
för vanliga fasta murar. Informera dig eventuellt hos behörig fackhandel om lämpligt
monteringsmaterial för andra väggar.
10
8
.
.
3. Dra bort remsan i batterifacket
4. Placera vågen i vägghållaren
Obs: Om monteringen inte är vertikal kan
mätningens noggrannhet påverkas.
23 SE
63925_silv_Digitale_Küchenwaage_content_LB3.indd 23 23.02.11 15:49
Page 22

Idrifttagning / Användning
Idrifttagning
Ställa in klockslag
Tryck MODE/+ 5 tills klockläget visas.
Tryck SET/WEIGHT MODE
3
för att komma
till inställningsläge. Minuterna blinkar.
Använd MODE/+
UNIT/Alarm/Obs: Tryck knapparna
5
eller nedräkningsur/
4
för att ställa in värdet.
4, 5
och håll dem
tryckta för att ställa in värden snabbare.
Tryck SET/WEIGHT MODE
3
för att spara
det inställda värdet och växla till timmarnas
inställning. Timmarna blinkar.
Använd MODE/+
UNIT/Alarm/-
Tryck SET/WEIGHT MODE
5
eller nedräkningsur/
4
för att ställa in värdet.
3
för att spara
det inställda värdet och lämna inställningsläget.
Obs: Om ingen knapp trycks inom 10 sek-
under slutar det inställda värdet att blinka.
Tiden ställs automatiskt in på visat värde.
Användning
Produkten har fem funktioner:
1. Klockslagsindikering
2. Väga
3. Temperaturindikering
4. Larmfunktion
5. Nedräkningsur
Växla mellan de olika funktionerna med
MODE/+
Klockslagsindikering
5
.
Tryck MODE/+ 5 tills klockläget visas.
Klockslaget visas i displayen (timmar:minuter).
Om du vill ställa om klockslaget till ett annat
värden, se kapitel ”Ställa in klockslag“.
Obs: Produkten visar klockslaget tills
MODE/+
5
trycks för att växla till en
annan funktion.
Använda vågen
Obs: Om produkten används som bordsvåg
måste den placeras på jämnt och stabilt underlag.
Fäll ner glasplattan
Placera vågskålen
Tryck om nödvändigt MODE/+
9
.
1
på produktens platta.
5
tills
vägningsläget visas. Detta visas efter klockslagsindikeringen.
Använd SET/WEIGHT MODE
växla mellan mätinställningar för vikt
16
vatten
och mjölk 15. Vald mätinställning
3
för att
17
,
visas med en liten balk i displayen.
Obs: Mätinställningarna för vatten och
mjölk visar vätskans beräknade volym (ml/
floz). Denna funktion ersätter en mätbägare
för vätskor. Observera att speciellt volym för
mjölk beror på fetthalt, ursprung och andra
faktorer. Volymindikeringen motsvarar därför
ett genomsnittligt värde.
Använd nedräkningsur/UNIT/Alarm/-
för att växla visad enhet
13, 14
. Följande
4
enheter kan användas för mätinställningarna:
Vikt: Gram (grundinställning), oz, lb
Vatten: ml (grundinställning), floz
Mjölk: ml (grundinställning), floz
Obs: Mätenheten oz (ounce = engl. för
ounce) används ibland för livsmedel och
motsvarar ca. 28,35 g. Mätenheten lb
(libra = lat. för pund) motsvarar ca. 453,59 g
resp. 16 oz. Mätenheten floz (fluid ounce=
engl. för flytande ounce) motsvarar ca.
28,4 ml. 100 ml motsvarar därmed ca.
3,5 floz.
Lägga till och väga livsmedel:
Obs: Om du väger tunga varor, placera dem
långsamt och försiktigt i vågskålen
1
för att
inte skada köksvågen.
1. Placera en ingrediens i vågskålen
1
. Vikten
visas i displayen.
2. Tryck TARE
Displayen visar ”0“ och taraindikeringen
2
för att nollställa indikeringen.
20
lyser.
24 SE
63925_silv_Digitale_Küchenwaage_content_LB3.indd 24 23.02.11 15:49
Page 23

Användning
3. Ange önskad mängd för den andra ingrediensen. Tillfogad mängd kan avläsas direkt i
displayen.
4. Upprepa steg 2 och 3 tills alla nödvändiga
ingredienser är tillagda.
Observera att vågens maximala
5 kg
belastning är 5 kg.
Obs: Om vågen överbelastas visas indike-
ringen ”
“ i displayen.
Obs: Köksvågens display visar automatiskt
tiden om ingen knapp trycks inom två
minuter.
Använda
temperaturindikering
Tryck MODE/+ 5 tills temperaturindike-
ringsläget visas. Detta visas efter vägningsläget.
Temperaturmätningen sker inom ca. 10 sek-
under.
Använd nedräkningsur/UNIT/Alarm/-
för att växla indikeringen
12
mellan °C
och °F.
Obs: Köksvågens display visar automatiskt
tiden om ingen knapp trycks inom två minuter.
Använda larmfunktion
Tryck MODE/+ 5 tills larmläget visas.
Detta visas efter temperaturindikeringen.
Tryck SET/WEIGHT MODE
3
för att kom-
ma till inställningsläge. Minuterna blinkar.
Använd MODE/+
UNIT/Alarm/-
Tryck SET/WEIGHT MODE
5
eller nedräkningsur/
4
för att ställa in värdet.
3
för att spara
det inställda värdet och växla till timmarnas
inställning. Timmarna blinkar.
Använd MODE/+
UNIT/Alarm/-
Tryck SET/WEIGHT MODE
5
eller nedräkningsur/
4
för att ställa in värdet.
3
för att spara
det inställda värdet och lämna inställningsläget.
4
Obs: Om ingen knapp trycks inom 10 sek-
under slutar det inställda värdet att blinka.
Larmtiden ställs automatiskt in på visat värde.
Tryck nedräkningsur/UNIT/Alarm/-
för att starta larmet. Larmsymbolen
i displayen.
Stäng av larmet genom att trycka nedräk-
ningsur/UNIT/Alarm/-
18
bolen
slocknar i displayen.
4
igen. Larmsym-
En larmsignal ljuder i ca. en minut när
inställd larmtid uppnås.
Larmsignalen ljuder inte om produkten
befinner sig i vägningsläge när tiden är slut.
Larmsymbolen
18
blinkar istället i displayen.
Obs: Köksvågens display visar automatiskt
tiden om ingen knapp trycks inom två
minuter.
Använda nedräkningsur
Tryck MODE/+ 5 tills nedräkningursläget
visas. Detta visas efter larmfunktionen.
Tryck SET/WEIGHT MODE
till inställningsläge. Sekunderna blinkar.
Använd MODE/+
UNIT/Alarm/-
4
Tryck SET/WEIGHT MODE
5
för att ställa in värdet.
3
för att komma
eller nedräkningsur/
3
för att spara
det inställda värdet och växla till minuternas
inställning. Minuterna blinkar.
Använd MODE/+
UNIT/Alarm/-
Tryck SET/WEIGHT MODE
5
eller nedräkningsur/
4
för att ställa in värdet.
3
för att spara
det inställda värdet och lämna inställningsläget.
Tryck nedräkningsur/UNIT/Alarm/-
för att starta nedräkningsuret. Indikeringen
21
för nedräkningsuret
Obs: Använd MODE/+
visas i displayen.
5
för att växla till
en annan funktion i produkten när nedräkningsuret används. Indikeringen för nedräkningsuret
21
visas fortfarande i displayen.
Stäng av nedräkningsuret genom att trycka
nedräkningsur/UNIT/Alarm/Indikeringen för nedräkningsuret
21
nar i displayen.
4
18
visas
4
igen.
slock-
4
25 SE
63925_silv_Digitale_Küchenwaage_content_LB3.indd 25 23.02.11 15:49
Page 24

Användning / Åtgärda fel / Rengöring och skötsel / Avfallshantering
En larmsignal ljuder i ca. en minut när
inställd tid är slut och den inställda tiden
visas i displayen.
Larmsignalen ljuder inte om produkten
befinner sig i vägningsläge när tiden är slut.
Istället blinkar indikeringen för nedräknings-
21
uret
i displayen.
Obs: Köksvågens display visar automatiskt
tiden om ingen knapp trycks inom två
minuter.
Återställa inställningar
Det finns en resetknapp 11 på husets baksida.
Tryck denna knapp för att återställa inställningarna till fabriksinställningar.
Byta batterier
Batteriladdningsindikeringen 19 lyser i
displayen när batterierna är svaga.
Byta batterierna när symbolen “
” visas i
displayen. Ett svagt eller tomt batteri kan
påverka mätresultatens noggrannhet.
Öppna batterifacket
8
på vågens baksida.
Ta ur de tomma batterierna och avfallshan-
tera enligt gällande miljölagstiftning (se
kapitel ”Avfallshantering“).
Lägg in två nya batterier av typ CR2032,
3V
i batterifacket 8. Kontrollera att
polerna är korrekt placerade. Detta visas
under batterifacket
Stäng sedan batterifacket
Åtgärda fel
8
.
8
.
= Fel
= Orsak
= Åtgärd
=
= Vågen är instabil eller hänger inte vertikalt.
= Se till att monteringen är stabil och rikta
absolut vertikalt.
=
= Vågen är överbelastad.
= Ta bort överlasten.
= Indikering out2, sedan växel till
temperaturindikering
= Vågen är belastad med 1000 g innan du
växlat till vägningsläge.
= Ta bort överlasten inom 10 sekunder. Dis-
playen återgår till vägningsläge inom fem
sekunder.
=
= Batterierna är för svaga för att väga.
= Byt batterier (se ”Byta batterier“).
Rengöring och skötsel
Använd inga kemiska rengöringsmedel,
skurmedel eller vassa föremål för rengöring.
Annars kan produkten skadas.
Doppa aldrig produkten i vatten eller i
andra vätskor. Produkten kan skadas.
Rengör produkten med en lätt fuktad, luddfri
trasa. Vid starkare nedsmutsning kan du
också fukta trasan med en mild tvållösning.
Avfallshantering
Förpackningen består av miljövänligt
material, som kan lämnas på lokala
återvinningsplatser.
Information om var du kan kasta den kasserade
produkten erhåller du hos kommunen.
Av miljöskäl kasta ej produkten till-
sammans med hushållsavfallet när
den kasserats, utan säkerställ en
fackmässig avfallshantering. Du
erhåller information om återvinningsplatser och öppettider hos de lokala
myndigheterna.
26 SE
63925_silv_Digitale_Küchenwaage_content_LB3.indd 26 23.02.11 15:49
Page 25

Defekta eller förbrukade batterier måste återvinnas enligt EU-direktiv 2006 / 66 / EC. Lämna
batterier och / eller produkten till befintliga återvinningsstationer.
Risk för miljöskador pga
felaktig avfallshantering
Pb
Batterier får inte kastas i hushållssoporna. Batterierna kan innehålla giftiga tungmetaller och skall
behandla som specialavfall. De kemiska symbolerna för tungmetaller är följande: Cd = Kadmium,
Hg= Kvicksilver, Pb = Bly. Lämna därför förbrukade batterier till kommunens återvinningsstation.
Produktbeteckning:
Digital köksvåg
Modellnr.: Z30170
Version: 04 / 2011
av batterier!
Avfallshantering
EMC
27 SE
63925_silv_Digitale_Küchenwaage_content_LB3.indd 27 23.02.11 15:49
Page 26

Indholdsfortegnelse
Indledning
Formålsbestemt anvendelse .....................................................................................Side 29
Beskrivelse af delene ................................................................................................Side 29
Tekniske specifikationer ............................................................................................Side 29
Leverancens omfang .................................................................................................Side 30
Sikkerhedsinformationer
Almene sikkerheds-informationer .............................................................................Side 30
Elektrisk sikkerhed .....................................................................................................Side 31
Sikkerhedshenvisninger til batterier ..........................................................................Side 31
Montering .............................................................................................................Side 31
Ibrugtagen
Klokkeslæt indstilles ..................................................................................................Side 32
Betjening
Klokkeslætvisning ......................................................................................................Side 32
Vægten anvendes .....................................................................................................Side 32
Temperaturvisning anvendes ....................................................................................Side 33
Alarm-funktion anvendes ..........................................................................................Side 33
Timer anvendes .........................................................................................................Side 34
Indstillinger nulstilles ..................................................................................................Side 34
Batterier skiftes ..........................................................................................................Side 34
Fejl afhjælpes .....................................................................................................Side 34
Rengøring og pleje .......................................................................................Side 35
Bortskaffelse ......................................................................................................Side 35
28 DK
63925_silv_Digitale_Küchenwaage_content_LB3.indd 28 23.02.11 15:49
Page 27

Indledning
Digital køkkenvægt
Indledning
Gør dig fortrolig med apparatet inden
første ibrugtagning. Læs til dette formål
den efterfølgende monterings- og
betjeningsvejledning og sikkerhedshenvisningerne
omhyggeligt. Anvend kun apparatet som beskrevet
og kun til det formål det er beregnet til. Opbevar
denne vejledning omhyggelig. Hvis du giver
apparatet videre til tredjemand, bedes du ligeledes videregive papirerne.
Formålsbestemt anvendelse
Apparatet er beregnet til at veje husholdningsgængse mængder levnedsmidler. Den digitale
køkkenvægt tjener til vejning af ikke aggressive,
ikke ætsende og ikke slibende væsker eller faste
genstande. Den egner sig ikke til at veje medikamenter eller ulovlige materialer. Den tjener
også til visning af temperatur og klokkeslæt og
råder over en timer- og en alarm-funktion. Anden
anvendelse end den beskrevne eller ændring af
produktet er ikke tilladt og kan føre til personskader
og / eller skader på produktet. Desuden kan den
forårsage livsfare eller fare for personskader.
Produktet er kun beregnet til privat brug og ikke
til medicinsk eller kommerciel anvendelse.
12
Visning for °Celsius/°Fahrenheit
13
Visning for Gramm/Milliliter
14
Visning for pund (lb) og flydende unse (floz)
15
Visning for mælk-vejemodus
16
Visning for vand-vejemodus
17
Visning for vægt-vejemodus
18
Alarm-symbol
19
Batteriniveau-visning
20
Tara-visning (Tare)
21
Visning for timeren
Tekniske specifikationer
Mål:
sammenfoldet: ca. 12,9 x 21,9 x 5,6 cm
(B x H x D)
Måleområde:
Vægt: 0 – 5100 g, afvigelse ±
(0,1 % + 1 g)
0 – 11 lb 4 oz, afvigelse ±
(0,1 % + 1 oz)
Vand: 0 – 5100 ml, afvigelse ±
(0,1 % + 1 ml)
0 – 179,5 floz, afvigelse ±
(0,1 % + 1 floz)
Mælk: 0 – 4950 ml, afvigelse ±
(0,1 % + 1 ml)
0 – 174,2 floz, afvigelse ±
(0,1 % + 1 floz)
Beskrivelse af delene
Måleinddeling:
Vægt: 1 g
1
Vægtskål
2
TARE-tast (”nulstilling“)
3
SET/WEIGHT MODE-tast
4
Timer/UNIT/Alarm/- -tast
5
MODE/+-tast
6
Rawlplug (ø 6 mm)
7
Skrue
8
Batteribeholder
9
Glasplade
10
Vægholder
11
Reset-tast
63925_silv_Digitale_Küchenwaage_content_LB3.indd 29 23.02.11 15:49
Vand/mælk: 1 ml
Timer: til 99 minutter og
59 sekunder (± 1 s)
Temperaturvisning:
0,0 °C – 50,0 °C, afvigelse ±
2,0 °C 32,0 °F – 122,0 °F,
afvigelse ± 3,6 °F
Batteri: 2 x CR2032, 3 V
holdt i leveringsomfanget)
(inde-
29 DK
Page 28

Indledning / Sikkerhedsinformationer
Materiale:
Kabinet /
Vægtskål: kunststof
Leverancens omfang
Kontroller umiddelbart efter udpakningen, at alle
dele er leveret med og at produktet og alle delene befinder sig i en upåklagelig tilstand. Saml
ikke produktet, hvis ikke alle dele er leveret med.
1 køkkenvægt
1 vægtskål
1 vægholder
2 batterier CR2032, 3 V
2 rawlplug (ø 6 mm)
2 skruer
1 betjeningsvejledning
Sikkerhedsinformationer
ALLE SIKKERHEDSANVISNINGER OG ANDRE DOKUMENTER BØR OPBEVARES TIL
FREMTIDIG BRUG!
Almene sikkerhedsinformationer
emballagematerialet uden opsyn. Der er
risiko for kvælning. Børn er ofte ikke i stand
til at vurdere et faremoment. Hold altid børn
væk fra emballagen.
ADVARSEL!
blive slugt, og det kan være livsfarligt. Hvis
et batteri bliver slugt, skal der omgående
søges lægehjælp.
Apparatet er ikke beregnet til, at blive
anvendt af personer (indbefattet børn) med
indskrænkede fysiske, sensoriske eller mentale evner eller med manglende erfaring og /
eller manglende viden, med mindre, de er
ADVARSEL!
RISIKO FOR
BØRNS LIV OG HELBRED!
Børn må aldrig være alene med
LIVSFARE! Batterier kan
under opsyn af en person, der er ansvarlig
for deres sikkerhed eller fik anvisninger fra
denne person om, hvordan apparatet skal
anvendes. Børn bør være under opsyn, for
at sikre, at de ikke leger med apparatet.
PAS PÅ! FARE FOR KVÆ-
5 kg
STELSER! Belast ikke vægten
med mere end 5 kg. Produktet
kan beskadiges.
Udsæt ikke apparatet for
– ekstreme temperaturer,
– stærke vibrationer,
– stærkt mekanisk slid,
– direkte solskin,
– magnetiske omgivelser,
– fugtighed.
I modsat fald er der fare for, at produktet
tager skade.
Beskyt produktet mod elektrostatisk ladning /
afladning. I modsat fald kan dette forårsage
en intern dataudskiftning, hvilket genererer
fejl i LC-displayet.
Inden første anvendelse skal produktet
undersøges for evt. skader. Tag aldrig et
beskadiget apparat i brug.
ADVARSEL!
Åbn aldrig produktets kabinet.
Konsekvensen kan være personskader og /
eller materielle skader. Reparationer må kun
udføres af en fagkyndig elektriker.
Lad ikke uerfarne personer bruge produktet.
Sørg for at alle personer, der bruger produktet,
har læst brugsanvisningen og er i stand til
at anvende produktet sikkert.
Produktets funktioner kan hæmmes på
grund af magnetiske støjfelter/højfrekvensudsendelser. Skulle dette ske, skal du fjerne
batterierne fra produktet i et par sekunder
og sætte dem i igen. Fremgangsmåden
finder du beskrevet i kapitlet ”Batterier skiftes”.
FØDEVAREGODKENDT!
Smags- og duftegenskaber påvirkes ikke af vægtskålen
Anvend vægtskålen
1
udelukkende til
1
.
vejning af fødevarer, som skal vejes. Stil ikke
andre ting på vægtskålen
1
hhv. køkkenvægten. Tilsidesættelse kan resultere i
beskadigelser på produktet.
30 DK
63925_silv_Digitale_Küchenwaage_content_LB3.indd 30 23.02.11 15:49
Page 29

Sikkerhedsinformationer / Montering
Tryk tasterne på displayet forsigtigt. Anvend
ikke spidse genstande til at trykke på tasterne
med.
OBS! RISIKO FOR ELEKTRISK STØD!
Forvis Dem inden boringen, at der ikke
befinder sig ledninger på borestedet.
OBS! VANDSKADE! Forvis Dem inden
boringen, at der ikke befinder sig rør på
borestedet.
Elektrisk sikkerhed
Hæng ikke apparatet op over varme over-
flader eller åbne flamme, for at undgå, at
kabinettet smelter. Sikker, at apparatet ikke
er truet, hverken når det er foldet ud eller
når det er foldet sammen.
Hold apparatet væk fra væde. Vandets
indtrængen øger risikoen for elektrisk stød.
Anvend ikke vægten med våde hænder.
Fjern batterierne ved forstyrrelser eller fra et
defekt apparat.
Tag ikke et beskadiget apparat i brug.
ADVARSEL!
Åben aldrig apparatets
kabinet. Lad reparationer eller udskiftnings-
arbejder udelukkende udføres af en elektrofagkraft.
Sikkerhedshenvisninger
til batterier
Batterierne bør tages ud af uret hvis de ikke
har været brugt gennem længere tid.
Vær opmærksom på den rigtige polaritet
ved indsættelse! Denne vises i batteribeholderen
Eventuelt skal kontakterne mellem batteri og
apparat renses før ilægningen.
Tomme batterier skal tages ud af apparatet
omgående. Der er øget risiko for at de
løber ud!
FORSIGTIG! EKSPLOSI-
ONSFARE! Batterier må ikke
genoplades!
8
.
Batterier hører ikke til i husholdningsaffaldet.
Hver forbruger er efter loven forspligtet til at
bortskaffe batterierne efter forskrifterne!
FORSIGTIG! EKSPLOSI-
ONSFARE! Hold batterier borte
fra børn, kast ikke batterier i ild,
kortslut ikke batterier og skil dem ikke ad.
Hvis anvisningerne ikke følges, kan batterierne
blive ladet af ud over deres slutspænding.
Der er da risiko for at de løber ud. Hvis det
sker i apparatet, skal de omgående tages ud
for at undgå at apparatet bliver beskadiget!
Undgå berøring med huden, øjnene og
slimhinderne. Ved berøring med batterisyre,
skal der skylles med rigeligt med vand og /
eller opsøges lægehjælp!
Montering
Bemærk: Produktet kan både anvendes mon-
teret på væggen og som bordapparat. Efterfølgende beskrives vægmonteringen.
Forvis Dem om, at De ikke støder på støm-,
gas- eller vandledninger, når De arbejder
med et boreværktøj. Kontroller i givet fald
med en ledningssøger, inden De borer i
væggen. Læs til dette formål vejledningen til
Deres boreværktøj.
Monter vægten, så en upåklagelig funktion
og anvendelse er garanteret.
Bemærk: Den anbefalede maksimale højde til vægmontering af køkkenvægten ligger på ca. 1,5 m.
1. Fjern vægholderen
10
på kabinettets bagside,
idet De skubber den nedad (illust. A).
2. Monter vægholderen
10
på det valgte sted
lodret til væggen ved hjælp af de medleverede skruer
7
og rawlplug 6.
Bemærk: Rawlpluggene, som er leveret
med, er beregnet til almindeligt, fast murværk.
Spørg i faghandelen for egnet fastgørelsesmateriale, hvis det handler om andre vægsopbygninger.
3. Træk skillestrimlen ud af batteribeholderen
8
.
31 DK
63925_silv_Digitale_Küchenwaage_content_LB3.indd 31 23.02.11 15:49
Page 30

Montering / Ibrugtagen / Betjening
4. Sæt efterfølgende vægten op på væghol-
10
deren
.
Bemærk: Hvis monteringen ikke er lodret
kan det tage indflydelse på målingens
nøjagtighed.
Ibrugtagen
Klokkeslæt indstilles
Tryk MODE/+-tasten 5, indtil De befinder
Dem i ur-modussen.
Tryk SET/WEIGHT MODE-tasten
3
, for at
komme ind i indstillings-modus. Minutvisningen blinker.
De kan bruge MODE/+-tasten
timer/UNIT/alarm/- -tasten
5
eller
4
, til indstil-
ling af værdien.
Bemærk: Hvis tasterne
4, 5
holdes
trykket, opnås en hurtigere indstilling af
værdierne.
Tryk SET/WEIGHT MODE-tasten
3
, for at
gemme den indstillede værdi og for at komme
videre til indstilling af timerne. Timevisningen
blinker.
De kan bruge MODE/+-tasten
timer/UNIT/alarm/- -tasten
5
eller
4
, til indstilling
af værdien.
Tryk SET/WEIGHT MODE-tasten
3
, for at
gemme den indstillede værdi og for at forlade indstillings-modus.
Bemærk: Hvis der ikke trykkes nogen tast
i 10 sekunder, holder den indstillede værdi
opmed at blinke. Så indstilles tiden automatisk til den viste værdi.
Betjening
Apparatet råder over fem funktioner:
1. Klokkeslætvisning
2. Vejning
3. Temperaturvisning
4. Alarmfunktion
5. Timer
Med MODE/+-tsten
5
kan De skifte
mellem de forskellige funktioner.
Klokkeslætvisning
Tryk MODE/+-tasten 5, indtil De befinder
Dem i ur-modussen.
I displayet vises klokkeslættet (timer:minutter).
Hvis De ønsker at indstille klokkeslættet til
en anden værdi, gå venligst frem som
beskrevet i kapitlet ”Klokkeslæt indstilles”.
Bemærk: Apparatet viser klokkeslættet
indtil ved hjælp af MODE/+-tasten
5
skiftes til en anden af apparatets funktioner.
Vægten anvendes
Bemærk: Hvis produktet anvendes som bord-
apparat, skal det stilles på en jævn og stabil
overflade til vejning.
Klap glaspladen
Stil vægtskålen
Tryk, hvis nødvendigt, Mode/+-tasten
9
ned.
1
på apparatets vejeplade.
5
indtil De befinder Dem i veje-modussen.
Denne følger på klokkeslætsvisningen.
De kan bruge SET/WEIGHT MODE-tasten
3
, for at skifte mellem måleindstillingerne
for vægt
17
, vand 16 og mælk 15. Den
valgte måleindstilling vise ved hjælp af en
lille bjælke i displayet.
Bemærk: Ved måleindstillingerne for vand
og mælk vises væskens beregnede volumen
(ml/floz). Denne funktion erstatter målebægeret for væsker. Bemærk venligst, at især
mælkens volumen er afhængig af fedtindholdet, produktionsstedet og andre faktorer.
Derfor svarer visningen af volumen til en
gennemsnitsværdi.
De kan bruge timer/UNIT/alarm/- -tasten
4
, for at skifte den viste enhed 13, 14.
Følgende enheder kan anvendes i måleindstillingerne:
Vægt: gram (grundindstilling), oz, lb
vand: ml (grundindstilling), floz
32 DK
63925_silv_Digitale_Küchenwaage_content_LB3.indd 32 23.02.11 15:49
Page 31

Betjening
mælk: ml (grundindstilling), floz
Bemærk: Måleenheden oz (ounce = engl.
for unse) anvendes engang imellem til fødevarer og svarer til ca. 28,35 g. Måleenheden
lb (libra = lat. for pund) svarer til ca. 453,59 g
hhv. 16 oz. Måleenheden floz (fluid ounce=
engl. for flydende unse) svarer til ca.
28,4 ml. 100 ml svarer altså til ca. 3,5 floz.
Fødevarer vejes supplerende:
Bemærk: Når tunge objekter vejes, lægges
disse langsomt og forsigtigt på vægtskålen
1
,
for at undgå beskadigelse af køkkenvægten.
1. Kom en ingrediens i vægtskålen
1
. Vægten
vises i displayet.
2. Tryk TARE-tasten
2
, for at nulstille visningen.
I displayet dukker visningen ”0“ op og taravisningen
20
lyser op.
3. Kom nu den ønskede mængde af den næste
ingrediens i. De kan aflæse den påfyldte
mængde direkte på displayet.
4. Gentag trinene 2 og 3 til De har fyldt alle
nødvendige ingredienser i.
Vær opmærksom på, at vægtens
5 kg
maksimale bæreevne er 5 kg.
Bemærk: Hvis vægten overbelastes, dukker
visningen ”
“ op i displayet.
Bemærk: Hvis der ikke trykkes nogen tast
indenfor to minutter, viser køkkenvægtens
display automatisk klokkeslættet.
Temperaturvisning anvendes
Tryk MODE/+-tasten 5, indtil De befinder
Dem i temperatur-modussen. Denne kommer
efter veje-moussen.
Temperaturmålingen sker i en afstand på
ca. 10 sekunder.
De kan bruge timer/UNIT/alarm/- -tasten
4
, for at skifte i veningen 12 melllem °C
og °F .
Bemærk: Hvis der ikke trykkes nogen tast indenfor to minutter, viser køkkenvægtens display
automatisk klokkeslættet.
Alarm-funktion anvendes
Tryk MODE/+-tasten 5, indtil De befinder
Dem i alarm-modussen. Denne følger på
temperaturvisningen.
Tryk SET/WEIGHT MODE-tasten
3
, for at
komme ind i indstillings-modus. Minutvisningen blinker.
De kan bruge MODE/+-tasten
timer/UNIT/alarm/- -tasten
5
eller
4
, til indstilling
af værdien.
Tryk SET/WEIGHT MODE-tasten
3
, for at
gemme den indstillede værdi og for at komme
videre til indstilling af timerne. Timevisningen
blinker.
De kan bruge MODE/+-tasten
timer/UNIT/alarm/- -tasten
5
eller
4
, til indstilling
af værdien.
Tryk SET/WEIGHT MODE-tasten
3
, for at
gemme den indstillede værdi og for at forlade
indstillings-modus.
Bemærk: Hvis der ikke trykkes nogen tast
i 10 sekunder, holder den indstillede værdi
opmed at blinke. Så indstilles alarm-tidspunktet automatisk til den viste værdi.
Tryk timer/UNIT/Alarm/- -tasten
starte alarmen. Alarm-symboletl
4
18
dukker
for at
op i displayet.
De kan slå alarmen fra ved at trykke timer/
UNIT/Alarm/- -tasten
symbolet
18
slukkes i displayet.
4
igen. Alarm-
Når det indstillede alarm-tidspunkt er nået,
lyder en alarm-tone i ca. et minut.
Hvis apparatet befinder sig i veje-modussen,
når det indstillede alarm-tidspunkt nås, lyder
ingen alarm-tone. I stedet for blinker alarmsymbolet
18
i displayet.
Bemærk: Hvis der ikke trykkes nogen tast
indenfor to minutter, viser køkkenvægtens
display automatisk klokkeslættet.
33 DK
63925_silv_Digitale_Küchenwaage_content_LB3.indd 33 23.02.11 15:49
Page 32

Betjening / Fejl afhjælpes
Timer anvendes
Tryk MODE/+-tasten 5, indtil De befinder
Dem i timer-modussen. Denne følger på
alarm-funktionen.
Tryk SET/WEIGHT MODE-tasten
3
, for at
komme ind i indstillings-modus. Sekundvisningen blinker.
De kan bruge MODE/+-tasten
timer/UNIT/alarm/- -tasten
5
eller
4
, til indstilling
af værdien.
Tryk SET/WEIGHT MODE-tasten
3
, for at
gemme den indstillede værdi og for at komme
videre til indstilling af timerne. Minutvisningen blinker.
De kan bruge MODE/+-tasten
timer/UNIT/alarm/- -tasten
5
eller
4
, til indstilling
af værdien.
Tryk SET/WEIGHT MODE-tasten
3
, for at
gemme den indstillede værdi og for at forlade indstillings-modus.
Tryk timer/UNIT/alarm/- -tasten
starte timeren. Visningen for timeren
4
21
for at
dukker op i displayet.
Bemærk: Mens timeren kører kan De ved
hjælp af MODE/+-tasten
5
skifte til en
anden af apparatets funktioner. Visningen
for timeren
21
vises så stadig i displayet.
De kan slå timeren fra, idet De trykker
timer/UNIT/alarm/- -tasten
ningen for timeren
21
slukkes i displayet.
4
igen. Vis-
Når den indstillede tid er gået, lyder en
alarm-tone i ca. et minut og den tidligere
indstillede tid dukker op i displaet.
Hvis apparatet befinder sig i veje-modussen,
når det indstillede alarm-tidspunkt nås, lyder
ingen alarm-tone. I stedet for blinker visningen
for timeren
21
i displayet.
Bemærk: Hvis der ikke trykkes nogen tast
indenfor to minutter, viser køkkenvægtens
display automatisk klokkeslættet.
Indstillinger nulstilles
På apparatets bagside befinder sig Reset-
11
tasten
. Tryk denne tast, for nulstille ind-
stillingerne tilbage til fabriksindstillingerne.
Batterier skiftes
Når batterierne bliver svagere, dukker bat-
teriniveau-visningen
19
op i displayet.
Skift batterierne senest, når symbolet “
dukker op i displayet. Et svagt eller tomt batteri kan påvirke måleresultatets nøjagtighed.
Åben batteribeholderen
8
på vægtens
bagside.
Tag de brugte batterier ud og tilfør dem
bortskaffelse ifølge forskrifterne (se kapitel
”Bortskaffelse”).
Indsæt to nye batterier af typen CR2032,
3 V
i batteribeholderen 8. Vær
opmærksom på den rigtige polaritet. Denne
vises ved siden af batteribeholderen
Luk efterfølgende batteribeholderen
Fejl afhjælpes
8
.
8
.
= Fejl
= Årsag
= Løsning
=
= Vægten er ustabil og ikke præcis lodret.
= Sørg for en stabil fastgørelse og præcis
lodret udrrettelse.
=
= Vægten er overbelastet.
= Fjern overlasten.
= Visning out2, så skift til tempera-
turvisning
= Vægten er belastet med 1000 g inden der
skiftes til vejemodus.
”
34 DK
63925_silv_Digitale_Küchenwaage_content_LB3.indd 34 23.02.11 15:49
Page 33

Fejl afhjælpes / Rengøring og pleje / Bortskaffelse
= Fjern overlasten indenfor 10 sekunder.
Displayet vender indenfor fem sekunder
tilbage til veje-modussen.
=
= Batterierne er for svag til vejning.
= Skift batterierne (se kapitel ”Batterier
skiftes”).
Rengøring og pleje
Brug ingen kemiske rengøringsmidler, skure-
midler eller skarpe genstande til rengøringen.
I modsat fald kan produktet tage skade.
Dyp aldrig produktet i vand eller andre
væsker. I modsat fald kan produktet tage
skade.
Rengør produktet med en lidt fugtig, fnugfri
klud. Ved stærkere forurening kan du fugte
kluden med mildt sæbevand.
Akku‘er må ikke bortskaffes med husholdningsaffald. De kan indeholde giftige tungmetaller
og er underlagt behandling af miljøskadelig
affald. De kemiske symboler for tungmetaller
er følgende: Cd = kadmium, Hg= kviksølv,
Pb = bly. Aflever derfor brugte akku‘er på
Deres kommunale opsamlingsplads.
Produktbetegnelse:
Digital køkkenvægt
Model-nr.: Z30170
Version: 04 / 2011
EMC
Bortskaffelse
Indpakningen består af miljøvenlige
materialer, der kan bortskaffes ved
de stedlige genbrugscentre.
Din kommune oplyser om muligheder for bortskaffelse af det udtjente produkt.
Det udtjente produkt må af hensyn til
miljøet ikke bortskaffes over det normale husholdningsaffald, men skal
afleveres ved det passende genbrugscenter. Den ansvarlige forvaltning
oplyser gerne åbningstider og genbrugssteder.
Defekte eller brugte Batterier skal gevindes efter
direktiv 2006 / 66 / EC. Batterierne og / eller
apparatet returneres over et indsamlingspunkt.
Miljøskader på grund af
forkert bortskaffelse af
Pb
batterier!
35 DK
63925_silv_Digitale_Küchenwaage_content_LB3.indd 35 23.02.11 15:49
Page 34

Inhaltsverzeichnis
Einleitung
Bestimmungsgemäßer Gebrauch ............................................................................ Seite 37
Teilebeschreibung .................................................................................................... Seite 37
Technische Daten ..................................................................................................... Seite 37
Lieferumfang ............................................................................................................. Seite 38
Sicherheitshinweise
Allgemeine Sicherheitshinweise ..............................................................................Seite 38
Elektrische Sicherheit ................................................................................................ Seite 39
Sicherheitshinweise zu Batterien .............................................................................Seite 39
Montage ................................................................................................................Seite 40
Inbetriebnahme
Uhrzeit einstellen ...................................................................................................... Seite 40
Bedienung
Uhrzeit-Anzeige ........................................................................................................Seite 40
Waage verwenden .................................................................................................. Seite 41
Temperaturanzeige verwenden ..............................................................................Seite 41
Alarm-Funktion verwenden ......................................................................................Seite 42
Kurzzeitmesser verwenden ...................................................................................... Seite 42
Einstellungen zurücksetzen ...................................................................................... Seite 43
Batterien wechseln ...................................................................................................Seite 43
Fehler beheben ............................................................................................... Seite 43
Reinigung und Pflege .................................................................................Seite 43
Entsorgung .......................................................................................................... Seite 44
36 DE/AT/CH
63925_silv_Digitale_Küchenwaage_content_LB3.indd 36 23.02.11 15:49
Page 35

Einleitung
Digitale Küchenwaage
Einleitung
Machen Sie sich vor dem ersten
Gebrauch
Lesen Sie hierzu
nachfolgende Montage- und Bedienungs
mit dem Produkt vertraut.
aufmerksam die
anleitung
und die Sicherheitshinweise. Benutzen Sie das
Produkt nur wie beschrieben und für die angegebenen Einsatzbereiche. Bewahren Sie diese
Anleitung gut auf. Händigen Sie alle Unterlagen
bei Weitergabe des Produkts an Dritte ebenfalls
mit aus.
Bestimmungsgemäßer
Gebrauch
Dieses Gerät ist zum Wiegen und Zuwiegen
haushaltsüblicher Mengen von Lebensmitteln
bestimmt. Die Küchenwaage dient zur Ermittlung
des Gewichts von nicht aggressiven, nicht
ätzenden und nicht schleifenden Flüssigkeiten
oder Feststoffen. Sie ist nicht dafür vorgesehen,
Medikamente oder unerlaubte Materialien zu
wiegen. Sie dient ebenso zur Anzeige der Temperatur und der Uhrzeit und verfügt über eine
Kurzzeitmesser- und eine Alarm-Funktion. Eine
andere Verwendung als zuvor beschrieben
oder eine Veränderung des Produktes ist nicht
zulässig und führt zur Beschädigung. Darüber
hinaus können weitere lebensgefährliche Gefahren und Verletzungen die Folge sein. Das Produkt
ist nur zur Eigenanwendung, nicht für den
medizinischen oder kommerziellen Gebrauch
vorgesehen.
6
Dübel (ø 6 mm)
7
Schraube
8
Batteriefach
9
Glasplatte
10
Wandhalter
11
Reset-Taste
12
Anzeige für °Celsius / °Fahrenheit
13
Anzeige für Gramm / Milliliter
14
Anzeige für Pfund (lb) und Flüssigunzen (floz)
15
Anzeige für Milch-Wiegemodus
16
Anzeige für Wasser-Wiegemodus
17
Anzeige für Gewicht-Wiegemodus
18
Alarm-Symbol
19
Batterie-Ladeanzeige
20
Tara-Anzeige (Tare)
21
Anzeige für den Kurzzeitmesser
Technische Daten
Maße:
zusammengeklappt: ca. 12,9 x 21,9 x 5,6 cm
(B x H x T)
Messbereich:
Gewicht: 0 – 5100 g, Abweichung
± (0,1 % + 1 g)
0 – 11 lb 4 oz, Abweichung
± (0,1 % + 1 oz)
Wasser: 0 – 5100 ml, Abweichung
± (0,1 % + 1 ml)
0 – 179,5 floz, Abweichung
± (0,1 % + 1 floz)
Milch: 0 – 4950 ml, Abweichung
± (0,1 % + 1 ml)
0 – 174,2 floz, Abweichung
± (0,1 % + 1 floz)
Teilebeschreibung
Messteilung:
Gewicht: 1 g
1
Wiegeschale
2
TARE-Taste („Nullstellung“)
3
SET / WEIGHT MODE-Taste
4
Kurzzeitmesser / UNIT / Alarm / - -Taste
5
MODE / +-Taste
63925_silv_Digitale_Küchenwaage_content_LB3.indd 37 23.02.11 15:49
Wasser / Milch: 1 ml
Kurzzeitmesser: bis 99 Minuten und
59 Sekunden (± 1 s)
37 DE/AT/CH
Page 36

Einleitung / Sicherheitshinweise
Temperaturanzeige: 0,0 °C – 50,0 °C,
Abweichung ± 2,0 °C
32,0 °F – 122,0 °F,
Abweichung ± 3,6 °F
Batterie: 2 x CR2032, 3 V
(im Lieferumfang enthalten)
Material:
Gehäuse /
Wiegeschale: Kunststoff
Lieferumfang
Kontrollieren Sie unmittelbar nach dem Auspacken den Lieferumfang auf Vollständigkeit sowie
den einwandfreien Zustand des Produkts und
aller Teile. Verwenden Sie das Produkt keinesfalls,
wenn der Lieferumfang nicht vollständig ist.
1 Küchenwaage
1 Wiegeschale
1 Wandhalter
2 Batterien CR2032, 3 V
2 Dübel (ø 6 mm)
2 Schrauben
1 Bedienungsanleitung
Sicherheitshinweise
BEWAHREN SIE ALLE SICHERHEITSHINWEISE
UND ANWEISUNGEN FÜR DIE ZUKUNFT
AUF!
Allgemeine
Sicherheitshinweise
WARNUNG!
UND UNFALLGEFAHR FÜR
KLEINKINDER UND KINDER!
Lassen Sie Kinder niemals unbeaufsichtigt
mit dem Verpackungsmaterial. Es besteht Erstickungsgefahr durch Verpackungsmaterial.
Kinder unterschätzen häufig die Gefahren.
LEBENS-
Halten Sie Kinder stets vom Verpackungsmaterial fern.
WARNUNG!
LEBENSGEFAHR! Batte-
rien können verschluckt werden, was
lebensgefährlich sein kann. Ist eine Batterie
verschluckt worden, muss sofort medizinische
Hilfe in Anspruch genommen werden.
Dieses Gerät ist nicht dafür bestimmt, durch
Personen (einschließlich Kinder) mit eingeschränkten physischen, sensorischen oder
geistigen Fähigkeiten oder mangels Erfahrung und / oder mangels Wissen benutzt zu
werden, es sei denn, sie werden durch eine
für ihre Sicherheit zuständige Person beaufsichtigt oder erhielten von ihr Anweisungen,
wie das Gerät zu benutzen ist. Kinder sollten beaufsichtigt werden, um sicherzustellen, dass sie nicht mit dem Gerät spielen.
VORSICHT! VERLETZUNGS-
5 kg
GEFAHR! Belasten Sie die
Waage nicht über 5 kg.
Das Produkt könnte beschädigt werden.
Setzen Sie das Produkt
– keinen extremen Temperaturen,
– keinen starken Vibrationen,
– keinen starken mechanischen Beanspru-
chungen,
– keiner direkten Sonneneinstrahlung,
– keiner magnetischen Umgebung,
– keiner Feuchtigkeit aus.
Andernfalls droht Beschädigung des
Produktes.
Schützen Sie das Produkt vor elektrostatischer
Ladung / Entladung. Diese könnten eine
Behinderung des internen Datenaustausches
verursachen, was Fehler im LC-Display erzeugt.
Kontrollieren Sie das Produkt vor der Inbe-
triebnahme auf Beschädigungen. Nehmen
Sie ein beschädigtes Produkt nicht in Betrieb.
WARNUNG!
Öffnen Sie niemals das
Gehäuse des Produktes. Verletzungen und
Beschädigungen am Produkt können die
Folge sein. Lassen Sie Reparaturen nur von
einer Elektrofachkraft durchführen.
Lassen Sie keine unerfahrenen Personen
das Produkt nutzen. Gehen Sie sicher, dass
38 DE/AT/CH
63925_silv_Digitale_Küchenwaage_content_LB3.indd 38 23.02.11 15:49
Page 37

Sicherheitshinweise
jeder, der das Produkt nutzt, die Bedienungsanleitung gelesen hat und in der Lage ist,
das Produkt sicher zu bedienen.
Die Funktionen des Produktes können durch
magnetische Störfelder / Hochfrequenzaussendungen behindert werden. Entfernen Sie
in diesem Fall kurz die Batterien aus dem
Produkt und setzen Sie sie erneut ein. Gehen
Sie hierzu gemäß dem Kapitel „Batterien
wechseln” vor.
LEBENSMITTELECHT! Ge-
schmacks- und Geruchseigenschaften werden durch die
Wiegeschale
Verwenden Sie die Wiegeschale
1
nicht beeinträchtigt.
1
nur für
zu wiegende Lebensmittel. Stellen Sie keine
anderen Dinge auf der Wiegeschale
1
bzw. der Küchenwaage ab. Bei Nichtbeachtung kann es zu Beschädigungen des
Produkts kommen.
Drücken Sie die Tasten am Display vorsichtig.
Verwenden Sie keine spitzen Gegenstände
zum Drücken der Tasten.
VORSICHT! GEFAHR DES ELEKTRI-
SCHEN SCHLAGES! Vergewissern Sie sich
vor dem Bohren, dass sich keine Leitungen
an der Bohrstelle befinden.
VORSICHT! WASSERSCHADEN!
Vergewissern Sie sich vor dem Bohren, dass
sich keine Rohre an der Bohrstelle befinden.
Elektrische Sicherheit
Hängen Sie das Gerät nicht über heiße
Flächen oder in die Nähe von offenen
Flammen, um ein Anschmelzen des Gehäuses zu vermeiden. Stellen Sie sicher, dass
das Gerät weder im geschlossenen, noch
im ausgeklappten Zustand gefährdet ist.
Halten Sie das Gerät von Nässe fern. Das
Eindringen von Wasser erhöht die Gefahr
eines elektrischen Schlages.
Verwenden Sie die Waage nicht mit nassen
Händen.
Entfernen Sie bei Störungen oder defektem
Gerät die Batterien.
Nehmen Sie ein beschädigtes Gerät nicht
in Betrieb.
WARNUNG!
Öffnen Sie niemals das
Gehäuse des Gerätes. Lassen Sie Reparatur-
oder Austauscharbeiten nur von einer
Elektrofachkraft durchführen.
Sicherheitshinweise
zu Batterien
Entfernen Sie die Batterien, wenn sie längere
Zeit nicht verwendet worden sind, aus dem
Gerät.
Achten Sie beim Einlegen auf die richtige
Polarität! Diese wird im Batteriefach
angezeigt.
Reinigen Sie Batterie- und Gerätekontakt
vor dem Einlegen falls erforderlich.
Entfernen Sie erschöpfte Batterien umgehend
aus dem Gerät. Es besteht erhöhte Auslaufgefahr!
Batterien gehören nicht in den Hausmüll!
Jeder Verbraucher ist gesetzlich verpflichtet,
Batterien ordnungsgemäß zu entsorgen!
terien nicht ins Feuer, schließen Sie Batterien
nicht kurz und nehmen Sie sie nicht auseinander.
Bei Nichtbeachtung der Hinweise können
die Batterien über ihre Endspannung hinaus
entladen werden. Es besteht dann die Gefahr des Auslaufens. Falls die Batterien in
Ihrem Gerät ausgelaufen sein sollten, entnehmen Sie diese sofort, um Schäden am
Gerät vorzubeugen!
Vermeiden Sie den Kontakt mit Haut, Augen
und Schleimhäuten. Bei Kontakt mit Batteriesäure spülen Sie die betroffene Stelle mit
reichlich Wasser ab und / oder suchen Sie
einen Arzt auf!
VORSICHT! EXPLOSIONS-
GEFAHR! Laden Sie Batterien
niemals wieder auf!
8
VORSICHT! EXPLOSIONS-
GEFAHR! Halten Sie Batterien
von Kindern fern, werfen Sie Bat-
39 DE/AT/CH
63925_silv_Digitale_Küchenwaage_content_LB3.indd 39 23.02.11 15:49
Page 38

Montage / Inbetriebnahme / Bedienung
Montage
Hinweis: Sie können das Produkt sowohl
wandhängend als auch als Tischgerät verwenden. Im Folgenden wird die Wandmontage
beschrieben.
Vergewissern Sie sich, dass Sie nicht auf
Strom-, Gas- oder Wasserleitungen stoßen,
wenn Sie mit einem Bohrwerkzeug arbeiten.
Prüfen Sie dies ggf. mit einem Leitungssucher,
bevor Sie in eine Wand bohren. Lesen Sie
dazu auch die Anleitung Ihres Bohrwerkzeugs.
Montieren Sie die Waage so, dass eine ein-
wandfreie Funktion und Verwendung garantiert ist.
Hinweis: Die empfohlene maximale Höhe
der Küchenwaage zur Wandmontage liegt
bei ca. 1,5 m.
1. Entfernen Sie den Wandhalter
Rückseite des Gehäuses, indem Sie ihn nach
unten schieben (Abb. A).
2. Montieren Sie den Wandhalter
ausgesuchten Stelle im Lot zur Wand mit
Hilfe der mitgelieferten Schrauben
Dübel
6
.
Hinweis: Die mitgelieferten Dübel sind für
normales, festes Mauerwerk vorgesehen.
Erkundigen Sie sich bei anderen Wandaufbauten im Fachhandel nach geeignetem
Befestigungsmaterial.
3. Ziehen Sie den Trennstreifen aus dem
Batteriefach
8
.
4. Setzen Sie die Waage anschließend auf
den Wandhalter
10
auf.
Hinweis: Bei nicht lotrechter Montage
kann die Genauigkeit der Messung beeinflusst werden.
10
auf der
10
an der
7
und
Drücken Sie die SET / WEIGHT MODE-
3
Taste
, um in den Einstell-Modus zu
gelangen. Die Minutenanzeige blinkt.
Sie können die MODE / +-Taste
Kurzzeitmesser / UNIT / Alarm / - -Taste
5
oder die
4
benutzen, um den Wert einzustellen.
Hinweis: Wenn Sie diese Tasten
4, 5
gedrückt halten, erreichen Sie ein beschleunigtes Einstellen der Werte.
Drücken Sie die SET / WEIGHT MODE-
3
Taste
, um den eingestellten Wert zu
speichern und zur Einstellung der Stunden
zu wechseln. Die Stundenanzeige blinkt.
Sie können die MODE / +-Taste
Kurzzeitmesser / UNIT / Alarm / - -Taste
5
oder die
4
benutzen, um den Wert einzustellen.
Drücken Sie die SET / WEIGHT MODE-
3
Taste
, um den eingestellten Wert zu speichern und den Einstell-Modus zu verlassen.
Hinweis: Wenn 10 Sekunden lang keine
Taste gedrückt wird, hört der eingestellte Wert
auf zu blinken. Die Zeit wird dann automatisch auf den angezeigten Wert eingestellt
Bedienung
Das Gerät verfügt über fünf Funktionen:
1. Uhrzeit-Anzeige
2. Wiegen
3. Temperatur-Anzeige
4. Alarmfunktion
5. Kurzzeitmesser
Mit der MODE / +-Taste
5
können Sie
zwischen den verschiedenen Funktionen
umschalten.
Uhrzeit-Anzeige
Inbetriebnahme
Drücken Sie die MODE / +-Taste 5, bis
Uhrzeit einstellen
die Waage sich im Uhren-Modus befindet.
Im Display wird die Uhrzeit angezeigt
Drücken Sie die MODE / +-Taste 5, bis
(Stunden:Minuten).
die Waage sich im Uhren-Modus befindet.
40 DE/AT/CH
63925_silv_Digitale_Küchenwaage_content_LB3.indd 40 23.02.11 15:49
Page 39

Bedienung
Falls Sie die Uhrzeit auf einen anderen
Wert einstellen möchten, gehen Sie wie im
Kapitel „Uhrzeit einstellen“ beschrieben vor.
Hinweis: Das Gerät zeigt so lange die
Uhrzeit an, bis mit der MODE / +-Taste
5
zu einer anderen Funktion des Gerätes
gewechselt wird.
Waage verwenden
Hinweis: Bei Verwendung als Tischgerät muss
das Produkt zum Wiegen auf eine ebene und
stabile Oberfläche gestellt werden.
Klappen Sie die Glasplatte
Stellen Sie die Wiegeschale
9
nach unten.
1
auf die
Wiegeplatte des Gerätes.
Drücken Sie wenn nötig die MODE / +-Taste
5
, bis die Waage sich im Wiege-Modus be-
findet. Dieser folgt nach der Uhrzeit-Anzeige.
Sie können die SET / WEIGHT MODE-
3
Taste
einstellungen für Gewicht
und Milch
benutzen, um zwischen den Mess-
17
, Wasser 16
15
umzuschalten. Die gewählte
Messeinstellung wird durch einen kleinen
Balken im Display angezeigt.
Hinweis: Bei den Messeinstellungen für
Wasser und Milch wird das errechnete Volumen (ml / floz) der Flüssigkeit angezeigt.
Diese Funktion ersetzt einen Messbecher für
Flüssigkeiten. Bitte beachten Sie, dass insbesondere das Volumen von Milch abhängig
vom Fettgehalt, von der Herkunft und weiteren Faktoren ist. Die Anzeige des Volumens
entspricht deshalb einem durchschnittlichen
Wert.
Sie können die Kurzzeitmesser / UNIT /
Alarm / - -Taste
zeigte Einheit
4
benutzen, um die ange-
13, 14
zu wechseln. Folgende
Einheiten können in den Messeinstellungen
verwendet werden:
Gewicht: Gramm (Grundeinstellung), oz, lb
Wasser: ml (Grundeinstellung), floz
Milch: ml (Grundeinstellung), floz
Hinweis: Die Maßeinheit oz (ounce =
engl. für Unze) wird gelegentlich bei
Lebensmitteln verwendet und entspricht ca.
28,35 g. Die Maßeinheit lb (libra = lat. für
Pfund) entspricht ca. 453,59 g bzw. 16 oz.
Die Maßeinheit floz (fluid ounce= engl. für
Flüssigunze) entspricht ca. 28,4 ml. 100 ml
entsprechen somit ca. 3,5 floz.
Lebensmittel zuwiegen:
Hinweis: Wenn Sie schwere Objekte wiegen,
legen Sie diese langsam und vorsichtig auf die
Wiegeschale
1
, um eine Beschädigung der
Küchenwaage zu verhindern.
1. Geben Sie eine Zutat in die Wiegeschale
Das Gewicht wird im Display angezeigt.
2. Drücken Sie die TARE-Taste
2
, um die Anzeige zurückzusetzen. Im Display erscheint
die Anzeige „0“ und die Tara-Anzeige
leuchtet auf.
3. Geben Sie nun die gewünschte Menge der
zweiten Zutat hinzu. Sie können die eingefüllte Menge direkt im Display ablesen.
4. Wiederholen Sie Schritt 2 und 3, bis Sie
alle benötigten Zutaten eingefüllt haben.
Beachten Sie, dass die maximale
5 kg
Belastung der Waage 5 kg beträgt.
Hinweis: Bei einer Überlastung der Waage
erscheint im Display die Anzeige „
Hinweis: Wenn zwei Minuten keine Taste
gedrückt wird, zeigt die Anzeige der Küchenwaage automatisch die Zeit an.
Temperaturanzeige
verwenden
Drücken Sie die MODE / +-Taste 5, bis
die Waage sich im TemperaturanzeigeModus befindet. Dieser folgt nach dem
Wiege-Modus.
Die Temperaturmessung erfolgt in einem
Abstand von ca. 10 Sekunden.
Sie können die Kurzzeitmesser / UNIT /
Alarm / - -Taste
12
zeige
4
benutzen, um in der An-
zwischen °C und °F zu wechseln.
20
“.
1
.
41 DE/AT/CH
63925_silv_Digitale_Küchenwaage_content_LB3.indd 41 23.02.11 15:49
Page 40

Bedienung
Hinweis: Wenn zwei Minuten keine Taste
gedrückt wird, zeigt die Anzeige der
Küchenwaage automatisch die Zeit an.
Alarm-Funktion verwenden
Drücken Sie die MODE / +-Taste 5, bis
die Waage sich im Alarm-Modus befindet.
Dieser folgt nach der Temperatur-Anzeige.
Drücken Sie die SET / WEIGHT MODE-
3
Taste
, um in den Einstell-Modus zu
gelangen. Die Minutenanzeige blinkt.
Sie können die MODE / +-Taste
Kurzzeitmesser / UNIT / Alarm / - -Taste
5
oder die
4
benutzen, um den Wert einzustellen.
Drücken Sie die SET / WEIGHT MODE-
3
Taste
, um den eingestellten Wert zu
speichern und zur Einstellung der Stunden
zu wechseln. Die Stundenanzeige blinkt.
Sie können die MODE / +-Taste
Kurzzeitmesser / UNIT / Alarm / - -Taste
5
oder die
4
benutzen, um den Wert einzustellen.
Drücken Sie die SET / WEIGHT MODE-
3
Taste
, um den eingestellten Wert zu speichern und den Einstell-Modus zu verlassen.
Hinweis: Wenn 10 Sekunden lang keine
Taste gedrückt wird, hört der eingestellte Wert
auf zu blinken. Die Alarm-Zeit wird dann
automatisch auf den angezeigten Wert
eingestellt
Drücken Sie die Kurzzeitmesser / UNIT /
Alarm / - -Taste
starten. Das Alarm-Symbol
4
, um den Alarm zu
18
erscheint im
Display.
Sie können den Alarm ausschalten, indem
Sie die Kurzzeitmesser / UNIT / Alarm /
- -Taste
bol
4
erneut drücken. Das Alarm-Sym-
18
im Display erlischt.
Beim Erreichen der eingestellten Alarm-Zeit
ertönt für ca. eine Minute ein Alarm-Ton.
Befindet sich das Gerät beim Erreichen der
eingestellten Zeit im Wiege-Modus, ertönt
kein Alarmton. Stattdessen blinkt das AlarmSymbol
18
im Display.
Hinweis: Wenn zwei Minuten keine Taste
gedrückt wird, zeigt die Anzeige der
Küchenwaage automatisch die Zeit an.
Kurzzeitmesser verwenden
Drücken Sie die MODE / +-Taste 5, bis
die Waage sich im Kurzzeitmesser-Modus
befindet. Dieser folgt nach der Alarm-Funktion.
Drücken Sie die SET / WEIGHT MODE-
3
Taste
, um in den Einstell-Modus zu ge-
langen. Die Sekundenanzeige blinkt.
Sie können die MODE / +-Taste
Kurzzeitmesser / UNIT / Alarm / - -Taste
5
benutzen, um den Wert einzustellen.
Drücken Sie die SET / WEIGHT MODE-
3
Taste
, um den eingestellten Wert zu
speichern und zur Einstellung der Minuten
zu wechseln. Die Minutenanzeige blinkt.
Sie können die MODE / +-Taste
Kurzzeitmesser / UNIT / Alarm / - -Taste
5
benutzen, um den Wert einzustellen.
Drücken Sie die SET / WEIGHT MODE-
3
Taste
, um den eingestellten Wert zu speichern und den Einstell-Modus zu verlassen.
Drücken Sie die Kurzzeitmesser / UNIT /
Alarm / - -Taste
4
, um den Kurzzeitmesser
zu starten. Die Anzeige für den Kurzzeitmesser
21
erscheint im Display.
Hinweis: Während der Kurzzeitmesser
läuft, können Sie mit der MODE / +-Taste
5
zu einer anderen Funktion des Gerätes
wechseln. Die Anzeige für den Kurzzeitmes-
21
ser
wird dann weiterhin im Display
angezeigt.
Sie können den Kurzzeitmesser ausschalten,
indem Sie die Kurzzeitmesser / UNIT /
Alarm / - -Taste
zeige für den Kurzzeitmesser
4
erneut drücken. Die An-
21
im Display
erlischt.
Wenn die eingestellte Zeit abgelaufen ist,
ertönt für ca. eine Minute ein Alarm-Ton
und die zuvor eingestellte Zeit erscheint auf
dem Display.
oder die
4
oder die
4
42 DE/AT/CH
63925_silv_Digitale_Küchenwaage_content_LB3.indd 42 23.02.11 15:49
Page 41

Bedienung / Fehler beheben / Reinigung und Pflege / Entsorgung
Befindet sich das Gerät beim Erreichen der
eingestellten Zeit im Wiege-Modus, ertönt
kein Alarmton. Stattdessen blinkt die Anzeige
für den Kurzzeitmesser
21
im Display.
Hinweis: Wenn zwei Minuten keine Taste
gedrückt wird, zeigt die Anzeige der
Küchenwaage automatisch die Zeit an.
Einstellungen zurücksetzen
Auf der Rückseite des Gehäuses befindet
sich die Reset-Taste
11
. Drücken Sie diese
Taste, um die Einstellungen auf die
Werkseinstellungen zurückzusetzen.
Batterien wechseln
Wenn die Batterien schwächer werden,
leuchtet im Display die Batterie-Ladeanzei-
19
ge
auf.
Wechseln Sie die Batterien spätestens,
wenn im Display das Symbol „
” erscheint.
Eine schwache oder leere Batterie kann sich
auf die Genauigkeit des Messergebnisses
auswirken.
Öffnen Sie das Batteriefach
8
an der
Rückseite der Waage.
Entnehmen Sie die leeren Batterien und
führen Sie diese einer ordnungsgemäßen
Entsorgung zu (siehe Kapitel „Entsorgung“).
Legen Sie zwei neue Batterien vom Typ
CR2032, 3 V
in das Batteriefach 8
ein. Achten Sie dabei auf die richtige Polarität. Diese wird unter dem Batteriefach
8
angezeigt.
Schließen Sie anschließend das Batterie-
8
fach
.
=
= Die Waage ist instabil oder nicht genau
senkrecht.
= Achten Sie auf eine stabile Befestigung und
genau senkrechte Ausrichtung.
=
= Die Waage ist überlastet.
= Entfernen Sie die Überlast.
= Anzeige out2, dann Wechsel in
Zeitanzeige
= Die Waage ist mit 1000 g belastet, bevor
Sie in den Wiegemodus umgeschaltet
haben.
= Entfernen Sie die Überlast innerhalb von
10 Sekunden. Das Display kehrt innerhalb
von fünf Sekunden zum Wiege-Modus
zurück.
=
= Die Batterien sind zu schwach zum Wiegen.
= Wechseln Sie die Batterien aus (siehe
Kapitel „Batterien wechseln“).
Reinigung und Pflege
Verwenden Sie zur Reinigung keine
chemischen Reiniger, Scheuermittel oder
scharfe Gegenstände. Andernfalls kann das
Produkt beschädigt werden.
Tauchen Sie das Produkt niemals in Wasser
oder in andere Flüssigkeiten. Andernfalls
kann das Produkt beschädigt werden.
Reinigen Sie das Produkt mit einem leicht
angefeuchteten, fusselfreien Tuch. Bei stärkerer Verschmutzung können Sie das Tuch
auch mit einer leichten Seifenlauge
befeuchten.
Fehler beheben
= Fehler
= Grund
= Lösung
43 DE/AT/CH
63925_silv_Digitale_Küchenwaage_content_LB3.indd 43 23.02.11 15:49
Page 42

Entsorgung
Entsorgung
Die Verpackung besteht aus umwelt-
freundlichen Materialien, die Sie
über die örtlichen Recyclingstellen
entsorgen können.
Möglichkeiten zur Entsorgung des ausgedienten
Produkts erfahren Sie bei Ihrer Gemeinde oder
Stadtverwaltung.
Werfen Sie Ihr Produkt, wenn es
ausgedient hat, im Interesse des Umweltschutzes nicht in den Hausmüll,
sondern führen Sie es einer fachgerechten Entsorgung zu. Über Sammelstellen und deren Öffnungszeiten
können Sie sich bei Ihrer zuständigen
Verwaltung informieren.
EMC
Defekte oder verbrauchte Batterien müssen
gemäß Richtlinie 2006 / 66 / EC recycelt werden.
Geben Sie Batterien und / oder das Gerät über
die angebotenen Sammeleinrichtungen zurück.
Umweltschäden durch falsche
Pb
Batterien dürfen nicht über den Hausmüll entsorgt werden. Sie können giftige Schwermetalle
enthalten und unterliegen der Sondermüllbehandlung. Die chemischen Symbole der
Schwermetalle sind wie folgt: Cd = Cadmium,
Hg= Quecksilber, Pb = Blei. Geben Sie deshalb
verbrauchte Batterien bei einer kommunalen
Sammelstelle ab.
Produktbezeichnung:
Digitale Küchenwaage
Modell-Nr.: Z30170
Version: 04 / 2011
Entsorgung der Batterien!
44 DE/AT/CH
63925_silv_Digitale_Küchenwaage_content_LB3.indd 44 23.02.11 15:49
 Loading...