

Page 1
IAN 59345
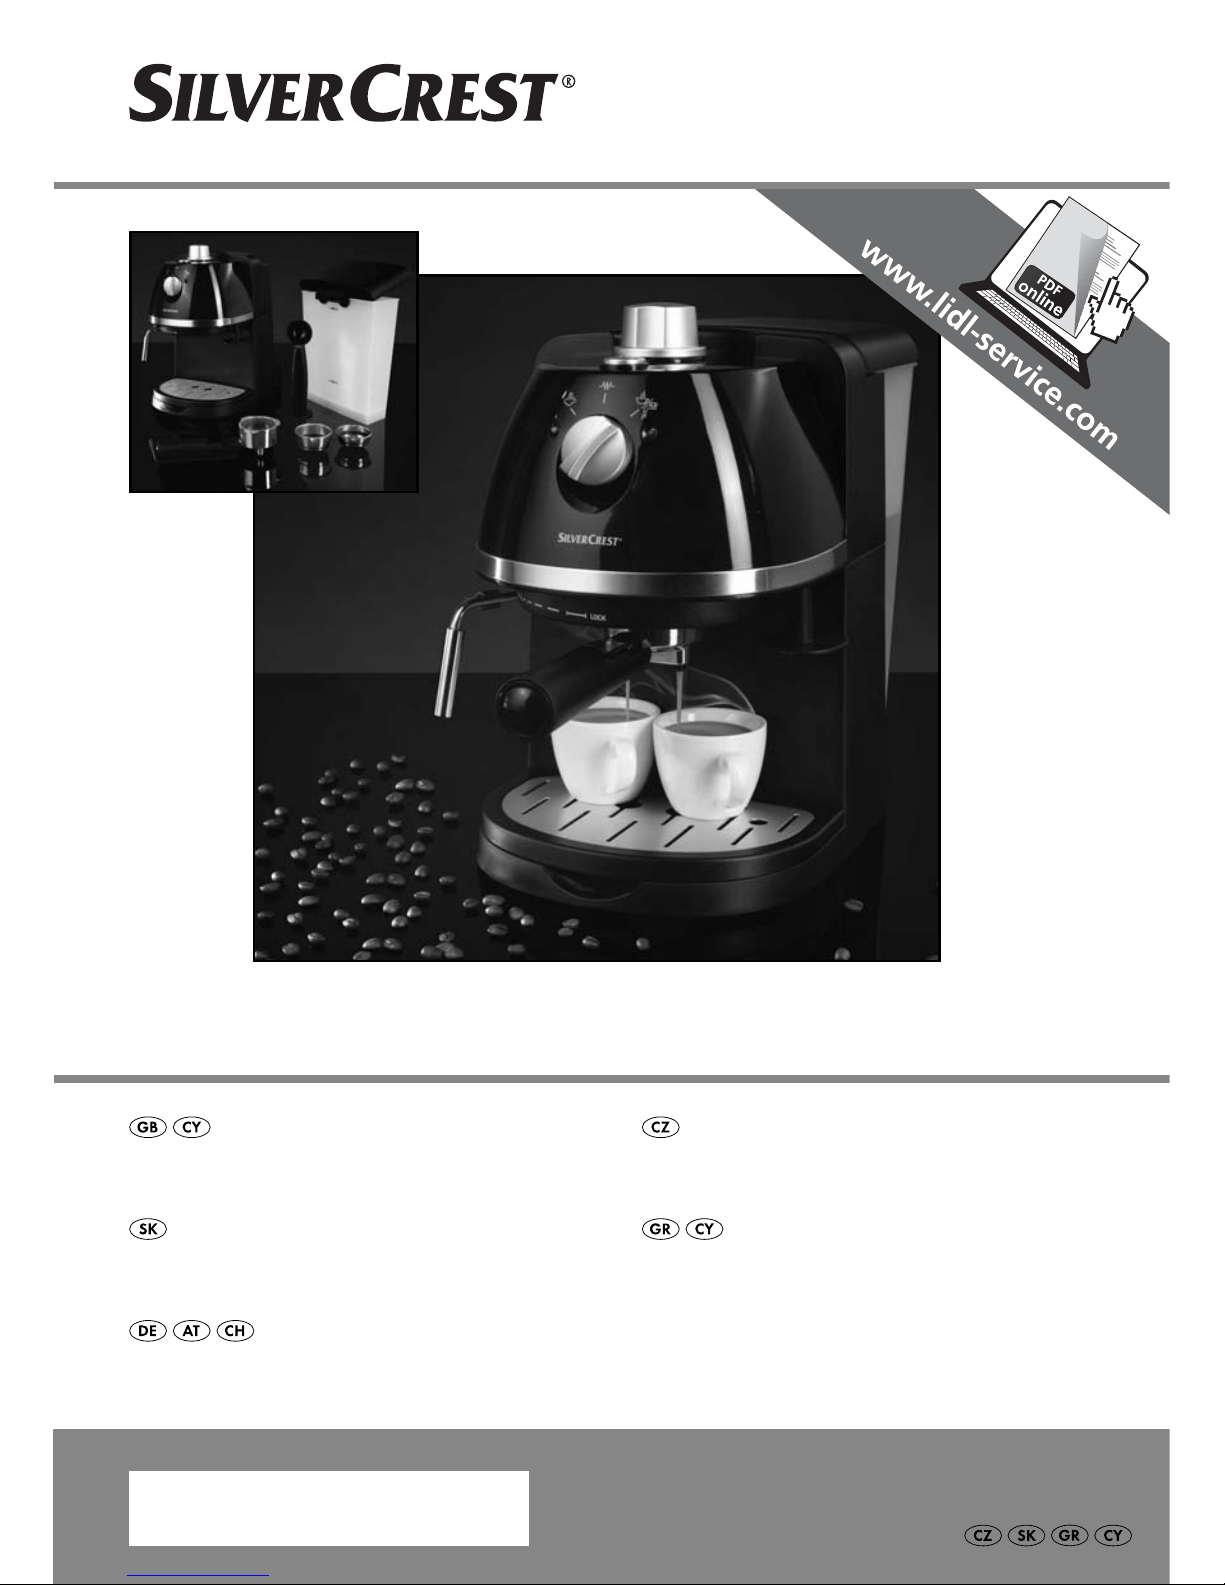
ESPRESSO MACHINE SEM 1100 A2
ESPRESSO MACHINE
Operating instructions
ESPRESSOMASCHINE
Bedienungsanleitung
ΕΣΠΡΕΣΙΕΡΑ
Οδηүίες χρήσης
ESPRESOVAČ
Návod k obsluze
ESPRESOVAČ
Návod na obsluhu
Page 2
GB / CY Operating instructions Page 1
CZ Návod k obsluze Strana 21
SK Návod na obsluhu Strana 41
GR / CY Οδηүίες χρήσης Σελίδα 61
DE / AT / CH Bedienungsanleitung Seite 81
Before reading, unfold the page containing the illustrations and familiarise yourself with all functions of
the device.
Před čtením si otevřete stranu s obrázky a potom se seznamte se všemi funkcemi přístroje.
Pred čítaním si odklopte stranu s obrázkami a potom sa oboznámte so všetkými funkciami prístroja.
Πριν ξεκινήσετε την ανάγνωση, ανοίξτε τη σελίδα με τις εικόνες και εξοικειωθείτε με όλες τις λειτουργίες
της συσκευής.
Klappen Sie vor dem Lesen die Seite mit den Abbildungen aus und machen Sie sich anschließend mit allen
Funktionen des Gerätes vertraut.
Page 3

A
B
8
7
6
5
4
3
2
1
i
r
z
u
t
e w q 0
9
Page 4
Index
Introduction . . . . . . . . . . . . . . . . . . . . . . . . . . . . . . . . . . . . . . . . . . . . . .2
Copyright . . . . . . . . . . . . . . . . . . . . . . . . . . . . . . . . . . . . . . . . . . . . . . . . . . . . . . . . . .2
Limited liability . . . . . . . . . . . . . . . . . . . . . . . . . . . . . . . . . . . . . . . . . . . . . . . . . . . . . .2
Warnings . . . . . . . . . . . . . . . . . . . . . . . . . . . . . . . . . . . . . . . . . . . . . . . . . . . . . . . . . . 2
Intended use . . . . . . . . . . . . . . . . . . . . . . . . . . . . . . . . . . . . . . . . . . . . . . . . . . . . . . . . 3
Items supplied / Transport inspection . . . . . . . . . . . . . . . . . . . . . . . . . . . . . . . . . . . . . 4
Disposal of the packaging . . . . . . . . . . . . . . . . . . . . . . . . . . . . . . . . . . . . . . . . . . . . .4
Safety instructions . . . . . . . . . . . . . . . . . . . . . . . . . . . . . . . . . . . . . . . . .5
Operating components . . . . . . . . . . . . . . . . . . . . . . . . . . . . . . . . . . . . .7
Technical data . . . . . . . . . . . . . . . . . . . . . . . . . . . . . . . . . . . . . . . . . . . . .7
Commissioning . . . . . . . . . . . . . . . . . . . . . . . . . . . . . . . . . . . . . . . . . . . .8
Operation . . . . . . . . . . . . . . . . . . . . . . . . . . . . . . . . . . . . . . . . . . . . . . . .8
Filling the water tank. . . . . . . . . . . . . . . . . . . . . . . . . . . . . . . . . . . . . . . . . . . . . . . . . .8
Heating-up after a long standing time / on the fi rst use . . . . . . . . . . . . . . . . . . . . . . .9
Heating up before every use . . . . . . . . . . . . . . . . . . . . . . . . . . . . . . . . . . . . . . . . . .10
Preparing Espresso . . . . . . . . . . . . . . . . . . . . . . . . . . . . . . . . . . . . . . . . . . . . . . . . . .10
Preparing Cappuccino . . . . . . . . . . . . . . . . . . . . . . . . . . . . . . . . . . . . . . . . . . . . . . .12
Tips for the milk froth . . . . . . . . . . . . . . . . . . . . . . . . . . . . . . . . . . . . . . . . . . . . . . . .14
Generating hot water . . . . . . . . . . . . . . . . . . . . . . . . . . . . . . . . . . . . . . . . . . . . . . . .14
GB
CY
Cleaning and Care . . . . . . . . . . . . . . . . . . . . . . . . . . . . . . . . . . . . . . . .15
Cleaning the milk frother . . . . . . . . . . . . . . . . . . . . . . . . . . . . . . . . . . . . . . . . . . . . .15
Cleaning the hot water shower . . . . . . . . . . . . . . . . . . . . . . . . . . . . . . . . . . . . . . . .16
Cleaning accessories . . . . . . . . . . . . . . . . . . . . . . . . . . . . . . . . . . . . . . . . . . . . . . . .16
Cleaning the appliance . . . . . . . . . . . . . . . . . . . . . . . . . . . . . . . . . . . . . . . . . . . . . .16
Descaling the appliance . . . . . . . . . . . . . . . . . . . . . . . . . . . . . . . . . . . . . . . . . . . . . .16
Troubleshooting . . . . . . . . . . . . . . . . . . . . . . . . . . . . . . . . . . . . . . . . . .18
Disposal . . . . . . . . . . . . . . . . . . . . . . . . . . . . . . . . . . . . . . . . . . . . . . . . .19
Disposal of the appliance . . . . . . . . . . . . . . . . . . . . . . . . . . . . . . . . . . . . . . . . . . . . .19
Warranty and Service . . . . . . . . . . . . . . . . . . . . . . . . . . . . . . . . . . . . .20
Importer . . . . . . . . . . . . . . . . . . . . . . . . . . . . . . . . . . . . . . . . . . . . . . . .20
SEM 1100 A2
1
Page 5

GB
CY
Introduction
Congratulations on the purchase of your new appliance.
You have clearly decided in favour of a quality product. These operating instruc-
tions are a part of this product. They contain important information in regard to
safety, use and disposal. Before using the product, familiarise yourself with all of
these operating and safety instructions. Use the product only as described and
only for the specifi ed areas of application. In addition, pass these documents on,
together with the product, to any future owner.
Copyright
This documentation is copyright protected.
All rights, including those of photographic reproduction, duplication and distribution
by means of particular methods (for example data processing, data carriers and
data networks), wholly or partially, as well as substantive and technical changes,
are reserved.
Limited liability
All technical information, data and information for installation and operation contained in these operating instructions corresponds to the latest available at the
time of printing and, to the best of our knowledge, take into account our previous
experience and know-how.
No claims can be derived from the details, illustrations and descriptions in these
instructions.
The manufacturer assumes no responsibility for damage caused by failure to observe these instructions, improper use, inappropriate repairs, making unauthorized
modifi cations or for using unapproved replacement parts.
Warnings
In the extant operation instructions the following warnings are used:
WARNING
A warning of this risk level signifi es a potentially dangerous
situation.
If the risk situation is not avoided it can lead to injuries.
► The directives in this warning are there to avoid personal injuries.
2
SEM 1100 A2
Page 6
IMPORTANT
A warning of this risk level signifi
damage.
If the situation is not avoided it can lead to property damage.
► The directives in this warning are there to avoid property damage.
NOTICE
► A notice signifying additional information that assists in the operation of this
appliance.
Intended use
This appliance serves exclusively for the preparation of espresso/cappuccino and
the heating of water. It is intended solely for use in domestic households. Do not
use it for commercial applications.
This appliance is not intended for any other use or for uses beyond those detailed here.
WARNING
Risk from unintended use!
es potentially property
GB
CY
Risks can come from the appliance if it is used for unintended purposes and/
or other types of use.
► Use this appliance exclusively for its intended purposes.
► Observe the procedures described in these operating instructions.
Claims of an
The operator alone bears liability.
y kind for damage resulting from unintended use will not be accepted.
SEM 1100 A2
3
Page 7
GB
CY
Items supplied / Transport inspection
WARNING
Risk of suff ocation!
► Packaging material should not be used as a play thing.
Ther
e is a risk of suff ocation!
The appliance is delivered with the following components as standard:
▯ Espresso Machine
▯ Sieve carrier
▯ large espresso sieve
▯ small espresso sieve
▯ Measuring spoon with compactor
▯ Operating Instructions
NOTICE
► Check the contents to make sure everything is available and there are no
signs of visible damage.
► If the contents are not complete, or are damaged due to defective packaging
ansportation, contact the service hotline.
or tr
Disposal of the packaging
The packaging protects the appliance from transport damage. The packaging
materials are selected from the point of view of their environmental friendliness
and disposal technology and are therefore recyclable.
The recirculation of packaging into the material circuit saves on raw material and
reduces generated waste. Dispose of packaging material that is no longer needed
according to the regionally established regulations.
NOTICE
► If possible preserve the appliance's original packaging during the warranty
period so that in the case of a w
ance properly for return.
arranty claim you can package the appli-
4
SEM 1100 A2
Page 8

Safety instructions
For safe handling of the appliance observe the following safety information:
WARNING - RISK OF INJURY!
■ Before use check the appliance for visible external damage. Do not put
into operation an appliance that is damaged or has been dropped.
■ This appliance may not be used by children.
■ Keep the appliance and its connecting cable out of the reach of
children.
■ The appliance and its connecting cable must be kept away from
children younger than 8 years old.
■ This appliance may be used by children aged 8 years or over if they
are supervised or have been instructed in how to use the appliance
safely and have understood the potential risks.
■ This appliance may be used by people with reduced physical, sen-
GB
CY
sory or mental capabilities or lack of experience and/or knowledge
if they are supervised and have been instructed in how to use the
appliance safely and have understood the potential risks.
■ Cleaning and user maintenance must not be carried out by children,
unless they are aged 8 or over and are supervised.
■ Children must not play with the appliance.
■ Repairs should only be carried out by authorized specialist companies
or by the Customer Service Department. Incorrect repairs can result
in signifi cant risks for the user. In addition warranty claims become void.
■ NEVER submerse the appliance in water or other liquids.
Risk of electric shock!
■ Never touch the appliance with wet or moist hands.
■ To avoid risks, arrange for defective plugs and/or cables to be replaced
at once by qualifi ed technicians or our Customer Service Department.
■ Risk of Burns! During use, some parts become very hot!
■ Hot vapour plumes are formed when the product is in use. Take care
to ensure that you do not scald yourself! Keep a safe distance away
from the steam.
SEM 1100 A2
5
Page 9

GB
CY
■ Connect the appliance only to correctly installed and earthed mains
power sockets.
ATTENTION - PROPERTY DAMAGE
■ Defective components may only be replaced with original replace-
ment parts. Compliance with the safety requirements can only be
assured by using original replacement parts.
■ Protect the appliance from moisture and liquid penetration.
■ Protect the appliance against shock, moisture, dust, chemicals, ex-
tremes of temperature and from being too close to sources of heat
(ovens, radiators).
■ NEVER submerse the appliance in water or other liquids.
■ Always pull the plug from the mains power socket; never pull on the cable.
■ Never leave the appliance unsupervised whilst in use.
■ Do not use an external timing switch or a separate remote control
system to operate the appliance.
■ Do not operate the appliance in rooms where the temperatures are below
or around 0° C. Should the water in the pipes or the water tank
freeze, the appliance could be damaged.
■ Never operate the appliance outdoors. This appliance is intended
only for indoor use.
NOTICE
► A repair to the appliance during the warranty period may only
be carried out by a customer service department authorized by
the manufacturer otherwise no additional warranty claims can be
considered for subsequent damages.
6
SEM 1100 A2
Page 10
Operating components
1 Water tank
2 Steam regulation knob
3 On/Off switch
4 Green heating-up control lamp
5 Rotary switch
6 Compactor
7 Recess for the red fl oat
8 Drip grill
9 Measuring spoon with compactor
0 Small espresso sieve
q Large espresso sieve
w Sieve carrier
e Sieve blocker
r Drip tray
t Hot water showermax
GB
CY
z Milk foamer
u Grip
i Red heating-up control lamp
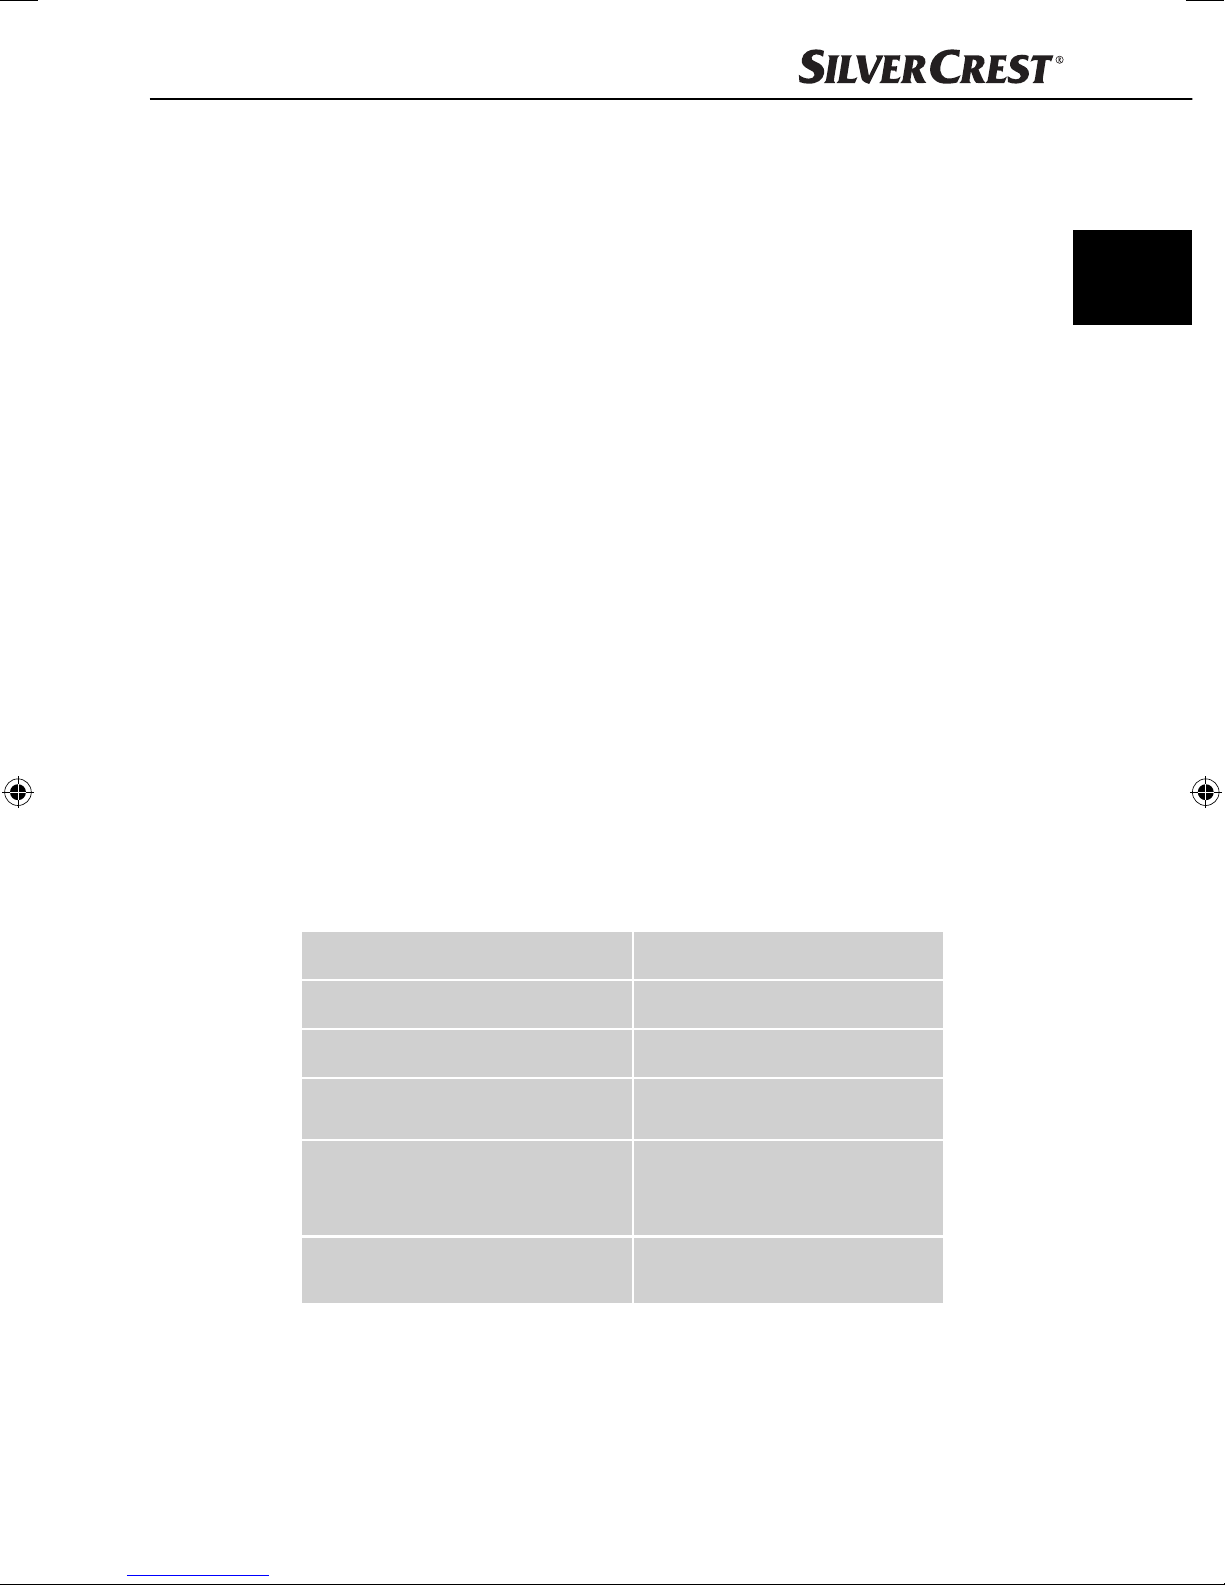
Technical data
Voltage 220 - 240 V ∼ / 50 Hz
Nominal performance 1100 W
Pump pressure approx. 1.5 MPa (15 bar)
Water tank (MAX) 1.5 Litres
Energy consumption in standby
mode until automatic switch-off
Energy consumption in off -mode 0 Wh
approx. 31.3 Wh
SEM 1100 A2
7
Page 11

GB
CY
Commissioning
1) Clean the sieve holder w, the measuring spoon 9, the espresso sieve 0 q,
the drip grill 8 and the water tank 1 as described in the chapter “Cleaning
and Care”.
2) Place the appliance on a level and heat-resistant surface. Ensure that a mains
power socket is in the vicinity.
3) Insert the drip grill 8 so that the red fl oat can protrude through the recess 7
in the drip grill 8.
4) Insert the plug into a mains power socket.
5) Proceed as follows before the fi rst use, so as to clean the internal pipelines:
6) Allow suffi cient water for about 5 cups of coff ee to fl ow through the appli-
ance. Refer to the chapter “Operation”.
7) Let steam generate for about 30 seconds. Refer to the chapter “Operation”.
NOTICE
► On the fi rst use it may be that the pump is already audibly working, noises
, but still no water is coming out of the appliance. In this case, turn
occur
the steam control switch 2 in the direction “+” so that air can escape from
the pipelines of the appliance (the function rotary switch 5 stands at the
position “
noises disappear and water fl ows from the appliance.
“). After approx. 20 seconds the air will have escaped, the
Operation
Filling the water tank
NOTICE
► Use only fresh drinking water for making espresso/cappuccino.
Pull the water tank 1 upward and out, open the lid and fi ll it with water:
1)
Fill it with water to at least the Min. marking.
Never fi ll it with more water than up to the MAX marking.
2) Push the water tank 1 back into the appliance so that it slides into the appli-
ance on the rails and sits fi rmly.
► You can also fi ll the water tank 1 without having to r
ance. Simply open the water tank lid and fi ll it with water from a bottle etc.
Ensure that no water runs beside the water tank 1.
emove it from the appli-
8
SEM 1100 A2
Page 12

Heating-up after a long standing time / on the fi rst use
If you have not used it for some time, preheat the appliance as follows:
1) Fill the water tank 1 with water.
2) Place either the large q or the small espresso sieve 0 in the sieve carrier w.
3) Insert the sieve carrier w into the appliance by placing it at the marking
“INSERT” and then turning it anticlockwise to the marking “LOCK”.
4) Place a cup under the sieve carrier w.
5) Close the steam regulation knob 2 (turn it as far as it will go in the direction “ - “).
6) Switch the appliance on with the on/off switch 3.
7) The red heating-up control lamp i glows.
GB
CY
8) Turn the rotary switch 5 to the position “
into the appliance. As soon as water fl ows from the sieve carrier opening, turn
the rotary switch 5 back to the position “ ”.
9) As soon as the green heating-up control lamp 4 glows, turn the rotary switch 5
to the position “
you need to empty the cup in between. To do this, stop the process for a moment
by turning the rotary switch 5 back to the position „ “.
10) After approx. 1 minute turn the rotary switch 5 back to the position “
11) Wait until the green heating-up control lamp 4 glows again. The warming-up
is concluded. You can now prepare espresso.
”. Allow the water to fl ow for about 1 minute. It may be that
”. The pump begins to pump water
”.
SEM 1100 A2
9
Page 13
GB
CY
Heating up before every use
Before you can prepare an espresso or cappuccino, the appliance must be heated up.
1) Switch the appliance on with the on/off switch 3. The rotary switch 5 is at
the position “
2) The red heating-up control lamp i glows.
3) Wait until the green heating-up control lamp 4 glows.
You can now make an espresso / cappuccino.
“.
Preparing Espresso
NOTICE
► If, before starting to make the espresso, you have taken hot steam from the
machine, w
with the espresso preparation. If you do not, it may be that the coff ee tastes
burnt. Hold an empty cup under the milk frother z. Turn the steam control
knob 2 in the direction “+“. Turn the function rotary knob 5 to the posi-
tion “
before turning the function rotary knob 5 back to to the position “
Then turn the steam control knob 2 back to closed (in the direction “-“).
e recommend you draw a little hot water before commencing
“ so that hot water fl ows out of the nozzle. Wait a few seconds
“.
NOTICE
► Always ensure that the espresso sieve 0 q is clean and fr
powder residues.
1) When the appliance is heated-up:
To prepare an espresso, place the small espresso sieve 0 in the sieve carrier w.
To prepare two espressos, place the large espresso sieve q in the sieve
carrier w.
2) Fill the small espresso sieve 0 to the MAX marking with espresso powder.
This equates to approx. 7g of powder or a levelled measuring spoon 9.
or...
Fill the large espresso sieve q to the MAX marking with espresso powder.
This equates to about 7g + 7g of powder or two levelled measuring spoons 9.
3) Compress the espresso powder using the tamper on the appliance 6. Then,
if necessary, fi ll it with more espresso powder, until the espresso sieb 0 q is
full up to the MAX marking. Tamp the coff ee powder down once again.
ee of coff ee
10
SEM 1100 A2
Page 14
NOTICE
► Compaction of the coff ee powder is an essential process for the prepara-
tion of an espr
espresso runs through more slowly and there is more crema. If the espresso
powder is not so strongly compacted, the espresso runs through more
quickly and it creates very little crema.
4) Insert the sieve carrier w into the appliance by placing it at the marking
“INSERT” and then turning it anticlockwise to the marking “LOCK”.
5) Place one (or two) cup(s) under the sieve carrier openings. We recommend
that you rinse the cups out with hot water beforehand, so that the espresso
does not cool so quickly.
6) As soon as the green heating-up control lamp 4 glows, you can turn the
rotary switch 5 to the position “
WARNING
Never remove the sieve carrier w during the espresso output!
The resulting spray of hot espresso would lead to injury!!
esso. If the espresso powder is compacted very strongly, the
”. The espresso fl ows into the cup(s).
GB
CY
► Always ensure that the rotary switch 5 stands at “
ve the sieve carrier w.
NOTICE
► This appliance is fi tted with a pre-brew function. This means that the hot
ater, before it is pressed through the espresso powder, stands for a short
w
time in the fi lter holder. This refi nes the aroma of the espresso.
7) When the cup(s) are fi lled to the desired quantity (about 20 ml), turn the
rotary switch 5 back to the position “
You can now drink the espresso.
8) Switch the appliance off with the on/off switch 3.
NOTICE
► After 3 minutes the appliance will switch itself off automatically.
After every use remove the espresso powder from the espresso sieve 0 q.
9)
Remove the sieve holder w from the appliance. Flip the sieve blocker e
upwards so that the espresso sieve 0 q cannot fall out of the sieve holder w.
Now empty the espresso sieve 0 q. Always dispose of the espresso powder
or espresso pads in an environmentally friendly manner, for example, with the
organic waste.
”.
“ before you remo-
SEM 1100 A2
11
Page 15
GB
CY
NOTICE
► Absolutely clean the hot water shower t af
chapter "Cleaning and Care".
NOTICE
ter every use. Refer to the
► Regularly empty the drip tray r, at the latest when the r
recess 7 of the drip grill 8 is visible.
NOTICE
► You can also use espresso pads for the preparation of espresso. Use only
esso pads that correspond to the ESE standard. The ESE standard is
espr
a system accepted by the leading manufacturers of espresso pads, which
makes possible the simple and clean preparation of espresso.
Preparing Cappuccino
WARNING
Be careful when working with steam for the milk foam production!
The hot steam or hot splashes can lead to injuries!
► Always operate the steam regulation knob 2 slo
1) Fill a container for frothing (preferably made of stainless steel) to third with
cold milk.
2) Ensure that the steam regulation knob 2 is closed (turn it as far as it will go
in the direction “-”).
ed fl oat in the
wly.
3) Push the milk foamer z out to the side. Thereby, take hold of it only by the
grip u.
4) Turn the rotary switch 5 to the position “
control lamp 4 glows.
5) Hold an empty container under the milk frother z. Slowly turn the steam con-
trol knob 2 in the direction “+”. Condensed water/spray comes from the nozzle. Thus, the nozzle and the water circulation inside the appliance is cleaned.
6) When only steam comes out of the nozzle, turn the steam control knob 2 in
the direction “-” until no more steam comes out of the nozzle. Pour the water
in the container away.
7) Now hold the frothing container in your hand, so as to feel the milk tempera-
ture, and guide the nozzle of the milk frother z lightly into the milk. Thereby,
hold the frothing container at a slight angle.
12
”. Wait until the green heating-up
SEM 1100 A2
Page 16

8) Slowly turn the steam control knob 2 in the direction “+”.
9) Rotate the container for frothing in a circular motion and hold the tip of the
nozzle just below the surface of the milk: deep enough so that the milk does
not spray in all directions and high enough so that a thick foam is produced.
Done properly, a deep buzzing sound is audible.
10) As the milk froth rises place the nozzle deeper in the milk, to froth up the next
“layer” and to avoid a burnt taste in the foam.
11) Finally, insert the nozzle completely and close the steam control knob 2
a little, so that the milk is heated. Hold the frothing container at a slight angle,
so that the milk gently spins around while it is being stirred with the nozzle.
12) When the milk foam has the desired consistency and temperature, switch the
steam control knob 2 off (up to the stop in the “-” direction).
13) First then remove the nozzle from the milk.
GB
CY
14) Turn the rotary switch 5 to the position “
NOTICE
► For the preparation of cappuccino always use bigger cups than for espresso,
because foamed milk will be added.
For the preparation of a cappuccino, proceed exactly as you would for an
15)
espresso (see chapter “Preparing espresso“/ the heating up is no longer necessary). Allow the water to pass through only for about twice as long as an
espresso (about 40 ml).
16) Switch the appliance off with the on/off switch 3.
NOTICE
► After 3 minutes the appliance will switch itself off automatically.
Now add the frothed milk into the previously prepared espresso. The cappuc-
17)
cino is now ready. According to taste, you can add sugar or sprinkle it with
cocoa powder.
NOTICE
► You can also use the milk frother z to heat up other liquids, such as cocoa
or tea.
”.
NOTICE
► Absolutely clean the milk frother z af
"Cleaning and Care".
SEM 1100 A2
ter every use. Refer to the chapter
13
Page 17
GB
CY
Tips for the milk froth
■ In principle, any type of milk can be frothed, including soy and rice milk. How-
ever, some types of milk can only be frothed with limitations.
■ Skimmed or low-fat milk does not burn as easily as whole milk, but with a too
lo
w fat content there is a risk that the milk froth will not be good. Therefore, if
possible use a milk with 3.5% or 1.5% fat content.
■ Well chilled milk can be frothed better than less cold.
■ Do not froth milk up a second time, otherwise it could burn on.
■ Allow frothed milk to stand for about 30 seconds before you pour it onto the
espr
esso. Thus, larger bubbles burst and still fl uid milk falls to the bottom. You
can then pour the fi ne froth onto the espresso.
Generating hot water
1) When the appliance is heated-up:
2) Place a cup under the milk frother z.
3) When the green heating-up control lamp 4 glows, turn the steam control
knob 2 to the position “+”.
4) Turn the rotary switch 5 to the position “
5) If you wish to interrupt the hot water supply, turn the steam control knob 2
off (as far as it will go in the direction “-”) and place the rotary switch 5 at
the position “
6) Switch the appliance off with the on/off switch 3.
NOTICE
► After 3 minutes the appliance will switch itself off automatically.
”.
”. Hot water fl ows from the nozzle.
14
SEM 1100 A2
Page 18

Cleaning and Care
WARNING - RISK OF INJURY!
■ Always remove the plug from the mains power socket before you clean the
appliance. Risk of electric shock!
■ Always allow the appliance to cool down before you start to clean it. Risk of
Burns!
■ NEVER submerse the appliance in water or other liquids. Risk of electric shock!
Cleaning the milk frother
ATTENTION - PROPERTY DAMAGE
■ NEVER use abrasive, corrosive or chemical agents to clean the appliance.
These could damage the upper sur
1) Place an empty container under the milk frother z.
2) Immediately after use turn the steam control knob 2 to the position “+ “ and,
for a few seconds, allow the steam to escape.
3) Turn the steam control knob 2 off (as far as it will go in the direction “-”),
switch the appliance off and remove the plug from the mains power socket.
GB
CY
faces of the appliance.
4) Allow the nozzle to cool down.
5) Remove the nozzle and clean it thoroughly in warm water.
6) Check to see if the small hole in the nozzle is clogged and, if so, clear it with
a needle.
7) Clean the steam delivery tube of the milk frother z with a damp cloth.
8) Replace the nozzle back onto the steam supply pipe.
SEM 1100 A2
15
Page 19

GB
CY
Cleaning the hot water shower
Clean the hot water shower t after each use:
1) After you have prepared the espresso/cappuccino and removed the sieve
holder w, wipe the entire surface of the hot water shower t with a moist
cloth so that all powder residues are removed.
2) Insert the fi lter holder w back in without the espresso fi lters 0 q.
3) Then place an empty cup under the hot water spray t and turn the rotary
function switch 5 to the position “
and rinses the last of the powder residue out.
4) After about 20 seconds place the rotary function switch 5 back to the position “
5) Take the fi lter holder w back off .
“ and then switch the appliance off with the On/Off switch 3.
Cleaning accessories
1) Clean the fi lter holder w, the two coff ee fi lters 0 q, the water tank 1, the
measuring scoop 9 and the drip tray 8 in warm water.
NOTICE
“. Water fl ows from the hot water spray t
► If you put detergent into the water, it may have a negative eff ect on the taste
of the espr
rinse the items afterwards with lots of clean water.
2) Dry all parts well.
3) The drip tray r is suitable for cleaning in the dishwasher.
esso. If the stains can only be removed with detergent, always
Cleaning the appliance
Clean the housing with a moist cloth. If necessary, use a little detergent on the
cloth.
Descaling the appliance
Regularly descale the appliance. The appliance should be descaled after about
200 espresso preparations. Depending on the hardness of the water in your area,
this fi gure may diff er.
For descaling, use commercial available descaler for espresso machines. Proceed
as described in the instructions for usage of the descaler.
If you do not have a descaler, you can proceed as follows:
1) Fill the water tank 1 to the marking MAX.
16
SEM 1100 A2
Page 20

2) Dissolve 2 tablespoons (about 30 grams) of citric acid (available in drugstores or chemists) into the water.
3) Replace the water tank 1 into the appliance.
4) Switch the appliance on with the on/off switch 3. The rotary switch 5 must
be in the position “
5) Insert the sieve carrier w, without either of the espresso sieves 0/q, into the
appliance and place a cup under the sieve carrier w. As soon as the green
heating-up control lamp 4 glows, turn the rotary switch 5 to the position “
6) Let about 2 cups (coff ee cups) of water pass through and then stop the process.
7) Hold a container under the milk frother z.
”. The steam control knob 2 is closed.
”.
GB
CY
8) Place the rotary switch 5 at the position “
ing-up control lamp 4 glows. Slowly turn the steam control knob 2 to the
position “+ “. Allow the appliance to create steam for about 2 minutes.
9) After 2 minutes close the steam control knob 2, set the rotary switch 5 to the
position “
10) Let the scaling agent take eff ect for about 15 minutes.
11) Repeat the steps 4 - 10 three times.
12) Then place the rotary switch 5 at the position “
through until the water tank 1 is empty.
13) Rinse the water tank 1 with clean water and then fi ll it with clean water up
to the MAX marking.
14) Turn the rotary switch 5 to the position “
up control lamp 4 glows.
15) Allow the water to run through.
16) Repeat the steps 13 - 15 three times.
17) Fill the water tank 1 with water once again.
” and switch the appliance off .
” and wait until the green heat-
” and let the solution fl ow
” as soon as the green heating-
18) Turn the rotary switch 5 to the position “
19) Hold a container under the milk frother z and slowly rotate the steam control
knob 2 to the position “+” as soon as the green heating-up control lamp 4
glows.
20) After about 1 minute close the steam control knob 2, set the rotary switch 5
to the position “
NOTICE
► After 3 minutes the appliance will switch itself off automatically.
SEM 1100 A2
”.
” and switch the appliance off .
17
Page 21
GB
CY
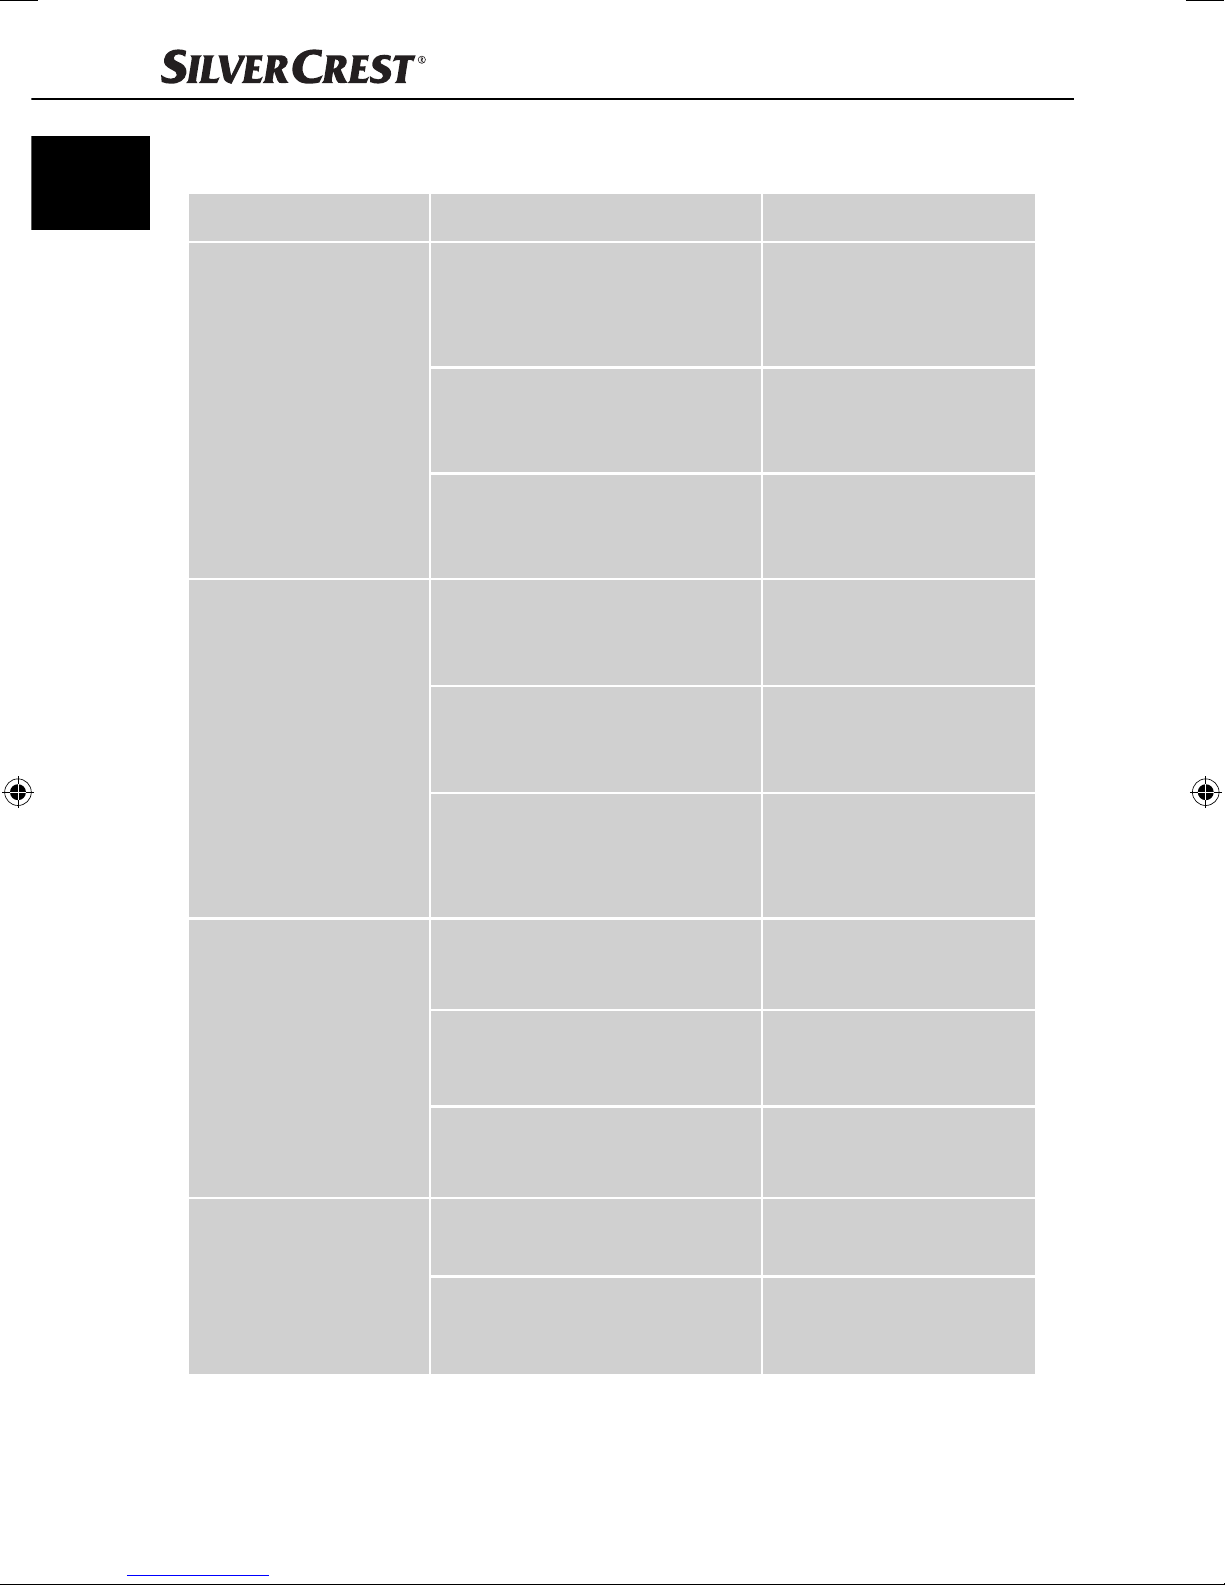
Troubleshooting
Problem Cause Remedy
The espresso no
longer fl ows out.
the espresso drips over
the edges of the sieve
carrier w instead of
from the openings.
• The espresso powder is too
moist and/or compressed
too tight.
• No water in the water tank 1.
• The holes in the sieve carrier
openings are blocked.
• The sieve carrier w is not
correctly inserted.
• The sieve carrier openings
are blocked.
• There are espresso powder
residues on the edges of the
sieve carrier w.
• Reprepare the espresso,
however, this time do not
compress it so tightly, or
exchange it completely.
• Fill the water tank 1
with water.
• Clean the sieve carrier w.
• Correctly insert the sieve
carrier w.
• Clean the sieve carrier w.
• Clean the espresso
powder residues from
the edges of the sieve
carrier w.
The espresso is cold.
Noisy operation
of the pump.
• The appliance was not
preheated.
• The green heating-up control
lamp 4 has not yet glowed.
• The cups were not prewarmed. • Prewarm the cups.
• The water tank 1 is empty.
• The water tank 1 is not properly
inserted, meaning that water
cannot enter into the appliance.
• Preheat the appliance.
• Wait until the green
heating-up control lamp
4 glows.
• Fill the water tank 1
with water.
• Correctly insert the water
tank 1.
18
SEM 1100 A2
Page 22
The crema is too light
(the espresso runs
quickly out of the
sieve carrier w).
• too little espresso powder.
• The espresso powder is too
coarsely ground.
• Use more espresso
powder.
• Use only the espresso
powder specially manufactured for espresso.
GB
CY
• too much espresso powder.
The crema is too dark
(the espresso runs
slowly out of the
sieve carrier w).
The milk does not foam.
• The powder is too fi nely ground
or moist.
• The sieve is blocked. • Clean the sieve.
• The milk is not cold enough.
• The milk foamer z is dirty. • Clean the milk foamer z.
Disposal
Disposal of the appliance
Do not dispose of this appliance in your normal domestic waste.
This product is subject to the provisions of the European Directive
2012/19/EU-WEEE (Waste Electrical and Electronic Equipment).
• Use less espresso
powder.
• Use only the espresso
powder specially manufactured for espresso.
• Use milk from the
refrigerator.
Dispose of this appliance through an approved waste disposal centre or at your
community waste facility. Observe the currently applicable regulations. In case of
doubt, please contact your waste disposal centre.
SEM 1100 A2
19
Page 23
GB
CY
Warranty and Service
The warranty for this appliance is for 3 years from the date of purchase. The
appliance has been manufactured with care and meticulously examined before
delivery.
Please retain your receipt as proof of purchase. In the case of a warranty claim,
please make contact by telephone with our Customer Service Department. Only
in this way can a post-free despatch for your goods be assured.
NOTICE
► The warranty covers only claims for material and manufacturing defects,
but not for tr
components, e.g. buttons or batteries.
This product is for domestic use only and is not intended for commercial use. The
warranty is void in the case of abusive and improper handling, use of force and
internal tampering not carried out by our authorised service branch.
Your statutory rights are not restricted in any way by this warranty. The warranty
period is not extended by repairs made under the warranty. This applies also to
replaced and repaired parts.
Damages and defects extant at the time of purchase must be reported immediately
after unpacking, resp. no later than two days after the date of purchase.
ansport damage, wearing parts or for damage to fragile
Repairs made after the lapse of the warranty period are subject to charge.
Service Great Britain
Tel.: 0871 5000 720 (£ 0.10/Min.)
E-Mail: kompernass@lidl.co.uk
IAN 59345
CY
Service Cyprus
Tel.: 8009 4409
E-Mail: kompernass@lidl.com.cy
IAN 59345
Hotline availability: Monday to Friday 08:00 - 20:00 (CET)
Importer
KOMPERNASS HANDELS GMBH
BURGSTRASSE 21
44867 BOCHUM
GERMANY
www.kompernass.com
20
20
SEM 1100 A2
SEM 1100 A2
Page 24

Obsah
Úvod . . . . . . . . . . . . . . . . . . . . . . . . . . . . . . . . . . . . . . . . . . . . . . . . . . 22
Autorské právo . . . . . . . . . . . . . . . . . . . . . . . . . . . . . . . . . . . . . . . . . . . . . . . . . . . . 22
Omezení ručení . . . . . . . . . . . . . . . . . . . . . . . . . . . . . . . . . . . . . . . . . . . . . . . . . . . 22
Výstražná upozornění . . . . . . . . . . . . . . . . . . . . . . . . . . . . . . . . . . . . . . . . . . . . . . . 22
Použití dle předpisů . . . . . . . . . . . . . . . . . . . . . . . . . . . . . . . . . . . . . . . . . . . . . . . . 23
Rozsah dodávky/ inspekce dopravy . . . . . . . . . . . . . . . . . . . . . . . . . . . . . . . . . . . 24
Likvidace obalu. . . . . . . . . . . . . . . . . . . . . . . . . . . . . . . . . . . . . . . . . . . . . . . . . . . . 24
Bezpečnostní pokyny . . . . . . . . . . . . . . . . . . . . . . . . . . . . . . . . . . . . . 25
Ovládací prvky . . . . . . . . . . . . . . . . . . . . . . . . . . . . . . . . . . . . . . . . . . 27
Technická data . . . . . . . . . . . . . . . . . . . . . . . . . . . . . . . . . . . . . . . . . . 27
První uvedení do provozu . . . . . . . . . . . . . . . . . . . . . . . . . . . . . . . . . 28
Obsluha . . . . . . . . . . . . . . . . . . . . . . . . . . . . . . . . . . . . . . . . . . . . . . . . 28
Naplnění nádržky na vodu . . . . . . . . . . . . . . . . . . . . . . . . . . . . . . . . . . . . . . . . . . 28
Rozehřátí po delší době odstavení / při prvním uvedení do provozu . . . . . . . . . . . 29
Ohřev před každým použitím . . . . . . . . . . . . . . . . . . . . . . . . . . . . . . . . . . . . . . . . . 30
Příprava espressa . . . . . . . . . . . . . . . . . . . . . . . . . . . . . . . . . . . . . . . . . . . . . . . . . . 30
Příprava cappuccina. . . . . . . . . . . . . . . . . . . . . . . . . . . . . . . . . . . . . . . . . . . . . . . . 32
Tipy pro vytvoření mléčné pěny . . . . . . . . . . . . . . . . . . . . . . . . . . . . . . . . . . . . . . . 34
Vyprodukovat horkou vodu. . . . . . . . . . . . . . . . . . . . . . . . . . . . . . . . . . . . . . . . . . . 34
CZ
Čištění a údržba . . . . . . . . . . . . . . . . . . . . . . . . . . . . . . . . . . . . . . . . . 35
Čištění zpěňovače mléka . . . . . . . . . . . . . . . . . . . . . . . . . . . . . . . . . . . . . . . . . . . . 35
Čištění trysky na horkou vodu . . . . . . . . . . . . . . . . . . . . . . . . . . . . . . . . . . . . . . . . . 36
Čištění příslušenství . . . . . . . . . . . . . . . . . . . . . . . . . . . . . . . . . . . . . . . . . . . . . . . . . 36
Čištění přístroje . . . . . . . . . . . . . . . . . . . . . . . . . . . . . . . . . . . . . . . . . . . . . . . . . . . . 36
Odvápnění přístroje . . . . . . . . . . . . . . . . . . . . . . . . . . . . . . . . . . . . . . . . . . . . . . . . 36
Odstranění závad . . . . . . . . . . . . . . . . . . . . . . . . . . . . . . . . . . . . . . . 38
Likvidace . . . . . . . . . . . . . . . . . . . . . . . . . . . . . . . . . . . . . . . . . . . . . . . 39
Likvidace přístroje . . . . . . . . . . . . . . . . . . . . . . . . . . . . . . . . . . . . . . . . . . . . . . . . . . 39
Záruka a servis . . . . . . . . . . . . . . . . . . . . . . . . . . . . . . . . . . . . . . . . . . 40
Dovozce . . . . . . . . . . . . . . . . . . . . . . . . . . . . . . . . . . . . . . . . . . . . . . . . 40
SEM 1100 A2
21
Page 25

CZ
Úvod
Gratulujeme Vám k zakoupení nového přístroje.
Vaším nákupem jste si vybrali kvalitní výrobek. Návod k obsluze je součástí tohoto
výrobku. Obsahuje důležité pokyny a upozornění ohledně bezpečnosti, použití a
likvidace. Před použitím výrobku si dobře přečtěte provozní a bezpečnostní pokyny. Výrobek používejte pouze předepsaným způsobem a v uvedených oblastech
použití. Při předávání výrobku třetím osobám předávejte i tyto podklady.
Autorské právo
Tato dokumentace je chráněná autorským právem.
Všechna práva, a i fotomechanická reprodukce, rozmnožování a rozšiřování pro-
střednictvím zvláštního procesu (například zpracování dat, nosiče dat a datové
sítě), i jenom částečně, jakož obsahové a technické změny, jsou vyhrazeny.
Omezení ručení
Všechny technické informace, údaje a pokyny pro obsluhu, obsažené v tomto návodu
k obsluze, odpovídají aktuálnímu stavu v době tisku a byly provedeny se zřetelem
na dosavadní zkušenosti a poznatky dle nejlepšího vědomí.
Z údajů, obrázků a popisů v tomto návodu nelze odvodit žádné nároky.
Výrobce nepřebírá ručení za škody, vzniklé na základě nedodržení návodu, na
základě použití ne dle předpisů, neodborných oprav, nedovoleně provedených
změn nebo na základě použití nedovolených náhradních dílů.
Výstražná upozornění
V předloženém návodu k obsluze jsou použita následující výstražná upozornění:
VÝSTRAHA
Tímto výstražným upozorněním tohoto stupně nebezpečí se označuje možná
nebezpečná situace.
Pokud se nezabrání nebezpečné situaci, může vést tato ke zraněním.
► Proto třeba následovat pokynům v tomto výstražném upozornění pro
ánění zranění osob.
zabr
22
SEM 1100 A2
Page 26

POZOR
Tímto výstražným upozorněním tohoto stupně nebezpečí se označuje možná
hmotná šk
oda.
Pokud se nezabrání této nebezpečné situaci, může vést tato ke hmotným
škodám.
► Proto třeba následovat pokynům v tomto výstražném upozornění pro
ánění hmotných škod.
zabr
UPOZORNĚNÍ
► Upozornění označuje dodatečné informace, které ulehčí manipulaci
ístrojem.
s př
Použití dle předpisů
Tento přístroj je určen výhradně pro přípravu espressa/cappuccina a pro ohřev
vody. Je určen výhradně pro použití v domácnostech. Nepoužívejte jej komerčně.
Jiné, než k tomu určené použití,platí jako použití ne podle předpisů.
VÝSTRAHA
Nebezpečí na základě použití ne dle předpisů!
Z důvodu neodborného použití a použití ne dle předpisů a/nebo použití
jiného druhu mohou z přístroje vycházet různá nebezpečí.
CZ
► Přístroj používat výlučně dle předpisů.
► Dodržovat postup, popsaný v tomto návodu k obsluze.
oky jakéhokoliv druhu kvůli poškození, které vzniklo na základě neodborného
Nár
použití,jsou vyloučeny.
Riziko nese sám v plném rozsahu provozovatel.
SEM 1100 A2
23
Page 27
CZ
Rozsah dodávky/ inspekce dopravy
VÝSTRAHA
Nebezpečí udušení!
► Obalový materiál není na hraní. Hrozí nebezpečí udušením.
ístroj se standarně dodává s následujícími komponenty:
Př
▯ Espresovač
▯ Držák sítka
▯ Velké sítko na espresso
▯ Malé sítko na espresso
▯ Odměrka s pěchovadlem
▯ Návod k obsluze
UPOZORNĚNÍ
► Zkontrolujte dodávku na kompletnost a viditelné poškození.
► V případě nekompletní dodávky nebo v případě poškození přístroje
odu vadného obalu nebo z důvodu přepravy, se obraťte laskavě
z dův
na servisní hotline.
Likvidace obalu
Obal chrání přístroj před poškozením při přepravě. Obalový materiál je zvolen
podle ekologického a likvidačně technického hlediska, a proto jej lze recyklovat.
Navrácení obalu do oběhu zpracování materiálu šetří suroviny a sníží produkci odpadů. Více nepotřebný obalový materiál zlikvidujte dle místně platných předpisů.
UPOZORNĚNÍ
► Pokud možno, uschovejte originální balení během záruční doby přístroje,
y bylo možné, v případě záruky přístroj řádně zabalit.
ab
24
SEM 1100 A2
Page 28

Bezpečnostní pokyny
Pro bezpečnou manipulaci s přístrojem dodržujte následující bezpečnostní
pokyny:
VÝSTRAHA - NEBEZPEČÍ PORANĚNÍ!
■ Zkontrolujte přístroj před použitím na vnější viditelná poškození.
Vadný nebo na zem padlý přístroj neuvádějte do provozu.
■ Tento přístroj nesmí používat děti.
■ Udržujte přístroj a jeho přípojný kabel mimo dosah dětí.
■ Děti mladší 8 let nesmí mít přístup k přístroji a přípojnému kabelu.
■ Děti od 8 let mohou používat přístroj pouze tehdy, pokud jsou pod do-
hledem nebo pokud byly poučeny o bezpečném používání přístroje a
pokud porozuměly z toho vyplývajícímu nebezpečí.
■ Osoby s omezenými fyzickými, smyslovými nebo mentálními schop-
CZ
nostmi či nedostatkem zkušeností a/nebo znalostí mohou používat
přístroj pouze tehdy, pokud jsou pod dohledem nebo pokud byly poučeny o bezpečném používání přístroje a pokud porozuměly z toho
vyplývajícímu nebezpečí.
■ Čištění a uživatelskou údržbu nesmí provádět děti, ledaže jsou starší
8 let a jsou pod dohledem.
■ Děti si nesmí hrát s přístrojem.
■ Opravy na přístroji nechte provádět pouze autorizovanými odborný-
mi podniky nebo službou zákazníkům. Neodborné opravy mohou
způsobit závažná nebezpečí pro uživatele. K tomu zanikají i záruční nároky.
■ Přístroj nikdy neponořujte do vody či jiných tekutin. Nebezpečí úra-
zu elektrickým proudem!
■ Nikdy nesahejte na přístroj mokrými nebo vlhkými rukami.
■ Pro zabránění vzniku nebezpečí nechte poškozenou síťovou zástrč-
ku nebo poškozený napájecí kabel vyměnit okamžitě autorizovaným odborným personálem nebo službou zákazníkům.
SEM 1100 A2
25
Page 29

■ Nebezpečí popálení! Některé díly se během používání silně ohřejí!
■ Při používání přístroje se vytvoří horké páry. Třeba dávat pozor, aby
nedošlo k opaření párou! Udržujte dostatečnou vzdálenost k páře.
CZ
■ Tento přístroj připojte pouze do řádně instalované a uzemněné zásuvky.
POZOR - VĚCNÉ ŠKODY
■ Závadné stavební součásti se smí nahradit pouze originálními náhrad-
ními díly. Pouze při těchto dílech je zaručeno, že se splní bezpečnostní
požadavky.
■ Chraňte přístroj před vlhkostí a pronikání kapalin.
■ Chraňte přístroj před nárazy, vlhkostí, prachem, chemikáliemi, silnými
výkyvy teplot a před příliš blízkými tepelnými zdroji (pečicí trouby,
radiátory).
■ Přístroj nikdy neponořujte do vody či jiných tekutin!
■ Vytáhněte vždy síťovou zástrčku ze zásuvky; nikdy netahejte za kabel.
■ Během provozu nikdy nenechte přístroj bez dozoru.
■ Pro provoz přístroje nikdy nepoužívejte externí časovač nebo separátní
systém k dálkovému ovládání.
■ Neprovozujte přístroj nikdy v místnostech, ve kterých je teplota pod nebo
kolem 0°C. Při zamrznutí vody v trubkách na vodu nebo v v nádržce
na vodu může dojít k poškození přístroje.
■ Přístroj nikdy neprovozujte venku. Tento přístroj je určen pouze pro
použití ve vntiřních prostorách.
UPOZORNĚNÍ
► Opravu přístroje během záruční doby smí provést pouze
výrobcem autorizovaná služba zákazníkům, jinak zaniká při
následném poškození nárok na záruku.
26
SEM 1100 A2
Page 30
Ovládací prvky
1 nádržka na vodu
2 spínač, regulující páru
3 vypínač zapnuto/vypnuto
4 zelená kontrolka předhřevu
5 otočný přepínač funkce
6 pěchovadlo
7 vyhloubení pro červený plovák
8 odkapávací mřížka
9 Odměrka s pěchovadlem
0 malé sítko na espresso
q velké sítko na espresso
w držák sítka
e zablokování sítka
r lapač kapek
t tryska horké vody
z zpěňovač mléka
u držadlo
i červená kontrolka předhřevu
CZ
Technická data
Síťové napětí 220 - 240 V ∼ / 50 Hz
Jmenovitý výkon 1100 W
Tlak čerpadla ca. 1,5 MPa (15 bar)
Nádrž na vodu (max.) 1,5 litrů
Spotřeba energie v pohotovostním režimu až do automatického
vypnutí
Spotřeba energie ve vypnutém
stavu
cca 31,3 Wh
0 Wh
SEM 1100 A2
27
Page 31

CZ
První uvedení do provozu
1) Vyčistěte držák sítka w, odměrku 9, sítka na espresso 0 q, odkapávací
mřížku 8 a nádržku na vodu 1 tak, jak je popsáno v kapitole „Čištění
a péče“.
2) Postavte přístroj na suchý, rovný povrch odolný vůči teplu. Dbejte na to, aby se
síťová zásuvka nacházela v dosažitelné blízkosti.
3) Vložte odkapávací mřížku 8 tak, aby červený plovák mohl vyčnívat vyhloubeninou 7 do odkapávací mřížky 8.
4) Zapojte zástrčku do zásuvky.
5) K čištění interních trubek na vodu postupujte před prvním použitím následovně:
6) Nechte kávovarem protéct vodu pro cca. 5 šálků espressa. Přečtěte si k tomu
kapitolu „Obsluha“.
7) Nechte na cca. 30 sekund vytvořit páru. Přečtěte si k tomu kapitolu „Obsluha“.
UPOZORNĚNÍ
► Při prvním použití se může stát, že čerpadlo už slyšitelně pracuje, je slyšet
, avšak z přístroje nevytéká žádná voda. V tomto případě otočte
zvuky
regulačním spínačem páry 2 ve směru „+“ tak, aby z hadiček přístroje
mohl uniknout vzduch (funkční ovladač 5 je na pozici „
sekundách vzduch unikl, zvuky zmizí a voda vytéká z přístroje.
“). Po cca. 20
Obsluha
Naplnění nádržky na vodu
UPOZORNĚNÍ
► Pro přípravu espressa/cappuccina používejte výlučně čerstvou pitnou vodu.
Nádržku na vodu 1 vytáhněte směrem nahoru, otevřte víko a nalijte do
1)
nádržky vodu:
Nalijte vodu minimálně až po značku min.
Nikdy nenalévejte více vody, než po značku max.
2) Nádržku na vodu 1 opět zastrčte do přístroje tak, aby bylo možné, ji zasunout do lišt na přístroji a aby dosedala napevno.
► Vodu do nádržky na vodu 1 můž
z přístroje. Otevřte k tomu jednoduše víko nádržky na vodu a nalijte do ní vodu
např. lahví. Dbejte při tom na to, aby voda netekla vedle nádržky na vodu 1.
ete nalít i bez toho, že by jste ji vyjmuli
28
SEM 1100 A2
Page 32

Rozehřátí po delší době odstavení /
při prvním uvedení do provozu
Pokud jste přístroj nepoužívali delší dobu, nechte jej rozehřát následujícím způsobem:
1) Naplňte nádržku na vodu 1 vodou.
2) Vložte velké q nebo malé sítko na espresso 0 do držáku sítka w.
3) Držák sítka w nasaďte i se sítkem do přístroje, a to na značku „INSERT“ na
přístroji a potom jej otáčejte v proti směru hodinových ručiček až po značku
„LOCK“ na přístroji.
4) Pod držák sítka w postavte šálek.
5) Otočte regulačním spínačem páry 2 (až na doraz ve směru „ - “).
6) Zapněte přístroj vypínačem zapnuto/vypnuto 3.
7) Svítí červená kontrolka rozehřívání i.
8) Nastavte otočný přepínač funkcí 5 do pozice „
čerpat voda do přístroje. Jakmile vytéká voda z otvorů na držáku sítka, nastavte
otočný spínač funkcí 5 opět do pozice „ “.
9) Jakmile se rozsvítí zelená kontrolka rozehřívání 4, nastavte otočný spínač
funkcí 5 do pozice „
budete muset mezitím vyprázdnit šálek. Přerušte k tomu krátce chod kávovaru.
Za tím účelem zastavte proces na chvíli tím, že otočný přepínač funkce 5
otočíte opět do pozice „ “.
“. Nechte cca. 1 minutu protéct vodu. Je možné, že
“. Čerpadlem se začne
CZ
10) Po cca. 1 minutě nastavte otočný spínač funkcí 5 opět do pozice „
11) Vyčkejte, dokud se opět nerozsvítí zelená kontrolka rozehřívání 4. Ohřev
kávovaru je ukončen. Nyní si můžete připravit espresso.
“.
SEM 1100 A2
29
Page 33

CZ
Ohřev před každým použitím
Předtím, než si můžete připravit espresso nebo cappuccino, se musí přístroj rozehřát.
1) Zapněte přístroj vypínačemzapnuto/vypnuto 3. Otočný přepínač funkcí 5
je v pozici „
2) Svítí červená kontrolka rozehřívání i.
3) Vyčkejte, dokud se nerozsvítí zelená kontrolka rozehřívání 4.
Nyní můžete připravovat espresso/cappuccino.
“.
Příprava espressa
UPOZORNĚNÍ
► Pokud jste před přípravou espressa vypustili horkou páru ze stroje, tak Vám
doporučujeme, vypustit př
V opačném případě se může stát, že espresso chutná připáleně. Podržte
prázdný šálek pod zpěňovačem mléka z. Otočte regulační spínač páry 2
do směru „+“. Otočte otočný spínač funkcí 5 do pozice „
horká voda z trysky. Vyčkejte několik sekund, než otočíte otočíte otočný
spínač funkcí 5 opět do pozice „ “. Poté otočteregulační spínač páry 2
opět do pozice (směrem „-“).
ed další přípravou espressa trochu horké vody.
“, aby vytékala
UPOZORNĚNÍ
► Vždy se přesvědčte o tom, zda je sítko na espresso 0 q čisté a zda jsou
aněny zbytky prášku na espresso.
odstr
1) Když už je přístroj rozehřán:
Pro přípravu espressa vsaďte malé sítko na espresso 0 do držáku sítka w.
Pro přípravu dvou espress vsaďte velké sítko na espresso q do držáku sítka w.
2) Nasypte do malého sítka na espresso 0 prášek pro přípravu espressa až
po značku max. Toto odpovídá cca. 7g prášku, nebo jedné zarovnané
odměrce 9.
nebo...
Nasypte do velkého sítka na espresso q prášek pro přípravu espressa až
po značku max. To odpovídá cca. 7g + 7g prášku, nebo dvoum zarovnaným odměrkám 9.
3) Zatlačte kávový prášek na espresso pomocí nacpávátka na přístroji 6.
Poté dle potřeby doplňte prášek na přípravu espressa tak, aby bylo sítko na
espresso 0 q naplněno práškem až po značku max. Prášek pro přípravu
espressa opět zatlačte.
30
SEM 1100 A2
Page 34

UPOZORNĚNÍ
► Zatlačení prášku pro přípravu espressa je podstatným procesem při příprave
essa. Natlačí-li se prášek na přípravu espressa příliš silně do sítka, protéká
espr
espresso pomalu a na jeho povrchu se vytvoří větší krémovitá vrstva.
Není-li prášek pro přípravu espressa silně zatlačený do sítka, proteče
espresso rychle sítkem a vytvoří se pouze tenká krémovitá vrstva.
4) Držák sítka w nasaďte i se sítkem do přístroje, a to na značku „INSERT“ na
přístroji a potom jej otáčejte v proti směru hodinových ručiček až po značku
„LOCK“ na přístroji.
5) Postavte jeden (nebo dva) šálek/šálky pod otvory držáku sítka. Doporučujeme, vypláchnout šálky předtím horkou vodou, aby espresso rychle nevychladlo.
6) Jakmile se rozsvítí zelená kontrolka rozehřívání 4, můžete nastavit otočný
přepínač funkcí 5 do pozice „
VÝSTRAHA
Držák sítka w nikdy nevyndavejte během protékání espressa!
Tím vzniklé stříkání horkého espressa vede ke zranění!
“. Espresso teče do šálku/šálků.
CZ
► Vždy se přesvědčte, že je otočný spínač funkcí 5 v pozici„
odeberete držák sítka w.
UPOZORNĚNÍ
► Tento přístroj má také předspařovací funkci. To znamená, že předtím, než
á voda proteče práškem na espresso, se krátce usadí v držáku sítka.
hork
To zjmení arómu espressa.
7) Jakmile je/jsou šálek/šálky naplněny požadovaným množstvím kávy (cca.
20 ml), otočte otočný spínač funkcí 5 opět do pozice „
Espresso můžete nyní vypít.
8) Vypněte přístroj vypínačem zapnuto/vypnuto 3.
UPOZORNĚNÍ
► Po 3 minutách se přístroj automaticky vypne.
Po každém použití odstraňte kávový prášek ze sítka na espresso 0 q. Vyjmě-
9)
te držák sítka w z přístroje.Vyklopte blokovač sítka e nahoru tak, aby sítko
na espresso 0 q nemohlo vypadnout z držáku sítka w.Nyní vyprázdněte
sítko na epsresso 0 q. Zlikvidujte espresso prášek nebo espresso pady vždy
ekologicky, například jako organický odpad.
“, než
“.
SEM 1100 A2
31
Page 35

UPOZORNĚNÍ
CZ
► Trysku na horkou vodu t vy
Přečtěte si k tomu kapitolu „Čištění a péče“.
UPOZORNĚNÍ
► Vyprázdněte pravidelně lapač kapek r, nejpozději však, jakmile se uk
červený plovák ve vyhloubění 7 odkapávací mřížky 8.
UPOZORNĚNÍ
► Pro přípravu espressa můžete také používat Espresso pady. Používejte
e ty espresso pady, která odpovídají standardu ESE. U standardu
pouz
ESE se jedná o systém, přijatý vedoucími výrobci padů pro espresso, který
umožňuje jednoduchou a čistou přípravu espressa.
Příprava cappuccina
VÝSTRAHA
Buďte opatrní při zacházení s párou pro vytvoření mléčné pěny!
Horká pára nebo horké postříkání vedou ke zranění!
► Regulačním spínačem páry 2 otáč
čistěte bezpodmínečně po každém použití.
áže
ejte vždy pomalu.
1) Nalijte do zpěňovací nádoby (nejlépe z nerezavějící oceli) do jedné třetiny
studené mléko.
2) Přesvědčte se, zda je regulační spínač páry 2 otočený na bodu vypnutí (otočit
až na doraz ve směru „ - “).
3) Zpěňovač mléka z vytočte na stranu. Uchopte jej při tom pouze za držadlo u.
4) Otočte otočný spínač funkcí 5 do pozice „
zelená kontrolka předhřevu 4.
5) Podržte prázdnou nádobu pod zpěňovačem mléka z. Otáčejte pomalu regulačním spínačem páry 2 ve směru „+“. Z trysky vytéká kondenzační voda/
nebo dojde ke stříkání. Tak se uvnitř přístroje vyčistí tryska a oběh vody.
6) Uniká-li z trysky pouze pára, otočte regulační spínač páry 2 do směru
„-“, dokud z trysky neuniká více žádná pára. Vylijte vodu z nádoby.
7) Podržte nyní zpěňovací nádobu v ruce, pro kontrolu teploty mléka, a zaveďte
trysku zpěňovače mléka z lehce do mléka v nádobě. Přitom držte zpěňovací
nádobu trochu nakloněnou.
“. Vyčkejte, dokud se nerozsvítí
32
SEM 1100 A2
Page 36

8) Otáčejte pomalu regulačním spínačem páry 2 ve směru „+“.
9) Otáčejte zpěňovací nádobou do kruhu a přidržujte při tom špičku trysky těsně
pod povrchem mléka: dostatečně do hloubky, aby mléko nestříkalo do všech
stran a dostatečně vysoko, aby se vytvořila silná pěna. Děláte-li to správně, je
slyšet při tom hluboký bzučivý zvuk.
10) Jakmile stoupá mléčná pěna, zasuňte trysku hlouběji do nádoby pro zpěnění
další „vrstvy“ a pro zabránění připálení pěny.
11) Vzápětí ponořte trysku kompletně do nádoby a pootočte o něco regulační
spínač páry 2, aby se mléko ohřálo. Podržte zpěňovací nádobu lehce šikmo
tak, že se mléko jemně se točí, když se promíchává tryskou.
12) Jakmile má mléčná pěna požadovanou konzistenci a teplotu, otočte regulační
spínač páry 2 zpět (až po doraz k „ - “).
13) Až poté vytáhněte trysku z mléka.
CZ
14) Otočte otočný spínač funkcí 5 do pozice „
UPOZORNĚNÍ
► Pro přípravu cappuccina používejte vždy větší šálky, než pro přípravu
essa, protože k tomu se ještě přidá zpěněné mléko.
espr
15) Při přípravě cappuccina postupujte přesně tak, jako při přípravě espressa (viz
kapitolu „Příprava espresso“/předehřátí přístroje není více potřebné). Nechte
protéct vodu pouze cca. dvakrát tak dlouho, než jak u espressa (cca. 40 ml).
16) Zapněte přístroj vypínačem zapnuto/vypnuto 3.
UPOZORNĚNÍ
► Po 3 minutách se přístroj automaticky vypne.
Dejte nyní zpěněné mléko do předem připraveného espressa. Cappuccino je
17)
nyní hotové. Dle chuti jej můžete pocukrovat nebo posypat kakaem.
UPOZORNĚNÍ
► Zpěňovačem mléka z můž
nebo čaj.
ete ohřát také jiné tekutiny, jako např. kakao
“.
UPOZORNĚNÍ
► Zpěňovač mléka z vy
si k tomu kapitolu „Čištění a péče“.
SEM 1100 A2
čistěte bezpodmínečně po každém použití. Přečtěte
33
Page 37

Tipy pro vytvoření mléčné pěny
■ V zasadě lze zpěnit každý druh mléka, také sójové a rýžové mléko. Některé
druhy mléka lze však zpěnit pouze s určitým omezením.
CZ
■ Odstředěné nebo nízkotučné mléko se nepřipálí tak snadno, jako plnotučné
mlék
o, při příliš nízkém obsahu tuku je zde však riziko, že mléko nelze dobře
zpěnit. Používejte proto dle možnosti mléko s obsahem tuku 3,5% nebo 1,5%.
■ Dobře chlazené mléko se dá líp zpěnit, než málo chladné mléko.
■ Nezpěňujte mléko podruhé, protože by se mohlo jinak připálit.
■ Zpěněné mléko nechte cca. 30 sekund odstát, než dáte pěnu na espresso.
T
ím tak prasknou větší bubliny a ještě tekuté mléko steče dolů. Jemnou pěnu
můžete dát potom na espresso.
Vyprodukovat horkou vodu
1) Když už je přístroj rozehřán:
2) Pod držák sítka z postavte šálek.
3) Jakmile se rozsvítí zelená kontrolka předhřevu 4, otočte regulačním spínačem
páry 2 na označení „ + “.
4) Otočte otočný spínač funkcí 5 do pozice „
5) Chcete-li přerušit vytékání horké vody, uzavřete regulační spínač páry 2 (otočit
až na doraz ve směru „ - “) a nastavte otoční spínač funkcí 5 do pozice „
“. Z trysky vytéká horká voda.
“.
6) Zapněte přístroj vypínačem zapnuto/vypnuto 3.
UPOZORNĚNÍ
► Po 3 minutách se přístroj automaticky vypne.
34
SEM 1100 A2
Page 38

Čištění a údržba
VÝSTRAHA - NEBEZPEČÍ PORANĚNÍ!
■ Než začnete přístroj čistit, vytáhněte vždy síťovou zástrčku ze sítě. Nebezpečí
azu elektrickým proudem!
úr
■ Před čištěním nechte vždy přístroj vychladnout. Nebezpečí popálení!
■ Přístroj nikdy neponořujte do vody či jiných tekutin! Nebezpečí úrazu elektric-
kým pr
oudem!
Čištění zpěňovače mléka
POZOR - VĚCNÉ ŠKODY
■ Nikdy nepoužívejte abrazivní, korozivní nebo chemické čisticí prostředky
k čištění př
1) Postavte prázdnou nádobu pod zpěňovač mléka z.
2) Otočte regulační přepínač páry 2 přímo po použití na „ + “ a nechte několik
sekund unikat páru.
3) Uzavřete regulační přepínač páry 2 (otočte až na dorazu ve směru k „ - “),
vypněte přístroj a vytáhněte zástrčku ze zásuvky.
4) Nechte vychladnout trysku.
5) Poté trysku vytáhněte a vymyjte ji pečlivě v teplé vodě.
ístroje. Jimi se poškozuje povrch přístroje.
CZ
6) Zkontrolujte, zda není malý otvor v trysce ucpaný a vyčistěte ji v případě
potřeby jehlou.
7) Vyčistěte výstupní trubici na páru zpěňovače mléka z vlhkým hadříkem.
8) Zasuňte trysku zpět do výstupní trubice na páru.
SEM 1100 A2
35
Page 39

CZ
Čištění trysky na horkou vodu
Trysku na horkou vodu t vyčistěte po každém použití:
1) Poté, co jste připravili espresso/cappuccino a sejmuli nosič sítka w, otřete
celou plochu kolem trysky na horkou vodu t vlhkým hadříkem, aby se odstranily veškeré zbytky prášku.
2) Nosné rameno sítka w opět nasaďte bez vloženého sítka na espresso 0 q.
3) Pod trysku horké vody t postavte prázdnou šálku a funkční otočný spínač 5
nastavte do pozice „
poslední zbytky kávového prášku.
“. Z trysky horké vody t vytéká voda a vyplachuje
4) Po cca 20 sekundách nastavte funkční otočný spínač 5 opět od pozice „
vypínačem/zapínačem 3 vypněte přístroj.
5) Nosné rameno sítka w opět sejměte.
Čištění příslušenství
1) Opláchněte držák sítka w, obě sítka na espresso 0 q, vodní nádrž 1,
odměrku 9 a odkapávací mřížku 8 v teplé vodě.
UPOZORNĚNÍ
► Pokud přidáte do vody mycí prostředek, může se stát, že se ovlivní chuť
essa. Pokud se dá znečištění dostranit pouze mycím prostředkem,
espr
opláchněte poté všechny díly řádně čistou vodou.
2) Všechny součásti dobře vysušte.
3) Lapač kapek r je vhodný pro mytí v myčce na nádobí.
Čištění přístroje
Samotný přístroj otřete vlhkým hadříkem. Pokud je to nutné, dejte na hadřík trochu
saponátu.
“ a
Odvápnění přístroje
Odstraňte pravidelně z přístroje vodní kámen.Po cca. 200 příprav espressa by
se měl přístroj odvápnit. V závislosti na tvrdosti vody ve Vaší oblasti se může tato
hodnota odlišovat.
K odvápnění používejte obvyklý odvápňovací prostředek pro kávovary espresso.
Postupujte podle návodu k použití, uvedeném na odvápňovacím prostředku.
Jestliže nemáte odvápňovací prostředek, lze alternativně postupovat takto:
1) Nádržku na vodu 1 naplňte až po označení MAX vodou.
36
SEM 1100 A2
Page 40

2) Rozpušťte v ní 2 lžíce (cca. 30 gramů) kyseliny citronové (k dostání v drogériích, nebo lékárnách).
3) Nasaďte nádržku na vodu 1 opět do přístroje.
4) Zapněte přístroj vypínačem pro zapnuto/vypnuto 3. Otočný přepínač funkcí 5
se musí nacházet v poloze „
5) Vsaďte držák sítka w bez sítka na espresso 0/q do přístroje a postavte pod
držák sítka w jeden šálek. Jakmile se rozsvítí zelená kontrolka předhřívání 4,
otočte otočný spínač funkcí 5 do pozice „
6) Nechte protéct cca. 2 šálky (kávové šálky) vody a poté proces zastavte.
7) Podržte nádobu pod zpěňovačem mléka z.
“. Regulační přepínač páry 2 je uzavřen.
“.
CZ
8) Nastavte otočný přepínač funkcí 5 do pozice „
nerozsvítí zelená kontrola předehřevu 4. Regulačním přepínačem páry 2
otáčejte pomalu k označení „ + “. Nechte přístrojem na cca. 2 minuty vytvořit
páru.
9) Po 2 minutách uzavřete opět regulační přepínač páry 2, nastavte otočný
přepínač funkcí 5 na „
10) Nechte odvápňovací prostředek působit cca. 15 minut.
11) Kroky 4 - 10 opakujte tři-krát.
12) Nastavte poté otočný přepínač funkcí 5 do polohy „
odtékat vodu, dokud není nádržka na vodu 1 prázdná.
13) Vypláchněte nádržku na vodu 1 čistou vodou a nalijte čistou vodu až po
značku MAX..
14) Nastavte otočný spínač funkcí 5 do pozice „
kontrolka předhřívání 4.
15) Nechte protéct vodu.
16) Kroky 13 - 15 opakujte tři-krát.
17) Naplňte vodní nádržku 1 ještě jednou vodou.
“ a vypněte přístroj.
“ a vyčkejte, dokud se
“ a nechte tak dlouho
“, jakmile se rozsvítí zelená
18) Nastavte otočný spínač funkcí 5 do pozice „
19) Pod zpěňovačem mléka z podržte nádobu a otáčejte pomalu regulačním
přepínačem páry 2 na „ + “ , jakmile se rozsvítí zelená kontrolka předhřevu
4.
20) Po cca. 1 minutě uzavřete opět regulační přepínač páry 2, nastavte otočný
přepínač funkcí 5 na „
UPOZORNĚNÍ
► Po 3 minutách se přístroj automaticky vypne.
SEM 1100 A2
“.
“ a vypněte přístroj.
37
Page 41

Odstranění závad
CZ
Porucha Příčina
• Prášek pro přípravu espressa je
příliš vlhký a/nebo je příliš silně
natlačený do sítka.
Espresso nevytéká
• V nádržce na vodu 1 není
voda.
• Otvory držáku sítka jsou
ucpané.
• Držák sítka w nebyl správně
vsazený.
Espresso přetéká přes
okraje držáku sítka w,
namísto aby teklo
z otvorů držáku sítka.
• Otvory držáku sítka jsou
ucpané.
Odstranění
problému
• Espresso připravit
nanovo, při tom však nezatlačit příliš silně prášek
pro přípravu espressa do
sítka, nebo vše celkem
vyměnit.
• Naplňte vodní nádržku
1 vodou.
• Držák sítkaw vyčistit.
• Držák sítka w správně
vsadit.
• Držák sítka w vyčistit.
Espresso je studené.
Hlučný provoz
čerpadla.
• Na okraji držáku sítka w se
nachází zbytky prášku pro
přípravu espressa.
• Přístroj nebyl předehřán. • Předehřát přístroj.
• Nerozsvítila se ještě zelená
kontrolka předehřevu 4.
• Šálky nebyly předehřáté. • Předehřát šálky.
• Nádržka na vodu 1 je
prázdná.
• Nádržka na vodu 1 není
správně vsazená, takže voda
se nedostane do přístroje.
• Z okraje držáku sítka w
odstranit zbytky prášku
pro přípravu espressa.
• Vyčkejte, dokud se neroz-
svítí zelená kontrolka
předhřevu 4.
• Naplňte vodní nádržku
1 vodou.
• Nádržku na vodu 1
správně nasadit.
38
SEM 1100 A2
Page 42

Krémovitá vrstva je příliš
světlá (espresso vytéká
příliš rychle z držáku
sítka w)
• příliš málo prášku pro přípravu
espressa.
• Prášek pro přípravu espressa je
semletý příliš nahrubo.
• Dát více prášku pro
přípravu espressa.
• Použít pouze prášek,
vyroben speciálně pro
přípravu espressa.
CZ
• příliš mnoho prášku pro
Krémovitá vrstva je příliš
tmavá (espresso vytéká
příliš pomalu z držáku
sítka w)
Mléko se nezpění.
• Prášek je semletý příliš jemně
• Sítko je ucpané. • VYčistit sítko.
• Mléko není dost studené. • Použijte mléko z ledničky.
• Zpěňovač mléka z je
Likvidace
Likvidace přístroje
Přístroj v žádném případě neodhazujte do obvyklého domovního
odpadu.
Tento výrobke podléhá evropské směrnici č. 2012/19/EU-WEEE
(Waste Electrical and Electronic Equipment).
přípravu espressa.
nebo je vlhký.
znečištěn.
• Dát méně prášku pro
přípravu espressa.
• Použít pouze prášek,
vyroben speciálně pro
přípravu espressa.
• VYčistěte zpěňovač
mléka z.
Přístroj předejte k likvidaci odborné fi rmě či jej odevzdejte ve Vašem místním recyklačním zařízení. Dodržujte aktuální platné předpisy. V případě pochybností
kontaktujte příslušnou fi rmu, která se zabývá likvidací odpadu.
SEM 1100 A2
39
Page 43

Záruka a servis
Na tento přístroj platí 3 letá záruka od data zakoupení. Přístroj byl vyroben
s nejvyšší pečlivostí a před odesláním prošel výstupní kontrolou.
CZ
Uschovejte si, prosím, pokladní lístek jako doklad o nákupu. Budete-li uplatňovat
záruku, spojte se prosím telefonicky se servisní provozovnou. Pouze tak vám můžeme zajistit bezplatné zaslání vašeho zboží.
UPOZORNĚNÍ
► Záruční plnění se vztahuje pouze na vady materiálu nebo výrobní závady,
oliv však na opotřebované díly nebo poškození, vzniklé při dopravě
nik
a na poškození rozbitných součástí, např. spínačů nebo akumulátorů.
Výrobek je určen výhradně pro soukromé použití, nikoliv pro podnikatelské účely. Při
nesprávném a neodborném využívání, při použití násilí a při zásazích, které nebyly
provedeny našimi autorizovanými servisními provozovnami, záruční nároky zanikají.
Vaše práva vyplývající ze zákona touto zárukou nejsou omezena. Záručním plněním
se záruční doba neprodlouží. To platí jak pro nahrazené, tak i pro opravené díly.
Případné škody a nedostatky, zjištěné už při koupě, se musí hlásit hned po vybalení
výrobku, nejpozdějí však do dvou dnů od data nákupu.
Po uplynutí záruční doby podléhají veškerá opravy poplatkům.
Servis Česko
Tel.: 800143873
E-Mail: kompernass@lidl.cz
IAN 59345
Dostupnost horké linky: pondělí až pátek 8:00 hod. – 20:00 hod. (SEČ)
Dovozce
KOMPERNASS HANDELS GMBH
BURGSTRASSE 21
44867 BOCHUM
GERMANY
www.kompernass.com
40
SEM 1100 A2
Page 44

Obsah
Úvod . . . . . . . . . . . . . . . . . . . . . . . . . . . . . . . . . . . . . . . . . . . . . . . . . . .42
Autorské práva . . . . . . . . . . . . . . . . . . . . . . . . . . . . . . . . . . . . . . . . . . . . . . . . . . . . .42
Obmedzenie ručenia . . . . . . . . . . . . . . . . . . . . . . . . . . . . . . . . . . . . . . . . . . . . . . . .42
Varovania . . . . . . . . . . . . . . . . . . . . . . . . . . . . . . . . . . . . . . . . . . . . . . . . . . . . . . . . .42
Používanie primerané účelu . . . . . . . . . . . . . . . . . . . . . . . . . . . . . . . . . . . . . . . . . . .43
Obsah dodávky a prepravná kontrola . . . . . . . . . . . . . . . . . . . . . . . . . . . . . . . . . . .44
Likvidácia obalových materiálov . . . . . . . . . . . . . . . . . . . . . . . . . . . . . . . . . . . . . . .44
Bezpečnostné pokyny . . . . . . . . . . . . . . . . . . . . . . . . . . . . . . . . . . . . .45
Ovládacie prvky. . . . . . . . . . . . . . . . . . . . . . . . . . . . . . . . . . . . . . . . . .47
Technické údaje . . . . . . . . . . . . . . . . . . . . . . . . . . . . . . . . . . . . . . . . . .47
Prvé uvedenie do prevádzky . . . . . . . . . . . . . . . . . . . . . . . . . . . . . . .48
Ovládanie . . . . . . . . . . . . . . . . . . . . . . . . . . . . . . . . . . . . . . . . . . . . . . .48
Napĺňanie nádoby na vodu . . . . . . . . . . . . . . . . . . . . . . . . . . . . . . . . . . . . . . . . . . .48
Zohriatie po dlhšom odstavení alebo pri prvom uvedení do prevádzky . . . . . . . . .49
Zohrievanie pred každým použitím . . . . . . . . . . . . . . . . . . . . . . . . . . . . . . . . . . . . .50
Príprava kávy espresso . . . . . . . . . . . . . . . . . . . . . . . . . . . . . . . . . . . . . . . . . . . . . . .50
Príprava kávy cappuccino . . . . . . . . . . . . . . . . . . . . . . . . . . . . . . . . . . . . . . . . . . . .52
Tipy k mliečnej pene . . . . . . . . . . . . . . . . . . . . . . . . . . . . . . . . . . . . . . . . . . . . . . . . .54
Príprava horúcej vody . . . . . . . . . . . . . . . . . . . . . . . . . . . . . . . . . . . . . . . . . . . . . . . .54
SK
Čistenie a údržba . . . . . . . . . . . . . . . . . . . . . . . . . . . . . . . . . . . . . . . . .55
Čistenie speňovača mlieka . . . . . . . . . . . . . . . . . . . . . . . . . . . . . . . . . . . . . . . . . . . .55
Čistenie sprchy na horúcu vodu . . . . . . . . . . . . . . . . . . . . . . . . . . . . . . . . . . . . . . . .56
Čistenie príslušenstva . . . . . . . . . . . . . . . . . . . . . . . . . . . . . . . . . . . . . . . . . . . . . . . .56
Čistenie prístroja . . . . . . . . . . . . . . . . . . . . . . . . . . . . . . . . . . . . . . . . . . . . . . . . . . . .56
Odvápňovanie prístroja . . . . . . . . . . . . . . . . . . . . . . . . . . . . . . . . . . . . . . . . . . . . . .56
Odstraňovanie porúch . . . . . . . . . . . . . . . . . . . . . . . . . . . . . . . . . . . . .58
Likvidácia . . . . . . . . . . . . . . . . . . . . . . . . . . . . . . . . . . . . . . . . . . . . . . .59
Likvidácia prístroja . . . . . . . . . . . . . . . . . . . . . . . . . . . . . . . . . . . . . . . . . . . . . . . . . .59
Záruka a servis . . . . . . . . . . . . . . . . . . . . . . . . . . . . . . . . . . . . . . . . . . .60
Dovozca. . . . . . . . . . . . . . . . . . . . . . . . . . . . . . . . . . . . . . . . . . . . . . . . .60
SEM 1100 A2
41
Page 45

SK
Úvod
Srdečne vám gratulujeme ku kúpe tohto nového prístroja.
Rozhodli ste sa tým pre vysokokvalitný výrobok. Návod na používanie je súčas-
ťou tohto výrobku. Obsahuje dôležité pokyny týkajúce sa bezpečnosti, použí-
vania a likvidácie zariadenia. Pred používaním tohto výrobku sa oboznámte so
všetkými pokynmi na ovládanie a bezpečnostnými pokynmi. Výrobok používajte
iba tak, ako je tu opísané a iba v tých oblastiach použitia, ktoré sú tu uvedené.
Pri odovzdávaní výrobku tretej osobe s ním odovzdajte aj všetky podklady.
Autorské práva
Táto dokumentácia je chránená podľa zákona o autorských právach.
Všetky práva vyhradené, aj na fotomechanickú reprodukciu, rozmnožovanie a rozširo-
vanie pomocou zvláštnych postupov (napríklad spracovaním dát, dátovými nosičmi a
dátovými sieťami), aj len čiastkovo, ako aj na obsahové a technické zmeny.
Obmedzenie ručenia
Všetky v tomto návode na používanie uvedené technické informácie, údaje a pokyny
pre obsluhu zodpovedajú najnovšiemu stavu pri odovzdávaní do tlače a zohľadňujú
s najlepším vedomím naše doterajšie skúsenosti a znalosti.
Z údajov, zobrazení a opisov v tomto návode nemožno odvodzovať žiadne nároky.
Výrobca nepreberá žiadni záruku za škody, ktoré vzniknú nedodržaním tohto návodu,
nesprávnym používaním, neodbornými opravami, nepovolenými zmenami alebo použitím nepovolených náhradných dielov.
Varovania
V tomto návode na používanie sú uvedené nasledujúce varovania:
VAROVANIE
Varovanie s týmto stupňom nebezpečenstva označuje možnú
nebezpečnú situáciu.
Ak sa nevyhnete nebezpečnej situácii, môže to viesť k úrazu.
► Riaďte sa pokynmi v tomto varovaní, aby ste zabránili úrazom osôb.
42
SEM 1100 A2
Page 46

POZOR
Varovanie s týmto stupňom nebezpečens
vecné škody.
Ak sa nevyhnete nebezpečnej situácii, môže to viesť k vecným škodám.
► Riaďte sa pokynmi v tomto varovaní, aby ste zabránili vecným škodám.
UPOZORNENIE
► Pokyn označuje dodatočné informácie, ktoré uľahčujú zaobchádzanie
ojom.
s prístr
Používanie primerané účelu
Tento prístroj slúži len na prípravu kávy espresso, cappuccino a na zohrievanie vody.
Je určený len na súkromné používanie v domácnostiach. Nepoužívajte ho na komerčné účely.
Iné alebo tento opis prekračujúce používanie platí ako nezodpovedajúce určeniu
prístroja.
VAROVANIE
Nebezpečenstvo spôsobené používaním mimo rámca určenia!
tva označuje možné
SK
Prístroj je pri používaní mimo rámca určenia alebo pri inom používaní nebezpečný.
► Tento prístroj používajte výlučne v zmysle jeho určenia.
► Dodržte v tomto návode na používanie opísané postupy obsluhy.
Nár
oky akéhokoľvek druhu za škody spôsobené používaním nezodpovedajúcim
určeniu sú vylúčené.
Riziko znáša výlučne prevádzkovateľ.
SEM 1100 A2
43
Page 47

Obsah dodávky a prepravná kontrola
VAROVANIE
Nebezpečenstvo zadusenia!
► Obalové materiály sa nesmú používať na hranie.
Hr
ozí nebezpečenstvo zadusenia.
SK
Prístroj sa štandardne dodáva s nasledujúcou výbavou:
▯ espresovač
▯ nosič sitka
▯ veľké sitko na espresso
▯ malé sitko na espresso
▯ odmerná lyžica s vtláčadlom
▯ návod na používanie
UPOZORNENIE
► Skontrolujte dodávku, či je kompletná a bez viditeľných poškodení.
► V prípade nekompletnej dodávky alebo poškodenia spôsobeného zlým
balením alebo pr
epravou sa obráťte na hotline servisu.
Likvidácia obalových materiálov
Obal chráni prístroj pred poškodením pri preprave. Voľba obalových materiálov
zohľadňuje ekologické a likvidačno-technické hľadiská, a preto sú tieto materiály
recyklovateľné.
Vrátenie obalových materiálov späť do obehu šetrí surovinami a znižuje náklady na
odpad. Nepotrebné obalové materiály zlikvidujte podľa miestne platných predpisov.
UPOZORNENIE
► Podľa možnosti si odložte obalové materiály počas záručnej doby prístroja,
by ste mohli prístroj v prípade uplatňovania záruky správne zabaliť.
a
44
SEM 1100 A2
Page 48

Bezpečnostné pokyny
Pre bezpečné zaobchádzanie s prístrojom dodržujte nasledujúce bezpečnostné pokyny:
VAROVANIE - NEBEZPEČENSTVO PORANENIA!
■ Skontrolujte prístroj pred použitím, či nemá zvonka viditeľné poško-
denia. Poškodený alebo spadnutý prístroj neuvádzajte do prevádzky.
■ Prístroj nesmú používať deti.
■ Prístroj a jeho pripojovací kábel uchovávajte mimo dosahu detí.
■ Prístroj a jeho pripojovací kábel uchovávajte mimo dosahu detí
mladších ako 8 rokov.
■ Tento prístroj môžu používať deti od 8 rokov, ak sú pod dohľadom
alebo boli dostatočne poučené o bezpečnom používaní prístroja a
pochopili z toho vyplývajúce riziká.
■ Prístroj môžu používať osoby so zníženými fyzickými, senzorickými
alebo mentálnymi schopnosťami, prípadne s nedostatočnými skúsenosťami alebo znalosťami, ak sú pod dohľadom alebo boli dostatočne poučené o bezpečnom používaní prístroja a pochopili z toho
vyplývajúce riziká.
SK
■ Čistenie a užívateľskú údržbu nesmú vykonávať deti, okrem prípa-
dov, ak sú staršie ako 8 rokov a sú pod dozorom.
■ Deti sa nesmú hrať s prístrojom.
■ Opravy prístroja zverte len autorizovaným odborníkom alebo zákazníc-
kemu servisu. Pri neodborných opravách môže pre používateľa vzniknúť veľké nebezpečenstvo. Okrem toho zaniknú nároky na záruku.
■ Nikdy neponárajte prístroj do vody ani do iných tekutín. Nebezpe-
čenstvo úrazu elektrickým prúdom!
■ Nikdy sa nedotýkajte prístroja mokrými alebo vlhkými rukami.
■ Poškodenú sieťovú šnúru alebo zástrčku nechajte ihneď vymeniť
oprávnenému odborníkovi alebo v zákazníckom servise, aby ste sa
vyhli ohrozeniu zdravia.
SEM 1100 A2
45
Page 49

■ Nebezpečenstvo popálenia! Niektoré diely sú počas prevádzky veľ-
mi horúce!
■ Pri používaní prístroja vznikajú oblaky horúcej pary. Dajte pozor na to,
aby ste sa nimi neobarili! Udržiavajte si dostatočný odstup od pary.
■ Prístroj pripojte iba do takej zásuvky, ktorá je nainštalovaná a uzem-
SK
nená podľa predpisov.
POZOR - VECNÉ ŠKODY
■ Chybné diely sa smú vymeniť len za originálne náhradné diely. Len
pri takýchto dieloch je zabezpečené, že budú splnené požiadavky
na bezpečnosť.
■ Chráňte prístroj pred vlhkosťou a vniknutím tekutín dovnútra.
■ Chráňte prístroj pred nárazmi, vlhkosťou, prachom, chemikáliami,
veľkými teplotnými zmenami, a nedávajte ho do blízkosti zdrojov
tepla (kachle, vyhrievacie telesá).
■ Nikdy neponárajte prístroj do vody ani do iných tekutín!
■ Vždy vytiahnite sieťovú zástrčku zo zásuvky, nikdy neťahajte za kábel
samotný.
■ Počas činnosti nenechávajte prístroj nikdy bez dozoru.
■ Na zapínanie a vypínanie prístroja nepoužívajte žiadne externé spí-
nacie hodiny ani samostatný systém diaľkového ovládania.
■ Nikdy nepoužívajte prístroj v priestoroch, kde je teplota nižšia než
0°C alebo okolo nuly. Ak by zamrzla voda vo vedení alebo v nádobe na vodu, mohol by sa prístroj poškodiť.
■ Nikdy nepoužívajte prístroj vonku (vo voľnom prostredí). Tento prí-
stroj je určený len na používanie vo vnútorných priestoroch.
UPOZORNENIE
► Opravy prístroja v priebehu záručnej doby smie vykonávať len
výrobcom autorizovaný zákaznícky servis, inak pri následných
škodách záruka stráca platnosť.
46
SEM 1100 A2
Page 50

Ovládacie prvky
1 nádržka na vodu
2 regulátor pary
3 sieťový vypínač
4 zelená kontrolka zohrievania
5 otočný prepínač funkcií
6 vtláčadlo
7 vyhĺbenina pre červený plavák
8 odkvapkávacia mriežka
9 odmerná lyžica s vtláčadlom
0 malé sitko na espresso
q veľké sitko na espresso
w nosič sitka
e blokovač sitka
r odkvapkávacia miska
t sprcha na horúcu vodu
SK
z speňovač mlieka
u rukoväť
i červená kontrolka zohrievania
Technické údaje
Menovité napätie 220 - 240 V ∼, 50 Hz
Menovitý výkon 1100 W
Tlak čerpadla asi 1,5 MPa (15 bar)
Objem nádržky na vodu (max.) 1,5 l
Spotreba energie v stave
pripravenosti až do
automatického vypnutia
Spotreba energie vo vypnutom
stave
asi 31,3 Wh
0 Wh
SEM 1100 A2
47
Page 51

Prvé uvedenie do prevádzky
1) Vyčistite nosič sitka w, odmernú lyžicu 9, sitká na espresso 0 q, odkvap-
kávaciu mriežku 8 a nádobu na vodu 1 spôsobom uvedeným v kapitole
„Čistenie a údržba“.
2) Postavte prístroj na rovný a voči teplu odolný podklad. Dajte pozor na to, aby
bola sieťová zásuvka v dostatočnej blízkosti.
SK
3) Nasaďte odkvapkávaciu mriežku 8 tak, aby červený plavák mohol cez vyhĺbeninu 7 čnieť do odkvapkávacej mriežky 8.
4) Zasuňte sieťovú zástrčku do zásuvky.
5) Pred prvým použitím postupujte nasledujúcim spôsobom, aby ste vyčistili vnútorné
vedenia:
6) Nechajte prístrojom pretiecť vodu asi na 5 šálok espressa. Prečítajte si k tomu
kapitolu „Obsluha“.
7) Asi 30 sekúnd nechajte vytvárať paru. Prečítajte si k tomu kapitolu „Obsluha“.
UPOZORNENIE
► Pri prvom použití môže dôjsť k tomu, že čerpadlo bude hlučne pracovať,
vznikne hluk, ale žiadna v
regulátor pary 2 smerom k „+“ tak, aby mohol vzduch z vedení prístroja
uniknúť (otočný prepínač funkcií 5 je v polohe „
dách vzduch z vedení unikne, hluk zmizne a z prístroja vyjde voda.
Ovládanie
oda nepôjde z prístroja. V takom prípade otočte
“). Asi po 20 sekun-
Napĺňanie nádoby na vodu
UPOZORNENIE
► Na prípravu kávy espresso a cappuccino používajte výlučne čerstvú pitnú
odu.
v
1) Vytiahnite nádobu na vodu 1 smerom nahor, otvorte veko a naplňte ju vodou:
Nalejte vodu aspoň po značku MIN.
Nikdy však nedajte viac vody než po značku MAX.
2) Nasuňte nádobu na vodu 1 späť na prístroj tak, aby skĺzla po vodiacich
lištách na prístroji nadol a pevne zapadla.
■ Nádobu na vodu 1 môž
z prístroja. V takom prípade jednoducho otvorte veko nádoby na vodu a nádobu naplňte vodou napr. z fľaše. Dajte pritom pozor na to, aby žiadna voda
nevytiekla mimo nádoby na vodu 1
48
ete naplniť vodou aj bez toho, že by ste ju vybrali
SEM 1100 A2
Page 52

Zohriatie po dlhšom odstavení
alebo pri prvom uvedení do prevádzky
Ak ste prístroj po dlhšiu dobu nepoužívali, zohrejte ho takýmto spôsobom:
1) Nalejte vodu do nádoby na vodu 1.
2) Vložte veľké q alebo malé sitko na espresso 0 do nosiča sitka w.
3) Nasaďte nosič sitka w do prístroja tak, že ho nasadíte na značku „INSERT“
(vložiť) na prístroji, a potom otočíte proti smeru hodinových ručičiek až po
značku „LOCK“ (zaistiť) na prístroji.
4) Položte šálku pod nosič sitka w.
5) Zatvorte regulátor pary 2 (otočte až na doraz smerom k „ - “).
6) Zapnite prístroj vypínačom 3.
7) Červená kontrolka zohrievania i svieti.
SK
8) Otočte otočný prepínač funkcií 5 do polohy „
povať vodu do prístroja. Len čo voda vyjde z otvorov nosiča sitka, otočte
prepínač funkcií 5 znova do polohy „ “.
9) Len čo sa rozsvieti zelená kontrolka zohrievania 4, otočte otočný prepínač
funkcií 5 do polohy „
stať, že pritom budete musieť niekoľkokrát vyliať šálku. Pritom nakrátko zastavte procedúru. Krátko preto zastavte postup, tým že otočíte otočný prepínač
funkcií 5 znova do polohy „ “.
10) Asi po 1 minúte otočte prepínač funkcií 5 znova do polohy „
11) Vyčkajte, kým sa znova rozsvieti zelená kontrolka zohrievania 4. Zohrievanie
sa práve skončilo. Teraz si už môžete pripraviť espresso.
“. Nechajte vodu pretekať asi 1 minútu. Môže sa
“. Čerpadlo začne pum-
“.
SEM 1100 A2
49
Page 53

Zohrievanie pred každým použitím
Predtým než si pripravíte espresso alebo cappuccino, musíte prístroj najprv zohriať.
SK
1) Zapnite prístroj vypínačom 3. Otočný prepínač funkcií 5 je v polohe „
2) Červená kontrolka zohrievania i svieti.
3) Vyčkajte, kým sa rozsvieti zelená kontrolka zohrievania 4.
Teraz si môžete pripraviť espresso alebo cappuccino.
Príprava kávy espresso
UPOZORNENIE
► Ak ste pred prípravou kávy espresso vytiahli z prístroja horúcu paru, od-
porúčame pr
mohlo dôjsť k tomu, že by espresso chutilo ako spálené. Podržte prázdnu
šálku pod speňovačom mlieka z. Otočte regulátor pary 2 smerom k „+“.
Otočte prepínač funkcií 5 do polohy „
z dýzy. Vyčkajte niekoľko sekúnd, až potom otočte prepínač funkcií 5 znova
do polohy „ “. Potom znova privrite regulátor pary 2 (smerom k „-“).
UPOZORNENIE
► Vždy sa postarajte o to, aby bolo sitko na espresso 0 q čisté a bez
ov kávového prášku.
zvyšk
ed prípravou espressa odobrať trocha horúcej vody. Inak by
“.
“ tak, aby horúca voda vyšla
1) Keď je prístroj zohriaty:
Ak chcete pripraviť jednu šálku espressa, nasaďte malé sitko na espresso 0
do držiaka sitka w.
Ak chcete pripraviť dve šálky espressa, nasaďte veľké sitko na espresso q do
držiaka sitka w.
2) Naplňte pomletou kávou malé sitko na espresso 0 až po značku MAX.
To zodpovedá asi 7 g kávy alebo zarovnanej odmernej lyžici 9.
alebo...
Naplňte pomletou kávou veľké sitko na espresso q až po značku MAX.
To zodpovedá asi 7 g + 7 g mletej kávy alebo dvom zarovnaným odmerným
lyžiciam 9.
3) Stlačte mletú kávu pomocou vtláčadla na prístroji 6. Ak sa ukáže potreba,
pridajte potom ďalšiu mletú kávu tak, aby bolo sitko na espresso 0 q napl-
nené až po značku MAX. Potom kávu znova stlačte.
50
SEM 1100 A2
Page 54

UPOZORNENIE
► Stlačenie (zhustenie) mletej kávy je veľmi dôležitý krok pri príprave espressa.
Ak je mletá k
peny (crema). Ak nie je mletá káva dosť silno stlačená, espresso pretečie
rýchlo a vznikne málo peny.
4) Nasaďte nosič sitka w do prístroja tak, že ho nasadíte na značku „INSERT“
(vložiť) na prístroji, a potom otočíte proti smeru hodinových ručičiek až po
značku „LOCK“ (zaistiť) na prístroji.
5) Dajte jednu šálku (alebo dve šálky) pod otvory v nosiči sitka. Odporúčame, aby
ste si šálky vopred opláchli horúcou vodou, takže espresso potom nevychladne
tak rýchlo.
6) Keď sa rozsvieti zelená kontrolka zohrievania 4, môžete otočiť prepínač funkcií 5
do polohy „
VAROVANIE
Nikdy nevyberajte nosič sitka w vtedy, keď vyteká espresso!
Pritom vzniknuté fŕkance horúceho espressa môžu spôsobiť úraz!
áva veľmi silno stlačená, espresso preteká pomaly a dáva viac
“. Espresso vyteká do šálky (šálok).
SK
► Vždy zabezpečte, aby bol otočný prepínač funkcií 5 v polohe „
predtým, než vyberiete nosič sitka w.
UPOZORNENIE
► Tento prístroj je vybavený funkciou predhrievania. To znamená, že horúca
oda predtým než bude pretlačená cez mletú kávu, bude krátky čas v
v
nosiči sitka. Tým sa zjemní aróma kávy espresso.
7) Keď je šálka (šálky) naplnená požadovaným množstvom espressa (asi 20 ml),
otočte prepínač funkcií 5 znova do polohy „
Teraz môžete vypiť svoje espresso.
8) Vypnite prístroj vypínačom 3.
UPOZORNENIE
► Po 3 minútach sa prístroj automaticky vypne.
Po každom použití odstráňte mletú kávu zo sitka na espresso 0 q. Vyberte
9)
nosič sitka w z prístroja. Vyklopte blokovač sitka e nahor tak, aby sitko na
espresso 0 q nemohlo vypadnúť z nosiča sitka w. Teraz vyprázdnite sitko
na espresso 0 q. Použitú kávu alebo kapsule na espresso zlikvidujte vždy
ekologickým spôsobom, napríklad v bioodpade.
“.
“
SEM 1100 A2
51
Page 55

UPOZORNENIE
SK
► Sprchu na horúcu vodu t vy
Prečítajte si k tomu kapitolu „Čistenie a údržba“.
UPOZORNENIE
► Pravidelne vyprázdňujte odkvapkávaciu misku r, najnesk
keď je vidieť červený plavák vo vyhĺbenine 7 odkvapkávacej mriežky 8.
UPOZORNENIE
► Na prípravu espressa môžete použiť aj kapsule. Používajte len také kapsule,
é vyhovujú norme ESE. Norma ESE je systém, ktorý prijali poprední vý-
ktor
robcovia kapsúl pre kávovary, a ktorý umožňuje jednoduchú a čistú prípravu
espressa.
Príprava kávy cappuccino
VAROVANIE
Buďte veľmi opatrní pri zaobchádzaní s parou na speňovanie
mlieka!
Horúca para alebo horúce fŕkance spôsobujú úrazy!
čistite bezpodmienečne po každom použití.
oršie však vtedy,
► S regulátorom pary 2 pr
1) Nádobku na speňovanie (najlepšie z nehrdzavejúcej ocele) naplňte do jednej
tretiny studeným mliekom.
2) Zabezpečte, aby bol regulátor pary 2 zatvorený (otočiť až na doraz smerom k „ - “).
3) Vysuňte speňovač mlieka z nabok. Chytajte ho pritom len za rukoväť u.
4) Otočte otočný prepínač funkcií 5 do polohy „
zelená kontrolka zohrievania 4.
5) Podržte prázdnu nádobku pod speňovačom mlieka z. Pomaly otáčajte regulátor pary 2 smerom k „+“. Skondenzovaná voda a fŕkance vychádzajú z dýzy.
Tým sa vyčistí dýza a systém obehu vody vo vnútri prístroja.
6) Keď už z dýzy vychádza len para, otočte regulátor pary 2 smerom k „-“, až
para prestane vychádzať z dýzy. Vylejte vodu z nádoby.
7) Teraz podržte nádobu na speňovanie mlieka v ruke, aby ste cítili teplotu mlieka,
a zaveďte dýzu speňovača mlieka z zľahka do mlieka. Nádobu na speňovanie
mlieka pritom držte mierne šikmo.
acujte vždy pomaly.
“. Vyčkajte, kým sa rozsvieti
52
SEM 1100 A2
Page 56

8) Pomaly otáčajte regulátor pary 2 smerom k „+“.
9) Pohybujte nádobou na speňovanie v kruhu a držte pritom špičku dýzy tesne
pod povrchom mlieka - dosť hlboko na to, aby sa mlieko nerozstrekovalo na
všetky strany a dosť vysoko na to, aby sa vytvorila hustá pena. Ak to robíte
správne, je pritom počuť hlboký brum.
10) Keď mliečna pena vystúpa nahor, zaveďte dýzu hlbšie, aby ste napenili ďalšiu
„vrstvu“ a zabránili spáleniu peny.
11) Nakoniec ponorte dýzu celkom a trocha privrite regulátor pary 2 tak, aby
sa mlieko zohrialo. Držte nádobku speňovača mierne šikmo, aby sa mlieko
jemne vírilo, keď ho dýzou miešate.
12) Keď mliečna pena dosiahne požadovanú konzistenciu a teplotu, zatvorte regulátor pary 2 (otočiť až na doraz smerom k „ - “).
13) Potom najprv vytiahnite dýzu z mlieka.
SK
14) Otočte otočný prepínač funkcií 5 do polohy „
UPOZORNENIE
► Na prípravu cappuccina použite vždy väčšie šálky než na prípravu espressa,
etože do nich treba dať ešte aj spenené mlieko.
pr
15) Pri príprave cappuccina postupujte tak isto, ako keby ste pripravovali espresso
(pozri kapitolu „Príprava kávy espresso“, ale zohrievanie tu nie je potrebné).
Nechajte vodu pretekať len asi dvakrát tak dlho ako pri espresse (asi 40 ml).
16) Vypnite prístroj vypínačom 3.
UPOZORNENIE
► Po 3 minútach sa prístroj automaticky vypne.
Teraz pridajte napenené mlieko do vopred pripravenej kávy espresso.
17)
Cappuccino je teraz hotové. Podľa chuti si ho môžete prisladiť cukrom alebo
posypať kakaovým práškom.
UPOZORNENIE
► Pomocou speňovača mlieka z môž
kakao alebo čaj.
ete zohriať aj iné tekutiny, napríklad
“.
UPOZORNENIE
► Speňovač mlieka z vy
te si k tomu kapitolu „Čistenie a údržba“.
SEM 1100 A2
čistite bezpodmienečne po každom použití. Prečítaj-
53
Page 57

SK
Tipy k mliečnej pene
■ V zásade sa dá napeniť každý druh mlieka, aj sójové alebo ryžové mlieko.
Niektoré druhy mlieka sa však dajú napeniť len s istými obmedzeniami.
■ Odstredené alebo odtučnené mlieko sa nespáli tak ľahko ako plnotučné
mliek
o, ale pri malom obsahu tuku hrozí nebezpečenstvo, že sa mlieko nedá
dobre napeniť. Preto používajte podľa možnosti mlieko s obsahom tuku 3,5 %
alebo 1,5 %.
■ Celkom vychladené mlieko sa dá lepšie napeniť ako menej studené.
■ Nikdy nenapeňujte mlieko druhý raz, pretože potom sa spáli.
■ Napenené mlieko nechajte stáť asi 30 sekúnd predtým, než dáte penu do es-
pr
essa. Pritom spľasnú väčšie bubliny a ešte tekuté mlieko klesne nadol. Potom
môžete dať na espresso jemnú penu.
Príprava horúcej vody
1) Keď je prístroj zohriaty:
2) Dajte prázdnu šálku pod speňovač mlieka z.
3) Keď svieti zelená kontrolka zohrievania 4, otočte regulátor pary 2 na „ + “.
4) Otočte otočný prepínač funkcií 5 do polohy „
5) Keď chcete prerušiť vytekanie horúcej vody, zatvorte regulátor pary 2 (otočiť až
na doraz smerom k „ - “) a otočný prepínač funkcií 5 dajte do polohy „
6) Vypnite prístroj vypínačom 3.
UPOZORNENIE
► Po 3 minútach sa prístroj automaticky vypne.
“. Horúca voda vyteká z dýzy.
“.
54
SEM 1100 A2
Page 58

Čistenie a údržba
VAROVANIE - NEBEZPEČENSTVO PORANENIA!
■ Skôr než začnete prístroj čistiť, vytiahnite sieťovú zástrčku zo zásuvky. Nebez-
enstvo úrazu elektrickým prúdom!
peč
■ Predtým, než začnete prístroj čistiť, ho nechajte vždy najprv vychladnúť.
Nebezpeč
■ Nikdy neponárajte prístroj do vody ani do iných tekutín! Nebezpečenstvo
úr
azu elektrickým prúdom!
Čistenie speňovača mlieka
POZOR - VECNÉ ŠKODY
■ Na čistenie prístroja nikdy nepoužívajte drsné, agresívne ani chemické čistiace
ostriedky. Tieto môžu rozrušiť povrchové časti prístroja.
pr
1) Dajte prázdnu nádobku pod speňovač mlieka z.
2) Hneď po použití otočte regulátor pary 2 na „ + “ a niekoľko sekúnd nechajte
unikať paru.
enstvo popálenia!
SK
3) Zatvorte regulátor pary 2 (otočiť až na doraz smerom k „ - “), vypnite prístroj
a vytiahnite sieťovú zástrčku.
4) Nechajte dýzu vychladnúť.
5) Vytiahnite dýzu a vyčistite ju starostlivo v teplej vode.
6) Skontrolujte, či nie je malý otvor v dýze upchatý, a v prípade potreby ho
vyčistite ihlou.
7) Navlhčenou utierkou vyčistite výtokovú rúrku speňovača mlieka z.
8) Nasuňte dýzu späť na výtokovú rúrku pary.
SEM 1100 A2
55
Page 59

Čistenie sprchy na horúcu vodu
Sprchu na horúcu vodu t vyčistite po každom použití.
1) Po skončení prípravy kávy espresso alebo cappuccino a vybratí nosiča sitka w
utrite celú plochu sprchy na horúcu vodu t navlhčenou utierkou, aby ste
odstránili všetky zvyšky mletej kávy.
2) Nasaďte nosič sitka w bez vloženého sitka na espresso 0 q späť.
SK
3) Potom dajte prázdnu šálku pod výtok horúcej vody t a otočte prepínač
funkcií 5 do polohy „
zvyšky kávy.
4) Po asi 20 sekundách dajte prepínač funkcií 5 znova do polohy „
vypnite prístroj vypínačom 3.
5) Znova vyberte nosič sitka w.
Čistenie príslušenstva
1) Nosič sitka w, obe sitká na espresso 0 q, nádobu na vodu 1, odmernú
lyžicu 9 a odkvapkávaciu mriežku 8 umyte teplou vodou.
UPOZORNENIE
► Keď do vody pridáte čistiaci prostriedok, môže sa stať, že to ovplyvní chuť
ávy espresso. Ak sa nečistoty nedajú odstrániť inak, len čistiacim prostried-
k
kom, opláchnite potom všetky diely vždy veľkým množstvom čistej vody.
2) Vysušte všetky diely.
3) Odkvapkávacia miska r je vhodná na čistenie v umývačke riadu.
“. Voda vytečie z výtoku t a spláchne posledné
“ a
Čistenie prístroja
Prístroj očistite vlhkou utierkou. V prípade potreby pridajte na utierku trocha čistiaceho prostriedku.
Odvápňovanie prístroja
Pravidelne odvápňujte prístroj. Približne po 200 pripravených dávkach kávy
espresso treba prístroj odvápniť. Podľa stupňa tvrdosti vody, ktorú používate, sa
môže táto hodnota odlišovať.
Na odvápňovanie používajte bežne dostupné odvápňovače určené pre kávovary
espresso. Postupujte pri tom tak, ako je uvedené v návode na používanie odvápňovača.
Ak nemáte k dispozícii odvápňovač, môžete postupovať aj takto:
1) Naplňte nádržku na vodu 1 až po značku MAX.
56
SEM 1100 A2
Page 60

2) Rozpusťte v nej 2 lyžice (asi 30 g) kyseliny citrónovej (dá sa kúpiť v drogérii
alebo v lekárni).
3) Nasaďte nádobu na vodu 1 do prístroja.
4) Zapnite prístroj vypínačom 3. Prepínač funkcií 5 musí byť v polohe „
Regulátor pary 2 je zatvorený.
5) Do prístroja vložte nosič sitka w bez sitka na espresso 0/q a pod nosič
sitka w položte šálku. Len čo sa rozsvieti zelená kontrolka zohrievania 4,
otočte otočný prepínač funkcií 5 do polohy „
6) Nechajte pretiecť asi 2 šálky (kávové) vody a potom zastavte proces.
7) Podržte nádobku pod speňovačom mlieka z.
8) Dajte prepínač funkcií 5 do polohy „
kontrolka zohrievania 4. Pomaly otáčajte regulátor pary 2 na „ + “. Nechajte
prístroj asi 2 minúty vytvárať paru.
9) Po 2 minútach zatvorte regulátor pary 2, dajte prepínač funkcií 5 na „
a vypnite prístroj.
10) Nechajte odvápňovač pôsobiť asi 15 minút.
11) Trikrát zopakujte kroky 4 - 10.
12) Potom dajte prepínač funkcií 5 do polohy „
dovtedy, kým sa nádoba na vodu 1 nevyprázdni.
13) Opláchnite nádobu na vodu 1 čistou vodou a naplňte čistú vodu až po
značku MAX.
“ a vyčkajte, kým sa rozsvieti zelená
“.
“ a nechajte vodu pretekať
“.
“
SK
14) Len čo sa rozsvieti zelená kontrolka zohrievania 4, otočte otočný prepínač
funkcií 5 do polohy „
15) Nechajte pretiecť vodu.
16) Trikrát zopakujte kroky 13 - 15.
17) Ešte raz nalejte vodu do nádoby na vodu 1.
18) Otočte otočný prepínač funkcií 5 do polohy „
19) Len čo sa rozsvieti zelená kontrolka zohrievania 4, podržte nejakú nádobu
pod speňovačom mlieka z a pomaly otáčajte regulátor pary 2 na „ + “.
20) Asi po 1 minúte zatvorte regulátor pary 2, dajte prepínač funkcií 5 na
„
“ a vypnite prístroj.
UPOZORNENIE
► Po 3 minútach sa prístroj automaticky vypne.
“.
“.
SEM 1100 A2
57
Page 61

SK
Odstraňovanie porúch
Porucha Príčina Náprava
• Pomletá káva je príliš vlhká
alebo je príliš stlačená.
Káva espresso už
ďalej nevyteká
• Nie je voda v nádobe
na vodu 1.
• Znovu pripravte kávu
espresso, ale teraz už
natoľko nestlačte pomletú kávu alebo ju celkom
vymeňte.
• Nalejte vodu do nádoby
na vodu 1.
Káva espresso vykvapkáva cez okraje nosiča
sitka w namiesto toho,
aby tiekla z otvorov.
Káva espresso je
studená.
• Otvory výstupu z nosiča
sitka sú upchaté.
• Nosič sitka w nie je správne
nasadený.
• Otvory nosiča sitka sú upchaté.
• Zvyšky pomletej kávy sú na
okrajoch nosiča sitka w.
• Prístroj nebol predhriaty. • Predhrejte prístroj.
• Zelená kontrolka zohrievania 4
sa ešte nerozsvietila.
• Vyčistite nosič sitka w.
• Správne nasaďte nosič
sitka w.
• Vyčistite nosič sitka w.
• Očistite okraj nosiča sitka
w od zvyškov pomletej
kávy.
• Vyčkajte, kým sa rozsvieti
zelená kontrolka zohrievania 4.
Hlučný chod čerpadla.
58
• Šálky neboli predhriate. • Predhrejte šálky.
• Nádoba na vodu 1 je
prázdna.
• Nádoba na vodu 1 nie je
správne nasadená, takže voda
z nej sa nedostáva do prístroja.
• Nalejte vodu do nádoby
na vodu 1.
• Správne nasaďte nádo-
bu na vodu 1.
SEM 1100 A2
Page 62

Pena (crema) je príliš
svetlá (káva espresso
vyteká rýchlo z nosiča
sitka w).
• príliš málo mletej kávy. • Použite viac mletej kávy.
• Používajte len mletú kávu
• Káva je pomletá príliš nahrubo.
určenú špeciálne na
prípravu kávy espresso.
• príliš veľa mletej kávy.
Pena (crema) je príliš
tmavá (káva espresso
vyteká pomaly z nosiča
sitka w).
Mlieko sa nenapeňuje.
• Káva je pomletá príliš
• Sitko je upchaté. • Vyčistite sitko.
• Mlieko nie je dosť studené.
• Speňovač mlieka z je
Likvidácia
Likvidácia prístroja
Prístroj v žiadnom prípade nevyhadzujte do bežného domového
odpadu.
Na tento výrobok sa vzťahuje európska smernica 2012/19/EU
o opotrebovaných elektrických a elektronických spotrebičoch.
najemno alebo je vlhká.
znečistený.
• Použite menej mletej
kávy.
• Používajte len mletú kávu
určenú špeciálne na prípravu kávy espresso.
• Používajte mlieko z
chladničky.
• Vyčistite speňovač
mlieka z.
SK
Prístroj nechajte zlikvidovať v príslušnej fi rme na likvidáciu odpadu alebo v komunálnom zariadení na likvidáciu odpadu. Dbajte na aktuálne platné predpisy.
V prípade pochybností sa obráťte na zariadenia na odstraňovanie odpadu.
SEM 1100 A2
59
Page 63

Záruka a servis
Na tento prístroj máte 3 ročnú záruku od dátumu nákupu. Prístroj bol starostlivo
vyrobený a pred expedíciou dôkladne vyskúšaný.
Uschovajte si, prosím, účtenku ako dôkaz o nákupe. V prípade uplatnenia záruky
sa spojte s opravovňou telefonicky. Len tak sa dá zabezpečiť bezplatné zaslanie
tovaru.
SK
POZNÁMKA
► Záruka platí len na chyby materiálu a výroby, nie na škody spôsobené
epravou, opotrebením, ani na poškodenia krehkých častí, ako sú spínače
pr
alebo akumulátory.
Výrobok je určený len na súkromné používanie a nie na podnikateľské účely.
Záruka prestáva platiť pri zaobchádzaní nezodpovedajúcom účelu a pri neprimeranom zaobchádzaní, pri použití násilia a pri zásahoch, ktoré neurobil nami
autorizovaný servis.
Práva vyplývajúce zo zákona nie sú touto zárukou obmedzené. Záručná doba
sa nepredlžuje o dobu trvania záručných opráv. To platí aj na vymenené alebo
opravené diely.
Prípadné poškodenia alebo nedostatky zistené už pri kúpe musíte nahlásiť ihneď
po vybalení, najneskoršie však do dvoch dní po dátume kúpy.
Opravy, ktoré spadajú do obdobia po skončení záručnej doby, si musíte zaplatiť.
Servis Slovensko
Tel. 0850 232001
E-Mail: kompernass@lidl.sk
IAN 59345
Dostupnosť hotline: pondelok až piatok od 8:00 hod. – 20:00 hod. (SEČ)
Dovozca
KOMPERNASS HANDELS GMBH
BURGSTRASSE 21
44867 BOCHUM
GERMANY
www.kompernass.com
60
SEM 1100 A2
Page 64

Περιεχόμενα
Εισαγωγή . . . . . . . . . . . . . . . . . . . . . . . . . . . . . . . . . . . . . . . . . . . . . . .62
Πνευματικά δικαιώματα . . . . . . . . . . . . . . . . . . . . . . . . . . . . . . . . . . . . . . . . . . . . .62
Περιορισμός ευθύνης . . . . . . . . . . . . . . . . . . . . . . . . . . . . . . . . . . . . . . . . . . . . . .62
Υποδείξεις προειδοποίησης . . . . . . . . . . . . . . . . . . . . . . . . . . . . . . . . . . . . . . . . .62
Χρήση σύμφωνη με τους κανονισμούς . . . . . . . . . . . . . . . . . . . . . . . . . . . . . . . . . .63
Σύνολο αποστολής / Επιθεώρηση μεταφοράς . . . . . . . . . . . . . . . . . . . . . . . . . . .64
Απόρριψη της συσκευασίας . . . . . . . . . . . . . . . . . . . . . . . . . . . . . . . . . . . . . . . . .64
Υποδείξεις ασφαλείας . . . . . . . . . . . . . . . . . . . . . . . . . . . . . . . . . . . . . 65
Στοιχεία χειρισμού . . . . . . . . . . . . . . . . . . . . . . . . . . . . . . . . . . . . . . .67
Τεχνικές πληροφορίες . . . . . . . . . . . . . . . . . . . . . . . . . . . . . . . . . . . .67
Πρώτη θέση σε λειτουργία . . . . . . . . . . . . . . . . . . . . . . . . . . . . . . . . .68
Χειρισμός . . . . . . . . . . . . . . . . . . . . . . . . . . . . . . . . . . . . . . . . . . . . . . .68
Πλήρωση δοχείου νερού . . . . . . . . . . . . . . . . . . . . . . . . . . . . . . . . . . . . . . . . . . . .68
Ζέσταμα μετά από μεγάλη διάρκεια μη χρήσης /
κατά την πρώτη θέση σε λειτουργία . . . . . . . . . . . . . . . . . . . . . . . . . . . . . . . . . . . .69
Ζέσταμα πριν από κάθε χρήση . . . . . . . . . . . . . . . . . . . . . . . . . . . . . . . . . . . . . . .70
Προετοιμασία καφέ εσπρέσο . . . . . . . . . . . . . . . . . . . . . . . . . . . . . . . . . . . . . . . . .70
Προετοιμασία καπουτσίνο . . . . . . . . . . . . . . . . . . . . . . . . . . . . . . . . . . . . . . . . . . .72
Υποδείξεις για το αφρόγαλα . . . . . . . . . . . . . . . . . . . . . . . . . . . . . . . . . . . . . . . . .74
Δημιουργία καυτού νερού . . . . . . . . . . . . . . . . . . . . . . . . . . . . . . . . . . . . . . . . . . .74
GR
CY
Καθαρισμός και φροντίδα . . . . . . . . . . . . . . . . . . . . . . . . . . . . . . . . .75
Καθαρισμός διάταξης για το αφρόγαλα . . . . . . . . . . . . . . . . . . . . . . . . . . . . . . . .75
Καθαρισμός της διάταξης καυτού νερού . . . . . . . . . . . . . . . . . . . . . . . . . . . . . . .76
Καθαρισμός αξεσουάρ . . . . . . . . . . . . . . . . . . . . . . . . . . . . . . . . . . . . . . . . . . . . .76
Καθαρισμός συσκευής . . . . . . . . . . . . . . . . . . . . . . . . . . . . . . . . . . . . . . . . . . . . . .76
Αφαίρεση αλάτων από τη συσκευή . . . . . . . . . . . . . . . . . . . . . . . . . . . . . . . . . . . .76
Διόρθωση σφαλμάτων . . . . . . . . . . . . . . . . . . . . . . . . . . . . . . . . . . . .78
Απόρριψη . . . . . . . . . . . . . . . . . . . . . . . . . . . . . . . . . . . . . . . . . . . . . .79
Απόρριψη συσκευής . . . . . . . . . . . . . . . . . . . . . . . . . . . . . . . . . . . . . . . . . . . . . . .79
Εγγύηση και σέρβις πελατών . . . . . . . . . . . . . . . . . . . . . . . . . . . . . . . 80
Εισαγωγέας . . . . . . . . . . . . . . . . . . . . . . . . . . . . . . . . . . . . . . . . . . . . .80
SEM 1100 A2
61
Page 65

Εισαγωγή
Συγχαρητήρια για την αγορά της νέας σας συσκευής.
Αποφασίσατε έτσι την απόκτηση ενός προϊόντος υψηλής ποιότητας. Οι οδηγίες
χειρισμού είναι τμήμα αυτού του προϊόντος. Περιέχουν σημαντικές υποδείξεις
για την ασφάλεια, τη χρήση και την απόρριψη.Πριν από τη χρήση του προϊόντος
εξοικειωθείτε με όλες τις υποδείξεις χειρισμού και ασφάλειας. Χρησιμοποιείτε το
προϊόν μόνο όπως περιγράφεται και για τα αναφερόμενα πεδία χρήσης. Σε περίπτωση παράδοσης του προϊόντος σε τρίτους, παραδίδετε και όλα τα έγγραφα.
GR
CY
Πνευματικά δικαιώματα
Αυτές οι οδηγίες έχουν προστασία πνευματικών δικαιωμάτων.
Με την επιφύλαξη όλων των δικαιωμάτων, ακόμα και της φωτομηχανικής αναπα-
ραγωγής, της ανατύπωσης, της μεταβίβασης μέσω ειδικών διαδικασιών (για παράδειγμα της επεξεργασίας δεδομένων, φορέων αρχείων και δικτύων δεδομένων),
και τμηματικά, όπως και αλλαγών στο περιεχόμενο και τεχνικών αλλαγών.
Περιορισμός ευθύνης
Όλες οι τεχνικές πληροφορίες, τα δεδομένα και οι υποδείξεις που περιλαμβάνονται
σε αυτό το εγχειρίδιο χειρισμού, αντιστοιχούν στην τελευταία λέξη της τεχνολογίας
κατά την εκτύπωση και διεξάγονται τηρώντας τις έως τώρα εμπειρίες και γνώσεις
μας σύμφωνα με όλα όσα μπορούμε να γνωρίζουμε.
Από τα στοιχεία, τις απεικονίσεις και περιγραφές σε αυτή την οδηγία δεν μπορούν να εγερθούν απαιτήσεις.
Ο κατασκευαστής δεν αναλαμβάνει καμία ευθύνη για βλάβες από μη τήρηση
των οδηγιών, από μη σύμφωνη με τους κανονισμούς χρήση, από εσφαλμένες
επισκευές, από μη εγκεκριμένες διεξαχθείσες τροποποιήσεις ή από χρήση μη
εγκεκριμένων εξαρτημάτων.
Υποδείξεις προειδοποίησης
Στις παρούσες οδηγίες χειρισμού χρησιμοποιούνται οι εξής υποδείξεις προειδοποίησης:
ΠΡΟΕΙΔΟΠΟΙΗΣΗ
Μία προειδοποίηση υπόδειξης αυτού του βαθμού κινδύνου
χαρακτηρίζει μία πιθανή επικίνδυνη κατάσταση.
Στην περίπτωση που δεν μπορεί να αποφευχθεί μία επικίνδυνη κατάσταση,
μπορεί να συμβούν τραυματισμοί.
► Οι οδηγίες σε αυτή την υπόδειξη προειδοποίησης πρέπει να τηρούνται,
ώστε να αποφεύγονται τραυματισμοί στα άτομα.
62
SEM 1100 A2
Page 66

ΠΡΟΣΟΧΗ
Μία υπόδειξη προειδοποίησης αυτού του βαθμού κινδύνου
χαρακτηρίζει μία πιθανή εμπράγματη ζημιά.
Στην περίπτωση που δεν μπορεί να αποφευχθεί αυτή η κατάσταση, μπορεί να
συμβεί εμπράγματη ζημιά.
► Οι οδηγίες σε αυτή την υπόδειξη προειδοποίησης πρέπει να τηρούνται,
ώστε να αποφεύγονται εμπράγματες ζημιές.
ΥΠΟΔΕΙΞΗ
► Μία υπόδειξη χαρακτηρίζει επιπλέον πληροφορίες που διευκολύνουν τον
χειρισμό της συσκευής.
Χρήση σύμφωνη με τους κανονισμούς
Αυτή η συσκευή εξυπηρετεί αποκλειστικά στην προετοιμασία καφέ εσπρέσο/καπουτσίνο και στο ζέσταμα νερού. Προορίζεται αποκλειστικά για τη χρήση σε ιδιωτικά νοικοκυριά. Μην τη χρησιμοποιείτε για επαγγελματικούς σκοπούς.
Μία άλλη ή διαφορετική χρήση από τα ανωτέρω αναφερόμενα ισχύει ως μη σύμφωνη με τους κανονισμούς.
GR
CY
ΠΡΟΕΙΔΟΠΟΙΗΣΗ
Κίνδυνος μέσω μη σύμφωνης με τους κανονισμούς χρήσης!
Μπορεί να προκύψουν κίνδυνοι από τη συσκευή σε μη σύμφωνη με τους
κανονισμούς χρήση και/ή άλλου είδους χρήση.
► Χρησιμοποιείτε αποκλειστικά τη συσκευή με τρόπο σύμφωνο με τους
κανονισμούς.
► Τηρείτε τις περιγραφόμενες διαδικασίες σε αυτές τις οδηγίες χειρισμού.
Απαιτήσεις οποιουδήποτε είδους έναντι φθορών από μη σύμφωνη με τους κανονισμούς χρήση, απορρίπτονται.
Την ευθύνη φέρει αποκλειστικά ο χρήστης.
SEM 1100 A2
63
Page 67

Σύνολο αποστολής / Επιθεώρηση μεταφοράς
ΠΡΟΕΙΔΟΠΟΙΗΣΗ
Κίνδυνος πνιγμού!
► Τα υλικά συσκευασίας δεν επιτρέπεται να χρησιμοποιούνται για παιχνίδι.
Υπάρχει κίνδυνος πνιγμού.
Η συσκευή παραδίδεται κανονικά με τα εξής στοιχεία:
▯ Εσπρεσιέρα
GR
CY
▯ Φορέας φίλτρου
▯ Μεγάλο φίλτρο καφέ εσπρέσο
▯ Μικρό φίλτρο καφέ εσπρέσο
▯ Κουτάλι δοσομέτρησης με πώμα
▯ Οδηγίες χρήσης
ΥΠΟΔΕΙΞΗ
► Ελέγχετε την παράδοση ως προς την πληρότητα και εμφανείς φθορές.
► Σε μη πλήρη αποστολή ή σε ζημιές λόγω ελλιπούς συσκευασίας ή από τη
μεταφορά, απευθυνθείτε στη γραμμή του σέρβις.
Απόρριψη της συσκευασίας
Η συσκευασία προστατεύει τη συσκευή από φθορές κατά τη μεταφορά. Τα υλικά
συσκευασίας έχουν επιλεγεί σύμφωνα με τους οικολογικούς παράγοντες και τους
παράγοντες της τεχνικής απόρριψης και για το λόγο αυτό είναι ανακυκλώσιμα.
Η επιστροφή της συσκευασίας στον κύκλο ροής υλικών εξοικονομεί πρώτες ύλες
και μειώνει την ποσότητα των απορριμμάτων. Απορρίπτετε τα υλικά συσκευασίας
που δεν χρησιμοποιούνται πλέον σύμφωνα με τις τοπικές ισχύουσες προδιαγραφές.
ΥΠΟΔΕΙΞΗ
► Εάν είναι δυνατό φυλάξτε τη γνήσια συσκευασία κατά τη διάρκεια της
εγγύησης, για να μπορείτε σε περίπτωση εγγύησης να συσκευάσετε τη
συσκευή σωστά.
64
SEM 1100 A2
Page 68

Υποδείξεις ασφαλείας
Προσέξτε τις εξής υποδείξεις ασφαλείας για έναν ασφαλή χειρισμό της
συσκευής:
ΠΡΟΕΙΔΟΠΟΙΗΣΗ - ΚΙΝΔΥΝΟΣ ΤΡΑΥΜΑΤΙΣΜΟΥ!
■ Πριν από τη χρήση ελέγχετε τη συσκευή ως προς εξωτερικές εμφα-
νείς φθορές. Μην θέτετε σε λειτουργία μία συσκευή που έχει φθορές
ή που έχει πέσει κάτω.
■ Η συσκευή αυτή δεν επιτρέπεται να χρησιμοποιείται από παιδιά.
■ Διατηρείτε τη συσκευή και το καλώδιο σύνδεσης εκτός εμβέλειας παιδιών.
■ Η συσκευή και το καλώδιο σύνδεσής της πρέπει να φυλάσσονται
μακριά από παιδιά κάτω των 8 ετών.
■ Μπορεί να γίνεται χρήση της συσκευής από παιδιά άνω των 8 ετών, εφό-
σον επιτηρούνται ή έχουν εκπαιδευτεί αναφορικά με την ασφαλή χρήση
της συσκευής και έχουν κατανοήσει τους επακόλουθους κινδύνους.
GR
CY
■ Μπορεί να γίνεται χρήση αυτής της συσκευής από άτομα με μει-
ωμένες φυσικές, αισθητηριακές ή νοητικές ικανότητες ή με έλλειψη
εμπειρίας και/ή γνώσεων, εφόσον επιτηρούνται ή έχουν εκπαιδευτεί
αναφορικά με την ασφαλή χρήση της συσκευής και έχουν κατανοήσει
τους επακόλουθους κινδύνους.
■ Ο καθαρισμός και η συντήρηση χρήστη δεν επιτρέπεται να διεξά-
γονται από παιδιά εκτός εάν είναι 8 ετών και άνω και επιτηρούνται.
■ Τα παιδιά δεν επιτρέπεται να παίζουν με τη συσκευή.
■ Επιτρέπετε τις επισκευές στη συσκευή μόνο από εξουσιοδοτημένα
συνεργεία ή από το τμήμα εξυπηρέτησης πελατών. Μέσω ακατάλληλων επισκευών μπορεί να εμφανιστούν αυξημένοι κίνδυνοι για το
χρήστη. Επίσης ακυρώνεται η απαίτηση της εγγύησης.
■ Μη βυθίζετε τη συσκευή σε νερό ή σε άλλα υγρά! Κίνδυνος ηλε-
κτροπληξίας!
■ Ποτέ μην πιάνετε τη συσκευή με βρεγμένα ή υγρά χέρια.
■ Τα βύσματα ή καλώδια δικτύου με βλάβη πρέπει να αντικαθίστανται
αμέσως από εξουσιοδοτημένο ειδικό προσωπικό ή από το τμήμα
εξυπηρέτησης πελατών, ώστε να αποφεύγονται κίνδυνοι.
SEM 1100 A2
65
Page 69

■ Κίνδυνος εγκαύματος! Ορισμένα μέρη γίνονται κατά τη χρήση
πολύ καυτά!
■ Κατά τη χρήση της συσκευής, δημιουργούνται καυτοί ατμοί. Προ-
σέξτε ώστε να μην καείτε από αυτούς! Διατηρείτε επαρκή απόσταση
από τους ατμούς.
■ Συνδέετε τη συσκευή μόνο σε μια σύμφωνα με τις προδιαγραφές
εγκατεστημένη και γειωμένη πρίζα.
GR
CY
ΠΡΟΣΟΧΗ - ΕΜΠΡΑΓΜΑΤΕΣ ΖΗΜΙΕΣ
■ Τα ελαττωματικά μέρη κατασκευής επιτρέπεται να αντικαθίστανται
μόνο από γνήσια ανταλλακτικά. Μόνο με αυτά τα ανταλλακτικά
εξασφαλίζεται ή πλήρωση των απαιτήσεων ασφάλειας.
■ Προστατεύετε τη συσκευή από την υγρασία και την εισροή υγρών.
■ Προστατεύετε τη συσκευή από κρούσεις, υγρασία, σκόνη, χημικά,
δυνατές διακυμάνσεις θερμοκρασίας και από πολύ κοντινές πηγές
θερμότητας (φούρνοι, θερμαντικά σώματα).
■ Ποτέ μη βυθίζετε τη συσκευή σε νερό ή σε άλλα υγρά!
■ Τραβάτε πάντα το βύσμα δικτύου από την πρίζα, ποτέ μην τραβάτε
από το καλώδιο.
■ Ποτέ μην αφήνετε τη συσκευή ανεπιτήρητη κατά τη διάρκεια της λει-
τουργίας.
■ Μη χρησιμοποιείτε εξωτερικό χρονοδιακόπτη ή ξεχωριστό τηλεχει-
ριστήριο για να λειτουργήσετε τη συσκευή.
■ Ποτέ μη λειτουργείτε τη συσκευή σε χώρους στους οποίους υπάρ-
χουν θερμοκρασίες κάτω του 0°C. Εάν παγώσει το νερό στους
αγωγούς ή στο δοχείο νερού, μπορεί η συσκευή να πάθει ζημιά.
■ Ποτέ μη λειτουργείτε τη συσκευή σε εξωτερικό χώρο. Αυτή η συ-
σκευή προορίζεται μόνο για χρήση σε εσωτερικούς χώρους.
ΥΠΟΔΕΙΞΗ
► Μία επισκευή της συσκευής κατά το χρόνο της εγγύησης
επιτρέπεται να γίνεται μόνο από το εξουσιοδοτημένο από τον
κατασκευαστή τμήμα εξυπηρέτησης πελατών, αλλιώς δεν ισχύει η απαίτηση της εγγύησης σε επακόλουθες φθορές.
66
SEM 1100 A2
Page 70

Στοιχεία χειρισμού
1 Δοχείο νερού
2 Διακόπτης ρύθμισης ατμού
3 Διακόπτης On/Off
4 Πράσινη λυχνία ελέγχου ζεστάματος
5 Περιστρεφόμενος διακόπτης λειτουργίας
6 Πώμα
7 Εσοχή για τον κόκκινο πλωτήρα
8 Σχάρα στραγγίσματος
9 Κουτάλι δοσομέτρησης με ενσωματωμένο πώμα
0 Μικρό φίλτρο καφέ εσπρέσο
q Μεγάλο φίλτρο καφέ εσπρέσο
w Φορέας φίλτρου
e Διάταξη μπλοκαρίσματος φίλτρου
r Υποδοχή συλλογής σταγόνων
t Διάταξ καυτού νερού
GR
CY
z Διάταξη για το αφρόγαλα
u Λαβή
i Κόκκινη λυχνία ελέγχου ζεστάματος
Τεχνικές πληροφορίες
Τάση δικτύου 220 - 240 V ∼ / 50 Hz
Ονομαστική απόδοση 1100 W
Πίεση αντλίας περ. 1,5 MPa (15 bar)
Δοχείο νερού (Μέγ.) 1,5 λίτρο
Κατανάλωση ενέργειας στην
κατάσταση ετοιμότητας έως την
αυτόματη απενεργοποίηση
Κατανάλωση ενέργειας στην
ανενεργή κατάσταση
περ. 31,3 Wh
0 Wh
SEM 1100 A2
67
Page 71

GR
CY
Πρώτη θέση σε λειτουργία
1) Καθαρίοτε το φορέα φίλτρου w, το κουτάλι δοσομέτρησης 9, τα φίλτρα
καφέ εσπρέσο 0 q, τη σχάρα σταξίματος 8 και το δοχείο νερού 1 όπως
περιγράφεται στο Κεφάλαιο „Καθαρισμός και φροντίδα“.
2) Τοποθετείστε τη συσκευή σε μια ίσια και θερμανθεκτική βάση. Προσέξτε ώστε
η πρίζα δικτύου να είναι προσβάσιμη.
3) Τοποθετήστε τη σχάρα σταξίματος 8 έτσι ώστε ο κόκκινος πλωτήρας να
μπορεί να προεξέχει μέσω της εσοχής 7 στη σχάρα σταξίματος 8.
4) Βάλτε το φις στην πρίζα.
5) Πριν από την πρώτη χρήση ακολουθήστε την εξής διαδικασία, για τον καθαρισμό των εσωτερικών αγωγών:
6) Αφήστε να περάσει νερό περ. για 5 φλιτζάνια εσπρέσο μέσα από τη συσκευή.
Διαβάστε για αυτό το Κεφάλαιο „Χειρισμός“.
7) Επιτρέψτε να δημιουργηθεί περ. για 30 δευτερόλεπτα ατμός. Διαβάστε για
αυτό το Κεφάλαιο „Χειρισμός“.
ΥΠΟΔΕΙΞΗ
► Κατά την πρώτη χρήση μπορεί να ακούγεται η αντλία που λειτουργεί, να
δημιουργούνται θόρυβοι, αλλά ωστόσο να μην εξέρχεται νερό από τη σ
σκευή. Σε αυτή την περίπτωση περιστρέψτε το διακόπτη ρύθμισης ατμού 2 στην
κατεύθυνση „+“, έτσι ώστε ο αέρας να μπορεί να εκφεύγει από τους αγωγούς
της συσκευής (ο περιστρεφόμενος διακόπτης λειτουργίας 5 βρίσκεται στη
θέση „
θόρυβοι χάνονται και εξέρχεται νερό από τη συσκευή.
“). Μετά από περίπου 20 δευτερόλεπτα έχει εκφύγει ο αέρας, οι
υ-
Χειρισμός
Πλήρωση δοχείου νερού
ΥΠΟΔΕΙΞΗ
► Χρησιμοποιείτε για την παρασκευή καφέ εσπρέσο/καπουτσίνο
αποκλειστικά καθαρό πόσιμο νερό.
Βγάλτε το δοχείο νερού 1 προς τα επάνω και έξω, ανοίξτε το κάλυμμα και
1)
γεμίστε με νερό:
Γεμίζετε με νερό τουλάχιστο έως το σύμβολο Min (ελάχιστο). Ποτέ μη γεμίζετε
με περισσότερο νερό παρά μόνο έως το σύμβολο Max (μέγιστο).
2) Ωθήστε πάλι το δοχείο νερού 1 έτσι επάνω στη συσκευή, ώστε να γλιστρά
κάτω στις γραμμές στη συσκευή και να εδράζεται σταθερά.
► Μπορείτε να γεμίσετε το δοχείο νερού 1 και χωρίς να το απομακρύνετε από τη
συσκευή. Ανοίξτε για αυτό απλά το κάλυμμα δοχείου νερού και γεμίστε με νερό
με μια φιάλη ή με κάτι παρόμοιο. Προσέξτε εδώ ότι δεν πρέπει να τρέχει νερό
δίπλα από το δοχείο νερού 1.
68
SEM 1100 A2
Page 72

Ζέσταμα μετά από μεγάλη διάρκεια μη χρήσης /
κατά την πρώτη θέση σε λειτουργία
Προθερμάνετε τη συσκευή ως ακολούθως, εάν δεν την έχετε χρησιμοποιήσει για
μεγάλο χρονικό διάστημα:
1) Γεμίστε το δοχείο νερού 1 με νερό.
2) Τοποθετήστε το μεγάλο q ή το μικρό φίλτρο εσπρέσο 0 στον φορέα φίλτρου w.
3) Τοποθετήστε τον φορέα φίλτρου w μέσα στη συσκευή, βάζοντας τον στο
σύμβολο „INSERT“ στη συσκευή και στη συνέχεια περιστρέφοντας αριστερόστροφα έως το σύμβολο „LOCK“ στη συσκευή.
4) Τοποθετήστε ένα φλιτζάνι κάτω από τον φορέα φίλτρου w.
5) Κλείστε με περιστροφή τον διακόπτη ρύθμισης ατμού 2 (περιστρέψτε έως τον
αναστολέα σε κατεύθυνση „ - “).
6) Ενεργοποιήστε τη συσκευή στο διακόπτη on/off 3.
7) Η κόκκινη λυχνία ελέγχου ζεστάματος i ανάβει.
GR
CY
8) Περιστρέψτε τον διακόπτη λειτουργίας 5 στη θέση „
να τροφοδοτεί τη συσκευή με νερό. Μόλις εμφανιστεί νερό από τα ανοίγματα
φορέα φίλτρου, γυρίοτε πάλι τον περιστρεφόμενο διακόπτη λειτουργίας 5
στη θέση „
9) Μόλις ανάψει η πράσινη λυχνία ελέγχου ζεστάματος 4, γυρίοτε τον περιστρεφόμενο διακόπτη λειτουργίας 5 στη θέση „
περάσει για περ. 1 λεπτό. Για αυτό σταματήστε τη διαδικασία, γυρίζοντας
πάλι τον περιστρεφόμενο διακόπτη λειτουργίας 5 στη θέση „
10) Μετά από περ. 1 λεπτό, γυρίοτε τον περιστρεφόμενο διακόπτη λειτουργίας
πάλι στη θέση „
11) Περιμένετε έως ότου ανάψει πάλι η πράσινη λυχνία ε 5 λέγχου ζεστάματος 4 Το ζέσταμα έχει ολοκληρωθεί. Τώρα μπορείτε να προετοιμάσετε καφέ
εσπρέσο.
“.
“.
“. Η αντλία ξεκινά
“. Αφήστε το νερό να
“ drehen.
SEM 1100 A2
69
Page 73

Ζέσταμα πριν από κάθε χρήση
Προτού ετοιμάσετε καφέ εσπρέσο ή καπουτσίνο, πρέπει η συσκευή να ζεσταθεί.
1) Ενεργοποιήστε τη συσκευή στο διακόπτη on/off 3. Ο περιστρεφόμενος
διακόπτης λειτουργίας 5 βρίσκεται στη θέση „
2) Η κόκκινη λυχνία ελέγχου ζεστάματος i ανάβει.
3) Περιμένετε έως ότου ανάψει η πράσινη λυχνία ελέγχου ζεστάματος 4
Τώρα μπορείτε να ετοιμάσετε καφέ εσπρέσο/καπουτσίνο.
“.
GR
CY
Προετοιμασία καφέ εσπρέσο
ΥΠΟΔΕΙΞΗ
► Στην περίπτωση που πριν από την προετοιμασία καφέ εσπρέσο χρησι-
μοποιήσατε καυτό ατμό από τη μηχανή, σας προτείνουμε πριν από την
προετοιμασία του εσπρέσο να βγάλετε λίγο καυτό νερό. Αλλιώς μπορεί ο
εσπρέσο να έχει γεύση καμένου. Κρατήστε ένα άδειο φλιτζάνι κάτω από τη
διάταξη για το αφρόγαλα z. Περιστρέψτε αργά τον διακόπτη ρύθμισης
ατμού 2 προς την κατεύθυνση „+“. Στρέψτε τον περιστρεφόμενο διακόπτη
λειτουργίας 5 στην κατεύθυνση „
από το ακροφύσιο. Περιμένετε μερικά δευτερόλεπτα προτού στρέψετε τον
περιστρεφόμενο διακόπτη λειτουργίας 5 πάλι στη θέση „ “. κλείοτε
στη συνέχεια πάλι τον διακόπτη ρύθμισης ατμού 2 (στην κατεύθυνση „-“).
ΥΠΟΔΕΙΞΗ
► Εξασφαλίζετε πάντα ότι το φίλτρο καφέ εσπρέσο 0 q θα είναι καθαρό
και δεν θα έχει υπολείμματα από σκόνη καφέ εσπρέσο.
Όταν έχει ζεσταθεί η συσκευή:
1)
Για να προετοιμάσετε έναν καφέ εσπρέσο, τοποθετήστε το μικρό φίλτρο καφέ
εσπρέσο 0 στη συγκράτηση φίλτρου w.
Για να προετοιμάσετε δύο εσπρέσο, τοποθετήστε το μεγάλο φίλτρο καφέ
εσπρέσο q στη συγκράτηση φίλτρου w.
“, έτσι ώστε να εξέλθει καυτό νερό
2) Γεμίστε το μικρό φίλτρο καφέ εσπρέσο 0 έως το σύμβολο Max, με σκόνη
καφέ εσπρέσο. Αυτό αντιστοιχεί περ σε 7 γρ. σκόνη, ή σε ένα κοφτό κουτάλι
δοσομέτρησης 9.
Ή...
Γεμίστε το μεγάλο φίλτρο καφέ εσπρέσο q έως το σύμβολο Max, με σκόνη
καφέ εσπρέσο. Αυτό αντιστοιχεί περ σε 7 γρ. + 7 γρ. σκόνη ή σε δύο κοφτά
κουτάλια δοσομέτρησης 9.
3) Συμπιέστε τη σκόνη καφέ εσπρέσσο με τη βοήθεια του εξαρτήματος συμπίεσης στη συσκευή 6. Στη συνέχεια γεμίστε, εάν απαιτείται, και με άλλη σκόνη
καφέ εσπρέσο, έως ότου το φίλτρο εσπρέσο 0 q γεμίσει έως το σύμβολο
Max. Συμπιέστε στη συνέχει εκ νέου τη σκόνη καφέ εσπρέσο.
70
SEM 1100 A2
Page 74

ΥΠΟΔΕΙΞΗ
► Η συμπίεση της σκόνης εσπρέσο είναι μια σημαντική διαδικασία κατά την
προετοιμασία ενός καφέ εσπρέσο. Εάν η σκόνη καφέ εσπρέσο πιεστεί πάρα
πολύ, τότε ο καφές εσπρέσο περνάει αργά και δεν δημιουργείται πλέον
κρέμα. Εάν η σκόνη εσπρέσο δεν συμπιεστεί τόσο δυνατά, ο εσπρέσο
περνάει γρήγορα και δημιουργείται μόνο λίγη κρέμα.
4) Τοποθετήστε τον φορέα φίλτρου w μέσα στη συσκευή, βάζοντας τον στο
σύμβολο „INSERT“ στη συσκευή και στη συνέχεια περιστρέφοντας αριστερόστροφα έως το σύμβολο „LOCK“ στη συσκευή.
5) Τοποθετήστε ένα (ή δύο) φλιτζάνι (α) κάτω από τα ανοίγματα φορέα φίλτρου.
Προτείνουμε να ξεπλύνετε προηγουμένως τα φλιτζάνια με καυτό νερό, ώστε ο
εσπρέσο να μην κρυώσει τόσο γρήγορα.
6) Όταν ανάψει η πράσινη λυχνία ελέγχου ζεστάματος 4, μπορείτε να στρέψετε
τον περιστρεφόμενο διακόπτη λειτουργίας 5 στη θέση „
τρέχει στο (στα) φλιτζάνι (α).
ΠΡΟΕΙΔΟΠΟΙΗΣΗ
Ποτέ μην απομακρύνετε τον φορέα φίλτρου w κατά τη διάρκεια
της δημιουργίας του καφέ εσπρέσο!
Τα πιτσιλίσματα του καυτού εσπρέσο οδηγούν σε τραυματισμούς!
► Εξασφαλίζετε πάντα ότι ο περιστρεφόμενος διακόπτης λειτουργίας 5
στέκεται στο „
ΥΠΟΔΕΙΞΗ
► Αυτή η συσκευή είναι εξοπλισμένη με μια λειτουργία προ-βρασίματος.
Αυτό σημαίνει ότι το καυτό νερό, προτού πιεστεί μέσα από το σκόνη καφέ
εσπρέσο, παραμένει για λίγο στο φορέα φίλτρου. Έτσι γίνεται το άρωμα
του καφέ εσπρέσο πιο εκλεπτυσμένο.
“, προτού απομακρύνετε τον φορέα φίλτρου w.
“. Ο εσπρέσο
GR
CY
Όταν το (τα) φλιτζάνι (α) έχει γεμίσει έως την επιθυμητή ποσότητα (περ. 20 ml),
7)
στρέψτε τον περιστρεφόμενο διακόπτη λειτουργίας 5 πάλι στη θέση „
Τώρα μπορείτε να πιείτε τον καφέ εσπρέσο.
8) Απενεργοποιήστε τη συσκευή από το διακόπτη on/off 3.
ΥΠΟΔΕΙΞΗ
► Μετά από 3 λεπτά, η συσκευή απενεργοποιείται αυτόματα.
Απομακρύνετε μετά από κάθε χρήση τη σκόνη εσπρέσο από το φίλτρο εσπρέ-
9)
σο 0 q. Για αυτό σηκώστε επάνω τη διάταξη μπλοκαρίσματος του φίλτρου
e, έτσι ώστε να μην μπορεί να πέσει έξω το φίλτρο εσπρέσο 0 q από τον
φορέα φίλτρου w. Τώρα αδειάστε το φίλτρο καφέ εσπρέσο 0 q. Απορρίπτετε τη σκόνη καφέ εσπρέσο ή τις κάψουλες εσπρέσο πάντα με φιλικό προς
το περιβάλλον τρόπο, για παράδειγμα στα βιολογικά απορρίμματα.
SEM 1100 A2
“.
71
Page 75

GR
CY
ΥΠΟΔΕΙΞΗ
► Καθαρίζετε τη διάταξη καυτού νερού t απαραίτητα μετά από κάθε χρή-
ση. Διαβάστε σχετικά το Κεφάλαιο „Καθαρισμός και φροντίδα“.
ΥΠΟΔΕΙΞΗ
► Αδειάζετε τακτικά την υποδοχή συλλογής σταγόνων r, το αργότερο
ωστόσο όταν ο κόκκινος πλωτήρας φαίνεται στην εσοχή 7 της σχάρας
σταξίματος 8.
ΥΠΟΔΕΙΞΗ
► Μπορείτε επίσης να χρησιμοποιήσετε ταμπλέτες εσπρέσο για την προ-
ετοιμασία καφέ εσπρέσο. Χρησιμοποιείτε μόνο ταμπλέτες εσπρέσο που
αντιστοιχούν στο πρότυπο ESE. Το πρότυπο ESE είναι ένα σύστημα που
χρησιμοποιούν οι γνωστότεροι κατασκευαστές ταμπλετών εσπρέσο και με
το οποίο γίνεται απλή και καθαρή προετοιμασία του εσπρέσο.
Προετοιμασία καπουτσίνο
ΠΡΟΕΙΔΟΠΟΙΗΣΗ
Να είστε προσεκτικοί κατά την αντιμετώπιση του ατμού όταν
φτιάχνετε αφρόγαλα!
Ο καυτός ατμός ή οι καυτές πιτσιλιές οδηγούν σε τραυματισμούς!
► Χειρίζεστε τον διακόπτη ρύθμισης ατμού 2 πάντα αργά.
1)
Γεμίστε ένα δοχείο για αφρόγαλα (κατά προτίμηση από ανοξείδωτο ατσάλι)
έως το ένα τρίτο με κρύο γάλα.
2) Εξασφαλίστε ότι ο διακόπτης ρύθμισης ατμού 2 έχει κλείσει (περιστρέψτε
έως τον αναστολέα στην κατεύθυνση „ - “).
3) Ωθήστε τη διάταξη για αφρόγαλα z στα πλάγια προς τα έξω. Πιάνετε την
τότε μόνο από τη λαβή u.
4) Στρέψτε τον περιστρεφόμενο διακόπτη λειτουργίας 5 στη θέση „
νετε έως ότου ανάψει η πράσινη λυχνία ελέγχου ζεστάματος 4
5) Κρατήστε ένα άδειο δοχείο κάτω από τη διάταξη για αφρόγαλα z. Περιστρέψτε αργά τον διακόπτη ρύθμισης ατμού 2 προς την κατεύθυνση „+“.
Εξέρχονται συμπυκνωμένο νερό/πιτσιλιές από το ακροφύσιο. Έτσι καθαρίζεται
το ακροφύσιο και το κύκλωμα νερού στο εσωτερικό της συσκευής.
6) Όταν εξέρχεται μόνο ατμός από το ακροφύσιο, στρέψτε τον διακόπτη ρύθμισης ατμού 2 προς την κατεύθυνση „-“, έως ότου δεν θα εξέρχεται άλλος
ατμός από το ακροφύσιο.Πετάξτε το νερό από το δοχείο.
“. Περιμέ-
7) Κρατήστε τώρα το δοχείο για το αφρόγαλα στο χέρι, ώστε να αισθανθείτε τη
θερμοκρασία του γάλακτος και οδηγήστε το ακροφύσιο της διάταξης για
το αφρόγαλα z ελαφρώς μέσα στο γάλα. Κρατήστε τότε το δοχείο για το
αφρόγαλα λίγο λοξά.
72
SEM 1100 A2
Page 76

8) Περιστρέψτε αργά τον διακόπτη ρύθμισης ατμού 2 προς την κατεύθυνση „+“.
9) Μετακινείτε το δοχείο για αφρόγαλα κυκλικά και κρατάτε τότε την ακμή του
ακροφυσίου ελάχιστα κάτω από την επιφάνεια του γάλακτος: τόσο βαθιά
ώστε το γάλα να μην ψεκάζεται σε όλες τις κατευθύνσεις και τόσο ψηλά ώστε
να δημιουργείται ένας παχύς αφρός. Εάν αυτή η εργασία γίνεται σωστά,
ακούγεται τότε ένας βαθύς θόρυβος γουργουρίσματος.
10) Όταν ανεβαίνει ο αφρός γάλακτος, οδηγήστε το ακροφύσιο πιο βαθιά, ώστε
να δημιουργήσετε αφρό στην επόμενη „στρώση“ και για να αποφύγετε ένα
κάψιμο του αφρού.
11) Τέλος βυθίστε το ακροφύσιο πλήρως και περιστρέψτε τον διακόπτη ρύθμισης
ατμού 2 λίγο, ώστε να ζεσταθεί το γάλα.Κρατήστε το δοχείο για αφρόγαλα
λίγο λοξά, έτσι ώστε το γάλα να στροβιλίζεται αργά, ενώ ανακατεύεται με το
ακροφύσιο.
12) Όταν ο αφρός γάλακτος έχει την επιθυμητή πυκνότητα και θερμοκρασία, κλείστε το διακόπτη ρύθμισης ατμού 2 (περιστρέψτε έως τον αναστολέα στην
κατεύθυνση „ - “).
13) Μόνο μετά τραβήξτε το ακροφύσιο από το γάλα.
14) Θέστε τον περιστρεφόμενο διακόπτη λειτουργίας 5 στη θέση „
ΥΠΟΔΕΙΞΗ
► Χρησιμοποιείτε για την προετοιμασία καπουτσίνο πάντα μεγαλύτερα φλι-
τζάνια από ότι για εσπρέσο, διότι προστίθεται και γάλα.
Ακολουθήστε για την προετοιμασία του καπουτσίνο την ίδια διαδικασία σαν
15)
να επρόκειτο να προετοιμάσετε έναν εσπρέσο (βλέπε Κεφάλαιο „Προετοιμασία εσπρέσο“/το ζέσταμα δεν είναι πλέον απαραίτητο).Αφήστε το νερό να
περάσει περ. δύο φορές περισσότερο από ότι στον εσπρέσο (περ. 40 ml).
16) Απενεργοποιήστε τη συσκευή στο διακόπτη on/off 3.
“.
GR
CY
ΥΠΟΔΕΙΞΗ
► Μετά από 3 λεπτά, η συσκευή απενεργοποιείται αυτόματα.
Βάλτε τώρα το αφρόγαλα στον προετοιμασμένο εσπρέσο. Ο καπουτσίνο εί-
17)
ναι τώρα έτοιμος. Μπορείτε να βάλετε όση ζάχαρη θέλετε ή να τον επιστρώσετε με σκόνη κακάο.
ΥΠΟΔΕΙΞΗ
► Μπορείτε να ζεστάνετε με τη διάταξη για το αφρόγαλα z και άλλα υγρά
όπως κακάο ή τσάι.
ΥΠΟΔΕΙΞΗ
► Καθαρίζετε τη διάταξη για αφρόγαλα z απαραίτητα μετά από κάθε χρή-
ση. Διαβάστε σχετικά το Κεφάλαιο „Καθαρισμός και φροντίδα“.
SEM 1100 A2
73
Page 77

GR
CY
Υποδείξεις για το αφρόγαλα
■ Κάθε είδος γάλακτος μπορεί να γίνει κατά βάση αφρόγαλα, ακόμα και το
γάλα σόγιας και ρυζιού. Ορισμένα είδη γάλακτος μπορούν να γίνουν ωστόσο αφρόγαλα μόνο υπό περιορισμούς.
■ Το αποβουτυρωμένο ή άπαχο γάλα δεν καίγεται τόσο εύκολα όπως το πλή-
ρες γάλα, σε πολύ ελάχιστο περιεχόμενο λίπους υπάρχει ωστόσο ο κίνδυνος,
το γάλα να μην γίνει σωστό αφρόγαλα. Για το λόγο αυτό χρησιμοποιείτε το
δυνατόν γάλα με αναλογία λίπους 3,5% ή 1,5%.
■ Το γάλα που έχει κρυώσει καλά, μπορεί να γίνει καλύτερο αφρόγαλα από ότι
το γάλα που δεν είναι τόσο κρύο.
■ Μην κάνετε αφρόγαλα για δεύτερη φορά, διότι αλλιώς αυτό καίγεται.
■ Αφήστε το αφρόγαλα να κάτσει για περ. 30 δευτερόλεπτα, προτού βάλετε τον
αφρό στον εσπρέσο. Έτσι σπάτε μεγαλύτερες φυσαλίδες και το ακόμα υγρό
γάλα πέφτει προς τα κάτω. Στη συνέχεια μπορείτε να βάλετε τον απαλό αφρό
επάνω στον εσπρέσο.
Δημιουργία καυτού νερού
1) Όταν έχει ζεσταθεί η συσκευή:
2) Τοποθετήστε ένα φλιτζάνι κάτω από τη διάταξη για αφρόγαλα z.
3) Όταν ανάβει η πράσινη λυχνία ελέγχου ζεστάματος 4, στρέψτε τον διακόπτη
ρύθμισης ατμού 2 στο „ + “.
4) Θέστε τον περιστρεφόμενο διακόπτη λειτουργίας 5 στη θέση „
νερό εξέρχεται από το ακροφύσιο.
5) Όταν θέλετε να διακόψετε την εξαγωγή καυτού νερού, κλείστε τον διακόπτη
ρύθμισης ατμού 2 (στρέψτε έως τον αναστολέα προς την κατεύθυνση „ - “)
και θέστε τον περιστρεφόμενο διακόπτη λειτουργίας 5 στη θέση „
6) Απενεργοποιήστε τη συσκευή στο διακόπτη on/off 3.
ΥΠΟΔΕΙΞΗ
► Μετά από 3 λεπτά, η συσκευή απενεργοποιείται αυτόματα.
“. Καυτό
“.
74
SEM 1100 A2
Page 78

Καθαρισμός και φροντίδα
ΠΡΟΕΙΔΟΠΟΙΗΣΗ - ΚΙΝΔΥΝΟΣ ΤΡΑΥΜΑΤΙΣΜΟΥ!
■ Τραβάτε πάντα το βύσμα από την πρίζα, προτού καθαρίσετε τη συσκευή.
Κίνδυνος ηλεκτροπληξίας!
■ Αφήνετε πάντα πρώτα τη συσκευή να κρυώνει, προτού καθαρίσετε τη συσκευή.
Κίνδυνος εγκαύματος!
■ Ποτέ μη βυθίζετε τη συσκευή σε νερό ή σε άλλα υγρά! Κίνδυνος ηλεκτροπληξίας!
Καθαρισμός διάταξης για το αφρόγαλα
ΠΡΟΣΟΧΗ - ΕΜΠΡΑΓΜΑΤΕΣ ΖΗΜΙΕΣ
■ Ποτέ μη χρησιμοποιείτε τριβικά, επιθετικά ή χημικά καθαριστικά μέσα για τον
καθαρισμό της συσκευής. Αυτά προσβάλλουν την επιφάνεια της συσκευής.
1)
Τοποθετήστε ένα άδειο δοχείο κάτω από το εξάρτημα για αφρόγαλα z.
2) Στρέφετε τον διακόπτη ρύθμισης ατμού 2 κατευθείαν μετά τη χρήση στο
„ + “ και αφήστε για ορισμένα δευτερόλεπτα να εκφύγει ατμός.
3) Κλείστε τον διακόπτη ρύθμισης ατμού 2 (στρέψτε έως τον αναστολέα προς την
κατεύθυνση „ - “), απενεργοποιήστε τη συσκευή και τραβήξτε το βύσμα δικτύου.
4) Αφήστε το ακροφύσιο να κρυώσει.
5) Απομακρύνετε το ακροφύσιο και καθαρίστε το προσεκτικά σε ζεστό νερό.
6) Ελέγξτε εάν η μικρή οπή έχει έμφραξη στο ακροφύσιο και καθαρίστε την εάν
απαιτείται με μια βελόνα.
7) Καθαρίστε το σωλήνα εξαγωγής ατμού της διάταξης για αφρόγαλα z με
ένα νωπό πανί.
8) Ωθήστε το ακροφύσιο πάλι επάνω στον σωλήνα εξαγωγής ατμού.
GR
CY
SEM 1100 A2
75
Page 79

GR
CY
Καθαρισμός της διάταξης καυτού νερού
Καθαρίζετε τη διάταξη καυτού νερού t μετά από κάθε χρήση.
1) Αφού έχετε ετοιμάσει τον εσπρέσο/καπουτσίνο και έχετε απομακρύνει το φορέα
φίλτρου w, καθαρίστε ολόκληρη την επιφάνεια της διάταξης καυτού νερού t
με ένα νωπό πανί έτσι ώστε να απομακρυνθούν όλα τα υπολείμματα σκόνης.
2) Τοποθετήστε πάλι το φορέα σήτας w χωρίς τοποθετημένη σήτα εσπρέσο 0 q.
3) Στη συνέχεια τοποθετήστε ένα άδειο φλιτζάνι κάτω από την έξοδο καυτού
νερού t και περιστρέψτε τον περιστρεφόμενο διακόπτη λειτουργίας 5 προς
τη θέση „
έκπλυση των τελευταίων υπολειμμάτων σκόνης.
4) Μετά από περ. 20 δευτερόλεπτα θέστε πάλι τον περιστρεφόμενο διακόπτη λειτουργίας 5 στη θέση „
5) Αφαιρέστε πάλι το φορέα σήτας w.
“. Εξέρχεται νερό από την έξοδο καυτού νερού t, και διεξάγει
“ και απενεργοποιήστε τη συσκευή στο διακόπτη on/off 3.
Καθαρισμός αξεσουάρ
1) ) Καθαρίζετε το φορέα φίλτρου w, τα δύο φίλτρα καφέ εσπρέσο 0 q, το δοχείο
νερού 1, το δοσομετρικό κουτάλι 9 και τη σχάρα σταξίματος 8 σε ζεστό νερό.
ΥΠΟΔΕΙΞΗ
► Εάν προσθέσετε απορρυπαντικό στο νερό μπορεί να επηρεαστεί η γεύση
του καφέ εσπρέσο. Στην περίπτωση που οι ακαθαρσίες απομακρύνονται
μόνο με απορρυπαντικό, ξεπλένετε τα εξαρτήματα στη συνέχεια πάντα με
πολύ καθαρό νερό.
Στεγνώνετε όλα τα εξαρτήματα.
2)
3) Η υποδοχή συλλογής σταγόνων r ενδείκνυται για καθαρισμό στο πλυντήριο πιάτων.
Καθαρισμός συσκευής
Καθαρίζετε τη συσκευή με ένα νωπό πανί. Εάν απαιτείται προσθέστε λίγο απορρυπαντικό στο πανί.
Αφαίρεση αλάτων από τη συσκευή
Απομακρύνετε τα άλατα από τη συσκευή τακτικά. Μετά από περ. 200 διαδικασίες προετοιμασίας καφέ, πρέπει να απομακρύνετε τα άλατα από τη συσκευή.
Ανάλογα με το βαθμό σκληρότητας νερού στην περιοχή σας, αυτή η τιμή μπορεί
να αποκλίνει.
Χρησιμοποιείτε για την απομάκρυνση των αλάτων τα προϊόντα του εμπορίου για
μηχανές εσπρέσο. Ακολουθείτε τις διαδικασίες που περιγράφονται στις οδηγίες
χρήσης του προϊόντος απομάκρυνσης αλάτων.
Εάν δεν έχετε τέτοιο προϊόν, μπορείτε εναλλακτικά να ακολουθήσετε την εξής διαδικασία:
1) Γεμίστε το δοχείο νερού 1 έως το σύμβολο MAX.
76
SEM 1100 A2
Page 80

2) Διαλύστε εκεί μέσα 2 κουτάλια (περ. 30 γραμ.) κιτρικό οξύ (διατίθεται σε φαρμακεία).
3) Τοποθετήστε το δοχείο νερού 1 στη συσκευή.
4) Ενεργοποιήστε τη συσκευή από το διακόπτη on/off 3. Ο περιστρεφόμενος
διακόπτης λειτουργίας 5 πρέπει να βρίσκεται στη θέση „
ρύθμισης ατμού 2 είναι κλειστός.
5) Τοποθετήστε τον φορέα φίλτρου w χωρίς φίλτρο καφέ εσπρέσο 0/q μέσα
στη συσκευή και τοποθετήστε ένα φλιτζάνι κάτω από τον φορέα φίλτρου w.
Μόλις ανάψει η πράσινη λυχνία ελέγχου ζεστάματος 4, θέστε τον περιστρε-
φόμενο διακόπτη λειτουργίας 5 στη θέση „
“.
“. Ο διακόπτης
6) Αφήστε να περάσουν περ. 2 φλιτζάνια (φλιτζάνια καφέ) νερό και στη συνέχεια σταματήστε τη διαδικασία.
7) Κρατήστε ένα δοχείο κάτω από τη διάταξη για αφρόγαλα z.
8) Θέστε τον περιστρεφόμενο διακόπτη λειτουργίας 5 στη θέση "
νετε έως ότου ανάψει η πράσινη λυχνία ελέγχου ζεστάματος 4. Περιστρέψτε
αργά τον διακόπτη ρύθμισης ατμού 2 στο „ + “. Αφήστε τη συσκευή να
δημιουργήσει για περ. 2 λεπτά ατμό.
9) Κλείστε μετά από 2 λεπτά τον διακόπτη ρύθμισης ατμού 2, θέστε τον περιστρεφόμενο διακόπτη λειτουργίας 5 στο „
10) Αφήστε το προϊόν απομάκρυνσης αλάτων να επιδράσει για περ. 15 λεπτά.
11) Επαναλάβετε τα βήματα 4 - 10 τρεις φορές.
12) Στη συνέχεια θέστε τον περιστρεφόμενο διακόπτη λειτουργίας 5 στη θέση „
“ και αφήστε το νερό να περάσει για τόσο, έως ότου το δοχείο νερού 1 αδειάσει.
13) Ξεπλύνετε το δοχείο νερού 1 με καθαρό νερό και γεμίστε με καθαρό νερό
έως το σύμβολο Max.
14) Θέστε τον περιστρεφόμενο διακόπτη λειτουργίας 5 στη θέση „
ανάψει η πράσινη λυχνία ελέγχου ζεστάματος 4.
“ και απενεργοποιήστε τη συσκευή.
" και περιμέ-
“, μόλις
GR
CY
15) Αφήστε το νερό να τρέξει.
16) Επαναλάβετε τα βήματα 13 - 15 τρεις φορές.
17) Γεμίστε μια φορά το δοχείο νερού 1 με νερό.
18) Στρέψτε τον περιστρεφόμενο διακόπτη λειτουργίας 5 στη θέση „
19) Κρατήστε ένα δοχείο κάτω από τη διάταξη για αφρόγαλα z και στρέψτε
αργά τον διακόπτη ρύθμισης ατμού 2 στο „ + “ , μόλις ανάψει η πράσινη
λυχνία ελέγχου ζεστάματος 4.
20) Κλείστε μετά από περ. 1 λεπτό τον διακόπτη ρύθμισης ατμού 2, θέστε τον
περιστρεφόμενο διακόπτη λειτουργίας 5 στο „
τη συσκευή.
ΥΠΟΔΕΙΞΗ
► Μετά από 3 λεπτά, η συσκευή απενεργοποιείται αυτόματα.
SEM 1100 A2
“.
“ και απενεργοποιήστε
77
Page 81

Διόρθωση σφαλμάτων
Βλάβη Αιτία Υποστήριξη
• Η σκόνη εσπρέσο είναι πολύ
υγρή και/ή έχει πιεστεί πολύ.
• Ετοιμάστε νέο εσπρέσο,
μην πιέσετε πολύ δυνατά
τη σκόνη εσπρέσο ή
βάλτε νέο καφέ.
GR
CY
Ο καφές εσπρέσο δεν
βγαίνει προς τα έξω.
Ο καφές εσπρέσο τρέχει πάνω από τα άκρα
του φορέα φίλτρου w
αντί από τα ανοίγματα.
• Δεν υπάρχει νερό στο
δοχείο νερού 1.
• Οι οπές των ανοιγμάτων φορέα
φίλτρου έχουν έμφραξη.
• Ο φορέας φίλτρου w δεν
έχει τοποθετηθεί σωστά.
• Τα ανοίγματα φορέα φίλτρου
έχουν έμφραξη.
• Υπάρχουν υπολείμματα
σκόνης εσπρέσο στα άκρα
του φορέα φίλτρου w.
• Δεν έγινε προθέρμανση στη
συσκευή.
• Γεμίστε με νερό στο
δοχείο νερού 1.
• Καθαρίστε το φορέα
φίλτρου w.
• Τοποθετήστε τον φορέα
φίλτρου w σωστά.
• Καθαρίστε το φορέα
φίλτρου w.
• Απελευθερώστε τα άκρα
του φορέα φίλτρου w
από υπολείμματα σκόνης εσπρέσο.
• Προθερμάνετε τη
συσκευή.
Ο καφές εσπρέσο
είναι κρύος.
Θορυβώδης λειτουργία
της αντλίας.
78
• Η πράσινη λυχνία ελέγχου
ζεστάματος 4 δεν έχει ανάψει
ακόμα.
• Τα φλιτζάνια δεν έχουν
προθερμανθεί.
• Το δοχείο νερού 1 είναι άδειο.
• Το δοχείο νερού 1 δεν έχει
τοποθετηθεί σωστά, έτσι ώστε
το νερό να μην φτάνει στη
συσκευή.
• Περιμένετε έως ότου
ανάψει η πράσινη
λυχνία ελέγχου ζεστάματος 4
• Προθερμάνετε τα φλι-
τζάνια.
• Γεμίστε με νερό στο
δοχείο νερού 1.
• Τοποθετήστε σωστά το
δοχείο νερού 1.
SEM 1100 A2
Page 82

Η κρέμα είναι πολύ
ανοιχτόχρωμη (ο καφές
τρέχει γρήγορα από τον
φορέα φίλτρου w).
• Πολύ λίγη σκόνη εσπρέσο.
• Η σκόνη εσπρέσο είναι πολύ
χονδρά αλεσμένη.
• Χρησιμοποιήστε περισσότερη σκόνη εσπρέσο.
• Χρησιμοποιείτε μόνο ειδικά δημιουργημένη σκόνη
για καφέ εσπρέσο.
• Πολύ σκόνη καφέ εσπρέσο.
Η κρέμα είναι πολύ
σκουρόχρωμη (ο καφές
τρέχει αργά από τον
φορέα φίλτρου w).
Το γάλα δεν αφρίζει.
• Η σκόνη έχει πολύ λεπτό
άλεσμα ή είναι νωπή.
• Το φίλτρο έχει έμφραξη. • Καθαρίστε το φίλτρο.
• Το γάλα δεν είναι αρκετά κρύο.
• Η διάταξη για αφρόγαλα z
έχει ακαθαρσίες.
Απόρριψη
Απόρριψη συσκευής
Σε καμία περίπτωση μην πετάξετε τη συσκευή στα οικιακά απορρίμματα.
Αυτό το προϊόν υπόκειται στην Ευρωπαϊκή Οδηγία 2012/19/EUWEEE (Waste Electrical and Electronic Equipment - Απόρριψη
ηλεκτρικών και ηλεκτρονικών συσκευών).
• Χρησιμοποιήστε λιγότερη
σκόνη εσπρέσο.
• Χρησιμοποιείτε μόνο ειδικά δημιουργημένη σκόνη
για καφέ εσπρέσο.
• Χρησιμοποιήστε γάλα
από το ψυγείο.
• Καθαρίστε τη διάταξη
για το αφρόγαλα z.
GR
CY
Απομακρύνετε τη συσκευή μέσω μιας εγκεκριμένης επιχείρησης απομάκρυνσης ή
μέσω της κοινοτικής επιχείρησης απομάκρυνσης. Να τηρείτε τους ισχύοντες κανονισμούς. Σε περίπτωση αμφιβολιών ελάτε σε επαφή με την επιχείρηση απόρριψης.
SEM 1100 A2
79
Page 83

Εγγύηση και σέρβις πελατών
Έχετε για αυτή τη συσκευή 3 χρόνια εγγύηση από την ημερομηνία αγοράς.
Η συσκευή κατασκευάστηκε και ελέγχθηκε προσεκτικά πριν από την αποστολή.
Παρακαλούμε φυλάξτε την απόδειξη ταμείου ως απόδειξη για την αγορά. Σε
περίπτωση εγγύησης ελάτε σε επικοινωνία με το τμήμα του σέρβις τηλεφωνικά.
Μόνο έτσι μπορεί να εξασφαλιστεί μια δωρεάν αποστολή του εμπορεύματός σας.
ΥΠΟΔΕΙΞΗ
► Η απόδοση εγγύησης ισχύει μόνο για σφάλματα υλικού ή κατασκευής, όχι
ωστόσο για ζημιές από τη μεταφορά, για εξαρτήματα φθοράς ή για ζημιές
σε εύθραυστά εξαρτήματα, π.χ. διακόπτες.
Το προϊόν προορίζεται μόνο για την ιδιωτική και όχι για την επαγγελματική χρήση.
Σε περίπτωση κακής μεταχείρισης και ακατάλληλης χρήσης, σε χρήση βίας και
σε παρεμβάσεις οι οποίες δεν διεξήχθησαν από το εξουσιοδοτημένο μας τμήμα
σέρβις, η εγγύηση παύει να ισχύει.
Τα νομικά σας δικαιώματα δεν περιορίζονται μέσω αυτής της εγγύησης. Ο χρόνος
εγγύησης δεν επεκτείνεται μέσω της εγγύησης. Αυτό ισχύει και για εξαρτήματα τα
οποία έχουν αντικατασταθεί και επισκευαστεί.
Ενδεχόμενες ήδη υπάρχουσες κατά την αγορά ζημιές και ελλείψεις πρέπει να
ανακοινώνονται αμέσως μετά την αποσυσκευασία, το αργότερο όμως δύο ημέρες
μετά την ημερομηνία αγοράς.
Μετά τη λήξη του χρόνου εγγύησης χρεώνονται οι εμφανιζόμενες επισκευές.
Σέρβις Ελλάδα
Tel.: 801 5000 019 (0,03 EUR/Min.)
E-Mail: kompernass@lidl.gr
IAN 59345
CY
Σέρβις Κύπρος
Tel.: 8009 4409
E-Mail: kompernass@lidl.com.cy
IAN 59345
Τηλεφωνικό κέντρο (Hotline): Δευτέρα έως Παρασκευή, 8:00 – 20:00 (CET)
Εισαγωγέας
KOMPERNASS HANDELS GMBH
BURGSTRASSE 21
44867 BOCHUM
GERMANY
www.kompernass.com
80
SEM 1100 A2
Page 84

Inhaltsverzeichnis
Einführung . . . . . . . . . . . . . . . . . . . . . . . . . . . . . . . . . . . . . . . . . . . . . . .82
Urheberrecht. . . . . . . . . . . . . . . . . . . . . . . . . . . . . . . . . . . . . . . . . . . . . . . . . . . . . . .82
Haftungsbeschränkung . . . . . . . . . . . . . . . . . . . . . . . . . . . . . . . . . . . . . . . . . . . . . . .82
Warnhinweise . . . . . . . . . . . . . . . . . . . . . . . . . . . . . . . . . . . . . . . . . . . . . . . . . . . . . .82
Bestimmungsgemäße Verwendung . . . . . . . . . . . . . . . . . . . . . . . . . . . . . . . . . . . . .83
Lieferumfang / Transportinspektion . . . . . . . . . . . . . . . . . . . . . . . . . . . . . . . . . . . . .84
Entsorgung der Verpackung . . . . . . . . . . . . . . . . . . . . . . . . . . . . . . . . . . . . . . . . . . .84
Sicherheitshinweise . . . . . . . . . . . . . . . . . . . . . . . . . . . . . . . . . . . . . . .85
Geräteelemente . . . . . . . . . . . . . . . . . . . . . . . . . . . . . . . . . . . . . . . . . .87
Technische Daten . . . . . . . . . . . . . . . . . . . . . . . . . . . . . . . . . . . . . . . . .87
Erste Inbetriebnahme . . . . . . . . . . . . . . . . . . . . . . . . . . . . . . . . . . . . . .88
Bedienung . . . . . . . . . . . . . . . . . . . . . . . . . . . . . . . . . . . . . . . . . . . . . . .88
Wassertank befüllen . . . . . . . . . . . . . . . . . . . . . . . . . . . . . . . . . . . . . . . . . . . . . . . . .88
Aufheizen nach längerer Standzeit/bei erster Inbetriebnahme . . . . . . . . . . . . . . . .89
Aufheizen vor jedem Gebrauch . . . . . . . . . . . . . . . . . . . . . . . . . . . . . . . . . . . . . . . .90
Espresso zubereiten . . . . . . . . . . . . . . . . . . . . . . . . . . . . . . . . . . . . . . . . . . . . . . . . .90
Cappuccino zubereiten . . . . . . . . . . . . . . . . . . . . . . . . . . . . . . . . . . . . . . . . . . . . . .92
Tipps für den Milchschaum . . . . . . . . . . . . . . . . . . . . . . . . . . . . . . . . . . . . . . . . . . . .94
Heißes Wasser erzeugen . . . . . . . . . . . . . . . . . . . . . . . . . . . . . . . . . . . . . . . . . . . . .94
Reinigen und Pfl egen . . . . . . . . . . . . . . . . . . . . . . . . . . . . . . . . . . . . . .95
Milchaufschäumer reinigen . . . . . . . . . . . . . . . . . . . . . . . . . . . . . . . . . . . . . . . . . . .95
Heißwasserdusche reinigen . . . . . . . . . . . . . . . . . . . . . . . . . . . . . . . . . . . . . . . . . . .96
Zubehörteile reinigen . . . . . . . . . . . . . . . . . . . . . . . . . . . . . . . . . . . . . . . . . . . . . . . .96
Gerät reinigen . . . . . . . . . . . . . . . . . . . . . . . . . . . . . . . . . . . . . . . . . . . . . . . . . . . . .96
Gerät entkalken . . . . . . . . . . . . . . . . . . . . . . . . . . . . . . . . . . . . . . . . . . . . . . . . . . . .96
DE
AT
CH
Fehlerbehebung . . . . . . . . . . . . . . . . . . . . . . . . . . . . . . . . . . . . . . . . . .98
Entsorgung . . . . . . . . . . . . . . . . . . . . . . . . . . . . . . . . . . . . . . . . . . . . . .99
Gerät entsorgen . . . . . . . . . . . . . . . . . . . . . . . . . . . . . . . . . . . . . . . . . . . . . . . . . . . .99
Garantie und Service . . . . . . . . . . . . . . . . . . . . . . . . . . . . . . . . . . . . .100
Importeur . . . . . . . . . . . . . . . . . . . . . . . . . . . . . . . . . . . . . . . . . . . . . .100
SEM 1100 A2
81
Page 85

Einführung
Herzlichen Glückwunsch zum Kauf Ihres neuen Gerätes.
Sie haben sich damit für ein hochwertiges Produkt entschieden. Die Bedienungsan-
leitung ist Bestandteil dieses Produkts. Sie enthält wichtige Hinweise für Sicherheit,
Gebrauch und Entsorgung. Machen Sie sich vor der Benutzung des Produkts mit
allen Bedien- und Sicherheitshinweisen vertraut. Benutzen Sie das Produkt nur wie
beschrieben und für die angegebenen Einsatzbereiche. Händigen Sie alle Unterlagen bei Weitergabe des Produkts an Dritte mit aus.
Urheberrecht
Diese Dokumentation ist urheberrechtlich geschützt.
DE
AT
CH
Alle Rechte, auch die der fotomechanischen Wiedergabe, der Vervielfältigung
und der Verbreitung mittels besonderer Verfahren (zum Beispiel Datenverarbeitung, Datenträger und Datennetze), auch teilweise, sowie inhaltliche und technische Änderungen vorbehalten.
Haftungsbeschränkung
Alle in dieser Bedienungsanleitung enthaltenen technischen Informationen, Daten
und Hinweise für die Bedienung, entsprechen dem letzten Stand bei Drucklegung
und erfolgen unter Berücksichtigung unserer bisherigen Erfahrungen und Erkenntnisse nach bestem Wissen.
Aus den Angaben, Abbildungen und Beschreibungen in dieser Anleitung können
keine Ansprüche hergeleitet werden.
Der Hersteller übernimmt keine Haftung für Schäden aufgrund von Nichtbeachtung der Anleitung, nicht bestimmungsgemäßer Verwendung, unsachgemäßen
Reparaturen, unerlaubt vorgenommener Veränderungen oder Verwendung nicht
zugelassener Ersatzteile.
Warnhinweise
In der vorliegenden Bedienungsanleitung werden folgende Warnhinweise verwendet:
WARNUNG
Ein Warnhinweis dieser Gefahrenstufe kennzeichnet eine mög-
liche gefährliche Situation.
Falls die gefährliche Situation nicht vermieden wird, kann dies zu Verletzungen
führen.
► Die Anweisungen in diesem Warnhinweis befolgen, um Verletzungen von
P
ersonen zu vermeiden.
82
SEM 1100 A2
Page 86

ACHTUNG
Ein Warnhinweis dieser Gefahrenstufe kennzeichnet einen
mög
lichen Sachschaden.
Falls die Situation nicht vermieden wird, kann dies zu Sachschäden führen.
► Die Anweisungen in diesem Warnhinweis befolgen, um Sachschäden zu
ermeiden.
v
HINWEIS
► Ein Hinweis kennzeichnet zusätzliche Informationen, die den Umgang mit
dem Ger
ät erleichtern.
Bestimmungsgemäße Verwendung
Dieses Gerät dient ausschließlich dem Zubereiten von Espresso/Cappuccino und
dem Erwärmen von Wasser. Es ist ausschließlich für die Nutzung in privaten Haushalten bestimmt. Nutzen Sie es nicht gewerblich.
Eine andere oder darüber hinausgehende Benutzung gilt als nicht bestimmungsgemäß.
WARNUNG
Gefahr durch nicht bestimmungsgemäße Verwendung!
Von dem Gerät können bei nicht bestimmungsgemäßer Verwendung und/
oder andersartiger Nutzung Gefahren ausgehen.
► Das Gerät ausschließlich bestimmungsgemäß verwenden.
► Die in dieser Bedienungsanleitung beschriebenen Vorgehensweisen
einhalten.
Ansprüche jeglicher Ar
dung sind ausgeschlossen.
Das Risiko trägt allein der Benutzer.
t wegen Schäden aus nicht bestimmungsgemäßer Verwen-
DE
AT
CH
SEM 1100 A2
83
Page 87

Lieferumfang / Transportinspektion
WARNUNG
Erstickungsgefahr!
► Verpackungsmaterialien dürfen nicht zum Spielen verwendet werden.
Es besteht Er
Das Gerät wird standardmäßig mit folgenden Komponenten geliefert:
▯ Espressomaschine
▯ Siebträger
▯ großes Espressosieb
stickungsgefahr.
DE
AT
CH
▯ kleines Espressosieb
▯ Messlöff el mit Stopfer
▯ Bedienungsanleitung
HINWEIS
► Prüfen Sie die Lieferung auf Vollständigkeit und auf sichtbare Schäden.
► Bei einer unvollständigen Lieferung oder Schäden infolge mangelhafter
erpackung oder durch Transport wenden Sie sich an die Service-Hotline.
V
Entsorgung der Verpackung
Die Verpackung schützt das Gerät vor Transportschäden. Die Verpackungsmaterialien sind nach umweltverträglichen und entsorgungstechnischen Gesichtspunkten
ausgewählt und deshalb recyclebar.
Die Rückführung der Verpackung in den Materialkreislauf spart Rohstoff e und verringert das Abfallaufkommen. Entsorgen Sie nicht mehr benötigte Verpackungsmaterialien gemäß den örtlich geltenden Vorschriften.
HINWEIS
► Heben Sie wenn möglich die Originalverpackung während der Garan-
eit des Gerätes auf, um das Gerät im Garantiefall ordnungsgemäß
tiez
verpacken zu können.
84
SEM 1100 A2
Page 88

Sicherheitshinweise
Beachten Sie für einen sicheren Umgang mit dem Gerät die folgenden
Sicherheitshinweise:
WARNUNG - VERLETZUNGSGEFAHR!
■ Kontrollieren Sie das Gerät vor der Verwendung auf äußere sichtbare
Schäden. Nehmen Sie ein beschädigtes oder heruntergefallenes
Gerät nicht in Betrieb.
■ Dieses Gerät darf nicht von Kindern benutzt werden.
■ Halten Sie das Gerät und seine Anschlussleitung außerhalb der Reich-
weite von Kindern.
■ Das Gerät und seine Anschlussleitung sind von Kindern jünger als 8
Jahren fernzuhalten.
■ Das Gerät kann von Kindern ab 8 Jahren benutzt werden, wenn sie
beaufsichtigt oder bezüglich des sicheren Gebrauchs des Gerätes
unterwiesen wurden und die draus resultierenden Gefahren verstan-
DE
AT
CH
den haben.
■ Das Gerät kann von Personen mit reduzierten physischen, sensori-
schen oder mentalen Fähigkeiten oder Mangel an Erfahrung und/
oder Wissen benutzt werden, wenn sie beaufsichtigt oder bezüglich
des sicheren Gebrauchs des Gerätes unterwiesen wurden und die
daraus resultierenden Gefahren verstanden haben.
■ Reinigung und Benutzer-Wartung dürfen nicht von Kindern durchge-
führt werden, es sei denn, sie sind 8 Jahre oder älter und beaufsichtigt.
■ Kinder dürfen nicht mit dem Gerät spielen.
■ Lassen Sie Reparaturen am Gerät nur von autorisierten Fachbetrieben
oder dem Kundenservice durchführen. Durch unsachgemäße Reparaturen können erhebliche Gefahren für den Benutzer entstehen. Zudem
erlischt der Garantieanspruch.
■ Tauchen Sie das Gerät nicht in Wasser oder andere Flüssigkeiten.
Gefahr eines elektrischen Schlages!
■ Fassen Sie das Gerät niemals mit nassen oder feuchten Händen an.
■ Lassen Sie beschädigte Netzstecker oder Netzkabel sofort von au-
torisiertem Fachpersonal oder dem Kundenservice austauschen, um
Gefährdungen zu vermeiden.
SEM 1100 A2
85
Page 89

■ Verbrennungsgefahr! Einige Teile werden während der Benutzung
sehr heiß!
■ Bei der Benutzung des Gerätes entstehen heiße Dampfschwaden.
Achten Sie darauf, dass Sie sich nicht daran verbrühen! Halten Sie
ausreichenden Abstand zum Dampf.
■ Schließen Sie das Gerät nur an eine vorschriftsmäßig installierte
und geerdete Netzsteckdose an.
ACHTUNG - SACHSCHÄDEN
■ Defekte Bauteile dürfen nur gegen Original-Ersatzteile ausgetauscht
DE
AT
CH
werden. Nur bei diesen Teilen ist gewährleistet, dass sie die Sicherheitsanforderungen erfüllen werden.
■ Schützen Sie das Gerät vor Feuchtigkeit und dem Eindringen von Flüs-
sigkeiten.
■ Schützen Sie das Gerät vor Stößen, Staub, Chemikalien, starken Tempe-
raturschwankungen und zu nahen Wärmequellen (Öfen, Heizkörper).
■ Tauchen Sie das Gerät niemals in Wasser oder andere Flüssigkeiten.
■ Ziehen Sie immer den Netzstecker aus der Netzsteckdose; ziehen
Sie niemals am Kabel.
■ Lassen Sie das Gerät während des Betriebes niemals unbeaufsichtigt.
■ Benutzen Sie keine externe Zeitschaltuhr oder ein separates Fern-
wirksystem um das Gerät zu betreiben.
■ Betreiben Sie das Gerät niemals in Räumen, in denen sich Tempera-
turen unter oder um 0°C befi nden. Bei Gefrieren des Wassers in den
Leitungen oder im Wassertank, kann das Gerät beschädigt werden.
■ Betreiben Sie das Gerät niemals im Freien. Dieses Gerät ist nur für
die Verwendung in Innenräumen vorgesehen.
HINWEIS
► Eine Reparatur des Gerätes während der Garantiezeit darf nur
von einem vom Hersteller autorisierten Kundendienst vorgenommen werden, sonst besteht bei nachfolgenden Schäden kein
Garantieanspruch mehr.
86
SEM 1100 A2
Page 90

Geräteelemente
1 Wassertank
2 Dampfregulierungsschalter
3 Ein-/Aus-Schalter
4 grüne Aufheizkontrollleuchte
5 Funktionsdrehschalter
6 Stopfer
7 Aussparung für den roten Schwimmer
8 Abtropfgitter
9 Messlöff el mit Stopfer
0 kleines Espressosieb
q großes Espressosieb
w Siebträger
e Siebblockierer
r Tropfenauff angschale
t Heißwasserdusche
DE
AT
CH
z Milchaufschäumer
u Griff
i rote Kontrollleuchte
Technische Daten
Netzspannung 220 - 240 V ∼ / 50 Hz
Nennleistung 1100 W
Pumpendruck ca. 1,5 MPa (15 bar)
Wasserbehälter (Max) 1,5 Liter
Energieverbrauch im Bereitschafts-
zustand bis zur automatischen
Abschaltung
Leistungsaufnahme im
Aus-Zustand
ca. 31,3 Wh
0 W
SEM 1100 A2
87
Page 91

Erste Inbetriebnahme
1) Reinigen Sie den Siebträger w, den Messlöff el 9, die Espressosiebe 0 q,
das Abtropfgitter 8 und den Wassertank 1 wie im Kapitel „Reinigen und
Pfl egen“ beschrieben.
2) Stellen Sie das Gerät auf eine ebene und hitzebeständige Unterlage. Achten
Sie drauf, dass die Netzsteckdose in erreichbarer Nähe ist.
3) Setzen Sie das Abtropfgitter 8 so ein, dass der rote Schwimmer durch die
Aussparung 7 im Abtropfgitter 8 ragen kann.
4) Stecken Sie den Netzstecker in eine Netzsteckdose.
5) Gehen Sie vor der ersten Verwendung folgendermaßen vor, um die internen
Leitungen zu reinigen:
DE
AT
CH
6) Lassen Sie Wasser für ca. 5 Tassen Espresso durch das Gerät laufen. Lesen Sie
hierzu das Kapitel „Bedienung“.
7) Lassen Sie für ca. 30 Sekunden Dampf erzeugen. Lesen Sie hierzu das Kapitel
„Bedienung“.
HINWEIS
► Bei der ersten Benutzung kann es sein, dass die Pumpe schon hörbar arbei-
tet, Ger
In diesem Fall drehen Sie den Dampfregulierungsschalter 2 in Richtung
„+“, so dass die Luft aus den Leitungen des Gerätes entweichen kann (der
Funktionsdrehschalter 5 steht auf der Position „
Sekunden ist die Luft entwichen, die Geräusche verschwinden und Wasser
tritt aus dem Gerät aus.
äusche entstehen, jedoch noch kein Wasser aus dem Gerät kommt.
Bedienung
Wassertank befüllen
HINWEIS
“). Nach etwa 20
► Verwenden Sie für die Zubereitung von Espresso/Cappuccino ausschließ-
lich frisches T
1) Ziehen Sie den Wassertank 1 nach oben heraus, öff nen Sie den Deckel
und füllen Sie ihn mit Wasser:
Füllen Sie mindestens Wasser bis zur Min-Markierung ein.
Füllen Sie nie mehr Wasser als bis zu Max-Markierung ein.
2) Schieben Sie den Wassertank 1 wieder so auf das Gerät, dass dieser in den
Schienen am Gerät heruntergleitet und fest sitzt.
► Sie können den Wassertank 1 auch befüllen, ohne dass Sie ihn v
abnehmen. Öff nen Sie dafür einfach den Wassertankdeckel und füllen Sie
Wasser mit einer Flasche o.ä. ein. Achten Sie dabei darauf, dass kein Wasser
neben den Wassertank 1 läuft.
88
rinkwasser.
om Gerät
SEM 1100 A2
Page 92

Aufheizen nach längerer Standzeit/
bei erster Inbetriebnahme
Heizen Sie das Gerät, wenn Sie es längere Zeit nicht benutzt haben, folgendermaßen auf:
1) Füllen Sie Wasser in den Wassertank 1.
2) Legen Sie das große q oder das kleine Espressosieb 0 in den Siebträger w.
3) Setzen Sie den Siebträger w in das Gerät ein, indem Sie ihn an der Markierung „INSERT“ am Gerät einsetzen und dann gegen den Uhrzeigersinn, bis
zur Markierung „LOCK“ am Gerät, drehen.
4) Stellen Sie eine Tasse unter den Siebträger w.
5) Drehen Sie den Dampfregulierungsschalter 2 zu (bis zum Anschlag in Richtung „ - “ drehen).
6) Schalten Sie das Gerät am Ein-/Aus-Schalter 3 an.
7) Die rote Kontrollleuchte i leuchtet.
DE
AT
CH
8) Drehen Sie den Funktionsdrehschalter 5 auf die Position „
pe beginnt, Wasser in das Gerät zu pumpen. Sobald das Wasser aus den
Siebträger-Öff nungen tritt, drehen Sie den Funktionsdrehschalter 5 wieder
auf die Position „ “.
9) Sobald die grüne Aufheizkontrollleuchte 4 leuchtet, drehen Sie den Funktionsdrehschalter 5 auf die Position „
te durchlaufen. Es kann sein, dass Sie zwischendurch die Tasse leeren müssen.
Stoppen Sie dafür kurz den Vorgang, indem Sie den Funktionsdrehschalter 5
wieder auf die Position „ “ drehen.
10) Nach ca. 1 Minute drehen Sie den Funktionsdrehschalter 5 wieder auf die
Position „
11) Warten Sie, bis die grüne Aufheizkontrollleuchte 4 wieder leuchtet. Das Aufheizen ist abgeschlossen. Sie können nun Espresso zubereiten.
“.
“. Lassen Sie das Wasser ca. 1 Minu-
“. Die Pum-
SEM 1100 A2
89
Page 93

Aufheizen vor jedem Gebrauch
Bevor Sie einen Espresso oder Cappuccino zubereiten können, muss das Gerät aufheizen.
1) Schalten Sie das Gerät am Ein-/Aus-Schalter 3 an. Der Funktionsdrehschalter 5
steht auf der Position „
2) Die rote Kontrollleuchte i leuchtet.
3) Warten Sie, bis die grüne Aufheizkontrollleuchte 4 leuchtet.
Sie können nun einen Espresso/Cappuccino zubereiten.
“.
Espresso zubereiten
HINWEIS
DE
AT
CH
► Falls Sie vor der Espressozubereitung heißen Dampf aus der Maschine
ogen haben, empfehlen wir Ihnen vor der Espressozubereitung etwas
bez
heißes Wasser zu beziehen. Ansonsten kann es sein, dass der Espresso
verbrannt schmeckt. Halten Sie eine leere Tasse unter den Milchaufschäumer z. Drehen Sie den Dampfregulierungsschalter 2 in Richtung „+“.
Drehen Sie den Funktionsdrehschalter 5 auf die Position „
heißes Wasser aus der Düse tritt. Warten Sie einige Sekunden, bevor Sie
den Funktionsdrehschalter 5 wieder auf die Position „ “ stellen. Drehen
Sie dann den Dampfregulierungsschalter 2 wieder zu (in Richtung „-“).
HINWEIS
► Stellen Sie immer sicher, dass das Espressosieb 0 q sauber und v
Espressopulver-Resten befreit ist.
1) Wenn das Gerät aufgeheizt ist:
Um einen Espresso zuzubereiten, setzen Sie das kleine Espressosieb 0 in
den Siebträger w ein.
Um zwei Espressi zuzubereiten, setzen Sie das große Espressosieb q in den
Siebträger w ein.
2) Füllen Sie das kleine Espressosieb 0 bis zur Max-Markierung mit Espressopulver. Dies entspricht ca. 7g Pulver, oder einem gestrichenem Messlöff el 9.
oder...
Füllen Sie das große Espressosieb q bis zur Max-Markierung mit Espressopulver. Das entspricht ca. 7g + 7g Pulver, oder zwei gestrichenen Messlöffeln 9.
“, so dass
on
3) Verdichten Sie das Espressopulver mit Hilfe des Stopfers am Gerät 6. Füllen
Sie danach, falls nötig, weiteres Espressopulver nach, so dass das Espressosieb 0 q bis zur Max-Markierung gefüllt ist. Verdichten Sie das Espressopulver danach erneut.
90
SEM 1100 A2
Page 94

HINWEIS
► Das Verdichten des Espressopulvers ist ein wesentlicher Vorgang bei der
eitung eines Espressos. Wird das Espressopulver sehr stark gepresst,
Zuber
so läuft der Espresso langsam durch und es gibt mehr Crema. Ist das
Espressopulver nicht so stark verdichtet, läuft der Espresso schnell durch, es
entsteht nur wenig Crema.
4) Setzen Sie den Siebträger w in das Gerät ein, indem Sie ihn an der Markierung „INSERT“ am Gerät einsetzen und dann gegen den Uhrzeigersinn, bis
zur Markierung „LOCK“ am Gerät, drehen.
5) Stellen Sie eine (oder zwei) Tasse(n) unter die Siebträger-Öff nungen. Wir
empfehlen, die Tassen vorher mit heißem Wasser auszuspülen, damit der Espresso nicht so schnell abkühlt.
6) Wenn die grüne Aufheizkontrollleuchte 4 leuchtet, können Sie nun den Funktionsdrehschalter 5 auf die Position „
Tasse(n).
WARNUNG
Entnehmen Sie niemals den Siebträger w während der Espres-
soausgabe!
“ drehen. Der Espresso läuft in die
DE
AT
CH
Die entstehenden Spritzer des heißen Espressos führen zu Verletzungen!
► Stellen Sie immer sicher, dass der Funktionsdrehschalter 5 auf „
bevor Sie den Siebträger w entfernen.
HINWEIS
► Dieses Gerät ist mit einer Vorbrühfunktion ausgestattet. Das bedeutet, dass
das heiße W
kurze Zeit im Siebträger steht. Dies verfeinert das Aroma des Espressos.
7) Wenn die Tasse(n) bis zur gewünschten Menge gefüllt sind (ca. 20 ml), drehen Sie den Funktionsdrehschalter 5 wieder in die Position „
Sie können den Espresso nun trinken.
8) Stellen Sie das Gerät am Ein-/Aus-Schalter 3 aus.
HINWEIS
► Nach 3 Minuten schaltet sich das Gerät automatisch aus.
Entfernen Sie nach jedem Gebrauch das Espressopulver aus dem Espresso-
9)
sieb 0 q. Entnehmen Sie den Siebträger w aus dem Gerät. Klappen Sie
den Siebblockierer e nach oben, so dass das Espressosieb 0 q nicht aus dem
Siebträger w herausfallen kann. Entleeren Sie nun das Espressosieb 0 q. Entsorgen Sie das Espressopulver oder die Espressopads immer umweltgerecht,
zum Beispiel im Bioabfall.
asser, bevor es durch das Espressopulver gedrückt wird, für
“ steht,
“.
SEM 1100 A2
91
Page 95

HINWEIS
DE
AT
CH
► Reinigen Sie die Heißwasserdusche t unbedingt nach jedem Gebr
Lesen Sie hierzu das Kapitel „Reinigen und Pfl egen“.
HINWEIS
► Entleeren Sie regelmäßig die Tropfenauff angschale r, spätestens jedoch,
enn der rote Schwimmer in der Aussparung 7 des Abtropfgitters 8 zu
w
sehen ist.
HINWEIS
► Sie können auch Espresso-Pads für die Zubereitung des Espressos verwen-
erwenden Sie nur Espresso-Pads die dem ESE-Standard entsprechen.
den. V
Bei dem ESE-Standard handelt es sich um ein von führenden EspressoPads-Herstellern angenommenes System, das eine einfache und saubere
Zubereitung von Espresso möglich macht.
Cappuccino zubereiten
WARNUNG
Seien Sie vorsichtig im Umgang mit dem Dampf zur Milchschau-
merzeugung!
auch.
Der heiße Dampf oder heiße Spritzer führen zu Verletzungen!
► Bedienen Sie den Dampfregulierungsschalter 2 immer langsam.
1)
Füllen Sie einen Aufschäumbehälter (vorzugsweise aus rostfreiem Stahl) zu
einem Drittel mit kalter Milch.
2) Stellen Sie sicher, dass der Dampfregulierungsschalter 2 zugedreht ist (bis
zum Anschlag in Richtung „ - “ drehen).
3) Schieben Sie den Milchaufschäumer z zur Seite heraus. Fassen Sie ihn dabei
nur am Griff u an.
4) Drehen Sie den Funktionsdrehschalter 5 auf die Position „
bis die grüne Aufheizkontrollleuchte 4 leuchtet.
5) Halten Sie ein leeres Gefäß unter den Milchaufschäumer z. Drehen Sie
langsam den Dampfregulierungsschalter 2 in Richtung „+“. Kondenswasser/
Spritzer kommen aus der Düse. So wird die Düse und der Wasserkreislauf im
Inneren des Gerätes gereinigt.
6) Wenn nur noch Dampf aus der Düse tritt, drehen Sie den Dampfregulierungsschalter 2 in Richtung „-“, bis kein Dampf mehr aus der Düse kommt. Schütten
Sie das Wasser aus dem Gefäß weg.
“. Warten Sie,
7) Halten Sie nun den Aufschäumbehälter in der Hand, um die Milchtemperatur
zu fühlen, und führen Sie die Düse des Milchaufschäumers z leicht in die
Milch. Halten Sie den Aufschäumbehälter dabei ein wenig schräg.
92
SEM 1100 A2
Page 96

8) Drehen Sie langsam den Dampfregulierungsschalter 2 in Richtung „+“.
9) Bewegen Sie den Aufschäumbehälter kreisförmig und halten Sie dabei die
Spitze der Düse knapp unter die Milchoberfl äche: tief genug, dass die Milch
nicht in alle Richtungen spritzt und hoch genug, dass ein dicker Schaum erzeugt wird. Machten Sie es richtig, ist dabei ein tiefes Brummgeräusch zu hören.
10) Wenn der Milchschaum hochsteigt, führen Sie die Düse tiefer ein, um die
nächste „Schicht“ aufzuschäumen und ein Anbrennen des Schaums zu vermeiden.
11) Tauchen Sie schließlich die Düse vollständig ein und drehen Sie den Dampfregulierungsschalter 2 etwas zu, so dass die Milch erhitzt wird. Halten Sie
den Aufschäumbehälter leicht schräg, so dass die Milch sanft herumwirbelt,
während sie mit der Düse umgerührt wird.
12) Wenn der Milchschaum die gewünschte Konsistenz und Temperatur hat, drehen Sie den Dampfregulierungsschalter 2 zu (bis zum Anschlag in Richtung
„ - “ drehen).
13) Ziehen Sie erst dann die Düse aus der Milch.
DE
AT
CH
14) Stellen Sie den Funktionsdrehschalter 5 auf die Position „
HINWEIS
► Benutzen Sie zur Zubereitung von Cappuccino immer größere Tassen als
für Espr
15) Gehen Sie für die Zubereitung des Cappuccinos genauso vor, als würden
Sie einen Espresso zubereiten (siehe Kapitel „Espresso zubereiten“/das Aufheizen ist nicht mehr nötig). Lassen Sie das Wasser nur ca. doppelt so lange
durchlaufen, wie bei einem Espresso (ca. 40 ml).
16) Stellen Sie das Gerät am Ein-/Aus-Schalter 3 aus.
HINWEIS
► Nach 3 Minuten schaltet sich das Gerät automatisch aus.
Geben Sie nun die aufgeschäumte Milch in den zuvor vorbereiteten Espresso.
17)
Der Cappuccino ist nun fertig. Sie können ihn nach Belieben zuckern oder ihn
mit Kakaopulver bestreuen.
HINWEIS
► Sie können mit dem Milchaufschäumer z auch ander
Kakao oder Tee erhitzen.
esso, da noch aufgeschäumte Milch hinzugefügt wird.
e Flüssigkeiten, wie
“.
HINWEIS
► Reinigen Sie den Milchaufschäumer z unbedingt nach jedem Gebr
Lesen Sie hierzu das Kapitel „Reinigen und Pfl egen“.
SEM 1100 A2
auch.
93
Page 97

DE
AT
CH
Tipps für den Milchschaum
■ Jede Art von Milch lässt sich prinzipiell aufschäumen, auch Soja- und Reis-
milch. Einige Milchsorten lassen sich allerdings nur mit Einschränkungen aufschäumen.
■ Entrahmte oder Magermilch brennt nicht so leicht an wie Vollmilch, bei zu
geringem F
aufschäumen lässt. Benutzen Sie daher möglichst eine Milch mit 3,5% oder
1,5% Fettanteil.
■ Gut gekühlte Milch lässt sich besser aufschäumen als weniger kalte.
■ Schäumen Sie die Milch kein zweites Mal auf, da sie sonst anbrennt.
■ Lassen Sie aufgeschäumte Milch ca. 30 Sekunden lang stehen, bevor Sie
den Schaum auf den Espr
fl üssige Milch sinkt nach unten. Sie können dann den feinen Schaum auf den
Espresso geben.
ettgehalt besteht allerdings das Risiko, dass sich die Milch nicht gut
Heißes Wasser erzeugen
1) Wenn das Gerät aufgeheizt ist:
2) Stellen Sie eine Tasse unter den Milchaufschäumer z.
esso geben. So platzen größere Blasen und noch
3) Wenn die grüne Aufheizkontrollleuchte 4 leuchtet, drehen Sie den Dampfregulierungsschalter 2 auf „ + “.
4) Stellen Sie den Funktionsdrehschalter 5 auf die Position „
ser tritt aus der Düse aus.
5) Wenn Sie die Heißwasserabgabe unterbrechen wollen, stellen Sie den Funktionsdrehschalter 5 auf die Position „
gulierungsschalter 2 zu (bis zum Anschlag in Richtung „ - “ drehen).
6) Stellen Sie das Gerät am Ein-/Aus-Schalter 3 aus.
HINWEIS
► Nach 3 Minuten schaltet sich das Gerät automatisch aus.
“ und drehen Sie dann den Dampfre-
“. Heißes Was-
94
SEM 1100 A2
Page 98

Reinigen und Pfl egen
WARNUNG - VERLETZUNGSGEFAHR!
■ Ziehen Sie immer den Netzstecker aus der Netzsteckdose, bevor Sie das Ge-
ät reinigen. Gefahr eines elektrischen Schlages!
r
■ Lassen Sie das Gerät immer erst abkühlen, bevor Sie das Gerät reinigen. Ver-
br
ennungsgefahr!
■ Tauchen Sie das Gerät niemals in Wasser oder andere Flüssigkeiten. Gefahr
eines elektr
Milchaufschäumer reinigen
ischen Schlages!
ACHTUNG - SACHSCHÄDEN
■ Benutzen Sie niemals scheuernde, aggressive oder chemische Reinigungsmit-
tel zur R
1) Stellen Sie einen leeren Behälter unter den Milchaufschäumer z.
2) Drehen Sie den Dampfregulierungsschalter 2 direkt nach dem Gebrauch auf
„ + “ und lassen Sie einige Sekunden Dampf entweichen.
3) Drehen Sie den Dampfregulierungsschalter 2 zu (bis zum Anschlag in Richtung „ - “ drehen), schalten Sie das Gerät aus und ziehen Sie den Netzstecker.
4) Lassen Sie die Düse abkühlen.
5) Ziehen Sie die Düse ab und reinigen Sie diese sorgfältig in warmen Wasser.
6) Kontrollieren Sie, ob das kleine Loch in der Düse verstopft ist und reinigen Sie
es gegebenenfalls mit einer Nadel.
7) Reinigen Sie das Dampfabgaberohr des Milchaufschäumers z mit einem
feuchten Tuch.
8) Schieben Sie die Düse wieder auf das Dampfabgaberohr auf.
einigung des Gerätes. Diese greifen die Oberfl äche des Gerätes an.
DE
AT
CH
SEM 1100 A2
95
Page 99

DE
AT
CH
Heißwasserdusche reinigen
Reinigen Sie die Heißwasserdusche t nach jedem Gebrauch:
1) Nachdem Sie den Espresso/Cappuccino zubereitet haben und den Siebträger w abgenommen haben, wischen Sie die gesamte Fläche der Heißwasserdusche t mit einem feuchten Tuch ab, so dass alle Pulverreste entfernt
werden.
2) Setzen Sie den Siebträger w ohne eingesetzte Espressosiebe 0 q wieder ein.
3) Stellen Sie dann eine leere Tasse unter die Heißwasserdusche t und drehen
Sie den Funktionsdrehschalter 5 auf die Position „
Heißwasserdusche t aus, und spült letzte Pulverreste heraus.
4) Stellen Sie nach ca. 20 Sekunden den Funktionsdrehschalter 5 wieder in
die Position „
5) Nehmen Sie den Siebträger w wieder ab.
“ und schalten Sie das Gerät am Ein-/Aus-Schalter 3 aus.
Zubehörteile reinigen
1) Reinigen Sie den Siebträger w, die beiden Espressosiebe 0 q, den Wassertank 1, den Messlöff el 9 und das Abtropfgitter 8 in warmen Wasser.
“. Wasser tritt aus der
HINWEIS
► Wenn Sie Spülmittel in das Wasser geben, kann es sein, dass der Ge-
schmack des Espr
mit Spülmittel beseitigen lassen, spülen Sie die Teile hinterher immer mit viel
klarem Wasser ab.
2) Trocknen Sie alle Teile.
3) Die Tropfenauff angschale r ist zur Reinigung in der Spülmaschine geeignet.
Gerät reinigen
Reinigen Sie das Gerät mit einem feuchten Tuch. Geben Sie gegebenenfalls etwas
Spülmittel auf das Tuch.
Gerät entkalken
Entkalken Sie das Gerät regelmäßig. Nach ca. 200 Espressozubereitungen sollte
das Gerät entkalkt werden. Je nach Härtegrad des Wassers in Ihrer Region kann
dieser Wert abweichen.
Verwenden Sie zum Entkalken handelsüblichen Entkalker für Espressomaschinen.
Gehen Sie so vor, wie in der Bedienungsanleitung des Entkalkers beschrieben.
essos beeinfl usst wird. Falls die Verschmutzungen sich nur
Wenn Sie keinen Entkalker haben, können Sie alternativ wie folgt vorgehen:
1) Füllen Sie den Wassertank 1 bis zur Max-Markierung.
96
SEM 1100 A2
Page 100

2) Lösen Sie darin 2 Löff el (ca. 30 Gramm) Zitronensäure (erhältlich in Drogerien
oder Apotheken) auf.
3) Setzen Sie den Wassertank 1 in das Gerät ein.
4) Schalten Sie das Gerät am Ein-/Aus-Schalter 3 ein. Der Funktionsdrehschalter 5 muss auf der Position „
ist zugedreht.
5) Setzen Sie den Siebträger w ohne Espressosieb 0/q in das Gerät ein und
stellen Sie eine Tasse unter den Siebträger w. Sobald die grüne Aufheizkon-
trollleuchte 4 leuchtet, stellen Sie den den Funktionsdrehschalter 5 auf die
Position „
6) Lassen Sie ca. 2 Tassen (Kaff eetassen) Wasser durchlaufen und stoppen Sie
dann den Vorgang.
7) Halten Sie ein Gefäß unter den Milchaufschäumer z.
8) Stellen Sie den Funktionsdrehschalter 5 auf die Position „
Sie, bis die grüne Aufheizkontrollleuchte 4 leuchtet. Drehen Sie langsam den
Dampfregulierungsschalter 2 auf „ + “. Lassen Sie das Gerät für ca. 2 Minu-
ten Dampf erzeugen.
9) Drehen Sie nach 2 Minuten den Dampfregulierungsschalter 2 zu, stellen Sie
den Funktionsdrehschalter 5 auf „
“.
“ stehen. Der Dampfregulierungsschalter 2
“ und warten
“ und schalten Sie das Gerät aus.
DE
AT
CH
10) Lassen Sie den Entkalker für ca. 15 Minuten einwirken.
11) Wiederholen Sie die Schritte 4 - 10 drei mal.
12) Stellen Sie dann den Funktionsdrehschalter 5 auf die Position „
lassen Sie das Wasser solange durchlaufen, bis der Wassertank 1 leer ist.
13) Spülen Sie den Wassertank 1 mit klarem Wasser aus und füllen Sie klares
Wasser bis zur Max-Markierung ein.
14) Stellen Sie den Funktionsdrehschalter 5 auf die Position „
grüne Aufheizkontrollleuchte 4 leuchtet.
15) Lassen Sie das Wasser durchlaufen.
16) Wiederholen Sie die Schritte 13 - 15 drei mal.
17) Füllen Sie noch einmal Wasser in den Wassertank 1.
18) Drehen Sie den Funktionsdrehschalter 5 auf die Position „
19) Halten Sie ein Gefäß unter den Milchaufschäumer z und drehen Sie lang-
sam den Dampfregulierungsschalter 2 auf „ + “ , sobald die grüne Aufheizkontrollleuchte 4 leuchtet.
20) Drehen Sie nach ca. 1 Minute den Dampfregulierungsschalter 2 zu (bis zum
Anschlag in Richtung „ - “ drehen), stellen Sie den Funktionsdrehschalter 5
auf „
“ und schalten Sie das Gerät aus.
“, sobald die
“.
“ und
HINWEIS
► Nach 3 Minuten schaltet sich das Gerät automatisch aus.
SEM 1100 A2
97
 Loading...