

Page 1
Page 2
Page 3

English .................................................................................... 2
Magyar ................................................................................ 41
Čeština ................................................................................. 83
Deutsch ............................................................................... 121
V 1.12
Page 4

SilverCrest SWDR 500 A1
Contents
Intended use ............................................................................. 4
Package contents ..................................................................... 5
Technical specifications ............................................................. 6
Safety instructions .................................................................... 7
Copyright ............................................................................... 13
Operating environment .......................................................... 13
Overview of controls and button functions ............................. 14
Display icons ..................................................................................................... 16
Stand .................................................................................................................. 17
Before you start ..................................................................... 17
External power / battery power operation .................................................... 18
Inserting the batteries ........................................................................................ 18
Connecting the power adapter ....................................................................... 19
Getting started ....................................................................... 19
Display illumination ........................................................................................... 19
Switching the device on/off ............................................................................. 19
Setting the time zone ........................................................................................ 20
Setting the date and time ................................................................................. 22
Automatic synchronisation via RDS ............................................................. 22
Manual setting .............................................................................................. 22
Displaying the world clock ............................................................................... 24
The "MODE" button functions .......................................................................... 25
SDA (Special Date Alarm) ............................................................................... 25
NAP timer .......................................................................................................... 26
Stop watch ........................................................................................................ 27
Setting the AM reception spacing ................................................................... 27
Adjusting the volume ........................................................................................ 28
Setting the sensitivity ......................................................................................... 28
Enabling bass amplification ............................................................................. 28
Selecting a station ............................................................................................. 28
2 - English
Page 5

SilverCrest SWDR 500 A1
Automatic station search and automatic store ................................................ 28
Manual station search ...................................................................................... 29
Manually tuning a station ................................................................................ 30
Fine tuning ......................................................................................................... 30
Saving a station manually ................................................................................ 30
Recalling a saved station ................................................................................. 31
Stereo output ..................................................................................................... 31
SLEEP timer ........................................................................................................ 32
Setting the alarm ............................................................................................... 32
Enabling the alarm ............................................................................................ 34
Enabling/disabling the button lock ................................................................. 35
Connecting the earphones ............................................................................... 36
Storage when not using the product ............................................................... 36
Troubleshooting ..................................................................... 36
Environmental regulations and disposal information ............. 37
Conformity notes .................................................................... 38
Warranty and Service Information ......................................... 39
English - 3
Page 6

SilverCrest SWDR 500 A1
Congratulations!
By purchasing the SilverCrest SWDR 500 A1 multi-band radio, hereinafter
referred to as multi-band radio, you have opted for a high-quality product.
Familiarise yourself with the multi-band radio before using it for the first time
and read these operating instructions carefully. Observe the safety instructions
and only use the multi-band radio in the manner described in these operating
instructions and for the indicated fields of application.
Keep these operating instructions in a safe place. Hand over all documents in
the event that you pass on the multi-band radio to a third party.
Intended use
This device is a consumer electronics device. It has been designed to receive
and play back radio stations. The device can also be used as a clock and as
an alarm clock. It is suitable only for private use, not for industrial or
commercial purposes. The device may also not be used in tropical climates.
The manufacturer is not liable for any damage or problems caused by
unauthorised modifications. Only use accessories recommended by the
manufacturer. Observe the regulations and laws in the country of use.
Please note that country-specific regulations may exist with respect to the
frequency bands that can be received. Any information received from
frequency bands outside those that are explicitly free for public use may not be
used, nor may its contents be forwarded to any third parties.
4 - English
Page 7

SilverCrest SWDR 500 A1
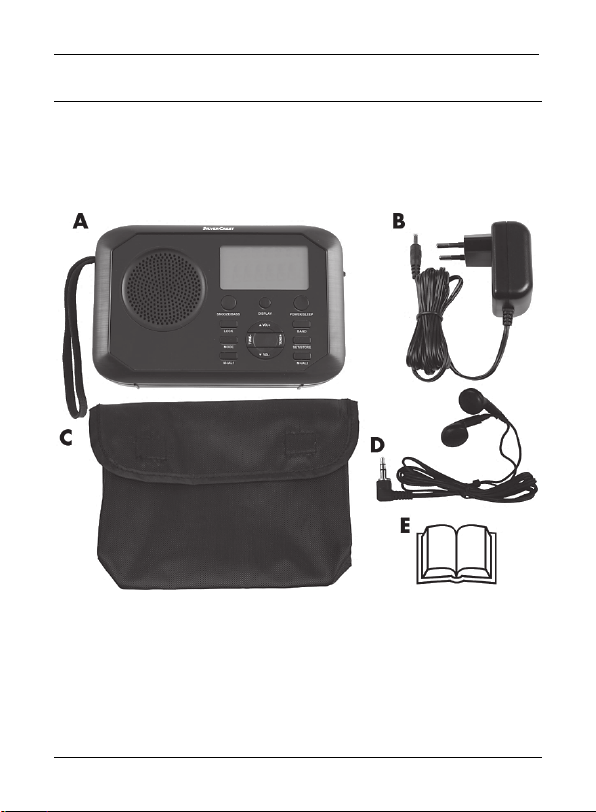
Package contents
Remove the device and all the accessories from the packaging. Remove the
packaging material and check whether all the parts are complete and
undamaged. If you find anything missing or damaged, please contact the
manufacturer.
A Multi-band tuner SilverCrest SWDR 500 A1
B Wall plug power adapter
C Pouch
D Earphones SWDR 500 A1
E These operating instructions (lineart illustration)
English - 5
Page 8

SilverCrest SWDR 500 A1
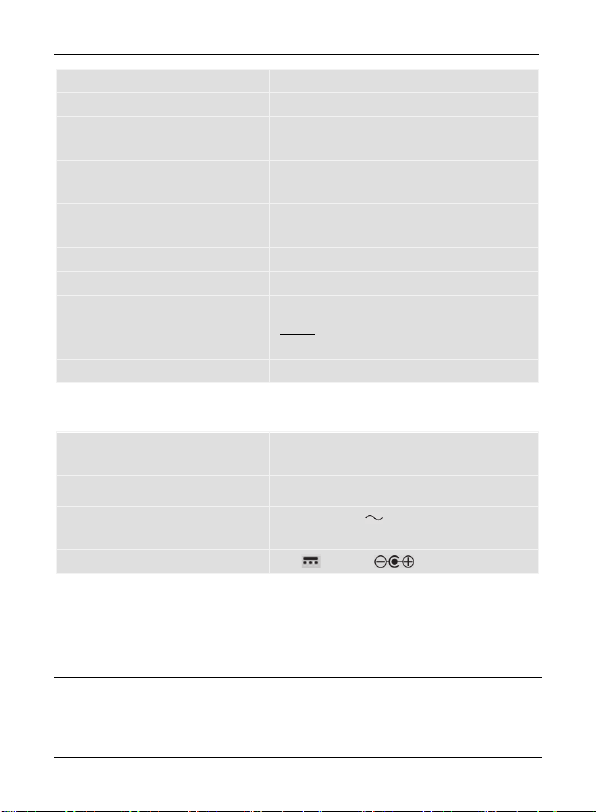
Technical specifications
This information describes the technical characteristics of your
device. Different national regulations may apply in different
countries with respect to the frequency bands that are free for
public use. Please note that receiving any information from
bands outside these frequency bands will be illegal and may
Multi-band tuner
Power supply supplied power adapter
Max. current consumption 0.3A
Power consumption in radio mode: approx. 0.7 W
Audio output power 500mW
Frequency bands
Please note that the given tuning
bands may slightly vary upwards or
downwards because of product
tolerances.
Station presets 400 (100 per band)
Dimensions approx. 17 x 4.1 x 11 cm (W x D x H)
Weight approx. 315 g (without batteries)
6 - English
be punishable by law.
optional 4x AA 1.5V (LR6) batteries
in Standby mode: < 0.2 W
FM 87.5 - 108 MHz
AM 522 - 1620 KHz
SW1 4.75 - 5.94 MHz
SW2 5.95 - 7.09 MHz
SW3 7.10 - 9.49 MHz
SW4 9.50 - 11.64 MHz
SW5 11.65 - 13.59 MHz
SW6 13.60 - 15.09 MHz
SW7 15.10 - 17.49 MHz
SW8 17.50 – 21.44 MHz
SW9 21.45 – 21.85 MHz
LW 153 – 279 KHz
Page 9
SilverCrest SWDR 500 A1
Earphones SWDR 500 A1
Impedance 32 Ohms
Broadband characteristic
voltage approx. 90mV +/-10%
Max. sound pressure level with
supplied earphones approx. 95 dB(A)
Max. output voltage on
earphones jack approx. 110mV
Battery life approx. 28 hours
Operating temperature 5 °C to 35 °C
Storage conditions -10 °C to 50 °C
Note: Do not store the device at hot
places (e.g. inside a car in summer)
Operating humidity max. 85% rel. humidity
Power adapter
Manufacturer SHENZHEN SHI GUANGKAIYUAN
TECHNOLOGY., LTD.
Type
Input voltage, frequency /
input current
Output voltage / output current 6V / 0.3A,
The technical data and design may be changed without prior notice.
GKYPS0030060EU1
100 to 240 V , 50/60 Hz / 0.5 A
Safety instructions
Before you use this device for the first time, please read the following notes in
this manual and heed all warnings, even if you are familiar with handling
electronic devices. Keep this manual in a safe place for future reference. If you
English - 7
Page 10
SilverCrest SWDR 500 A1
sell the device or pass it on, it is essential that you also hand over this manual.
The User Manual is part of the product.
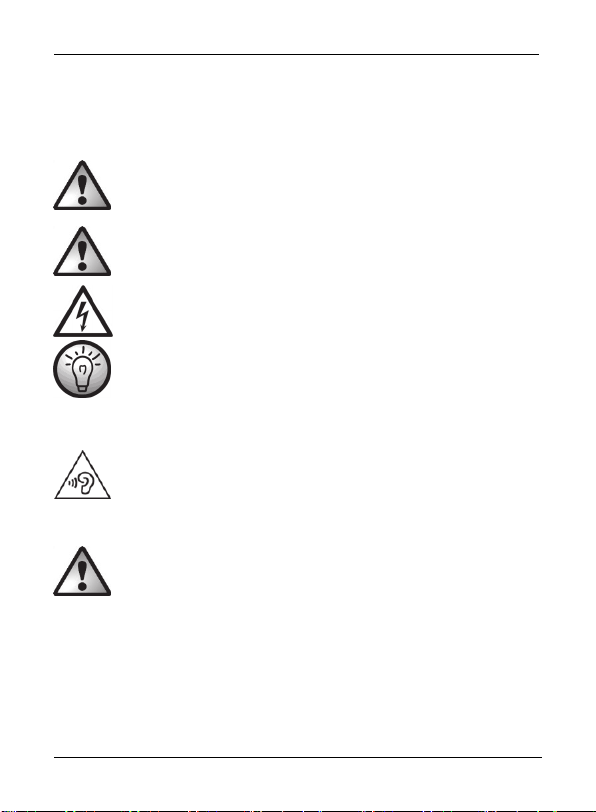
Explanation of used symbols
DANGER! This symbol and the word "Danger" denote a
potentially dangerous situation. Ignoring it can lead to severe
injury or even death.
WARNING! This symbol and the word “Warning” denote
important information required for the safe operation of the
product and for the safety of its users.
This symbol denotes possible danger due to electric shock.
This symbol denotes further information on the topic.
Risks associated with high volumes
Caution when using earphones. Audio listening at high volume
can harm the user’s auditory system.
DANGER!
1. Only use the earphones (D) supplied with your device, type
SWDR 500 A1. Other types of earphones can produce harmful
sound pressure levels.
2. Do not use the earphones (D) supplied, type SWDR 500 A1,
with other playback devices.
Do not use the earphones (D) at high volume levels, otherwise you will damage
your hearing and possibly disturb other people. Please remember that
environmental noise may sound unfamiliar when using earphones. Although the
device is designed to enable you to perceive external noise, only adjust the
8 - English
Page 11

SilverCrest SWDR 500 A1
volume to a level so that you still capable of hearing what is happening around
you. Under dangerous circumstances (for example when driving a vehicle or
when working with machines or other situations that require your full attention)
the sound may distract your attention or prevent you from being aware of what
is happening around you. Therefore, do not use the earphones in such
situations.
DANGER! Make sure that:
there is free circulation of air (do not place the device on shelves, on a
carpet, on a bed, or anywhere that obstructs the ventilation slots and leave
at least 10 cm clearance on all sides);
the device is not exposed to direct heat sources (e.g. radiators);
no direct sunlight or bright artificial light reaches the device;
contact with water spray and drops and aggressive fluids is avoided and the
device is never operated near water, and the device is never submerged (do
not place any items containing liquids, such as drinks, vases, etc. on or near
the device);
the device is never placed near magnetic fields (e.g. speakers);
no naked flames (e.g. burning candles) are placed on or near the device;
no foreign bodies can penetrate into the device;
the device is not subject to major great temperature fluctuations as this can
cause condensation and short-circuits. If the device has been exposed to
strong temperature variations, wait for it to reach the ambient temperature
before switching it on (about 2 hours);
the device is not subjected to excessive shocks or vibrations;
the device or the wall plug power adapter is not used during thunder and
lightning storms. When there is the possibility of thunderstorms, disconnect
the wall plug power adapter from the power socket.
English - 9
Page 12
SilverCrest SWDR 500 A1
when using an optional wall plug power adapter the power socket used
must be easily accessible at all times and cables should be laid so they do
not present a trip hazard.
DANGER! Batteries
Insert the batteries with the correct polarity. Refer to the diagram inside the
battery compartment. Do not attempt to recharge the batteries and do not
dispose of the batteries in a fire. Do not mix battery types (old and new or
carbon and alkaline, etc.). Remove the batteries when the device is not to be
used for an extended period. Improper use could cause explosions or leaks.
Batteries must never be opened or deformed, as this could result in chemicals
leaking out which could cause injuries. If the battery fluid comes into contact
with the skin or eyes, rinse immediately with plenty of water and seek medical
aid.
Do not allow children to play with the batteries as they represent potential
choking hazards. Keep batteries out of reach of children. If a battery is
swallowed, seek medical help immediately.
DANGER! Children and persons with
disabilities
Electrical devices are not suitable for children. Also persons with reduced
physical, sensory or mental capabilities should only use electrical devices in
appropriate circumstances. Never allow children or persons with disabilities to
use electrical devices unsupervised, unless they are instructed accordingly and
supervised by a competent person responsible for their safety. Children should
always be supervised to ensure that they do not play with the product. Small
10 - English
Page 13

SilverCrest SWDR 500 A1
parts can represent choking hazards. If small parts are swallowed, seek
medical help immediately.
Keep the packaging away from children and persons with
disabilities.
Danger of suffocation!
DANGER! Wall plug power
adapter
Only plug the wall plug power adapter into a suitable and easily accessible
power socket. Do not touch the power adapter with wet hands as this could
cause an electric shock. Unplug the wall plug power adapter from the mains in
the following circumstances:
in any dangerous situation
if the wall plug power adapter makes an unusual noise or gives off smoke
before a storm and/or thunderstorm
if the wall plug power adapter is damaged
if the wall plug power adapter has been exposed to rain, liquids or high
levels of humidity
when you wish to clean it
The wall plug power adapter consumes electricity even in Standby mode. In
order to completely disconnect the device from the mains, the wall plug
power adapter must be pulled out from the power socket.
Please follow these instructions to avoid risk of potential fatal injury or fire!
Never cover the wall plug power adapter, otherwise there is a risk of fire. Do
not attempt to open the housing of the wall plug power adapter. This could
result in potentially fatal electrocution.
English - 11
Page 14
SilverCrest SWDR 500 A1
DANGER! Cables
Unplug all cables by holding the plugs and never pull on the cables
themselves. Never place pieces of furniture or other heavy objects on the
cables and take care that they do not become damaged, especially at the
plugs and sockets. Never install the cables around hot or sharp objects to
avoid damaging them. Never tie knots in cables and do not tie them to other
cables. All cables should be positioned so that nobody can trip over them or
be obstructed by them.
DANGER! Display
Do not apply any pressure to the screen and keep sharp objects away from the
screen. A broken screen represents a risk of injury. Wear gloves when
collecting the broken parts and contact the manufacturer if necessary. In the
case of scratches or other damage to the display, take extreme care to ensure
that no fluid escapes from the display.
If fluid does escape, proceed as follows:
If the fluid comes into contact with the skin, wipe off with a clean cloth
and rinse with plenty of water. Contact a doctor if necessary.
If the fluid comes into contact with the eyes, rinse them under running
water for at least 15 minutes and contact a doctor immediately.
If the fluid is swallowed, first rinse the mouth out with water and then
drink plenty of water. Contact a doctor immediately!
DANGER! Repairs
Repairs are required when this device has been damaged in any way, for
example, when the power adapter or device housing is damaged, when
12 - English
Page 15
SilverCrest SWDR 500 A1
liquids or objects have entered the device or when the product has been
exposed to rain or moisture. Repairs are also necessary if the product is not
working properly or has been dropped. If you notice any smoke, unusual noise
or strange smells, switch off the device immediately, disconnect the wall plug
power adapter from the power supply and remove any inserted batteries. If this
occurs, do not continue to use the device and have it checked out by an
expert. All repairs must be carried out by qualified service personnel. Never
open the housing of the device or the wall plug power adapter.
DANGER! Cleaning
Disconnect the device from the mains. Only use a clean, dry cloth for cleaning
the multi-band tuner. Never use any corrosive liquids. Do not attempt to open
the housing of the device, this will void your warranty.
If the batteries leak, contact a technician for a professional cleaning.
Copyright
All the contents of this user manual are protected by copyright and provided to
the reader for information only.
Copying data and information without the prior explicit written consent of the
author is strictly forbidden. This also applies to any commercial use of the
contents and information.
All texts and diagrams are up-to-date as of the date of printing.
Operating environment
The device is not designed for use in environments with high temperatures or
humidity (e.g. bathrooms) or those with above-average levels of dust.
Operating temperature and operating humidity: 5°C to 35°C, max. 85% rel.
humidity.
English - 13
Page 16

SilverCrest SWDR 500 A1
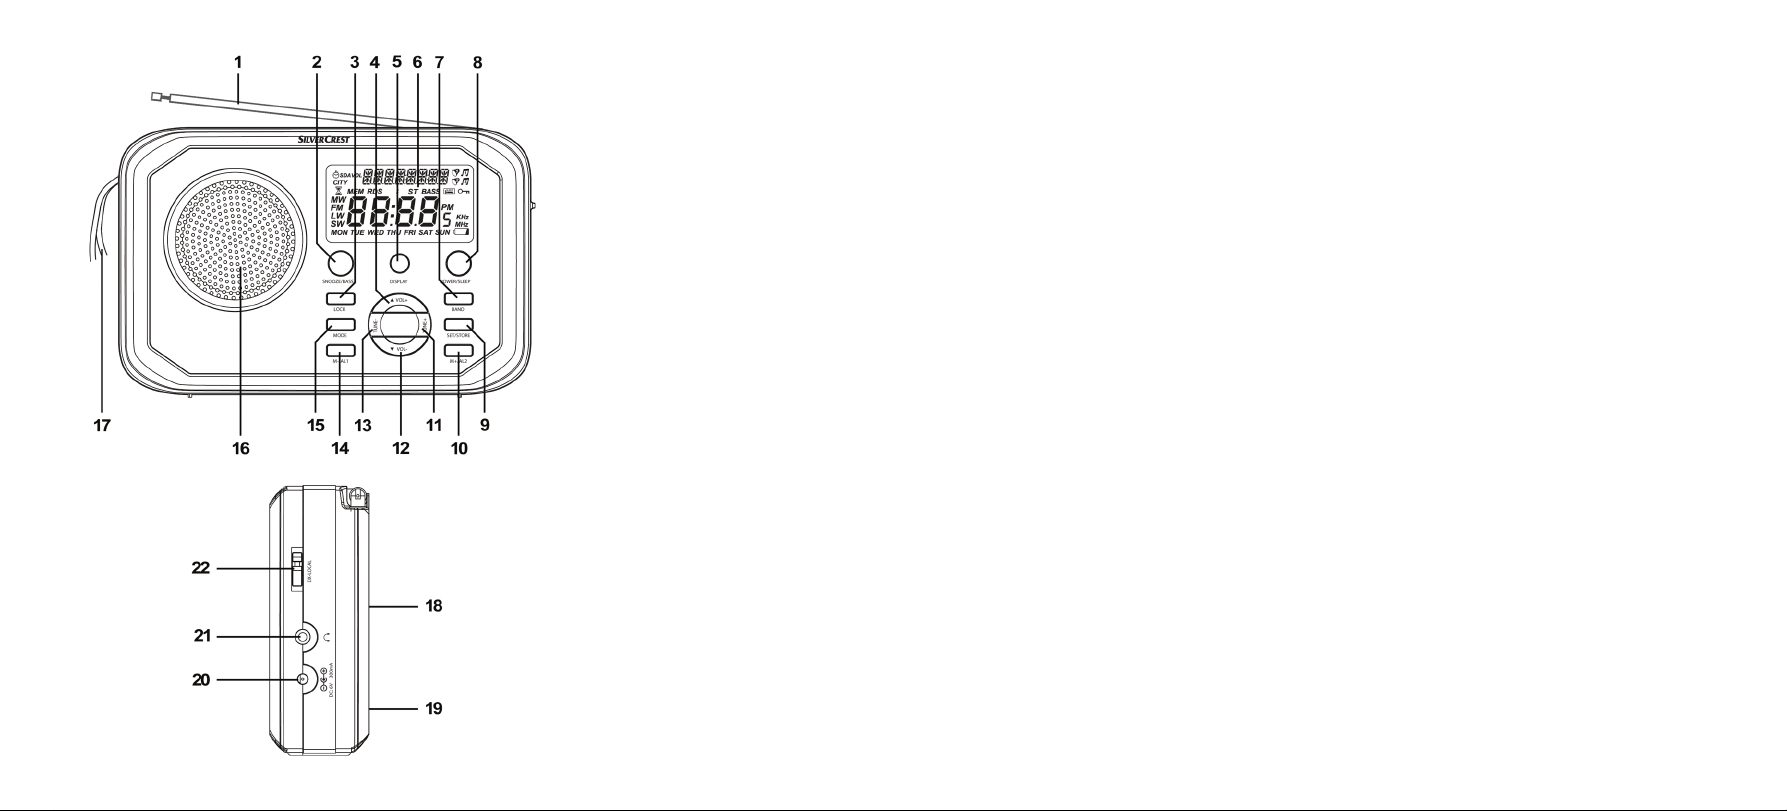
Overview of controls and button functions
These operating instructions have a fold-out cover. Fold-out the cover so you
can refer to the relevant controls at any time.
14 - English
Page 17
SilverCrest SWDR 500 A1
1
Telescopic antenna
2
SNOOZE/BASS button (delay the alarm for 5 to 120
minutes/amplify low-frequency sound)
3
LOCK button (button lock)
4
VOL + button (increase the sound volume)
5
DISPLAY button (show the time zone)
6
Display
7
BAND button (select the frequency band)
8
POWER/SLEEP button (switch on/off; set the sleep timer)
9
SET/STORE button (set time, store a station)
10
M+/AL2 button (tune in the next station preset, Alarm 2)
11
TUNE+ button (station scan to increasing frequencies, set minutes +)
12
VOL - button (reduce the sound volume)
13
TUNE- button (station scan to decreasing frequencies, set minutes -)
14
M- / AL1 button (tune in the previous station preset, Alarm 1)
15
MODE button
16
Speaker
17
Strap
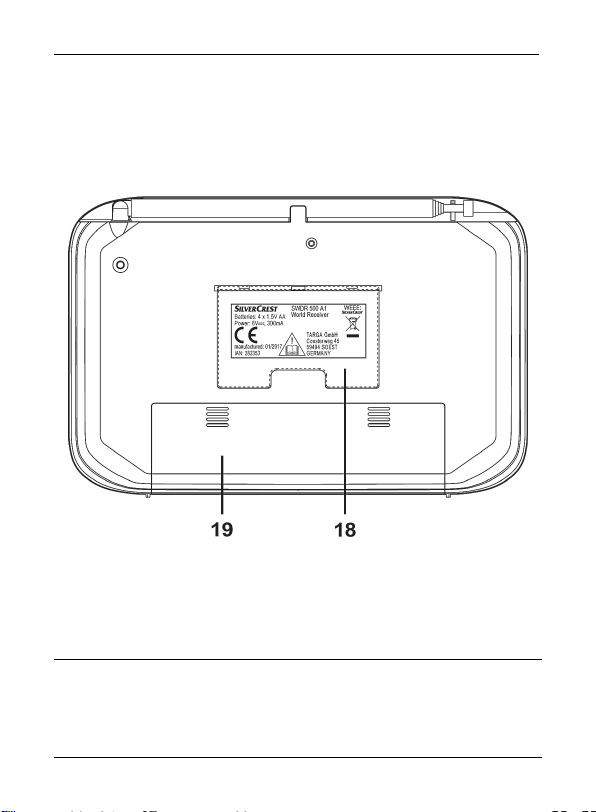
18
Stand (on the back)
19
Battery compartment (on the back)
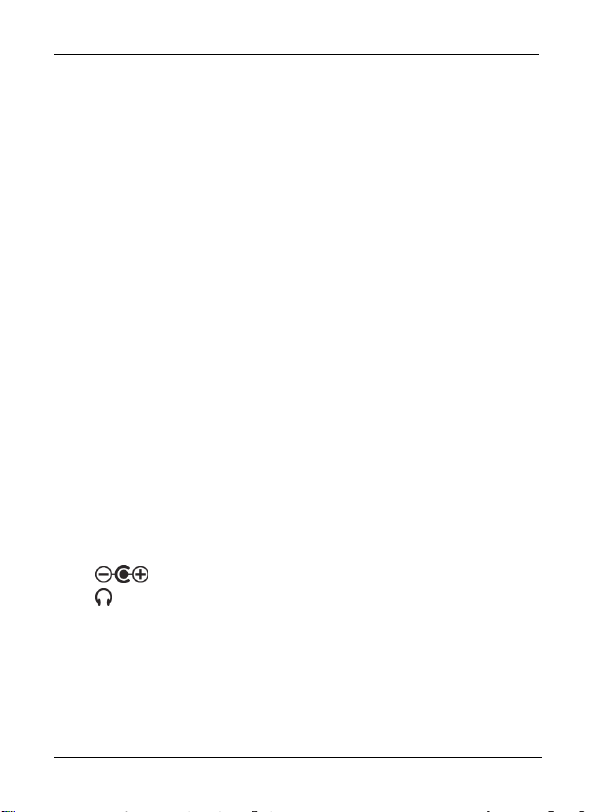
20 (receptacle for optional wall plug power adapter)
21 (earphones receptacle)
22
DX/LOCAL button (set the reception sensitivity)
English - 15
Page 18
SilverCrest SWDR 500 A1
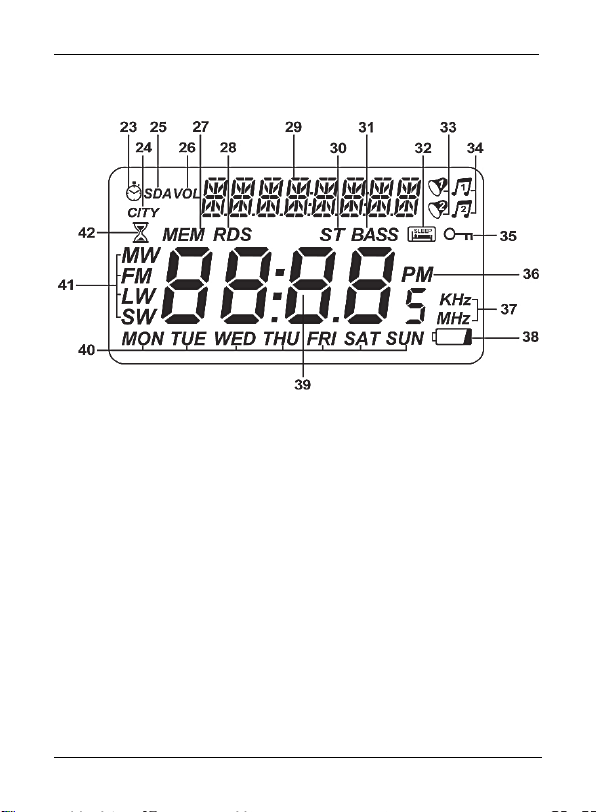
Display icons
23 Stop watch
24 CITY
25 SDA (Special Date Alarm)
26 VOL (sound volume)
27 MEM (station preset)
28 RDS (Radio Data System)
29 Different indicators: station name, date, station preset
30 ST (STEREO - only for earphones mode)
31 BASS (bass amplification enabled)
32 SLEEP (sleep timer)
33 Alarm 1/2 enabled (buzzer)
34 Alarm 1/2 enabled (radio)
35 LOCK (button lock)
36 Afternoon indicator (PM)
37 Frequency unit
38 Low battery level
39 Clock/frequency display
16 - English
Page 19
SilverCrest SWDR 500 A1
40 Day of the week indication
41 Frequency band
42 NAP timer
Stand
On the back panel of the device you’ll find a stand (18) that allows to install
the multi-band tuner in an inclined position. To do this, fold-out the retractile
stand (18).
Before you start
You can power the device on either by using the supplied power adapter (B)
or by using 4 optional AA-sized (LR6) batteries. The batteries are not included
in the package.
English - 17
Page 20
SilverCrest SWDR 500 A1
External power / battery power operation
When disconnecting the multi-band tuner (A) from the power supply, different
settings (time and alarm time) are lost. To avoid this, insert batteries before
disconnecting the device from the mains. This guarantees that the mentioned
settings are preserved.
Any stored stations are preserved even if there are no batteries inserted when
disconnecting the device from the mains.
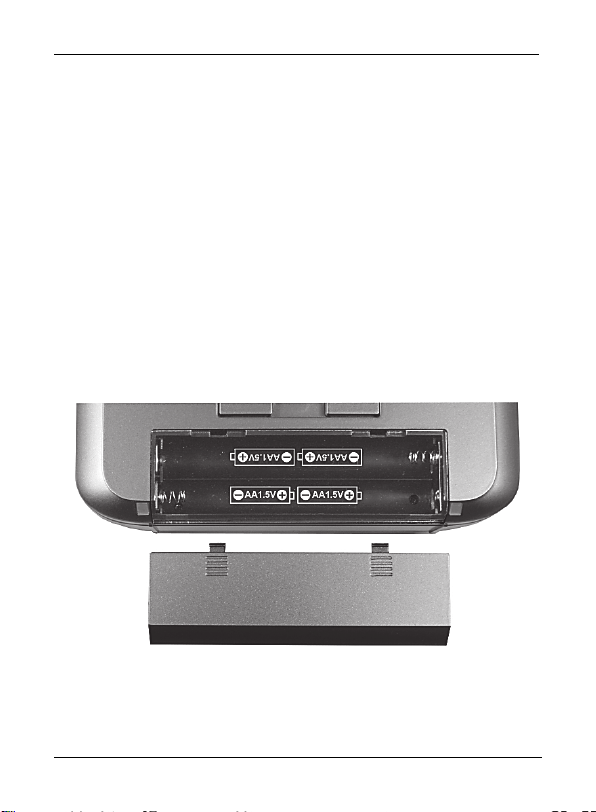
Inserting the batteries
Open the battery compartment cover (19) on the back panel of the device by
sliding it towards the bottom and remove it. Insert the batteries with the correct
polarity (+ and -), as shown in the following figure. The correct polarity is
labelled on the batteries and inside the battery compartment. Re-insert the
cover of the battery compartment (19) and slide it upwards until it locks in
place.
If the display (6) indicates a low battery level (38), the batteries are almost
empty. When this happens, replace the batteries with new batteries of the
same type.
18 - English
Page 21
SilverCrest SWDR 500 A1
WARNING! Remove the batteries when the device is not to be
used for an extended period. The batteries could leak and cause
damage to the device.
Connecting the power adapter
Plug the wall plug power adapter plug (B) into the receptacle (20) of the multiband tuner (A). Plug the wall plug power adapter (B) into an easily accessible
power socket.
While the wall plug power adapter (B) is connected, the device is powered
from the mains and not from any inserted batteries. When powering the device
via the wall plug power adapter (B) for a long time, you should remove the
batteries to avoid any leakage.
Getting started
Display illumination
Press any button to switch the display illumination on for approx. 9 seconds. It
automatically switches back off after this time.
Switching the device on/off
To power the device on, press the "POWER/SLEEP" button (8) once. When
powered on, the currently tuned in frequency, the frequency band and the day
of the week are shown on the display (6):
FM
MW
SW
LW
For the "FM" band, the name of the station is also shown, if broadcast. When
the station transmits no name or when the signal is too weak, the current date is
shown instead.
VHF FM band
Medium wave band
Short wave band
Long wave band
English - 19
Page 22
SilverCrest SWDR 500 A1
For the "MW", "SW", and "LW" bands, the current date is shown there.
To power the device off, press the POWER/SLEEP button (8) again. When
powered off, the current date and time, and the day of the week are shown on
the display (6).
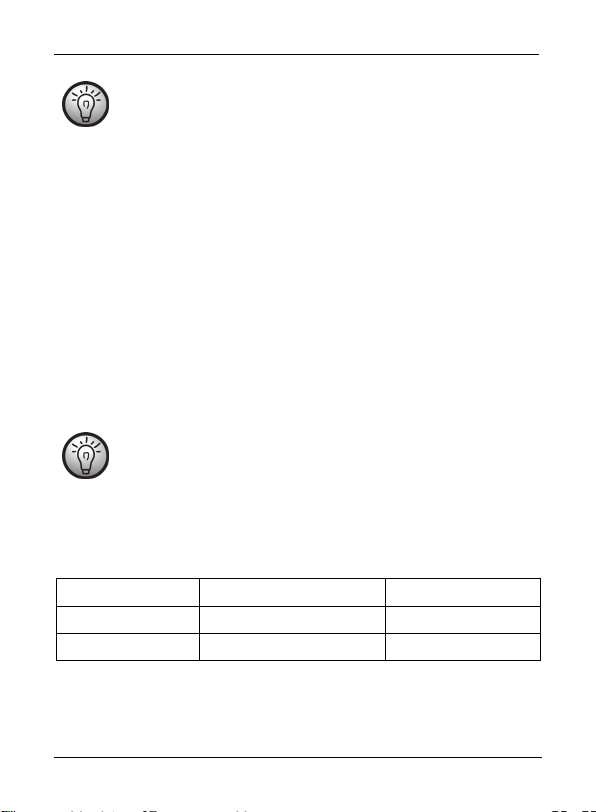
It is recommended to start configuring the multi-band tuner with
setting the time zone. To do so, see the "Setting the time zone"
section below.
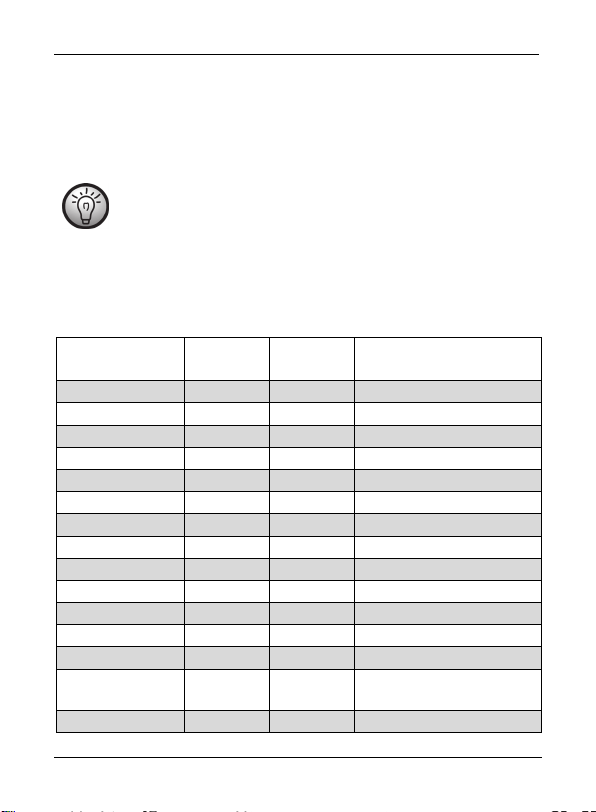
Setting the time zone
The following table contains an overview of the abbreviated city names for the
different time zones. The table also lets you check the time offset and, if
applicable, a daylight saving.
Abbreviation UTC
offset*
HNL
ANC
YVR
LAX
DEN
CHI
MEX
NYC
YYZ
YUL
CCS
RIO
BUE
UTC*
LON
-10:00h no Honolulu / USA
-9:00h yes Anchorage / USA
-8:00h yes Vancouver / Canada
-8:00h yes Los Angeles / USA
-7:00h yes Denver / USA
-6:00h yes Chicago / USA
-6:00h yes Mexico City / Mexico
-5:00h yes New York / USA
-5:00h yes Toronto / Canada
-5:00h yes Montreal / Canada
-4:30h no Caracas / Venezuela
-3:00h yes Rio de Janeiro / Brazil
-3:00h no Buenos Aires / Argentina
0:00h no Universal Time
0:00h yes London / United Kingdom
Daylight
saving
City / country
Coordinated
20 - English
Page 23
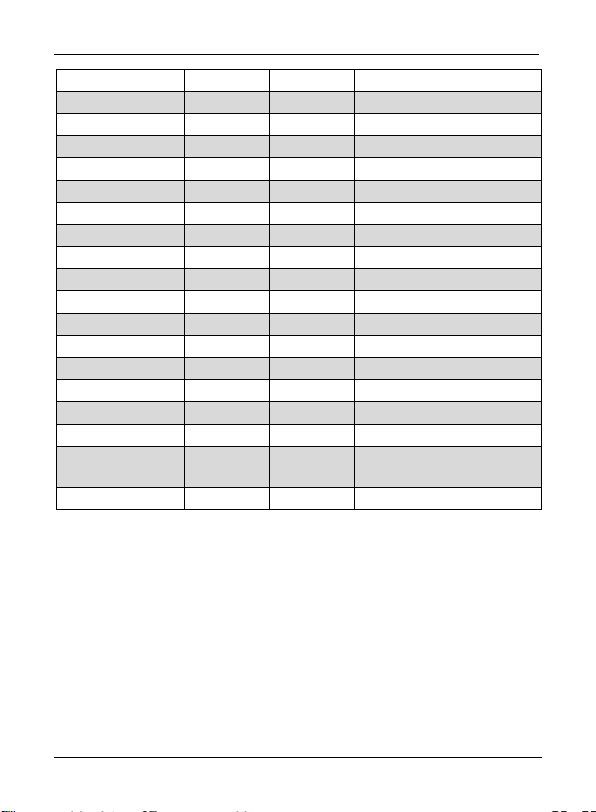
SilverCrest SWDR 500 A1
BER
PAR
ROM
CAI
IST
MOW
KWI
DXB
KHI
DAC
BKK
SIN
HKG
PEK
SHA
TYO
SYD
NOU
+1:00h yes Berlin / Germany
+1:00h yes Paris / France
+1:00h yes Rome / Italy
+2:00h yes Cairo / Egypt
+2:00h yes Istanbul / Turkey
+3:00h yes Moscow / Russia
+3:00h no Kuwait City / Kuwait
+4:00h no Dubai / Saudi Arabia
+5:00h no Karachi / Pakistan
+6:00h yes Dacca / Bangladesh
+7:00h no Bangkok / Thailand
+8:00h no Singapore
+8:00h no Hong Kong
+8:00h no Beijing / China
+8:00h no Shanghai / China
+9:00h no Tokyo / Japan
+10:00h yes Sydney / Australia
+11:00h no Noumea / New
Caledonia
AKL
+12:00h yes Auckland / New Zealand
*UTC: Universal Time Coordinated
UTC is the abbreviation for "Universal Time Coordinated", formerly also called
GMT (Greenwich Mean Time). UTC is the base for time zone calculation. The
corresponding offset is shown in the 2nd column of the table.
To set the time zone, proceed as follows:
While powered off, press and hold the "SET/STORE" button (9) until the
display (6) reads "US" or "EU". Then press the "SET/STORE" button (9)
briefly to go to the time zone setting. The currently set city abbreviation and
English - 21
Page 24

SilverCrest SWDR 500 A1
the corresponding local time are shown in the upper part to the display (6).
The default setting is "UTC".
Press the "VOL-" (12) or "VOL+" (4) button to set the city abbreviation for
your current time zone, e.g. BER for Berlin. You can find the city abbreviation
in the table above. With each city abbreviation, the displayed time is
changed.
When finished, set the correct time as described in the following section.
Setting the date and time
Automatic synchronisation via RDS
Upon factory delivery time synchronisation via RDS is enabled. If the device
receives an RDS signal after powering on, the date and time are synchronised
and shown correctly after a few moments.
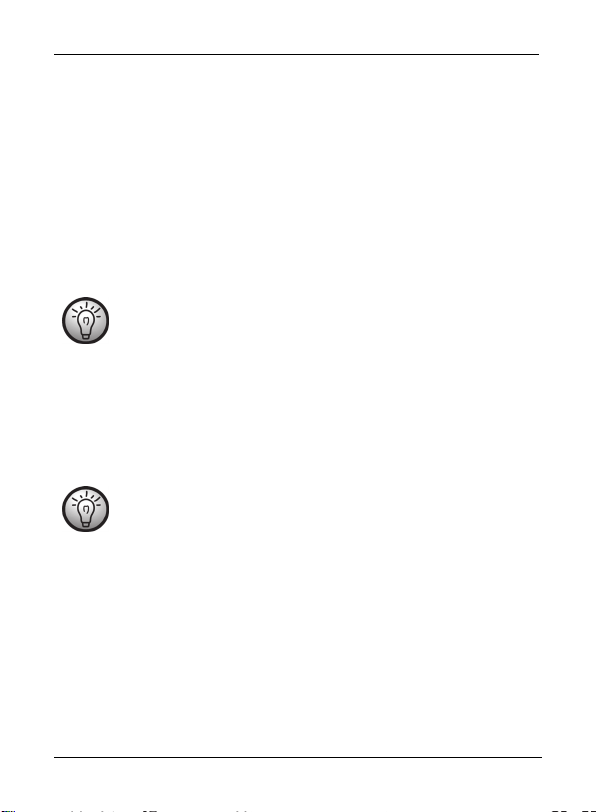
The multi-band radio is only set automatically if the selected station
transmits an RDS signal and the reception quality is strong enough
to receive the RDS signal. If an RDS signal is received, the RDS
indicator (28) appears on the display.
Time synchronisation and the correct time setting also depend on the set time
zone. Therefore it is mandatory to set the correct time zone first. To do so, see
the "Setting the time zone" section above.
Manual setting
First disable automatic time synchronisation via RDS. To do so, while powered
off, press the "MODE" button (15) four times until "TS ON" (Time
Synchronisation ON) appears in the upper part of the display (6). Press the
"VOL-" (12) or "VOL+" (4) button to set it to “TS OFF” (Time Synchronisation
OFF).
Now set the correct time zone.
22 - English
Page 25

SilverCrest SWDR 500 A1
The time can only be set while the device is powered off. If it is powered on,
press the POWER/SLEEP button (8) to power the device off.
If no button is pressed for approx. 7 seconds while changing the setting, the
settings are applied and the unit exits the setting mode. You can keep the
buttons "VOL-" (12) or "VOL+" (4) pressed to accelerate the digits count.
While powered off, press and hold the "SET/STORE" button (9) until the
display (6) reads "US" or "EU". Now press the "VOL-" (12) or "VOL+" (4)
button to select your preferred date format.
Example:
EU DD.MM.YYYY
US MM.DD.YYYY
Press the "SET/STORE" button (9) to confirm your selection.
Please remember that the tuning spacing for the AM band is also changed
with this setting.
Now set the correct time zone as described in the previous chapter and
press the "SET/STORE" button (9) to confirm the setting. The set time format
flashes.
Now you can press the "VOL-" (12) or "VOL+" (4) buttons to set the desired
time format. Upon factory delivery the time format is set to 24 hours. You
have the choice between 12H and 24H. Press the "SET/STORE" button (9)
to confirm the setting. The hour digit flashes.
Press the "VOL-" (12) and "VOL +" (4) buttons to set the hour. Press the
"SET/STORE" button (9) to confirm the setting. The minutes digit flashes.
Press the "VOL-" (12) and "VOL +" (4) buttons to set the minute. Press the
"SET/STORE" button (9) to confirm the setting. The year digit flashes.
Press the "VOL-" (12) or "VOL+" (4) buttons to set the correct year. Press the
"SET/STORE" button (9) to confirm the setting. The month digit flashes.
English - 23
Page 26
SilverCrest SWDR 500 A1
Press the "VOL-" (12) and "VOL +" (4) buttons to set the month. Press the
"SET/STORE" button (9) to confirm the setting. The day digit flashes.
Press the "VOL-" (12) and "VOL +" (4) buttons to set the day. Press the
"SET/STORE" button (9) to confirm the setting.
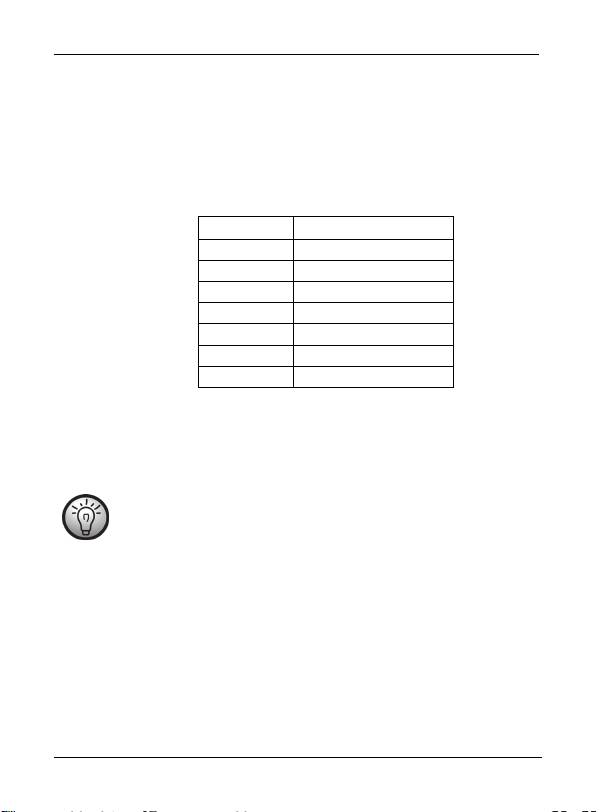
The day of the week (40) is calculated automatically and shown on the display
(6).
Display Day of the week
MON Monday
TUE Tuesday
WED Wednesday
THU Thursday
FRI Friday
SAT Saturday
SUN Sunday
You have finished the setting.
If you have selected the 12-hour clock format, the "PM" icon (36) appears
on the display (6) for post meridian clock hours.
Please note that you should adjust the clock when you move into a
different time zone.
Displaying the world clock
Press the "DISPLAY" button (5). The time is shown in large digits on the display
(6). Additionally, you can show the time for a specific time zone in the upper
part of the display. Use the "TUNE-" (13) or " TUNE+" (11) button to select the
time zone for which you want to know the current time. After this, with each
press of the "DISPLAY" button (5) the selected time zone and the corresponding
time are displayed.
Please remember that the time zone is being displayed only. To set the time
zone, proceed as described in the "Setting the time zone" chapter.
24 - English
Page 27
SilverCrest SWDR 500 A1
The "MODE" button functions
While the device is powered off the "MODE" button (15) lets you access the
setting mode for different functions.
Press once SDA (Special Date Alarm)
Press twice NAP timer
Press 3 times Stop watch
Press 4 times RDS time synchronisation ON/OFF
In radio mode the "MODE" button (15) has the following functions:
Press once To show and change the tuning mode
Press twice
FM: To show and change the "MONO"
and "AUTO-ST" settings
SW: Quick selection of the different short
wave bands
SDA (Special Date Alarm)
This function lets you program up to 10 yearly-recurring date alarms. The
procedure is as follows:
While the device is powered off, press the "MODE" button (15) once. The
display (6) reads "SDA". 01 (for the first SDA) and the associated date in
month.day format flash. If the alarm is disabled, the "SDA" icon (25) will
also flash. While an SDA is enabled, the "SDA" icon (25) illuminates. In this
case, the "SDA" icon (25) is also shown in clock mode.
Press the "VOL-" (12) or "VOL+" (4) buttons to set the desired date. You can
keep the buttons pressed to accelerate the digits count.
Press the "SET/STORE" button (9) briefly to enable or disable the set SDA.
You can enable or disable each SDA independently from the others. The
setting will be saved automatically.
English - 25
Page 28

SilverCrest SWDR 500 A1
Press the "TUNE-" (13) or " TUNE+" (11) button to program more SDAs in
the same way.
The enabled SDAs will sound every year. If the current date matches the set
SDA alarm date, the buzzer will sound for approx. 10 minutes hourly between
08:00 h and 23:00 h. The current radio mode is not interrupted by the SDA.
The alarm will sound only after the user has stopped radio mode and the
minutes digit has increased by "1".
Press any button to disable the alarm sound.
NAP timer
You can set a nap timer (with alarm buzzer only) for a one-time power on
event. There are 6 preset times, use the "TUNE-" (13) or "TUNE+" (11) button
to select one. The default settings of the 6 timers are different and are 10, 15,
20, 25, 30 and 35 minutes.
While the device is powered off, press the "MODE" button (15) twice. The
NAP timer icon (42), the timer number and the preset power-on time in
minutes appear on the display (6).
Press the "TUNE-" (13) or " TUNE+" (11) button multiple times to toggle
between the preset times.
Press the "VOL-" (12) and "VOL +" (4) buttons to set these times from 1 to 39
minutes as required.
Press the "SET/STORE" button (9) briefly to launch the timer.
The countdown appears on the display (6). After the timer is finished, an
alarm will sound until you disable it.
Press any button to disable the nap timer alarm buzzer.
Press the "SET/STORE" button (9) briefly to cancel the enabled NAP timer
before the countdown ends. The remaining time of the previously set timer is
shown on the display. Press the "SET/STORE" button (9) briefly again to
relaunch the timer with the remaining time.
While the timer is running, you can change its value by pressing the "VOL-"
(12) or "VOL+" (4) buttons.
26 - English
Page 29
SilverCrest SWDR 500 A1
Please note: When the NAP-timer is activated do not press any
buttons apart from “SET/STORE” (9), “VOL-“ (12) or “VOL+” (4).
Otherwise the NAP-timer will be finished.
Stop watch
To use the stop watch, proceed as follows:
While the device is powered off, press the "MODE" button (15) three times.
The display (6) shows the stop watch icon (23) and "STOP" 00:00
(minutes:seconds) and in the upper right corner the seconds/100 are
shown.
Press the "VOL+" button (4) briefly to start the stop watch.
Press the "VOL+" button (4) briefly again to stop or pause the stopwatch.
Press the "VOL+" button (4) again to resume the stopwatch from the currently
displayed time count.
Press the "VOL-" button (12) briefly to stop reset stop watch to 00:00.
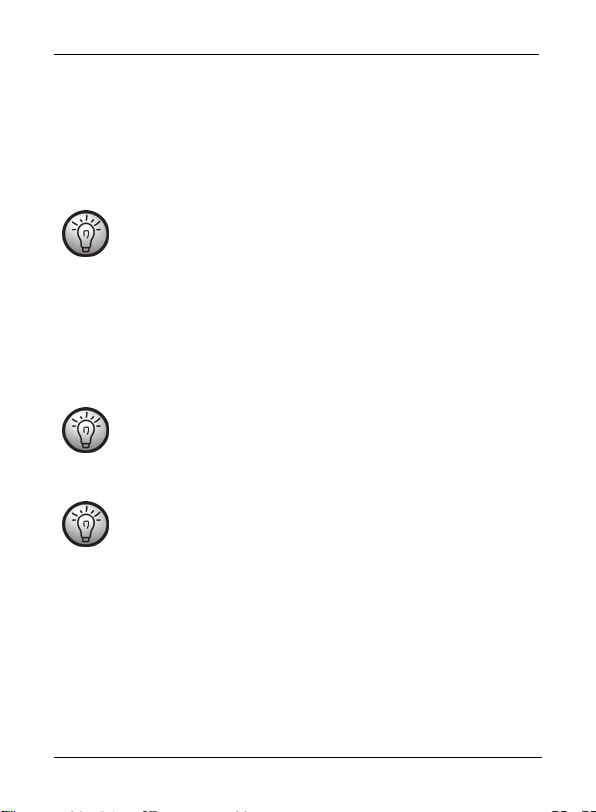
While the stop watch is running, the running time is shown on the
display (6). After resetting the stop watch to 00:00, the display
toggles to the normal clock time after approx. 8 seconds.
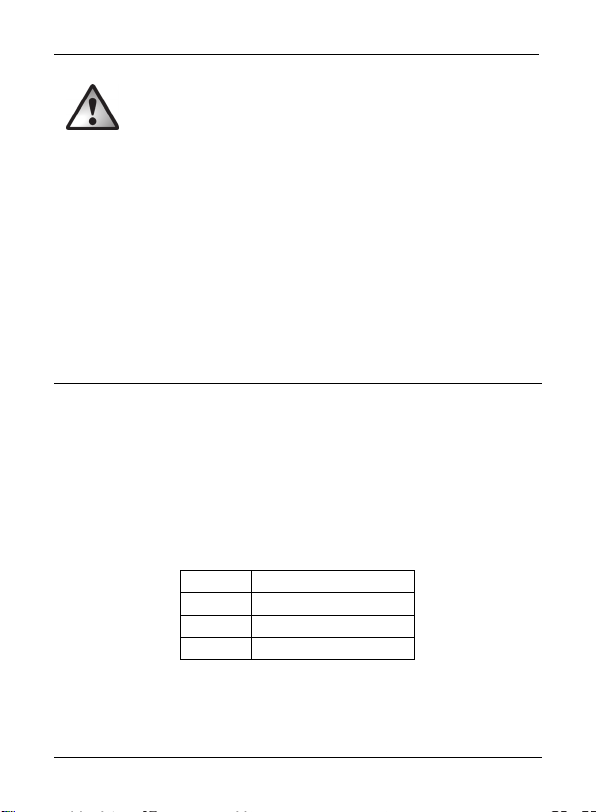
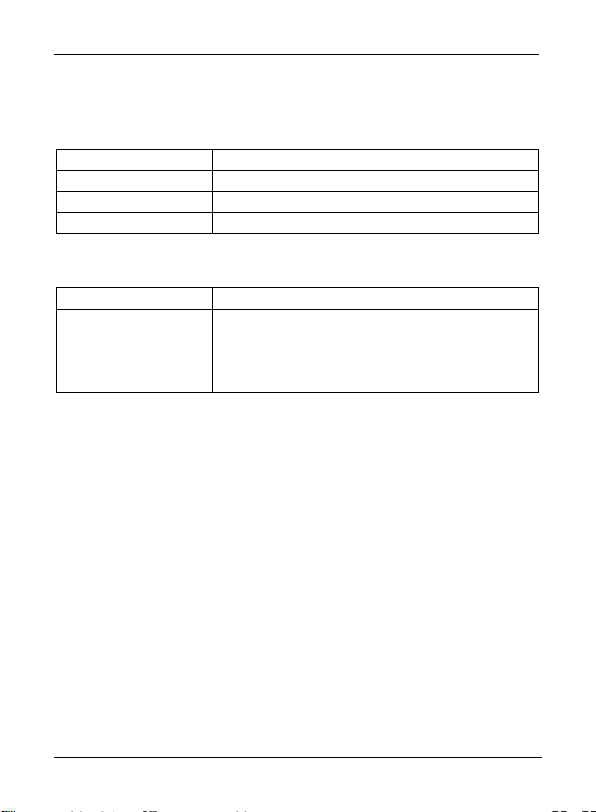
Setting the AM reception spacing
Due to different radio broadcasting band allocation in different countries it is
necessary to adjust the tuning spacing:
Region Frequency band Tuning spacing
Europe 522 kHz - 1,620 kHz 9 kHz
America 520 kHz - 1,710 kHz 10 kHz
The procedure is as follows:
While powered off, press and hold the "SET/STORE" button (9) until the
display (6) reads "US" or "EU". Now press the "VOL-" (12) or "VOL+" (4)
English - 27
Page 30

SilverCrest SWDR 500 A1
button to select your tuning region. Please remember that the date format is
also changed with this setting.
Adjusting the volume
Press the "VOL–" (12) and "VOL+" (4) buttons to adjust the volume to the
desired level. You can set it from level "00" (minimum volume) to level "16"
(maximum level). The device will always power on with the volume level that
was set when it was powered off.
Setting the sensitivity
This feature is only relevant for the FM and SW bands. Slide the
"DX/LOCAL" switch (22) to the “DX” position to use the device in normal
mode.
Slide the "DX/LOCAL" switch (22) to the “LOCAL” position to receive strong
broadcasting station signals only. This is recommended whenever a weaker
local station is receiving interference from a non-local station.
Enabling bass amplification
You can choose to have the bass sounds amplified.
While the device is powered on, press the "SNOOZE/BASS" button (2).
BASS (31) is shown on the display (6).
Press the "SNOOZE/BASS" button (2) again to disable bass amplification.
The "BASS" indicator (31) goes out.
Selecting a station
For an optimum reception, please fully extend the telescopic antenna (1)
before tuning a station. The telescopic antenna (1) can be rotated. This lets you
optimise the signal quality.
Automatic station search and automatic store
The most convenient way to search for and store radio stations is the automatic
scan with auto-store.
Power the device on.
28 - English
Page 31
SilverCrest SWDR 500 A1
Press the "BAND" button (7) to select the desired frequency band.
Keep the "SET/STORE" button (9) pressed for approx. 1 second to launch
the automatic station search. The automatic station search always starts at
the lowest frequency.
The multi-band tuner (A) will scan the entire frequency band for strong radio
stations.
The 100 first found stations are directly saved on the presets P001 to P100.
After all 100 presets have been filled, the station search continues to the end of
the frequency band but no more stations will be saved. After the scan is
finished, the station of preset P001 will be tuned-in.
Please note that any station presets already used will be
overwritten.
Manual station search
Power the device on.
Press the "BAND" button (7) to select the desired frequency band.
The short wave band "SW" is divided into 9 different frequency subbands "SW1" to "SW9" (see the "Technical specifications" chapter).
To select the different short wave bands, start pressing the "MODE"
button (15) twice. The upper part of display reads “SW << >>”.
Press the "TUNE-" (13) or "TUNE+" (11) button to select the desired
SW band. Press the "MODE" button (15) again to start searching
for any stations.
Keep the "TUNE-" (13) or "TUNE+" (11) button pressed for approx. one
second to launch the station search down or upwards. The search will stop
when the next station has been found and its frequency is shown on the
display (6).
English - 29
Page 32

SilverCrest SWDR 500 A1
Manually tuning a station
Besides the automatic station search, you can also tune in a station manually.
This allows you to also tune-in any weaker stations. Proceed as follows:
Briefly press the "TUNE-" (13) or "TUNE+" (11) button to increase or reduce
the frequency stepwise. These steps depends on the selected frequency band
and tuning spacing. Please also read the following chapter for different tuning
spacings.
Fine tuning
If you don't succeed to find a specific station, you can adjust the tuning spacing
to a finer setting (see the following table).
The procedure is as follows:
In radio mode, press the "Mode" button (15) once.
The display (6) shows the current frequency and above it the "STEP"
indication as well as the current tuning spacing.
Press the "TUNE-" (13) or "TUNE+" (11) button to toggle between the
normal or fine tuning spacing. The setting will be saved automatically.
Frequency range Normal / fine tuning spacing
FM 100kHz/50 kHz
AM EU* 9 kHz/1 kHz
AM US* 10 kHz/1 kHz
SW 5 kHz/1 kHz
LW 9 kHz/1 kHz
*For medium wave (AM), the tuning spacing depends on the date format
setting (EU or US), as set in chapter "Setting the date and time".
Saving a station manually
You can save up to 100 stations or frequencies for each frequency band.
Proceed as follows:
30 - English
Page 33
SilverCrest SWDR 500 A1
Tune in the station that you want to store.
Press the "SET/STORE" button (9) briefly.
The last selected preset flashes in the upper part of the display (6).
Press "M-/AL1" (14) or "M+/AL2" (10) to select the desired preset where
you want to store the station.
Press the "SET/STORE" button (9) to finish saving.
Please note that any station presets already used will be
overwritten.
Recalling a saved station
To tune in a previously stored station, press "M-/AL1" (14) or "M+/AL2"
(10) to select the preset where the desired station has been saved.
Please note:
On delivery, the presets are empty. When selecting an empty
preset, the lowest frequency of the selected band is tuned in.
Once a station has been saved on a preset, its frequency is stored
until it is overwritten by a new frequency.
When no power is supplied to the multi-band tuner, the clock is
erased but the stored stations are preserved.
Stereo output
A stereo sound output is only possible while the earphones are connected. In
this case, the display (6) will show the "ST" (30) icon.
However, the stereo signal may be weak or noisy in some cases. In "AUTO-ST"
mode the multi-band tuner will toggle between "MONO" and "STEREO"
depending on the signal quality.
English - 31
Page 34

SilverCrest SWDR 500 A1
However, you can always use the "MONO" setting if you want. To do so, in
radio mode, press the "MODE" button (15) twice and then use the "TUNE-"
(13) or "TUNE+" (11) button to select between the "MONO" and "AUTO-ST"
settings. The setting made here will prevail until you change it again.
SLEEP timer
The SLEEP timer function lets you set a countdown time between 10 and 90
minutes. After this time, the multi-band tuner (A) switches off automatically. This
setting can be adjusted in 10-minutes steps. The procedure is as follows:
Press the "POWER/SLEEP" button (8) to power the device off.
Hold down the ‘POWER/SLEEP’ button (8) for approx. one second. The
multi-band radio (A) now switches on and the number 90 (for 90 minutes)
and the ‘SLEEP’ symbol (32) flash on the display (6).
Press the "POWER/SLEEP" button (8) as many times as necessary to display
the desired time in minutes (e.g. 40). Each press of the "POWER/SLEEP"
button (8) reduces the number of minutes before power off by 10 minutes.
The multi-band radio (A) automatically switches off after the selected number
of minutes (e.g. 40) has elapsed.
While the sleep timer is enabled, the "SLEEP" icon (32) is shown on the
display (6).
While the sleep timer is enabled, it is still possible to select a different
frequency band, to start a station search, to recall a stored station and to set
the volume.
You can cancel the enabled sleep timer by switching the device off.
Setting the alarm
You can set up to two alarm times (AL1 and AL2). Verify that the clock displays
the correct time. The alarm time can only be set while the device is powered
off. If it is powered on, press the "POWER/SLEEP" button (8) to power the
device off.
32 - English
Page 35
SilverCrest SWDR 500 A1
In the following we describe the setting for AL1. You can program AL2 in the
same way. If during the setting procedure no button is pressed for approx. 8
seconds, the settings are applied and the setting mode is quit.
Press the "M-/AL1" button (14) for approx. 1 second. The hours flash on the
display (6).
Press the "VOL-" (12) or "VOL+" (4) buttons to set the desired hour of the
alarm time. You can keep the buttons pressed to accelerate the digits count.
Press the "M-/AL1" button (14) briefly to apply the setting. The minutes flash
on the display (6).
Press the "VOL-" (12) or "VOL+" (4) buttons to set the desired minutes of the
alarm time. You can keep the buttons pressed to accelerate the digits count.
Press the "M-/AL1" button (14) briefly to apply the setting.
Now you can press the "VOL-" (12) or "VOL+" (4) button to select if you
want to wake-up with the buzzer ("bUZZ") or the radio ("rdA"). Press the "M-
/AL1" button (14) to confirm your selection.
Now you can press the "VOL-" (12) or "VOL+" (4) buttons to set the desired
alarm volume. Press the "M-/AL1" button (14) briefly to apply the setting.
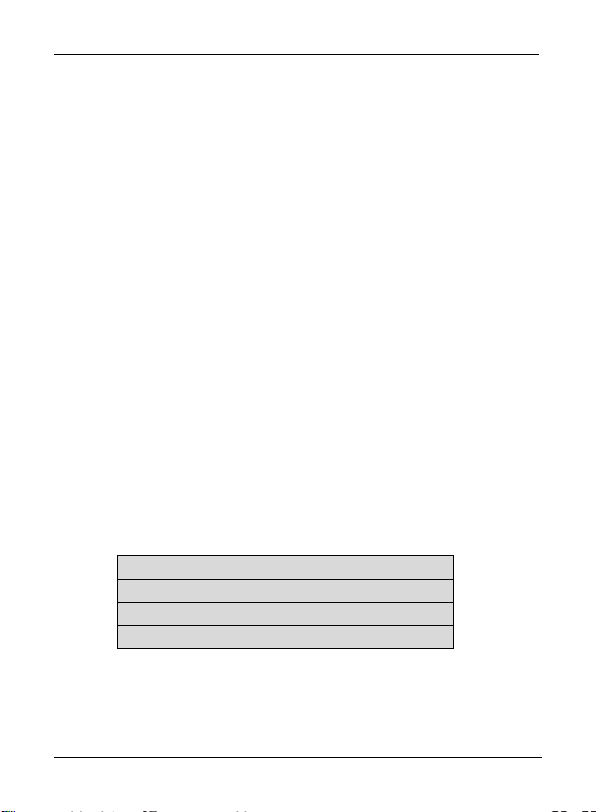
Finally you can select the days of the week for which you want enable the
set alarm. Press the "VOL-" (12) and "VOL +" (4) buttons to toggle between
the following options:
Individual days of the week
Days of the week from Monday to Friday
Weekend Saturday and Sunday
All days of the week
Press the "M-/AL1" button (14) briefly to apply the setting.
You have finished setting the alarm time.
English - 33
Page 36

SilverCrest SWDR 500 A1
Enabling the alarm
In the following we describe the setting for AL1. You can program AL2 in the
same way.
After you have set the alarm time you want, you can enable the alarm as
follows:
While the device is powered off, press the "M-/AL1" button (14) briefly to
show the set alarm time on the display (6).
Press the "M-/AL1" button (14) briefly once again to enable the alarm with
the buzzer. The corresponding icon (33) will appear on the display (6).
Press the "M-/AL1" button (14) briefly once again to enable the alarm with
the radio. The corresponding icon (34) will appear on the display (6).
Please note that no earphones must be connected when waking up
with the radio. If the earphones are connected, the alarm sound
(buzzer or radio) is output over the earphones only.
The device will power on at the set alarm time and will receive the last tuned-
in frequency and frequency band. However, if you have chosen the buzzer
during alarm setting you will wake-up with the buzzer.
The alarm tone starts quietly and gradually becomes louder until it
reaches the selected alarm volume.
Press any button to cancel the alarm sound or press the "SNOOZE/BASS"
button (2) briefly to delay the alarm for approx. 5 minutes. The alarm
indicator (33, 34) flashes. After the 5 minutes snooze period, the alarm starts
again. If you press any button within the 5 minutes of snooze time, the
"SNOOZE" function is disabled but the alarm remains enabled.
Upon factory delivery the snooze delay is set to 5 minutes. If
required, you can customise it to up to 120 minutes. To do so, while
the device is powered off, keep the "SNOOZE/BASS" button (2)
34 - English
Page 37

SilverCrest SWDR 500 A1
pressed for approx. one second. The set snooze time is shown on
the display (6). Press the "VOL-" (12) or "VOL+" (4) buttons to
change the snooze time. You can keep the buttons pressed to
accelerate the digits count. Press the "SNOOZE/BASS" button (2)
briefly to apply the setting.
To disable the alarm, press the "M-/AL1" button (14) as many times as
necessary until no alarm icon (33, 34) is shown on the display (6).
Even when the alarm function is enabled, you can use the device as
usual. Please note:
Waking up with the radio:
The alarm always powers on with the last tuned-in frequency
and frequency band.
Waking up with the buzzer:
The alarm starts very low and gets louder until the set volume is
reached.
Enabling/disabling the button lock
Press and hold the "LOCK" button (3) for approx. one second to activate the
button lock. The "LOCK" icon (35) flashes on the display (6).
In order to operate the device, you first have to disable the button lock. To do
this, press and hold the "LOCK" button (3) again for approx. one second. The
"LOCK" icon (35) no longer flashes on the display (6).
Please note that the alarm sound cannot be stopped or delayed while the
button lock is enabled.
English - 35
Page 38

SilverCrest SWDR 500 A1
Connecting the earphones
WARNING! Do not use any earphones other than the supplied
SWDR 500 A1. Other types of earphones can produce harmful
sound pressure levels.
Caution when using earphones. Listening at a high volume can
damage your hearing.
You can connect the supplied earphones SWDR 500 A1 (D) to the earphones
connector (21). While the earphones are plugged in, the speaker (16) is
muted automatically.
Storage when not using the product
If you will not be using the device for a long period of time, remove
any inserted batteries.
Store the device in a dry, cool place. To protect against dust, we
recommend storing the device in the pouch (C) supplied.
Troubleshooting
The device does not switch on.
Check whether the wall plug power adapter is plugged in.
The inserted batteries may be empty, fit new batteries.
Test that the batteries are fitted with the correct polarity. Please note the
diagram in the battery compartment and on the batteries. See also the
chapter “Inserting the batteries”.
Please check if the button lock feature is enabled. If necessary, press and
hold the "LOCK" button (3) for approx. one second to disable the button
lock.
36 - English
Page 39

SilverCrest SWDR 500 A1
No radio reception, poor radio reception
Pull the telescopic antenna (1) all the way out and make sure it is
orientated correctly.
Tune in the station correctly. If necessary, start a new station search.
Check whether the "DX/LOCAL" switch (22) is in the correct position.
Please also read the chapter "Setting the sensitivity".
The station name is not shown.
This feature is only supported in FM mode.
The tuned-in station does not broadcast any RDS signal or the signal is too
weak. Re-orientate the antenna to optimise reception.
Device switched on but no sound
Check the volume setting.
While the headphones are plugged in, the built-in speaker (16) is muted
automatically.
No alarm sound or alarm sound too low
Check the alarm sound volume in the alarm settings and, if necessary, set
a higher volume.
Unable to operate the device
Please check if the button lock feature is enabled.
Environmental regulations and disposal
information
A symbol depicting a crossed-out rubbish bin on a product means
it is subject to European Directive 2012/19/EU. All electrical and
electronic devices must be disposed of separately from household
waste at official disposal centres. Remove the batteries before
disposal of the device. With the proper disposal of old or
English - 37
Page 40

SilverCrest SWDR 500 A1
defective devices you avoid damage to the environment and your personal
health. For further information about proper disposal, contact your local
government, disposal bodies or the shop where you bought the device.
Disposal of packaging
Dispose of all packaging in an environmentally friendly manner. Cardboard
packaging can be taken to paper recycling centres or public collection points
for recycling. Any film or plastic contained in the packaging should be taken to
your public collection points for disposal.
Disposal of batteries
Respect the environment. Old batteries must not be disposed of
with domestic waste. They must be handed in at a collection point
for waste batteries. Please note that batteries must be disposed of
fully discharged at appropriate collection points for old batteries.
To prevent any short circuits cover the battery poles of not fully discharged
batteries with insulating tape.
Conformity notes
This device complies with the basic and other relevant
requirements of the EMC Directive 2014/30/EU, the Lowvoltage Directive 2014/35/EU, the ErP Directive
2009/125/EC and the RoHS II Directive 2011/65/EU.
In order to receive the complete EU declaration of conformity, please send an
e-mail to the following e-mail address:
ce@targa.de
38 - English
Page 41

SilverCrest SWDR 500 A1
Warranty and Service Information
Warranty of TARGA GmbH
This device is sold with three years warranty from the date of purchase. Please
keep the original receipt in a safe place as proof of purchase. Before using
your product for the first time, please read the enclosed documentation. Should
any problems arise which cannot be solved in this way, please call our hotline.
Please have the article number and, if available, the serial number to hand for
all enquiries. If it is not possible to solve the problem on the phone, our hotline
support staff will initiate further servicing procedures depending on the fault.
Within the warranty period the product will be repaired or replaced free of
charge as we deem appropriate. No new warranty period commences if the
product is repaired or replaced. Consumables such as batteries, rechargeable
batteries and lamps are not covered by the warranty.
Your statutory rights towards the seller are not affected or restricted by this
warranty.
English - 39
Page 42
SilverCrest SWDR 500 A1
Service
E-Mail: service.GB@targa-online.com
E-Mail: service.IE@targa-online.com
E-Mail: service.MT@targa-online.com
E-Mail: service.CY@targa-online.com
TARGA GmbH
IAN: 282353
Manufacturer
Coesterweg 45
59494 SOEST
GERMANY
Phone: 020 – 70 49 04 03
Phone: 01 - 4370121
Phone: 027 78 11 03
Phone: 02 – 20 09 025
40 - English
Page 43

SilverCrest SWDR 500 A1
Tartalom
Rendeltetésszerű használat .................................................... 43
Szállítási tartozékok .............................................................. 44
Műszaki adatok ..................................................................... 45
Biztonsági tudnivalók ............................................................. 47
Szerzői jog ............................................................................. 52
Üzemi környezet .................................................................... 53
Áttekintés– Kezelőelemek és a gombok funkciói ................... 54
A kijelzőn megjelenő elemek ........................................................................... 56
Tartóláb ............................................................................................................. 57
Az üzembe helyezés előtt ....................................................... 57
Hálózati és elemről történő üzemeltetés ......................................................... 58
Az elemek behelyezése ................................................................................... 58
A hálózati töltő csatlakoztatása ...................................................................... 59
Üzembe helyezés ................................................................... 59
A kijelző megvilágítása .................................................................................... 59
A készülék be- és kikapcsolása ....................................................................... 59
Az időzóna beállítása ...................................................................................... 60
A dátum / idő beállítása .................................................................................. 62
Automatikus beállítás RDS-en keresztül ...................................................... 62
Kézi beállítás ................................................................................................ 63
A világidő megjelenítése .................................................................................. 65
A „MODE” gomb funkciói ............................................................................... 65
SDA (speciális dátum-ébresztő) ....................................................................... 66
Rövid idejű időzítő (NAP Timer) ...................................................................... 67
Stopper .............................................................................................................. 68
Az AM-fogadási tartomány beállítása ............................................................ 68
A hangerő beállítása ........................................................................................ 69
A fogadási érzékenység beállítása ................................................................. 69
A basszus erősítésének aktiválása .................................................................. 69
Egy rádióadó kiválasztása .............................................................................. 70
Magyar – 41
Page 44

SilverCrest SWDR 500 A1
Automatikus rádióadó-keresés automatikus tárolás (Auto-Store) funkcióval 70
Rádióadó manuális keresése: .......................................................................... 70
Rádióadó manuális beállítása ......................................................................... 71
Rádióadó finomhangolása............................................................................... 71
Rádióadó manuális mentése ............................................................................ 72
A tárolt rádióadó előhívása ............................................................................. 72
Sztereólejátszás ................................................................................................ 73
Alvási időzítő (SLEEP-Timer) ............................................................................. 73
Ébresztés idejének beállítása (Alarm) ............................................................. 74
Az ébresztés aktiválása .................................................................................... 75
A billentyűzár aktiválása / inaktiválása .......................................................... 77
A fülhallgató csatlakoztatása .......................................................................... 78
Tárolás használaton kívül ................................................................................. 78
Hibaelhárítás .......................................................................... 78
Környezetvédelmi tudnivalók és ártalmatlanítási adatok ...... 79
Megfelelőségi megjegyzések ................................................. 80
Tudnivalók a garanciáról és a szerviz-ügyintézésről .............. 81
42- Magyar
Page 45

SilverCrest SWDR 500 A1
Gratulálunk!
Az SWDR 500 A1 SilverCrest világvevő rádió (a továbbiakban: világvevő
rádió) megvásárlásával Ön egy kiváló minőségű termék mellett döntött.
Az első használat előtt ismerje meg a világvevő rádiót, és gondosan olvassa el
ezt a kezelési útmutatót. Vegye figyelembe a biztonsági tudnivalókat, és csak a
kezelési útmutatóban leírt módon és csak a megadott rendeltetésre használja a
világvevő rádiót.
Gondosan őrizze meg a kezelési útmutatót. Ha a világvevő rádiót továbbadja
egy harmadik személynek, mellékelje az összes dokumentumot is.
Rendeltetésszerű használat
Ez egy szórakoztatóelektronikai készülék, amely rádióadók jeleinek
fogadására és visszaadására szolgál. A készüléket ezenkívül órának és
ébresztőórának is használhatja. Kizárólag magáncélra szabad felhasználni,
ne használja a terméket ipari vagy kereskedelmi célokra. Ezen kívül tilos a
rádiót trópusi éghajlatú területeken használni. A készülék önkényes átépítése
esetén a gyártó semmilyen szavatosságot nem vállal az ebből eredő károkért
vagy üzemzavarokért. Kizárólag a gyártótól kapott tartozékokat használja.
Kérjük, tartsa be a használat helyén érvényes nemzeti előírásokat és
törvényeket.
Vegye figyelembe, hogy az egyes országokban eltérő nemzeti szabályozás
lehet érvényben arra vonatkozóan, hogy mely frekvenciatartományt lehet
szabadon fogadni. Ezenkívül az engedélyezett frekvenciatartományban
fogadott információkat tilos értékesíteni, valamint azok tartalmát, illetve a
fogadás tényét tilos harmadik félnek továbbadni.
Magyar – 43
Page 46
SilverCrest SWDR 500 A1
Szállítási tartozékok
Vegye ki a csomagolásból a készüléket és az összes tartozékot. Távolítson el
minden csomagolóanyagot, és ellenőrizze az alkatrészek hiánytalanságát és
sérülésmentességét. Hiányos vagy sérült szállítmány esetén forduljon a
gyártóhoz.
A. SWDR 500 A1 világvevő rádió
B. Hálózati töltő
C. Táska
D. SWDR 500 A1 fülhallgató
E. Ez az útmutató (jelképes ábra)
44- Magyar
Page 47

SilverCrest SWDR 500 A1
Műszaki adatok
Ezek az adatok csak a készülék műszaki lehetőségeit írják le.
A különböző országok ettől eltérő törvényi szabályozást
alkalmazhatnak a szabadon fogadható frekvenciatartományra
vonatkozóan. Ügyeljen arra, hogy ebben az esetben a
szabályozáson kívül eső tartomány fogadása törvénybe
Világvevő rádió
Hálózati feszültség mellékelt hálózati töltő:
maximum áramfelvétel 0,3 A
Teljesítményfelvétel rádió üzemmódban: kb. 0,7 W
Hang-kimeneti teljesítmény 500 mW
Frekvenciasávok
Kérjük, vegye figyelembe, hogy a
gyártási tűréshatárok miatt a
megadott alsó és felső jelfogadási
tartomány jelentéktelen mértékben
eltérhet.
Rádióadó-tárolóhelyek 400 (frekvenciasávonként 100)
Méret kb. 17 x 4,1 x 11 cm (szé x mé x ma)
ütközik, és bírsággal sújtható.
opcionálisan 4 db AA típusú 1,5V
feszültségű elem (Mignon, LR6)
készenléti módban: < 0,2 W
FM 87,5 - 108 MHz
MW 522 - 1620 KHz
SW1 4,75 – 5,94 MHz
SW2 5,95 – 7,09 MHz
SW3 7,10 – 9,49 MHz
SW4 9,50 – 11,64 MHz
SW5 11,65 – 13,59 MHz
SW6 13,60 – 15,09 MHz
SW7 15,10 – 17,49 MHz
SW8 17,50 – 21,44 MHz
SW9 21,45 – 21,85 MHz
LW 153 - 279 KHz
Magyar – 45
Page 48

SilverCrest SWDR 500 A1
Tömeg kb. 315 g (elemek nélkül)
Fülhallgató SWDR 500 A1
Ellenállás 32 Ohm
Szélessáv-észlelési feszültség kb. 90 mV +/-10%
Maximális hangnyomásszint a
mellékelt fülhallgató
használatával kb. 95 dB (A)
Maximális kimeneti feszültség
a fülhallgató-csatlakozónál kb. 110 mV
Elemek használati ideje kb. 28 óra
Üzemi hőmérséklet 5 °C – 35 °C
Tárolási körülmények -10 °C – 50 °C
Tudnivaló: Tilos a készüléket forró
helyeken, pl. nyáron gépjárműben
tárolni.
Üzemi páratartalom Max. 85% relatív páratartalom
Hálózati csatlakozó
Gyártó SHENZHEN SHI GUANGKAIYUAN
TECHNOLOGY., LTD.
Típus
Bemeneti feszültség, frekvencia
/ bemeneti áramerősség
Kimeneti feszültség / kimeneti
áramerősség
A műszaki adatok és a kivitel módosítása külön bejelentés nélkül lehetséges.
GKYPS0030060EU1
100 – 240 V , 50/60 Hz / 0,5 A
6V / 0,3A,
46- Magyar
Page 49

SilverCrest SWDR 500 A1
Biztonsági tudnivalók
A készülék első használata előtt kérjük, figyelmesen olvassa át a következő
utasításokat és tartsa be a figyelmeztetéseket, akkor is, ha tisztában van az
elektronikus készülékek kezelésével. Őrizze meg ezt az útmutatót későbbi
használatra. A készülék eladásakor vagy továbbadásakor mindenképpen adja
át ezt az útmutatót is. Az a termék elválaszthatatlan részét képezi.
A használt szimbólumok és jelentésük
VESZÉLY! Ez a szimbólum a „Veszély” figyelemfelhívással együtt
olyan fenyegető veszélyes helyzetet jelöl, amely súlyos
sérülésekhez vagy akár halálhoz vezethet, ha nem küszöbölik ki.
FIGYELEM! Ez a szimbólum a „Figyelem” figyelemfelhívással
együtt a készülék biztonságos üzemeltetése és a felhasználó
védelme érdekében fontos tudnivalókat jelöli.
Ez a szimbólum áramütés veszélyére figyelmeztet.
Ez a szimbólum a témával kapcsolatos további hasznos
tudnivalókat jelöli.
Túl magas hangerőszintből eredő veszély
Legyen óvatos a fülhallgató használatakor. Ha hosszabb ideig
nagy hangerőn használja, az a felhasználó halláskárosodásához
vezethet.
VESZÉLY!
1. Kizárólag a készülékhez mellékelt fülhallgatót (D) használja
(típus: SWDR 500 A1). Más fülhallgatók az egészségre káros
hangnyomást hozhatnak létre.
2. A mellékelt fülhallgatót (D) (típus: SWDR 500 A1) ne használja
más lejátszóeszközökkel.
Magyar – 47
Page 50

SilverCrest SWDR 500 A1
Ne használja a fülhallgatót (D) túl nagy hangerőn. Ezzel károsíthatja a
hallását és zavarhatja a környezetét. Vegye figyelembe, hogy bizonyos
körülmények között a környező hangok szokatlanul hallhatók, ha fülhallhatót
használ. Ha a készülék úgy van kialakítva, hogy a külső zörejek észlelése
biztosított, akkor a hangerőt legfeljebb olyan szintre állítsa be, hogy a
környező zajokat továbbra is észlelje. Veszélyes helyzetekben (például a
közlekedésben való részvételkor, gépekkel való munkavégzéskor vagy egyéb
helyzetekben, amelyek a teljes figyelmét igénylik) a hang elvonhatja a
figyelmét, és emiatt előfordulhat, hogy nem érzékeli, mi történik a
környezetében. Ezért ilyen helyzetekben ne használja a fülhallgatót.
VESZÉLY! Ügyeljen arra, hogy:
mindig biztosítson megfelelő szellőzést (ne helyezze a készüléket polcra,
szőnyegre, ágyra vagy egyéb olyan helyre, ahol a szellőzőréseket letakarja,
és hagyjon a készülék minden oldalán kb. 10 cm távolságot),
a készülék le legyen kitéve közvetlen hőforrások (pl. fűtőtestek) hatásának,
közvetlen napfény vagy erős mesterséges fény ne hasson a készülékre,
a fröccsenő és cseppenő vízzel, valamint agresszív folyadékokkal való
érintkezést elkerüljék, és a készüléket ne használják víz közelében. Ezen
belül különösen ügyelni kell arra, hogy a készülékre ne ömöljön víz, ne
helyezzen folyadékkal teli tárgyat, pl. vázát vagy italt a készülékre vagy
mellé,
a készülék ne kerüljön mágneses mezők (pl. hangszórók) közvetlen
közelébe,
nyílt tűzforrás (pl. égő gyertya) ne kerüljön a készülékre vagy mellé,
ne jussanak idegen tárgyak a készülékbe,
48- Magyar
Page 51

SilverCrest SWDR 500 A1
a készülék ne legyen kitéve túl nagy hőmérséklet-ingadozásnak, mivel
különben a levegő páratartalma kicsapódhat, és elektromos rövidzárlatot
okozhat. Ha a készülék mégis nagy hőmérséklet-ingadozásnak lett kitéve, ne
használja, amíg a hőmérséklete fel nem veszi a környezeti hőmérsékletet
(kb. 2 óra),
a készülék ne legyen kitéve túl nagy rázkódásoknak és rezgéseknek,
a készüléket vagy az opcionális USB-tápegységet ne használják villámlással
járó viharban, az opcionális USB-tápegységet villámlással járó vihar esetén
húzzák ki a csatlakozóaljból,
hálózati töltő használatakor a használt fali csatlakozóaljzat mindig jól
hozzáférhető legyen. A kábelt mindig úgy helyezze el, hogy senki ne tudjon
elbotlani benne.
VESZÉLY! Elemek
Az elemeket helyes polaritással helyezze a készülékbe. Ehhez vegye
figyelembe az elemrekeszben található jelzést. Ne próbálja meg az elemeket
újból feltölteni, és semmilyen körülmények között ne dobja azokat tűzbe. Ne
használjon egyidejűleg különböző elemeket keverten (régi és új, alkáli és szén
stb.). Vegye ki az elemeket, ha a készüléket hosszabb ideig nem használja.
Nem rendeltetésszerű használat esetén robbanásveszély és az elemek
kifolyásának veszélye áll fenn. Az elemeket tilos felnyitni vagy átalakítani, mivel
a kifolyó vegyszerek sérüléseket okozhatnak. Bőrrel való érintkezés vagy
szembe kerülés esetén bő vízzel azonnal öblítse le, illetve öblítse ki a
vegyszert, és forduljon orvoshoz.
Semmiképpen ne játsszanak gyerekek az elemekkel, mivel az elemek lenyelése
életveszélyes lehet. Az elemeket mindig gyerekek elől jól elzárva tárolja. Ha
lenyelik az elemet, azonnal vegyenek igénybe orvosi segítséget.
Magyar – 49
Page 52

SilverCrest SWDR 500 A1
VESZÉLY! Gyerekek és fogyatékossággal
élő felnőttek
Az elektromos készülékek nem valók gyerekek kezébe. Fizikai, érzékszervi
vagy szellemi képességeikben korlátozott személyek is csak ennek megfelelően
használhatnak elektromos készülékeket. Soha ne engedje, hogy gyermekek,
vagy fogyatékossággal élő személyek felügyelet nélkül használjanak
elektromos készülékeket. Ettől csak akkor szabad eltérni, ha az érintettek
megfelelő tájékoztatást kaptak, vagy egy biztonságukért felelős személy
felügyelete alatt állnak. A gyerekeket felügyelni kell, hogy ne játszhassanak a
készülékkel. A kis alkatrészek lenyelése életveszélyes lehet. Ha lenyelnek egy
kis alkatrészt, azonnal vegyenek igénybe orvosi segítséget.
A csomagolófóliákat is tartsa távol.
Fulladásveszély áll fenn!
A hálózati töltőt kizárólag a célnak megfelelő, mindig jól hozzáférhető fali
csatlakozóaljzatba dugja be. Soha ne nyúljon a hálózati töltőhöz nedves
kézzel. Áramütés veszélye áll fenn. Az alábbi esetekben válassza le a hálózati
töltőt az áramforrásról:
Ha veszélyes helyzet áll fent.
Ha szokatlan hangok vagy füst lép ki a hálózati töltőből.
Villámlás veszélyével járó vihar és/vagy zivatar előtt.
Ha a hálózati töltő sérült.
Ha a hálózati töltő esőnek, folyadékoknak vagy magas páratartalomnak
Ha azt meg szeretné tisztítani.
volt kitéve.
VESZÉLY! Hálózati töltő
50- Magyar
Page 53

SilverCrest SWDR 500 A1
A hálózati töltő készenléti üzemmódban is áramot fogyaszt. A hálózatról
való teljes leválasztáshoz húzza ki a hálózati töltőt a fali
csatlakozóaljzatból.
Az életveszély és a tűzveszély elkerülése érdekében vegye figyelembe ezeket
a tudnivalókat! Továbbá a hálózati töltőt soha ne fedje le, különben tűzveszély
áll fent. Soha ne próbálja meg felnyitni a hálózati töltő burkolatát. Áramütés
miatti életveszély áll fent.
VESZÉLY! Kábel
Az összes kábelt a csatlakozónál fogja meg, és ne magát a kábelt húzza. Ne
helyezzen bútorokat vagy más nehéz tárgyakat a kábelekre, és ügyeljen arra,
hogy a kábelek ne törjenek meg, különösen a csatlakozódugónál és a
csatlakozóaljzatoknál. Ne vezesse át a kábeleket forró vagy éles helyeken és
peremeken, így elkerülheti azok károsodását. A kábelre tilos csomót kötni, és a
kábelt tilos másik kábelhez csatlakoztatni. Az összes kábelt úgy kell elhelyezni,
hogy senki ne lépjen rájuk, és senkit ne akadályoztassanak.
VESZÉLY! Kijelző
Ne fejtsen ki nyomást a kijelzőre, és tartsa távol a kijelzőtől az éles tárgyakat.
Törött kijelző esetén sérülésveszély áll fent. Viseljen kesztyűt a törött alkatrészek
összegyűjtéséhez, és adott esetben forduljon a gyártóhoz. A kijelző
összekarcolódásakor vagy más sérülésekor gondosan ügyeljen arra, hogy a
kijelzőben lévő folyadék ne folyjon ki.
Amennyiben a folyadék kifolyt, vegye figyelembe a következőket:
Ha a folyadék a bőrrel érintkezik, törölje azt le egy tiszta kendővel, és
bő vízzel öblítse le a területet. Adott esetben forduljon orvoshoz.
Magyar – 51
Page 54

SilverCrest SWDR 500 A1
Ha a folyadék szembe kerül, legalább 15 percen keresztül öblítse ki
folyó víz alatt. Majd azonnal forduljon orvoshoz.
Ha a folyadékot lenyeli, először bő vízzel öblítse ki a száját, majd igyon
rá bőségesen vizet. Azonnal forduljon orvoshoz!
VESZÉLY! Karbantartás
Javításra olyankor van szükség, ha a készülék megsérül, pl. ha a hálózati töltő
vagy a készülék burkolata megsérült, folyadék vagy tárgyak kerültek a
készülék belsejébe, illetve ha esőnek vagy nedvességnek lett kitéve. Javítási
munkákra akkor is szükség van, ha a készülék nem működik kifogástalanul,
vagy leesett. Ha füstképződést, szokatlan zajokat vagy szagokat észlel,
azonnal kapcsolja ki a készüléket, húzza ki a hálózati töltőt az aljzatból, és
vegye ki a behelyezett elemeket. Ilyen esetekben a készüléket tilos tovább
használni mindaddig, amíg szakember nem vizsgálta meg. A javítási munkákat
kizárólag képzett szakemberekkel végeztesse. A hálózati töltő vagy a készülék
burkolatát tilos kinyitni.
VESZÉLY! Tisztítás
Válassza le a készüléket az elektromos hálózatról. A világvevő rádiót csak
tiszta, száraz kendővel szabad megtisztítani, agresszív folyadékokkal tilos. Ne
próbálja meg kinyitni a készülék burkolatát. Ez a garancia elvesztésével jár.
Ha az elem kifolyt, a készüléket szakértővel kell megtisztíttatni.
Szerzői jog
A jelen kezelési útmutató teljes tartalma szerzői jogi védelem alatt áll, és
kizárólag információforrásként áll az olvasó rendelkezésére.
52- Magyar
Page 55

SilverCrest SWDR 500 A1
A szerzők kifejezett és írásos engedélye nélkül tilos az adatok és információk
bármilyen módon történő másolása vagy sokszorosítása. Ez vonatkozik a
tartalmak és adatok iparszerű használatára is.
A szöveg és az ábrák a nyomdába adáskor fennálló műszaki állapotot
tükrözik.
Üzemi környezet
A készülék nem magas hőmérsékletű vagy páratartalmú (pl. fürdőszoba) vagy
nagyon poros helyiségekben való használatra készült. Üzemi hőmérséklet és
üzemi páratartalom: 5 °C és 35 °C között, max. 85 % relatív páratartalom.
Magyar – 53
Page 56

SilverCrest SWDR 500 A1
Áttekintés– Kezelőelemek és a gombok funkciói
A kezelési útmutató borítója kihajtható. A borítót kihajtva mindig láthatja a
kezelőelemeket.
54- Magyar
Page 57

SilverCrest SWDR 500 A1
1
Teleszkópos antenna
2
SNOOZE/BASS gomb („szundi” – ébresztés késleltetése 5 –
120 percig / „basszus” – a mély hangok felerősítése)
3
LOCK gomb (gombok lezárása)
4
VOL + gomb (hangerő növelése)
5
DISPLAY gomb (az időzóna megjelenítése)
6
Kijelző
7
BAND gomb (a frekvenciasáv kiválasztása)
8
POWER/SLEEP gomb (be-/kikapcsolás, időzített kikapcsolás
beállítása)
9
SET/STORE gomb (időbeállítás, rádióadó mentése)
10
M+/AL2 gomb (következő tárhely lehívása, 2. ébresztő)
11
TUNE+ gomb (rádióadó keresése felfelé, perc-beállítás +)
12
VOL- gomb (hangerő csökkentése)
13
TUNE- gomb (rádióadó keresése lefelé, perc-beállítás -)
14
M-/AL1 gomb (előző tárhely lehívása, 1. ébresztő)
15
MODE gomb (üzemmód)
16
Hangszóró
17
Tartószíj
18
Tartóláb (a hátoldalon)
19
Elemrekesz (a hátoldalon)
20 (Csatlakozóhüvely az opcionális hálózati töltőhöz)
21 (Csatlakozóhüvely a fülhallgatóhoz)
22
DX/LOCAL kapcsoló (a jelfogadás érzékenységének beállítása)
Magyar – 55
Page 58

SilverCrest SWDR 500 A1
A kijelzőn megjelenő elemek
23 Stopper
24 CITY
25 SDA (speciális dátum-ébresztő)
26 VOLUME (hangerő)
27 MEM (tárhely)
28 RDS (rádiós adatrendszer)
29 Különböző jelzések: Rádióadó neve, dátum, tárhely
30 ST (SZTEREÓ – csak fülhallgatóval való használatkor)
31 BASS (a basszus-felerősítés aktív)
32 SLEEP (alvó funkció)
33 1/2 ébresztő aktív (csörgő hangjelzés)
34 1/2 ébresztő aktív (rádió)
35 LOCK (gombok zárolása)
36 A délutáni órák jelzése
37 A frekvencia mértékegysége
38 Az elemek töltöttsége alacsony
39 Idő-/frekvenciakijelzés
56- Magyar
Page 59

SilverCrest SWDR 500 A1
40 A hét napjának jelzése
41 Frekvenciasáv
42 NAP Timer (rövid idejű időzítő)
Tartóláb
A készülék hátulján egy tartóláb (18) található, amely lehetővé teszi, hogy a
világvevő rádiót döntött módon felállítsa. Ehhez pattintsa ki a tartólábat (18).
Az üzembe helyezés előtt
A készüléket választása szerint a mellékelt hálózati csatlakozóról (B) vagy 4
darab AA típusú elemmel (Mignon, LR6) üzemeltetheti. Az elemek nem képezik
a leszállított csomag részét.
Magyar – 57
Page 60

SilverCrest SWDR 500 A1
Hálózati és elemről történő üzemeltetés
Ha a világvevő rádiót (A) leválasztja a hálózatról, elvesznek a különböző
beállítások (idő és ébresztési idő). Ennek elkerülése érdekében a hálózatról
való leválasztás előtt helyezzen a készülékbe elemeket. Így az említett
beállítások megmaradnak.
Az eltárolt rádióadók akkor is megmaradnak, ha a hálózatról való
leválasztáskor nincsenek elemek a készülékben.
Az elemek behelyezése
Nyissa ki a készülék hátulján található elemrekeszt (19). Ehhez húzza lefelé az
elemrekesz fedelét, és vegye le a készülékről. Az elemeket helyes polaritással
helyezze be (vegye figyelembe a + és - jelzéseket), amint azt az alábbi ábra is
szemlélteti. A polaritás az elemeken és az elemrekeszben is jelezve van.
Ezután helyezze vissza a fedelet az elemrekeszre (19), és tolja felfelé, amíg a
helyére kattan.
Ha a kijelzőn (6) megjelenik az alacsony töltési elemeket jelző szimbólum
(38), akkor az elemek hamarosan lemerülnek. Cserélje ki az elemeket
ugyanolyan típusú új elemekre.
58- Magyar
Page 61

SilverCrest SWDR 500 A1
V
A
FIGYELEM!
ideig nem használja.
készüléket.
egye ki az elemeket, ha a készüléket hosszabb
z elemek kifolyhatnak és károsíthatják a
A hálózati töltő csatlakoztatása
Dugja be a hálózati töltő (B) csatlakozóját a világvevő rádió (A)
csatlakozóhüvelyébe (20). Ezután csatlakoztassa a hálózati töltőt (B) egy
könnyen hozzáférhető hálózati dugaszolóaljzatba.
Csatlakoztatott hálózati töltő (B) esetén a készülék kizárólag a töltőről kap
áramot, nem pedig az esetlegesen behelyezett elemekről. Ha a készüléket
hosszabb ideig használja a hálózati töltővel (B), vegye ki a behelyezett
elemeket, így elkerülheti azok kifolyását.
Üzembe helyezés
A kijelző megvilágítása
A kijelző megvilágítása bármely gomb megnyomásakor kb. 9 másodpercre
bekapcsol, majd ismét kialszik.
A készülék be- és kikapcsolása
A készülék bekapcsolásához nyomja meg egyszer rövid ideig a
„POWER/SLEEP” gombot (8). A bekapcsolt készüléken a kijelző (6) a
beállított frekvenciát, a frekvenciasávot, valamint a hét napját jeleníti meg:
FM
MW
SW
LW
Az „FM” frekvenciasávon megjelenik továbbá az aktuálisan beállított rádióadó
neve is, amennyiben azt a jelen közvetítik. Ha az adó nem közvetíti a rádióadó
URH
Közepes hullámhossz
Rövid hullámhossz
Hosszú hullámhossz
Magyar – 59
Page 62

SilverCrest SWDR 500 A1
nevét, vagy a jelfogadás gyenge, akkor ehelyett a dátum jelenik meg a
kijelzőn.
Az „MW”, „SW” és „LW” frekvenciasávokon minden rádióállomás esetében
az aktuális dátum jelenik meg a kijelzőn.
A készülék kikapcsolásához nyomja meg újra a „POWER/SLEEP” gombot (8).
A kikapcsolt készüléken a kijelző (6) a dátumot, az aktuális időt és a hét napját
jeleníti meg.
Értelemszerűen az időzóna beállításával kezdje a világvevő rádió
beprogramozását. Ehhez vegye figyelembe a következő „Az
időzóna beállítása” című fejezetet.
Az időzóna beállítása
Az alábbi táblázat áttekintést nyújt a különböző időzónák városainak
rövidítéseiről. Ezenkívül a táblázatból kiolvashatja az időeltolódást és az
esetleges nyári időszámítási szabályozást is.
Rövidí
tés
HNL
ANC
YVR
LAX
DEN
CHI
MEX
NYC
YYZ
YUL
CCS
RIO
BUE
Eltérés az
UTC-től*
-10:00 óra nem Honolulu / USA
-9:00 óra igen Anchorage / USA
-8:00 óra igen Vancouver / Kanada
-8:00 óra igen Los Angeles / USA
-7:00 óra igen Denver / USA
-6:00 óra igen Chicago / USA
-6:00 óra igen Mexikóváros / Mexikó
-5:00 óra igen New York / USA
-5:00 óra igen Toronto / Kanada
-5:00 óra igen Montreal / Kanada
-4:30 óra nem Caracas / Venezuela
-3:00 óra igen Rio de Janeiro / Brazília
-3:00 óra nem Buenos Aires / Argentína
Nyári
időszámítás
Város / ország
60- Magyar
Page 63

SilverCrest SWDR 500 A1
UTC*
LON
BER
PAR
ROM
CAI
IST
MOW
KWI
DXB
KHI
DAC
BKK
SIN
HKG
PEK
SHA
TYO
SYD
NOU
AKL
0:00 óra nem Koordinált világidő
0:00 óra igen London / Nagy-Britannia
+1:00 óra igen Berlin / Németország
+1:00 óra igen Párizs / Franciaország
+1:00 óra igen Róma / Olaszország
+2:00 óra igen Kairó / Egyiptom
+2:00 óra igen Isztambul / Törökország
+3:00 óra igen Moszkva / Oroszország
+3:00 óra nem Kuvait / Kuvait
+4:00 óra nem Dubai / Szaúd-Arábia
+5:00 óra nem Karacsi / Pakisztán
+6:00 óra igen Dakka / Banglades
+7:00 óra nem Bangkok / Thaiföld
+8:00 óra nem Szingapúr
+8:00 óra nem Hong Kong
+8:00 óra nem Peking / Kína
+8:00 óra nem Sanghaj / Kína
+9:00 óra nem Tokió / Japán
+10:00 óra igen Sydney / Ausztrália
+11:00 óra nem Nouméa / Új-Kaledónia
+12:00 óra igen Auckland / Új-Zéland
*UTC: Koordinált világidő
Az UTC rövidítés jelentése „Universal Time Coordinated” (koordinált világidő),
és korábban GMT-ként (Greenwich Mean Time - greenwichi középidő) is
hivatkoztak rá. A különböző időzónákat az UTC-hez, azaz a koordinált
világidőhöz képest számítják. A különbségek a táblázat 2. oszlopában
jelennek meg.
Az időzóna beállításához járjon el a következők szerint:
Magyar – 61
Page 64

SilverCrest SWDR 500 A1
A kikapcsolt készüléken tartsa nyomva a „SET/STORE” gombot (9), amíg a
kijelzőn (6) megjelenik az „US”, illetve „EU” felirat. Most nyomja meg még
egyszer rövid ideig a „SET/STORE” (9) gombot az időzóna-beállítások
eléréséhez. A kijelző (6) tetején ekkor megjelenik az aktuálisan beállított
város rövidítése, valamint alatta a hozzá tartozó helyi idő.
Alapértelmezésben az időzóna a „UTC”-re van beállítva.
Ezután a „VOL-” (12) vagy „VOL+” (4) gomb megnyomásával beállíthatja a
saját időzónájához tartozó várost, pl. a BER rövidítés Berlint jelenti. Az Ön
időzónájára vonatkozó város rövidítését olvassa ki a fenti táblázatból. Egy
másik városra való átváltással a kijelzett idő is az adott időzónához
igazodik.
Végül a következő fejezetben leírtak szerint állítsa be a pontos időt.
A dátum / idő beállítása
Automatikus beállítás RDS-en keresztül
A kiszállított terméken be van állítva az RDS-en keresztül való automatikus
időszinkronizálás. Amint a készülék bekapcsolás után veszi az RDS-jelet,
szinkronizál a dátum és az idő, és rövid idő múlva már helyesen jelennek meg
a kijelzőn.
Az automatikus beállítás attól függ, hogy a beállított rádióadó
közvetít-e RDS-jelet, és hogy a jelfogadás minősége megfelel-e az
RDS-jel fogadására. Amikor a készülék RDS-jelet fogad, a kijelzőn
megjelenik az RDS felirat (28).
Ezenkívül az időszinkronizálás és a pontos idő beállítása közvetlenül függ az
időzóna beállításától is. Ezért feltétlenül a helyes időzónát kell beállítani. Ehhez
vegye figyelembe az előző „Az időzóna beállítása” című fejezetet.
62- Magyar
Page 65

SilverCrest SWDR 500 A1
Kézi beállítás
Először is kapcsolja ki az RDS-en keresztül való automatikus időszinkronizálást.
Ehhez a kikapcsolt készüléken nyomja meg 4-szer a „MODE” (15) gombot,
amíg a kijelző felső részén (6) megjelenik a „TS ON” (automatikus
időszinkronizálás aktiválva) felirat. A „VOL-” (12) vagy „VOL+” (4) gomb
megnyomásával állítsa át a „TS OFF” (automatikus időszinkronizálás
inaktiválva) feliratra.
Ezután állítsa be a helyes időzónát.
Az időt csak a kikapcsolt készüléken lehet beállítani. Ha be van kapcsolva,
kapcsolja ki a készüléket a POWER/SLEEP (8) gombbal.
Ha a beállításkor kb. 7 másodpercig semmilyen gombot nem nyom meg, akkor
a készülék átveszi az új beállításokat, és kilép a beállítási módból. A számok
léptetésének gyorsításához tartsa nyomva a „VOL-” (12) vagy „VOL+” (4)
gombot.
A kikapcsolt készüléken tartsa nyomva a „SET/STORE” gombot (9), amíg a
kijelzőn (6) megjelenik az „US”, illetve „EU” felirat. Ezután a „VOL-” (12)
vagy „VOL+” gombbal válassza ki a kívánt dátumformátumot.
Példa:
EU NN.HH.ÉÉÉÉ
USA HH.NN.ÉÉÉÉ
Erősítse meg a kiválasztást a „SET/STORE” (9) gomb megnyomásával.
Vegye figyelembe, hogy ezzel a beállítással megváltoztatja az AMfrekvenciasáv hangolási távolságát is.
Az előző fejezetben leírtak szerint állítsa be a megfelelő időzónát, és
erősítse meg a kiválasztást a „SET/STORE” (9) gomb megnyomásával. A
beállított időformátum villog.
Magyar – 63
Page 66

SilverCrest SWDR 500 A1
Most a „VOL-” (12) vagy „VOL+” (4) gombbal beállíthatja az
időformátumot. A terméket alapértelmezésként a 24-órás időformátumbeállítással szállítjuk. Ön választhat a 12H és 24H lehetőségek közül.
Erősítse meg a beállítást a „SET/STORE” (9) gomb megnyomásával. Az órát
jelző szám villog.
Most a „VOL-” (12) vagy „VOL+” (4) gomb megnyomásával beállíthatja az
órát. Erősítse meg a beállítást a „SET/STORE” (9) gomb megnyomásával.
A percet jelző szám villog.
Most a „VOL-” (12) vagy „VOL+” (4) gomb megnyomásával beállíthatja a
percet. Erősítse meg a beállítást a „SET/STORE” (9) gomb
megnyomásával. Az évet jelző szám villog.
Ezután a „VOL-” (12) vagy „VOL+” (4) gombbal állítsa be a pontos évet.
Erősítse meg a beállítást a „SET/STORE” (9) gomb megnyomásával. A
hónapot jelző szám villog.
Most a „VOL-” (12) vagy „VOL+” (4) gomb megnyomásával beállíthatja a
hónapot. Erősítse meg a beállítást a „SET/STORE” (9) gomb
megnyomásával. A napot jelző szám villog.
Most a „VOL-” (12) vagy „VOL+” (4) gomb megnyomásával beállíthatja a
napot. Erősítse meg a beállítást a „SET/STORE” (9) gomb
megnyomásával.
A beállításhoz igazodva a kijelzőn (6) a hét napja (40) is megjelenik.
Jelzés A hét napja
MON hétfő
TUE kedd
WED szerda
THU csütörtök
FRI péntek
SAT szombat
SUN vasárnap
64- Magyar
Page 67

SilverCrest SWDR 500 A1
Ezzel befejezte a beállítást.
Ha a 12-órás időformátumot választotta, a kijelzőn (6) a délutáni órák
esetén a „PM” (36) jel is megjelenik.
Az időt át kell állítania, ha más időzónába utazik.
A világidő megjelenítése
Nyomja meg a „DISPLAY” (5) gombot. A kijelzőn (6) nagy számokkal
kijelezve megjelenik a pontos idő. Továbbá a kijelző felső részén
megjelenítheti egy további kívánt időzóna pontos idejét. A „TUNE-” (13) vagy
„TUNE+” (11) gombbal válassza ki azt az időzónát, melynek pontos idejét
meg szeretné jeleníteni. A kiválasztott időzóna és a hozzá tartozó idő ezután a
„DISPLAY” (5) gomb minden egyes megnyomásakor megjelenik a pontos idő
fölött.
Vegye figyelembe, hogy az időzónát itt csak megjeleníteni lehet. Az időzóna
beállításához járjon el „Az időzóna beállítása” fejezetben leírtak szerint.
A „MODE” gomb funkciói
Ha a kikapcsolt készüléken megnyomja a „MODE” (15) gombot, különböző
funkciók beállítási üzemmódját éri el:
1-szeri megnyomás SDA (speciális dátum-ébresztő)
2-szeri megnyomás NAP Timer (rövid idejű időzítő)
3-szori megnyomás Stopper
4-szeri megnyomás RDS-en keresztül való időszinkronizálás BE/KI
Magyar – 65
Page 68

SilverCrest SWDR 500 A1
Rádió üzemmódban a „MODE” (15) gomb az alábbi funkciókkal bír
1-szeri megnyomás A hangolási távolság megjelenítése és
módosítása
2-szeri megnyomás
URH (FM): A „MONO” és „AUTO-ST”
beállítás megjelenítése és módosítása
RH (SW): Az alsávok gyors kiválasztása
SDA (speciális dátum-ébresztő)
Ezzel a funkcióval akár 10 évig ismétlődő speciális dátumokra vonatkozó
ébresztőt programozhat be. A következőképpen járjon el:
A kikapcsolt készüléken nyomja meg egyszer a „MODE” (15) gombot. A
kijelzőn (6) világítani kezd az „SDA” felirat. A 01 (az első „SDA” tárhelye)
jel és az ahhoz beállított dátum hónap.nap formátumban villog. Ha az
ébresztő nincs aktiválva, akkor az „SDA” (25) szimbólum is villog. Ha
aktiválta az SDA-t, azt a folyamatosan kijelzett „SDA” (25) szimbólum jelzi.
Ebben az esetben a készülék idő üzemmódban is megjeleníti az „SDA” (25)
szimbólumot.
A „VOL-” (12) vagy „VOL+” (4) gombbal állítsa be a kívánt dátumot. A
számok gyorsabb léptetéséhez tartsa nyomva a gombot.
A beállított „SDA” aktiválásához, illetve inaktiválásához nyomja meg rövid
ideig a „SET/STORE” (9) gombot. Minden „SDA”-t egymástól függetlenül
aktiválhat/inaktiválhat. A készülék automatikusan menti a beállításokat.
Nyomja meg a „TUNE-” (13) vagy „TUNE+” (11) gombot, hogy hasonló
módon további speciális dátum-ébresztőket programozzon be.
Az aktivált speciális dátum-ébresztések csak évente egyszer hangzanak fel. Ha
az aktuális dátum megfelel az SDA-ébresztőhöz beállított dátumnak, akkor az
adott napon 08:00-tól 23:00-ig minden egész órában szólni kezd egy kb. 10
percig tartó csörgő hangjelzés. Ha éppen szól a rádió, azt nem szakítja meg a
66- Magyar
Page 69

SilverCrest SWDR 500 A1
speciális dátum-ébresztő. Az ébresztő csak azután kapcsol ki, hogy a
felhasználó befejezte a lejátszást, és az óra perckijelzését „1” értékkel
megnövelte.
Az ébresztést egy tetszőleges gomb megnyomásával fejezheti be.
Rövid idejű időzítő (NAP Timer)
Lehetősége van arra, hogy egyszeri bekapcsoláshoz beállítson egy rövid idejű
időzítőt (csak hangjelzéssel). A „TUNE-” (13) vagy „TUNE+” (11) gombbal
választhat 6 előre beállított időpont közül. A 6 időzítő előbeállításai
különböznek, és 10, 15, 20, 25, 30, valamint 35 percet tesznek ki.
A kikapcsolt készüléken nyomja meg kétszer a „MODE” (15) gombot. A
kijelzőn (6) megjelenik a NAP-Timer (42) szimbólum, az időzítő száma,
valamint az előre beállított bekapcsolási idő percben kifejezve.
Nyomja meg ismét a „TUNE-” (13) vagy „TUNE+” (11) gombot, hogy az
előre beállított időt átkapcsolja.
Ezt az időt ezután igényei szerint állítsa be a „VOL-” (12) vagy „VOL+” (4)
gombbal 1-39 perc között.
Az időzítő indításához nyomja meg rövid ideig a „SET/STORE” (9) gombot.
A kijelzőn (6) ekkor az idő visszaszámlál. Az időzítő letelte után hangjelzést
ad a készülék, amíg azt ki nem kapcsolja.
A rövid idejű időzítő hangjelzését egy tetszőleges gomb megnyomásával
kapcsolhatja ki.
Ahhoz, hogy az aktivált rövid idejű időzítőt a beállított idő letelte előtt
inaktiválja, nyomja meg rövid ideig a „SET/STORE” (9) gombot. Ekkor a
kijelző a korábban beállított időzítőből hátrelévő időt jeleníti meg. Az
időzítőből hátralévő idő indításához nyomja meg ismét rövid ideig a
„SET/STORE” (9) gombot.
Magyar – 67
Page 70

SilverCrest SWDR 500 A1
Miközben az időzítő folyamatban van, Ön a „VOL-” (12) vagy „VOL+” (4)
gombbal továbbra is módosíthatja a beállított lefutási időt.
Ügyeljen az alábbiakra: Az aktivált rövid idejű időzítő esetén ne
nyomjon meg más gombot a „SET/STORE” (9), „VOL-” (12) és
„VOL+” (4) gombokon kívül. Különben kikapcsolja a rövid idejű
időzítőt.
Stopper
A stoppert a következők szerint használja:
A kikapcsolt készüléken nyomja meg háromszor a „MODE” (15) gombot. A
kijelzőn (6) megjelenik a stopper szimbólum (23) és a „STOP” felirat,
valamint a 00:00 (perc:másodperc) számláló és a jobb felső sarokban
a századmásodperc is.
A stopper indításához nyomja meg rövid ideig a „VOL+” (4) gombot.
A stopper leállításához, illetve szüneteltetéséhez nyomja meg ismét rövid
ideig a „VOL+” (4) gombot.
A „VOL+” (4) gomb újbóli megnyomásával a stopper a megjelenített időtől
folytatja a számlálást.
A stopper 00:00-ra való visszaállításához nyomja meg rövid ideig a „VOL-”
(12) gombot.
Működő stopper esetén a kijelzőn (6) a stopper által számlált idő
jelenik meg. Ha a stoppert visszaállítja 00:00-ra, akkor a kijelző
kb. 8 másodperc múlva automatikusan átvált a normál idő
megjelenítésére.
Az AM-fogadási tartomány beállítása
Mivel a különböző országokban különböző rádióadó-rendszerek vannak,
ezért érdemes a hangolási távolságot, illetve a fogadási tartományt ehhez
igazítani:
68- Magyar
Page 71

SilverCrest SWDR 500 A1
Régió Frekvenciasáv-
tartomány
Európa 522 kHz – 1620 kHz 9 kHz
Amerika 520 kHz – 1710 kHz 10 kHz
A következőképpen járjon el:
A kikapcsolt készüléken tartsa nyomva a „SET/STORE” gombot (9), amíg a
kijelzőn (6) megjelenik az „US”, illetve „EU” felirat. Ezután a „VOL-” (12)
vagy „VOL+” gombbal válassza ki a saját fogadási régióját. Vegye
figyelembe, hogy ezzel a beállítással megváltoztatja a dátumformátumot is.
Hangolási
távolság
A hangerő beállítása
A „VOL-” (12) vagy „VOL+” (4) gomb megnyomásával igényei szerint
beállíthatja a hangerőt. A hangerőt a „00” (minimális hangerő) és a „16”
(maximális hangerő) szint között állíthatja be. Bekapcsoláskor a készülék
hangereje az utolsó kikapcsoláskor beállított szinten van.
A fogadási érzékenység beállítása
Ez a funkció csak az FM és SW frekvenciákra vonatkozik. Tolja a
„DX/LOCAL” (22) kapcsolót a „DX” állásra, ha a készüléket normál
üzemmódban szeretné használni.
Tolja a „LOCAL/LOCAL” (22) kapcsolót a „LOCAL” állásra, ha csak erős
térerejű rádióadókat szeretne fogadni. Ez például akkor javasolt, ha egy kívánt
gyenge jelű helyi rádióadót az erősebb jelű országos rádióadók lefednek.
A basszus erősítésének aktiválása
Ezzel a lehetőséggel felerősítheti a mély hangok lejátszását.
A bekapcsolt készüléken nyomja meg a „SNOOZE/BASS” (2) gombot. A
kijelzőn (6) megjelenik a BASS (31) felirat.
A basszus-felerősítés kikapcsolásához nyomja meg újra a
„SNOOZE/BASS” gombot (2). A kijelzőről eltűnik a „BASS” (31) felirat.
Magyar – 69
Page 72

SilverCrest SWDR 500 A1
Egy rádióadó kiválasztása
A lehető legjobb jelfogadás érdekében a rádióadó kiválasztása előtt húzza ki
teljes hosszában a készülék teleszkópos antennáját (1). A teleszkópos antenna
(1) forgatható. Így optimalizálhatja a jelfogadást.
Automatikus rádióadó-keresés automatikus tárolás
(Auto-Store) funkcióval
A rádióadók keresésének és elmentésének legkényelmesebb módja az
automatikus tárolás funkcióval kiegészített automatikus rádióadó-keresés (AutoStore funkció).
Kapcsolja be a készüléket.
Ezután a „BAND” (7) gombbal válassza ki a kívánt frekvenciasávot.
Az automatikus rádióadó-keresés indításához tartsa nyomva a „SET/STORE”
(9) gombot kb. 1 másodpercig. Az automatikus rádióadó-keresés mindig a
legalacsonyabb frekvencián kezdődik.
A világvevő rádió (A) a teljes frekvenciatartományban megkeresi az erős
jelű rádióadókat.
Az első 100 megtalált rádióadót a készülék közvetlenül a P001 – P100
tárhelyre osztja ki és tárolja el.
Ha már mind a 100 tárhely foglalt, a keresési folyamat még teljesen lefut, bár
további rádióadókat már nem tud eltárolni. A keresési folyamat befejezése
után a készülék a P001 tárhelyre mentett rádióadóra kapcsol.
Vegye figyelembe, hogy a már foglalt tárhelyeket a készülék
felülírja.
Rádióadó manuális keresése:
Kapcsolja be a készüléket.
Ezután a „BAND” (7) gombbal válassza ki a kívánt frekvenciasávot.
Az „SW” rövidhullámú sáv 9 alsávra van felosztva: „SW1” –
„SW9” (lásd a „Műszaki adatok” című fejezetet). Az egyes
alsávok kiválasztásához ezután nyomja meg kétszer a „MODE”
70- Magyar
Page 73

SilverCrest SWDR 500 A1
(15) gombot. A kijelző tetején megjelenik az „SW << >>” felirat. A
„TUNE-” (13) vagy „TUNE+” (11) gombbal válassza ki a kívánt
alsávot. Végül a rádióadó-keresés elvégzéséhez nyomja meg ismét
a „MODE” (15) gombot.
A rádióadó-keresés választott irányba való elindításához tartsa nyomva a
„TUNE-” (13) vagy „TUNE+” (11) gombot kb. 1 másodpercig. A keresés a
következő megtalált rádióadónál megáll, és a kijelzőn (6) megjelenik a
rádióadó frekvenciája.
Rádióadó manuális beállítása
A rádióadó-keresés mellett másik lehetőségként manuálisan is beállíthat egy
rádióadót. Így lehetősége van arra is, hogy gyengébb jelű rádióadókat
megtaláljon. Ezt a következőképpen teheti meg:
Nyomja meg rövid ideig a „TUNE-” (13) vagy „TUNE+” (11) gombot, hogy a
frekvenciát egy fokkal növelje, illetve csökkentse. A kiválasztott frekvenciasávtól
és a kiválasztott hangolási távolságtól függ, hogy mekkora léptékben változik
a frekvencia. A hangolási távolságokhoz vegye figyelembe a következő
fejezetet is.
Rádióadó finomhangolása
A rádióadó-beállítás hangolási távolságát a következő táblázat alapján
finomabb hangolásra is beállíthatja, ha egy rádióadót nem talál.
A beállításhoz a következőképpen járjon el:
A rádió üzemmódban levő készüléken nyomja meg egyszer a „MODE”
(15) gombot.
A kijelzőn (6) megjelenik az aktuálisan beállított frekvencia, fölötte a „STEP”
felirat, valamint az aktuális hangolási távolság.
Magyar – 71
Page 74
SilverCrest SWDR 500 A1
A „TUNE-” (13) vagy „TUNE+” (11) gombbal állíthatja be a hangolási
távolságot normál- vagy finomhangolásra. A készülék automatikusan menti a
beállításokat.
Frekvenciatartomány
URH (FM) 100kHz / 50 kHz
MW (AM) EU* 9 kHz / 1 kHz
MW (AM) US* 10 kHz / 1 kHz
RH (SW) 5 kHz / 1 kHz
LW 9 kHz / 1 kHz
* MW (AM) esetén a hangolási távolság a dátumformátumtól (EU vagy US)
függ, amelyet „A dátum / idő beállítása” fejezetben választott ki.
Hangolási távolság normál /
finom
Rádióadó manuális mentése
Lehetősége van arra, hogy frekvenciasávonként 100 rádióadót, illetve
frekvenciát eltároljon. Ezt a következőképpen teheti meg:
Keresse meg a rádióadót, amelyet el kíván tárolni.
Nyomja meg rövid ideig a „SET/STORE” (9) gombot.
A kijelző (6) tetején villogni kezd az utoljára kiválasztott tárhely.
Az „M-/AL1” (14) vagy „M+/AL2” (10) gombbal válassza ki azt a
tárhelyet, ahová a kívánt rádióadót el szeretné menteni.
Nyomja meg a „SET/STORE” (9) gombot a tárolás lezárásához.
Vegye figyelembe, hogy a már foglalt tárhelyeket a készülék
felülírja.
A tárolt rádióadó előhívása
Egy korábban elmentett rádióadó előhívásához az „M-/AL1” (14) vagy
„M+/AL2” (10) gombbal válassza ki azt a tárhelyet, ahová a kívánt
rádióadót elmentette.
72- Magyar
Page 75

SilverCrest SWDR 500 A1
Ügyeljen az alábbiakra:
A szállított termékben alapértelmezésben nem foglaltak a
tárhelyek. Egy még nem foglalt tárhely kiválasztásakor a készülék a
kiválasztott frekvenciasáv legalacsonyabb frekvenciáját játssza le.
Ha egy tárhelyet lefoglal, akkor a készülék addig tartja meg a
mentett frekvenciát, amíg azt egy következő tárolásnál felül nem
írja.
Ha a rádió nem kap áramot, akkor az időbeállítás elveszik, de a
tárolt rádióadókat továbbra is tárolja.
Sztereólejátszás
A rádióadót sztereóminőségben csak fülhallgató használatával tudja
lejátszani. Ebben az esetben a kijelzőn (6) megjelenik az „ST” (30)
szimbólum.
Előfordulhat, hogy a sztereójel gyenge, és zúg. Az „AUTO-ST” módban a
fogadott jel minőségétől függően a világvevő rádió automatikusan átkapcsol a
„MONO” és a „STEREO” mód között.
A jelfogadást manuálisan is átállíthatja állandó „MONO”-ra. Ehhez az FMrádióra kapcsolt készüléken nyomja meg kétszer a „MODE” (15) gombot, és
válassza ki a „TUNE-” (13) vagy „TUNE+” (11) gombbal a „MONO” vagy
„AUTO-ST” beállítást. Az elvégzett beállítás mindaddig megmarad a
készüléken, amíg azt újból nem módosítja.
Alvási időzítő (SLEEP-Timer)
Az alvási időzítővel beállíthat egy 10 és 90 perc közti időtartamot, amely
lejárta után a világvevő rádió (A) automatikusan kikapcsol. Az időt 10 perces
léptékekben állíthatja be. A következőképpen járjon el:
Kapcsolja ki a készüléket a „POWER/SLEEP” (8) gombbal.
Magyar – 73
Page 76

SilverCrest SWDR 500 A1
Tartsa nyomva a „POWER/SLEEP” gombot (8) kb. egy másodpercig. Ekkor
bekapcsol a világvevő rádió (A), és a kijelzőn (6) villog a „90”-es szám (a
90 percet jelezve), valamint a „SLEEP” szimbólum (32).
Ekkor nyomogassa a „POWER/SLEEP” gombot (8) addig, amíg eléri a
kívánt percszámot (pl. 40). A „POWER/SLEEP” gomb (8) minden egyes
megnyomásával 10 perccel csökkenti a kikapcsolásig hátralévő percszámot.
A világvevő rádió (A) a korábban kiválasztott percszám (pl. 40) lejárata
után automatikusan kikapcsol.
Ha aktiválta az alvási időzítőt, akkor a kijelzőn (6) látható a „SLEEP”
szimbólum (32).
Ha aktiválta az alvási időzítőt, akkor is frekvenciasávot válthat, elindíthatja a
rádióadó-keresést, visszaléphet egy eltárolt adóra, és beállíthatja a
hangerőt.
Az aktivált alvási időzítőt törölheti, ha a készüléket kikapcsolja.
Ébresztés idejének beállítása (Alarm)
Két ébresztési időt (AL1 és AL2) állíthat be. Győződjön meg arról, hogy a
pontos idő van-e beállítva. Az ébresztési időt csak a kikapcsolt készüléken
lehet beállítani. Ha be van kapcsolva, kapcsolja ki a készüléket a
„POWER/SLEEP” (8) gombbal.
Az alábbiakban az AL1 ébresztés beállítását írjuk le. Az AL2 ébresztést ehhez
hasonlóan programozhatja be. Ha a beállításkor kb. 8 másodpercig
semmilyen gombot nem nyom meg, akkor a készülék átveszi az új
beállításokat, és kilép a beállítási módból.
Tartsa nyomva a „M-/AL1” (14) gombot kb. 1 másodpercig. A kijelzőn (6)
villogni kezd az óra-kijelzés.
Ezután a „VOL-” (12) vagy „VOL+” (4) gombbal állítsa be a kívánt
ébresztési idő óraértékét. Ha a számokat gyorsabban szeretné léptetni,
74- Magyar
Page 77
SilverCrest SWDR 500 A1
tartsa nyomva a gombot. A beállítás jóváhagyásához nyomja meg rövid
ideig a „M-/AL1” (14) gombot. A kijelzőn (6) villogni kezd a perc-kijelzés.
Ezután a „VOL-” (12) vagy „VOL+” (4) gombbal állítsa be a kívánt
ébresztési idő percértékét. Ha a számokat gyorsabban szeretné léptetni,
tartsa nyomva a gombot. A beállítás jóváhagyásához nyomja meg rövid
ideig a „M-/AL1” (14) gombot.
Ekkor a „VOL-” (12) vagy „VOL+” (4) gombbal kiválaszthatja, hogy a
„BUZZ” (hangjelzés) vagy „rdA” (rádió) ébressze. Erősítse meg a
kiválasztást a „M-/AL1” (14) gomb megnyomásával.
Most a „VOL-” (12) vagy „VOL+” (4) gombbal beállíthatja az ébresztés
hangerejét. A beállítás jóváhagyásához nyomja meg rövid ideig a „M-
/AL1” (14) gombot.
Végül kiválaszthatja, hogy a beállított ébresztés a hét mely napjain legyen
éles. A „VOL-” (12) vagy „VOL+” (4) gombbal a következő lehetőségek
közül választhat:
A hét egy bizonyos napja
Hétköznapok (hétfőtől péntekig)
Hétvége (szombat és vasárnap)
A hét minden napja
A beállítás jóváhagyásához nyomja meg rövid ideig a „M-/AL1” (14) gombot.
Ezzel befejezte az ébresztő beállítását.
Az ébresztés aktiválása
Az alábbiakban az AL1 ébresztés beállítását írjuk le. Az AL2 ébresztésnél is
ugyanígy járjon el.
Miután beállította a kívánt ébresztési időt, az ébresztést a következők szerint
aktiválhatja:
A kikapcsolt készüléken nyomja meg egyszer, rövid ideig a „M-/AL1”
gombot (14), hogy a kijelzőn (6) megjelenjen a beállított ébresztési idő.
Magyar – 75
Page 78

SilverCrest SWDR 500 A1
Nyomja meg másodszor is rövid ideig a „M-/AL1” (14) gombot, hogy
aktiválja a hangjelzéses ébresztést. A kijelzőn (6) világítani kezd az ehhez
tartozó szimbólum (33).
Nyomja meg harmadszor is rövid ideig a „M-/AL1” (14) gombot, hogy
aktiválja a rádiós ébresztést. A kijelzőn (6) világítani kezd az ehhez tartozó
szimbólum (34).
Kérjük, ügyeljen arra, hogy rádiós ébresztésnél ne legyen a
készülékhez fülhallgató csatlakoztatva. Ha csatlakoztatva van a
fülhallgató, akkor az ébresztés hangja (akár a rádió, akár a
hangjelzés) kizárólag a fülhallgatóban hallatszik.
A beállított ébresztési időben a készülék automatikusan az utoljára beállított
frekvencián, és az utoljára beállított frekvenciasávon kapcsol be. Ha az
ébresztési beállításokban a hangjelzést választotta ki, akkor az szólal meg
ébresztéskor.
Az ébresztési hangjelzés halkan kezdődik, majd lassan emelkedve
eléri a beállított ébresztési hangerőt.
Az ébresztési hang befejezéséhez nyomjon meg egy tetszőleges gombot,
vagy nyomja meg a „SNOOZE/BASS” (2) gombot, hogy az ébresztést kb.
5 perccel elhalassza. Villog az ébresztés szimbólum (33, 34). Az 5 perces
szünet után ismét szól az ébresztési hangjelzés. Ha az 5 perces szünet alatt
egy tetszőleges gombot megnyom, azzal kikapcsolja a „SZUNDI” funkciót,
de az ébresztő aktív marad.
A kiszállított terméken alapértelmezésben 5 perc ébresztési szünet
(szundi) van beállítva. Igényei szerint ezt az ébresztési szünetet
(szundi időt) akár 120 percre is meghosszabbíthatja. Ehhez a
kikapcsolt készüléken tartsa nyomva a „SNOOZE/BASS” gombot
(2) kb. egy másodpercig. A kijelzőn (6) megjelenik az aktuálisan
beállított ébresztési szünet. A „VOL-” (12) vagy „VOL+” (4)
76- Magyar
Page 79

SilverCrest SWDR 500 A1
gombbal módosíthatja az ébresztési szünetet. Ha a számokat
gyorsabban szeretné léptetni, tartsa nyomva a gombot. A beállítás
jóváhagyásához nyomja meg rövid ideig a „SNOOZE/BASS” (2)
gombot.
Az ébresztés inaktiválásához nyomogassa addig a „M-/AL1” (14) gombot,
amíg a kijelzőn (6) már egyik ébresztés szimbólum (33, 34) sem jelenik
meg.
Ha az ébresztés aktiválva van, a készüléket akkor is a megszokott
módon használhatja. Ügyeljen az alábbiakra:
Rádiós ébresztés:
Az ébresztés mindig az utoljára beállított frekvencia utoljára
beállított frekvenciasávján kapcsolja be a rádiót.
Hangjelzéses ébresztés:
Az ébresztési hangjelzés halkan kezdődik, és egyre
hangosabbá válik, amíg el nem éri a beállított hangerőt.
A billentyűzár aktiválása / inaktiválása
Ha aktiválni szeretné a világvevő rádió billentyűzárját, tartsa nyomva a
„LOCK” (3) gombot kb. egy másodpercig. A kijelzőn (6) ekkor villog a
„LOCK” szimbólum (35).
Ezután csak akkor tudja újból kezelni a készüléket, ha inaktiválja a
billentyűzárat. Ehhez tartsa ismét nyomva a „LOCK” (3) gombot kb. egy
másodpercig. A kijelzőn (6) ezután már nem villog a „LOCK” (35) szimbólum.
Vegye figyelembe, hogy aktív billentyűzár esetén az ébresztés hangjelzését
sem befejezni, sem megszakítani nem lehet.
Magyar – 77
Page 80

SilverCrest SWDR 500 A1
A fülhallgató csatlakoztatása
FIGYELEM! Ne használjon más fülhallgatót, csak a mellékelt
SWDR 500 A1 fülhallgatót. Más fülhallgatók az egészségre káros
hangnyomást hozhatnak létre.
Legyen óvatos a fülhallgató használatakor. Ha hosszabb ideig
teljes hangerőn használja, az a felhasználó halláskárosodásához
vezethet.
A mellékelt SWDR 500 A1 fülhallgatót (D) a fülhallgató-csatlakozóhüvelybe
(21) csatlakoztathatja. Ha a fülhallgató be van dugva, a hangszóró (16)
automatikusan kikapcsol.
Tárolás használaton kívül
Ha a készüléket hosszabb ideig nem használja, akkor távolítsa el
belőle az esetlegesen használt elemeket.
A készüléket száraz és hűvös helyen kell tárolni. A portól való
védelem érdekében javasoljuk, hogy tárolja a mellékelt táskában
(C).
Hibaelhárítás
A készüléket nem lehet bekapcsolni
Ellenőrizze, hogy a hálózati töltő be van-e dugva.
Előfordulhat, hogy a behelyezett elemek lemerültek; helyezzen be új
elemeket.
Ellenőrizze, hogy az elemeket helyes polaritással helyezte-e be. Ehhez
vegye figyelembe az elemrekeszben és az elemeken szereplő jelzéseket.
Vegye továbbá figyelembe „Az elemek behelyezése” című fejezetet.
Ellenőrizze, hogy aktív-e a billentyűzár. Ha inaktiválni szeretné a
billentyűzárat, tartsa nyomva a „LOCK” (3) gombot kb. egy másodpercig.
78- Magyar
Page 81

SilverCrest SWDR 500 A1
Nincs rádiójel-fogadás, rossz a rádiójel-fogadás
Húzza ki teljesen a teleszkópos antennát (1), és figyeljen a helyes
beállításra.
Állítsa be megfelelően a rádióadót. Adott esetben indítsa újra a keresési
folyamatot.
Ellenőrizze, hogy a „DX/LOCAL” (22) kapcsoló a megfelelő állásban
van-e. Ehhez vegye figyelembe „A fogadási érzékenység beállítása” című
fejezetet.
A rádióadó neve nem jelenik meg
Ez a funkció csak URH hullámhosszon támogatott.
A beállított rádióadó nem küld RDS-jelet, vagy rossz az RDS-jel vétele.
Próbálja az antennát újból beállítani és a jelfogadást javítani.
Nincs hang, pedig a készülék be van kapcsolva
Ellenőrizze a hangerőbeállítást.
Ha a fülhallgatót csatlakoztatták, a beépített hangszóró (16) kikapcsol.
Nincs ébresztési hang vagy nagyon halk
Az ébresztés beállításaiban ellenőrizze az ébresztés hangerejét, és adott
esetben növelje meg.
A készüléket nem lehet kezelni
Ellenőrizze, hogy aktív-e a billentyűzár.
Környezetvédelmi tudnivalók és ártalmatlanítási
adatok
Ha egy terméken feltüntetik az áthúzott szemeteskuka
szimbólumot, akkor az adott termék a 2012/19/EU uniós
irányelv hatályába tartozik. Minden használt elektromos és
elektronikus készüléket a háztartási hulladéktól elkülönítve, az
ilyen célra államilag kijelölt helyeken kell ártalmatlanítani. A
készülék ártalmatlanítása előtt vegye ki a készülékből az elemeket. A
Magyar – 79
Page 82
SilverCrest SWDR 500 A1
régi/hibás készülék szabályos ártalmatlanításával elkerülhető a környezet
károsítása, és az egészség veszélyeztetése. A régi/hibás készülék
ártalmatlanításával kapcsolatban további információkat az önkormányzatnál,
a környezetvédelmi hivatalban vagy abban az üzletben kaphat, amelyben a
terméket megvásárolta.
A csomagolás ártalmatlanítása
A csomagolást is környezetkímélő módon kell ártalmatlanítani. A
kartoncsomagolások papírgyűjtőkben vagy nyilvános gyűjtőhelyeken adhatók
le újrahasznosítás céljából. A szállított csomaghoz tartozó fóliákat és
műanyagokat a helyi ártalmatlanító vállalat gyűjti be, és ártalmatlanítja
környezetkímélő módon.
Az elemek ártalmatlanítása
Gondoljon a környezetvédelemre. A használt elemek nem valók
a háztartási hulladékba. Azokat használtelem-gyűjtőpontban kell
leadni. Vegye figyelembe, hogy az elemeket csak teljesen
lemerült állapotban lehet a készülékek használt elemeinek
gyűjtőtartályába elhelyezni. A rövidzárlat megelőzése érdekében
elővigyázatosságból ragassza le ragasztószalaggal a nem teljesen lemerült
elemek érintkezőit.
Megfelelőségi megjegyzések
Ez a készülék megfelel a 2014/30/EU elektromágneses
összeférhetőségről szóló irányelv, a 2014/35/EU kisfeszültségű
irányelv, a 2009/125/EC ERP-irányelv, valamint a
2011/65/EU RoHS-irányelv alapvető követelményeinek és
egyéb vonatkozó előírásainak.
A teljes EU-megfelelőségi nyilatkozat lekéréséhez küldjön egy e-mailt az alábbi
e-mail címre:
ce@targa.de
80- Magyar
Page 83

SilverCrest SWDR 500 A1
Tudnivalók a garanciáról és a szervizügyintézésről
A TARGA GmbH által nyújtott garancia
E készülék garanciája 3 év a vásárlás időpontjától számítva. Jól őrizze meg az
eredeti kasszaszalagot, ez szolgál vásárlási bizonylatként. A termék üzembe
helyezése előtt olvassa át a mellékelt dokumentációt. Amennyiben olyan
probléma jelentkezik, amelyet így nem lehet megoldani, forduljon a forródrót
szolgálatunkhoz. Bármilyen kérés esetén tartsa készenlétben a cikkszámot,
vagy ha van ilyen, a sorozatszámot. Amennyiben a telefonos megoldás nem
lehetséges, a forródrót szolgáltatásunk a hiba okától függően egy
szervizmegoldást kezdeményez. A garancia ideje alatt a terméket anyag vagy
gyártási hiba esetén a saját belátásunk szerint ingyenesen megjavítjuk vagy
kicseréljük. A termék javításával vagy cseréjével nem kezdődik újra a garancia
érvényessége. A fogyó anyagok, mint például elemek, akkumulátorok és égők
nem képezik a garancia tárgyát.
Az eladóval szembeni, törvény által előírt szavatosság a garanciától
függetlenül fennáll, és a garancia nem korlátozza azt.
Magyar – 81
Page 84
SilverCrest SWDR 500 A1
Szerviz
E-Mail: service.HU@targa-online.com
IAN: 282353
Gyártó
TARGA GmbH
Coesterweg 45
59494 SOEST
GERMANY
Telefon: 01 - 8480360
82- Magyar
Page 85

SilverCrest SWDR 500 A1
Obsah
Určené použití ........................................................................ 85
Obsah balení .......................................................................... 86
Technické údaje ...................................................................... 87
Bezpečnostní pokyny ............................................................. 89
Ochrana autorských práv ....................................................... 94
Provozní podmínky ................................................................ 94
Funkce ovládacích prvků a tlačítek ......................................... 95
Ikony na displeji ................................................................................................ 97
Stojánek ............................................................................................................. 98
Než začnete............................................................................ 98
Externí napájení / napájení z baterií .............................................................. 99
Vkládání baterií ................................................................................................. 99
Připojení napájecího adaptéru ..................................................................... 100
Začínáme ............................................................................. 100
Osvětlení displeje ........................................................................................... 100
Zapnutí/vypnutí přístroje ............................................................................... 100
Nastavení časového pásma ......................................................................... 101
Nastavení data a času .................................................................................. 103
Automatická synchronizace prostřednictvím RDS ................................... 103
Ruční nastavení .......................................................................................... 103
Zobrazení světového času ............................................................................ 105
Funkce tlačítka „MODE“ ............................................................................... 106
SDA (Zvláštní datový alarm) ......................................................................... 106
Časovač (dřímání) ......................................................................................... 107
Stopky ............................................................................................................. 108
Nastavení odstupu ladění při příjmu v pásmu AM. .................................... 108
Nastavení hlasitosti ........................................................................................ 109
Nastavení citlivosti ......................................................................................... 109
Aktivace zdůraznění basů ............................................................................. 109
Volba stanice .................................................................................................. 109
Čeština - 83
Page 86

SilverCrest SWDR 500 A1
Automatické vyhledávání a ukládání stanic ................................................ 109
Ruční vyhledávání stanic ............................................................................... 110
Ruční ladění stanic ......................................................................................... 111
Jemné ladění .................................................................................................. 111
Ruční ukládání stanic ..................................................................................... 111
Vyvolání uložené stanice ............................................................................... 112
Stereofonní výstup.......................................................................................... 112
Časovač SLEEP ............................................................................................... 113
Nastavení alarmu .......................................................................................... 113
Aktivace alarmu ............................................................................................. 115
Aktivace/vypnutí zámku tlačítek ................................................................... 116
Připojení sluchátek ......................................................................................... 116
Skladování nepoužívaného výrobku ............................................................ 117
Odstraňování problémů ....................................................... 117
Předpisy na ochranu životního prostředí a informace
o likvidaci ............................................................................. 118
Prohlášení o shodě ............................................................... 119
Informace o záruce a servisu ................................................ 120
84 - Čeština
Page 87

SilverCrest SWDR 500 A1
Srdečně blahopřejeme!
Koupí tohoto vícepásmového přijímače SilverCrest SWDR 500 A1, dále
označovaného jen jako vícepásmový přijímač, jste se rozhodli pro kvalitní
výrobek.
Před prvním použitím se s vícepásmovým přijímačem důkladně seznamte a
pozorně si přečtěte tento návod k obsluze. Řiďte se především bezpečnostními
pokyny a vícepásmový přijímač používejte pouze způsobem popsaným
v tomto návodu k obsluze a pouze pro uvedené účely.
Tento návod k obsluze pečlivě uschovejte. V případě předání vícepásmového
přijímače třetím osobám těmto předejte rovněž veškerou dokumentaci
k výrobku.
Určené použití
Tento přístroj představuje zařízení spotřební elektroniky. Je určen k příjmu a
přehrávání rozhlasových stanic. Lze jej použít také jako hodiny a budík. Je
vhodné pouze k soukromému využití, nikoli pro průmyslové nebo komerční
účely. Zařízení také nelze používat v tropických klimatech. Výrobce není
odpovědný za škody nebo problémy způsobené neautorizovanými úpravami.
Používejte pouze příslušenství doporučené výrobcem. Dodržujte předpisy a
zákony platné v zemi použití.
Uvědomte si, že v dané zemi mohou platit specifické předpisy vztahující se na
frekvenční pásma, která lze přijímat. Jakékoli informace přijaté z frekvenčních
pásem mimo těch, která jsou výslovně volně přístupná pro veřejné použití,
nesmí být používány a jejich obsah nesmí být poskytován třetím stranám.
Čeština - 85
Page 88
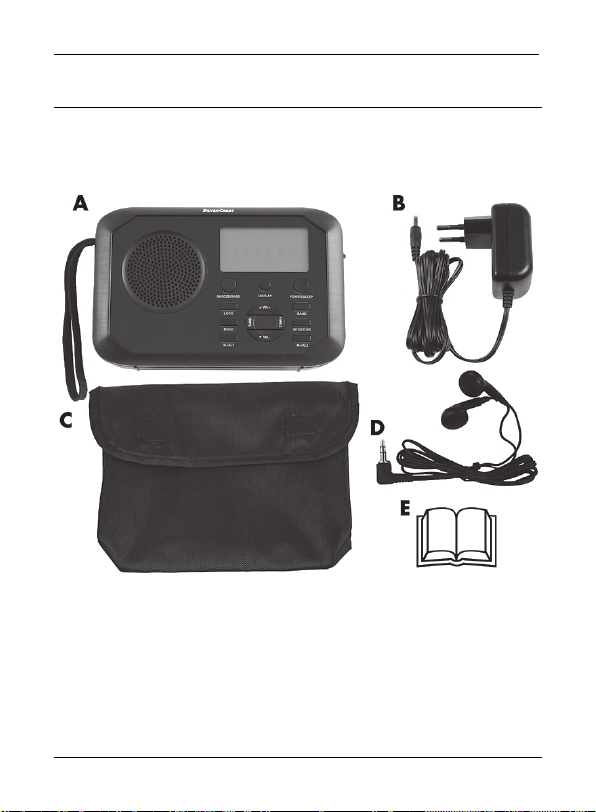
SilverCrest SWDR 500 A1
Obsah balení
Přístroj a veškeré příslušenství vyndejte z obalu. Odstraňte obalový materiál a
zkontrolujte, zda jsou všechny součástí kompletní a nepoškozené. Pokud zjistíte
jakoukoli chybějící nebo poškozenou položku, kontaktujte výrobce.
A Vícepásmový přijímač SilverCrest SWDR 500 A1
B Napájecí adaptér
C Pouzdro
D Sluchátka SWDR 500 A1
E Tyto provozní pokyny (vyobrazení)
86 - Čeština
Page 89

SilverCrest SWDR 500 A1
Technické údaje
Tyto informace popisují technické údaje vašeho zařízení.
V jiných zemích mohou platit odlišné národní předpisy týkající
se dodržování frekvenčních pásem, která jsou volně přístupná
pro veřejné použití. Uvědomte si, prosím, že příjem jakýchkoli
informací z frekvenčních pásem mimo těch, která jsou
Vícepásmový přijímač
Zdroj napájení přiložený síťový adaptér
Max. odběr proudu 0,3 A
Příkon v režimu rádio: přibližně 0,7 W
Výstupní výkon 500 mW
Kmitočtová pásma
Dané kmitočtové rozsahy se mohou
v obou směrech mírně lišit kvůli
tolerancím výrobku.
Předvolby stanic 400 (100 pro každé pásmo)
Rozměry přibližně 17 x 4,1 x 11 cm (Š x H x V)
Hmotnost přibližně 315 g (bez baterií)
uvedena, bude nezákonný a může být trestně stíhatelný.
volitelně 4x baterie AA 1,5 V (LR6)
v pohotovostním režimu: < 0,2 W
FM 87,5 - 108 MHz
AM 522 - 1 620 KHz
SW1 4,75 - 5,94 MHz
SW2 5,95 - 7,09 MHz
SW3 7,10 - 9,49 MHz
SW4 9,50 - 11,64 MHz
SW5 11,65 - 13,59 MHz
SW6 13,60 - 15,09 MHz
SW7 15,10 - 17,49 MHz
SW8 17,50 - 21,44 MHz
SW9 21,45 - 21,85 MHz
LW 153 - 279 KHz
Čeština - 87
Page 90
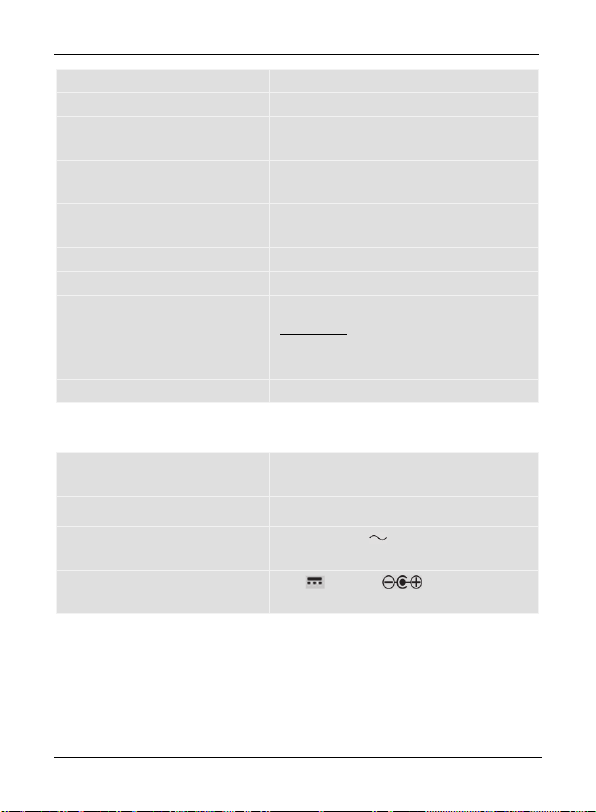
SilverCrest SWDR 500 A1
Sluchátka (do uší) SWDR 500 A1
Impedance 32 ohmů
Napětí širokopásmové
charakteristiky cca 90 mV +/- -10%
Max. úroveň akustického tlaku
s dodanými sluchátky cca 95 dB(A)
Max. výstupní napětí na
konektoru sluchátek přibližně 110 mV
Životnost baterie přibližně 28 hodin
Provozní teplota 5 °C až 35 °C
Skladovací podmínky -10 °C až 50 °C,
Poznámka: Přístroj neskladujte na
horkých místech (např. v létě uvnitř
vozu)
Provozní vlhkost max. 85 % relativní vlhkost
Napájecí adaptér
Výrobce SHENZHEN SHI GUANGKAIYUAN
TECHNOLOGY., LTD.
Typ
Vstupní napětí, frekvence /
vstupní proud
Výstupní napětí / výstupní
proud
Technická specifikace a vzhled může být předmětem změny bez předchozího
upozornění.
GKYPS0030060EU1
100 až 240 V , 50/60 Hz / 0,5 A
6 V / 0,3 A,
88 - Čeština
Page 91

SilverCrest SWDR 500 A1
Bezpečnostní pokyny
Před prvním použitím tohoto zařízení si přečtěte níže uvedené poznámky a
dbejte na všechna upozornění, a to i v případě, že máte s používáním
elektronických zařízení zkušenosti. Příručku uchovejte na bezpečném místě,
abyste se k ní mohli v budoucnu vracet. Při prodeji zařízení nebo jeho
postoupení jiné osobě je nezbytné, abyste jí odevzdali i tento návod.
Uživatelská příručka je součástí dodávky zařízení.
Popis použitých symbolů
POZOR! Tento symbol a nápis „Pozor“ označuje potencionálně
nebezpečnou situaci. Pokud ho budete ignorovat, může dojít
k vážnému zranění či dokonce úmrtí.
VAROVÁNÍ! Tento symbol a nápis „Varování“ označuje
důležité informace pro bezpečné používání výrobku a bezpečnost
uživatele.
Tento symbol upozorňuje na možné nebezpečí úrazu elektrickým
proudem.
Tento symbol označuje další informaci na dané téma.
Rizika související s vysokými úrovněmi hluku
Upozornění týkající se používání sluchátek Při poslechu s vysokou
úrovní hlasitosti může dojít k poškození sluchu uživatele.
POZOR!
1. Používejte pouze sluchátka do uší (D) dodávaná k přístroji (typ
SWDR 500 A1). Ostatní typy sluchátek mohou vyzařovat škodlivé
úrovně akustického tlaku.
2. Dodávaná sluchátka do uší (D) (typ SWDR 500 A1)
nepoužívejte s jinými přehrávači.
Čeština - 89
Page 92

SilverCrest SWDR 500 A1
Sluchátka (D) nepoužívejte k poslechu při vysoké hlasitosti, neboť mohou
poškodit váš sluch a možná rušit osoby v okolí. Mějte na paměti, že hluk
okolního prostředí může znít se sluchátky jiným způsobem. I když bylo zařízení
navrženo tak, aby bylo možné vnímat okolní zvuky, nikdy nezvyšujte hlasitost
na takovou úroveň, abyste neslyšeli, co se kolem vás děje. V nebezpečných
situacích (např. při řízení motorového vozidla, práci s nástroji nebo v dalších
případech, které vyžadují plné soustředění) může poslech odpoutat vaši
pozornost nebo ovlivnit vaše vnímání okolí. Sluchátka proto v takových
situacích nepoužívejte.
POZOR! Ujistěte se, že:
v okolí zařízení je dostatek prostoru pro proudění vzduchu (zařízení
neumísťujte na police, na koberec, na postel nebo na jakékoli místo, kde by
došlo k zakrytí ventilačních otvorů, po všech stranách zařízení ponechte
nejméně 10 cm volného prostoru);
přístroj není vystaven přímým zdrojům tepla (např. radiátory);
na přístroj nepůsobí žádné přímé sluneční záření ani jasné umělé světlo;
přístroj není vystaven působení stříkající nebo kapající vody a agresivních
kapalin, nesmí se používat v blízkosti vody a nikdy se nesmí ponořit (do
blízkosti přístroje neumisťujte předměty naplněné vodou, například vázy
nebo skleničky)
zařízení není umístěno v blízkosti magnetických polí (např. reproduktorů);
na přístroj nebo do jeho blízkosti nestavte zdroje otevřeného ohně (např.
zapálené svíčky);
do přístroje se nedostaly žádné cizí předměty;
zařízení není vystaveno větším teplotním rozdílům, které by mohly způsobit
vznik kondenzátu, a tedy zkraty. Pokud byl přístroj vystaven větším rozdílům
90 - Čeština
Page 93
SilverCrest SWDR 500 A1
teplot, před jeho zapnutím vyčkejte, dokud nedosáhne teploty prostředí (asi
2 hodiny).
zařízení není vystaveno nadměrným otřesům a vibracím.
přístroj nebo napájecí adaptér se nepoužívá během bouřky s blesky. V
případě nebezpečí bouřky odpojte napájecí adaptér od síťové zásuvky.
při použití volitelného napájecího adaptéru musí být použitá zásuvka po
celou dobu snadno přístupná a kabely musí být vedeny tak, aby o ně nikdo
nemohl zakopnout.
POZOR! Baterie
Při vkládání baterií dbejte na dodržení správné polarity. Postupujte dle nákresu,
který se nachází uvnitř prostoru pro baterie. Baterie se nepokoušejte nabíjet a
nevyhazujte je do ohně. Nepoužívejte současně různé typy baterií (staré a
nové nebo uhlíkové a alkalické a podobně). Pokud nebudete zařízení delší
dobu používat, baterie vyjměte. Nevhodné použití může způsobit výbuch nebo
únik elektrolytu. Baterie se nikdy nesmí otevírat ani deformovat, protože by
mohlo dojít k úniku chemických látek a poranění. V případě kontaktu elektrolytu
z baterie s vaší pokožkou nebo očima si je okamžitě vypláchněte velkým
množstvím vody a vyhledejte lékařskou pomoc.
Nedovolte dětem, aby si s bateriemi hrály, neboť hrozí nebezpečí udušení.
Baterie uchovávejte mimo dosah dětí. V případě spolknutí baterie okamžitě
vyhledejte lékařskou pomoc.
POZOR! Děti a postižené osoby
Elektrická zařízení nejsou určena pro děti. Také osoby se sníženými fyzickými,
smyslovými nebo duševními schopnostmi smí používat elektrická zařízení pouze
za odpovídajících podmínek. Nikdy nedovolte dětem nebo postiženým
osobám, aby používaly elektrická zařízení bez dozoru, kromě případů, kdy
Čeština - 91
Page 94

SilverCrest SWDR 500 A1
jsou náležitě poučeny a dohlíží na ně kompetentní osoba odpovědná za jejich
bezpečnost. Děti musí být vždy pod dohledem, aby bylo jisté, že si s výrobkem
nehrají. Malé součásti mohou způsobit udušení. V případě spolknutí baterie
okamžitě vyhledejte lékařskou pomoc.
Mimo dosah dětí a postižených osob uchovávejte také obaly.
Hrozí nebezpečí udušení!
Napájecí adaptér stačí zapojit do vhodné síťové zásuvky. Napájecího
adaptéru se nikdy nedotýkejte mokrýma rukama, protože by mohlo dojít
k zásahu elektrickým proudem. Za následujících podmínek odpojte napájecí
adaptér od sítě:
při každé nebezpečné situaci
pokud se z napájecího adaptéru ozývá neobvyklý hluk nebo z něj uniká
před vichřicí a/nebo bouřkou
pokud je napájecí adaptér poškozen
pokud byl napájecí adaptér vystaven dešti, tekutinám či vysokým úrovním
chcete-li přístroj vyčistit
Napájecí adaptér odebírá elektrický proud i v pohotovostním režimu.
Postupujte dle následujících pokynů, abyste zabránili potencionálnímu
vážnému zranění či požáru! Napájecí adaptér nikdy nezakrývejte, jinak hrozí
nebezpečí požáru. Napájecí adaptér se nepokoušejte otevřít. Mohlo být dojít
k usmrcení elektrickým proudem.
POZOR! Napájecí adaptér
kouř
vlhkosti
Chcete-li zařízení zcela odpojit od elektrické sítě, musíte vytáhnout napájecí
adaptér ze zásuvky.
92 - Čeština
Page 95

SilverCrest SWDR 500 A1
POZOR! Kabely
Při odpojování od zásuvky držte kabel za vidlici, nikdy netahejte za samotný
kabel. Na kabely nikdy nepokládejte kusy nábytku ani jiné těžké předměty a
dejte pozor, aby nedošlo k uvíznutí kabelů, zejména u vidlic a zásuvek. Kabel
nikdy neinstalujte okolo horkých nebo ostrých předmětů, aby nedošlo k jeho
poškození. Na kabelech nikdy nedělejte uzly a nesvazujte je spolu s jinými
kabely. Všechny kabely umístěte tak, aby nepřekážely a nehrozilo nebezpečí
zakopnutí.
POZOR! Displej
Displej nevystavujte tlaku a nedávejte do jeho blízkosti ostré předměty. Prasklý
displej může způsobit zranění. Při sbírání rozbitých částí noste rukavice a
v případě potřeby kontaktujte výrobce. V případě poškrábání nebo jiného
poškození displeje dejte pozor především a na to, aby z displeje neunikla
tekutina.
V případě úniku tekutiny postupujte následovně:
Pokud tekutina přijde do kontaktu s pokožkou, otřete ji čistou tkaninou a
opláchněte větším množstvím vody. V případě potřeby se obraťte na
lékaře.
Pokud tekutina přijde do kontaktu s očima, opláchněte je tekoucí vodou
po dobu nejméně 15 minut a okamžitě kontaktujte lékaře.
V případě polknutí tekutiny si ústa vypláchněte vodou a poté vypijte
větší množství vody. Okamžitě kontaktujte lékaře!
POZOR! Opravy
V případě jakéhokoli poškození zařízení je nutná oprava - např. když dojde
k poškození napájecího adaptéru nebo krytu, vniknutí tekutiny nebo předmětů
Čeština - 93
Page 96

SilverCrest SWDR 500 A1
do zařízení nebo pokud bylo zařízení vystaveno dešti či vlhkosti. Oprava je
nutná také v případě, kdy přístroj nefunguje správně nebo došlo k jeho pádu.
Všimnete-li si kouře, neobvyklých zvuků nebo zápachu, okamžitě přístroj
vypněte a odpojte napájecí kabel od sítě a vyjměte všechny baterie. V tomto
případě přístroj dále nepoužívejte a nechte ho zkontrolovat odborníkem.
Všechny opravy musí provádět kvalifikovaný servisní technik. Zařízení ani
napájecí adaptér nikdy neotvírejte.
POZOR! Čištění
Odpojte zařízení od elektrické sítě. K čištění vícepásmového přijímače
používejte pouze čistou suchou tkaninu. Nikdy nepoužívejte agresivní kapaliny.
Kryt přístroje se nepokoušejte otevřít, jinak porušíte záruku.
V případě úniku elektrolytu z baterie vyhledejte technika zabývajícího se
profesionálním čištěním.
Ochrana autorských práv
Veškerý obsah tohoto uživatelského návodu je chráněn autorským právem a
čtenáři slouží pouze k informačním účelům.
Kopírování dat a informací bez předešlého výslovného písemného schválení
autora je přísně zakázáno. To se týká i komerčního využití tohoto obsahu a
informací.
Veškerý text a obrázky jsou aktuální k datu vytištění.
Provozní podmínky
Zařízení není určeno k použití v prostředích s vysokými teplotami nebo vlhkostí
(např. koupelny) nebo v prostředí s nadprůměrnou úrovní prachu. Provozní
teplota a provozní vlhkost: 5 °C až 35 °C, relativní vlhkost max. 85 %.
94 - Čeština
Page 97
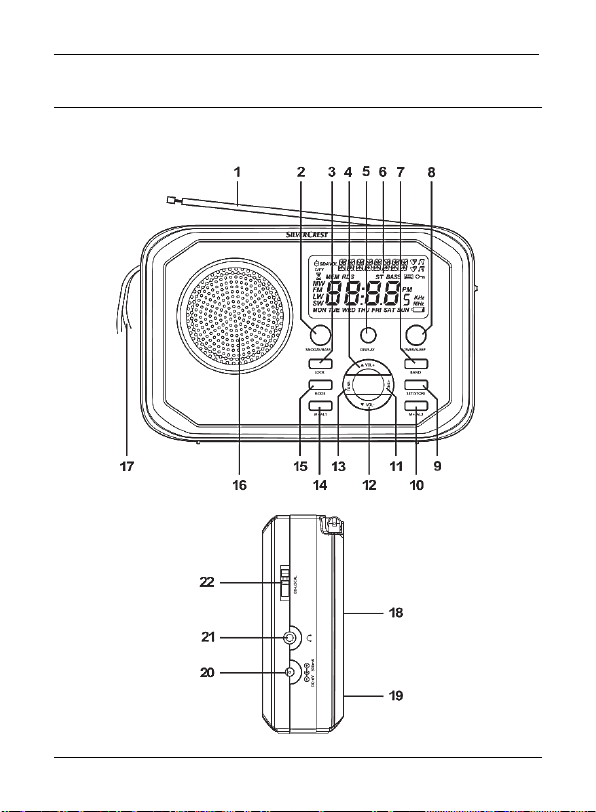
SilverCrest SWDR 500 A1
Funkce ovládacích prvků a tlačítek
Tento uživatelský návod má rozkládací obálku. Tak si můžete příslušné položky
kdykoli prohlédnout.
Čeština - 95
Page 98

SilverCrest SWDR 500 A1
1
Teleskopická anténa
2
Tlačítko SNOOZE/BASS (odložení buzení o 5 až
120 minut/zdůraznění spodního kmitočtového pásma)
3
Tlačítko LOCK (uzamknutí tlačítek)
4
Tlačítko VOL + (zvýšení hlasitosti)
5
Tlačítko DISPLAY (zobrazení časového pásma)
6
Displej
7
Tlačítko BAND (volba kmitočtového pásma)
8
Tlačítko POWER/SLEEP (vypínač; nastavení časovače vypnutí)
9
Tlačítko SET/STORE (nastavení času, ukládání stanice)
10
Tlačítko M+/AL2 (naladění předvolby další stanice, Alarm 2)
11
Tlačítko TUNE+ (vyhledávání stanic vzestupně k vyšším kmitočtům,
nastavení minut +)
12
Tlačítko VOL – (snížení hlasitosti)
13
Tlačítko TUNE– (vyhledávání stanic sestupně k nižším kmitočtům,
nastavení minut -)
14
Tlačítko M- / AL1 (naladění předvolby předchozí stanice, Alarm 1)
15
Tlačítko MODE
16
Reproduktor
17
Poutko
18
Stojánek (na zadní straně)
19
Přihrádka na baterie (na zadní straně)
20 (zdířka k připojení volitelného napájecího adaptéru)
21 (zdířka k připojení sluchátek)
22
Tlačítko DX/LOCAL (nastavení citlivosti příjmu)
96 - Čeština
Page 99

SilverCrest SWDR 500 A1
Ikony na displeji
23 Stopky
24 MĚSTO
25 SDA (Zvláštní datový alarm)
26 VOL (hlasitost)
27 MEM (předvolba stanic)
28 RDS (Rozhlasový systém datového vysílání)
29 Různé indikátory: název stanice, datum, předvolba stanice
30 ST (STEREO pouze pro sluchátka)
31 BASS (zdůraznění basů)
32 SLEEP (časovač vypnutí)
33 Alarm 1/2 (zvukový signál)
34 Alarm 1/2 (rádio)
35 LOCK (uzamknutí tlačítek)
36 Indikátor odpoledne (PM)
37 Jednotky kmitočtu
38 Vybitá baterie
39 Zobrazení hodin/kmitočtu
Čeština - 97
Page 100

SilverCrest SWDR 500 A1
40 Den v týdnu
41 Kmitočtové pásmo
42 Časovač (dřímání)
Stojánek
Na zadní straně přístroje se nachází stojánek (18), který umožňuje používat
vícepásmový přijímač v nakloněné poloze. Tento sklápěcí stojánek (18) stačí
jednoduše vyklopit.
Než začnete
Přístroj lze napájet prostřednictvím dodávaného síťového adaptéru (B) nebo ze
4 volitelných baterií typu AA (LR6). Baterie nejsou součástí balení.
98 - Čeština
 Loading...