

Page 1
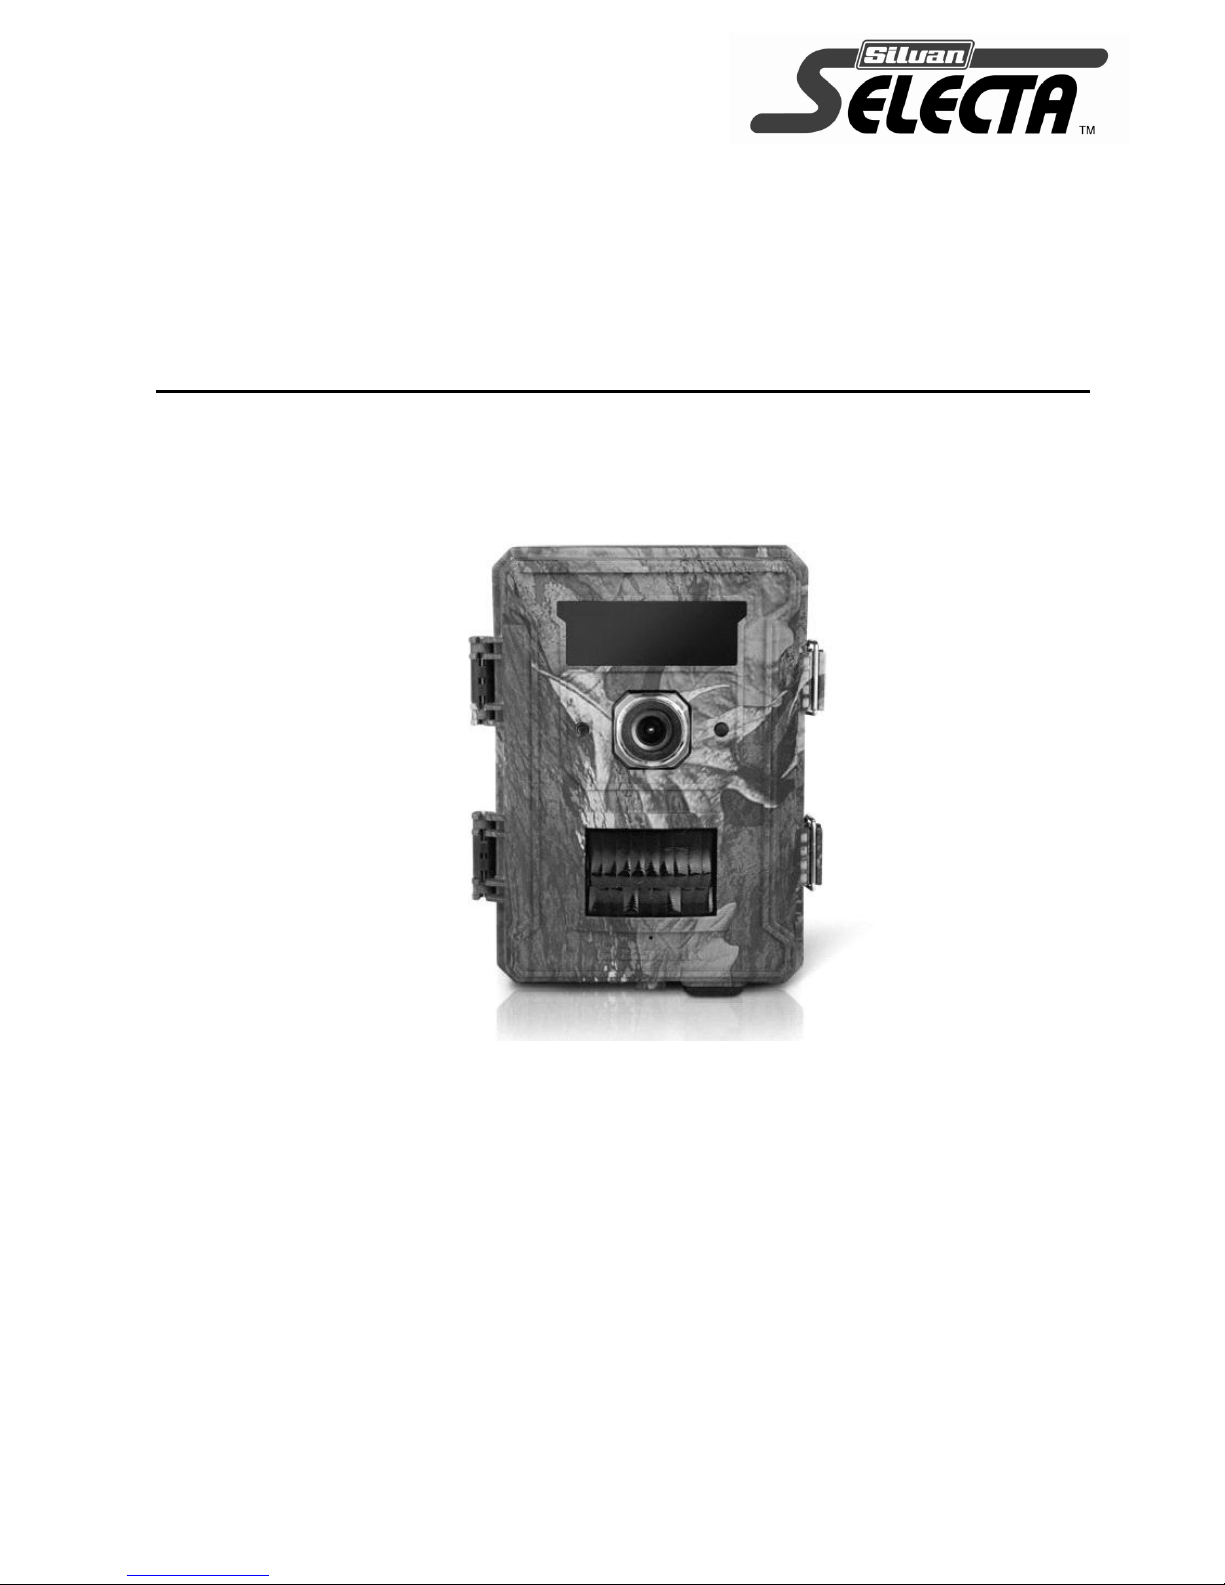
Instruction Manual
MANSECURE120 REV-A 23/07/13
Wide Angle Motion Activated Security Camera
VICTORIA (HEAD OFFICE)
244- 264 Greens Rd,
Dandenong South, 3175 Australia
Telephone: +61 (03) 9215 2700
Facsimile: +61 (03) 9215 2701
www.silvan.com.au
NEW ZEALAND
22 Sunshine Avenue
Te Rapa, Hamilton, 2001 New
Zealand
Telephone: +64 (07) 8496030
Fax: +64 (07) 8496070
www.silvannz.co.nz
SILVAN AUSTRALIA PTY. LTD.
ABN 48 099 851 144
Page 2

Silvan Warranty
Our goods come with guarantees that cannot be excluded under the Australian Consumer Law. You are entitled to a
replacement or refund for a major failure and for compensation for any other reasonably foreseeable loss or
damage. You are also entitled to have the goods repaired or replaced if the goods fail to be of acceptable quality and
the failure does not amount to a major failure.
We warrant our goods to be free from defects in materials and workmanship for the warranty period of 12 months from the
date the product is delivered to the consumer.
Silvan warrants its authorised Dealer, who in turn warrants the original purchaser (consumer) of each new Silvan product that
it will repair or replace the product, or, pay the cost of repair or replacement, as determined by Silvan without charge for
labour or any defective or malfunctioning parts in accordance with the warranty limitations below.
This Warranty is in addition to any other rights and remedies available to consumers under the law
This Warranty Covers
Only conditions resulting directly from defects in workmanship or material under normal use and service.
Warranty Exclusions
The Warranty does not cover:
Conditions resulting from misuse, use of incompatible chemicals, exceeding machine specifications including
overloading, impact damage, negligence, accidental damage or failure to perform recommended maintenance
services as specified in the Owner/Operator Manual applicable to the product.
Damage caused by continued use of a product after initial failure
Any product which has been repaired by other than an authorised Silvan service outlet in a way which, in the sole and
absolute judgment of Silvan, adversely affect its performance or reliability.
The replacement of maintenance items such as diaphragms, batteries, V belts and ground engaging components, etc.
How to claim Warranty
Return the goods to the place of purchase at your cost and within the warranty period along with evidence of the purchase
date. If the original supplier cannot be contacted then contact Silvan as below and we can direct you on how to proceed with
your warranty claim.
How your claim will be managed
The repair of a defective product qualifying under this warranty will be performed by any authorised Silvan service outlet
within a reasonable time following the delivery of the product, at the cost of the owner, to the service outlet’s place of
business. The product will be repaired or replaced depending on the extent of the problem at the discretion of Silvan and the
Silvan dealer.
Silvan Australia Pty Ltd
264 -266 Greens Rd
Dandenong Sth
Victoria 3164
1300 SILVAN (745 826)
[email protected]
New Product Warranty
Page 3

General Information
1.1 Introduction
1.2 Application
1.3 Illustration
Quick Start
2.1 Load Batteries
2.2 Insert SD Card
2.3 Enter Test Mode
2.4 Enter Live Mode
2.4 Review Pictures or Video
Advanced Settings
3.1 Parameter Settings
3.2 File Format
Appendix Technical Specifications
1.1 Introduction
The Selecta Wide Angle Motion Activated Security Camera can be triggered by sudden change of ambient temperature
caused by movement in a region of interest (ROI), which is detected by a highly sensitive Passive Infra-Red (PIR) sensor,
and then take pictures or video clips automatically even in the total darkness thanks to the build-in infrared LED flash.
High quality pictures (up to 12 mega pixels) or video clips are taken consequently upon the triggering.
SECURE120 features:
12 Mega Pixels Color CMOS
Wide Angle Lens 120° Field of View (More suitable for capturing objects closer to the camera)
Records Photos and/or Video
Audio recording function available
Sharp and bright color pictures in daytime. Night time (black/white) pictures areclear thanks to enhanced invisible
flash capacity
Low standby power consumption. *Extremely long in-field life (in standby mode, up to 3,6 or 9 months with 4, 8
or 12 x AA batteries. Note: * Requires good quality batteries, preferably camera batteries to achieve maximum
standby time period without activity.
Singular 140° PIR Motion sensor matched to the Camera Field of View
Perform in the most extreme temperatures from -30°C to 70°F
Trigger (or response) time 0.85 second
Serial Number function enables you to record an 4 character alpha-numeric name onto photos. This helps multi-
camera users identify the location when reviewing the photos
Date, time can be stamped in the pictures (as well as temperature and moon phase)
Lockable and password protected
Note the SECURE120 doesn’t not feature MMS functionality (other premium models of this camera are made to
feature MMS function and those cameras which have a SIM card slot in the camera). Some menu option refer to
MMS however they will not effect the operation of the SECURE120.
1.2 Application
Motion-triggered security camera, for home, office and community
Trail camera for hunting, stock monitoring
Event observation (also refer to time lapse function)
All other indoor/outdoor surveillance where invasion evidence needed
Table of Contents
General Information
Page 4
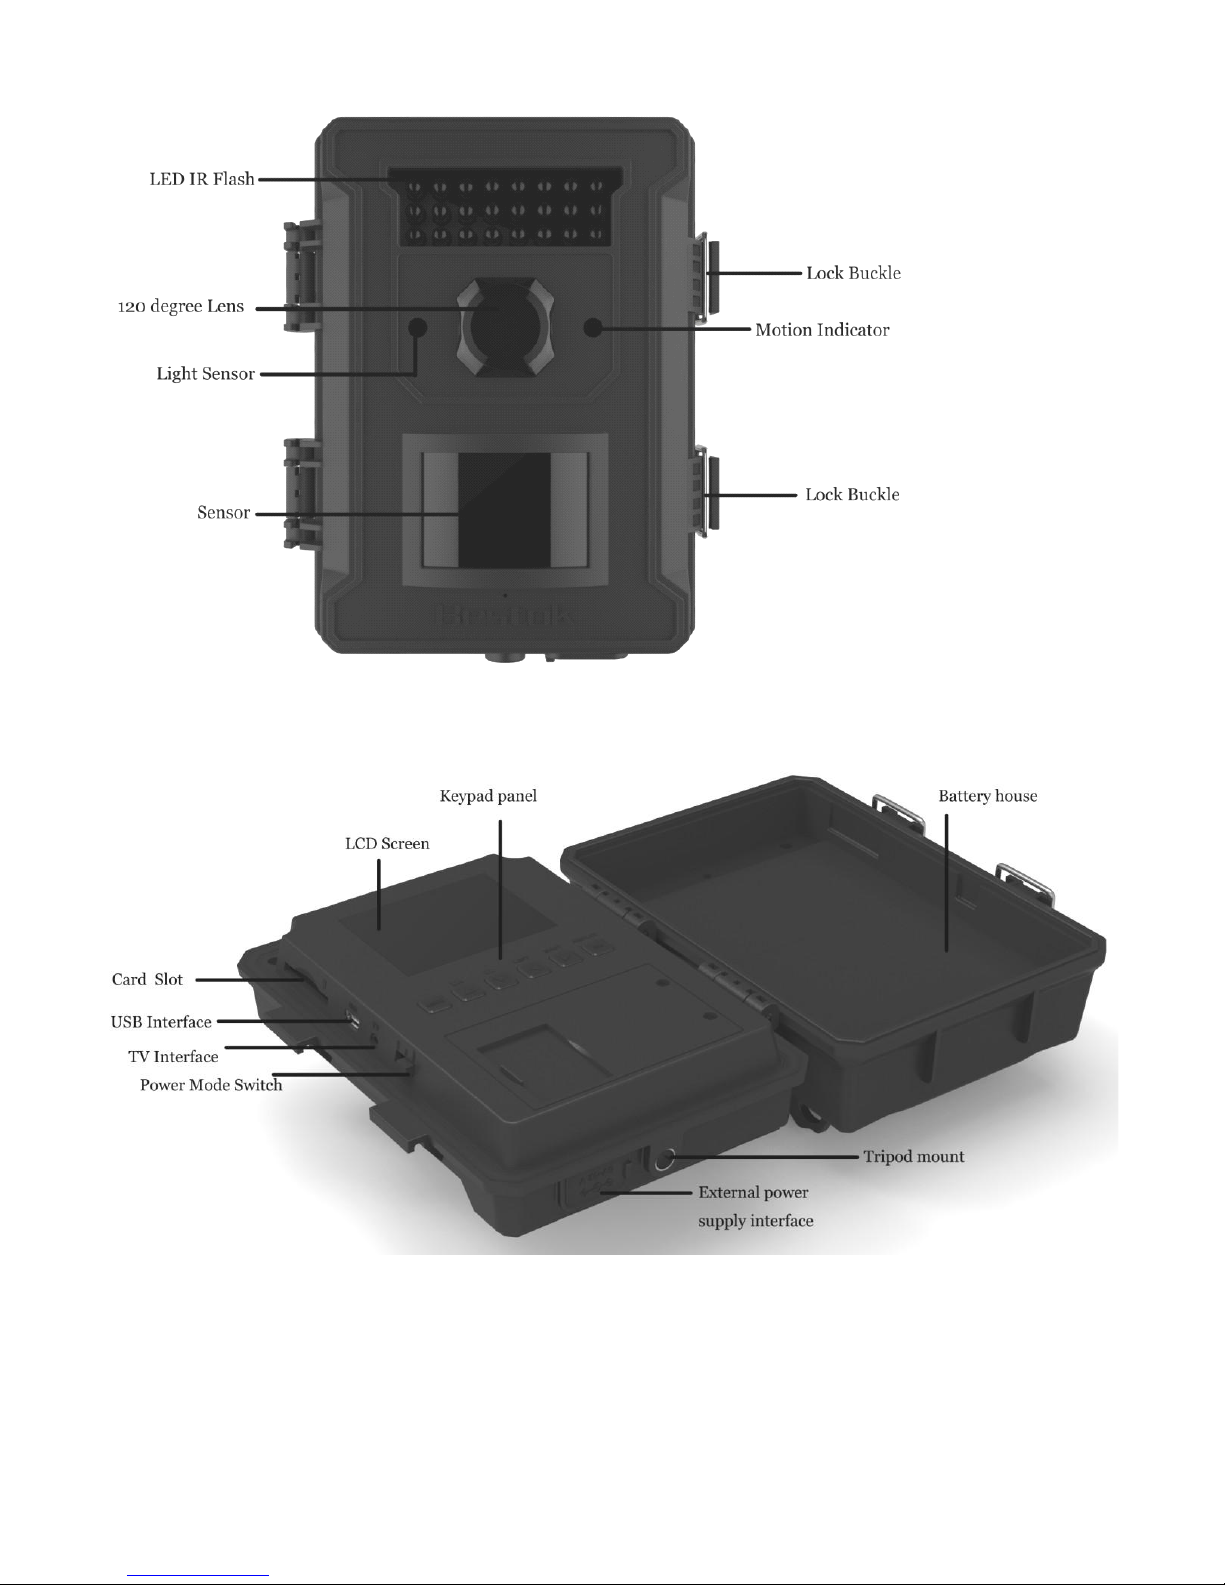
1.3 Illustration
Front View
Internal View
Page 5
The camera provides the following connections for external devices: USB port, SD card slot, TV out jack, and external
DC power in jack. The 3-way Power/Mode Switch is used to select the main operation modes: OFF, ON and TEST (Also
called SET).
CAUTION: ALWAYS SWITCH THE CAMERA TO OFF MODE BEFORE YOU INSTALL OR
REMOVE THE BATTERIES OR THE SD CARD.
Quick Start
If you are not familiar with the operation of this camera, the following instructions will help you get a quick overview.
Before doing any operation, please make sure you have loaded batteries and plugged the SD card correctly. If the SD
card is not inserted correctly or its write-protect is enabled, the device will give you a long beep and turn off
automatically.
2.1 Load Batteries
To install batteries on the camera, please follow the instructions below.
1) Unlock the two buckles and open the camera, the right part is battery box.
2) Open the battery cover and load 4 / 8 / 12 pieces batteries.
To supply power, it is recommended to use new high-performance alkaline AA batteries, low self-discharge Ni-MH or
Lithium rechargeable AA batteries with a high mAh rating.
CAUTION: If you are not using the camera for an extended period of time, it is highly recommended that you remove
the batteries from the camera to avoid possible acid leak that may damage the camera which would void the warranty.
Alternatively the camera can run on an external 6V DC power source (optional, user provided). When both external
power and batteries are connected, the camera will be powered by the external one.
2.2 Insert SD Card
The camera does not come with internal memory. So it will not work without a SD (Secure Digital) memory card or
SDHC (High Capacity) card. Before inserting the SD card into the card slot, please make sure the write-protect switch
on the side of the SD card is “off” (NOT in the “Lock” position). The supported memory capacity is up to 16GB. If
you use a card capable of above 32GB, make sure you test it before putting the camera in use. Because of the HD720P
video resolution, SDHC card are recommended.
Page 6
2.3 Enter Test mode
Switch to the TEST position to enter the Test mode. In this mode you can take pictures or video clips like a regular
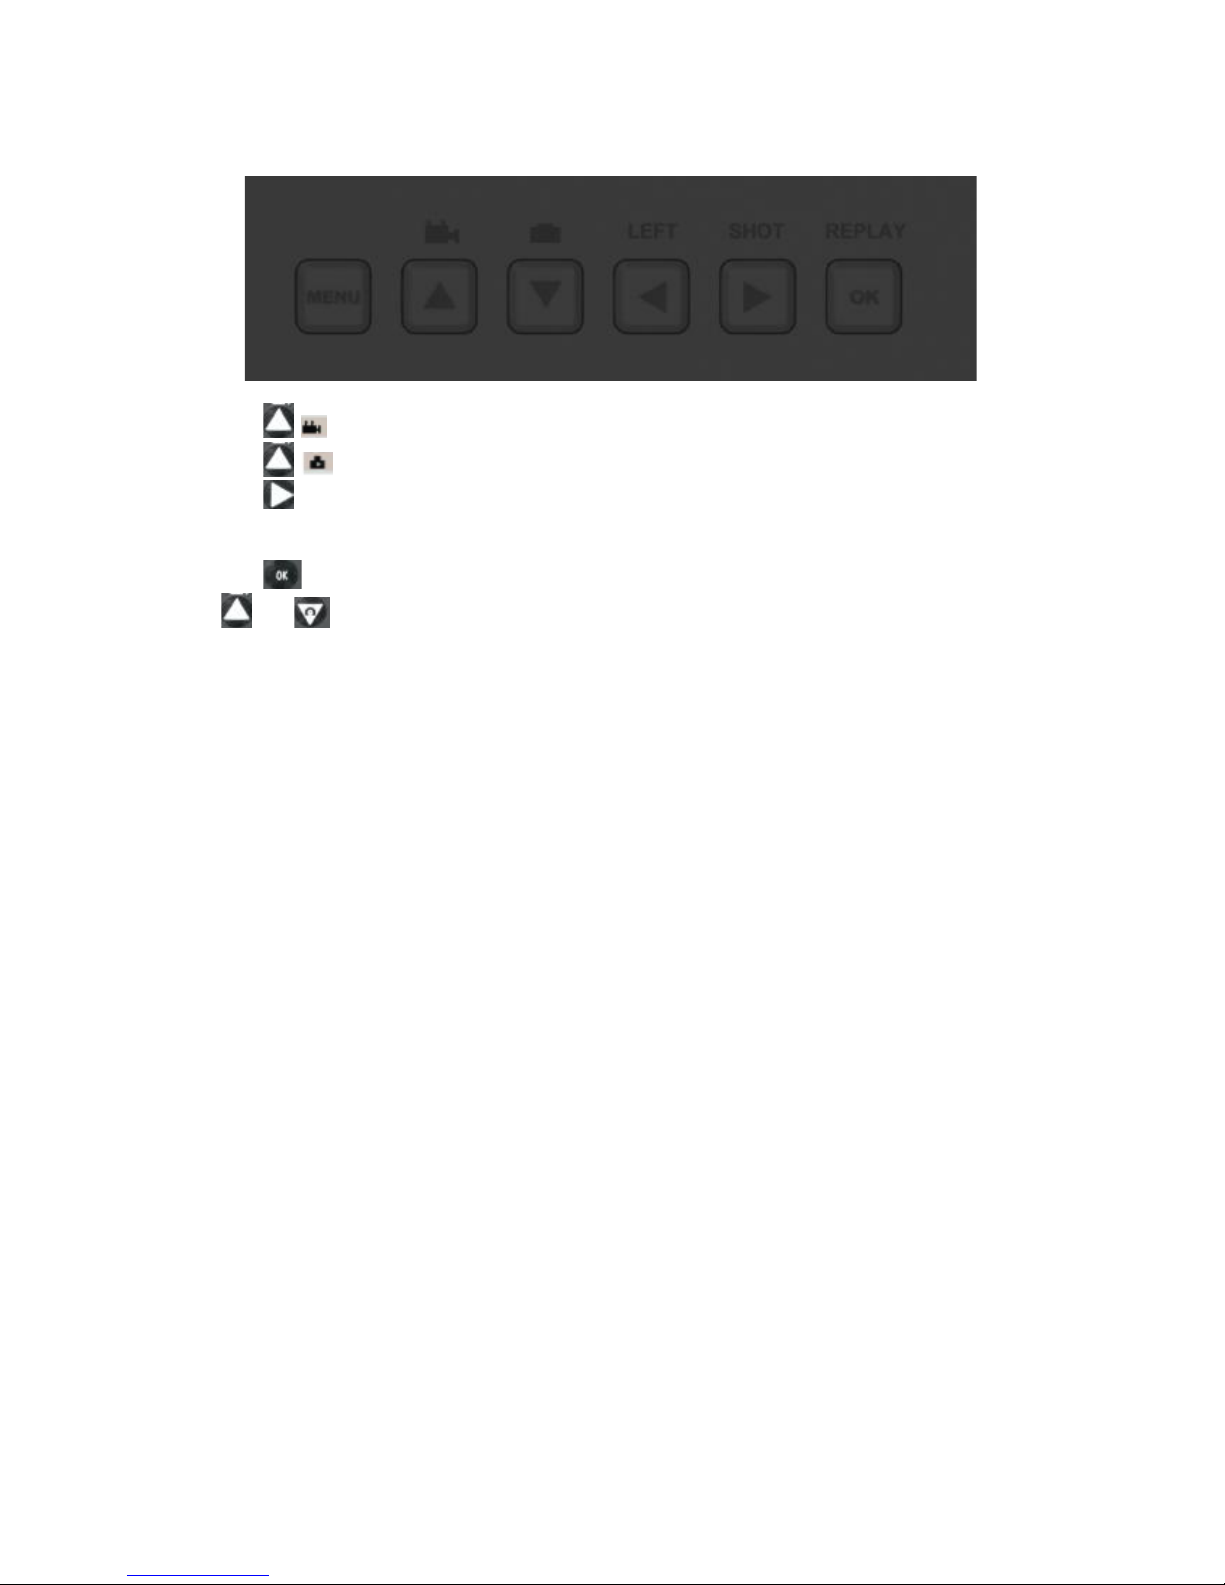
digital camera, or enter the Menu to set up parameters. On the keypad there are four “shortcut” functional keys (see
Figure 2-1) working as below:
Figure 2.1
Press the key to set the camera to shoot video clips.
Press the key to set the camera to take still pictures.
Press the SHOT key to manually trigger the shutter. A photo or video (depending on the camera setting)
will be taken and saved to the SD card. If the display shows “CARD PROTECTED” when you press the
SHOT key, switch the power OFF, remove the SD card and slide its write-protect switch to off.
Press the REPLAY key to review/playback photos/videos on the LCD screen, or a connected TV monitor.
Use and key to navigate.
There is another key, MENU, on the keypad that allows you to program the camera to work the way you want. Please
make reference to 3.1 Parameter Settings in the Advanced Operation section.
Under the test mode, one useful function you would like is testing the work area of the PIR (Passive Infrared) sensor,
specifically the sensing angle and monitoring distance. To perform the test:
First strap the camera on a tree aiming the region of interest (ROI).
Walk slowly from one side of the ROI to the other parallel to the camera. Try different distances and angles
from the camera.
If the Motion Indicator flashes blue, it indicates the position from where you were detected by one of the
side Prep PIR sensors. If the Motion Indicator flashes red, it indicates the position from where you were
captured by the main PIR sensor.
By doing this test, you can find the best placement when mounting and aiming the Our scouting camera. In general,
you are recommended to place the camera 3 to 6 feet (1 to 2 meters) above the ground.
To avoid potential false triggers due to temperature and motion disturbances, please do not aim the camera at a heat
source (i.e. the sun) or nearby tree branches and limbs. The ideal direction to aim at is North or South. Also, remove
any limbs close to the front of the camera.
2.4 Enter Live Mode
Switch to the ON position to enter the Live mode. The indicator LED will blink for several seconds. This period is for
you to make the camera ready for the working condition: close the camera and battery box and lock it, mount the
camera on a tree and walk away. After entering the Live mode, the camera will begin to take picture or video
according to the previous programmed setting when human or animal enters monitor area.
Before entering the Live mode please pay attention to the following:
1) The polarity of the power is correct and the power is sufficient
2) The SD card has sufficient space and its write-protection is disabled
3) The Power switch is at the ON position
4) Avoiding temperature and motion disturbances in front of the device such as big leaf, curtain, air-conditioner, air
outlet of the chimney and other heat sources to prevent false trigger.
Page 7
Parameter
Settings
(Bold = default)
Description
Mode
Camera,
Video,
Camera+Video
Select whether still photos or video clips are taken. In
Camera+Video mode, can first take photos and then shoot
videos afterward
Format
Enter
All files will be deleted after formatting the SD card. Highly
recommend you format the SD card if it has been used
previously in other devices. Caution: make sure wanted files on
the SD card have been backed up first!
Photo Size
(affects still photos
only)
1MP, 3MP,
5MP, 8MP,
12MP available
Select desired resolution for still photos in mega pixels. Note:
Lower resolution setting allows for smaller file size and faster
camera reaction speed. High resolution photos require more time
to record to memory hence slower camera reaction speed
Video Size
(affects video
clips only)
1280 x 720
720 x 480
640 x 480,
320 x 240
Select video resolution (pixels per frame). Higher resolution
produces better quality videos, but creates larger files that take
more of the SD card capacity.
Set Clock
Enter
Press Enter to set up date and time Note: The Time must be set
every time batteries are changed or temporarily removed
Picture No.
(affects still
photos only)
01 Photo, 02
Photos, 03
Photos
Select the number of photos taken in sequence per motion event
triggering the Camera.
Video Length
(affects video clips
only)
Optional from 1s to 30s.
Default is 10s
Videos are in AVI format that can be played back on most video
Players (or on the camera).
Interval
1 Min,
optional from
1S to 60M
A high Interval prevents the SD card from filling up with too
many redundant images when there is a lot of repeat activity i.e.
animal standing at a watering trough. A low interval reduces the
chance of missing activity but increased chance of recording too
many photos using memory and battery life.
Sense Level
(of PIR motion
sensor)
Normal,
High,
Low
Select the sensitivity of the PIR sensor. The High setting suits
indoors and environments with little interference, while the
Normal/Low suits outdoors and environments with more
interference. Temperature also affects the sensitivity. The High
setting is suitable when the ambient temperature is warm, and
the Low setting is helpful in cold weather.
2.5 Review Picture or Video
There are two ways to review captured picture or video:
1) TV monitor (or a SD-card viewer with a TV-in jack) Connect the camera to a TV monitor with the supplied
cable. Then enter the TEST mode. The last picture will be shown on the TV monitor after pressing the OK
key. At any time pressing the OK key again will return to the TEST mode.
2) Computer (or a SD-card viewer with a USB port) Connect the camera to a PC with the supplied USB cable.
Then use any image/video viewing program or image/video browser to view the pictures or videos.
ADVANCED SETTINGS
The Scouting camera trail camera comes with preset manufacturer settings. You can change the settings to meet your
requirements. Please make sure the camera is in the test mode.
3.1 Parameter Settings
Press “MENU” key to enter/exit the menu. Press , to move the marker,
, to change the setting, and
to confirm the change. Always remember to press to save the change. Otherwise you will lose your new
setting.
Page 8

Parameter
Settings
(Bold = default)
Description
Date Stamp
(affects still
photos only)
On, Off
Select On if you want the date & time imprinted in every photo.
Note: When Date/Time is additional details are recorded
including Serial No. and temperature.
Timer Switch
Off, On
Select On if you only want the camera to work within a
specified time period every day. For instance, if the starting time
is set at 07:30 and the ending time at 18:25, the camera will
function only within these times for instance to monitor a home
property only when away at work.
Password Set
Off, On
Set up a password to protect your camera from unauthorized
users utilizing the camera
Serial No.
Off, On
Select On to assign a name to each camera you have. You can
use the combination of 4 digits and/or letters. This helps multicamera users identify the location when reviewing the photos.
(e.g. NTGT for North Gate).
Note: The Date Stamp must be set on to record the Serial on the
image.
This helps multi-camera users identify the location when
reviewing the photos
Time Lapse
Off, On
If set On, the camera will automatically take photos/videos
according to the set interval.
Time Lapse interval can be set from 1sec to 23h:59min:59sec.
This is a novel function for observing processes such as of
flowering, harvesting, building a house etc.
Note: When Time lapse is active all motion sensing functions
are disabled
Audio
On,Off
The default setting is On, when it is on, the camera can record
audio to video, otherwise ,the video will be silent.
Default Set
Press OK Enter to return all your
previous settings back to the manufacturer default.
3.2 File format
The camera stores photos and videos in the folder \DCIM\100MEDIA in the SD card. Photos are saved with filenames
like PICT0001.JPG and videos like VIDO0001.AVI.
In the OFF mode, you can use the provided USB cable to download the files to a computer. Or you can put the SD
card to a SD card reader, plug in a computer, and browse the files on the
computer without downloading.
The AVI video files can be played back on most popular media
players, such as Windows Media Player, QuickTime, etc.
Page 9

Appendix: TECHNICAL SPECIFICATION
Model
Parameters
Image Sensor
12 Mega Pixels Colour CMOS
Lens
FOV=120°; Auto IR-Cut
IR Flash
20 Meters / 65 Feet (Non-Visible Flash, no glow LEDs)
LCD Screen
48x35.69mm(2.36"); 16.7M Colour
Operation Keypad
6 Keys
Memory Compatibility
SD Card (8MB ~32GB)
Picture Size (pixels)
12MP=4000x3000;
5MP = 2560x1920;
Video Size
1280x720p: 30fps; 720x480: 20fps; 640x480: 20fps; 320x240: 20fps
PIR (Motion) Sensitivity
High/Normal/Low
PIR Sensing Distance
20m /65ft (On the Normal sensitivity and temperature is below 25°C/77°F)
Central PIR Sensing angle
140°
Operation Mode
Day/Night
Trigger Time
0.85 Second (When using the 2G SD card)
Trigger Interval
0sec. - 60min; Programmable
Photo Playback Zoom
1~8 Times
Time Stamp
On /Off; Include serial no.,
Timer
On /Off; Timer Set
Password
4-Digit Numbers
Device Serial No.
4 character alphanumeric
Time Lapse
1 Second ~ 24 Hours
Audio
On/Off
Language
English/Chinese/French/Norwegian/Deutsch/Spanish/Portuguese/Japanese/Russian
Power Supply
4xAA; Expandable to 8 or 12 AA
Stand-by Current
0.4mA
Stand-by Time
Maximum 3, 6 or 9 Months (using 4, 8 or12AA battery)
Auto Power Off
Auto power off in 2 minutes while no keypad controlling
Power Consumption when
activated by motion
150mA (+500mA when IR LED lights up)
Interface
TV out (NTSC); USB; SD Card Slot; 6V DC External
Mounting
Strap; Tripod Nail
Waterproof
IP54
Operation Temperature
-30 to 70°C (-22 to 158°F)
Operation Humidity
5% ~ 95%
Certificate
FCC & CE & RoHS
 Loading...