


Lifestyle Automation
Pro-EM
IntelliHub
OPERATION MANUAL
Version IHP01.02
SC-IHP01

Table of Contents
Introduction
Introduction to the Pro-EM® controller
Electrical specifications
Instructions
Installation instructions
Download and registration of the Silux Control® app
Silux Control
®
app & Pro-EM® IntelliHub
®
Connecting the Pro-EM® IntelliHub® to your local network
Factory reset
Warranty & Support
1. Troubleshooting
2. Warranty
I. What this warranty covers
II. What period does this warranty cover
III. What Silux Control® will do to correct any problems
IV. What is not covered by this warranty
3. Support
4. Disclaimer of liability
Introduction
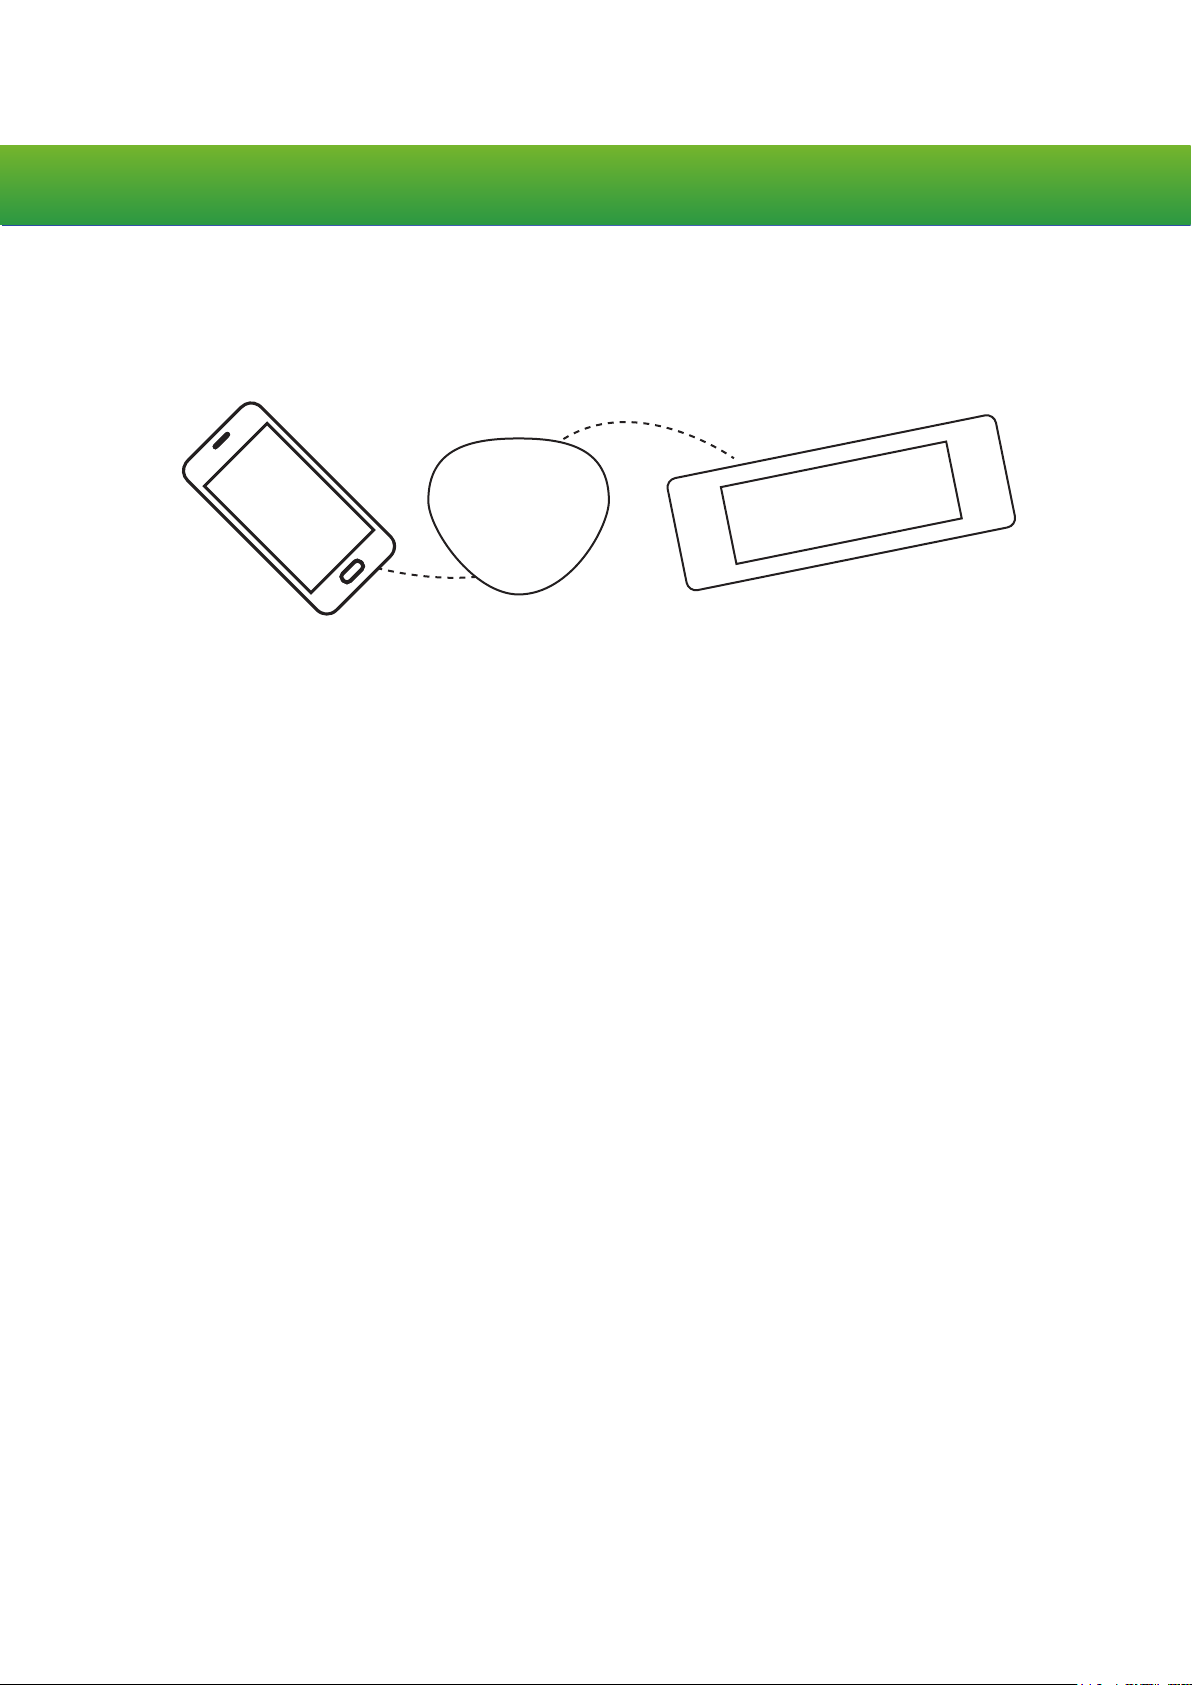
PLEASE NOTE: You are not able to connect directly to the Pro-EM® controller. You will be
required to connect directly to the Pro-EM® Intellihub® to ensure you can control all devices
via the Silux Control
®
app.
Introduction to the Pro-EM
Pro-EM
IntelliHub
®
IntelliHub®
Pro-Em
Controller
The Pro-EM® IntelliHub® is the link between your app and your Pro-EM® controllers.
All messages sent between your Pro-EM® controllers and your app are handled and veried by your
Pro-EM® IntelliHub®. All controllers require SecureCodes and all messages are encrypted to ensure your
security and privacy.
®
The purpose of the Pro-EM
IntelliHub®, along with the Pro-EM® controller, is to ensure your
emergency lighting is kept at the healthiest status level without requiring human assistance or
interventions, viewable from anywhere in the world.
Electrical specifications
Input
Operating Temperature
Storage Temperature
190 ~ 250V/AC (USB Adapter plug)
0 ºC ~ 40 ºC 10% ~90% RH
-10 ºC ~ -70 ºC 5% ~90% RH
WiFi Module
& Encryption
WiFi Range
Radio Network
Radio Frequency
Language
OS
App
Accessories
WPA, WPA2
WPA/WPA2
± 30m
Silux Control
868MHZ (Adjustable frequency to meet different country legislations)
English, others coming soon
Android 4.0+, iOS 8.0+, Windows 7+
Silux Control
1 x USB Adapter
1 x USB Cable
1 x Installation manual
®
RF proprietary meshing
®
can be integrated with other automation features of Silux Control
WE RECOMMEND THAT YOU USE A QUALIFIED ELECTRICIAN TO INSTALL THESE
PRODUCTS FOR YOU.
®
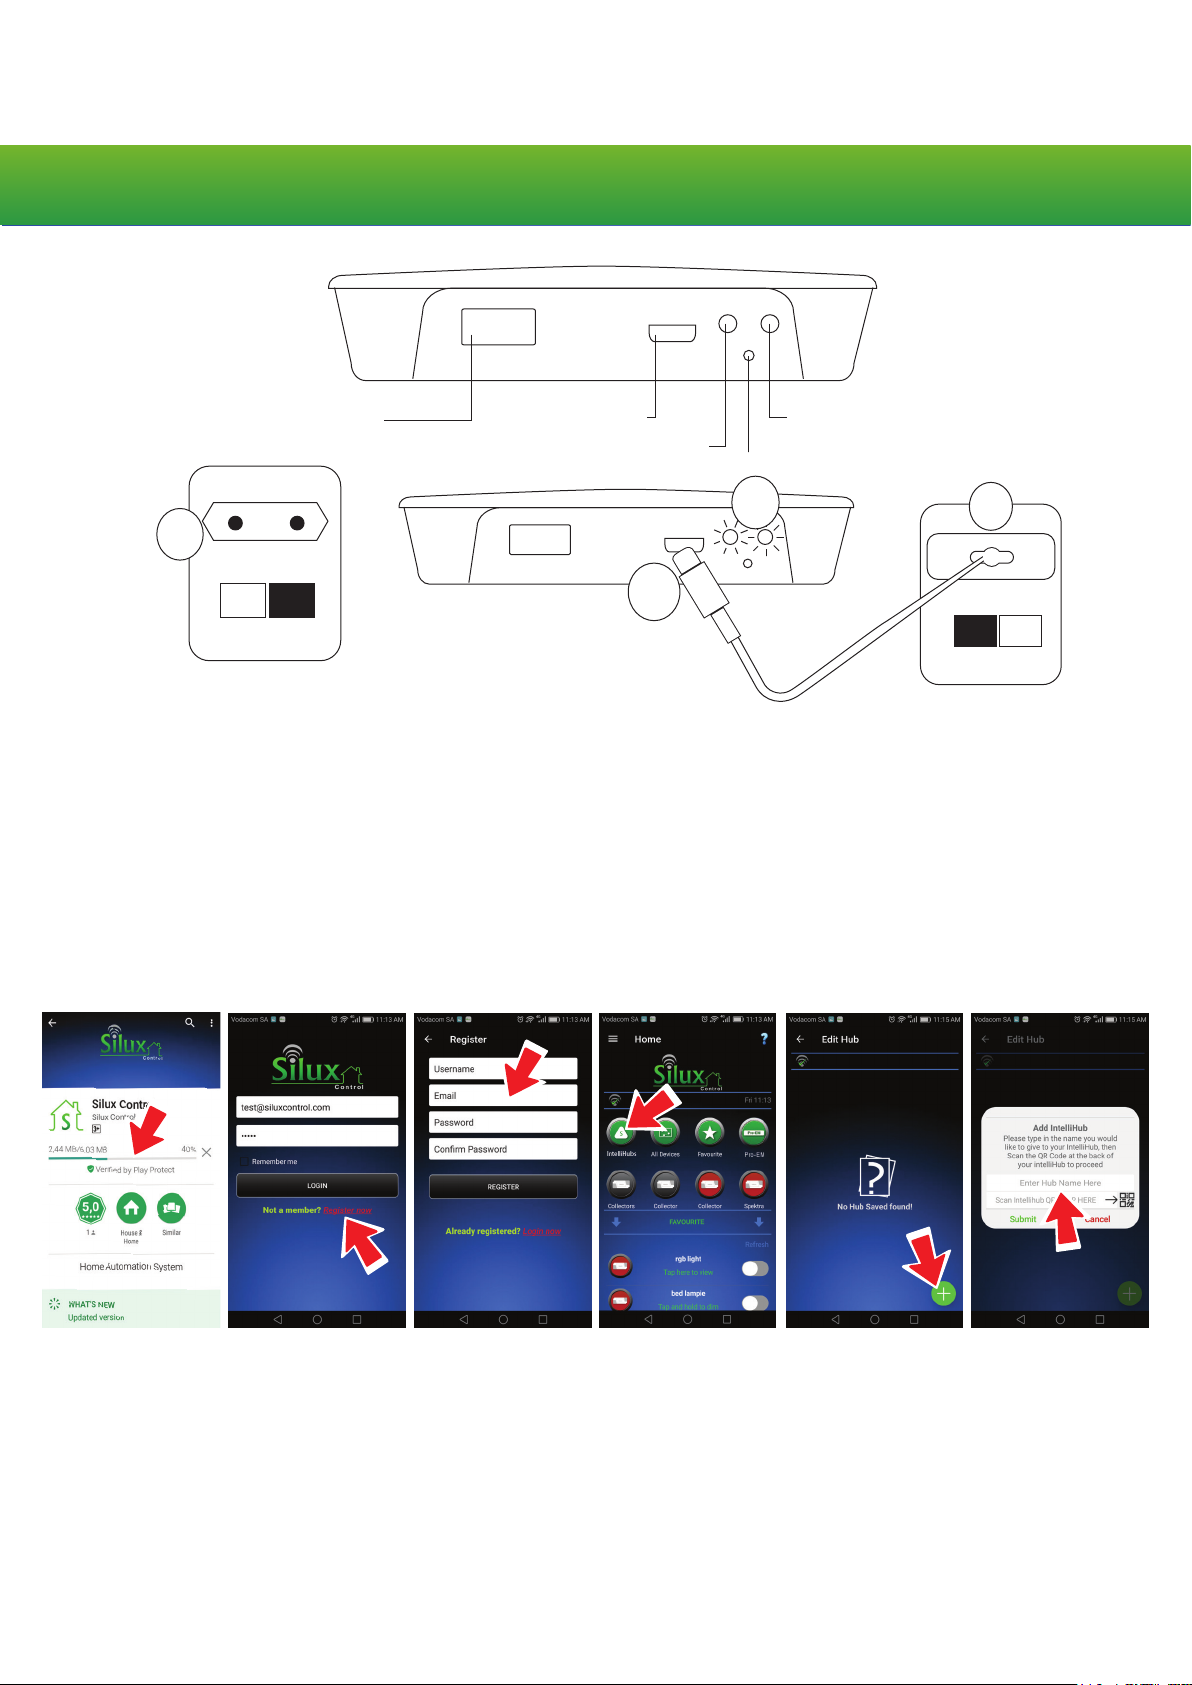
Instructions
Servicing USB Port Power Port Power Light
Reset Button
Status Light
4
1
OFF
Installation instructions
Step 1. Turn the power socket OFF and plug the power supply into the power socket.
®
Step 2. Connect the IntelliHub
and power supply using the micro USB cable.
Step 3. Turn the power socket ON.
Step 4. The power light will turn on and the status light will turn RED whilst switching on.
Once the Pro-EM
®
IntelliHub® is ready for use, the status light will turn GREEN and flash off and on
every 2 seconds.
Before continuing with pairing the Pro-EM
®
IntelliHub®, please ensure that your Silux Control
app is installed and registered.
2
ON
3
®
®
Download and registration of the Silux Control
Step 1. The Silux Control
search for Silux Control
®
app can be downloaded from the Play Store or from the iStore. Simply
®
and install it.
Step 2. Once you open the installed app, you will be directed to the Silux Control
app
®
login page. Tap
“Register Now”.
Step 3. You will be asked to register with an email address and password. You will then receive an
email with a verification code. Enter this code into the verification code field on your Silux Control
®
app and tap “Verify”.
Step 4. On the home page, tap the “IntelliHubs” icon.
Step 5. Tap the “+” at the bottom of the page and create a name for your Pro-EM
®
scan the QR code located on the back of your Pro-EM
IntelliHub®.
®
IntelliHub® and
Pro-EM IntelliHub559097897
Pro-EM IntelliHub559097897
Saved, encrypted
Hub discovered - Welcome to Silux Control
***********
WiFi name
Silux Control® Pro-EM® IntelliHub
®
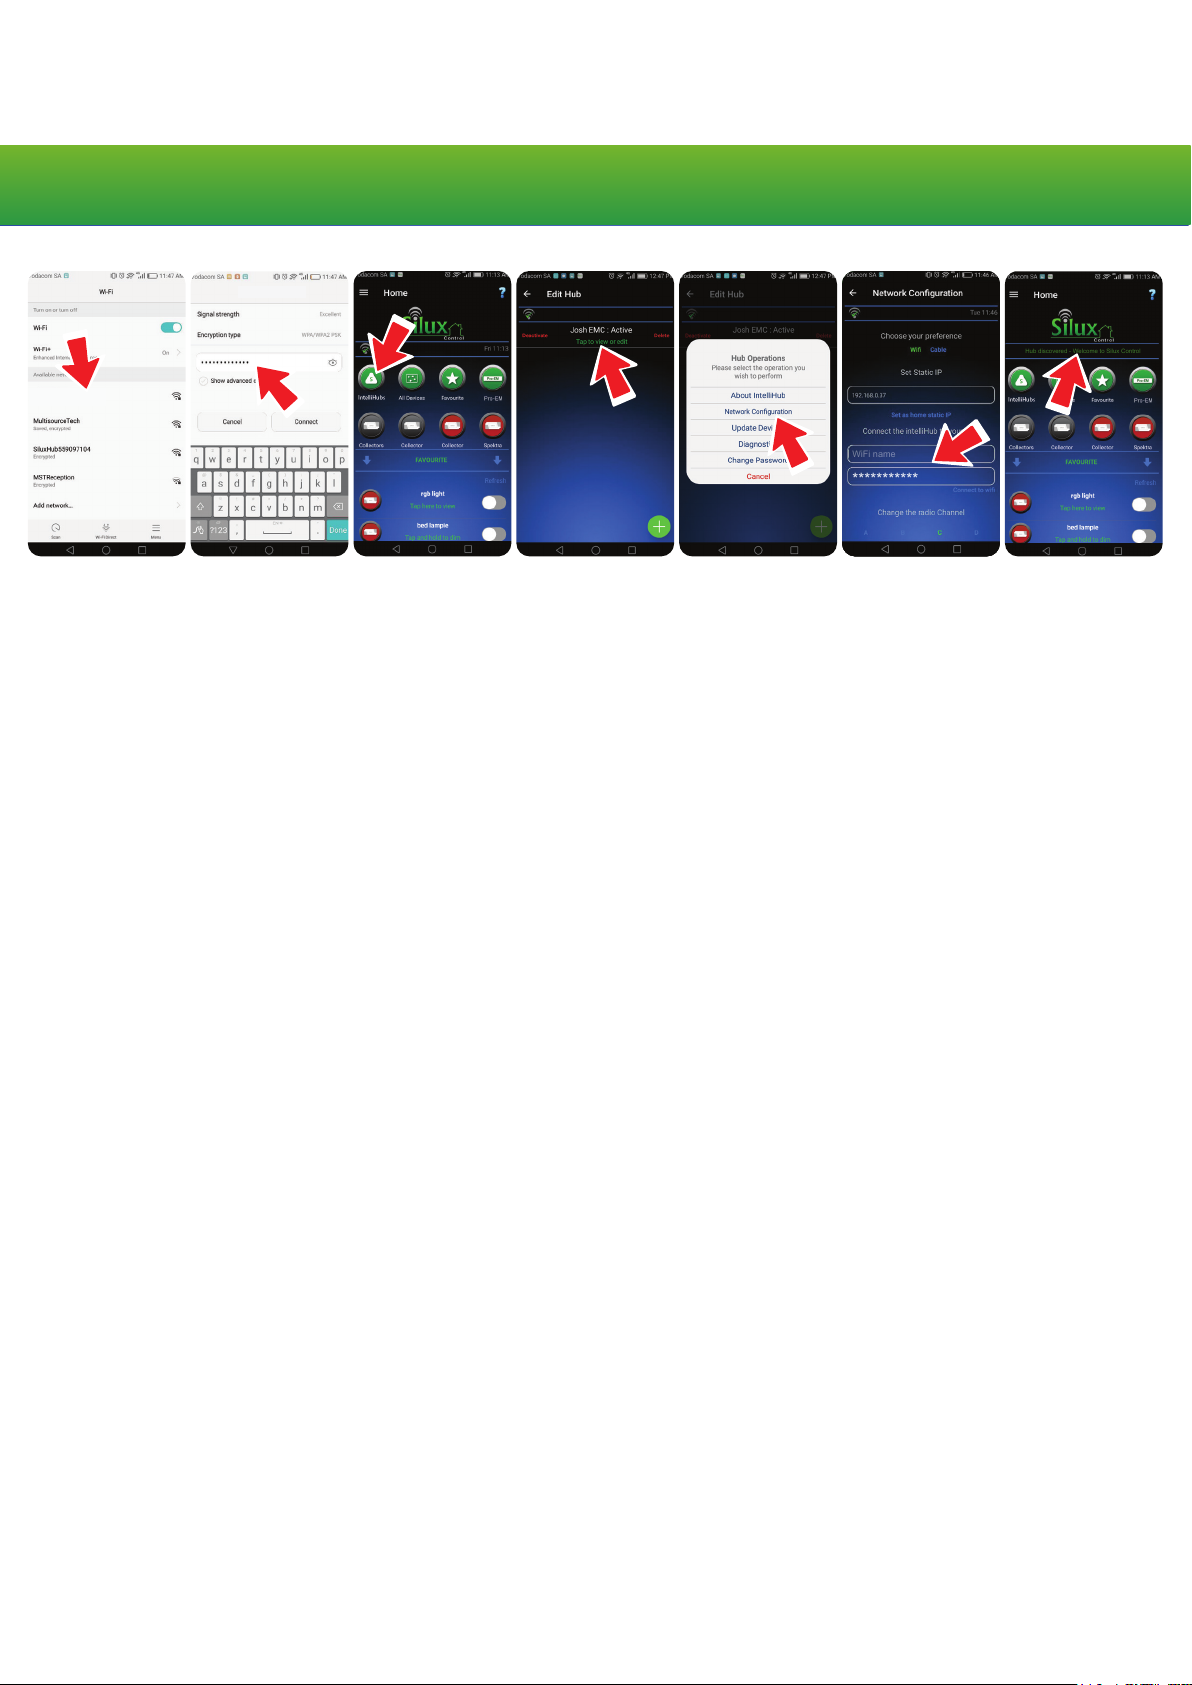
Connecting the Pro-EM® IntelliHub® to your local network
Step 1. On your smart device, scan your “available WiFi networks”.
Step 2. Connect to the Pro-EM
If you are unsure which name refers to your Silux Control
®
IntelliHub®’s WiFi.
®
Pro-EM® IntelliHub®, it can be located on
the bottom of your Pro-EM® IntelliHub® as SSID, along with the default password. When prompted for
a password, use the password provided.
Step 3. Once you have successfully connected to the Pro-EM
®
Control
app.
®
IntelliHub®’s WiFi, open your Silux
Step 4. On the home page, tap the “IntelliHubs” icon.
®
Step 5. Tap on the Pro-EM
IntelliHub® in the list.
Step 6. Tap “Network Configuration”.
Step 7. Under the heading “Connect your IntelliHub
select it from the drop down list, enter your password and tap “Connect to wifi”. Your Pro-EM
®
to your WiFi”, enter your local WiFi name or
®
IntelliHub® will restart and attempt to connect to your local network.
Step 8. On your smart device, scan your “available WiFi networks” and connect to your local WiFi.
®
Step 9. Go back to the dropdown menu on your Silux Control
app and tap “Discover Hub”.
While the Pro-EM
ing by switching off for 2 seconds then on for half a second. Once it has connected it will flash on for
2 seconds and off for half a second.
In the status bar, a message will be displayed stating the discovery was successful.
Please note: Your network name and password are case sensitive. Please ensure you type it
exactly as it is displayed if not selecting from the list.
Factory Reset
This function will remove all settings and be restored to its original state. Press and hold the reset
button on the Pro-EM
flashing ORANGE. The Pro-EM
IntelliHub
®
IntelliHub® is attempting to join your WfFi the power indicator light will start flash-
®
to boot up.
®
IntelliHub® with a pen or paper clip for 5 seconds. The status light will start
®
IntelliHub® will reboot automatically. Please allow a minute for the
Your device will now be restored to its default state.

Warranty & Support
1. Troubleshooting
Please visit our website at www.siluxcontrol.com/FAQ for a detailed list of all the Frequently Asked Questions.
• Ensure that the power going to the device is on.
• Ensure you have the latest app installed on your device and that you’re connected to your local network.
®
• Ensure that your IntelliHub
• Ensure that this device is added to your device list when using the app.
• Ensure that you have the correct device selected when using the app.
2. Warranty
I. What this warranty covers:
®
Silux Control
warrants to the original purchaser of this Silux Control® product that the product shall be free from defects
in design, assembly, material or workmanship under normal use and operation.
Silux Control
®
‘s sole and exclusive obligation under the foregoing warranty shall be to repair or replace, at its option, any
defective product that fails during the warranty period. The expense of removal and re-installation of any item is not
included in this warranty.
WARNING: Silux Control
might have caused including 3rd party damages.
is on and connected to your local network.
®
and its distributors and resellers cannot be held responsible for any damages this product
II. What period does this warranty cover:
Silux Control
III. What Silux Control
Silux Control
®
warrants this product for 12 months.
®
will do to correct any problems:
®
will repair or replace, at its option, any defective product free of charge (excluding shipping charges for this
product).
®
Silux Control
reserves the right to discontinue any of its products without notice and disclaims any limited warranty to
repair or replace any such discontinued products.
IV. What is not covered by this warranty
Upon claiming this warranty, all above warranties are null and void if the purchased Silux Control® product is not returned
for an authorized inspection, at the sole expense of the purchaser, or if Silux Control
product has been improperly installed, altered in any way or opened/tampered with. The Silux Control
®
determines that the Silux Control®
®
product warranty
does not protect against instances of uncontrollable natural disasters such as flood, lightning, earthquake, war, vandalism, theft, normal use wear and tear, erosion, depletion, obsolescence, physical damage, water damage, damage due to
low voltage disturbances (i.e. brownouts or sags), non-authorized program or system equipment modification/alteration.
3. Support
Please visit our website at www.siluxcontrol.com for any other support, products, future products, and updated user
manuals.
4. Disclaimer of Liability
Please read this user manual thoroughly before using Silux Control® products. Follow all safety precautions when
installing this product. It is always recommended to use a qualified electrician.
Under no circumstances shall Silux Control
consequential damage that results from the use of or inability to use the Silux Control
Control
®
automation products, you expressly agree that the use of these products are at own risk. Neither Silux Control®
®
or its associates be liable for any direct, indirect, incidental, special or
®
products. By using any Silux
nor its affiliates, subsidiaries, or designees nor each of their respective officers, directors, employees, agents, third party
content providers, designers, contractors, distributors, merchants, sponsors or licensors can be held responsible for any
injury, death or damages this product might have caused.
 Loading...