

Silicon Laboratories Finland WT11IA User Manual

Team2 SW Help


Table of Contents
Introduction .................................................................................................................................. 1
Quick Steps.............................................................................................................................. 1
About the Help.......................................................................................................................... 1
Water-Resistance..................................................................................................................... 2
Medical Devices In Professional Use....................................................................................... 2
Training Articles........................................................................................................................ 2
Service...................................................................................................................................... 2
Bluetooth .................................................................................................................................. 2
Quick Guide ................................................................................................................................. 3
Quick Guide.............................................................................................................................. 3
PC Requirements..................................................................................................................... 3
Hardware.................................................................................................................................. 4
Lights and Sounds.................................................................................................................... 4
Wizard ...................................................................................................................................... 7
Care and Maintenance Instructions ....................................................................................... 14
Hardware.................................................................................................................................... 15
Hardware................................................................................................................................ 15
Base Station........................................................................................................................... 15
Charger................................................................................................................................... 19
Transmitters and Straps......................................................................................................... 20
Bluetooth USB Adapter (USB Dongle)................................................................................... 22
Non-secured transmitter mode............................................................................................... 23
iii

Team2 SW Help
How to... ................................................................................................................................. 24
Software..................................................................................................................................... 36
Introduction to Software ......................................................................................................... 36
Main menu.............................................................................................................................. 37
Training calendar.................................................................................................................... 52
Online training ........................................................................................................................ 64
Training session log ............................................................................................................... 68
Training reports...................................................................................................................... 73
How to... ................................................................................................................................. 76
PDA software........................................................................................................................... 121
Introduction to PDA Software............................................................................................... 121
PDA Requirements............................................................................................................... 121
Installation of PDA Software................................................................................................. 122
PDA Software....................................................................................................................... 122
Settings................................................................................................................................. 125
How to... ............................................................................................................................... 128
Troubleshooting ....................................................................................................................... 143
Troubleshooting.................................................................................................................... 143
Connections.......................................................................................................................... 144
Online Training..................................................................................................................... 147
Sport Zones.......................................................................................................................... 149
Training computer ................................................................................................................ 150
Transfer................................................................................................................................150
iv

Table of Contents
Transmitters.......................................................................................................................... 152
USB dongle .......................................................................................................................... 155
Glossary................................................................................................................................... 156
Precautions.............................................................................................................................. 157
Minimizing Possible Risks.................................................................................................... 157
Important Safety Information.................................................................................................... 159
Base Station......................................................................................................................... 159
AC-Powered Devices...........................................................................................................159
Battery-Powered Devices..................................................................................................... 160
Wireless Devices.................................................................................................................. 160
All Devices............................................................................................................................161
Regulatory Information............................................................................................................. 161
Base Station......................................................................................................................... 161
Transmitter ........................................................................................................................... 164
Industry Canada (IC) regulatory information........................................................................ 164
Avis de conformité à la réglementation d’Industrie Canada................................................. 164
Charger................................................................................................................................. 166
Technical Specifications .......................................................................................................... 168
Transmitter ........................................................................................................................... 168
Radio Frequency Technical Specifications..........................................................................168
Guarantee and Disclaimer.......................................................................................................169
Polar Team
2
Pro International Warranty .............................................................................. 169
Disclaimer.............................................................................................................................169
v


TEAM2 SW HELP
Introduction
Welcome to Polar Team2! Team2 is a versatile system that allows you to plan your team's
seasons, monitor the training and analyse the data.
2
Team
includes software for both a PC and PDA. The PC software is designed for planning,
recording and storage and the PDA software is for online monitoring.
We recommend that you read through this manual before beginning to work with Team
easiest way to learn how to use the versatile features of Team
or coach. For more visual guidance, see the Team
2
tutorial which can be found from the PC
2
efficiently in your job as a trainer
software (Help > Tutorial).
Quick Steps
1. Install PC software from the DVD.
2. Set up the system and software.
3. Give transmitters to the players.
4. Start training and monitoring heart rates online.
5. Analyze data.
6. Report and follow-up.
About the Help
2
. It is the
The help is divided into 5 main categories, Quick Guide, Hardware, Software, PDA Software
and Troubleshooting.
Quick guide
least the quick guide before beginning to work with Team
offers basic information on the product. We strongly recommend that you read at
2
. Quick guide and, in particular, the
Wizard instructions are only for the initial introduction of the software. Please read the software
chapter for instructions on the software itself.
Hardware
offers information on the hardware that is included in the Team2 set.
1

Team2 SW Help
Software offers information on the PC software that has been installed onto your PC. The Team2
software is the core of Team
2
. In this section you can find information on all software features.
See the How to... section for instructions on the most commo n f u nctions.
PDA software
Troubleshooting
offers information on the PDA software that can be installed on a PDA device.
offers you first-hand help if you have a problem with either the hardware, PC
software or PDA software.
To find necessary information efficiently, use the Search function (go to Search tab).
Water-Resistance
When a product is water-resistant it is protected against splashes while washing, sweat,
raindrops etc. It is not, however, suitable for swimming.
Medical Devices In Professional Use
Professional use sets high standards for the manufacturer, distributor and user of a medical
device. Polar offers user instructions and training for professional users in order to ensure the
safe use of Polar devices.
Training Articles
For more information on the physiological aspects and other features of Polar products, visit the
Polar Collection of Training Articles
.
Service
Your Polar Team2 system is designed to help you achieve your personal fitness goals and
indicate the level of physiological strain and intensity during training sessions. No other use is
intended or implied. During the one-year guarantee/warranty period we recommend that you have
service done by an authorized Polar Service Center only. The warranty does not cover damage
or consequential damage caused by service not authorized by Polar Electro. Register your Polar
product at http://register.polar.fi/ to ensure we can keep improving our products and services to
better meet your needs.
Bluetooth
Polar Team2 uses Bluetooth wireless communication between Polar Team2 Transmitters and
Polar Team
transmitting live data in the sports instrument industry today.
2
Base station. Bluetooth provides the most reliable and secured technology for
2

Team2 SW help
Quick Guide
Quick Guide
This is Quick guide for Polar Team2. Please read Quick guide through before starting to work with
2
Team
. Quick guide gives you the basic information on Team2. Quick guide, in particular, Wizard
instructions are only for the first introduction of the software. For instructions on the software itself,
please read the software chapter
.
• PC requirements
• Hardware
• Lights and sounds
• Wizard
• Care and maintenance instructions
PC Requirements
For Team2 to work properly and smoothly, your PC has to be powerful enough. In addition to the
requirements listed below, it is recommended that you update system drivers, especially Wi-Fi
adapter drivers. Contact your Wi-Fi adapter manufacturer's web site to find the latest release of
the drivers.
Minimum system requirements are:
• 1.6 GHz processor
• 1 GB RAM
• 1 GB of free hard drive space
• Wireless connection (IEEE802.11b or newer)
• Microsoft Windows XP, Vista or 7
Recommended system requirements are:
• 2 GHz processor
• 2 GB RAM
3

Team2 SW Help
• 1 GB of free hard drive space
• Wireless connection (IEEE802.11b or newer)
• Microsoft Windows XP, Vista or 7
Hardware
Polar Team2 includes the following hardware. For more information, see hardware section.
• Base station
• Charger
• Transmitters and straps
• USB dongle
Lights and Sounds
Base station and transmitters inform the user of their status with a few different lights and sounds.
Base station
Light Function
Charge indicator
Green light is on: Power cable is connected and/or the battery is full.
Red light is on: Battery is low and charging.
Power indicator
4
Red light is blinking every 5 seconds: Battery is low and not charging.
Red light blinks for 3 seconds and power switches off automatically: Battery is
empty.
Base station is on.
Team2 SW help
Blue 1
Blue 2
Blue 3
Blue 4
Base station is ready for use. Takes approx. 1 minute after switching on.
On secondary base stations, the only one that lights up when the base station is ready
for use. Note that also the main base station must be on and ready for use.
PC is connected to the base station and software is running.
At least one transmitter is connected to the base station with Bluetooth.
Lights up on main base station when at least one secondary base station is connected
to the main base station.
NOTE:
• The Bluetooth indicator
is not a light, only a label.
Transmitter
Below is a description of lights and sounds during training.
Light/Sound Function
Green led is blinking at
HR.
Transmitter detects the HR signal and is ready for recording.
5

Team2 SW Help
Red led is blinking at HR.
Start recording sound,
one beep.
Green led is blinking
every 3 seconds.
Stop recording sound, two
beeps.
Red led is double blinking
every 5 seconds for 30
seconds.
Stop recording sound.
Transmitter detects the HR signal and is ready for recording. Memory or battery level is
low.
Transmitter starts recording.
Transmitter is recording.
Transmitter stops recording.
Recording cannot be started because the battery or memory level is low.
Red led is double-blinking
every 5 seconds for 10
minutes.
Stop recording sound.
Recording has been stopped because the transmitter memory is full or the battery is
empty.
Below is a description of lights and sounds during charging or when a transmitter is inserted into
the charger.
Light/Sound Function
Red led is on for 5
seconds.
Short sound.
Transmitter is properly placed into the charger and is in secured mode.
6

Team2 SW help
Red led is blinking every 5
seconds.
Green led is blinking
every 10 seconds.
Green led is on.
Red led is on for 5
seconds.
Three short sounds.
Transmitter is charging.
Transmitter's battery is full.
The user can activate the connection between a new transmitter and the system and
activate the transmitter's number while introducing new transmitters to the system.
Transmitter is properly placed into the charger, but is in not-secured mode. Data
cannot be transferred while the transmitter is in not-secured mode.
To be able to transfer data from the transmitter to the PC or to change the transmitter's
settings, change the mode to secured by removing the transmitter from the charger
and inserting it back after a minimum of 3 seconds. Only one sound should be heard.
Wizard
Wizard launches when the Team2 software is run for the first time. Wizard guides you through the
introduction process step by step. Before you can run Team
your PC.
If you want to run Wizard again at some point, remove all the transmitters from the system
according to the instructions
, shut down the software and re-run it. Wizard then launches
automatically.
• Wizard can be stopped at any time by clicking the Cancel button.
• It is possible to shift between the steps by clicking the Next and Back buttons.
NOTE: These instructions apply only to the initialization wizard that launches when the Team
software is run for the first time. For instructions on the rest of the software, see the software
chapter.
Welcome (Step 1)
2
software you have to install it on
2
7

Team2 SW Help
The first step instructs you on how to connect the hardware correctly. Follow the instructions
below and on the screen. By clicking the numbered steps, help animations are displayed in the
box on the right side of the list.
1. Plug the power cable into the base station.
2. Connect the first (or only) base station to the PC with the network cable.
3. Switch on the first (or only) base station. Wait until (1) and (2) are lit (approx. 1. min).
4. Plug the power cable into the charger.
5. Insert transmitters 1-10 into the charger. Wait until (3) is lit on the base station.
6. Plug the USB dongle into the PC.
Continue to the next step by clicking Next.
NOTE:
• Insert the transmitters into the charger so that so that the P of the Polar logo is not visible.
The led is located next to the R of the Polar logo.
• When the transmitter is inserted correctly into the charger the red led is on for 5 seconds.
At the same time you can hear a short sound.
• It is important that the USB dongle is introduced to the system during Wizard. The dongle
doesn't work later on if this part has been skipped in the beginning. For instructions of
what to do, if the USB dongle is not introduced to the system during Wizard, see How to
introduce USB dongle.
• Do not install the USB dongle drivers from the included CD! The USB dongle works
with the Team
the instructions
2
only if the drivers are not installed. If you have installed the drivers, follow
in the troubleshooting chapter.
Team (Step 2)
The second step asks you to create the first team and fill in team information. It is also possible to
import team data from a previous Polar software by clicking the link at the bottom of the window.
Compatible data can be imported from the Polar Precision Performance and Polar ProTrainer
software.
1. Type the team name into the Name field. The default name is My Team.
8

Team2 SW help
2. Add the team logo (in *.jpg format) by clicking Click here to add a logo text. This is an
optional feature.
3. Type team details into the Team Details field. This is an optional feature.
Continue to the next step by clicking Next.
NOTE:
• The added logo can be removed by clicking Remove logo at the bottom of the Wizard
window.
• When team data is imported from the previous Polar software, all team data (including
player information) is imported to the system.
Sport Zones (Step 3)
The third step asks to specify your team's sport zones. Sport zones specify how training is
divided into different intensity zones. You can either use the default settings or modify the sport
zones to fit the team's training.
Sport zones can be based on one of three different calculation methods. Wizard offers two of
them to choose from, the player's maximum heart rate
values. A third option is the player's heart rate reserve (% of HRR) which can be taken into use,
in preferences, after Wizard is completed.
1. Select the calculation method that you want the sport zones to be based on.
2. The sport zone settings can be changed after the calculation method is selected. Settings
are given on the right side of Wizard window.
Continue to the next step by clicking Next.
(% of HRmax) and the player's threshold
Player's maximum heart rate (% of HRmax)
When the player's maximum heart rate is selected as the sport zone calculation method, sport
zones which the user can determine are specified as a percentage of a player's maximum heart
rate. As the zones are based on percentages of a player's own maximum heart rate, they are
individual for each player. The same percentages are, however, used for the whole team.
Player's threshold values
When the player's threshold values are selected as the sport zone calculation method, the sport
zones are based on the players' threshold values which are determined in the player settings.
Each player has an upper threshold (anaerobic) and a lower threshold (aerobic) value. The
9

Team2 SW Help
coach/trainer can determine how many heart beats the upper threshold zone and the lower
threshold zone differ from the players' upper and lower threshold values. The variances are the
same for the whole team. The threshold values enable the most individual training analysis.
NOTE:
• Default settings can be restored by clicking the Restore default setting link on the
bottom of the window.
• More sport zones can be added by clicking the Add sport zone link on the bottom of the
window.
Activities (Step 4)
The fourth step asks to define the training activities of your team. You can choose a different
color for every activity. This helps you to visualize your team's training calendar.
There are three different types for activities; intermittent, continuous and strength. The type
indicates how exhausting the training activity is. The type you select affects the training load and
recovery time calculations. Select the types carefully and the calculations will be more accurate.
Training activity examples:
Continuous Intermittent Strength
Swimming Football Gym
Walking Ice hockey BodyPump
Skiing Up/Downhill running
Roller-skating Rugby
Running Alpine skiing
1. Fill in your team's training activities and select their types from the drop-down menu.
10

Team2 SW help
2. Select a color for each activity by clicking the color box at the end of each training activity
line. If each training activity or test has its own individual color, it is easier for you to
visualize your team's training calendar. Activities are shown in the calendar as color
boxes.
Continue to the next step by clicking Next.
NOTE:
• Training activities can be modified after Wizard is completed.
• Training activities can be added by clicking Add training activity link at the bottom of the
window.
• Training activities can be added at any time after completing Wizard.
• Training activities can be removed by clicking Remove link at the end of the training
activity line.
Players (Step 5)
The fifth step asks you to fill in your players' information. You can also import players' information
from previous Polar software by clicking the link on the bottom of the window. Player information
is imported one player at a time. Compatible data can be imported from the Polar Precision
Performance and Polar ProTrainer software.
1. Fill in the name and other information of the first player.
2. Click the Add player link below the player list.
3. Fill in the name and other information of the second player.
4. Continue repeating steps 2 and 3 until you have added all the players you wish to add.
Continue to the next step by clicking Next.
NOTE:
• Physiological values are calculated automatically when the date of birth is selected.
Automatic values can be modified.
• A player can be removed from the player list. Click on the player you want to remove and
then click the Remove link on the bottom of the wizard window.
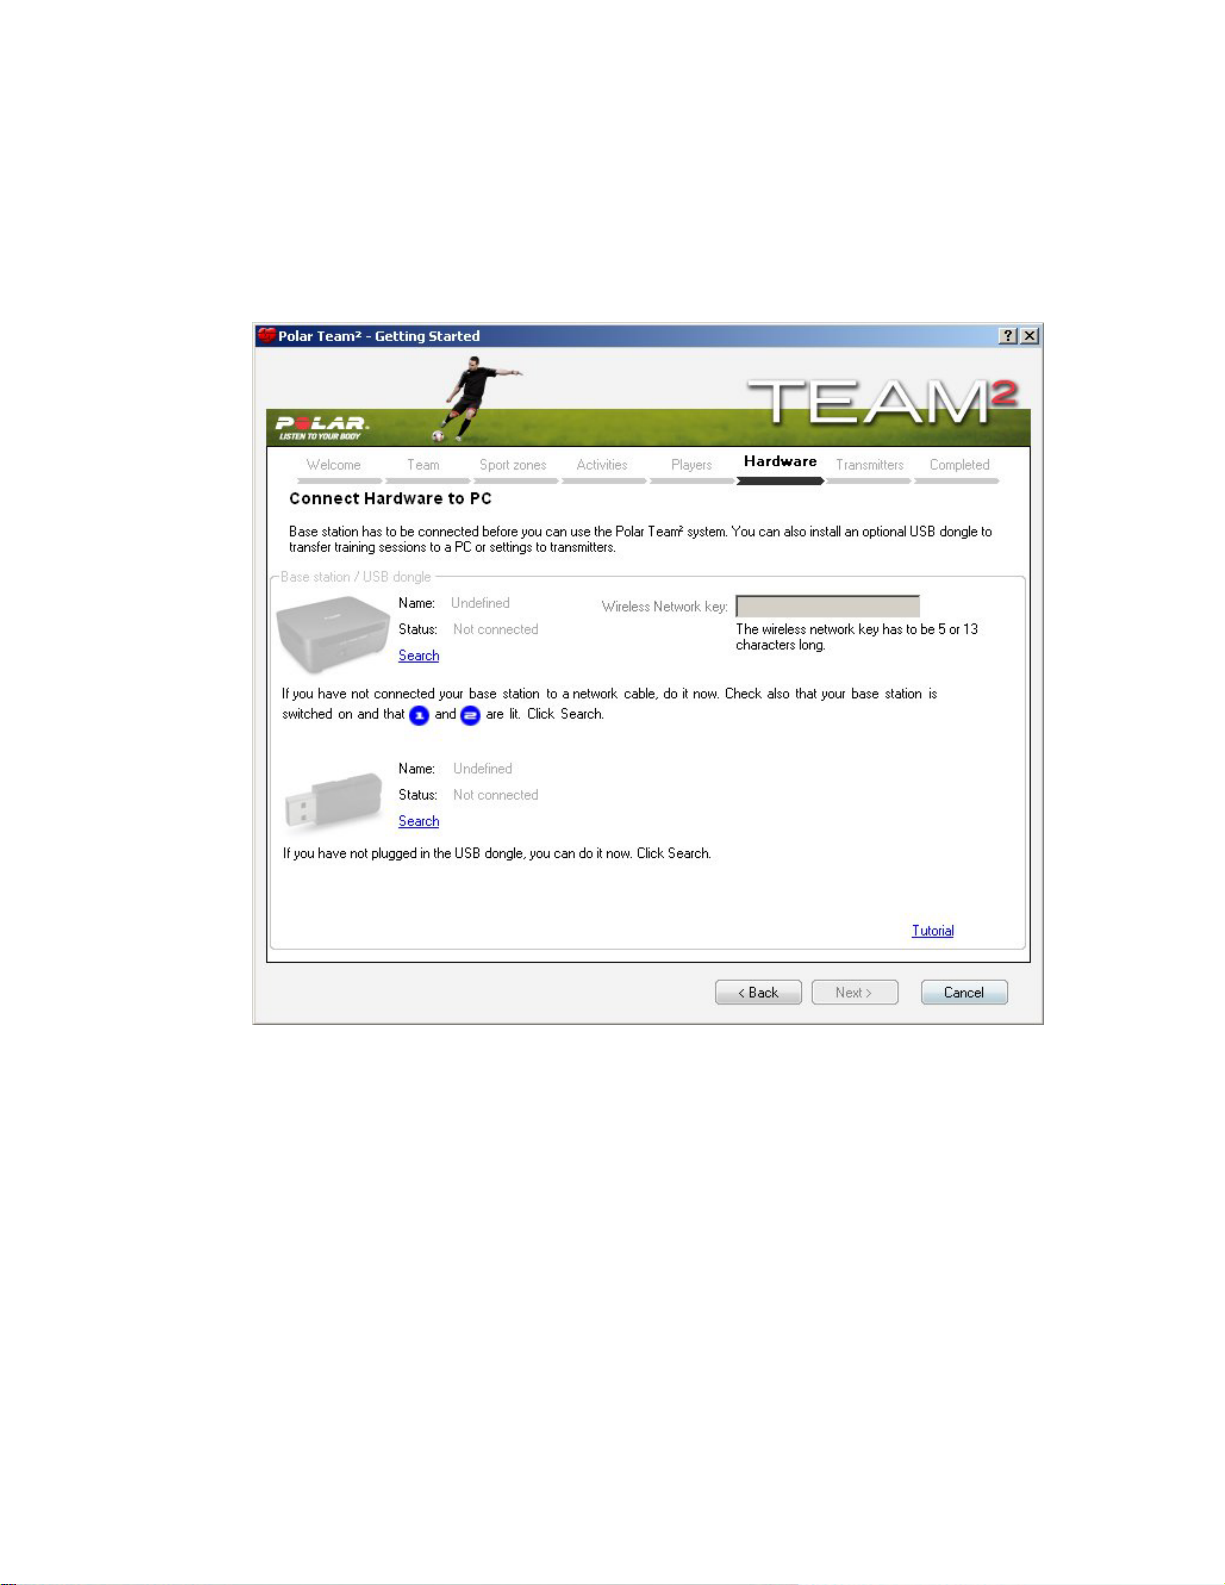
Hardware (Step 6)
11
Team2 SW Help
To make sure that the Team
2
hardware is plugged in correctly, do the following.
1. Check that you have connected your base station to the PC with the network cable and
that lights 1 and 2 are lit on the base station.
2. Click the Search link below the grayed-out picture of base station.
If the connection is ready, the picture fades into black.
3. Choose a wireless network key, i.e. Wi-Fi password, and type it into the Wireless
network key input field.
12
Team2 SW help
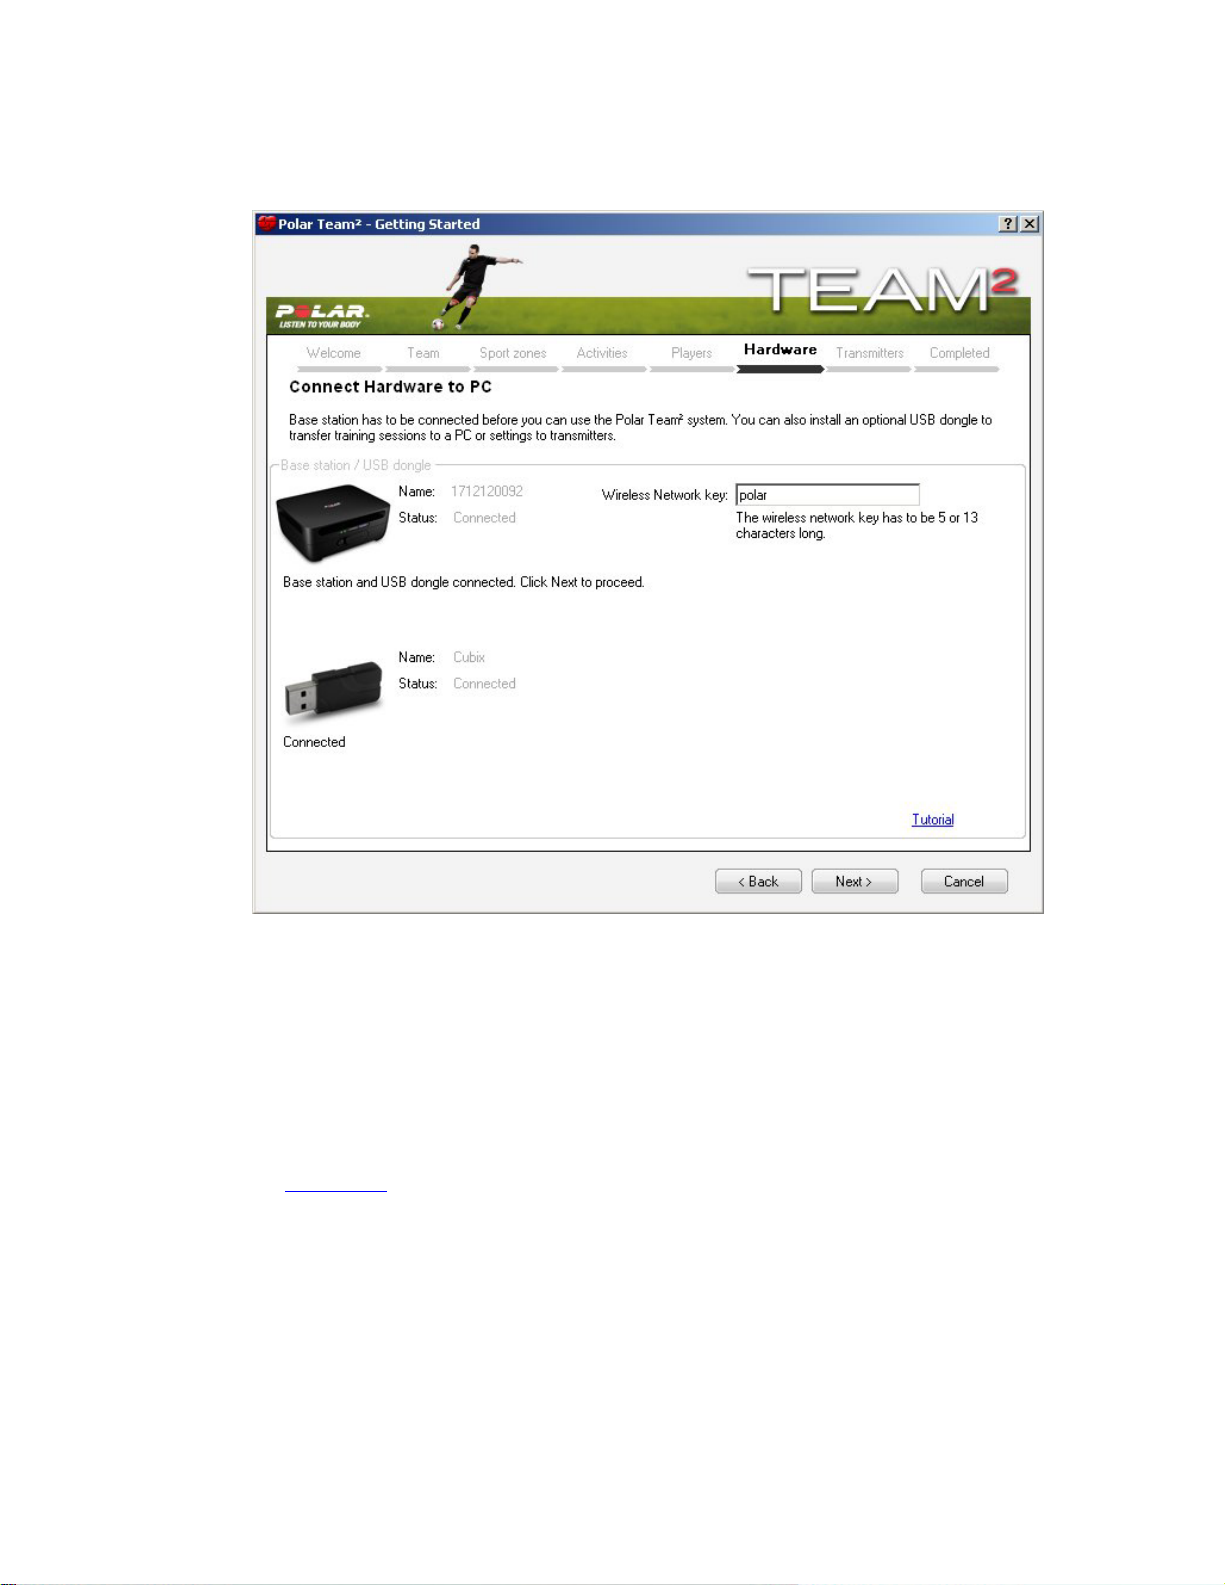
4. If you have not plugged in the USB dongle, do it now. Wait for a couple of seconds and
click the Search link below the picture of USB dongle.
Continue to the next step by clicking Next.
NOTE:
• Follow the instructions on the screen when selecting the wireless n etwork key.
• Do not install the USB dongle drivers from the included CD! The USB dongle works
with the Team
the instructions
2
only if the drivers are not installed. If you have installed the drivers, follow
in the troubleshooting chapter.
Transmitters (Step 7)
Wizard starts to search for the transmitters. If the search doesn't start, click Search. Make sure
the power cable has been plugged into the charger and the transmitters are inserted into the
charger correctly.
13

Team2 SW Help
Wait until the search is done. After the search, Wizard tells you how many of the 10 transmitters it
has found. If Wizard didn't find all the transmitters, make sure that they are inserted correctly. The
correct way is to leave the tip with led light on the outside. A short sound will be heard when a
transmitter is inserted into the charger correctly. There will be a light blinking on the transmitters
that are inserted correctly. Click Search to start the search again.
When Wizard has found all 10 transmitters, select a player for each transmitter from the dropdown menu. Transmitters are identified by the number label. When a transmitter is assigned,
letter X is added after the player's name.
Continue to the next step by clicking Next.
NOTE:
• More transmitters can be added after Wizard is completed. For more information, see
How to add transmitters
.
• If a transmitter was not found during Wizard after a couple of tries, you can add it to the
system using Add New Transmitters feature. For more information, see How to add
transmitters.
• Transmitter-player connections can be modified after Wizard is completed. For more
information, see How to assign transmitter to player
.
Completed (Step 8)
Installation is now complete. Polar Team
2
is now initialized and ready for use.
End Wizard by clicking the Finish button.
Care and Maintenance Instructions
It is important to follow the care and maintenance instructions to assure the long life of the Team2
hardware. Sweat and moisture can keep the electrodes wet and the transmitter activated, which
shortens battery life.
2
Team
Transmitter Straps
• Wash the straps in a washing machine at 40 °C (104°F) after every fifth use. Always use
the washing pouch (included in the Team
strap before wash!
2
set). NOTE: Detach the transmitter from the
• Do not use bleach or fabric softener.
• Rinse the straps under running lukewarm water after every use.
14

Team2 SW help
• Store the straps in the Team
2
bag, in a pocket with vents.
• Make sure you don’t store straps wet.
Transmitters
• Detach the transmitters from the straps and store separately.
• Rinse the transmitters under running lukewarm water after every use.
• Do not insert wet transmitters into the charger.
• Store transmitters in the charger.
• When the transmitters are not in daily use or are stored for a longer period of time,
recharge the transmitters regularly to prevent a complete exhaustion of the battery in the
transmitter.
Charger and Base Station
• Wipe the base station and the charger with a moist cloth regularly.
Hardware
Hardware
Polar Team2 includes the following hardware:
• Base station
• Charger
• 10 transmitters and straps
• USB dongle
Extra transmitters and Team
separately. There is also a charger included in the transmitter kit.
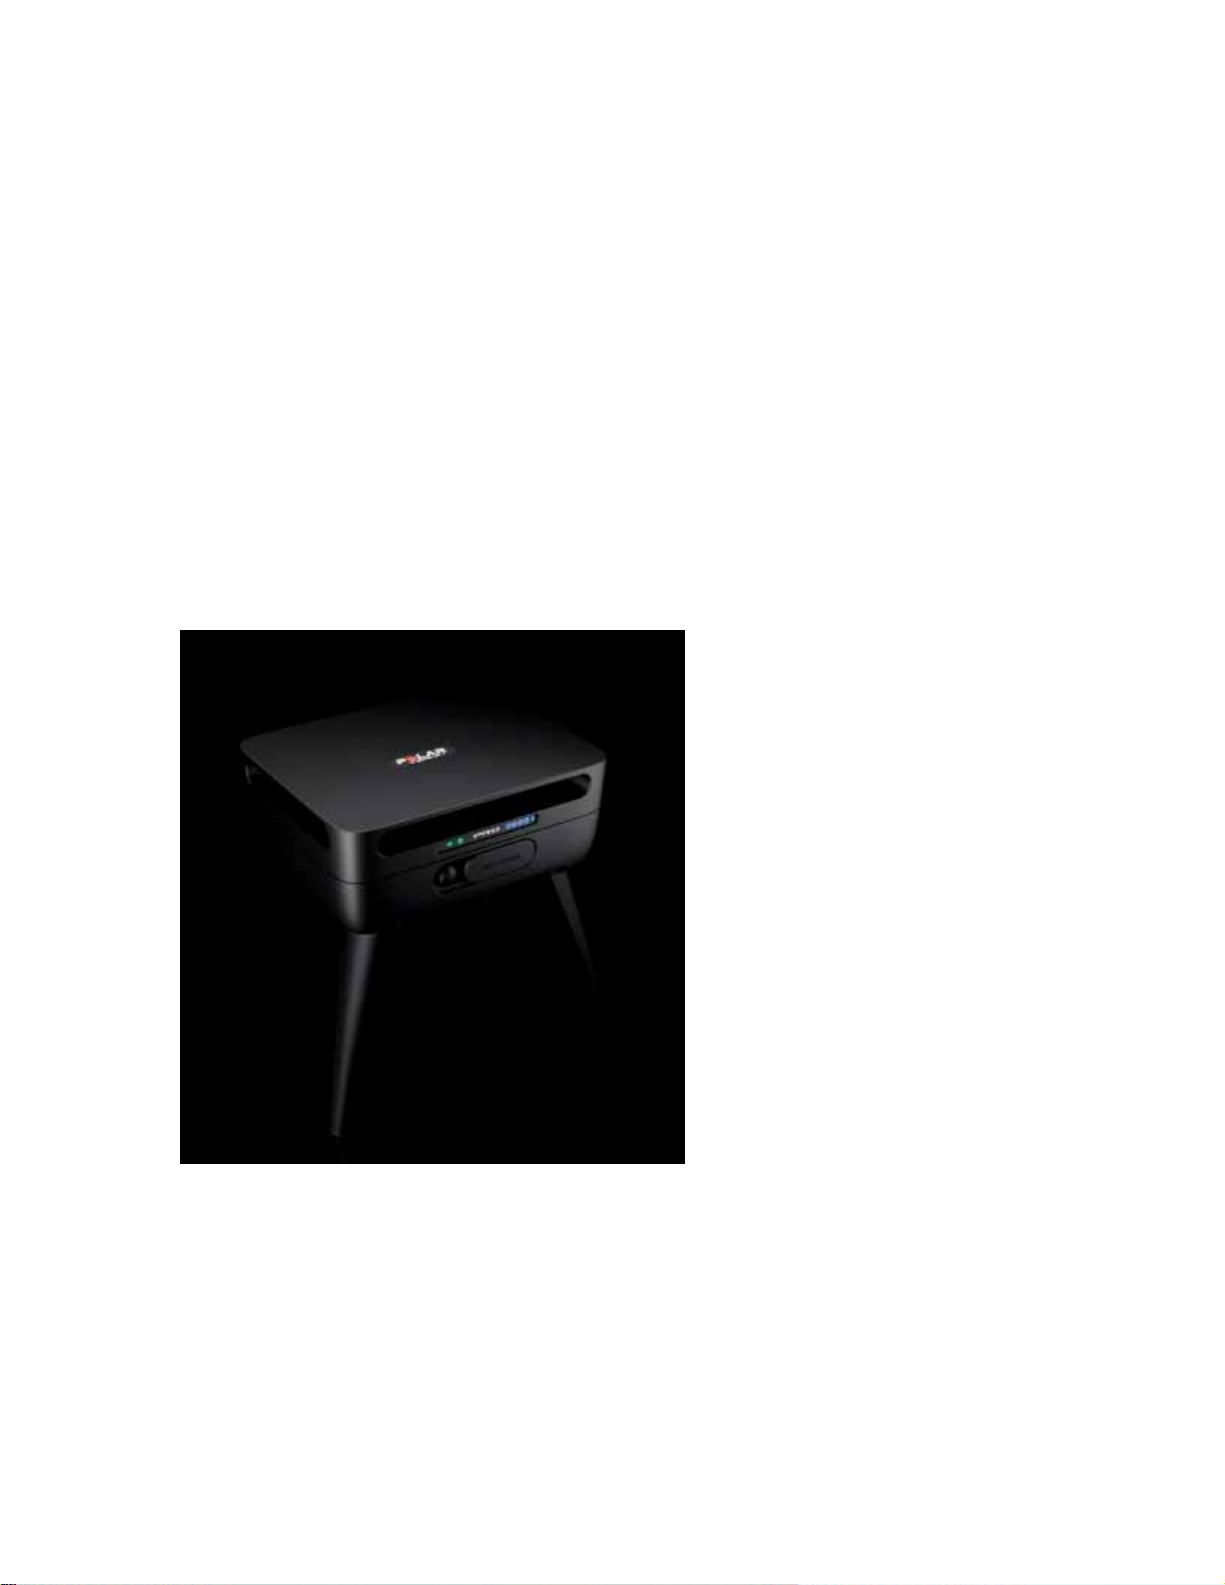
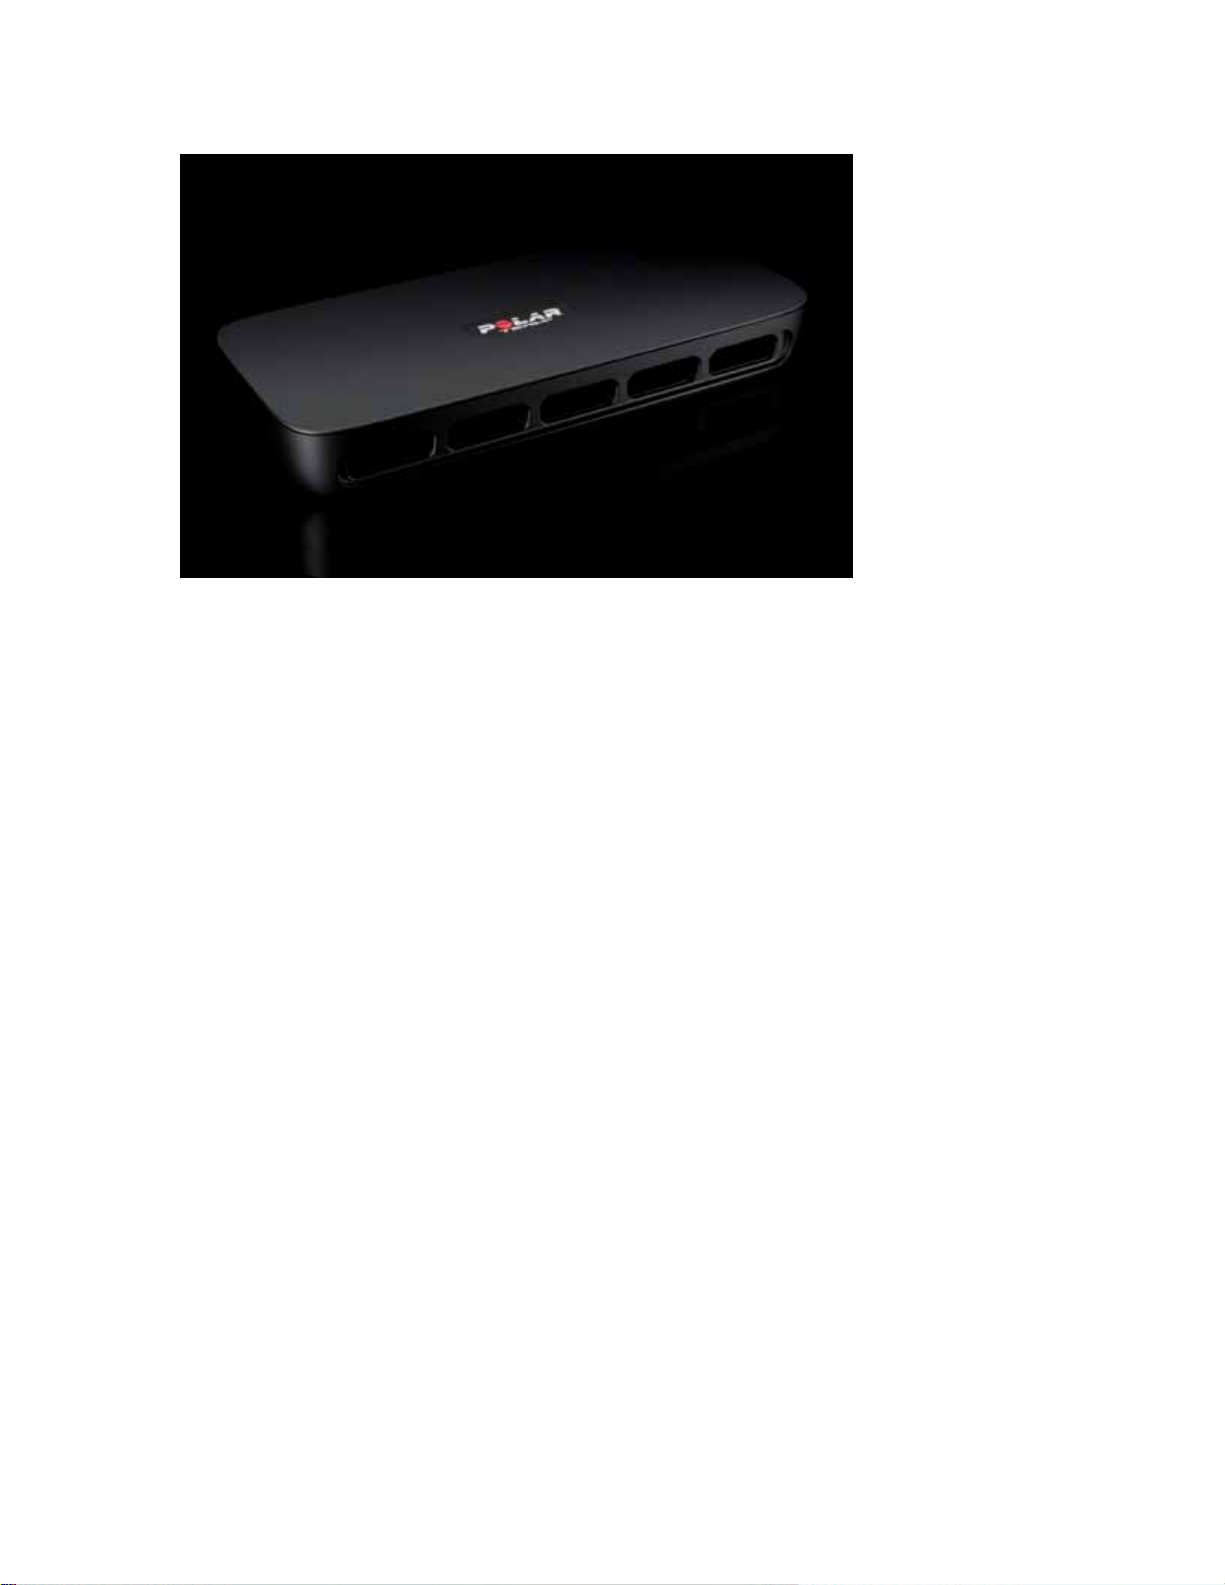
Base Station
The base station is the device that connects the transmitters with your PC or PDA. There can be
up to three base stations in a Team
based on the number of base stations:
2
transmitter straps and additional base stations can be purchased
2
system. The number of transmitters online is determined
15
Team2 SW Help
• one (main) base station: up to 28 transmitters/players online
• two base stations (main + one secondary base stations): up to 56 transmitters/players
online
• three base stations (main + two secondary base stations): up to 80 transmitters/players
online
The main station does not differ from the secondary base stations on the hardware level. The first
base station you connect/introduce to the system becomes the main base station.
If you are using more than one base station in the Team
2
system, only the main base station is
connected to the PC (either wireless or wired connection). The secondary base stations (one or
two) are connected to the main base station wirelessly and automatically after switching on. Light
(4) lights up on main base station when at least one secondary base station is connected to the
main base station.
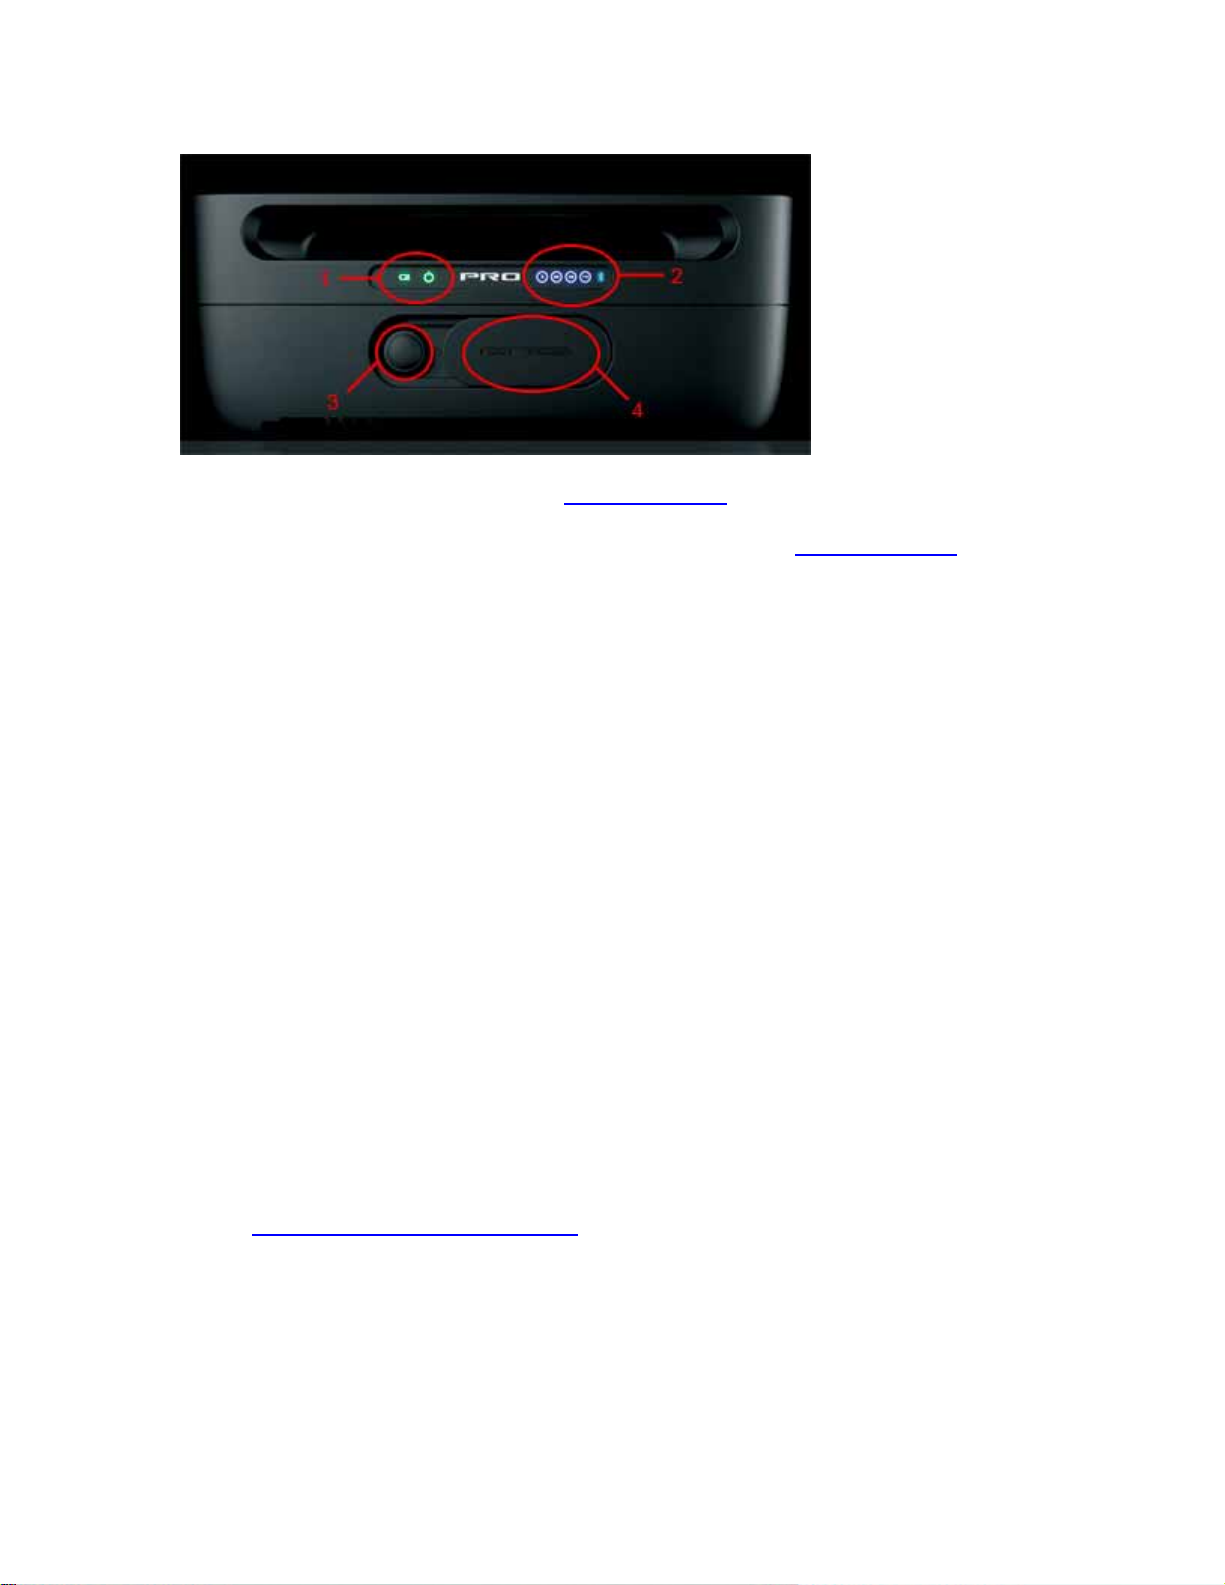
Front panel
16
Team2 SW help
1. Charger and power indicators (see Lights and sounds
2. Number indicators for connections and a Bluetooth logo (see Lights and sounds
)
)
3. Power button
4. Reset button (red), Ethernet port and power plug under the cover
To connect the main base station to the PC
1. Turn on your PC and open Team
2
software.
2. Plug the power cable into the main base station. NOTE that using power cable is only
allowed indoors. During outdoor use, use the battery as power source.
3. Connect the main base station to the PC with the network cable.
4. Switch on the main base station. Wait until (1) and (2) are lit (approx. 1. min).
When the lights (1) and (2) are lit on the main base station, it is ready to communicate with the
PC.
To rename the main base station
The main base station can be renamed. The base station name is the name of the base station's
wireless network.
1. Connect the main base station to PC
either with a Ethernet cable or wireless connection.
Wired (Ethernet cable) connection is recommended.
2. Run the Team
2
software.
3. Select Tools > Preferences from the main menu.
17

Team2 SW Help
4. Select the Base station/USB Dongle tab.
5. Select the main base station from the base station list. Note that if a secondary base
station is introduced to the system, the base station settings cannot be changed.
6. Type a base station name into the Name input box. The base station name is the name
of the base station's wireless network.
7. End by clicking Save.
To use secondary base stations
In order the secondary base stations work, the main base station must be on and connecte d to
the PC.
1. Introduce secondary base stations to the system
2. Turn on the main base station and connect it to the PC and the Team
.
2
software.
3. Turn on the secondary base station(s).
4. Wait until the light (1) is lit on the secondary base station(s) and light (4) is lit on the main
base station. If the secondary base stations are introduced to the system, they connect to
the main base station wirelessly, automatically.
Facts
• The base station is water-resistant so it can be used in the rain as long as the plug is in
place. Always use wireless connection and battery power in the rain!
• Allows you to monitor up to 80 players in real time at the same time.
• Built-in Wi-Fi (IEEE802.11b) so that wireless connection can be used between the
PC/PDA and the base station.
• Built-in Bluetooth (100 m (330 ft) range).
• RJ45 connector for Ethernet connection.
• Secondary base stations connect to the main base station wirelessly.
• Re-chargeable batteries with up to 12 hours stand alone use. Charging time 4 hours.
• AC adapter included. There are four different plugs for the AC adapter included. Choose
the correct plug (according to the country) and place it into the adapter.
18

Team2 SW help
• Operating temperature -20°C - +60°C (-4°F - +140°F).
• The stand must be used when base station is placed on moist ground, e.g., on a wet
lawn.
• When the base station is placed on the wall, the plug must be towards the ground,
especially outdoors.
• During charging the legs of the base station must be used because the bottom heats up.
The bottom of the base station heats up to 60°C (140°F).
• During charging, the maximum operating temperature is 45°C (113°F).
• It is recommended that the base station is placed 2 meters (6.5 ft) above the ground to
optimize the signal.
• Check the range of the signal if the base station is surrounded by metal.
• Wall mount and legs included.
• The sockets that are provided in the wall mounting kit are meant for concrete surfaces.
Charger
Charger is used to re-charge the batteries of the transmitters. The charger can be used only
indoors. Data transfer (transmitter settings, memory contents) between the transmitters and the
PC is enabled only when the transmitters are inserted into the charger.
To transmit data between transmitters and PC, follow these instructions:
1. Turn on your PC and open Team
2. Connect the base station to PC according to the instructions
3. Plug the power cable into the charger.
4. Insert transmitters into the charger. Wait until (3) is lit in the base station.
If the transmitter is inserted correctly into the charger, you hear one short sound and red led is on
for 5 seconds. Software's toolbar
shows in the upper right corner how many transmitters are
connected to the base station/USB dongle.
2
software.
.
19
Team2 SW Help
Facts
• Up to 10 transmitters can be inserted into the charger at a time.
• The transmitters are inserted into the charger in such a way that the led light is left on the
outside. The led is located next to the Polar Team
2
logo's letter R.
• Not water-resistant, for indoor use only.
• AC adapter included. There are four different plugs for the AC adapter included. Choose
the correct plug (according to the country) and place it into the adapter.
• Wall mount included.
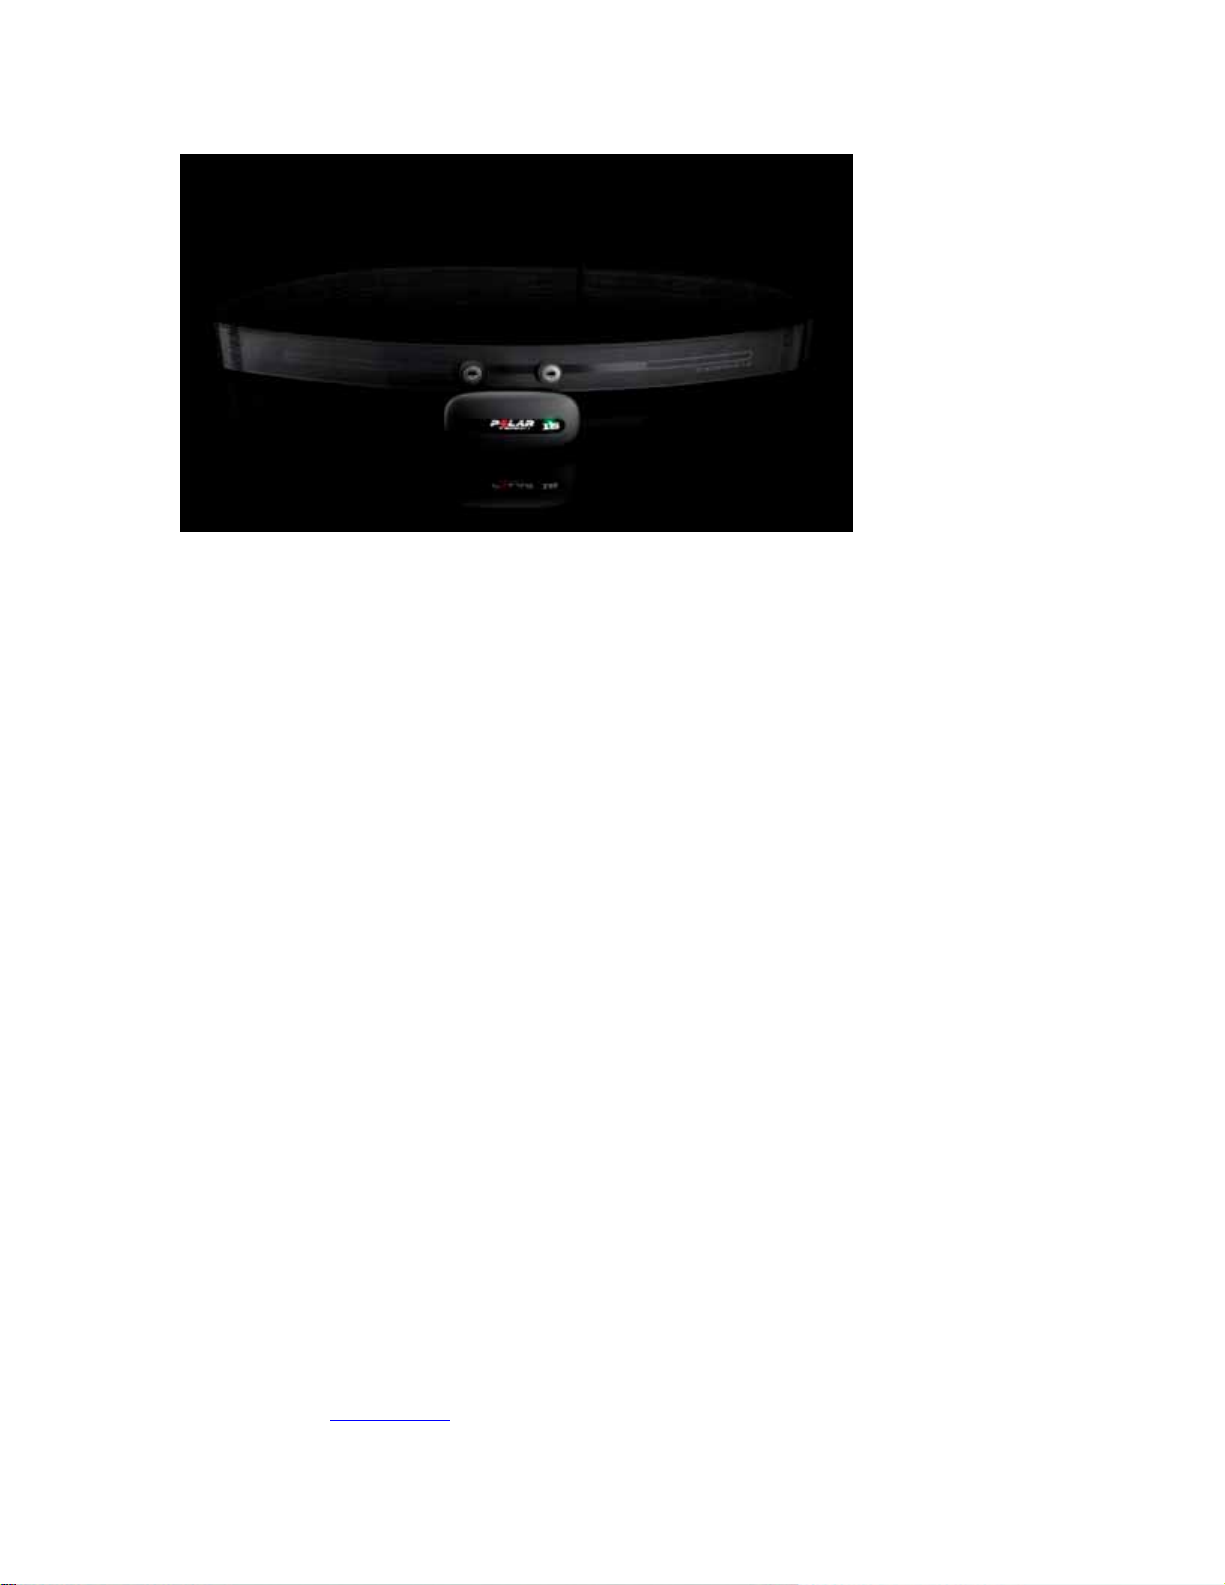
Transmitters and Straps
Transmitter records heart rate data and transmits it to the PC using Bluetooth. During trai ning the
heart rate data can also be monitored with a Polar wrist unit. During the training transmitter is
attached to the Team
Two electrode areas on the back of Team
water before use.
After training (or after the transmitter have been in off-season use) the data is transferred from
the transmitters to the PC. The transmitters must be inserted into the charger during the data
transfer.
2
transmitter strap and the strap is secured around player's chest. NOTE:
2
transmitter strap must be made wet under running
20
Team2 SW help
Facts
• Re-chargeable battery, Polar magnetic communication technology transmitter and built-in
Bluetooth.
• Battery lasts up to 80 hours (in online mode for 24 hours).
• Re-charge takes 24 hours.
• Transmitter memory can record 48 hours of data in online mode and up to 360 hours of
data in off-season mode.
• Training sessions shorter than 30 seconds are not recorded into the transmitter's memory.
• Bluetooth range is 100 meters (330 ft).
• Transmitter is water-resistant.
• When the transmitter is inserted into the charger, the data transfer from the transmitters
to the PC is enabled. Transmitter settings can be changed when the transmitters are in
the charger.
• The transmitter is in the sleep mode if it's not inserted into charger or attached to the
strap.
• If the data transmission ceases in the online mode, the transmitter searches for a new
connection automatically.
• For example, the following Polar training computers can be used with Team
2
transmitter:
RS400, RS300X, AXN500 and AXN700. Full list of compatible training computers can be
found at Polar website
.
21

Team2 SW Help
• Strap works only with Team
• See also Non-secured transmitter mode
For more information, see also How to use transmitters
2
transmitters.
.
.
Online and Off-Season Modes
Transmitter can be used in two different modes, Online and Off-season. HR data can be
monitored in both modes with a Polar wrist unit.
Online mode is used when training is monitored online using the base station. At that time, the
transmitter transfers heart rate data to the PC via the base station in addition to recording it. In
Online mode the battery lasts up to 30 hours.
Off-season mode can be used when training is not monitored online, e.g., during independent
training season. At the time, in order to save battery, the transmitter is not trying to send data to
PC but only records it. In this mode the battery can last up to 250 hours. Data can be transferred
to the PC afterwards.
The mode can be changed in two places:
• Team properties: Options > Team properties > Players tab > Transmitter tab
• Polar Team
More information about transmitter settings
2
Preferences: Tools > Preferences > Transmitters tab.
, see the software chapter.
Bluetooth USB Adapter (USB Dongle)
The USB dongle is plugged into the PC's USB port, and it can replace the base station when data
is transferred (transmitter settings, memory contents) between the transmitters and the PC. Data
can be transferred between the transmitters and PC via the USB dongle when the transmitters
are inserted into the charger. Online monitoring cannot be performed via the USB dongle.
The USB dongle has to be introduced to the system during wizard
won't work properly.
(or separately); otherwise it
22

Facts
• Built-in Bluetooth.
Team2 SW help
• Do not install the USB dongle drivers from the included CD! The USB dongle works
with the Team
the instructions
2
only if the drivers are not installed. If you have installed the drivers, follow
in the troubleshooting chapter.
• NOTE that in order the USB dongle to work properly, the discovery feature must be
turned on in the Windows settings.
Non-secured transmitter mode
Transmitters can be either in secured or non-secured mode. Basically these modes mean that:
• in secured mode the transmitter is hidden from Bluetooth devices that do not know it
exists, and
• in non-secured mode the transmitter is visible for all Bluetooth devices.
How to recognize:
The transmitter is in secured mode if only one short sound is heard when it is inserted into the
charger. The transmitter is in non-secured mode if three short sounds are heard when the
transmitter is inserted into the charger. See Lights and sounds
.
How to change:
By default, when a transmitter is inserted into the charger
it goes into secured mode. Change the
transmitter's mode to non-secured by removing the transmitter from the charger and inserting it
back within 3 seconds while the charger is powered on. If you have several transmitters that you
want to put into non-secured mode, the easier way is to insert all the transmitters into the charger
and then un-plug and re-plug the power cord within 3 seconds.
Usage:
23

Team2 SW Help
Normally the transmitters are always in secured mode. The non-secured mode is used only when:
• the base station combination has been changed and the transmitters must be
synchronized with the new combination, or
• the transmitter has been previously paired with a base station and is now paired with
another.
How to...
How to Connect Base Station to PC
The main base station can be connected to the PC with either a Ethernet cable or wireless
connection. When Team
to the PC with the Ethernet cable. The first base station you connect/introduce to the system
becomes the main base station.
2
is taken into use for the first time, the base station must be connected
If you are using more than one base station in the Team
2
system, only the main base station is
connected to the PC (either wireless or wired connection). The secondary base stations (one or
two) are connected to the main base station wirelessly and automatically after switching on. Light
(4) lights up on main base station when at least one secondary base station is connected to the
main base station.
To connect the main base station to the PC
1. Turn on your PC and open Team
2. Plug the power cable into the main base station. NOTE that using power cable is only
allowed indoors. During outdoor use, use the battery as power source.
3. Connect the main base station to the PC with the network cable.
4. Switch on the main base station. Wait until (1) and (2) are lit (approx. 1. min).
5. If you are using the base station with the Team
main base station is introduced to the system: go to software preferences (Tools >
Preferences > Base station/USB dongle tab). The main base station should be on the
base station list. If you want to change base station settings (name or wireless network
key), do it before introducing the secondary base stations.
2
software.
2
system for the first time, make sure the
When the lights (1) and (2) are lit on the main base station, it is ready to communicate with the
PC.
See also How to setup wireless connection
.
24
 Loading...