


Silicon Laboratories ToolStick User Manual
ToolStick Programming Adapter
OOLSTICK PROGRAMMING ADAPTER USER’S GUIDE
T
1. Handling Recommendations
The ToolStick Base Adapter and daughter cards are distributed without any protective plastics. To prevent damage
to the devices or the host PC, please take into consideration the following recommendations when using the
ToolStick:
Never connect or disconnect a daughter card to or from the ToolStick Base Adapter while the Base Adapter is
connected to a PC.
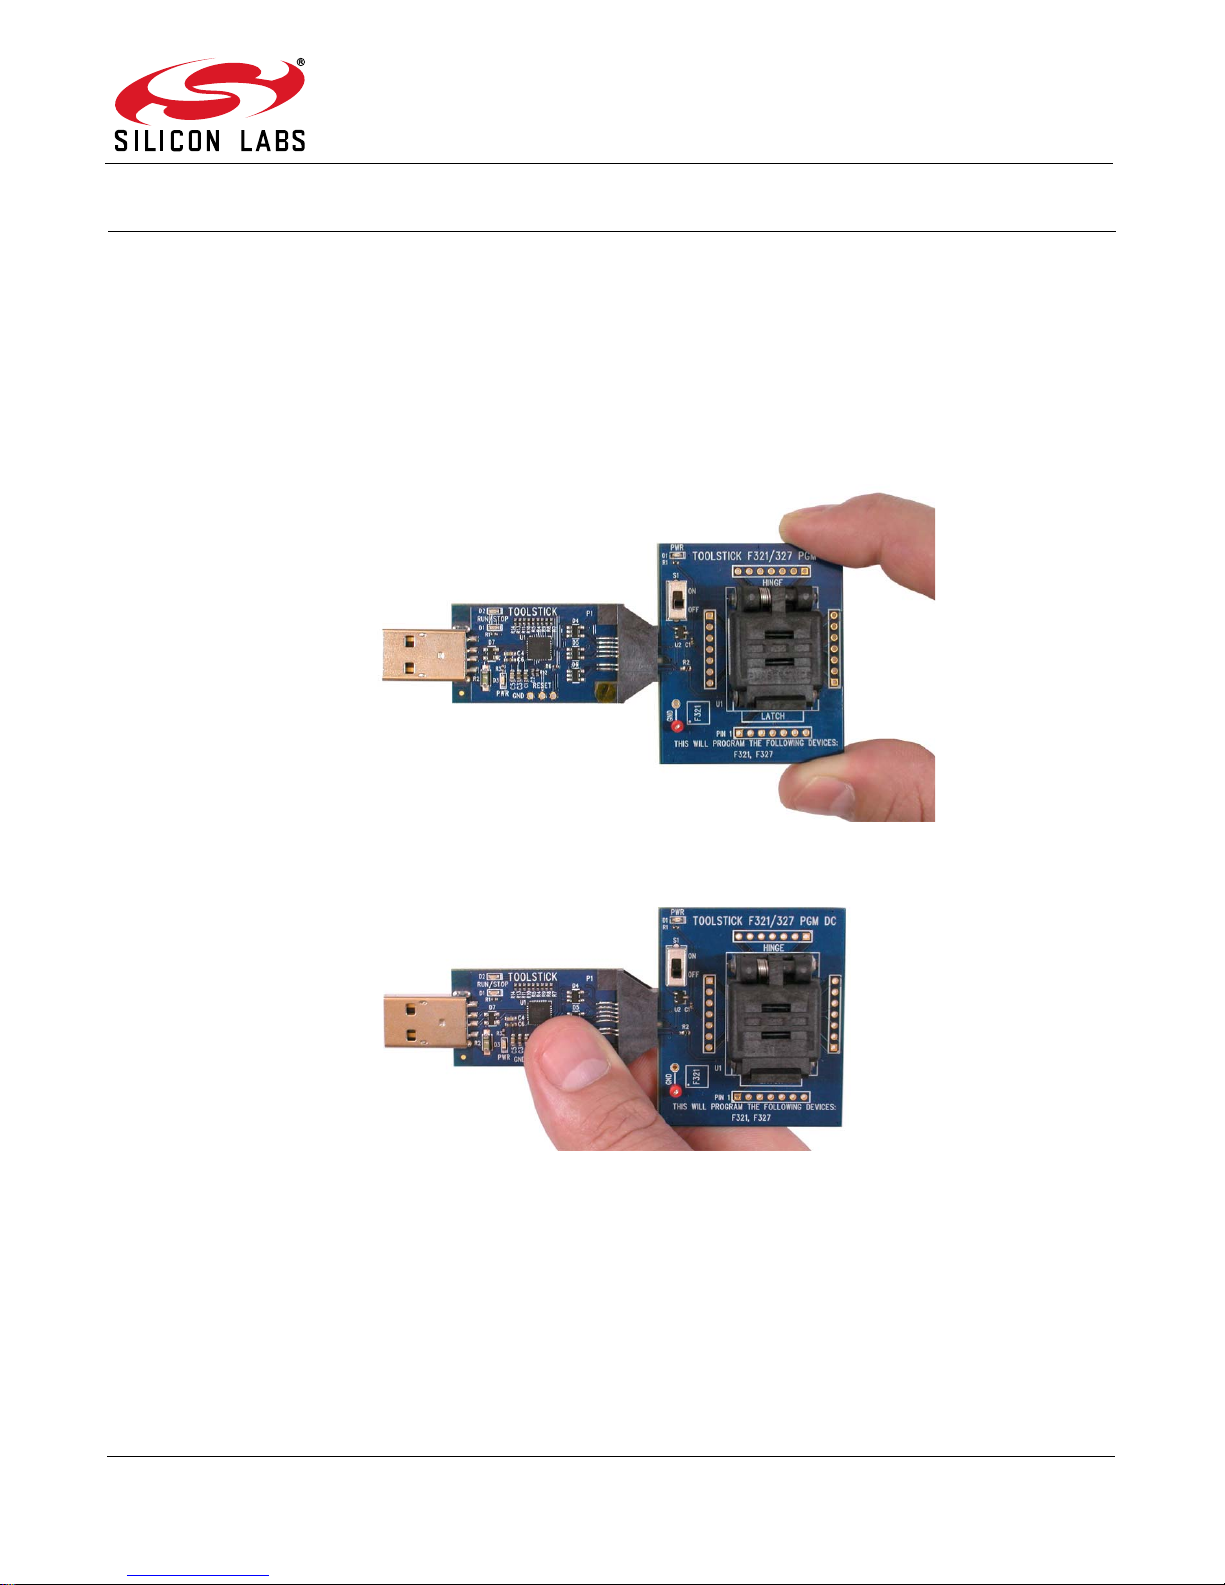
Always connect and disconnect the To olStick Base Adapter from the PC by holding the edges of the board.
Figure 1. Proper Method of Holding the ToolStick
Figure 2. Improper Method of Holding the ToolStick
Avoid directly touching any of the components other than the plastic connector or the socket.
2. Kit Contents
The ToolStick Programming Adapter package contains the following items:
ToolStick Base Adapter
To olStick Programming Adapter Daughter Card
USB extension cable
Rev. 0.3 9/08 Copyright © 2008 by Silicon Laboratories ToolStick Programming Adapter
ToolStick Programming Adapter
3. ToolStick Programming Adapter Overview
The ToolStick Programming Adapters are an ideal platform for programming Silicon Labs microcontrollers for
prototypes or for small volume produ ction. Their low cost and ease-of- use make them easy to integrate into an y
production flow.
The ToolStick programming platform consists of two components: the ToolStick Base Adapter and the
programming daughter card. The ToolStick Base Adapter provides a USB programming interface between a
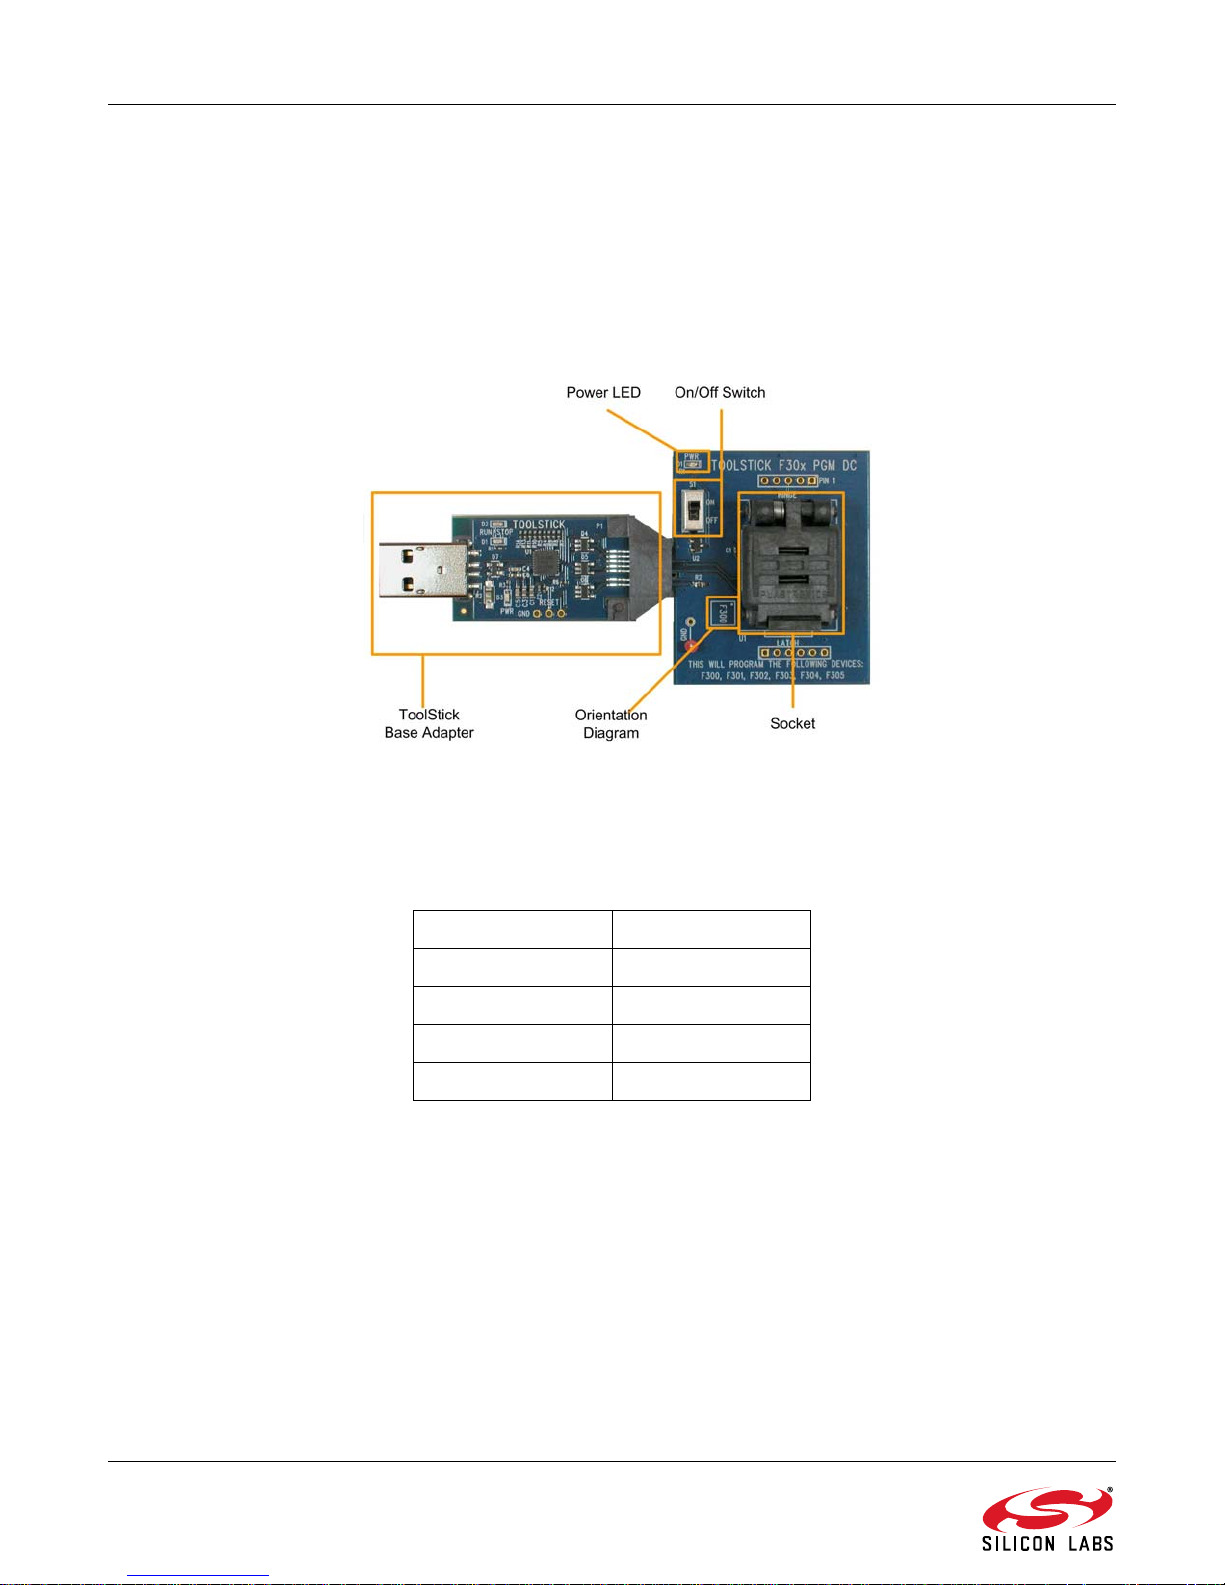
Windows PC and the target microcontroller . The socket daughter card includes the socket th at houses the device,
a power LED and an On/Off switch. Figure 3 shows an example daughter card.
Figure 3. Example Programming Daughter Card
Silicon Labs MCUs are available in different packages: QFN (MLP), QFP, TSSOP, and DIP. The daughter cards
use a different type of socket for each p acka ge type and each of these sock et types is rated for a minimum number
of insertions. Table 1 below shows the minimum guaranteed number of insertions for each socket type:
Table 1. Minimum Guaranteed Device Insertions Per Socket Type
Package Type Minimum Insertions
QFN—Clam-Shell 5,000
QFP—Top-loader 10,000
TSSOP—Top-loader 5,000
DIP - ZIP / ZIF 20,000
Check the ToolStick website (www.silabs.com/toolstick) to ensure that the daughter card is the appropriate one for
the device being programmed. Inserting a device into the wrong socket could damage the device.
4. Requirements
The following are required to use the ToolStick programming platform
PC running Windows 2000 or later
Silicon Labs MCU Production Programmer
Tweezers
The Silicon Labs MCU Production Programmer is the PC application that is used to download the code to the
target device. This program is available at: https://www.silabs.com/products/mcu/Pages/SoftwareDownloads.aspx.
The source code for this program is available to enable development of custom programming applications.
2 Rev. 0.3
ToolStick Programming Adapter
5. Software Installation Instructions
This section describes how to download and install the Silicon Labs MCU Production Programmer. This program is
used to download the firmware to the target MCU from a Windows PC.
Step 1. Download the MCU Production Programmer from
https://www.silabs.com/products/mcu/Pages/SoftwareDownloads.aspx.
Step 2. Install the program by running the executable and following the on-screen
instructions.
Step 3. Start the program from Start All Programs Silicon Laboratories MCU
Production Programmer.
Step 4. Connect the ToolStick to the socket daughter card, and connect it to the PC.
Step 5. Go to Program Menu Configure Programming Information.
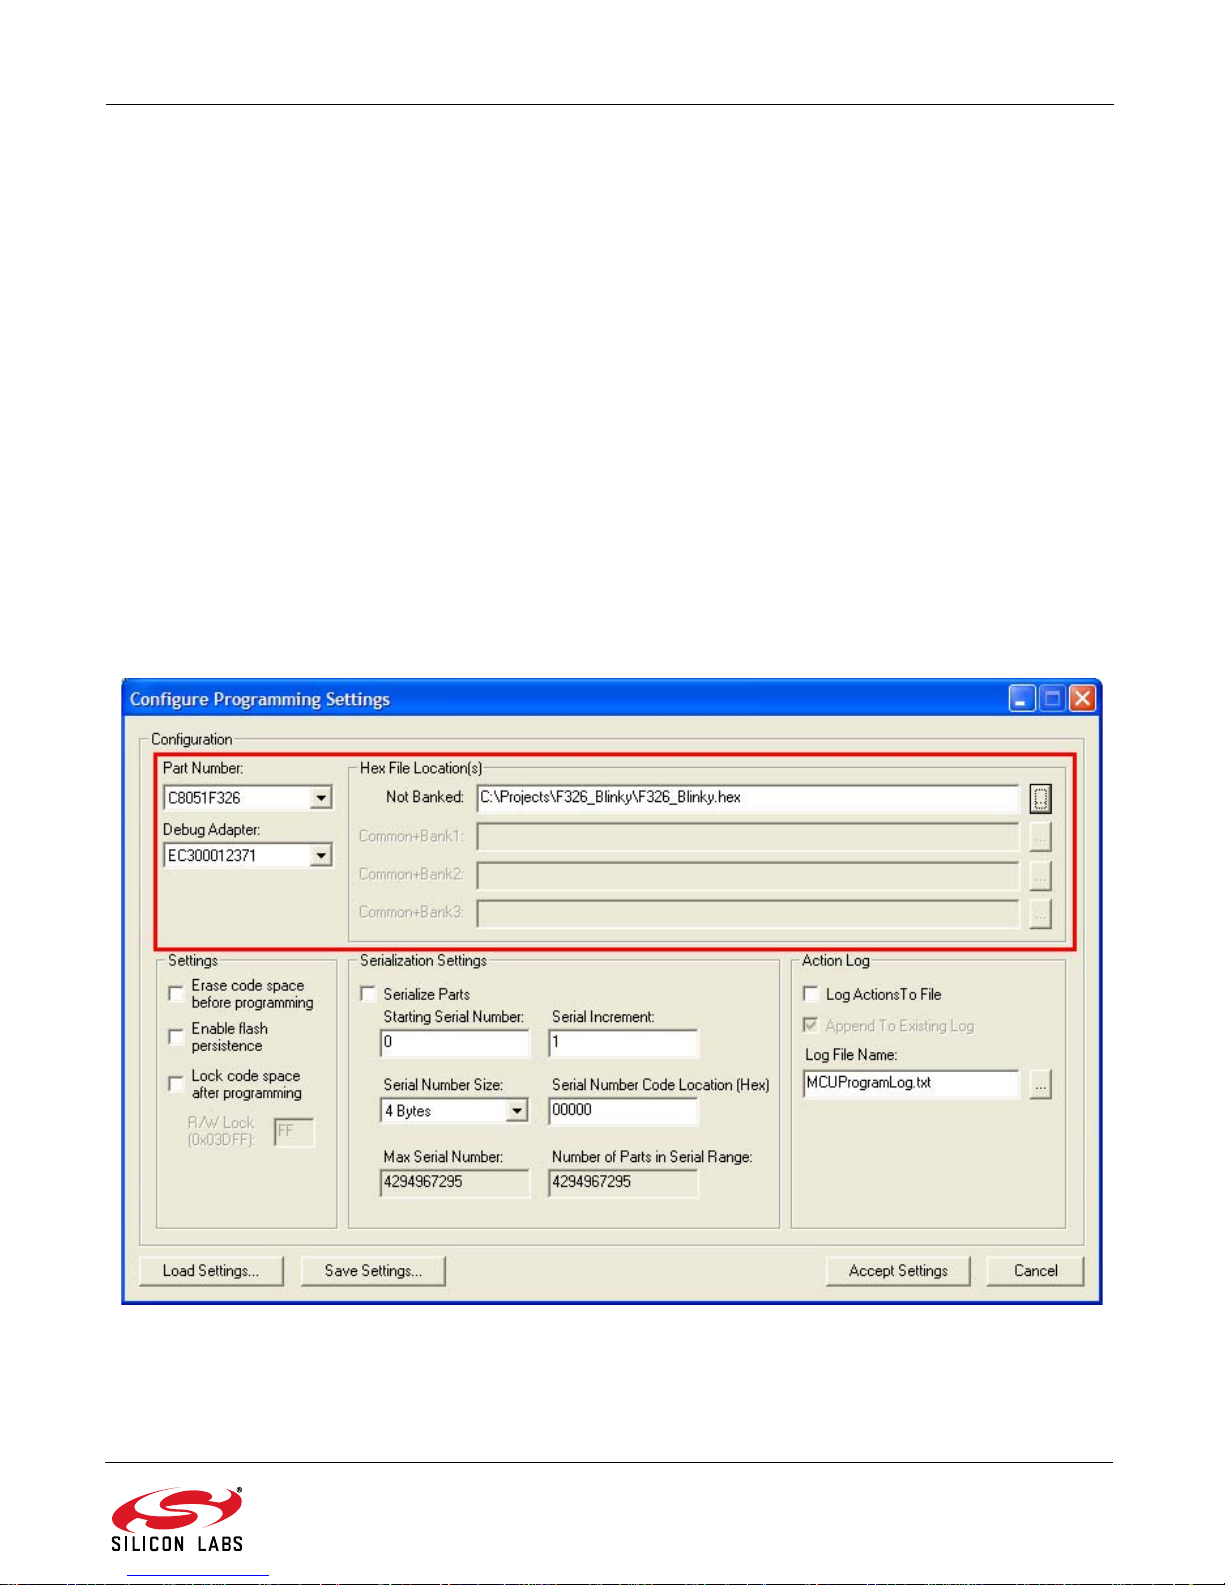
Step 6. Configure the required programming settings.
The required settings are Part Number, Debug Adapter, and Hex File. Configuration of the other,
optional settings should be also done during this step.
Note: The ToolStick might no t a ppe ar as a "De bu g Adap ter" selection until the MCU is inserted into the
socket and the switch on the daughter card is set to the ON position. See Section 6 for h ardware usage
instructions.
Figure 4. Configure Programming Settings
Step 7. Save these settings to a file using the "Save Settings" button.
Whenever the program is started, th e settings saved in S tep 7 ca n be restored using the "Load Setting s"
button in this same menu.
Rev. 0.3 3
ToolStick Programming Adapter
6. Usage Instructions
This section describes how to use the ToolStick Programming Adapter. It is recommended to use a clean
workspace that includes a level surface to place the ToolStick.
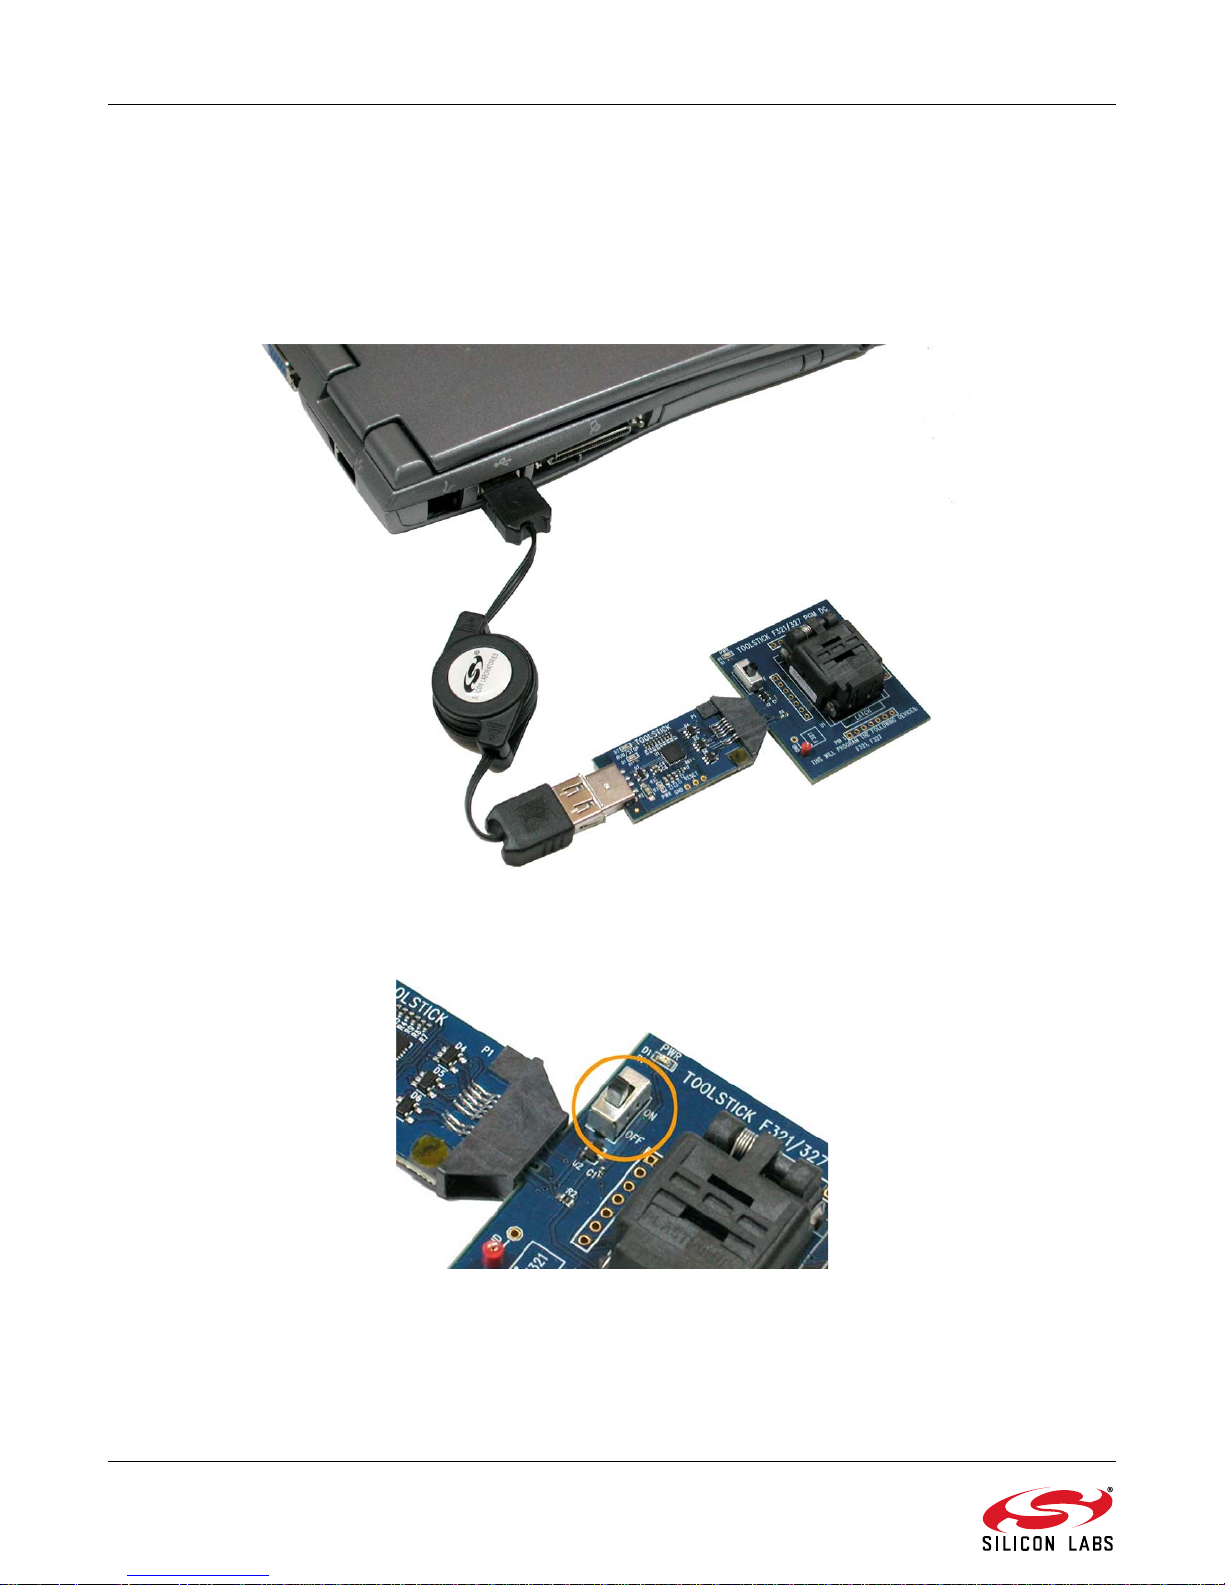
Step 1. Connect the ToolStick Base Adapter and daughter card to the PC.
The ToolStick Programming Adapter kit includes a USB extension cable that can be used to make it
easier to place the Base Adapter and daughter card on a level surface.
Figure 5. ToolStick Socket Platform Connected to PC
Step 2. Move the switch on the daughter card to the OFF position.
Figure 6. Switch on Daughter Card Moved to the OFF Position
4 Rev. 0.3