

Page 1
Silicon Graphics®
C220 Flat Diamondtron® Color Display
User Guide
Page 2

860-0367-001
Page 3

TCO’95
Congratulations! You have just purchased a TCO’95
approved and labeled product! Your choice has
provided you with a product developed for
professional use. Your purchase has also contributed
to reducing the burden on the environment and also,
to the further development of environmentally
adapted electronics products.
Why do we have environmentally labelled computers?
In many countries, environmental labelling has become an
established method for encouraging the adaptation of goods and
services to the environment. The main problem, as far as
computers and other electronics equipment are concerned, is that
environmentally harmful substances are used both in the products
and during the manufacturing. Since it has not been possible for
the majority of electronics equipment to be recycled in a
satisfactory way, most of these potentially damaging substances
sooner or later enter Nature.
There are also other characteristics of a computer, such as
energy consumption levels, that are important from the viewpoints
of both the work (Internal) and natural (external) environments.
Since all methods of conventional electricity generation have a
negative effect on the environment (acidic and climate-influencing
emissions, radioactive waste, etc.), it is vital to conserve energy.
Electronics equipment in offices consume an enormous amount
of energy since they are often left running continuously.
What does labelling involve?
This product meets the requirements for the TCO’95 scheme
which provides for international and environmental labelling of
personal computers. The labelling scheme was developed as a
joint effort by the TCO (The Swedish Confederation of
Professional Employees), Naturskyddsforeningen (The Swedish
Society for Nature Conservation) and NUTEK (The National Board
for Industrial and Technical Development in Sweden).
The requirements cover a wide range of issues: environment,
ergonomics, usability, emission of electrical and magnetic fields,
energy consumption and electrical and fire safety.
The environmental demands concern restrictions on the presence
and use of heavy metals, brominated and chlorinated flame
retardants, CFCs (freons) and chlorinated solvents, among other
things. The product must be prepared for recycling and the
manufacturer is obliged to have an environmental plan which must
be adhered to in each country where the company implements its
operational policy. The energy requirements include a demand
that the computer and/or display, after a certain period of
inactivity, shall reduce its power consumption to a lower level in
one or more stages. The length of time to reactivate the computer
shall be reasonable for the user.
Labelled products must meet strict environmental demands, for
example, in respect of the reduction of electric and magnetic
fields, physical and visual ergonomics and good usability.
TCO’95 is a co-operative project between TCO (The Swedish
Confederation of Professional Employees),
Naturskyddsforeningen (The Swedish Society for Nature
Conservation) and NUTEK (The National Board for Industrial and
Technical Development in Sweden).
Environmental Requirements
Brominated flame retardants
Brominated flame retardants are present in printed circuit boards,
cables, wires, casings and housings. In turn, they delay the spread
of fire. Up to thirty percent of the plastic in a computer casing can
consist of flame retardant substances. These are related to another
group of environmental toxins, PCBs, which are suspected to give
rise to similar harm, including reproductive damage in fisheating
birds and mammals, due to the bio-accumulative* processes.
Flame retardants have been found in human blood and
researchers fear that disturbances in foetus development may
occur.
TCO’95 demand requires that plastic components weighing more
than 25 grams must not contain organically bound chlorine and
bromine.
Lead**
Lead can be found in picture tubes, display screens, solders and
capacitors. Lead damages the nervous system and in higher
doses, causes lead poisoning.
TCO’95 requirement permits the inclusion of lead since no
replacement has yet been developed.
Cadmium**
Cadmium is present in rechargeable batteries and in the
colourgenerating layers of certain computer displays. Cadmium
damages the nervous system and is toxic in high doses.
TCO’95 requirement states that batteries may not contain more
than 25 ppm (parts per million) of cadmium. The colourgenerating
layers of display screens must not contain any cadmium.
Mercury**
Mercury is sometimes found in batteries, relays, switches, and
back-light systems, Mercury damages the nervous system and is
toxic in high doses.
TCO’95 requirement states that batteries may not contain more
than 25 ppm (parts per million) of mercury. It also demands that
no mercury is present in any of the electrical or electronics
components concerned with the display unit, except the back-light
system.
CFCs (freons)
CFCs (freons) are sometimes used for washing printed circuit
boards and in the manufacturing of expanded foam for packaging.
CFCs break down ozone and thereby damage the ozone layer in
the stratosphere, causing increased reception on Earth of
ultraviolet light with consequent increased risks of skin cancer
(malignant melanoma).
The relevant TCO’95 requirement; Neither CFCs nor HCFCs may
be used during the manufacturing of the product or its packaging.
*Bio-accumulative is defined as substances which accumulate
within living organisms.
**Lead, Cadmium and Mercury are heavy metals which are
Bio-accumulative.
To obtain complete information on the environmental criteria
document, order from:
TCO Development Unit
SE-114 94 Stockholm
SWEDEN
FAX Number: +46 8 782 92 07
E-mail (Internet): [email protected]
You may also obtain current information on TCO’95 approved
and labelled products by visiting their website at:
http://www.tcodevelopment.com
Page 4

Index
Safety Instruction ........................English-1
Warning.......................................English-1
Caution........................................English-1
Contents......................................English-2
Quick Start ..................................English-3
Controls.......................................English-4
Recommended use .....................English-7
Specifications ............................. English-9
Features ....................................English-10
Monitor Troubleshooting ............English-11
Page 5

Page 6
English
English-1
TO PREVENT FIRE OR SHOCK HAZARDS, DO NOT EXPOSE THIS UNIT TO RAIN OR MOISTURE. ALSO, DO NOT
USE THIS UNIT’S POLARIZED PLUG WITH AN EXTENSION CORD RECEPTACLE OR OTHER OUTLETS UNLESS
THE PRONGS CAN BE FULLY INSERTED.
REFRAIN FROM OPENING THE CABINET AS THERE ARE HIGH VOLTAGE COMPONENTS INSIDE. REFER
SERVICING TO QUALIFIED SERVICE PERSONNEL.
WARNING
CAUTION
Canadian Department of Communications Compliance Statement
DOC: This Class B digital apparatus meets all requirements of the Canadian Interference-Causing Equipment Regulations.
C-UL: Bears the C-UL Mark and is in compliance with Canadian Safety Regulations according to CSA C22.2 #950.
FCC Information
1.Use the attached specified cables with the color monitor so as not to interfere with radio and television reception.
(1) Please use the supplied power cable or equivalent to ensure FCC compliance.
(2) Shielded video type signal cable.
Use of other cables and adapters may cause interference with radio and television reception.
2.
This equipment has been tested and found to comply with the limits for a Class B digital device, pursuant to part 15 of the FCC Rules.
These limits are designed to provide reasonable protection against harmful interference in a residential installation. This equipment
generates, uses, and can radiate radio frequency energy, and, if not installed and used in accordance with the instructions, may
cause harmful interference to radio communications. However, there is no guarantee that interference will not occur in a particular
installation. If this equipment does cause harmful interference to radio or television reception, which can be determined by turning
the equipment off and on, the user is encouraged to try to correct the interference by one or more of the following measures:
• Reorient or relocate the receiving antenna.
• Increase the separation between the equipment and receiver.
• Connect the equipment into an outlet on a circuit different from that to which the receiver is connected.
• Consult your dealer or an experienced radio/TV technician for help.
If necessary, the user should contact the dealer or an experienced radio/television technician for additional suggestions. The user
may find the following booklet, prepared by the Federal Communications Commission, helpful: “How to Identify and Resolve RadioTV Interference Problems.” This booklet is available from the U.S. Government Printing Office, Washington, D.C., 20402, Stock No.
004-000-00345-4.
No user serviceable parts inside. Do not attempt to modify this equipment. If modified, your authority to operate this equipment might
be voided by FCC.
Safety Instruction
RISK OF ELECTRIC SHOCK • DO NOT OPEN
CAUTION: TO REDUCE THE RISK OF ELECTRIC SHOCK, DO NOT REMOVE COVER (OR BACK). NO USER
SERVICEABLE PARTS INSIDE. REFER SERVICING TO QUALIFIED SERVICE PERSONNEL.
This symbol warns user that uninsulated voltage within the unit may have sufficient magnitude to cause
electric shock. Therefore, it is dangerous to make any kind of contact with any part inside this unit.
This symbol alerts the user that important literature concerning the operation and maintenance of this unit
has been included. Therefore, it should be read carefully in order to avoid any problems.
E
NERGY STAR
®
is a U.S. registered trademark. All other brands and product names are trademarks or registered trademarks of
their respective owners.
As an ENERGY STAR Partner, Silicon Graphics, Inc. have determined that this product meets the ENERGY STAR guidelines for
energy efficiency.
The ENERGY STAR emblem does not represent EPA endorsement of any product or service.
All other trademarks mentioned in this manual are the property of their respective owners.
Page 7
English-2
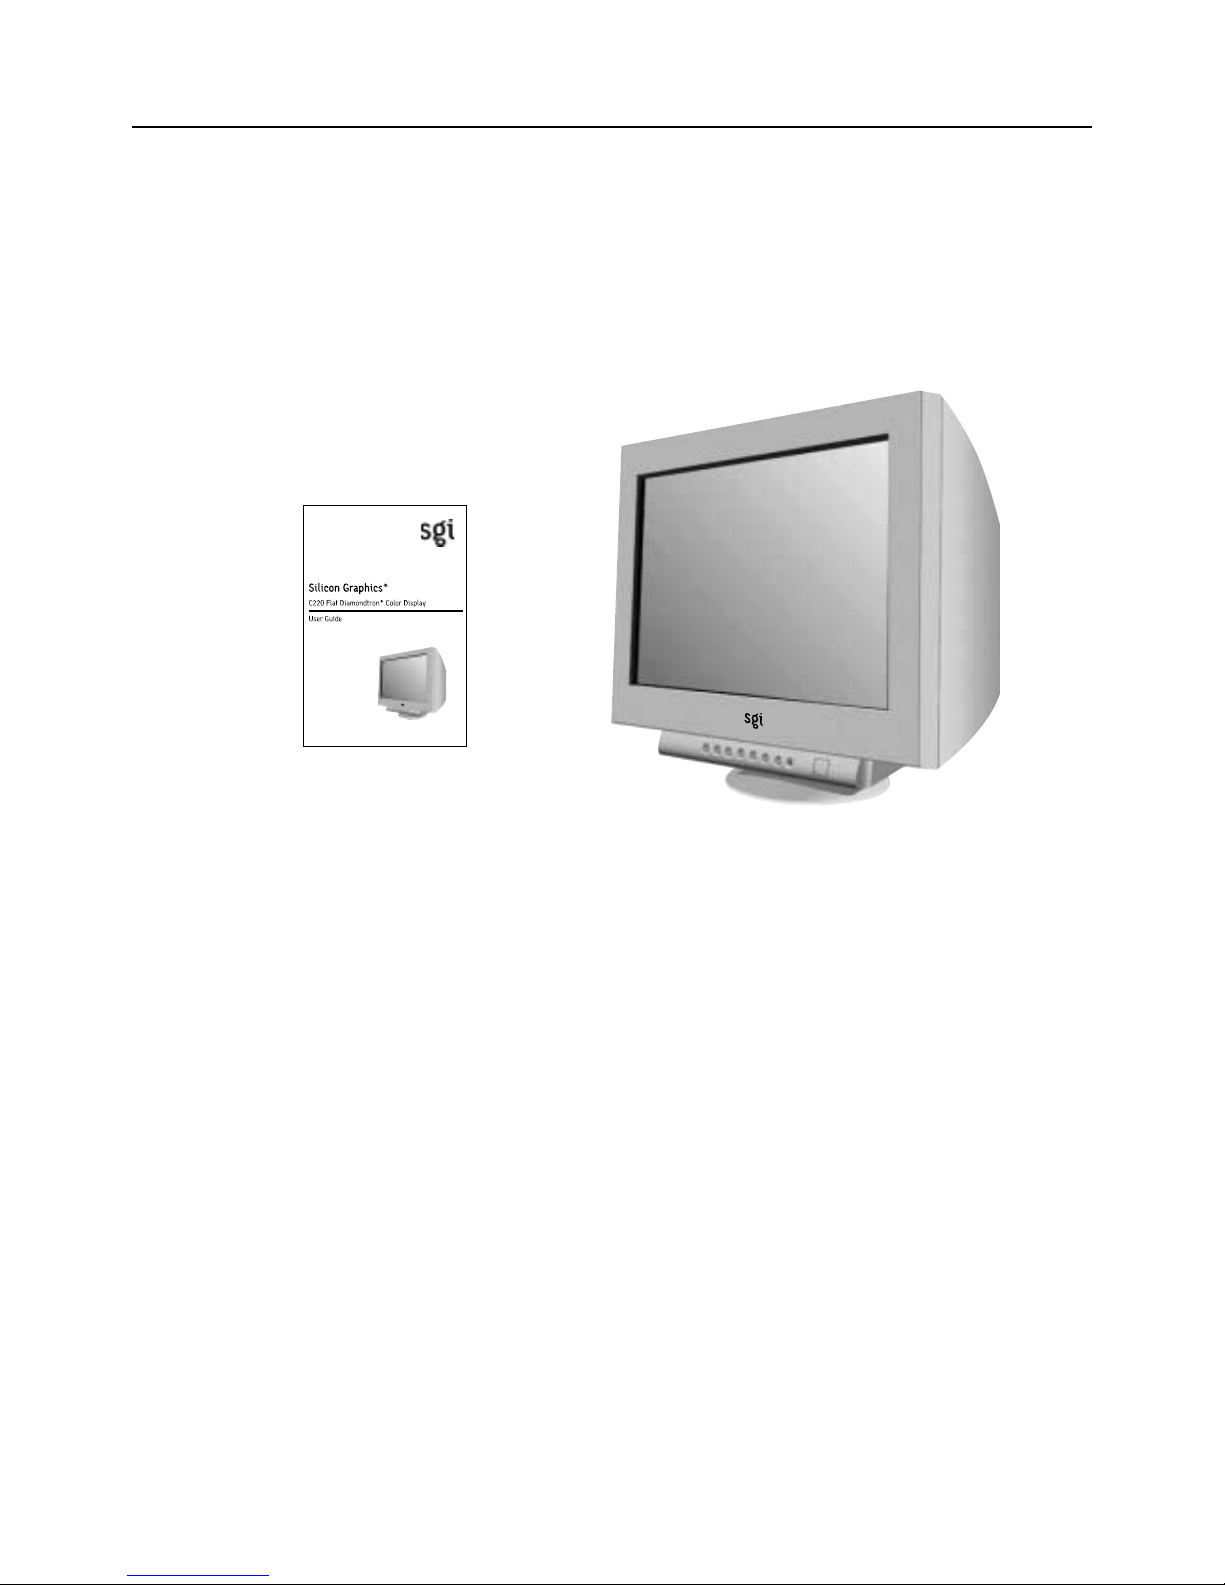
Your new display box* should contain the following:
• Display with tilt/swivel base
• User’s Manual
The Power and Video cables are provided with your SGI system.
* Remember to save your original box and packing material to transport or ship the monitor.
Contents
User’s Manual
Page 8
English
English-3
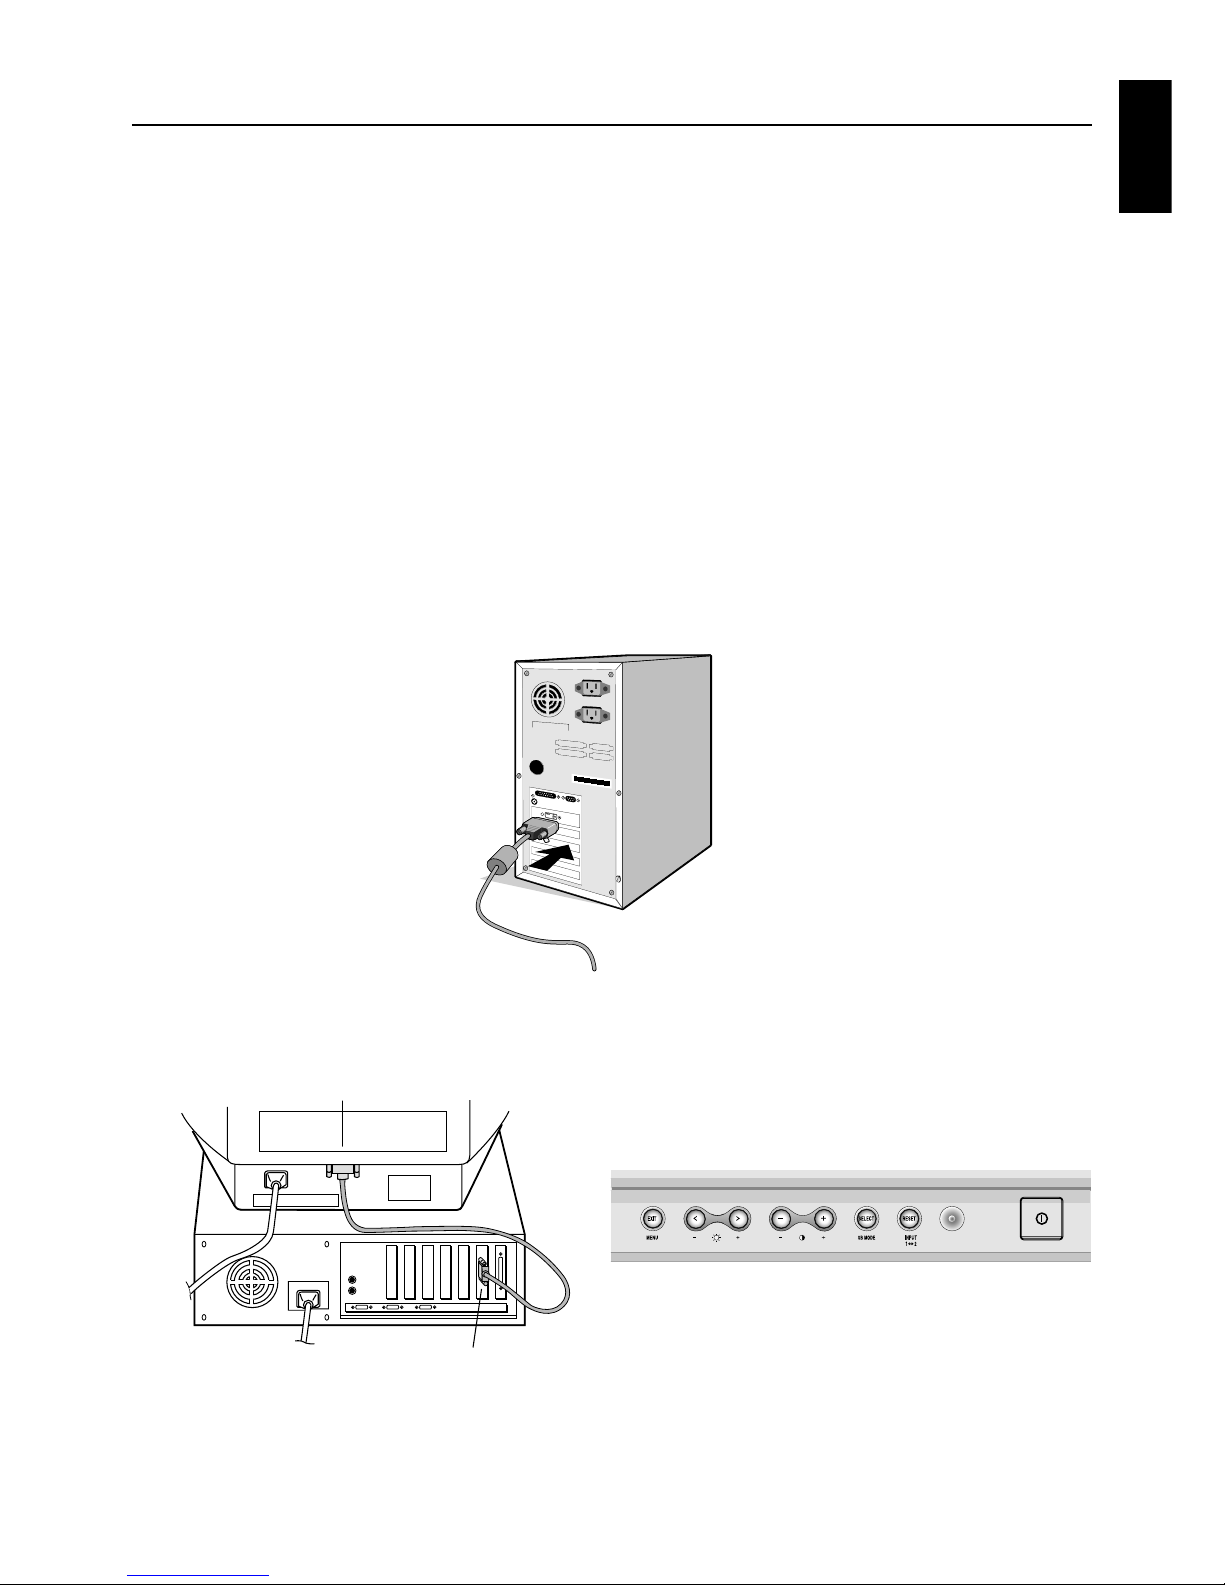
To attach the monitor to your system, follow these instructions:
1. Turn off the power to your computer.
2. Connect one end of the signal cable to the connector of the display card in your system (Figure A.1).
Tighten all screws.
3. Connect the other end of signal cable connector on the back of the monitor.
NOTE: Incorrect cable connections may result in irregular operation, damage display quality/components of CRT monitor.
4. Connect one end of the power cord to the AC inlet on the back of the monitor and the other end to the power outlet (Figure
B.1).
5. Turn on the monitor (Figure C.1).
6. Turn on the Computer.
NOTE: If you have any problems, please refer to the Troubleshooting section of this User’s Manual.
Figure A.1
Figure C.1
Figure B.1
Quick Start
15-pin mini D-SUB
Detachable Signal Cable
Page 9

English-4
Controls
OSD (On-Screen Display) control buttons on the front of the monitor function as follows:
Main Menu Sub-Menu
EXIT Exits the OSD menu. Exits to the OSD controls
main menu.
Note : Deactivates the OSD menu and activates the OSD menu when the OSD is turned off.
CONTROL Moves the highlighted Moves the highlighted area
area left/right to select left/right to select one of the
one of the sub-menu. controls.
Note : When the OSD menu is off, it acts as a Hot key for Brightness.
CONTROL Has no function Moves the bar in the – or +
+/– direction to decrease or
increase the adjustment.
Note : Deactivates the OSD menu and to adjust Contrast with Hot key set “ON”
SELECT/ Enters sub-menu. Has no function.
SB MODE
When the OSD is off, it will act as the SuperBright (SB) function key. User can select between SB MODE
OFF, SB MODE1, and SB MODE2. The first time this key is pressed, the current SB Mode is indicated.
Within a 3 second window, if this key is selected again, the SB MODE will change to the next SB MODE. For
example, the current mode is SB MODE OFF, the key is pressed twice within a 3 second time frame, the SB
MODE will change to SB MODE1 and so on. The color temperature at each SB Mode is adjusted by appropri
ate color control except for the sRGB mode whose color setting cannot be adjusted. When the unit is turned
off, it will reset to SB off mode.
RESET Resets all the controls within the Resets the highlighted control to
highlighted menu to the factory the factory setting.
setting.
Note: Deactivates the OSD menu and Hot Key for input connector (INPUT 1 2).
Note: When RESET is pressed in the main and sub-menu, a warning window will appear allowing you to
select the reset function.
Brightness/Contrast Controls
Brightness: Adjusts the overall image and background screen brightness.
Contrast: Adjusts the image brightness in relation to the background.
Degauss: Eliminates the buildup of stray magnetic fields which alter the correct scan of the electron beams and affect the
purity of the screen colors, focus and convergence. When activated, your screen image will jump and waver a bit as the
screen is demagnetized.
NOTE: Please allow a minimum of 20 minutes to elapse between uses of the Degauss Control.
Constant Brightness: Sustains the brightness and screen color levels consistently over the normal life of the monitor. The
Constant Brightness function requires a 30 minute warm-up of the monitor before the feature is fully functional.
Size and Position Controls
Auto Adjust: Automatically adjust the horizontal and vertical size and position settings for the applicable timing signal.
NOTE: Auto Adjust is unavailable with no image signal or narrow size of image signal input.
Left/Right: Moves the image horizontally (left or right).
Down/Up: Moves the image vertically (up or down).
Narrow/Wide: Decreases or increases the horizontal size of the image.
Short/Tall: Decreases or increases the vertical size of the image.
Page 10
English
English-5
Color Control System
Color presets 1 through 5 selects the desired color setting. The bar is replaced by the color setting choice from 1, 2, 3, sRGB,
5. Each color setting is adjusted at the factory to the stated Kelvin degrees. If a setting is adjusted, the name of the setting will
change from Kelvin to Custom.
NOTE: sRGB does not allow you to adjust each color.
Red, Green, Blue: Color Control System decreases or increases the monitor’s red, green or blue color guns depending upon
which is selected. The change in color will appear on screen and the direction (decrease or increase) will be shown by the
bars.
NOTE: sRGB does not allow you to control the Color, Brightness and Contrast.
Geometry Controls
Geometry Controls Menu
The Geometry controls allow you to adjust the curvature or angle of the sides of your display.
In/Out (pincushion): Decreases or increases the curvature of the sides either inward or outward.
Left/Right (pincushion balance): Decreases or increases the curvature of the sides either to the left or right.
Tilt (parallelogram): Decreases or increases the tilt of the sides either to the left or right.
Align (trapezoidal): Decreases or increases the bottom of the screen to be the same as the top.
Rotate (raster rotation): Rotates the entire display clockwise or counterclockwise.
Corner Correction: Allows you to adjust the geometry of the corners of your display — Top, Top Balance, Bottom or
Bottom Balance.
Tools 1
Moiré Canceler: Moiré is a wavy pattern which can sometimes appear on the screen. The pattern is repetitive and superim-
posed as rippled images. When running certain applications, the wavy pattern is more evident than in others. To reduce moiré,
adjust the level by using the –/+ CONTROL buttons.
Convergence: Aligns all three colors (R,G,B) to form a single color (white). The purpose of this control is to ensure that a white
line drawn on the screen is as crisp and clear as possible.
• Use the CONVERGENCE (HOR.) control to adjust the alignment of the white lines in the left/right direction.
• Use the CONVERGENCE (VER.) control to adjust the alignment of the white lines in the up/down direction.
• Use the V-CONVERGENCE-TOP control to adjust the alignment of the top area of the white line in the up/down direction.
• Use the V-CONVERGENCE-BOTTOM control to adjust the alignment of the bottom area of the white line in the up/down
direciton.
Linearity: This selection allows you to adjust the spacing of the area on the screen. The purpose of this control is to ensure that a
one-inch circle is a true one-inch circle wherever it is on the screen. The best way to determine the vertical linearity is as follows:
• Draw equally spaced horizontal lines using a drawing application that has a ruler.
• Use the Vertical Balance control to adjust the lines near the top and bottom of your screen.
• Use the LINEARITY (VER.) control to adjust the spacing between the lines near the center and top of your screen.
Corner Purity Control: Eliminates picture impurities that may result from the earth’s magnetic field. While in the sub-menus
(TL: Top Left, TR: Top Right, BL: Bottom Left, BR: Bottom Right or L/R: Left/Right, use the –/+ control buttons to fine tune
the Corner Purity corrections.
NOTE: We recommend that you perform Corner Purity correction while running a typical application such as a
spreadsheet or text document.
Controls (continued)
Page 11
English-6
Factory Preset: Selecting Factory Preset allows you a reset most OSD control settings back to the factory settings. A warning
statement will appear to confirm that you do want to reset ALL settings. Individual settings can be reset by highlighting the
control to be reset and pressing the RESET button.
Information
Display Mode: Indicates the current mode and frequency setting of the monitor.
Monitor Info: Indicates the model and serial numbers of your monitor.
Tools 2
Language: OSD controls menus are available in 6 languages.
OSD Position: You can choose where you would like the OSD controls menu to appear on your screen. Selecting OSD
Position allows you to manually adjust the OSD controls menu left, right, up or down.
OSD Turn Off: The OSD controls menu will stay on as long as it is in use. In the OSD Turn Off sub-menu, you can select how
long the monitor waits after the last touch of a button for the OSD controls menu to disappear. The preset choice is in 5
seconds step between 5–120 seconds.
OSD Lock Out: This control completely locks out access to all OSD controls functions except Brightness and Contrast. When
attempting to activate OSD controls while in the lock out mode, a screen will appear indicating that OSD controls are locked
out. To activate the OSD Lock Out function, press SELECT, then press + and hold down simultaneously. To deactivate the
OSD Lock Out, press SELECT, then press + and hold down simultaneously.
Off Mode: Enable: The Off Mode works normally and all stages of energy savings are utilized.
Disable: The Off Mode reset
NOTE:For standard systems and graphics boards, keep the factory setting at ENABLE.
NOTE:Don’t keep the monitor on when ‘No Signal’ is applied. This could cause image burn in on the screen due to the ‘No
Signal’ message being displayed.
Clamp Pulse Position Control: Operating your monitor at a nonstandard timing may cause images to appear darker than
normal or have color distortion. Use of the Clamp Pulse Position control will adjust images to their normal state.
Hot Key: This selection allows you to use as brightness control and –/+ as contrast control.
Controls (continued)
Page 12
English
English-7
Safety Precautions and Maintenance
FOR OPTIMUM PERFORMANCE, PLEASE NOTE THE
FOLLOWING WHEN SETTING UP AND USING THE
COLOR MONITOR:
• DO NOT OPEN THE MONITOR. There are no user serviceable parts inside and opening or removing covers may expose
you to dangerous shock hazards or other risks. Refer all servicing to qualified service personnel.
• Do not spill any liquids into the cabinet or use your monitor near water.
• Do not insert objects of any kind into the cabinet slots, as they may touch dangerous voltage points,which can be harmful
or fatal or may cause electric shock,fire or equipment failure.
• Do not place any heavy objects on the power cord. Damage to the cord may cause shock or fire.
• Do not place this product on a sloping or unstable cart, stand or table, as the monitor may fall, causing serious damage to
the monitor.
• Keep the monitor away from high capacity transformers, electric motors and other devices such as external speakers or
fans, which may create strong magnetic fields.
• If possible, position the monitor so that it is facing the east to minimise the effects of the earth’s magnetic field.
• Changing the direction of the monitor while it is powered on may cause image discolouration. To correct this, turn the
monitor off for 20 minutes before powering it back on.
• When operating the monitor with its AC 100-120/220-240V worldwide power supply, use a power supply cord that
matches the power supply voltage of the AC power outlet being used. The power supply cord you use must have been
approved by and comply with the safety standards of your country. (Type H05VV-F 3G 0.7 mm
2
should be used in
Europe)
• In UK, use a BS-approved power cord with molded plug having a black (5A) fuse installed for use with this monitor. If a
power cord is not supplied with this monitor, please contact your supplier.
Immediately unplug your monitor from the wall outlet and refer servicing to qualified service personnel under the following
conditions:
• When the power supply cord or plug is damaged.
• If liquid has been spilled, or objects have fallen into the monitor.
• If the monitor has been exposed to rain or water.
• If the monitor has been dropped or the cabinet damaged.
• If the monitor does not operate normally by following operating instructions.
• Allow adequate ventilation around the monitor so that heat can properly dissipate. Do not block
ventilated openings or place the monitor near a radiator or other heat sources. Do not put anything on
top of monitor.
• The power cable connector is the primary means of detaching the system from the power supply. The
monitor should be installed close to a power outlet which is easily accessible.
• Handle with care when transporting. Save packaging for transporting.
CORRECT PLACEMENT AND ADJUSTMENT OF THE MONITOR
CAN REDUCE EYE, SHOULDER AND NECK FATIGUE. CHECK
THE FOLLOWING WHEN YOU POSITION THE MONITOR:
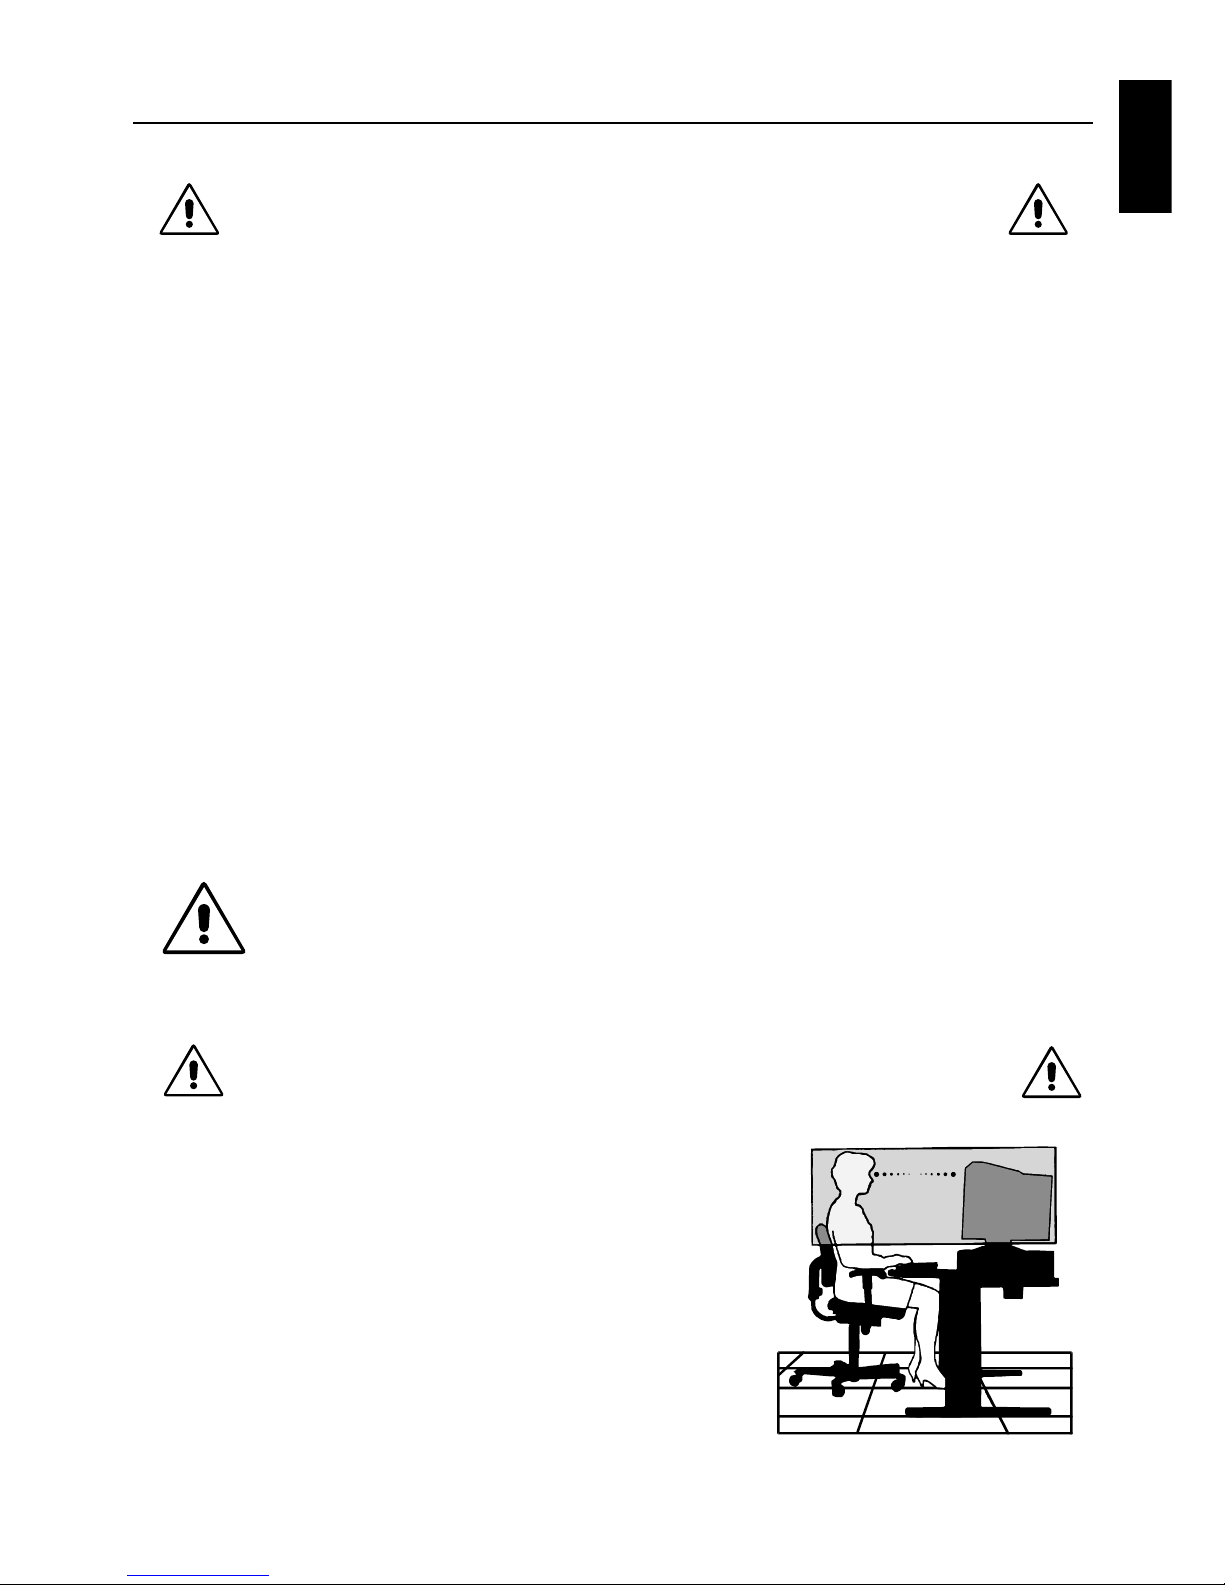
• Adjust the monitor height so that the top of the screen is at or slightly below
eye level. Your eyes should look slightly downward when viewing the middle
of the screen.
• Position your monitor no closer than 40 cm (16 inches) and no further away
than 70 cm (28 inches) from your eyes. The optimal distance is 60 cm (24
inches).
• Rest your eyes periodically by focusing on an object at least 6 m away. Blink
often.
• Position the monitor at a 90° angle to windows and other light sources to
minimise glare and reflections. Adjust the monitor tilt so that ceiling lights do
not reflect on your screen.
• If reflected light makes it hard for you to see your screen, use an anti-glare
filter.
CAUTION
Recommended use
Page 13

English-8
• Clean your monitor
A special coating is provided on the glass (CRT) surface of this monitor to reduce a reflection and static electricity on the
glass surface.
Due to the delicate coating on the glass surface, use a lint-free, nonabrasive cloth (cotton or equivalent) and a non-
alcohol, neutral, nonabrasive cleaning solution to minimise dust. If the screen requires more than a light cleaning, apply
water or soften neutral detergent with much water directly to a soft cloth and use it upon wringing water, to clean the glass
surface.
CAUTION: The following agents will cause damage to the CRT when cleaning the glass surface: Benzene, thinner, acid/
alkaline detergent, alcohol deter-gent, detergent with abrasive powder, detergent with antistatic agent, detergent for
cleaning.
• Adjust the monitor’s brightness and contrast controls to enhance readability.
• Use a document holder placed close to the screen.
• Position whatever you are looking at most of the time (the screen or reference material) directly in front of you to minimise
turning your head while you are typing.
• Get regular eye checkups.
Ergonomics
To realise the maximum ergonomics benefits,we recommend the following:
• Adjust the Brightness until the background raster disappears
• Do not position the Contrast control to its maximum setting
• Use the preset Size and Position controls with standard signals
• Use the preset Color Setting and Sides Left/Right controls
• Use non-interlaced signals with a vertical refresh rate between 75-160Hz
• Do not use primary color blue on a dark background, as it is difficult to see and may produce eye fatigue due to insufficient
contrast
Recommended use (continued)
Page 14
English
English-9
Monitor Specifications Notes
Picture Tube Diagonal: 22 inch/550 mm 90° deflection, 0.24 mm grille pitch,
Viewable Image Size: 20 inch/508 mm medium short persistence phosphor,
Radius: 50000 mm aperture grille CRT, G-WARAS coating
Input Signal Video: ANALOG 0.7 Vp-p/75 Ohms
Sync: Separate sync. TTL Level
Horizontal sync. Positive/Negative
Vertical sync. Positive/Negative
Composite sync. (Negative) (TTL Level)
Sync on Green video (Positive) 0.7 Vp-p and sync
Negative 0.3 Vp-p
Display Colors Analog input: Unlimited number of Colors Depends on display card used.
Synchronization Range Horizontal: 30 kHz to 140 kHz Automatically
Vertical: 48 Hz to 160 Hz Automatically
Resolutions Supported 640 x 480 @ 48 to 160 Hz Some systems may not support all
Resolution based on horizontal and 800 x 600 @ 48 to 160 Hz modes listed.
vertical frequencies only 1024 x 768 @ 48 to 160 Hz
1280 x 1024 @ 48 to 127 Hz
1600 x 1200 @ 48 to 109 Hz
1800 x 1350 @ 48 to 98 Hz
1800 x 1440 @ 48 to 92 Hz
1856 x 1392 @ 48 to 95 Hz
2048 x 1536 @ 48 to 86 Hz
Active Display Area Horizontal: 396 mm/15.6 inches Dependent upon signal timing used, and
(Factory Setting) Vertical: 297 mm/11.7 inches does not include border area.
Active Display Area (Full Scan) 406 mm/16.0 inches Dependent upon signal timing used, and
304.6 mm/12.0 inches does not include border area.
Power Supply AC 100-120 V/220-240 V, 50/60 Hz
Current Rating 1.35A @ 100-120 V / 0.65A @ 220-240 V
Dimensions 495 mm (W) x 486 mm (H) x 477 mm (D)
19.5 inches (W) x 19.1 inches (H) x 18.8 inches (D)
Weight 29.3 kg
64.6 lbs
Environmental Considerations
Operating Temperature: +5°C to +35°C/+41°F to +90°F
Humidity: 10% to 90%
Storage Temperature: -20°C to +60°C/-4°F to +140°F
Humidity: 10% to 90%
Regulations Safety: UL1950 (UL) , CSA C22.2 No.950 (c-UL),
EN60950 (TÜV-GS)
CCC, KETI
EMC: FCC Class-B, DOC Class-B,
EN55022 Class-B, VCCI Class-B,
EN61000-3-2, EN61000-3-3, EN55024
CCC, MIC, BSMI
X-Ray: DHHS, HWC, Röv vom 8.1, 1987
Other: CE-Marking, MPR-II/TCO’91
ISO9241-3, ISO9241-7, ISO9241-8
TCO’95
International ENERGY STA R Program
Specifications
Page 15

English-10
Flat Aperture Grille CRT: Delivers an unparalleled viewing experience with a virtually flat image, eliminating distortion and
reducing glare so that what you see on-screen is what you get on your printed output. The striped phosphor alignment of the
CRT delivers superior vertical definition with improved brightness for more uniform image contrast.
Screen Surface: Reduces reflection and glare and increases contrast without sacrificing focus level, clarity or brightness. Along
with the flat square technology CRT, a high contrast screen with 0.24mm grille pitch delivers crisp, clean text and graphics.
Dual Dynamic Beam Focus: Provides precise, continuous focus adjustments of the electron beams resulting in optimum image
quality, even to the far edges of the screen.
Color Control System: Allows you to change between five color settings on your display to match your personal preference.
OSD (On-Screen Display) Controls: Allow you to quickly and easily adjust all elements of your screen image via simple to use
on-screen menus.
Design Features: Enhance human ergonomics to improve the working environment, protect the health of the user and save
money. Examples include OSD controls for quick and easy image adjustments, tilt/swivel base for preferred angle of vision and
compliance with MPRII guidelines for lower emissions.
Plug and Play: The Microsoft
®
solution with the Windows®95/98/2000/Me/XP operating system facilitates setup and installation
by allowing the monitor to send its capabilities (such as screen size and resolutions supported) directly to your computer,
automatically optimizing display performance.
Off Mode System: Provides innovative power-saving methods that allow the monitor to shift to a lower power consumption level
when on but not in use, saving two-thirds of your monitor energy costs, reducing emissions and lowering the air conditioning
costs of the workplace.
Reduced Magnetic Field Technology: Reduces magnetic and alternating electric field emissions and static electricity, addressing ergonomic concerns regarding potential risks from extended computer monitor use.
Multiple Frequency Technology: Automatically adjusts monitor to the display card’s scanning frequency, thus displaying the
resolution required.
Full Scan Capability: Allows you to use the entire screen area in most resolutions, significantly expanding image size.
Corner Purity Control: The unique design automatically eliminates picture impurities that may result from stray magnetic fields
(including the earth’s permanent magnets, etc.) and now allows you to easily adjust impurities in the four corners of your
monitor.
Convergence Control: Allows you to adjust the horizontal and vertical convergence ensure that a white line drawn on the
screen is as crisp and clear as possible.
Auto Adjust: Allows you to easily and quickly adjust and position for Non-preset timming.
GTF Auto Adjust: Automatically adjust horizontal and vertical size and position settings according to GTF standard with the
signal timing which Auto Adjust is not available.
Constant Brightness: Sustains the brightness and screen color levels consistently over the normal life of the monitor.
SB (Super Brightness) Mode: Provides the screen brightness suitable for the screen images displayed.
Super Bright Mode OFF: for text based images (normal use)
Super Bright Mode-1 ON: for images
Super bright Mode-2 ON: for moving image such as DVD movies
Features
Page 16
English
English-11
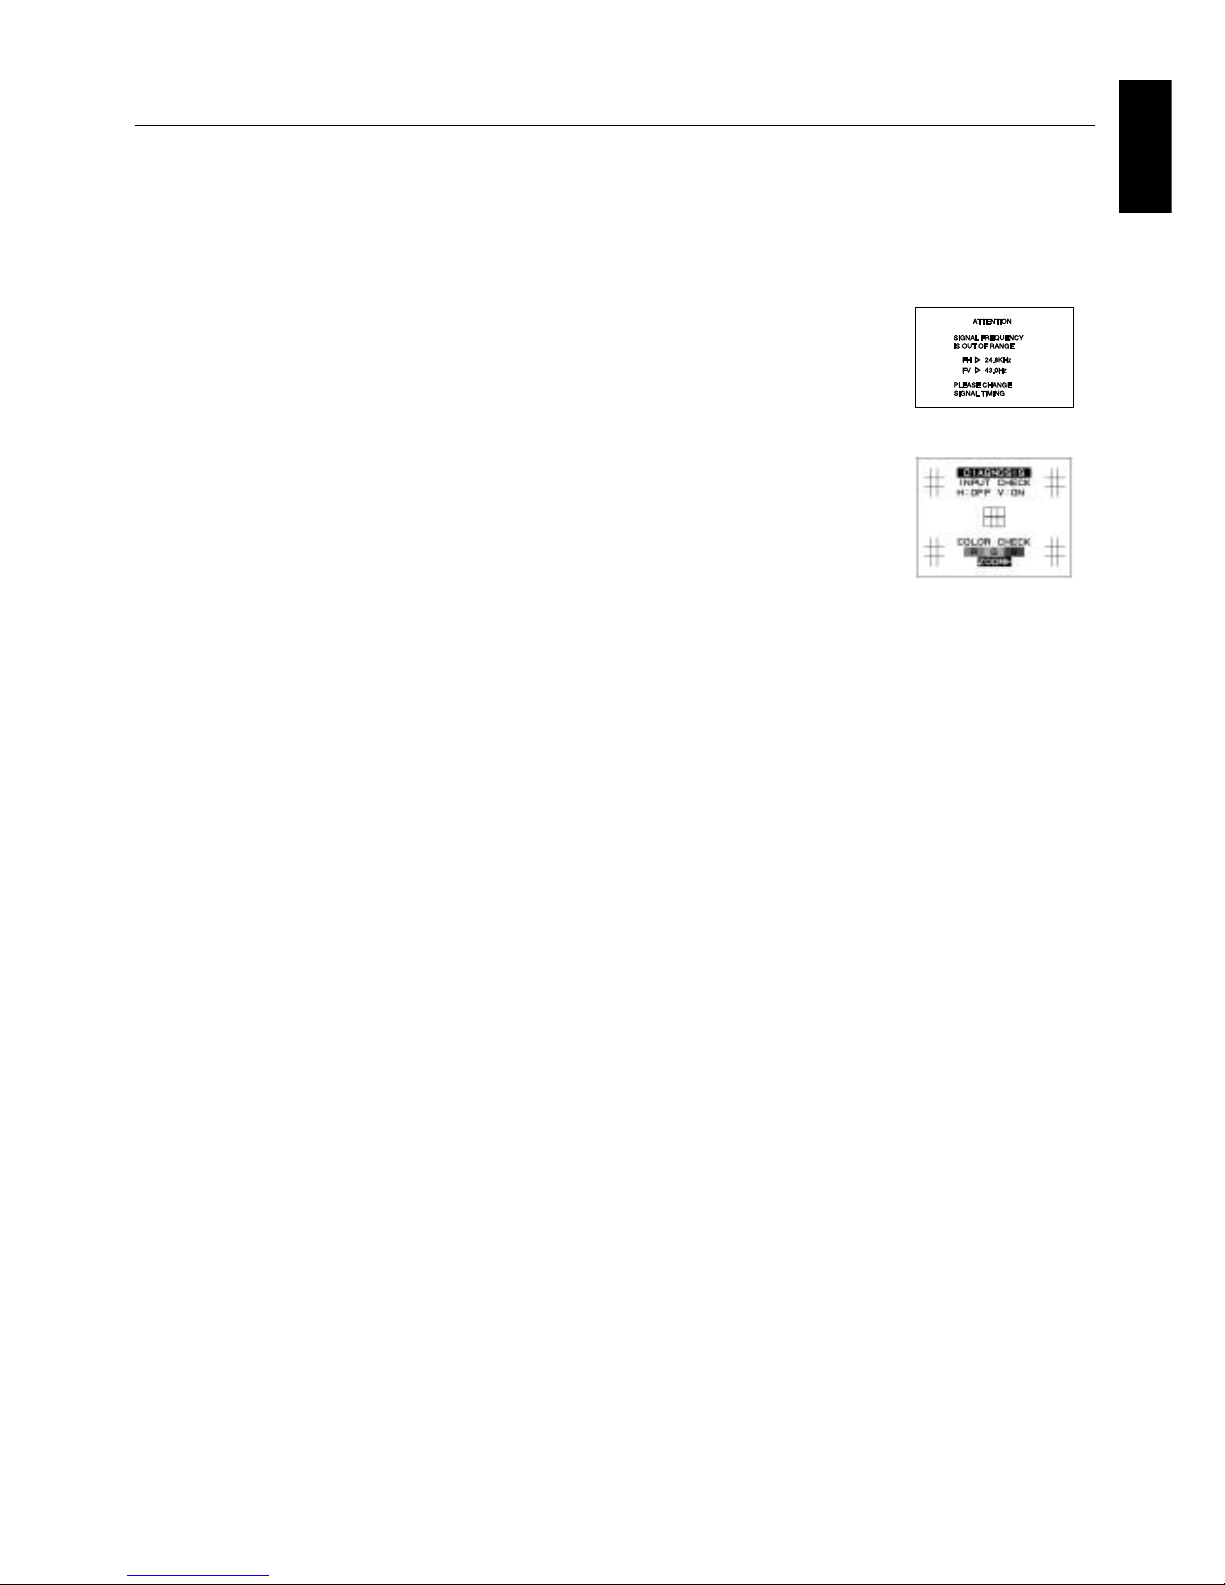
Self check function
• Press any control button on the front of monitor when you see a problem on the screen.
- In case that all R, G and B colors are seen in the diagnosis message, the monitor has no problem.
In case that some color is lack in the message, the monitor has a problem. Contact Customer Service.
- In case that no diagnosis message displayed with LED lit in green, power off the computer.
• Check the signal cable and computer in case that the diagnosis message displayed.
• Contact Customer Service in case that the diagnosis message still does not display.
- In case that no diagnosis message displayed with LED lit in orange.
• Check the signal cable and computer.
• Move the mouse or press any key on the keyboard.
- In case that no diagnosis message displayed with LED lit in green and orange.
• Contact Customer Service.
No picture
• Display card should be completely seated in its slot.
• Power Button and computer power switch should be in the ON position.
• Signal cable should be completely connected to display card/computer.
• Check connector for bent or pushed-in pins.
Image is scrolling or unstable
• Signal cable should be completely attached to the computer.
• Check pin assignments and signal timings of the monitor and your display card with respect to recommended timings
and pin assignments.
LED on monitor is not lit (no green or orange color can be seen)
• Power Switch should be in the ON position and power cord should be connected.
Picture is fuzzy or color looks blotchy
• If the picture is fuzzy, adjust the Moiré Canceler control. If the color looks blotchy, adjust the Brightness, Contrast or
Corner Purity controls, or use the Clamp pulse Position control to change modes.
• Access the Degauss Control through OSD controls. Activate the Degauss Control.
CAUTION: A minimum interval of 20 minutes should elapse before the Degauss Control is used a second
time when not switching between modes.
Picture bounces or a wavy pattern is present in the picture
• Move electrical devices that may be causing electrical interference away from the monitor.
Edges of the display image are not square
• Use the OSD Geometry Controls to straighten the edges.
• If possible, position the front of the monitor facing east.
Display image is not centered, too small, or too large
• Use the OSD Size and Position Controls to adjust the image.
Thin horizontal lines appear on your screen
• Thin horizontal lines are normal for an aperture grille CRT and are not a malfunction. These are shadows from the
damper wires used to stabilize the aperture grille and are most noticeable when the screen’s background is light
(usually white).
Black vertical lines are visible on the screen
• Thin vertical black lines on one or both sides of the screen. This minor condition is caused by grille element overlap
which can occur during shipping.
• Position an open white window over the affected area of the screen and maximize the brightness and contrast controls.
This will cause localized heating of the overlap which will clear in a few minutes. Be sure to readjust the brightness and
contrast controls back to the normal viewing level after this procedure.
Attention message displayed
• Check the inputted signal.
NOTE: The attention message may display when power on the monitor. In case that the attention message disappear
after in a little while, there is no problem at the inputted signal.
Monitor Troubleshooting
Page 17

 Loading...