

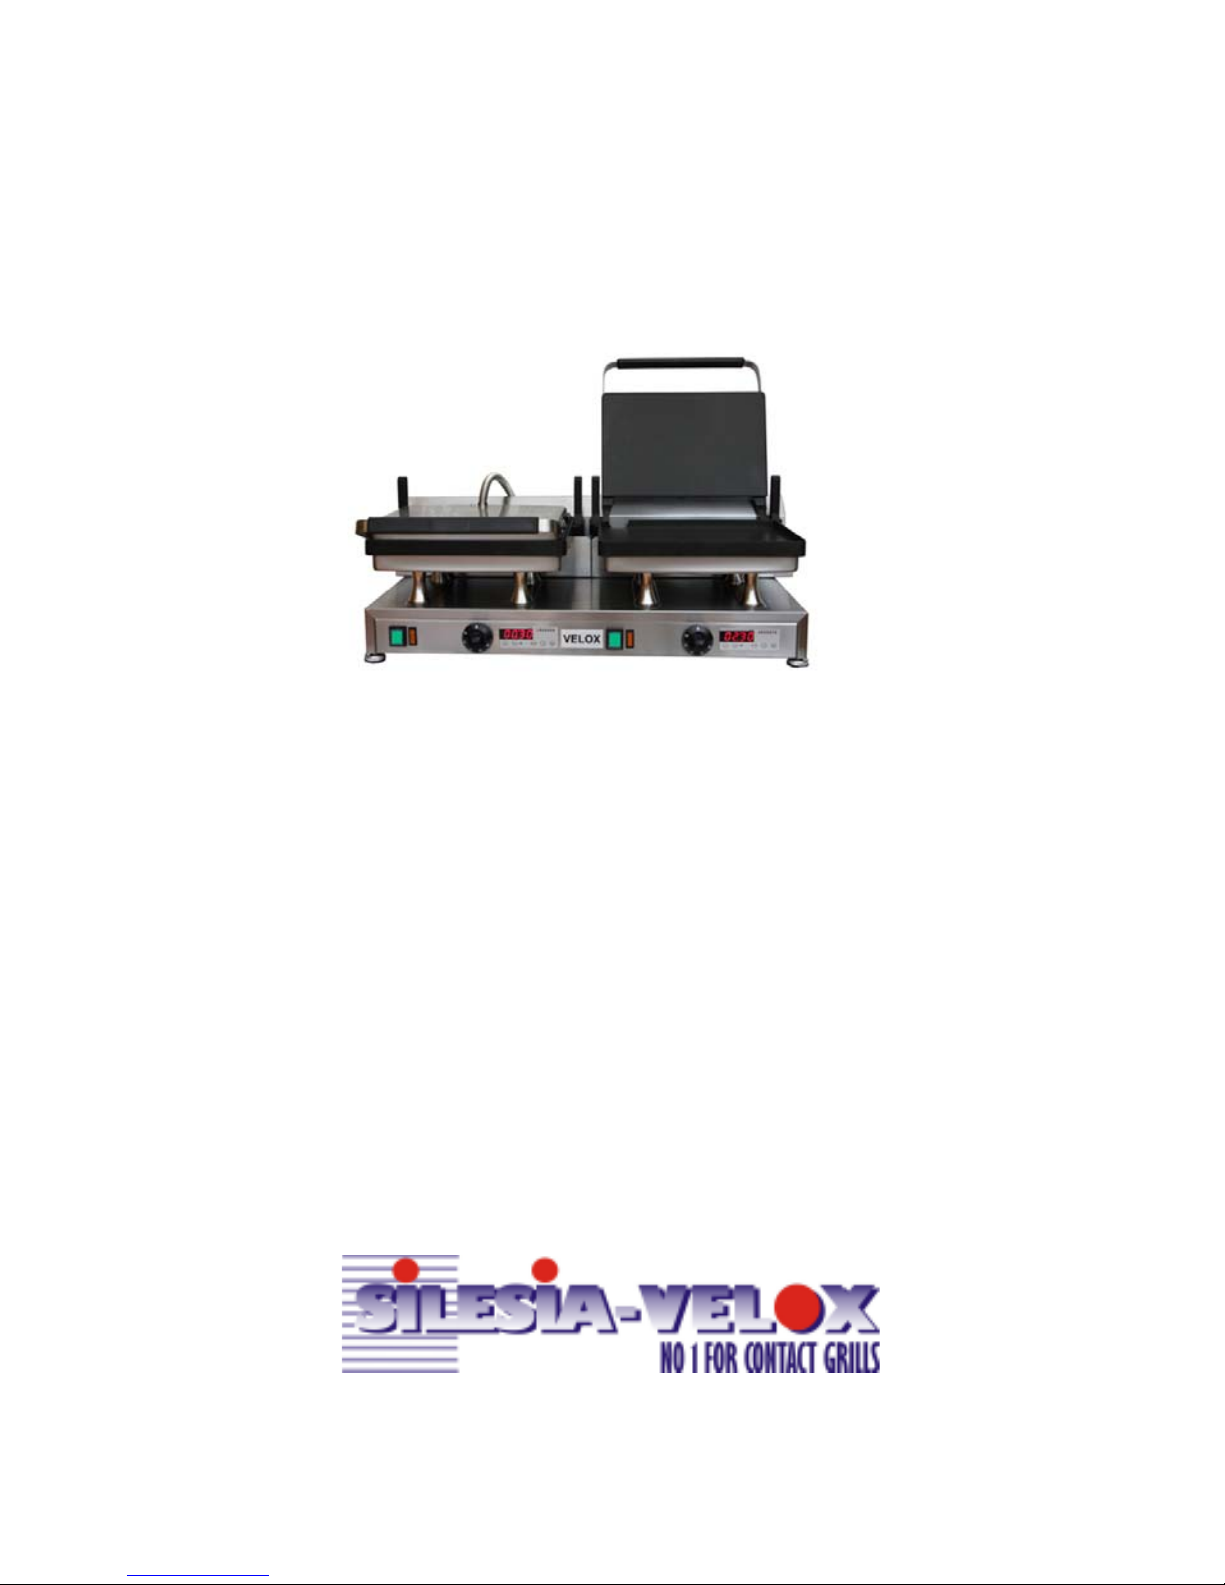
SILESIA VELOX
High Speed Contact Grills
Models CG1 & CG2
Operating Instructions and General Guide
Issue 10/11
©
CCE Limited 2011
Silesia - Velox
208 Frimley Road
Camberley GU15 2QJ
T:01276 681919
sales@silesia.co.uk www.silesia.co.uk

Silesia - Velox
t:01276 681919 sales@silesia.co.uk www.silesia.co.uk
© Camberley Catering Equipment Ltd - all rights reserved - reproduction of any part of this document is forbidden
Dear Customer
Thank you for your purchase of a Velox High Speed contact grill. This practical modern appliance is
manufactured using materials of the highest quality which are subject to strict Quality Control throughout
the entire manufacturing process. This grill has been tested to ensure that it meets the needs of the
professional caterer.
We strongly advise you to read through and follow the simple instructions contained in the guide, to
ensure that you get the best results from the moment you first use your grill. This guide also contains
important information, not only on how to use the grill, but also on maintenance and safety.
UNPACKING
Please ensure that you remove all equipment and ancillary items before disposing of the packaging,
please refer to the packing list to check you have received all the contents.
To ensure safe transportation your grill we need to use suitable protective packaging, however we have
reduced our packaging to the bare essentials and all materials are completely recyclable.
PACKING CONTENTS
OVERALL DIMENSIONS COOKING PLATES ELECTRICAL WEIGHT
MODEL L x H x D L x D POWER kg
(in millimetres) (in millimetres) REQUIREMENTS net/ship
CG1 430 x 530 x 530 340 x 220 230V 2.35kW 3/17
CG2 830 x 530 x 530 340 x 220 2 x 230V 2.35kW* 25/33
TECHNICAL DATA
*Please note the two 13 Amp sockets MUST be part of the ring main and NOT spurs from it. If in doubt please consult a
qualified electrician. If it is not possible to connect to the power supply by this method then the grill can be rewired to
connect to a 30 Amp ‘cooker point”. Again please consult a qualified electrician.
INSTALLATION
Where this appliance is to be positioned in close proximity to a wall, partitions, kitchen furniture, decorative
finishes etc., it is recommended that they be made of non-combustible material; if not, they should be clad
with a suitable non-combustible heat insulating material, and that the closest attention be paid to fire
prevention regulations. Under no circumstances should the wire protection tube from the chassis to the
top cooking plate be allowed to foul any wall or parttion behind the grill.
SAFETY
High-pressure cleaning equipment or hand showers should never be used for cleaning the appliance. The
appliance should not be immersed in water or held under running water!
The appliance should be protected from splashing water and should therefore not be positioned next to
other appliances, which may be cleaned with high-pressure cleaning equipment or jets of water. If there
is no other option but to place the appliance next to such appliances, it must be covered when the other
appliances are being cleaned to prevent water from penetrating.
The appliance may only be used or stored in dry rooms.
INSTALLATION
Where this appliance is to be positioned in close proximity to a wall, partitions, kitchen furniture, decorative
finishes etc., it is recommended that they be made of non-combustible material; if not, they should be clad
with a suitable non-combustible heat insulating material, and that the closest attention be paid to fire
prevention regulations. Under no circumstances should the wire protection tube from the chassis to the
top cooking plate be allowed to foul any wall or parttion behind the grill.
CG-1
1 x Cleaning Scraper
1 x Serving Spatula
1 x Char Marker
1 x Middle Frame
1 x Middle Frame Handle
1 x Sandwich Spacer
CG-2
1 x Cleaning Scraper
1 x Serving Spatula
1 x Char Marker
2 x Middle Frame
2 x Middle Frame sHandles
2 x Sandwich Spacers
Please Note: Grills with one or more grooved plates will also be supplied with a grooved cleaning scraper

Silesia - Velox
t:01276 681919 sales@silesia.co.uk www.silesia.co.uk
© Camberley Catering Equipment Ltd - all rights reserved - reproduction of any part of this document is forbidden
SAFETY
High-pressure cleaning equipment or hand showers should never be used for cleaning the appliance. The
appliance should not be immersed in water or held under running water!
The appliance should be protected from splashing water and should therefore not be positioned next to
other appliances, which may be cleaned with high-pressure cleaning equipment or jets of water. If there
is no other option but to place the appliance next to such appliances, it must be covered when the other
appliances are being cleaned to prevent water from penetrating.
The appliance may only be used or stored in dry rooms.
1. Power ON Light (GREEN)
2. Grill Heating Indicator Light (ORANGE)
3. Temperature Control Knob
4. Timer Control Panel
OPERATING YOUR GRILL
00:3000:30
00:3000:30
00:30
MIN/SEC
VELOX
2
1
3
4
The Controls
BEFORE FIRST USE
Before using your SILESIA -VELOX Grill for the first time, please complete the following steps:
Grill plates should be seasoned as follows:
a) Close the upper grill plate.
b) Set the thermostat switch to 200ºC.
c) Allow the indicator lamp to go out and then leave the grill on for 20 minutes (the light will go on and
off several times during this period, indicating the Grill is using power). NOTE: As the grill is new
there may be some smoke & a clicking sound coming from the unit during the seasoning process.
Please be advised that this is normal.
d) Turn the thermostat switch to off and let the Grill cool down for approximately 10 minutes.
e) Distribute oil or margarine onto both entire cooking surfaces. Leave the oil on the plates for 2 —
3 minutes, then wipe off the excess oil with an absorbent paper towel.
Electronic timer will be automatically activated when the grill is first connected. After the timer alarm
sounds initially, it is ready for use as required.
To set the electronic timer, simply position timer knob to required time and press the “Timer Start Switch”.
Indicator light on timer switch will illuminate until the set time has elapsed, at which time the alarm will
sound and the timer light will turn off.
Please note that the timer knob will remain in this position until altered by the operator. Therfore, if the
same time setting is required, the timer knob does not need repositioning; simply press the “Timer start
Switch”.
However, if a new time setting is required, simply reposition the timer knob to required time and press
“Timer start Switch” to activate the timer for the new time.
THE PROTECTIVE THERMAL CUT-OUT DEVICE
This item is fitted with a protective thermal cut-out device. In the event of the operation of this cut-out,
the equipment will cease to function. Should this occur, the equipment should be unplugged from the
mains and left to cool for at least 1 hour before resetting the cut-out and continuing operation. The cutout can be reset by pushing the reset button on the rear of the grill. Should the cut-out operate repeatedly
this equipment should be sent to an authorised qualified service person for inspection and for repair.

Silesia - Velox
t:01276 681919 sales@silesia.co.uk www.silesia.co.uk
© Camberley Catering Equipment Ltd - all rights reserved - reproduction of any part of this document is forbidden
The timer is pre-programmed
with the following operating
times:
1 = 30 seconds
2 = 45 seconds
3 = 1 minute
4 = 1 minute and 30 seconds
5 = 2 minutes
6 = 2 minutes and 30 seconds
7 = 4 minutes and 30 seconds
00:3000:30
00:3000:30
00:30
MIN/SEC
1 2 3 4 5 6 7
TIMER
PROGRAM INDICATOR LIGHTS
DIGITAL DISPLAY
INCREASE TIME
DECREASE TIME/
CANCEL ALARM
Start
Stop
PROG
1....7
PROGRAMME
BUTTON
PROGRAMME
SELECT
START/STOP
CANCEL
Timer selection:
The 7 adjustable pre-programmed operating times can be selected with the button. Each press will switch to the next
program – the corresponding LED is illuminated to indicate the program selected. Upon selection, the new program is ready
to be activated. This program selection will remain the same until changed. The program selection is saved after power off,
therefore, the last program setting used will come on after return to power on.
Start the timer:
Select program with the button. Start the timer by pressing the button. The remaining time is counted down in
seconds. When the time has elapsed, the alarm will sound and the display will flash 00:00.
To modify pre-programmed operating times:
Select the program that you wish to change by using the button. Press and hold the button for one second (the LED
of the program selected will flash indicating that the time is ready to be modified). You now have 5 seconds to start modifying
the time. While the LED is flashing press the
or buttons to activate the programming mode (indicated by the two
flashing dots on the display) and immediately continue to press until the required time is displayed. When the two dots on the
display have stopped flashing, the new time has been stored.
Pause the timer:
If the button is pressed during the program cycle, the sequence is interrupted and the display flashes. To continue the
timer cycle again, please press the
button again.
Cancel the timer:
If the button is pressed for 3 seconds after start, the program is cancelled and the display will flash 00:00 and after
releasing the button, the initial time is displayed.
Temporary settings:
Select the program that you wish to change by using the button. Press the
or buttons to activate the
programming mode (indicated by the two flashing dots on the display) then immediately continue to press until the required
time is displayed. This time will remain until a new operating time is selected (or at power off).
Stop the timer buzzer alarm sound:
After completion of the timer cycle the buzzer alarm sounds for 5 seconds and the display will flash 00:00. If needed the alarm
sound can be stopped during the 5 seconds by pressing the button.
Changing the duration of the buzzer alarm sound (P1):
Press the and the buttons simultaneously for 2 seconds. The display will change to P1. Then press the button and
the value of P1 is displayed (pre-programmed for 5 seconds). Press and hold the button and press the
or button
until the required alarm sound time has been reached.
The length of the alarm sound can be programmed between 0 and 60 seconds with 0 = no alarm.
Wait approximately 1 minute and the timer will store the new setting and exit the programming mode.
Please note: If at any time the display shows P2, P3, P4 or P19, simply press the button until the display show P1.
1...7
1...7
Start
Stop
1...7
PROG
Start
Stop
Start
Stop
Start
Stop
1...7
PROG
PROG
DIGITAL TIMER INSTRUCTIONS

Silesia - Velox
t:01276 681919 sales@silesia.co.uk www.silesia.co.uk
© Camberley Catering Equipment Ltd - all rights reserved - reproduction of any part of this document is forbidden
Cleaning Instructions for Silesia - Velox Grills
If required, plates should be scraped with the metal scraper provided after every cooking cycle. If
changing products, wipe plates thoroughly with kitchen roll or cotton cloth to eliminate cross-flavouring.
Do not allow carbon (oils and residues) to build up on the plate surfaces as this will reduce the efficiency
of the grill, allow products to stick and the carbon will flake off on to the food. It is the carbon flaking off,
not the coating.
We recommend that the plates be scraped thoroughly and wiped down with a dry cloth or kitchen roll at
the end of each day. Under NO circumstances should WATER or CHEMICAL CLEANERS be used on
the cooking surfaces as this WILL damage your grill and may cause food to stick to the plates.
In cases of severe carbon build up the grill plates should be scraped thoroughly. Once, the carbon layer
has been removed, the grill plates should be re-oiled before cooking. More regular cleaning is
recommended to avoid recurrence of this problem.
In extreme cases of carbon build up (the surface may appear to be cracking), turn the machine to
maximum and wait until the orange temperature light goes off. Leave for between 30 minutes and 2 hours
with the plates in the open position. (This will loosen or burn off the carbon deposits making it easier to
scrape with the metal scraper). We recommend that you ensure that you do not leave the machine
unattended.
Unplug the grill at the mains, allow the grill to cool slightly and then scrape and wipe thoroughly.
NB: Carbon flakes may still be very hot so please exercise caution and use appropriate protection
(ie: glasses, gloves, etc.).
Always re-oil before cooking, turn the machine to maximum with the plates open and wait for the orange
light to go off. Leave for approximately 1 hour. Turn the machine off and leave to cool until the plates
have cooled but are still slightly warm. Brush or spray plates liberally with a good quality vegetable oil
and allow to soak in for at least 4 hours preferably overnight if possible. Remove excess oil and continue
to use machine as normal.
Please note, if you have cleaned down to the metal surface, you have not harmed the plates. Once you
begin cooking, a natural carbon layer will form again which should be maintained at a thin level.
Footnotes:
1. Ideal temperature for plate cleaning at the end of the day is approximately 100ºC.
2. Always unplug at the mains before end of day cleaning.
3. To remove oil film from the stainless steel chassis, use non-corrosive degreaser & a damp
soft scourer.
4. Never use corrosive materials on the grill, as this will invalidate the Silesia-Velox warranty.
5. Water and or liquids should never be used on the grill plates as this may damage the
aluminum cooking surface and will invalidate the Silesia-Velox warranty.
6. Always re-oil after cleaning.
DANGER OF ELECTROCUTION
To avoid the risk of electrocution, ensure that the grill is switched off and
disconnected from the mains supply when cleaning and do not allow
water to enter the grill.
It is very important that you keep your Velox grill
Silesia - Velox
t:01276 681919 sales@silesia.co.uk www.silesia.co.uk
© Camberley Catering Equipment Ltd - all rights reserved - reproduction of any part of this document is forbidden
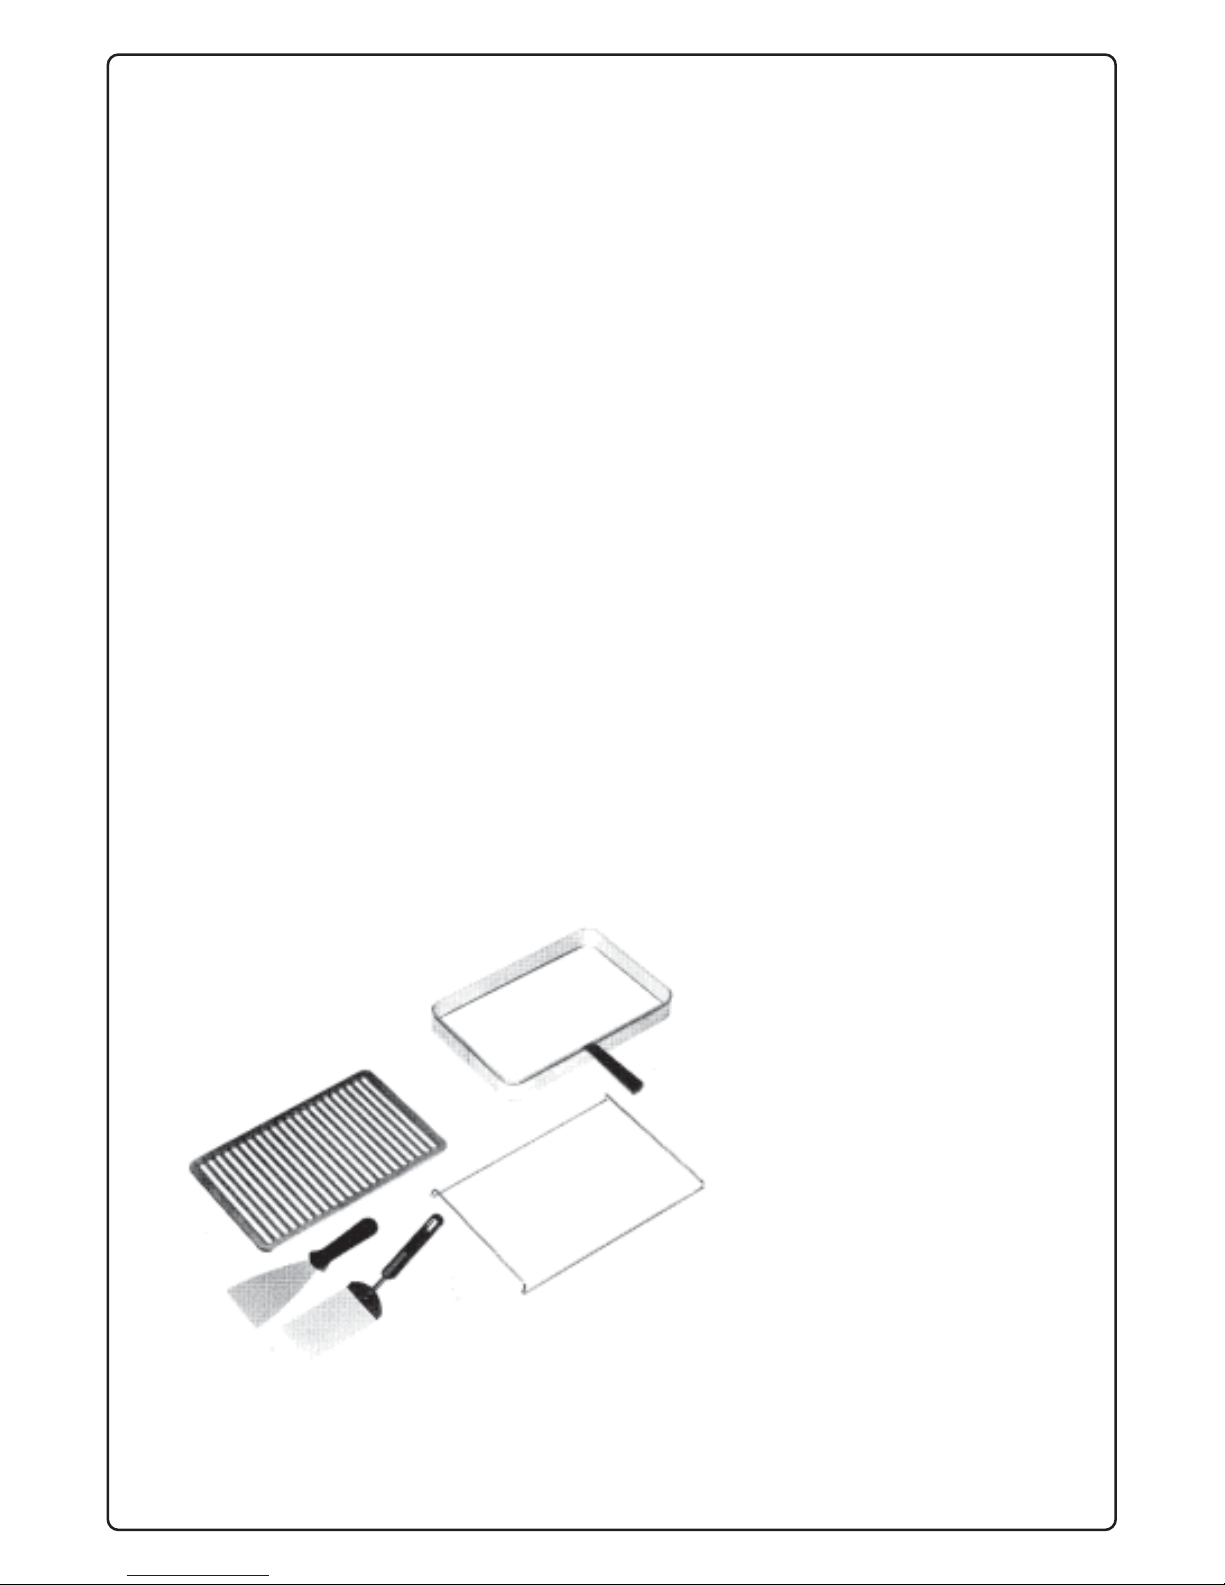
ACCESSORIES
Middle Frame
When using the middle frame, the Grill operates as an oven or prevents the upper plate from making
contact with the top of your products (i. e. open face sandwiches, pizza slices, fluffy omelettes, etc.). To
use the middle frame, lift the upper plate to the resting position. Place the middle frame on the lower plate
so that it fits around the periphery of the plate. Place products onto the lower plate and close the upper
plate so that it rests on the middle frame.
Sandwich Spacer
The sandwich spacer is used to prevent the upper plate from squeezing the bread. To use the sandwich
spacer, lift the upper plate to the resting position. Place the long, horizontal section of the wire on the lower
plate so that the raised, short, vertical section of the wire is facing up. Place your sandwiches on the lower
plate and close the upper plate so that it self adjusts to the product.
Char Marker
The char marker is only needed if a char broiled appearance on your product is desired. To use the char
marker, lift the upper plate to the resting position. Insert the char marker onto the lower plate, close the
upper plate and let the char marker heat until the indicator lamp goes out.
Cleaning Scraper
The metal scraper should only be used for cleaning purposes, such as scraping and removing carbon build
up on the upper and lower grill plates. When using the metal scraper the flat edge should be used as the
corners of the scraper may deeply score the plates. Please be advised, when scraping the upper plate in
the resting position we recommend that you firmly grasp the handle in order to secure the upper plate.
Serving Spatular
To place and remove food products from the cooking plates and for light cleaning.
1 Char Marker
2 Cleaning Scraper
3 Serving Spatular
4 Sandwich Spacer
3 Middle Frame
5
4
1
2
3

Silesia - Velox
t:01276 681919 sales@silesia.co.uk www.silesia.co.uk
© Camberley Catering Equipment Ltd - all rights reserved - reproduction of any part of this document is forbidden
COOKING ON YOUR GRILL
To commence cooking, turn the thermostat switch to the required temperature using the following as a
guide. In general a higher setting is required for thinner products and a lower setting for thicker products.
1. Fresh Foods and thinner Sandwiches 200-225ºC.
2. Frozen Foods and thicker Sandwiches 175-200ºC.
Set the required temperature and when the indicator lamp goes out initially the Grill is ready for operation.
The indicator lamp will then go on and off during the use of the machine indicating it is using power.
Lift the upper grill plate to the resting position. The upper grill plate will sit in a vertical position on the
hinges. Lightly apply margarine or oil of your choice (preferably salt free) to both sides of your product
and place the food to be cooked onto the lower grill plate, bring the upper grill plate down until it rests
on the food.
When the product is cooked, lift the upper grill plate to the resting position and remove the food. If at this
stage the food is not cooked to preference, return it to the Grill for a little longer.
To prevent unnecessary smoking and odours, do not grease the grill plates unless they have been
dried out or if you are cooking omelettes, pancakes etc.
For most meats the Grill time is approximately one minute per half inch (1 cm) of meat thickness.
Frozen foods, double the time. Individual preference, meat thickness, quality and food temperature
will dictate the actual times.
BREAKFAST
Omelettes
Sausage Patties
Bacon Strips
Hash Browns (Frozen)
French Toast
Ham Steaks
English Muffins
Ham & Cheese Croissants
SANDWICHES
Grilled Cheese
Grilled Ham & Cheese
Grilled Cheese & Tomato
Reuben
Tuna Melt
PhilIy Steak & Cheese
Pita Pockets with Cheese
Kebabs for Sandwiches
Open Face Sandwiches
Time
20 Seconds
30 Seconds
1 Minute
2 Minutes
45 Seconds
1 Minute
1 Minute
1 Minute
1 Minute
1 Minute
1 Minute
3 Minutes
3 Minutes
1 Minute
15 Seconds
2 Minutes
3 Minutes
ENTREES
Steaks
Veal Parmigiana
Pork Chops
Lamb Chops
Calves’Liver
Wienerschnitzel
Kebabs
Chicken Fillets
Chicken Cordon Bleu
Trout
Fish Fillets
SNACKS
Hamburgers
Hamburgers (Frozen)
Hot Dogs
Bratwurst
Breaded Oysters or Shrimp
Garlic Bread
Crepes
Time
2 Minutes
1½
Minutes
3 Minutes
3 Minutes
1 Minute
2 Minutes
3 Minutes
1½ Minutes
3½
Minutes
4 Minutes
2 Minutes
1 Minute
1½ Minutes
2 Minutes
3½
Minutes
1½ Minutes
1 Minute
30 Seconds

Silesia - Velox
t:01276 681919 sales@silesia.co.uk www.silesia.co.uk
© Camberley Catering Equipment Ltd - all rights reserved - reproduction of any part of this document is forbidden
OMELETTE
1) Set the temperature to 200ºC and wait for the indicator light to go out (for fluffy omelettes insert the
middle frame), cook without char marker.
2) Beat two eggs and add desired fillings to mixture (ex. diced mushrooms, grated cheese, chopped
Canadian bacon or ham, etc.).
3) Lightly grease both upper and lower plates with margarine or oil of your choice.
4) Pour egg mixture onto lower plate from right to left.
5) Close the upper plate gently. If you are cooking without the middle frame you will see the upper
plate rise.
6) Cook for approximately 15 —20 seconds depending on preference, 45 seconds with the middle
frame.
7) Lift the upper plate to the resting position. Fold or roll omelette with spatula and remove.
8) Wipe both upper and lower plates clean with a paper towel or cloth.
Omelettes are delicious and very cost effective when cooked on the SILESIA-VELOX Grills.
BREADED FOODS — Chicken Fillet, Seafood, etc.
1) Set the temperature to 200ºC and wait for the indicator light to go out (cook without char marker
and middle frame).
2) Dip food item in a bowl of water.
3) Roll food item in bread crumbs so that food is completely covered (no egg is required).
4) Apply margarine or oil of your choice on the outside of the product so that the bread crumbs will
become golden brown.
5) Place food item on lower plate and close the upper plate. Cook for approximately 1½ — 2 minutes.
6) Lift the upper plate to the resting position and remove food item with a spatula.
7) Clean the cooking plates with a metal spatLila.and then wipe with a paper towel or cloth.
Very tasty on a bun with vegetables or on a platter with rice, etc.
Breaded Foods are simple and economical to cook on the SILESIA-VELOX Grills as no egg is
required to bind the bread crumbs to the food. What a pleasure!
STUFFED CHICKEN
1) Set the temperature to 200ºC and wait for the indicator light to go out (cook without char marker or
middle frame).
2) Prepare chicken, cut a pocket in chicken breast and fill with stuffing of your choice. If you wish to
bread the chicken simply follow the recipe shown previously. However, we recommend that you dip
the chicken in water before stuffing it.
3) Apply margarine or oil of your choice to the outside of the chicken.
4) Place chicken on lower plate and close upper plate. Cook for approximately 4 minutes.
5) Lift the upper plate to the resting position and remove chicken with a spatula.
6) Clean the cooking plates with a metal spatula and then wipe with a paper towel or cloth. Stuffed
Chicken is a very tasty dish and although it takes a little more preparation, it is well worth it!
Stuffing —an inexpensive stuffing can be made by mixing chopped ham, cheese, mixed herbs, dash
of Worcestershire sauce and garlic powder.
STEAK
1) Set the temperature to 200ºC and wait for indicator light to go out (cook without middle frame).
2) Lightly apply margarine or oil of your choice to both sides of steak.
3) Place steak on lower plate and close the upper plate.
4) To determine cooking time use the general guide of one minute Grill time per half inch (1 cm) of
meat thickness.
5) Lift the upper plate to the resting position and remove steak with a spatula.
6) Clean the cooking plates with a metal spatula and then wipe with a paper towel or cloth.
Steaks are delicious when cooked on the SILESIA-VELOX Grill due to the contact and high
temperature from top and bottom, sealing in the juices of the meat, producing a very juicy and
tasty steak even when well done.
EASY & SUCCESSFUL ITEMS T O BE COOKED ON VELOX GRILLS

Silesia - Velox
t:01276 681919 sales@silesia.co.uk www.silesia.co.uk
© Camberley Catering Equipment Ltd - all rights reserved - reproduction of any part of this document is forbidden
CHOPS — Lamb/Pork
1) Set the temperature to 200ºC and wait for the indicator light to go out (cook without char marker
and middle frame).
2) Lightly apply margarine or oil of your choice to both sides of the chops.
3) Place chops on lower plate and close upper plate. Cook for approximately 3 minutes.
4) Lift the upper plate to the resting position and remove chops with a spatula.
5) Clean the cooking plates with a metal spatula and then wipe with a paper towel or cloth.
Chops and all meats are quite economical to cook on the SILESIA-VELOX Grills as loss from
shrinkage is greatly reduced.
Pocket Sandwiches
A-1) Set the temperature to 200ºC and wait for the indicator light to go out (cook without char marker and
middle frame).
2) Cut Pita pocket and stuff with provolone cheese and pepperoni or any stuffing of your choice.
3) Place pocket on lower plate and close upper plate.
4) Cook for approximately 1 minute.
5) Lift the upper plate to the resting position and remove the pocket with a spatula.
6) Wipe both upper and lower plates, clean with a paper towel or cloth.
B-1) Set the temperature to 200ºC and wait for the indicator light to go out (cook without char marker and
middle frame).
2) Cut Pita pocket and place on the lower plate and close the upper plate.
3) Cook for approximately 20 seconds.
4) Lift the upper plate to the resting position and remove the pocket with a spatula.
5) Fill the pocket with chicken salad, egg salad, tuna salad, or any filling of your choice.
6) Wipe both upper and lower plates clean with a paper towel or cloth.
Pocket Sandwiches are absolutely delicious when cooked on the SILESIA-VELOX Grills as well as being
quite a profitable menu item.
PIZZA — French Bread or Prebaked Pizza Slices
1) Set the temperature to 200ºC and wait for the indicator light to go out (cook without char marker).
2) Lightly grease lower plate with margarine or oil of your choice and insert middle frame.
3) Place Pizza on the lower plate and close the upper plate.
4) Cook for approximately 3 — 5 minutes.
5) Lift the upper plate to the resting position and remove Pizza with a spatula.
6) Clean the cooking plates with a metal spatula and then wipe with a paper towel or cloth.
CREPES
1) Set the temperature to 200ºC and wait for the indicator light to go out (cook without char marker
and middle frame).
2) Lightly grease both upper and lower plates with margarine or oil of your choice.
3) Pour crepe mix onto the lower plate and close the upper plate. Cook for approximately 30 seconds.
4) Lift the upper plate to the resting position and remove the crepe with a spatula.
5) Fill the crepe with any of the following hot or cold fillings and fold.
6) Wipe both upper and lower plates clean with a paper towel or cloth.

Silesia - Velox
t:01276 681919 sales@silesia.co.uk www.silesia.co.uk
© Camberley Catering Equipment Ltd - all rights reserved - reproduction of any part of this document is forbidden
Crepe Filling Suggestions:
Ham & Swiss Cheese — Serve Hot
Creamed Turkey — Serve Hot
Asparagus, Ham & Swiss Cheese — Serve Hot
Egg & Creamed Spinach — Serve Hot
Egg, Bacon, Mushrooms & Swiss Cheese — Serve Hot
Bananas Suzette with Whipped Cream
Strawberry Jam & Grand Marnier
KEBABS — Lamb, Pork, Beef, Seafood, etc.
1) Set the temperature to 200ºC and wait for the indicator light to go out (cook without char marker
or middle frame).
2) Dice meat, peppers and onions. Make kebab using meat, peppers, onions and other produce if
desired, such as mushrooms, tomatoes, etc.
3) Lightly apply margarine or oil of your choice to all sides of kebab.
4) Place kebabs on lower plate and close the upper plate.
5) Cook kebabs for approximately 1½ minutes, lift the upper plate and turn kebab skewers a ¼
turn. Close the upper plate and cook for an additional 1 ½ — 2 minutes.
6) Lift the upper plate to resting position and carefully remove kebabs (skewers are hot).
7) Clean the cooking plates with a metal spatula and then wipe with a paper towel or cloth.
Kebabs cooked on the VELOX Grill will be a very appealing item on your menu, served on a bun or a
platter.
TOASTED SANDWICHES
1) Set the temperature to 200 and wait for the indicator light to go out (cook with or without middle
frame or wire sandwich spacer).
2) Using 2 slices of bread, preferably rye or thick firm bread. Fill with meats, cheeses etc. of your
choice.
3) Apply margarine of your choice to the outside of the sandwich (top and bottom slices of bread)
and place on lower plate and close the upper plate.
4) Cook for approximately 45 seconds or longer, depending on filling and the thickness of such.
5) Lift the upper plate to the resting position and remove sandwich with a spatula.
6) Wipe both upper and lower plates clean with a paper towel or cloth. Toasted Sandwiches are
profitable, quick and easy when cooked on the SILESIA-VELOX Grills.
PHILADELPHIA STEAKS & CHEESE
1) Set the temperature to 200ºC and wait for indicator light to go out (cook without char marker).
2) Dice peppers and onions.
3) Lightly grease both upper and lower plates with margarine or oil of your choice.
4) Place diced peppers and onions on lower plate and cook for approximately 30 seconds.
5) Lift the upper plate to the resting position and place thinly sliced beef on top of the produce,
close the upper plate and cook for approximately 30 seconds.
6) Lift the upper plate to the resting position, insert the middle frame and place cheese on top of
the meat.
7) Close the upper plate and cook until the cheese is melted.
8) Lift the upper plate to the resting position and remove the middle frame.
9) Remove the Philly Steak & Cheese with a spatula and serve on a hoagie roll.
10) Clean the cooking plates with a metal spatula and then wipe with a paper towel or cloth.
Philly Steak and Cheese is always a popular menu item and can easily and economically be cooked
on the VELOX Grill!

Silesia - Velox
t:01276 681919 sales@silesia.co.uk www.silesia.co.uk
© Camberley Catering Equipment Ltd - all rights reserved - reproduction of any part of this document is forbidden
Roma
Provolone
Mozzarella
Gorgonzola
Marinated
Artichokes
Fresh Basil
Leaves
Pizzaiola
Mozzarella
Smoked Turkey
Tomatoes
Grilled Egg Plant
Olive Oil
Garlic
Herb Marinade
Smoked Turkey
Smoked Cheddar Cheese
Gorgonzola
Pepperoncini
Olive Oil
Foccacia
Fontina Cheese
Baked Egg Plant
Sun Dried Tomatoes
Olive Oil
Focaccia
MiIano
Fiordi Latte Mozzarella
Pre-cooked Chicken
Grilled Zucchini
Tomatoes
Olive Oil
Garlic
Herb Marinade
Prosciutto
Provolone Cheese
Sun Dried Tomatoes
Fresh Sweet Basil Leaves
Olive Oil
Foccacia
Black Forest Ham
Sun Dried Tomatoes
Mozzarella Cheese
Green Pepper Rings
Red Onion Slices
Foccacia
Olive Oil
Chicken Breast
Fresh Tomatoes
Mushroom Slices
Fontina Cheese
Olive Oil
Foccacia
SiciIiano
Smoked Cheddar
Smoked Turkey
Gorgonzola
Pepperoncini (Peppers)
Sliced Red Onion
Pepperoni
Salami
Green Pepper Rings
Red Onion Slices
Mozzarella Cheese
Foccacia
Olive Oil
Prosciutto
Creamy Havarti
Fresh Tomato Slices
Fresh Sweet Basil
Olive Oil
Sour Dough Roll
Fresh Spinach
Provolone
Mozzarella
Red Onion
Olive Oil
Foccacia
Fresh Sweet Basil
Corenza
Provolone
Proscuitio
Sundried
Tomatoes
Fresh Basil
Leaves
Roasted Red
Peppers
Provolone Cheese
Cambozola Cheese
Sun Dried Tomatoes
Marinated Artichokes
Red Onion Slices
Mushroom Slices
Sweet Basil Leaves
Olive Oil
Foccacia
Smoked Turkey
Marinated Artichokes
Fresh Tomatoes
Red Onion Slices
Fresh Sweet Basil
Sour Dough Roll
Olive Oil
Mozzarella
Cheddar Cheese
Basil Loaf
Sun Dried Tomatoes
Olive Oil
Foccacia
Fresh Tomatoes Slices
Mozzarella
Salami
Sliced Olives
Manucher Basil Loaf
Split foccacia bread length wise (horizontally). Lightly brush inside of cut surfaces
with seasoned olive oil (soak crushed garlic cloves in 2 cups of olive oil, add 1
teaspoon white pepper and 1 teaspoon dried crushed oregano leaves. Marinate
mixture for at least 4 days.)
Build sandwiches and cut into wedges. Refrigerate until needed.
Please note for all recipes, that the times are quoted as a general guide. Actual
times depend on preference, quality, thickness and temperature of the product.
General Rule: 1 minute Grill time per ½” (1 cm) of thickness.
MEATS
Prosciutto
Salami
Pastrami
Braesala
Capacolla
Sopressata
Black Forest Ham
Pepperoni
Smoked Turkey
Mortadella
Pancetta
Italian Sausage
Chicken
VEGETABLES
Roasted Red Pepper
Marinated Artichoke Hearts
Red Onion
Fresh Spinach
Fresh Sweet Basil
Pepperoncini
Cilantro
Sun Dried Tomatoes
Roasted Egg Plant
Green Peppers
Fresh Tomatoes
Mushrooms
Parsley
Sliced Olives
CHEESES
Combozola
Smoked Cheddar
Taleggio
Cacciocavallo
Provolone
Swiss
Bel Paese
Morbier
Mozzarella
Gorgonzola
Creamy Havarti
Fontina
Gorgonzola
Creamy Havarti
Fontina
BREADS
Foccacia
Sour Dough
French Rolls
Basil Loaf
PANINI SANDWICH SUGGESTIONS

Silesia - Velox
208 Frimley Road
Camberley GU15 2QJ
T:01276 681919
sales@silesia.co.uk www.silesia.co.uk
© Camberley Catering Equipment Ltd - all rights reserved - reproduction of any part of this document is forbidden
 Loading...