

Silent Witness SW010 Quick Manual

1
FOR YOUR
SW010
2
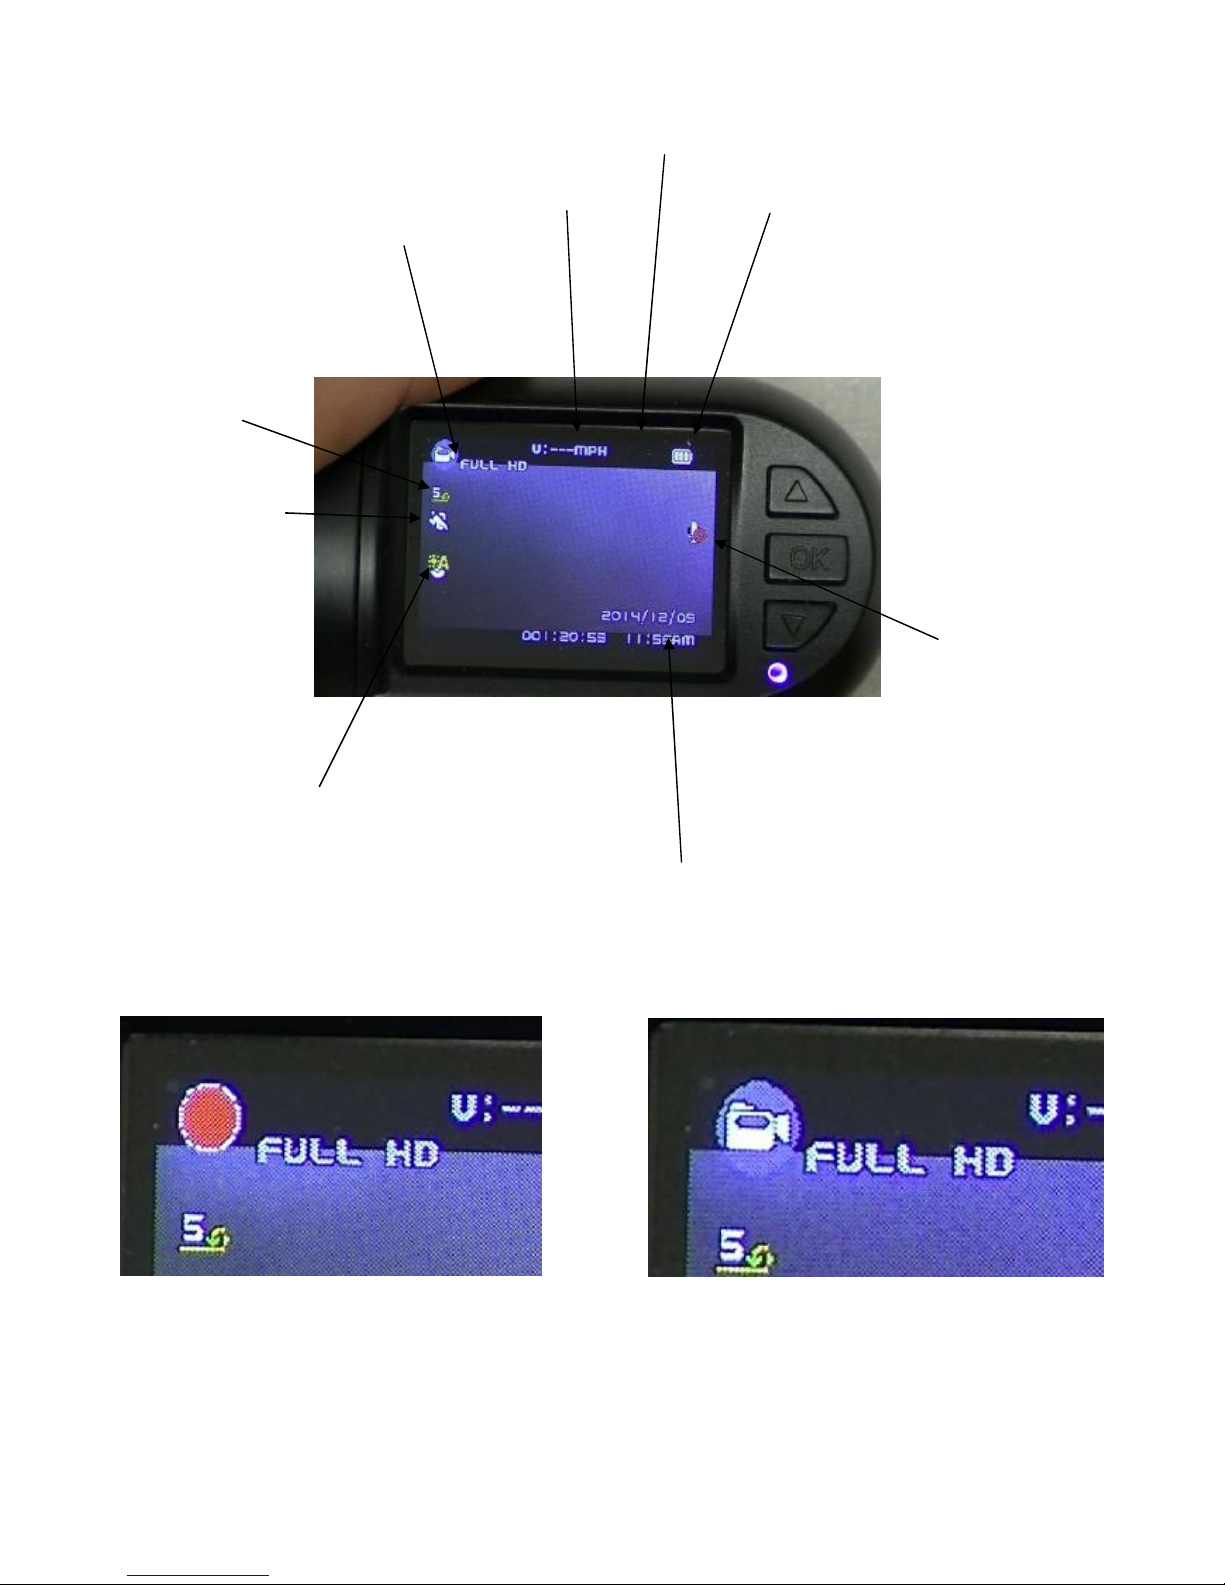
Recording
indicator
Speed
GPS
Ba ery
indicator
Microphone
Time & Date
Loop
Indicator
Digital Camera
Automa! c balance
Mo"on
Detec#on
This picture shows the camera is Recording This picture shows the camera with the recording Paused
3
1
2
3
4
5
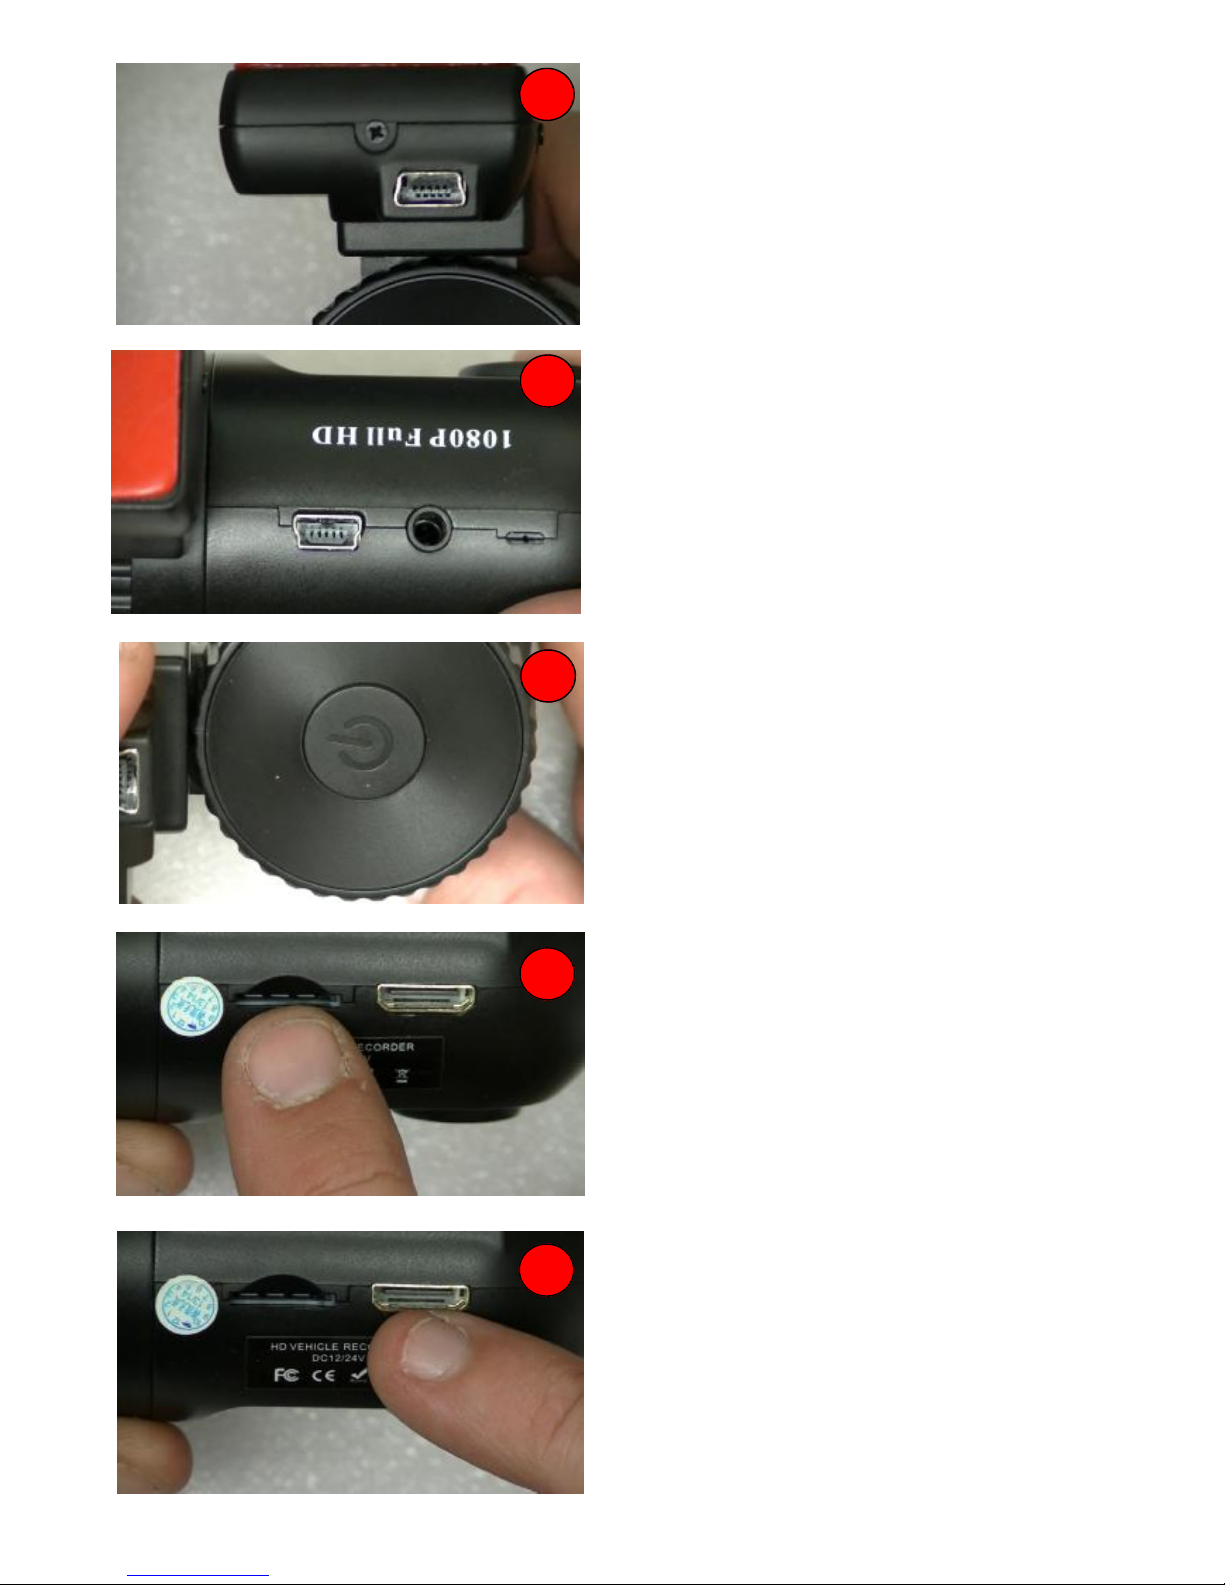
Picture 3
The le$ side of the camera, you can %nd a power bu&on,
this is used to manually turn the camera ON and OFF
Picture 1
This is the GPS windscreen module, the power must be
inserted into this usb port to enable the gps op'on.
Picture 2
This is the top of the camera (from le( to right)
computer usb port - AV output - Microphone
AV Output - This is used to connect the camera to a television
that does not have the HDMI port, This lead is included in the
kit.
Picture 4
This is the external SD card slot, if you wish to upgrade your
memory this expansion slot can be used.
Takes up to a 32gb micro sd class 6
Picture 5
This port is used to connect your camera to the television
using the HDMI lead included in the kit.
4
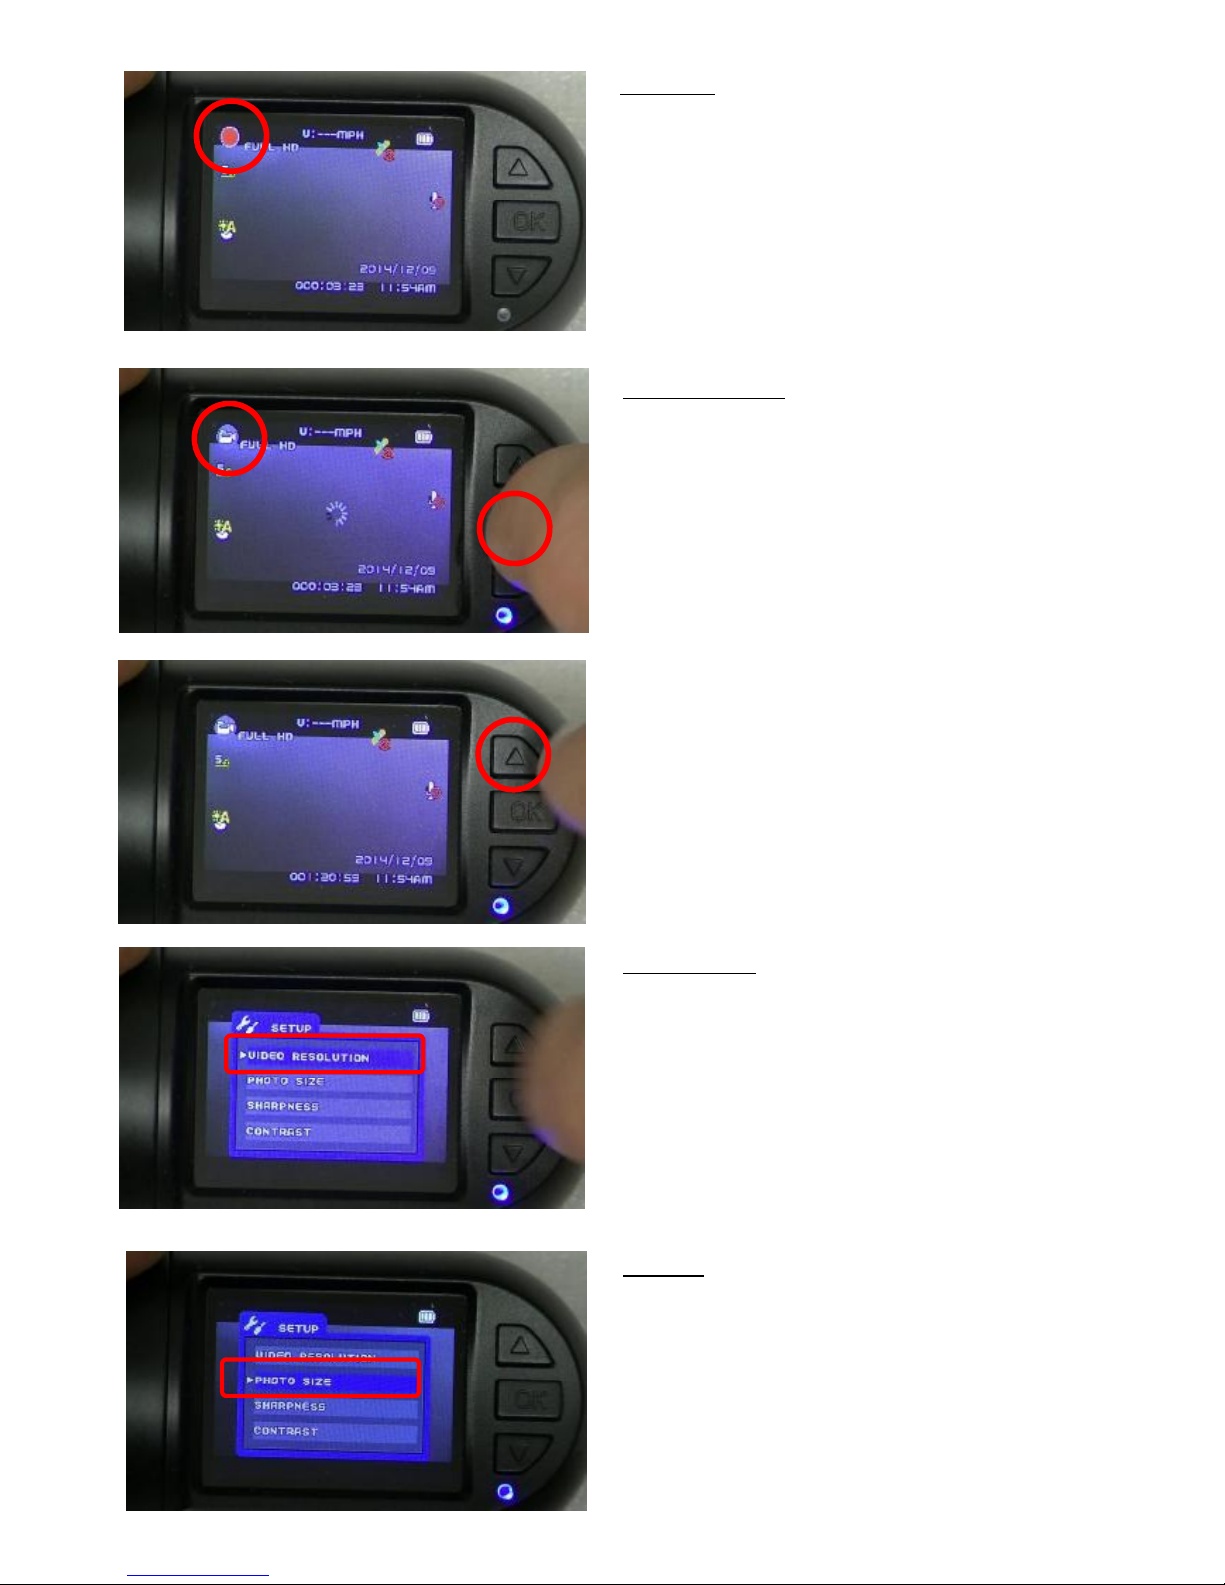
RECORDING
This screen shows your device switched on and recording
The red ball in the top le) will pulse to show it is recording.
When the camera has been PAUSED this will now allow you
to enter the menu.
PRESS and HOLD the UP arrow key, the menu will appear
When in the menu, use the UP and DOWN arrow keys to
highlight the op ons and PRESS OK to enter that op! on.
PAUSED RECORDING
This screen shows your device switched on and the recording
has been PAUSED.
You can PAUSE this device by pressing the OK
Video Resolu"on
Press OK to enter video resolu*on , and using the UP and
DOWN arrow keys make your selec+on and press OK to
to con%rm.
1920x1080 is the highest HD recording quality
VGA is the lowest recording quality
We recommend - 1920 x 1080
Photo Size
This op,on allows you to alter the digital camera picture size
From 0.9 Megapixel to 4 Megapixel
We recommend - 4 megapixel

5
Sharpness
This op-on Lets you alter the sharpness of the video and
digital Pictures,
We recommend this is set to AUTO
Contrast
This op.on lets you change the contrast of the video and
digital pictures.
We recommend this is set to AUTO
Flicker Rate
This op/on lets you change the 0icker rate of the device.
European countries use 60Hz .
If you are unsure please set this op1on to AUTO
6
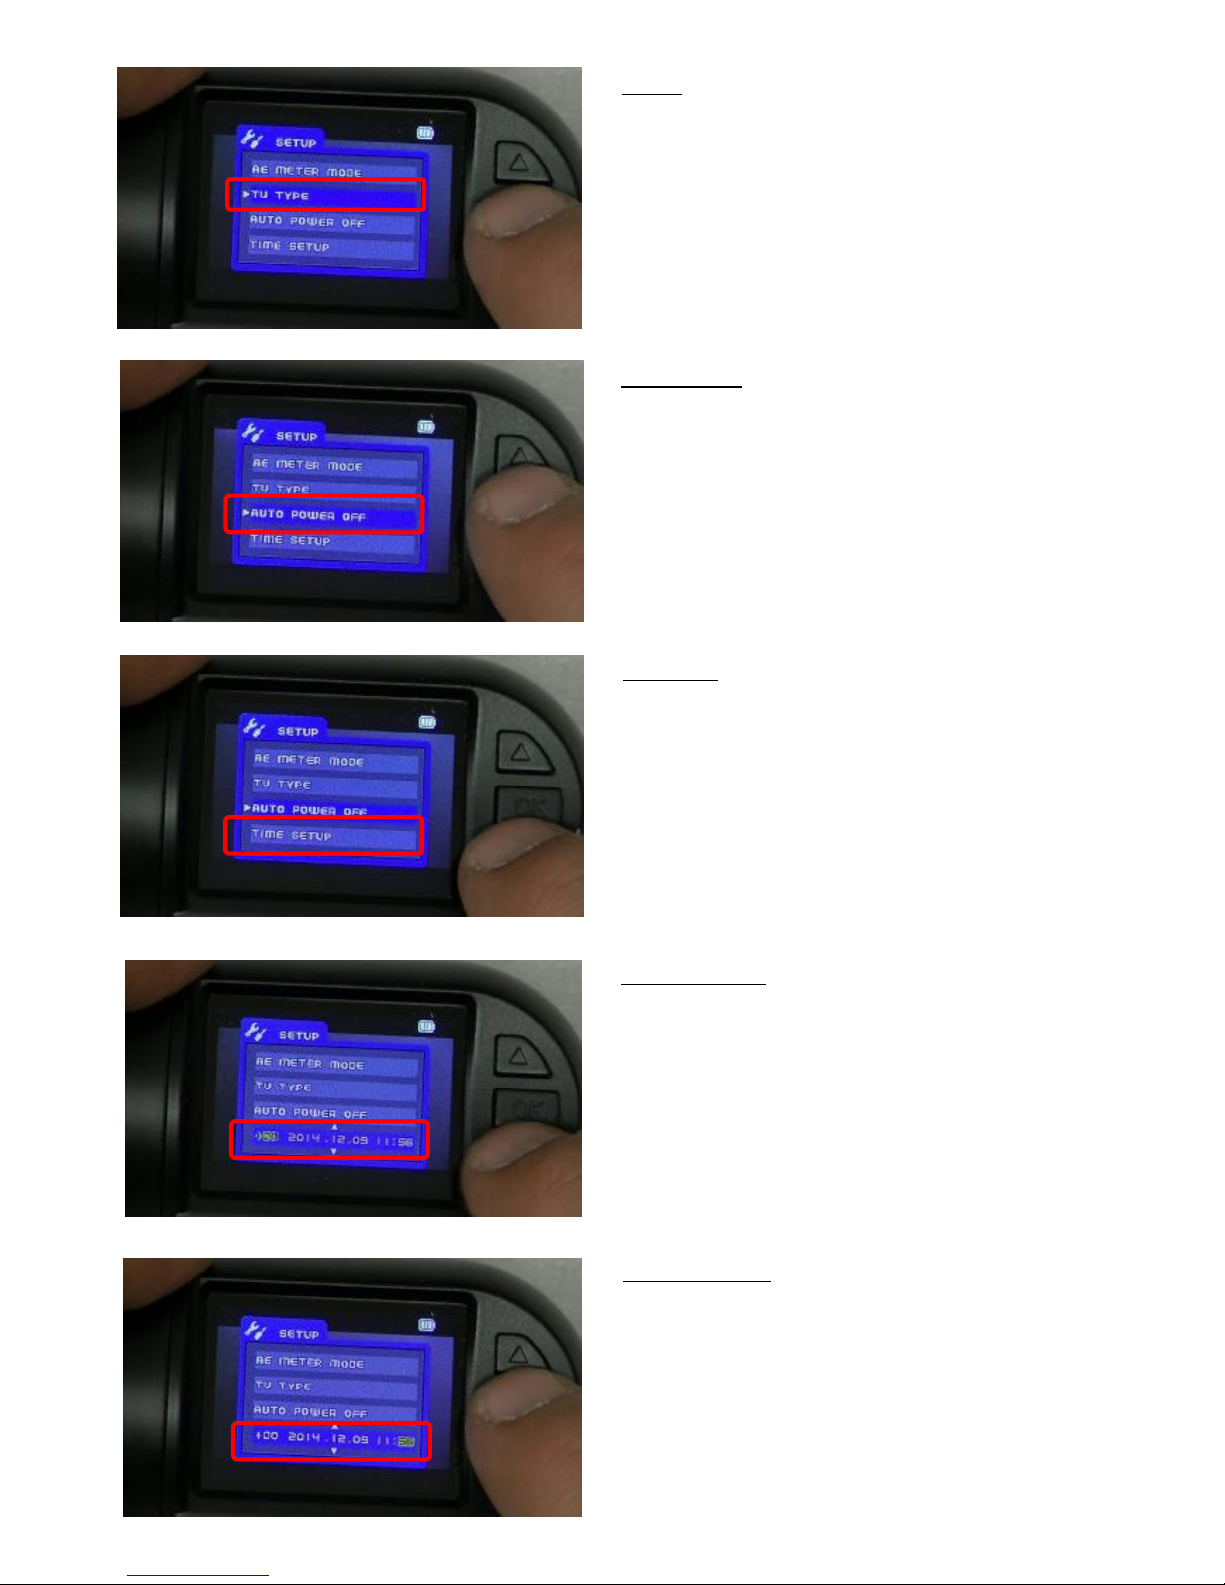
Tv Type
If you want to connect your camera to a analogue television,
you may need to change this se2 ng.
PAL is the most common type used in the UK
Please see page 3 picture 2 of the “quick guide”
Time Set Up
This op3on lets you set the date and 4me of the device.
Please note, that when the GPS is connected, the device will
obtain the 5me automa6cally from satellites.
Time Set Up Cont..
The 1st set of digits in yellow is the 7me zone, this has to be
correct for the GPS to obtain the 8me se9 ngs.
Bri:sh standard ; me +00
Bri<sh summer = me +01
Use the UP and DOWN arrows to navigate and OK to con%rm
Time Set Up Cont…
When you press OK the yellow box will move across the
screen to the next se> ng.
Time Zone—Year—Month– Day—Hour—Minutes
Auto Power O#
This op?on lets you set a @ mer to power down the camera
when the camera is removed from the power source.
When in the OFF posiA on the camera will remain on unB l the
baC ery is depleted.
7
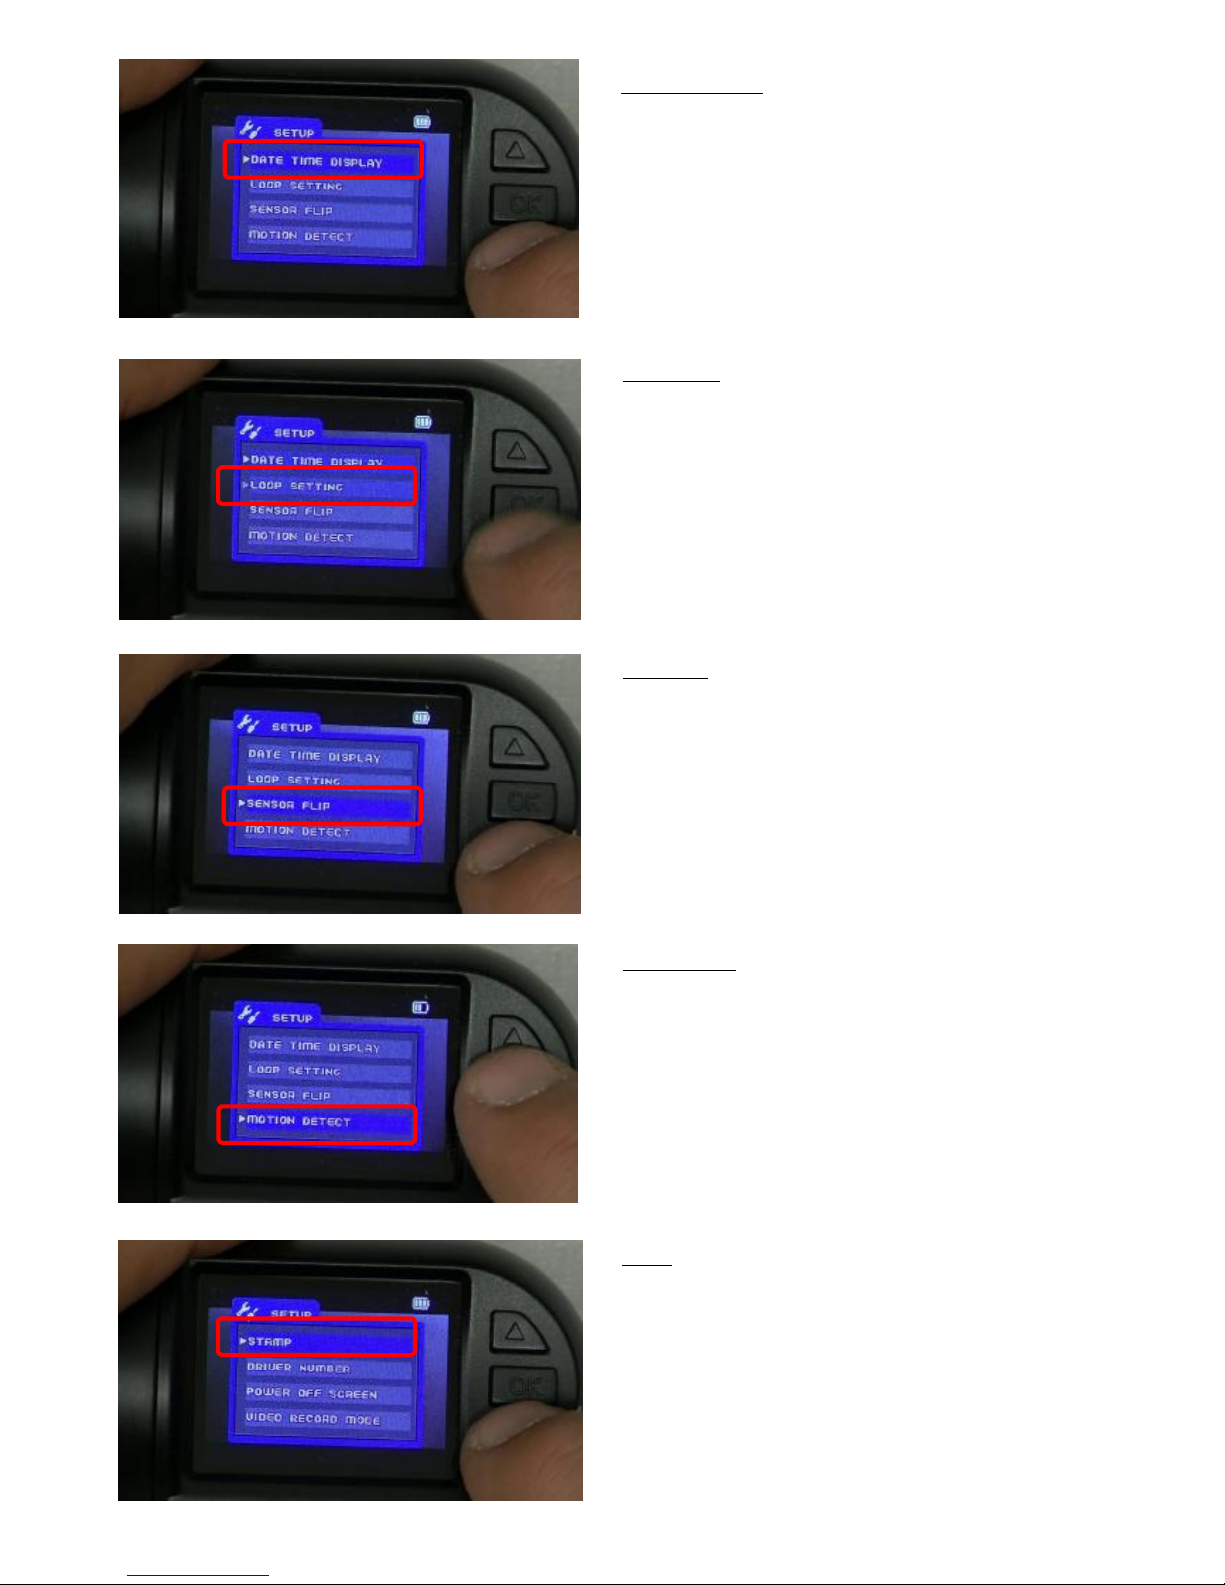
Date Time Display
This opD ons stamps the data into the video %le.
So when playing the video %le back the date and Eme will be
displayed
Loop Se$ ng
The Loop seF ng feature allows the device to recycle the
memory card.
We recommend a 5 minute loop seG ng, every 5 minutes the
camera will make a new video %le, when the card is full the
camera will automaHcally delete the oldest video and recycle
the recordings.
Please note in the OFF posiIon when the card is full the
camera %les will have to be deleted manually
Sensor Flip
This allows the camera to be installed 180 degrees so the
screen and camera are showing the correct way.
This funcJon is only used in certain installs
Mo%on Detect
This funcKon is used in a CCTV install, where the camera is in
sleep mode unLl the lens detects movement, when this
happens the camera wakes and starts recording.
This func&on is NOT used if the camera is being used as a
drive accident camera
Stamp
This funcM on allows more data to be inpuN ed into the video
%le.
We recommend GPS DATA so the speed and gps data is
stamped into the video %le along with the O me and date
8
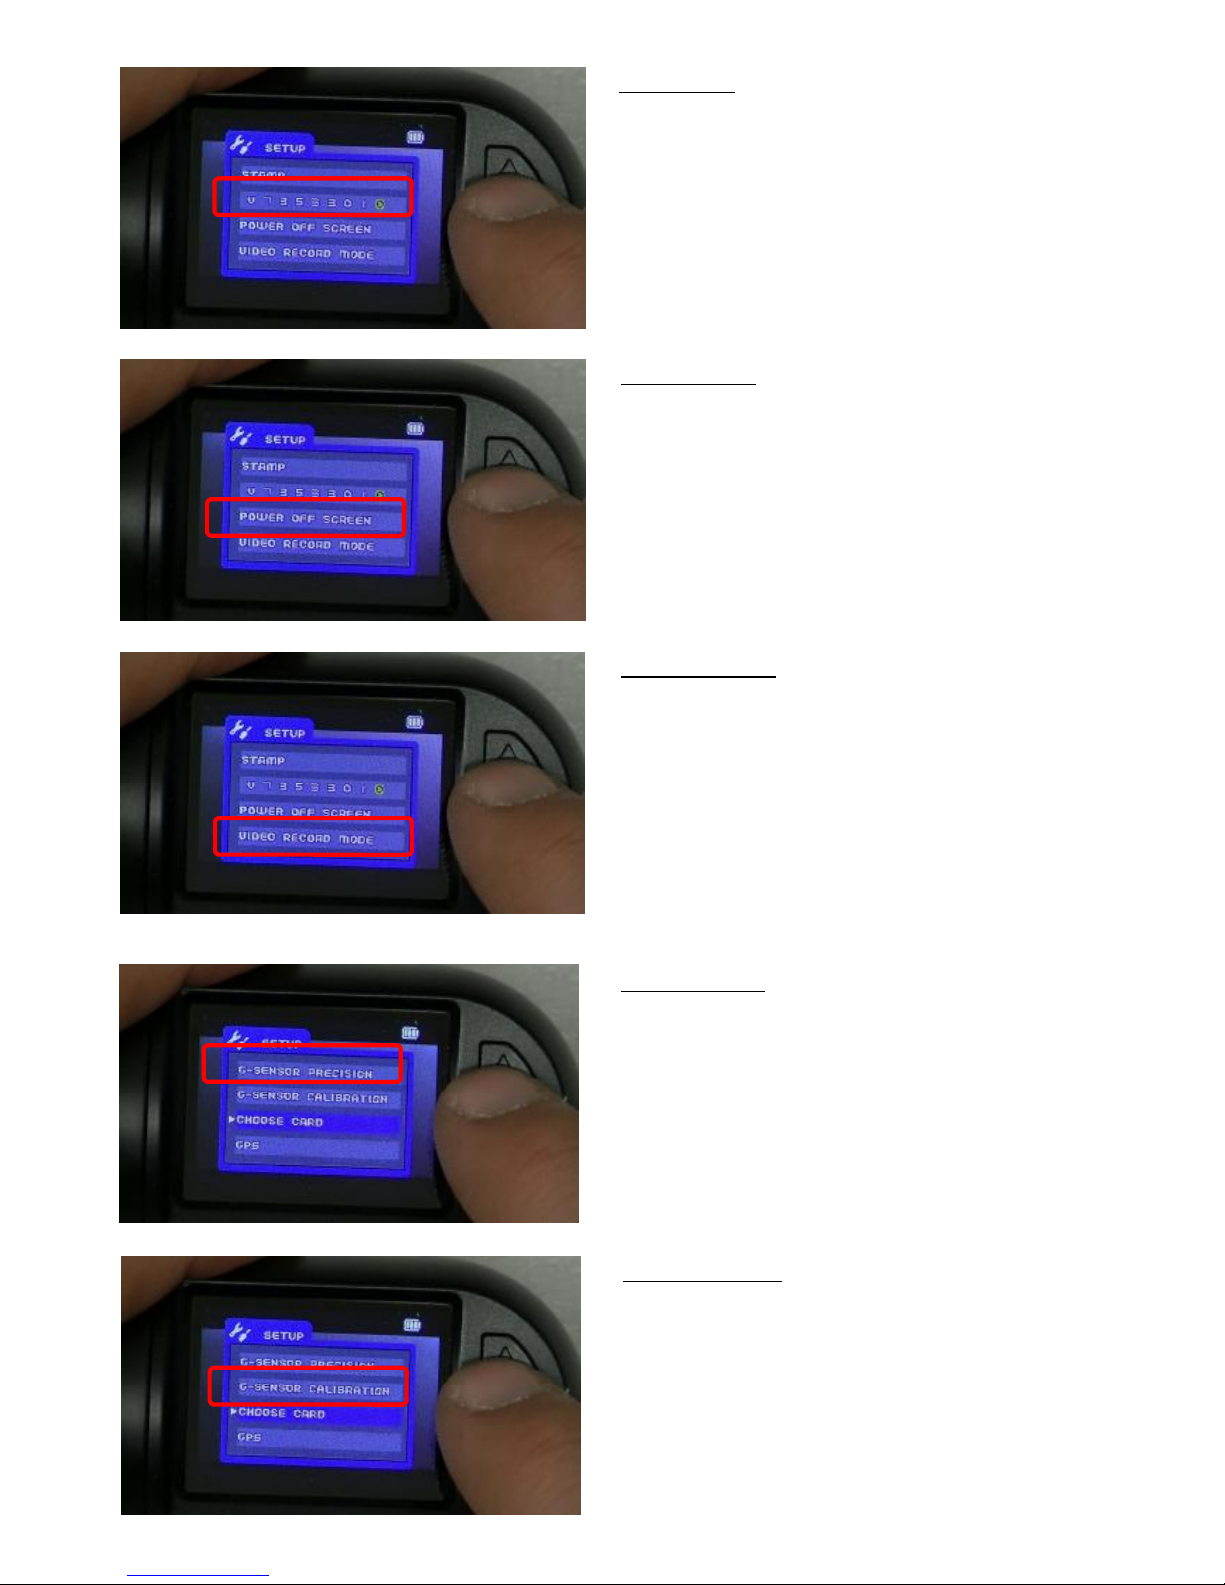
Video Record Mode
This funcP on lets you choose if the camera records
Video and audio or just video
Power O# Screen
When the device is switch on the screen can be set to automaQ cally switch oR and go into screensaver mode.
We recommend 1 minute , aS er 1 min the device will switch
oR the screen so it does not distract you whilst driving.
If switched to the OFF seT ng, the screen will remain on.
Driver Number
This funcU on allows a name-vehicle reg to idenV fy the
Use the UP and DOWN arrows to choose a LeW er or Number
and press OK to con%rm, this will then move to the next icon
on the screen.
G Sensor Precision
G Sensor is a shock sensor, which acX vates at front/side or
rear accident, it then locks the video %le for safe keeping.
This can be set from 2g up to 5g
We recommend this being set at 2g , this can be altered later
if required.
G Sensor Calibra'on
This funcY on needs to be run once installed in your vehicle,
This will calibrate the device, choose YES and keep the camera
and vehicle sZll, while the camera calibrates.
 Loading...