

Silent Alert KF3A-2219-EU-GFOB, KF3A-2219-EU Quick Start Manual
Quick start guide KF3A-2219-EU-GFOB
Emergency person to person keyfob with shock detection
Any questions? Call us on 01246 450789
TM
Silent
Alert
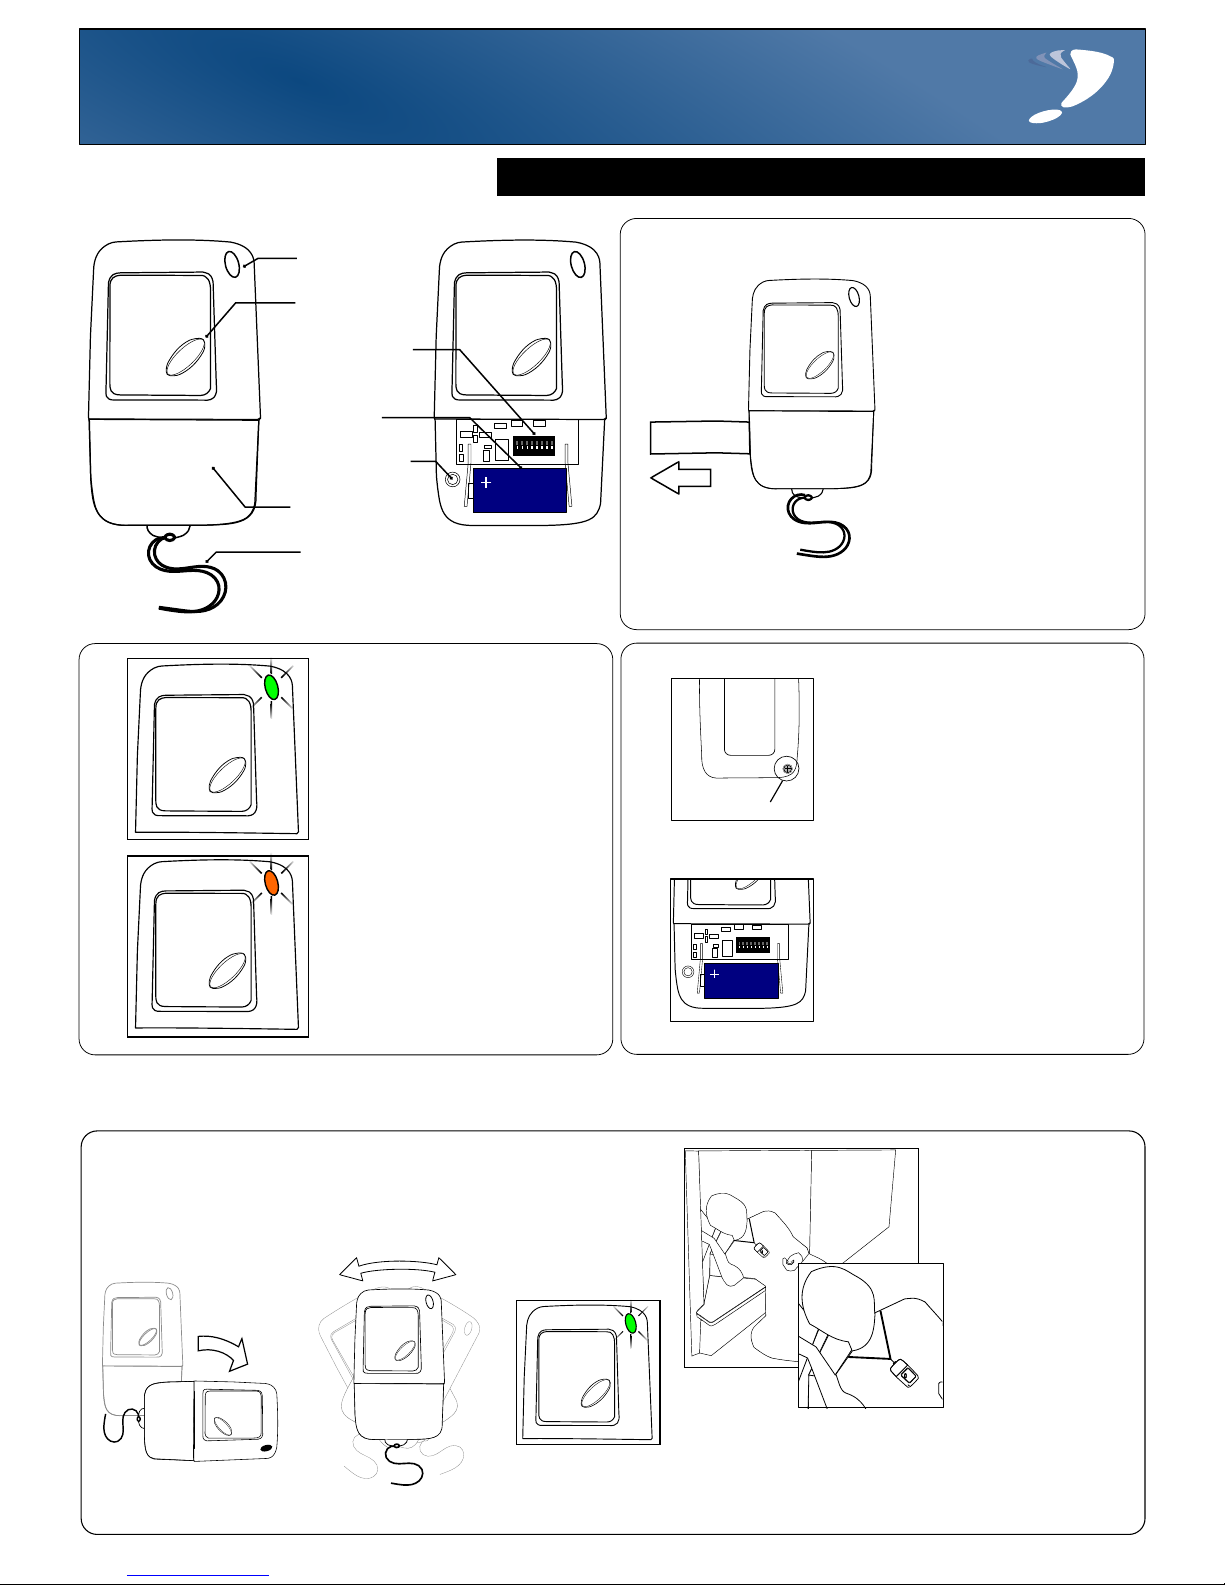
Standard Activation
1.
1 2 3 4 5 6 7 8
Status light
Send button
Configuration
switches
Battery
Security screw
Battery cover
Neck cord
1 2 3 4 5 6 7 8
A battery is already installed in the Keyfob.
Remove and
Discard
To activate the unit
simply remove the paper
tab by pulling it gently
away from the unit.
The keyfob is now ready
to go and is set to
illuminate person to
person by default.
2.
Sending a signal
The supplied lithium battery
should provide a large number
of activations
Press the send button.
The status light will shine green
and the Pager or SignWave
should receive a person to
person signal.
If the light shines orange when
the button is pressed the internal
battery is low and should be
replaced (see step 3).
3.
Low battery
When the battery needs replacing
remove the screw from the rear of
the unit.
Turn the unit over and gently push
the battery cover upwards
exposing the battery and
configuration switches.
Replace with a 6V lithium battery
(2CR1/3N OR PX28L)
1 2 3 4 5 6 7 8
Unscrew here
CCF3A-2219-EU-GFOB ALARM
05/02/2014 BATTERY TYPE
6 VOLT LITHIUM
2CR1/3N or PX28L
Silent Alert Care Call System
www.silent-alert.co.uk Clofield Ltd. UK
Tel: 01246-260045
KF3A-2219-EU-GFOB
Shock detection activation
The KF3A-2219-EU-GFOB variant incorporates a
sensor which will trigger the unit automatically when the device
receives a shock.
For best results we recommend the using the neck
cord provided to allow the keyfob to hang around the
neck. Placing the keyfob in a pocket may reduce the
effectiveness of the shock sensor.
WARNING! Your device and its accessories are not toys. They may contain small parts. Keep them out of the reach of small children.

Advanced settings KF3A-2219-EU-GFOB
Emergency person to person keyfob with shock detection
Any questions? Call us on 01246 450789
TM
Silent
Alert
Changing the system channel code
NOTE. In most cases it is not necessary to change the system code. However, when one or
more systems are in close proximity, system codes can be used to avoid interference from
other SA3000 systems using up to a maximum of 16 channels.
The monitor is supplied with no
system code switches set (system code 1).
For reference this is the factory setting
should you need to re-set the unit.
System codes can be set using
key switches 1 - 4.
The diagram to the right shows the 16
possible combinations.
Be sure that the same system code is set on
the receiver to be used and any other
monitoring options in that system.
13
1 2 3 4 5 6 7 8
14
1 2 3 4 5 6 7 8
15
1 2 3 4 5 6 7 8
16
1 2 3 4 5 6 7 8
2 3
4
1
1 2 3 4 5 6 7 8 1 2 3 4 5 6 7 8
1 2 3 4 5 6 7 8
1 2 3 4 5 6 7 8
9
1 2 3 4 5 6 7 8
10
1 2 3 4 5 6 7 8
12
1 2 3 4 5 6 7 8
11
1 2 3 4 5 6 7 8
5
6 7 8
1 2 3 4 5 6 7 8
1 2 3 4 5 6 7 8
1 2 3 4 5 6 7 8
1 2 3 4 5 6 7 8
WARNING! PRODUCT CONTAINS A LITHIUM BATTERY.
Battery can explode or leak if heated, disassembled, shorted, recharged, exposed to fire or high temperature or
inserted incorrectly. Keep in original package until ready to use. Do not carry batteries loose in your pocket or purse.
Keep batteries away from children. If swallowed, consult a physician at once.
Under certain misuse conditions and by abusively opening the battery, exposed lithium can react with water or
moisture in the air causing potential thermal burns or fire.
 Loading...