

Page 1
Easy Scan
Opera ng Manual
Manuale d’uso
Gebrauchsanleitung
Plus
Mode d’emploi
Manual de uso
Manual de u lização
Handleiding voor gebruik
D447826XA
vers. 1.1
Page 2

Easy Scan Plus
EN
(c) 2016 Silca S.p.A. - Vittorio Veneto
This manual has been drawn up by Silca S.p.A.
All rights reserved. No part of this publication can be reproduced or circulated by any means (photocopies, microfi lm or other)
without the approval of Silca S.p.A.
Edition: February 2017
by SILCA S.p.A.
Via Podgora, 20 (Z.I.) 31029 VITTORIO VENETO (TV) - Italy
IT
(c) 2016 Silca S.p.A. - Vittorio Veneto
La stesura di questo manuale è stata curata da Silca S.p.A.
Tutti i diritti sono riservati. Nessuna parte della pubblicazione può essere riprodotta o diffusa con un mezzo qualsiasi (fotocopie,
microfi lm o altro) senza il consenso di Silca S.p.A.
Edizione: Febbraio 2017
Da SILCA S.p.A.
Via Podgora, 20 (Z.I.) 31029 VITTORIO VENETO (TV) - Italia
DE
(c) 2016 Silca S.p.A. - Vittorio Veneto
Dieses Handbuch wurde von Silca S.p.A. herausgegeben.
Alle Rechte vorbehalten. Jede Vervielfältigung durch Fotokopien, Mikrofi lme, usw. bedarf der vorherigen Genehmigung von Silca
S.p.a.
Ausgabe: Februar 2017
von SILCA S.p.A.
Via Podgora, 20 (Z.I.) 31029 VITTORIO VENETO (TV) - Italie
FR
(c) 2016 SILCA S.p.A. - Vittorio Veneto
Ce mode d’emploi a été rédigé par SILCA S.p.A.
Tous les droits sont réservés. Aucune partie de cette publication ne pourra être reproduite ou divulguée quel que soit le moyen
utilisé (photocopies, microfi lm ou autre) sans le consentement écrit préalable de SILCA S.p.A.
Edition: Février 2017
par SILCA S.p.A.
Via Podgora, 20 (Z.I.) 31029 VITTORIO VENETO (TV) - Italie
ES
(c) 2016 Silca S.p.A. - Vittorio Veneto
Este manual ha sido redactado por Silca S.p.A.
Reservados todos los derechos. Ninguna parte de la publicación puede ser reproducida o difundida con cualquier medio fotocopias,
microfi lm u otro) sin el permiso de Silca S.p.A.
Edición: Febrero 2017
Por SILCA S.p.A.
Via Podgora, 20 (Z.I.) 31029 VITTORIO VENETO (TV) - Italia
PT
(c) 2016 Silca S.p.A. - Vittorio Veneto
Este manual foi redigido pela Silca S.p.A.
Todos os direitos reservados. Nenhuma parte da publicação pode ser reproduzida ou divulgada com qualquer meio (fotocópias,
microfi lmes ou outro) sem a autorização da Silca S.p.A.
Edição: Fevereiro 2017
pela SILCA S.p.A.
Via Podgora, 20 (Z.I.) 31029 VITTORIO VENETO (TV) - Itália
NL
(c) 2016 Silca S.p.A. – Vittorio Veneto
Deze handleiding werd opgesteld door de fi rma Silca S.p.A.
Alle rechten zijn voorbehouden. Geen enkel deel van deze publicatie mag vermenigvuldigd of verspreid worden, door gelijk welk
hulpmiddel (fotokopieën, microfi lms of andere hulpmiddelen), zonder toestemming van de fi rma Silca S.p.A.
Editie: Februari 2017
door SILCA S.p.A.
via Podgora, 20 (Z.I.) 31029 VITTORIO VENETO (TV) - Italië
Copyright Silca S.p.A. 20162
Page 3

Easy Scan Plus
B
C
A
N
D
Fig./Abb.1
L
E
Fig./Abb.2
F1
F
Fig./Abb.3
3Copyright Silca S.p.A. 2016
Page 4

Easy Scan Plus
M
H
Fig./Abb.4
G
Fig./Abb.5
Copyright Silca S.p.A. 20164
N
Fig./Abb.6
I
Fig./Abb.7
Page 5
Easy Scan Plus
English
USE OF THE MANUAL
This manual has been wri en by the Manufacturer and is an integral part of the device’s documenta on.
It provides the user with useful informa on so that the Easy Scan Plus device can be used safely.
User manual
All device users must read this manual carefully as it is essen al for the proper use and maintenance of the
device.
The manual must be carefully stored for the en re life cycle of the device, including the disposal stage. Store
the manual in a dry place near the device; somewhere where it is always at the user’s fi nger ps.
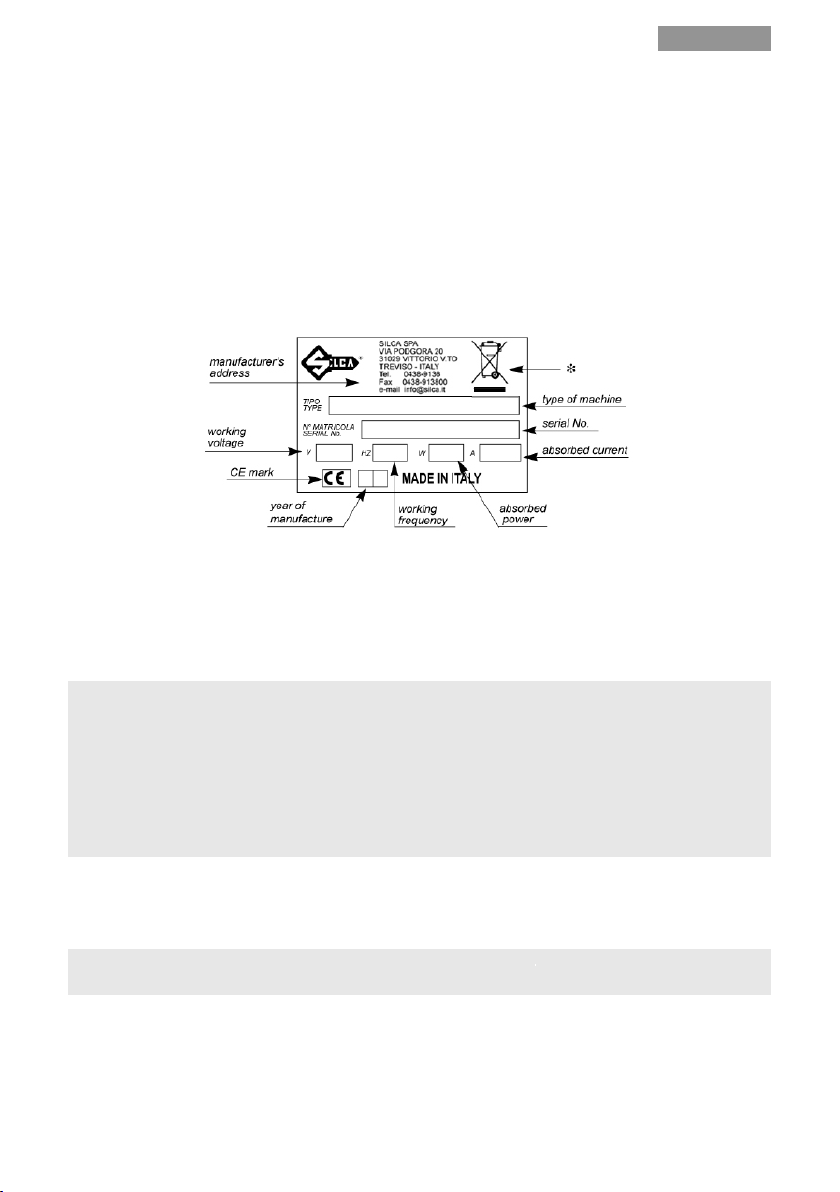
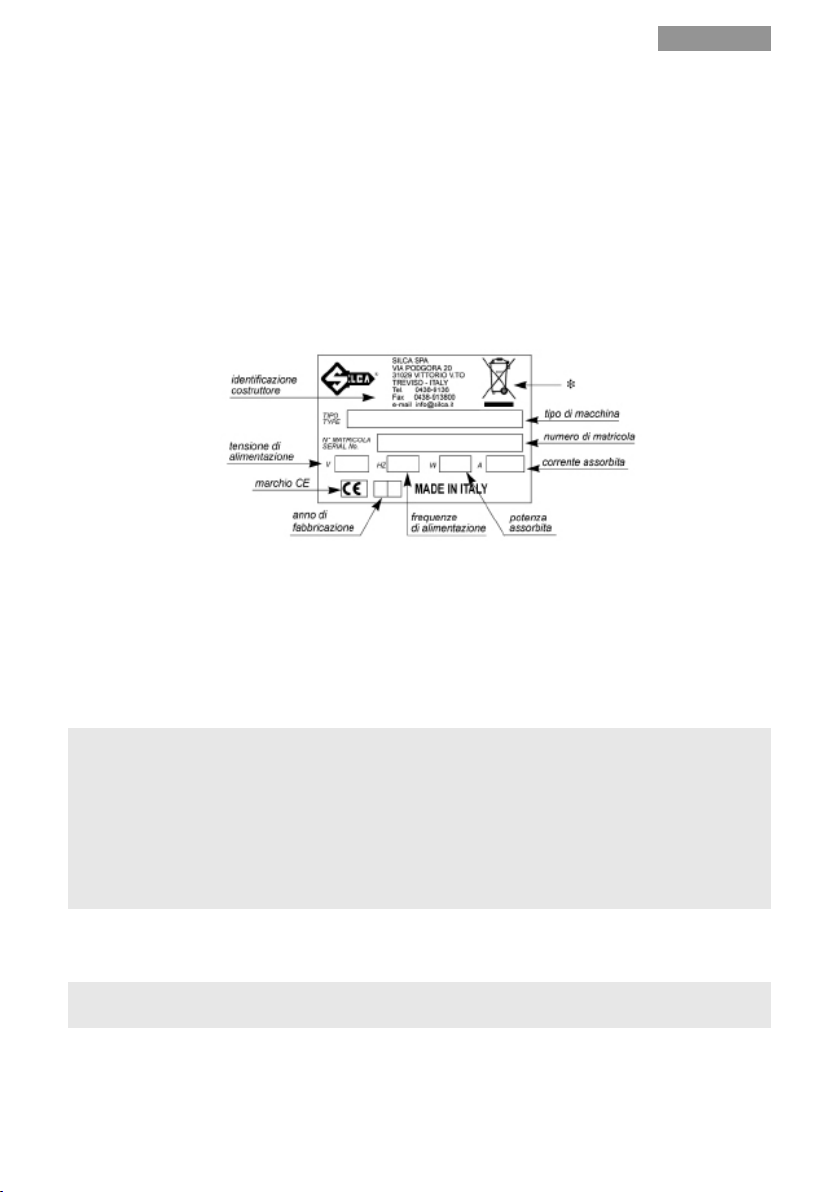
Device ID
An iden fi ca on plate indica ng the serial number is located on the back of the device.
GENERAL WARNINGS
The device has been designed in accordance with the principles of the EC European Direc ves.
The materials used for its construc on are not dangerous and render the device compliant with the direc ves.
In its design features, all of the device’s components are safe
1 - IN ORDER TO WORK PROPERLY AND RELIABLY, KEEP THE DEVICE AWAY FROM ANY SOURCES OF RADIO
INTERFERENCE, SUCH AS:
- CORDLESS PHONES
- ELECTRIC MOTORS
- NEON LIGHTS
- WI-FI MODEMS
2 - DO NOT CONNECT THE USB CABLE TO THE COMPUTER BEFORE INSTALLING THE PROGRAM.
ONLINE DOCUMENTATION
- For the latest documenta on or to download new updates of the Easy Scan Plus so ware program,
regularly visit www.silca.biz.
5Copyright Silca S.p.A 2016
Page 6

Easy Scan Plus
English
DEVICE DESCRIPTION
The Easy Scan Plus device is fitted with a display which guides the user through the use of several of
its features. To use the advanced features, the device can be connected to a computer and managed
by the “Air4 Remotes Programming Software”.
WORKING PARTS
A - Graphic display
B - Buttons for scrolling the menu items
C - Remote control reading area
D - Func on bu ons
E - Ba ery compartment
F - Easy Scan Plus iden fi ca on label
F1 - Device serial number
G - Micro-B USB port for connec ng to a computer
H - USB cable (supplied)
FUNCTIONS:
- Iden fi es the type of remote control, by determining both its frequency and code type (fi xed or rolling).
- Checks if copying would be possible and indicates which Silca remote control to use.
- Checks that the Silca remote control copy is an exact duplicate of the original remote control.
- Reads the frequency of the remote control (frequency meter)
- Adjusts (tunes) the intensity of the signal emi ed by quartz remote controls.
- Updates the internal so ware via the USB port, through a computer program.
- When using the computer so ware (op onal), other advanced copying features are available, remote
controls can be generated and managed and the Silca NFC remote control so ware can be updated.
TECHNICAL DATA
Power supply
The device is powered by 2 rechargeable AA 1.2V nickel-metal hydride batteries (NiMH) which are supplied.
It can also be powered via the provided USB cable, by connecting the device to the USB port of a computer or
a power supply with a USB connector (not supplied).
I - Ceramic screwdriver
L - Device on/ off bu on
M - Rechargeable AA 1.2V ba eries (supplied)
N - Silca NFC remote control wri ng area
Technical specifications
Supply voltage: 5 VDC with an external power supply
Supply voltage: 2.4 VDC with the ba eries
Current consump on: 0.5 A MAX.
Antenna range frequencies
NFC ANTENNA: 13.56 MHz
HF ANTENNA: 26 720 - 871.1 MHz
Environmental conditions
The device operates at an ambient temperature between 0 and 50°C.
Dimensions
Height: 90 mm
Width: 148 mm
Depth: 25 mm
Weight without ba eries 172.5 g
6
Copyright Silca S.p.A 2016
Page 7
Easy Scan Plus
USING THE EASY SCAN PLUS STAND ALONE
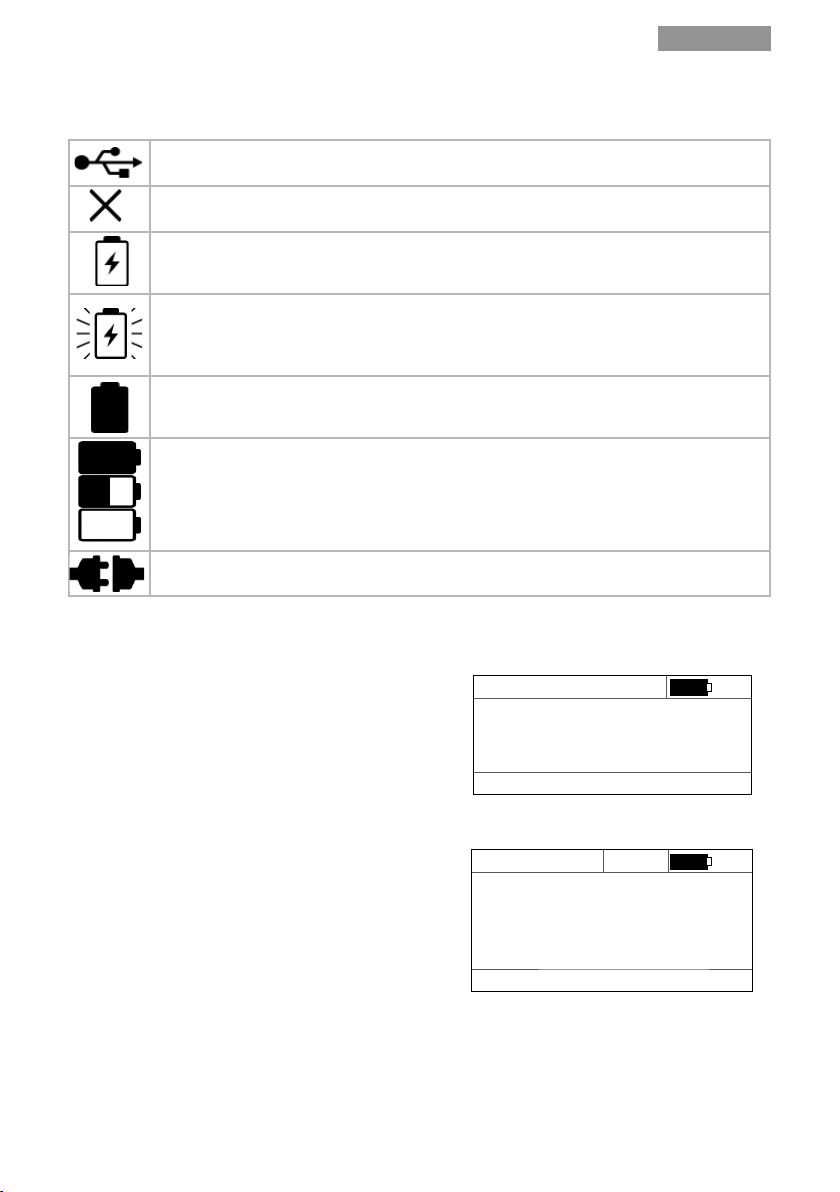
Battery status and connection symbols
Indicates that Easy Scan Plus is connected with the computer.
Indicates that the ba eries are missing, or have been fi ed wrongly. If so, remove them and
fi t them with the right polarity.
Indicates that the ba eries are charging.
Quick fl ashing indicates that the ba eries are not rechargeable, or there is an error in the
ba ery charging process.
If the ba eries being used are rechargeable, check immediately that they are not damaged or
overheated; if so remove them and replace with new ba eries.
Indicates that charging is complete.
Indicates that the ba ery charge is over 80%.
Indicates that the ba ery charge is between 10% and 80%.
Indicates that the ba ery charge is less than 10%.
Indicates that Easy Scan Plus is connected to a charger.
English
Power on
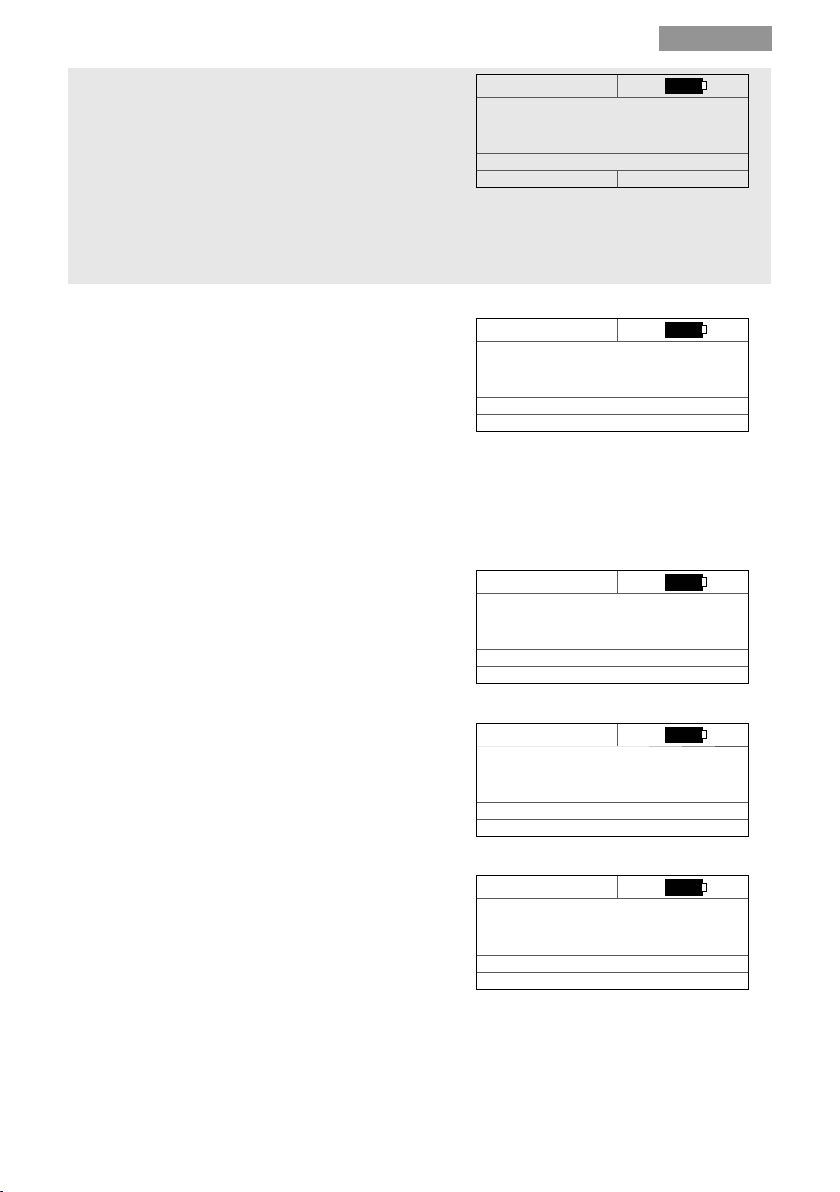
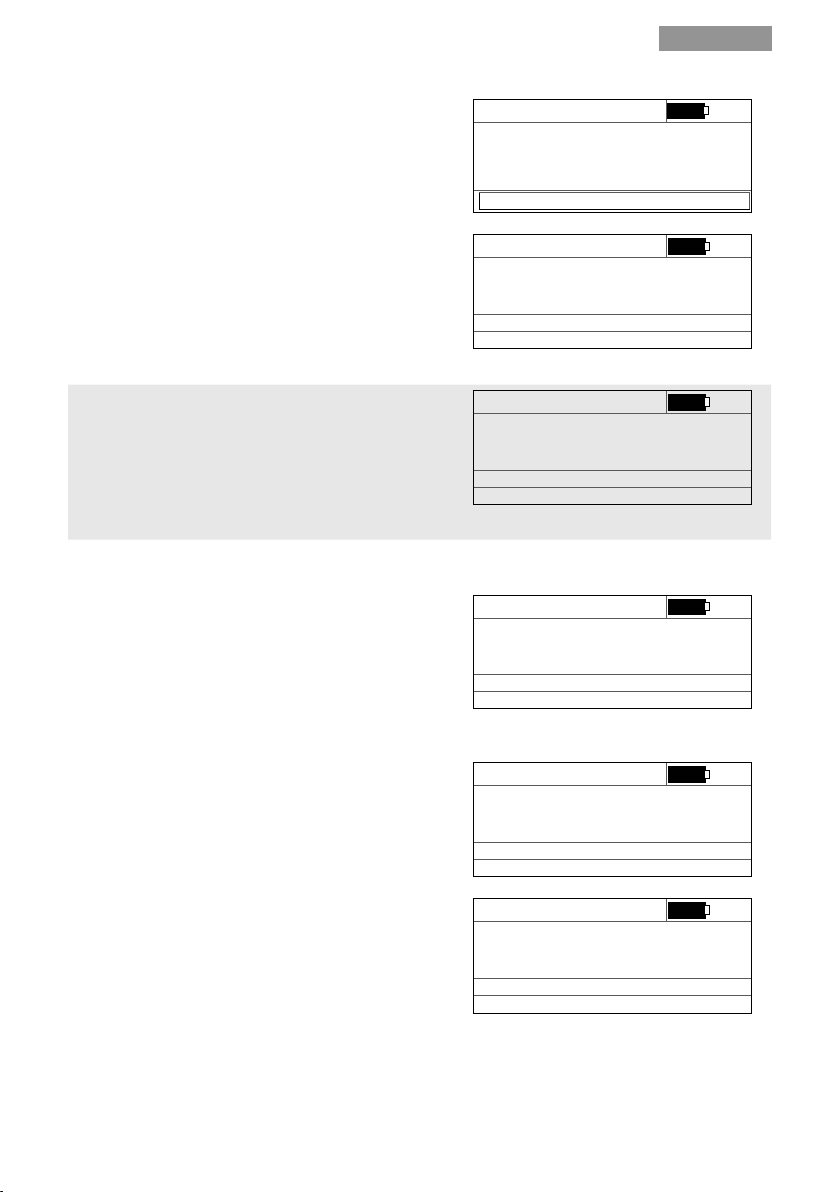
Hold down the Easy Scan Plus power bu on un l the display shows the Silca logo .
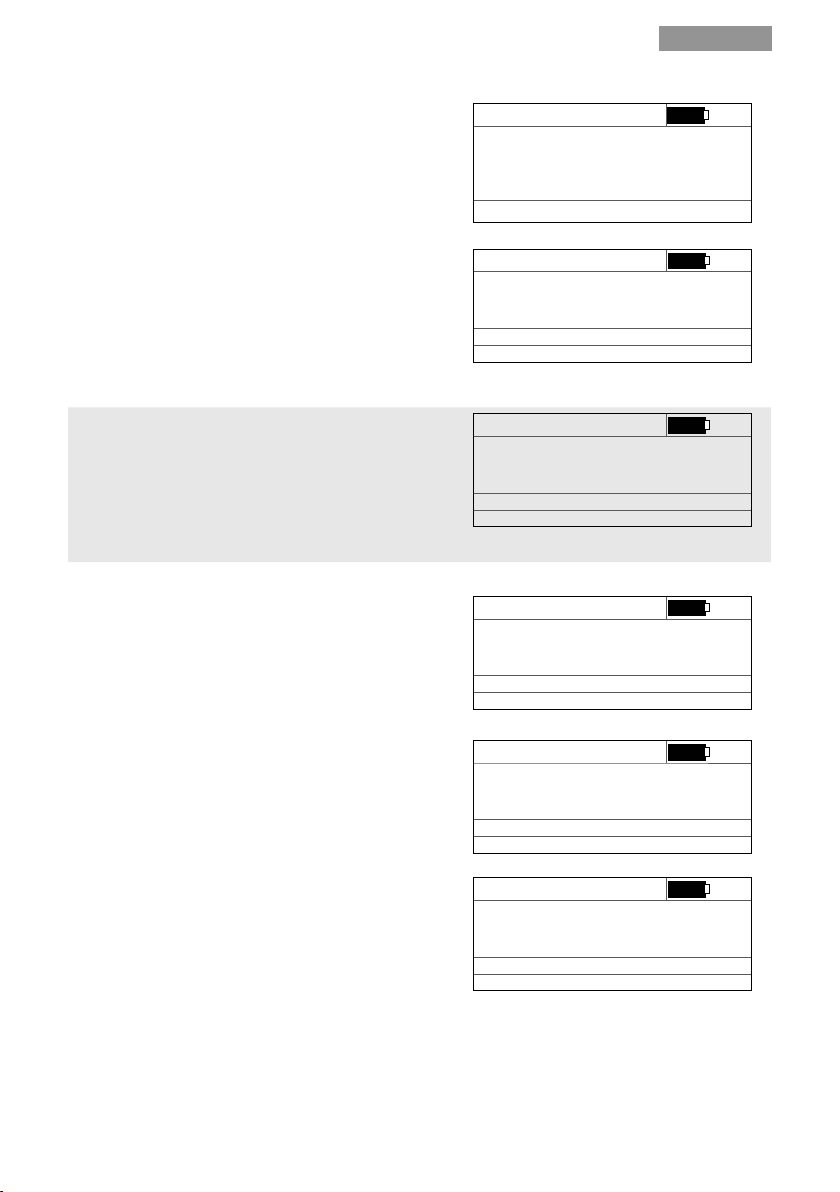
Language Selection
Language selec on will appear a er the fi rst power on of
Easy Scan Plus.
Use the bu on on the side of the display (B) to scroll the
languages available.
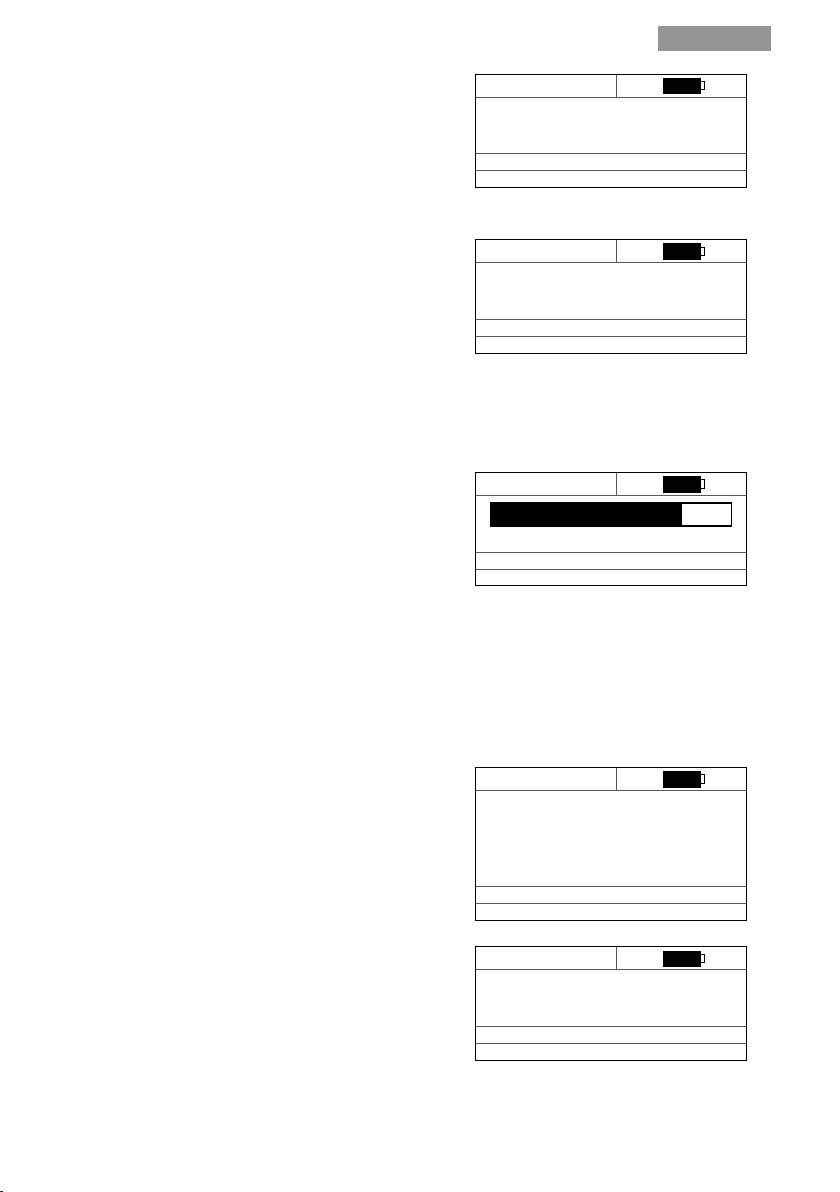
When the language has been selected press “ENTER” to
confi rm.
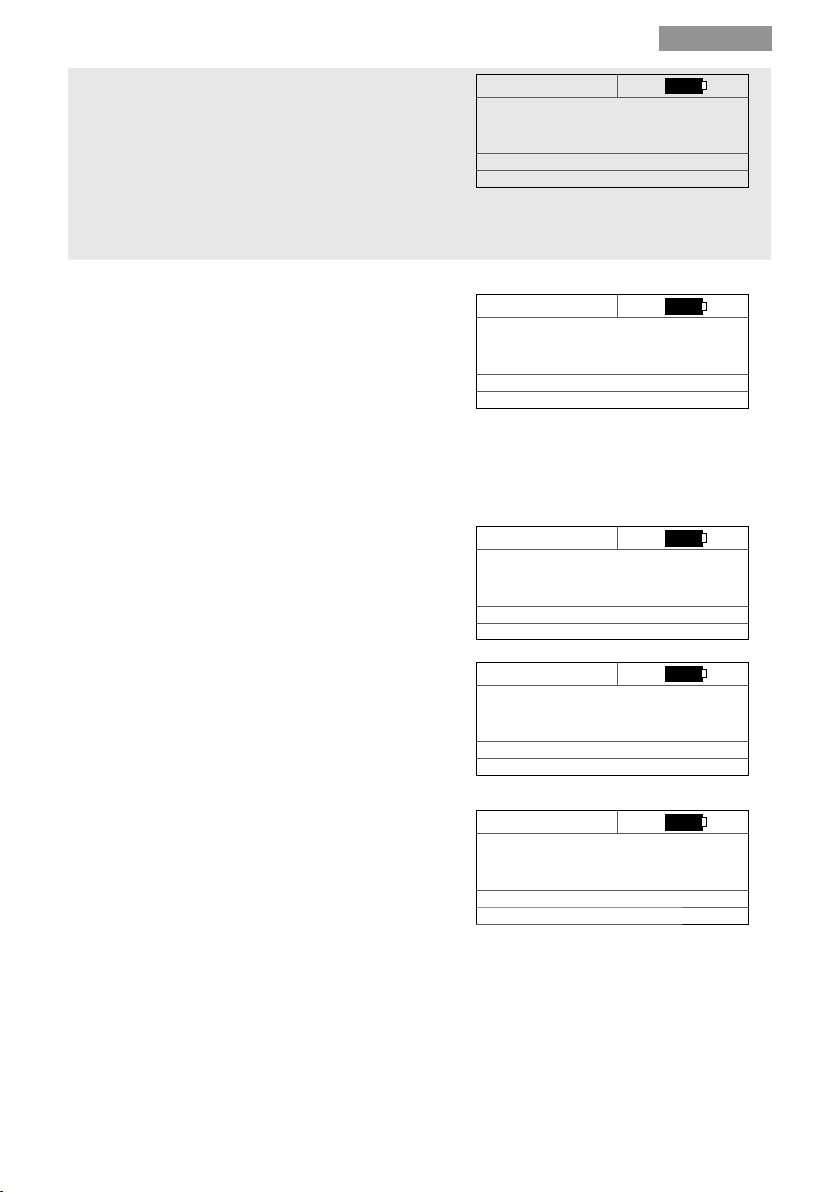
The main menu is displayed with the following
func ons:
- Iden fi ca on
- Check Copy
- Frequency meter
- Antenna Tuning
-Op ons
Language Selection
Italiano
> English
Français
Deutsch
(ENT) to continue
Main menu
> Identifi cation
Copy check
Frequency meter
Antenna Tuning
Options
(ENT) to continue
7Copyright Silca S.p.A 2016
Page 8
Easy Scan Plus
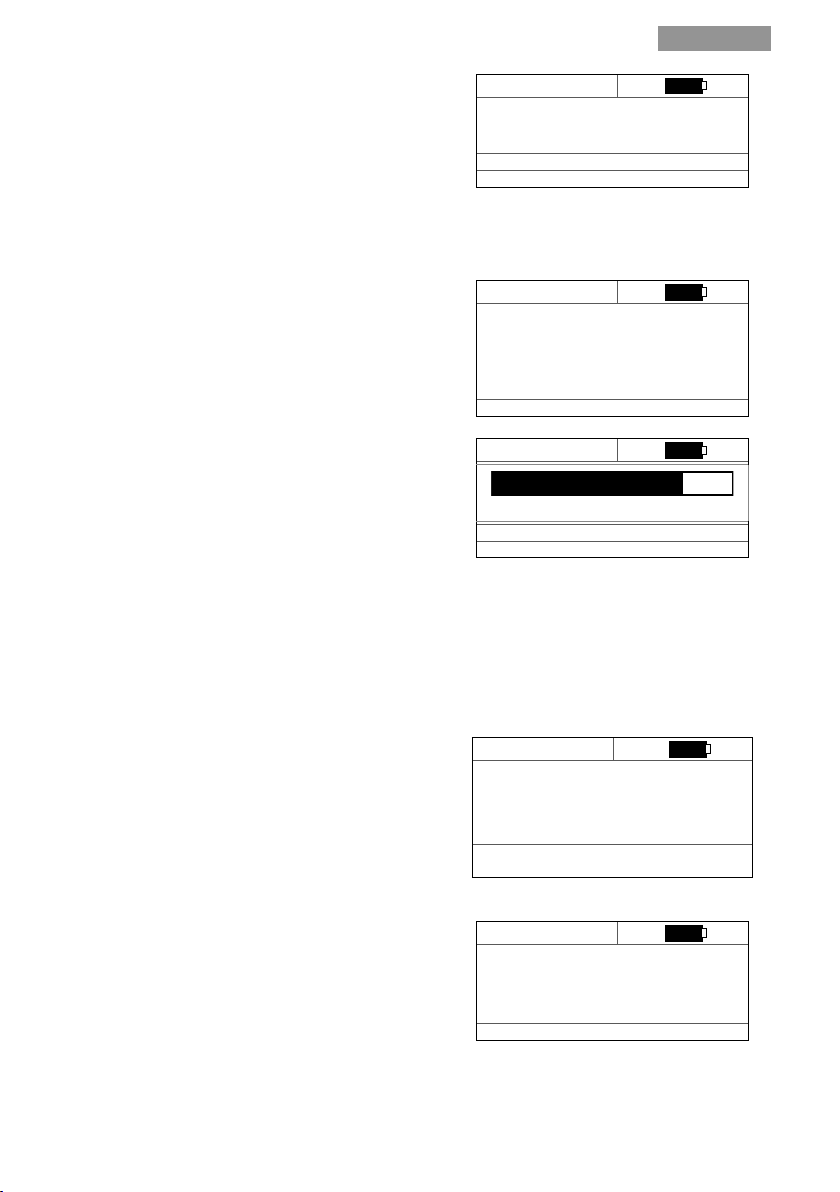
IDENTIFICATION / COPY OF A FIXED CODE REMOTE CONTROL
English
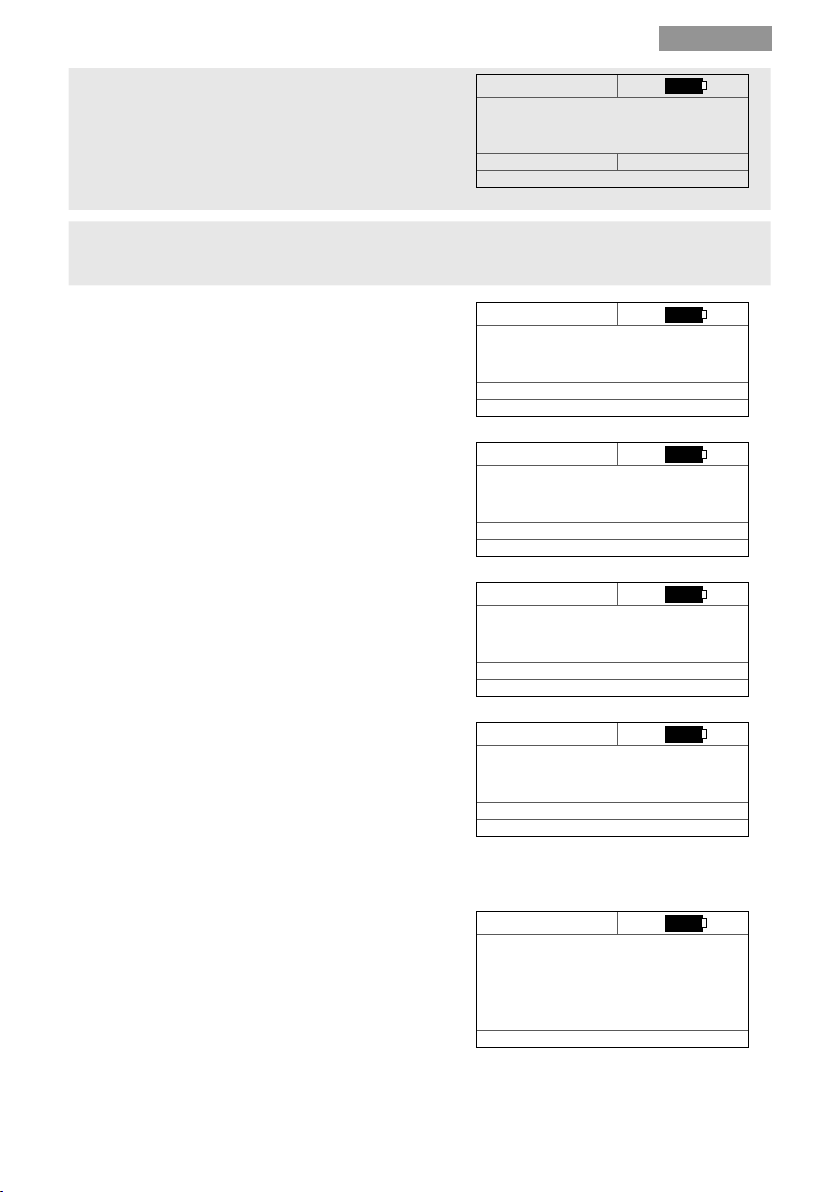
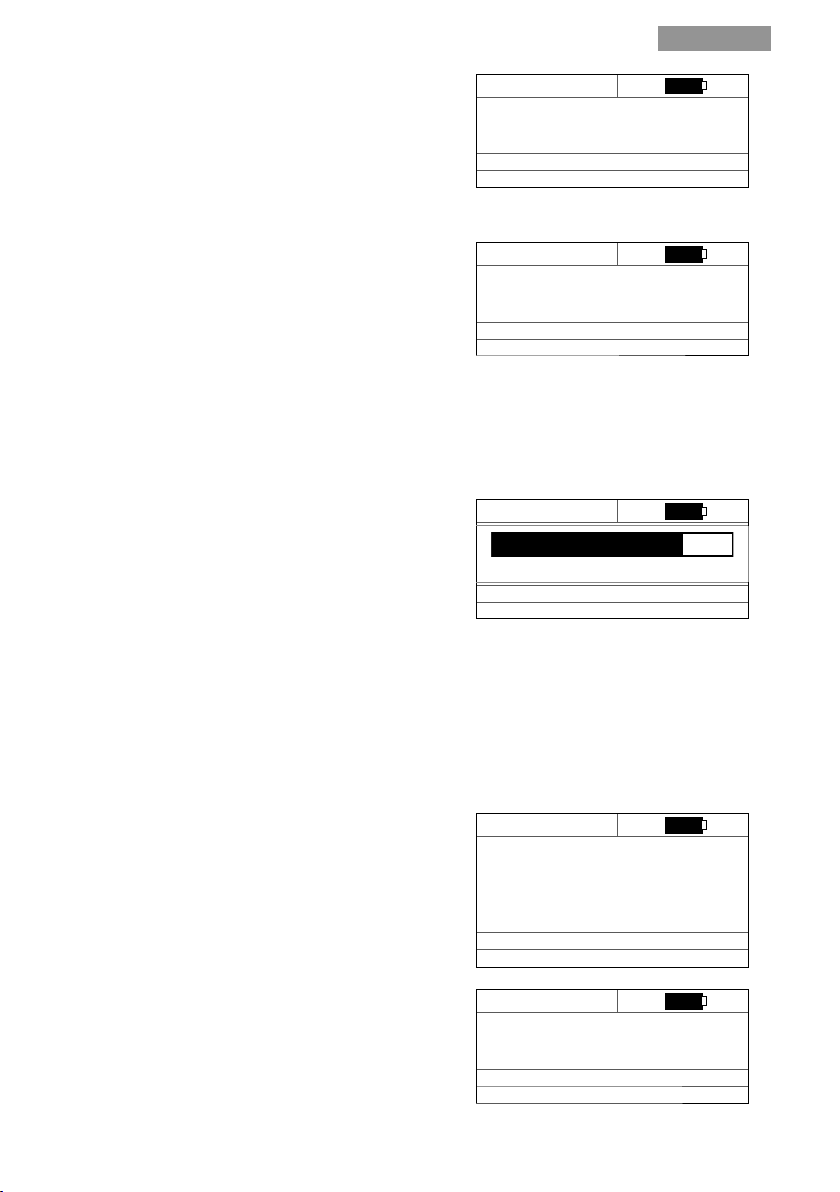
Take the remote control to be read up to the reading area
(see fi g.1-C) and press any bu on on the remote control.
If there are problems with reading, move the remote
control a few cen metres away and repeat the procedure.
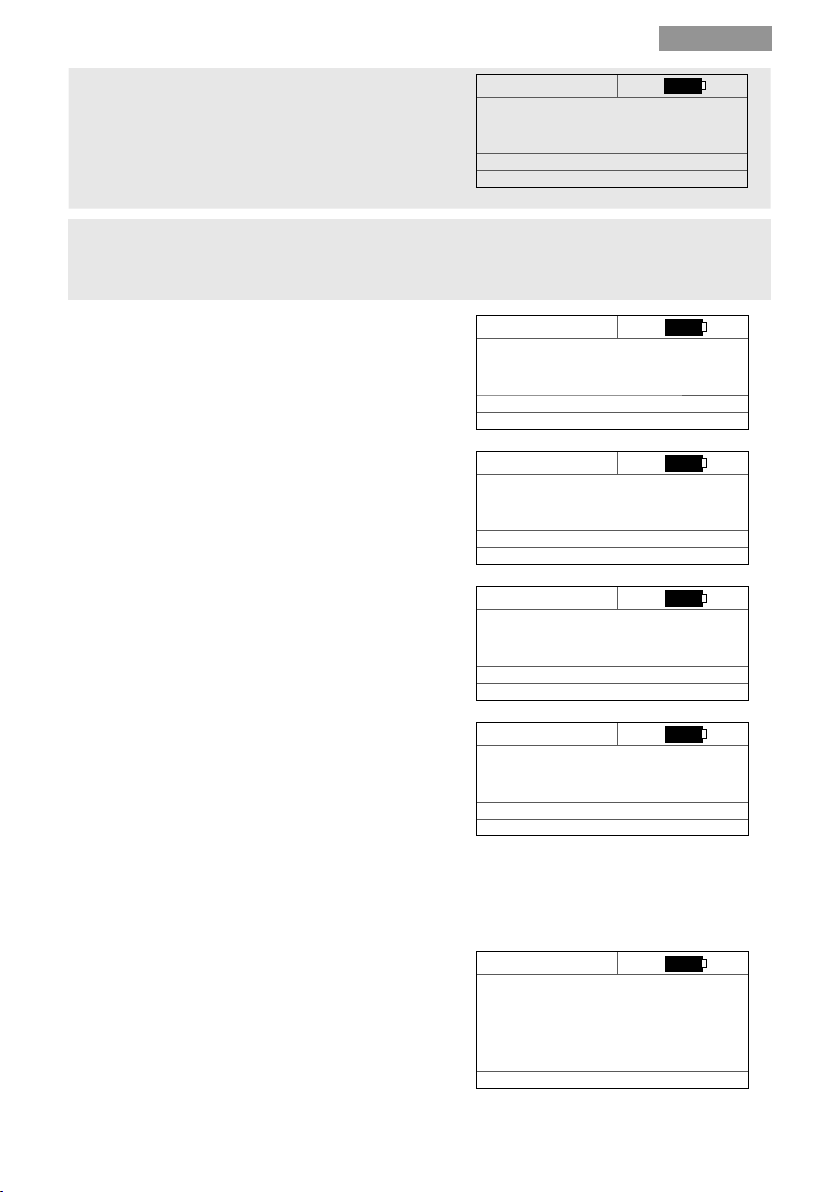
The remote control opera ng frequency is shown.
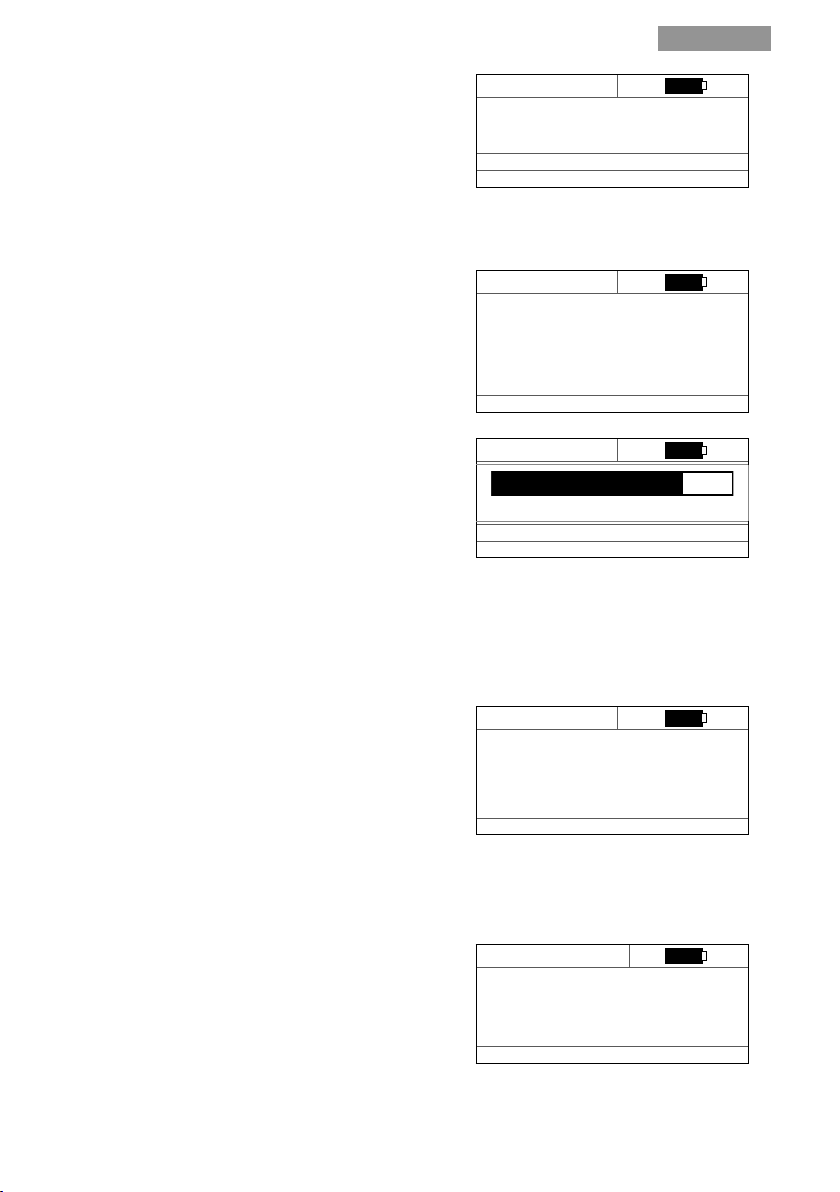
Request to press the same bu on again.
TLC : REMOTE CONTROL
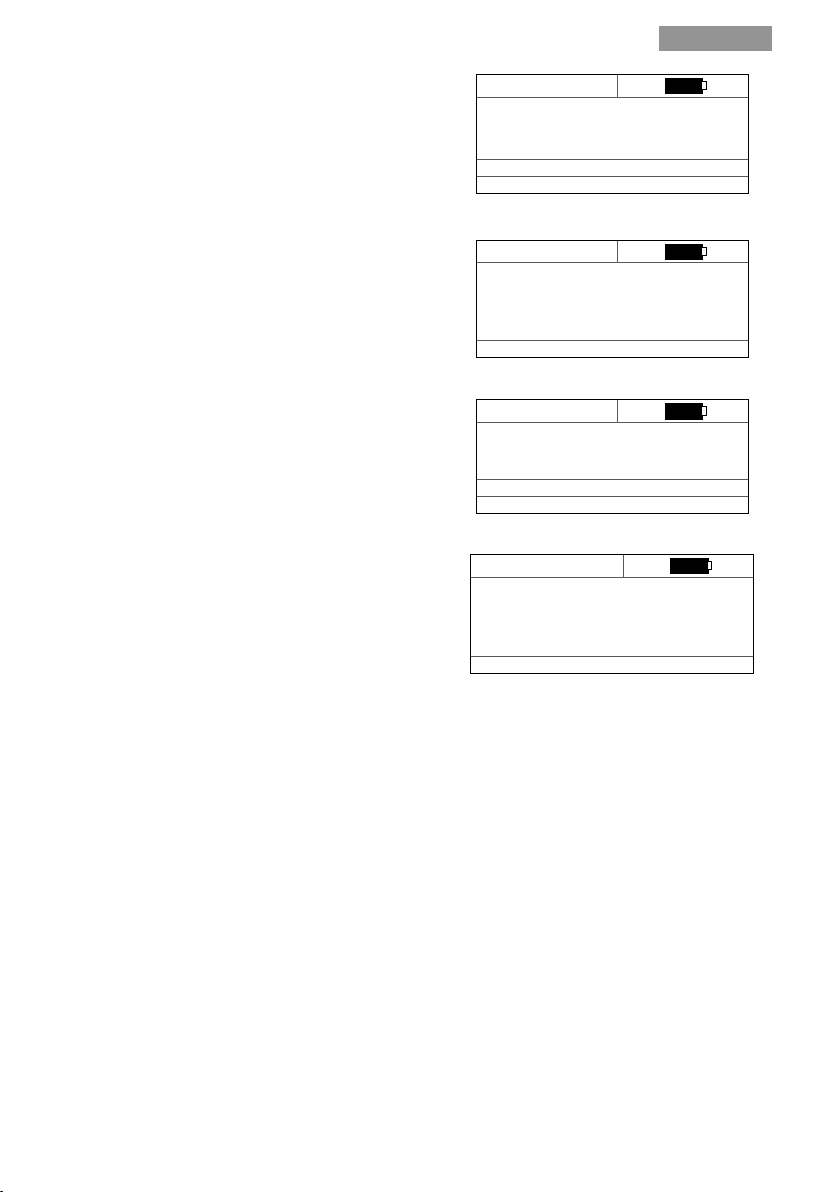
If the remote control in question can be copied the
compatible Silca remote control (model and version )
is indicated.
(The copying procedure is described in the instructions
provided with the Silca remote control indicated by
Easy Scan Plus).
Press “ENTER” for the “Check Copy” func on.
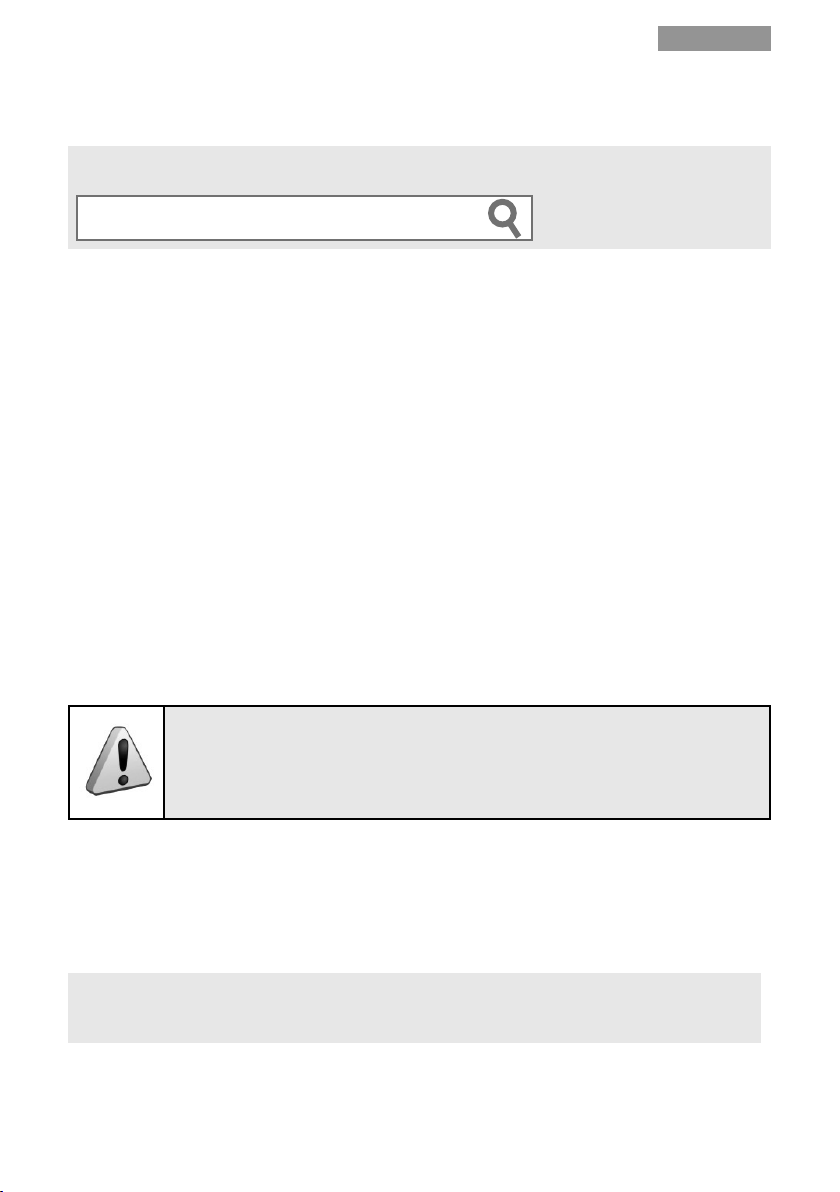
When the copy has been made, take the Silca remote
control up to the reading area (to make contact see fi gure
1) and press and release the same bu on as the one on the
copied remote control.
Keep the remote control near the reading area un l Easy
Scan Plus has fi nished the checking process.
Identifi cation
Press any key
on original Remote
(ESC) main menu
Identifi cation
press
same key
Waiting TLC
(ESC) main menu
Copy on
Silca Air X SW yy.yy
Fixed XXX Mhz
(ESC) Back (ENT) Next
Copy check
Press the same key
on copied Remote
(ESC) main menu
Successful copy:
Unsuccessful copy
Copy check
SUCCESSFUL copy
Fixed 433 MHz
(ENT) to continue
Copy check
WRONG copy
not matching code
Fixed 433 MHz
(ENT) to continue
In this case repeat the copying procedure observing the instruc ons provided with the Silca remote control
indicated by Easy Scan Plus. If the remote control copy is not successful contact the A er-Sales Service.
8
Copyright Silca S.p.A 2016
Page 9

Easy Scan Plus
English
Note:
This func on responds only with Silca remote controls.
If remote controls by another manufacturer are used, the
Easy Scan Plus display will show:
Copy check
NOT SILCA REMOTE
Verify again?
433 MHz
(ESC) NO (ENT) YES
IDENTIFICATION / COPY OF A ROLLING CODE NORMAL REMOTE CONTROL
The procedure for iden fying and checking the copy of Rolling Code Normal remote controls is the same as
that for fi xed code remote controls.
When the copy has been made the remote control must be linked to the receiver. This opera on can be
performed by A.L.S. (Simplifi ed procedure to ac vate the remote control on the receiver. The list of receivers
compa ble with the procedure can be found on www.silca.biz.) procedure or according to the procedure
chosen by the receiver manufacturer.
The possibility to use one procedure rather than another is indicated at the end of the copy check func on:
When a copy has been made successfully the display will show the following message:
The message “A.L.S. compa ble” indicates that the copied
remote control can be linked to the receiver by means of
the “A.L.S. procedure”.
See the instruc ons given for the Silca remote control
indicated by Easy Scan Plus and on the website www.silca.
biz.
The message “OEM compa ble” indicates that the copied
remote control can be linked to the receiver only by means
of the procedure chosen by the receiver manufacturer.
See the documenta on provided by the receiver manufac-
turer or fi er.
Copy check
SUCCESSFUL copy
Compatible A.L.S.
Rolling Code 433 MHz
(ENT) to continue
Copy check
SUCCESSFUL copy
Compatible OEM.
Rolling Code 433 MHz
(ENT) to conitnue
IDENTIFICATION / COPY OF A ROLLING CODE SECURE LEARNING REMOTE CONTROL
Take the remote control to be read up to the reading area
(see fi gure 1) and press any bu on on the remote control.
If there are problems with reading, move the remote
control a few cen metres away and repeat the procedure.
Identifi cation
Press any key
on original Remote
The remote control opera ng frequency is indicated.
The user is required to send the source code for the remote
control to be copied; how to send it depends on the remote
control involved. Check with website www.silca.biz to see
which way is indicated for your remote control.
(ESC) main menu
Identifi cation
Waiting for
SOURCE code
Wait TLC 433 MHz
(ESC) main menu
9Copyright Silca S.p.A 2016
Page 10
Easy Scan Plus
English
If the remote control being read can be copied, the
Silca remote control (model and version) compatible
with copying is shown, together with a message that
Copy on
Silca Air X SW yy.yy
the Rolling Secure Learning procedure must be used.
(The copying procedure depends on the remote
control to be copied.
Rolling Code S.L. 433 MHz
(ESC) Back (ENT) Next
Check with website www.silca.biz to see which one is
indicated for your remote control and see the instructions provided with the Silca remote control indicated
by Easy Scan Plus).
Press “ENTER” for the “Check Copy” func on.
When the copy has been made, take the Silca remote
control up to the reading area (to make contact see fi g. 1-C)
and press and release the same bu on as the one on the
copied remote control.
Keep the remote control near the reading area un l Easy
Scan Plus has fi nished the checking process.
Copy check
Press the same key
on copied Remote
433 MHz
(ESC) main menu
When the copy has been made the remote control must be linked to the receiver. This opera on can be
performed by A.L.S. ( simplifi ed procedure to ac vate the remote control on the receiver. The list of receivers
compa ble with the procedure can be found on www.silca.biz. ) procedure or according to the procedure
chosen by the receiver manufacturer.
The possibility to use one procedure rather than another is indicated at the end of the copy check func on.
When the copy has been made successfully the display will show the following message:
The message “A.L.S. compa ble” indicates that the copied
remote control can be linked to the receiver by means of
the “A.L.S. procedure”.
See the instruc ons for the Silca remote control indicated
by Easy Scan Plus and the website: www.silca.biz.
Copy check
SUCCESSFUL copy
Compatible A.L.S.
Rolling Code 433 MHz
(ENT) to continue
The message “OEM compa ble” indicates that the copied
remote control can be linked to the receiver only by means
of the procedure chosen by the receiver manufacturer.
See the documenta on provided by the receiver manufac-
turer or fi er.
UNSUCCESSFUL copy:
Copy check
SUCCESSFUL copy
Compatible OEM.
433 MHz
(ENT) to continue
Copy check
WRONG copy
not matching code
433 MHz
(ESC) main menu
In this case repeat the copying procedure observing the instruc ons provided with the Silca remote control
indicated by Easy Scan Plus.
If the remote control copy is not successful contact the A er-Sales Service.
10
Copyright Silca S.p.A 2016
Page 11
Easy Scan Plus
English
Note:
This func on responds only with Silca remote controls.
If remote controls by another manufacturer are used, the
Easy Scan Plus display will show:
If the remote control cannot be copied the Easy Scan Plus
display will show the following message:
Copy check
NOT SILCA REMOTE
Verify again?
(ESC) NO (ENT) YES
Identifi cation
Not copyable remote
433 MHz
(ESC) main menu
IDENTIFICATION / COPY OF A QUARTZED REMOTE CONTROL
The “Iden fi ca on” and “Check Copy” func ons for quartzed remote controls is the same as that for fi xed
code ones.
Before star ng a copy check procedure, Easy Scan Plus requires the intensity of the signal from the copied
remote control to be tuned:
Open the remote control case (see remote control instruc ons).
Take the quartzed remote control up to the reading area (to
make contact see fi gure 1), hold down any bu on.
Use the ceramic screwdriver to slowly turn the antenna
adjus ng screw to achieve maximum band on the intensity
indicator on the display.
When the maximum value is reached, move the remote
control a li le farther away and repeat the opera on un l
the maximum visible on the display is reached.
Close the remote control case.
Antenna Tuning
0 | 50 | 100
Press remote button
(ESC) back (ENT) Next
OTHER EASY SCAN PLUS FUNCTIONS
CHECK COPY FUNCTION
Use the bu ons on the side of the display to select “Check
Copy”.
Press “ENTER” to con nue.
Take the original remote control up to the reading area (to
make contact see fi g.1) and press any bu on on the remote
control.
Main menu
Identifi cation
> Copy check
Frequency meter
Antenna Tuning
Options
(ENT) to continue
Copy check
Press any key
on original Remote
(ESC) main menu
11Copyright Silca S.p.A 2016
Page 12
Easy Scan Plus
English
Only in the case of Rolling Secure Learning remote
control
The user is required to send the source code for the remote
control to be copied; how to send it depends on the remote
control involved. Check with website www.silca.biz to see
which way is indicated for your remote control.
Copy check
Waiting for
SOURCE code
Wait Remote 433 MHz
(ESC) main menu
Only in the case of quartzed remote control
To make copy checking for quartzed remote controls more reliable and precise, we recommend using the
“Tuning Antenna” func on to read the intensity of the copied remote control signal.
When required, take the copied Silca remote control up to
the reading area (to make contact see fi gure 1) and press
any bu on on the remote control.
If the copied remote control is the same as the original,
Easy Scan Plus will show the message:
Otherwise:
Identifi cation
Press the same key
on copied Remote
(ESC) main menu
Copy check
SUCCESSFUL copy
433 MHz
(ENT) to continue
Copy check
WRONG copy
not matching code
433 MHz
(ENT) to continue
Note:
This func on responds only with Silca remote controls.
If remote controls by another manufacturer are used, the
Easy Scan Plus display will show:
FREQUENCY METER:
Use the bu ons on the side of the display to select
“Frequency meter”.
Press “ENTER” to con nue.
12
Copyright Silca S.p.A 2016
Copy check
NOT SILCA REMOTE
Verify again?
433 MHz
(ESC) NO (ENT) YES
Main menu
Identifi cation
Copy check
> Frequency meter
Antenna Tuning
Options
(ENT) to continue
Page 13
Easy Scan Plus
English
Take the remote control to be read up to the reading area
(to make contact see fi g.1) and press any bu on on the
remote control.
Easy Scan Plus indicates the frequency and modula on of
the signal emi ed from the remote control.
Frequency meter
AM
433.92 MHZ
Press remote button
(ESC) main menu
ANTENNA TUNING:
Use the bu ons on the side of the display to select
“Antenna Tuning”.
Press “ENTER” to con nue.
Open the remote control case (see remote control instruc ons).
Take the remote control up to the reading area (to make
contact see fi gure 1), hold down any bu on.
Use the ceramic screwdriver to slowly turn the antenna
adjus ng screw to achieve maximum band on the intensity
indicator on the display .
When the maximum value is reached, move the remote control a li le farther away and repeat the opera on
un l the maximum visible on the display is reached.
Close the remote control case.
Main menu
Identifi cation
Copy check
Frequency meter
>Antenna Tuning
Options
(ENT) to conitnue
Antenna Tuning
0 | 50 | 100
Press remote button
(ESC) back (ENT) Next
OPTIONS MENU
This menu is used to access the following func ons:
- Language (see sec on Power on for setup/language
change).
- Read SW version on Silca remote controls
- Selec on of SILCA Remotes to show
- About Easy Scan Plus
READ SW VERSION ON SILCA REMOTE CONTROLS:
Take the Silca remote control up to the reading area and
press any bu on.
Options
> Language Selection
Silca Remote version
Select SILCA Remotes
Easy Scan Info
(ESC) Back (ENT) Next
Silca Remote version
Press any key
on SILCA remote
(ESC) main menu
13Copyright Silca S.p.A 2016
Page 14

Easy Scan Plus
English
Informa on about the remote control is shown:
- Remote control model
- Hardware and so ware versions on remote control
- Serial Number
- Frequency
SELECTION OF SILCA REMOTES TO SHOW :
Allows to select the remotes to show during the iden fi -
ca on phases:
- Using the buttons for scrolling the menu items, move the
cursor near to the name of the remote , and press ENTER
to disable or enable it.
Note:
This func on responds only with Silca remote controls.
If remote controls by another manufacturer are used, the
Easy Scan Plus display will show:
ABOUT EASY SCAN PLUS:
This func on provides the following informa on:
- Model
- SW version
- ID (univocal with 24 digits)
Silca Remote version
TLC SILCA Air X
HW: 00000 SW: 00.00.00
SN: 00000000
868 MHz
(ESC) Back (ENT) Next
SILCA Remotes
> (*) AirV Plus EU
(*) AirV Plus IB
(*) AirV
(*) AirF
(ESC) main menu
Silca Remote version
Not SILCA REMOTE!
868 MHz
(ESC) Back (ENT) Next
Easy Scan Info
Model: Easy Scan Plus
Ver: 0.3.0
ID: XXXXXXXXXXXXXXXXXXXXXX
(ESC) main menu
USING THE DEVICE WITH A COMPUTER
Easy Scan Plus has been developed to interface with a computer via the “Air4 Remotes Programming So ware”
which is available on the Silca website (www.silca.biz), and can be installed on Windows® Vista, 7, 8 and 10.
Jointly using the device with the computer program will keep the Easy Scan Plus SW updated, will update
the Silca NFA remote control SW to increase the possibility of copying new remote controls and will provide
access to informa on and documents that are useful for making the most out of the range of Silca remote
controls and devices for residen al applica ons.
When Easy Scan Plus has been ac vated, the advanced special features may also be used, such as the remote-
control assisted and facilitated copy, the genera on of duplicate remote controls (which is useful if the remote
control being copied has been misplaced or is no longer working), radio parameter management (e.g. serial
codes, counters, frequency), etc.
For more details, please refer to the informa on provided on the online help sec on of the “Air4 Remotes
Programming So ware”.
PROCEDURE FOR USING EASY SCAN PLUS WITH A COMPUTER
A er installing the “Air4 Remotes Programming So ware”, turn on Easy Scan Plus and connect it to the
computer via the provided USB cable.
The fi rst me that Easy Scan Plus is connected, the opera ng system will automa cally install the drivers (an
internet connec on may be required).
If this message appears: “Device not recognised - Unable to install the drivers”, the drivers must be installed
by opening the “Drivers” folder inside the program’s installa on folder.
14
Copyright Silca S.p.A 2016
Page 15
Easy Scan Plus
English
PROGRAMMING AND UPDATING THE REMOTE CONTROL VIA THE NFC
The remote control is programd using NFC technology, by placing the remote control in the specifi ed part of
the wri ng area (Fig. 1-N) and selec ng the appropriate func on that is available on the computer so ware.
FOR MORE INFORMATION, VISIT THE “www.silca.biz” WEBSITE AND ENTER THE KEYWORDS
“EASYSCANPLUSSOFTWARE” INTO THE SEARCH FIELD:
EASYSCANPLUSSOFTWARE
INSERTING, REPLACING AND RECHARGING THE BATTERIES
- INSERTING & REMOVING
To insert or remove the ba eries, slide the ba ery compartment lid and li it up (Fig.2 - E).
Insert the ba eries the correct way around, as indicated on the bo om of the compartment, then close the
cover.
- REPLACING
Replace the ba eries with rechargeable ba eries which have the same characteris cs as those supplied
with the Easy Scan Plus: rechargeable AA 1.2V
- RECHARGING
Easy Scan Plus can recharge the ba eries:
1. By connec ng the device to a computer via the USB cable provided (a USB 2.0 port with a 0.5 A current
capacity must be used).
2. By connec ng the device to a ba ery charger with a Micro-B USB connector (not supplied) which has
the following characteris cs: 5.0 VDC output voltage and 0.5 A minimum amperage, compliant to CE
norms.
1800÷2400 mAh nickel-metal hydride ba eries (NiMH).
FIRE DANGER:
WHEN RECHARGING BATTERIES WITH A SEPARATE POWER KIT, TAKE CARE TO USE
CHARGERS WITH THE FOLLOWING CHARACTERISTICS:
MAXIMUM OUTLET CURRENT 8A
MAXIMUM OUTLET POWER 100VA
Tips to increase the life of the ba eries:
• If the device is not used for a long period of me, remove the ba eries and store them in a safe, cool
and dry place.
• To extend the life of the ba eries, avoid leaving the device connected to the USB port for long periods
of me once the ba eries have fi nished charging.
IMPORTANT NOTE: THERE IS A RISK OF EXPLOSION IF INCORRECT OR DAMAGED BATTERIES
ARE USED E.G. IF THERE IS OXIDATION, LIQUID LOSS OR DEFORMATION.
15Copyright Silca S.p.A 2016
Page 16
Easy Scan Plus
English
DISPOSAL
INFORMATION FOR USERS OF PROFESSIONAL EQUIPMENT
From “Actua on of Direc ve 2012/19/EU regarding Waste Electrical and Electronic Equipment (WEEE)”
The symbol of a crossed waste bin found on equipment or its packing indicates that at the end of the product’s
useful life it must be collected separately from other waste so that it can be properly treated and recycled .
In par cular, separate collec on of this professional equipment when no longer in use is organised and
managed:
a. directly by the user when the equipment was placed on the market before 31 December 2010 and
the user personally decides to eliminate it without replacing it with new equivalent equipment
designed for the same use ;
b. by the manufacturer, that is to say the subject which was the fi rst to introduce and market new
equipment that replaces previous equipment, when the user decides to eliminate equipment
placed on the market before 31 December 2010 at the end of its useful life and replace it with an
equivalent product designed for the same use. In this la er case the user may ask the manufacturer
to collect the exis ng equipment;
c. by the manufacturer, that is to say the subject which was the fi rst to introduce and market new
equipment that replaces previous equipment, if it was placed on the market a er 31 December
2010 ;
With reference to portable ba eries/accumulators, when such products are no longer in use the user shall
take them to suitable authorised waste treatment facili es.
Suitable separate collec on for the purpose of forwarding discarded equipment and ba eries/accumulators
for recycling, treatment or disposal in an environmentally friendly way helps to avoid possible nega ve eff ects
on the environment and human health and encourages re-use and/or recycling of the materials making up
the equipment.
To remove ba eries/accumulators, consult the manufacturer’s specifi c instruc ons: (see relevant chapter in
the users’ manual).
The sanc ons currently provided for by law shall apply to users who dispose of equipment, ba eries and
accumulators in unauthorised ways .
16
Copyright Silca S.p.A 2016
Page 17
Easy Scan Plus
Italiano
Italiano
UTILIZZO DEL MANUALE
Il presente manuale è stato scri o dal Produ ore e cos tuisce parte integrante della documentazione del
disposi vo.
Esso fornisce informazioni u li all’utente per u lizzare il disposi vo Easy Scan Plus in modo sicuro.
Manuale utente
Il presente manuale deve essere le o con a enzione da tu gli uten del disposi vo.Tale premessa è indi-
spensabile per il corre o u lizzo e manutenzione del disposi vo.
Il manuale deve essere conservato con cura per l’intera durata di vita del disposi vo, incluso lo stadio di smal-
mento. Conservare in un posto asciu o vicino al disposi vo, dove sia sempre a portata di mano dell’utente.
ID distributore
Il disposi vo possiede una targhe a iden fi ca va indicante il numero di serie situato sul retro .
AVVERTENZE GENERALI
Il disposi vo è stato proge ato nel rispe o dei principi delle Dire ve Europee CE.
I materiali usa per la costruzione non sono pericolosi e rendono il disposi vo conforme alle dire ve. Nelle
sue cara eris che proge uali è un disposi vo sicuro in tu i suoi componen .
1 - PER UN CORRETTO ED AFFIDABILE FUNZIONAMENTO, POSIZIONARE IL DISPOSITIVO LONTANO DA
TUTTE LE SORGENTI CHE POSSONO GENERARE DISTURBI RADIO QUALI:
- TELEFONI CORDLESS
- MOTORI ELETTRICI
- LUCI AL NEON
- MODEM WI-FI
2 – NON INSERIRE IL CAVO USB NEL PC PRIMA DELL’INSTALLAZIONE DEL PROGRAMMA.
DOCUMENTAZIONE ON LINE
- Per documentazione aggiornata, per scaricare nuovi aggiornamen del programma so ware di Easy Scan
Plus, visitare periodicamente il sito www.silca.biz
17Copyright Silca S.p.A. 2016
Page 18
Easy Scan Plus
Italiano
DESCRIZIONE DEL DISPOSITIVO
Il Dispositivo Easy Scan Plus è provvisto di display che guida l’utente nell’utilizzo delle diverse funzionalità. Può essere collegato ad un PC per essere gestito dal software “Air4 Remotes Programming
Software” per utilizzo di funzionalità avanzate.
PARTI OPERATIVE
A - Display grafi co
B - Pulsanti per scorrimento voci menu
C - Zona le ura radiocomandi
D - Pulsan di funzione
E - Alloggiamento ba erie
F - E che a di iden fi cazione di Easy Scan Plus
F1 - Numero matricola disposi vo
G - Porta USB Micro-B per collegamento con PC
H - Cavo USB (fornito in dotazione)
FUNZIONI PREVISTE
- Iden fi ca le pologie di radiocomandi determinando sia la frequenza che il po (codice fi sso o Rolling Code).
- Verifi ca la possibilità di copia e indica il radiocomando Silca da u lizzare.
- Verifi ca che la copia su un radiocomando Silca corrisponda esa amente al radiocomando originale.
-Le ura della frequenza presente nel radiocomando (Frequenzimetro)
- Taratura (Tuning) dell’intensità di segnale emesso da radiocomandi quarza .
- Aggiornamento so ware interno tramite la porta USB u lizzando un programma a PC.
- Tramite l’u lizzo del so ware a PC ( opzionale ) sono disponibili altre funzioni avanzate di copia , generazio-
ne e ges one dei radiocomandi e aggiornamento del so ware dei radiocomandi NFC Silca.
DATI TECNICI
Alimentazione
Il disposi vo è alimentato con 2 batterie ricaricabili Nichel-Metallo idruro (NiMH) da 1.2 volt formato AA
fornite in dotazione .
Può essere alimentato anche tramite cavo USB fornito in dotazione, collegandolo alla porta USB di un PC o ad
un alimentatore con connettore USB ( non fornito in dotazione ).
I - Cacciavite ceramico
L - Pulsante accensione e spegnimento del
disposi vo
M - Ba erie ricaricabili po AA 1.2V ( fornite in
dotazione)
N - Zona di scri ura radiocomandi NFC Silca
Caratteristiche tecniche
Tensione di alimentazione : 5 VDC con alimentatore esterno
Tensione di alimentazione: 2.4 VDC con ba erie
Corrente assorbita: 0.5 A MAX
Frequenze di campo dell’antenna
ANTENNA NFC: 13,56 MHz
ANTENNA HF : 26,720 - 871.1 MHz
Condizioni ambientali
Il disposi vo funziona a una temperatura ambiente compresa tra 0 e +50°C
Dimensioni
Larghezza: 90 mm
Lunghezza: 148 mm
Profondità: 25 mm
Peso Senza ba erie 172.50 gr.
18
Copyright Silca S.p.A. 2016
Page 19

Easy Scan Plus
UTILIZZO DEL DISPOSITIVO STAND ALONE
Simbologia stato batteria e connessioni
Indica che Easy Scan Plus è collegato col PC
Indica che non sono presen ba erie, oppure non sono state inserite con la corre a polarità,
in quest’ul mo caso rimuoverle e inserirle rispe ando la corre a polarità .
Indica che le ba erie si stanno caricando
Lampeggiando veloce indica che sono presen ba erie non ricaricabili, oppure c’è un errore
nel processo di carica delle ba erie.
Nel caso le ba erie che si stanno u lizzando siano di po ricaricabile, verifi care immediata-
mente che non siano presen segni di danneggiamento o di surriscaldamento, in quest’ul mo
caso rimuoverle e sos tuirle con ba erie nuove.
Indica che il processo di carica è terminato.
Indica che il livello di carica delle ba erie è maggiore dell’ 80%.
Indica che il livello di carica delle ba erie è compreso tra il 10% e 80% .
Indica che il livello di carica delle ba erie è minore del 10%.
Indica che Easy Scan Plus è collegato ad un caricatore
Italiano
Accensione
Tenere premuto il tasto di accensione di Easy Scan Plus fi nché sul display appare il logo Silca.
Selezione della lingua
La selezione della lingua sarà proposta alla prima accensione di Easy Scan Plus, usare i pulsan a lato del display (B)
per scorrere le lingue disponibili.
Una volta selezionata la lingua premere “ENTER” per
confemare.
Viene visualizzato il menù principale con le seguen
funzioni :
- Iden fi cazione
- Verifi ca Copia
- Frequenzimetro
- Tuning antenna
- Opzioni di Easy Scan Plus
Selezionare la funzione desiderata e premere “ENTER” per
con nuare.
Selezione Lingua
> Italiano
English
Français
Deutsch
(ENT) per continuare
Menu principale
Identifi cazione
Verifi ca Copia
Frequenzimetro
Tuning antenna
Opzioni
(ENT) per continuare
19Copyright Silca S.p.A. 2016
Page 20
Easy Scan Plus
IDENTIFICAZIONE / COPIA DI UN RADIOCOMANDO A CODICE FISSO
Avvicinare il radiocomando da analizzare alla zona di
le ura (vedi fi g.1-C) e premere un tasto del radiocomando.
Nel caso la le ura dovesse risultare diffi coltosa, ripetere la
procedura allontanando il radiocomando di qualche cen metro.
Identifi cazione
del TLC da copiare
(ESC) menù principale
Italiano
Premere un tasto
Viene indicata la frequenza di funzionamento del radiocomando.
Viene richiesto di premere nuovamente lo stesso tasto del
radiocomando.
TLC : RADIOCOMANDO
Se il radiocomando in analisi è duplicabile, viene
indicato il radiocomando Silca ( modello e versione )
compatibile per la copia.
(Per la procedura di copia, fare riferimento alle istruzioni allegate al radiocomando Silca indicato da Easy
Scan Plus).
Premere “ENTER” per la funzione di “Verifi ca Copia”.
Una volta eseguita la copia, avvicinare il radiocomando
Silca da verifi care alla zona di le ura (portare a conta o,
vedi fi g.1-C) e premere e rilasciare lo stesso tasto del radio-
comando copiato.
Mantenere il radiocomando vicino alla zona di le ura
fi nché Easy Scan Plus non ha terminato il processo di
verifi ca.
Con copia corre a:
Identifi cazione
Premere
lo stesso tasto
Attesa TLC 433 MHz
(ESC) menù principale
Copiabile su
Silca Air X SW yy.yy
Codice fi sso 433 MHz
(ESC) Ritorno (ENT) Avanti
Verifi ca Copia
Premere stesso tasto
del TLC COPIATO
433 MHz
(ESC) per menù principale
Verifi ca Copia
Copia CORRETTA
Codice fi sso 433 MHz
(ENT) per continuare
Con copia NON corre a:
Verifi ca Copia
Copia ERRATA
il codice non corrisponde
433 MHz
(ENT) per continuare
In questo caso ripetere la procedura di copia facendo riferimento alle istruzioni del radiocomando Silca
indicato da Easy Scan Plus. Qualora la copia del radiocomando non avvenga corre amente, conta are il
servizio di assistenza tecnica.
20
Copyright Silca S.p.A. 2016
Page 21

Easy Scan Plus
Italiano
Nota:
Questa funzione risponde solo in presenza di radiocomandi
Silca.
Se si u lizzano radiocomandi di un altro produ ore, il
display di Easy Scan Plus mostrerà il messaggio:
Verifi ca Copia
TLC non Silca
Ripetere controllo?
433 MHz
(ESC) NO (ENT) SI
IDENTIFICAZIONE / COPIA DI UN RADIOCOMANDO ROLLING CODE NORMAL
La procedura di iden fi cazione e verifi ca della copia di radiocomandi Rolling Code Normal è uguale a quella
dei radiocomandi a codice fi sso.
Una volta eseguita la copia, il radiocomando copiato dovrà esser abbinato alla ricevente, tale operazione
potrà a seconda dei casi esser eff e uata tramite procedura A.L.S. ( Procedura semplifi cata per a vare il
radiocomando nella ricevente. La lista delle riceven compa bili con tale procedura è disponibile sul sito
www.silca.biz ) o tramite la procedura prevista dal produ ore della ricevente.La possibilità di poter usare una
procedura piu osto dell’altra verrà indicata con l’esito della funzione di verifi ca copia.
A copia avvenuta con successo a display appare il seguente messaggio:
Il messaggio “Compa bile A.L.S.” indica che il radiocoman-
do appena duplicato può esser abbinato alla ricevente
tramite “Procedura A.L.S.”.
Fare riferimento alle istruzioni del radiocomando Silca
indicato da Easy Scan Plus e al sito: www.silca.biz.
Il messaggio “Compa bile OEM” indica che il radiocoman-
do appena duplicato può esser abbinato alla ricevente
solo tramite la procedura prevista dal produ ore della
ricevente.
Fare riferimento alla documentazione fornita dal produ o-
re della ricevente o dall’installatore.
Verifi ca Copia
Copia CORRETTA
Compatibile A.L.S.
Rolling code 433 MHz
(ENT) per continuare
Verifi ca Copia
Copia CORRETTA
Compatibile OEM.
Rolling code 433 MHz
(ENT) per continuare
IDENTIFICAZIONE / COPIA DI UN RADIOCOMANDO ROLLING CODE SECURE LEARNING
Avvicinare il radiocomando da analizzare alla zona di le ura
( vedi fi gura 1) e premere un tasto del radiocomando.
Nel caso la le ura dovesse risultare diffi coltosa, ripetere la
procedura allontanando il radiocomando di qualche cen-
Identifi cazione
Premere un tasto
del TLC da copiare
metro.
(ESC) per menù principale
Viene indicata la frequenza di funzionamento del radiocomando.
Viene richiesto di inviare il codice sorgente del radiocomando da copiare.
La modalità di invio del codice sorgente dipende dal radiocomando che si deve copiare, verifi care sul sito www.silca.
Identifi cazione
Attesa per
Codice SORGENTE
Attesa TLC 433 MHz
(ESC) per menù principale
biz quella ada a al vostro radiocomando.
21Copyright Silca S.p.A. 2016
Page 22
Easy Scan Plus
Italiano
Se il radiocomando in analisi è duplicabile, viene
indicato il radiocomando Silca (modello e versione)
compatibile per la copia e che bisogna usare la proce-
Copiabile su
Silca Air X SW yy.yy
dura per Radiocomandi Rolling Secure Learning.
(La procedura di copia dipende dal radiocomando che
si deve copiare, verificare sul sito www.silca.biz quella
Rolling code S.L. 433 MHz
(ESC) Ritorno (ENT) Avanti
adatta al vostro radiocomando e fare riferimento alle
istruzioni allegate al radiocomando Silca indicato da
Easy Scan Plus).
Premere “ENTER” per la funzione di “Verifi ca Copia”.
Una volta eseguita la copia, avvicinare il radiocomando
Silca da verifi care alla zona di le ura (portare a conta o,
vedi fi g.1-C) e premere e rilasciare lo stesso tasto del radio-
comando copiato.
Mantenere il radiocomando vicino alla zona di le ura
fi nché Easy Scan Plus non ha terminato il processo di verica.
Verifi ca Copia
Premere stesso tasto
del TLC COPIATO
433 MHz
(ESC) menù principale
Una volta eseguita la copia, il radiocomando copiato dovrà esser abbinato alla ricevente, tale operazione
potrà a seconda dei casi esser eff e uata tramite procedura A.L.S. o tramite la procedura prevista dal produt-
tore della ricevente. La possibilità di poter usare una procedura piu osto dell’altra verrà indicata con l’esito
della funzione di verifi ca copia.
A copia avvenuta con successo a display appare il seguente messaggio:
Il messaggio “Compa bile A.L.S.” indica che il radiocoman-
do appena duplicato può esser abbinato alla ricevente
tramite “Procedura A.L.S.”.
Fare riferimento alle istruzioni del radiocomando Silca
indicato da Easy Scan Plus e al sito: www.silca.biz)
Verifi ca Copia
Copia corretta
Compatibile A.L.S.
Rolling code 433 MHz
(ENT) per continuare
Il messaggio “Compa bile OEM” indica che il radiocoman-
do appena duplicato può esser abbinato alla ricevente
solo tramite la procedura prevista dal produ ore della
ricevente.
Fare riferimento alla documentazione fornita dal produ o-
re della ricevente o dall’installatore.
Con copia NON corre a:
Verifi ca Copia
Copia corretta
Compatibile OEM.
433 MHz
(ENT) per continuare
Verifi ca Copia
Copia ERRATA !
il codice non è uguale
433 MHz
(ENT) per continuare
In questo caso ripetere la procedura di copia facendo riferimento alle istruzioni del radiocomando Silca
indicato da Easy Scan Plus. Qualora la copia del radiocomando non avvenga corre amente, conta are il
servizio di assistenza tecnica.
22
Copyright Silca S.p.A. 2016
Page 23
Easy Scan Plus
Italiano
Nota:
Questa funzione risponde solo in presenza di radiocomandi
Silca.
Se si u lizzano radiocomandi di un altro produ ore, il
display di Easy Scan Plus mostrerà il messaggio:
Nel caso in cui il radiocomando non sia duplicabile, a
display di Easy Scan Plus appare il seguente messaggio:
Verifi ca Copia
TLC non Silca
Ripetere controllo?
(ESC) NO (ENT) SI
Identifi cazione
TLC non copiabile
433 MHz
(ESC) per menù principale
IDENTIFICAZIONE / COPIA DI UN RADIOCOMANDO QUARZATO
La procedura di “Iden fi cazione” e “Verifi ca Copia” di radiocomandi Quarza è uguale a quella dei radioco-
mandi a codice fi sso.
Prima però di avviare la procedura di verifi ca copia, Easy Scan Plus richiede di eseguire la tataruta (Tuning)
dell’intensità del segnale emesso dal radiocomando copiato:
Aprire il guscio del radiocomando (vedere istruzioni del radiocomando).
Avvicinare il radiocomando quarzato alla zona di le ura
(portare a conta o, vedi fi g.1-C), premere e mantenere
premuto un tasto.
Con un cacciavite ceramico ruotare lentamente la vite che
regola l’antenna per avere l’ampiezza massima dell’indicatore di intensità sul display .
Una volta raggiunto il valore massimo, allontanare leggermente il radiocomando e ripetere l’operazione fi no a rag-
giungere il massimo visualizzabile sul display.
Richiudere il guscio del radiocomando.
Tuning Antenna
0 | 50 | 100
Premi pulsante TLC
(ESC) Ritorno (ENT) Avanti
ALTRE FUNZIONI DI EASY SCAN PLUS
FUNZIONE VERIFICA COPIA
U lizzare i pulsan a lato del display per selezionare:
“Verifi ca Copia”.
Premere “ENTER” per con nuare.
Avvicinare il radiocomando originale alla zona di le ura
(portare a conta o, vedi fi gura 1) e premere un tasto del
radiocomando.
Menu principale
Identifi cazione
> Verifi ca Copia
Frequenzimetro
Tuning antenna
Opzioni
(ENT) per continuare
Verifi ca Copia
Premere un tasto
del TLC originale
(ESC) Menù principale
23Copyright Silca S.p.A. 2016
Page 24
Easy Scan Plus
Italiano
Solo nel caso di Radiocomandi Rolling Secure Learning:
Viene richiesto di inviare il codice sorgente del radiocomando da copiare.
La modalità di invio del codice sorgente dipende dal radiocomando che si deve copiare, verifi care sul sito www.silca.
biz quella ada a al vostro radiocomando.
Verifi ca Copia
Attesa per
Codice SORGENTE
Attesa TLC 433 MHz
(ESC)Menù principale
Solo nel caso dei radiocomandi quarza :
Per rendere più affi dabile ed accurata la verifi ca copia, nel caso di Radiocomandi Quarza , si consiglia di
verifi care l’intensità del segnale emesso dal radiocomando copiato tramite la funzione “Tuning Antenna”.
Quando richiesto, avvicinare il radiocomando copiato Silca
alla zona di le ura (portare a conta o, vedi fi gura 1) e
premere un tasto del radiocomando.
Nel caso il radiocomando copiato coincida con l’originale,
Easy Scan Plus visualizza il messaggio:
Altrimen :
Identifi cazione
Premere stesso tasto
del TLC COPIATO
(ESC) per menù principale
Verifi ca Copia
Copia CORRETTA
433 MHz
(ENT) Menù principale
Verifi ca Copia
Copia ERRATA !
il codice non è uguale
433 MHz
(ENT) Menù principale
Nota:
Questa funzione risponde solo in presenza di radiocomandi
Silca.
Se si u lizzano radiocomandi di un altro produ ore, il
display di Easy Scan Plus mostrerà il messaggio:
FREQUENZIMETRO:
U lizzare i pulsan a lato del display per selezionare: “Fre-
quenzimetro”.
Premere “ENTER” per con nuare.
24
Copyright Silca S.p.A. 2016
Verifi ca Copia
TLC non Silca
Ripetere controllo?
433 MHz
(ESC) NO (ENT) SI
Menu principale
Identifi cazione
Verifi ca Copia
> Frequenzimetro
Tuning Antenna
Opzioni
(ENT) per continuare
Page 25
Easy Scan Plus
Italiano
Avvicinare il radiocomando da analizzare alla zona di
le ura (portare a conta o, vedi fi gura 1-C) e premere un
tasto del radiocomando.
Easy Scan Plus indica la frequenza e modulazione del
segnale emessa dal radiocomando.
Frequenzimetro
AM
433.900
Premere pulsante TLC
(ESC) Menù principale
TUNING ANTENNA:
U lizzare i pulsan a lato del display per selezionare:
“Tuning Antenna”.
Premere “ENTER” per con nuare.
Aprire il guscio del radiocomando (vedi istruzioni del radiocomando).
Avvicinare il radiocomando alla zona di le ura (portare a
conta o, vedi fi gura 1-C), premere e mantenere premuto
un pulsante.
Con un cacciavite ceramico ruotare lentamente la vite che
regola l’antenna per avere l’ampiezza massima dell’indicatore di intensità sul display .
Una volta raggiunto il valore massimo, allontanare leggermente il radiocomando e ripetere l’operazione fi no a
raggiungere il massimo visualizzabile sul display. Richiudere il guscio del radiocomando.
Menu principale
Identifi cazione
Verifi ca Copia
Frequenzimetro
> Tuning Antenna
Opzioni
(ENT) per continuare
Tuning Antenna
0 | 50 | 100
Premere pulsante TLC
(ESC) Ritorno (ENT) Avanti
MENU OPZIONI
Da questo menu si accede alle funzioni di:
- Lingua (vedi par. Accensione per impostazione/cambio
della lingua).
-Le ura della versione SW dei radiocomandi Silca
- Selezione dei radiocomandi Silca da visualizzare
- Informazioni su Easy Scan Plus
LETTURA VERSIONE RADIOCOMANDO SILCA:
Avvicinare il radiocomando Silca da analizzare alla zona di
le ura e premere un tasto.
Opzioni
> Selezione Lingua
Vers. TLC Silca
Selezione TLC Silca
Info. Easy Scan Plus
(ESC) Ritorno (ENT) Avanti
Vers. TLC SILCA
Premere un tasto
del TLC SILCA
(ESC) Menù principale
25Copyright Silca S.p.A. 2016
Page 26
Easy Scan Plus
Italiano
Vengono visualizzate le informazioni rela ve al radioco-
mando:
- Modello radiocomando
- Versione hardware e so ware del radiocomando
- Serial Number
- Frequenza
SELEZIONE DEI RADIOCOMANDI SILCA DA VISUALIZZARE:
Perme e di selezionare i radiocomandi da visualizzare
durante le fasi di idenfi cazione:
-U lizzando i pulsanti per scorrimento voci menu, posizio-
nare il cursore in corrispondenza del nome del radiocomando, premere ENTER per disabilitarlo o abilitarlo.
Nota:
Questa funzione risponde solo in presenza di radiocomandi
Silca.
Se si u lizzano radiocomandi di un altro produ ore, il
display di Easy Scan Plus mostrerà il messaggio:
INFORMAZIONI EASY SCAN PLUS:
Questa funzione fornisce le seguen informazioni:
- Modello
- Versione SW
- ID (univoco a 24 cifre)
Vers. TLC SILCA
TLC SILCA Air X
HW: 00000 SW: 00.00.00
SN: 00000000
868 MHz
(ESC) Ritorno (ENT) Avanti
TLC SILCA
> (*) AirV Plus EU
(*) AirV Plus IB
(*) AirV
(*) AirF
(ESC) Menù principale
Vers. TLC SILCA
TLC NON SILCA
868 MHz
(ESC) Ritorno (ENT) Avanti
Info Easy Scan Plus
Model: Easy Scan Plus
Ver: 0.3.0
ID: XXXXXXXXXXXXXXXXXXXXXX
(ESC) Menù principale
UTILIZZO DEL DISPOSITIVO CON PC
Easy Scan Plus è stato sviluppato per potersi interfacciare a PC tramite il programma “Air4 Remotes Programming So ware” reperibile sul sito Silca: www.silca.biz, tale programma può esser installato su Windows®,
Vista, 7, 8 e 10.
L’u lizzo congiunto del programma a PC perme erà di mantenere aggiornato il SW di Easy Scan Plus, di ag-
giornare il SW dei radiocomandi NFC Silca per espandere la possibilità di copia di nuovi radiocomandi, di
accedere a informazioni e documentazione u li per usare al meglio la gamma di radiocomandi e disposi vi
Silca per applicazioni residenziali.
Sarà altresì possibile, previa a vazione di Easy Scan Plus l’u lizzo di funzionalità speciali avanzate, quali copia
assis ta e facilitata di un radiocomando, generazione di radiocomandi come se fossero originali (u le nel caso
il radiocomando da copiare sia stato perso o non più funzionante), ges one dei parametri radio (ad es. codici
seriali, contatori, frequenza…), ecc.
Per maggiori de agli fare riferimento alle indicazioni fornite dalla guida in linea del programma “Air4 Remotes
Programming So ware”.
PROCEDURA PER UTILIZZARE EASY SCAN PLUS CON PC:
Dopo aver installato “Air4 Remotes Programming So ware”, accendere e collegare Easy Scan Plus al PC
tramite il cavo USB fornito in dotazione.
Al primo collegamento di Easy Scan Plus, il sistema opera vo installerà automa camente i drivers (potrebbe
esser necessaria una connessione a va ad internet).
Qualora si riceva un messaggio “Disposi vo non riconosciuto – Impossibile installare i drivers”, è necessa-
rio installare ques ul mi aprendo la cartella “Drivers” presente all’interno della cartella di installazione del
programma.
26
Copyright Silca S.p.A. 2016
Page 27
Easy Scan Plus
Italiano
PROGRAMMAZIONE E AGGIORNAMENTO DEL RADIOCOMANDO TRAMITE NFC
La programmazione del radiocomando viene eff e uata mediante la tecnologia NFC, posizionando il radioco-
mando nell’area specifi cata nella zona di scri ura (Fig.1-N) e selezionando l’opportuna funzione disponibile
sul so ware a PC .
PER MAGGIORI INFORMAZIONI CONSULTARE IL SITO www.silca.biz INSERENDO LA PAROLA CHIAVE
“EASYSCANPLUSSOFTWARE” NEL CAMPO DI RICERCA :
EASYSCANPLUSSOFTWARE
INSERIMENTO-SOSTITUZIONE-RICARICA BATTERIE
- INSERIMENTO - RIMOZIONE
Per inserire o rimuovere le ba erie è necessario far scorrere e sollevare il coperchio dell’allloggiamento (
Fig.2 - E ).
Inserire le ba erie rispe ando la corre a polarità indicata sul fondo dell’alloggiamento, quindi richiudere il
coperchio.
- SOSTITUZIONE
Sos tuire le ba erie u lizzando ba erie ricaricabili nuove aven cara eris che uguali a quelle fornite in
dotazione ad Easy Scan Plus : ba erie ricaricabili al NIchel- Metallo Idruro ( NiMH) formato AA, 1..2 volts,
1800÷2400 mAh.
- RICARICA
Easy Scan Plus è in grado di ricaricare le ba erie:
1. Collegandolo ad un PC tramite cavo USB fornito in dotazione (è necessario u lizzare porte di po USB2
in grado di erogare una corrente 0.5 A.
2. Collegandolo ad un caricaba erie con conne ore Micro USB di po B (non fornito in dotazione) avente
le seguen cara eris che: tensione in uscita 5.0 VDC e amperaggio minimo 0.5 A, conforme alla
norma va CE
PERICOLO DI INCENDIO:
DURANTE LA RICARICA DELLE BATTERIE TRAMITE ALIMENTATORE ESTERNO SI RAC
COMANDA L’UTILIZZO DI CARICATORI AVENTI LE SEGUENTI CARATTERISTICHE:
CORRENTE MASSIMA IN USCITA 8A
POTENZA MASSIMA IN USCITA 100VA
Consigli per un miglior u lizzo delle ba erie :
• Se il disposi vo non viene usato per un lungo periodo di tempo rimuovere le ba erie, e conservarle in
un luogo sicuro, fresco e asciu o.
• Per allungare la vita delle ba erie evitare di lasciare il disposi vo collegato alla porta USB per lunghi
periodi dopo il completamento della fase di ricarica.
NOTA IMPORTANTE : PERICOLO D’ESPLOSIONE SE SI UTILIZZANO BATTERIE DI TIPO ERRATO
O DANNEGGIATE ES. IN CASO DI PRESENZA DI OSSIDAZIONE, PERDITA DI LIQUIDI O DE
FORMAZIONI .
27Copyright Silca S.p.A. 2016
Page 28

Easy Scan Plus
INFORMAZIONE AGLI UTENTI DI APPARECCHIATURE PROFESSIONALI
Italiano
SMALTIMENTO
Ai sensi dell’art. 24 del Decreto Legisla vo 14 marzo 2014, n. 49 “A uazione della Dire va 2012/19/UE
Il simbolo del cassone o barrato riportato sull’apparecchiatura o sulla sua confezione indica che il prodo o
alla fi ne della propria vita u le deve essere raccolto separatamente dagli altri rifi u per perme erne un
adeguato tra amento e riciclo. In par colare, la raccolta diff erenziata della presente apparecchiatura profes-
sionale giunta a fi ne vita è organizzata e ges ta:
a. dire amente dall’utente, nel caso in cui l’apparecchiatura sia stata immessa sul mercato prima del
31 dicembre 2010 e l’utente stesso decida di disfarsi dell’apparecchiatura senza sos tuirla con una
apparecchiatura nuova equivalente ed adibita alle stesse funzioni;
b. dal produ ore, inteso come il sogge o che ha per primo introdo o e commercializzato in Italia
o rivende in Italia col proprio marchio l’apparecchiatura nuova che ha sos tuito la precedente,nel
caso in cui, contestualmente alla decisione di disfarsi dell’apparecchiatura a fi ne vita immessa sul
mercato prima del 31 dicembre 2010, l’utente eff e ui un acquisto di un prodo o di po e qui
valente ed adibito alle stesse funzioni. In tale ul mo caso l’utente potrà richiedere al produ ore il
ri ro della presente apparecchiatura;
c. dal produ ore, inteso come il sogge o che ha per primo introdo o e commercializzato in Italia o
rivende in Italia col proprio marchio l’apparecchiatura nuova che ha sos tuito la precedente, nel
caso in cui l’apparecchiatura si immessa sul mercato dopo il 31 dicembre 2010;
Con riferimento alle pile/accumulatori porta li l’utente dovrà conferire tali prodo giun a
idonei centri di raccolta diff erenziata predispos dalle autorità competen .
L’adeguata raccolta diff erenziata per l’avvio successivo dell’apparecchiatura e delle pile/accumulatori dismessi
al riciclaggio, al tra amento e allo smal mento ambientalmente compa bile contribuisce ad evitare possibili
eff e nega vi sull’ambiente e sulla salute e favorisce il reimpiego e/o riciclo dei materiali di cui essi sono
compos .
Per rimuovere le pile/accumulatori fare riferimento alle specifi che indicazioni del costruƩ ore: (vedi relaƟ vo
capitolo nel manuale d’uso)
Lo smal mento abusivo di apparecchiature, pile ed accumulatori da parte dell’utente comporta l’applicazione
delle sanzioni di cui alla corrente norma va di legge.
sui rifi u di apparecchiature ele riche ed ele roniche (RAEE)”
fi ne vita agli
SILCA ha scelto di aderire a Consorzio ReMedia, un primario Sistema Collettivo che garantisce ai
consumatori il corretto trattamento e recupero dei RAEE e la promozione di politiche orientate alla
tutela ambientale.
28
Copyright Silca S.p.A. 2016
Page 29

Deutsch
Easy Scan Plus
Deutsch
GEBRAUCH DES HANDBUCHS
Dieses Handbuch wurde vom Hersteller verfasst und stellt integrierenden Teil der Gerätedokumenta on dar.
Es erteilt dem Benutzer bei der sicheren Verwendung des Geräts Easy Scan Plus nützliche Informa onen.
Benutzerhandbuch
Das vorliegende Handbuch muss von allen Benutzern des Geräts aufmerksam gelesen werden. Diese Voraussetzung ist für den korrekten Gebrauch und die entsprechende Wartung des Geräts unerlässlich.
Das Handbuch muss während der gesamten Lebensdauer des Geräts, einschließlich der Entsorgung, sorgfäl g au ewahrt werden. Bringen Sie es an einem trockenen Ort in der Nähe des Geräts und immer in
Reichweite des Benutzers unter.
Händler-ID
Auf der Geräterückseite befi ndet sich ein Kennschild mit der Seriennummer darauf.
ALLGEMEINE HINWEISE
Das Gerät wurde unter Beachtung der Grundsätze der Europäischen CE-Richtlinien entworfen.
Die zu seiner Herstellung verwendeten Werkstoff e sind ungefährlich, daher ist es mit den Richtlinien konform.
In Hinblick auf seine Konstruk onsmerkmale handelt es sich um ein in allen seinen Bauteilen sicheres Gerät.
1 - FÜR EINEN KORREKTEN UND ZUVERLÄSSIGEN BETRIEB DAS GERÄT VON ALLEN POTENTIELLEN QUELLEN
VON FUNKSTÖRUNGEN ENTFERNT AUFSTELLEN, WIE ZUM BEISPIEL:
- SCHNURLOSE TELEFONE
- ELEKTROMOTOREN
- NEONLEUCHTEN
- MODEM WI-FI
2 - DAS USB-KABEL NICHT VOR DER INSTALLATION DES PROGRAMMS AN DEN PC ANSCHLIESSEN.
ONLINEDOKUMENTATION
- Für aktualisierte Dokumente oder zum Herunterladen neuer Aktualisierungen der So ware-Programme
von Easy Scan Plus regelmäßig die Website www.silca.biz besuchen
Copyright Silca S.p.A. 2016
29
Page 30

Easy Scan Plus
Deutsch
GERÄTEBESCHREIBUNG
Das Gerät Easy Scan Plus ist mit einem Display ausgestattet, das den Benutzer bei der Verwendung
der unterschiedlichen Funktionen anleitet. Es kann an einen PC angeschlossen werden, um über
die Software “Air4 Remotes Programming Software” zur Verwendung der erweiterten Funktionen
gesteuert zu werden.
GERÄTETEILE
A - Grafi k-Display
B - Tasten zum Scrollen durch die Menüpunkte
C - Bereich zum Ablesen der Funkfernsteuerungen
D - Funk onstasten
E - Ba eriefach
F - Iden fi zierungse ke des Easy Scan Plus
F1 - Seriennummer des Geräts
FUNKTIONEN:
- Iden fi ziert die Typologien von Funkfernsteuerungen und stellt dabei sowohl die Frequenz als auch den Typ
fest (fester oder Rolling Code).
- Überprü die Möglichkeit des Kopierens und gibt die zu verwendende Silca-Funkfernsteuerung an.
- Überprü , ob die Kopie auf einer Silca-Funkfernsteuerung exakt der Original-Funkfernsteuerung entspricht.
- Ablesen der in der Funkfernsteuerung vorhandenen Frequenz (Frequenzmesser)
- Eichung (Tuning) der Intensität des von Quarz-Funkfernsteuerungen ausgesendeten Signals.
- Aktualisierung der internen So ware über den USB-Port unter Verwendung eines PC-Programms.
- Durch die Verwendung der So ware auf dem PC (Op on) stehen mehrere erweiterte Funk onen zum
Kopieren, Erstellen und Verwalten von Funksteuerungen und zur Aktualisierung der So ware der NFC-Funk-
fernsteuerungen von Silca zur Verfügung.
TECHNISCHE ANGABEN
Versorgung
Das Gerät wird mit 2 wiederaufladbaren Nickel-Metallhydrid-Batterien (NiMH) mit 1,2 Volt im Format AA
versorgt, die im Lieferumfang enthalten sind.
Es kann auch über das im Lieferumfang enthaltene USB-Kabel versorgt werden, indem dieses an den USB-Port
eines PC oder ein Netzteil mit USB-Verbinder angeschlossen wird (nicht im Lieferumfang enthalten).
G - USB-Port Micro-B für den Anschluss an den PC
H - USB-Kabel (im Lieferumfang enthalten)
I - Keramikschraubendreher
L - Ein- und Ausschal aste des Geräts
M - Wiederaufl adbare Ba erien des Typs AA 1,2 V
(im Lieferumfang enthalten)
N - Bereich zum Schreiben von NFCFunkfernsteuerungen von Silca
Technische Eigenschaften
Versorgungsspannung: 5 VDC mit externem Netzteil
Versorgungsspannung: 2,4 VDC mit Ba erien
Stromaufnahme: MAX. 0,5 A
Feldfrequenz der Antenne
NFC-ANTENNE: 13,56 MHz
HFAntenne: 26,720 - 871.1 MHz
Umgebungsbedingungen
Das Gerät kann bei einer Umgebungstemperatur zwischen 0 und +50°C in Betrieb genommen werden
Abmessungen
Breite 90 mm
Länge 148 mm
Tiefe: 25 mm
Gewicht Ohne Ba erie 172,50 g
30
Copyright Silca S.p.A. 2016
Page 31

Easy Scan Plus
VERWENDUNG VON STAND ALONEGERÄTEN
Symbole des Batterie- und Verbindungsstatus
Gibt an, dass Easy Scan Plus an den PC angeschlossen .
Gibt an, dass keine Ba erien da sind oder dass sie nicht mit der rich gen Polarität eingesetzt
wurden. In diesem Fall die Ba erien herausnehmen und so einsetzen, dass die Pole auf der
jeweils rich gen Seite sind.
Gibt an, dass die Ba erien aufgeladen werden.
Schnelles Blinken gibt an, dass es nicht aufl adbare Ba erien gibt oder dass ein Fehler im
Ba erieladevorgang aufgetreten ist.
Sind die Ba erien, die benutzt werden, wiederaufl adbar, muss sofort geprü werden, ob
diese Zeichen einer Beschädigung oder Überhitzung aufweisen. Ist dies der Fall, die Ba erien
herausnehmen und durch neue ersetzen.
Gibt an, dass der Ladevorgang abgeschlossen ist.
Gibt an, dass der Ba erieladevorgang über 80 % erreicht hat.
Gibt an, dass der Ba erieladestand zwischen 10 % und 80 % liegt.
Gibt an, dass der Ba erieladestand unter 10 % liegt.
Gibt an, dass Easy Scan Plus an ein Ladegerät angeschlossen ist.
Deutsch
Einschalten
Die Einschal aste des Easy Scan Plus solange drücken, bis auf dem Display das Silca Logo erscheint.
Wahl der Sprache
Die Wahl der Sprache wird beim ersten Einschalten von
Easy Scan Plus vorgeschlagen; mit den Tasten an der Seite
des Display (B) die verfügbaren Sprachen ablaufen.
Nach der Wahl der Sprache zur Bestä gung “ENTER”
drücken.
Das Hauptmenü wird mit den folgenden Funk onen ein-
geblendet :
- Iden fi zierung
- Prüfung der Kopie
- Frequenzmesser
- Antenne Tuning
-Op onen von Easy Scan Plus
Für die Funk on „Kopierkontrolle“ “ENTER” drücken.
Copyright Silca S.p.A. 2016
Wahl der Sprache
Italiano
English
Français
> Deutsch
(ENT) zum Fortfahren
Hauptmenü
> Identifi zierung
Kopie Prüfen
Frequenzmesser
Antenne Tuning
Optionen
(ENT) zum Fortfahren
31
Page 32

Easy Scan Plus
IDENTIFIZIERUNG / KOPIE EINER FUNKFERNBEDIENUNG MIT FIXEM CODE
Deutsch
Die zu prüfende Funkfernbedienung der Lesezone nähern
(siehe Abb.1-C) und eine Taste der Funkfernbedienung
drücken. Falls das Lesen schwierig ist, den Vorgang wiederholen und die Funkfernbedienung um einige Zen me-
ter en ernen.
Es wird die Betriebsfrequenz der Funkfernbedienung
angegeben.
Erneut dieselbe Taste der Funkfernbedienung drücken.
FB:
FUNKFERNBEDIENUNG
Ist die geprüfte Funkfernbedienung kopierbar, wird
die zum Kopieren kompatible Silca Funkfernbedienung ( Modell und Version ) angegeben
(Zum Kopieren siehe der Silca Funkfernbedienung beigelegte Anleitungen, angegeben von Easy Scan Plus)
Für die Funk on „Kopierkontrolle“ “ENTER” drücken.
Nach der Anfer gung der Kopie die zu prüfende Silca
Funkfernbedienung der Lesezone nähern (in Kontakt
bringen, siehe Abb.1) und die Taste der kopierten
Funkfernbedienung drücken und loslassen. Die Funkfernbedienung in der Nähe der Lesezone lassen, bis Easy Scan Plus
den Prüfprozess abgeschlossen hat.
Identifi zierung
Eine Taste der zu
kopierenden FB drücken
(ESC) für Hauptmenü
Identifi zierung
Dieselbe
Taste drücken
Warten FB 433 MHz
(ESC) für Hauptmenü
Identifi zierung
Silca Air X SW. yy.yy
Fixem code. 433 MHz
(ESC) Zurück (ENT) Weiter
Kopie Prüfen
dieselbe Taste auf
KOPIERTER FB drücken
433 MHz
(ESC) für Hauptmenü
Mit ordnungsgemäßer Kopie:
Mit NICHT ordnungsgemäßer Kopie:
Kopie Prüfen
RICHTIGE Kopie
Fixer code 433 MHz
(ENT) zum Fortfahren
Kopie Prüfen
FALSCHE Kopie!
Code nicht passenden
433 MHz
(ENT) zum Fortfahren
In diesem Fall den Kopiervorgang nach den Anleitungen der Silca Funkfernbedienung, angezeigt von Esay
Scan, wiederholen. Ist die Kopie der Funkfernbedienung nicht in Ordnung, den Technischen Kundendienst
konta k eren.
32
Copyright Silca S.p.A. 2016
Page 33

Easy Scan Plus
Deutsch
Hinweis:
Diese Funk on funk oniert nur bei Silca Funkfernbedie-
nungen.
Werden Funkfernbedienungen von anderen Herstellern
benutzt, zeigt das Display von Easy Scan Plus folgende
Meldung an:
Kopie Prüfen
FB NICHT SILCA
wieder zu überprüfen?
433 MHz
(ESC) Nein (ENT) Ja
IDENTIFIZIERUNG / KOPIE EINER FUNKFERNBEDIENUNG ROLLING CODE NORMAL
Die Iden fi zierung und Prüfung der Kopie von Funkfernbedienungen Rolling Code Normal ist wie die für
Funkfernbedienungen mit fi xem Code.
Nach der Durchführung der Kopie muss die kopierte Funkfernbedienung dem Empfänger zugeordnet werden;
diese Opera on kann je nach Fall mit dem A.L.S.(Vereinfachtes Verfahren zur Ak vierung der Funksteurung
im Empfänger. Die Liste der mit diesem Verfahren kompa blen Empfänger ist auf der Webseite:www.silca.biz
) Verfahren oder dem vom Hersteller des Empfängers vorgesehenen Verfahren durchgeführt werden.
Die Möglichkeit ein Verfahren oder das andere zu benutzen hängt vom Ausgang der Prüfung der Kopie ab:
Nach erfolgreich durchgeführter Kopie erscheint auf dem Display folgende Meldung:
Die Meldung “Kompa bel A.L.S.” zeigt an, dass die soeben
kopierte Funkfernbedienung mit dem “Verfahren A.L.S.”
dem Empfänger zugeordnet werden kann.
Siehe Anleitungen der Silca Funkfernbedienung angegeben
von Easy Scan Plus und auf der Webseite: www.silca.biz).
Die Meldung “Kompa bel OEM” zeigt an, dass die soeben
kopierte Funkfernbedienung nur mit dem vom Hersteller
des Empfängers vorgesehenen Verfahren dem Empfänger
zugeordnet werden kann.
Siehe vom Hersteller des Empfängers oder vom für die Installa on Zuständigen gelieferte Unterlagen.
Kopie Prüfen
RICHTIGE Kopie
Kompatibel A.L.S.
Rolling code 433 MHz
(ENT) zum Fortfahren
Kopie Prüfen
RICHTIGE Kopie
Kompatibel OEM.
Rolling code 433 MHz
(ENT) zum Fortfahren
IDENTIFIZIERUNG / KOPIE EINER FUNKFERNBEDIENUNG ROLLING CODE SECURE LEARNING
Die zu prüfende Funkfernbedienung der Lesezone nähern
(siehe Abb.1) und eine Taste der Funkfernbedienung
drücken. Falls das Lesen schwierig ist, den Vorgang wiederholen und die Funkfernbedienung um einige Zen me-
Identifi zierung
Eine Taste der zu
kopierenden FB drücken
ter en ernen.
(ESC) für Hauptmenü
Es wird die Betriebsfrequenz der Funkfernbedienung
angezeigt.
Den Quellcode der zu kopierenden Funkfernbedienung
senden. Die Art der Übertragung des Quellcodes hängt von
der Funkfernbedienung ab, die kopiert werden soll. Auf der
Webseite www.silca.biz die für Ihre Funkfernbedienung
passende suchen.
Die Art der Übertragung des Quellcodes hängt von der zu
kopierenden Funkfernbedienung ab.
Copyright Silca S.p.A. 2016
Identifi zierung
Warten auf
Source-Code
Warten FB 433 MHz
(ESC) für Hauptmenü
33
Page 34

Easy Scan Plus
Deutsch
SIst die zu prüfende Funkfernbedienung kopierbar,
wird die zum Kopieren kompatible Silca Funkfernbedienung (Modell und Version ) angezeigt und dass
Identifi zierung
Kopierbar auf FB Air X ver. yy.yy
das Verfahren für Funkfernbedienungen Rolling
Secure Learning benutzt werden muss.
(Das Kopierverfahren hängt von der Funkfernbedie-
Rolling code S.L. 433 MHz
(ESC) Zurück (ENT) Avanti
nung ab, die kopiert werden soll.
Auf der Webseite www.silca.biz das für Ihre
Funkfernbedienung passende suchen und den der
Silca Funkfernbedienung beiliegenden Anleitungen,
angezeigt von Easy Scan Plus, folgen.
Für die Funk on „Prüfung der Kopie” “ENTER” drücken.
Nach der Durchführung der Kopie die Silca Funkfernbedienung der Lesezone nähern (in Kontakt bringen, siehe Abb.
1-C) und dieselbe Taste der kopierten Funkfernbedienung
drücken und loslassen.
Die Funkfernbedienung solange in der Nähe der Lesezone
lassen, bis Easy Scan Plus das Prüfverfahren beendet hat.
Kopie Prüfen
dieselbe Taste auf
KOPIERTER FB drücken
433 MHz
(ESC) für Hauptmenü
Nach der Durchführung der Kopie muss die kopierte Funkfernbedienung dem Empfänger zugeordnet werden;
diese Opera on kann je nach Fall mit dem Verfahren A.L.S. oder mit einem vom Hersteller des Empfängers
vorgeschlagenen durchgeführt werden.
Die Möglichkeit, das eine oder andere Verfahren zu benutzen, wird nach der Prüfung der Kopie angezeigt.
Nach der erfolgreich durchgeführten Kopie erscheint auf dem Display folgende Meldung:
Die Meldung “Kompa bel A.L.S.” zeigt an, dass die soeben
kopierte Funkfernbedienung mit dem “Verfahren A.L.S.
dem Empfänger zugeordnet werden kann.
Siehe Anleitungen der Silca Funkfernbedienung, angezeigt
von Easy Scan Plus und der Webseite: www.silca.biz).
Kopie Prüfen
RICHTIGE Kopie
Kompatibel A.L.S.
Rolling code 433 MHz
(ENT) zum Fortfahren
Die Meldung “Kompa bel OEM” zeigt an, dass die soeben
kopierte Funkfernbedienung nur mit dem vom Hersteller des Empfängers vorgesehenen Verfahren zugeordnet
werden kann.
Siehe vom Hersteller des Empfängers oder vom Zuständigen für die Installa on gelieferte Unterlagen.
Mit NICHT ordnungsgemäßer Kopie:
Kopie Prüfen
RICHTIGE Kopie
Kompatibel OEM.
433 MHz
(ENT) zum Fortfahren
Kopie Prüfen
FALSCHE Kopie!
Code nicht passenden
433 MHz
(ENT) zum Fortfahren
In diesem Fall den Kopiervorgang wiederholen und dabei die Anleitungen der Silca Funkfernbedienung von
Easy Scan Plus beachten.
Falls die Kopie der Funkfernbedienung nicht rich g durchgeführt wurde, den Technischen Kundendienst kon-
tak eren.
34
Copyright Silca S.p.A. 2016
Page 35

Easy Scan Plus
Deutsch
Hinweis:
Diese Funk on ist nur ak v bei Silca Funkfernbedienungen.
Werden Funkfernbedienungen von anderen Herstellern
benutzt, erscheint auf dem Display von Easy Scan Plus
folgende Meldung.
Ist die Funkfernbedienung nicht kopierbar, erscheint auf
dem Display des Easy Scan Plus folgende Meldung:
Kopie Prüfen
FB NICHT SILCA
wieder zu überprüfen?
(ESC) NO (ENT) SI
Identifi zierung
FB nicht kopierbar
433 MHz
(ESC) für Hauptmenü
IDENTIFIZIERUNG/KOPIE EINER QUARZFUNKFERNBEDIENUNG
Das Verfahren der “Iden fi zierung” und “Prüfung der Kopie” von Quarz-Funkfernbedienungen ist gleich wie
bei Funkfernbedienungen mit fi xem Code.
Vor dem Starten des Kopier-Prüfverfahrens fordert Easy Scan Plus zur Durchführung der Jus erung (Tuning)
der Intensität des von der kopierten Funkfernbedienung gesendeten Signals auf:
Das Gehäuse der Funkfernbedienung öff nen (siehe Anlei-
tungen Funkfernbedienung).
Die Quarz-Funkfernbedienung der Lesezone nähern (in
Kontakt bringen, siehe Abb.1 ), eine Taste drücken und
gedrückt halten.
Mit einem Keramikschraubenzieher langsam die Schraube
der Antennenregelung drehen, um die maximale Intensität
der Anzeige auf dem Display zu erreichen .
Nachdem der Höchstwert eingestellt wurde die Funkfernbedienung etwas en ernen und die Opera on wiederholen,
bis der Höchstwert auf dem Display angezeigt wird.Das
Gehäuse der Funkfernbedienung wieder schließen.
Antenne Tuning
0 | 50 | 100
FB drücken
(ESC) Zurück (ENT) Weiter
WEITERE FUNKTIONEN VON EASY SCAN PLUS
FUNKTION “PRÜFUNG DER KOPIE”
Mit den Taste an der Seite des Displays: “Kopie Prüfen“
drücken.
Zum Weitergehen “ENTER” drücken.
Die Original-Funkfernbedienung der Lesezone nähern
(in Kontakt bringen, siehe Abb.1-C) und eine Taste der
Funkfernbedienung drücken.
Copyright Silca S.p.A. 2016
Hauptmenü
Identifi zierung
>Kopie Prüfen
Frequenzmesser
Antenne Tuning
Optionen
(ENT) zum Fortfahren
Kopie Prüfen
Eine Taste der
Original FB drückene
(ESC) für Hauptmenü
35
Page 36

Easy Scan Plus
Deutsch
Nur im fall von Rolling Secure Learning Fernbedienungen:
Den Quellcode der zu kopierenden Funkfernbedienung
senden. Die Art der Übertragung des Quellcodes hängt von
der Funkfernbedienung ab, die kopiert werden soll. Auf der
Webseite www.silca.biz die für Ihre Funkfernbedienung
passende suchen.
Kopie Prüfen
Warten Auf
Source-Code
Warten FB 433 MHz
(ESC) für Hauptmenü
Die Art der Übertragung des Quellcodes hängt von der zu
kopierenden Funkfernbedienung ab.
Nur im fall von quarz-funkfernbedienung Fernbedienungen:
Um die Prüfung der Kopie bei Quarz-Funkfernbedienungen zuverlässiger und besser zu machen, empfehlen
wir, die Intensität des von der Funkfernbedienung gesendeten Signals, kopiert mit der Funk on “Antennen-
Tuning” , zu prüfen.
Nach der Auff orderung die kopierte Silca Funkfernbe-
dienung der Lesezone nähern (in Kontakt bringen, siehe
Abb.1) und eine Taste der Funkfernbedienung drücken.
Entspricht die kopierte Funkfernbedienung dem Original,
zeigt Easy Scan Plus folgende Meldung an:
Anderenfalls:
Identifi zierung
drücken gleiche Taste
auf der FB kopiert
(ESC) für Hauptmenü
Kopie Prüfen
RICHTIGE Kopie
433 MHz
(ENT) zum Fortfahren
Kopie Prüfen
FALSCHE Kopie!
Code nicht passenden
433 MHz
(ENT) zum Fortfahren
Hinweis:
Diese Funk on ist nur bei Silca Funkfernbedienungen ak v.
Werden Funkfernbedienungen von anderen Herstellern
benutzt zeigt EsayScan folgende Meldung an:
FREQUENZMESSGERÄT:
Mit den Tasten an der Seite des Display: “Frequenzmesser”
wählen.
Zum For ahren “ENTER” drücken.
36
Copyright Silca S.p.A. 2016
Kopie Prüfen
FB NICHT SILCA
wieder zu überprüfen?
433 MHz
(ESC) Nein (ENT) Ja
Hauptmenü
Identifi zierung
Kopie Prüfen
> Frequenzmesser
Antenne Tuning
Optionen
(ENT) zum Fortfahren
Page 37

Easy Scan Plus
Deutsch
Die zu prüfende Funkfernbedienung der Lesezone nähern
(in Kontakt bringen, siehe Abb.1) und eine Taste der
Funkfernbedienung drücken.
Easy Scan Plus gibt die Frequenz und Modula on des von
der Funkfernsteuerung ausgesendeten Signals an
.
Frequenzmesser
AM
433.92 MHZ
FB drücken
(ESC) für Hauptmenü
ANTENNENTUNING:
Mit den Tasten an der Seite des Display: “Antenne Tuning”
wählen.
Zum For ahren “ENTER” drücken.
Das Gehäuse der Funkfernbedienung öff nen (siehe Anlei-
tungen Funkfernbedienung).
Die Quarz-Funkfernbedienung der Lesezone nähern (in
Kontakt bringen, siehe Abb.1 ), eine Taste drücken und
gedrückt halten.
Mit einem Keramikschraubenzieher langsam die Schraube
der Antennenregelung drehen, um die maximale Intensität
der Anzeige auf dem Display zu erreichen.
Nachdem der Höchstwert eingestellt wurde die Funkfernbedienung etwas en ernen und die Opera on wie-
derholen, bis der Höchstwert auf dem Display angezeigt wird.
Das Gehäuse der Funkfernbedienung wieder schließen.
Hauptmenü
Identifi zierung
Kopie Prüfen
Frequenzmesser
> Antenne Tuning
Optionen
(ENT) zum Fortfahren
Antenne Tuning
0 | 50 | 100
FB drücken
(ESC) Zurück (ENT) Weiter
MENÜ OPTIONEN
Über dieses Menü erhält man Zugriff zu folgenden Funk onen:
- Sprache (siehe Abschni Einschalten für Einstellung/
Änderung der Sprache).
- Lesen der SW-Version der Silca Funkfernbedienungen
- Auswahl SILCA Fernbedienungen zu zeigen
- Informa onen zu Easy Scan Plus
LESEN DER VERSION SILCA FUNKFERNBEDIENUNG:
Die Silca Funkfernbedienung der Lesezone nähern (in
Kontakt bringen, und eine Taste drücken.
Copyright Silca S.p.A. 2016
Optionen
> Wahl der Sprache
Vers. FB SILCA
Wahl FB SILCA
Info. Easy Scan
(ESC) Zurück (ENT) Weiter
Vers. FB SILCA
Eine Taste der FB
SILCA drücken
(ESC) für Hauptmenü
37
Page 38

Easy Scan Plus
Deutsch
Es werden die Informa onen bezüglich der Funkfernbedie-
nung angezeigt:
- Modell der Funkfernbedienung
- Hardware und So wareversion der Funkfernbedienun-
gen
- Seriennummer
- Frequenz
AUSWAHL SILCA FERNBEDIENUNGEN ZU ZEIGEN:
Ermöglicht die Auswahl der Fernbedienungen, die während
der Iden fi ka onsphasen angezeigt werden sollen:
- Verwenden Sie die Tasten zum Scrollen der Menüpunkte,
setzen Sie den Cursor auf den Namen der Fernbedienung
und drücken Sie ENTER, um sie zu deaktivieren oder zu
aktivieren.
Hinweis:
Diese Funk on ist nur bei Silca Funkfernbedienungen ak v.
Werden Funkfernbedienungen anderer Hersteller benutzt,
erscheint auf dem Display von Easy Scan Plus folgende
Meldung:
INFORMATIONEN ZU EASY SCAN PLUS:
Diese Funk on liefert folgende Informa onen:
- Modell
- SW Version
- ID ( 24-stellig)
Vers. FB SILCA
FB SILCA Air X
HW: 00000 SW: 00.00.00
SN: 00000000
868 MHz
(ESC) Zurück (ENT) Weiter
FB SILCA
> (*) AirV Plus EU
(*) AirV Plus IB
(*) AirV
(*) AirF
(ESC) für Hauptmenü
Vers. FB SILCA
FB NICHT SILCA!
868 MHz
(ESC) Zurück (ENT) Weiter
Informat. Easy Scan Plus
Modell: Easy Scan Plus
Ver: X.X.X
ID: XXXXXXXXXXXXXXXXXXXXXX
(ESC) für Hauptmenü
Easy Scan Plus wurde darauf ausgelegt, über das Programm“Air4 Remotes Programming So ware“ mit einem
VERWENDUNG DES GERÄTS MIT PC
PC verbunden zu werden, die über die Website von Silca: www.silca.biz erhältlich ist. Dieses Programm kann
auf Windows®, Vista, 7, 8 und 10 installiert werden.
Die gemeinsame Verwendung des Programms auf dem PC gesta et es, stets über eine aktualisierte Version
der SW von Easy Scan Plus zu verfügen und die SW NFC-Funkfernsteuerungen von Silca zu aktualisieren, um
die Möglichkeit des Kopierens neuer Funkfernsteuerungen auszuweiten und auf Informa onen und Doku-
menta onen zuzugreifen, die zur besten Nutzung des Angebots an Funkfernsteuerungen und Geräten von
Silca für Gebäudeanwendungen hilfreich sind.
Außerdem ist es möglich, nach Ak vierung von Easy Scan Plus erweiterte Spezialfunk onen zu nutzen, wie
das unterstützte und erleichterte Kopieren einer Funkfernsteuerung, das Erstellen von Funkfernsteuerungen,
so als ob diese Originale wären (hilfreich, sollte die zu kopierende Funkfernsteuerung verloren gegangen sein
oder nicht mehr funk onieren), das Verwalten von Funkparametern (z. B. serielle Codes, Zähler, Frequenz,
usw.) usw..
Für weitere Einzelheiten beziehen Sie sich auf die Inline-Anweisungen der Anleitung des Programms „Air4
Remotes Programming So ware“.
VORGEHENSWEISE ZUM EINSATZ VON EASY SCAN PLUS MIT PC:
Nachdem die „Air4 Remotes Programming So ware“ installiert wurde, auf diese zugreifen und Easy Scan Plus
mit dem im Lieferumfang enthaltenen USB-Kabel an den PC anschließen.
Bei der ersten Verbindung von Easy Scan Plus installiert das System automa sch die Driver (es könnte eine
ak ve Internetverbindung erforderlich sein).
Sollte man die Nachricht „Gerät nicht erkannt - Driverinstalla on nicht möglich“ erhalten, müssen Letztere in-
stalliert werden, indem der Ordner „Drivers“ im Inneren des Ordners zur Installa on des Programms geöff net
wird.
38
Copyright Silca S.p.A. 2016
Page 39

Easy Scan Plus
Deutsch
PROGRAMMIERUNG UND AKTUALISIERUNG DER FUNKFERNSTEUERUNG ÜBER NFC
Die Programmierung der Funkfernsteuerung erfolgt über die NFC-Technologie, indem die Funkfernsteuerung in den im Schreibebereich (Abb. 1-N) angegebenen Bereich posi oniert und die entsprechende in der
So ware auf dem PC verfügbare Funk on ausgewählt wird.
FÜR WEITERE INFORMATIONEN BEGEBEN SIE SICH BITTE AUF DIE WEBSITE www.silca.biz UND
GEBEN DAS SCHLÜSSELWORT "EASYSCANPLUSSOFTWARE" IN DAS SUCHFELD EIN:
EASYSCANPLUSSOFTWARE
EINSETZEN - ERSETZEN - AUFLADEN DER BATTERIEN
- EINSETZEN - ENTNEHMEN
Zum Einsetzen oder Entnehmen der Ba erien muss der Ba eriefachdeckel verschoben und angehoben
werden (Abb. 2 - E ).
Die Ba erien unter Beachtung der korrekten Polarität in das Fach einsetzen und den Deckel wieder anbringen.
- ERSETZEN
Die Ba erien durch neue wiederaufl adbare Ba erien mit den gleichen Merkmalen wie die im Lieferumfang
von Easy Scan Plus enthaltenen ersetzen: wiederaufl adbare Nickel-Metallhydrid-Ba erien ( NiMH), Format
AA, 1,2 Volt,
- AUFLADEN
Easy Scan Plus ist in der Lage, die Ba erien aufzuladen:
1. Durch Anschließen des Geräts mit dem im Lieferumfang enthaltenen USB-Kabel an einen PC (es müssen
2. Durch Anschließen an ein Ba erieladegerät mit Micro USB-Verbinder des Typs B (nicht im Lie-
1800÷2400 mAh.
Ports des Typs USB2 verwendet werden, die in der Lage sind, einen Strom von 0,5 A abzugeben.
ferumfang enthalten) mit den folgenden Eigenscha en: Ausgangsspannung 5,0 VDC und
Mindeststromstärke 0,5 A, einhaltung der CE-Normen .
BRANDGEFAHR:
WÄHREND DES AUFLADENS DER BATTERIEN MIT HILFE EINES EXTERNEN LADEGERÄTS
WIRD DIE VERWENDUNG VON LADEGERÄTEN MIT DEN FOLGENDEN EIGENSCHAFTEN
EMPFOHLEN:
- AUSGANGSSTROM MAX. 8A
- AUSGANGSLEISTUNG MAX. 100VA
Empfehlungen für einen besseren Einsatz der Ba erien:
• Wird das Gerät lange Zeit nicht verwendet, die Ba erien entnehmen und an einem sicheren, kühlen und
trockenen Ort au ewahren.
• Um die Lebensdauer der Ba erien zu verlängern, vermeiden, das Gerät längere Zeit nach Abschluss des
Ladevorgangs an den USB-Port angeschlossen zu lassen.
WICHTIGER HINWEIS: ES BESTEHT EXPLOSIONSGEFAHR, WENN BATTERIEN DES FALSCHEN TYPS
ODER BESCHÄDIGTE BATTERIEN VERWENDET WERDEN (Z. B. IM FALL VON OXIDATION, FLÜSSIGKEITSVERLUST ODER VERFORMUNGEN).
Copyright Silca S.p.A. 2016
39
Page 40

Easy Scan Plus
Deutsch
ENTSORGUNG
INFORMATIONEN FÜR BENUTZER VON PROFESSIONELLEN GERÄTEN
Zur “Umsetzung der Richtlinie 2012/19/EU über Elektro- und Elektronik-Altgeräte (WEEE) “
Das Symbol der durchgestrichenen Abfalltonne auf Räder am Gerät oder an dessen Verpackung weist darauf
hin, dass das Produkt am Ende seiner Lebensdauer zur ordnungsgemäßen Behandlung und Wiederverwertung getrennt gesammelt werden muss.
Die getrennte Sammlung dieses professionellen Geräts obliegt am Ende seiner Lebensdauer:
a. direkt dem Benutzer, falls das Gerät vor dem 31. Dezember 2010 in Verkehr gebracht wurde und
der Benutzer beschließt es nicht mit einem neuen, gleichwer gen und gleich verwendetes Gerät
auszutauschen.
b. vom Hersteller, d.h. von demjenigen, der als erster das neue Gerät, das den alten austauscht,
eingeführt und vertrieben hat, falls, der Benutzer gleichzei g mit der Entledigung seines Altgeräts,
das vor 31. Dezember 2010 in Verkehr gebracht wurde, den Kauf eines gleichwer gen und
gleich genutzten Geräts beschließt. In diesem letzten Fall, kann der Benutzer vom Hersteller die
Rücknahme dieses Geräts verlangen;
c. vom Hersteller, d.h. von demjenigen, der als erster das neue Gerät, das den alten austauscht,
eingeführt und vertrieben hat, falls das Gerät nach dem 31. Dezember 2010 in Verkehr gebracht
wurde;
Der Benutzer hat die tragbaren Ba erien/Akkus am Ende ihrer Lebensdauer in angemessenen Recyclingzen-
tren zu entsorgen.
Eine angemessene getrennte Sammlung zur nachfolgenden umweltgerechten Wiederverwertung, Behandlung und Entsorgung des entledigten Geräts verhindert nega ve Umwelt- und Gesundheitsauswirkun-
gen und fördert die Wiederverwendung und/oder das Recycling seiner Werkstoff e.
Die En ernung von Ba erien/Akkus hat gemäß den Anleitungen des Herstellers zu erfolgen. (siehe entspre-
chenden Absatz der Bedienungsanleitung)
Die gesetzeswidrige Entsorgung des Produktes durch den Benutzer wird gemäß den geltenden Bes mmungen
bestra .
40
Copyright Silca S.p.A. 2016
Page 41

Easy Scan Plus
Français
UTILISATION DU MANUEL
Le présent manuel a été écrit par le Fabricant et cons tue une par e intégrante de la documenta on du
disposi f.
Il fournit des informa ons u les à l’u lisateur pour l’u lisa on du disposi f Easy Scan Plus de manière sure-
Manuel utilisateur
Le présent manuel doit être lu a en vement par toutes les personnes qui u lisent le disposi f. Ce préambule
est indispensable pour une correcte u lisa on et entre en du disposi f.
Le manuel doit être conservé soigneusement pendant la durée de vie du disposi f, y compris lors de l’étape
du démantèlement. Le conserver dans un endroit sec à côté du disposi f, où il doit être placé à portée de
main de l’u lisateur.
ID distributeur
Le disposi f a une plaque d’iden fi ca on qui indique le numéro de série placée à l’arrière.
INFORMATIONS GÉNÉRALES
Le disposi f a été conçu dans le respect des principes des Direc ves Européennes CE.
Les matériaux u lisés pour sa fabrica on ne sont pas dangereux et rendent le disposi f conforme aux direc-
ves. Dans les caractéris ques de concep on c’est un disposi f sûr en ce qui concerne tous ses composants.
1 - POUR UN FONCTIONNEMENT CORRECT ET FIABLE, PLACER LE DISPOSITIF LOIN DE TOUTES SOURCES QUI
POURRAIENT GÉNÉRER DES PERTURBATIONS RADIOS COMME PAR EXEMPLE :
- TÉLÉPHONES SANS FIL
- MOTEURS ÉLECTRIQUES
- ÉCLAIRAGES À NÉON
- MODEM WI-FI
2 -NE PAS INSÉRER LE CÂBLE USB DANS L’ORDINATEUR AVANT L’INSTALLATION DU PROGRAMME.
DOCUMENTATION EN LIGNE
- Pour une documenta on à jour, pour télécharger de nouvelles mises à jour du programme logiciel de Easy
Scan Plus, visiter périodiquement le site www.silca.biz.
41Copyright Silca S.p.A.2016
Page 42

Easy Scan Plus
Français
DESCRIPTION DU DISPOSITIF
Le Dispositif Easy Scan Plus est doté d’un écran qui guide l’utilisateur lors de l’utilisation des différentes fonctionnalités. Il peut être connecté à un ordinateur pour être géré par le logiciel «Air4
Remote Programming Software» pour utiliser les fonctions avancées.
PARTIES OPÉRATIONNELLES
A- Écran graphique
B - Boutons de défilement des points du menu
C - Zone lecture télécommandes
D- Boutons de fonc on
E - logement ba eries
F - É que es d'iden fi ca on de Easy Scan Plus
F1 - Numéro d'immatricula on disposi f
FONCTIONS :
- Iden fi e les types de télécommandes en déterminant la fréquence et le type (code fi xe ou Rolling code).
- Vérifi e la possibilité de copie et indique la télécommande Silca à u liser.
- Vérifi e que la copie sur une télécommande Silca corresponde exactement à la télécommande originale.
- Lecture de la fréquence présente dans la télécommande (Fréquencemètre)
- Étalonnage (Tuning) de l’intensité du signal émis par les télécommandes à quartz.
- Mise à jour du logiciel interne par le port USB en u lisant un programme sur ordinateur.
- Avec l’u lisa on du logiciel sur ordinateur (op on) les fonc ons avancées de copie, de généra on et ges on
des télécommandes et la mise à jour du logiciel des télécommandes NFC Silca sont disponibles.
DONNÉES TECHNIQUES
Alimentation
Le disposi f est alimenté avec 2 batteries rechargeables Nickel-Hydrure Métallique (NiMH) de 1.2 volt format
AA fournies .
Peut aussi être alimenté par câble USB fourni, en le connectant au port USB de l’ordinateur ou à un chargeur
avec un connecteur USB (non fourni).
G - Port USB Micro-B pour connexion avec
Ordinateur
H - Câble USB (fourni)
I - Tournevis céramique
L - Bouton d'allumage et d'ex nc on du disposi f
M - Ba eries rechargeables type AA 1.2V (fournies)
N - Zone d'écriture télécommandes NFC Silca
Caractéristiques techniques
Tension d’alimenta on 5 VDC avec chargeur externe
Tension d’alimenta on: 2.4 VDC avec ba erie
Courant absorbé: 0.5 A MAX
Fréquence de champ de l’antenne
ANTENNE NFC: 13,56 MHz
ANTENNE HF : 26,720 - 871.1 MHz
Conditions environnementales
Le disposi f fonc onne à une température ambiante comprise entre 0 et +50°C
Dimensions
Largeur: 90 mm
Longueur: 148 mm
Profondeur: 25 mm
Poids Sans ba erie 172.50 g.
42
Copyright Silca S.p.A.2016
Page 43

Easy Scan Plus
UTILISATION DU DISPOSITIF STAND ALONE
Liste des symboles état batterie et connexions
Indique que Easy Scan Plus est connecté avec l’ordinateur
Indique qu’aucune pile n’est détectée ou encore que la polarité est incorrecte ; dans ce dernier
cas, les enlever et me re des piles ayant la polarité demandée.
Indique que les ba eries sont en train de se charger
Un clignotement rapide indique que les piles installées ne sont pas rechargeables ou encore
que le chargement de la pile n’a pas été bien fait.
En cas d’u lisa on de piles rechargeables, vérifi er immédiatement qu’il n’y ait aucun signe
d’endommagement ou de surchauff e ; dans ce dernier cas, enlever les piles et me re des
piles neuves.
Indique que le processus de chargement est terminé.
Indique que le niveau de charge des piles est supérieur à 80%.
Indique que le niveau de charge des piles est compris entre 10% et 80%.
Indique que le niveau de charge des piles est inférieur à 10 %.
Indique que Easy Scan Plus est connecté à un chargeur
Français
Allumage
Maintenir enfoncée la touche d’allumage d’Easy Scan Plus jusqu’à ce que le logo Silca soit visualisé sur le
display.
Choisir la langue
Le choix de la langue sera proposé lors du premier allumage
d’Easy Scan Plus , u liser les boutons sur le côté du display
(B) pour défi ler les langues disponibles.
Une fois la langue choisie, taper “ENTER” pour valider.
Le menu principal avec les fonc ons suivantes s’affi che:
- Iden fi ca on
- Vérifi ca on Copie
- Fréquencemètre
- Tuning Antenne
-Op ons d’Easy Scan Plus
Choisir Langue
> Italiano
English
Français
Deutsch
(ENT) pour continuer
Menu principal
> Identifi cation
Vérifi e copie
Fréquencemètre
Tuning Antenne
Options
(ENT) pour continuer
43Copyright Silca S.p.A.2016
Page 44

Easy Scan Plus
IDENTIFICATION / COPIE D’UNE TÉLÉCOMMANDE A CODE FIXE
Rapprocher la télécommande à analyser de la zone de
lecture (voir fi g.1-C) et taper une touche de la télécom-
mande. Si la lecture s’avérait diffi cile, recommencer la
procédure en éloignant la télécommande de quelques cen mètres.
Identifi cation
(ESC) menu principal
Français
Taper une touche
de la TLC à copier
Visualisa on de la fréquence de fonc onnement de la
télécommande.
Taper à nouveau sur la même touche de la télécommande.
TLC: TÉLÉCOMMANDE
Si la télécommande en question est duplicable, l’homologue télécommande Silca (modèle et version)
compatible pour la copie sera visualisé.
(Pour la procédure du copiage, voir la notice annexée
à la télécommande Silca suggérée par Easy Scan Plus).
Taper “ENTER” pour la fonc on “Vérifi ca on Copie”.
Une fois la copie faite, rapprocher la télécommande Silca
à vérifi er à la zone de lecture (me re en contact voir fi gure
1) et taper puis relâcher ce e même touche de la télécom-
mande copiée.
Garder la télécommande près de la zone de lecture jusqu’à
ce qu’Easy Scan Plus ait terminé le processus de vérifi ca-
on.
Si la copie est correcte:
Identifi cation
Taper à nouveau
la même touche
Attente TLC 433 MHz
(ESC) menu principal
Copiable sur
Silca Air X SW. yy.yy
Code fi xe 433 MHz
(ESC) Debut (ENT) Avant
Vérifi e copie
Taper la même touche
sur la TLC copiée
433 MHz
(ESC) menu principal
Vérifi e copie
Copie correcte
Code fi xe 433 MHz
(ENT) pour continuer
Si la copie N’EST PAS correcte:
Vérifi e copie
Copie erronnée!
Code ne correspond pas
433 MHz
(ENT) pour continuer
Dans ce cas, refaire la procédure du copiage en se basant sur les instruc ons de la télécommande Silca
suggérées par Easy Scan Plus.
Si le copiage de la télécommande ne se fait pas correctement, contacter le service d’assistance technique.
44
Copyright Silca S.p.A.2016
Page 45

Easy Scan Plus
Français
Remarque
Ce e fonc on ne réagit qu’en présence de télécommandes
Silca.
Avec les télécommandes d’autres fabricants, le display d’
Easy Scan Plus visualisera le message:
Vérifi e copie
TLC non Silca
Verifi er encore?
433 MHz
(ESC) NON (ENT) OUI
IDENTIFIER / COPIER UNE TÉLÉCOMMANDE ROLLING CODE NORMAL
La procédure d’ iden fi ca on et la vérifi ca on de la copie de télécommandes Rolling Code Normal est
iden que à la procédure des télécommandes à code fi xe.
Une fois la copie faite, la télécommande copiée devra être associée au récepteur: ce e opéra on pourra,
selon le cas, être faite via la procédure A.L.S. (Procédure simplifi ée pour ac ver la télécommande dans le
récepteur. La liste des récepteurs compa bles est disponible sur notre site : www.silca.biz. ) ou via la procédure
conseillée par le fabricant du récepteur.
L’éventualité d’exploiter une procédure plutôt qu’une autre sera indiquée avec le résultat de la fonc on de
vérifi ca on de la copie:
Si la copie abou t, le display visualisera le message:
Le message “Compa ble A.L.S.” indique que la télécom-
mande venant d’être reproduite peut être associée au
récepteur via la « Procédure A.L.S.”.
Voir les instruc ons de la télécommande Silca indiquées
par Easy Scan Plus et notre site: www.silca.biz).
Le message “Compa ble OEM” indique que la télécom-
mande venant d’être reproduite ne peut être associée au
récepteur que par la procédure conseillée par le fabricant
du récepteur.
Voir la documenta on fournie par le fabricant du récepteur
ou par l’installateur.
Vérifi e copie
Copie correcte
Compatible A.L.S.
Rolling code 433 MHz
(ENT) pour continuer
Vérifi e copie
Copie correcte
Compatible OEM.
Rolling code 433 MHz
(ENT) pour continuer
IDENTIFICATION / COPIE D’UNE TÉLÉCOMMANDE ROLLING CODE SECURE LEARNING
Rapprocher la télécommande à examiner de la zone de
lecture (voir fi gure 1) et taper une touche de la télécom-
mande. Si la lecture s’avérait diffi cile, recommencer la
procédure en éloignant la télécommande de quelques cen-
Identifi cation
Taper une touche
de la TLC à copier
mètres.
(ESC) menu principal
Indica on de la fréquence de fonc onnement de la
télécommande.
Il sera demandé d’envoyer le code source de la télécommande à copier.
Les modalités d’envoi du code source dépend de la
télécommande à copier. Consultez notre site www.silca.biz
Identifi cation
En attente du
Code SOURCE
Attente TLC 433 MHz
(ESC) menu principal
la modalité la mieux adaptée à votre télécommande.
45Copyright Silca S.p.A.2016
Page 46

Easy Scan Plus
Français
Si la télécommande en question est duplicable, il sera
indiqué la télécommande Silca (modèle et version)
compatible pour la copie et qu’il faudra utiliser la
Copiable sur
Silca Air X ver. yy.yy
procédure pour Télécommandes Rolling Secure
Learning.
(La procédure de copiage dépend de la télécomman-
Rolling code S.L. 433 MHz
(ESC) Debut (ENT) Avant
de; vérifiez sur notre site www.silca.biz la procédure adaptée à votre télécommande et reportez-vous
aux instructions annexées à la télécommande Silca
indiquée par Easy Scan Plus).
Taper “ENTER” pour la fonc on de “Vérifi ca on Copie”.
Taper “ENTER” pour la fonc on de “Vérifi ca on Copie”.
Vérifi e copie
Taper la même touche
sur la TLC copiée
433 MHz
(ESC) menu principal
Une fois la copie faite, la télécommande copiée devra être associée au récepteur: ce e opéra on pourra,
selon le cas, être faite via la procédure A.L.S. ou via la procédure conseillée par le fabricant du récepteur.
L’éventualité d’exploiter une procédure plutôt qu’une autre sera indiquée avec le résultat de la fonc on de
vérifi ca on de la copie.
Si la copie abou t, le display visualisera le message:
Le message “Compa ble A.L.S.” indique que la télécom-
mande venant d’être reproduite peut être associée au
récepteur via la «Procédure A.L.S.”.
Voir les instruc ons de la télécommande Silca indiquées
par Easy Scan Plus et notre site: www.silca.biz).
Le message “Compa ble OEM” indique que la télécom-
mande venant d’être reproduite ne peut être associée au
récepteur que par la procédure conseillée par le fabricant
du récepteur.
Voir la documenta on fournie par le fabricant du récepteur
ou par l’installateur.
Vérifi e copie
Copie correcte
Compatible A.L.S.
Rolling code 433 MHz
(ENT) pour continuer
Vérifi e copie
Copie correcte
Compatible OEM.
433 MHz
(ENT) pour continuer
Si la copie N’EST PAS correcte:
Vérifi e copie
Copia erronée
Code ne correspond pas
433 MHz
(ENT) pour continuer
Dans ce cas, refaire la procédure du copiage en se basant sur les instruc ons de la télécommande Silca
suggérées par Easy Scan Plus.
Si le copiage de la télécommande ne se fait pas correctement, contacter le service d’assistance technique.
46
Copyright Silca S.p.A.2016
Page 47

Easy Scan Plus
Français
Remarque:
Ce e fonc on ne réagit qu’en présence de télécommandes
Silca.
Avec les télécommandes d’autres fabricants, le display d’
Easy Scan Plus visualisera le message:
Dans le cas de télécommande non duplicable, le display d’
Easy Scan Plus affi chera le message suivant:
Vérifi e copie
TLC non Silca
Verifi er encore?
(ESC) NON (ENT) OUI
Identifi cation
TLC non copiable
433 MHz
(ESC) menu principal
IDENTIFIER / COPIER UNE TÉLÉCOMMANDE A QUARTZ
La procédure d’ “Iden fi ca on” et “Vérifi ca on Copie” de télécommandes à quartz est iden que à celle des
télécommandes à code fi xe.
Toutefois, avant de lancer la procédure de vérifi ca on de la copie, il faudra étalonner (Tuning) l’intensité du
signal émis par la télécommande copiée:
Ouvrir la coque de la télécommande (v. mode d’emploi
télécommande).
Rapprocher la télécommande à quartz de la zone de lecture
(me re en Contact, voir fi g.1-C), enfoncer et maintenir une
touche enfoncée.
Avec un tournevis en céramique, faire tourner lentement la
vis réglant l’antenne pour obtenir l’amplitude maximum de
l’indicateur d’intensité sur le display.
Une fois le paramètre maximum a eint, éloigner légère-
ment la télécommande et répéter l’opéra on jusqu’à
a eindre le niveau maximum visualisable à l’écran.
Refermer la coque de la télécommande.
Tuning Antenne
0 | 50 | 100
Taper touche TLC
(ESC) Debut (ENT) Avant
AUTRES FONCTIONS D’EASY SCAN PLUS
FONCTION VERIFICATION COPIE
U liser les boutons latéraux du display pour sélecter:
“Vérifi er Copie”.
Taper “ENTER” pour con nuer.
Menu principal
Identifi cation
> Vérifi e copie
Fréquencemètre
Tuning Antenne
Options
(ENT) pour continuer
47Copyright Silca S.p.A.2016
Page 48

Easy Scan Plus
Français
Rapprocher la télécommande originale de la zone de
lecture (me re en Contact, voir fi gure 1) et taper une
touche de la télécommande.
Seulment dans le cas de télécommande Rolling Secure
Learning:
Il sera demandé d’envoyer le code source de la télécommande à copier.
Les modalités d’envoi du code source dépend de la
télécommande à copier. Consultez notre site www.silca.biz
Vérifi e copie
Taper une touche
de la TLC originale
(ESC) menu principal
Vérifi e copie
En attente du
Code SOURCE
Attente TLC 433 MHz
(ESC) menu principal
la modalité la mieux adaptée à votre télécommande.
Seulment dans le cas de télécommande a quartz :
Pour que le contrôle de la copie soit plus fi able et rapide, dans le cas de Télécommandes à Quartz, il est
conseillé de vérifi er l’intensité du Signal transmis par la télécommande copiée via la fonc on “Tuning
Antenne”.
Si demandé, rapprocher la télécommande copiée Silca de
la zone de lecture (me re en contact, voir fi gure 1) et taper
une touche de la télécommande.
Si la télécommande copiée coïncide avec l’original, Easy
Scan Plus visualisera le message:
Identifi cation
Taper la même touche
sur la TLC copiée
(ESC) menu principal
Vérifi e copie
Copie correcte
Remarque:
Ce e fonc on ne réagit qu’en présence de télécommandes
Silca.
Avec les télécommandes d’autres fabricants, le display d’
Easy Scan Plus visualisera le message:
FRÉQUENCEMÈTRE:
U liser les boutons latéraux du display pour sélecter:
“Fréquencemètre”.
Taper “ENTER” pour con nuer.
48
Copyright Silca S.p.A.2016
(ENT) pour continuer
433 MHz
Vérifi e copie
TLC non Silca
Verifi er encore?
433 MHz
(ESC) NON (ENT) OUI
Menu principal
Identifi cation
Vérifi e copie
> Fréquencemètre
Tuning Antenne
Options
(ESC) Debut (ENT) en Avant
Page 49

Easy Scan Plus
Français
Rapprocher la télécommande à examiner de la zone de
lecture (me re en Contact, voir fi gure 1) et taper une
touche de la télécommande.
Easy Scan Plus indique la fréquence e la modula on du
signal émis par la télécommande.
Fréquencemètre
AM
433.92 MHZ
Taper touche TLC
(ESC) menu principal
TUNING ANTENNE:
U liser les boutons latéraux du display pour sélecter:
“Tuning Antenne”.
Taper “ENTER” pour con nuer.
Ouvrir la coque de la télécommande (voir mode d’emploi
télécommande).
Rapprocher la télécommande de la zone de lecture (me re
en Contact, voir fi gure 1), enfoncer et maintenir une
touche enfoncée.
Avec un tournevis en céramique, faire tourner lentement la
vis réglant l’antenne pour obtenir l’amplitude maximum de
l’indicateur d’intensité sur le display.
Une fois le paramètre maximum a eint, éloigner légèrement la télécommande et répéter l’opéra on jusqu’à
a eindre le niveau maximum visualisable à l’écran.
Refermer la coque de la télécommande.
Menu principal
Identifi cation
Vérifi e copie
Fréquencemètre
> Tuning Antenne
Options
(ENT) pour continuer
Tuning Antenne
0 | 50 | 100
Taper touche TLC
(ESC) Debut (ENT) Avant
MENU OPTIONS
A par r de ce menu on peut accéder aux fonc ons:
- Langue (voir par. Allumage pour confi gura on/varia on
langue).
- Lecture de la version SW des télécommandes Silca
- Choix des télécommandes à affi cher
- Informa ons sur Easy Scan Plus
LECTURE VERSION TÉLÉCOMMANDE SILCA:
Rapprocher la télécommande Silca à examiner de la zone
de lecture et taper une touche.
Options
> Choisir Langue
Version TLC Silca
Choisir TLC Silca
Informations Easy Scan
(ESC) Debut (ENT) Avant
Version TLC Silca
Taper une touche
de la TLC SILCA
(ESC) menu principal
49Copyright Silca S.p.A.2016
Page 50

Easy Scan Plus
Français
Affi chage des informa ons rela ves à la télécommande:
- Modèle télécommande
- Version hardware et so ware de la télécommande
- Serial Number
- Fréquence
CHOIX DES TÉLÉCOMMANDES À AFFICHER:
Permet de sélec oner les télécommandes à affi cher
pendant les phases d’iden fi ca on:
-U liser les boutons de défilement des points du menu,
placer le courseur sur le nom de la télécommande et
presser ENTER pour le désactiver ou le activer.
Remarque:
Ce e fonc on ne réagit qu’en présence de télécommandes
Silca.
Avec les télécommandes d’autres fabricants, le display d’
Easy Scan Plus visualisera le message:
INFORMATIONS EASY SCAN PLUS:
Ce e fonc on donne les informa ons suivantes:
- Modèle
- Version SW
- ID (univoque à 24 chiff res)
Version TLC Silca
Télécomande SILCA Air X
HW: 00000 SW: 00.00.00
SN: 00000000
868 MHz
(ESC) Debut (ENT) Avant
TLC SILCA
> (*) AirV Plus EU
(*) AirV Plus IB
(*) AirV
(*) AirF
(ESC) menu principal
Vers. TLC SILCA
Télécomande non SILCA!
868 MHz
(ESC) Debut (ENT) Avant
Info Easy Scan
Model: Easy Scan
Ver: 0.3.0
ID: XXXXXXXXXXXXXXXXXXXXXX
(ESC) menu principal
UTILISATION DU DISPOSITIF AVEC ORDINATEUR
Easy Scan Plus a été développé pour pouvoir s’interfacer à l’ordinateur avec le programme «Air4 Remotes
Programming So ware» disponible sur le site Silca: www.silca.biz, ce programme peut être installé sur
Windows®, Vista, 7, 8 et 10.
L’u lisa on conjointe du programme sur l’ordinateur perme ra de tenir à jour le logiciel d’Easy Scan Plus, de
me re à jour le logiciel des télécommandes NFC Silca pour augmenter la possibilité de copie des nouvelles
télécommandes, d’accéder à des informa ons u les afi n d’u liser au mieux la gamme des télécommandes et
des disposi fs Silca pour des applica ons résiden elles.
Il sera aussi possible, après ac va on d’Easy Scan Plus, d’u liser des fonc ons spéciales avancées, comme la
copie assistée et facilitée d’une télécommande, généra on de télécommandes comme si elles étaient origi-
nales (u le si la télécommande à copier a été perdue ou ne marche plus), ges on des paramètres radio (par
ex. codes séries, compteurs, fréquence...), etc.
Pour de plus amples détails faire référence aux indica ons fournies par le guide en ligne du programme «Air4
Remotes Programming So ware».
PROCÉDURE POUR UTILISER EASY SCAN PLUS AVEC ORDINATEUR:
Après avoir installé «Air4 Remotes Programming So ware», me re en marche et connecter Easy Scan Plus à
l’ordinateur avec le câble USB fourni.
À la première connexion de Easy Scan Plus, le système opéra onnel installera automa quement les drivers
(une connexion ac ve à internet pourrait être nécessaire).
En cas de récep on d’un message «Disposi f non reconnu - Impossible installer les drivers», il faut installer
ceux-ci en ouvrant le dossier «Drivers» présent dans le dossier d’installa on du programme.
50
Copyright Silca S.p.A.2016
Page 51

Easy Scan Plus
Français
PROGRAMMATION ET MISE À JOUR DE LA TÉLÉCOMMANDE PAR NFC
La programma on de la télécommande est eff ectuée avec la technologie NFC, en plaçant le télécommande
dans la zone spécifi que de la zone d’écriture (Fig.1-N) et en sélec onnant la fonc on appropriée disponible
sur le logiciel de l’ordinateur.
POUR DE PLUS AMPLES INFORMATIONS CONSULTER LE SITE www.silca.biz EN SAISISSANT LE MOT
CLÉ «EASYSCANPLUSSOFTWARE» DANS LE CHAMP DE RECHERCHE :
EASYSCANPLUSSOFTWARE
MISE EN PLACE-REMPLACEMENT-RECHARGE BATTERIES
- MISE EN PLACE - ENLÈVEMENT
Pour me re en place ou enlever les ba eries il faut faire glisser et soulever le couvercle du logement
(Fig.2 - E).
Me re en place les ba eries en respectant la polarité indiquée sur le fond du logement, et refermer le
couvercle.
- REMPLACEMENT
Remplacer les ba eries en u lisant des ba eries rechargeables neuves qui ont les mêmes caractéris ques
que celles fournies avec Easy Scan Plus : ba eries rechargeables au Nickel - Hydrure Métallique (NiMh)
format AA, 1.2 volts,
- RECHARGE
Easy Scan Plus est capable de recharger les ba eries:
1. En connectant à un ordinateur avec le câble USB fourni (il faut u liser des ports de type USB 2 capable
de distribuer un courant de 0.5 A.
2. En connectant à un chargeur avec un connecteur Micro USB de type B (non fourni) ayant les caractéris ques suivantes: tension en sor e 5.0 VDC et ampérage minimum 0.5 A, conforme aux normes CE.
1800÷2400 mAh.
DANGER D’INCENDIE
LORS DU CHARGEMENT DES BATTERIES PAR ALIMENTATEUR EXTERNE, NOUS CONSEILLONS
VIVEMENT D’UTILISER DES CHARGEURS AYANT LES CARACTÉRISTIQUES SUIVANTES :
- COURANT DE SORTIE MAX 8A
- PUISSANCE DE SORTIE MAXIMUM 100VA
Conseils pour une meilleure u lisa on des ba eries :
• Si le disposi f n’est pas u lisé pendant une longue période enlever les ba eries et les conserver en lieu
sûr, frais et sec.
• Pour allonger la durée de vie des ba eries éviter de laisser le disposi f connecté au port USB pour de
longues périodes après avoir complété la phase de recharge.
IMPORTANT: DANGER D'EXPLOSION DANS LE CAS D'UTILISATION DE BATTERIES NON
CONFORMES OU ENDOMMAGÉES EX. EN CAS DE PRÉSENCE D'OXYDATION, PERTE DE
LIQUIDES OU DÉFORMATIONS .
51Copyright Silca S.p.A.2016
Page 52

Easy Scan Plus
Français
EVACUATION
NOTICE RESERVEE AUX UTILISATEURS D’APPAREILS PROFESSIONNELS
En «Application de la Directive 2012/19/UE sur les déchets
d’équipements électriques et électroniques (DEEE)”
La croix sur le pictogramme appliqué sur l’appareil ou sur l’emballage indique qu’une fois la durée de vie du
produit terminée, il faudra jeter ce dernier dans des bidons séparés pour qu’il soit opportunément traité et
recyclé. Quand, le moment venu, il faudra jeter cet appareil professionnel, sachez que sa collecte sélec ve
est organisée et gérée:
a. Directement par l’u lisateur si l’appareil a été mis sur le marché avant le 31 décembre 2010 et que
c’est l’u lisateur même qui décide de l’éliminer sans toutefois le remplacer par un nouvel appareil
équivalent et ayant les mêmes fonc ons;
b. Par le producteur, entendu comme le sujet qui a en premier introduit et commercialisé le nouvel
appareil qui a remplacé un appareil précédent à condi on que, simultanément à sa décision de se
défaire de l’appareil mis sur le marché avant le 31 décembre 2010 parce qu’inu lisable, l’u lisateur
décide d’acheter un produit équivalent et ayant les mêmes fonc ons. Dans pareil cas, l’u lisateur
pourra demander au producteur de re rer le vieil appareil;
c. Par le producteur, entendu comme le sujet qui a en premier introduit et commercialisé le nouvel
appareil qui a remplacé un appareil précédent à condi on que l’appareil ait été mis sur le marché
après le 31 décembre 2010 ;
La collecte sélec ve pour pouvoir amener l’appareil jeté au recyclage, au traitement et à une évacua on éco-
compa ble contribuera à éviter d’éventuels eff ets néga fs sur l’environnement et sur la santé; elle perme ra
en outre de favoriser la réu lisa on et/ou le recyclage des diff érents matériaux de l’appareil.
L’évacua on abusive du produit par l’u lisateur entrainera des sanc ons conformément aux prescrip ons
légales en vigueur.
To remove ba eries/accumulators, consult the manufacturer’s specifi c instruc ons: (see relevant chapter in
the users’ manual).
The sanc ons currently provided for by law shall apply to users who dispose of equipment, ba eries and
accumulators in unauthorised ways .
52
Copyright Silca S.p.A.2016
Page 53

Easy Scan Plus
Español
Español
USO DEL MANUAL
El Fabricante redactó este manual que cons tuye parte integrante de la documentación rela va al disposi vo.
Dicho manual proporciona las informaciones ú les para el usuario con el obje vo de que éste pueda u liza el
disposi vo Easy Scan Plus de forma más segura.
Manual del Usuario
Este manual debe leerse detenidamente por parte de todos los usuarios del disposi vo. Dicha premisa es
indispensable para u lizar y mantener correctamente el disposi vo.
El manual debe guardarse cuidadosamente durante toda la vida del disposi vo, incluida la fase de elimina-
ción. Guardar en un lugar seco al lado del disposi vo, donde permanezca al alcance del usuario.
Identificación del Distribuidor
El disposi vo cuenta con una placa de iden fi cación que con ene el número de serie que se encuentra en el
reverso.
ADVERTENCIAS GENERALES
El disposi vo fue ideado de acuerdo con los principios de las Direc vas Europeas CE.
Los materiales u lizados para su fabricación no son peligrosos y hacen que el disposi vo sea conforme a las
direc vas. Respecto a sus caracterís cas de diseño es un disposi vo seguro en todos sus componentes.
1 - PARA UN FUNCIONAMIENTO CORRECTO Y FIABLE, COLOCAR EL DISPOSITIVO LEJOS DE TODAS LAS
FUENTES QUE PUEDAN GENERAR MOLESTIAS DE RADIO COMO:
- TELÉFONOS INALÁMBRICOS
- MOTORES ELÉCTRICOS
- LUCES DE NEÓN
- MODEM WI-FI
2 - NO INTRODUCIR EL CABLE USB EN EL ORDENADOR ANTES DE INSTALAR EL PROGRAMA.
DOCUMENTACIÓN ONLINE
- Para recibir documentación actualizada, para descargar nuevas actualizaciones del programa so ware de
Easy Scan Plus, visite periódicamente la página web www.silca.biz.
53Copyright Silca S.p.A. 2016
Page 54

Easy Scan Plus
Español
DESCRIPCIÓN DEL DISPOSITIVO
El dispositivo Easy Scan Plus dispone de pantalla que guía el usuario en el uso de las diferentes funciones. Puede conectarse a un ordenador para que el software “Air4 Remotes Programming Software”
pueda gestionarlo durante el uso de funciones avanzadas.
PARTES OPERATIVAS
A - Pantalla gráfi ca
B - Pulsadores para navegación voces menú
C - Zona lectura radiotelemando
D - Pulsadores de función
E - Compar mento baterías
F - E queta de iden fi cación de Easy Scan Plus
F1 - Número matrícula disposi vo
G - Puerta USB Micro-B para conexión con
ordenador
FUNCIONES
- Iden fi ca las pologías de radiotelemandos determinando tanto la frecuencia como la pología (código fi jo
o código variable).
- Comprueba la posibilidad de copia e indica el radiotelemando Silca que se ene que u lizar.
- Comprueba que la copia en un radiotelemando Silca corresponda exactamente al radiotelemando original.
- Lectura de la frecuencia presente en el radiotelemando (Frecuencímetro)
- Calibrado (Tuning) de la intensidad de la señal emi da por los radiotelemandos de cuarzo.
- Actualización so ware interno mediante puerta USB u lizando un programa en el ordenador.
- Mediante el uso del so ware en el ordenador (opcional) existen otras funciones avanzadas de copia, ge-
neración y ges ón de los radiotelemandos y actualización del so ware de los radiotelemandos NFC Silca.
DATOS TÉCNICOS
Alimentación
El disposi vo queda alimentado por 2 baterías recargables Níquel-hidrurometálico (NiMH) de 1.2 volt formato
AA proporcionadas con el suministro.
También puede alimentarse con cable USB proporcionado con el suministro, conectándolo con la puerta USB
de un ordenador o con el alimentador con conector USB (no proporcionado con el suministro).
H - Cable USB (proporcionado con el suministro)
I - Destornillador cerámico
L - Pulsador encendido y apagado del disposi vo
M - Baterías recargables po AA 1.2V
(proporcionadas con el suministro)
N - Zona de escritura radiotelemandos NFC Silca
Características técnicas
Tensión de alimentación: 5 VDC con alimentador externo
Tensión de alimentación: 2.4 VDC con baterías
Corriente u lizada: 0.5 A MÁX
Frecuencias de campo de la antena
ANTENA NFC: 13,56 MHz
ANTENA HF : 26,720 - 871.1 MHz
Condiciones medioambientales
El disposi vo funciona a una temperatura ambiente que se encuentra entre 0 y +50°C
Dimensiones
Anchura: 90 mm
Longitud: 148 mm
Profundidad: 25 mm
Peso Sin baterías 172.50 gr.
Copyright Silca S.p.A. 2016 54
Page 55

Easy Scan Plus
USO DEL DISPOSITIVO STAND ALONE
Símbolos estado batería y conexiones
Indica que Easy Scan Plus está conectado con el ordenador.
Indica la ausencia de pilas o que se han colocado con la polaridad incorrecta; en el úl mo caso,
sacar las pilas y colocarlas de nuevo con la polaridad correcta.
Indica que las baterías se están cargando.
Un parpadeo rápido indica la presencia de pilas no recargables o bien un error en el proceso
de carga de las pilas.
Si se han usado pilas del po recargable, comprobar inmediatamente la ausencia de marcas
de daños o de recalentamientos; en el úl mo caso, quitar las pilas y sus tuirlas por nuevas.
Indica que el proceso de carga ha acabado.
Indica que el nivel de carga de las pilas es mayor que el 80%.
Indica que el nivel de carga de las pilas está comprendido entre el 10% y el 80%.
Indica que el nivel de carga de las pilas es menor que el 10%.
Indica que Easy Scan Plus está conectado con un cargador.
Español
Encendido
Mantener presionada la tecla de encendido de Easy Scan Plus hasta que en el display aparezca el logo po
Silca.
Selección del idioma
El idioma se selecciona al encender por primera vez Easy
Scan Plus, usar los botones que están al lado del display (B)
para visualizar los idiomas disponibles.
Tras haber seleccionado el idioma presionar “ENTER” para
aceptar.
Se visualiza el menú principal con estas funciones.
- Iden fi cación
- Comprobación Copia
- Frecuencímetro
- Tuning Antenna
- Opciones de Easy Scan Plus
Presionar “ENTER” para aceptar
Selección Idioma
> Italiano
English
Français
Deutsch
(ENT) para continuar
Selección Idioma
> Identifi cación
Comprobación Copia
Frecuencímetro
Tuning Antenna
Opciones
(ENT) para continuar
55Copyright Silca S.p.A. 2016
Page 56

Easy Scan Plus
IDENTIFICACIÓN / COPIA DE UN MANDO CON CÓDIGO FIJO
Acercar el mando a analizar a la zona de lectura ( véase
fi gura 1) y presionar una tecla del mando.
Si la lectura es di cil, repe r la operación alejando el
mando unos cen metros.
Identifi cación
(ESC) menu principal
Español
Presionar una tecla
del mando a copiar
Se indica la frecuencia de funcionamiento del mando.
Se pide presionar otra vez la misma tecla del mando.
TLC: MANDO
Si el mando que se está analizando resulta duplicable,
se visualiza el mando Silca (modelo y versión) compatible para la copia.
(Para el procedimiento de copia, consultar las instrucciones adjuntas al mando Silca indicado por Easy Scan
Plus).
Presionar “ENTER” para la función de “Comprobación Copia”.
Una vez que se haya copiado, acercar el mando Silca
a comprobar a la zona de lectura (llevar a contacto, véase
fi gura 1) y presionar y soltar la misma tecla del mando
copiado.
Mantener el mando cerca de la zona de lectura hasta que
Easy Scan Plus haya terminado la operación de comprobación.
Con copia correcta :
Identifi cación
presionar otra vez
la misma tecla
Espera TLC 433 MHz
(ESC) per menù principale
Comprobación Copia
Silca Air X ver.yy.yy
Cod. fi jo 433 MHz
(ESC) Atrás (ENT) Adel.
Comprobación Copia
presionar la misma tecla
en el mando COPIADO
433 MHz
(ESC) menu principal
Comprobación Copia
Copia CORRECTA
Cód. fi jo 433 MHz
(ENT) para continuar
Con copia NO correcta :
Comprobación Copia
Copia ERRADA!
el código no coincide
433 MHz
(ENT) para continuar
En este caso repe r el procedimiento de copia consultando las instrucciones del mando Silca indicado por
Easy Scan Plus.
En caso de que la copia del mando no resulte correcta, contactar con el servicio de asistencia técnica.
Copyright Silca S.p.A. 2016 56
Page 57

Easy Scan Plus
Español
Nota:
Esta función responde sólo con mandos Silca.
De u lizar mandos de otro productor, el display de Easy
Scan Plus visualizará el mensaje :
Comprobación Copia
Mando NO SILCA
Repita Comprobación?
433 MHz
(ESC) NO (ENT)SI
DENTIFICACIÓN / COPIA DE UN MANDO ROLLING CODE NORMAL
La operación de iden fi cación y comprobación de la copia de mandos Rolling Code Simple es igual a la de los
mandos con código fi jo.
Una vez que se haya efectuado la copia, hay que acoplar el mando copiado al receptor; esta operación podrá
efectuarse, según los dis ntos casos, por medio del procedimiento A.L.S. ( Procedimiento simplifi cado para
ac var el mando en el receptor. El listado de los receptores compa bles con dicho procedimiento está dispo-
nible en el si o: www.silca.biz.) o por medio del procedimiento previsto por el productor del recibidor.
La posibilidad de poder usar un procedimiento más bien que otro se visualizará con el resultado de la función
de comprobación copia.
Tras haber copiado con éxito en el display aparece el siguiente mensaje:
El mensaje “Compa ble A.L.S.” indica que el mando
recién duplicado puede acoplarse al recibidor por medio
del “Procedimiento A.L.S.”.
Consultar las instrucciones del mando Silca indicado por
Easy Scan Plus y el si o: www.silca.biz.
El mensaje “Compa ble OEM” indica que el mando
recién duplicado puede acoplarse al recibidor sólo por
medio del procedimiento previsto por el productor del
recibidor.
Consultar la documentación suministrada por el productor
del recibidor o por el instalador.
Comprobación Copia
Copia CORRECTA
Compatible A.L.S.
Rolling code 433 MHz
(ENT) para continuar
Comprobación Copia
Copia CORRECTA
Compatible OEM.
Rolling code 433 MHz
(ENT) para continuar
IDENTIFICACIÓN / COPIA DE UN RADIOMANDO ROLLING CODE SECURE LEARNING
Acercar el radiomando a analizar a la zona de lectura (véase
fi gura 1) y presionar una tecla del radiomando.
Si la lectura es di cil, repe r la operación alejando el radio-
mando unos cen metros.
Se visualiza la frecuencia de funcionamiento del radiomando. Se pide enviar el código fuente del radiomando a copiar.
La modalidad de envío del código fuente depende del radiomando que hay que copiar, comprobar en el si o www.
silca.biz cuál es la más apta para su radiomando.
Identifi cación
Presionar una tecla
del mando a copiar
(ESC) menu principal
Identifi cación
A la espera de
código fuente
Espera TLC 433 MHz
(ESC) menu principal
57Copyright Silca S.p.A. 2016
Page 58

Easy Scan Plus
Español
Si el radiomando que se está analizando resulta duplicable, se visualiza el radiomando Silca (modelo y
versión ) compatible para la copia y hay que usar el
Comprobación Copia
Silca Air X ver.yy.yy
procedimiento para Radiomandos Rolling Secure
Learning.
(El procedimiento de copia depende del radiomando
Rolling code S.L. 433 MHz
(ESC) Atrás (ENT) Adel.
que hay que copiar, comprobar en el sitio www.silca.
biz el más apto para su radiomando y consultar las instrucciones adjuntas al radiomando Silca indicado por
Easy Scan Plus).
Presionar “ENTER” para la función de “Comprobación Copia”.
Una vez que se haya efectuado la copia, acercar el radio-
mando Silca a comprobar a la zona de lectura (llevar a
contacto, véase fi gura 1) y presionar y soltar la misma tecla
del radiomando copiado.
Mantener el radiomando cerca de la zona de lectura hasta
que Easy Scan Plus haya terminado el proceso de compro-
Comprobación Copia
Presionar la misma tecla
en el mando COPIADO
433 MHz
(ESC) menu principal
bación.
Una vez que se haya efectuado la copia, hay que acoplar el radiomando copiado al receptor; esta operación
podrá efectuarse, según los dis ntos casos, por medio del proceso A.L.S. o por medio del procedimiento
previsto por el productor del recibidor. La posibilidad de poder usar un procedimiento más bien que otro se
visualizará con el resultado de la función de comprobación copia.
Tras haber copiado con éxito en el display aparece el siguiente mensaje:
El mensaje “Compa ble A.L.S.” indica que el radiomando
recién duplicado puede acoplarse al recibidor por medio
del “Procedimiento A.L.S.”.
Consultar las instrucciones del radiomando Silca indicado
por Easy Scan Plus y el si o: www.silca.biz
Comprobación Copia
Copia CORRECTA
Compatible A.L.S.
Rollin code 433 MHz
(ENT) para continuar
El mensaje “Compa ble OEM” indica que el radiomando
recién duplicado puede acoplarse al recibidor sólo por
medio del procedimiento previsto por el productor del
recibidor.
Consultar la documentación suministrada por el productor
del recibidor o por el instalador.
Con copia NO correcta :
Comprobación Copia
Copia CORRECTA
Compatible OEM.
433 MHz
(ENT) para continuar
Comprobación Copia
Copia ERRADA!
el código no coincide
433 MHz
(ESC) menu principal
En este caso repe r la operación de copia consultando las instrucciones del mando Silca indicado por Easy
Scan Plus.
En caso de que la copia del mando no resulte correcta, contactar con el servicio de asistencia técnica.
Copyright Silca S.p.A. 2016 58
Page 59

Easy Scan Plus
Español
Nota:
Esta función responde sólo con mandos Silca.
De u lizar mandos de otro productor, el display de Easy
Scan Plus visualizará el mensaje:
En caso de que el mando no resulte duplicable, en el display
de Easy Scan Plus aparece el siguiente mensaje:
Comprobación Copia
Mando NO SILCA
Repita Comprobación?
(ESC) NO (ENT) SI
Identifi cación
Mando no copiable
433 MHz
(ESC) menu principal
IDENTIFICACIÓN / COPIA DE UN MANDO CUARZADO
El procedimento de “Iden fi cación” y “Comprobación Copia” de mandos Cuarzados es igual al de los mandos
con código fi jo.
Antes de empezar la operación de verifi cación copia, Easy Scan Plus requiere efectuar el ajuste (Tuning) de la
intensidad de la señal emi da por el mando copiado:
Abrir la carcasa del mando (véanse instrucciones del
mando).
Acercar el mando cuarzado a la zona de lectura (llevar a
contacto, véase fi gura 1), presionar y mantener presionada
una tecla.
Con un destornillador cerámico girar despacio el tornillo
que regula la antena para conseguir la amplitud máxima
del indicador de intensidad en el display .
Tras haber alcanzado el valor máximo, alejar muy poco
el mando y repe r la operación hasta alcanzar el valor
máximo que puede visualizarse en el display.
Cerrar la carcasa del mando.
Tuning Antenna
0 | 50 | 100
Presionar una tecla
(ESC) menu principal
OTRAS FUNCIONES DE EASY SCAN PLUS
FUNCIÓN COMPROBACIÓN COPIA
U lizar los botones que están al lado del display para selec-
cionar: “Comprobación Copia”.
Presionar “ENTER” para con nuar .
Acercar el radiomando original a la zona de lectura (llevar
a contacto, véase fi gura 1) y presionar una tecla del radio-
mando.
menu principal
Identifi cación
>Comprobación Copia
Frecuencímetro
Tuning Antenna
Opciones
(ENT) para continuar
Comprobación Copia
Presionar una tecla del
mando original
(ESC) menu principal
59Copyright Silca S.p.A. 2016
Page 60

Easy Scan Plus
Español
Sòlo en el caso de un radiomando Rolling Secure Learning:
Se pide enviar el código fuente del radiomando a copiar.
La modalidad de envío del código fuente depende del radiomando que hay que copiar, comprobar en el si o www.
silca.biz cuál es la más apta para su radiomando.
Comprobación Copia
A la espera de
código fuente
Espera TLC 433 MHz
(ESC) menu principal
Sòlo en el caso de un radiomando cuarzado :
Para que la operación de comprobación copia resulte más fi able y minuciosa, en caso de Radiomandos
Cuarzados, se aconseja comprobar la intensidad de la señal emi da por el radiomando copiado por medio
de la función “Tuning Antenna”.
Cuando se solicita, acercar el radiomando copiado Silca
a la zona de lectura (llevar a contacto, véase fi gura 1) y
presionar una tecla del radiomando.
En caso de que el radiomando copiado coincida con el
original, Easy Scan Plus visualiza el mensaje:
En caso contrario:
Nota:
Esta función responde sólo con radiomandos Silca.
De u lizar radiomandos de otro productor,
el display de Easy Scan Plus visualizará el mensaje:
Identifi cación
Presionar la misma tecla
en el mando COPIADO
(ESC) menu principal
Comprobación Copia
Copia CORRECTA
433 MHz
(ESC) menu principal
Comprobación Copia
Copia ERRADA!
el código no coincide
433 MHz
(ESC) menu principal
Comprobación Copia
Mando NO SILCA
Repita Comprobación?
433 MHz
(ESC) NO (ENT) SI
FRECUENCÍMETRO:
U lizar los botones que están al lado del display para selec-
cionar: “Frecuencimetro”
Presionar “ENTER” para con nuar .
Copyright Silca S.p.A. 2016 60
menu principal
Identifi cación
Comprobación Copia
> Frecuencímetro
Tuning Antenna
Opciones
(ENT) para continuar
Page 61

Easy Scan Plus
Español
Acercar el mando a analizar a la zona de lectura (llevar a
contacto,
véase fi gura 1) y presionar una tecla del mando.
Easy Scan Plus indica la frecuencia y modulación de la señal
emi da por el radiotelemando.
Frecuencímetro
AM
433.92 MHZ
Presiona botón mando
(ESC) menu principal
TUNING ANTENA:
U lizar los botones que están al lado del display para selec-
cionar: “Tuning Antena”
Presionar “ENTER” para con nuar .
Abrir la carcasa del radiomando (véanse las instrucciones
del radiomando).
Acercar el radiomando a la zona de lectura (llevar a
contacto, véase fi gura 1), presionar y mantener presionado
un botón.
Con un destornillador cerámico girar despacio el tornillo
que regula la antena para conseguir la amplitud máxima
del indicador de intensidad en el display (véase fi gura 2).
Tras haber alcanzado el valor máximo, alejar muy poco el radiomando y repe r la operación hasta alcanzar el
valor máximo que puede visualizarse en el display.
Cerrar la carcasa del radiomando.
Menu principal
Identifi cación
Comprobación Copia
Frecuencímetro
> Tuning Antenna
Opciones
(ESC) Atrás (ENT) Adel.
Tuning Antenna
0 | 50 | 100
Presiona botón mando
(ESC) menu principal
MENÚ OPCIONES
Desde este menú se accede a las funciones de:
- Idioma (véase párr. Encendido para programación /
cambio del idioma).
- Lectura de la versión SW de los radiomandos Silca
- Seleccionar los mandos para mostrar
- Informaciones sobre Easy Scan Plus
LECTURA VERSIÓN RADIOMANDO SILCA:
Acercar el radiomando Silca a analizar a la zona de lectura
(llevar a contacto, véase fi gura 3) y presionar una tecla
Opciones
> Selección Idioma
Vers. mando SILCA
Selección mando SILCA
Informaciones Easy Scan
(ESC) Atrás (ENT) Adel.
Vers. TLC SILCA
Presionar una tecla
del mando SILCA
(ESC) menu principal
61Copyright Silca S.p.A. 2016
Page 62

Easy Scan Plus
Español
Se visualizan las informaciones rela vas al radiomando:
- Modelo radiomando
- Versión hardware y so ware del radiomando
- Serial Number
- Frecuencia
SELECCIONAR LOS MANDOS PARA MOSTRAR:
Permite seleccionar los mandos a mostrar durante el
proceso de identificación:
- Usando los botones de desplazamiento del menú, situe el
cursor cerca del nombre del mando y presione enter para
habilitar o deshabilitar.
Nota:
Esta función responde sólo con radiomandos Silca.
De u lizar radiomandos de otro productor, el display de
Easy Scan Plus visualizará el mensaje:
INFORMACIONES EASY SCAN PLUS:
- Esta función facilita las siguientes informaciones:
- Modelo
- Versión SW
- ID (unívoco con 24 cifras)
Vers. mando SILCA
Mando SILCA Air X
HW: 00000 SW: 00.00.00
SN: 00000000
868 MHz
(ESC) Atrás (ENT) Adel.
Mando SILCA
> (*) AirV Plus EU
(*) AirV Plus IB
(*) AirV
(*) AirF
(ESC) menu principal
Vers. mando SILCA
Mando NON SILCA!
868 MHz
(ESC) Atrás (ENT) Adel.
Info Easy Scan
Modelo: Easy Scan
Ver: 0.3.0
ID: XXXXXXXXXXXXXXXXXXXXXX
(ESC) menu principal
USO DEL DISPOSITIVO CON ORDENADOR
Easy Scan Plus se desarrolló para que pudiera comunicar con un ordenador mediante el programa “Air4
Remotes Programming So ware” que puede encontrarse en la web Silca: www.silca.biz, dicho programa
puede instalarse en Windows®, Vista, 7, 8 y 10.
El uso combinado del programa en el ordenador permi rá mantener actualizado el SW de Easy Scan Plus,
de actualizar el SW de los radiotelemandos NFC Silca para ampliar la posibilidad de copia de nuevos radiotelemandos, de acceder a informaciones y a documentos ú les para u lizar de la mejor manera la gama de
radiotelemandos y disposi vos Silca para aplicaciones residenciales.
Además, será posible tras la ac vación de Easy Scan Plus u lizar funcionalidades especiales y avanzadas,
como copia asis da y facilitada por un radiotelemando, generación de radiotelemandos como si fuesen origi-
nales (ú l en caso de que el radiotelemando que debe copiarse se haya perdido o ya no funcione), ges ón de
los parámetros radio (por ej. códigos de serie, contadores, frecuencia...), etc.
Para más detalles, consultar las indicaciones proporcionadas por la guía en línea del programa “Air4 Remotes
Programming So ware”.
PROCEDIMIENTO PARA UTILIZAR EASY SCAN PLUS CON ORDENADOR:
Tras haber instalado “Air4Remotes Programming So ware”, encender y conectar Easy Scan Plus al ordenador
mediante cable USB proporcionado con el suministro.
Tras la primera conexión con Easy Scan Plus, el sistema opera vo instalará en automá co los drivers (podría
precisarse una conexión ac va a Internet).
Si se recibe un mensaje “Disposi vo no reconocido - Imposible instalar los drivers”, es necesario instalar dichos
drivers abriendo la carpeta “Drivers” que se encuentra dentro de la carpeta de instalación del programa.
Copyright Silca S.p.A. 2016 62
Page 63

Easy Scan Plus
Español
PROGRAMACIÓN Y ACTUALIZACIÓN DEL RADIOTELEMANDO MEDIANTE NFC
La programación del radiotelemando se logra mediante tecnología NFC colocando el radiotelemando en el
área que se especifi ca en la zona de escritura (Fig.1-N) y seleccionando la función disponible y correspon-
diente en el so ware del ordenador.
PARA MÁS INFORMACIÓN CONSULTAR LA PÁGINA WEB www.silca.biz INTRODUCIENDO
LA PALABRA CLAVE “EASYSCANPLUSSOFTWARE” EN LA BÚSQUEDA:
EASYSCANPLUSSOFTWARE
INTRODUCCIÓN-SUSTITUCIÓN-RECARGA BATERÍAS
- INTRODUCCIÓN - ELIMINACIÓN
Para introducir o eliminar las baterías es necesario hacer correr o levantar la tapa del compar mento (Fig.2
- E).
Introducir las baterías respetando la polaridad correcta indicada en el fondo del compar mento, después
cerrar la tapa.
- SUSTITUCIÓN
Sus tuir las baterías u lizando baterías recargables nuevas con caracterís cas iguales a las proporcionadas
con el suministro de Easy Scan Plus: baterías recargables al Níquel-hidrurometálico (NiMH) formato AA, 1.2
volt,
1800÷2400 mAh.
- RECARGA
Easy Scan Plus es capaz de recargar las baterías:
1. Conectándolo con un ordenador mediante cable USB proporcionado con el suministro (es necesario
u lizar puertas USB2 capaces de suministrar una corriente de 0.5 A.
2. Conectándolo con un cargador de batería con conector Micro USB de po B (no proporcionado con el
suministro) con estas caracterís cas: tensión de salida 5.0 VDC y amperaje mínimo 0.5 A, en cumpli-
miento de las normas CE.
PELIGRO DE INCENDIO:
DURANTE LA CARGA DE LAS BATERÍAS CON UN ALIMENTADOR EXTERNO, SE RECO-
MIENDA USAR CARGADORES CON LAS SIGUIENTES CARACTERÍSTICAS:
- CORRIENTE MÁXIMA EN SALIDA 8A
- POTENCIA MÁXIMA EN SALIDA 100VA
Consejos para un uso ideal de las baterías:
• Si el disposi vo no se u liza durante mucho empo, quitar las baterías y guardarlas en lugar seguro,
fresco y seco.
• Para aumentar la vida de las baterías no dejar el disposi vo conectado con la puerta USB durante largos
plazos de empo después de que la batería haya logrado ya su carga máxima.
NOTA IMPORTANTE : PELIGRO DE EXPLOSIÓN SI SE UTILIZAN BATERÍAS DE TIPOLOGÍA EQUI
VOCADA O DAÑADA EJ. EN CASO DE PRESENCIA DE OXIDACIÓN, PÉRDIDA DE LÍQUIDOS O
DEFORMACIONES.
63Copyright Silca S.p.A. 2016
Page 64

Easy Scan Plus
INFORMACIÓN PARA LOS USUARIOS DE APARATOS PROFESIONALES
Español
ELIMINACIÓN
En “Cumplimiento de la Direc va 2012/19/UE sobre los residuos
El símbolo del contenedor de basura tachado con un aspa en el aparato o en el embalaje indica que el
producto al fi nal del ciclo de vida se ha de recoger por separado de los otros residuos para permi r un trata-
miento y un reciclaje adecuados.
En especial, la recogida selec va del presente aparato profesional al fi nal de su ciclo de vida es organizada y
ges onada:
a. directamente por el usuario, cuando el aparato se haya comercializado antes del 31 de diciembre
de 2010 y el mismo usuario decida eliminarlo sin sus tuirlo por otro aparato nuevo, equivalente y
des nado a las mismas funciones;
b. por el fabricante, considerado como el primer sujeto que ha introducido y comercializado el
aparato nuevo que ha sus tuido el precedente, en el caso en el que, contemporáneamente a la
decisión tomada de eliminar al fi nal de su ciclo de vida el aparato comercializado antes del 31 de
diciembre de 2010, el usuario compre un producto de po equivalente y des nado a las mismas
funciones. En este úl mo caso, el usuario podrá pedir al fabricante la re rada del presente aparato;
c. por el fabricante, considerado como el primer sujeto que ha introducido y comercializado el
aparato nuevo que ha sus tuido el precedente, cuando el aparato se haya comercializado después
del 31 de diciembre de 2010 ;
En lo que atañe a baterías/acumuladores portá les, el usuario ha de entregar dichos productos al fi nal del
ciclo de vida a centros idóneos de recogida selec va predispuestos por las autoridades competentes.
La recogida selec va adecuada para enviar posteriormente el aparato y las/los baterías/acumuladores
desguazados al reciclaje, al tratamiento y a la eliminación medioambiental compa ble ayuda a evitar posibles
efectos nega vos para el medio ambiente y la salud y favorece la reu lización y/o el reciclaje de los materiales
que componen los antedichos productos.
Para re rar baterías/acumuladores, consultar las indicaciones específi cas del fabricante (véase el capítulo
rela vo en el manual de uso).
La eliminación ilegal del aparato, baterías y acumuladores por parte del usuario comporta la aplicación de
sanciones contempladas en la presente norma va de ley.
de aparatos eléctricos y electrónicos (RAEE)”
Copyright Silca S.p.A. 2016 64
Page 65

Português
Easy Scan Plus
Português
USO DO MANUAL
Este manual foi escrito pelo Fabricante e é parte integrante da documentação do disposi vo.
Dá informações úteis para o usuário usar o disposi vo Easy Scan Plus de forma segura.
Manual do usuário
Este manual deve ser lido com atenção por todos usuários do disposi vo. Essa premissa é indispensável para
o uso e manutenção corretos.
O manual deve ser conservado com cuidado durante a vida ú l do disposi vo, incluindo a eliminação. Guardar
em local seco perto do disposi vo, ao alcance do usuário.
ID distribuidor
O disposi vo contém uma e queta de iden fi cação indicando o número de série colocado no verso.
ADVERTÊNCIAS GERAIS
O disposi vo foi projetado segundo os princípios das Direc vas Europeias CE
Os materiais usados na construção não são perigosos e tornam o disposi vo conforme as Direc vas. O dispo-
si vo, em suas caraterís cas de projeto é seguro em todos componentes.
1 - PARA UM FUNCIONAMENTO CORRETO E FIÁVEL, POSICIONE O APARELHO DISTANTE DE QUAISQUER
FONTES QUE POSSAM GERAR RÁDIO INTERFERÊNCIAS, TAIS COMO:
- TELEFONES SEM FIO
- MOTORES ELÉTRICOS
- LUZES DE NEON
- MODEM WI-FI
2 - POR FAVOR, INSTALE O SOFTWARE DO SMART REMOTE PROGRAMMER EM SEU PC ANTES DE CONECTAR
O CABO USB, ISSO PODE DEMORAR ALGUNS MINUTOS
DOCUMENTAÇÃO ONLINE
- Para atualizações de documento e baixar novas atualizações do so ware do Smart Remote Program-
mer, por favor, consulte periodicamente nosso site www.silca.biz
65Copyright Silca S.p.A. 2016
Page 66

Easy Scan Plus
Português
DESCRIÇÃO DO DISPOSITIVO
O Dispositivo Easy Scan Plus tem monitor que guia o usuário na utilização das várias funcionalidades.
Para ser gerenciado a partir do software “Air4 Remotes Programming Software” para o uso de funcionalidades avançadas pode ser conectado a um PC.
PARTES OPERATIVAS
A - Monitor gráfi co
B - Comandos para deslizamento itens de menu
C - Zona leitura controles remotos
D - Comandos de função
E - Compar mento pilhas
F - E queta de iden fi cação de Easy Scan Plus
F1 - Número registro disposi vo
G - Porta USB Micro-B para conexão com PC
FUNÇÕES PREVISTAS
- Iden fi ca os pos de controles remotos determinando a frequência e o po (código fi xo ou Código Rota vo).
- Verifi ca a possibilidade de cópia e indica o rádio controlo Silca a usar.
- Controla se a cópia em um rádio controlo Silca corresponde exatamente ao rádio controlo original.
- Leitura da frequência no rádio controlo (Frequenciômetro)
- Calibração (Tuning) da intensidade de sinal emi do por controles remotos de quartzo.
- Atualização so ware interior através da porta USB u lizando um programa para PC.
- Através do uso do so ware para PC (opcional) estão disponíveis outras funções avançadas de cópia, geração
e gerenciamento dos controles remotos e atualização do so ware dos controles remotos NFC Silca.
DADOS TÉCNICOS
Alimentação
O disposi vo é alimentado por 2 baterias recarregáveis Níquel-Hidreto Metálico (NiMH) de 1.2 volts formato
AA fornecidas com o dispositivo .
Pode também ser alimentado através do cabo USB fornecido com o dispositivo, conectando-o a porta USB de
um PC ou a um alimentador com conector USB (não fornecido com o dispositivo).
H - Cabo USB (fornecido com o disposi vo)
I - Chave de fendas cerâmica
L - Comando de acionamento e desligamento do
disposi vo
M - Baterias recarregáveis de po AA 1.2V (
fornecidas com o disposi vo)
N - Zona de escritura controles remotos NFC Silca
Caraterísticas técnicas
Tensão de alimentação: 5 VDC com alimentador exterior
Tensão de alimentação: 2,4 VDC com baterias
Corrente absorvida: 0,5 NO MÁX
Frequências de campo da antena
ANTENA NFC: 13,56 MHz
ANTENA HF: 26,720 - 871.1 MHz
Condições ambientais
O disposi vo funciona a uma temperatura ambiente entre 0 e +50°C
Dimensões
Largura: 90 mm
Comprimento: 148 mm
Profundidade: 25 mm
Peso Sem baterias 172,50 g.
66
Copyright Silca S.p.A. 2016
Page 67

Easy Scan Plus
USO DO DISPOSITIVO STAND ALONE
Simbologia estado bateria e conexões
Indica que Easy Scan Plus está conectado com o PC.
Indica que não estão presentes baterias, ou que não foram inseridas com a polaridade
correcta; neste úl mo caso, removê-las e inseri-la respeitando a polaridade correcta.
Indica que as bateras se estão carregando.
Piscando rapidamente indica que estão presentes baterias não recarregáveis, ou que há um
erro no processo de carga das baterias.
Ao u lizar baterias do po recarregável, verifi car imediatamente que não haja sinais de danifi -
cação ou sobreaquecimento; neste caso removê-las e subs tui-las por baterias novas .
Indica que o processo de carga acabou.
Indica que o nível de carga das baterias é superior a 80%.
Indica que o nível de carga das baterias está incluído entre 10% e 80%.
Indica que o nível de carga das baterias é inferior a 10%.
Indica que Easy Scan Plus está conectado a um carregador.
Português
Ligar
Manter premida a tecla para ligar Easy Scan Plus até no visor aparecer o logo po Silca.
Selecção do idioma
A selecção do idioma será proposta quando se ligar Easy
Scan Plus pela primeira vez, u lizar os botões ao lado do
visor (B) para rolar os idiomas disponíveis.
Uma vez seleccionado o idioma, premir “ENTER” para
confi rmar.
O menu principal é exibido com as seguintes funções:
- Iden fi cação
- Verifi cação Cópia
- Funções Especiais (Frequencímetro e ajuste da antena
dos rádio controlos quartzados)
- Opções do Easy Scan Plus
Selecção Idioma
> Italiano
English
Français
Deutsch
(ENT) para continuar
Selecção Idioma
> Identifi cação
Verifi cação Cópia
Frequencímetro
Tuning Antenna
Opções
(ENT) para continuar
67Copyright Silca S.p.A. 2016
Page 68

Easy Scan Plus
IDENTIFICAÇÃO / CÓPIA DE UM RÁDIO CONTROLO DE CÓDIGO FIXO
Português
Aproximar o rádio controlo a analisar da área de leitura (
ver fi g.1) e premir uma tecla do rádio controlo.
Se a leitura resultar di cil, repe r o procedimento
afastando o rádio controlo de alguns cen metros.
É indicada a frequência de funcionamento do rádio
controlo.
Solicita-se de premir de novo a mesma tecla do rádio
controlo.
TLC :
RÁDIO CONTROLO
Se o rádio controlo em análise pode ser duplicado, é
indicado o rádio controlo Silca (modelo e versão) compatível para a cópia.
(Para o procedimento de cópia, ter como referência as
instruções anexas ao rádio controlo Silca indicado pelo
Easy Scan Plus).
Premir “ENTER” para a função de “Verifi cação Cópia”.
Uma vez efectuada a cópia, aproximar o rádio controlo Silca
a verifi car à área de leitura (levar em contacto, ver fi gura 1)
e premir e soltar a mesma tecla do rádio controlo copiado.
Manter o rádio controlo próximo da área de leitura até Easy
Scan Plusacabar o procedimento de verifi cação.
Identifi cação
Premir uma tecla
do TLC a copiar
(ESC) menu principal
Identifi cação
Premir a mesma tecla
Espera TLC
(ENT) para continuar
Copia em
cópia em Air X ver.yy.yy
Cód. fi xo 433 MHz
(ENT) para continuar
Verifi cação Cópia
premir a mesma tecla
no telecomando COPIADO
433 MHz
(ESC) menu principal
Com cópia correcta:
Verifi cação Cópia
Cópia CORRECTA
Cód. fi xo 433 MHz
(ENT) para continuar
Com cópia NÃO correcta:
Verifi cação Cópia
Cópia ERRADA!
Código ambíguo
433 MHz
(ENT) para continuar
Neste caso repe r o procedimento de cópia tendo como referência as instruções do rádio controlo Silca
indicado pelo Easy Scan Plus.
Se a cópia do rádio controlo não for realizada correctamente, contactar o serviço de assistência técnica
68
Copyright Silca S.p.A. 2016
Page 69

Easy Scan Plus
Português
Obs.:
Esta função só responde na presença de rádio controlos
Silca.
U lizando rádio controlos de outro fabricante, o visor do
Easy Scan Plus mostrará a mensagem:
Verifi cação Cópia
TLC não SILCA
Repita o controle?
433 MHz
(ENT) para continuar
IDENTIFICAÇÃO / CÓPIA DE UM RÁDIO CONTROLO ROLLING CODE NORMAL
O procedimento de iden fi cação e verifi cação da cópia de rádio controlos Rolling Code Normal é igual àquele
dos rádio controlos de código fi xo.
Uma vez realizada a cópia, o rádio controlo copiado deverá ser associado à receptora; de acordo com os casos
essa operação poderá ser realizada por meio de procedimento A.L.S. ( Procedimento simplifi cado para ac var
o rádio controlo na receptora. A lista das receptoras compa veis com esse procedimento está disponível no
site: www.silca.biz. )ou por meio do procedimento previsto pelo fabricante da receptora.
A possibilidade de poder u lizar um procedimento em vez que outro será indicada com o resultado da função
de verifi cação cópia:
Uma vez realizada com sucesso a cópia, no visor aparece a mensagem seguinte:
A mensagem “Compa vel A.L.S.” indica que o rádio
controlo que se acaba de duplicar pode ser associado à
receptora por meio de “Procedimento A.L.S.”.
Ter como referência as instruções do rádio controlo Silca
indicado pelo Easy Scan Plus e o site: www.silca.biz).
A mensagem “Compa vel OEM” indica que o rádio controlo
que se acaba de duplicar pode ser associado à receptora
somente por meio do procedimento previsto pelo fabricante da receptora.
Ter como referência a documentação entregue pelo fabricante da receptora ou pelo instalador.
Verifi cação Cópia
Cópia CORRECTA
Compatível A.L.S.
Rolling code 433 MHz
(ENT) para continuar
Verifi cação Cópia
Cópia CORRECTA
Compatível OEM.
Rolling code 433 MHz
(ENT) para continuar
IDENTIFICAÇÃO / CÓPIA DE UM RÁDIO CONTROLO ROLLING CODE SECURE LEARNING
Aproximar o rádio controlo a analisar da área de leitura (
ver fi gura 1) e premir uma tecla do rádio controlo.
Se a leitura resultar di cil, repe r o procedimento
afastando o rádio controlo de alguns cen metros.
É indicada a frequência de funcionamento do rádio
controlo.
Solicita-se de enviar o código fonte do rádio controlo a
copiar. A modalidade de envio do código fonte depende do
rádio controlo que deve ser copiado, verifi car no site www.
silca.biz a adequada para o próprio rádio controlo.
Identifi cação
Premir uma tecla
do TLC a copiar
(ESC) menu principal
Identifi cação
À espera de
código-fonte
Espera TLC 433 MHz
(ESC) menu principal
69Copyright Silca S.p.A. 2016
Page 70

Easy Scan Plus
Português
Se o rádio controlo em análise pode ser duplicado, é
indicado o rádio controlo Silca (modelo e versão)compatível para a cópia e que deve ser usado o procedi-
Copia em
cópia em Air X ver. yy.yy
mento para Rádio controlos Rolling Secure Learning.
(O procedimento de cópia depende do rádio controlo
que deve ser copiado, verificar no site www.silca.biz o
Rolling code S.L. 433 MHz
(ESC) Ant. (ENT) Próximo
adequado para o rádio controlo e ter como referência
as instruções anexas ao rádio controlo Silca indicado
pelo Easy Scan Plus).
Premir “ENTER” para a função de “Verifi cação Cópia”.
Uma vez efectuada a cópia, aproximar o rádio controlo Silca
a verifi car da área de leitura (levar em contacto, ver fi g.1-C)
e premir e soltar a mesma tecla do rádio controlo copiado.
Manter o rádio controlo próximo da área de leitura até Easy
Scan Plusacabar o procedimento de verifi cação.
Verifi cação Cópia
premir a mesma tecla
no telecomando COPIADO
433 MHz
(ESC) menu principal
Uma vez realizada a cópia, o rádio controlo copiado deverá ser associado à receptora, de acordo com os casos
essa operação poderá ser realizada por meio de procedimento A.L.S. ( Procedimento simplifi cado para ac var
o rádio controlo na receptora. A lista das receptoras compa veis com esse procedimento está disponível no
site: www.silca.biz. )ou por meio do procedimento previsto pelo fabricante da receptora.
A possibilidade de poder u lizar um procedimento em vez que outro será indicada com o resultado da função
de verifi cação cópia.
Uma vez realizada com sucesso a cópia, no visor aparece a mensagem seguinte:
A mensagem “Compa vel A.L.S.” indica que o rádio
controlo que se acaba de duplicar pode ser associado à
receptora por meio de “Procedimento A.L.S.”.
Ter como referência as instruções do rádio controlo Silca
indicado pelo Easy Scan Plus e o site: www.silca.biz).
Verifi cação Cópia
Cópia CORRECTA
Compatível A.L.S.
Rolling code 433 MHz
(ENT) para continuar
A mensagem “Compa vel OEM” indica que o rádio controlo
que se acaba de duplicar pode ser associado à receptora
somente por meio do procedimento previsto pelo fabricante da receptora.
Ter como referência a documentação entregue pelo fabricante da receptora ou pelo instalador.
Com cópia NÃO correcta:
Verifi cação Cópia
Cópia CORRECTA
Compatível OEM.
433 MHz
(ENT) para continuar
Verifi cação Cópia
Cópia ERRADA!
Código ambíguo
433 MHz
(ENT) para continuar
Neste caso repe r o procedimento de cópia tendo como referência as instruções do rádio controlo Silca
indicado pelo Easy Scan Plus.
Se a cópia do rádio controlo não for realizada correctamente, contactar o serviço de assistência técnica.
70
Copyright Silca S.p.A. 2016
Page 71

Easy Scan Plus
Português
Obs.:
Esta função só responde na presença de rádio controlos
Silca.
U lizando rádio controlos de outro fabricante, o visor do
Easy Scan Plus mostrará a mensagem:
Se o rádio controlo não for duplicável, no visor do Easy Scan
Plus aparece a mensagem seguinte:
Verifi cação Cópia
TLC não SILCA
Repita o controle?
(ESC) Não (ENT) Sim
Identifi cação
TLC NÃO copiável
433 MHz
(ESC) menu principal
IDENTIFICAÇÃO / CÓPIA DE UM RÁDIO CONTROLO QUARTZADO
O procedimento de “Iden fi cação” e “Verifi cação Cópia” de rádio controlos Quartzados é igual àquele dos
rádio controlos de código fi xo.
Porém, antes de começar o procedimento de verifi cação da cópia, Easy Scan Plus solicita a execução do ajuste
(Tuning) da intensidade do sinal emi do pelo rádio controlo copiado:
Abrir o invólucro do rádio controlo (v. instruções do rádio
controlo).
Aproximar o rádio controlo quartzado da área de leitura
(levar em contacto, ver fi g.1-C), premir e manter premida
uma tecla.
Com uma chave de fendas cerâmica rodar lentamente o
parafuso que regula a antena para ter a amplidão máxima
do indicador de intensidade no visor.
Uma vez alcançado o valor máximo, afastar levemente o
rádio controlo e repe r a operação até alcançar o máximo
que pode ser visualizado no visor.
Fechar o invólucro do rádio controlo.
Tuning Antenna
0 | 50 | 100
Premir botão TLC
(ESC) Ant. (ENT) Próximo
OUTRAS FUNÇÕES DE EASY SCAN PLUS
FUNÇÃO DE VERIFICAÇÃO DA CÓPIA
O menu principal é exibido com as seguintes funções
Premir “ENTER” para con nuar.
Menu principal
Identifi cação
> Verifi cação Cópia
Frequencímetro
Tuning Antenna
Opções
Aproximar o rádio controlo original da área de leitura (levar
em contacto, ver fi gura 1) e premir uma tecla do rádio
controlo.
(ENT) para continuar
Verifi cação Cópia
Premir uma tecla
do TLC original
(ESC) menu principal
71Copyright Silca S.p.A. 2016
Page 72

Easy Scan Plus
Português
Sòlo en el caso de un mando Rolling Secure Learning:
Solicita-se de enviar o código fonte do rádio controlo a
copiar. A modalidade de envio do código fonte depende do
rádio controlo que deve ser copiado, verifi car no site www.
silca.biz a adequada para o próprio rádio controlo.
Verifi cação Cópia
À espera de
código-fonte
Espera TLC 433 MHz
(ESC) menu principal
Sòlo en el caso de un mando cuarzado :
Para tornar mais fi ável e minuciosa a verifi cação da cópia, no caso de Rádio Controlos Quartzados, aconselha-
se a verifi car a intensidade do sinal emi do pelo rádio controlo copiado por meio da função “Tuning Antena”.
Quando solicitado, aproximar o rádio controlo copiado
Silca da área de leitura (levar em contacto, ver fi gura 1) e
premir uma tecla do rádio controlo.
Se o rádio controlo copiado coincidir com o original, Easy
Scan Plus visualiza a mensagem:
Caso contrário:
Obs.:
Esta função só responde na presença de rádio controlos
Silca.
U lizando rádio controlos de outro fabricante, o visor do
Easy Scan Plus mostrará a mensagem:
Verifi cação Cópia
premir a mesma tecla
no telecomando COPIADO
(ENT) para continuar
Verifi cação Cópia
Cópia CORRECTA
433 MHz
(ENT) para continuar
Verifi cação Cópia
Cópia ERRADA!
Código ambíguo
433 MHz
(ENT) para continuar
Verifi cação Cópia
TLC não SILCA
Repita o controle?
433 MHz
(ESC) Não (ENT) Sim
72
Copyright Silca S.p.A. 2016
Page 73

Easy Scan Plus
FREQUENCÍMETRO:
U lizar os botões ao lado do visor para seleccionar: “Fre-
quencímetro”.
Premir “ENTER” para con nuar.
Português
Menu principal
Identifi cação
Verifi cação Cópia
> Frequencímetro
Tuning Antenna
Opções
(ESC) Ant. (ENT) Próximo
Aproximar o rádio controlo a analisar da área de leitura
(levar em contacto, ver fi gura 1) e premir uma tecla do
rádio controlo.
O Easy Scan Plus indica a frequência e modulação do sinal
emi do pelo rádio controlo.
Frequencímetro
AM
433.92 MHZ
Premir botão TLC
(ESC) menu principal
TUNING ANTENA:
U lizar os botões ao lado do visor para seleccionar: “Tuning
Antena”.
Premir “ENTER” para con nuar.
Abrir o invólucro do rádio controlo (v. instruções do rádio
controlo).
Aproximar o rádio controlo da área de leitura (levar em
contacto, ver fi gura 1), premir e manter premida uma tecla.
Com uma chave de fendas cerâmica rodar lentamente o
parafuso que regula a antena para ter a amplidão máxima
do indicador de intensidade no visor .
Uma vez alcançado o valor máximo, afastar levemente o rádio controlo e repe r a operação até alcançar o
máximo que pode ser visualizado no visor.
Fechar o invólucro do rádio controlo.
Menu principal
Identifi cação
Verifi cação Cópia
Frequencímetro
> Tuning Antena
Opções
(ENT) para continuar
Tuning Antenna
0 | 50 | 100
Premir botão TLC
(ESC) Ant. (ENT) Próximo
MENU OPÇÕES
Deste menu tem-se acesso às funções de:
- Idioma (ver par. Ligar para programação/troca do idioma).
- Leitura da versão SW dos rádio controlos Silca
- Selecção de rádio controlos para mostrar
- Informações sobre Easy Scan Plus
Opções
> Selecção Idioma
versão TLC SILCA
Selecção TLC SILCA
Info. EasyScan
(ESC) Ant. (ENT) Próximo
73Copyright Silca S.p.A. 2016
Page 74

Easy Scan Plus
LEITURA DA VERSÃO DO RÁDIO CONTROLO SILCA:
Aproximar o rádio controlo Silca a analisar da área de
leitura e premir uma tecla.
SELECIONE DE RÁDIO CONTROLOS PARA MOSTRAR :
Permite selecionar os controles remotos a serem exibidos
durante as fases de identificação:
- Usando os botões para percorrer os itens de menu,
mova o cursor próximo ao nome do controle remoto e
pressione ENTER para desativá-lo ou ativá-lo.
Português
versão TLC SILCA
Premere un tasto
del TLC SILCA
(ESC) menu principal
TLC SILCA
> (*) AirV Plus EU
(*) AirV Plus IB
(*) AirV
(*) AirF
(ESC) menu principal
São visualizadas as informações rela vas ao rádio controlo:
- Modelo de rádio controlo
- Versão de hardware e so ware do rádio controlo
- Número de série
- Frequência
Obs.:
Esta função só responde na presença de rádio controlos
Silca.
U lizando rádio controlos de outro fabricante, o visor do
Easy Scan Plus mostrará a mensagem:
versão TLC SILCA
TLC SILCA Air X
HW: 00000 SW: 00.00.00
SN: 00000000
868 MHz
(ESC) Ant. (ENT) Próximo
versão TLC SILCA
Telecomando NON SILCA!
868 MHz
(ESC) Ant. (ENT) Próximo
INFORMAÇÕES EASY SCAN PLUS:
- Esta função fornece as informações seguintes:
- Modelo
- Versão SW
- ID (unívoco de 24 algarismos)
Info Easy Scan
Modello: Easy Scan
Ver: 0.3.0
ID: XXXXXXXXXXXXXXXXXXXXXX
(ESC) menu principal
USO DO DISPOSITIVO COM PC
O Easy Scan Plus foi desenvolvido para se poder interagir com o PC através do programa “Air4 Remotes Programming So ware” que se pode encontrar no sí o Silca: www.silca.biz, esse programa pode ser instalado
em Windows®, Vista, 7, 8 e 10.
O uso combinado do programa para PC permi rá mater o SW de Easy Scan Plus atualizado, atualizar o SW dos
controles remotos NFC Silca para aumentar a possibilidade de cópia de novos controles remotos, acessar a
informações e documentação ú l para usar da melhor forma a gama de controles remotos e disposi vos Silca
para aplicações residenciais.
Será também possível, com prévia a vação do Easy Scan Plus , a u lização de funcionalidades especiais
avançadas, como cópia assis da e facilitada por um rádio controlo, geração de controles remotos como se
fosse o original (por ex: códigos seriais, contadores, frequência...), etc.
Para mais detalhes consulte as indicações fornecidas no guia em rede do programa “Air4 Remotes Programming So ware”.
74
Copyright Silca S.p.A. 2016
Page 75

Easy Scan Plus
Português
PROCEDURA PARA UTILIZAR O EASY SCAN PLUS COM PC:
Após ter instalado “Air4 Remotes Programming So ware”, acesse e conecte Easy Scan Plus ao PC através do
cabo USB fornecido com o disposi vo.
Na primeira conexão de Easy Scan Plus, o sistema opera vo instalará automa camente os drivers (poderá ser
necessária uma conexão a va em internet).
Caso se receba uma mensagem “Disposi vo não reconhecido – Impossível instalar os drivers”, é necessário
instalar estes úl mos abrindo o arquivo “Drivers” presente no arquivo de instalação do programa.
PROGRAMAÇÃO E ATUALIZAÇÃO DO RÁDIO CONTROLO ATRAVÉS DE NFC
A programação do rádio controlo é efetuada através da tecnologia NFC posicionando o rádio controlo na zona
indicada na zona de escritura (Fig.1-N) ) e selecionando a função adequada disponível no so ware para PC.
PARA MAIS INFORMAÇÕES CONSULTE O SÍTIO www.silca.biz, ESCREVENDO A SENHA “EASYSCANPLUSSOFTWARE” NO CAMPO DE BUSCA:
EASYSCANPLUSSOFTWARE
INSERMENTO-SUBSTITUIÇÃO-CARREGAMENTO BATERIAS
- INSERIMENTO - REMOÇÃO
Para inserir ou remover as baterias é necessário deixar deslizar e levantar a tampa do compar mento (Fig.2
- E).
Colocar as baterias respeitando a polaridade indicada embaixo do compar mento, e fechar a tampa.
- SUBSTITUIÇÃO
Subs tuir as baterias u lizando baterias recarregáveis novas com caraterís cas iguais às fornecidas com o
Easy Scan Plus: baterias recarregáveis de Níquel-Hidreto Metálico ( NiMH) formato AA, 1..2 volts,
mAh.
1800÷2400
- CARREGAMENTO
O Easy Scan Plus recarrega as baterias:
1. Conectando-o com um PC através do cabo USB fornecido com o disposi vo (é necessário u lizar portas
de po USB2 capazes de fornecer uma corrente de 0,5 A.
2. Conectando-o com um carregador de baterias com conector Micro USB de po B (não fornecido com o
disposi vo), com as seguintes caraterís cas: tensão em saída 5,0 VDC e amperagem mínima de 0,5 A,
conformidade com as normas CE.
PERIGO DE INCÊNDIO
QUANDO SE RECARREGAR AS BATERIAS COM UM ALIMENTADOR EXTERNO, RECOMENDASE A UTILIZAR CARREGADORES COM AS CARACTERÍSTICAS SEGUINTES:
- CORRENTE MÁXIMA EM SAÍDA 8A
- POTÊNCIA MÁXIMA EM SAÍDA 100VA
Conselhos para melhor u lização das baterias:
• Se o disposi vo não for usado por um longo período de tempo, remova as baterias e as guarde em local
seguro, fresco e seco.
• Para alongar a vida das baterias evite deixar o disposi vo conectado na porta USB por longos períodos
após terminar a fase de carregamento.
NOTA IMPORTANTE : PERIGO DE EXPLOSÃO CASO SE UTILIZEM BATERIAS DE TIPO ERRADO
OU DANIFICADAS EX: COM OXIDAÇÃO, PERDA DE LÍQUIDOS OU DEFORMAÇÕES.
75Copyright Silca S.p.A. 2016
Page 76

Easy Scan Plus
Português
ELIMINAÇÃO
INFORMAÇÕES PARA OS UTILIZADORES DE EQUIPAMENTOS PROFISSIONAIS
Em “Actuação da Direc va 2012/19/UE sobre os resíduos
de equipamentos eléctricos e electrónicos (REEE)”
O símbolo do caixote do lixo barrado com uma cruz referido no equipamento ou na sua embalagem indica que
o produto, no fi m da sua vida ú l, deve ser eliminado separadamente dos demais resíduos para permi r que
seja tratado e reciclado de maneira adequada.
Em par cular, a recolha selec va deste equipamento profi ssional no fi m da sua vida ú l é organizada e gerida:
a. directamente pelo u lizador, no caso em que o equipamento tenha sido apresentado no mercado
antes de 31 de dezembro de 2010 e o próprio u lizador decida eliminá-lo sem subs tui-lo por um
equipamento novo equivalente e des nado às mesmas funções;
b. pelo fabricante, entendido como o sujeito que primeiro apresentou e comercializou o equipa-
mento novo que subs tuiu o anterior, no caso em que, contextualmente à decisão de eliminar
o aparelho no fi m da sua vida ú l apresentado no mercado antes de 31 de dezembro de 2010, o
u lizador adquira um produto de po equivalente e des nado às mesmas funções. Neste úl mo
caso, o u lizador poderá solicitar o fabricante para que levante este equipamento;
c. pelo fabricante, entendido como o sujeito que primeiro apresentou e comercializou o equipa-
mento novo que subs tuiu o anterior, no caso em que o equipamento tenha sido apresentado no
mercado após 31 de dezembro de 2010 ;
Em relação às pilhas/acumuladores portáteis, o u lizador deverá entregar esses produtos no fi m da sua vida
ú l nas especiais instalações de recolha selec va predispostas pelas autoridades competentes.
Uma recolha selec va adequada para o sucessivo encaminhamento de equipamento e pilhas/acumuladores
eliminados para a reciclagem, o tratamento e a eliminação compa vel com o ambiente, contribui para evitar
possíveis efeitos nega vos no ambiente e na saúde e favorece a reu lização e/ou reciclagem dos materiais
que compõem o equipamento.
Para remover as pilhas/acumuladores, ter como referência as indicações específi cas do fabricante: (ver o
capítulo rela vo no manual de u lização).
A eliminação abusiva de equipamentos, pilhas e acumuladores por parte do u lizador acarreta a aplicação das
sanções previstas pelas normas em vigor.
76
Copyright Silca S.p.A. 2016
Page 77

Nederlands
Easy Scan Plus
Nederlands
GEBRUIK VAN DE HANDLEIDING
Deze handleiding is geschreven door de Producent en maakt integraal deel uit van de documenta e van het
apparaat.
Hierin wordt nu ge informa e verstrekt aan de gebruiker om het apparaat Easy Scan Plus veilig te gebruiken.
Gebruikershandleiding
Deze handleiding moet aandach g gelezen worden door alle gebruikers van het apparaat. Deze voorwaarde
is absoluut noodzakelijk voor het correcte gebruik en onderhoud van het apparaat.
De handleiding moet met zorg bewaard worden gedurende de volledige gebruiksduur van het apparaat,
inclusief de fase van afvalverwijdering. Bewaren op een droge plaats in de buurt van het apparaat, zodat hij
al jd onder handbereik van de gebruiker is.
ID distributeur
Het apparaat hee een typeplaatje waarop het op de achterkant aanwezige serienummer is aangegeven.
ALGEMENE WAARSCHUWINGEN
Het apparaat is ontworpen met inachtneming van de principes van de Europese CE-richtlijnen.
De voor de construc e gebruikte materialen zijn niet gevaarlijk en zorgen ervoor dat het apparaat conform is
aan de richtlijnen. Wat zijn ontwerpkenmerken betre zijn alle onderdelen van het apparaat veilig.
1 - VOOR EEN CORRECTE EN BETROUWBARE WERKING HET APPARAAT VER WEG PLAATSEN VAN ALLE
BRONNEN DIE RADIOSTORINGEN KUNNEN VEROORZAKEN, ZOALS:
- MOBIELE TELEFOONS
- ELEKTRISCHE MOTOREN
- NEONLICHTEN
- WIFI-MODEMS
2 – DE USB-KABEL NIET IN DE PC STEKEN VOORDAT HET PROGRAMMA GEÏNSTALLEERD IS.
ONLINE DOCUMENTATIE
- Ga voor een update van de documenta e en het downloaden van nieuwe updates voor het so warepro-
gramma van Easy Scan Plus regelma g naar de site www.silca.biz
Copyright Silca S.p.A. 2016
77
Page 78

Easy Scan Plus
Nederlands
BESCHRIJVING VAN HET APPARAAT
Het apparaat Easy Scan Plus is voorzien van een display waarmee de gebruiker door de verschillende
functies geleid wordt. Het kan op een pc worden aangesloten om te werken onder de software “Air4
Remotes Programming Software” en geavanceerde functies te gebruiken.
OPERATIONELE ONDERDELEN
A - Grafi sch display
B - Knoppen om door menupunten te bladeren
C - Afl eesgebied afstandsbedieningen
D - Func e-knoppen
E - Ba erijvak
F - Iden fi ca e-e ket van Easy Scan Plus
F1 - Serienummer apparaat
BESCHIKBARE FUNCTIES
- Iden fi ceert de soorten afstandsbedieningen door zowel de frequen e als het type te bepalen (vaste code
of rolling-code).
- Controleert de mogelijkheid om te kopiëren en gee de te gebruiken Silca afstandsbediening aan.
- Controleert of de kopie op een Silca afstandsbediening precies overeenkomt met de originele afstandsbediening.
-Afl ezing van de frequen e aanwezig in de afstandsbediening (frequen emeter)
- Kalibra e (tuning) van de signaalintensiteit uitgezonden door afstandsbedieningen met kwarts.
- Interne so ware-update door middel van de USB-poort met behulp van een programma op de pc.
- Met behulp van de pc-so ware (op oneel) zijn andere geavanceerde func es beschikbaar voor het
kopiëren, genereren en beheren van de afstandsbedieningen en het bijwerken van de so ware van de af-
standsbedieningen NFC Silca.
TECHNISCHE GEGEVENS
Voeding
Het apparaat wordt gevoed door 2 meegeleverde oplaadbare nikkel-metaal-hydride batterijen (NiMH) van
1.2 volt in AA-formaat .
Het kan ook worden gevoed door middel van de meegeleverde USB-kabel, door deze aan te sluiten op de
USB-poort van een pc of op een lader met USB-connector (niet meegeleverd).
G - USB-poort micro-B voor aanslui ng op pc
H - USB-kabel (meegeleverd)
I - Keramische schroevendraaier
L - Aan/Uit-knop van het apparaat
M - Oplaadbare ba erijen type AA 1.2V
(meegeleverd)
N - Schrijfgebied afstandsbedieningen NFC Silca
Technische kenmerken
Voedingsspanning: 5 VDC met externe lader
Voedingsspanning: 2.4 VDC met ba erijen
Stroomopname: 0.5 A MAX
Veldfrequentie van de antenne
ANTENNE NFC: 13,56 MHz
ANTENNE HF : 26,720 - 871.1 MHz
Omgevingscondities
Het apparaat werkt op een omgevingstemperatuur die ligt tussen 0 en +50°C
Afmetingen
Breedte: 90 mm
Lengte: 148 mm
Diepte: 25 mm
Gewicht Zonder ba erijen 172,50 gr.
78
Copyright Silca S.p.A. 2016
Page 79

Easy Scan Plus
STANDALONEGEBRUIK APPARAAT
Symbolen batterijstatus en aansluitingen
Gee aan dat de Easy Scan Plus met de pc communiceert.
Duidt aan dat er geen ba erijen aanwezig zijn, of dat ze niet volgens de correcte polariteit
werden geplaatst; in het laatste geval de ba erijen verwijderen en ze volgens de correcte
polariteit plaatsen.
Gee aan dat de ba erijen geladen worden.
Snel knipperend betekent dat er niet-herlaadbare ba erijen aanwezig zijn of dat er een fout
gebeurde jdens het laadproces van de ba erijen.
Indien de ba erijen herlaadbaar zijn moet men onmiddellijk controleren dat ze geen tekens
van schade of oververhi ng vertonen; in het laatste geval de ba erijen verwijderen en
vervangen door nieuwe ba erijen.
Duidt aan dat het laadproces werd voltooid.
Duidt aan dat het laadniveau van de ba erij hoger is dan 80%.
Duidt aan dat het laadniveau van de ba erij ligt tussen 10% en 80%.
Duidt aan dat het laadniveau van de ba erij lager is dan 10%.
Gee aan dat Easy Scan Plus op een lader is aangesloten.
Nederlands
Aanschakelen
Houd de aanschakeltoets van de Easy Scan Plus ingedrukt totdat het Silca-logo verschijnt op het display.
Taalinstelling
U kan de taal instellen de eerste maal dat u het toestel
Easy Scan Plus opstart: gebruik de toetsen aan de zijkant
van het display (B) om de verschillende beschikbare talen
te doorlopen.
Druk na instelling van de taal op “ENTER” om te beves gen.
Het hoofdmenu met de volgende func es wordt weerge-
geven :
- Iden fi ca e
- Controle kopij
- Frequen emeter
- Tuning Antenne
- Easy Scan Plus op es
Copyright Silca S.p.A. 2016
Selecteer taal
> Italiano
English
Français
Deutsch
(ENT) om door te gaan
Hoofdmenu
> Identifi catie
Controleer Kopij
Frequentiemeter
Tuning Antenne
Opties
(ENT) om door te gaan
79
Page 80

Easy Scan Plus
IDENTIFICATIE / KOPIËREN VAN EEN AFSTANDSBEDIENING MET VASTE CODE
Nederlands
Breng de te onderzoeken afstandsbediening bij de leeszone
(zie fi guur 1) en druk op een toets van de afstandsbedie-
ning. Indien het leesproces moeizaam verloopt moet u de
procedure herhalen door de afstandsbediening enkele cen meters verwijderen.
De werkfrequen e van de afstandsbediening wordt weer-
gegeven.
Er wordt gevraagd nogmaals op dezelfde toets van de
afstandsbediening te drukken.
AFSTANDSBEDIENINGEN
AFB :
Indien de te onderzoeken afstandsbediening kan
worden gedupliceerd, verschijnt er de Silca afstandsbediening (model en versie) die compatibel is voor
duplicatie.
(Voor de duplicatieprocedure wordt verwezen naar de
instructies in bijlage aan de Silca afstandsbediening
aangeduid door Easy Scan Plus).
Druk op “ENTER” voor de func e “Controle kopij”.
Nadat de kopij werd uitgevoerd, moet u de te controleren
Silca afstandsbediening tegen de leeszone brengen (contact
laten maken, zie fi guur 1) en dezelfde toets op de gedupli-
ceerde afstandsbediening indrukken en loslaten.
Houd de afstandsbediening dicht bij de leeszone totdat de
Easy Scan Plus de controleprocedure hee voltooid.
Identifi catie
Druk een toets in
van te dupliceren AFB
(ESC) Hoofdmenu
Identifi catie
Druk op
zelfde toets
Wachten AFB
(ESC) Hoofdmenu
Controleer Kopij
Dupliceerbaar op Air X ver. yy.yy
Vaste code 433 MHz
(ESC) Terug (ENT) Verder
Controleer Kopij
Druk op zelfde toets
van gedupliceerde AFB
433 MHz
(ESC) Hoofdmenu
Met correcte kopij:
Controleer Kopij
Kopij CORRECT
Vaste code 433 MHz
(ENT) om door te gaan
Met NIET correcte kopij:
Controleer Kopij
Kopij VERKEERD
Code stemt niet overeen
433 MHz
(ENT) om door te gaan
In dit geval moet u de duplica eprocedure herhalen door de instruc es van de Silca afstandsbediening
vermeld door Easy Scan Plus op te volgen. Mocht de afstandsbediening niet correct worden gedupliceerd,
neem dan contact op met de dienst technische bijstand.
80
Copyright Silca S.p.A. 2016
Page 81

Easy Scan Plus
Nederlands
Opm.:
Deze func e werkt enkel met Silca afstandsbedieningen.
Indien u afstandsbedieningen van een andere fabrikant
gebruikt, verschijnt de volgende melding op het display
van Easy Scan Plus:
Controleer Kopij
AFB NIET SILCA
Controle herhalen?
433 MHz
(ESC) Nee (ENT) Ja
IDENTIFICATIE / KOPIËREN VAN EEN AFSTANDSBEDIENING MET NORMALE ROLLING CODE
De procedure voor iden fi ca e en controle van de duplica e van Rolling Code Normal afstandsbedieningen is
iden ek aan die van afstandsbedieningen met vaste code.
Nadat de kopij werd uitgevoerd moet deze toegekend worden aan de ontvanger. Dit kan a ankelijk van
de gevallen gebeuren via de A.L.S. ( Vereenvoudigde procedure voor ac va e van afstandsbediening in
ontvanger. De lijst met ontvangers die compa bel zijn met deze procedure is beschikbaar op de site: www.
silca.biz. ) procedure of via de procedure voorzien door de fabrikant van de ontvanger.
De keuze van de te gebruiken procedure wordt aangeduid na uitvoering van de controle van de kopij.
Wanneer de afstandsbediening correct werd gekopieerd verschijnt de volgende melding op het display:
De melding “A.L.S. compa bel” duidt aan dat de zonet
bekomen kopij van de afstandsbediening kan toegekend
worden aan de ontvanger via de “A.L.S. Procedure”.
Raadpleeg de instruc es van de Silca afstandsbediening
vermeld door de Easy Scan Plus en op de website: www.
silca.biz).
De melding “OEM compa bel” duidt aan dat de zonet
bekomen kopij van deafstandsbediening enkel kan
toegekend worden aan de ontvanger via de procedure
voorzien door de fabrikant van de ontvanger.
Raadpleeg de documenta e geleverd door de fabrikant van
de ontvanger of van de installateur.
Controleer Kopij
Kopij CORRECT
Compatibel A.L.S.
Rolling code 433 MHz
(ENT) om door te gaan
Controleer Kopij
Kopij CORRECT
Compatibel OEM.
Rolling code 433 MHz
(ENT) om door te gaan
IDENTIFICATIE / KOPIËREN VAN EEN AFSTANDSBEDIENING MET ROLLING CODE SECURE
LEARNING
Breng de te onderzoeken afstandsbediening bij de leeszone
(zie fi guur 1) en druk op een toets van de afstandsbedie-
ning.
Indien het leesproces moeizaam verloopt moet u de
Identifi catie
Druk een toets in
van te dupliceren AFB
procedure herhalen door de afstandsbediening enkele cen meters verwijderen.
De werkfrequen e van de afstandsbediening wordt weer-
gegeven.
Er wordt gevraagd de broncode van de te dupliceren
afstandsbediening te verzenden. De verzendingswijze van
de broncode is a ankelijk van de afstandsbediening die u
moet dupliceren. Controleer op www.silca.biz welke wijze
(ESC) Hoofdmenu
Identifi catie
wachten op
BRONCODE
Wachten AFB 433 MHz
(ESC) Hoofdmenu
geschikt is voor uw afstandsbediening.
Copyright Silca S.p.A. 2016
81
Page 82

Easy Scan Plus
Nederlands
Indien de te onderzoeken afstandsbediening kan
worden gedupliceerd, verschijnt er de Silca afstandsbediening (model en versie) die compatibel is voor
Controleer Kopij
Dupliceerbaar op Air X ver.yy.yy
duplicatie en welke procedure moet gebruikt worden
voor afstandsbedieningen van het type Rolling Secure
Learning.
Rolling code S.L. 433 MHz
(ESC) Terug (ENT) Verder
(De duplicatieprocedure is afhankelijk van de afstandsbediening die u moet kopiëren, controleer op www.
silca.biz welke procedure geschikt is voor uw afstandsbediening en raadpleeg de instructies in bijlage aan
de Silca afstandsbediening vermeld door de Easy Scan
Plus).
Druk op “ENTER” voor de func e “Controle kopij”.
Nadat de kopij werd uitgevoerd, moet u de te controleren Silca afstandsbediening tegen de leeszone brengen
(contact laten maken, zie fi guur 1-C) en dezelfde toets op
de gedupliceerde afstandsbediening indrukken en loslaten.
Houd de afstandsbediening dicht bij de leeszone totdat de
Easy Scan Plus de controleprocedure hee voltooid.
Controleer Kopij
Druk op zelfde toets
van gedupliceerde AFB
433 MHz
(ESC) Hoofdmenu
Nadat de kopij werd uitgevoerd moet deze toegekend worden aan de ontvanger. Dit kan a ankelijk van
de gevallen gebeuren via de A.L.S. (Vereenvoudigde procedure voor ac va e van afstandsbediening in
ontvanger. De lijst met ontvangers die compa bel zijn met deze procedure is beschikbaar op de site: www.
silca.biz) procedure of via de procedure voorzien door de fabrikant van de ontvanger.
De keuze van de te gebruiken procedure wordt aangeduid na uitvoering van de controle van de kopij.
Wanneer de afstandsbediening correct werd gekopieerd verschijnt de volgende melding op het display:
De melding “A.L.S. compa bel” duidt aan dat de zonet
bekomen kopij van de afstandsbediening kan toegekend
worden aan de ontvanger via de “A.L.S. Procedure”.
Raadpleeg de instruc es van de Silca afstandsbediening
vermeld door de Easy Scan Plus en op de website: www.
silca.biz)
Controleer Kopij
Kopij CORRECT
Compatibel A.L.S.
Rolling code 433 MHz
(ENT) om door te gaan
De melding “OEM compa bel” duidt aan dat de zonet
bekomen kopij van de afstandsbediening enkel kan
toegekend worden aan de ontvanger via de procedure
voorzien door de fabrikant van de ontvanger.
Raadpleeg de documenta e geleverd door de fabrikant van
de ontvanger of van de installeerder.
Met NIET correcte kopij:
82
Copyright Silca S.p.A. 2016
Controleer Kopij
Kopij CORRECT
Compatibel OEM.
433 MHz
(ENT) om door te gaan
Controleer Kopij
Kopij VERKEERD
Code stemt niet overeen
433 MHz
(ENT) om door te gaan
Page 83

Easy Scan Plus
In dit geval moet u de duplica eprocedure herhalen door de instruc es van de Silca afstandsbediening
vermeld door Easy Scan Plus op te volgen.
Mocht de afstandsbediening niet correct worden gedupliceerd, neem dan contact op met de dienst technische bijstand.
Nederlands
Opm.:
Deze func e werkt enkel met Silca afstandsbedieningen.
Indien u afstandsbedieningen van een andere fabrikant
gebruikt, verschijnt de volgende melding op het display
van:
Mocht de afstandsbediening niet dupliceerbaar zijn, dan
verschijnt de volgende melding op het display van de:
Controleer Kopij
AFB NIET SILCA
Controle herhalen?
(ESC) Nee (ENT) Ja
Identifi catie
AFB NIET dupliceerbaar
433 MHz
(ESC) Hoofdmenu
IDENTIFICATIE / KOPIËREN VAN EEN KWARTS AFSTANDSBEDIENING
De procedure voor iden fi ca e en controle van de duplica e van kwarts afstandsbedieningen is iden ek aan
die van afstandsbedieningen met vaste code.
Alvorens de controleprocedure van de kopij op te starten vraagt Easy Scan Plus om de ijkprocedure van de
intensiteit van het signaal uitgezonden door de gedupliceerde afstandsbediening (Tuning) uit te voeren:
Open het luikje van de afstandsbediening (zie instruc es
van de afstandsbediening).
Breng de kwarts afstandsbediening bij de leeszone (contact
laten maken, zie fi g.1-C) en houd een toets ingedrukt.
Verdraai langzaam met behulp van een keramische schroevendraaier de stelschroef van de antenne totdat een
maximum wijdte wordt bereikt van de intensiteitsaanwijzer
op het display .
Nadat de maximumwaarde werd ingesteld moet u de
afstandsbediening lichtjes verwijderen en de bewerking
herhalen totdat de maximale waarde die op het scherm
kan worden weergegeven wordt bereikt.
Sluit het luikje van de afstandsbediening terug.
Antenne Tuning
0 | 50 | 100
Druk op toets AFB
(ESC) Terug (ENT) Verder
OVERIGE FUNCTIES VAN DE EASY SCAN PLUS
FUNCTIE CONTROLE KOPIJ
Gebruik de toetsen naast het display voor de selec e:
“Controle kopij”.
Druk op ENTER om verder te gaan.
Copyright Silca S.p.A. 2016
Hoofdmenu
Identifi catie
> Controleer Kopij
Frequentiemeter
Tuning Antenne
Opties
(ENT) om door te gaan
83
Page 84

Easy Scan Plus
Nederlands
Breng de originele afstandsbediening bij de leeszone
(contact laten maken, zie fi guur 1) en druk op een toets
van de afstandsbediening.
Alleen in het geval van een Rolling Secure Learning afstandsbedieningen:
Er wordt gevraagd de broncode van de te dupliceren
afstandsbediening te verzenden. De verzendingswijze van
de broncode is a ankelijk van de afstandsbediening die u
moet dupliceren. Controleer op www.silca.biz welke wijze
Controleer Kopij
Druk op een toets
van originele AFB
(ESC) Hoofdmenu
Controleer Kopij
wachten op
BRONCODE
Wachten AFB 433 MHz
(ESC) Hoofdmenu
geschikt is voor uw afstandsbediening.
Alleen in het geval van een kwarts afstandsbedieningen:
Om de controle van de kopij betrouwbaarder en nauwkeuriger te maken bij kwarts afstandsbedieningen,
raden wij aan om de intensiteit van het signaal uitgezonden door de gekopieerde afstandsbediening te controleren via de func e “Tuning Antenne”.
Breng de gedupliceerde Silca afstandsbediening, wanneer
het gevraagd wordt, bij de leeszone (contact laten maken,
zie fi guur 1) en druk op een toets van de afstandsbedie-
ning.
Indien de gedupliceerde afstandsbediening overeenstemt
met de originele afstandsbediening, verschijnt er op de
Easy Scan Plus de volgende melding:
Controleer Kopij
Druk op zelfde toets
van gedupliceerde AFB
(ESC) Hoofdmenu
Controleer Kopij
Kopij CORRECT
Zo niet verschijnt:
Opm.:
Deze func e werkt enkel met Silca afstandsbedieningen.
Indien u afstandsbedieningen van een andere fabrikant
gebruikt, verschijnt de volgende melding op het display
van Easy Scan Plus:
84
Copyright Silca S.p.A. 2016
(ENT) Hoofdmenu
433 MHz
Controleer Kopij
Kopij VERKEERD
Code stemt niet overeen
433 MHz
(ENT) Hoofdmenu
Controleer Kopij
AFB NIET SILCA
Controle herhalen?
433 MHz
(ESC) Nee (ENT) Ja
Page 85

Easy Scan Plus
FREQUENTIEMETER:
Gebruik de toetsen naast het display voor de selec e: “Fre-
quentiemeter”.
Druk op ENTER om verder te gaan.
Nederlands
Hoofdmenu
Identifi catie
Controleer Kopij
> Frequentiemeter
Tuning Antenne
Opties
(ENT) om door te gaan
Breng de te onderzoeken afstandsbediening bij de leeszone
(contact laten maken, zie fi guur 1) en druk op een toets van
de afstandsbediening.
Easy Scan Plus gee de frequen e en modula e aan van
het signaal uitgezonden door de afstandsbediening.
Frequentiemeter
AM
433.92 MHZ
Druk op toets AFB
(ESC) Hoofdmenu
TUNING ANTENNE:
Gebruik de toetsen naast het display voor de selec e:
“Tuning Antenne”.
Druk op ENTER om verder te gaan.
Open het luikje van de afstandsbediening (zie instruc es
van de afstandsbediening).
Breng de afstandsbediening bij de leeszone (contact laten
maken, zie fi guur 1) en houd een toets ingedrukt.
Verdraai langzaam met behulp van een keramische schroevendraaier de stelschroef van de antenne totdat een
maximum wijdte wordt bereikt van de intensiteitsaanwijzer
op het display .
Nadat de maximumwaarde werd ingesteld moet u de afstandsbediening lichtjes verwijderen en de bewerking
herhalen totdat de maximale waarde die op het scherm kan worden weergegeven wordt bereikt.
Sluit het luikje van de afstandsbediening terug.
Hoofdmenu
Identifi catie
Controleer Kopij
Frequentiemeter
> Tuning Antenne
Opties
(ENT) om door te gaan
Tuning Antenne
0 | 50 | 100
Druk op toets AFB
(ESC) Terug (ENT) Verder
MENU OPTIES
Vanaf dit menu gaat u naar de func es:
- Taal zie par. Aanschakelen voor instellen/wijzigen van
taal).
-Afl ezen van de SW-versie van de Silca afstandsbedienin-
gen.
- Selecteer de afstandsbedieningen te laten zien.
- Informa e over de Easy Scan Plus
Copyright Silca S.p.A. 2016
Opties
>Selecteer taal
Versie SILCA AFB
Selecteer SILCA AFB
Info. EasyScan
(ESC) Terug (ENT) Verder
85
Page 86

Easy Scan Plus
AFLEZEN VAN DE VERSIE SILCA AFSTANDSBEDIENING:
Breng de te onderzoeken Silca afstandsbediening bij de
leeszone en druk op een toets.
AFLEZEN VAN DE VERSIE SILCA AFSTANDSBEDIENING:
Het is toegestaan de afstandsbedieningen te bekijken ,
jdens de iden fi ca e fasen:
- Gebruik de knoppen om door de menu items te bladeren,
zet de cursor in buurt van de naam van de afstandsbediening, en druk op Enter om deze in- of uit te schakelen.
Nederlands
Versie SILCA AFB
Druk op een toets
van SILCA AFB
(ESC) Hoofdmenu
SILCA AFB
> (*) AirV Plus EU
(*) AirV Plus IB
(*) AirV
(*) AirF
(ESC) Hoofdmenu
Nu verschijnt de informa e over de afstandsbediening:
- Model afstandsbediening
- Hardware- en so wareversie van de afstandsbediening
- Serienummer
- Frequen e
Opm.:
Deze func e werkt enkel met Silca afstandsbedieningen.
Indien u afstandsbedieningen van een andere fabrikant
gebruikt, verschijnt de volgende melding op het display
van Easy Scan Plus:
Versie SILCA AFB
SILCA AFB SILCA Air X
HW: 00000 SW: 00.00.00
SN: 00000000
868 MHz
(ESC) Terug (ENT) Verder
Versie SILCA AFB
AFB NIET SILCA!
868 MHz
(ESC) Terug (ENT) Verder
INFORMATIE OVER DE EASY SCAN PLUS:
- Deze func e levert de volgende informa e:
- Model
- SW Versie
- ID (eenduidig, 24 cijfers)
Info Easy Scan
Model: Easy Scan
Ver: 0.3.0
ID: XXXXXXXXXXXXXXXXXXXXXX
(ESC) Hoofdmenu
GEBRUIK APPARAAT MET PC
Easy Scan Plus is ontwikkeld om op een pc te kunnen worden aangesloten door middel van het programma
“Air4 Remotes Programming So ware” dat u kunt vinden op de site van Silca: www.silca.biz, dit programma
kan worden geïnstalleerd op Windows®, Vista, 7, 8 en 10.
Door het programma ook op de pc te gebruiken, kan de so ware van Easy Scan Plus update blijven, kan
de so ware van de afstandsbedieningen NFC Silca worden bijgewerkt om de mogelijkheid te vergroten
om nieuwe afstandsbedieningen te kopiëren, toegang te verkrijgen tot nu ge informa e en documenta-
e, om het gamma afstandsbedieningen en apparaten van Silca voor privétoepassingen zo goed mogelijk te
gebruiken.
Ook is het mogelijk om na ac vering van Easy Scan Plus speciale geavanceerde func es te gebruiken, zoals het
vereenvoudigd, met hulp kopiëren van een afstandsbediening, het genereren van afstandsbedieningen alsof
ze origineel zouden zijn (nu g in het geval dat de te kopiëren afstandsbediening zoek is of niet meer werkt),
het beheren van de radioparameters (bijv. seriële codes, tellers, frequen e…), etc.
Raadpleeg voor nadere details de aanwijzingen in de online gids van het programma “Air4 Remotes Programming So ware”.
86
Copyright Silca S.p.A. 2016
Page 87

Easy Scan Plus
Nederlands
PROCEDURE OM EASY SCAN PLUS MET PC TE GEBRUIKEN:
Na het installeren van “Air4 Remotes Programming So ware” Easy Scan Plus aanze en en op de pc aansluiten
door middel van de meegeleverde USB-kabel.
Bij de eerste aanslui ng van Easy Scan Plus installeert het besturingssysteem automa sch de drivers (het kan
zijn dat een ac eve internetverbinding noodzakelijk is).
Mocht de melding “Apparaat niet herkend – Drivers installeren onmogelijk” verschijnen, dan is het noodzakelijk deze drivers te installeren door het openen van de map “Drivers” die zich in de installa emap van het
programma bevindt.
PROGRAMMERING EN UPDATE VAN DE AFSTANDSBEDIENING DOOR MIDDEL VAN NFC
De programmering van de afstandsbediening vindt plaats door middel van de NFC-technologie, door de afstandsbediening te plaatsen in het in de schrijfzone gespecifi ceerde gebied (Fig.1-N) en de passende func e
die op de pc-so ware beschikbaar is te selecteren.
RAADPLEEG VOOR MEER INFORMATIE DE SITE www.silca.biz DOOR HET WACHTWOORD
"EASYSCANPLUSSOFTWARE" IN HET ZOEKVELD IN TE VOEREN:
EASYSCANPLUSSOFTWARE
- PLAATSING - VERWIJDERING
PLAATSING-VERVANGING-OPLADEN BATTERIJEN
Om de ba erijen te plaatsen of te verwijderen, dient het deksel van het vakje (Fig.2 - E) te worden verscho-
ven en opge ld.
Plaats de ba erijen met inachtneming van de correcte polen aangegeven op de bodem van het vakje en sluit
daarna het deksel.
- VERVANGING
Vervang de ba erijen door gebruik te maken van de nieuwe oplaadbare ba erijen met dezelfde kenmerken
als de meegeleverde ba erijen bij Easy Scan Plus: oplaadbare nikkel-metaal-hydride ba erijen (NiMH) in
AA-formaat, 1.2 Volt,
- OPLADEN
Met Easy Scan Plus kunt u de ba erijen opnieuw laden:
1. Door aanslui ng op een pc door middel van de meegeleverde USB-kabel (poorten van het type USB2 zijn
nodig om een stroom van 0.5 A te leveren).
2. Door aanslui ng op een lader met micro USB-connector van het B-type (niet meegeleverd) en de
volgende kenmerken: uitgangsspanning 5.0 VDC en minimum ampèrage 0.5 A, naleving van CE-normen.
Adviezen voor een beter gebruik van de ba erijen:
• Als het apparaat gedurende een lange periode niet wordt gebruikt, de ba erijen verwijderen en
bewaren op een veilige, koele en droge plaats.
• Om de gebruiksduur van de ba erijen te verlengen, het apparaat niet voor lange periodes op de
USB-poort aangesloten laten nadat de laadfase is afgelopen.
BELANGRIJKE OPMERKING: ONTPLOFFINGSGEVAAR ALS ER VERKEERDE OF BESCHADIGDE
BATTERIJEN WORDEN GEBRUIKT BIJV. IN HET GEVAL VAN ROESTVORMING, VLOEISTOF
LEKKAGE OF VERVORMINGEN.
1800÷2400 mAh.
BRANDGEVAAR:
TIJDENS HET OPLADEN VAN DE BATTERIJEN MET EEN EXTERNE VOEDINGSEENHEID
MOET EEN LADER GEBRUIKT WORDEN MET DE VOGLENDE EIGENSCHAPPEN:
MAXIMALE UITGANGSSTROOM 8A
MAXIMALE UITGANGSVERMOGEN 100VA
Copyright Silca S.p.A. 2016
87
Page 88

Easy Scan Plus
INFORMATIE VOOR DE GEBRUIKERS VAN PROFESSIONELE APPARATUUR
Nederlands
AFVALVERWERKING
Ter uitvoering van de Richtlijn 2012/19/UE betreff ende afgedankte elektrische
Het symbool met doorkruiste vuilbak aangebracht op het toestel of op de verpakking duidt aan dat het
product op het einde van de levensduur gescheiden moet worden weggegooid, voor een verdere correcte
verwerking en recyclage.
Zo moet in het bijzonder de correcte gescheiden afvalinzameling op het einde van de levensduur van dit
apparaat voor professioneel gebruik als volgt worden georganiseerd en uitgevoerd:
a. rechtstreeks door de gebruiker, indien het apparaat op de markt werd gebracht vóór 31 december
2010 en de gebruiker zelf beslist zich te ontdoen van het apparaat zonder het te vervangen door
een nieuw analoog toestel bestemd voor dezelfde func es;
b. door de fabrikant, gedefi nieerd als hij die het nieuwe apparaat ter vervanging van het voorgaande
op de markt hee geïntroduceerd en verdeeld, indien gelijk jdig met de beslissing van afdanking
van het oude apparaat, gecommercialiseerd vóór 31 december 2010, de gebruiker een equivalent
product aankoopt bestemd voor dezelfde func es. In dit laatste geval kan de gebruiker de fabrikant
vragen te zorgen voor de afdanking van het oude apparaat;
c. door de fabrikant, gedefi nieerd als hij die het nieuwe apparaat ter vervanging van het voorgaande
op de markt hee geïntroduceerd en verdeeld, indien het apparaat op de markt werd gebracht na
31 december 2010 ;
De gebruiker moet de draagbare ba erijen en accu’s op het einde van hun levensduur overhandigen aan de
geautoriseerde milieu-/containerparken toegewezen door de bevoegde overheid
Een correcte gescheiden afvalinzameling en daarop volgende ontmanteling voor recyclage, ecologisch compa bele behandeling en afvalverwerking van de apparatuur en ba erijen/accu’s zorgt ervoor dat de nega eve
impact op het milieu en de gezondheid wordt vermeden en dat de materialen waaruit zij zijn opgebouwd
hergebruikt of gerecycled kunnen worden.
Lees de specifi eke instruc es van de fabrikant om de ba erijen en accu’s te verwijderen: (zie betreff ende
hoofdstuk in handleiding voor gebruik).
Een onwe elijke sloop van de apparatuur, ba erijen en accu’s door de gebruiker wordt we elijk bestra
conform de geldende wetgeving.
en elektronische apparatuur (AEEA)”
88
Copyright Silca S.p.A. 2016
Page 89

Easy Scan Plus
EN
Silca S.p.A. hereby declares that this Remote Controls Device complies with the essential
requisites and other relevant regulations established by Directive 2014/53/EU.
declaration of conformity on our website:
www.silca.biz/Products/Key Replacement Business/ResidenƟ al Remotes.
IT Con la presente Silca S.p.A. dichiara che questo Dispositivo per Radiocomandi è conforme ai
requisiti essenziali ed alle altre disposizioni pertinenti stabilite dalla direttiva 2014/53/UE. La
dichiarazione di conformità può essere consultata sul sito:
www.silca.biz/Prodoƫ /Key Replacement Business/Radiocomandi Residenziali.
DE Mit diesem Schreiben erklärt Silca S.p.A., dass diese Vorrichtung Für Funkfernbedienungen
den grundlegenden Anforderungen und den weiteren einschlägigen Bestimmungen der
Richtlinie 2014/53/EU entspricht. Die Konformitätserklärung kann eingesehen werden auf der
Website:
www.silca.biz/Produkte/Key Replacement Business/Funkfernbedienungen für den
Wohnbereich.
FR Silca S.p.A. déclare par la présente que cette Dispositif Pour Télécommandes est conforme
aux conditions essentielles et autres prescriptions afférentes fixées par la directive 2014/53/
UE. Vous pourrez consulter la déclaration de conformité sur le site:
www.silca.biz/Produits/Key Replacement Business/Télécommandes à usage DomesƟ que
ES Por medio de la presente Silca S.p.A. declara que este Dispositivo Para Mandos está
conforme con los requisitos esenciales y con otras disposiciones pertinentes establecidas por la
directiva 2014/53/UE. La declaración de conformidad puede consultarse en el sitio:
www.silca.biz/Productos/Mercado De Reposición/Mandos a Distancia Residenciales
Read the
PT Com a presente, a Silca S.p.A. declara que este Dispositivo Para Rádio Controlos cumpre os
requisitos essenciais e as demais disposições relativas definidas pela directiva 2014/53/UE. A
declaração de conformidade pode ser consultada no site:
www.silca.biz/Produtos/Key Replacement Business/Rádio Controlos Residenciais.
NL Hierbij verklaart Silca S.p.A. dat deze Toestel Voor Afstandsbedieningen conform de
essentiële eisen en overige toepasbare bepalingen vastgelegd in de Richtlijn 2014/53/EU is.
U kan de conformiteitsverklaring raadplegen op de site:
www.silca.biz/Products/Key Replacement Business/ResidenƟ al Remotes.
89Copyright Silca S.p.A. 2016
Page 90

Page 91

Page 92

SILCA S.p.A.
Via Podgora, 20 (Z.I.)
31029 VITTORIO VENETO (TV)
Phone: +39 0438 9136
Fax +39 0438 913800
E-mail: silca@silca.it
www.silca.biz
United Kingdom
SILCA Ltd.
Unit 6 Lloyds Court - Manor Royal
CRAWLEY RH10 9QU
Phone: +44 1293 531134
Fax +44 1293 531108
E-mail: sales@silcaltd.co.uk
www.silcaltd.co.uk
France
SILCA S.A.S.
12, Rue de Rouen
Z.I. de Limay - Porcheville
78440 PORCHEVILLE
Phone: +33 1 30983500
Fax +33 1 30983501
E-mail: info@silca.fr
www.silca.fr
Germany
SILCA GmbH
Siemensstrasse, 33
42551 VELBERT
Phone: +49 2051 2710
Fax +49 2051 271172
E-mail: info@silca.de
www.silca.de
Spain
SILCA KEY SYSTEMS S.A.
C/Santander 73A
08020 BARCELONA
Phone: +34 93 4981400
Fax +34 93 2788004
E-mail: silca@silca.es
www.silca.es
MINDA SILCA Engineering Ltd.
India
Plot no.37, Toy City,
GREATER NOIDA (U.P.) - 201308
Phone: +91 9871397630/31
Fax: +91 120 2351301
E-mail: info@mindasilca.in
www.mindasilca.in
North America
U.S.A., Canada, Caribbean Islands
KABA Ilco Corp.
400 Jeffreys Road
Rocky Mount, NC 27804 USA
Phone: 1 800 334 1381 / 1 252 446 3321
Fax: 1 252 446 4702
E-mail: info@irm.kaba.com
www.ilco.us
Mexico, Guatemala, Belize, El Salvador,
Honduras, Nicaragua, Costa Rica, Panama
Central America
Corporación Cerraiera Alba S.A. de C.V.
Prolongaci
Col.Los reyes, Tultitlán, Estado de México C.P. 54915
E-mail: informacion-mexico@kaba.com
Kaba Mexico
ó
n avenida independencia 14, Bodega 5,
Phone: 01 55 5366 7200
www.kabamexico.com
Brazil
KABA DO BRASIL Ltda
Rua Guilherme Asbahr Neto, 510
São Paulo, SP 04646-001
Phone: +55 11 55454520 / 29
E-mail: silca@kabadobrasil.com.br
www.silcachaves.com.br
Netherlands
H. CILLEKENS B.V.
Metaalweg, 4
6045 JB ROERMOND
Phone: +31 475 325147
Fax +31 475 323640
E-mail: info@hcillekens.nl
www.hcillekens.nl
Colombia
SILCA SOUTH AMERICA S.A.
Km 1.5 Via Briceño-Zipaquira
Parque Ind. Trafalgar Bodega 3
Tocancipa-Cundinamarca
Phone: +57 1 7366480
Fax +57 1 7366490
www.fl exonsilca.co
 Loading...