

SIIG SoundWave 7.1 PCI Quick Installation Manual

1
SoundWave 7.1 PCI
Quick Installation Guide
04-0360A
Introducing the SoundWave 7.1 PCI
The SoundWave 7.1 PCI transforms your PC into a home
theater system with multi-channel surround sound.
Features
• Compliant with PCI revision 2.2 and PC99
specification
• Supports 24-bit/96KHz playback, 16-bit/48KHz
recording
• S/PDIF transmitter supports 44.1/48/96KHz
sampling rate and 16-/24-bit resolution
• HRTF-based 3D positional audio supporting
DirectSound 3D, EAX and A3D interfaces
• Supports multi-channel output to 2/4/6/8
speakers
• 8-channel output capability supports the latest
Dolby Digital EX and DTS ES DVD audio format
System Requirements
• Pentium II 366 MHz or equivalent PC with an
available PCI slot
• Windows 98SE/ME/2000/XP/Server 2003
• 64 MB system memory
• CD-ROM or DVD-ROM drive
• DirectX 9.0 or above (recommended)
2
Package Contents
• SoundWave 7.1 PCI
• Software CD (Xear 3D and WinDVD 5.0)
• This quick installation guide
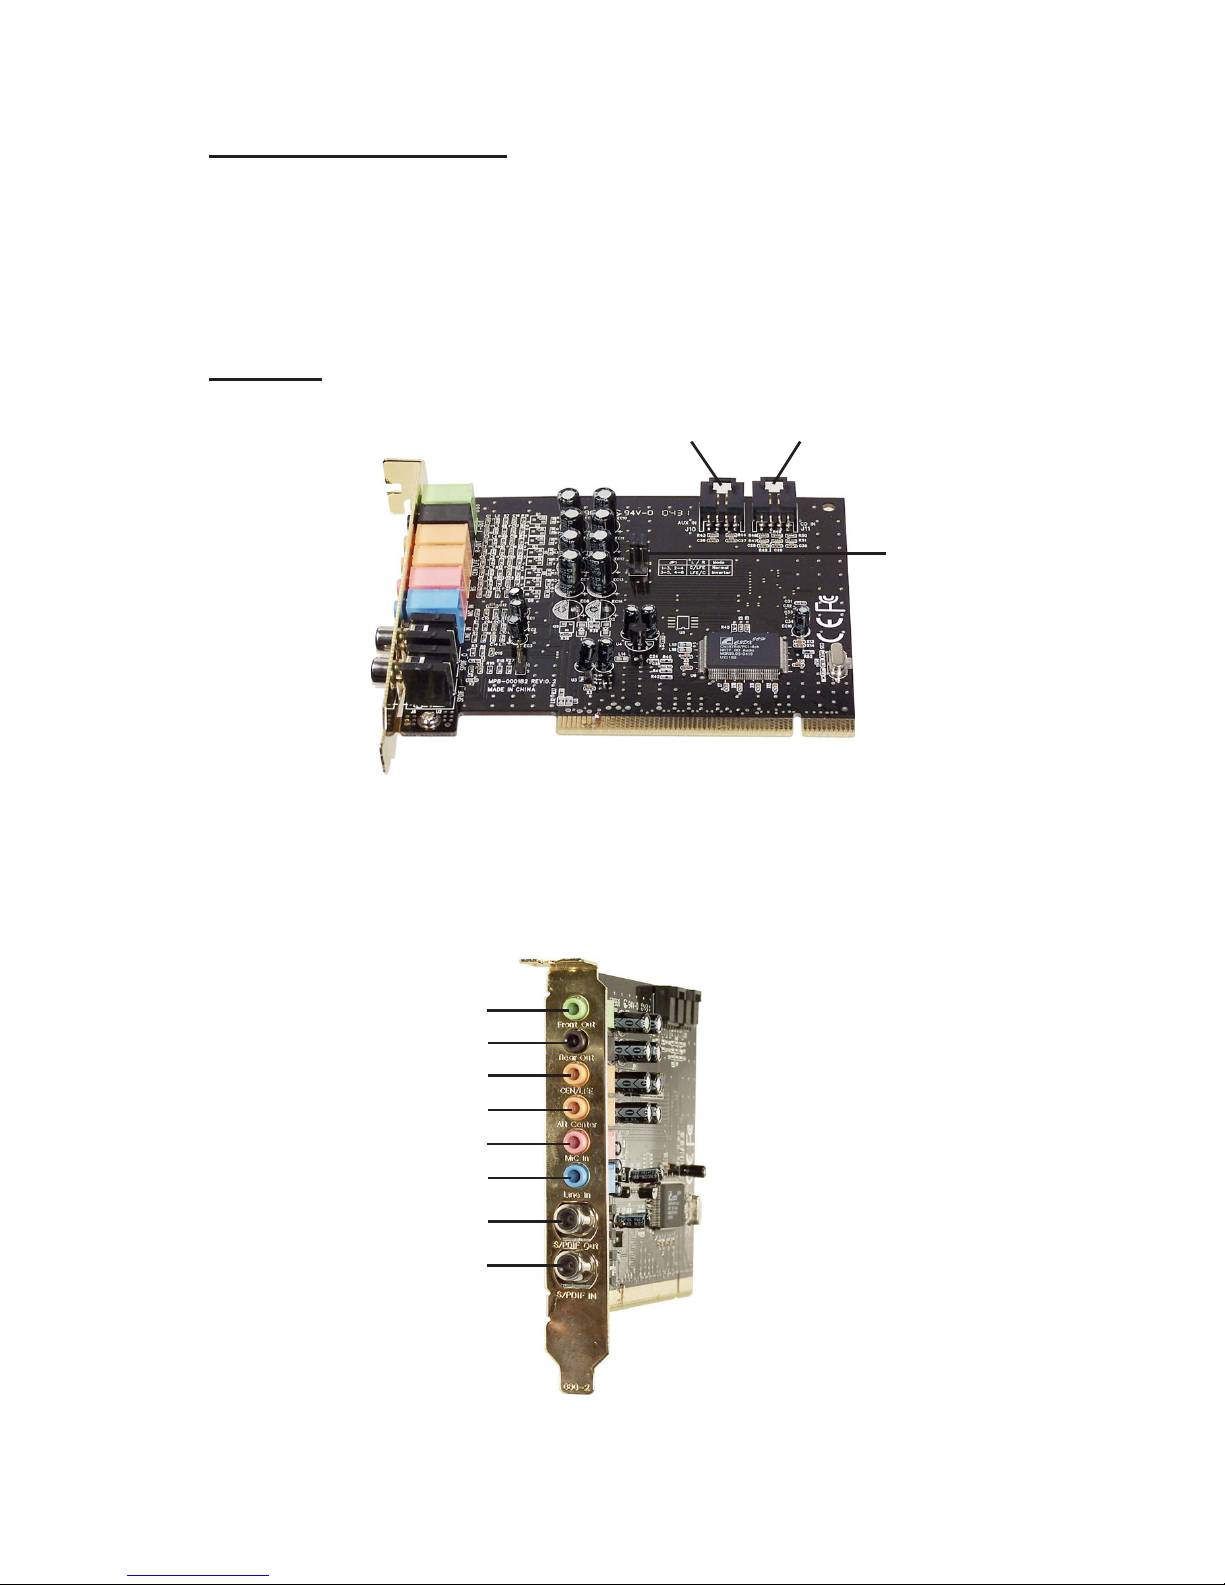
Layout
Figure 1: Layout
Note: Leave the jumpers in the default position. There
is no need to change this setting.
Figure 2: External Connectors
Aux In CD In
Jumpers
Front Out
Rear Out
C-LFE
Alt Cen
Mic
S/PDIF Out
S/PDIF In
Line In

3
Rear Connectors
Front Out:
This connector provides front source output, you can
connect one set of active speakers or headphone.
Rear Out:
This connector provides rear sound source output, you
can connect one set of active speakers or headphone.
C-LFE:
This connector provides center and subwoofer (LFE)
sound source output, you can connect one set of active
speakers.
ALT Cen:
This connector provides back-surround sound source
output.
MIC:
This connector provides microphone-in function.
LINE In:
This connector provides line-in function.
S/PDIF In:
This connector provides S/PDIF digital audio input
with a coaxial cable. Input from MD player, portable
CD player, or home audio system.
S/PDIF Out:
This connector provides S/PDIF digital audio output
with a coaxial cable. Output for MD Player, AC-3
decoder, or home audio system.
CD In/Aux In:
This connector provides input for CD-ROM, DVD-ROM
or other audio devices.

4
Hardware Installation
General instructions for installing the card are provided
below. Since the design of computer cases and
motherboards vary, refer to your computer’s reference
manual for further information, if needed.
Caution: Static Electricity Discharge may permanently
damage your system. To avoid possible static electricity
discharge during the installation, please follow the
guidelines below:
• Discharge any static electricity build up in your
body by touching a large grounded metal surface
or the computer’s case (if plugged in), for a few
seconds.
• During the installation, avoid contact with internal
parts. Handle cards only by their external edges.
1. Turn OFF the power to your computer.
2. Unplug the power cord and remove your
computer's cover.
3. Remove the slot bracket from an available PCI slot.
4. Carefully align the card to the selected PCI slot,
push the board down firmly, but gently, until it is
well seated.
5. Replace the slot bracket's holding screw to secure
the card.
6. Connect one end of the audio cable from your
CD-ROM or DVD-player to the CD In or Aux In on
the soundcard.
7. Replace the computer cover and reconnect the
power cord.
Hardware installation is complete. Continue to Driver
Installation on the next page.
 Loading...