

SIIG JU-SW2212-S1 Quick Installation Manual

1
04-0399C
USB 2.0 Switch
Quick Installation Guide
Introducing the USB 2.0 Switch
The USB 2.0 Switch is designed to share USB devices
between multiple systems.
Features and Benefits
• Compliant with USB Specifications, Revision 2.0.
Hot-swapping feature allows you to attach/detach
USB devices without powering down your
computer
• Use keyboard Hotkey control (PC only) or Power
LED/Manual Switching Button to switch between
computers
• Designed for USB devices including printers,
scanners, external hard drive enclosures, cameras,
CD-ROMS and more. Note: Not designed to work
with keyboard or mouse.
System Requirements
• PC or Mac® computer with an available USB port
(USB 2.0 recommended)
• Windows® 7 (32-/64-bit) / Vista (32-/64-bit) / XP
(32-/64-bit) / Server 2003 & 2008 (32-/64-bit) /
2000/ ME / 98SE
• Mac OS
®
X v10.0 or later
2
Package Contents
• USB 2.0 Switch
• 2 USB 2.0 cables (6 Ft, Type A to Type B)
• Driver CD and Quick Installation Guide
Layout
Do Not plug the USB 2.0 Switch into your system until
after the driver has been installed. Please refer to the
Installation section starting on page 4 to install its driver.
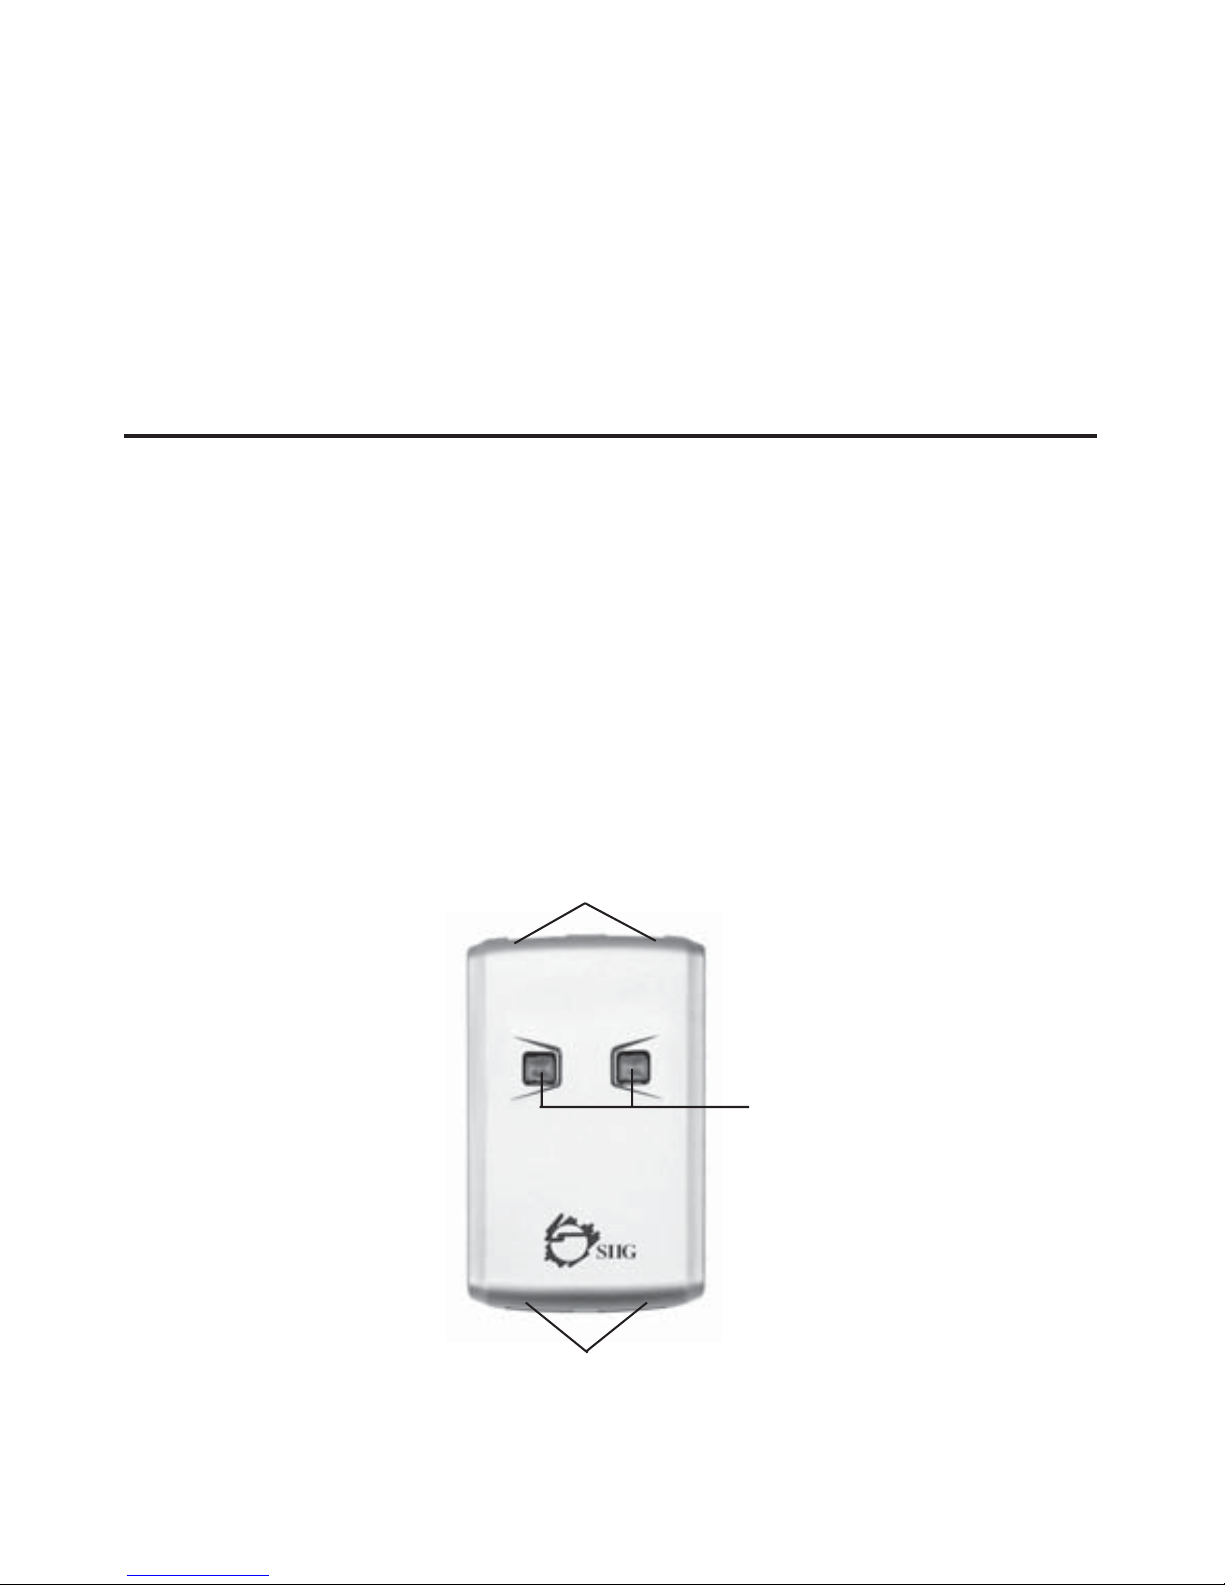
USB 2.0 Switch 2-to-2
• Two Type B connectors for system connection
• Two Type A connectors for USB device connection
• Convenient Manual Switching Buttons
Figure 1. USB 2.0 Switch 2-to-2 Layout
To System (Type B connector)
To USB device (Type A connector)
Power LED/Manual
Switching Button
3
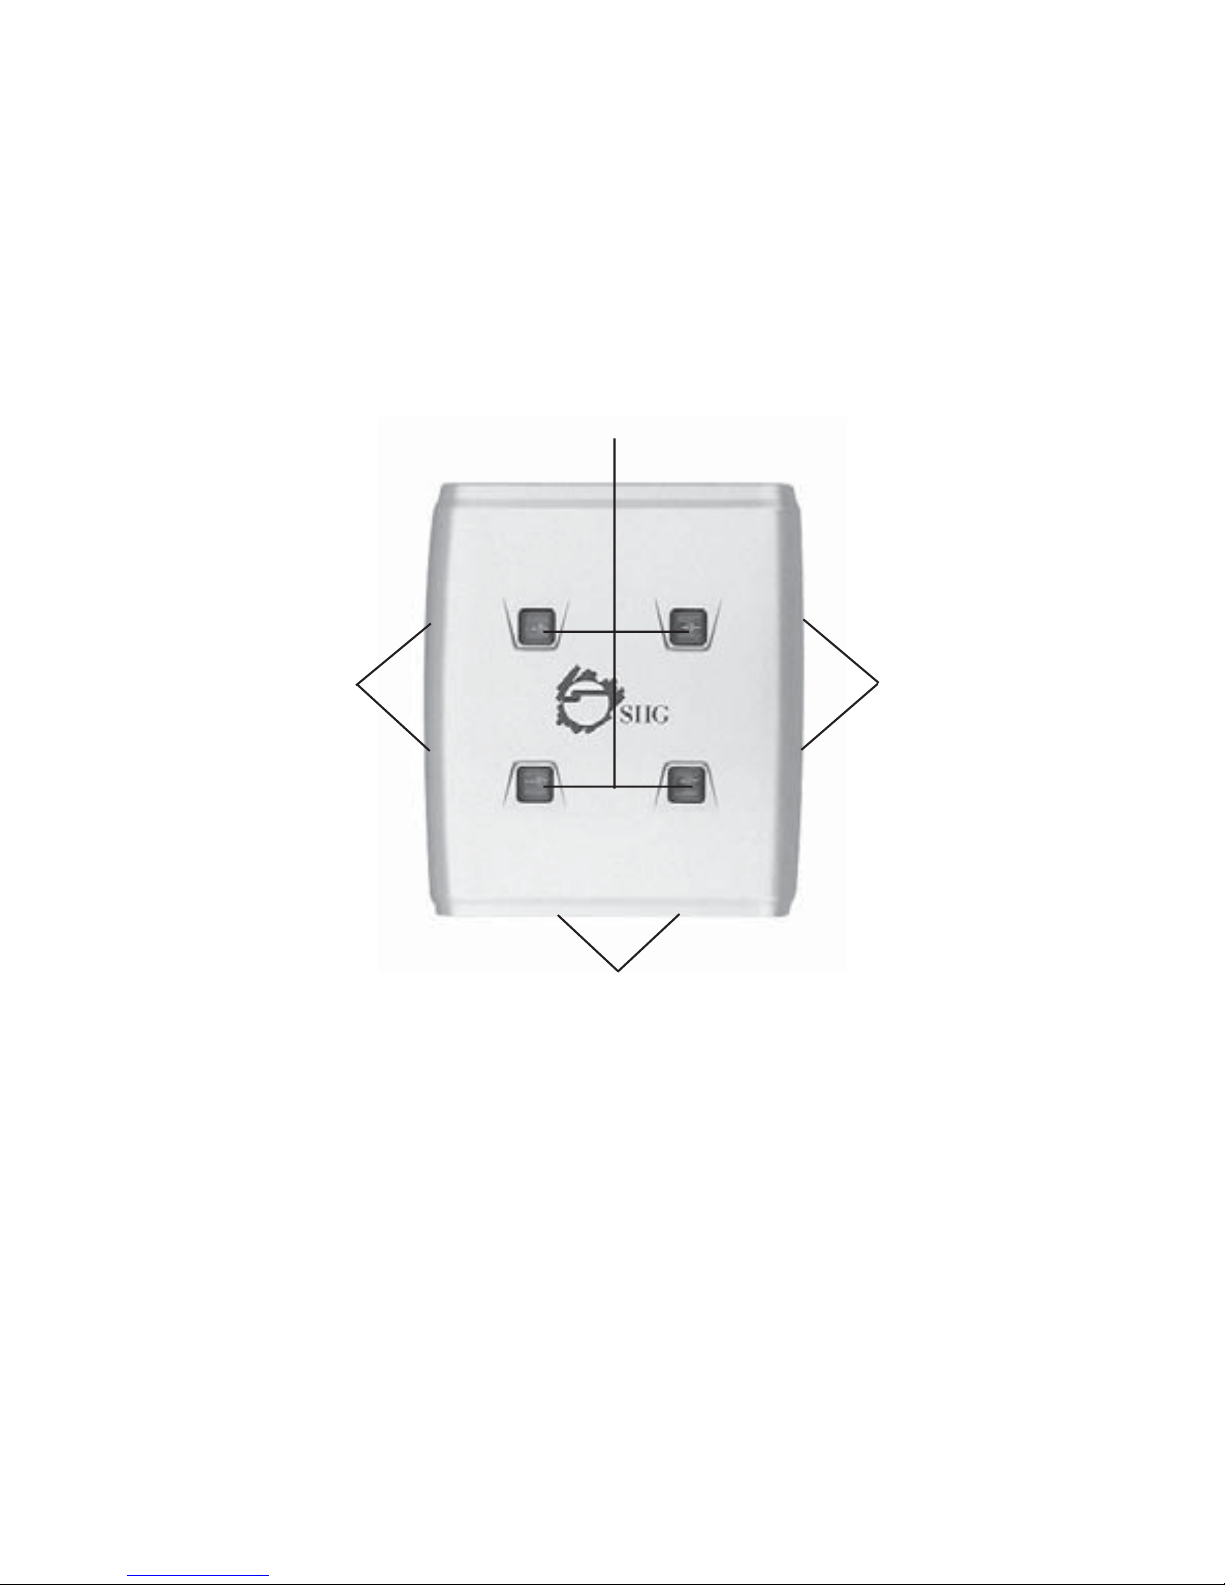
USB 2.0 Switch 4-to-2
• Four Type B connectors for system connection
• Two Type A connectors for device connection
• Convenient Manual Switching Buttons
Figure 2. USB 2.0 Switch 4-to-2 Layout
To USB device (Type A connector)
Power LED/Manual Switching Button
To System
(Type B connector)
To System
(Type B connector)

4
Windows Installation
Important: Do not connect the USB 2.0 Switch to your
system until after the driver has been installed.
Windows 7 (32-/64-bit) / Windows Vista
™
(32-/64-bit)
1. Insert the driver CD after Windows boots.
At the AutoPlay box: Click Run Setup.exe
If AutoPlay doesn't start: Click Start, in Start Search
type D:\Setup.exe, press Enter. (Change D: to
match your CD/DVD-ROM drive letter)
2. At User Account Control, click Allow.
3. Select your language, then click OK.
4. Click Next, Next, then Finish.
5. Plug the USB 2.0 Switch into an available USB port
(USB 2.0 recommended) with the supplied USB
cables and the driver will install automatically.
6. Press the Power LED/Manual Switching Button
that matches the system to complete the installation.
Windows XP (32-/64-bit) / Server 2003 (32-/64-bit)
1. Insert the driver CD after Windows boots.
2. AutoRun should start the installation. If AutoRun
doesn't start, click Start, Run, type D:\setup.exe,
then click OK. (Change D: to match your CD/DVDROM drive letter)
3. Select your language, then click OK.
4. Click Next, Next, then Finish.
 Loading...