

SIIG JU-IC5112-S2, USB SoundWave Optical 5.1 Quick Installation Manual

1
USB SoundWave
Optical 5.1
Quick Installation Guide
04-0355A
Introducing the USB SoundWave Optical
The USB SoundWave Optical 5.1 transforms your PC into
a home theatre system with multi-channel surround
sound.
Features and Benefits
• Compliant with USB 1.1 specification v1.1 and USB
Audio specification v1.0
• Compatible with Microsoft USB Multi-channel
driver and all standard Windows games
• True plug-n-play compatibility
• Delivers 5.1 surround sound to all Microsoft
DirectSound and DirectSound3D enabled games
• Supports DVD, MP3, Wave, Audio CD, MIDI audio
formats and many others
System Requirements
• Pentium III 450 MHz or equivalent PC with an
available USB port
• Windows 98SE/ME/2000/XP/Server 2003
• 128 MB RAM or above
• Powered-speakers (5.1-channel speaker system
required for 5.1-channel sound effects)
2
Package Contents
• USB SoundWave Optical 5.1
• USB cable
• Fiber optic cable
• WinDVD software CD
• This quick installation guide
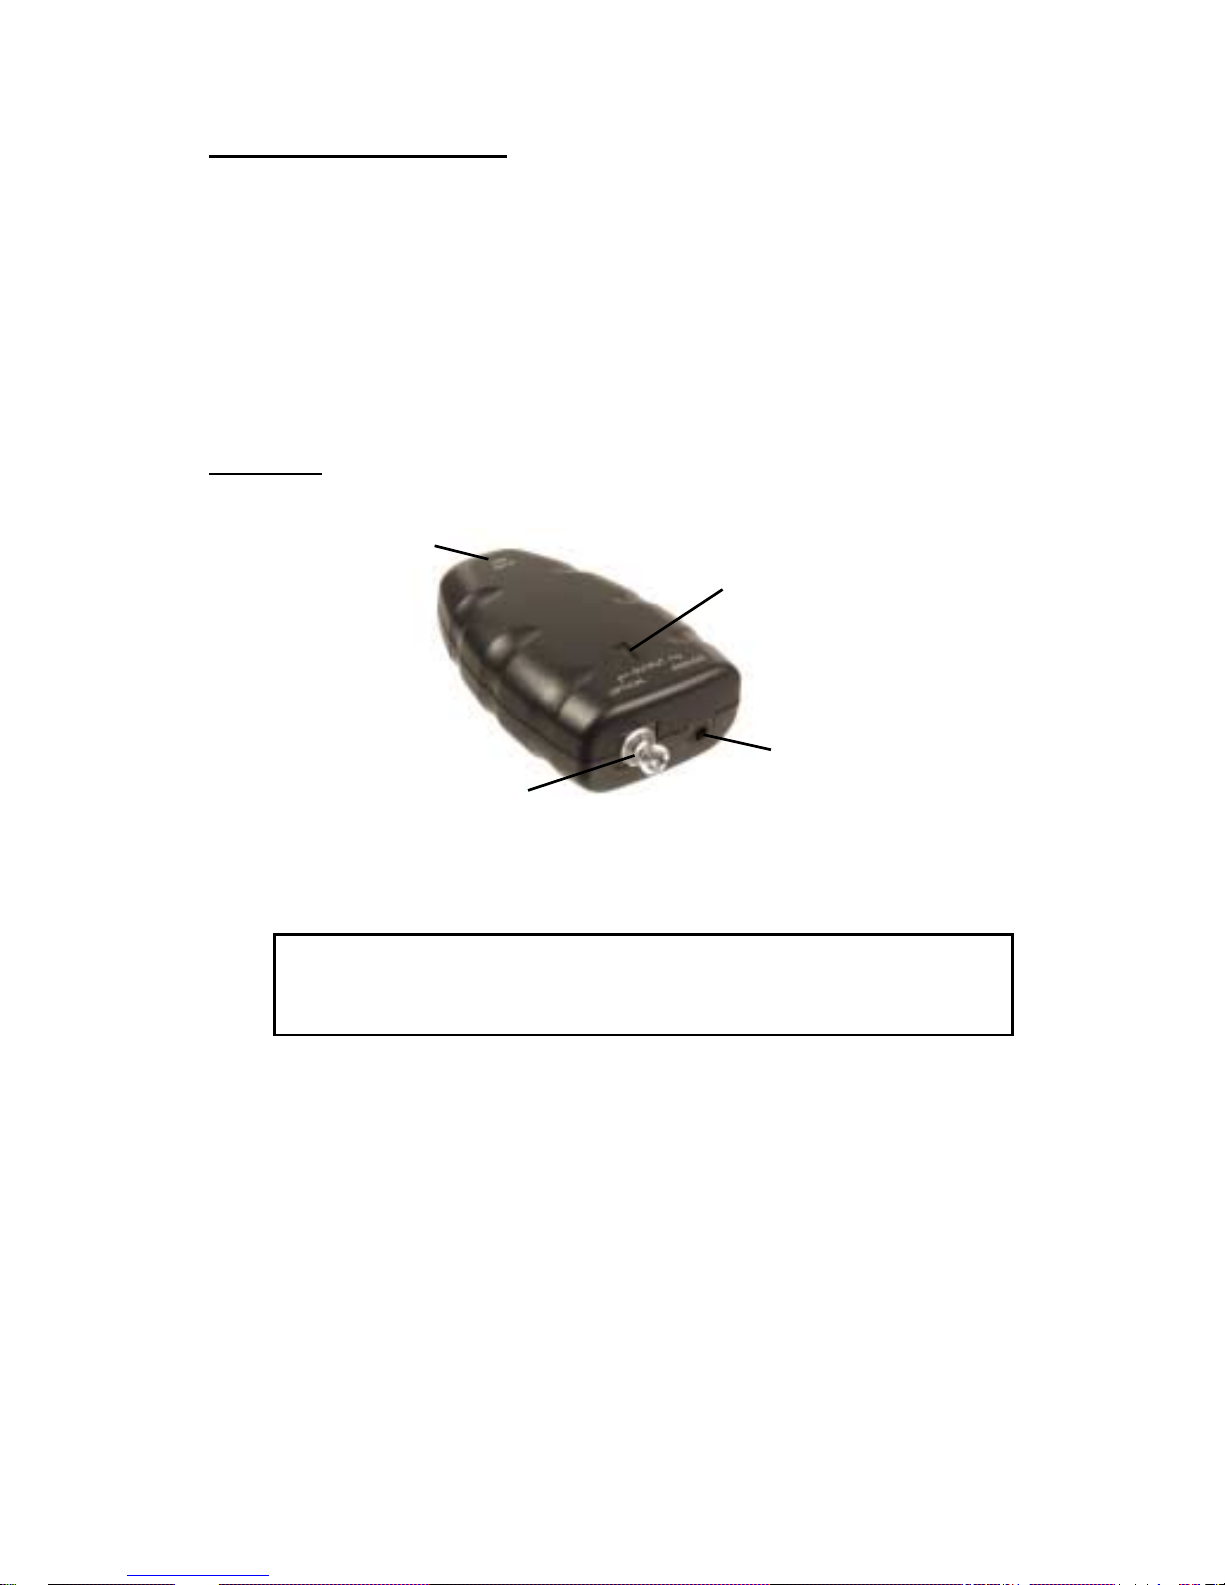
Layout
Figure 1: Layout
Note: The Analog output jack is available for
connecting stereo headphones or stereo speakers.
USB (input)
Analog
(output)
Toslink optical
(output)
Connection/Activity
LED

3
Hardware Installation
1. Plug the included USB cable into the USB input
port on the rear of the USB SoundWave Optical 5.1.
2. Plug the other end of the USB cable into an available
USB port.
3. Plug the included Fiber optic cable into the Toslink
optical output port of the USB SoundWave Optical
5.1.
4. Plug the other end of the Fiber optic cable into an
Optical input port of a digital receiver/decoder.
Hardware installation is complete, now go to Driver
Installation to complete the installation.
Driver Installation
Windows 98SE
1. At the Add New Hardware Wizard, click Next.
2. Click Search for the best driver for your device.
(Recommended), then click Next.
3. Click Next, Next, then Finish.
4. Repeat steps 1-2.
5. Click Next, then Next.
6. At the Insert Disk box, insert your Windows 98SE
Installation CD-ROM, then click OK.
7. At the Copying Files window, type in D:\Win98,
then click OK. (Change D: to match your CD-ROM
drive letter)
8. Click Finish.
9. Repeat steps 1-3 to complete the installation.
 Loading...