

SIIG JU-HM0112-S1 Quick Installation Manual

1
USB 2.0 to HDMI with
Audio
Quick Installation Guide
04-0664B
Introduction
The USB 2.0 to HDMI with Audio adds HDMI
port to your USB enabled system.
Key Features and Benefits
• Quickly adds a monitor, LCD or projector
to your USB enabled (USB 2.0 or later)
system
• Built with a DisplayLink chipset DL-165
System Requirements
• Desktop or notebook PC with a Single Core
CPU at 1.2 GHz or later and an available
USB 2.0/3.0 port
• Windows
®
7 (32-/64-bit) / Vista (32-/64-
bit) / XP (32-bit, SP2)
• MAC OS
®
10.4 or later (Intel-based Apple
computers only)
2
Package Contents
• USB 2.0 to HDMI with Audio
• USB Cable
• Driver CD
• Quick installation guide
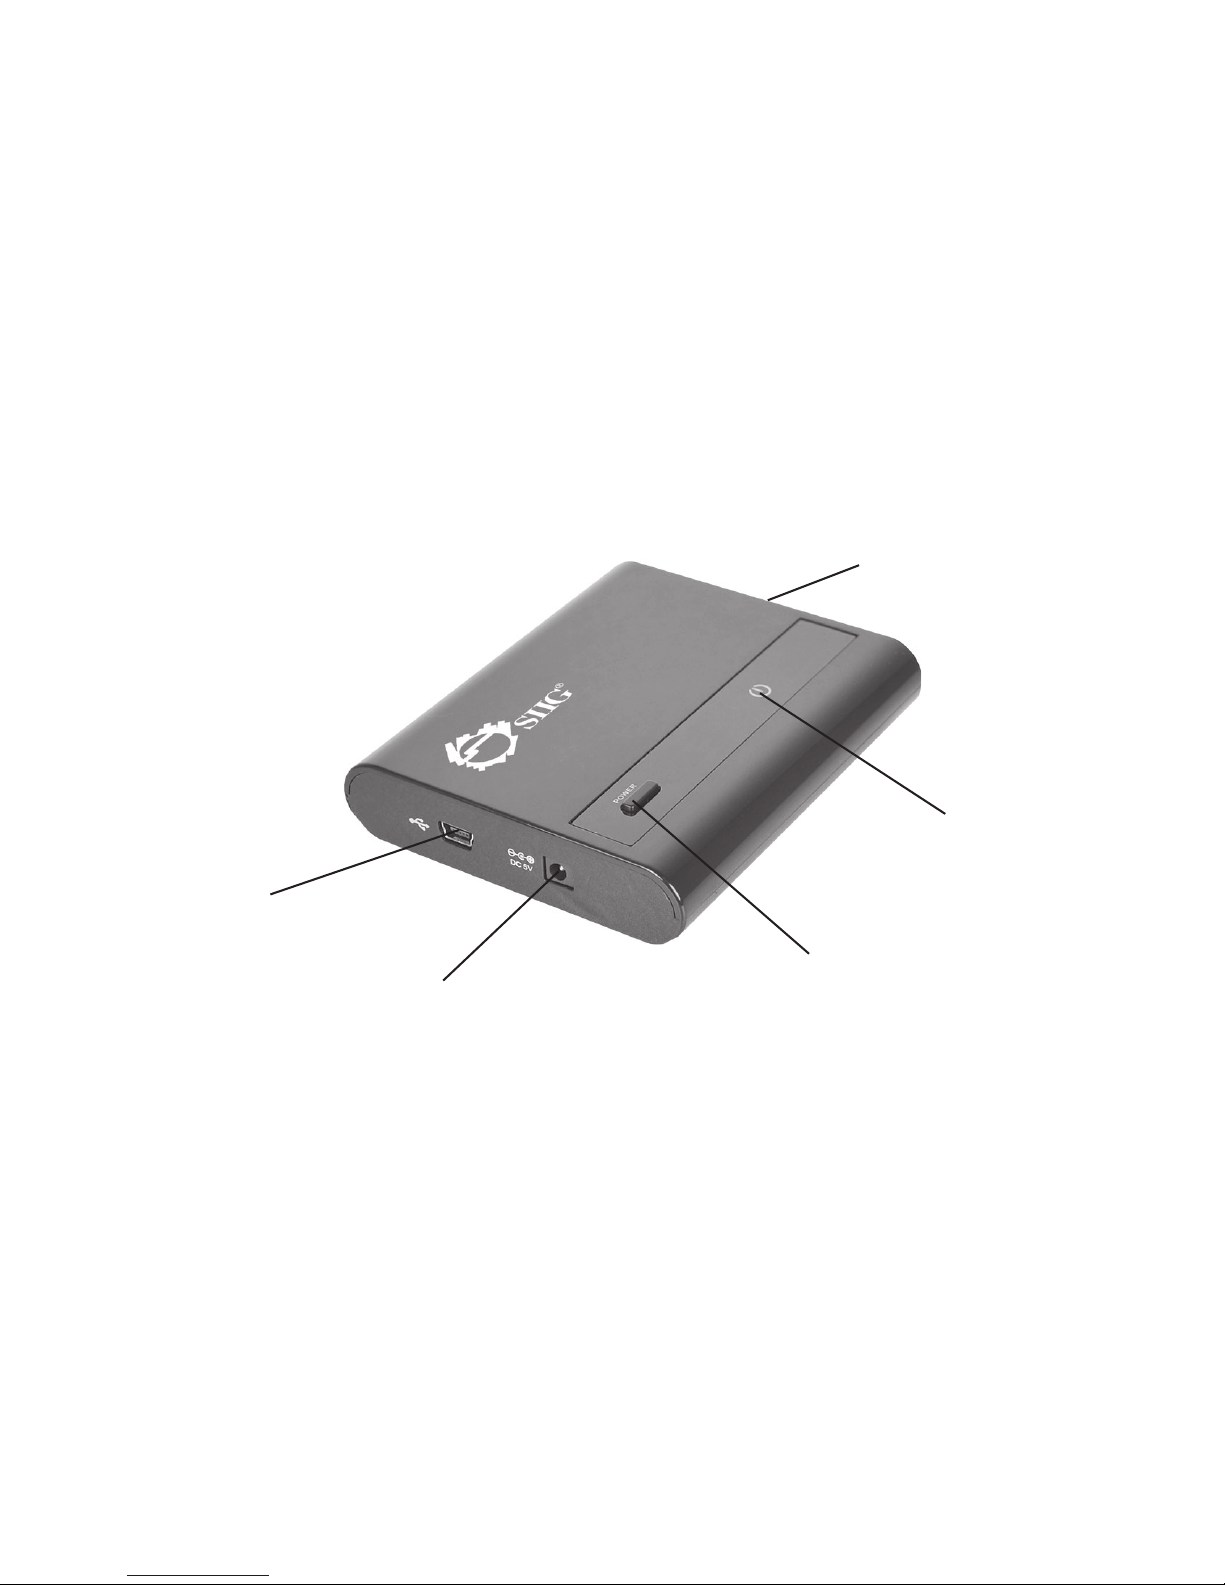
Layout
Figure 1: Layout
USB cable
connector
On/Off switch
Power LED (green)
Not used. Reserved for power adapter
HDMI Output

3
Windows Software Installation
Make sure the proper driver for your graphics
card is installed, the USB 2.0 to HDMI with Audio
is not designed to work with Windows' Standard
VGA Graphics Adapter driver. Important: Do
not plug the USB 2.0 to HDMI with Audio into the
computer until instructed to do so.
Windows 7 (32-/64-bit)
1. Insert the driver CD. Close AutoPlay box.
Click Start, in the Search programs and
files box, type D:\setup.exe, press Enter.
(Change D: to match your CD/DVD-ROM
drive letter).
2. At User Account Controls, click Yes.
3. Select I accept.
4. Connect your second monitor to the USB
2.0 to HDMI with Audio and turn it on.
5. Plug the USB 2.0 to HDMI with Audio into
the computer, the driver will be installed
automatically.

4
Windows Vista (32-/64-bit)
1. Insert the driver CD. Close AutoPlay box.
Click Start, in the Start Search box, type
D:\setup.exe, press Enter. (Change D: to
match your CD/DVD-ROM drive letter).
2. At User Account Controls, click Yes or
Continue.
3. Select I accept.
4 Connect your second monitor to the USB
2.0 to HDMI with Audio and turn it on.
5. Plug the USB 2.0 to HDMI with Audio into
the computer, the driver will be installed
automatically.
6. Restart your system to complete the
installation.
Windows XP (32-bit)
1. Insert the driver CD. Click Start, then Run.
Type D:\setup.exe, click OK. (Change D:
to match your CD/DVD-ROM drive letter).
2. Select I accept.
3. Connect your second monitor to the USB
2.0 to HDMI with Audio and turn it on.

5
4. Connect the USB 2.0 to HDMI with Audio to
the computer and the driver will be installed
automatically.
5. Restart your system to complete the
installation.
To Verify Windows Installation
1. From the desktop, right click Computer or
My Computer, then click Manage.
For Windows 7: Click Device Manager.
For Windows Vista: Click Continue, then
Device Manager.
For Windows XP: Click Device Manager.
2. Double click USB Display Adapters, USB
HDMI adapter should be displayed.
Uninstalling the Adapter Driver
Windows 7
1. Click Start, Control Panel.
2. Click Programs.
3. Click Programs and Features.
4. Select DisplayLink Graphics, then click
Uninstall. Click Yes, Yes.

6
5. Click Yes to complete uninstalling the driver
Windows Vista
1. Click Start, Control Panel.
2. Click Classic View, double click Programs
and Features.
3. Select DisplayLink Graphics, then click
Uninstall, then click Yes.
4. Click Allow.
5. Click Yes to complete uninstalling the driver.
Windows XP
1. Click Start.
2. Click Control Panel, double click Add/
Remove Programs.
3. Select DisplayLink Graphics, click either
Remove, then click Yes.
4. Click Yes to complete uninstalling the driver.

7
Windows Display Utility
After successful driver installation a USB HDMI
Adapter display utility icon will appear in the
taskbar by the system clock. This display utility
allows you to quickly change the viewing modes
and resolutions for the USB 2.0 to HDMI with
Audio. Access the utility by clicking the icon.
Viewing Modes
Windows Vista (32-bit) / XP (32-bit)
• Updates:
Check Now - Connects to the update server
to check for newer driver versions and
download them if available.
Configure - Opens the update Windows
where you can configure automatic updates.
• Screen Resolution: Displays a list of
available resolutions.
• Screen Rotation:
Normal - No rotation is applied to the USB
2.0 to HDMI with Audio display.
Rotated Left - Rotates the extended or
mirrored display by 270 degrees.

8
Rotated Right - Rotates the extended or
mirrored display by 90 degrees.
Upside-Down - Rotates the extended or
mirrored display by 180 degrees.
• Extend to:
Right - Extends the display to the right of
the main display.
Left - Extends the display to the left of the
main display.
Above - Extends the display above of the
main display.
Below - Extends the display below the main
display.
• Extend: This is the default setting of the
USB 2.0 to HDMI with Audio. This mode
extends your desktop for easy viewing of
multiple windows. Windows will move off
the primary display from the right side and
enter the extended display from the left
side.
• Set as Main Monitor: This mode, makes
the USB 2.0 to HDMI with Audio the main
display adapter in the system.
 Loading...