

Page 1

Full-HD Digital Signage
Player
Quick Installation Guide
Introduction
The CE-DS0011-S1/CE-DS0111-S1 is a Full-HD Digital Signage Player
featuring industrial grade mechanical design and versatile open-standard
SMIL programmability
Features and Benefits
Full-HD 1080p video decoding of MPEG, H.264, and VC-1 media
formats
4GB on-board flash local storage with CF card slot
Integrated audio and video output via HDMI
IEEE 802.3 Ethernet 10/100 Base-T with auto-MDIX
Supports full POPAI Screen Media Formats Standards Profiles S1 to S12,
and E1 to E9
Supports HTML5 technologies including CSS and JavaScript
SmartWidgets: clock, calendar, news, weather, RSS, Twitter, web content
Compliant with Wireless 802.11 b/g/n standards (
CE-DS0111-S1 Only)
Package Contents
Full-HD Digital Signage Player
Power Adapter
Ethernet Cable
Standard 3.5mm to RCA AV cable
Quick installation guide
Software CD
W i-Fi Antenna (
CE-DS0111-S1 Only)
04-0762B
1
Page 2
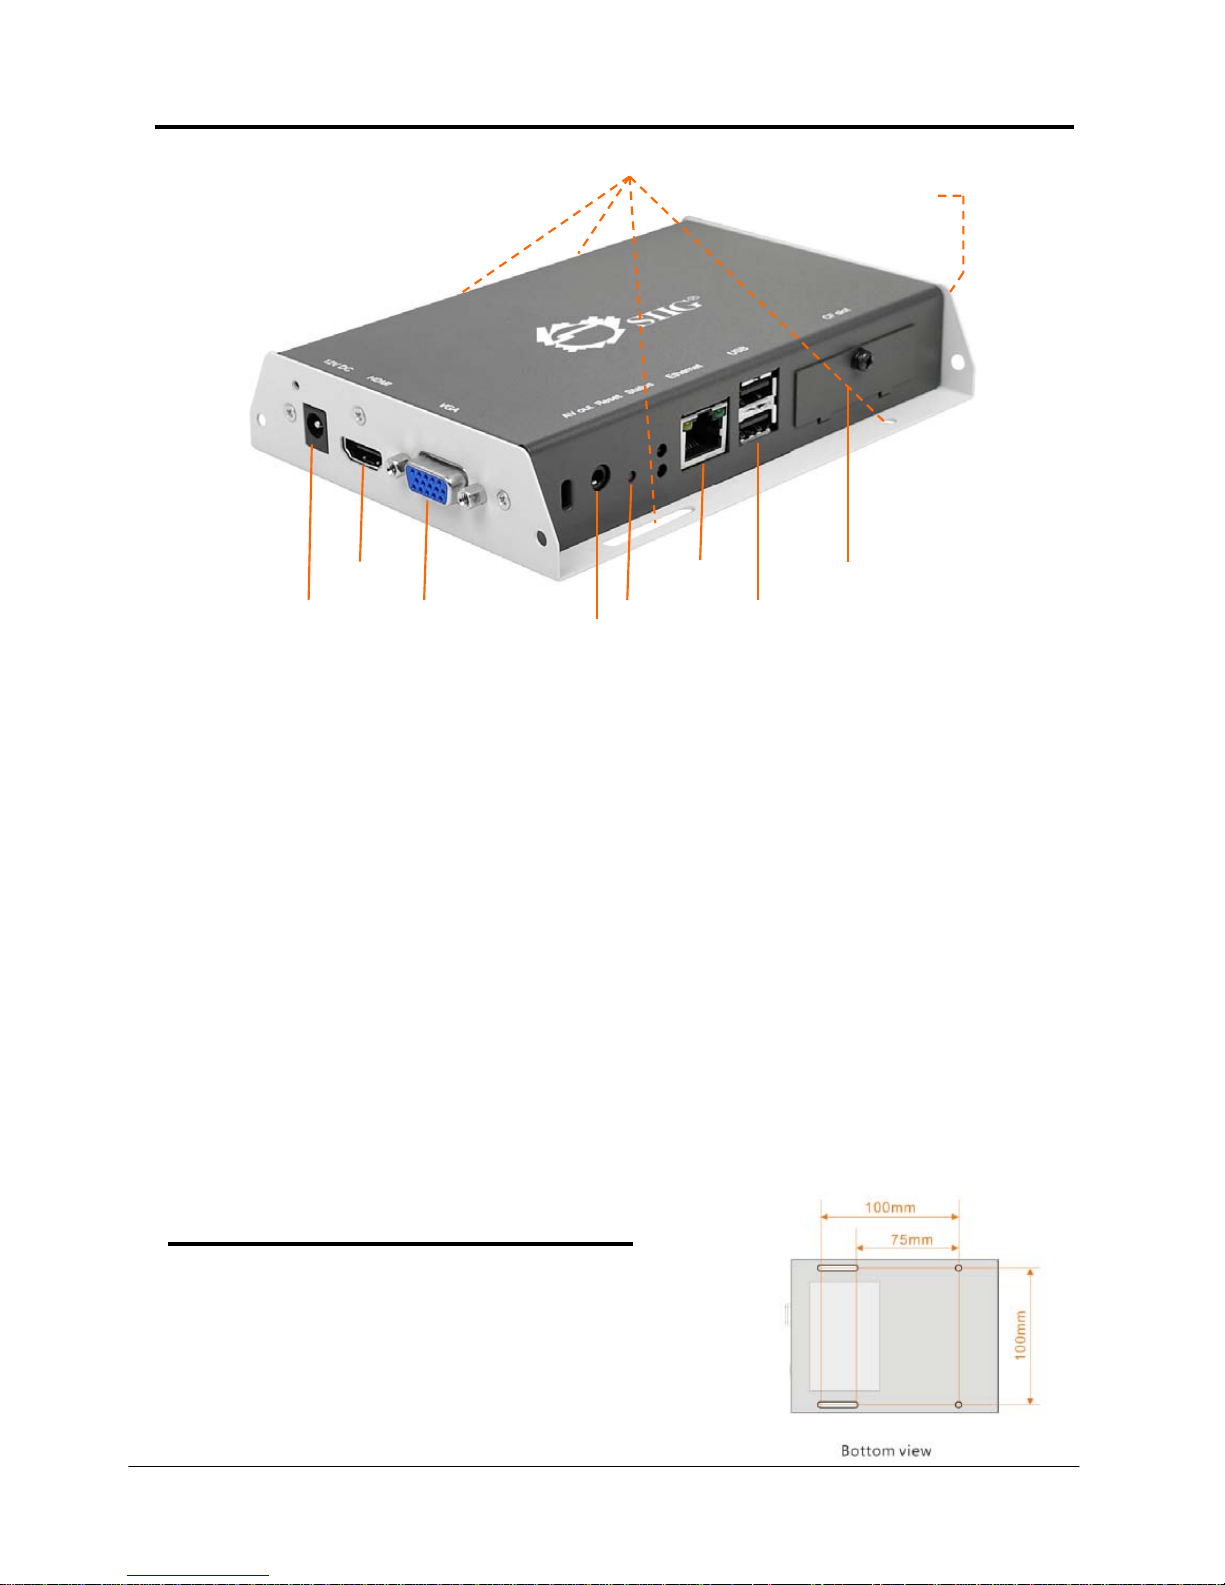
Layout
A
V
V
(
)
HDMI
12V DC In
GA
Figure1:Full‐HDDigitalSignagePlayerlayout
ESA mount
Reset
V out
MIS-D-100
Ethernet
USB x 2
Wi-Fi antenna
CF card slot (covered)
Physical features (left to right in above illustration)
12V DC in: For power adapter
HDMI: Connector for digital video and audio combined outputs, or
digital video via option DVI adapter
VGA: For analog video output
AV out: 3.5mm composite AV output
Reset: S/W button to perform factory reset
Ethernet: For network content update
USB: USB content update and configuration
CF card slot cover: Integrated CF card removing tool
Mounting and Installation
The player can be attached to mounting posts
on the back of screens or inside cabinetry
with the built in VESA MIS-D100
(100mmx100mm) compatible mounting
flange
2
Page 3

For CE-DS0111-S1 only
Connect the Wireless antenna as shown.
Screw antenna clockwise onto the post.
Configuring
1. Connect a video cable (either VGA or HDMI) to your monitor.
- When using the VGA connection, your monitor should support
XGA (1024x768) resolution or greater. For audio output, you will
also need to connect a stereo RCA cable from the Full-HD Digital
Signage player to your monitor.
- When using HDMI connection, audio and video are sent over a
single HDMI cable.
2. Plug the power adapter into the Full-HD Digital Sign age Player then
plug the power adapter into a reliable power source. Shortly afterwards,
the following progress bar will be displayed on your monitor:
~90 seconds
3. Player boot process takes approximately 90 seconds to complete. The
player will indicate that it is ready for content sync via the USB port or,
if content has been loaded, begin playback immediately.
4. Plug in a USB keyboard to the unit’s USB port the player will enter the
graphical menu system in approximate 30 sec.
5. Navigate the menus using your keyboard arrows keys, space bar, enter
key, and numeral keys on your USB keyboard. Use the keyboard
arrow keys to highlight menu items, press the space bar to move the
star (cursor), and then press enter to confirm(<OK>) or reject(<Cancel>)
any changes.
3
Page 4
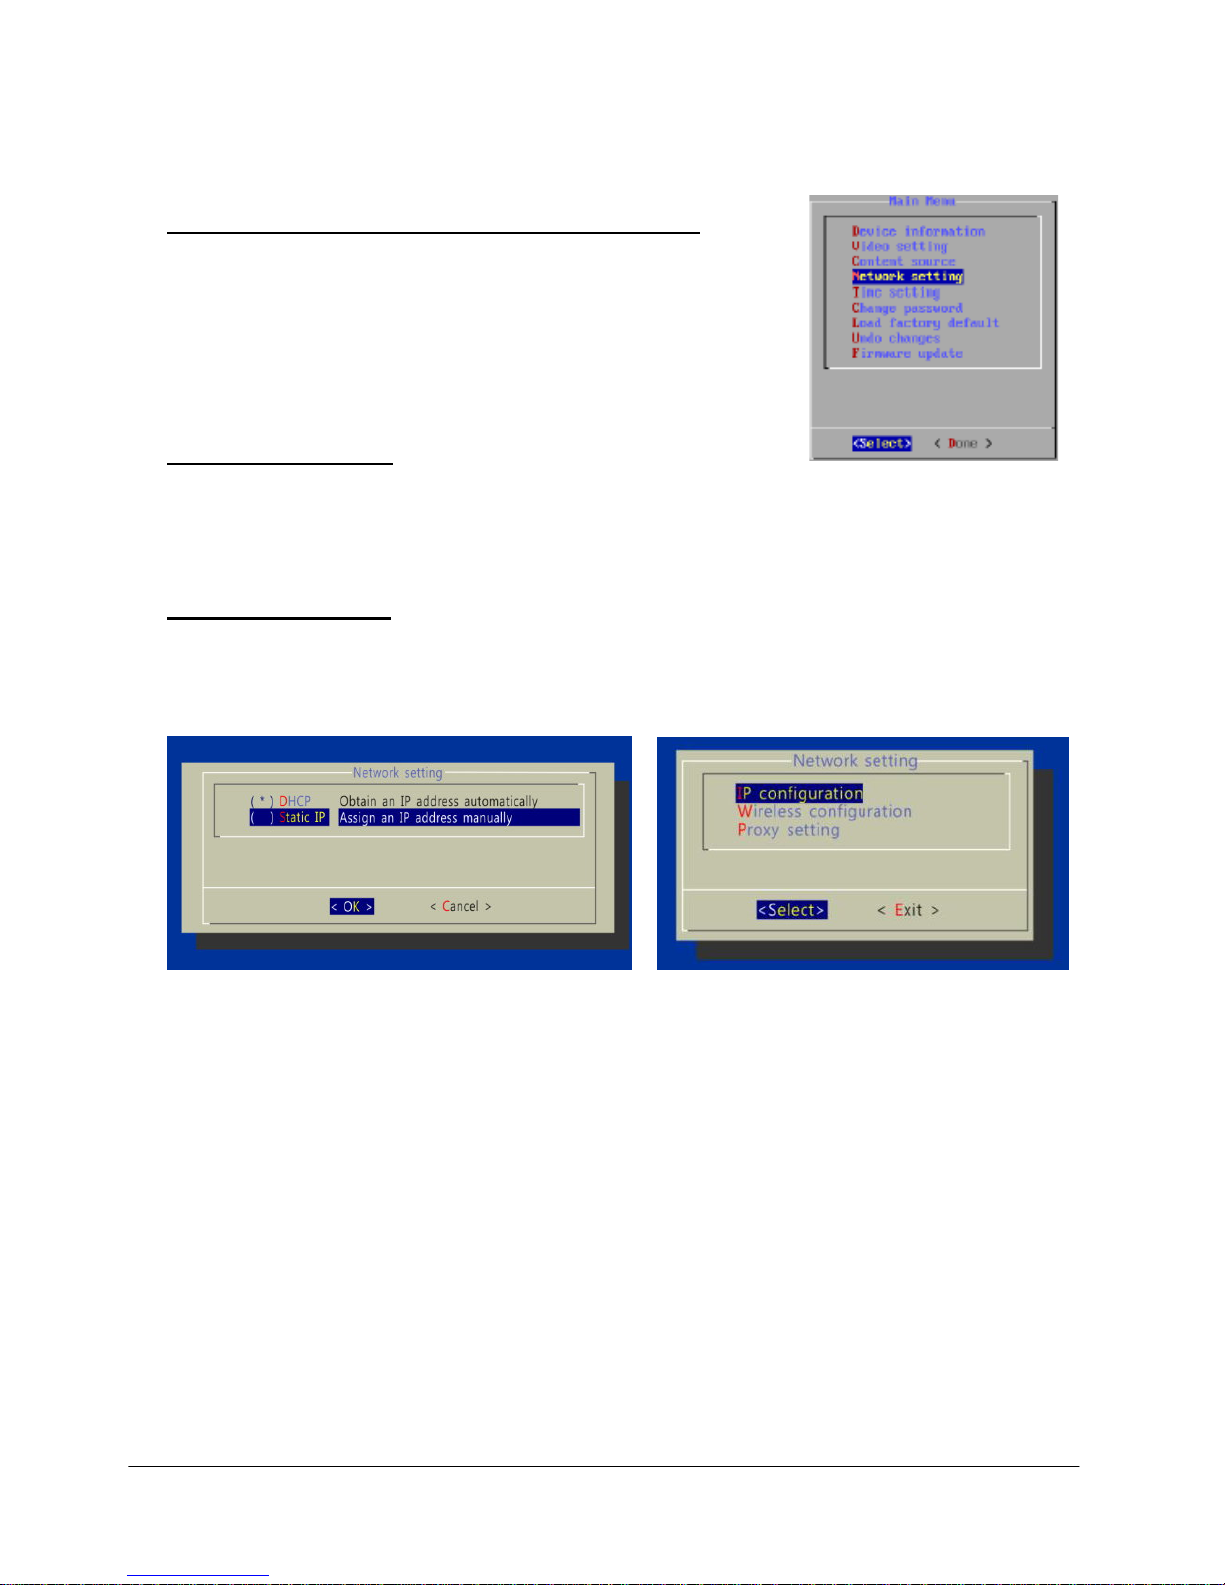
Connect the Full-HD Digital Signage Player to your network
Enter Network setting in the menu to set up a network connection method.
Wireless connection (CE-DS0111-S1 only)
The player will scan for wireless sign als nearby
during boot up. If the network requires
authentication, you will be asked to provide the
password for access.
Wired con nection
To use the wired Ethernet connection, connect an Ethernet cable and the
Wi-Fi (CE-DS0111-S1) will be disabled.
Player IP address
You will also need an IP address for the player on your network. This could
be set automatically (DHCP) or manually (static IP):
DHCP – automatically assign network IP address
DHCP is enabled by default. You do not need to change the settings unless
setting a static IP.
Static IP – manually assign network IP address
Highlight IP configuration and press Enter on keyboard to <Select>
Move the highlight to Static IP below, press Space bar on the keyboard to
fill in the star (*) at the Static IP brackets, and press Enter on the keyboard
to select <OK>.
Proceed to configure an available static IP address. Select Wireless
configuration or IP configuration as determined by your connection. Please
consult your network administrator for assistance if necessary.
4
Page 5
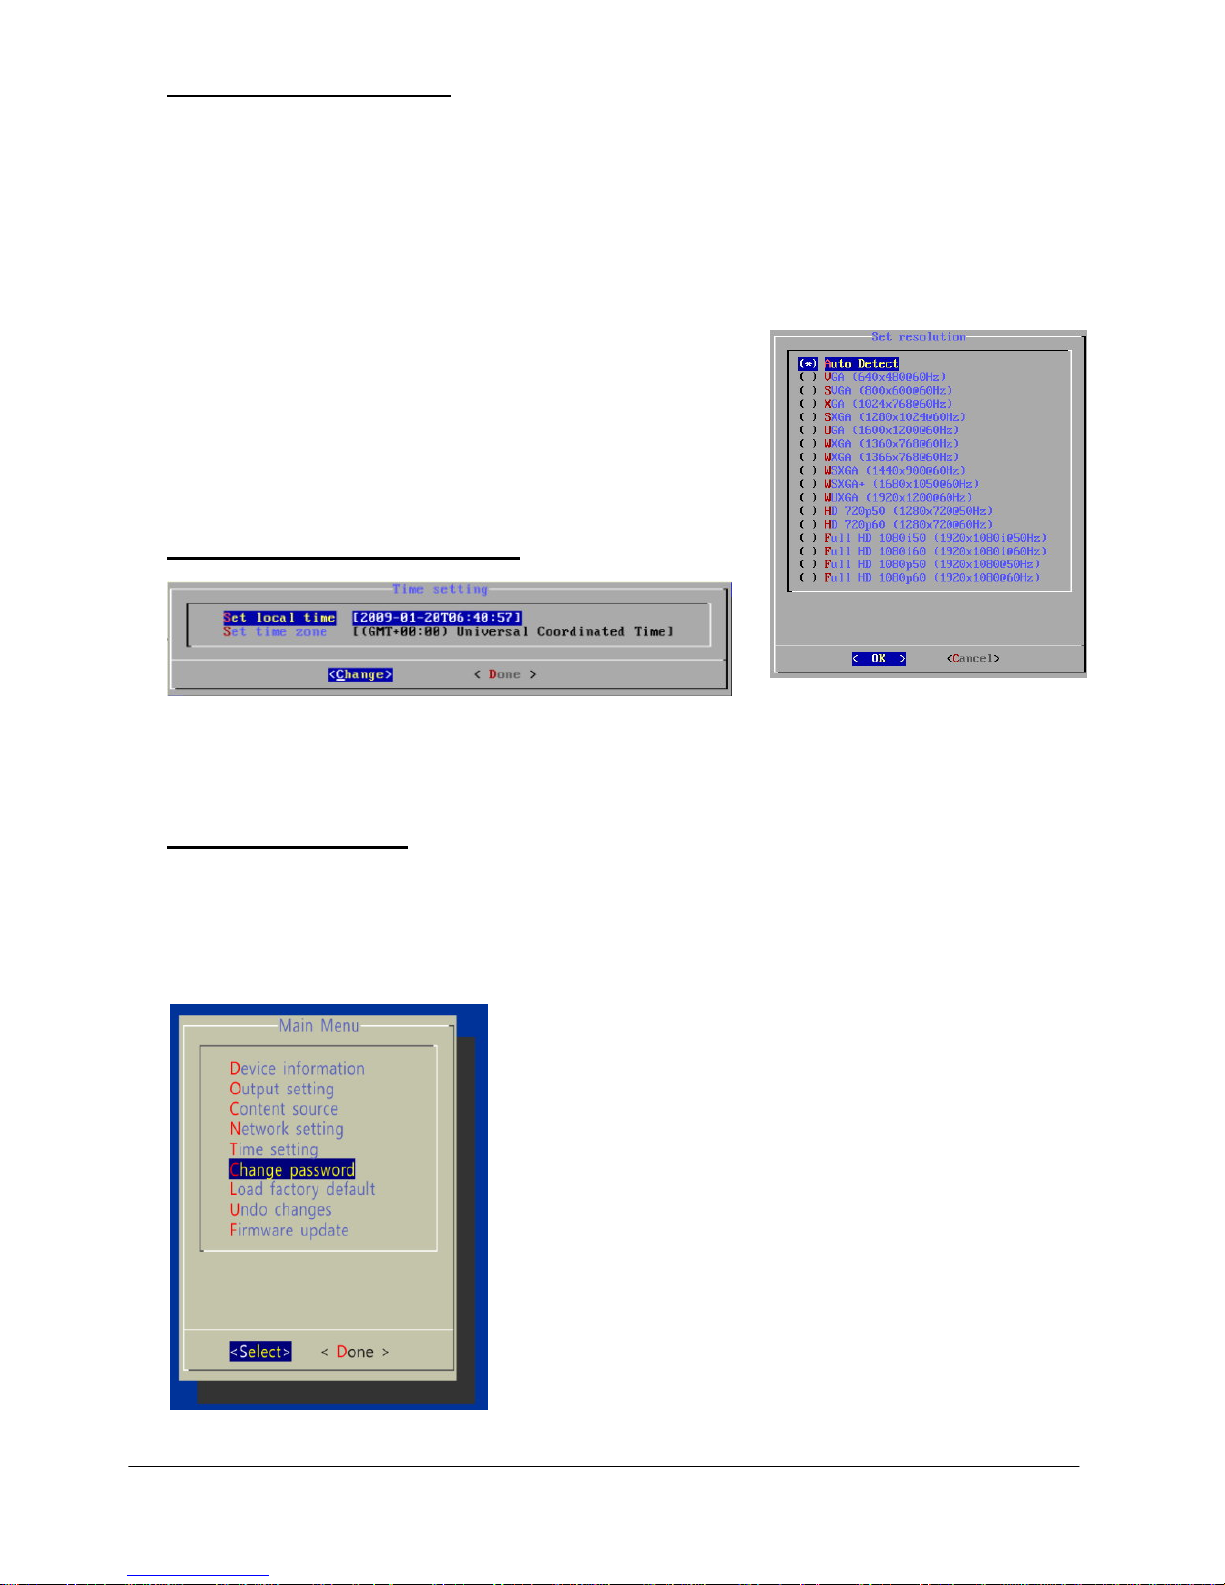
Video Output Settings
For best quality, set the output resolution to match your display’s native
resolution to avoid image scaling and blur.
If you are connecting to an LCD TV, the resolution setting is most likely
1366x768, 1280x720, or 1920x1080. If you are connecting a LCD
computer monitor, projector, or plasma display, refer to the device
specifications for the best matching setting.
Press the space bar to fill in the star (*) before
pressing the enter key for <OK>.
Clock and calendar settings
Set the correct time zone, time, and date. Daylight Saving (DST) rules can
be configured in Set time zone.
Setting a password
To prevent unauthorized modification of player settings, set a player
password to hide the menu.
From the top level menu, select Change password to set a password.
IMPORTANT: Once a password is set, you
can only access the menus by connecting a USB
keyboard and pressing CTRL + ALT +
DELETE (3-key combination) simultaneously.
You may connect the keyboard at any stage of
player operation or before/ during boot-up.
If you forget the password, you will need to
reset the device. See Reset Player to Factory
Default.
5
Page 6
Software Installation
1. Before the installation
Mini mu m S y st em Requ i rements :
• 1 GHz AMD or Intel CPU
• 512 MB RAM
• Windows XP, Windows Vista, or Windows 7
• DirectX 9
• Microsoft .NET framework 4.0
If your computer wasn’t equipped with .Net Framework 4.0, please
find .Net Framework 4.0 in the attached CD and install it.
Or you can download the latest version from the internet directly.
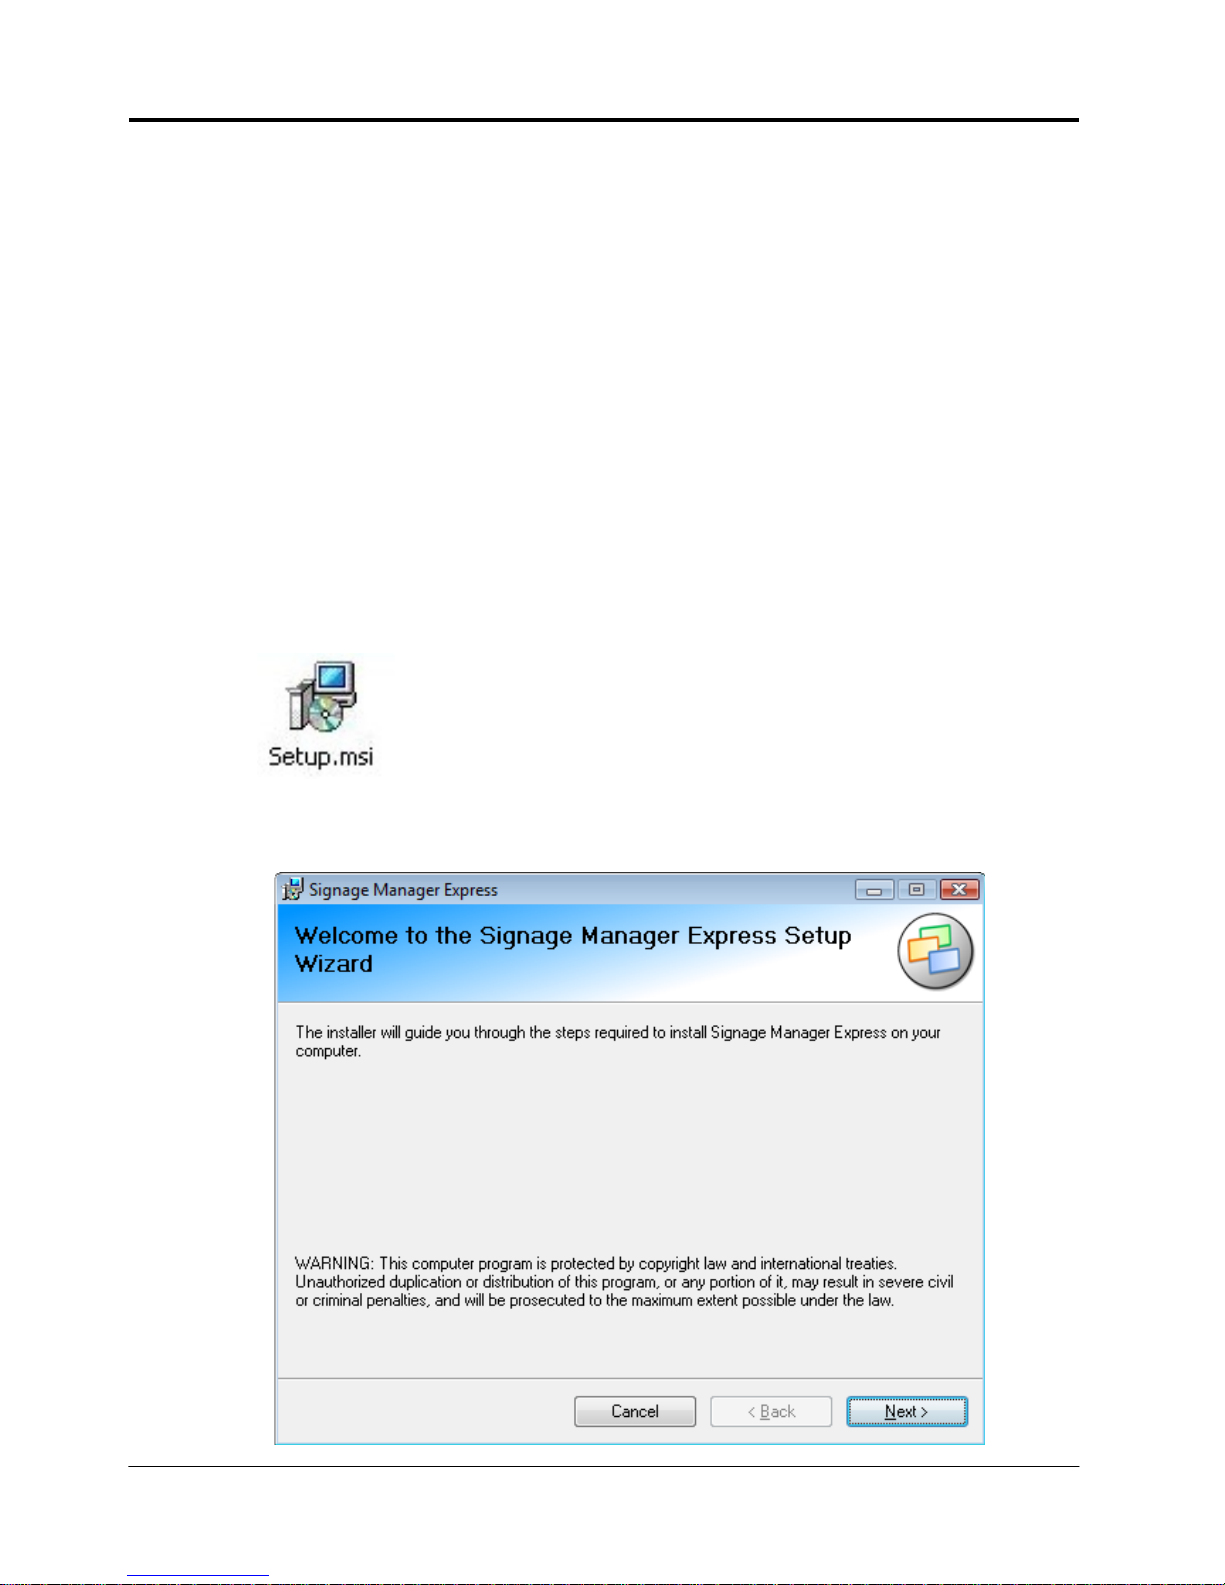
2. Start to run Signage Manager Express installer
(1) Find the Signage Manager Express installer icon in your software
CD and double click on it.
(2) Follow the pop out screen instructions to install Signage Manager
Express.
6
Page 7
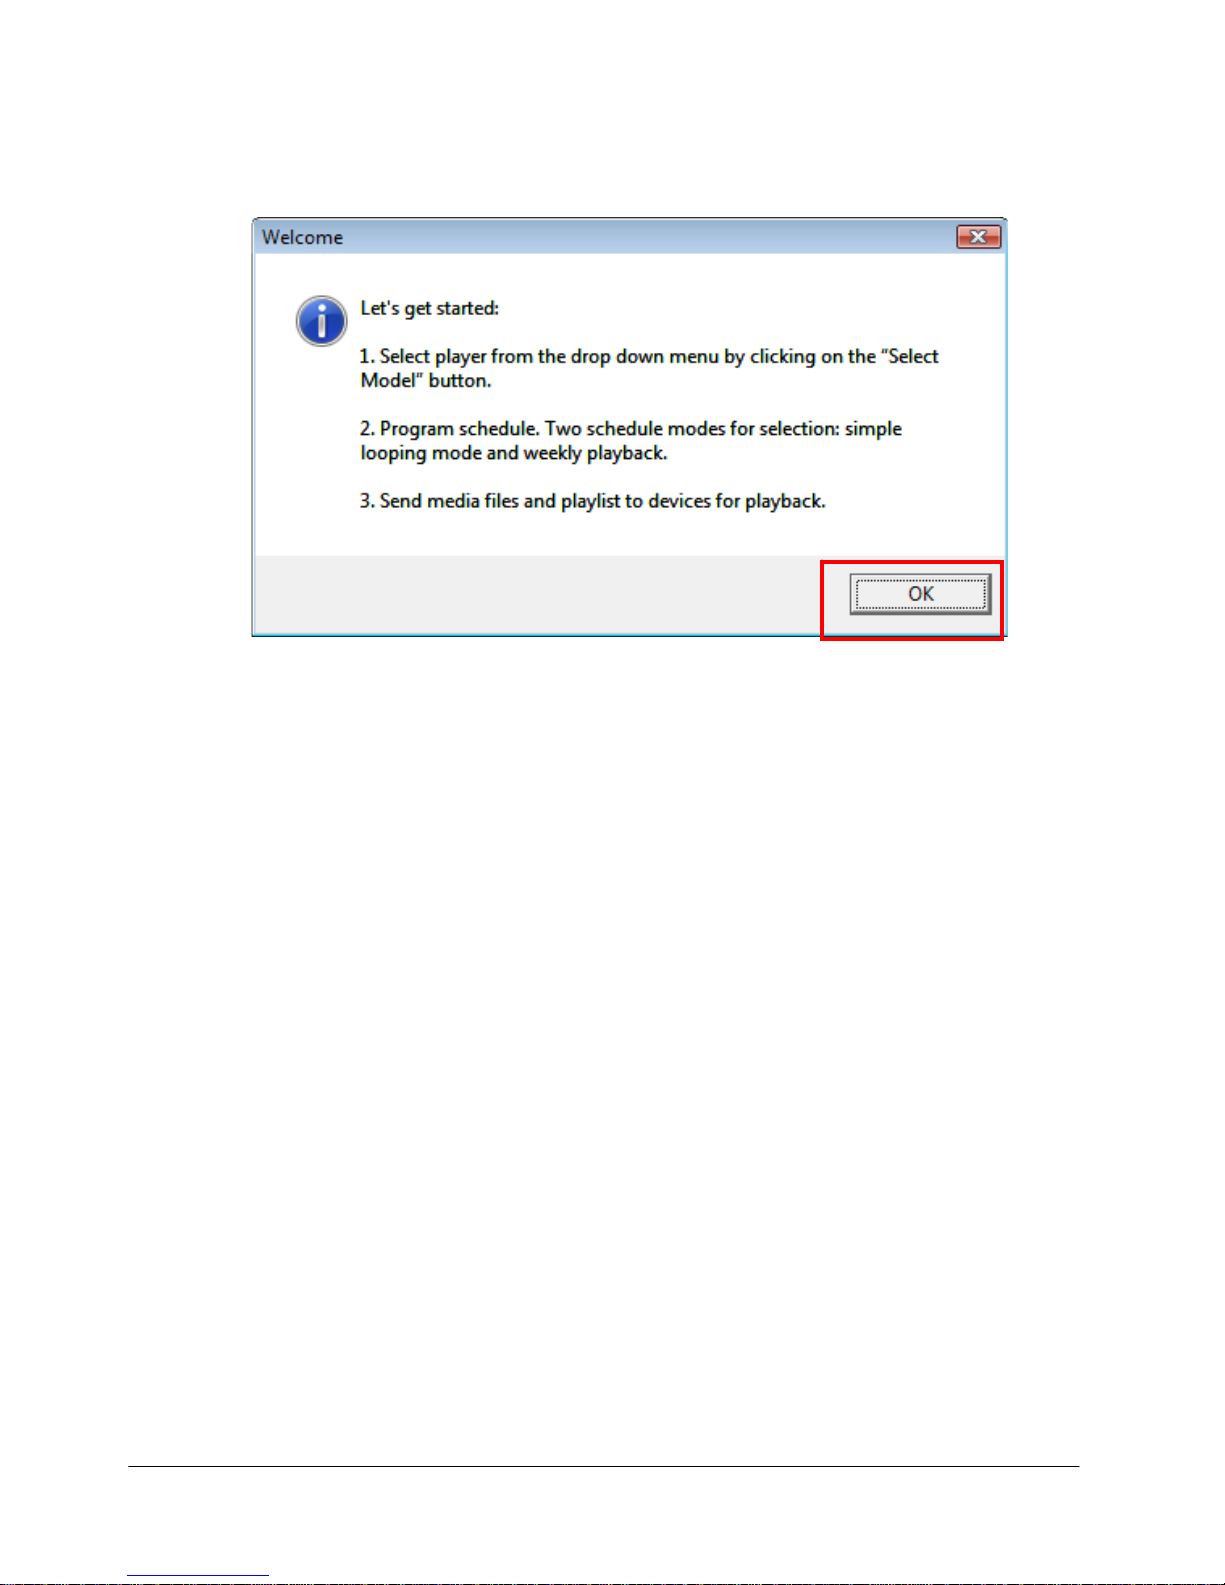
(3) After finish installation, double-click the Signage Manager Express
icon to launch the software.
For the first launch, the following window will appear.
Click OK to start it.
7
Page 8

Software Operation
Signage Manager Express software provides an easy way to let users to export
various media files to the display. Follow the following steps to do the display
settings:
1. Select Player Model
Select a suitable player model. In general, we use Full HD Open API
Player V2 model.
Click Network Media Player -> Full HD Open API Pl ayer V2
2. Choose aspect ratio and display format
(1) Click Aspect ratio to choose a display ratio from the list.
8
Page 9

(2) Click the down arrow key below the Aspect ratio to select a
suitable display layout.
Full screen display
3. Add files to the playlist
(1) Add media files to the list
A playlist may include A/V-in (Audio/Video Input) sequence. Make
sure player model supports A/V input and the video input device is
properly connected.
Multiple display windows
One display window with one
ticker bar on the bottom/ top
(2) Click Add button
, select files, and click open
9
Page 10

(3) When the files are added successfully, the files will show under the
“Recent items” section and the below “Media” section.
(4) Repeat the steps to add more files to the playlist.
Select the file in the Media window, and click Remove button
, you can remove the files from playlist easily.
(5) Click Proceed to export button to go on to the next step.
10
Page 11

4. Export your playlist
After completing your playlist, choose a way to export your playlist, via
Network or via USB.
(1) Export playlist via Network
Choose via Network to
export the file via Wi-Fi or
Ethernet cable.
Choose via USB to
save the template in
your USB pen drive.
If you choose to use to export the file via Network, click Scan button
to search for all the players on the internet.
Or you can also manually click Add button to add on your player.
Identify your player by its MAC or IP address.
11
Page 12

More than one player can be synchronized at once. Hold the “control”
key on your keyboard to select multiple players.
After the player is selected, click Export to export the files to the
player.
You can go back to change your display content whenever you want,
just click Back to schedule to continue editing the playlist.
Once synchronization complete, the player(s) will begin to play the
playlist.
12
Page 13

(2) Export playlist via USB
If you prefer to update contents without a network, you can export
contents to a USB drive and plug it into the player’s USB port for
synchronization.
Attach a USB drive to your computer and click
Export button
Upon transfer complete, remove the USB drive and
insert it in the player. The on-screen display will
show you the file(s) being copied
Upon synchronization complete, the player begins to
play the new playlist Remove the USB drive from
the player
5. Looping / Weekly schedule/ display interval setup
(1) Looping mode plays several files in a specified order repeatedly.
Click Looping-> Looping to make the content played continuously.
(Looping is the default setting.)
13
Page 14

(2) Weekly Schedule mode provides finer control over your playlists, and
lets you specify several different Looping mode playlists to be played
at different times of the day and week.
Click Looping-> Weekly schedule to create a customized weekly
play list and schedule
Click Add ->Add to create a
playback time slot;
Click Add-> Screen off to set
a video-off slot. (See below)
“Schedule template” is a collection of
schedule preset that allows
customization. Drag and drop a
template to the calendar on the right to
apply the preset.
14
Page 15

Click Add-> Add to create a playback time slot.
1. Select time
2. Select template
3. Add files
4. Click OK to save the settings
Or click Add-> Screen off to set a video-off slot.
Aftercompletingthesettings,youcansaveyourschedulesettingby
clickingFile‐>Save
15
Page 16

(3) Change display interval
A playlist can consist of a sequence of images, videos, or PowerPoint
slideshows which are played repeatedly in the specified order and
durations.
To change duration, select media file in playlist and click Option
button, enter the interval seconds in the “Duration” space, and click
OK to save the change.
1.
2.
3.
16
Page 17

6. Use SmartWidgets tool for dynamic content display
If your player has internet connection and supports HTML5, you can
schedule dynamic contents by using SmartWidgets.
(1) Choose one of the layouts with SmartWigets icon.
Figure2:LayoutswithSmartWidgeticon
(2) Start edit the content of each section
For example, select this “Sider and bottom widget” template
in the previous step.
This image icon
indicates that this
section is A/V
supporting.
Click the down arrow key next to the “Add” button, choose one from
the list.
Users can export various kinds of media files here, or we can use
This image icon
indicates that these
sections don’t
support A/V files.
SmartWidget tools to add more dynamic contents on it.
Click the down arrow key beside A dd butt on for these tool s:
17
Page 18

Click A/V input icon to add A/V media files
to the playlist.
Click Clock/ Calendar icon, an d it will
show time/ date in this display sect ion.
Click Weather icon, and it will show the
temperature in the assigned in this display
section.
Click Web page icon to add a web page
link.
18
Page 19

7. Add a ticker
Users can follow the steps to add a ticker bar to the display.
(1) Select a display layout with a ticker.
(2) Save the content in ticker in a text file.
(3) Select the ticker window, the selected section will be marked as color
yellow.
(4) Click Add button to select the text file.
(5) We can also change the background color by clicking Option button.
8. Software Updates
Update software to enhance features and reliability for player systems.
Check if there’s program updates on the internet. Or you can also
manually search for an update from the Help menu.
19
Page 20

Reset Player to Factory Default
If you forget a system password you have set, you must re set the syste m to
regain access to the player.
1. PRESS and hold the reset button with a pin
2. Re-connect the power cord
3. In about 8 seconds, the status LED flashes
4. Release reset button and wait 90 seconds for system to initialize
Content Management
Please consult the software documentation for information specific to your
management solution.
Troubleshooting
Why is there no video output on composite video connectors?
The player outputs video over HDMI and VGA by default. To switch to
composite video output, connect a HDMI or VGA display, then select PAL
or NTSC output from the menu system.
If both Ethernet & Wi -Fi are available, which connection will take
priority?
When Ethernet is not available or disconnected, system will try to use
Wi-Fi connection. If both connections are available, Ethernet will take
priority for data transfer.
How do I remove an inserted CF card?
You can install a CF card to replace the 4GB internal memory. The card slot
is located behind a metal plate (the CF card cover/remover). To remove an
inserted CF card, use the CF card cover/remover’s metal hooks to pull out
the card.
20
Page 21

blank page
21
Page 22

blank page
22
Page 23

Technical Support and Warranty:
QUESTIONS? SIIG’s Online Support has answers! Simply visit our website
at www.siig.com and click on Support. Our online support database is updated
daily with new drivers and solutions. Answers to your questions could be just a
few clicks away. You can also subm it questions online and one of our technical
support analysts will promptly respond.
SIIG offers three years manufacturer warranty with this product. Please see our
web site for more warranty details. If you encounter any problems with this
product, please follow the procedures below.
A) If it is within the store's return policy period, please return the product to
the store where you purchased from.
B) If your purchase has passed the store's return policy period, please follow
these steps to have the product repaired or replaced.
Step 1: Submit your RMA request.
Go to www.siig.com, click Support, then RMA to submit a request to SIIG
RMA or fax a request to 510-657-5962. Your RMA request will be
processed, if the product is determined to be defective, an RMA number
will be issued.
Step 2: After obtaining an RMA number, ship the product.
Properly pack the product for shipping. All software, cable(s) and any
other accessories that came with the original package must be included.
Clearly write your RMA number on the top of the returned package.
SIIG will refuse to accept any shipping package, and will not be
responsible for a product returned without an RMA number posted on
the outside of the shipping carton.
You are responsible for the cost of shipping the product to SIIG at the
following address:
SIIG, Inc.
6078 Stewart Avenue
Fremont, CA 94538-3152, USA
RMA #:____________________
SIIG will ship the repaired or replaced product via Ground in the U.S.
and International Economy outside of the U.S. at no cost to the
customer.
23
Page 24

About SIIG, Inc.
Founded in 1985, SIIG, Inc. is a leading manufacturer of IT connectivity
solutions (including Serial ATA and Ultra ATA Controllers, FireWire, USB,
and legacy I/O adapters) that bridge the connection between Desktop/
Notebook systems and external peripherals. SIIG continues to grow by
adding A/V and Digital Signage connectivity solutions to our extensive
portfolio. All centered around the distribution and switching of A/V signals
over CAT5/6, these products include matrix switches, distribution amplifiers,
extenders, converters, splitters, cabling, and more.
SIIG is the premier one-stop source of upgrades and is committed to
providing high quality products while keeping economical and competitive
prices. High-quality control standards are evident by one of the lowest
defective return rates in the industry. Our products offer comprehensive
user manuals, user-friendly features, and most products are backed by a
lifetime warranty.
SIIG products can be found in many computer retail stores, mail order
catalogs, and e-commerce sites in the Americas, as well as through major
distributors, system integrators, and VARs.
FCC RULES: TESTED TO COMPLY WITH FCC PART 15, CLASS
B OPERATING ENVIRONMENT: FOR HOME OR OFFICE USE
FCC COMPLIANCE STATEMENT:
This device complies with part 15 of the FCC Rules. Operation is
subject to the following two conditions: (1) This device may not cause
harmful interference, and (2) this device must accept any interference
received, including interference that may cause undesired operation.
THE PARTY RESPONSIBLE FOR PRODUCT COMPLIANCE
SIIG, Inc.
6078 Stewart Avenue
Fremont, CA 94538-3152, USA
Ph: 510-657-8688
PRODUCT NAME
Full-HD Digital Signage Player
Full-HD Digital Signage Player is a trademark of SIIG, Inc. SIIG and the SIIG logo are
registered trademarks of SIIG, Inc. Other n ames u sed in th is pub licatio n are for iden tifi cation
only and may be trademarks of their respective companies.
March, 2012 Copyright © 2012 by SIIG, Inc. All rights reserved.
24
 Loading...