

Page 1
Sigtronics “Y” Adapter Installation Instructions
Description
Sigtronics “Y” adapters are designed to simplify the
process of connecting a Sigtronics intercom system to
a radio.
Installation
1. To select an appropriate mounting location for the
adapter, rst connect it up to the radio.
2. Unplug the hand mic from the radio, you may also
have to unhook the cable strain relief, and plug it into
jack on the “Y” adapter module.
3. Plug the cord connector of the Sigtronics “Y” adapter
into the hand mic connector on radio.
4. Now you are ready to select a mounting location
for the adapter. Select a spot out of the way so that
the adapter and its cables will not interfere with the
normal operation of the vehicle and secure with the
supplied hardware.
5. Route the cable from the “Y” adapter and solder / insulate the four wires to the matching wires of the radio
input cable from the intercom or MRIM-2 unit.
NOTES: Don’t forget to also hook up the speaker wires
(2 violet wires) from the Sigtronics intercom or MRIM2 unit to the radio speaker leads. Adjust the Sigtronics
intercom or MRIM-2 units transmit and receive levels
per their appropriate installation instructions. Your
existing radio hand mic and speaker will still function
as normal.
WARRANTY: One year parts and labor.
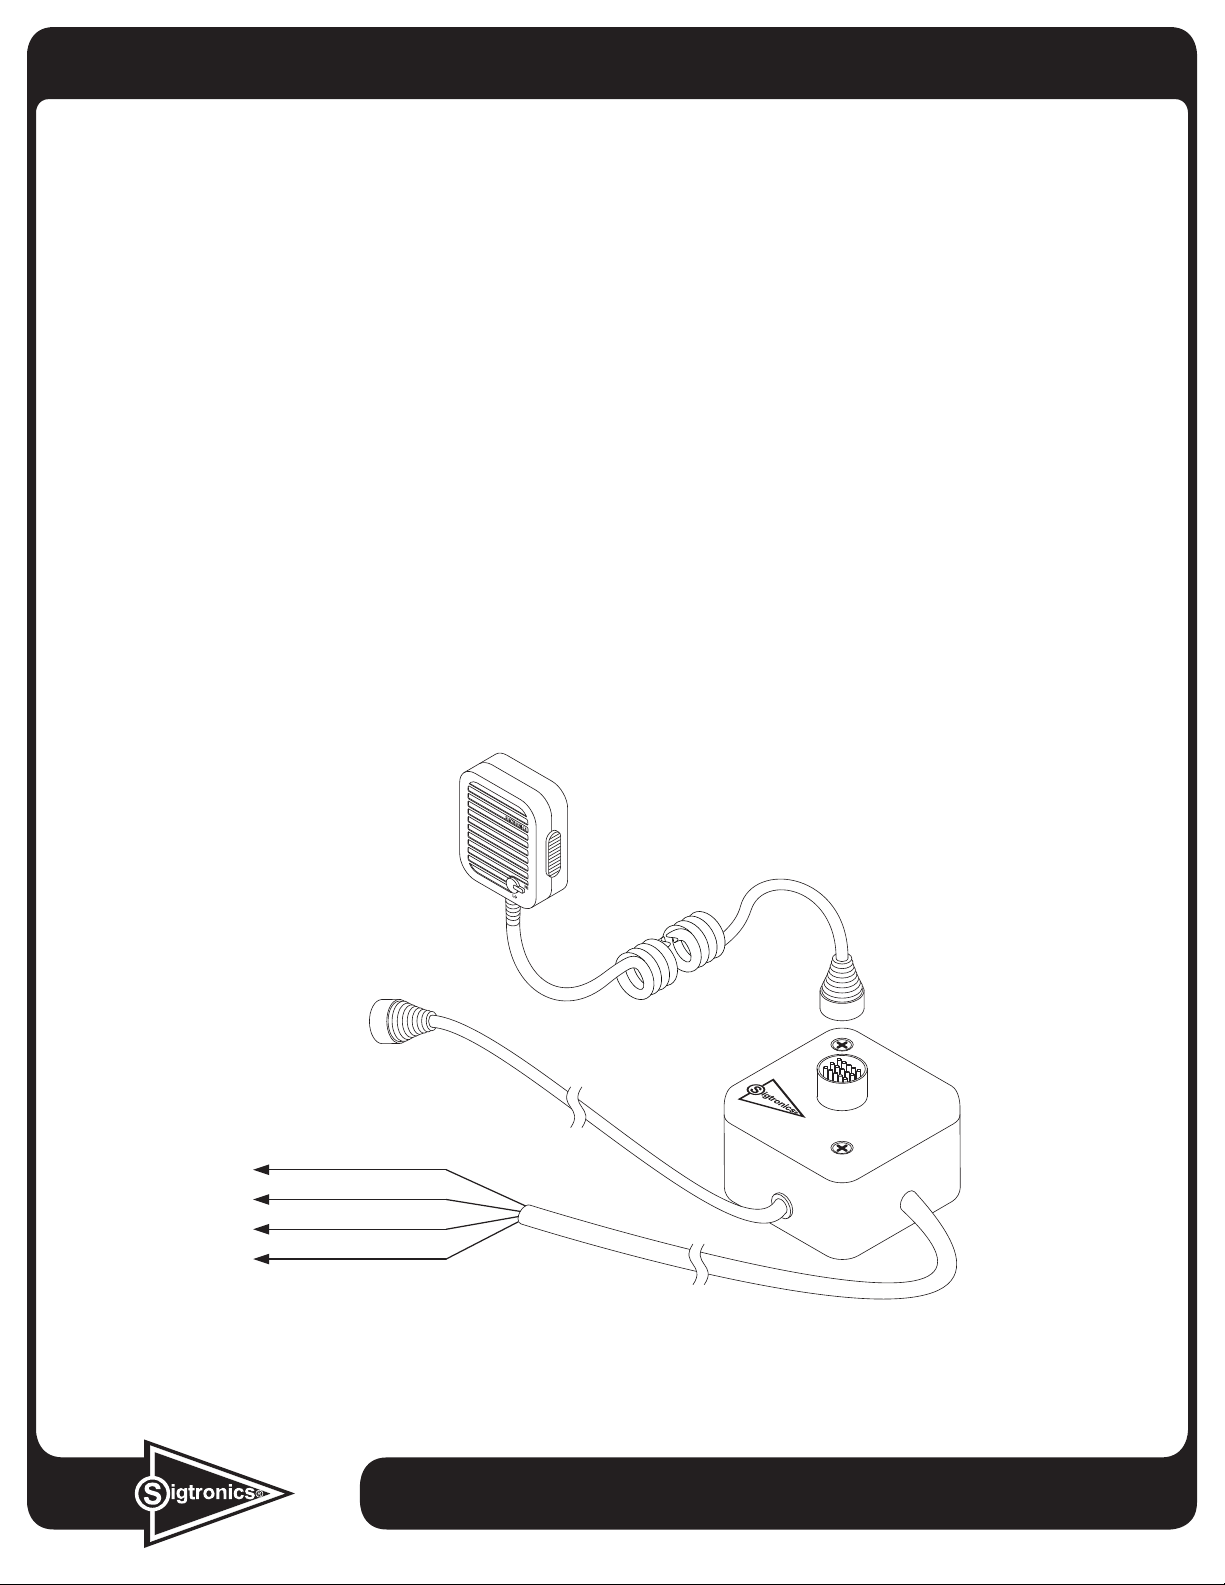
Plug this connector into
your mobile radio.
White: PTT Low
White: PTT High
Black: Mic Low
Brown: Mic High
(Supplied with the Sigtronics intercom)
Hand Mic
Plug your hand mic into
the “Y” adapter.
“Y” Adapter
4 ft. radio interface cable.
To UltraSound, EAI or MRIM-2.
Specialists in “SOUND” Management
178 East Arrow Highway, San Dimas, CA 91773 ( 909 ) 305-9399
10- 6-20 08 y_adp_c.p df
 Loading...